
Would you like to save this?
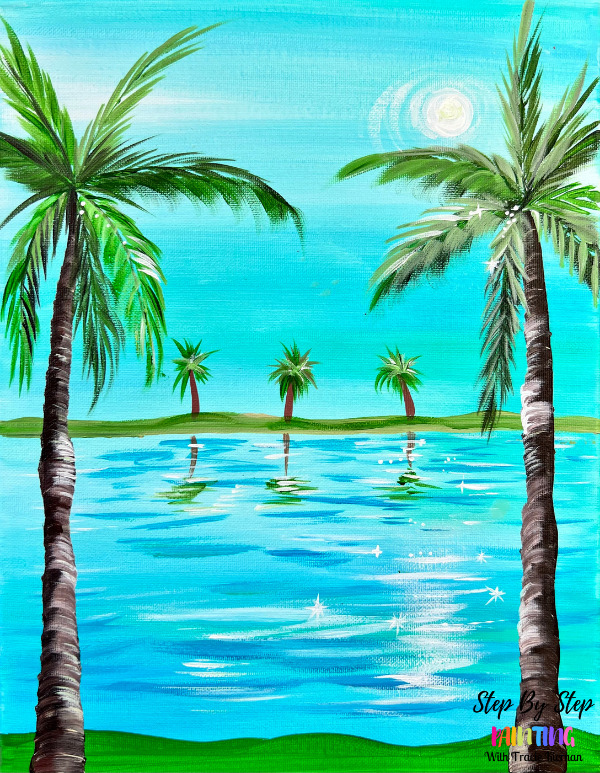
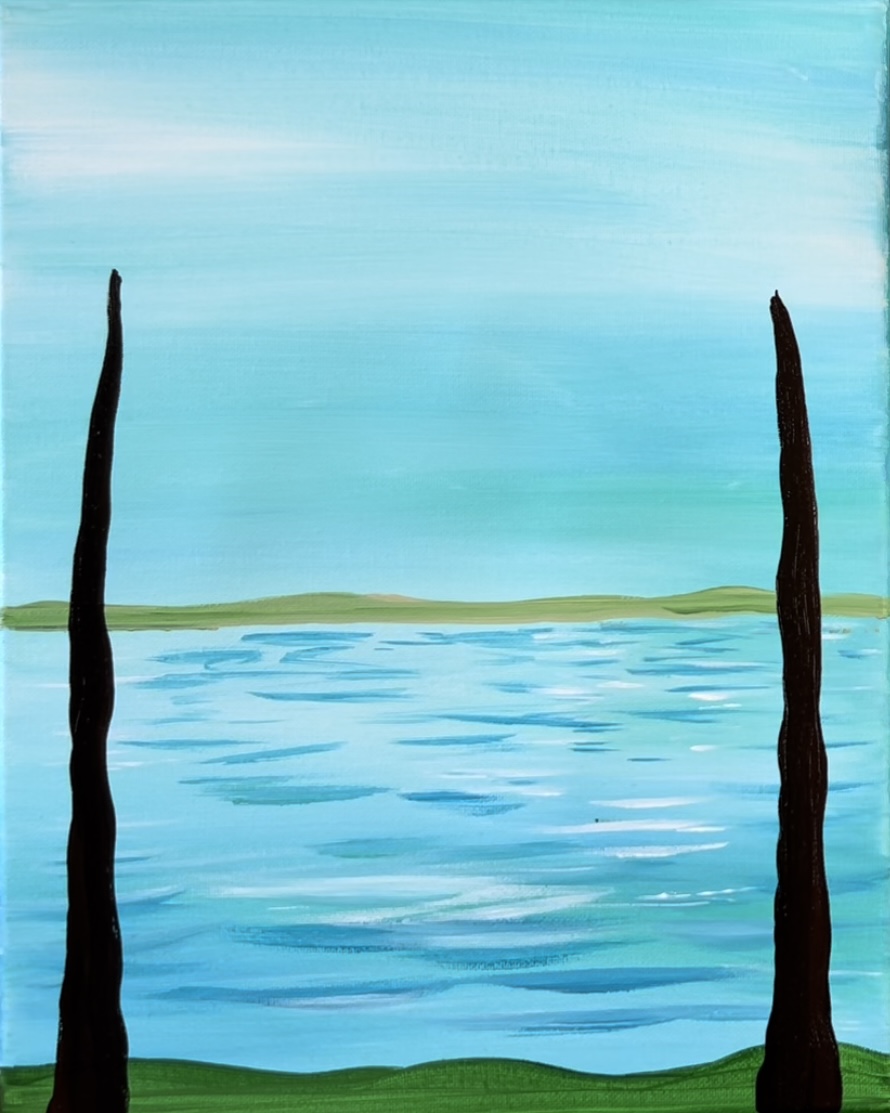
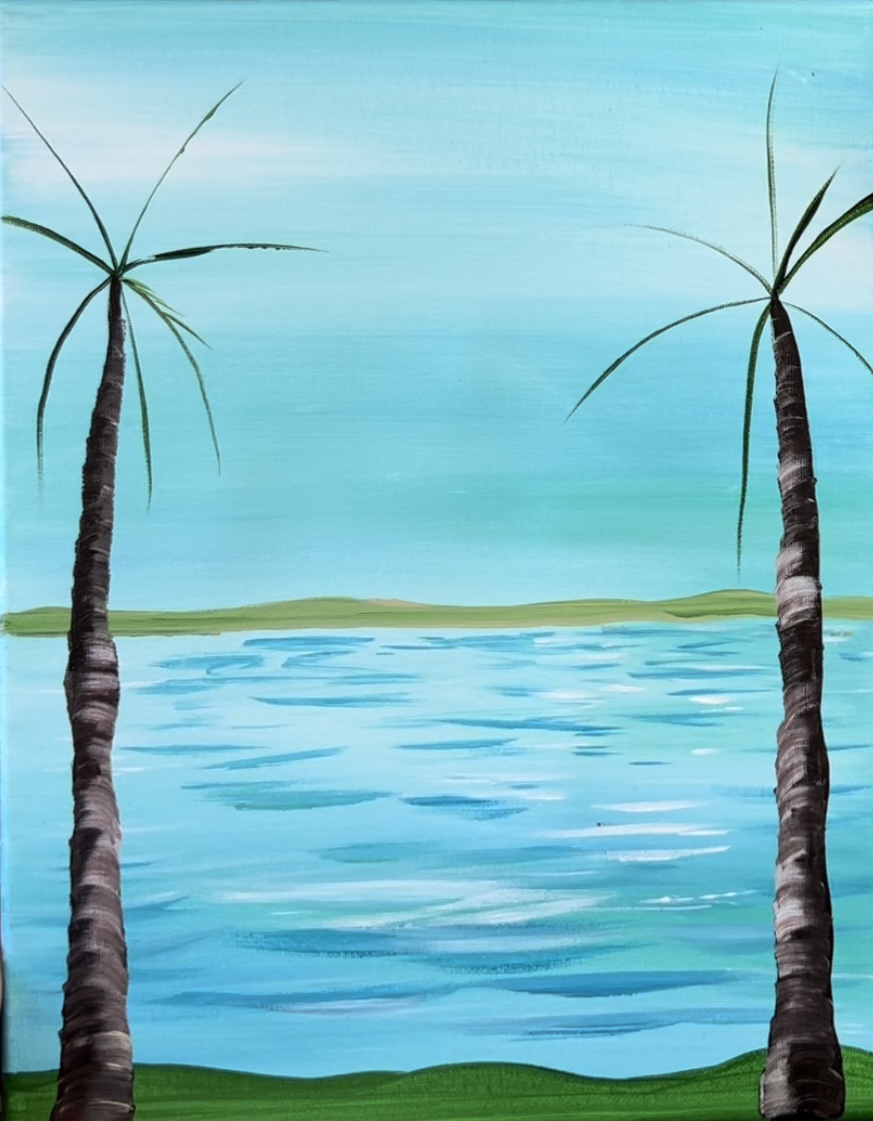
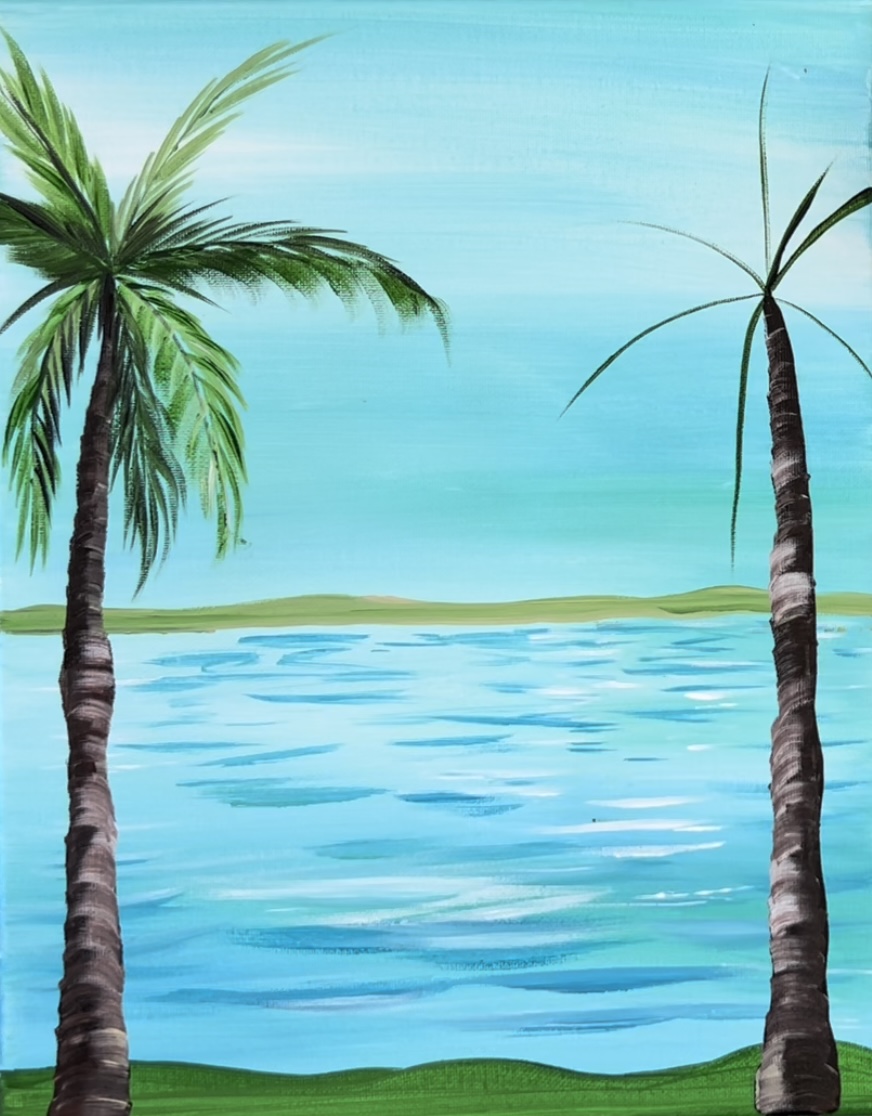
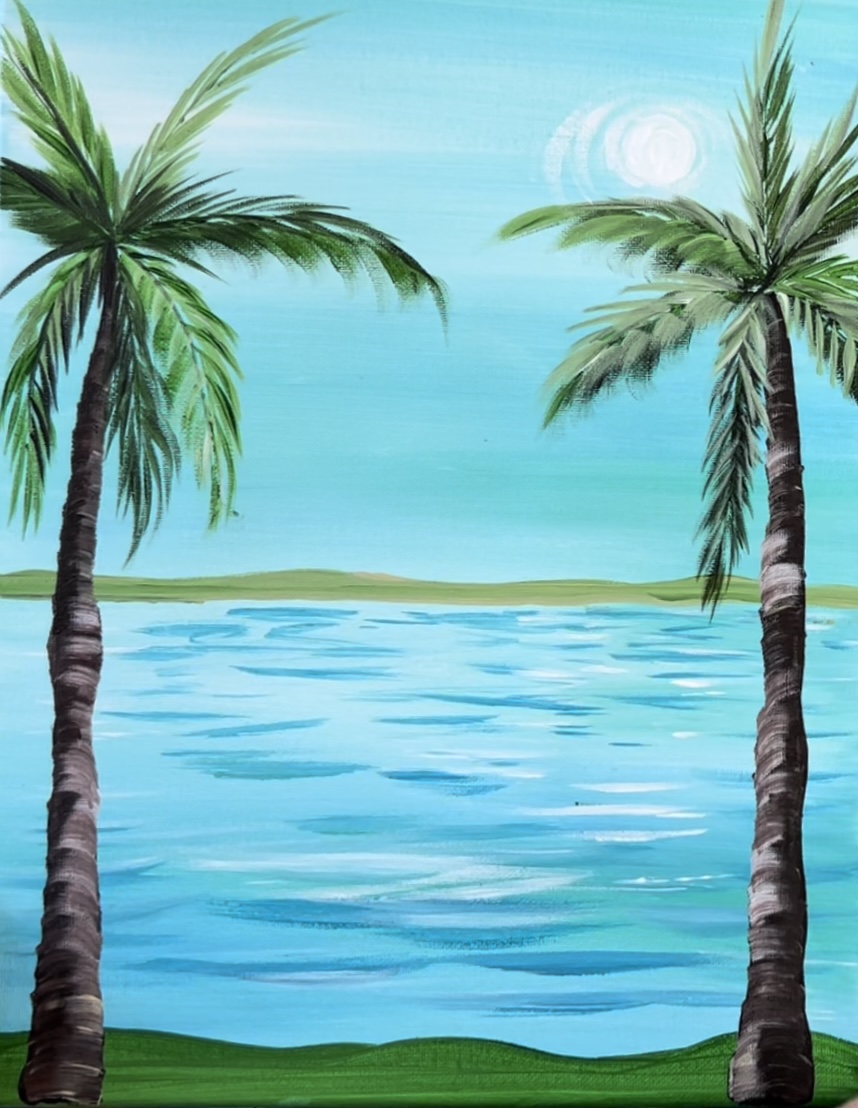
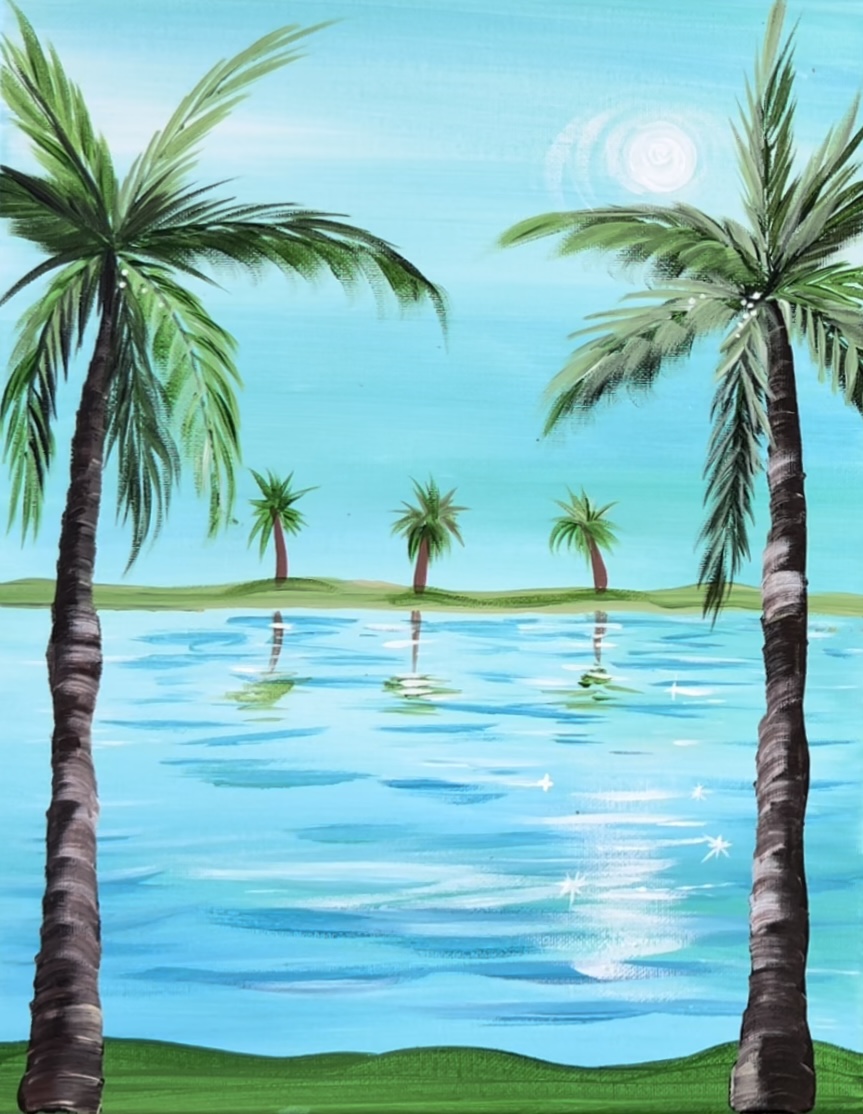
This acrylic painting tutorial will demonstrate how to paint palm trees! Paint palm trees in front of a bay with sparkly turquoise waters!
I love the combination of light turquoise blues against the dark greens in this painting! It is definitely a happy and cheerful place!
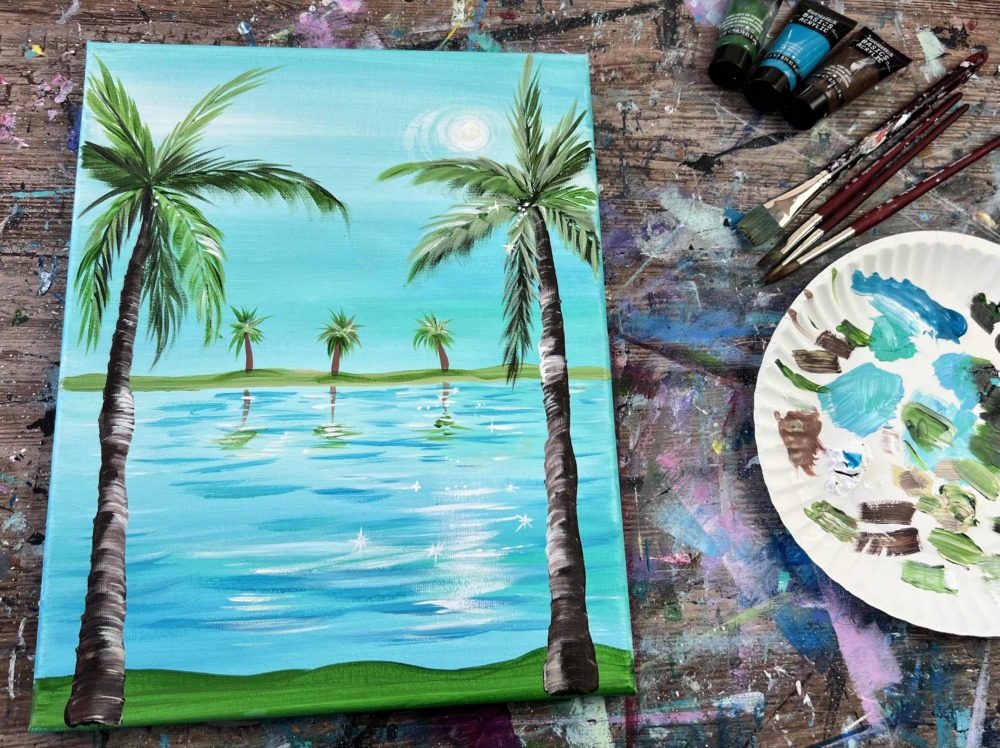
I used an angle brush to paint the palm trees including the trunk and palm fronds. The palm tree painting technique can, however, be achieved using other brushes such as a fan brush, flat brush, round brush etc.
Enjoy and happy painting!
Materials Needed:
How To Paint "Palm Tree Bay" - Palm Tree Painting Tutorial

This acrylic painting tutorial will demonstrate how to paint palm trees with acrylics on canvas.
Materials
Brushes
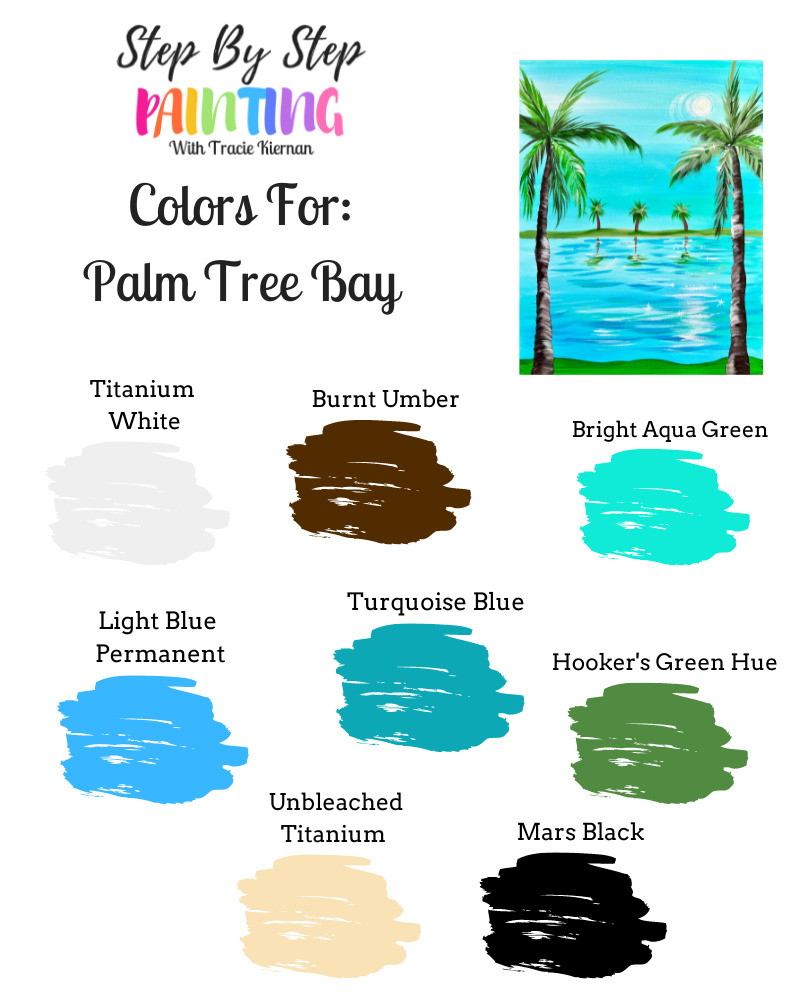
Paint Colors (Liquitex BASICS)
- Titanium White
- Unbleached Titanium
- Mars Black
- Burnt Umber
- Light Blue Permanent
- Bright Aqua Green
- Turquoise Blue
- Hooker's Green Hue Permanent
Color Palette:
I used Liquitex BASICS acrylic paints for this tutorial! You can use any paints that you may have. If you are using a different brand, use the color swatch below to try to match!
Craft Paint Conversion
If you are using craft paints such as these Apple Barrel Craft Paints, I would suggest subbing to these colors:
- White
- Brown Oxide
- Key West
- Regency Blue
- Laguna
- Parakeet
- Pale Daffodil
- Jet Black
Directions At A Glance
Video
Step By Step Instructions
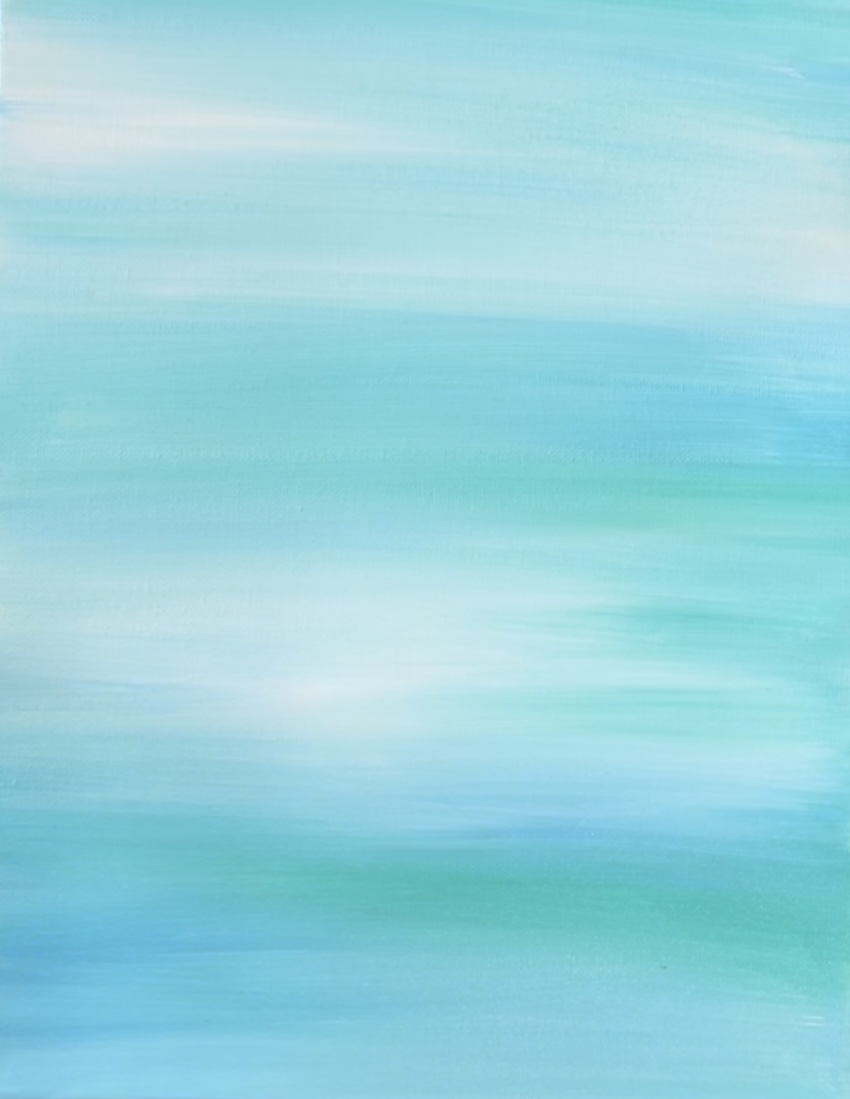
1. Paint Background
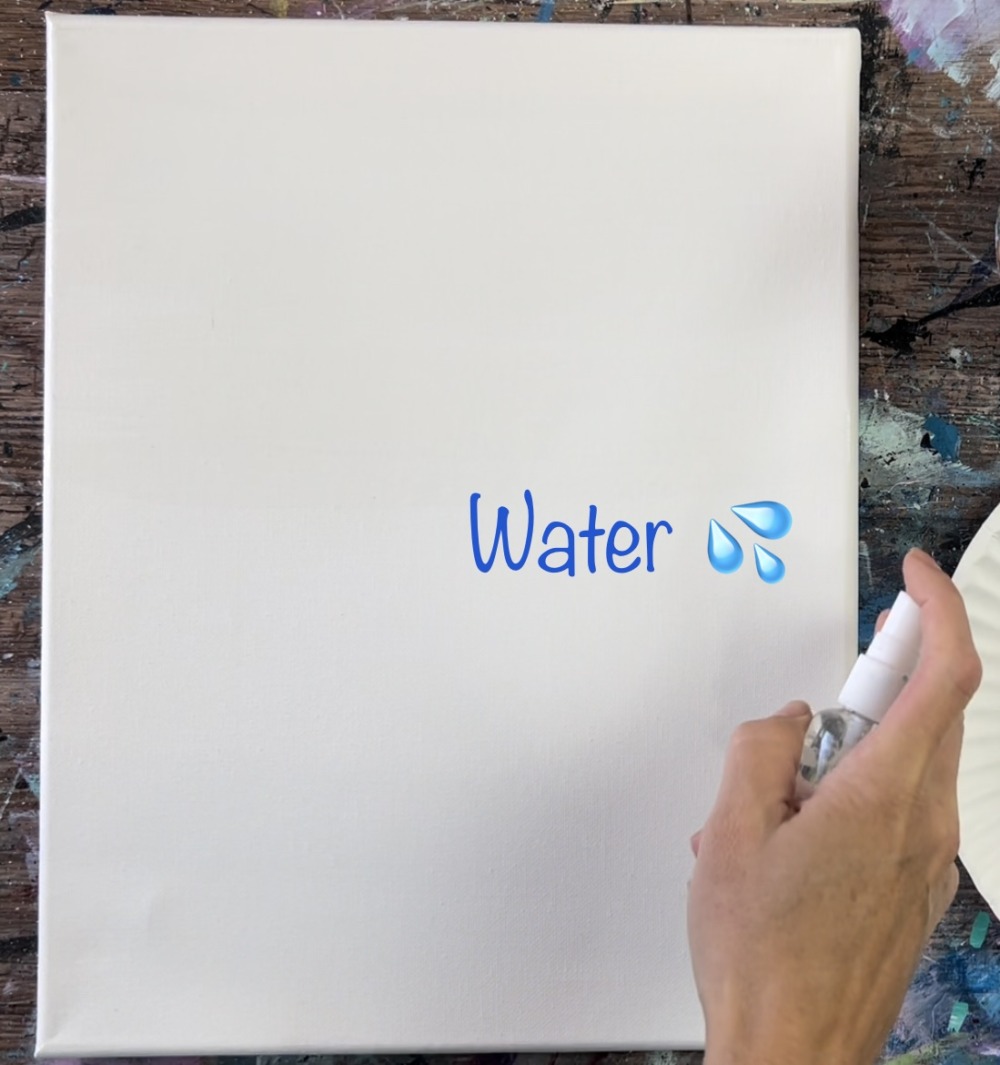
Use a clean wet paint brush or a fine mist sprayer to apply a very thin layer of water to the canvas. This will help with the blending of the background and water first layer of this painting.
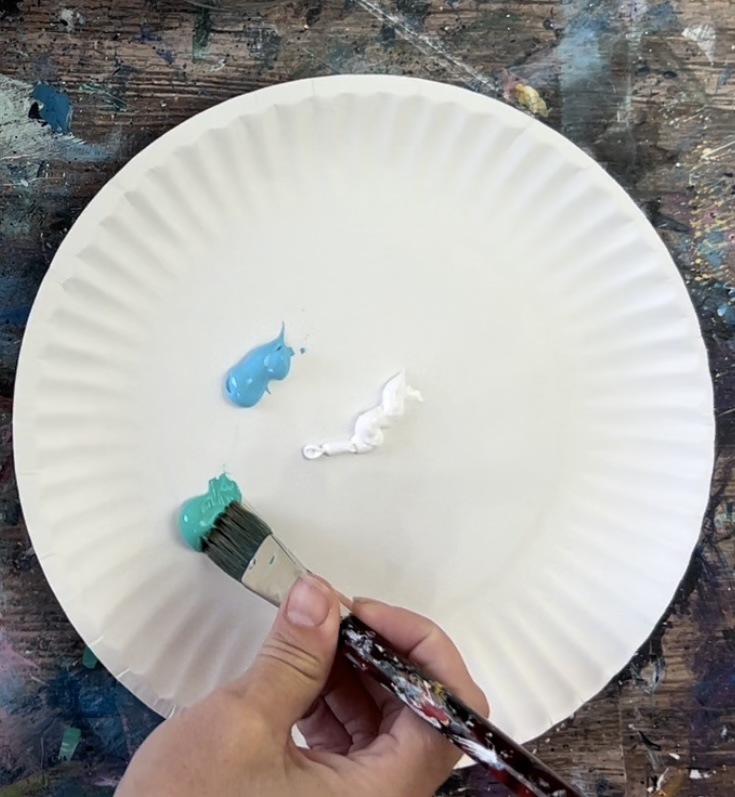
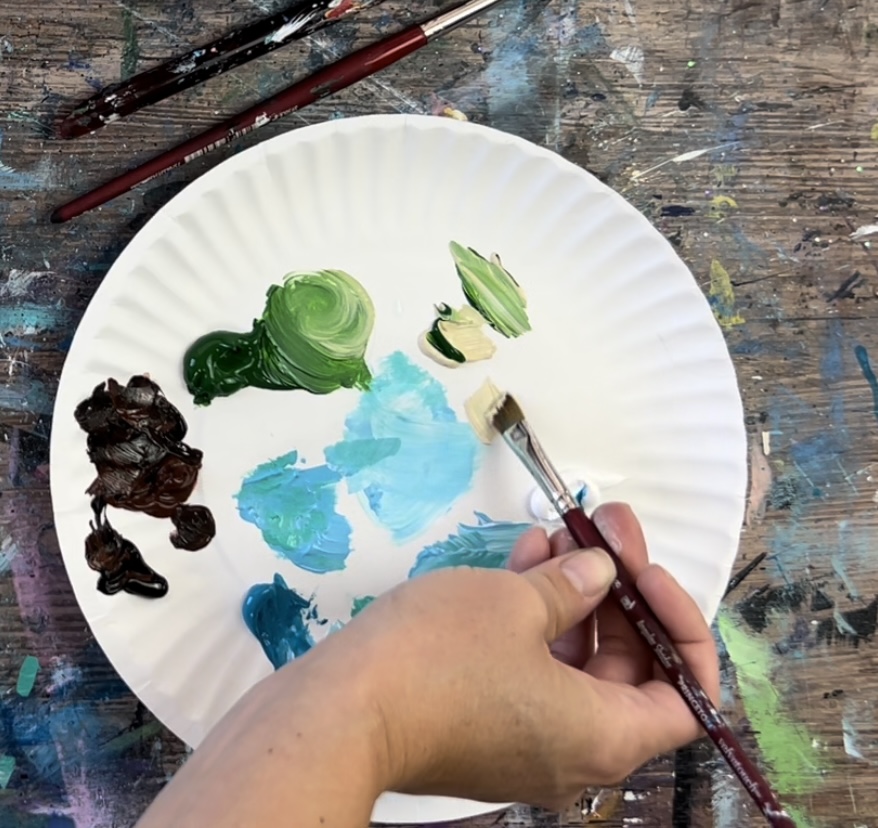
Load your palette with the colors: light blue permanent, titanium white and bright aqua green. Use your 3/4″ flat wash brush and triple load it into the aqua, blue and white. Make sure to load it with a little extra white to keep the colors very light.
Start at the top of the canvas. Paint left and right strokes with your brush going all the way across the canvas. The paint should apply thin because of the layer of water that was applied initially to the canvas.
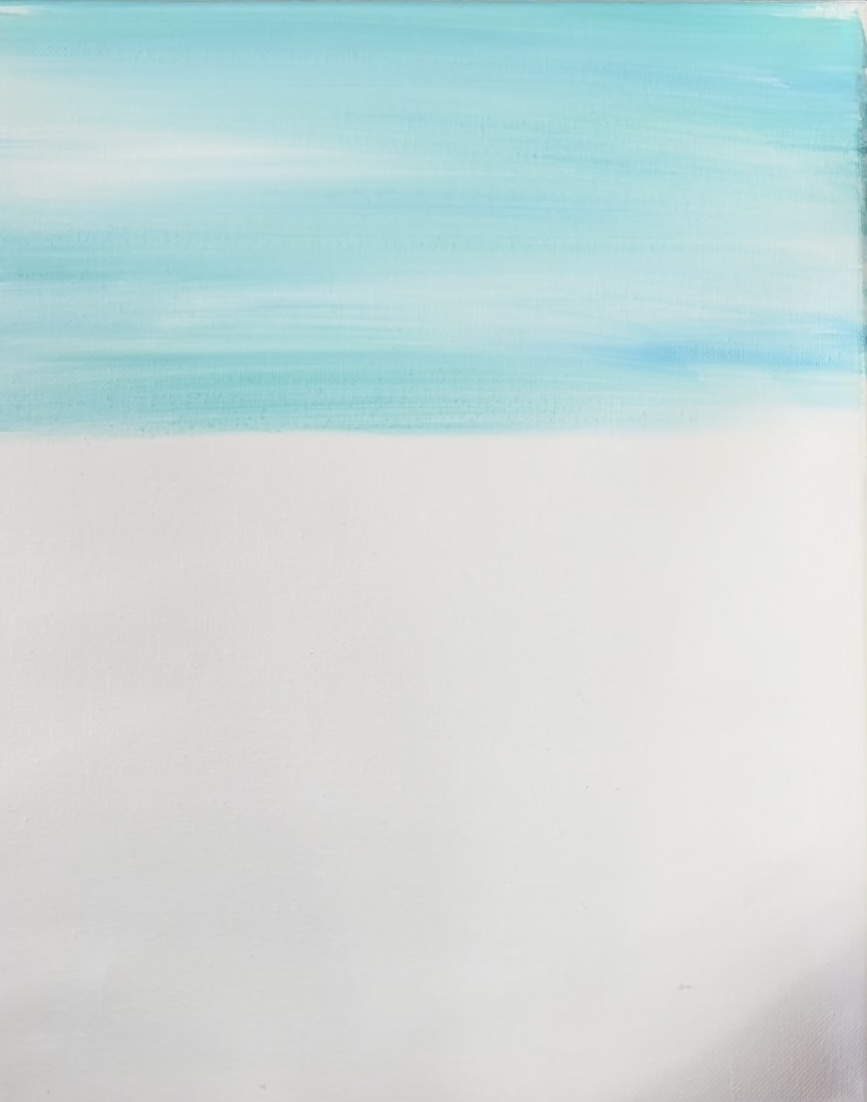
Paint the entire canvas with these left and right strokes using a variety of the blues and a higher proportion of white.
Try not to over blend the paint. Keep it “unblended” with streaks of the blues and turquoises all throughout.
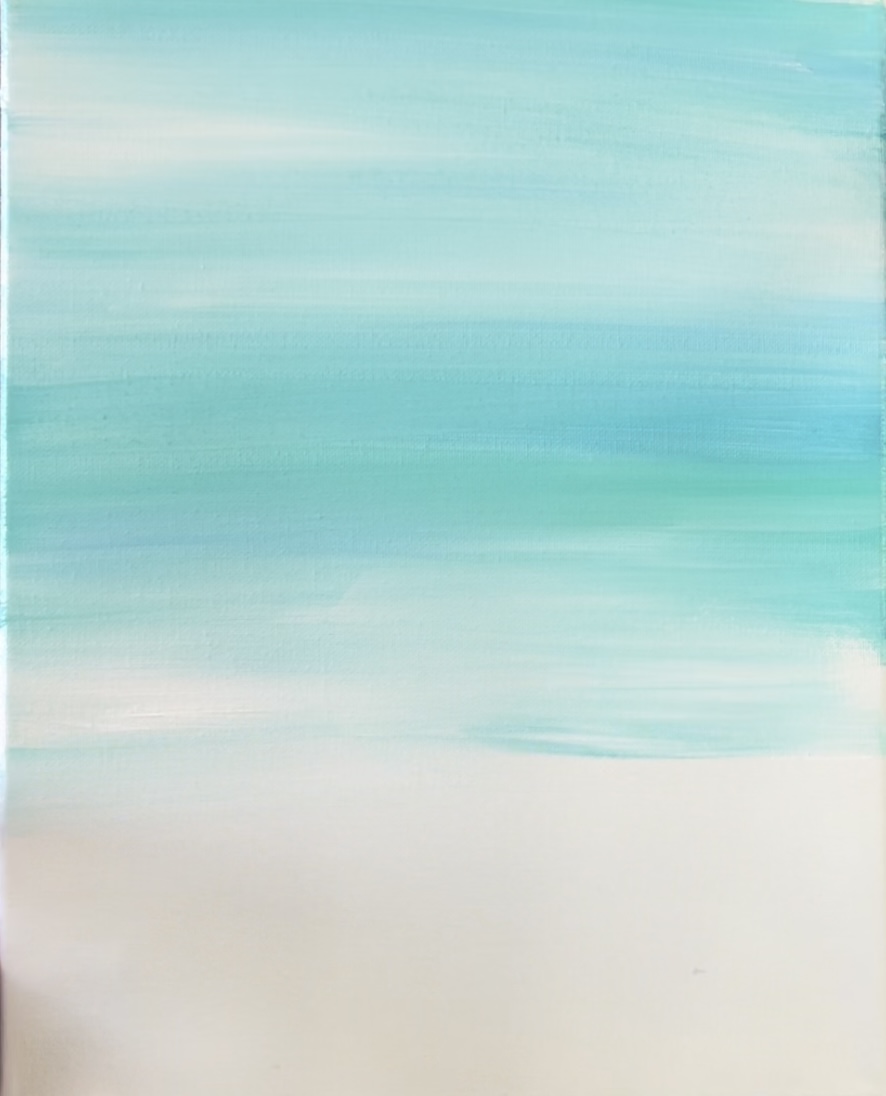
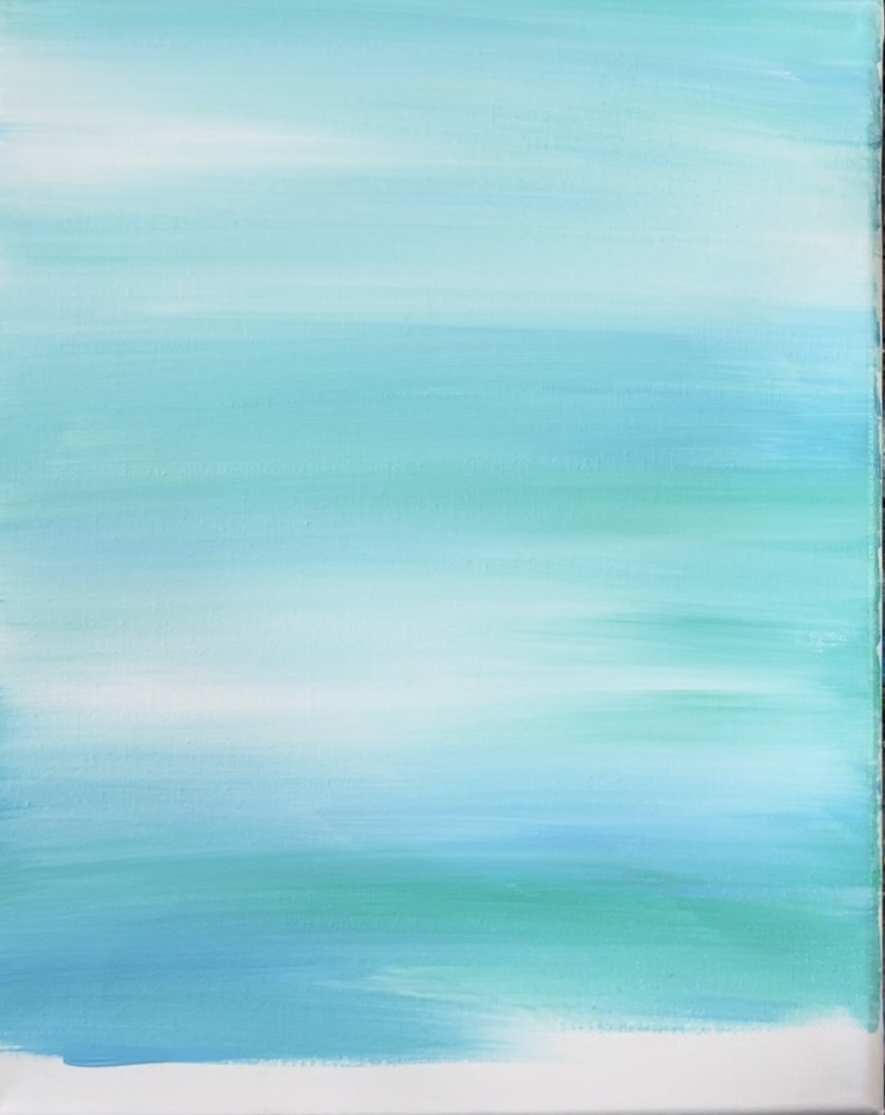
The background should be very light with blues and aquas and whites. There should be streaks of lighter white in there that blends with the blues. There will also be streaks of some darker color.
Let this dry before going onto the next step.
2. Paint Land
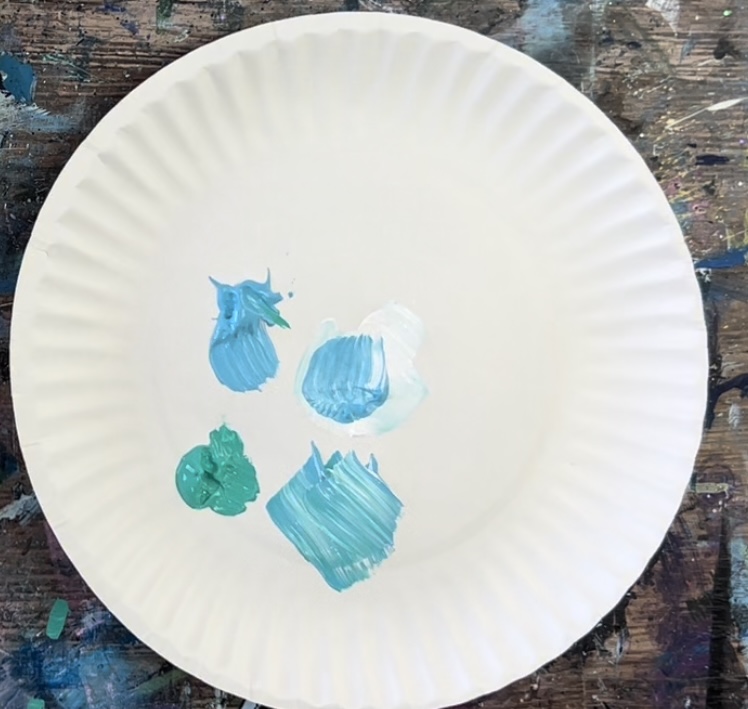
Load your palette with the colors: hooker’s green hue permanent and unbleached titanium.
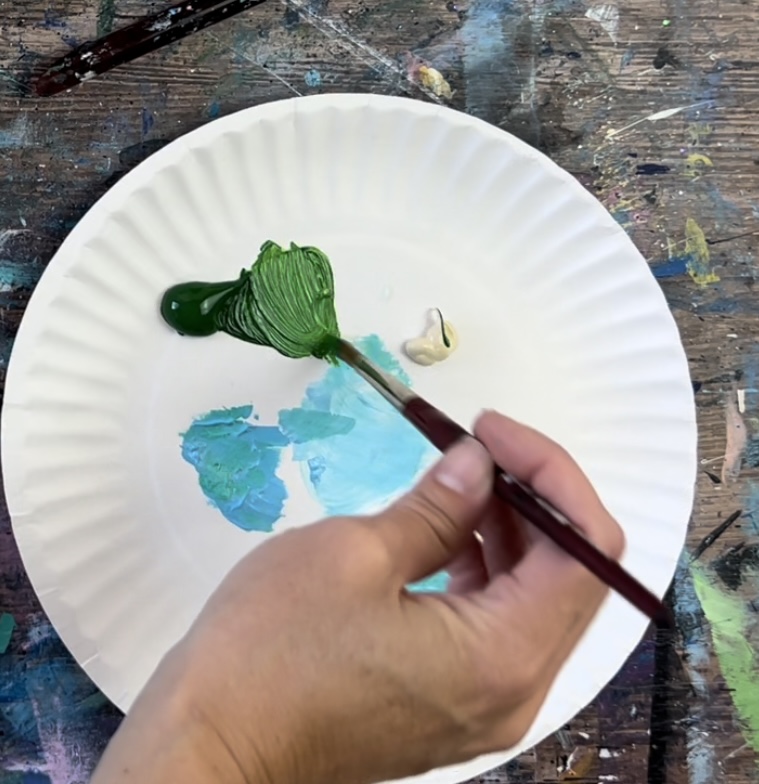
Mix about 3 parts green and 1 part unbleached titanium. Then use your #8 round brush to paint a bottom land area. This is about 1/4″ high and the top is wavy/ uneven.
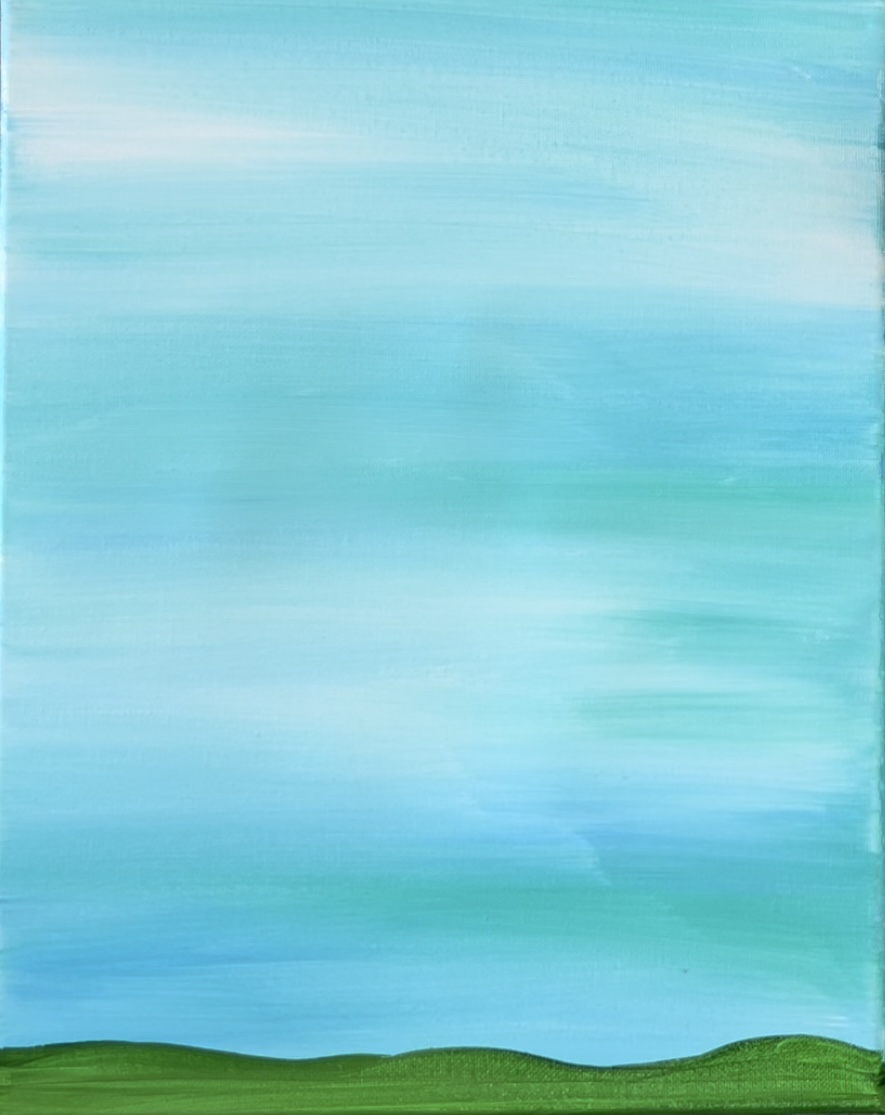
Then use a t-square ruler or straight edge. Locate the middle of the canvas and then bring the ruler down a little bit so the land in the middle is slightly lower.

Mix a lighter green on your palette by mixing about 2 parts unbleached titanium and 2 parts hooker’s green permanent. Paint the land line across the canvas using the straight edge to make sure the bottom edge is straight and horizontal. Then make the top part wavy/ uneven. This land line does not go as high as the one on the bottom.
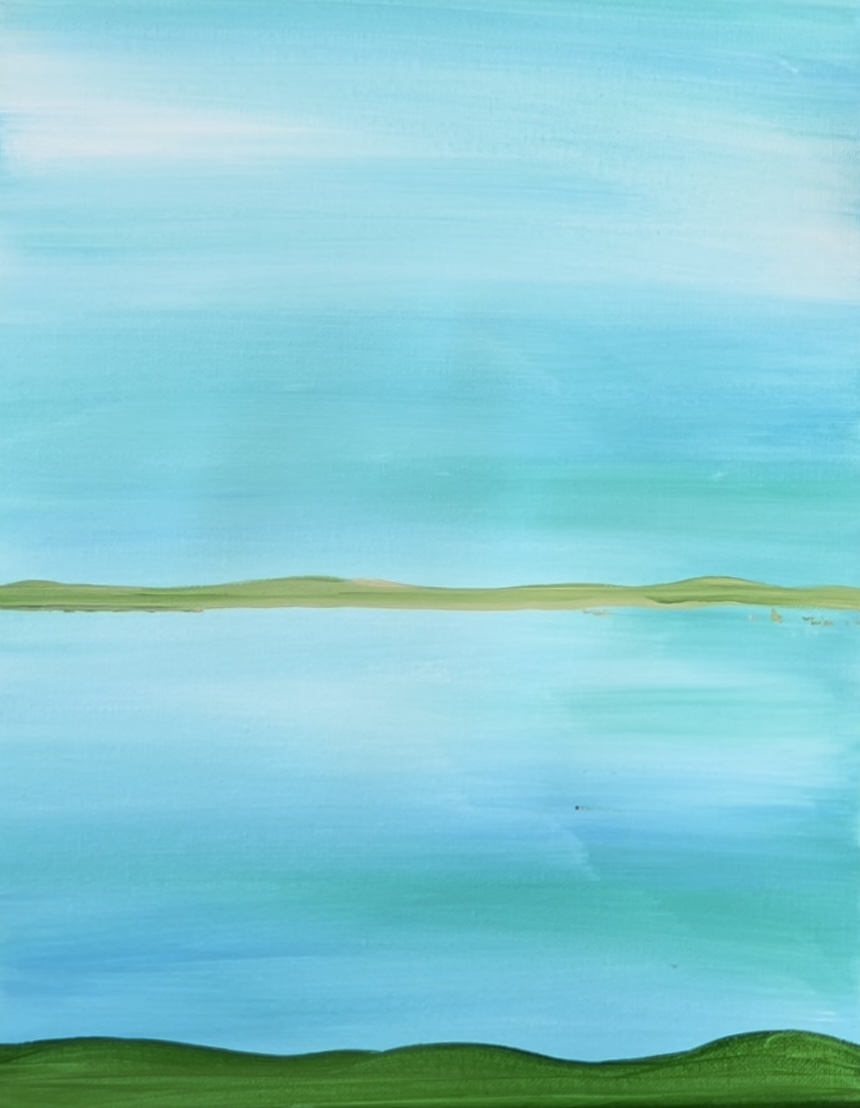
3. Paint Water Texture
Load your palette with turquoise blue. Mix about 1 part turquoise blue and 1 part titanium white to make the color lighter. Use a #8 round brush to paint “water lines”.
Start on the bottom of the water area and paint loose, thick left and right strokes.
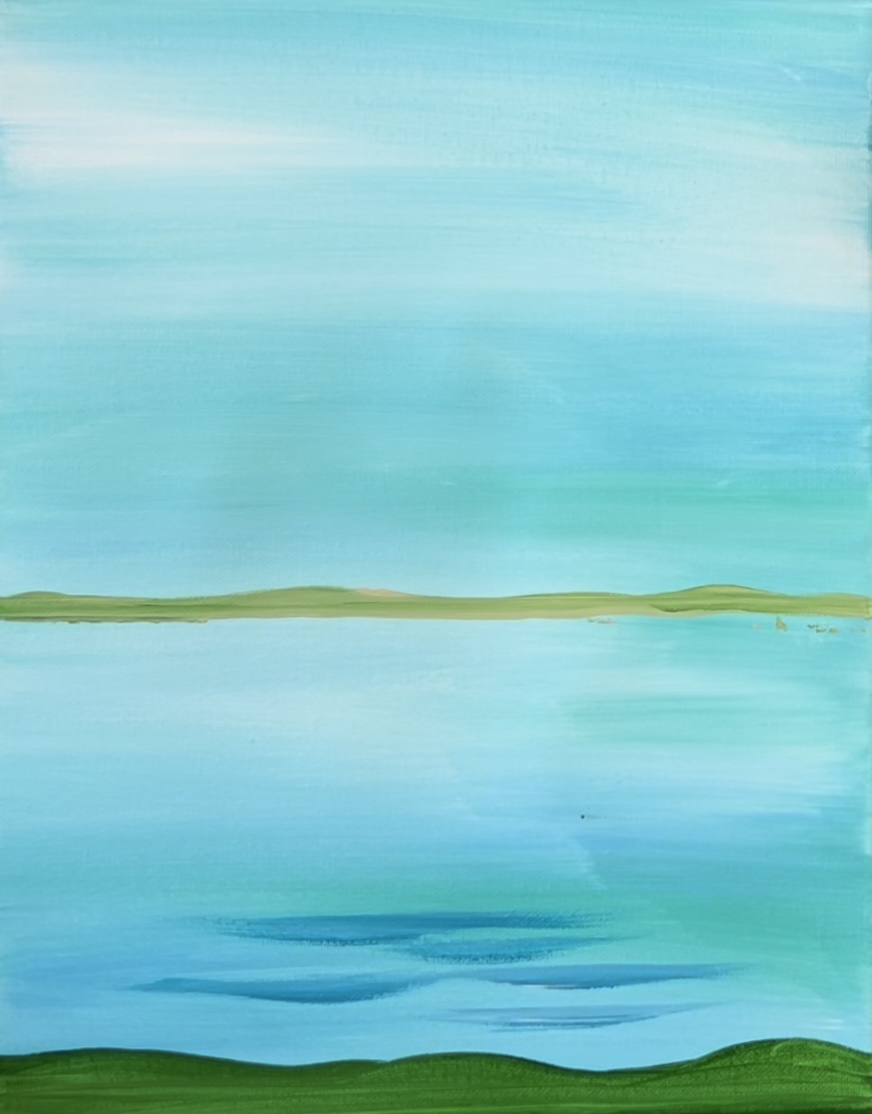
Then paint thinner and more denser horizontal water lines in the distance. This will create depth in your water when you make the lines smaller in the distance and larger on the bottom.

Then add some white water lines. If the white is showing up as too bright, you can dim it down with a little turquoise. Paint larger and thicker water lines on the bottom and smaller and thinner ones in the distance.
Don’t do too many water lines! You want to keep some areas blank so it doesn’t look “too busy” with too many lines in the water.
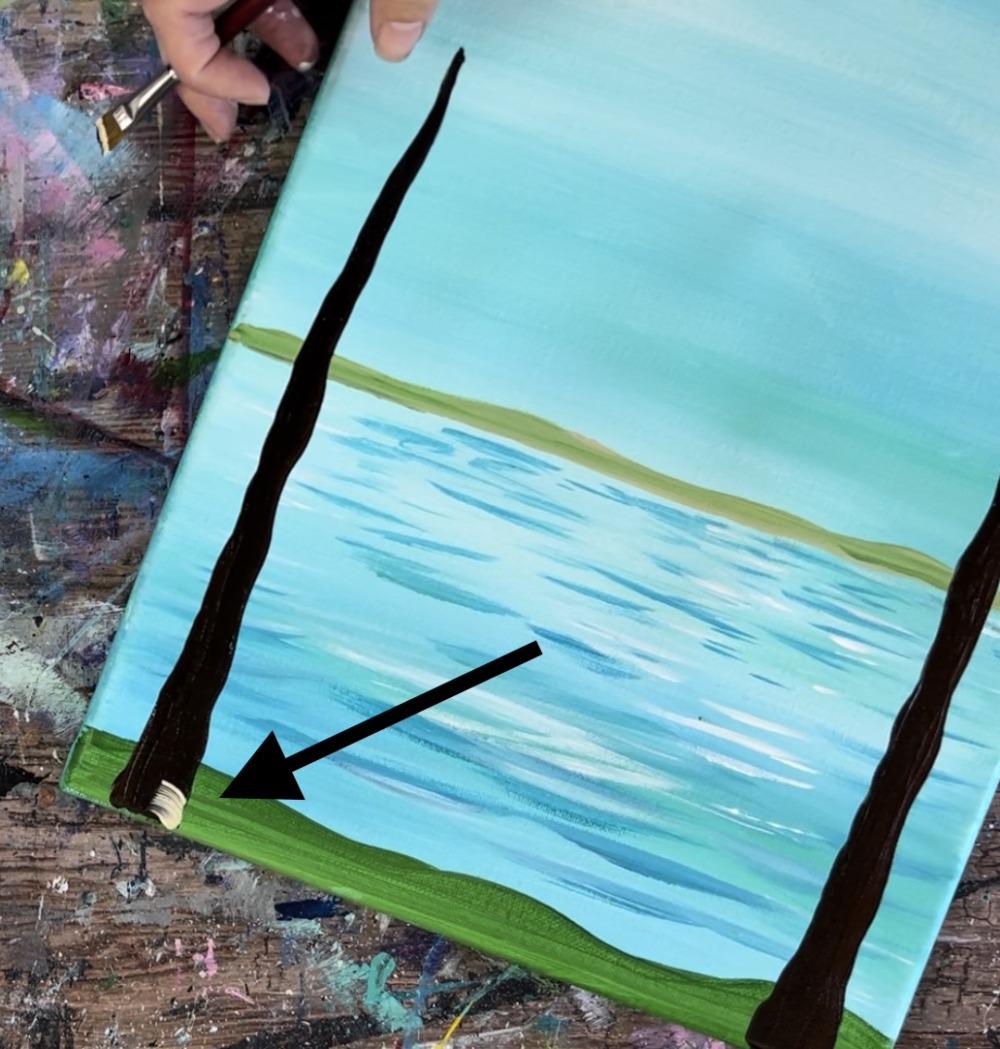
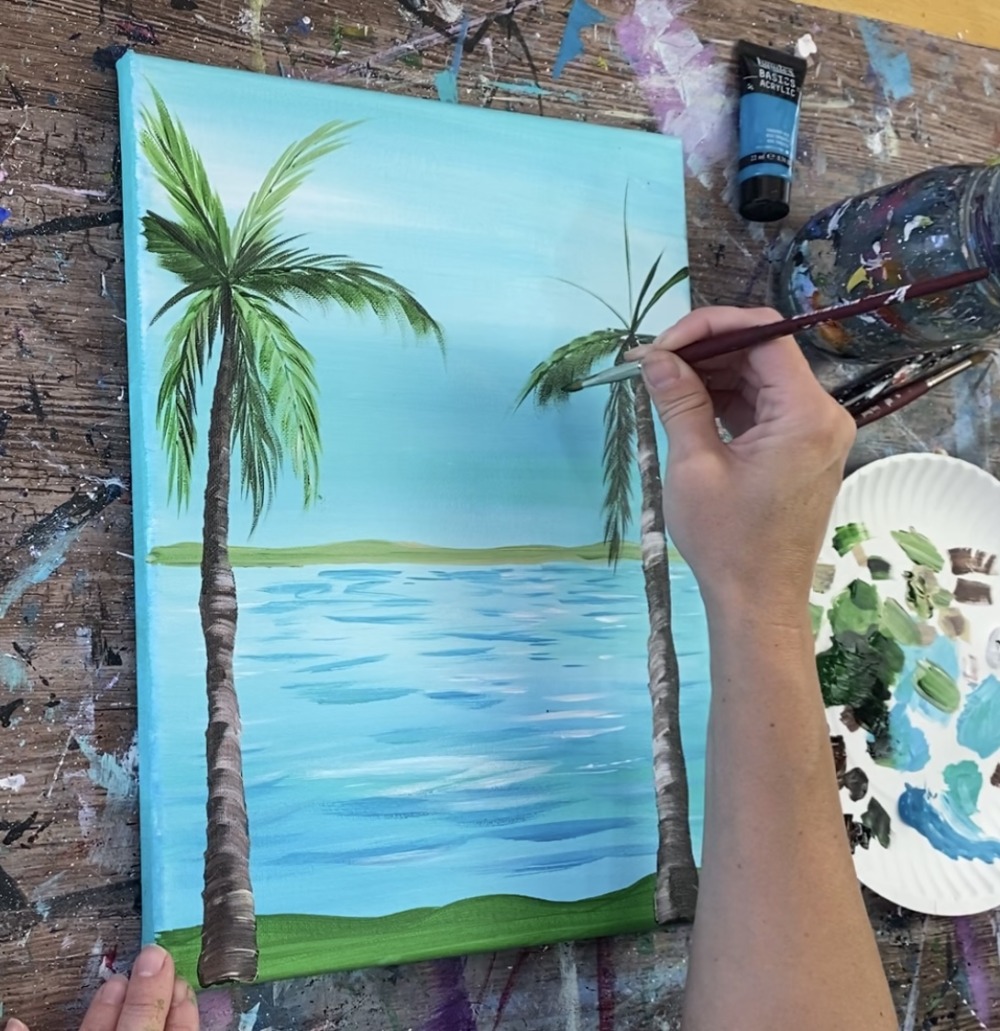
4. Paint Palm Trunks
Load your palette with burnt umber and mars black. Mix about 1 part black to 3 parts brown to make a very dark brown. Add just a small amount of water into it to thin it down a bit and allow it to flow when you paint the trunk.

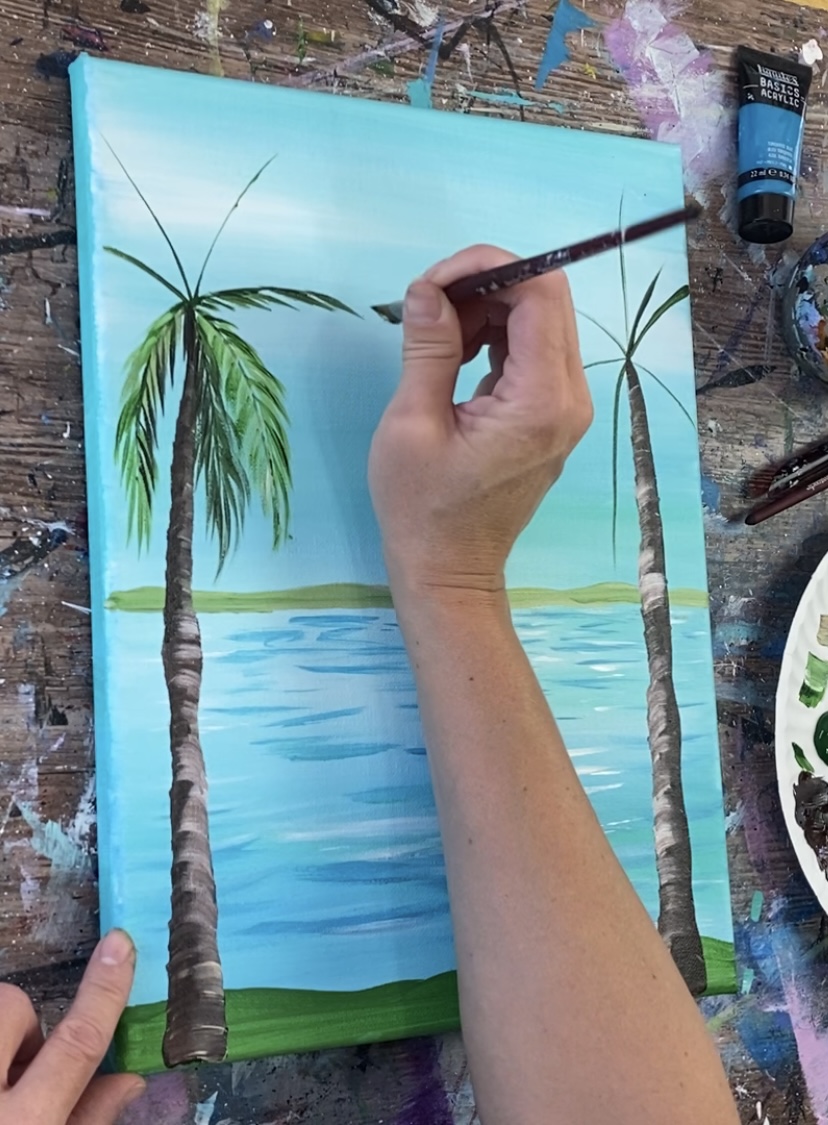
Start at the base of each of the trunks. The base should be slightly thicker. Then paint upwards. Make sure the edges of the trees are slightly wavy/ uneven. Allow the trunks to go to almost a point at the top and curve somewhat inwards towards each other. These trunks should be over halfway up the sky.
Don’t let this dry because in the next step the brown will be blending with the next color to create the texture.
Then paint the texture of the palm tree trunks using a 3/8″ angle brush and unbleached titanium (beige). Load the tip of the brush in the “beige” color.
Start at the bottom. Paint an upside down curved stroke on the right side of the trunk.
Your beige color should slightly blend with the dark brown color. Continue to paint curved strokes and go up the tree trunk.
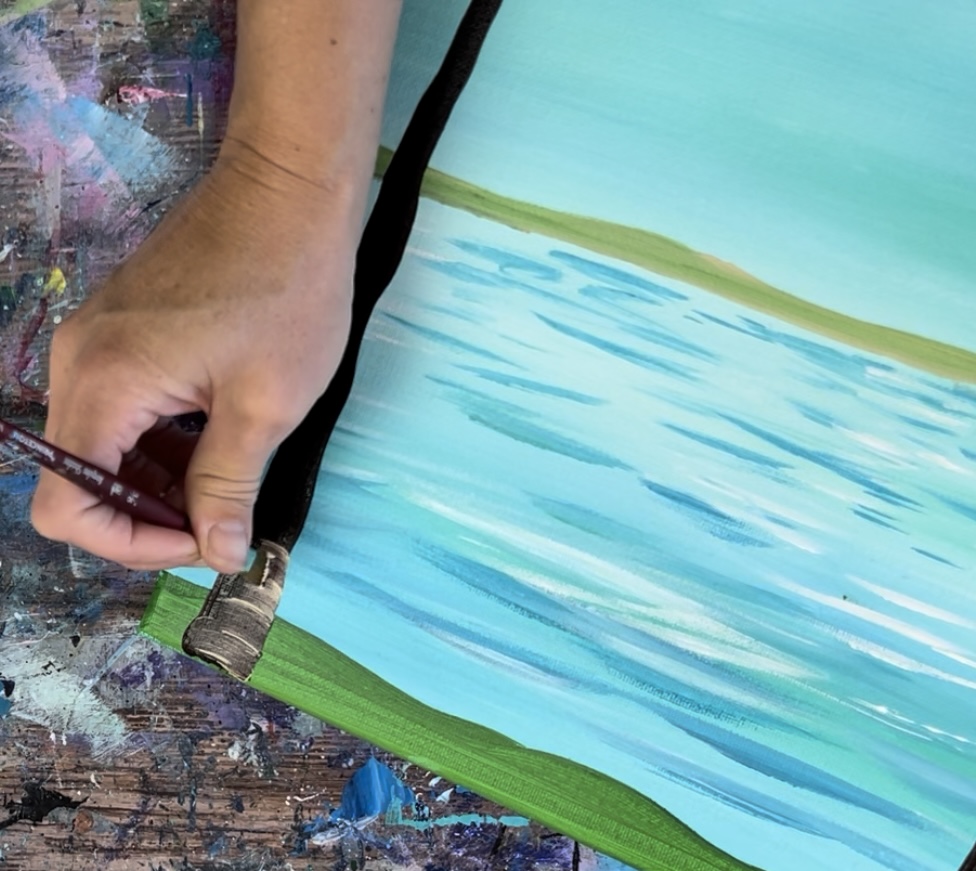
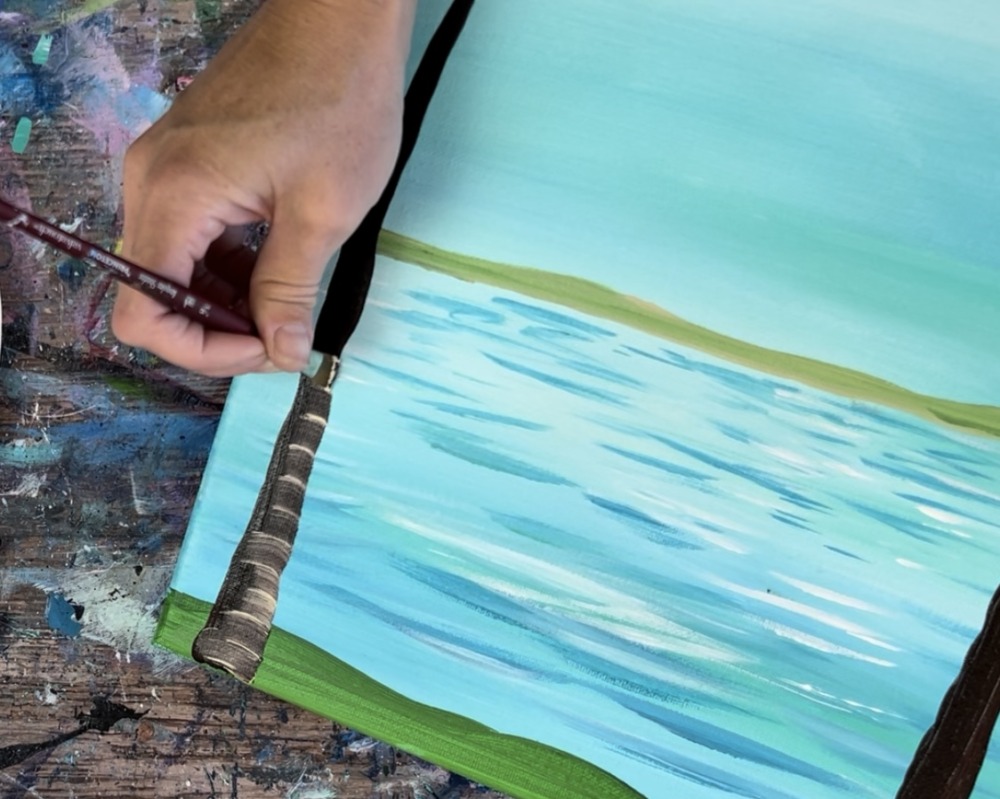
Then load the tip of the brush in burnt umber. Start on the left side of the trunk and paint the same type of curved stroke but don’t go all the way across. The dark brown should blend slightly with the beige.
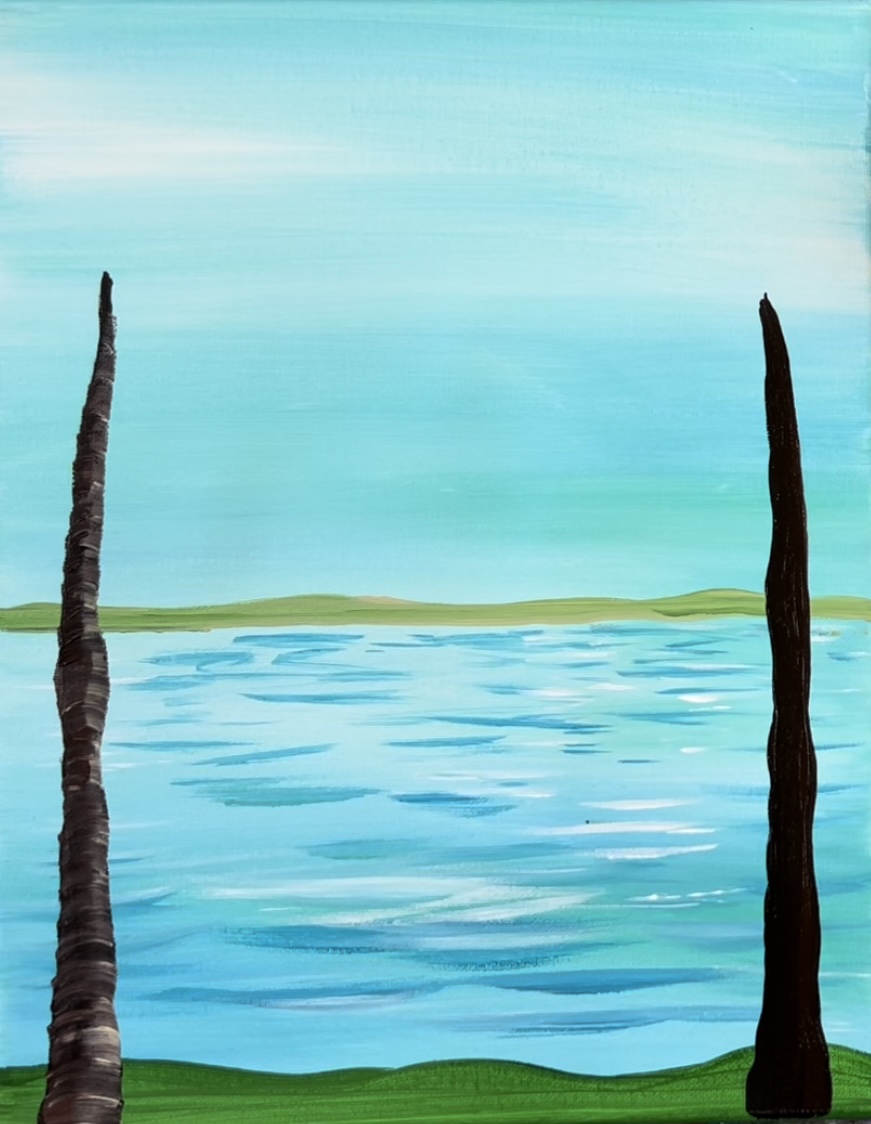
Do the same thing for the trunk on the right. The only different with this trunk is the lighter part of the texture (highlight) is on the opposite side (left side) and the dark side is on the right side.
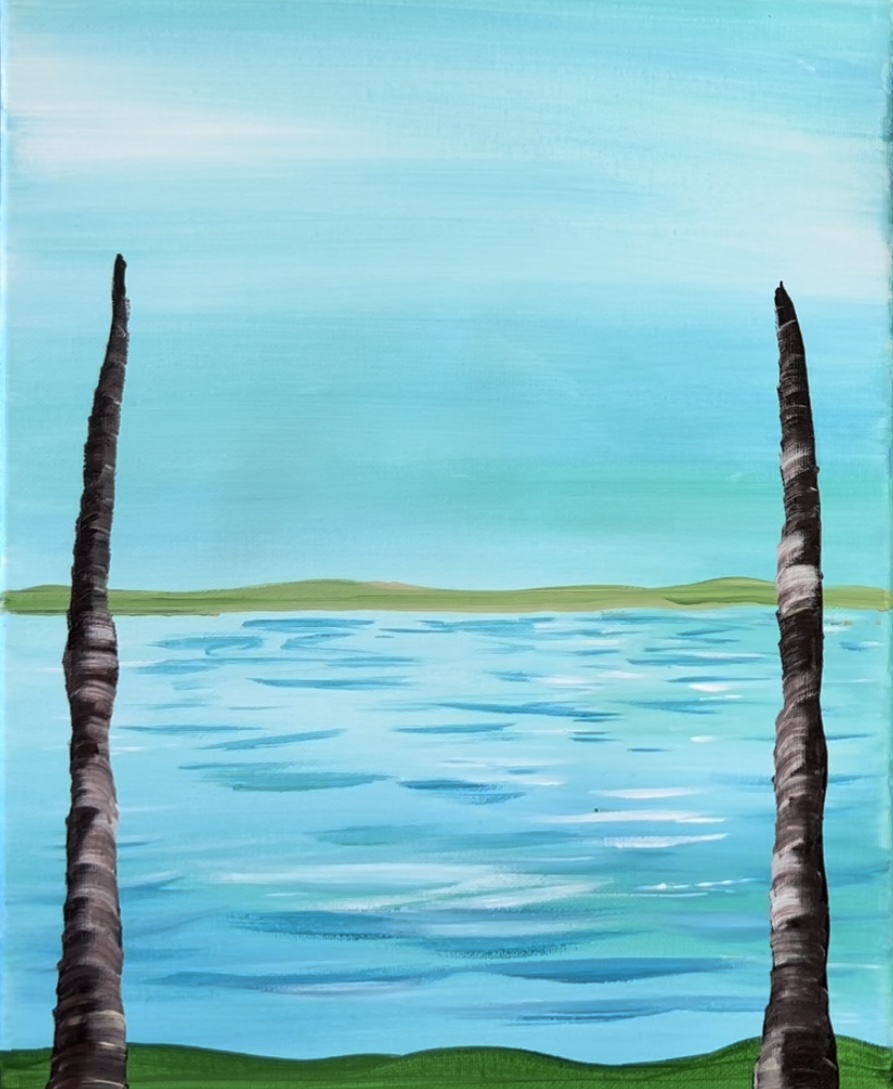
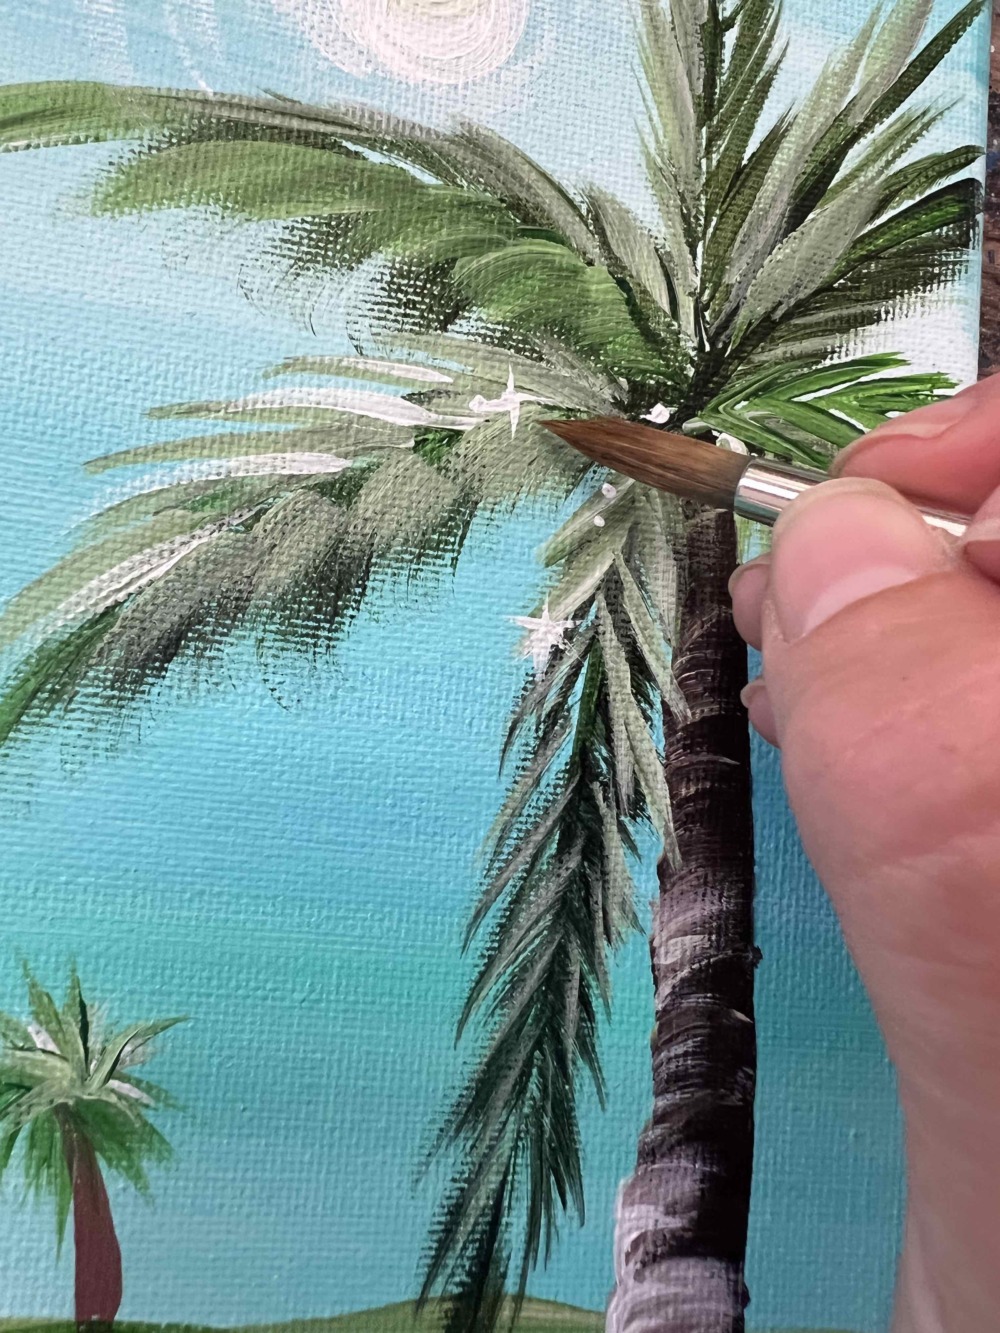
5. Paint Palm Fronds
Use the tip of your #8 round brush to paint the center lines for each of the palm fronds. Do this with hooker’s green hue permanent mixed with a little mars black so that it is a very dark green.
Start at the top tip of the palm tree trunk and paint a radial of lines going all different directions.
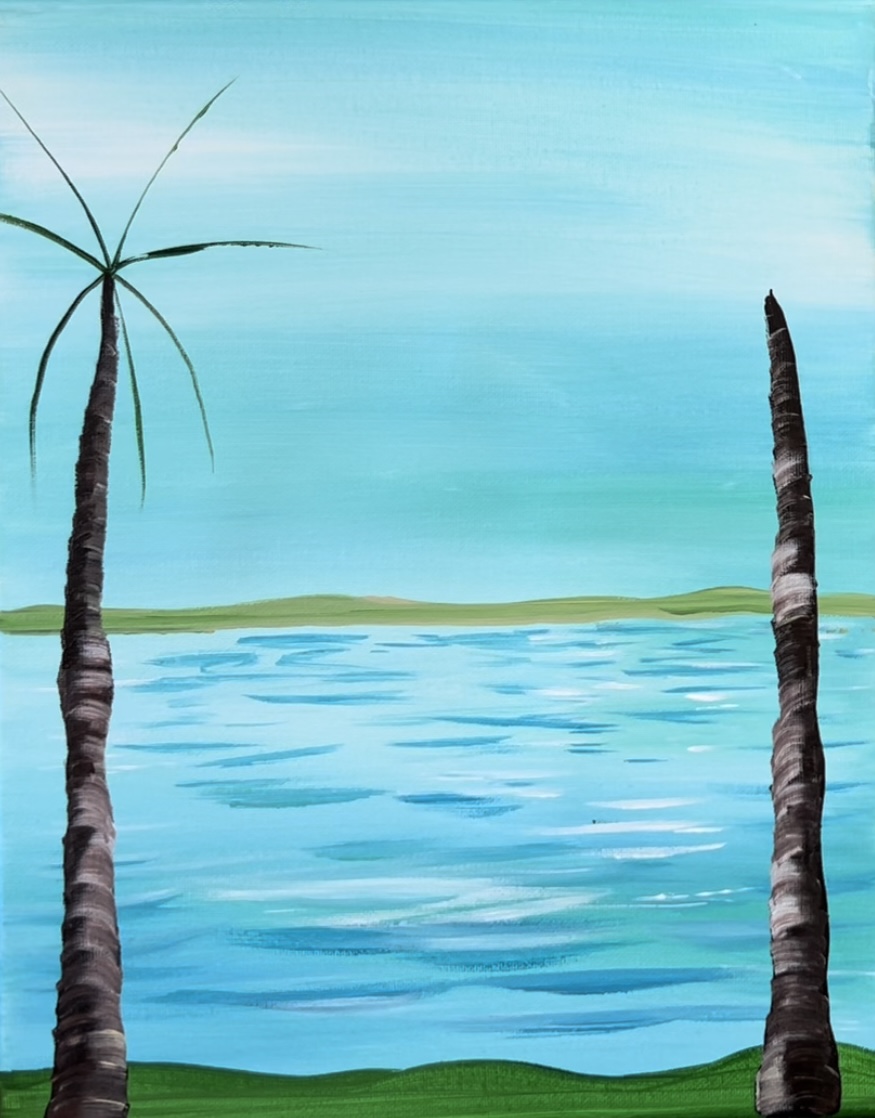
Repeat this for the second tree.
Next, load your 3/8″ angle brush in hooker’s green hue permanent mixed with titanium white (about 3 parts white and 1 part green). Use the tip of the brush to drag the strokes in an outwards direction to form the leaves on the palm frond.
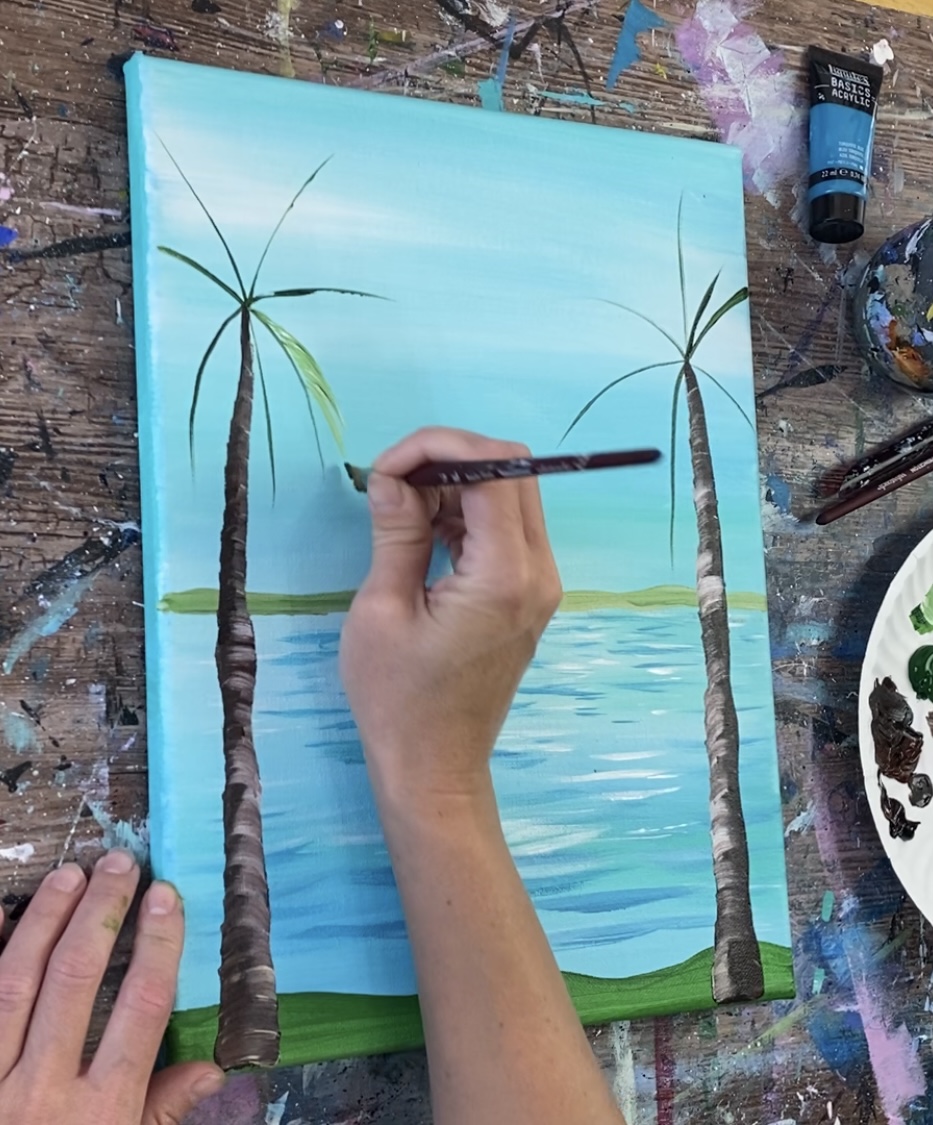
Repeat this for the other side of the line. Drag the brush in an angled/slightly curved direction for for the leaves.
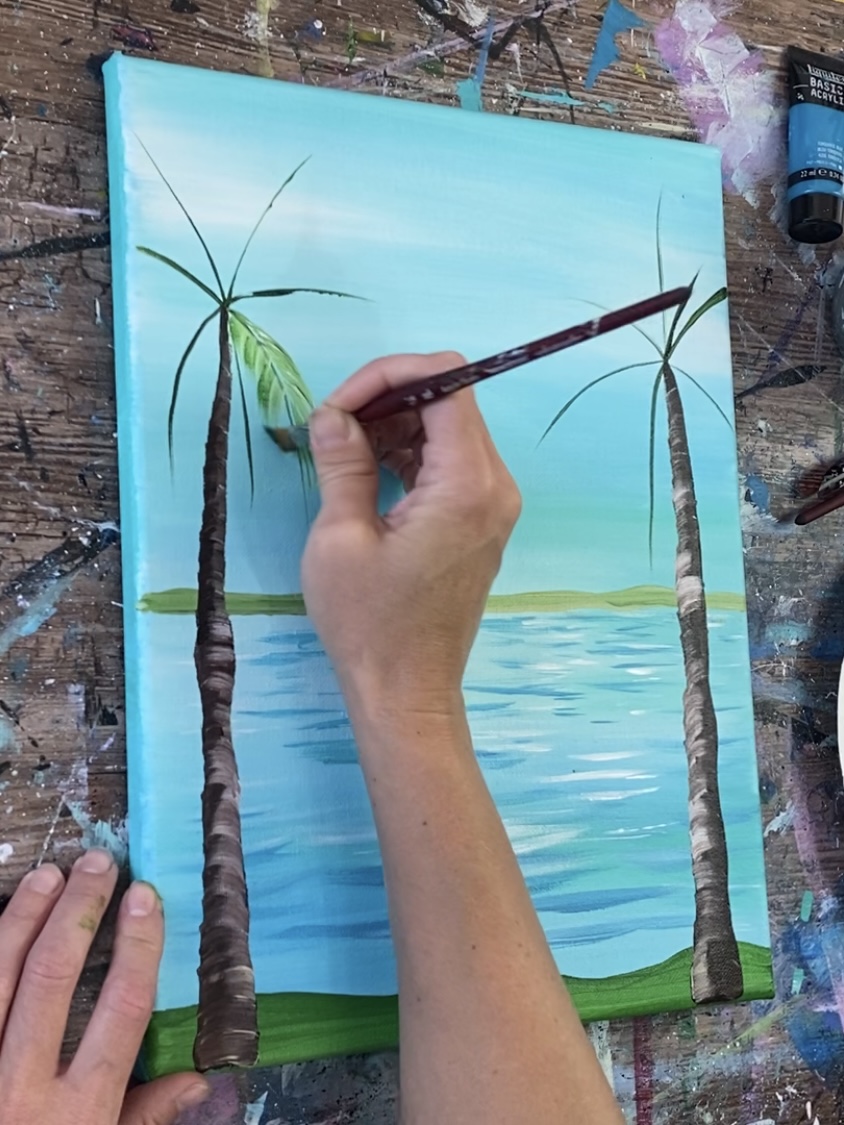
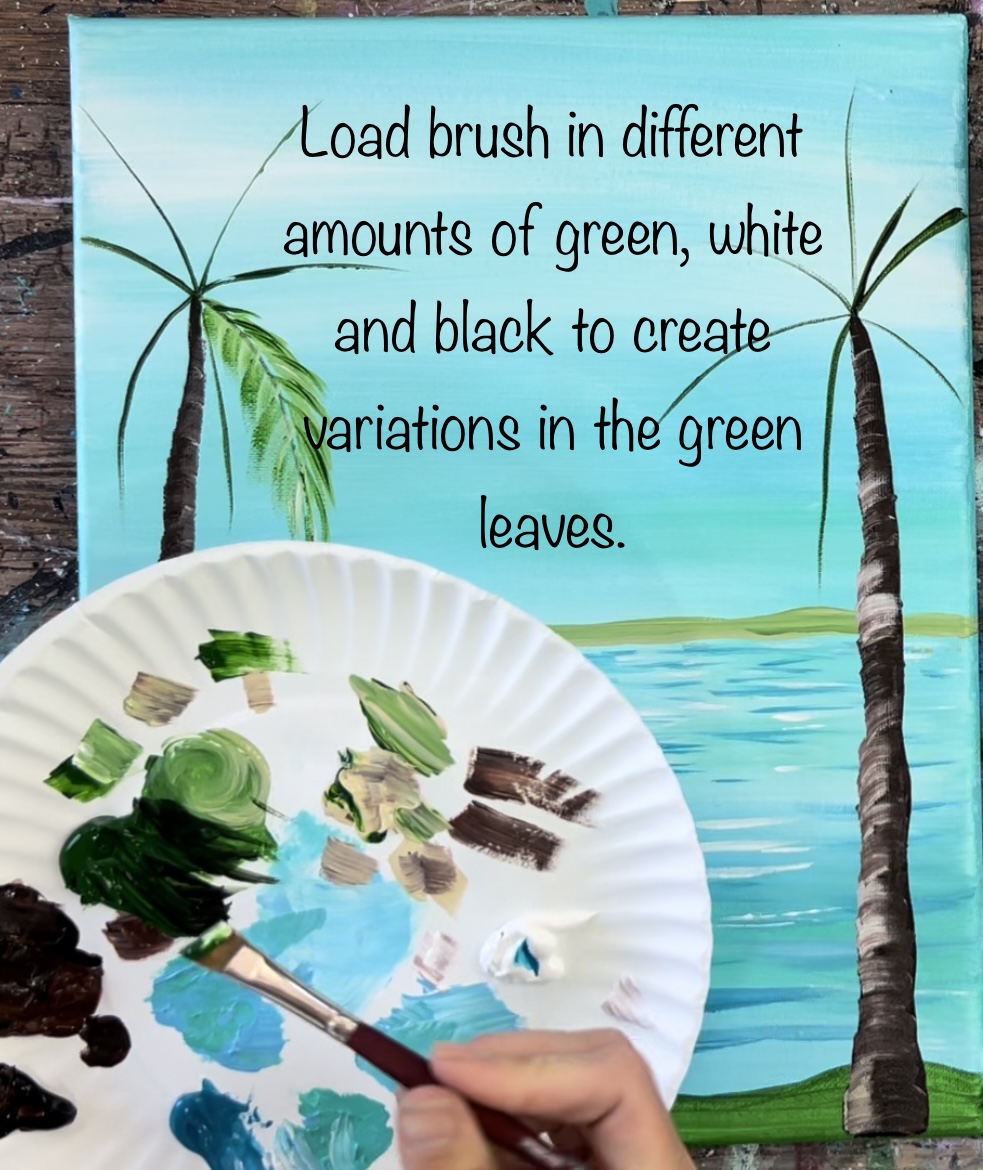
Use your palette to mix a variety of greens. Mix black in your green to make it darker and white in your green to make it lighter. You can even mix some brown or beige in your green.
With this technique, you are painting a variety of greens in your palm leaves to help them stand out from one another and give your tree “color variation”.
Paint the leaves on each of your lines using a variety of greens. For the next palm frond, pictured below, I used darker colors since that is a darker/ shadowy area. The direction of each of the palm leaf should go in the direction of the initial middle line.

Continue to paint more of the palm fronds using the angle brush and this technique.
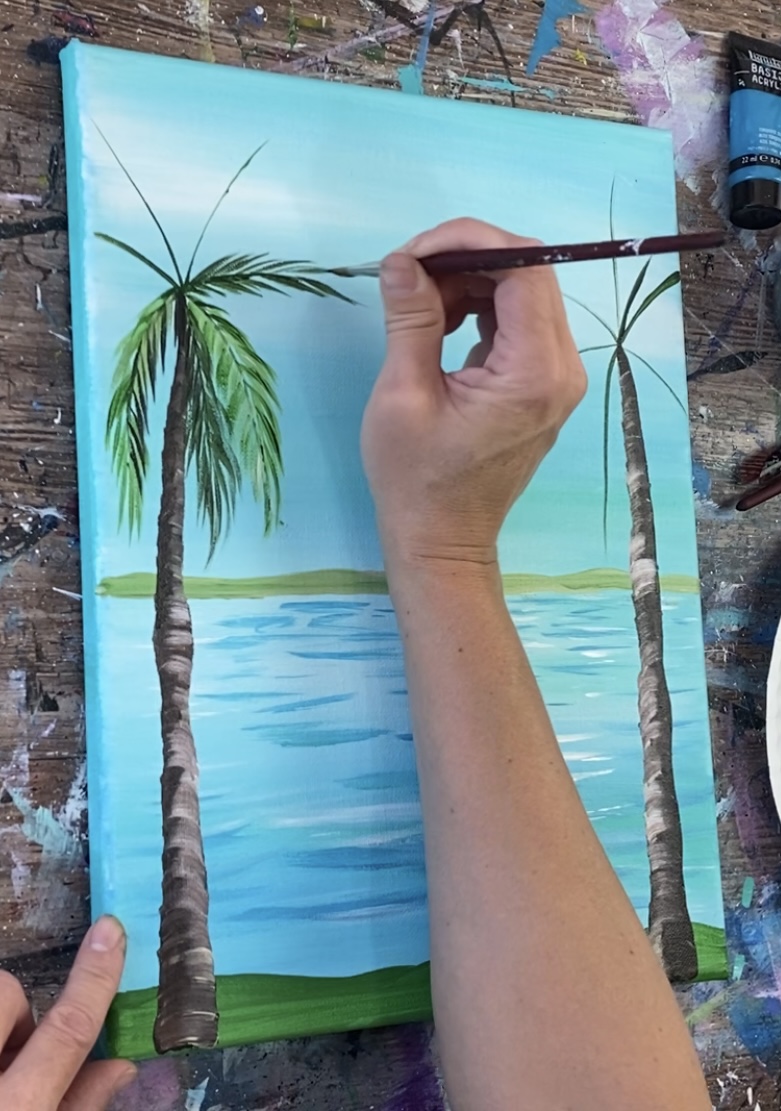
The variations in greens are created simply by mixing different lights and darks on your palette.
Repeat this for the tree on the right.
For the one on the right, I started by painting all the palm fronts with dark green.
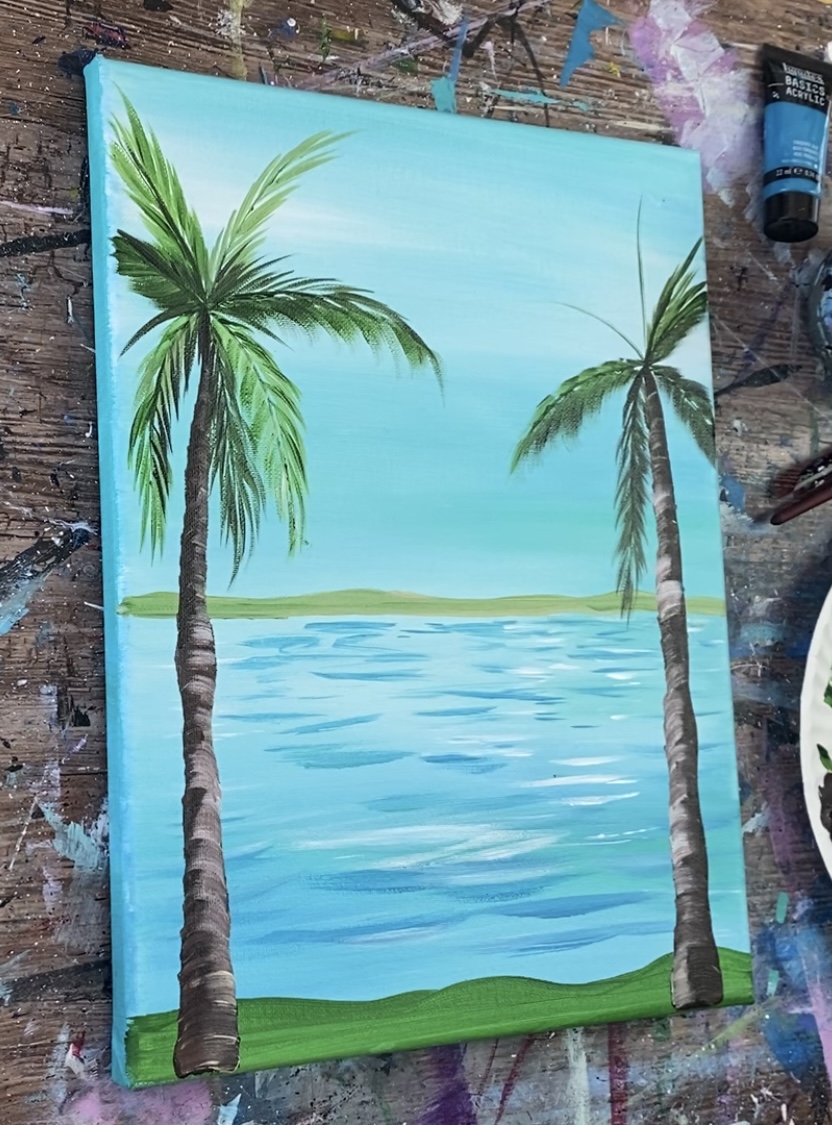
Then I added lighter green highlights over it by painting over most of the dark green strokes.
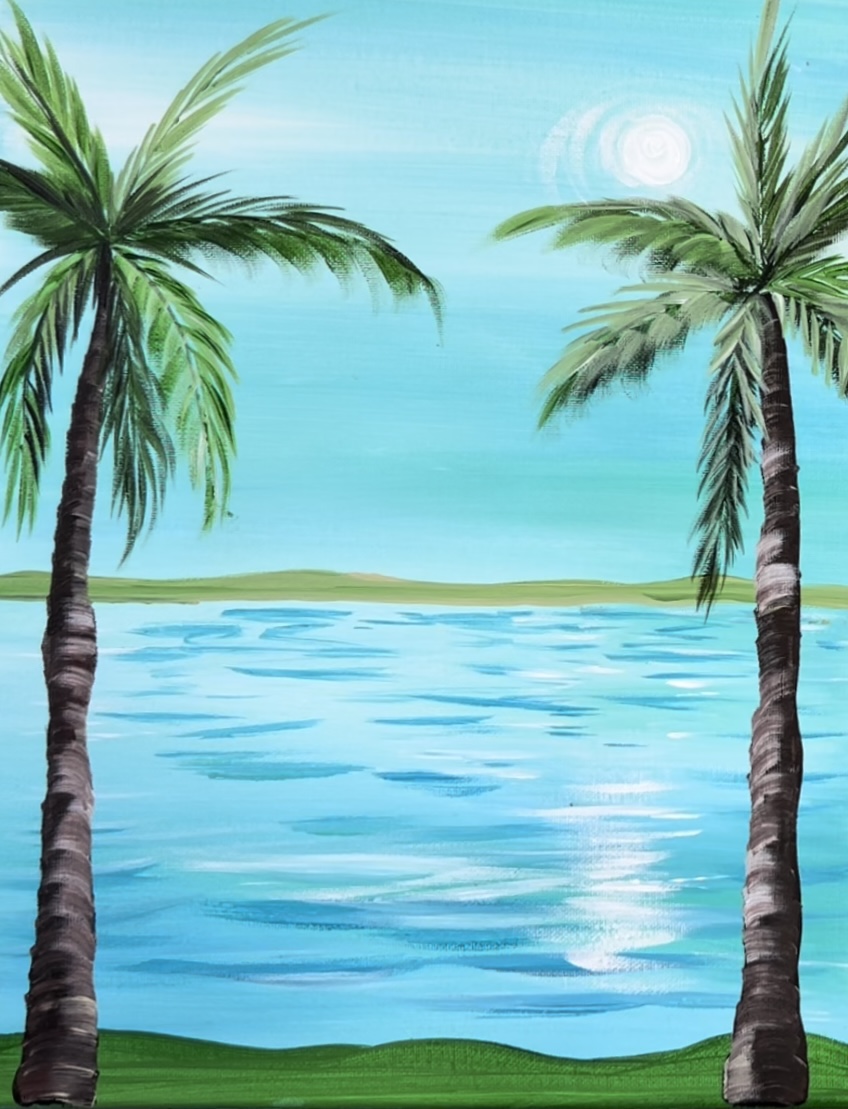
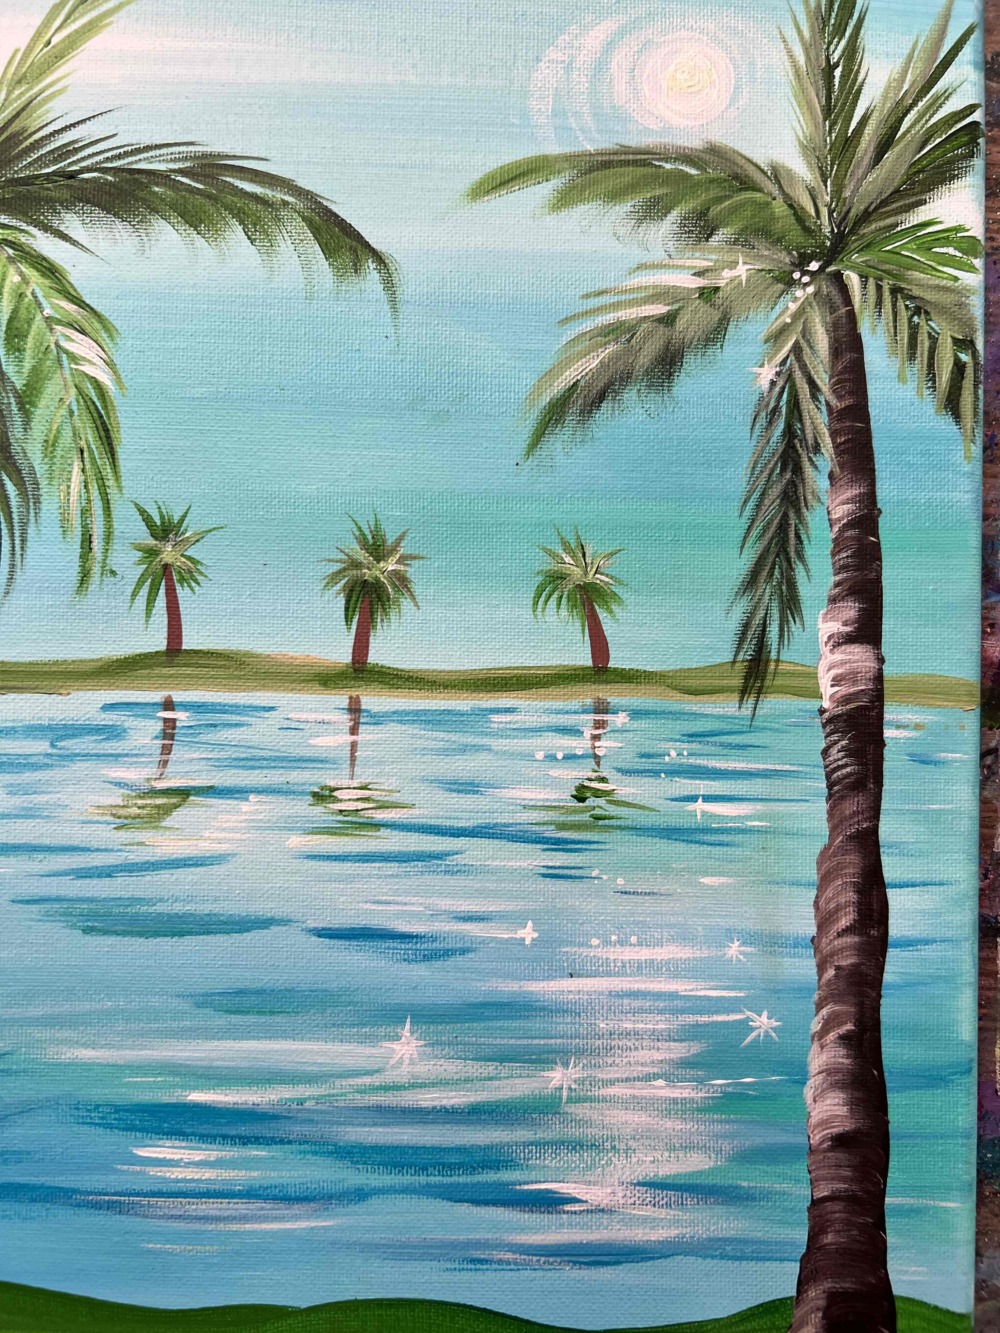
6. Paint Sun
Use a #4 round brush and titanium white to paint a small circle somewhere in the upper right part of the sky.
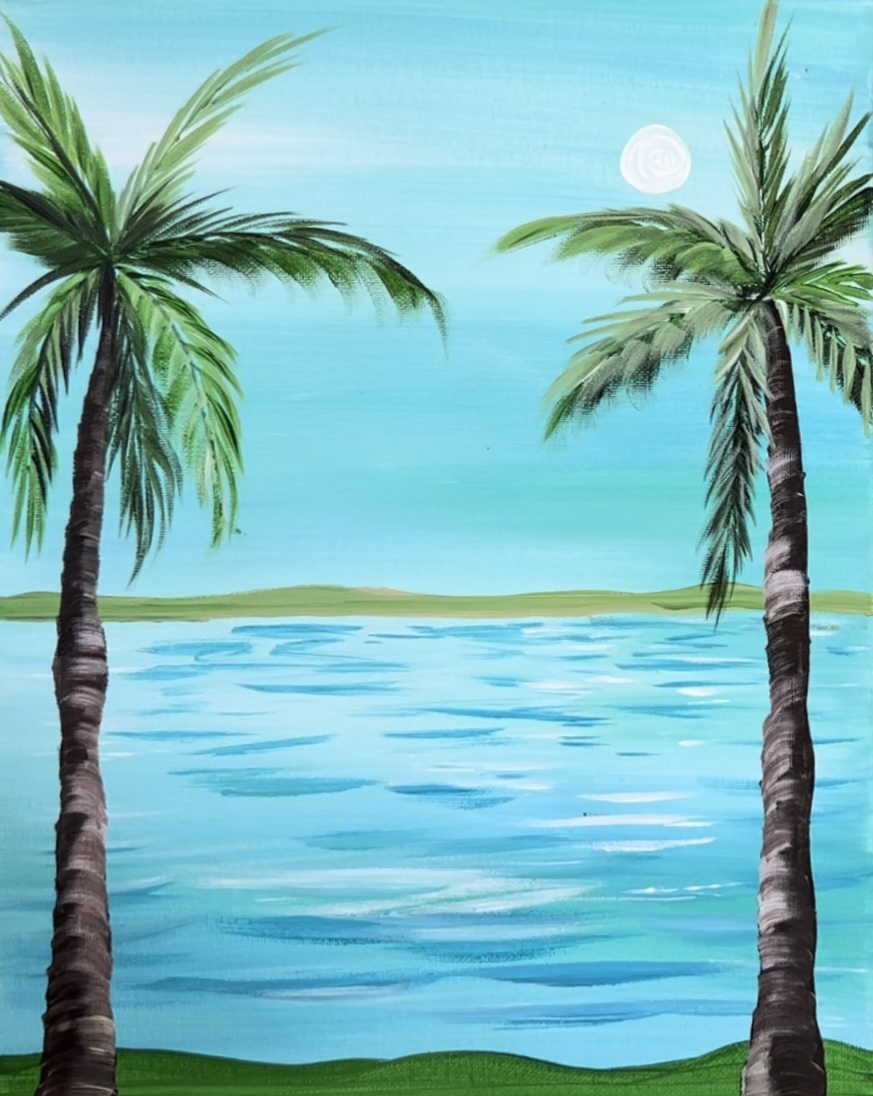
Optional: do “dry brush strokes” around the sun. Do this by loading a small amount of white on the tip of your brush and then wiping the brush off. Then paint in circular strokes around the sun. The white should be see through/ translucent because of it not having a lot of paint on the brush.
7. Paint Reflection
Next, paint white reflection lines under the sun. Paint left and right strokes creating a bright reflecting area on the water.
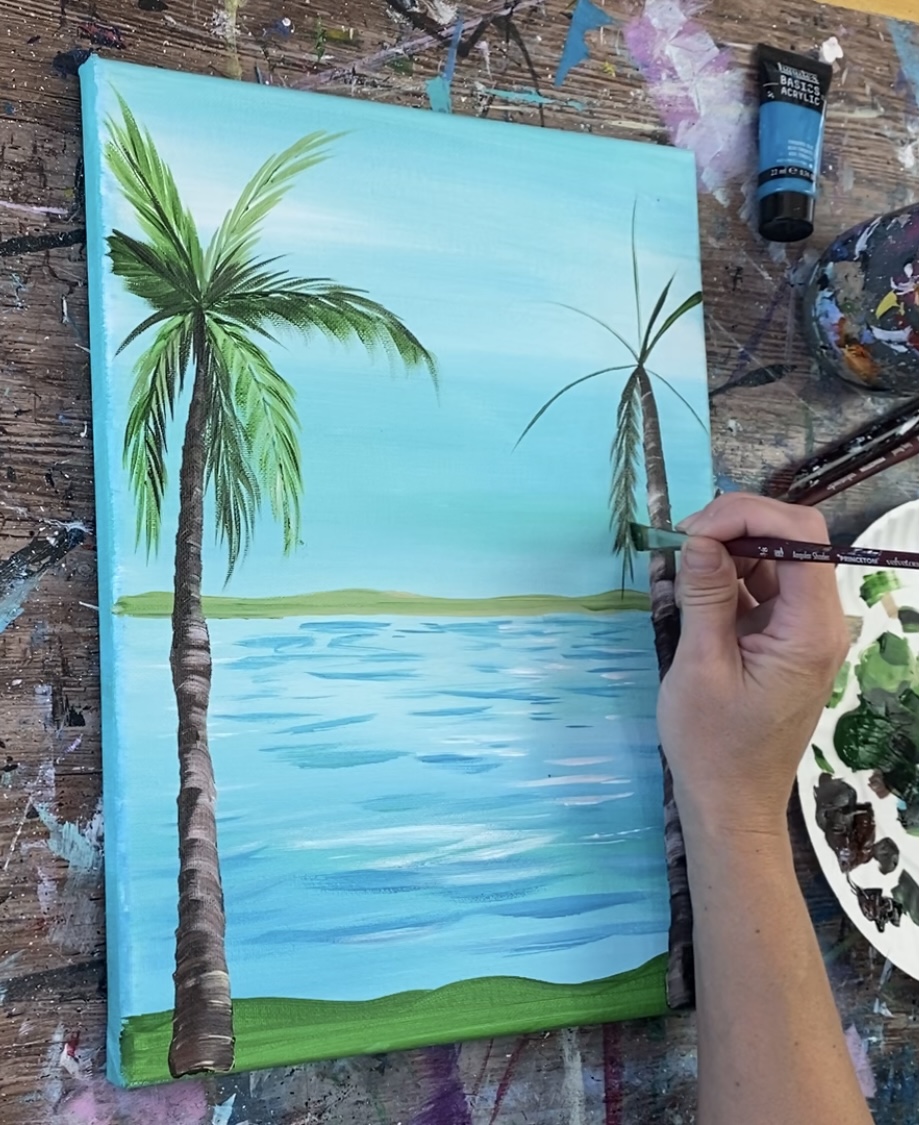
8. Paint Distant Palm Trees
Mix a light brown on your palette by mixing 2 parts titanium white and 1 part burnt umber. Paint three small tree trunks on the land in the distance. These tree trunks are sort of wider at the base and go thinner at the top. They also bend/ sway a little.
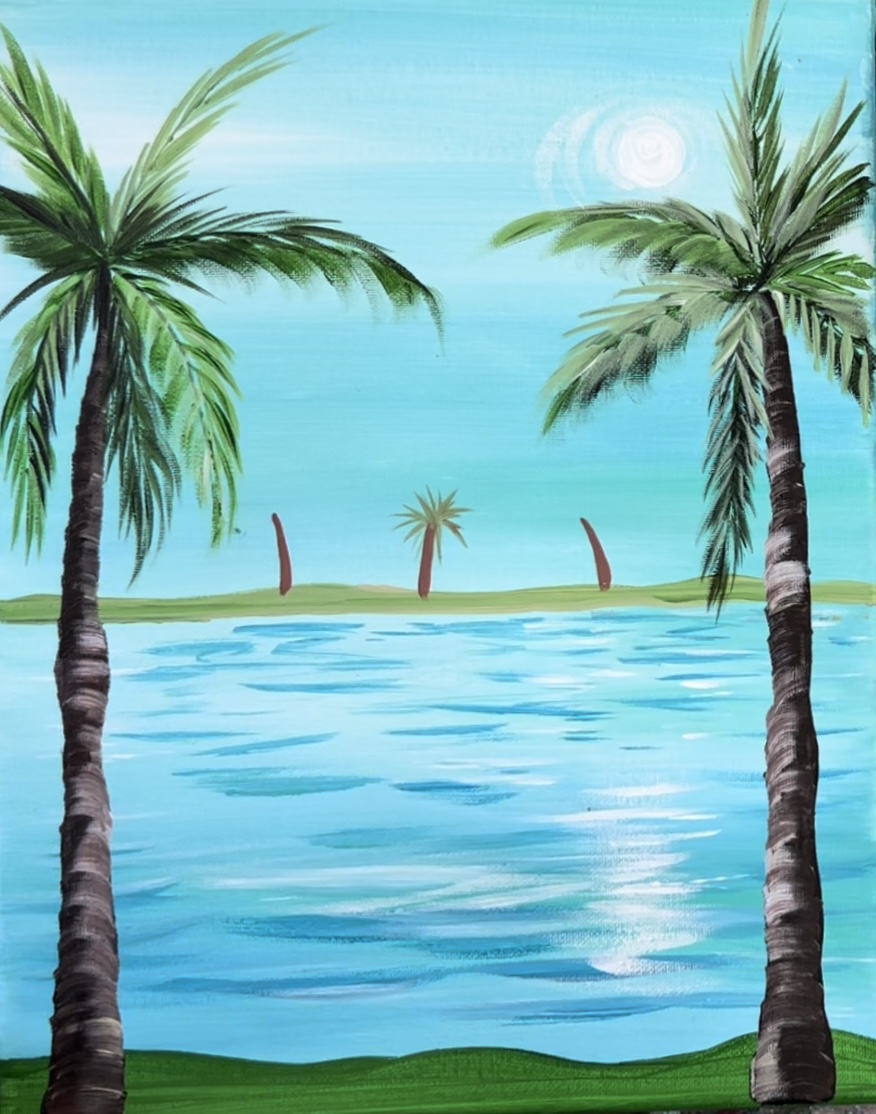
Then mix a light green on your palette by mixing 2 parts white with 1 part hooker’s green. Paint the palm leaves on the trees in the distance by painting small lines going in a fanned direction. You do not need to be as detailed with these palm trees because they are further in the distance.

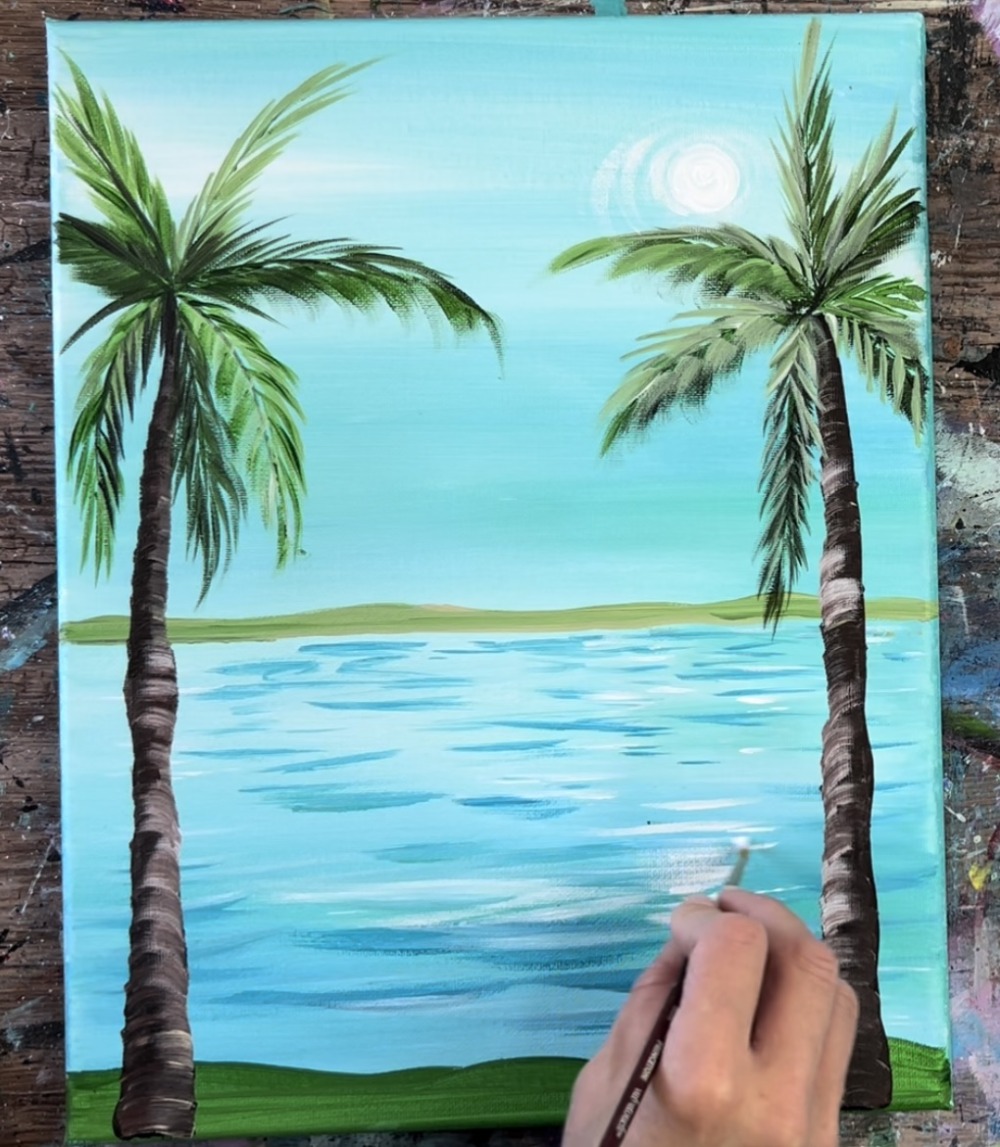
9. Paint Reflection & Water Sparkles
Paint reflections of the smaller palms in the water by using the same colors you used to paint them. Paint the vertical lines with the brown for the trunks. Then paint small horizontal strokes for the palm leaf reflections. When this dries, you can paint small white horizontal lines over the reflections.
Next, paint “sparkles” in the tree branches and in the water. Use titanium white to paint little stars and plus signs. I found it easier to use the #8 round brush and titanium white for these small details because that brush has a fine point to it.

Paint sparkles in the water, especially where the sun is reflecting.
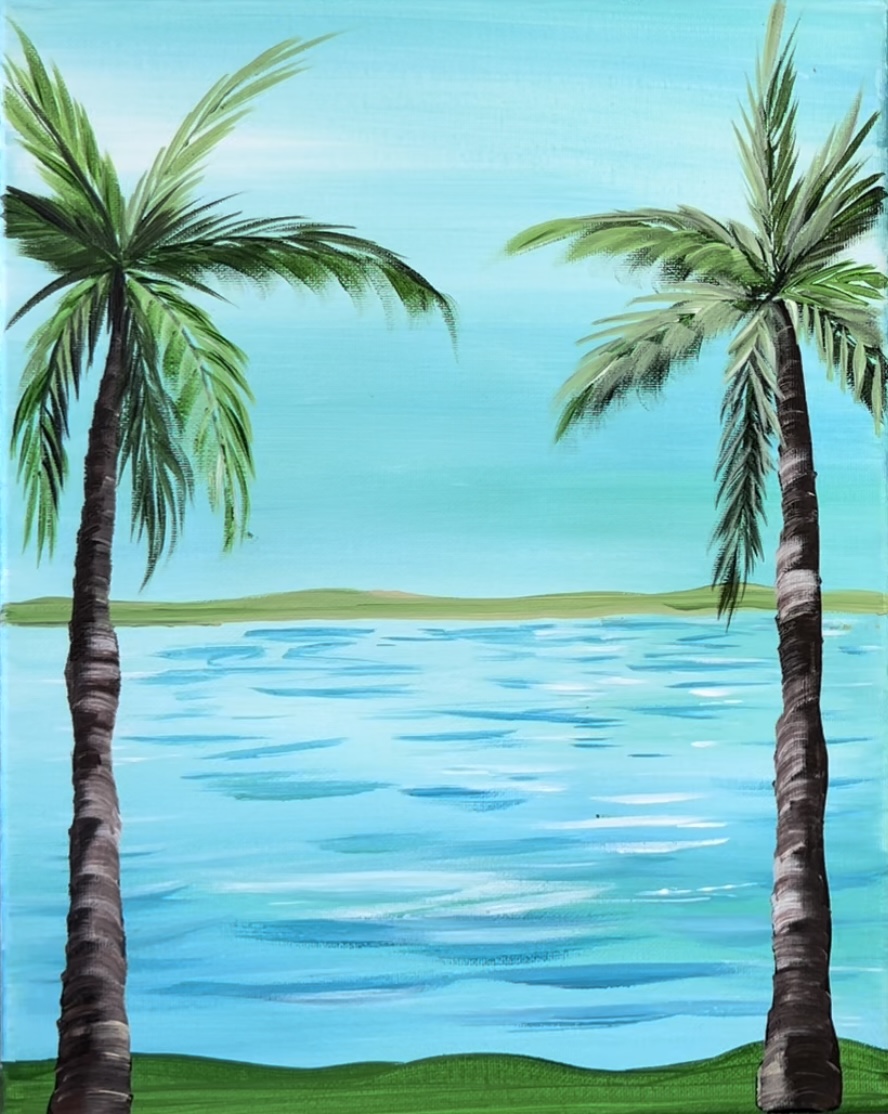
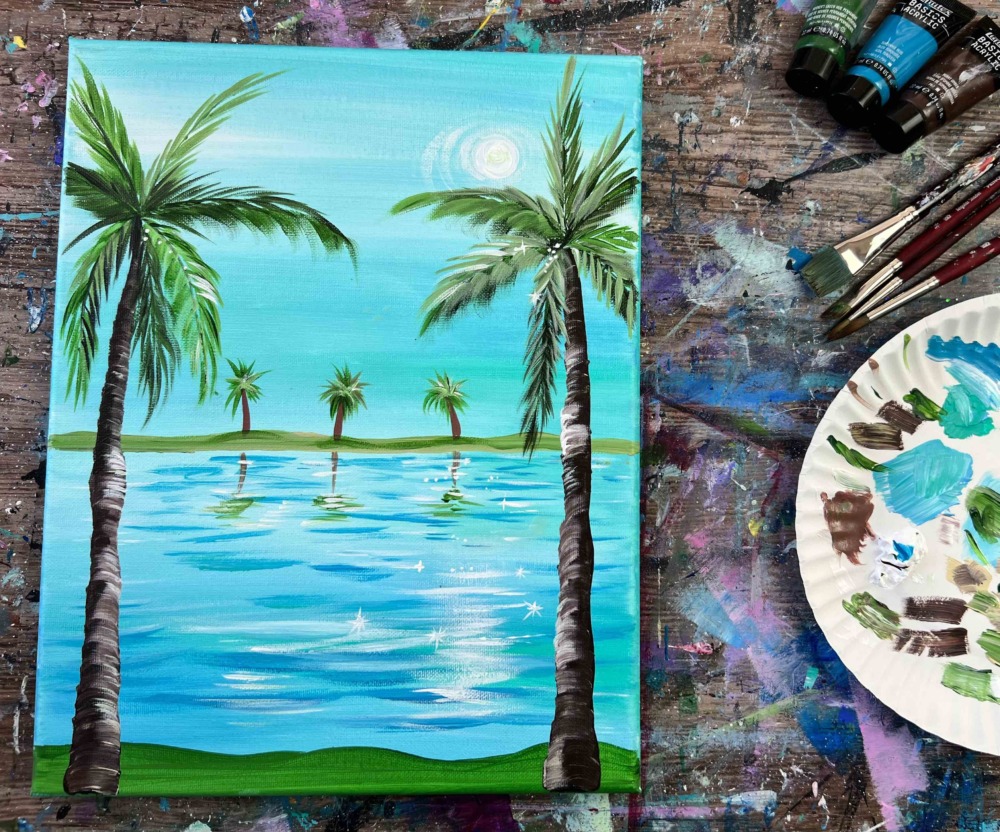
Finished!
Share your art here:


1 thought on “How To Paint “Palm Tree Bay” – Acrylic Painting Tutorial For Beginners”
Comments are closed.