
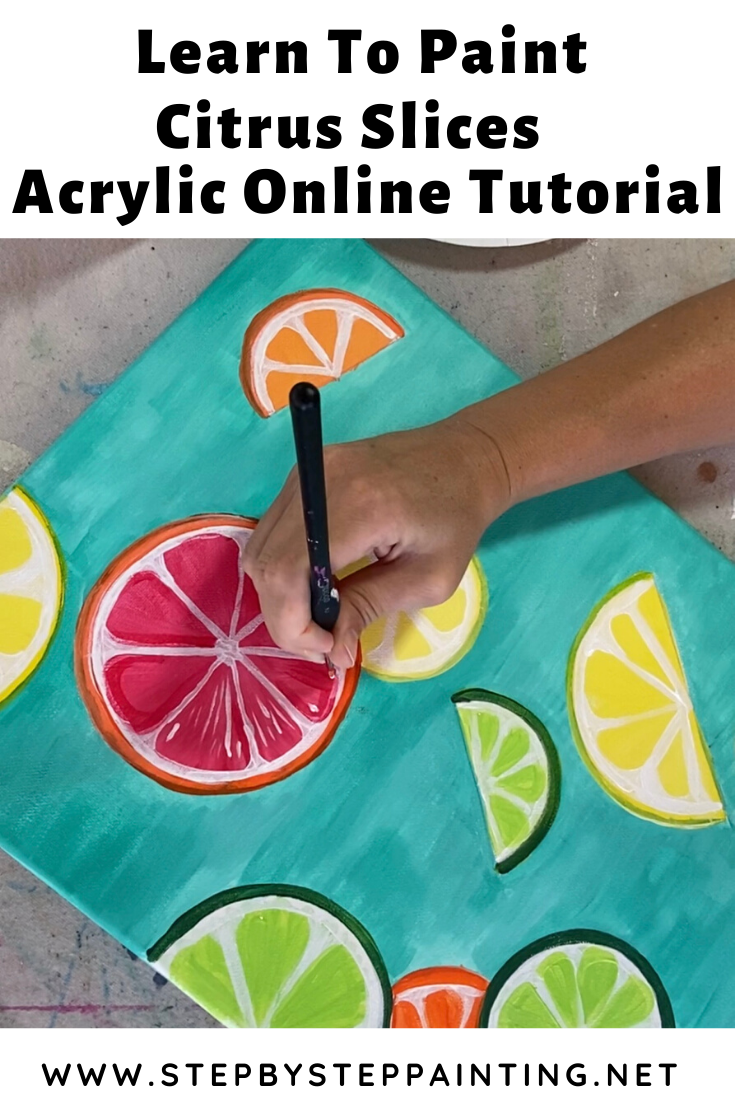
Citrus Painting Tutorial – Learn How To Paint Citrus Slices!
Would you like to save this?
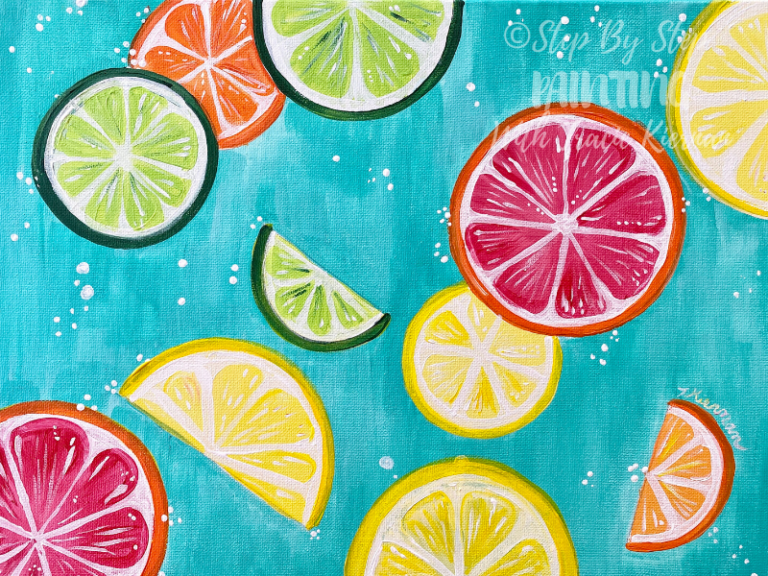
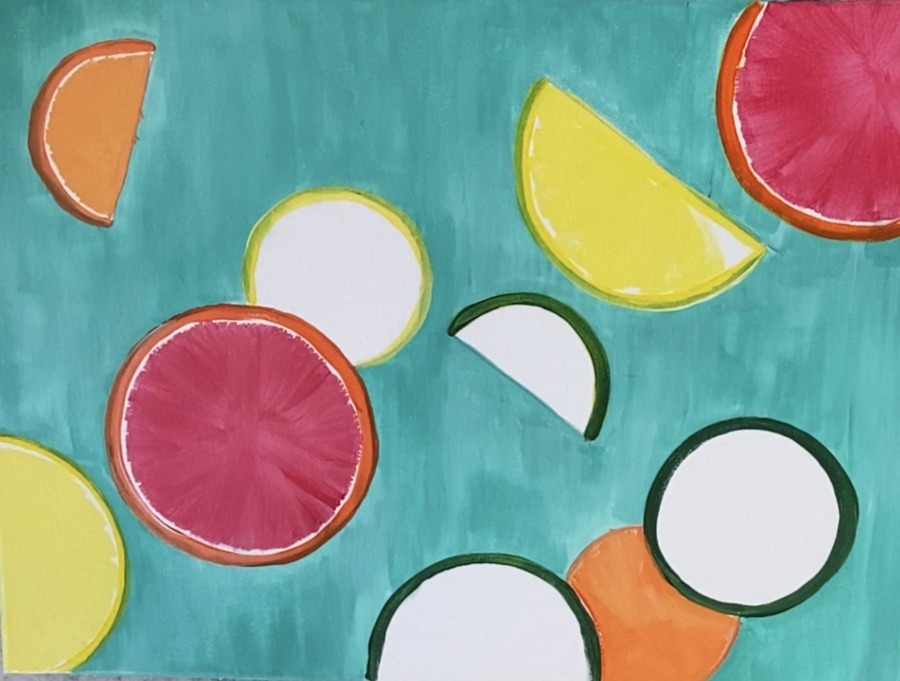
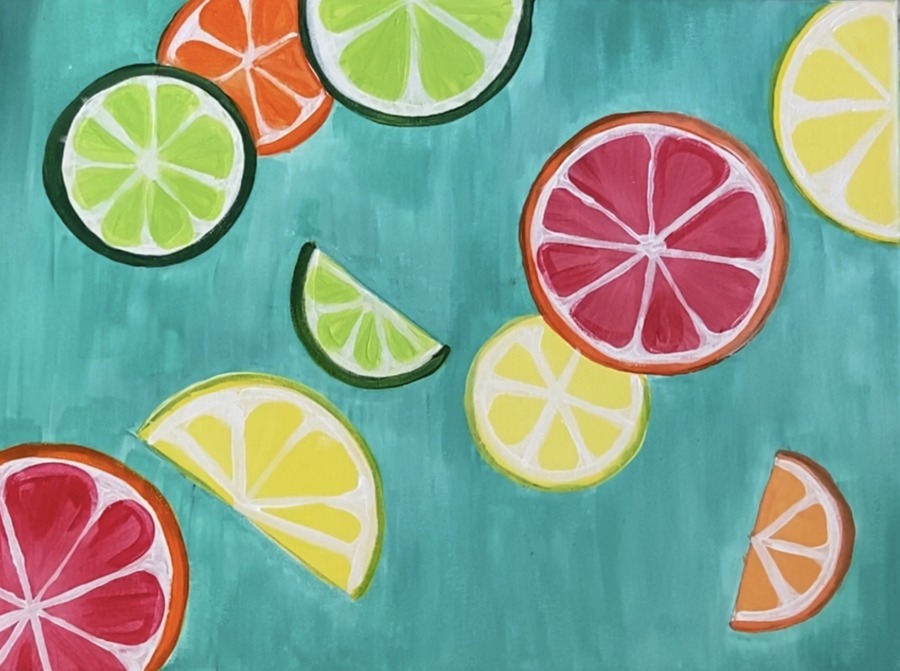
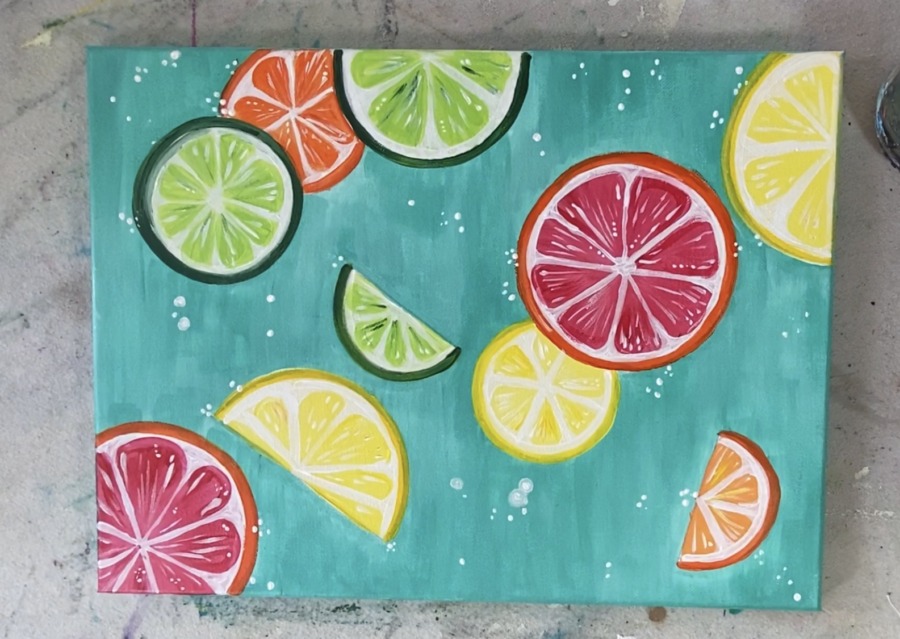
This painting reminds me of a big glass of water with lemon, lime, orange and grapefruit slices!
I love the bright, cheerful colors in this fun summery painting. You can do this citrus slice composition on literally any size canvas and have it be vertical or horizontal.
I did one painting on an 8 x 10 and another on a 12 x 16 with acrylics. You can also play around with the composition of this painting and have various sizes & overlapping.
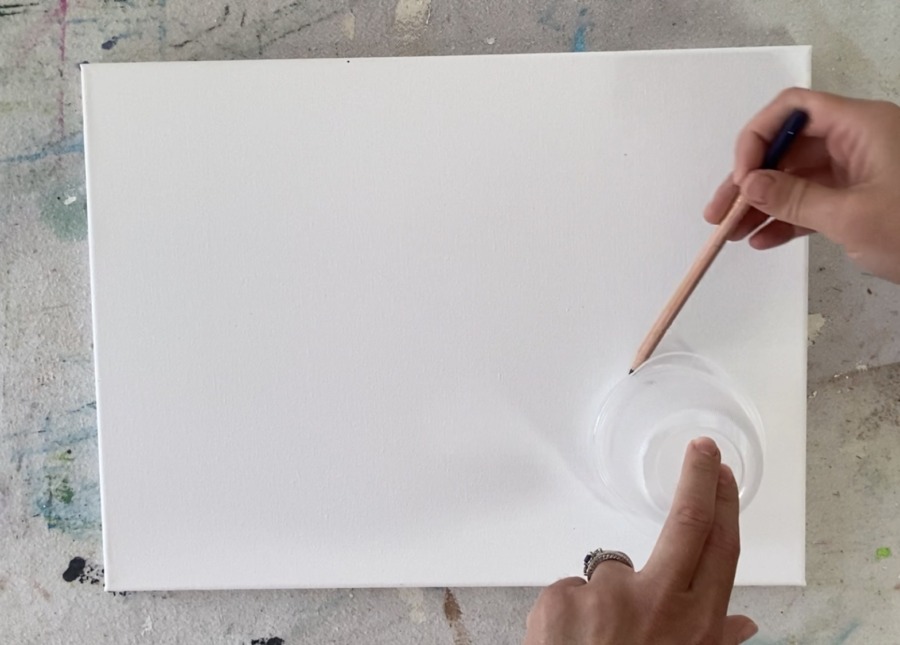
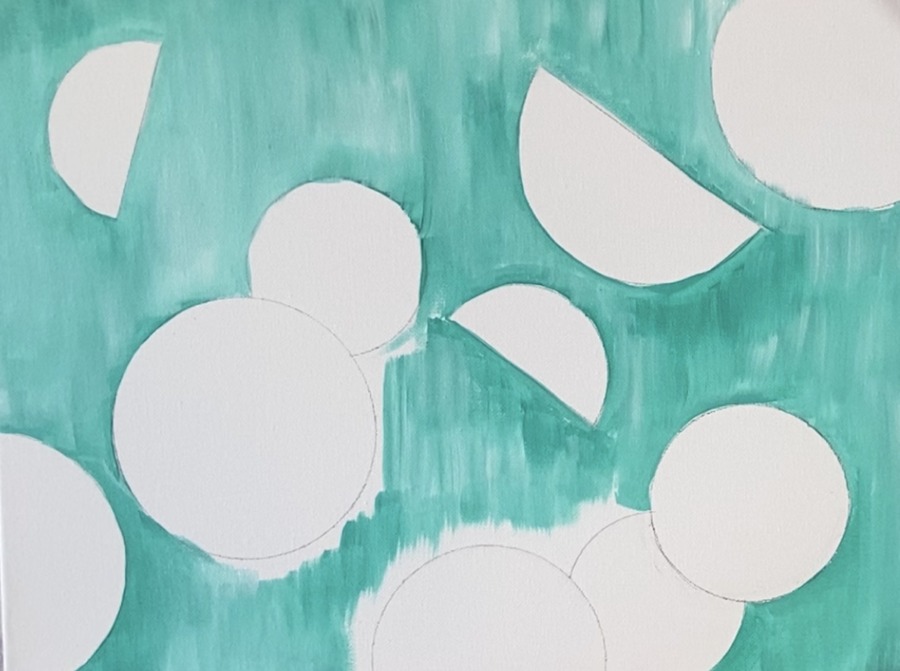
For the citrus circles, I simply traced a few different size circles found around the house (Tupperware lids, plastic cups, etc.) You can also use a compass.
For the fine details in the juicy citrus “pulp”, I used a smaller brush. This one is a #2 round in this set. I recommend you use at least a #2 or smaller because the find lines is what gives that citrus slice its texture.

![]()
Enjoy and happy painting!
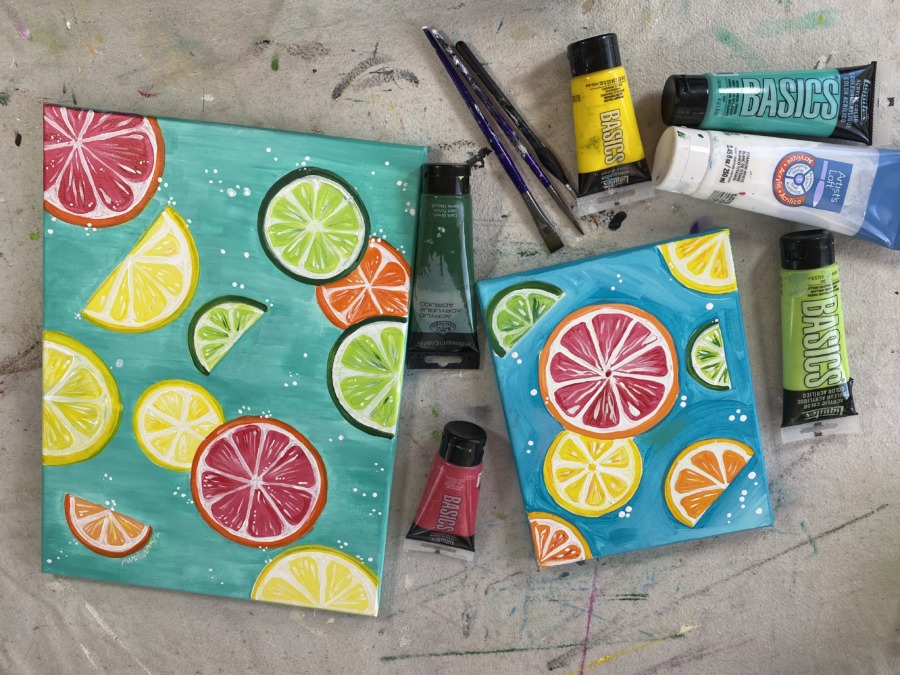
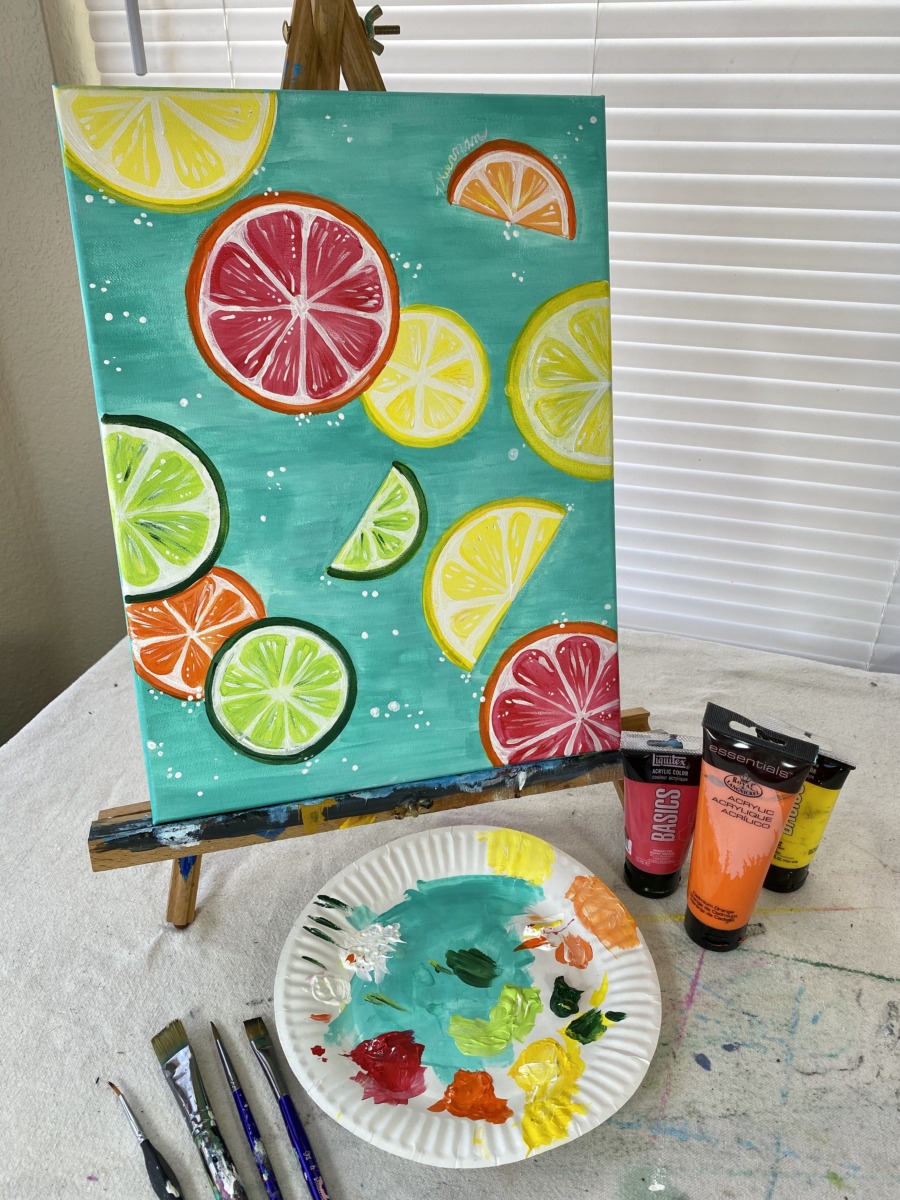
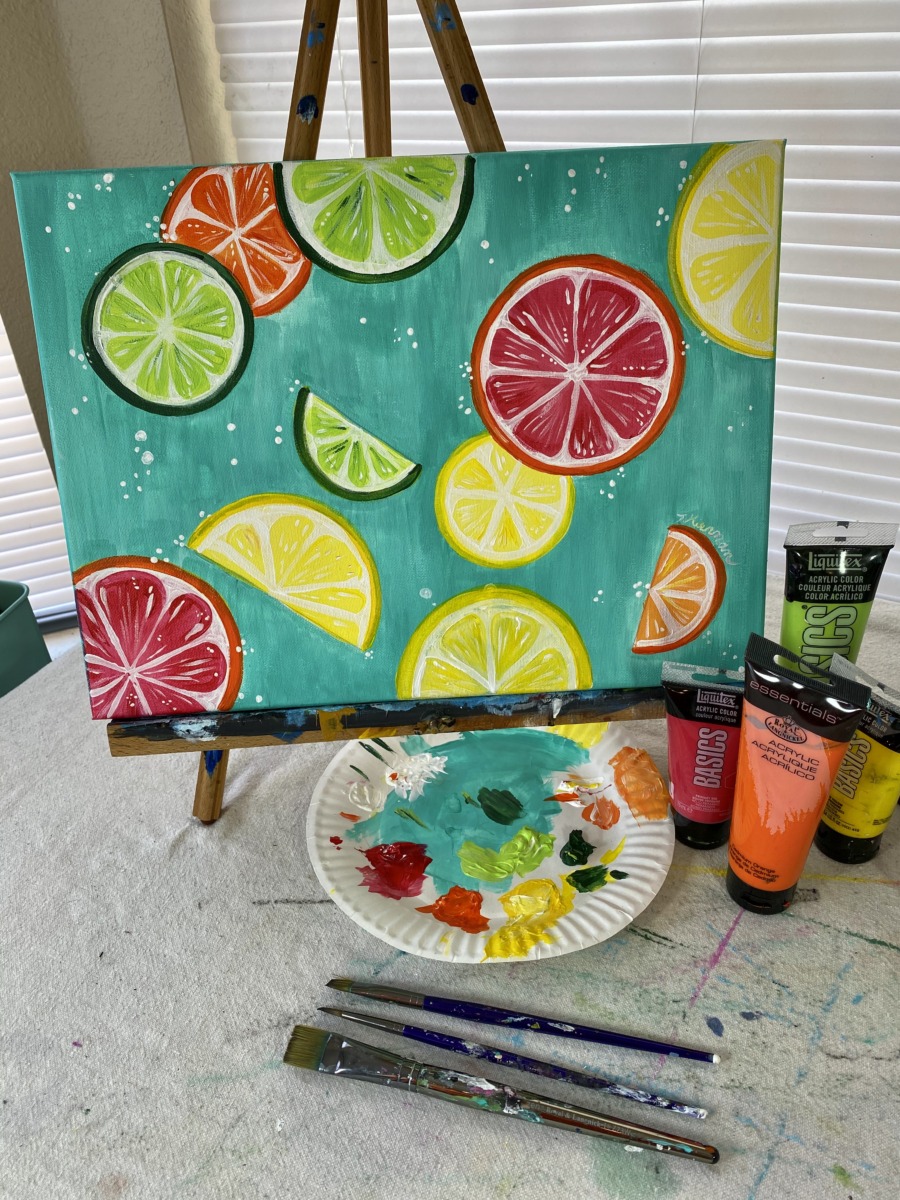
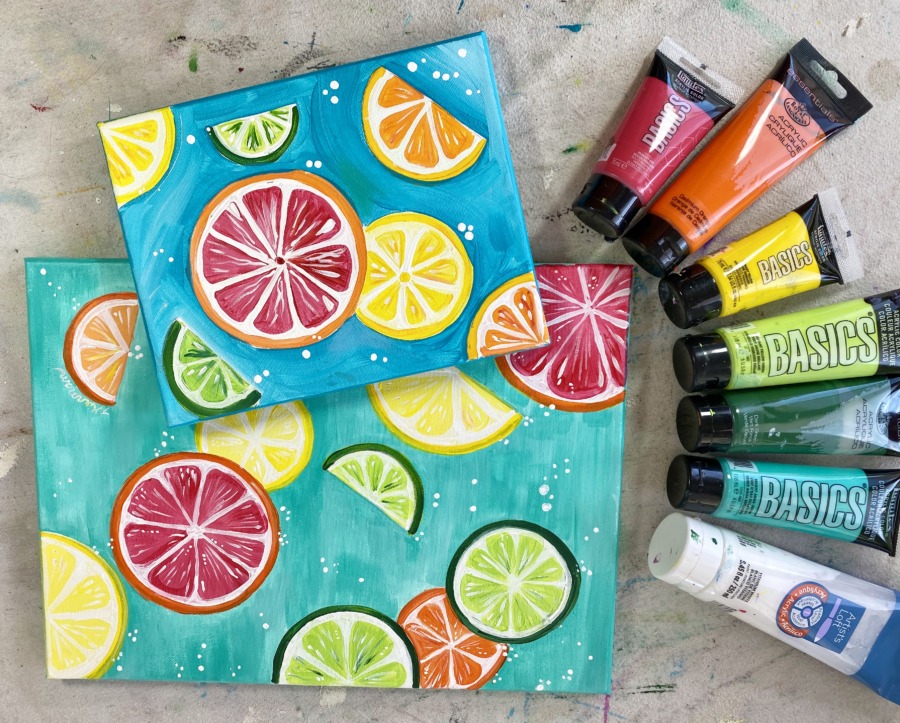
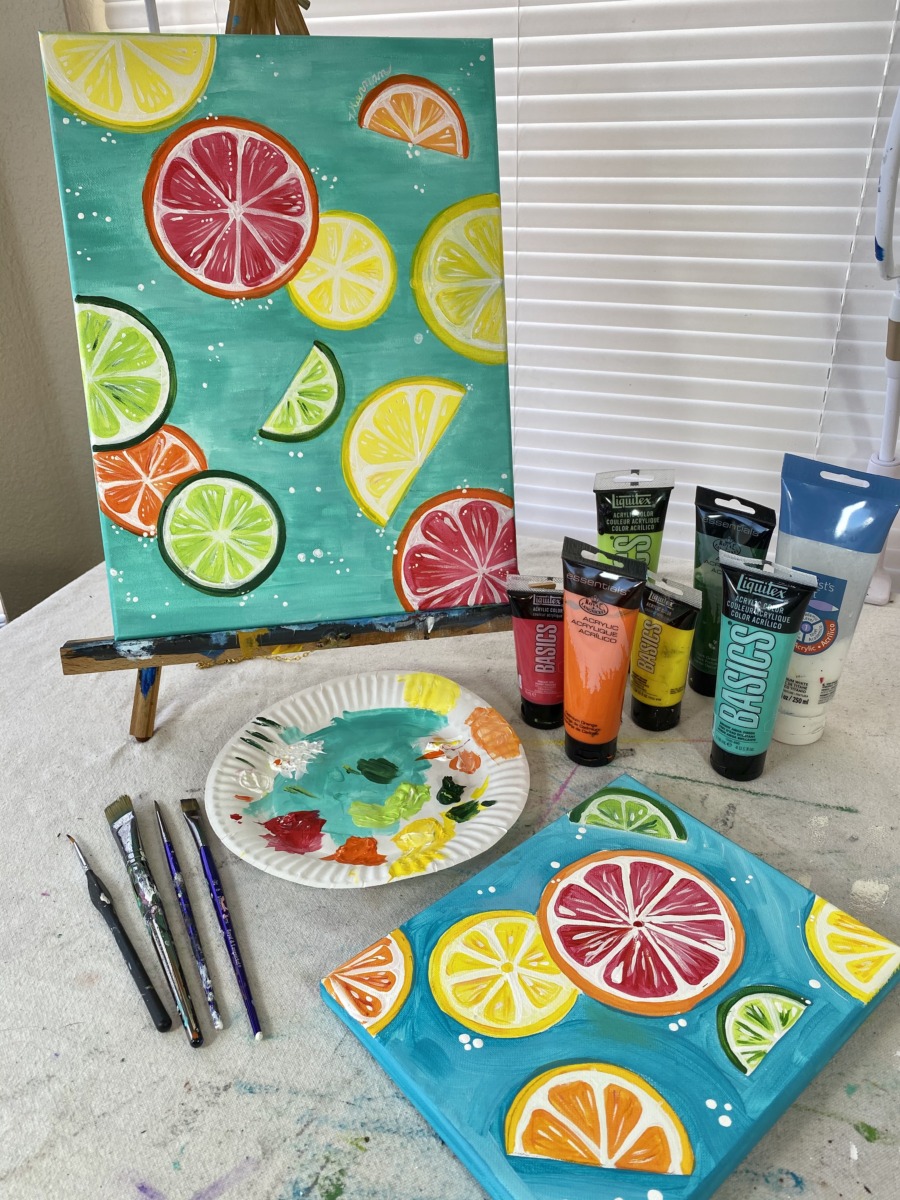
Materials
How To Paint Citrus Slices
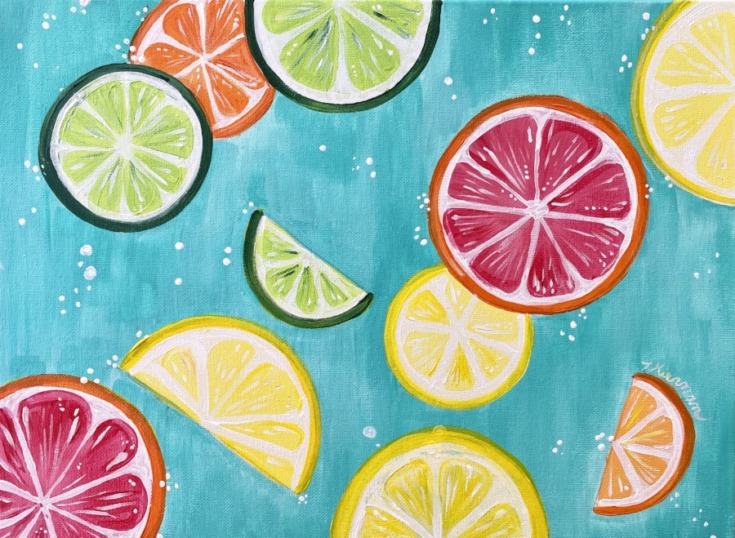
This citrus slice painting was done on a 12 x 16 and an 8 x 10, however, you can do this on any size canvas! You will learn step by step how to draw the circles, paint the background and render the citruses into fun, juicy looking fruit slices. This composition makes a perfect summer painting!
Materials
- Acrylic Paint
- Canvas (I use a 12 x 16 for the demonstration)
- Paint Brushes
- Pencil
- Three Different Size Circles To Trace
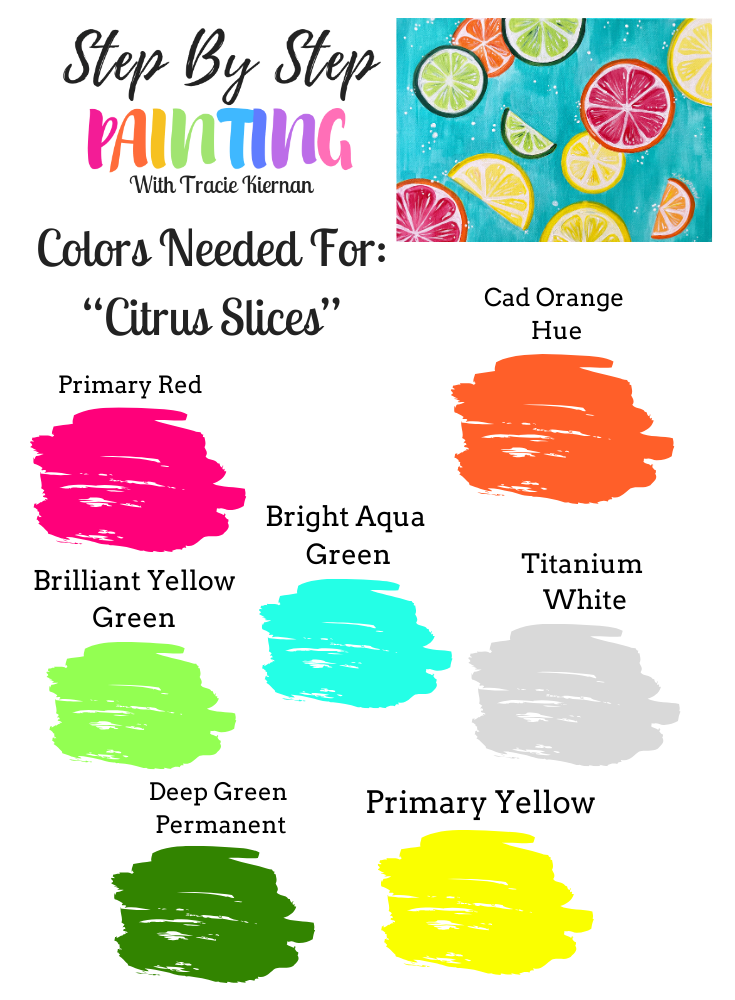
Colors
- Bright Aqua Green (background color can also be customized)
- Primary Red
- Cadmium Orange Hue
- Primary Yellow
- Brilliant Yellow Green
- Green Deep Permanent
- Titanium White
Brushes
Color Palette
Directions At A Glance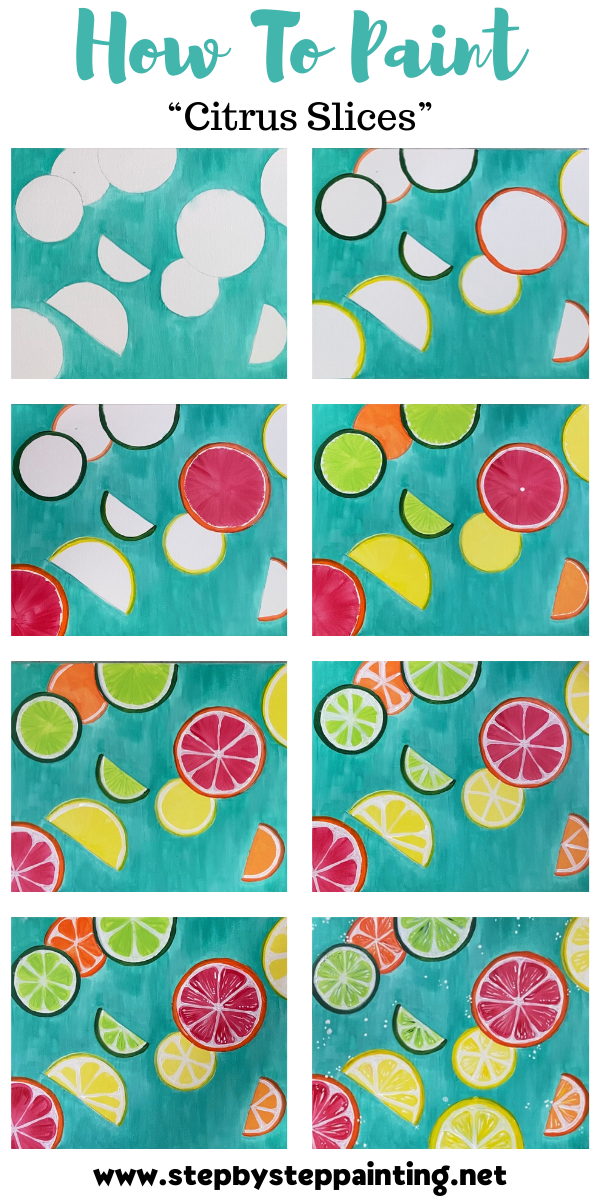

Or Vertical…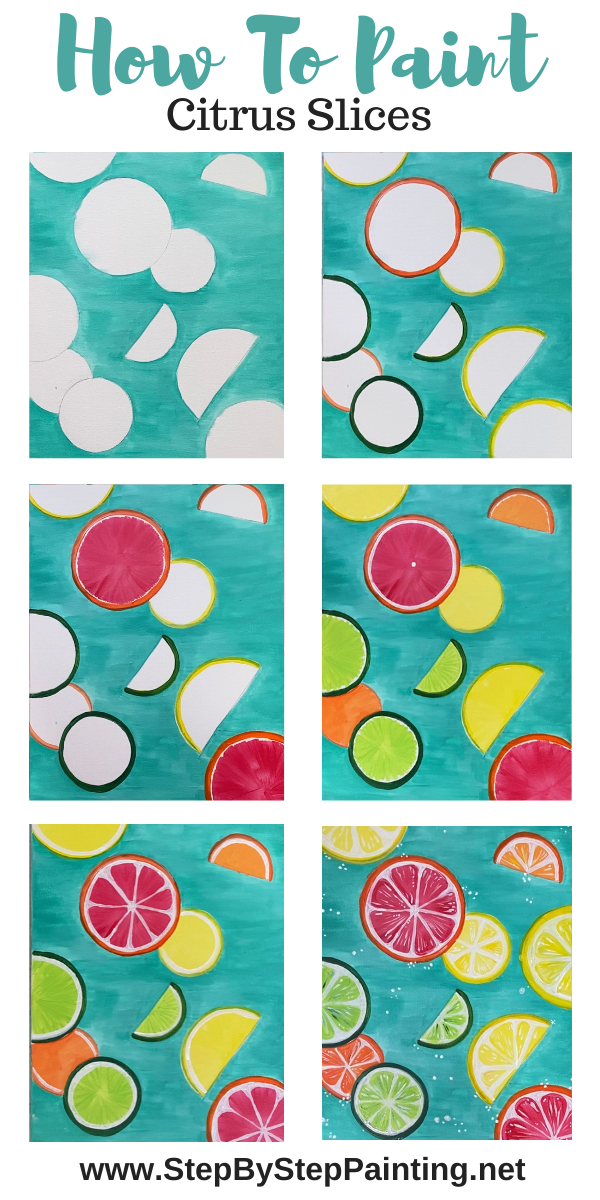
Video
Step By Step Directions
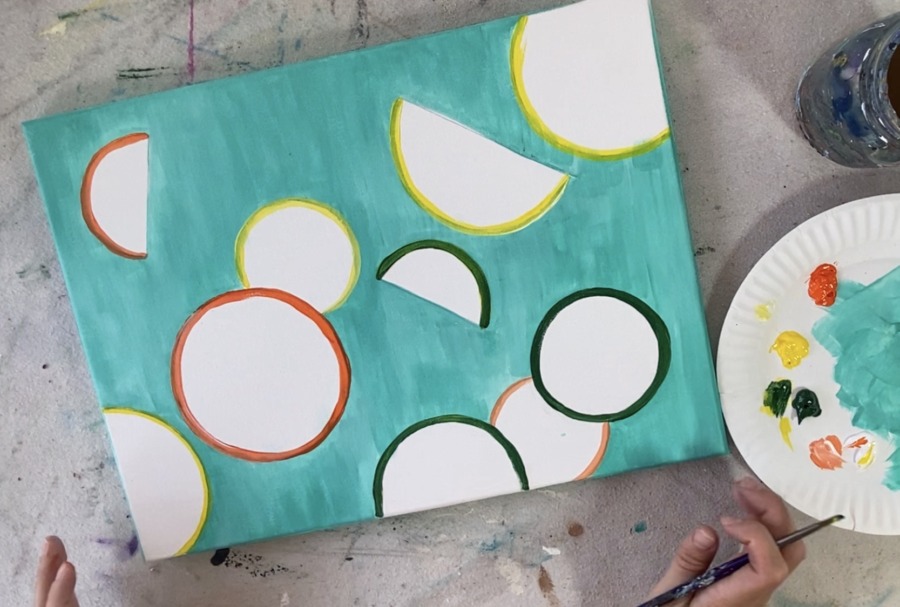
1. Trace Circles & Half Circles
I located three different size circles for this composition. Think small for a lime, medium for a lemon and orange and large for a grapefruit.
Simply trace them in various locations on your canvas.
A few circles overlap each other.
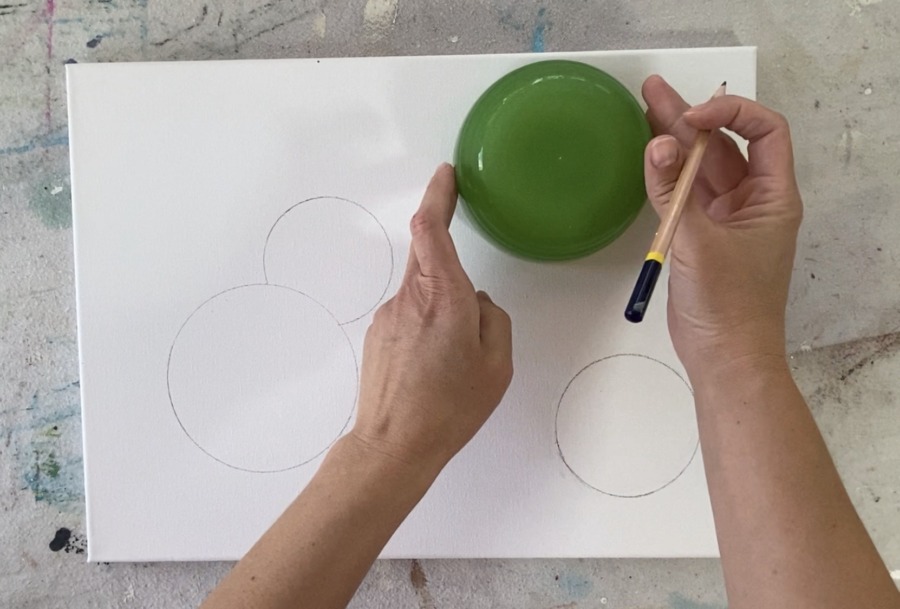
To do a half circle, simply trace half the circle and then use a ruler to draw the straight edge.
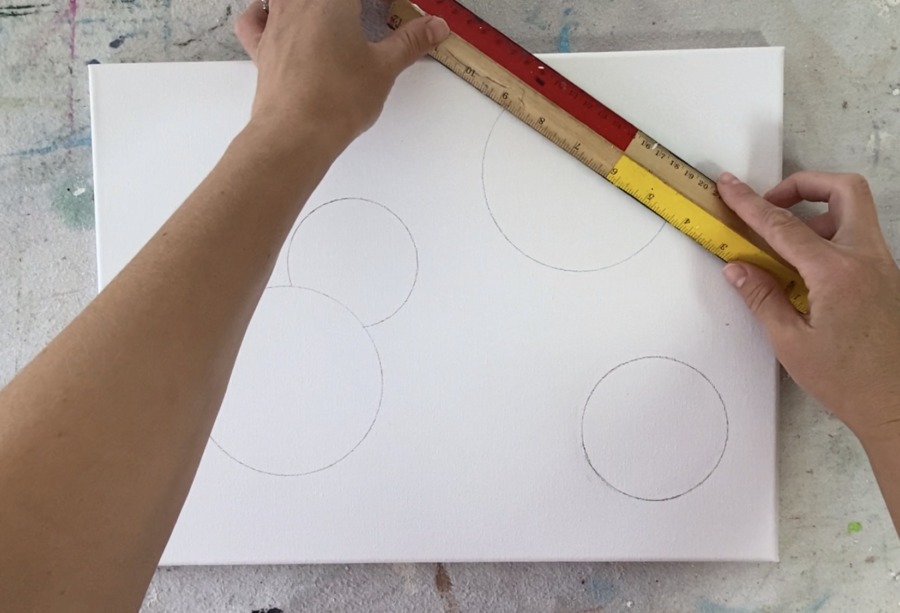
Keep an eraser handy! You might want to play around with the spacing and location of your circles until you get a composition you like.
It also looks interesting with a few circles going off the edge. I did a total of 10 slices. You can do more or less! You are also welcome to copy the way I did my circle placements.

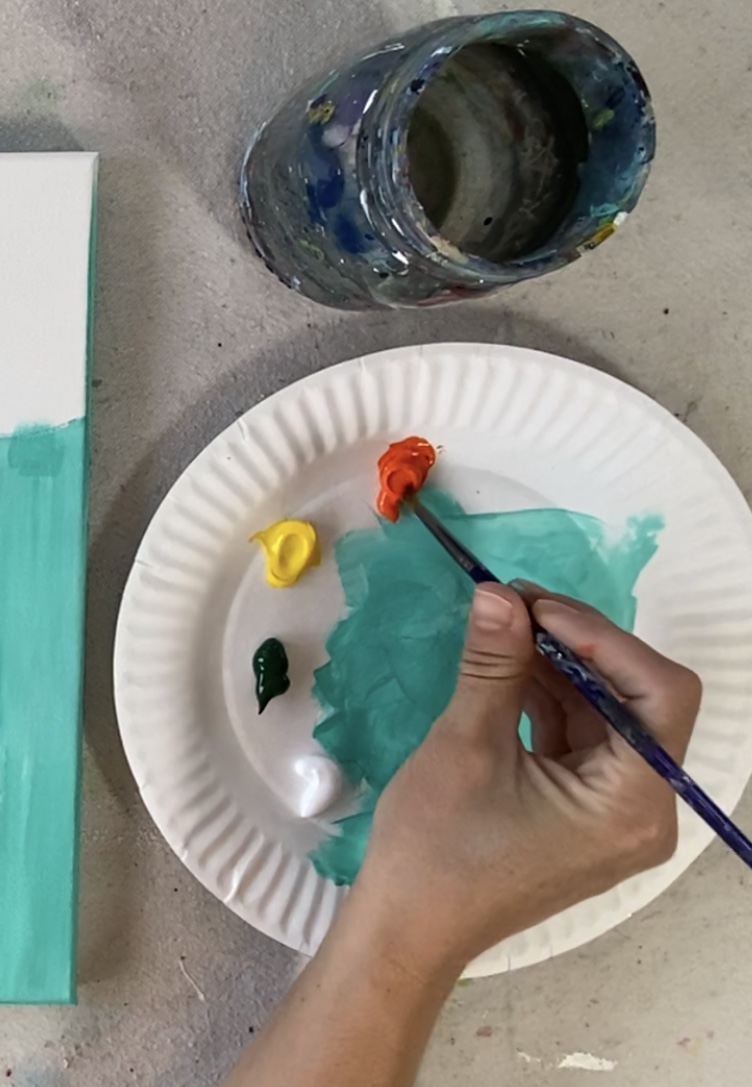
2. Paint the background
For this step, use both your 3/4 wash and 12 bright. Use the wash brush for large areas and use the 12 bright to cut in around the slices and in small areas.
I chose to paint the background bright aqua green mixed with a little white. However, there are so many other fun colors you can do for the background. Just chose a color that is not the same as any of the fruits.
I loaded my brush in the bright aqua green and a little bit of white.
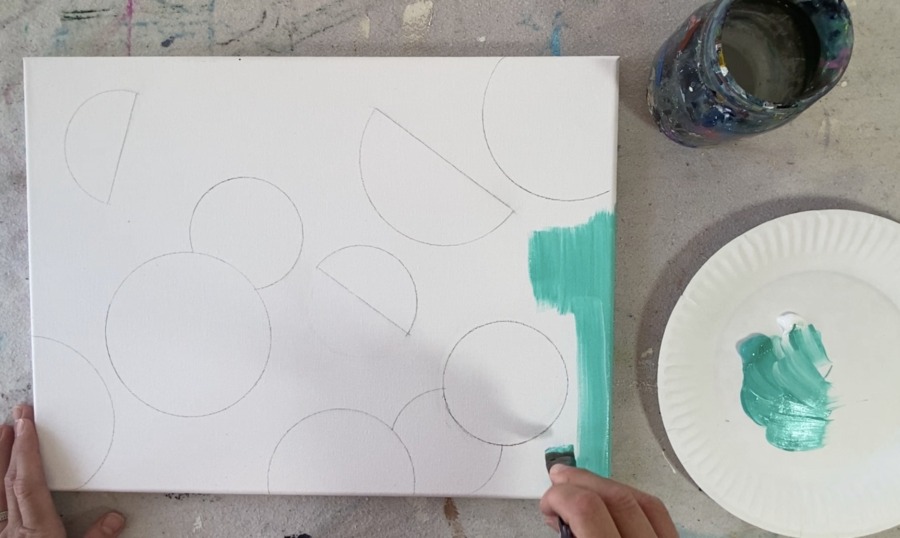
Paint up and down strokes throughout. As an alternative, you can have your strokes curve and contour around the slices.

Get as close to the circle edges as possible. If you accidentally paint inside the circle, that is fine. It can be touched up later!

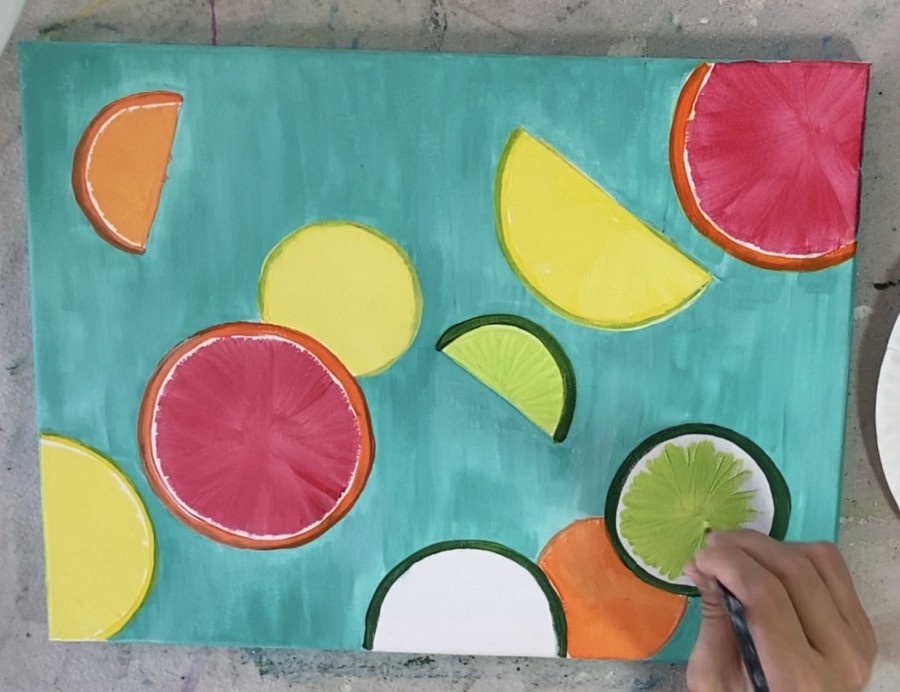
3. Paint the rind
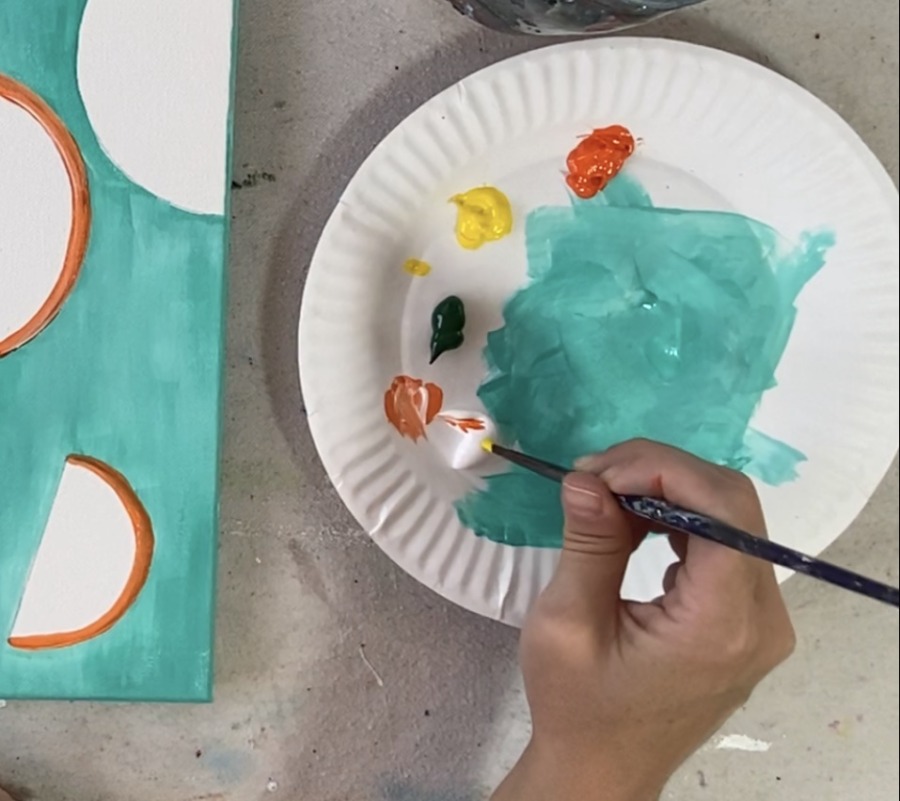
Next grab your #4 round brush and load your palette in: deep green, primary red, cad orange hue and primary yellow. You may also need a little white.
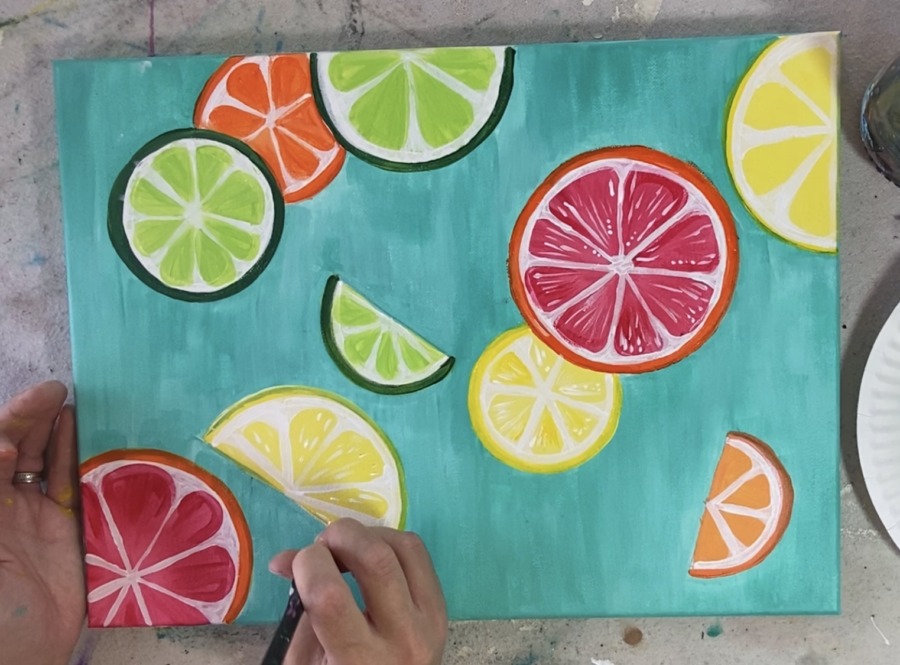
I started with the orange slices (and grapefruit). Simply outline the circle with a semi-thick line.
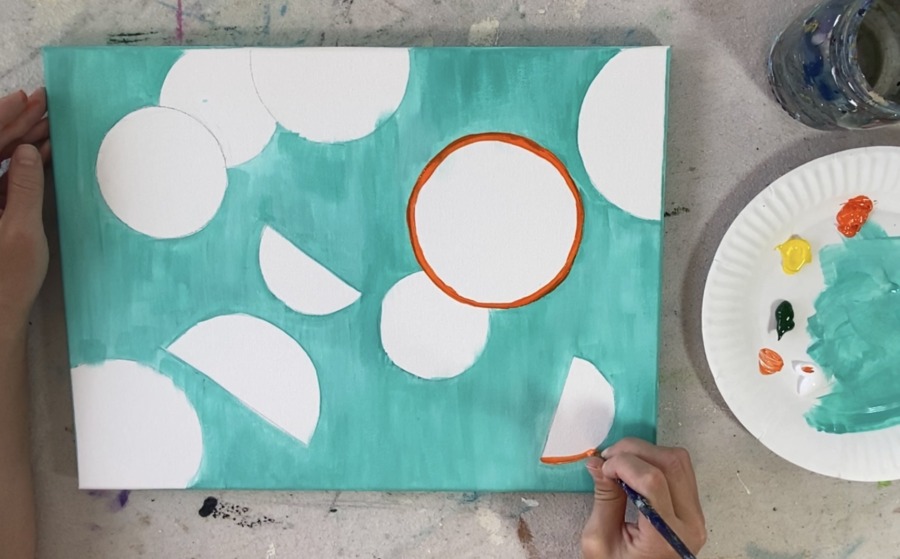
If you want some “color variation” in your rind, you can “double load” your brush in white and the color of the rind.
When you outline the half slices, make sure you do not paint on the straight line. Only outline the curves.
For the yellow, I recommend mixing a little bit of white into it because yellow is a very “translucent” color. Your yellow will show up better this way.
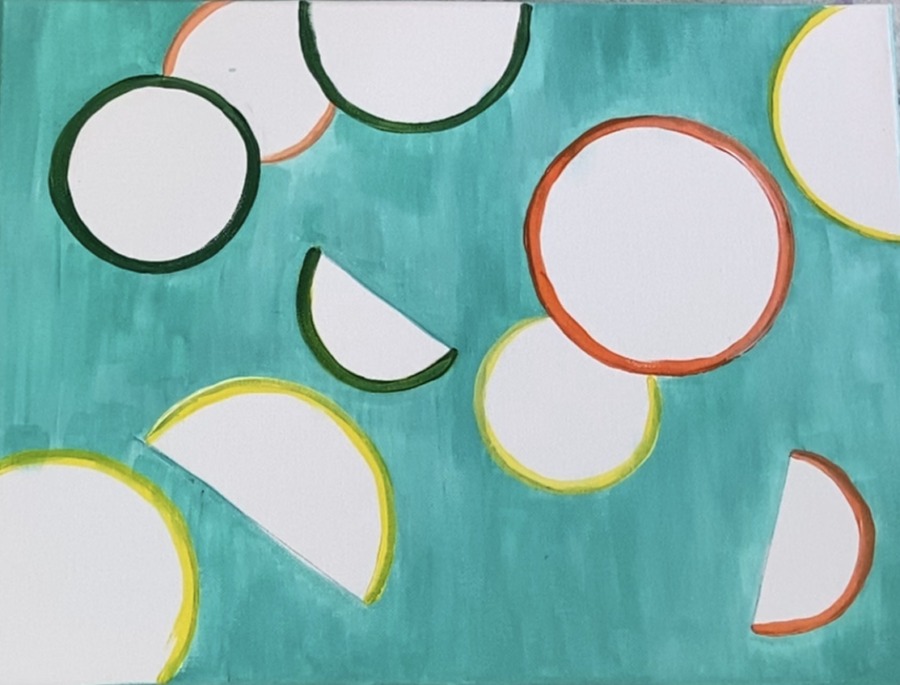
Also, if your rinds look like there is still some turquoise background color showing through, you can always add a second coat later on in the painting.
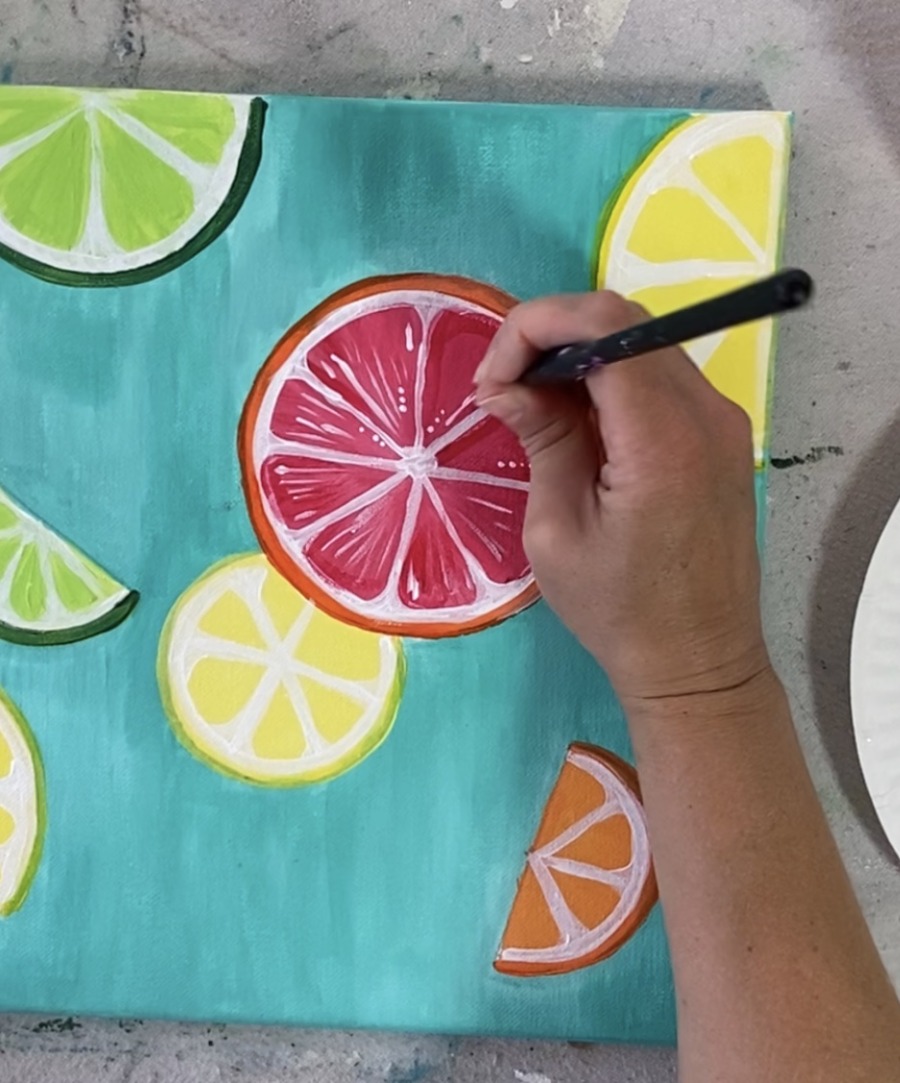
4. Paint the inside pulp
I used a 12 bright and a 4 round for this. For the grapefruit, I did primary red dipped in a tiny bit of white. When you do your strokes, start in the center and stroke towards the rind (outwards).
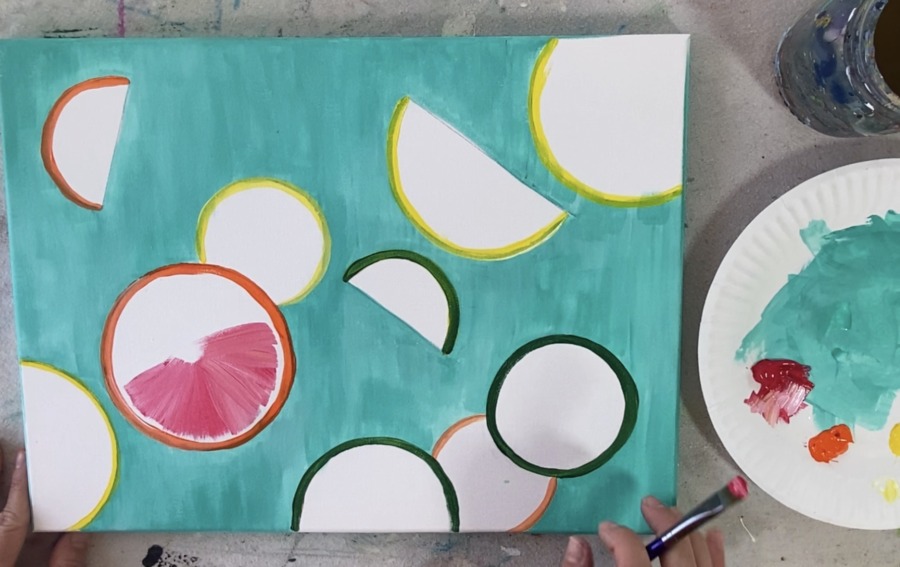
Try to leave a tiny gap between the rind and the flesh. But if you don’t leave a gap, that’s fine because the inner part of the circles will be painted white later.
Go around the circle until the entire fruit is filled. The white streaks you see in my grapefruit are because I loaded a tiny bit of titanium white onto the brush along with the primary red.
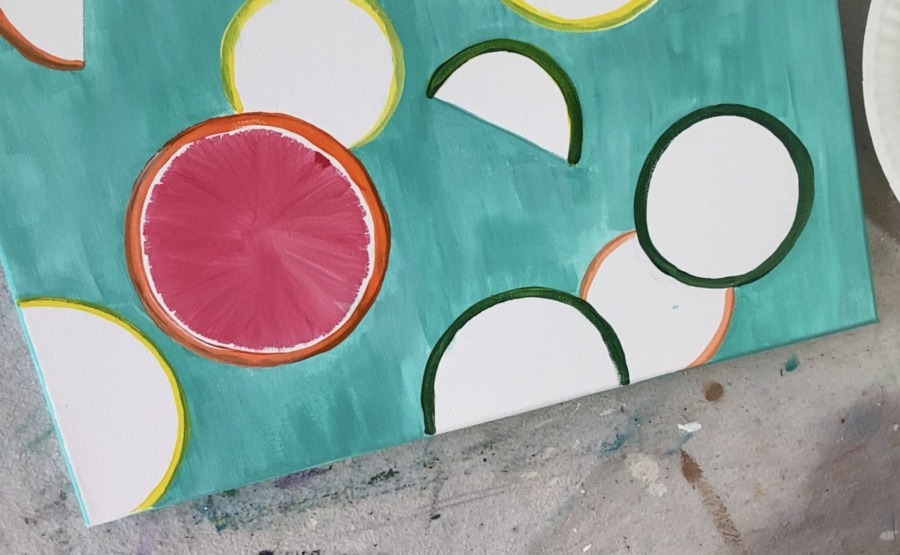
I changed one of my side lemons to an orange color so it could be a grapefruit because I loved how this color looked!

Repeat this step for all the fruits. Use your #4 round brush for the smaller fruits because they are smaller shapes but do the same technique.
For the lemon, I did yellow with a little bit of white. For the oranges, I did cad orange hue with a little bit of white. Just make sure you do your strokes going in a starburst/ radial formation.
For the limes, I used brilliant yellow green. Remember to start in the middle of your circle and do a starburst formation.
For the half slices paint the flesh color all the way to the straight edge. I love how that round brush worked for the lime half slice!

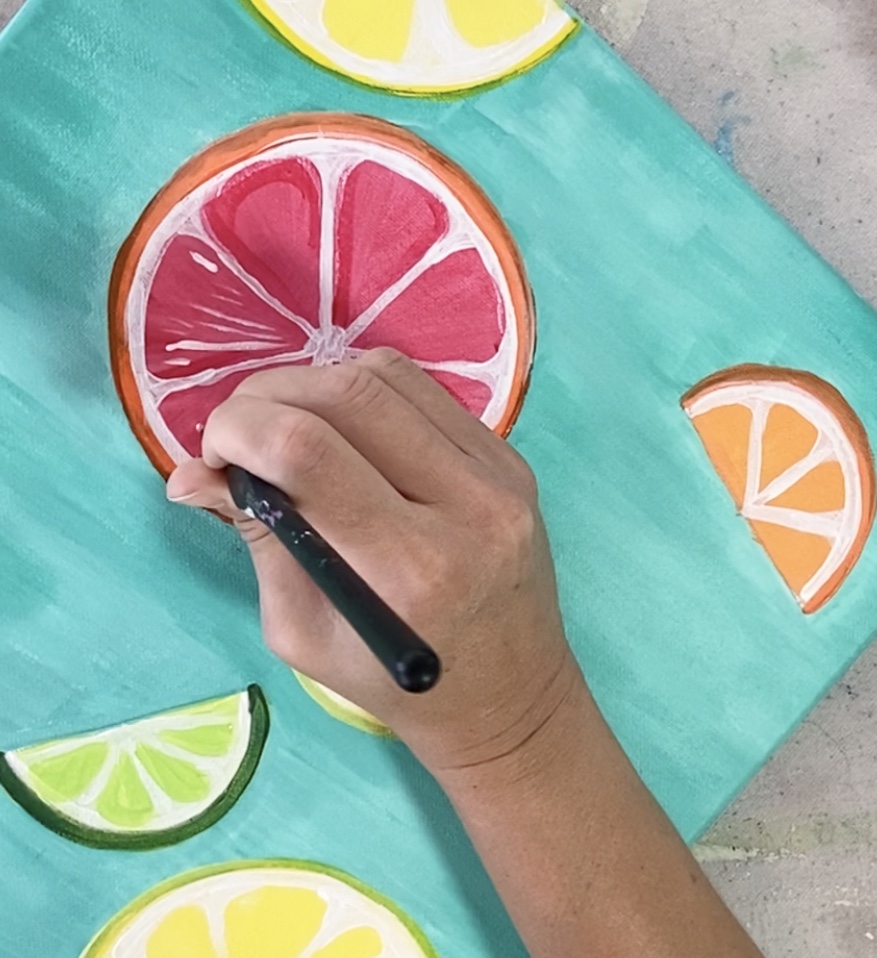
5. Paint the “Pith”
This is the white part just under the rind. To do this, use your 4 round brush and paint an outline of the white just under the colored rind.
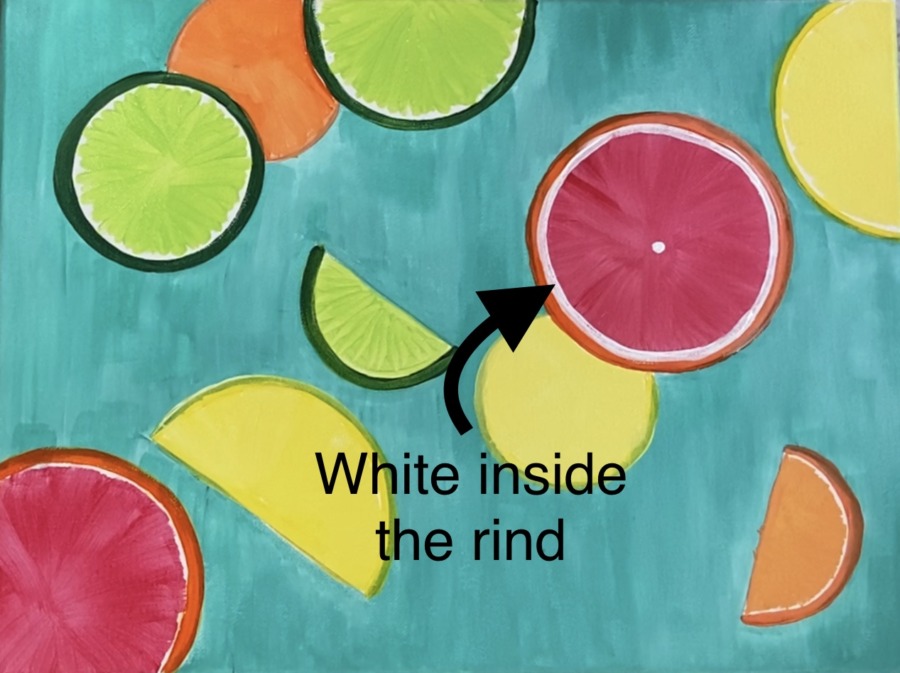
Then, make a dot in the center of the circle. This will help with dividing the slices up.
Using the 4 round brush, paint loose lines to divide the slices up into different sections (like slicing a pizza!).
Then at the corner of each of the slices, round it inwards.
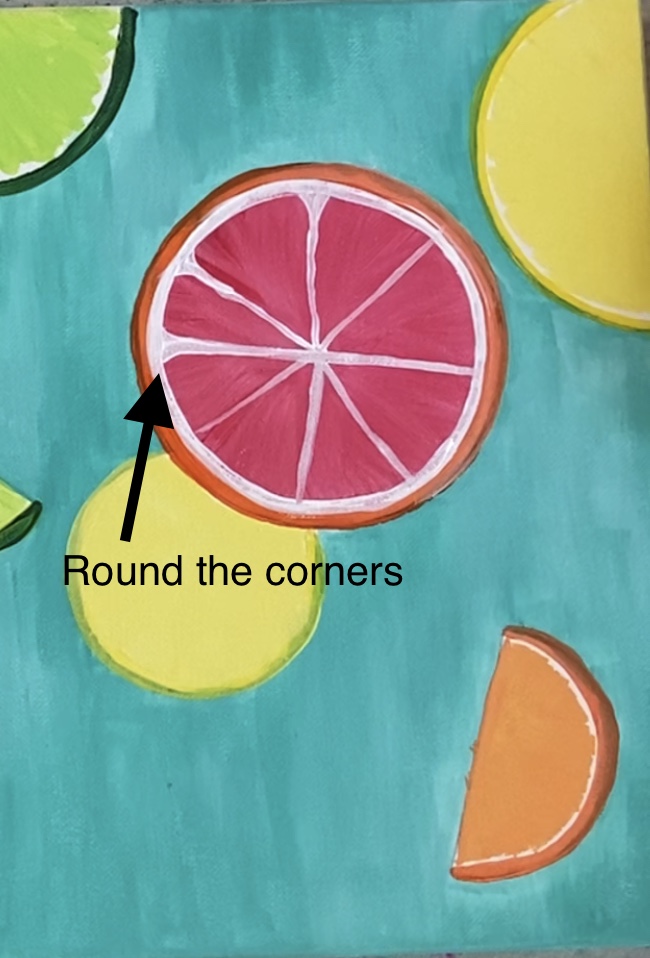
Round each of the corners for each of the sections. Then make the center circle slightly larger.
Then repeat these steps for each of the slices!
Because some of my triangular flesh shapes looked kind of funky after I rounded the corners, I went back and did touch ups with the flesh colors. You want your triangular shapes to be rounded at the base with the corners rounded as well (almost like a teardrop shape). However, each one doesn’t have to be identical.
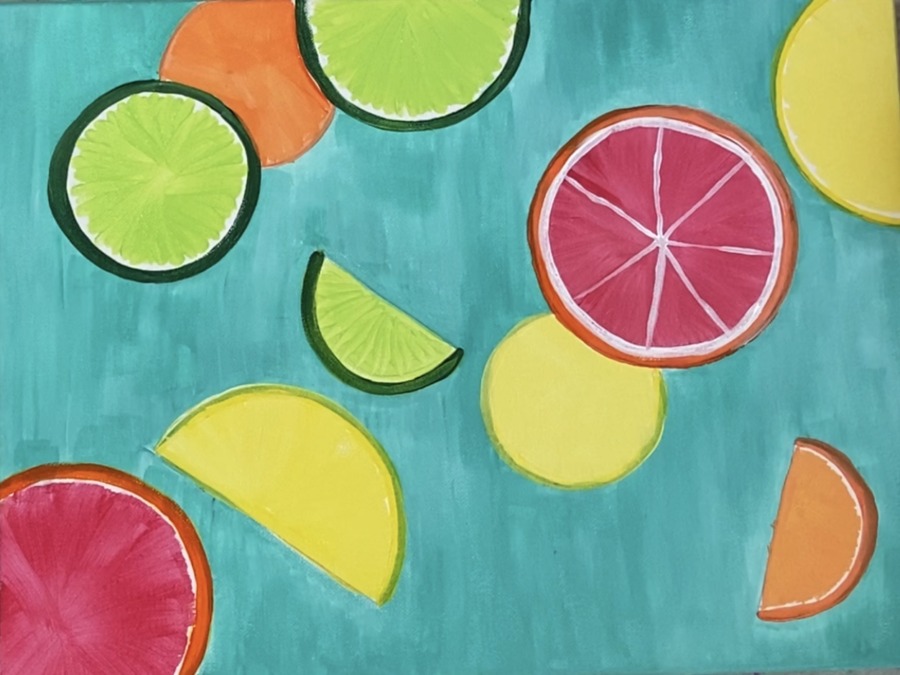
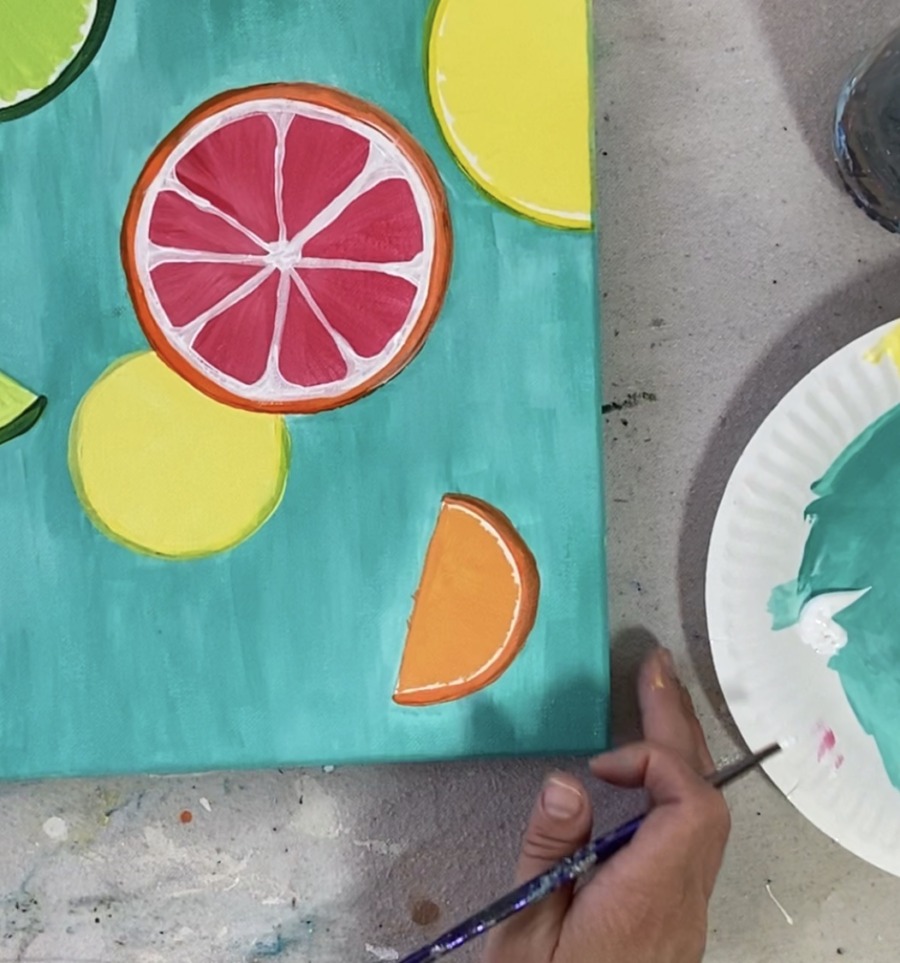
6. Paint the juice sacks/ pulp highlight
This was such a fun part! Use a smaller round brush. I used a #2 round in this set. Load it in just titanium white and paint long, sort of uneven lines. Stagger them and make them different lengths. These are very loose lines! Think citrus texture!
The direction of this should go in the direction of each of the slices. Some of the “juice sack highlights” were also painted as little tiny dots.
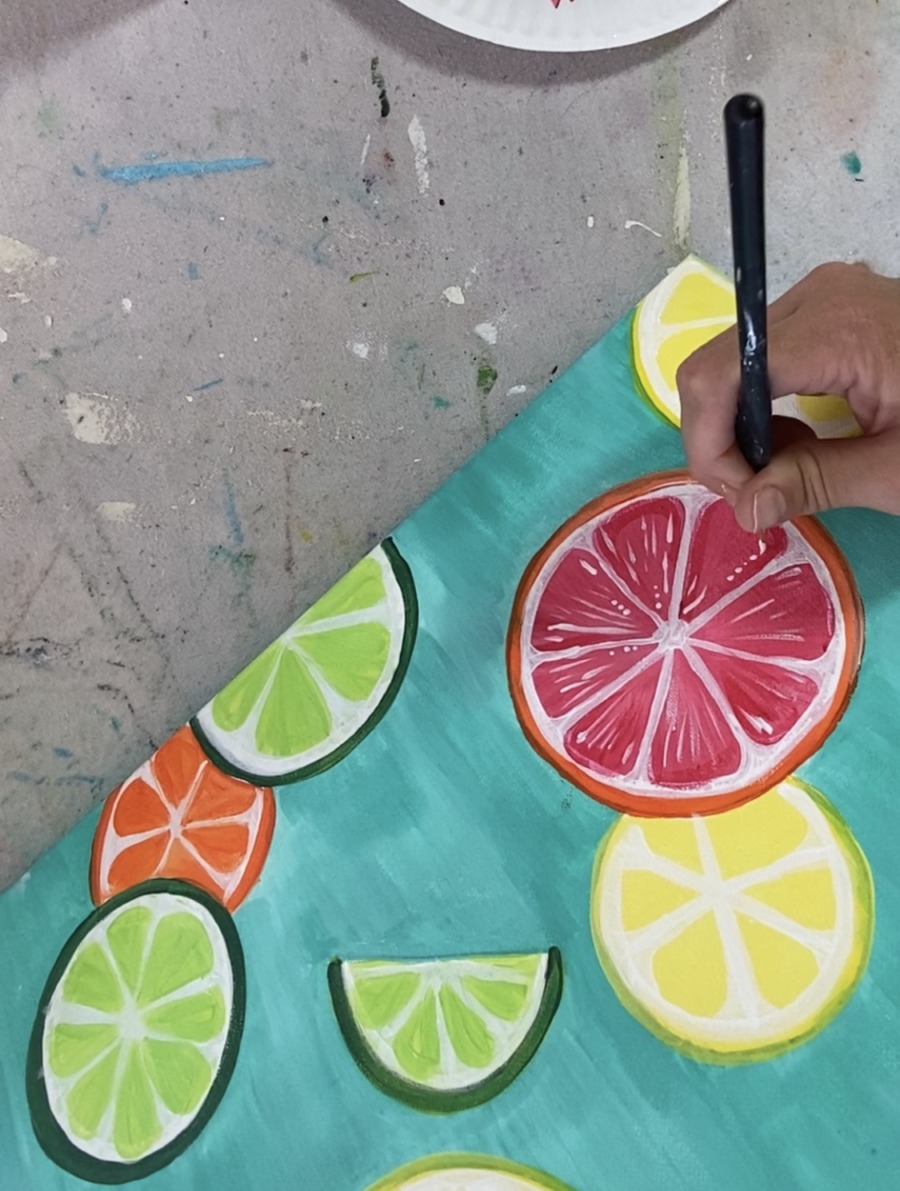
Repeat this technique for each of the citrus slices.
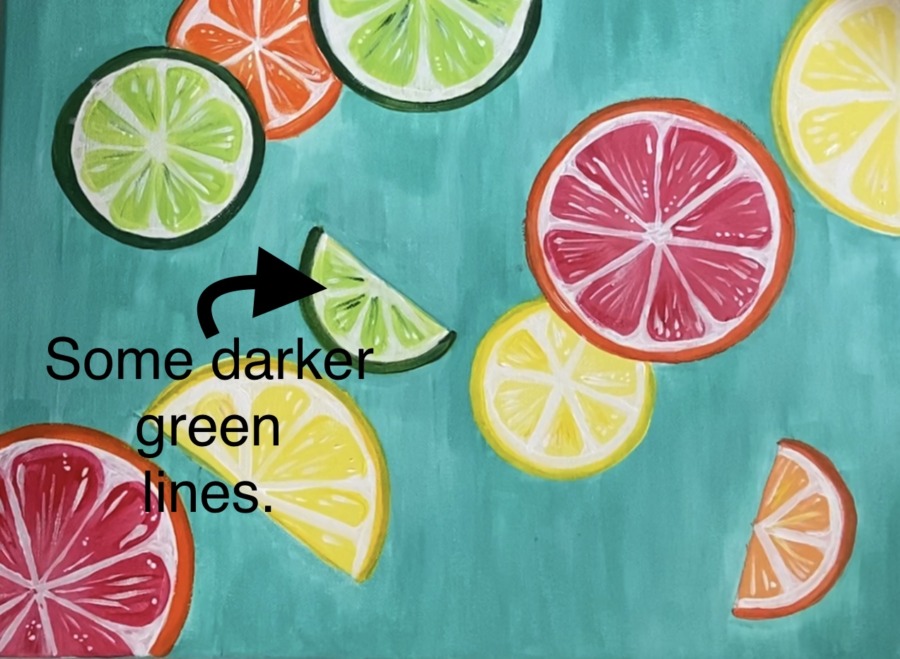
If you want to do some variety of color with these white lines, you can load your brush in a color. For example, for the limes, I loaded my brush with a little bit of dark green. You can see a few darker green lines in the flesh.
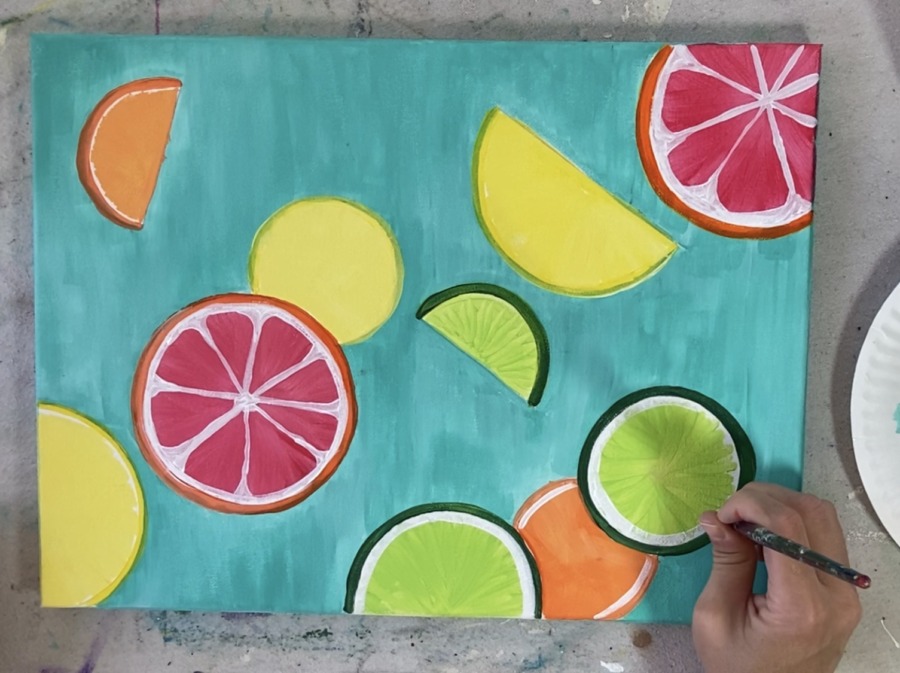
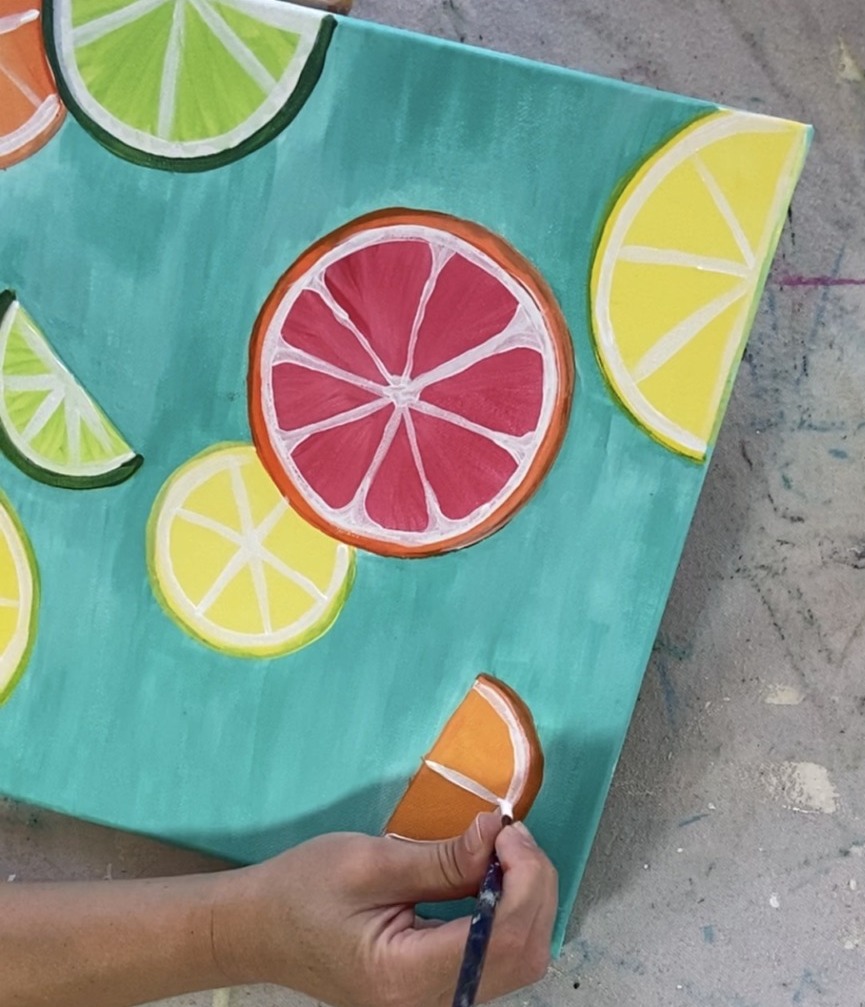
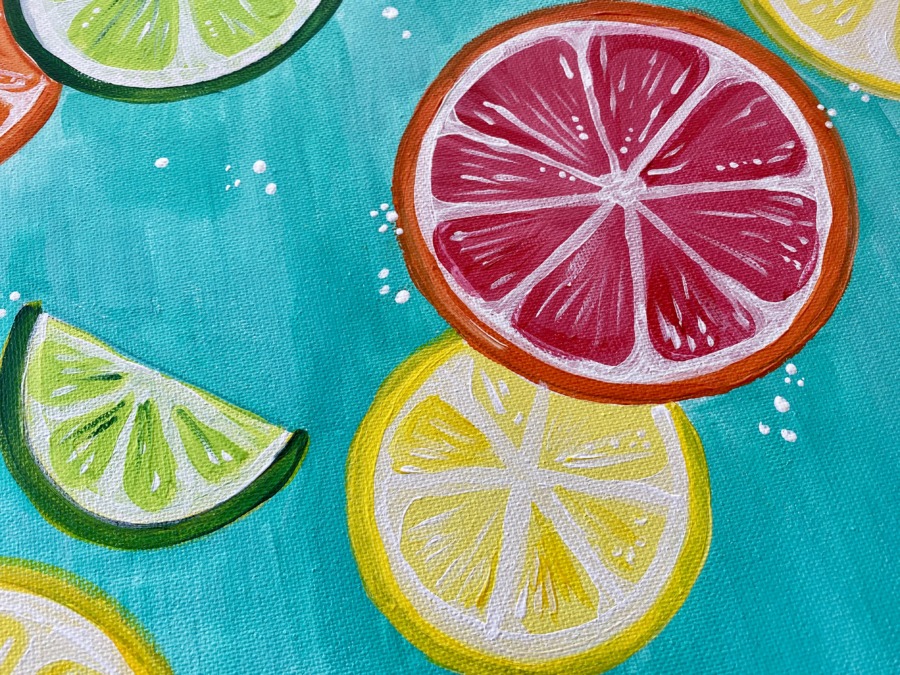
7. Paint white dots/ bubbles
I did clusters of white dots in areas around the background. I also overlapped some of the dots on the rinds of the fruit.
8. Some final steps!
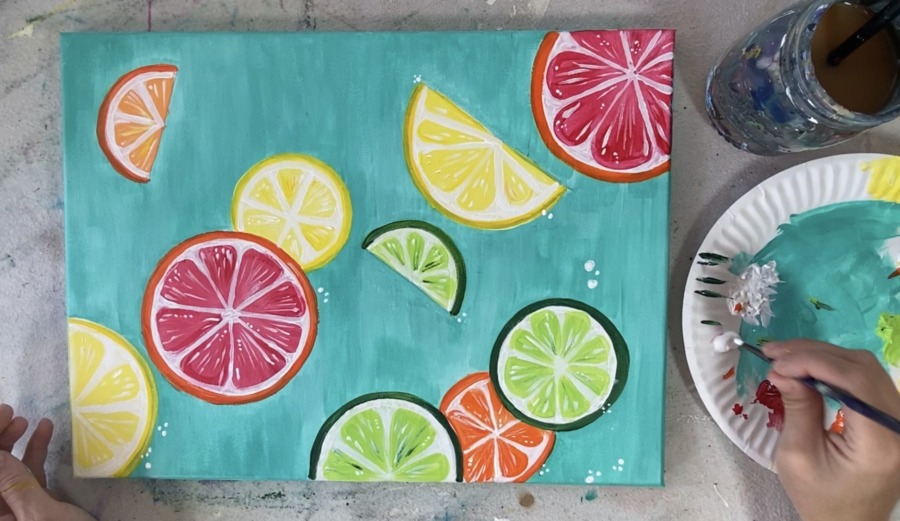
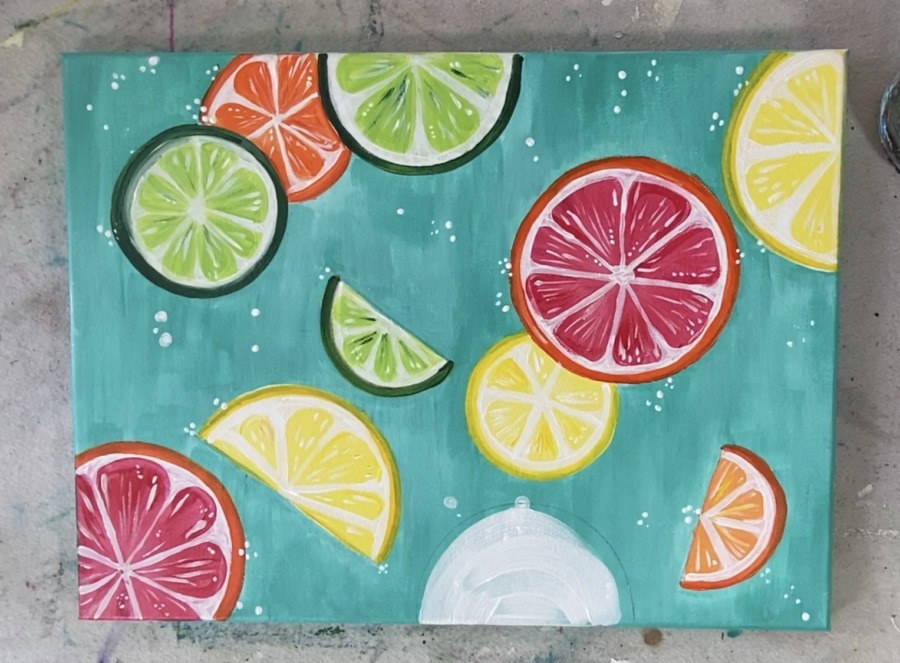
I did one more orange in that blank space at the bottom of the painting. If you wanted to add more fruit slices too, simply draw them and then paint it white first. Follow the same steps you did to paint the other citrus slices.
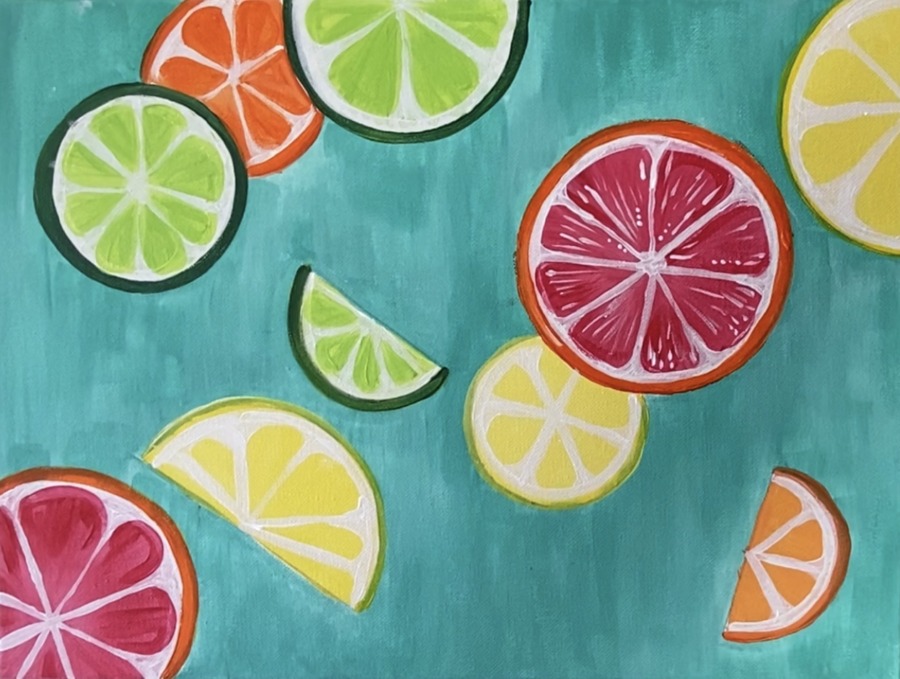
Finished!
Share Your Art!


Pin This To Tutorial Post To Pinterest!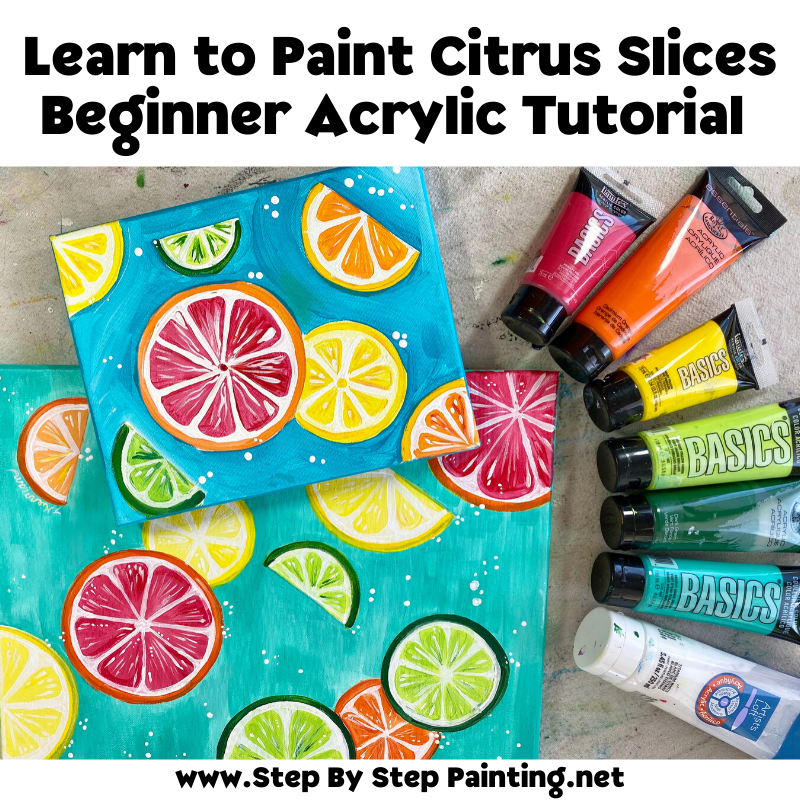

Your summer paintings are so cute! Thank you for all them. Keep it coming!(:
Thanks Hahna!
fabulous painting idea to engage kids,thank u!keep rocking
Yes you’re welcome!
Your site is amazing! I hosted a party for my sister’s birthday and we watched your video and all painted – ages 6 – 73 and had so much fun! We used 6 x 6 canvases and sent them home with the birthday girl to hang as a group. You made it so easy by including the links to the paint and brushes. This painting was the perfect one to do with a group of varying ages & abilities and each one turned out uniquely different. Can’t thank you enough! I’d love to share some pictures with you of how it turned out.
Hi Robin! That sounds incredible! I’m so glad you had a successful painting party with the citrus fruits! If you want to share pictures, you can email them to: hello@stepbysteppainting.net, share them on Facebook Page, Instagram or there is even a private Facebook group for Step By Step Painting ?
This is lovely. I’m using a mix of phthalo green and white to make a light turquoise for the background – I think it will work nicely 🙂
Yes that will work nicely!