
Would you like to save this?
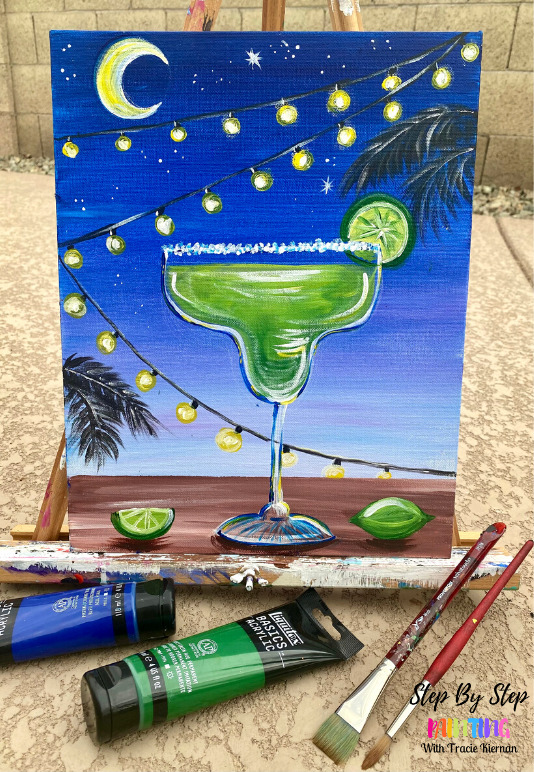
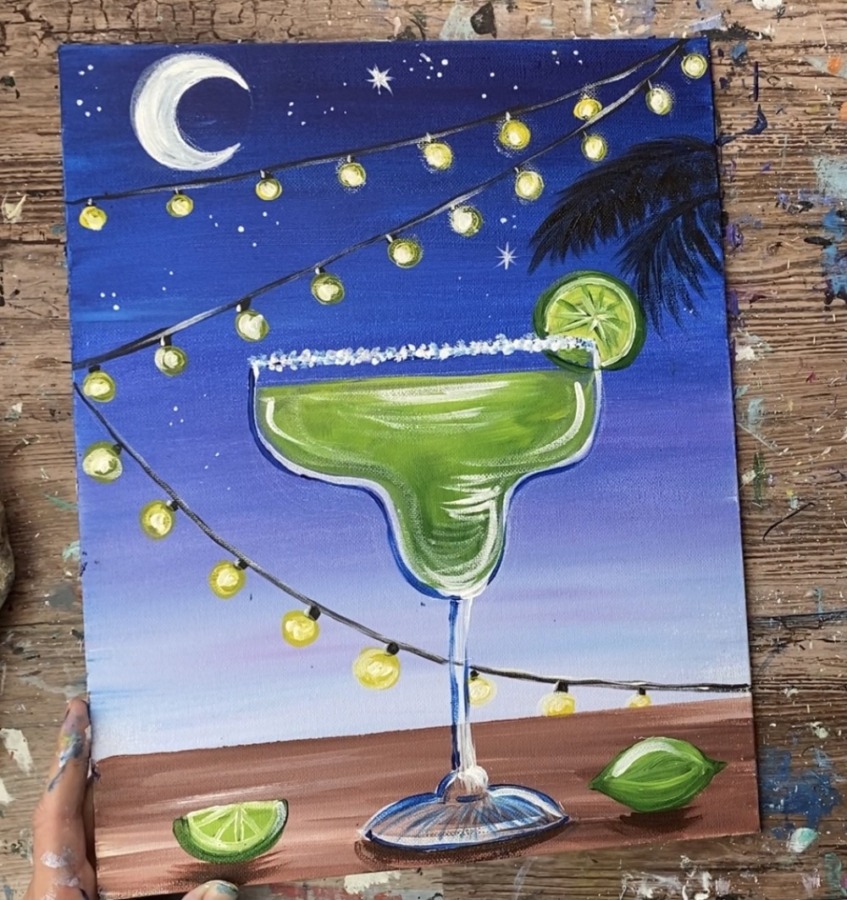
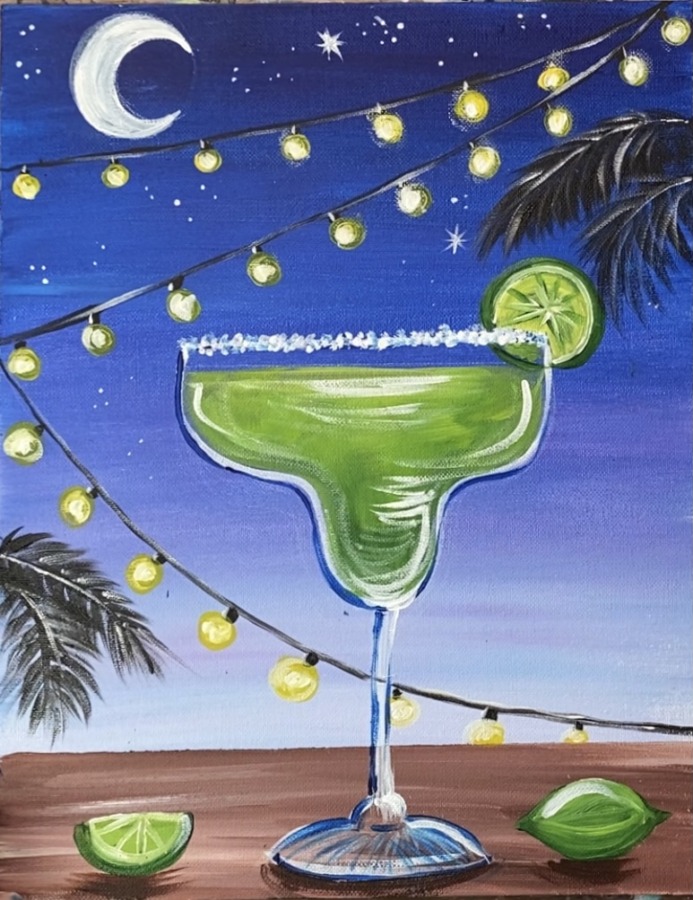
This acrylic painting tutorial will demonstrate how to create a margarita painting on canvas!
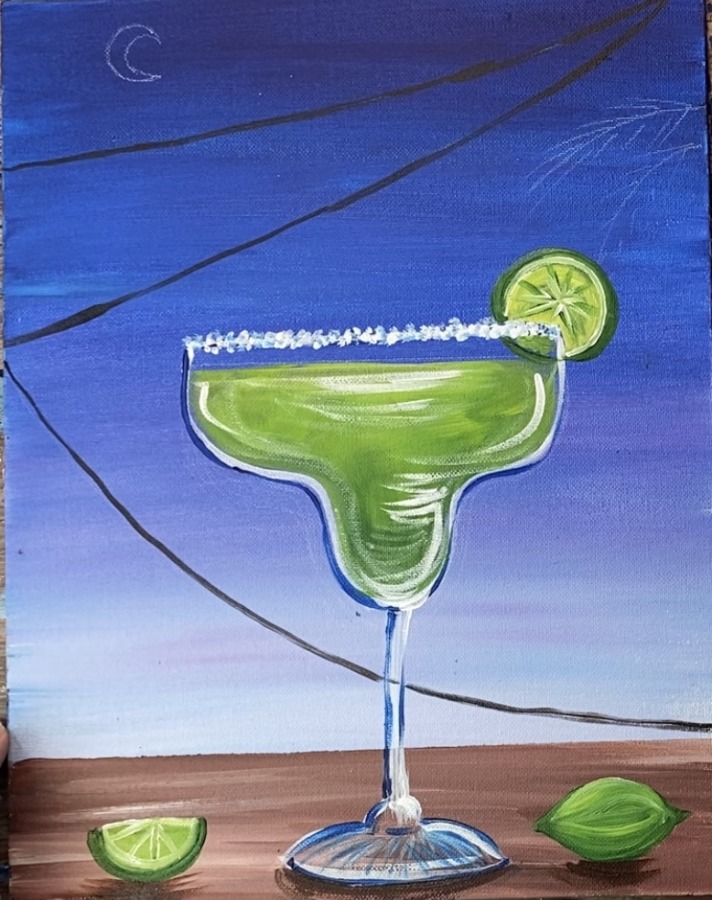
Paint fun string lights and a crescent moon in the background as well as fun lime accents! This is a great painting to do for the summer or as a year round design.
Enjoy and happy painting!
Materials
Moonlight Margarita Acrylic Painting Tutorial
Learn how to paint "Moonlight Margarita" on an 11 x 14 canvas.
Materials
- Acrylic Paint
- Paint Brushes
- 11 x 14 Canvas (or similar size)
- Water Cup
- Palette
- White Chalk Pencil
- Optional Traceable
- T-Square Ruler
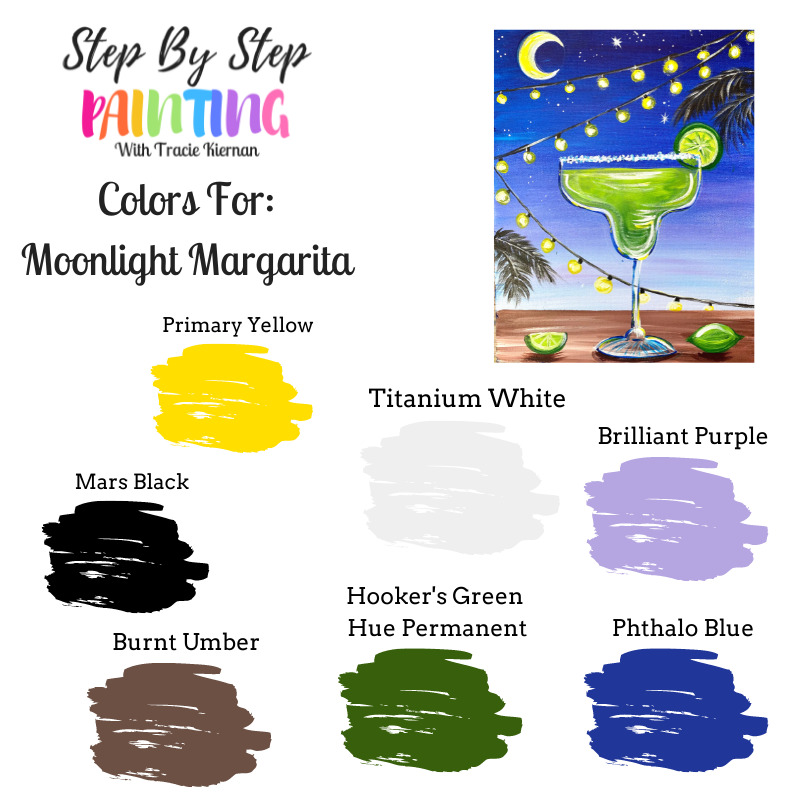
Colors
- Titanium White
- Mars Black
- Burnt Umber
- Primary Yellow
- Hooker's Green Hue Permanent
- Dioxazine Purple
- Brilliant Purple
Brushes
- 3/4" Flat Wash
- #4 Round Brush
Instructions
- See tutorial on www.stepbysteppainting.net for full tutorial!
Color Palette
Directions At A Glance

Traceable
This traceable is optional! I demonstrate how to do this painting without using the traceable. If you, however, need help with drawing the margarita glass, you are welcome to use this!
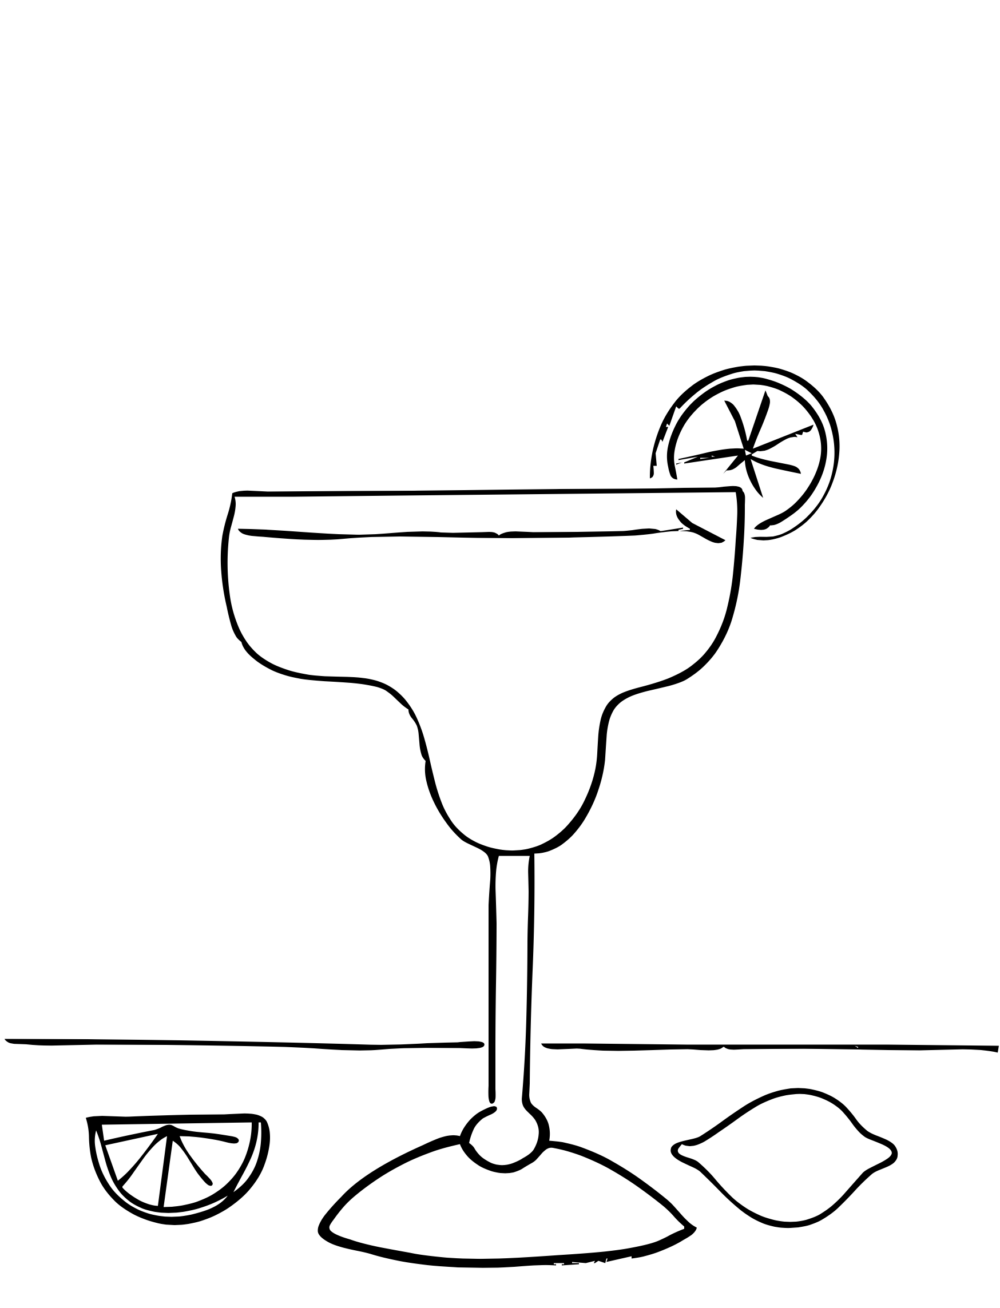
Click on the image to download the .png image or click the download below for the 11 x 14 PDF traceable. This will have it printed on two papers to be taped together.
Video
Step By Step Instructions
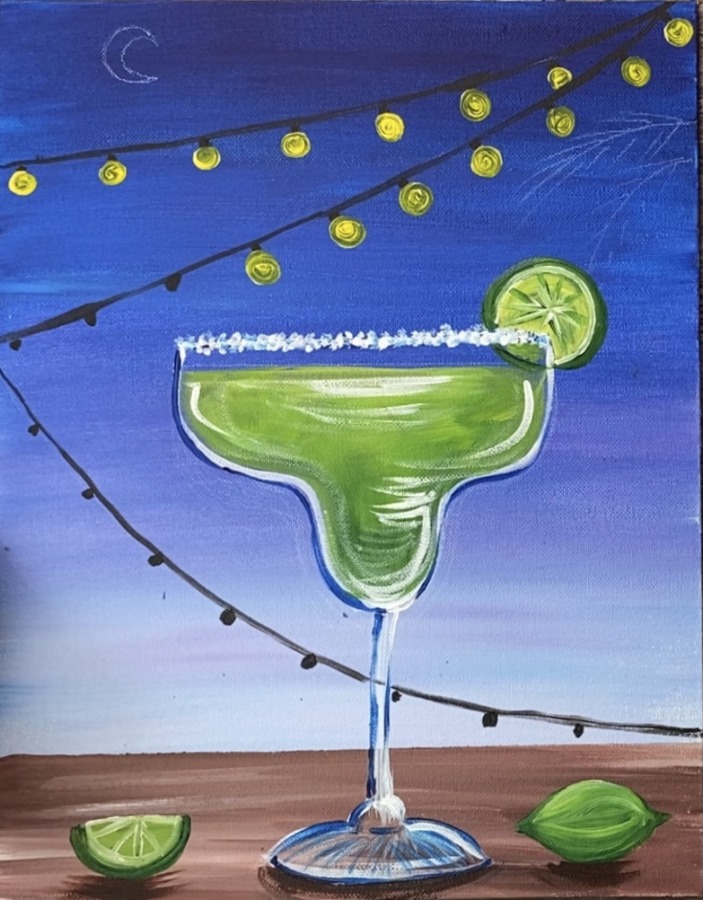
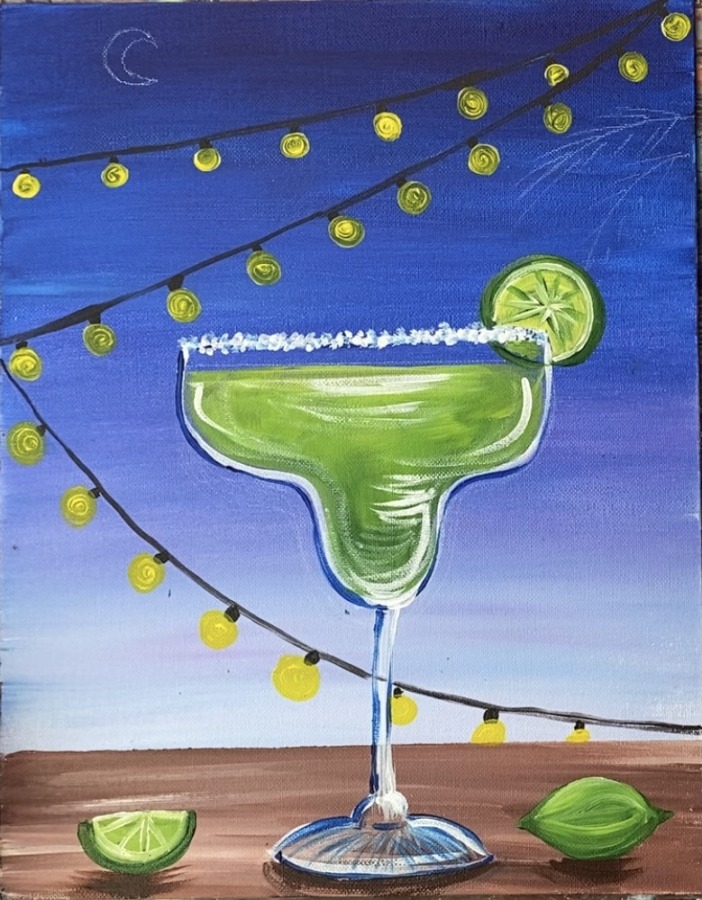
1. Paint The Background
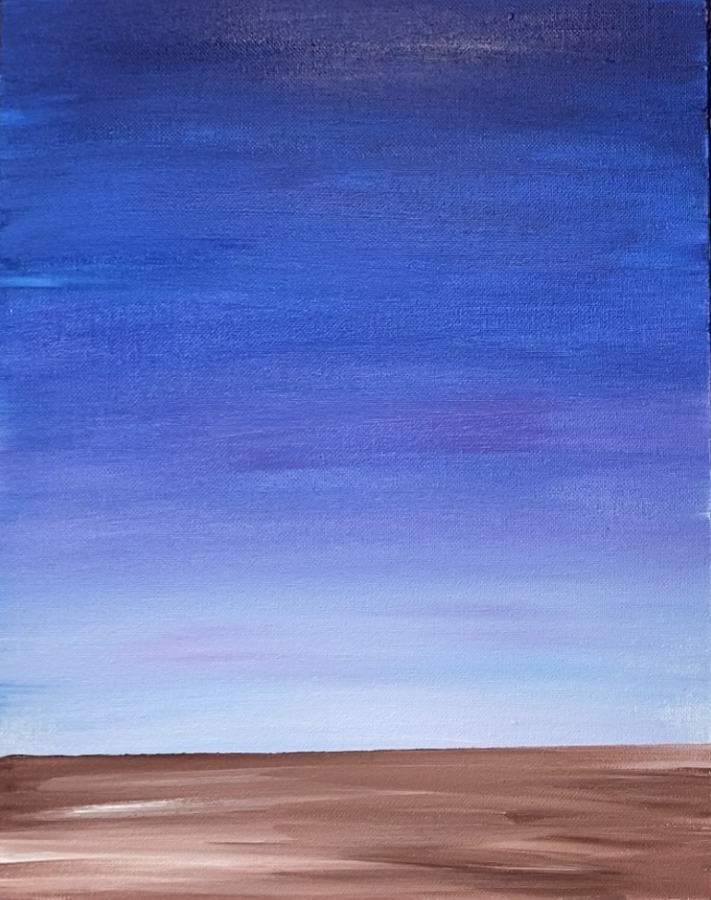
The background of this painting is a blended gradient that goes from blue to light purple to white.
Position your canvas so that is vertical. Load your palette with the three colors: phthalo blue, brilliant purple and titanium white. Use your 3/4″ flat wash brush and dip it in the water and then load it into phthalo blue.
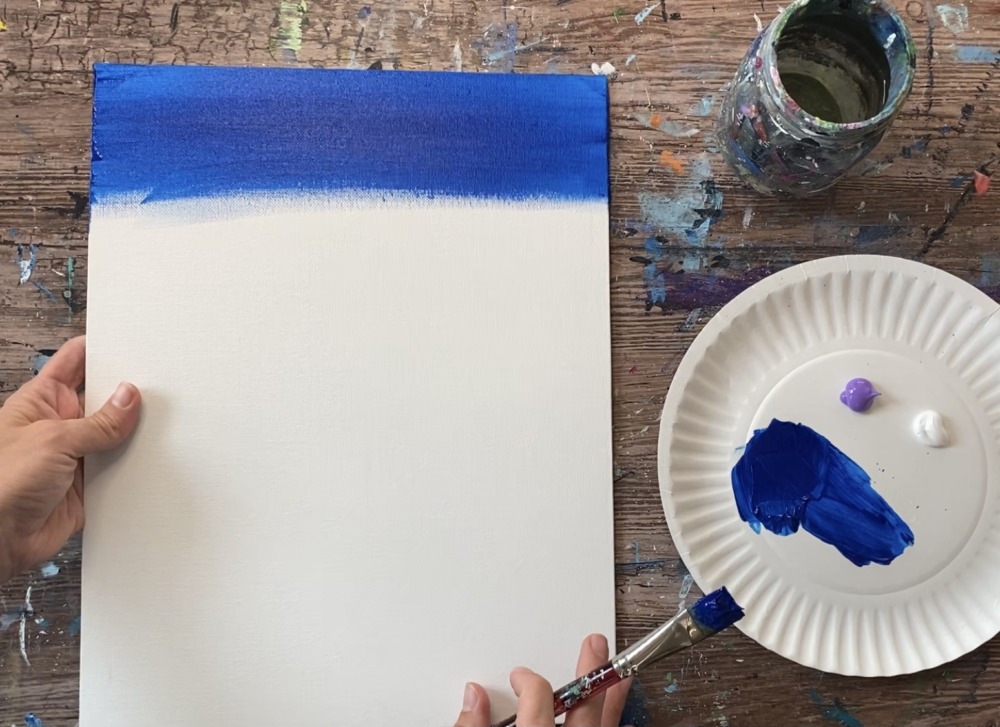
Then paint left and right strokes starting at the top of your canvas. Go down about 5″ with this dark blue.
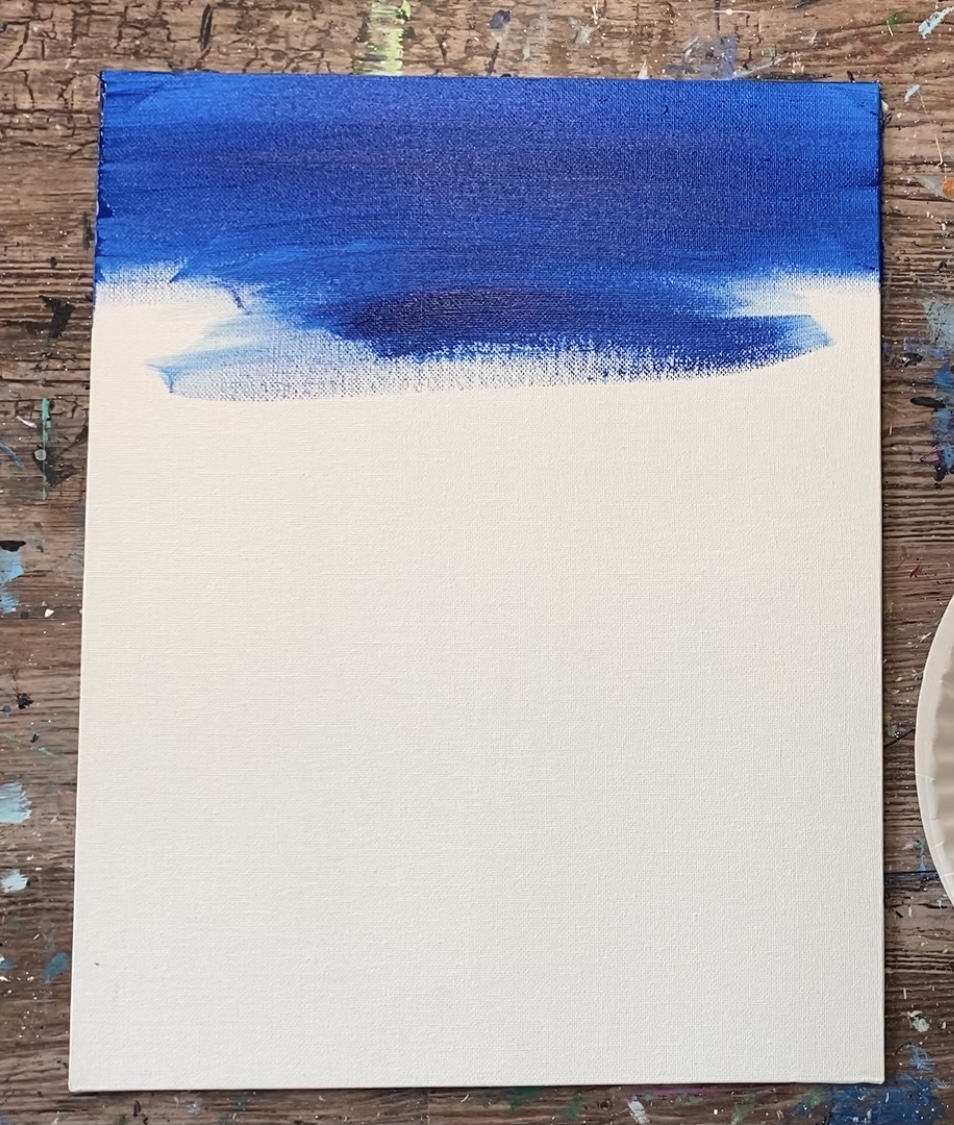
Then wipe off your brush and load it into the brilliant purple. Paint left and right strokes blending the purple into the blue. Then continue down to about the 1/3 mark from the bottom of the canvas (doesn’t have to be exact).

Next wipe your brush. Then load it into the titanium white and paint left and right strokes blending that white up into the light purple. Then continue down to the bottom of the canvas.
Leave about 1-2 inches of space on the bottom blank.
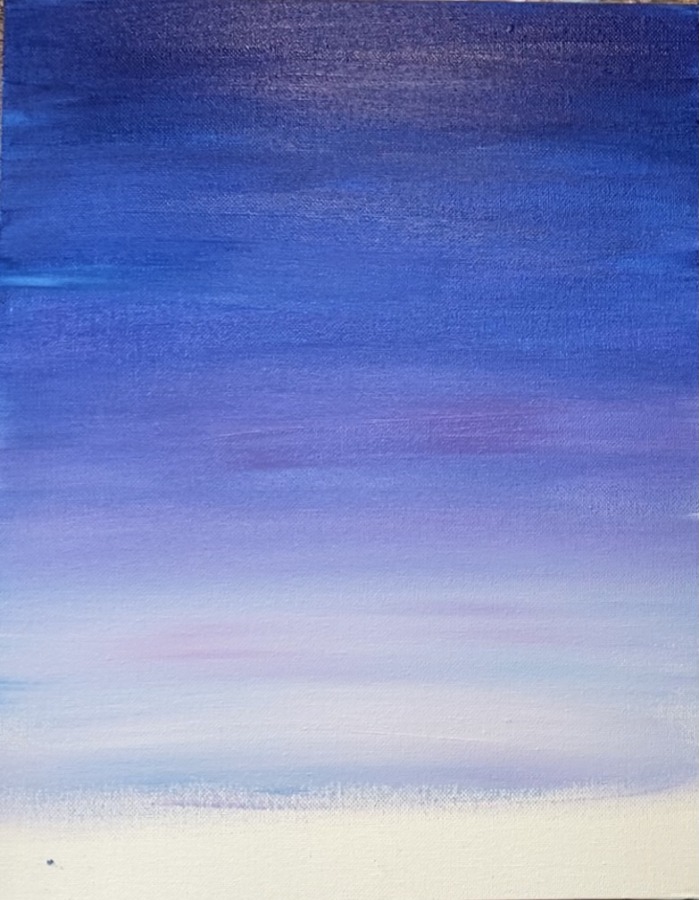
Tip: if the color is too blue at the bottom, try rinsing your brush to get all the residual phthalo blue off. The bottom of the sky should be a very light purple.
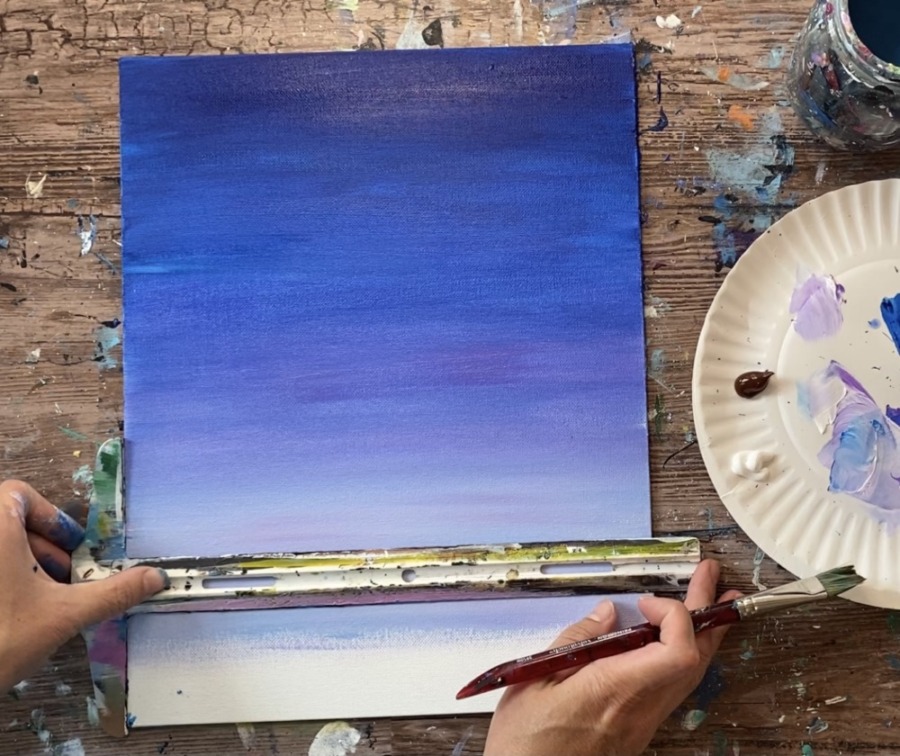
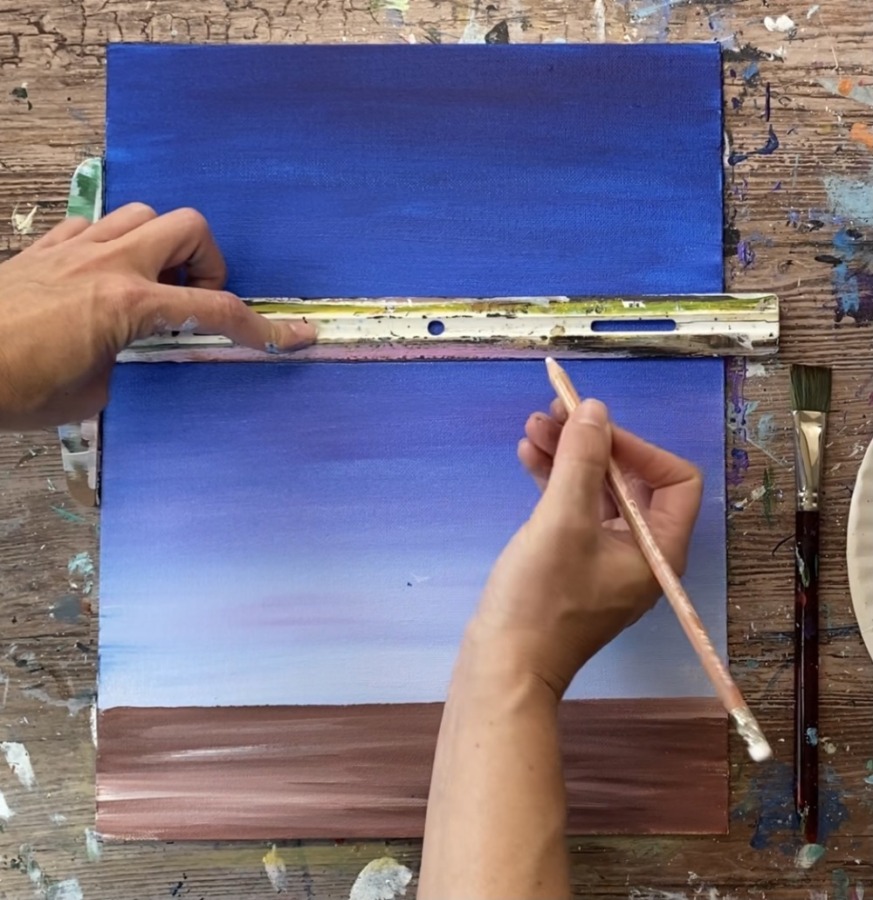
2. Paint The Table
Load your palette with burnt umber and titanium white. Then use a straight edge to define the table area. (You don’t have to use the straight edge, you can also just paint and estimate the straight line). Use your brush to paint a line under the ruler to define the line.
Then double load your 3/4″ flat wash in both burnt umber and titanium white. Paint left and right strokes blending the brown with the white.
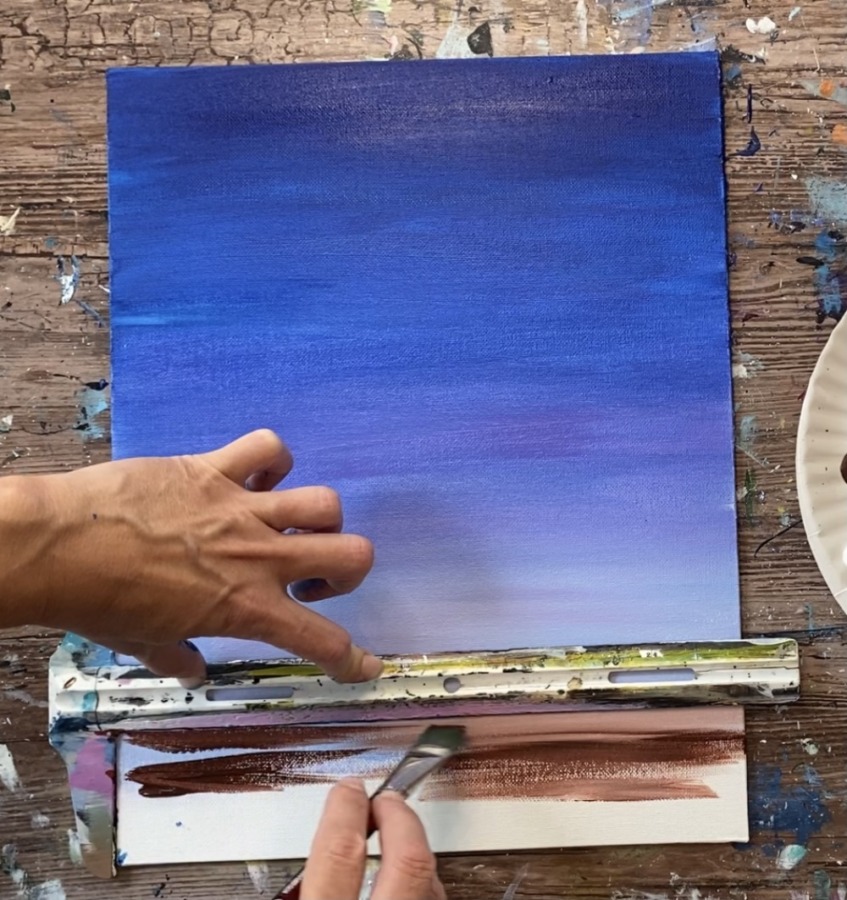
As the brown blends with the white, it will create a simple “faux wood” look. Try not to over blend the two together.
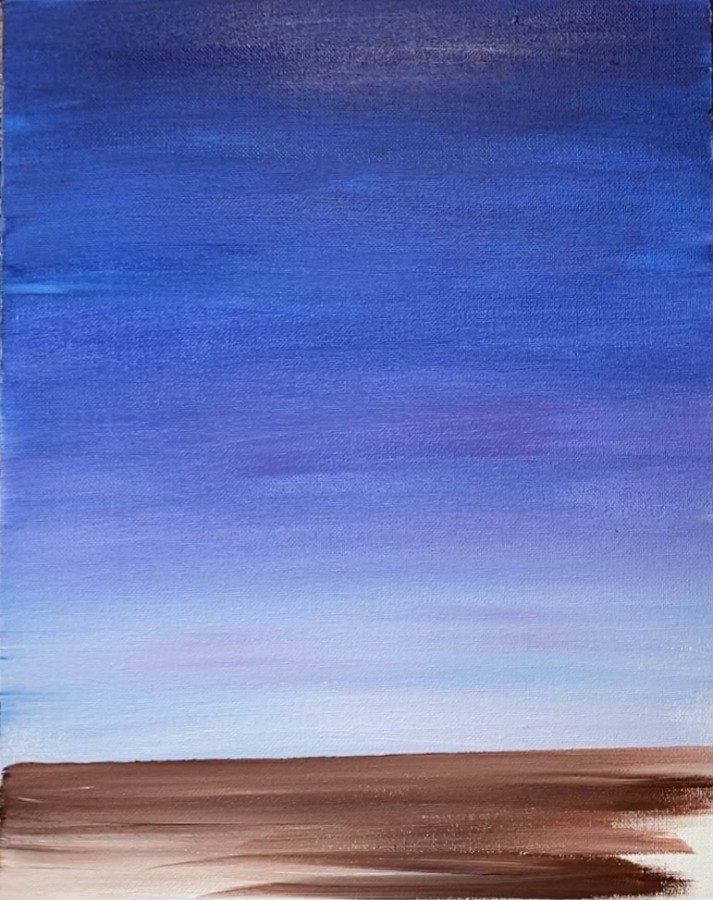
Fill the rest of the area of the table all the way to the bottom edge of the canvas.
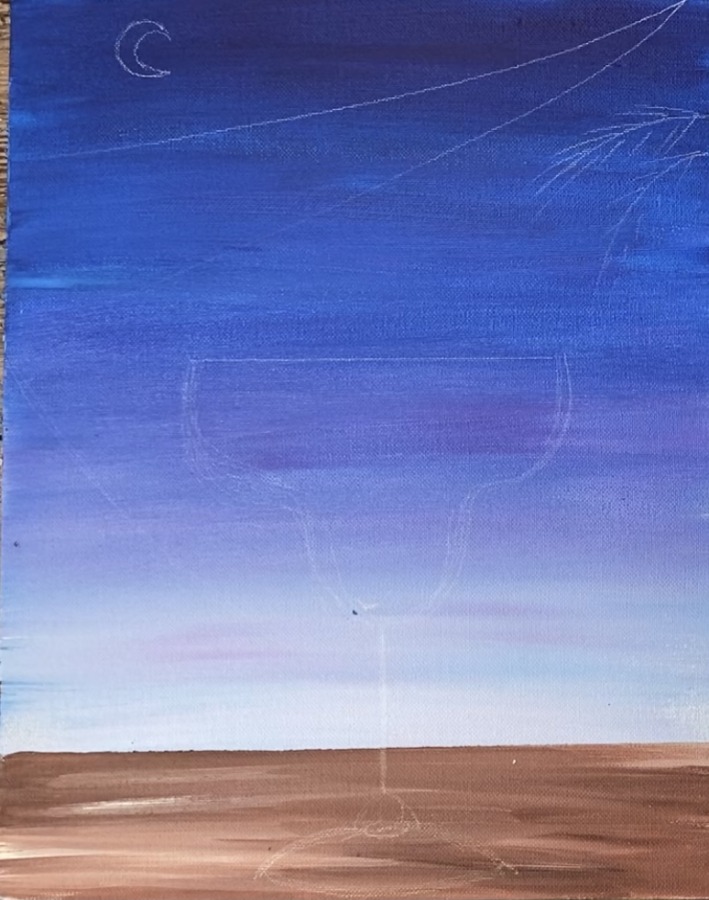
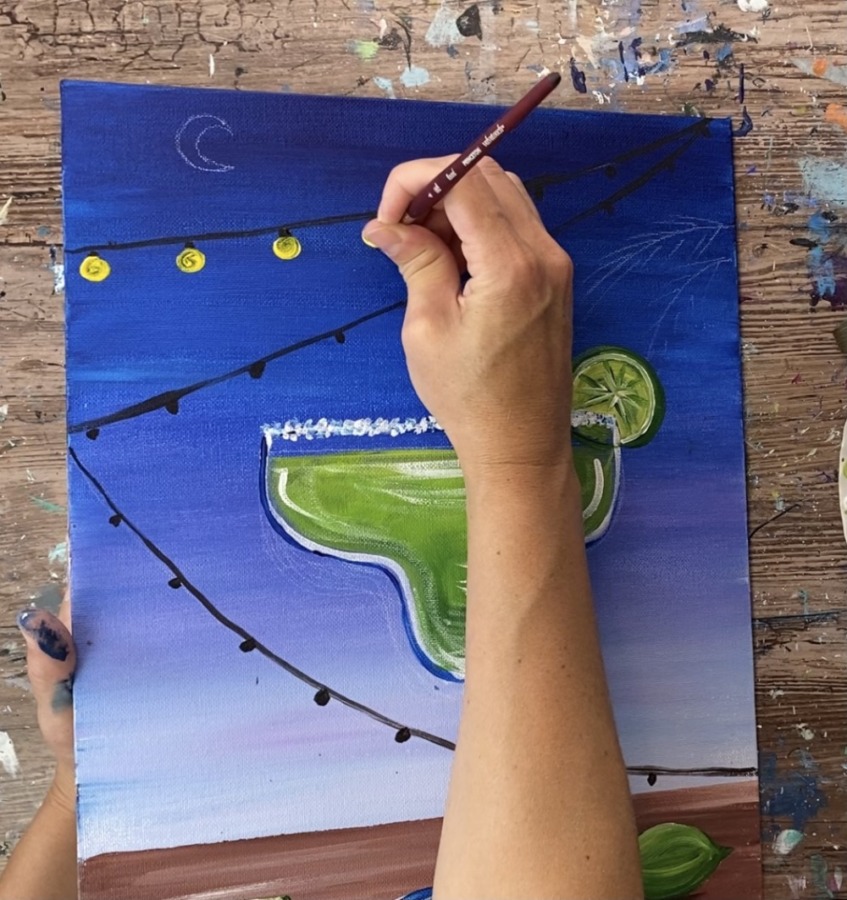
3. Draw The Margarita Glass
Next use a white chalk pencil (or chalk) to draw the margarita glass. Alternatively, you can use the traceable that is attached to this tutorial.
The stem of the glass is the same height as the bowl part. Estimate about how high you want your stem to be (mine was about 3-4 inches). Make a mark where the top and bottom of the stem will be.
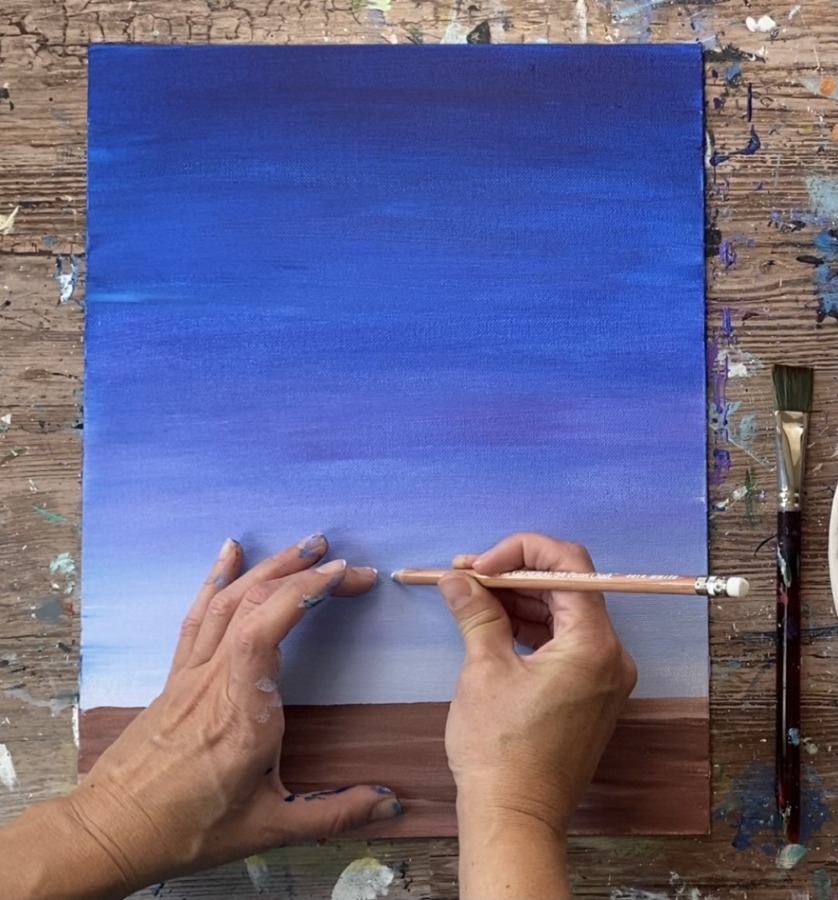
Then measure the same height for the bowl part of the margarita glass. Use a straight edge to draw a horizontal line for the top part of the glass.
Then draw the bowl part of the margarita. Draw the curved areas on the left and right as well as the bottom. Lightly sketch out the shape.
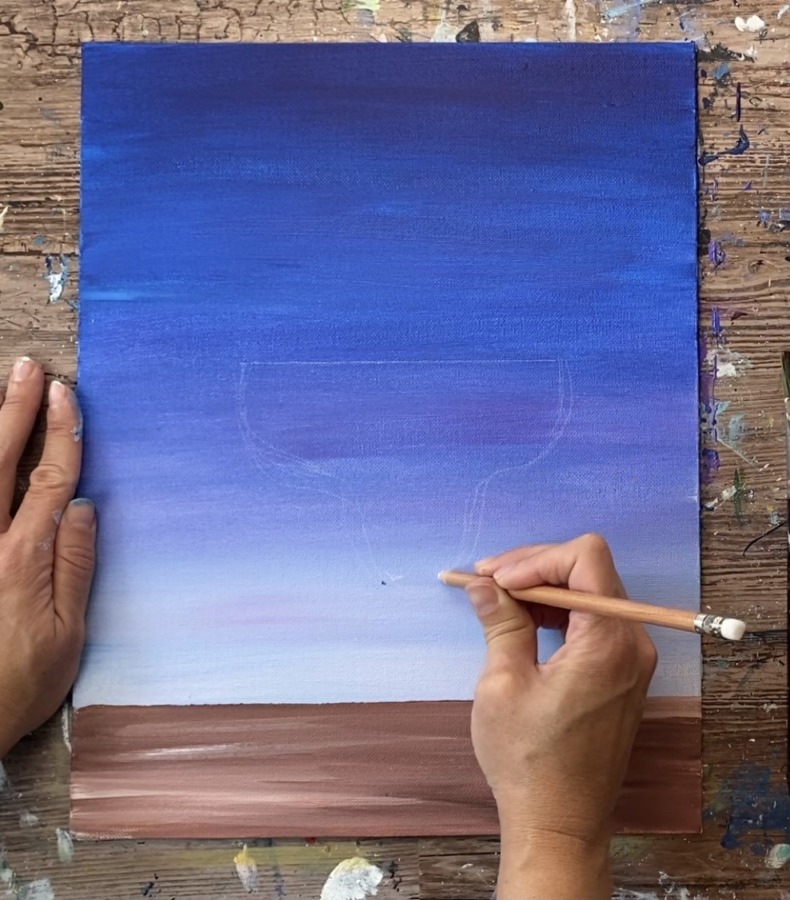
Then draw a vertical line that is the same height as the bowl part.
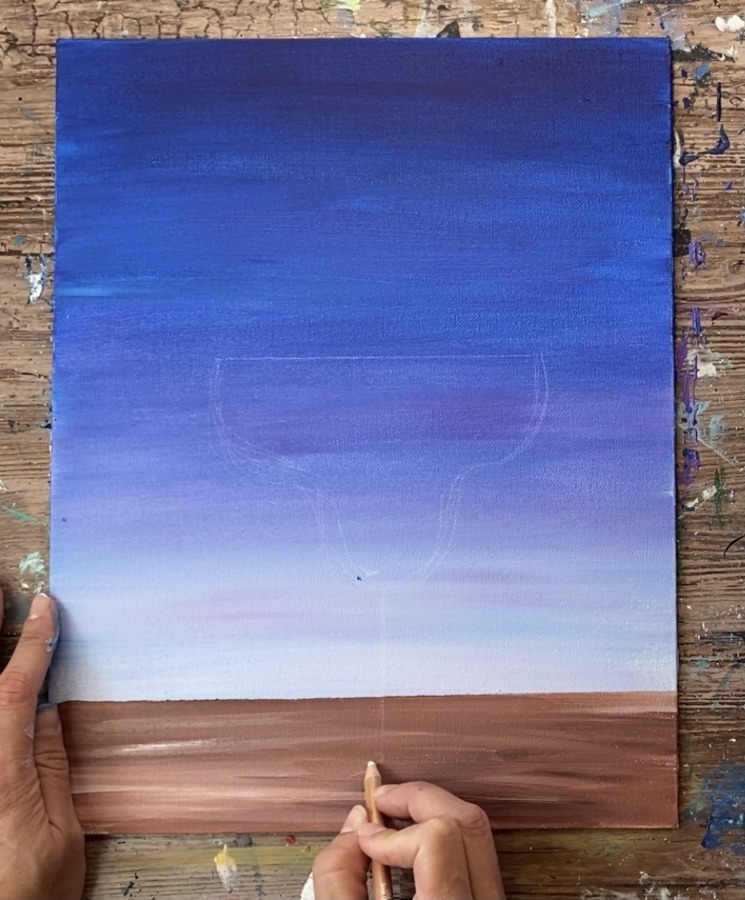
Then draw the bottom stand piece.
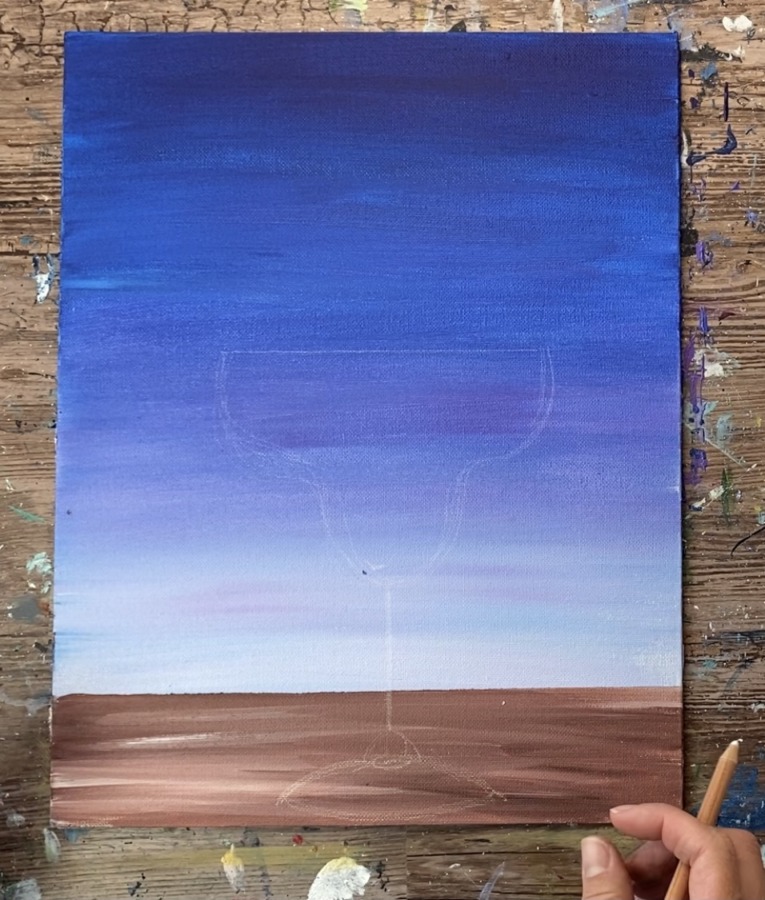
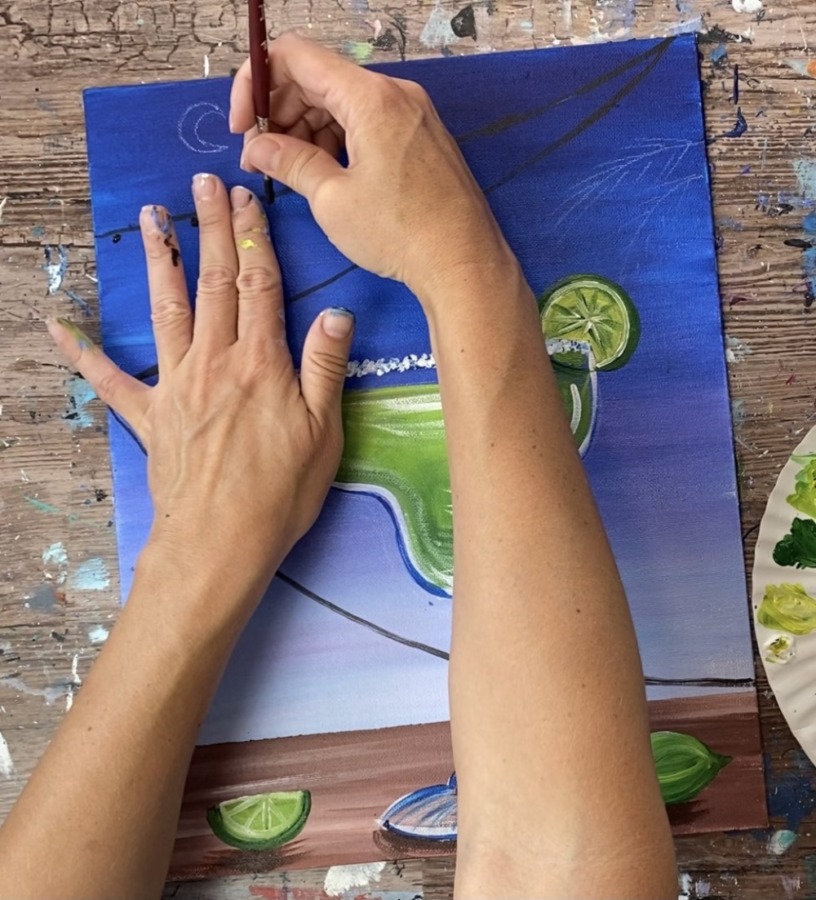
Optional: Then you can sketch out where the string lights will be above the margarita glass. Draw two curved lines that meet in the upper right. Draw a crescent moon and palms.
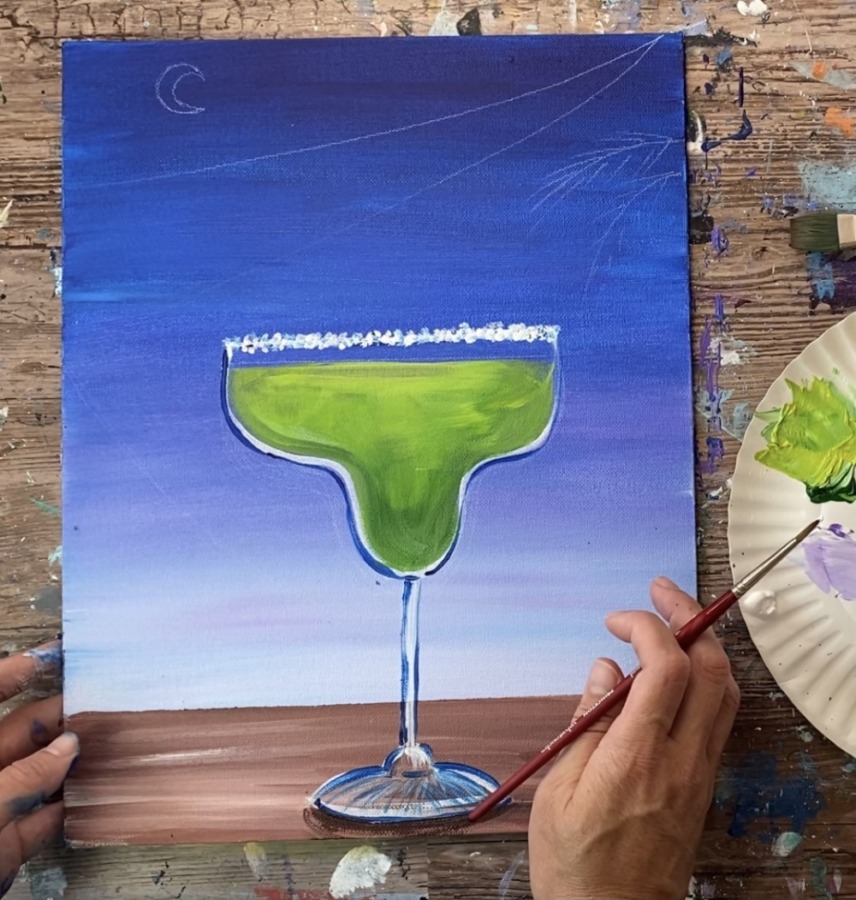
4. Paint The Margarita Glass Outline
Use a #4 round brush and titanium white. Slightly water down the white so that it will flow easily. Outline your margarita glass drawing.

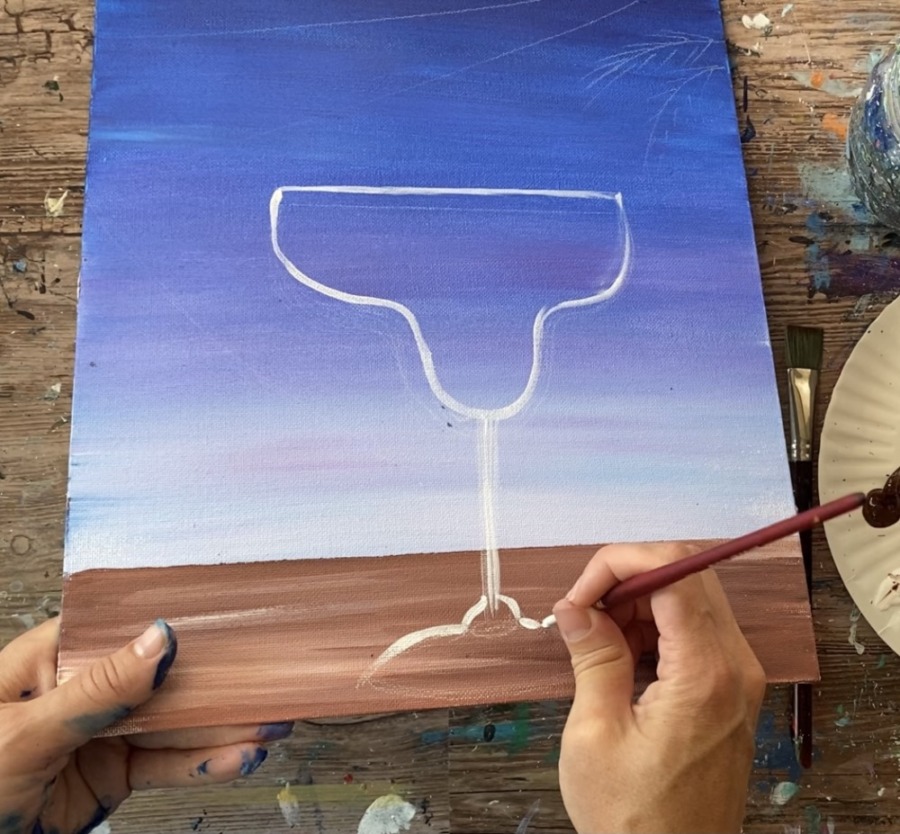

Then wipe the white off your brush and load it into phthalo blue. Loosely outline the glass again with the blue. When you loosely outline, you do not outline all of it, only some of it and your line is not continuous. Try not to cover all of the white.
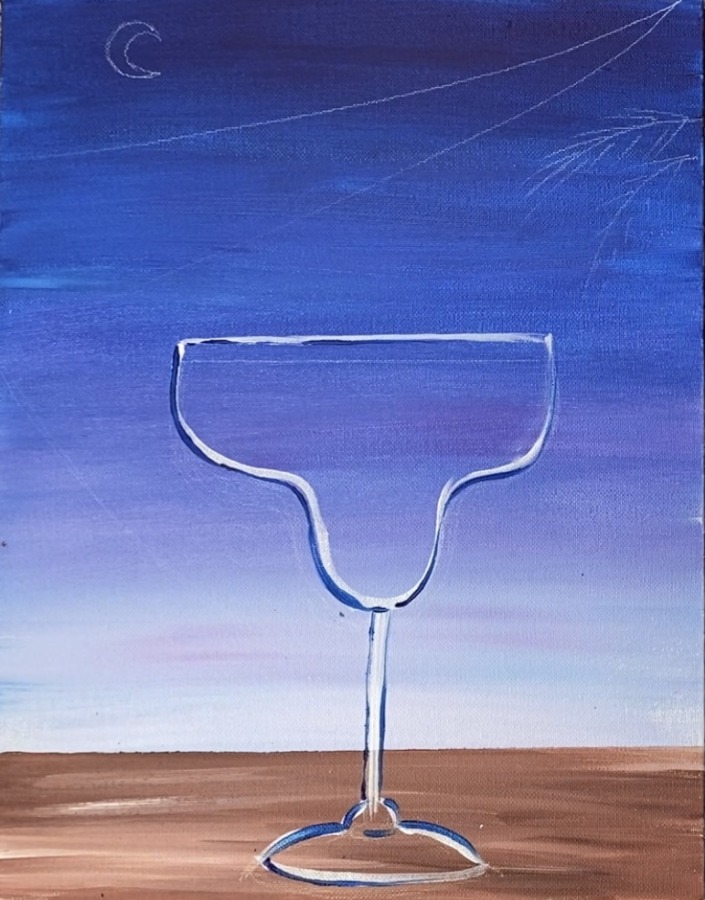
Then paint the base of the margarita glass. Do a “dry brush style” stroke with lines that go diagonal and slightly curved. Load your round brush in the phthalo blue but wipe some of the paint off. Then start at the top of the base and paint the curved/ diagonal strokes all along the base.
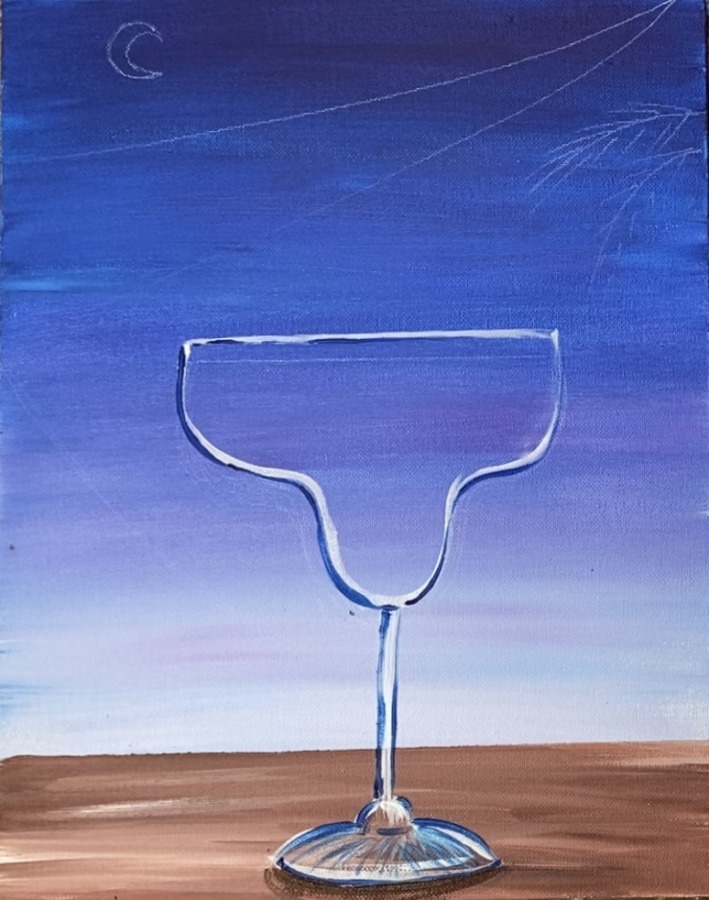
The base should be translucent enough to show some of the brown of the table through it.
Then paint a shadow under the base. Do this by watering down some burnt umber. Add a thin coat of paint just under the base to represent the shadow.
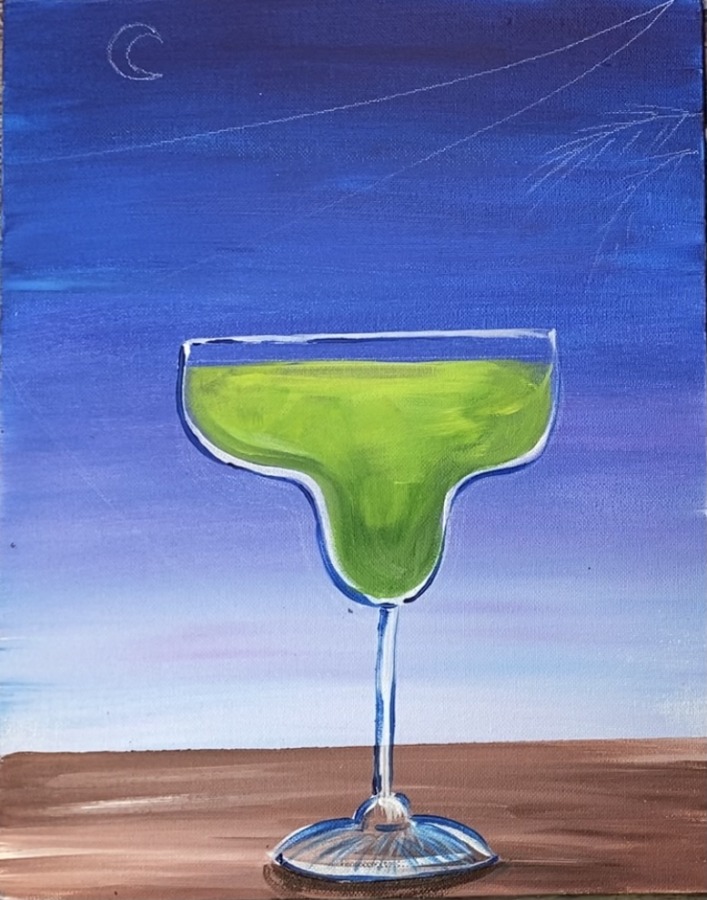
5. Paint The Margarita Liquid Inside Glass
Mix on your palette a “lime green” color. To do this, I mixed about 2 parts hooker’s green hue permanent, 2 parts titanium white and 1 part primary yellow. (This doesn’t have to be exact).
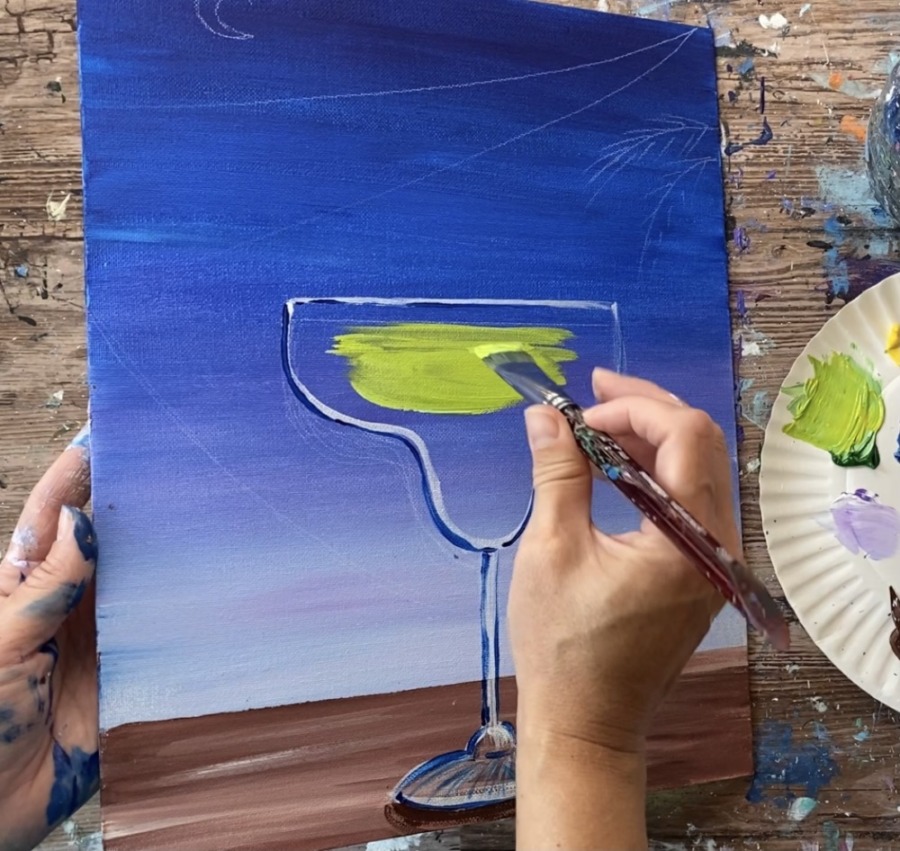
Use your 3/4″ flat wash brush to paint the liquid inside the margarita bowl. Then wipe off your brush and load it into some hooker’s green hue permanent and paint some darker shades of green that mix gently with the lighter green.
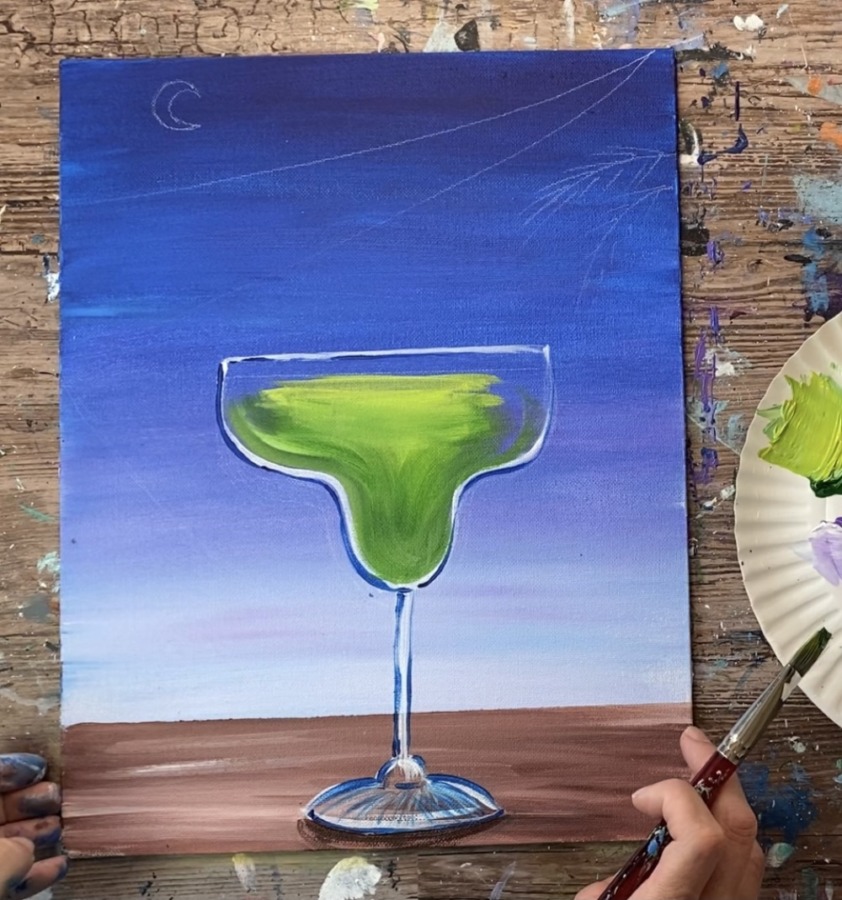
Paint in contouring strokes to the direction of the paint goes in the curved direction of the bowl. Try not to overland the lighter greens and darker greens. Leave it unblended so the colors will be varied.
6. Paint Salt On Rim
Use a #4 round brush and titanium white. Paint the salt on the rim by “stippling” or dotting the brush to paint clusters of white dots along the straight edge of the rim.
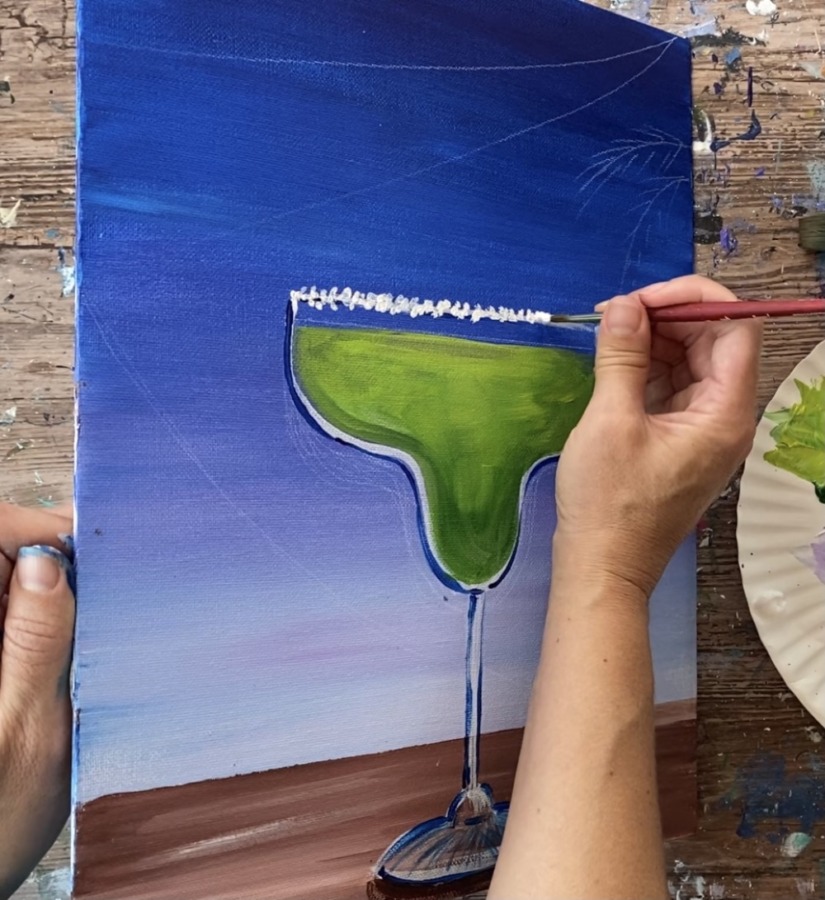
Optional: you can add a little phthalo blue on the dotted rim to give your salt a little bit of “shadowing”.
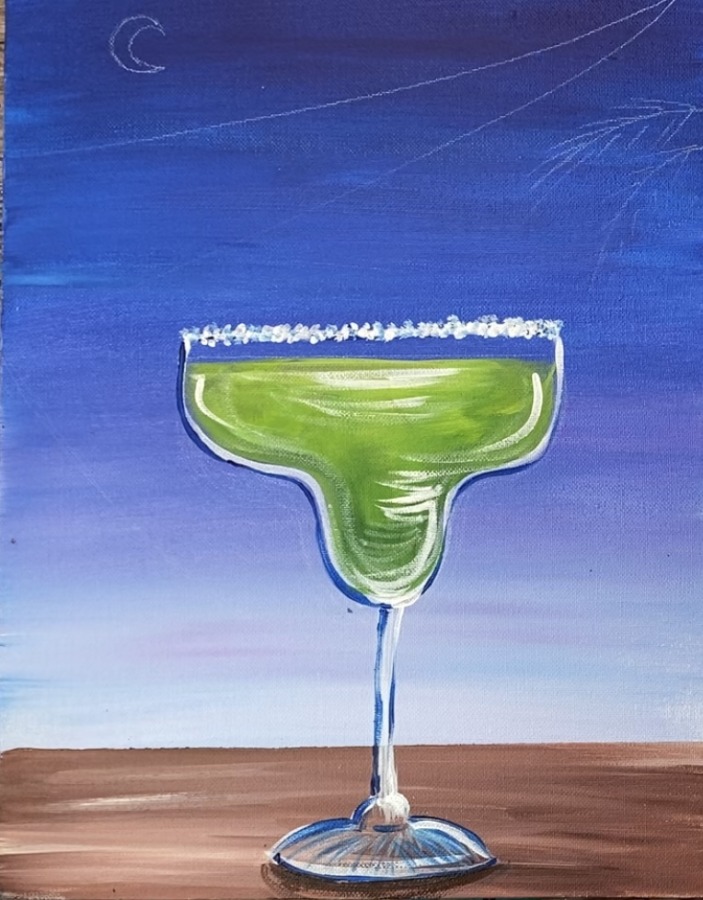
7. Paint Reflection On Glass
Make sure the green is dry before doing this step.
Use your #4 round brush and titanium white to paint the glare on the glass. Load your brush in the white but wipe off a little. Then paint marks on the glass. Some of the marks curve with the shape of the glass and some go left and right.
8. Paint Limes
Use your #4 round brush and the hookers green hue permanent color to paint a circle in the upper right area of the margarita bowl.
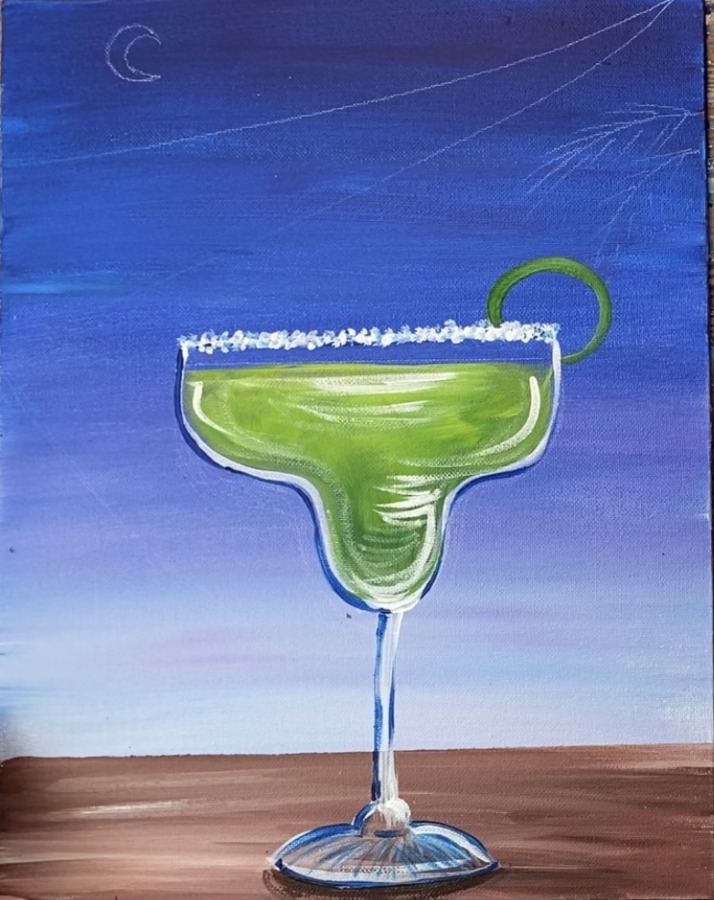
Fill the center part of the circle with a light green (mix a lime green color on your palette). Then paint diagonal lines from the center of the circle to the dark rim of the lime.
Next rinse and dry your round brush. Load it into titanium white and paint white diagonal lines going from the center outwards. Outline the outer part of the circle (but inner part of the lime) with the white.
Paint the rest of the circle lime piece showing throw the glass.

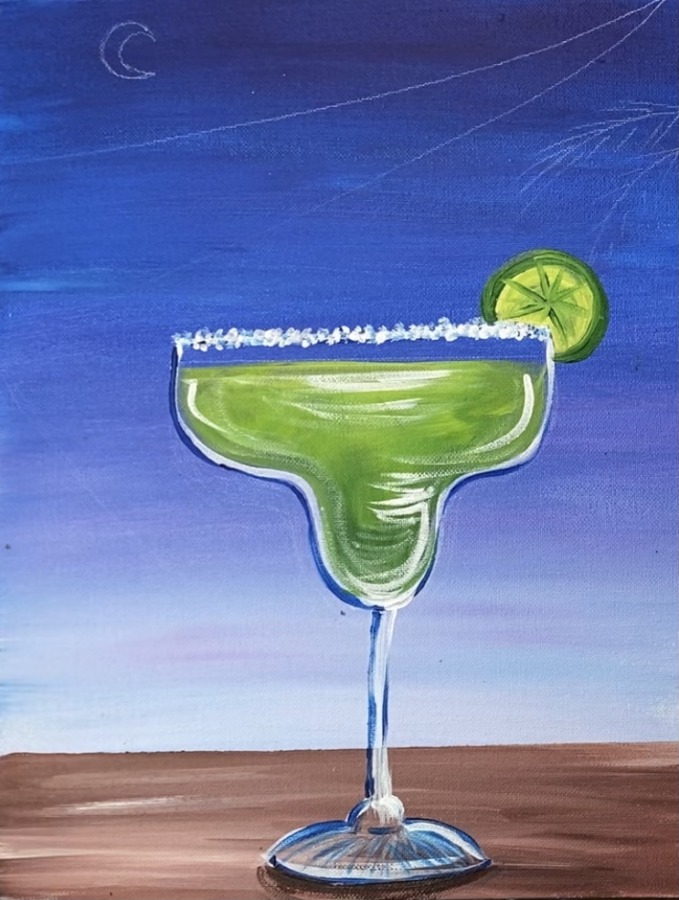
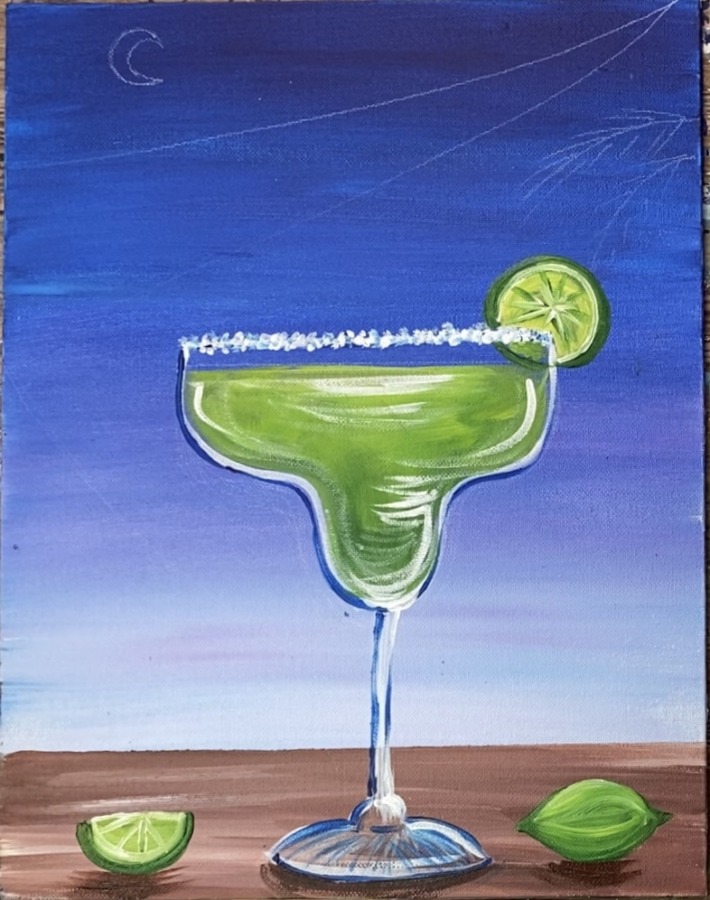
Then paint a lime on the table using the green mixed with a little bit of white. Outline the outer shape of the lime first.
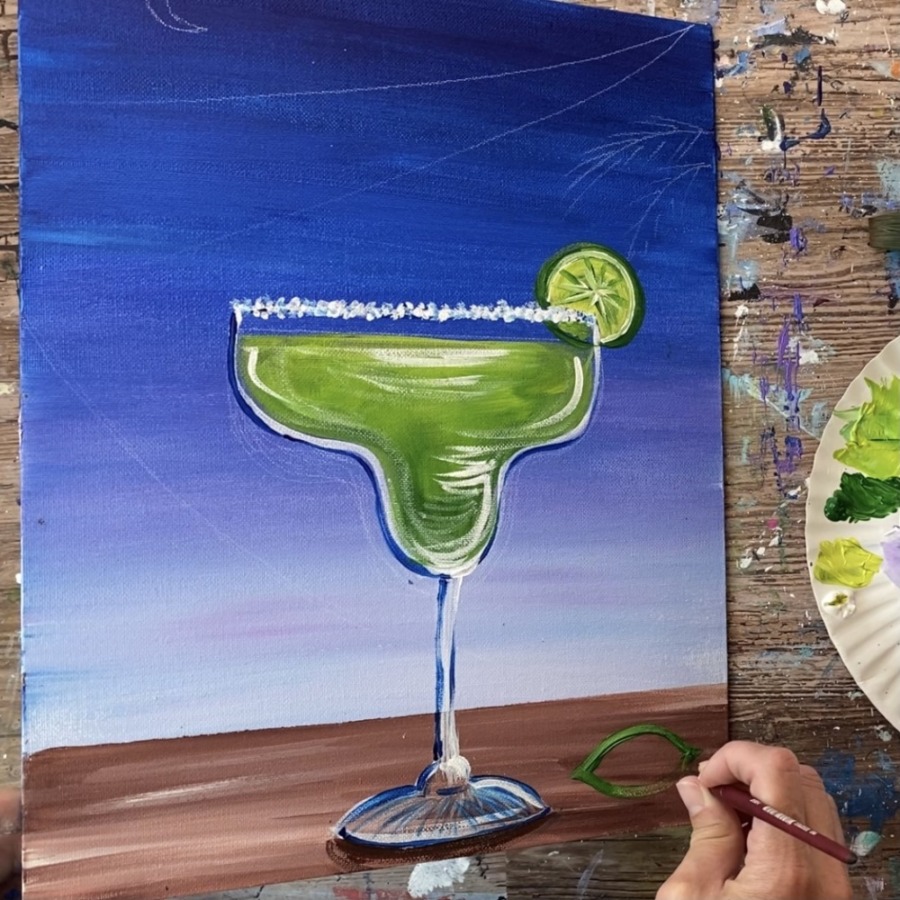
Then fill it in solid using the round brush. Paint in contouring strokes in the shape and direction of the lime shape. Use a combination of the green and white to create a variation of the dark and light green.
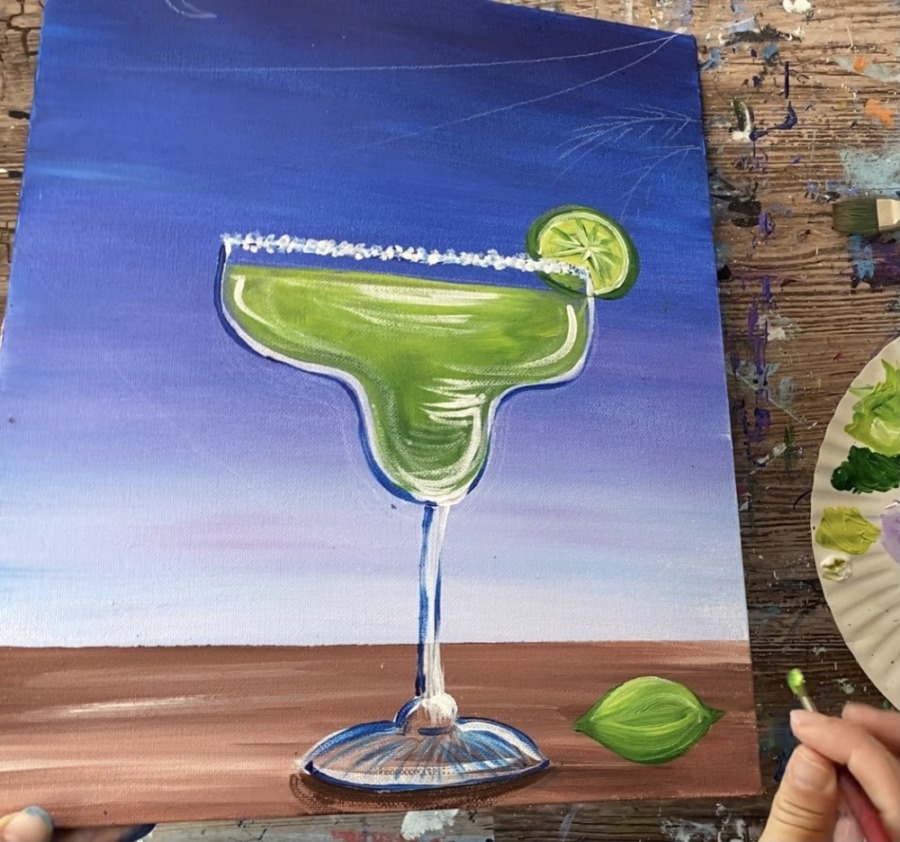
Then paint a lime slice on the left of the margarita glass on the table. Do this the same way you painted the circle lime piece.
Then paint the shadows under the limes. Do this with slightly watered down burnt umber and your round brush. Paint left and right strokes going down to the bottom of the canvas.
9. Paint String Lights
Use your #4 round brush and slightly watered down mars black to paint the wires of the string lights.
I did two wires that connected in the upper right and then another wire on that hangs down at the bottom.
Then paint the individual light sockets of the lights. I did a tiny square/ brush mark with my round brush. These are spaced about two fingers apart. You can use your fingers to estimate the spacing as your are painting the sockets.
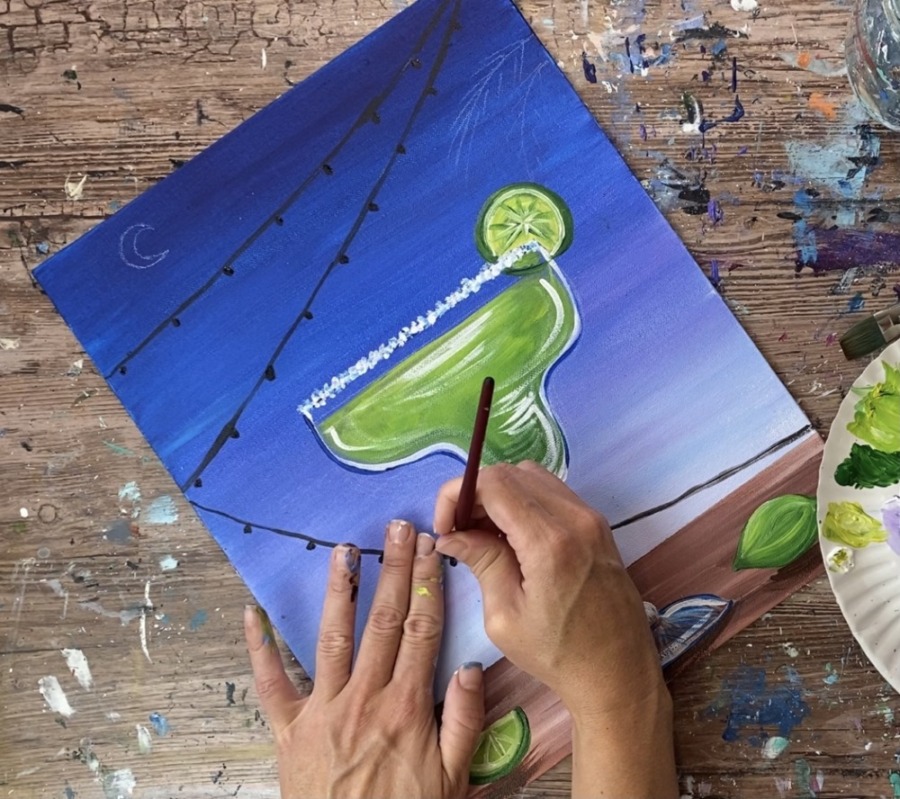
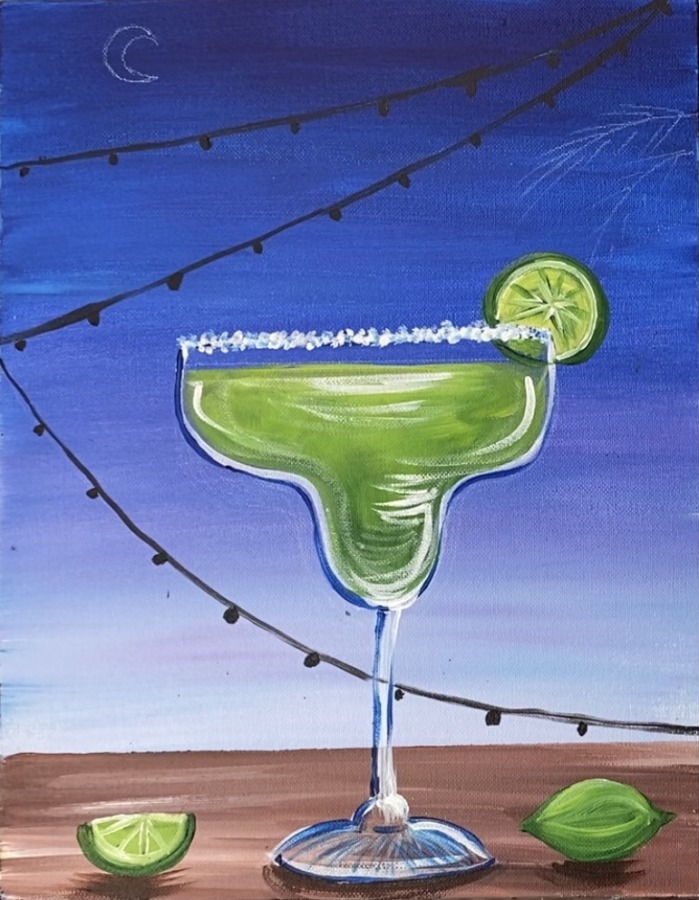
Next paint the lights. To do this, I used primary yellow and my #4 round brush. Paint small circles on the end of each of the light sockets.
Then load your brush in titanium white. Paint a smaller circle withe the white paint on the inside of each of the yellow circles.

Optional: you can use your index finger to smear some of the white paint outwards to make it look like the lights are glowing. Then use your round brush to paint a highlight on one side of each of the light sockets. Then loosely add some white to the black wires.
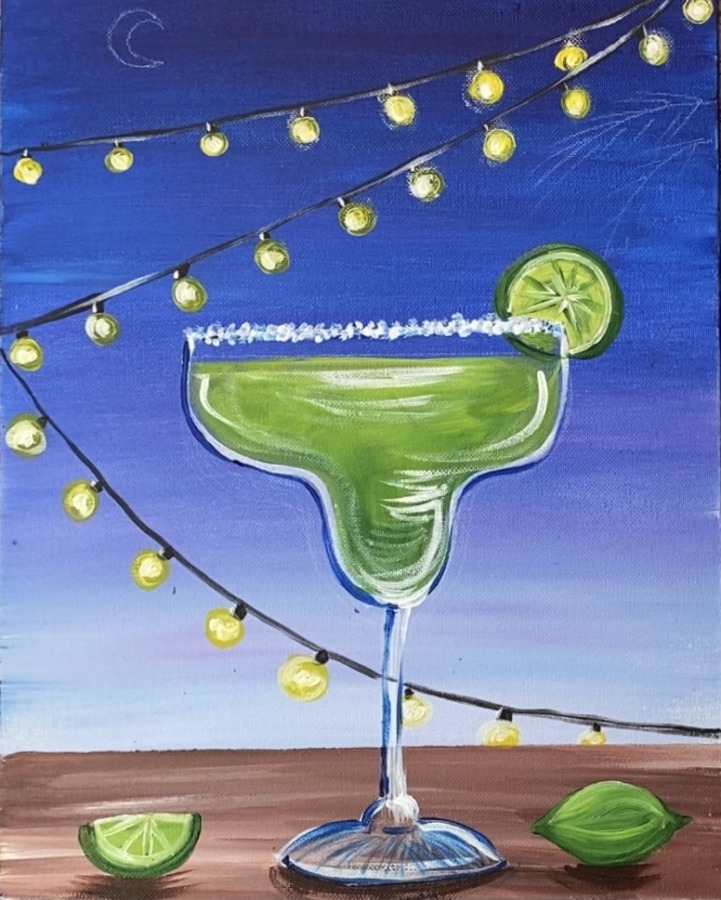
10. Draw/ Paint The Moon & Stars
For the crescent moon, I traced a small circle and then drew the inner crescent shape.
Paint in the circle solid white.
Then use your round brush to paint stars in the sky. Do a variety of small dots and star shapes.
11. Paint Palm Silhouettes
Next use your round brush and mars black to paint palm fronds on the upper right side of the sky area above the margarita.
Paint another set of palm fronds in the lower left. Then loosely add some white highlight to the palms.
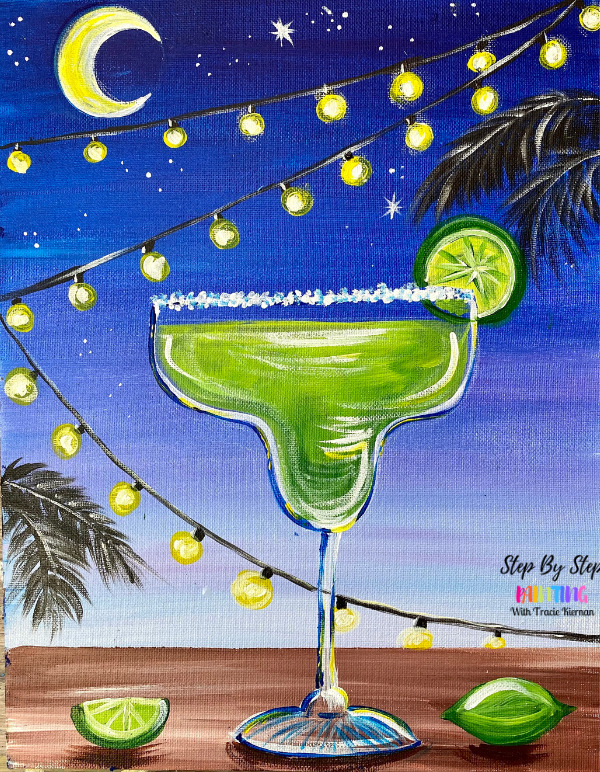
Finished!
As a final touch, I painted some yellow on the moon. Then I loosely added some yellow to the outer outline parts of the margarita glass.
Share Your Art Here!


