
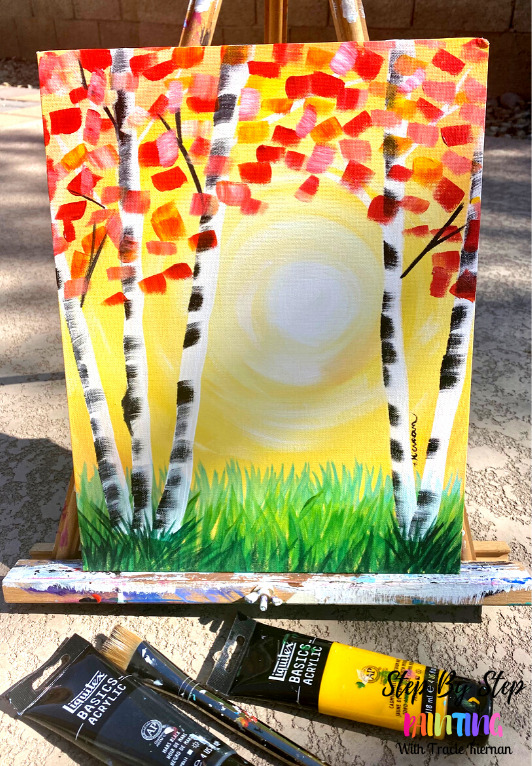
If you are dreaming of fall, or a very basic beginner level painting, or both, you will enjoy this easy aspen tree painting with a sunset background.
Would you like to save this?
This tutorial only utilizes ONE paint brush and only five basic acrylic paint colors.
It is a great first time painting if you’ve never picked up a brush before (or in a long time). It is also a great painting you can do with a group of beginner level painters and it is a PERFECT one to do with kids because the design is so simple!
I did this painting on an 11 x 14 canvas, however, you can do this painting design on any canvas size.
The leaves can also be customized to different colors. You can change them to green for a pretty summer/ spring scene.
Enjoy and happy painting!
Materials
Sunset Aspen Trees Super BASIC Beginner Painting
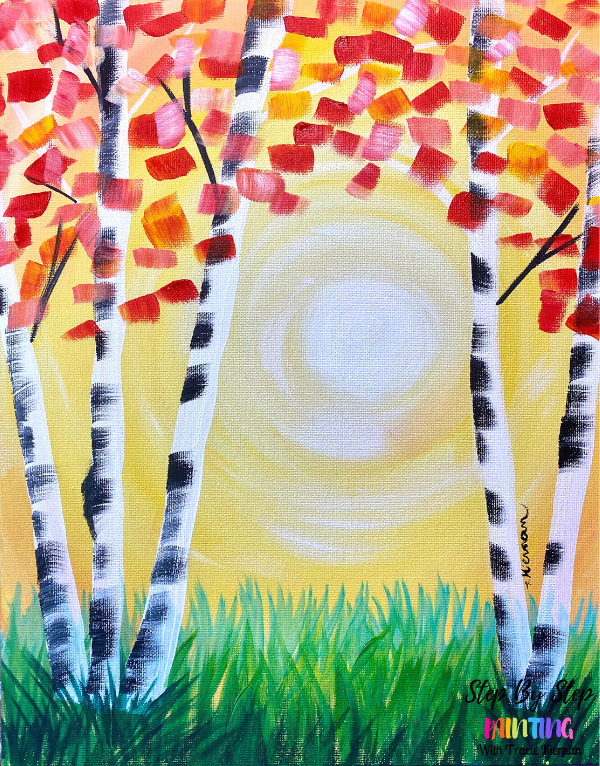
This is a very basic and easy beginner level painting perfect for the first time painter! Learn how to paint a sunset scene with aspen trees. Then add fall or spring leaves.
Tools
- Acrylic Paint
- 11 x 14 Canvas
- Brush
- Paper Towel
- Palette
- Water Cup
Brushes
- 3/4" Flat Wash
Colors
- Cadmium Red Medium Hue
- Cadmium Yellow Medium Hue
- Phthalo Emerald Green (you can use literally any shade of green for this!)
- Titanium White
- Mars Black
Instructions
- See tutorial on www.stepbysteppainting.net for full instructions
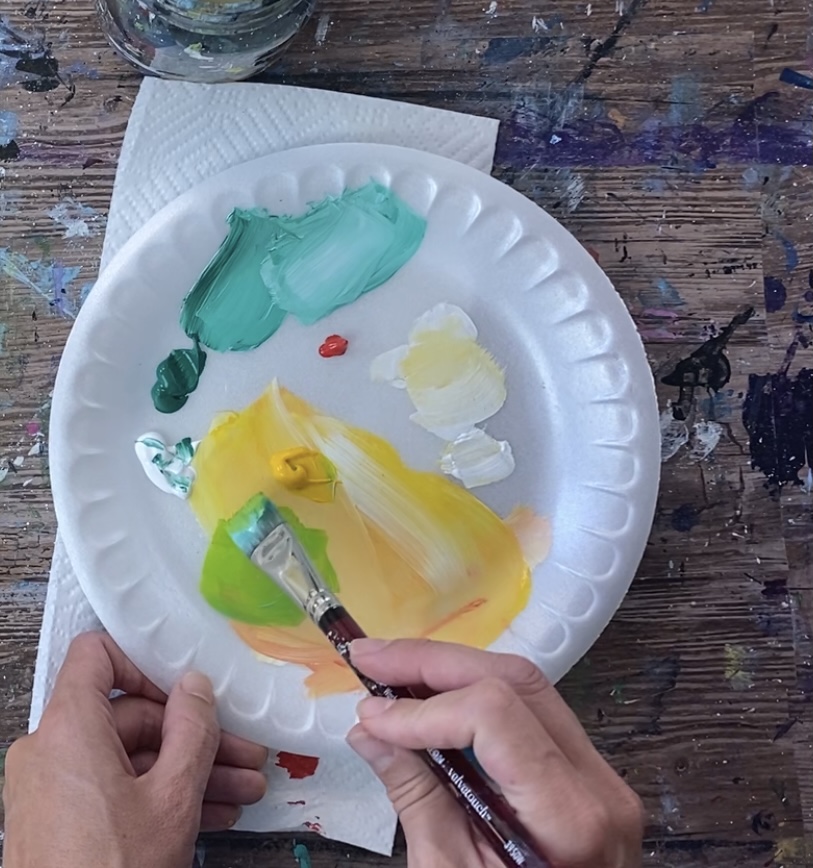
Color Palette
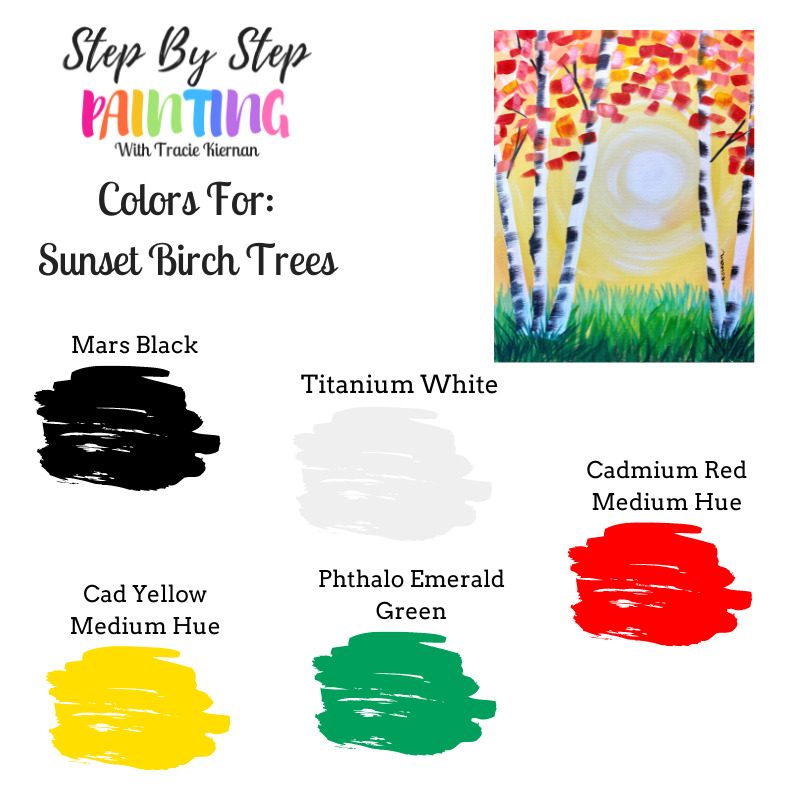
Note: you can substitute “phthalo emerald green” for any shade of green you may have!
Using craft paints?
You can try substituting with these Apple Barrel Craft Paints:
- White
- Black
- Bright Yellow
- Flag Red
- New Shamrock
Directions At A Glance
Video
Step By Step Directions
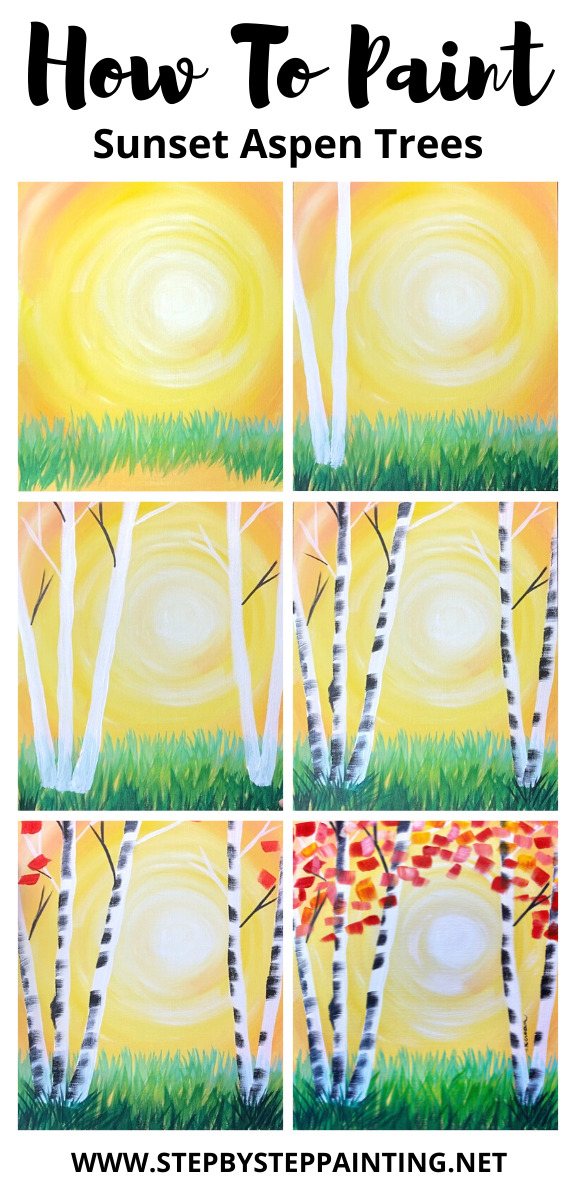
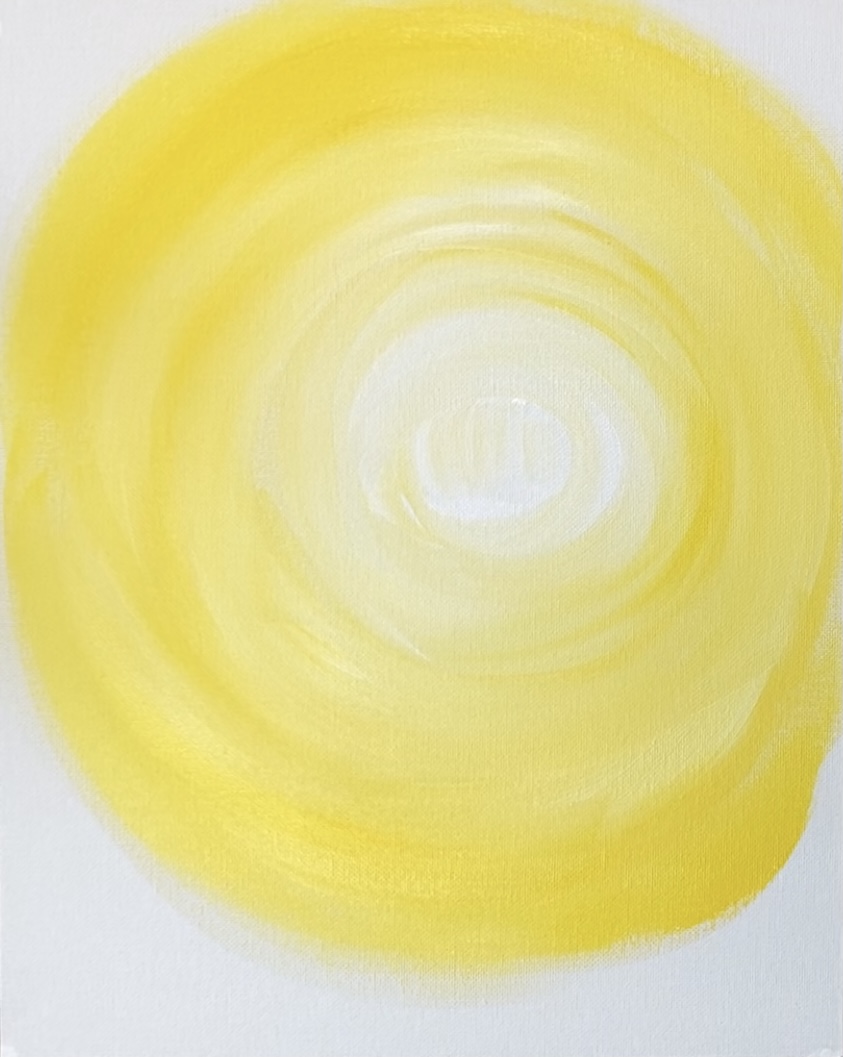
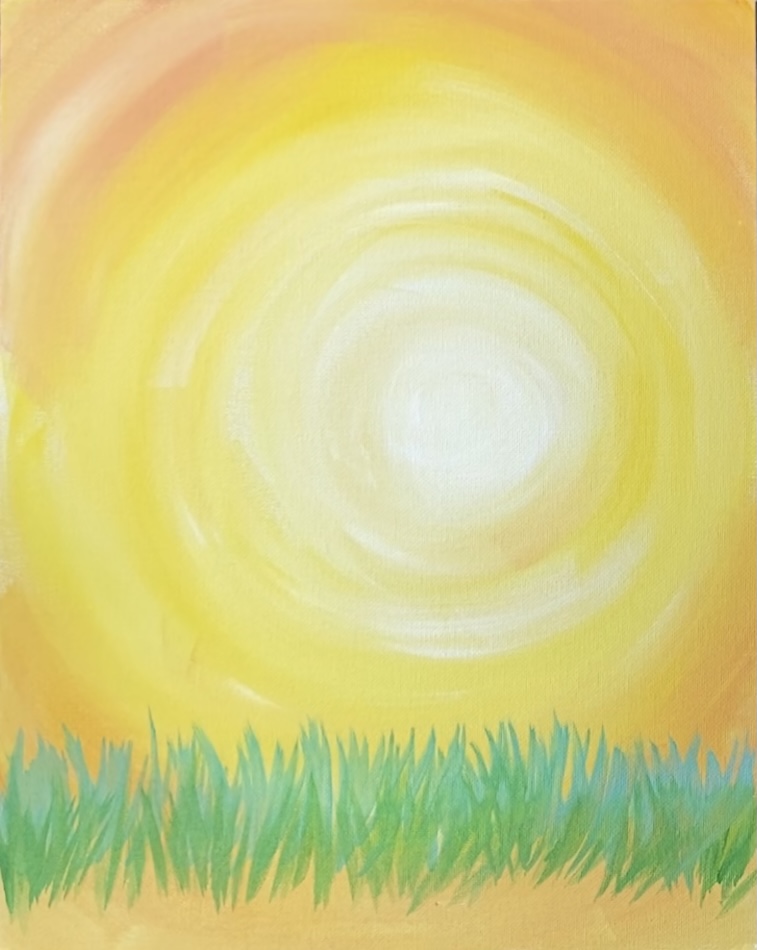
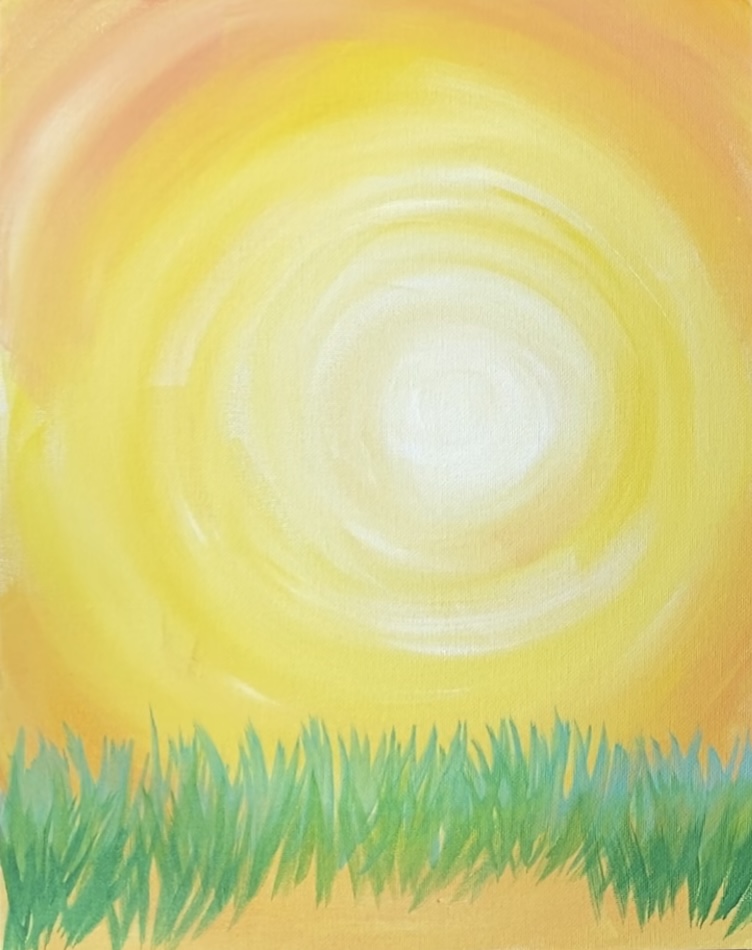
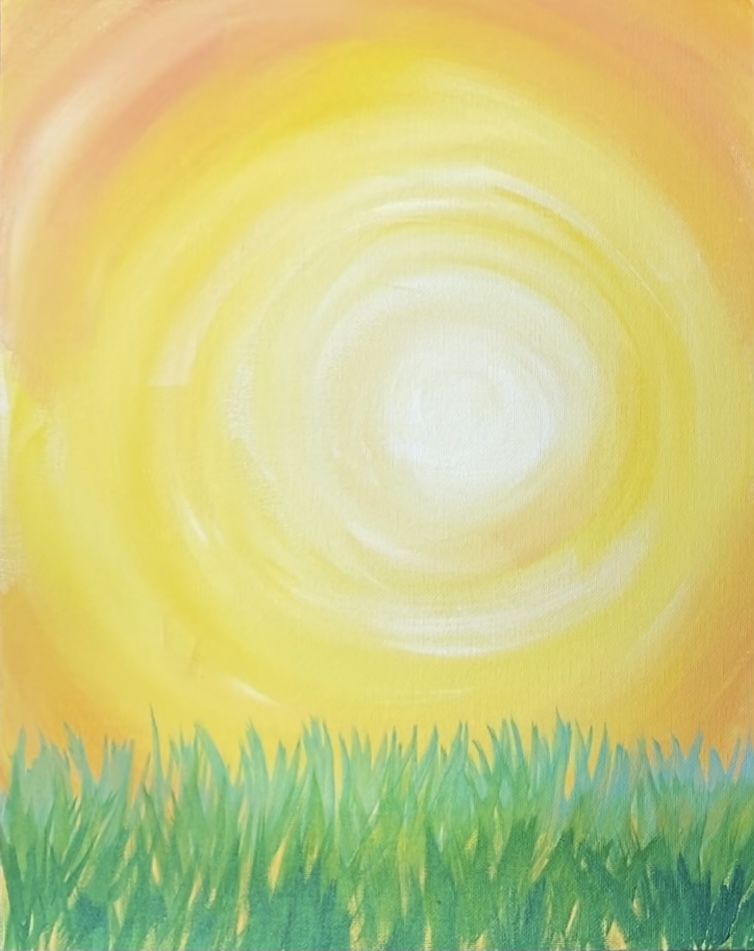
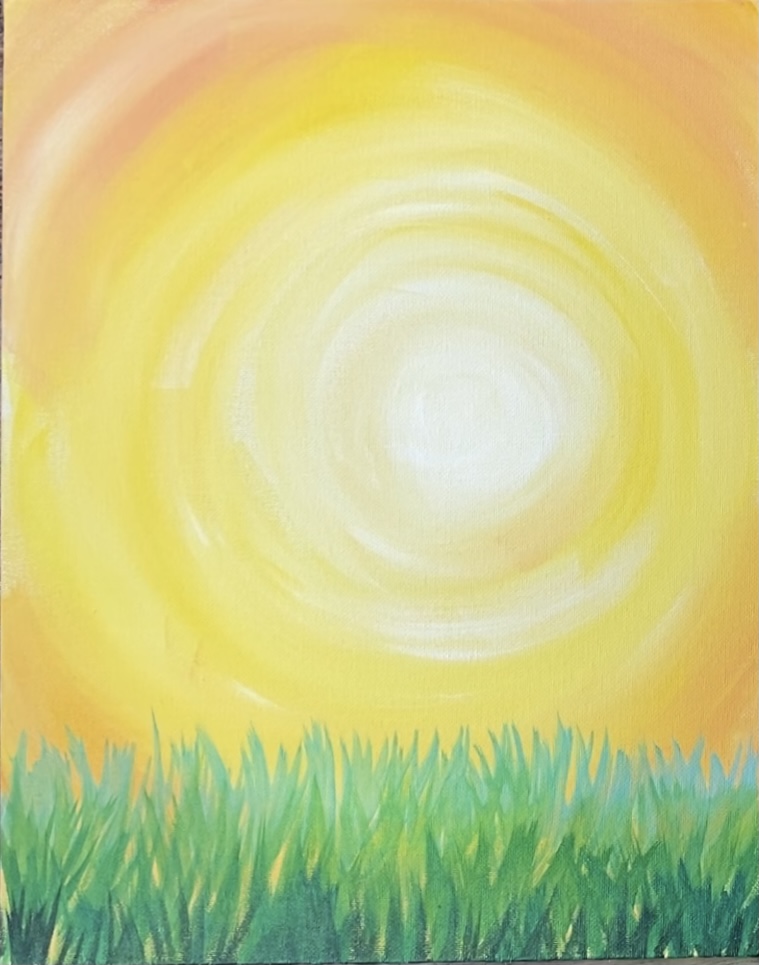
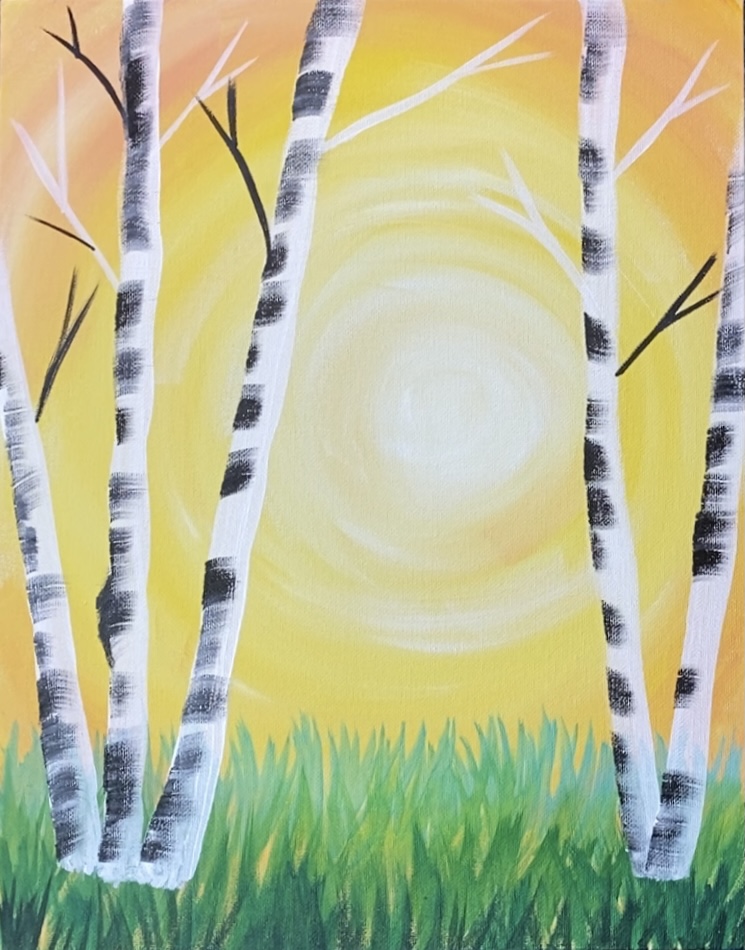
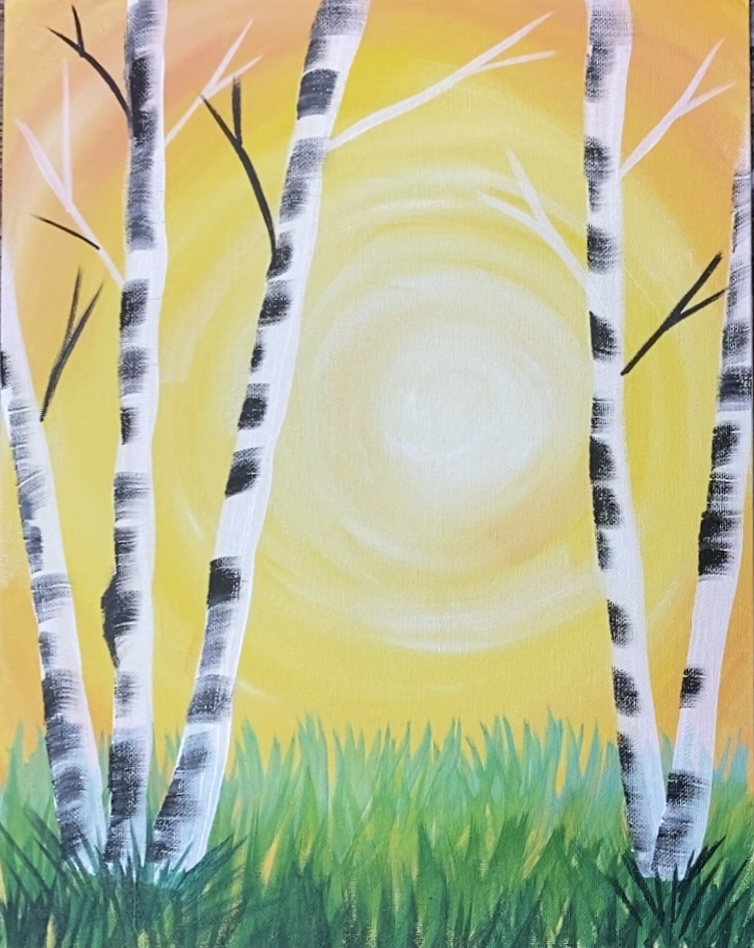
1. Paint The Sunset Background
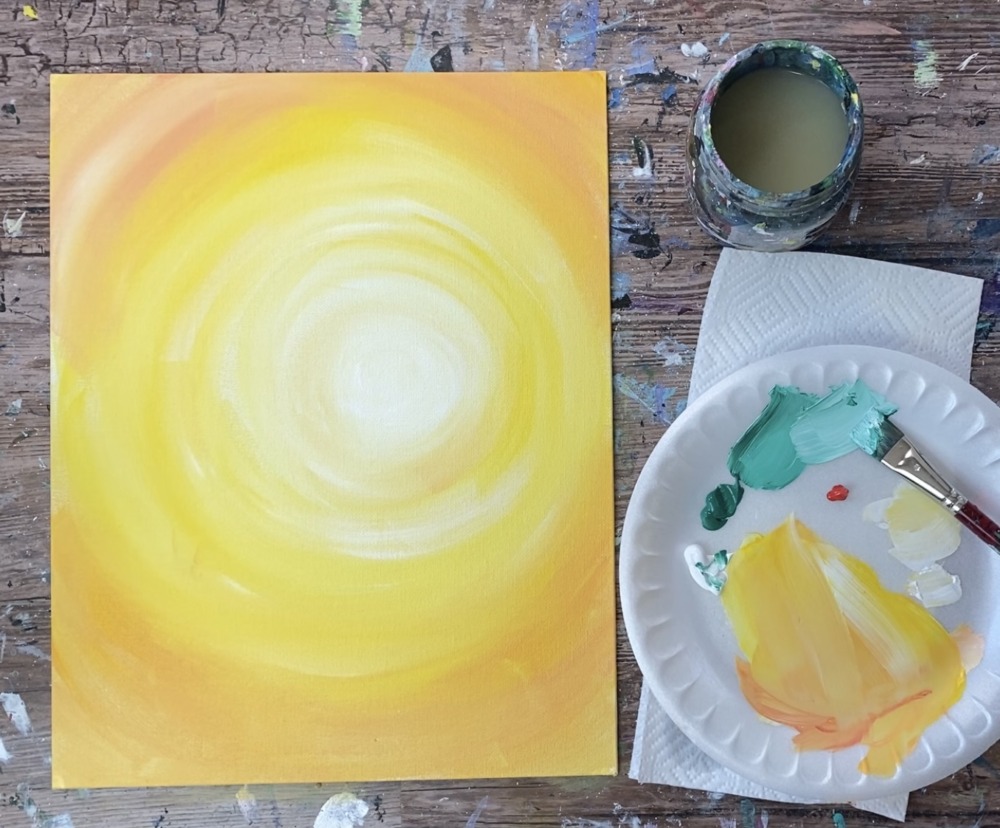
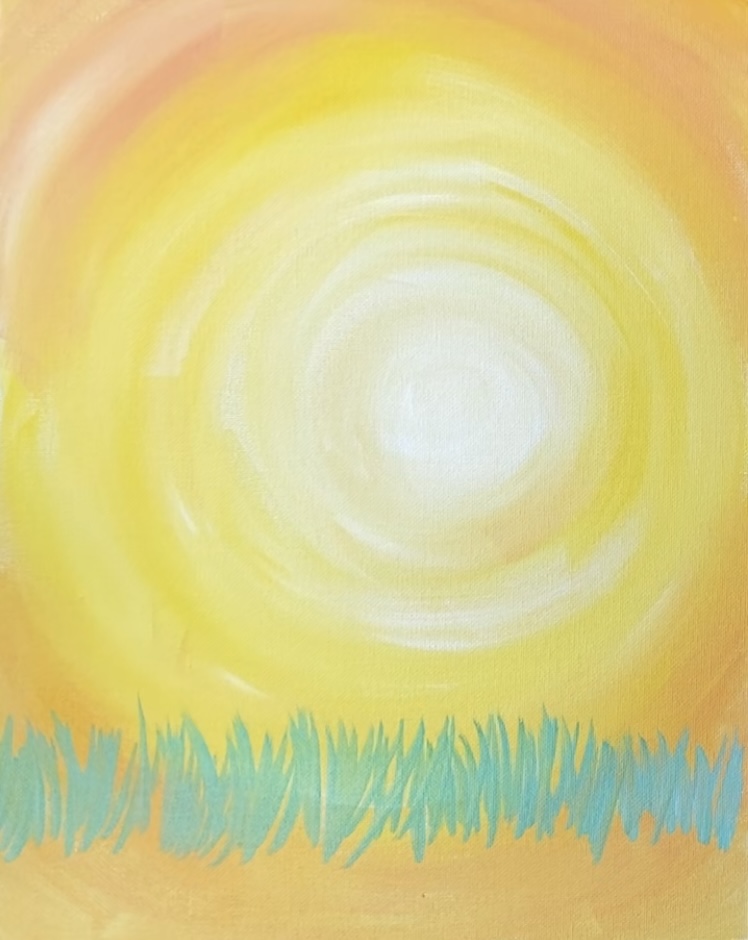
The background of this painting is a blended background with radiating (circular) strokes. It starts in the middle where the glowing sun is and the color yellow is blended outwards to the edge of the canvas. There is also a little hint of orange on the outer edges of the canvas.
To do this technique…
Position your canvas so that it is vertical. Then load your palette with the following colors: titanium white (white), cadmium yellow medium hue (yellow) and only a small amount of cadmium red medium hue (red).
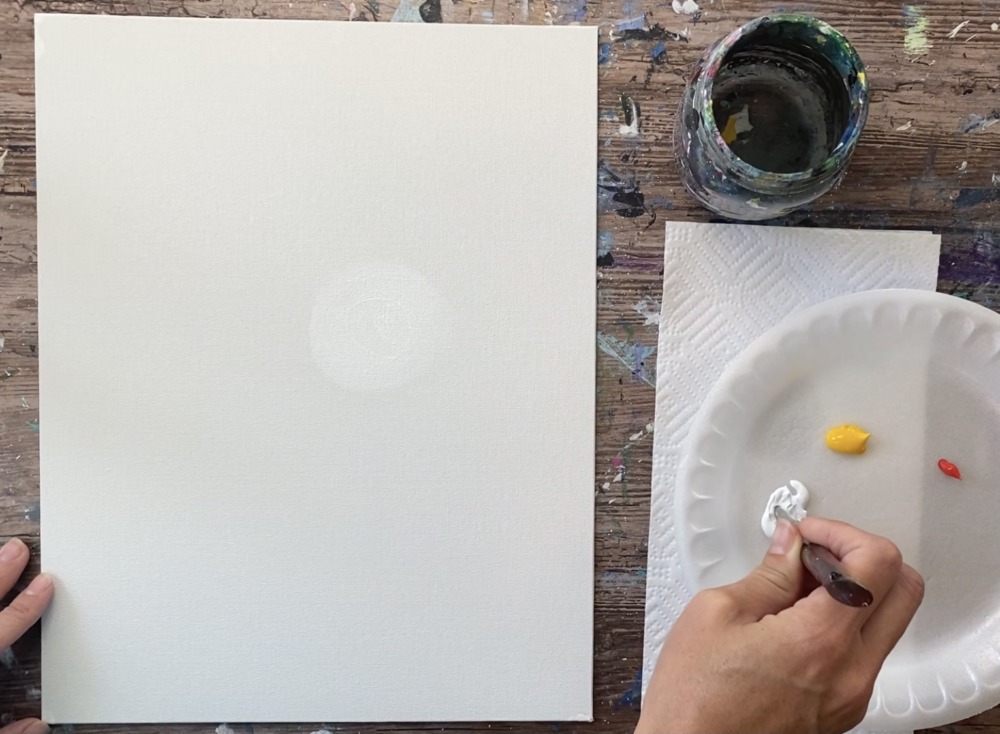
Next use your 3/4″ flat wash brush to paint a circle on the right middle part of the canvas. Paint a large circle about 6″ in diameter.
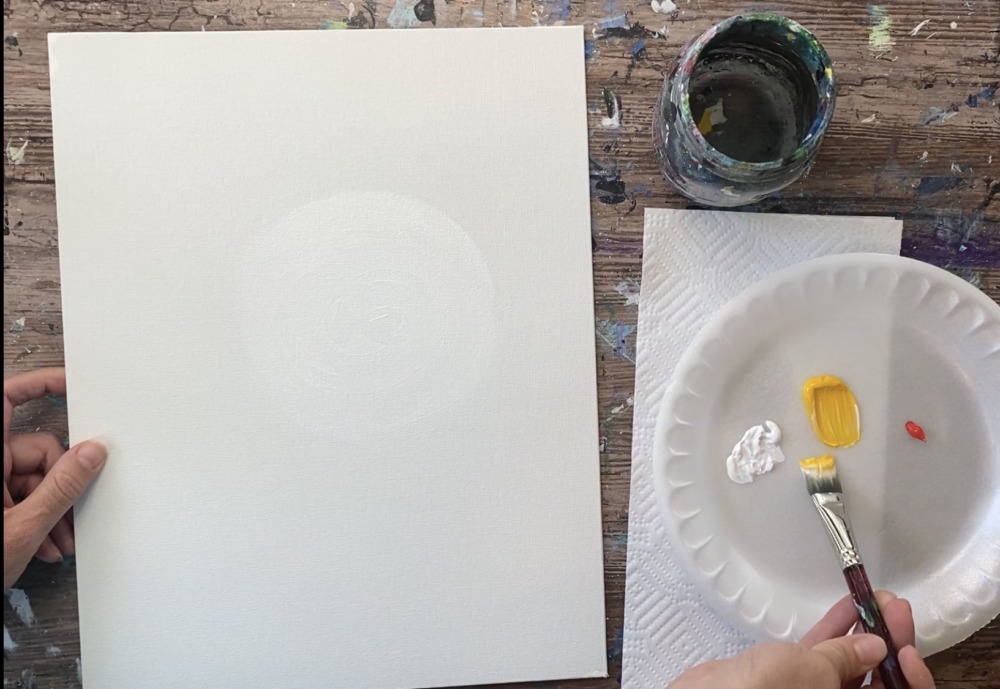
Then, without rinsing your brush, load the tip of it into a small amount of cadmium yellow medium hue.
Gently paint in circular strokes around the white circle, allowing that yellow to blend with the white. Keep your center circle (about 2-3 inches of circle) white and bright. If needed, add more white to your brush to help with the blending.
Do you need tips on how to blend acrylics? Check it out here!
Then continue to paint circular strokes outwards. As you work your way out, add small amounts of yellow to the brush and less white. The idea is to get the yellow to be more vibrant (less white) as it goes outwards and for the yellow to be brighter (more white) towards that middle circle.
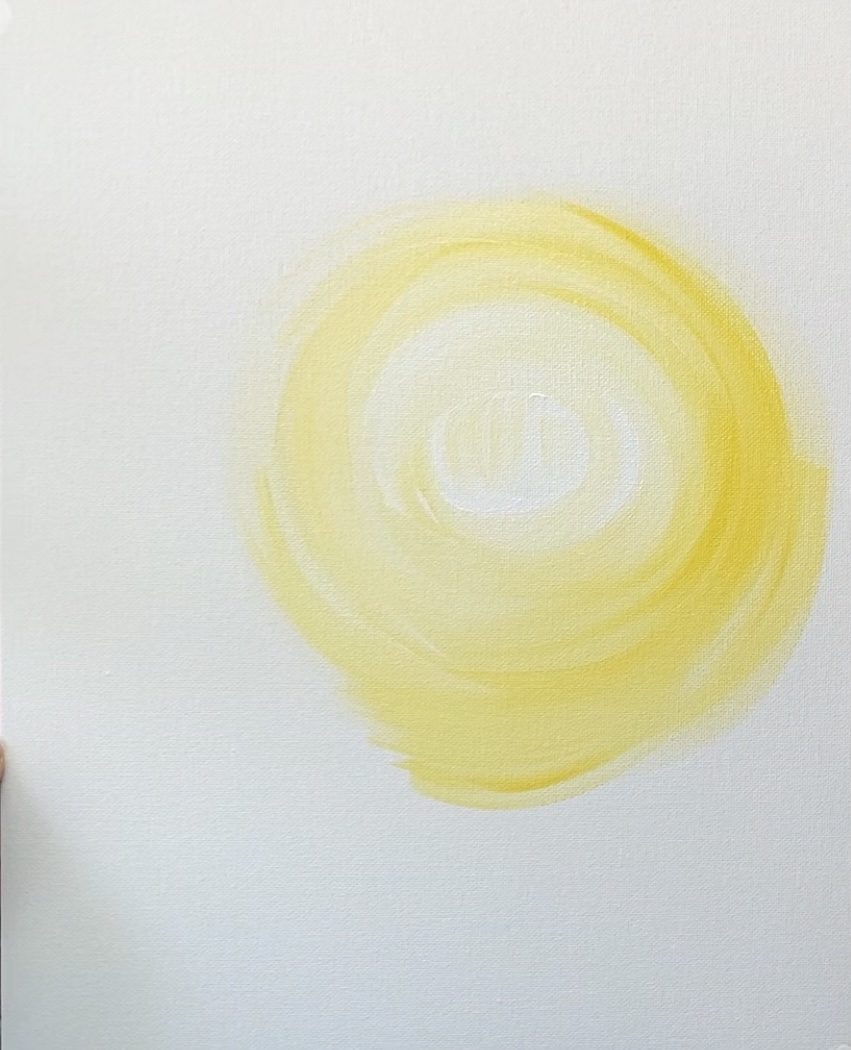
Keep painting in circles with that yellow! It is okay if your blending isn’t perfect or if it looks “streaky”. The trees will disguise a lot of that! Also, it may help to add a small amount of water to your brush to help with the flow of the paint and also to help with the blending.
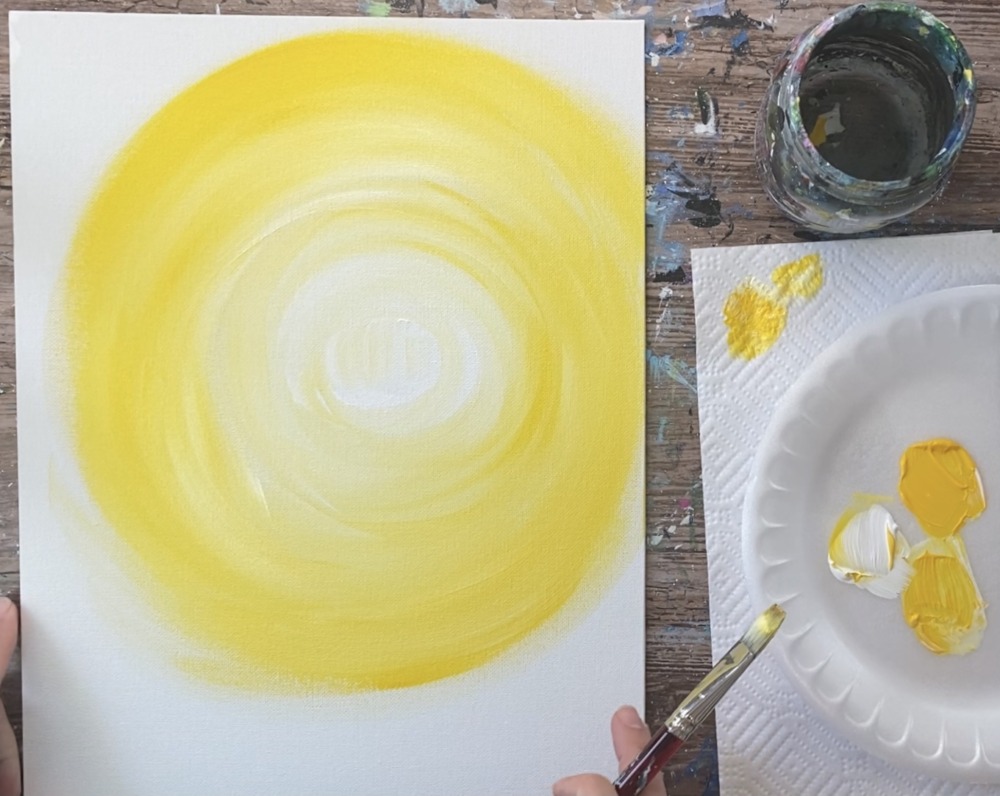
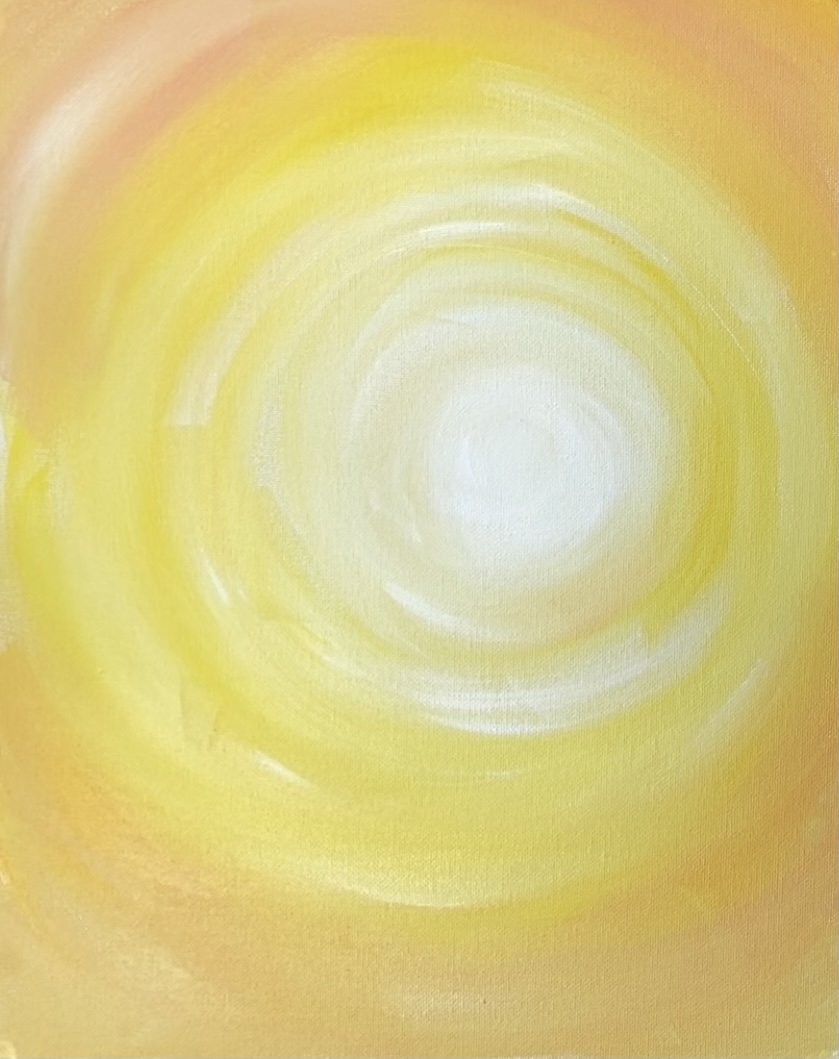
When you get to the corners, stop and mix a very very light orange color on your palette. Do this by mixing 1 part red, 3 parts yellow and about 4-5 parts white. It should be a very light almost peach color.
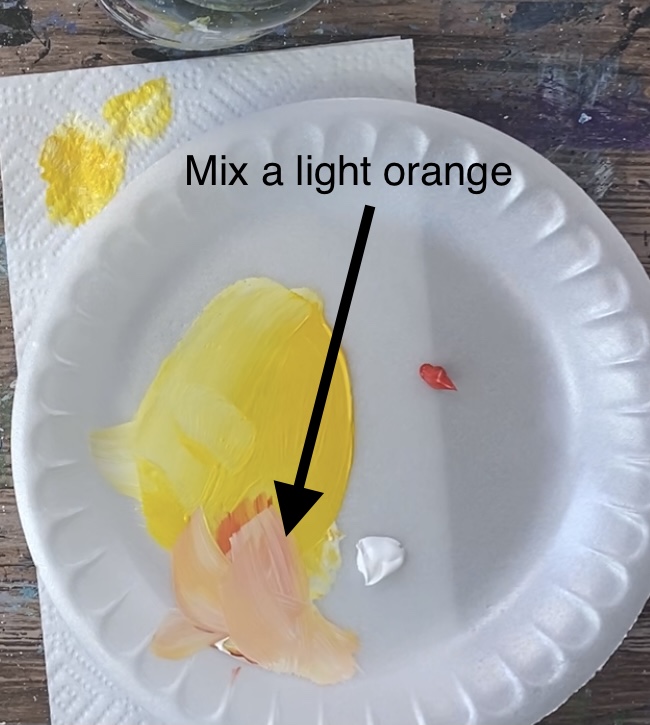
Blend that in circular strokes as you approach the edges of your canvas and the corners.
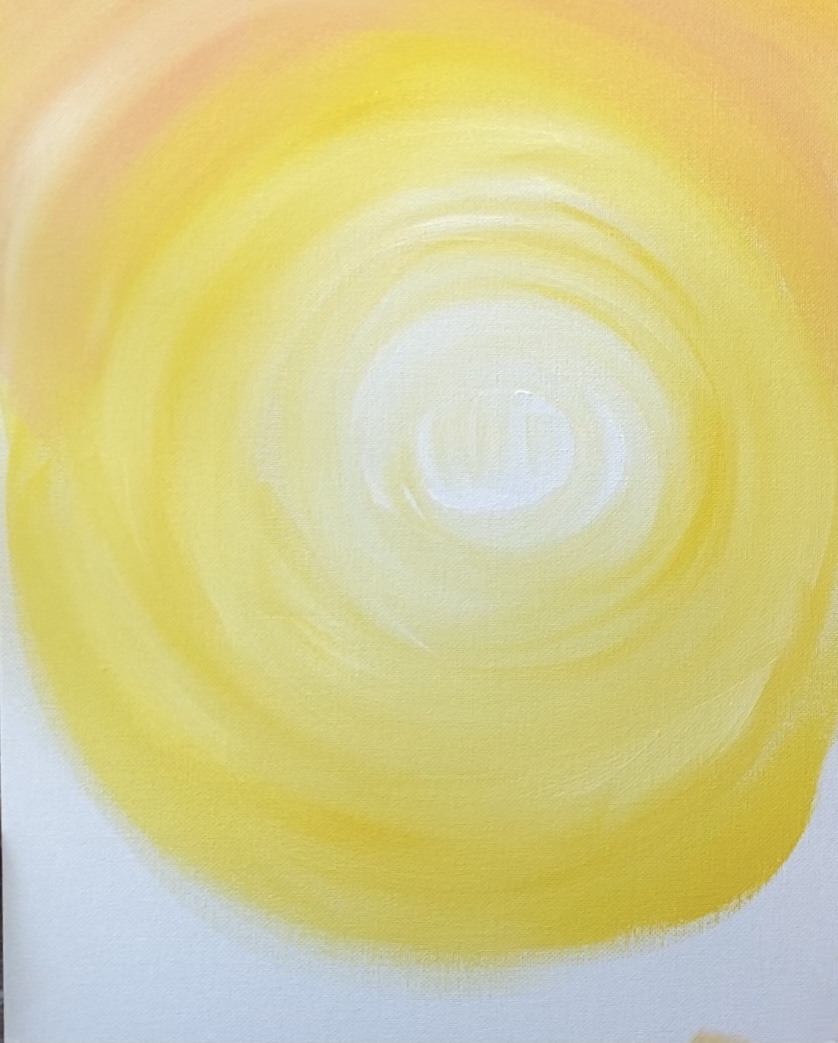
Fill the entire canvas.
Optional: You can add more white in the very center where the bright circle is. Then add some white strokes radiating outwards from it.
2. Paint The Grass
The grass in this painting consists of different shades and tints of green! It starts in the back with the lightest layer of green and then the green gradually gets dark as it goes to the bottom edge of the canvas. You will be painting the grass in rows with each row overlapping the previous row and getting darker towards the bottom.
Completely rinse and dry your 3/4″ flat wash brush. Then load your palette with phthalo emerald green (green). You are going to mix a “tint” of that green by mixing white into it to lighten it up.
Mix about 3 parts white to 1 part green (see picture of palette below).
Then paint the grass by holding your brush so you use just the tip. Paint vertical strokes across the bottom of the canvas. Start about 2 inches from the bottom of the canvas.
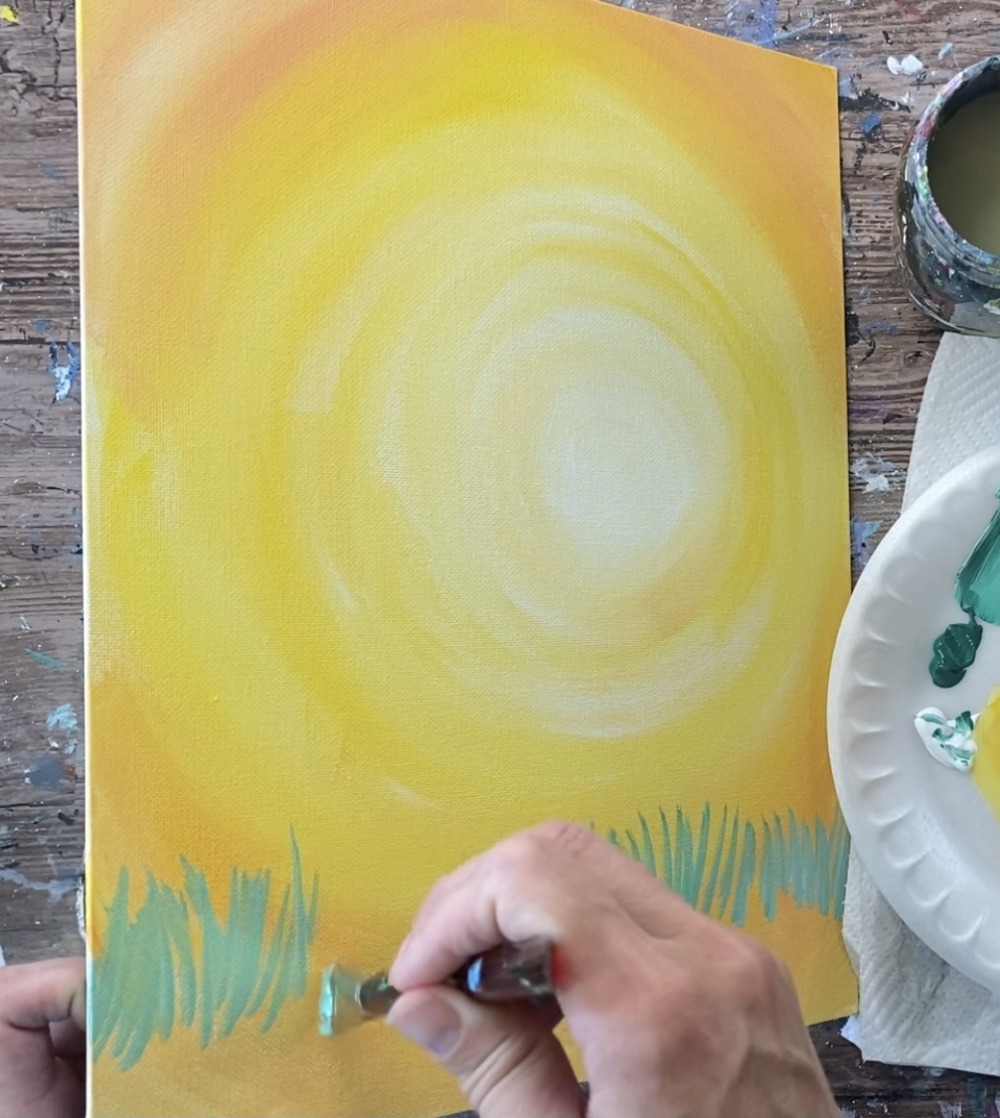
Then you will paint another layer of green grass using a different green. Mix on your palette a slightly darker green. I choose to mix yellow into my green this time! I did about 3 parts green, 2 parts yellow and 2 parts white.
Then make another layer of vertical grass line strokes that overlap the first row you painted.
As you work your way down the canvas, mix more green into your grass so it gradually gets darker.
This next row can be just the green not mixed with any white or yellow.
Keep painting rows of grass until you reach the bottom of the canvas.
Optional: you can make your bottom row of grass a darker shade of green by mixing a very tiny bit of black into the green.
Wait for this to completely dry before moving on to the next step.
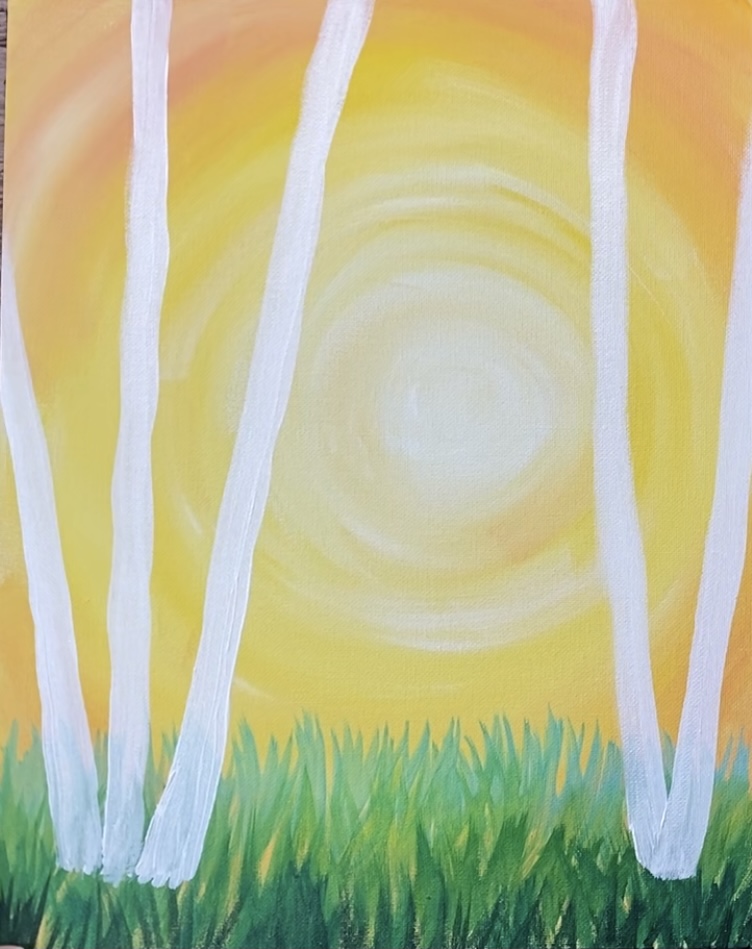
3. Paint Aspen Tree Trunks
Completely rinse and dry your brush! It is also recommended that you rinse your water out for this step so no green water gets mixed into the white paint that you will be using to paint the trees.
Load your palette with fresh white paint. Then use your 3/4″ brush to paint a vertical tree trunk starting at the bottom of the grass and going all the way to the top of the canvas.
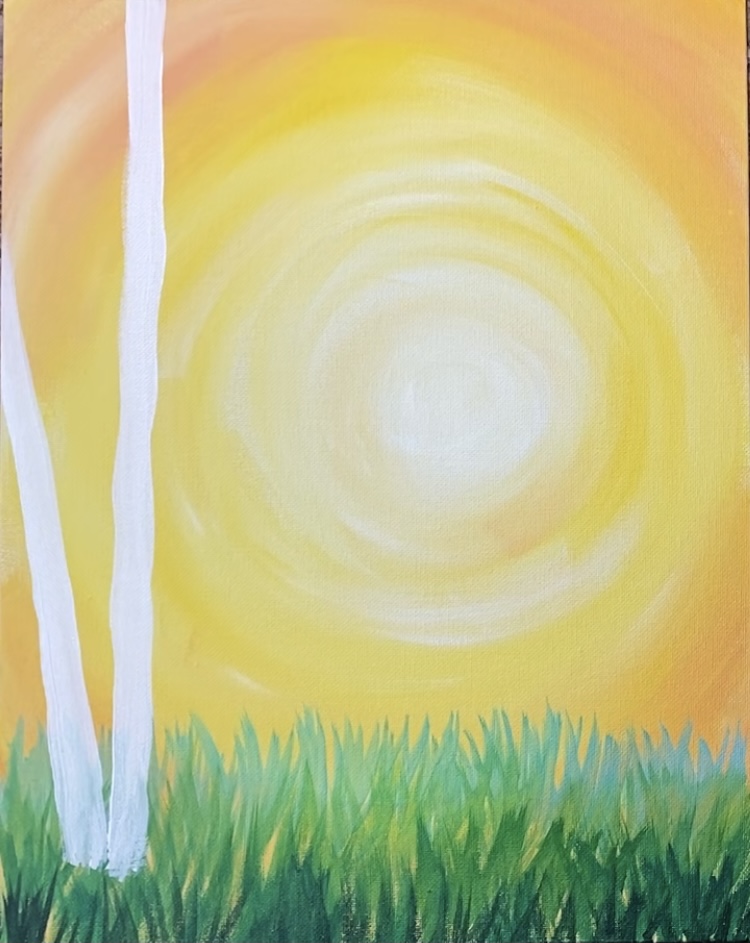
Paint five different trunks. Make them go slightly at different angles. The edges of these trunks do not have to be straight. They can be slightly uneven. You can also choose to paint more than five (or less than five) trees. I just made sure the sun was showing in between the trees.
Then use the tip of your brush to paint some smaller branches towards the top. These are very simple “Y’s” sticking out on the left and right of the trunks.
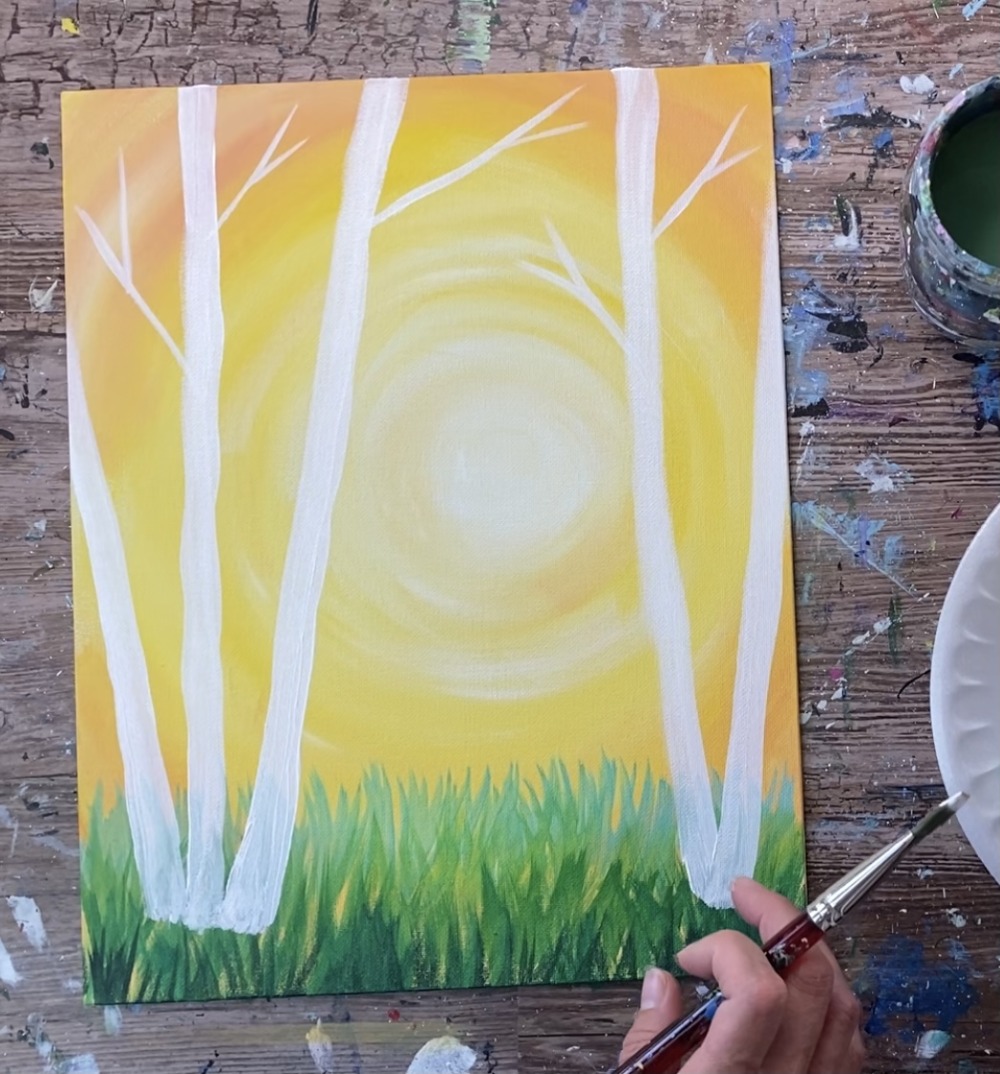
Optional: paint some black “Y” branches too!
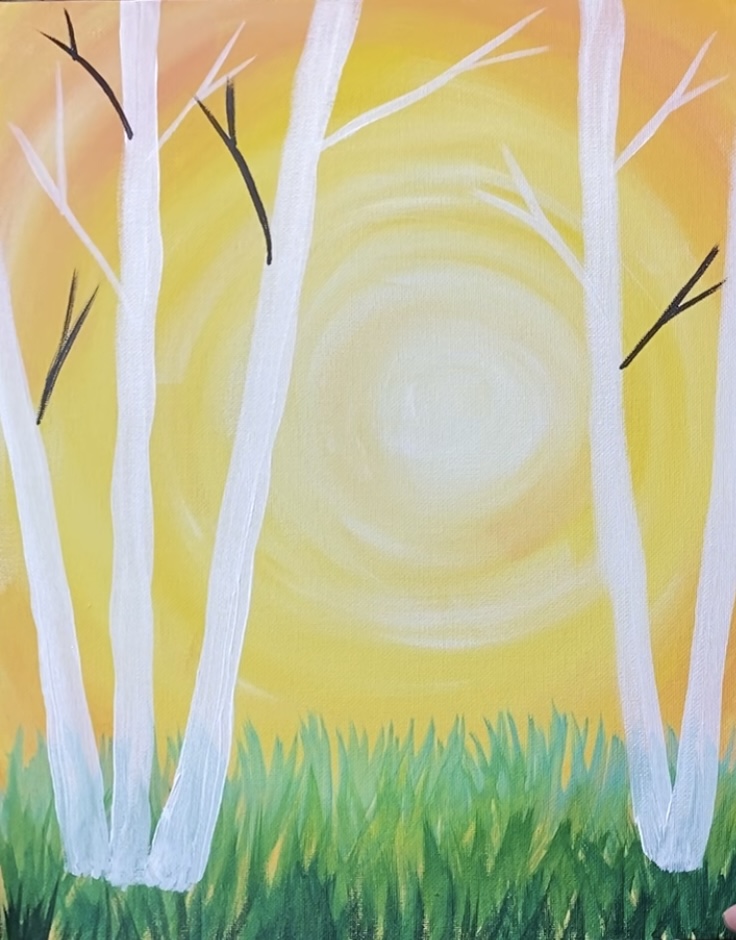
4. Paint Black Marks On Tree Trunks
The marks are very simple and require the “dry brush” technique. Basically you load the tip of your brush in black paint and then wipe off your brush with a paper towel.
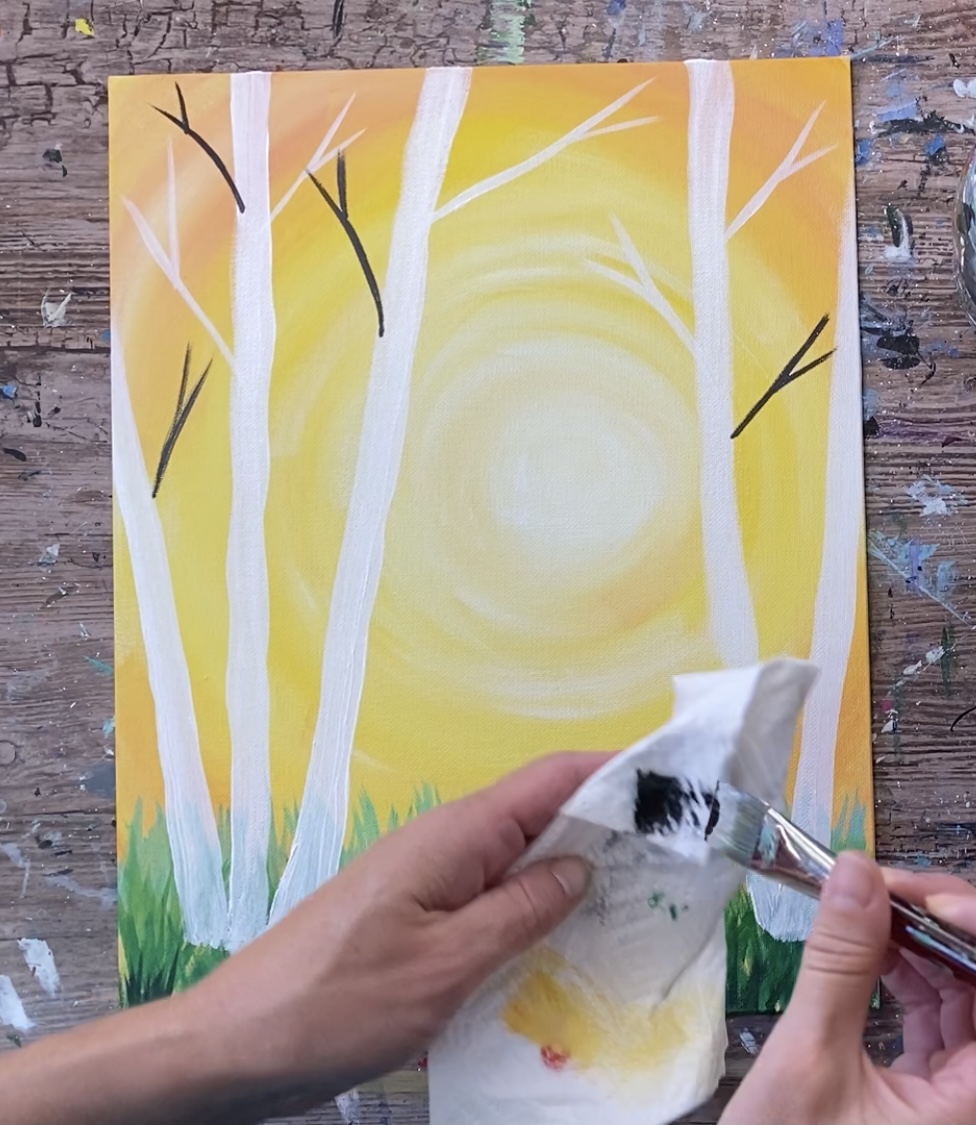
Hold the brush so the tip is vertical. You will be slightly dragging the brush from the left of the trunk to the right. It will make a dry mark on the tree.
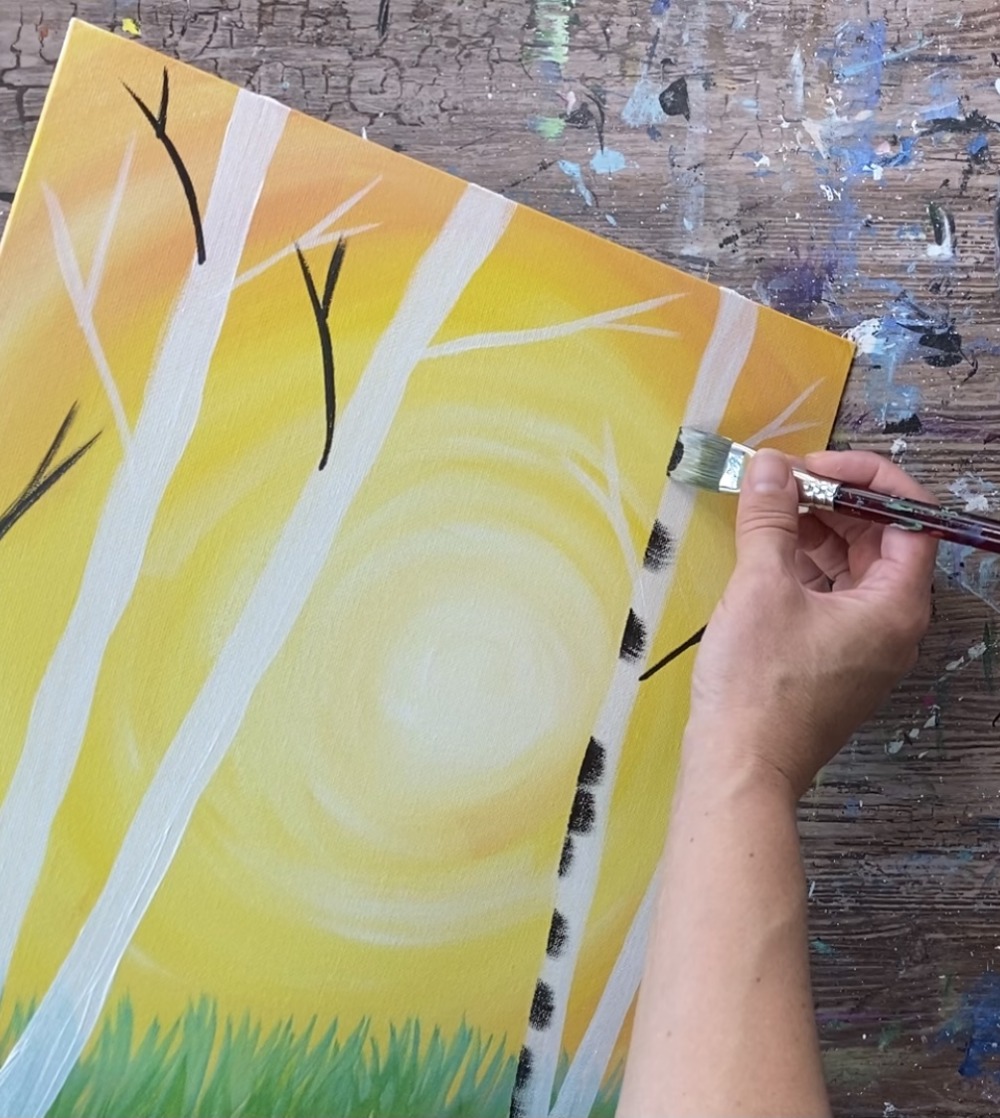
The stroke should be dry and somewhat see through. You may need to wipe off more paint if it is showing up too dark.
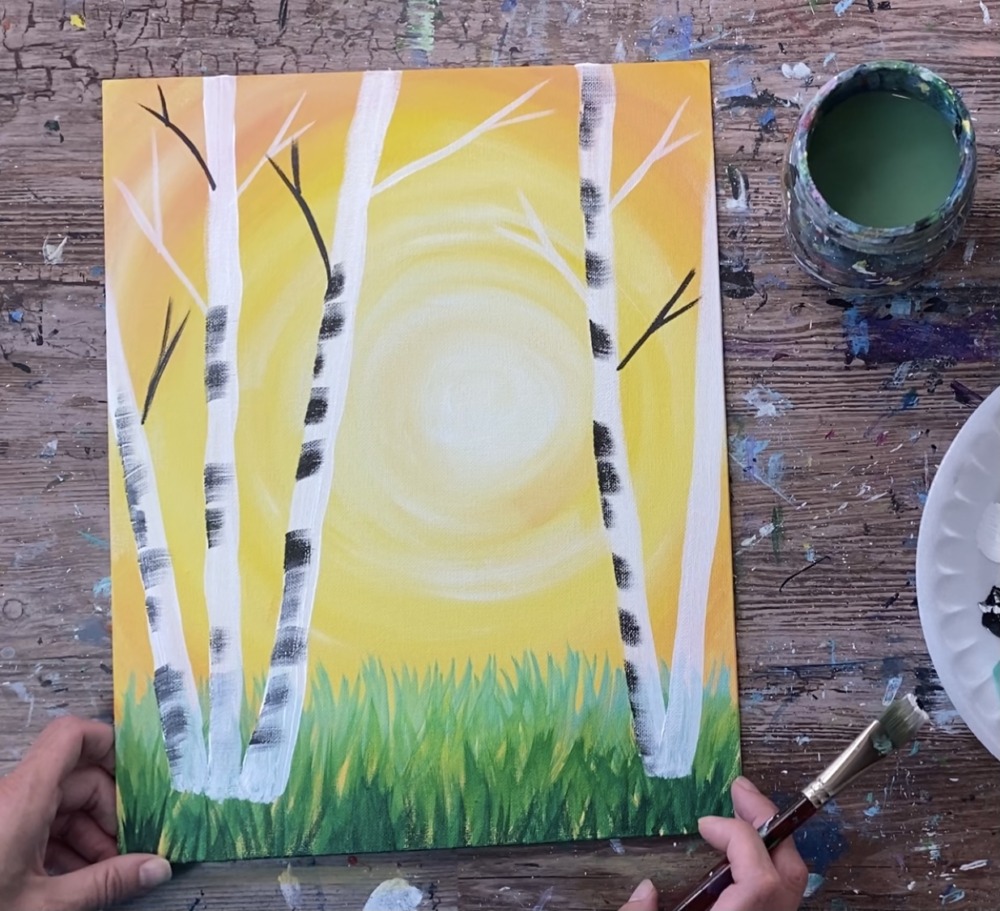
Continue to make more dry brush marks up the tree trunks. Try to make a variety of thicknesses in the strokes. You can also vary the darkness or lightness of the stroke.
Optional: at the base of your trunks you can paint dark grass strokes so that it overlaps part of the base. This will make it look like the aspen tree trunks are “nestled” into the grass.
5. Paint The Leaves
Completely rinse and dry your brush. Load your palette with cadmium red medium hue. Then load your brush in a thick amount of the red on the tip of the brush.
Paint small rectangular marks with your brush. Paint them at various angles and sizes.

Form a sort of arch shape with the leaves in the upper area of the painting.
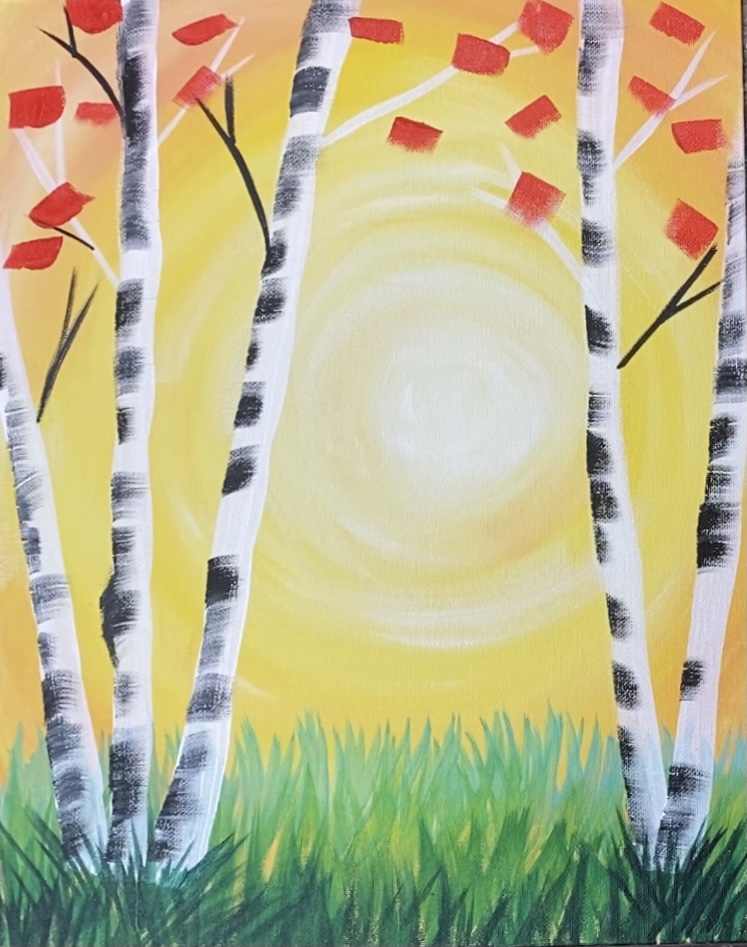
Add more colors into your leaves! Do this by mixing some yellow with red to make orange. Then add some white into the red and orange to make lighter colors. When you do this variety of color it really gives depth into your leaves!
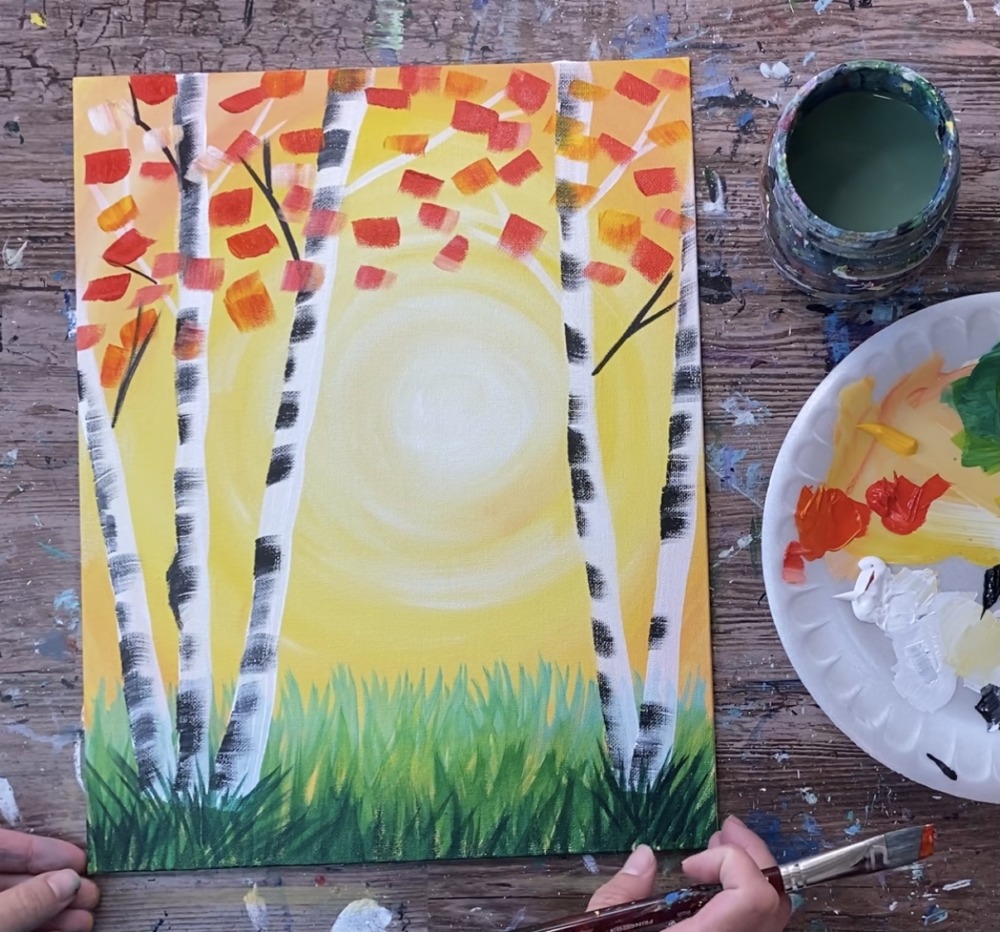
Keep filling up the top area with more leaf strokes. Try to make these strokes thick and forming an arch shape. I chose to make sure the bright sun circle had no leaves covering it.
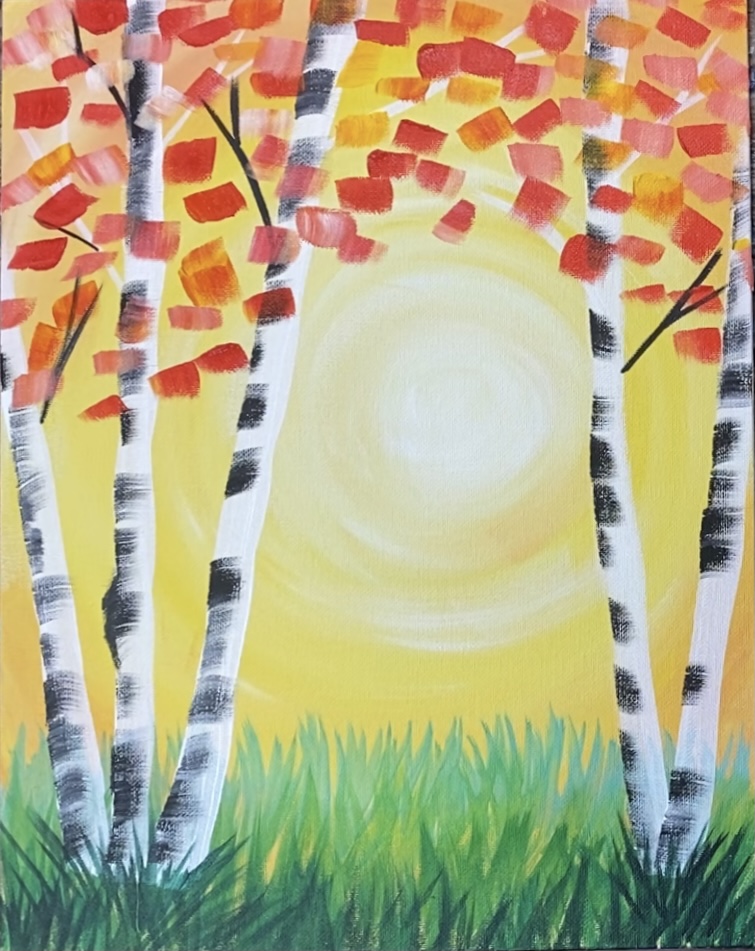
Finished!
Sign your name and show it off!
Share Your Art Here!


Hi Tracie
Just wanted to say I love your paintings Breen filling since December. I have done a few.
Thank you
Thanks for these step by step instructions, can’t wait to use them!!
You’re welcome!
Thank you so much!