

Would you like to save this?
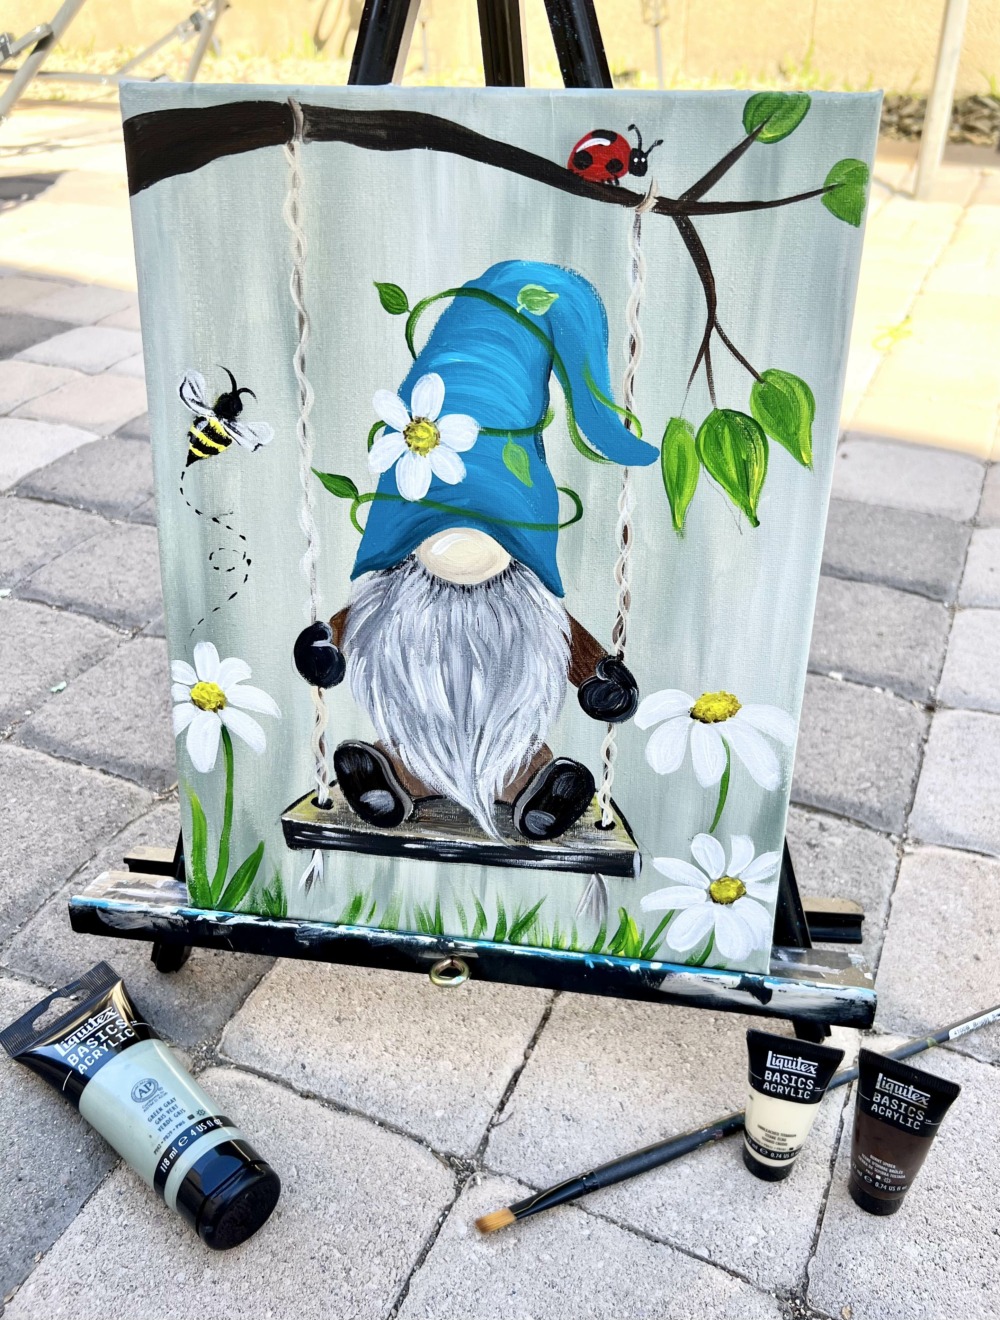
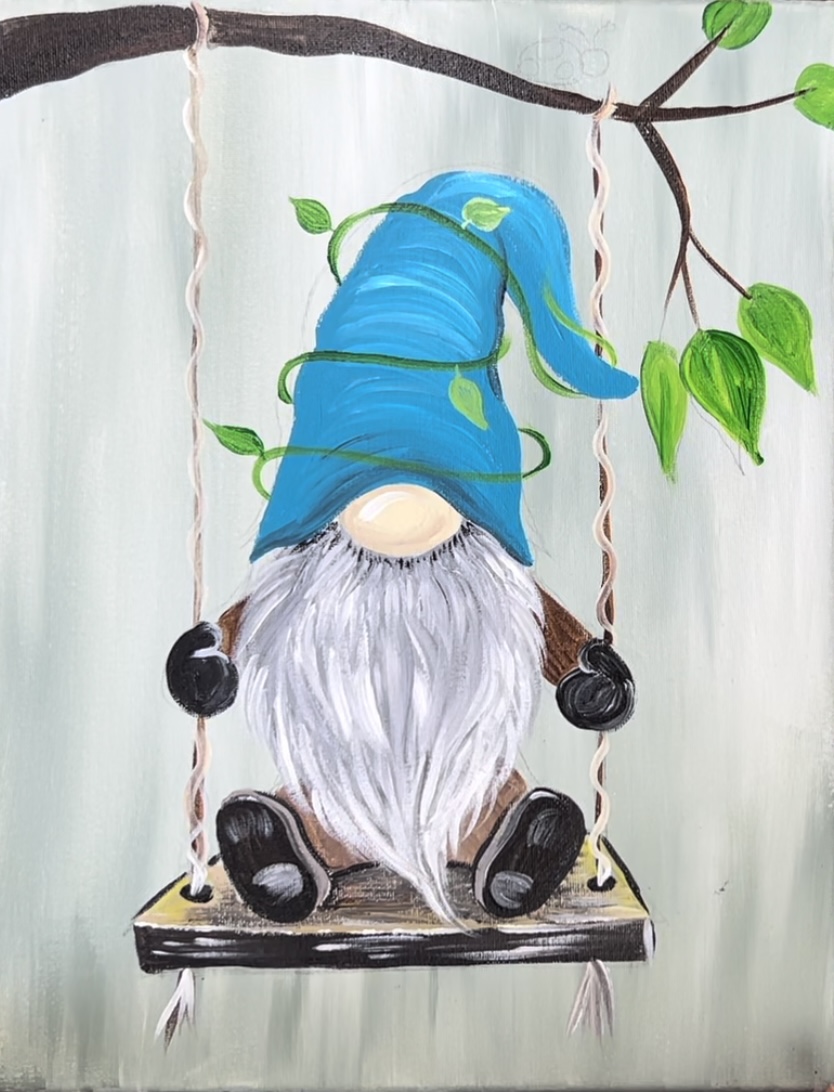
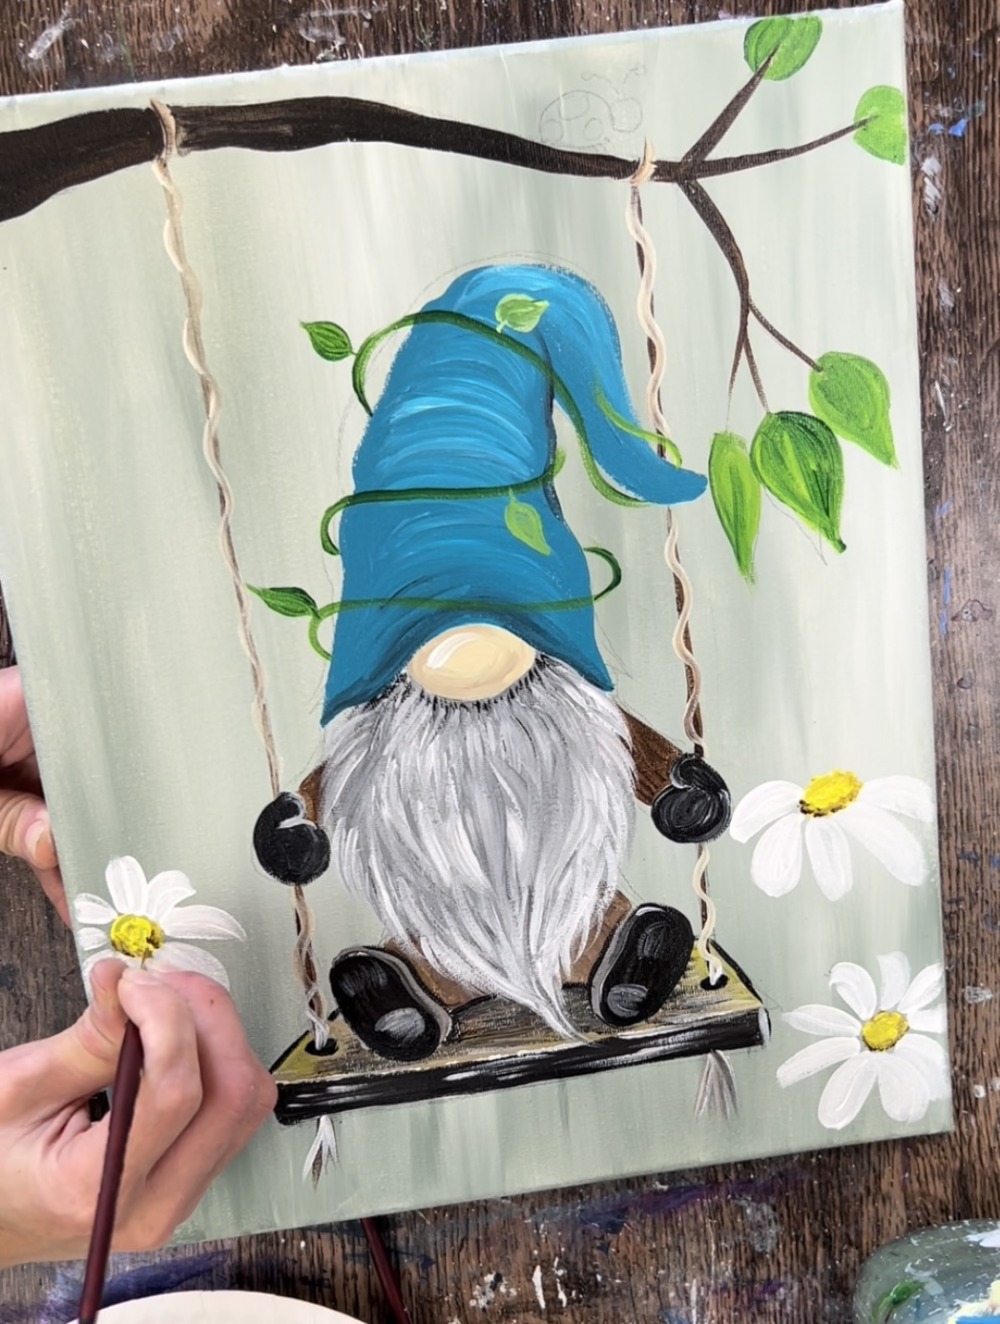
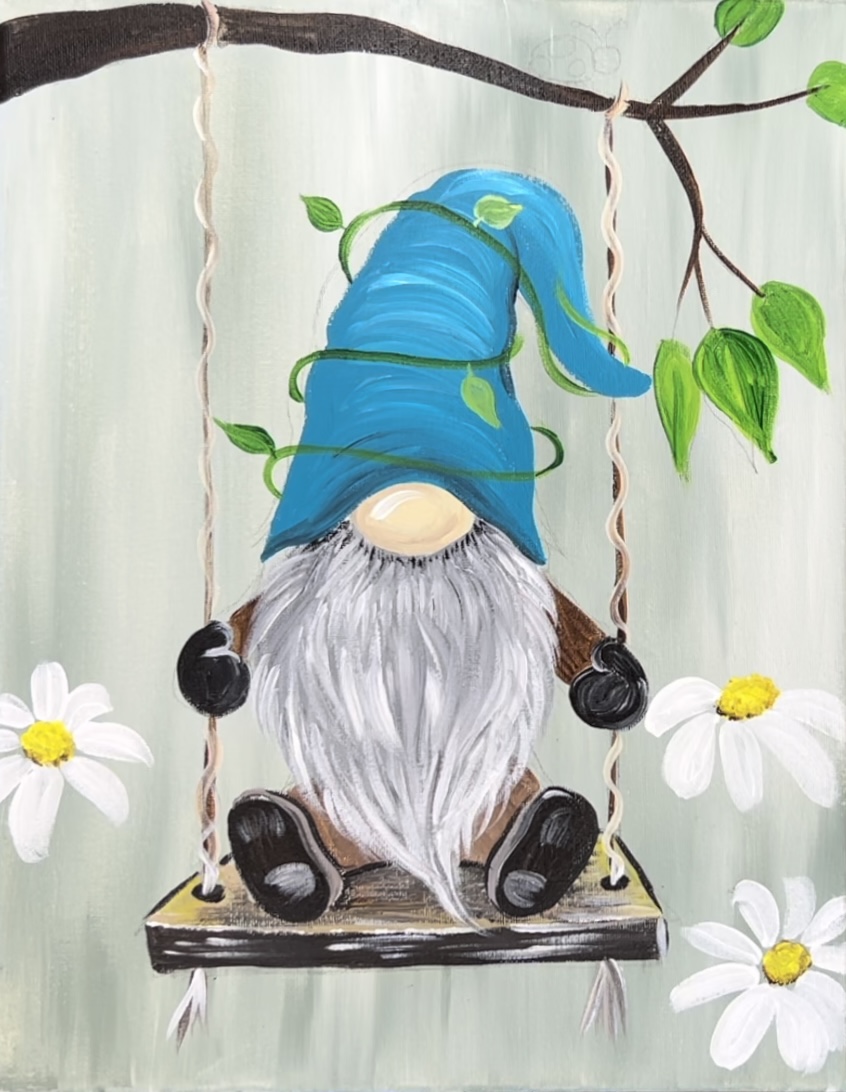
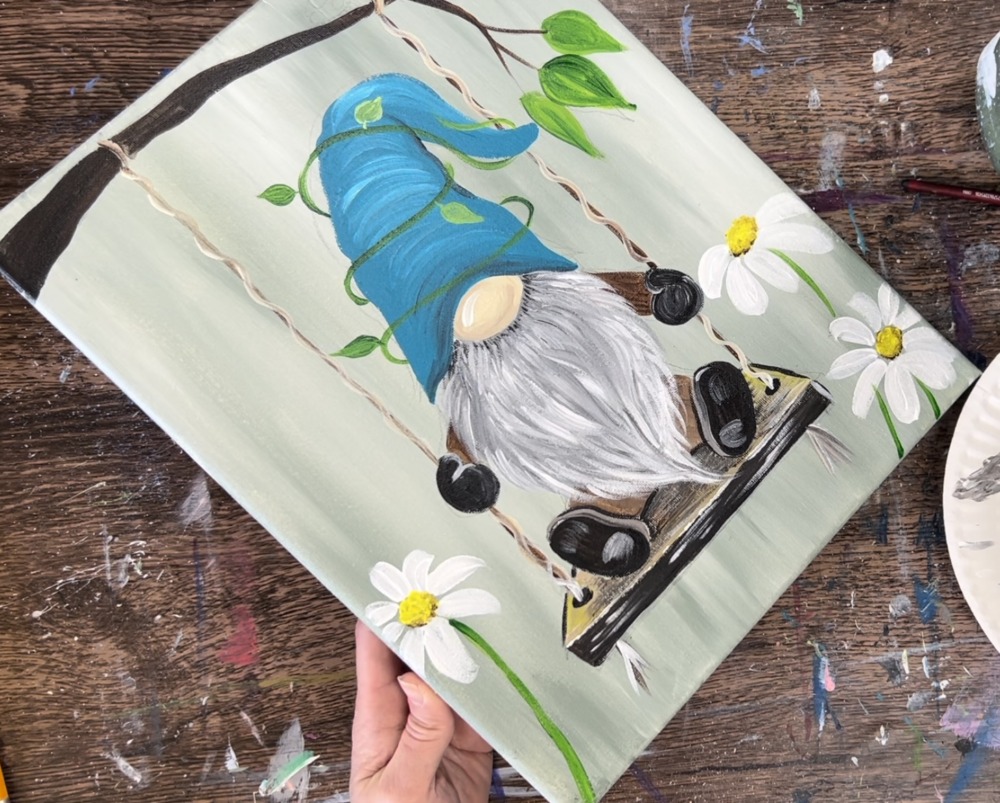
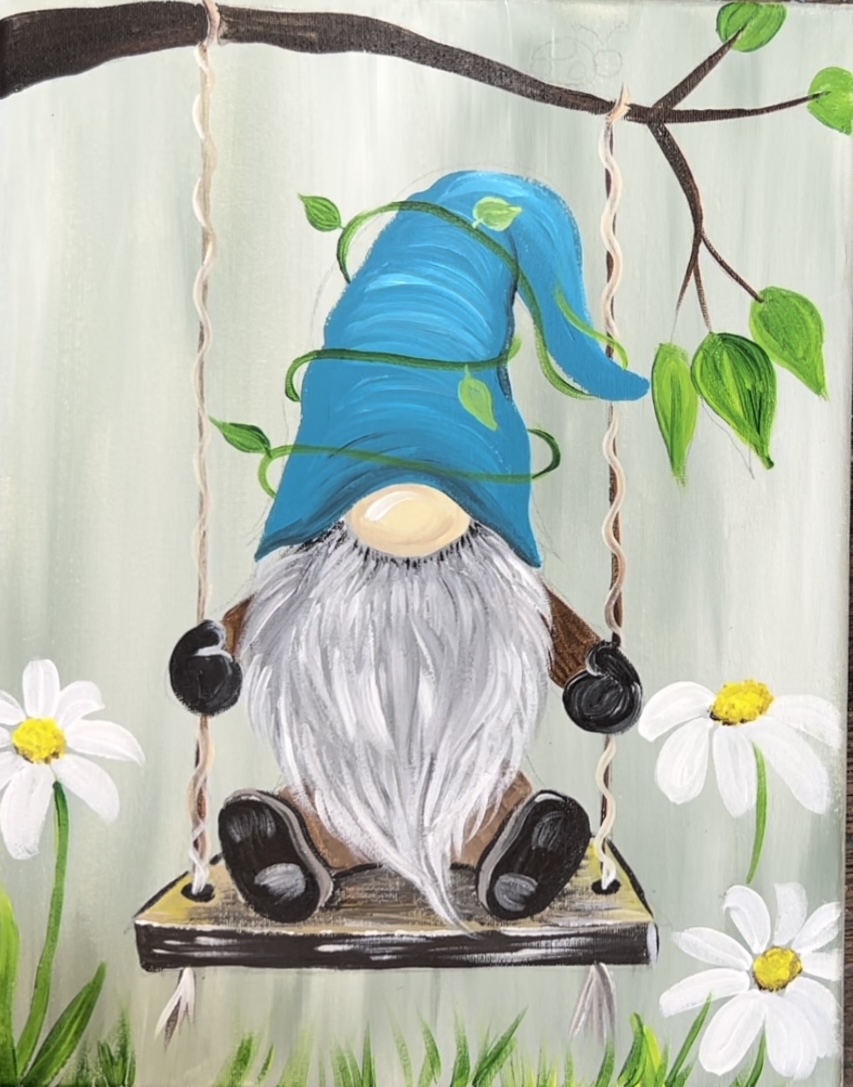
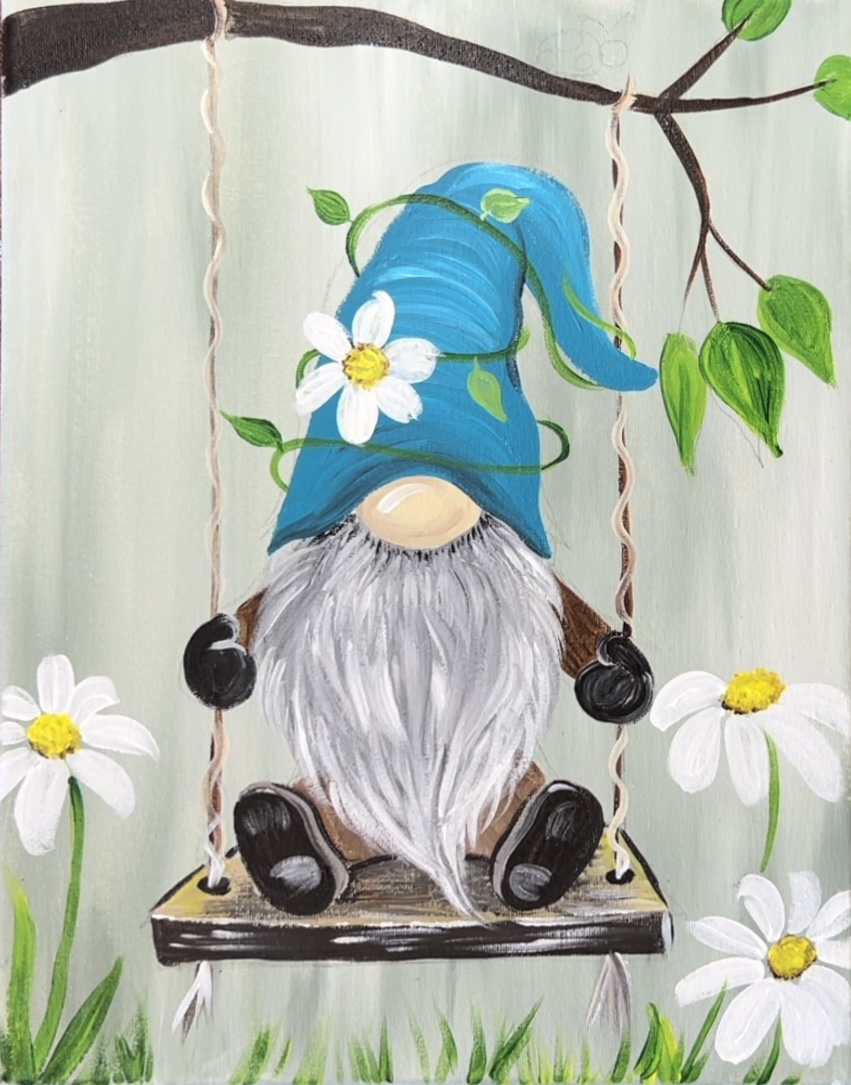
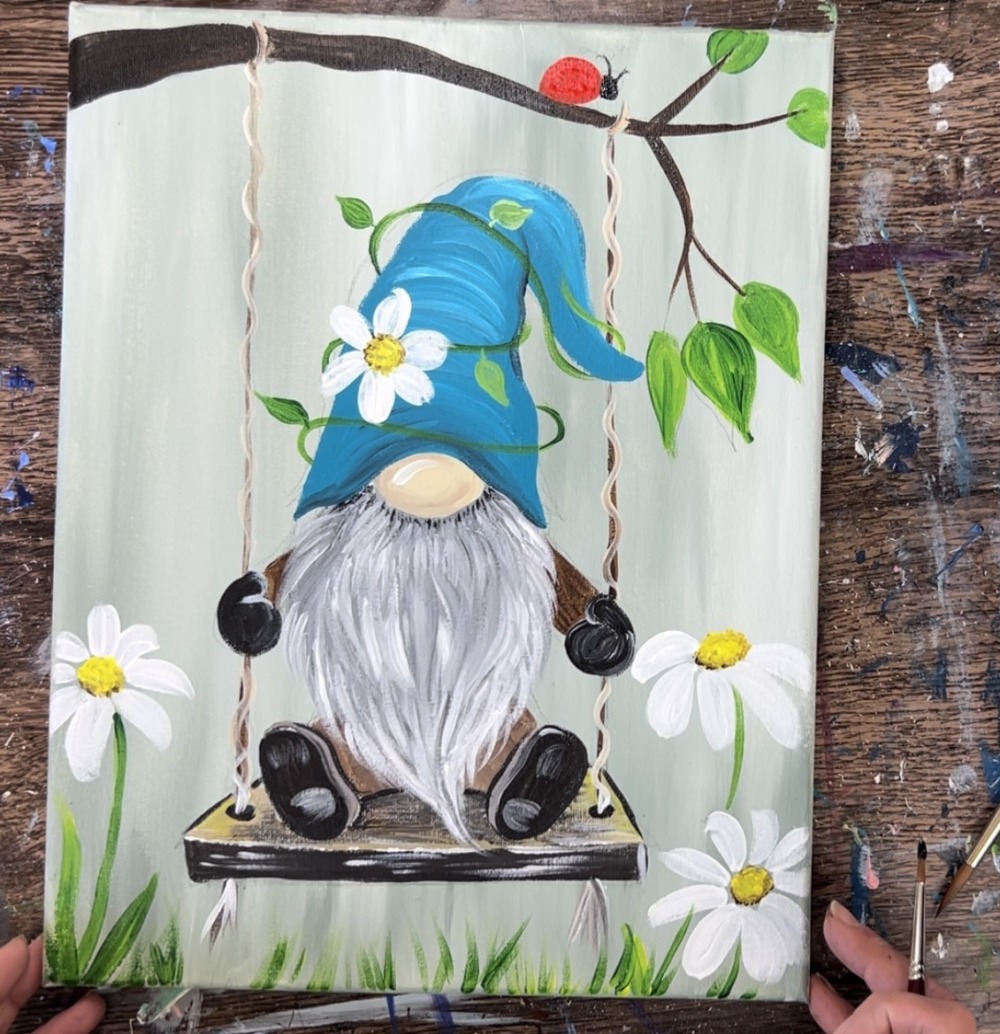
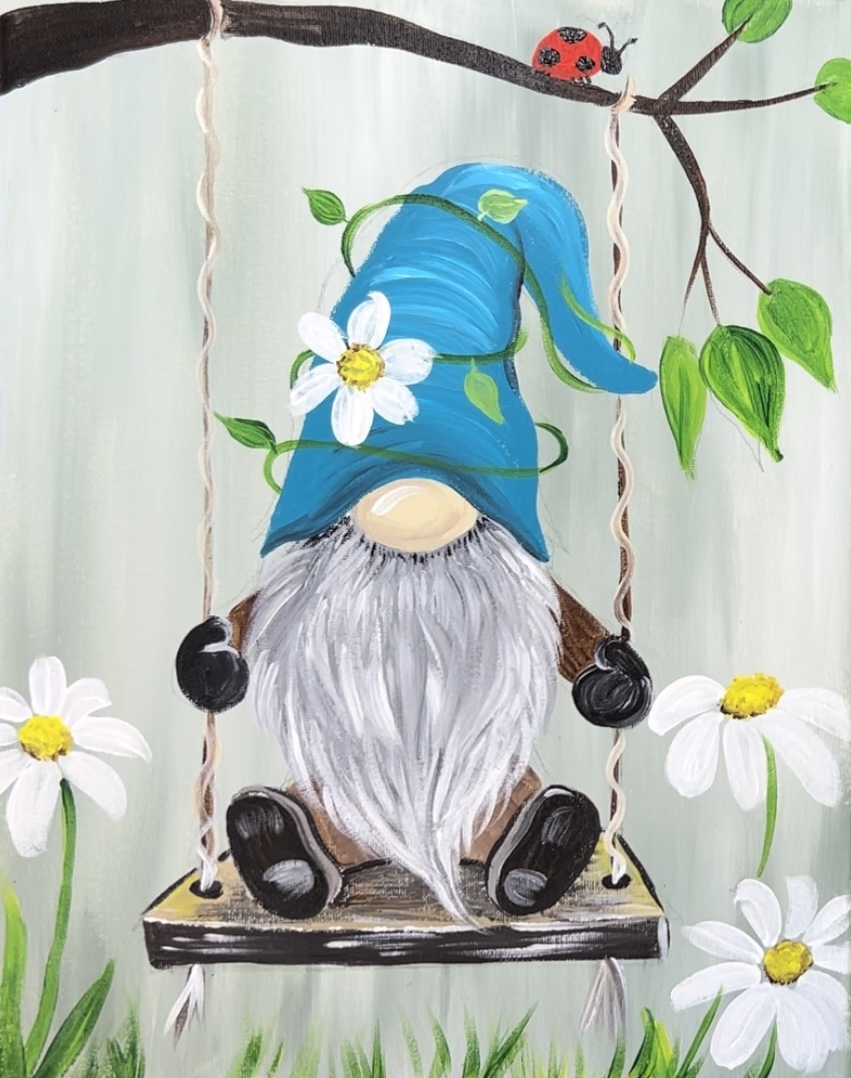
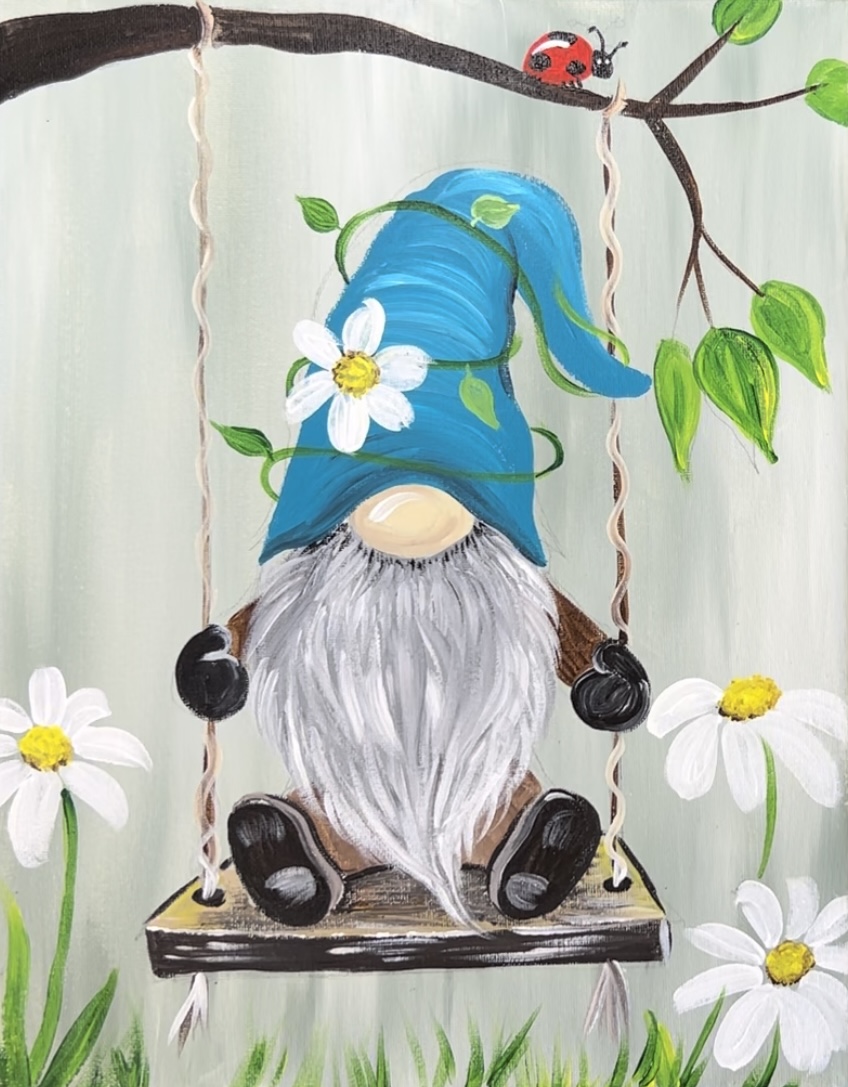
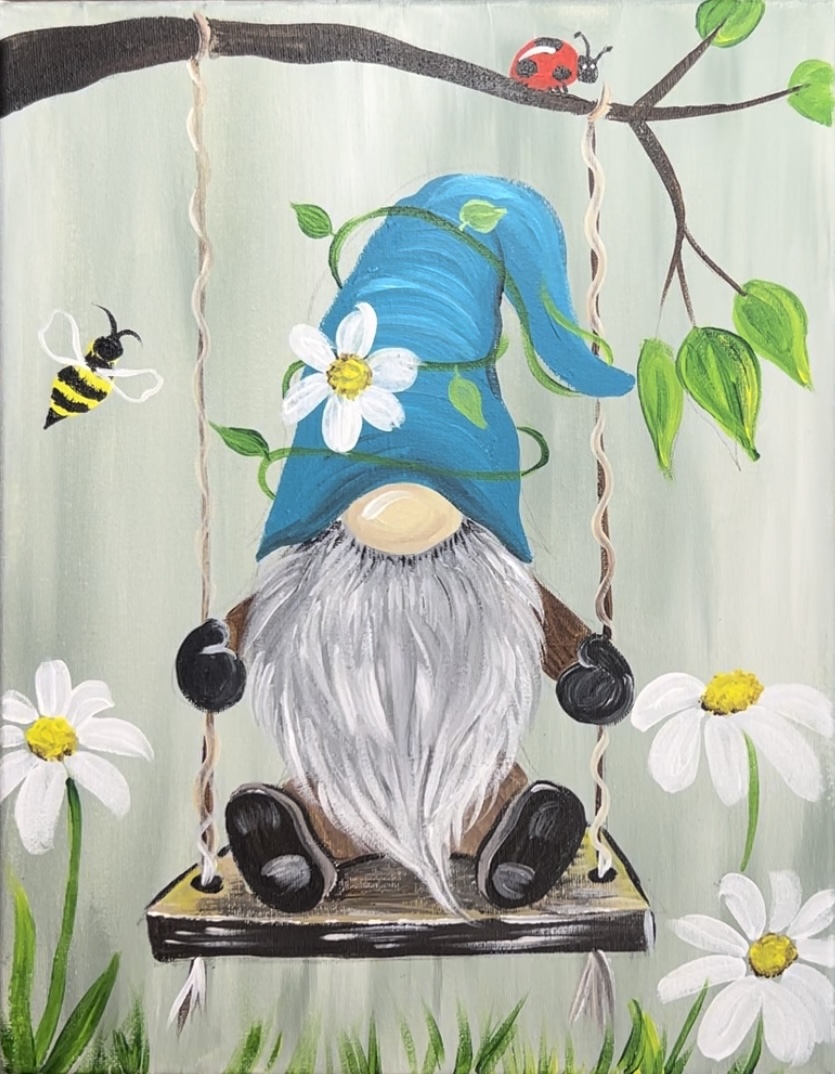
Learn how to paint a spring gnome on a swing! This spring gnome is a continuation of my gnome series and probably one of my favorites!
The tutorial is demonstrated on an 11 x 14 canvas, however, the design can work for any canvas size! There is also a template traceable for this. I will also be showing you how to draw the gnome.
Enjoy and happy painting!
Materials Needed
Spring Gnome On A Swing - Acrylic Painting Tutorial
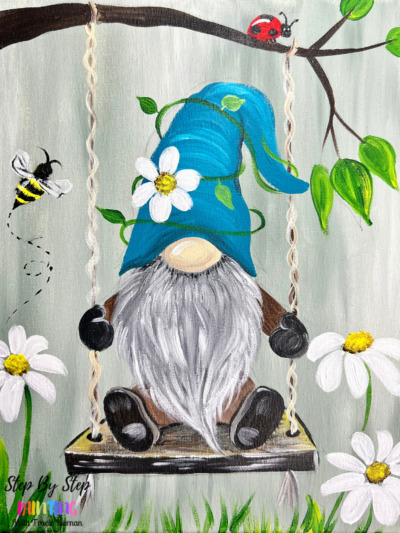
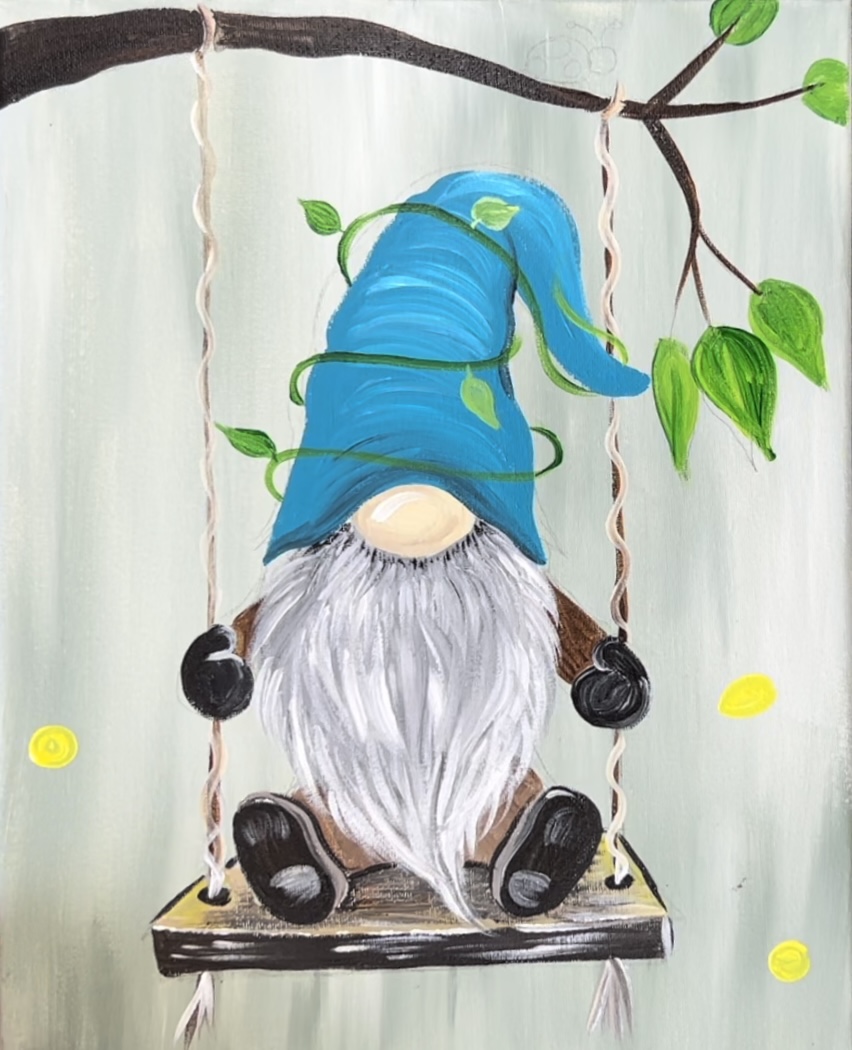
Learn how to paint a spring gnome on a swing surrounded by daisies with acrylics on canvas!
Materials
- 11 x14 Canvas
- Acrylic Paints
- Paint Brushes
- Pencil
- Optional Traceable Template
- Ruler (optional but helpful)
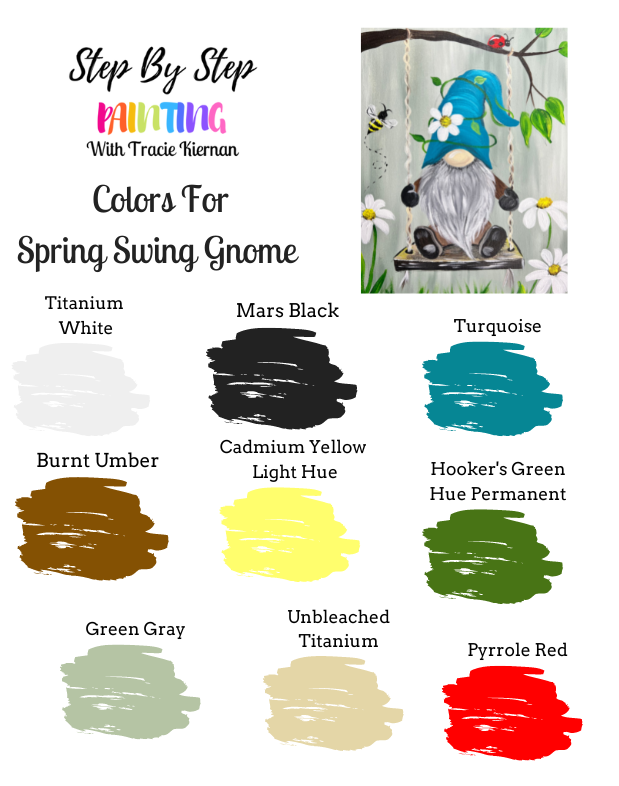
Colors
- Green Gray (see notes about how to make green gray)
- Mars Black
- Titanium White
- Pyrrole Red (just for the ladybug...you can use any red!)
- Cadmium Yellow Light Hue
- Hooker's Green Hue Permanent
- Turquoise Blue
- Unbleached Titanium
Brush Sizes
- 3/4 Flat Brush
- #8 Round Brush
- #4 Round Brush
Notes
"Green gray" is the color in the background. It's a Liquitex BASICS color. You can sub this color out for any gray or mix green gray! To make "green gray" you can mix titanium white with ultramarine blue and yellow oxide.
Color Palette
I used Liquitex BASICS acrylic paints for this tutorial. If you are using a different paint brand, you can use the color chart below to help you match colors! To make “green gray” you mix titanium white with ultramarine blue and yellow oxide.
Craft Paint Suggestions
If you are using craft paints such as “Apple Barrel by Plaid” craft paints, I would recommend subbing to these colors:
- Black
- White
- Bimini Blue (or any turquoise)
- Nutmeg Brown
- Yellow Flame
- New Shamrock
- Flag Red
- Pewter Gray (mix a little green and white into it)
- Any tan/beige color
Directions At A Glance
Traceable Template
This is optional! You’re welcome to print this out and transfer to your canvas to help you with the drawing portion of this tutorial.

Video
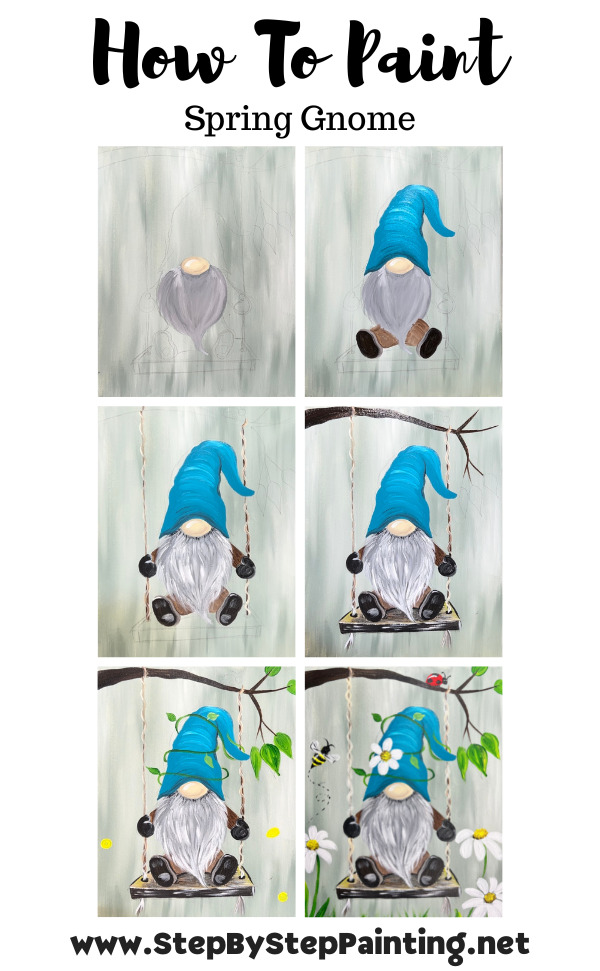
Step By Step Instructions
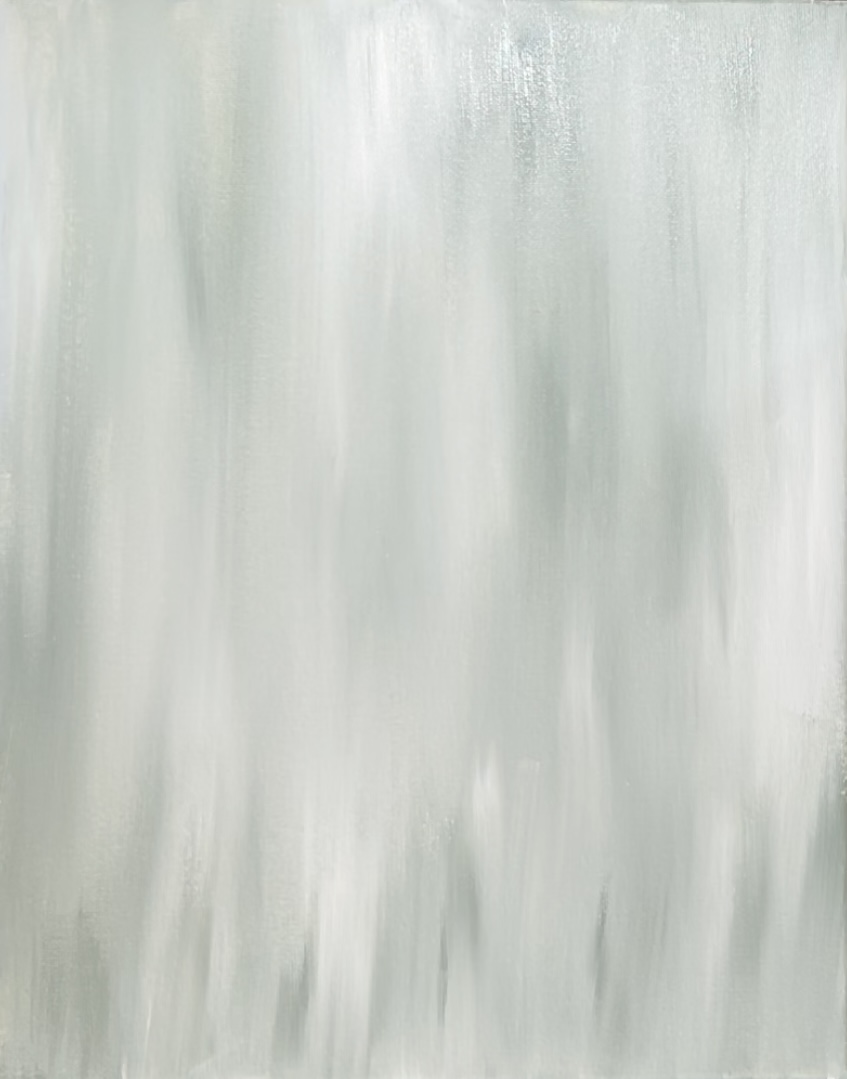
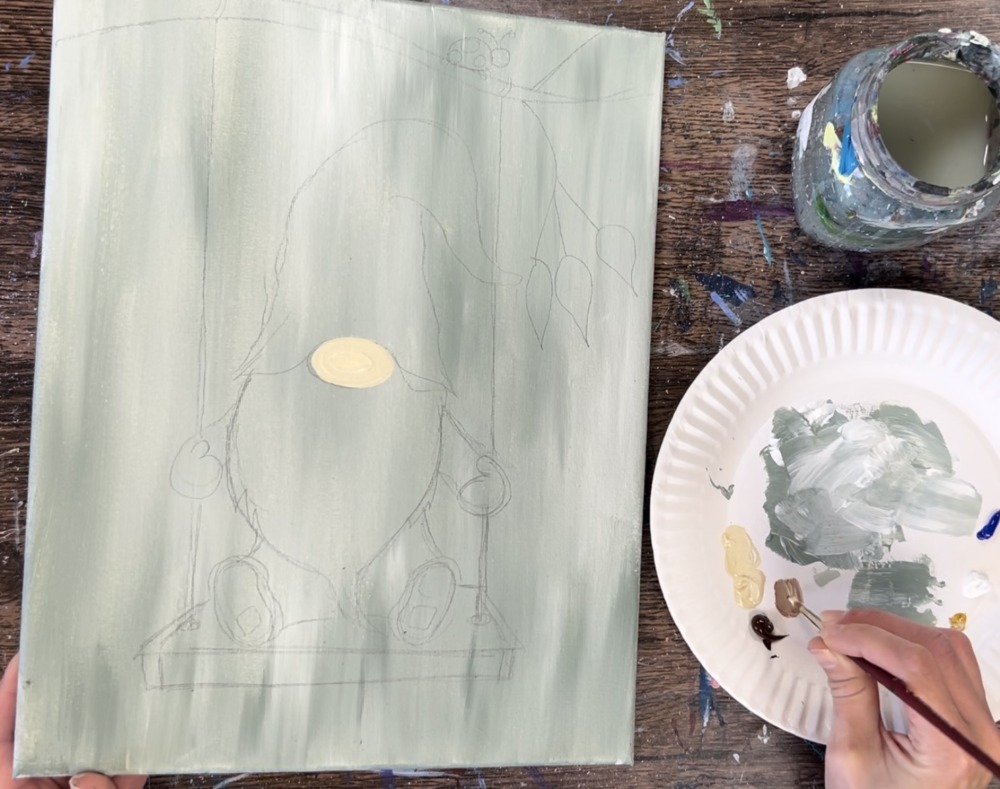
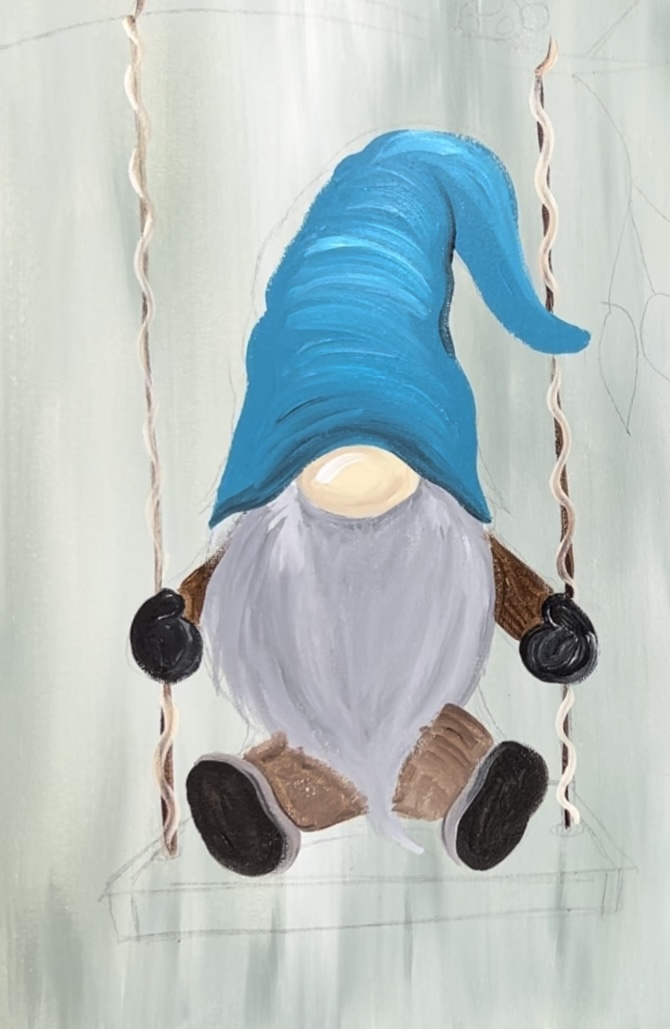
1. Paint background
The background of this painting is very simple. It is a blended mixture of the colors “green gray” and titanium white. If you don’t have “green gray”, you can mix the colors: titanium white, ultramarine blue and yellow oxide together to make this exact color.
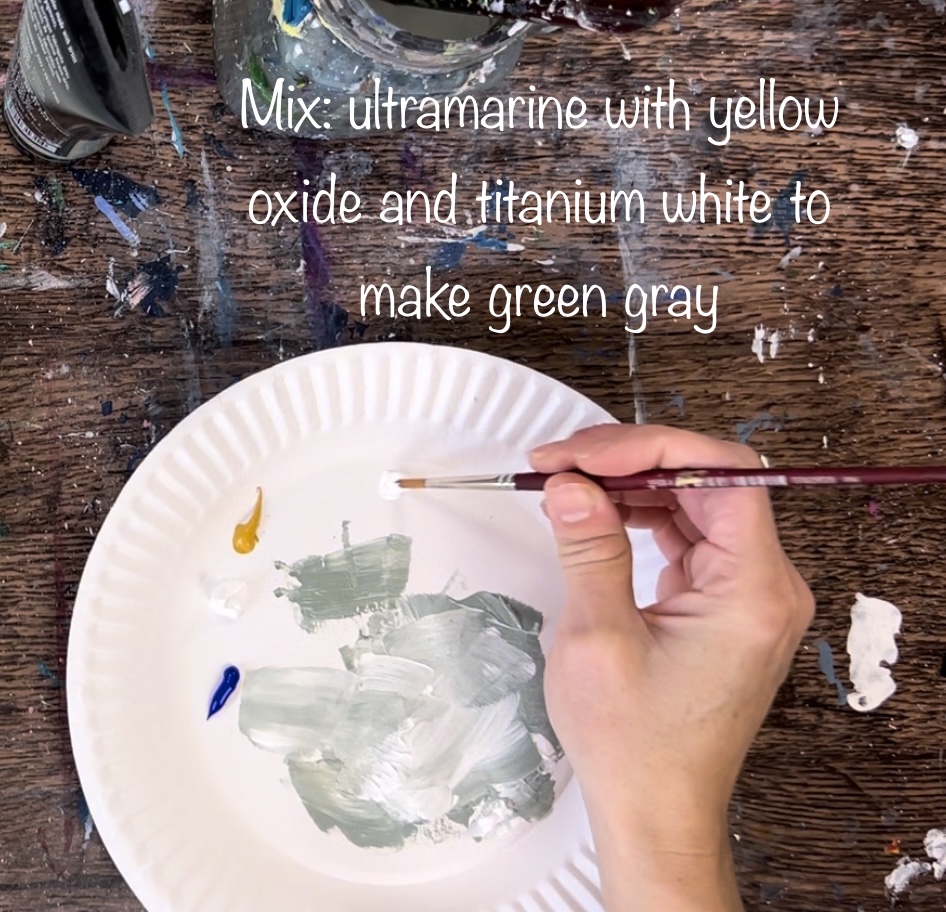
Load your palette with “green gray and titanium white”. Use a 3/4″ flat wash brush. Double load it into both colors (about equal amounts of each color).
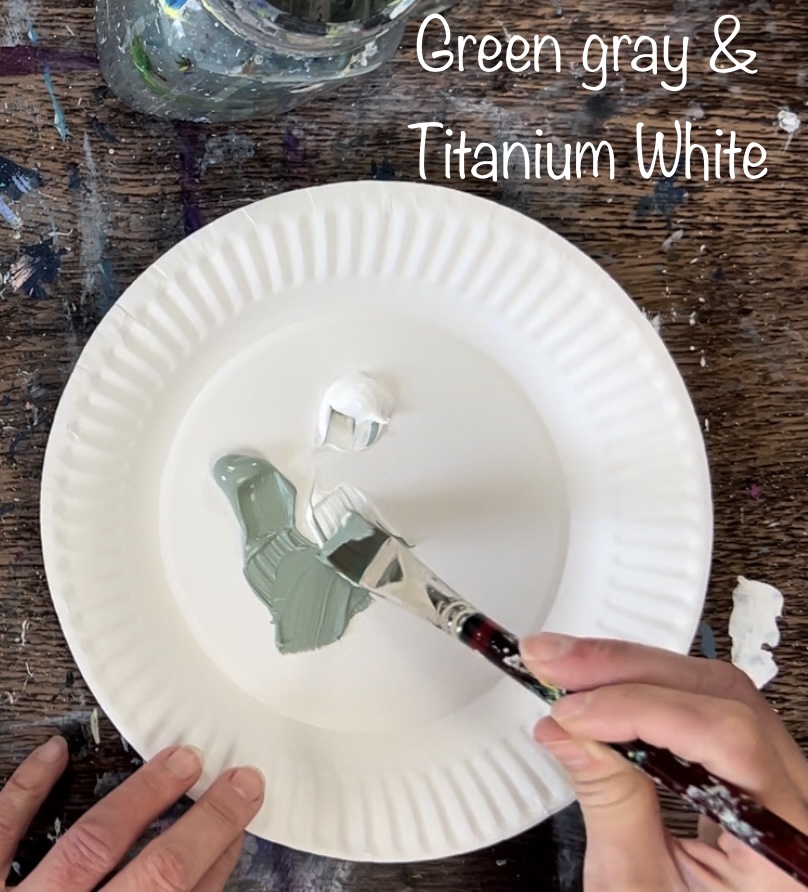
Then paint up and down vertical strokes all throughout the canvas gently blending the two colors.
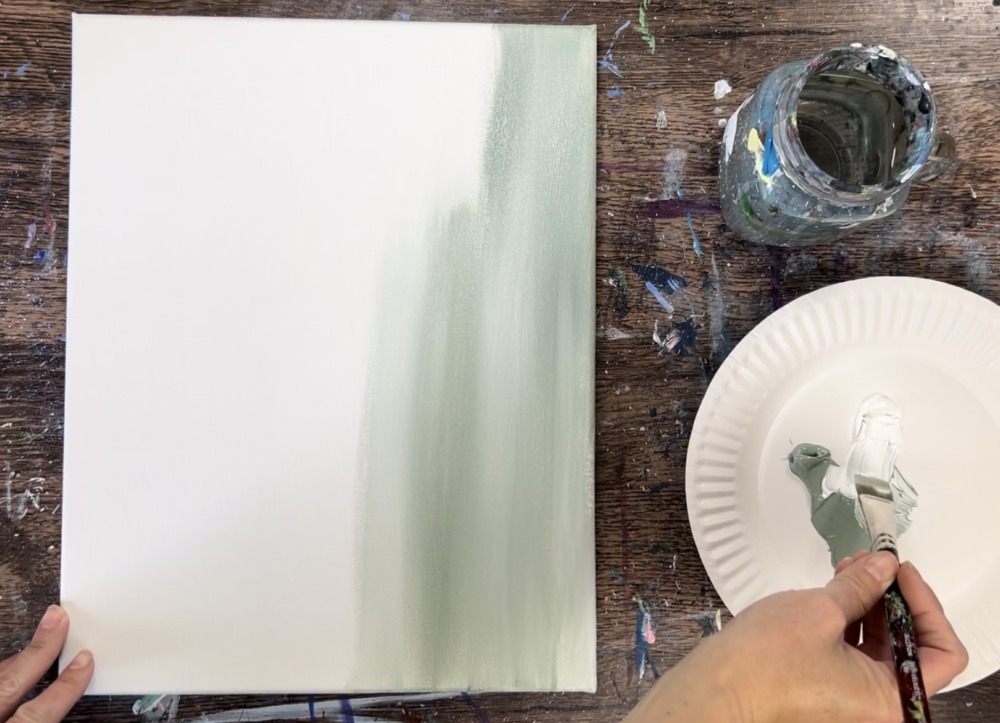
I tried not to “over blend” the colors. This gives it more of an abstract blended look.
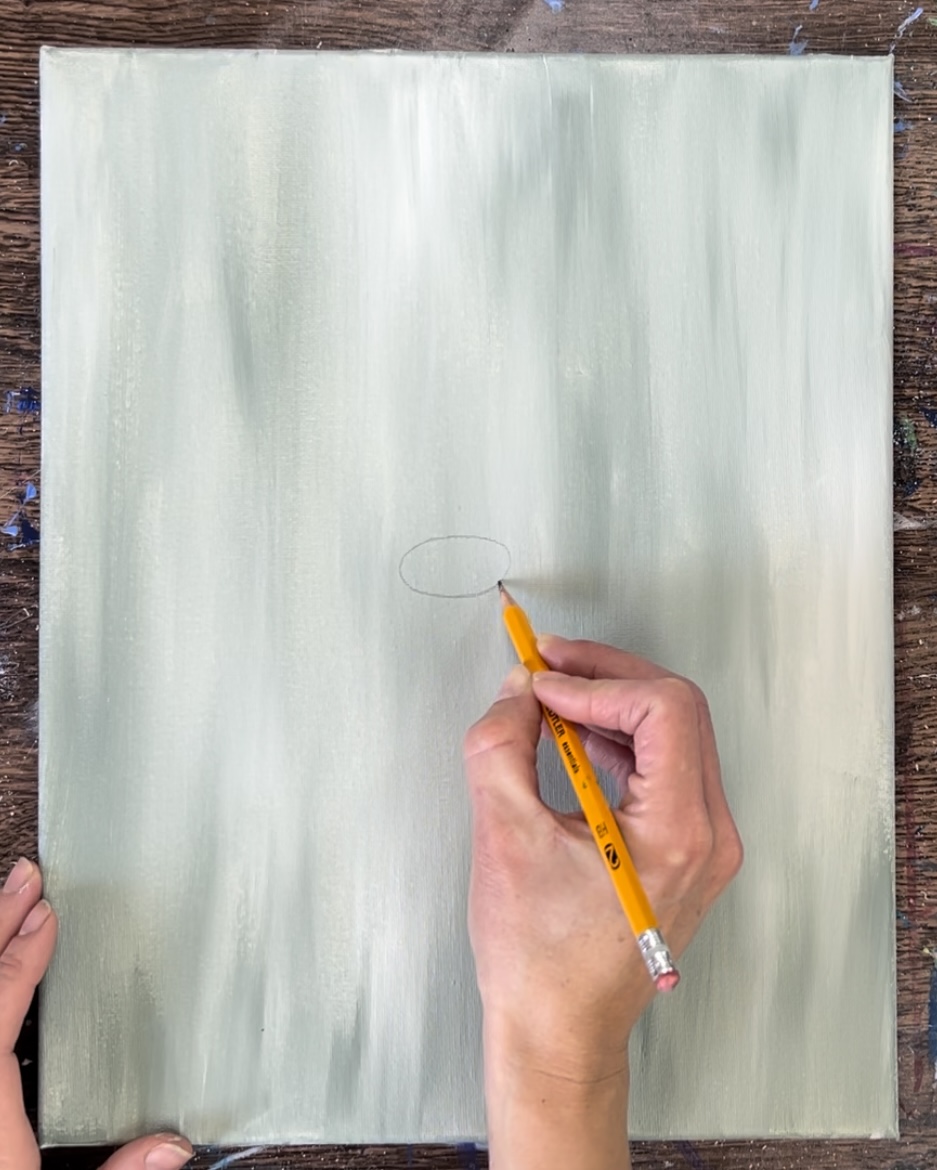
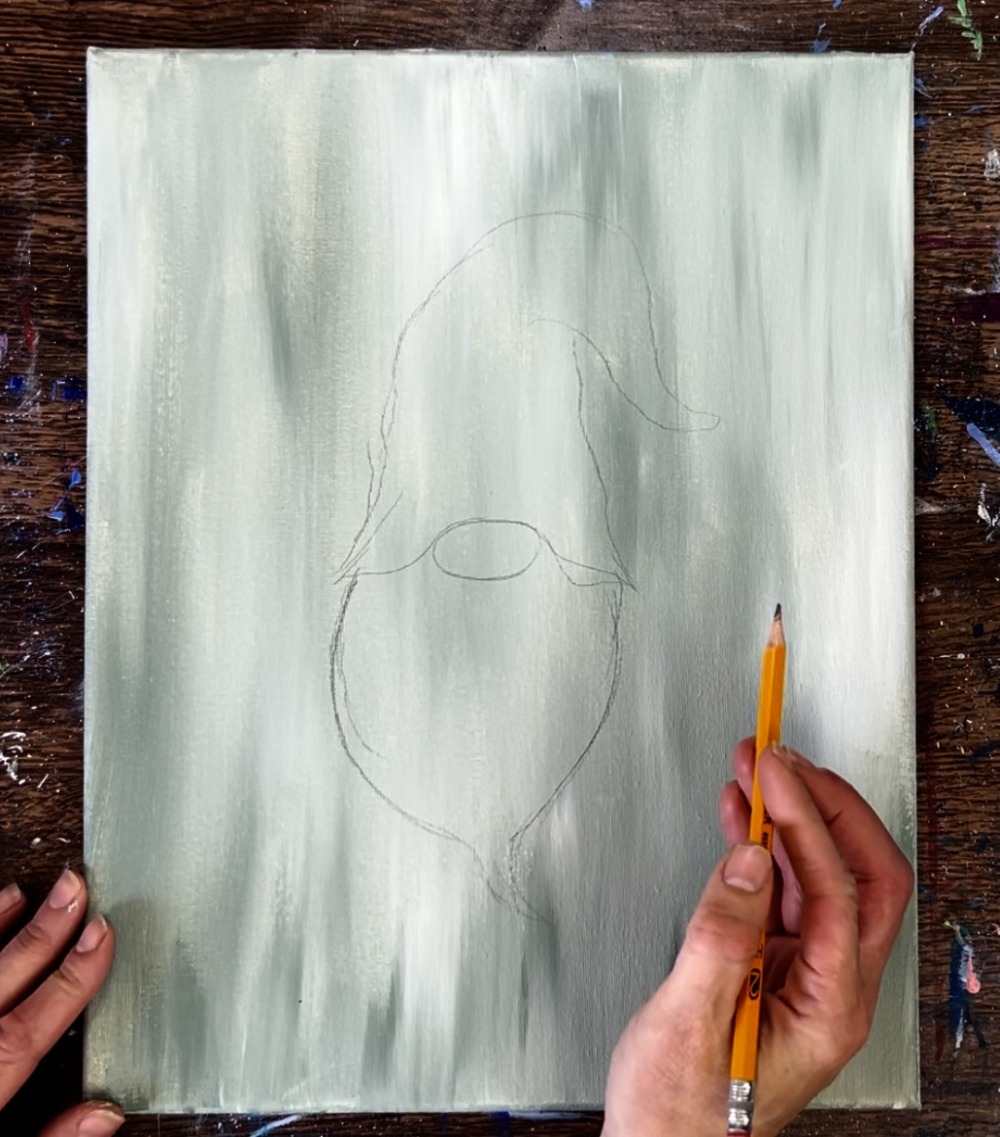
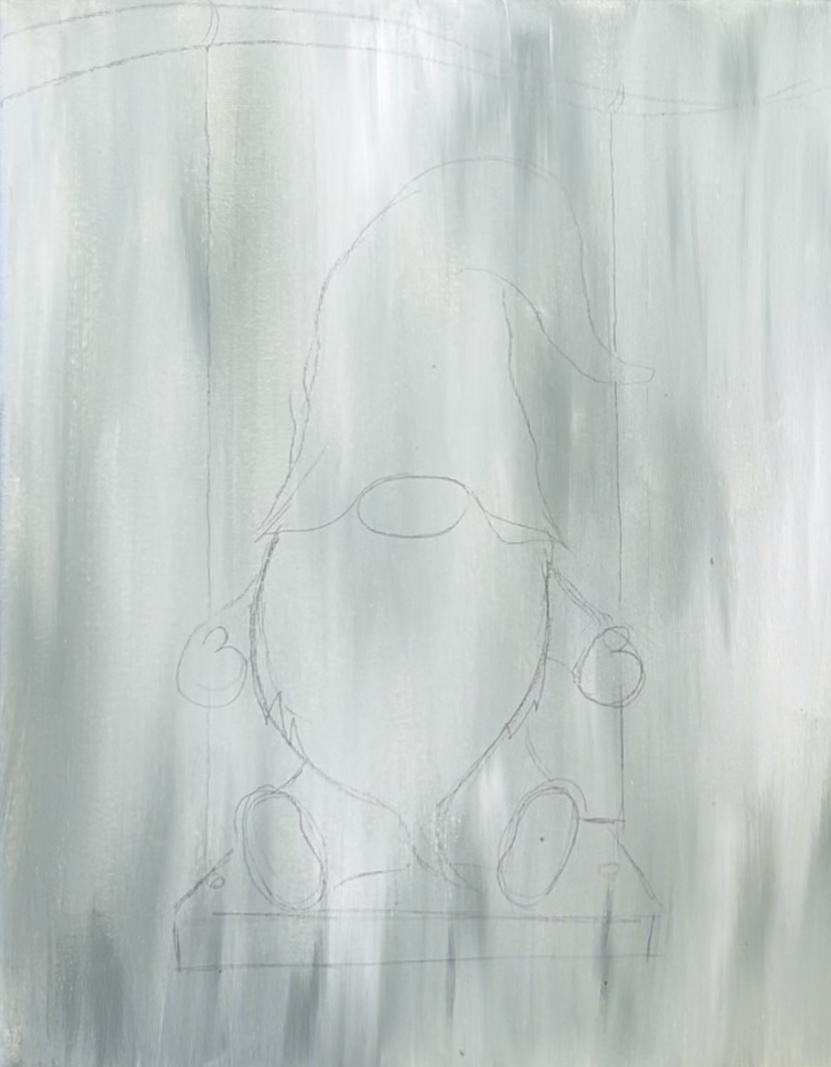
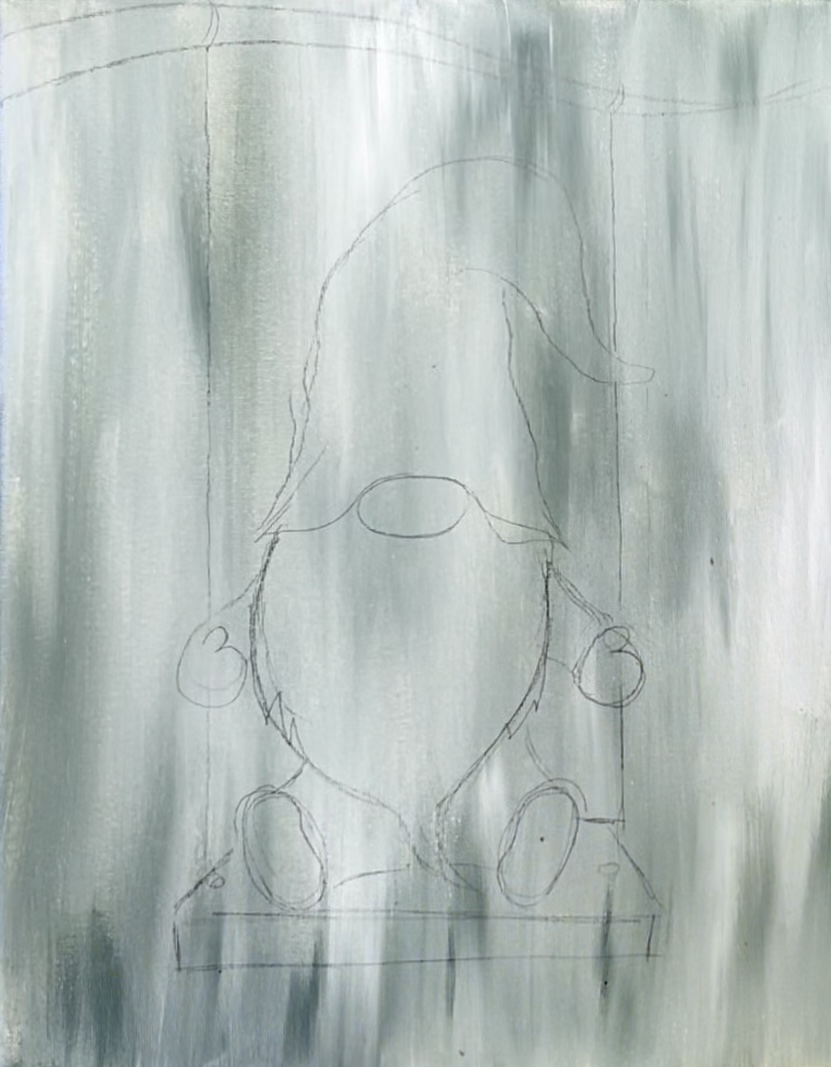
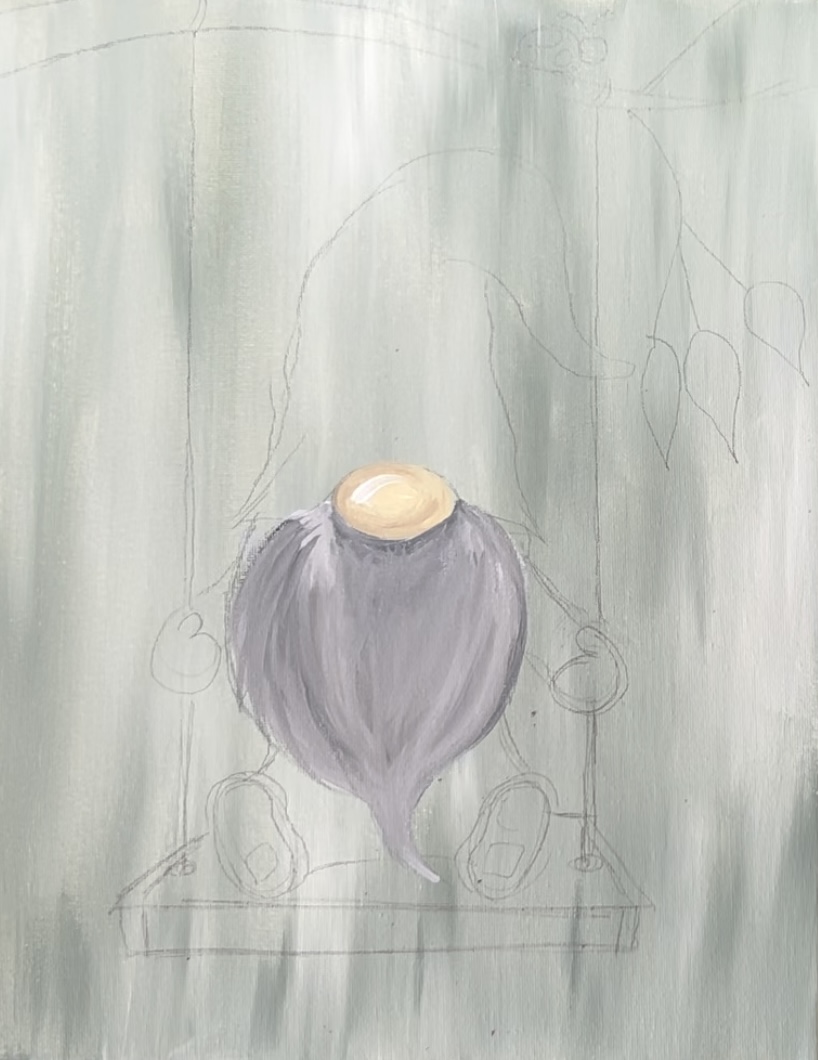
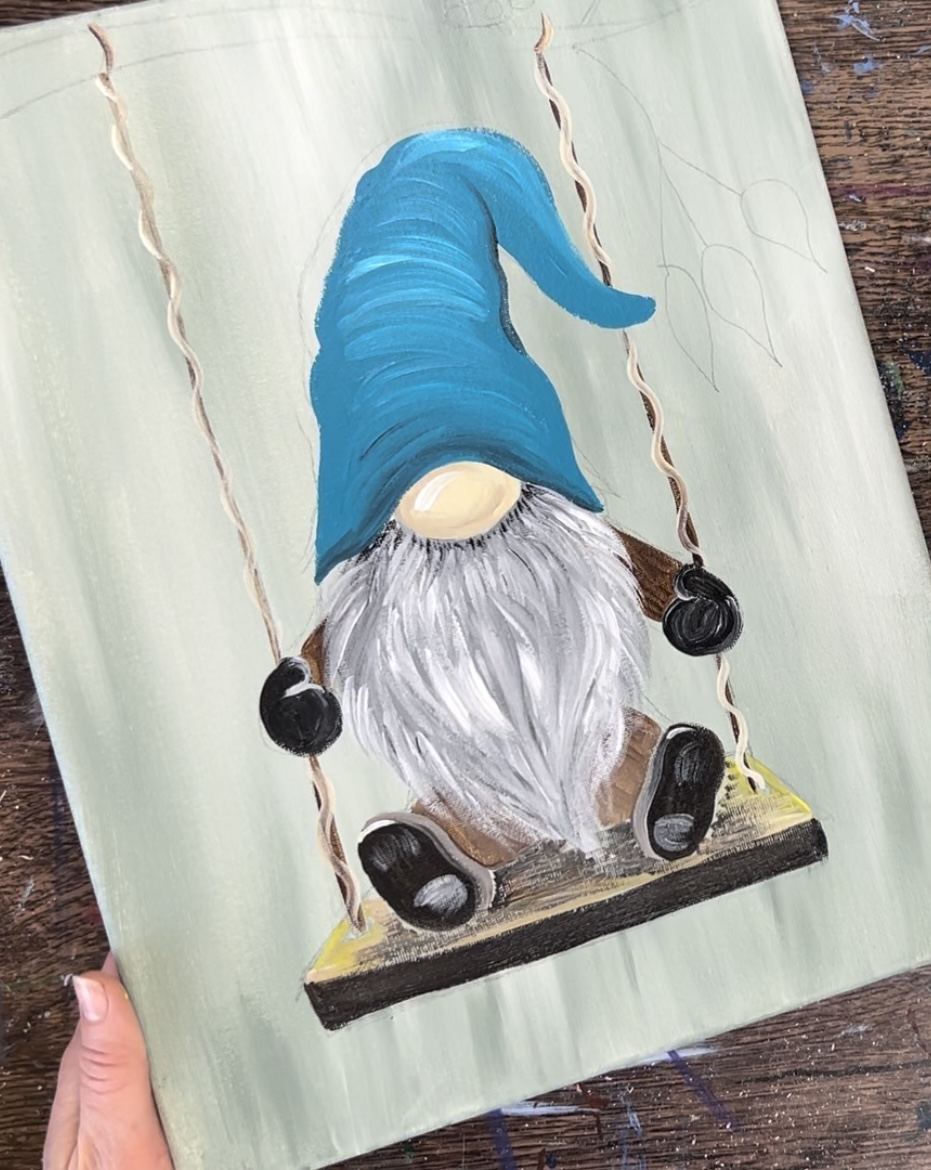
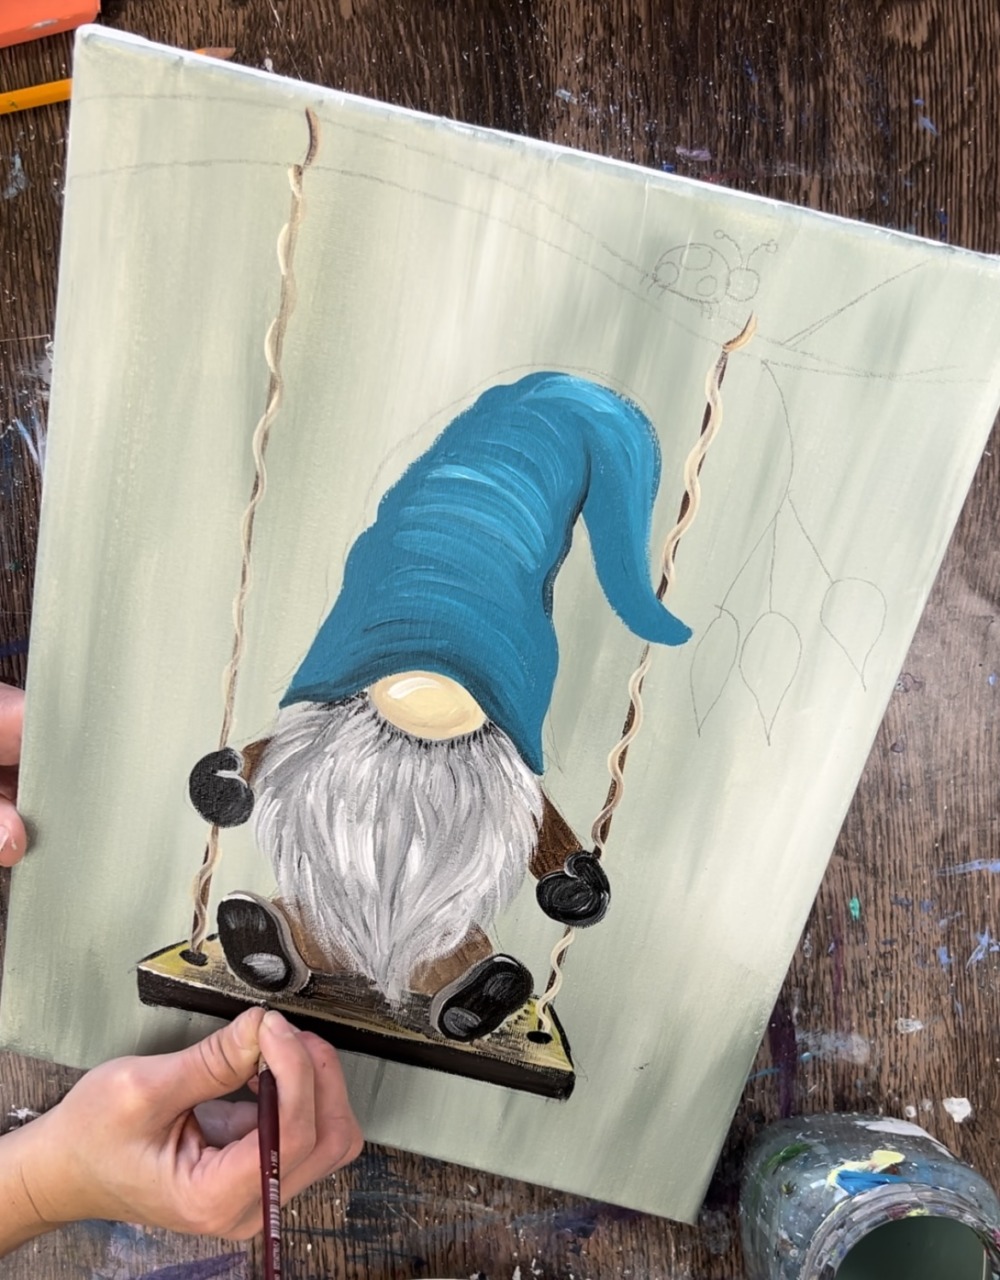
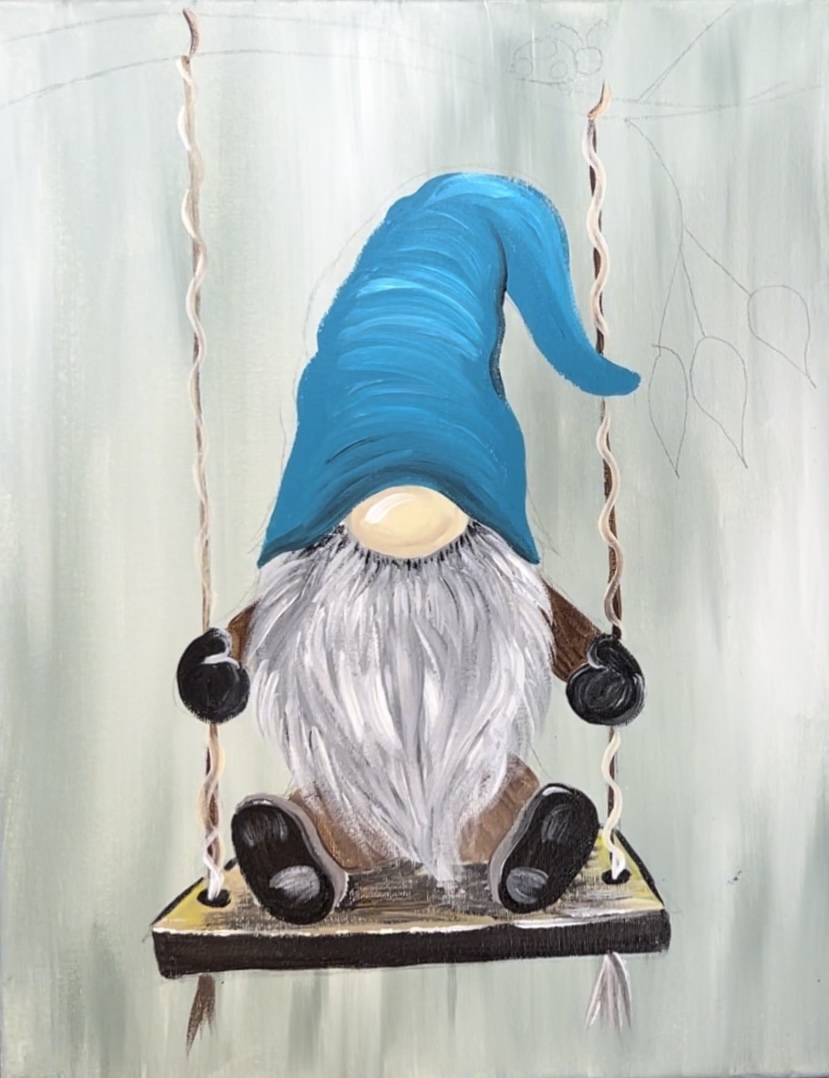
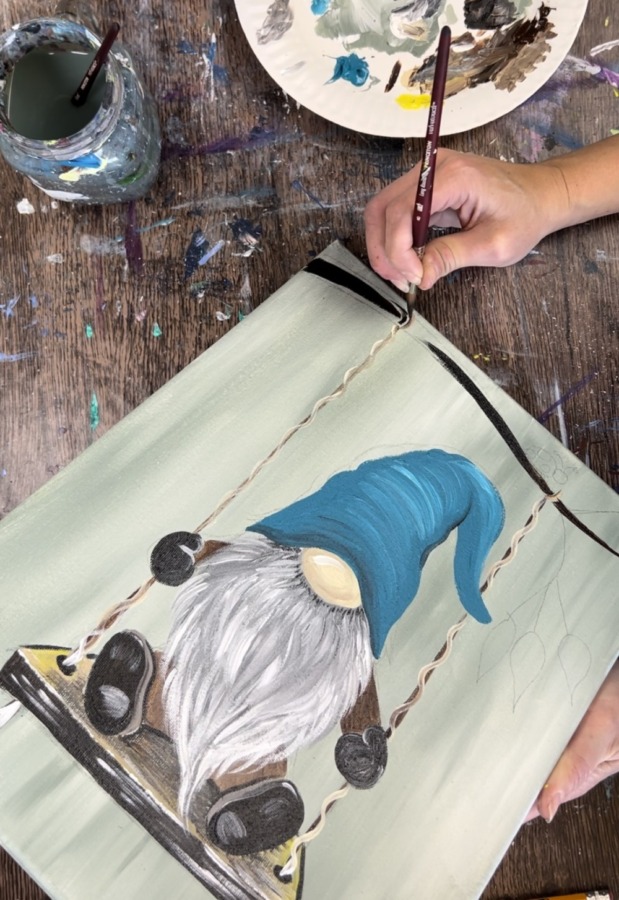
2. Draw or transfer gnome design
Let your canvas dry before drawing this gnome. If you are using the template, print it out. Then place a sheet of graphite paper below the template and trace.
If you are drawing this design, start by drawing an oval “nose” shape in the center of the canvas. The width is about 1.5″.
Then draw the bottom line of the hat. This line hugs the top part of the nose and dips down on the left and the right. The width of this hat is about 3.75″.
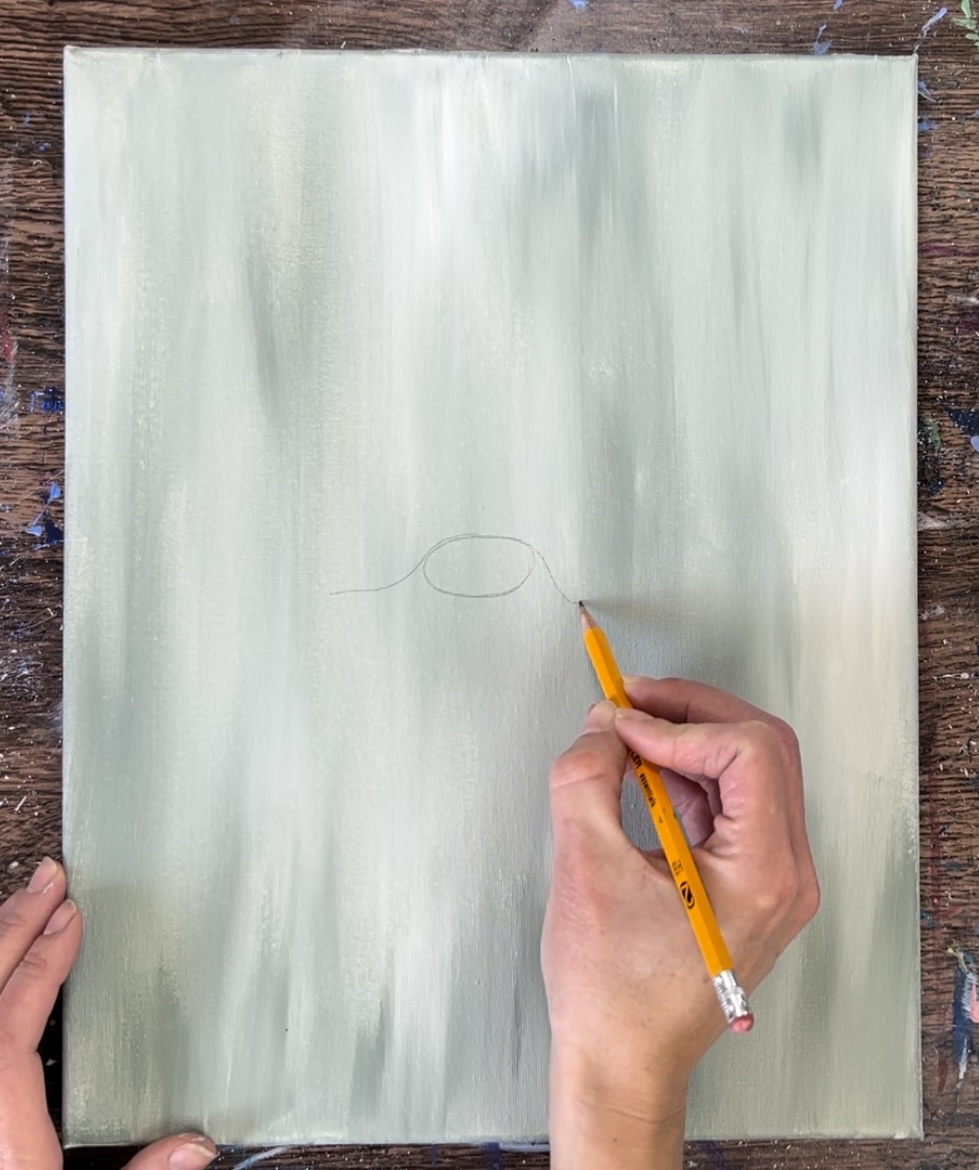
Next, lightly sketch the hat shape. It goes up relatively high but not all the way to the top of the canvas. You’ll want to make sure there is a gap at the top for the tree branch. The height of the hat is about 5″ from the lowest right or left ends to the top part curved part as it starts turning downwards.
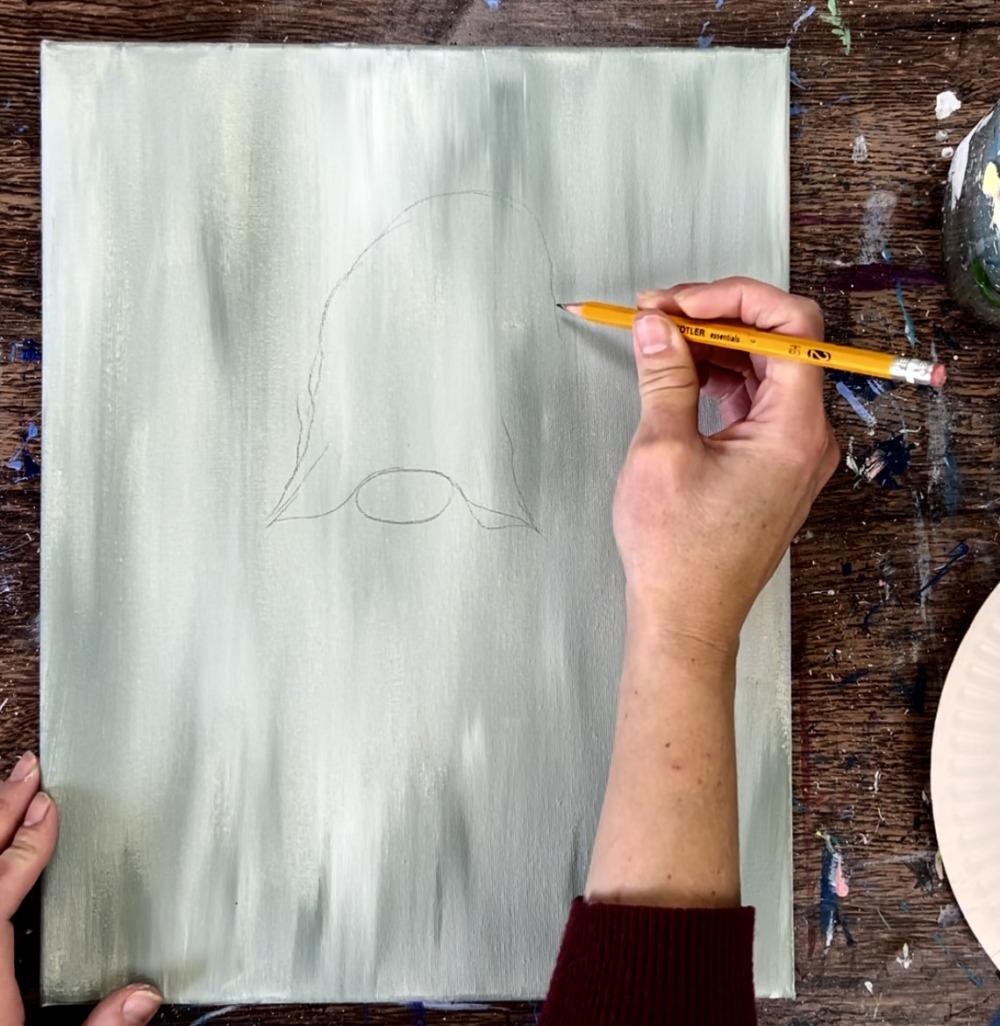
Then draw the hat so that it curves down to almost a point.
Next, draw the beard. Draw two long curved lines on each side that meet to a point. The bottom point of his beard sways slightly to the right. The beard is about 5″ long.
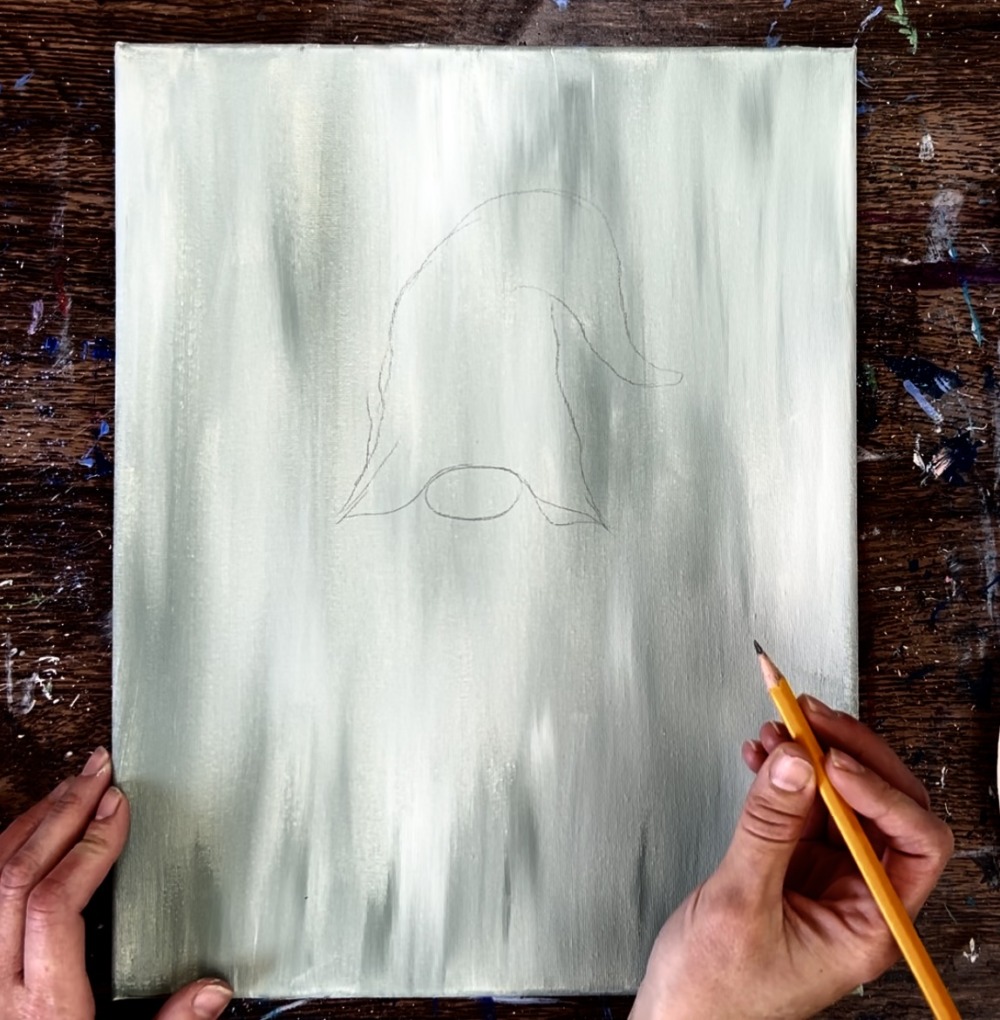
Next, draw the branch of the tree. It starts out wide on the left (about 1″ thick) and then goes to a thin point on the right.
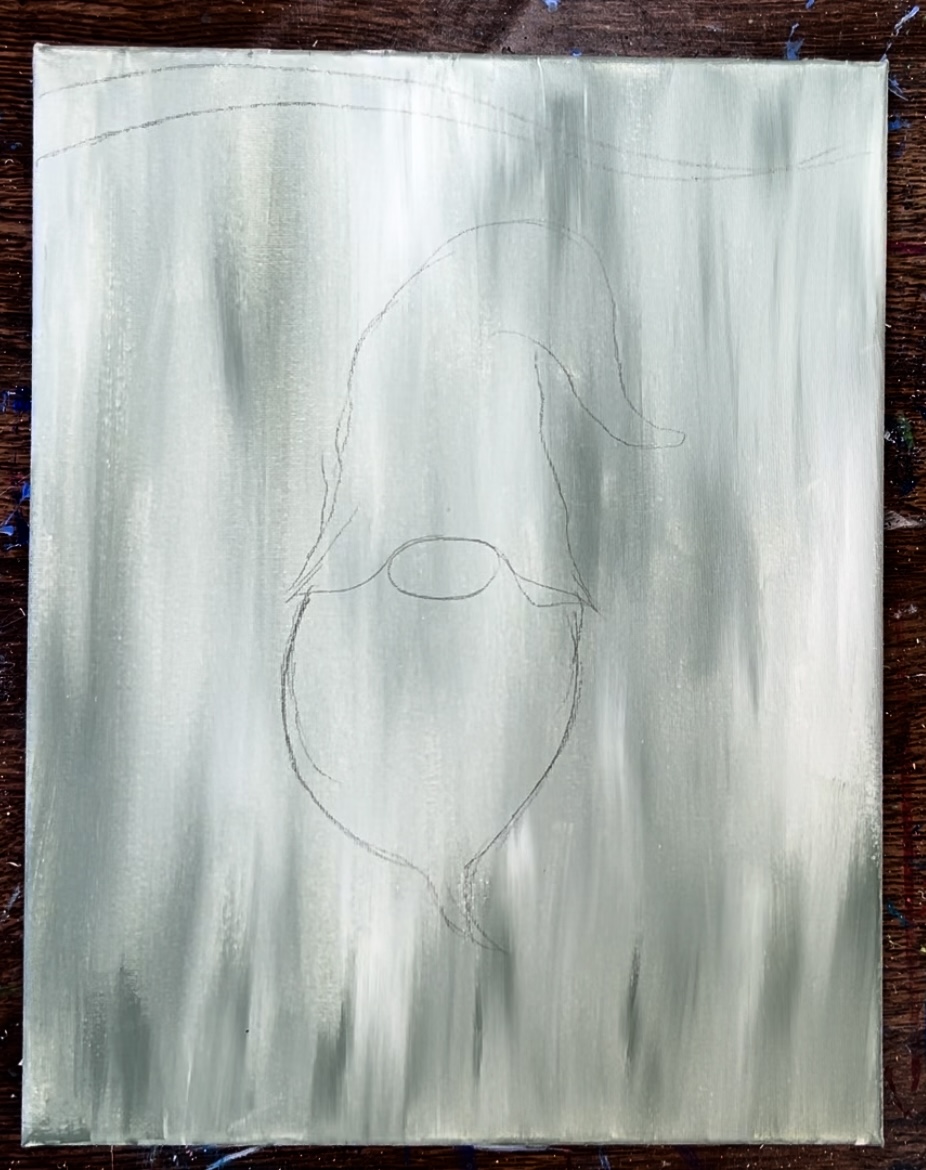
Next, draw the vertical rope lines. It may be helpful to use a t-square ruler to line up against the top edge of the canvas. Draw two vertical lines on each side of the gnome.

Go down to about where the bottom tip of the beard is.
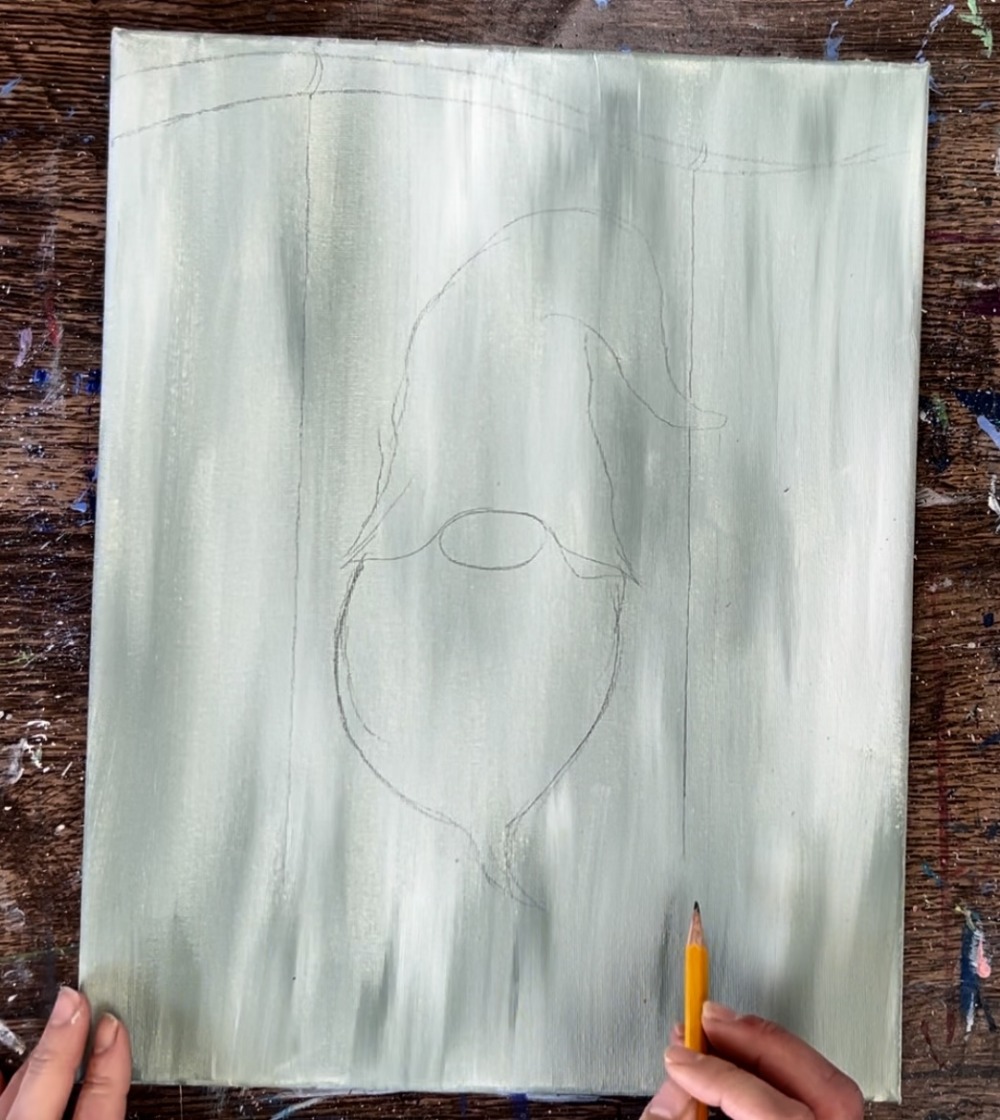
Then draw the bottom of both of his shoes. These are the same size as his nose and almost the same shape, only they curve inwards slightly.
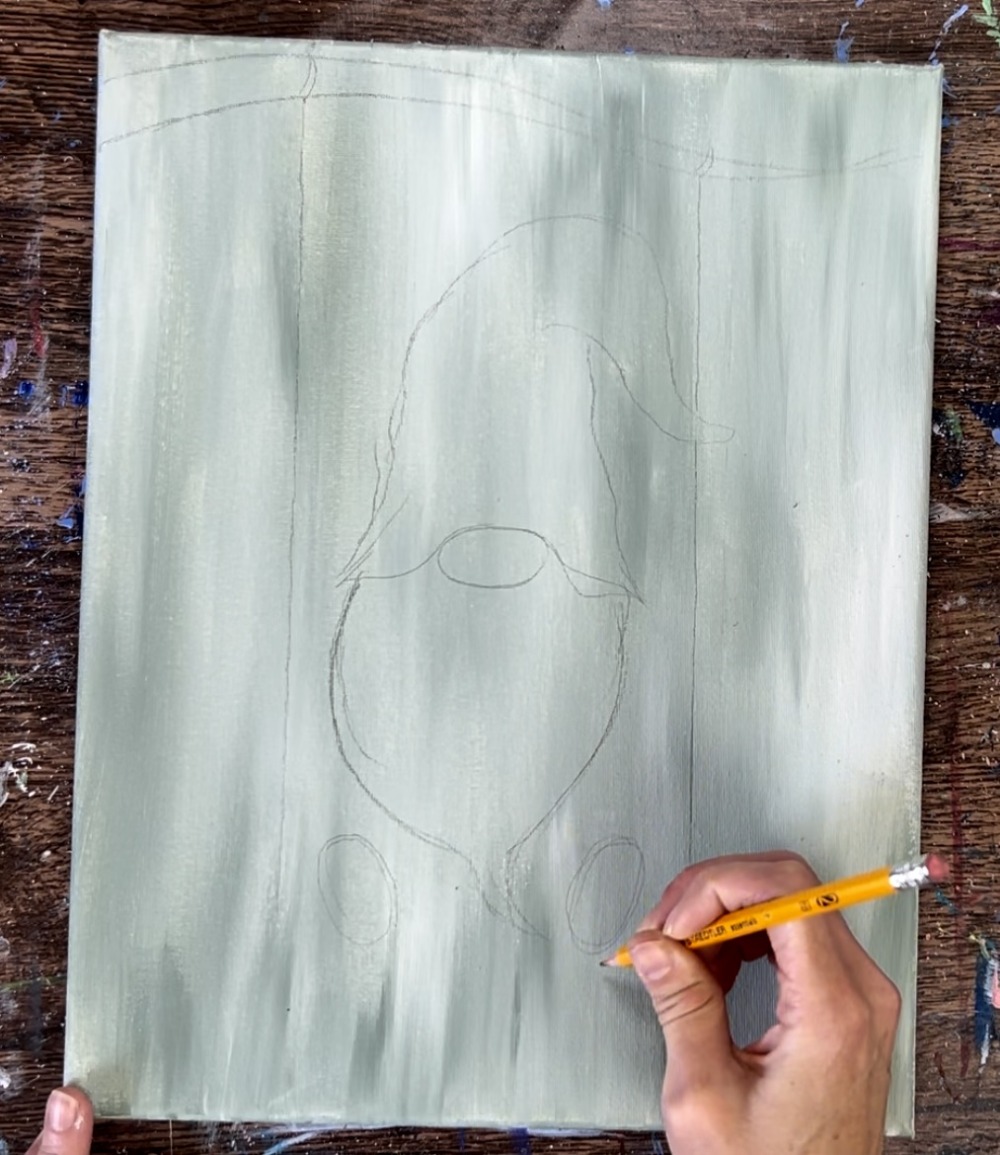
Then draw the leg lines so they attach from the edges of the shoe bottoms to the beard.
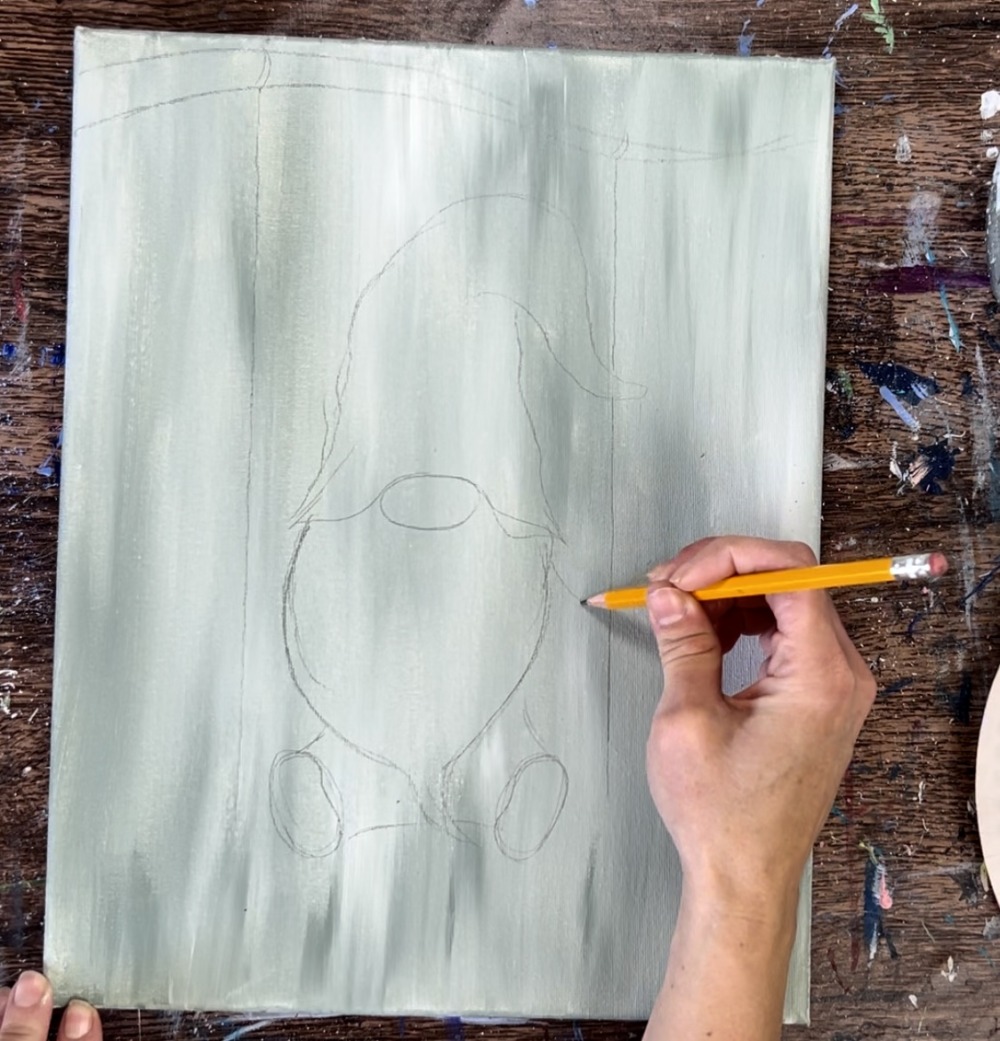
Next, draw two mitten hands overlapping the vertical rope line. Make the thumbs pointing upwards.

Draw the swing. The first line is a horizontal line just under the shoes. Then turn that line into a very thin rectangle for the front of the swing.
Then draw two diagonal lines going back and behind the gnome to make it look like he is sitting on the swing.
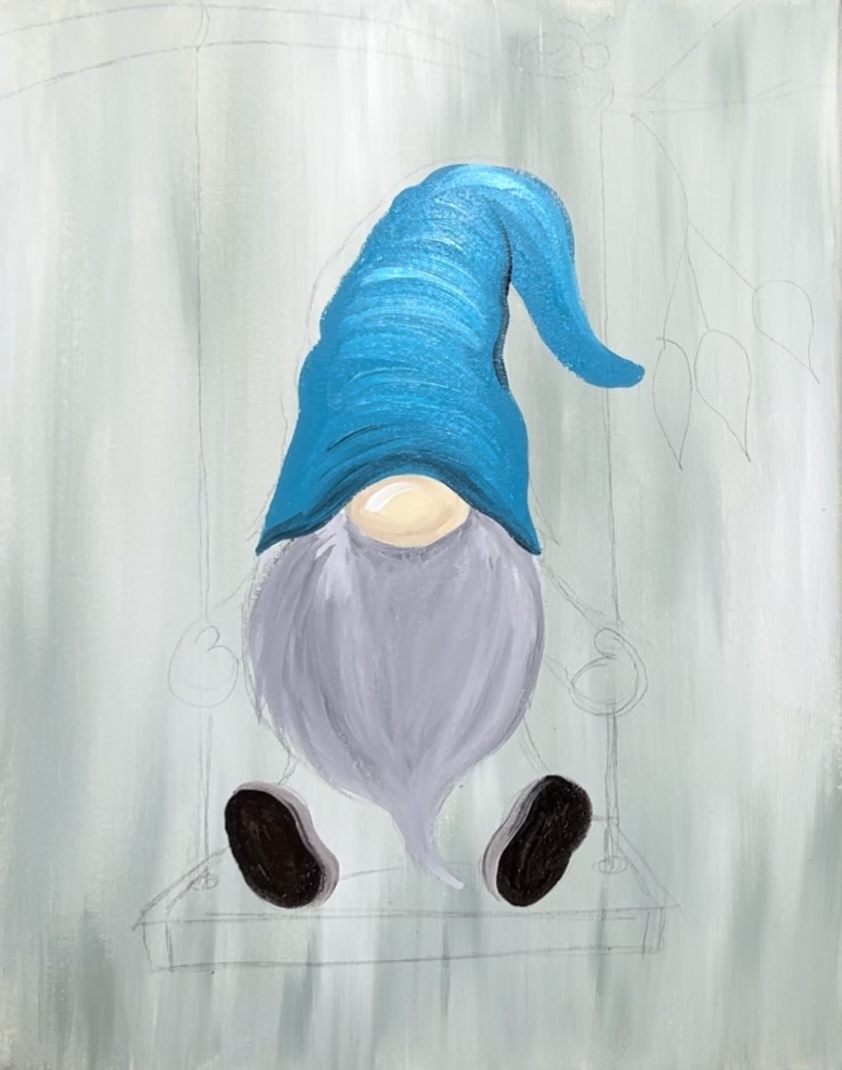
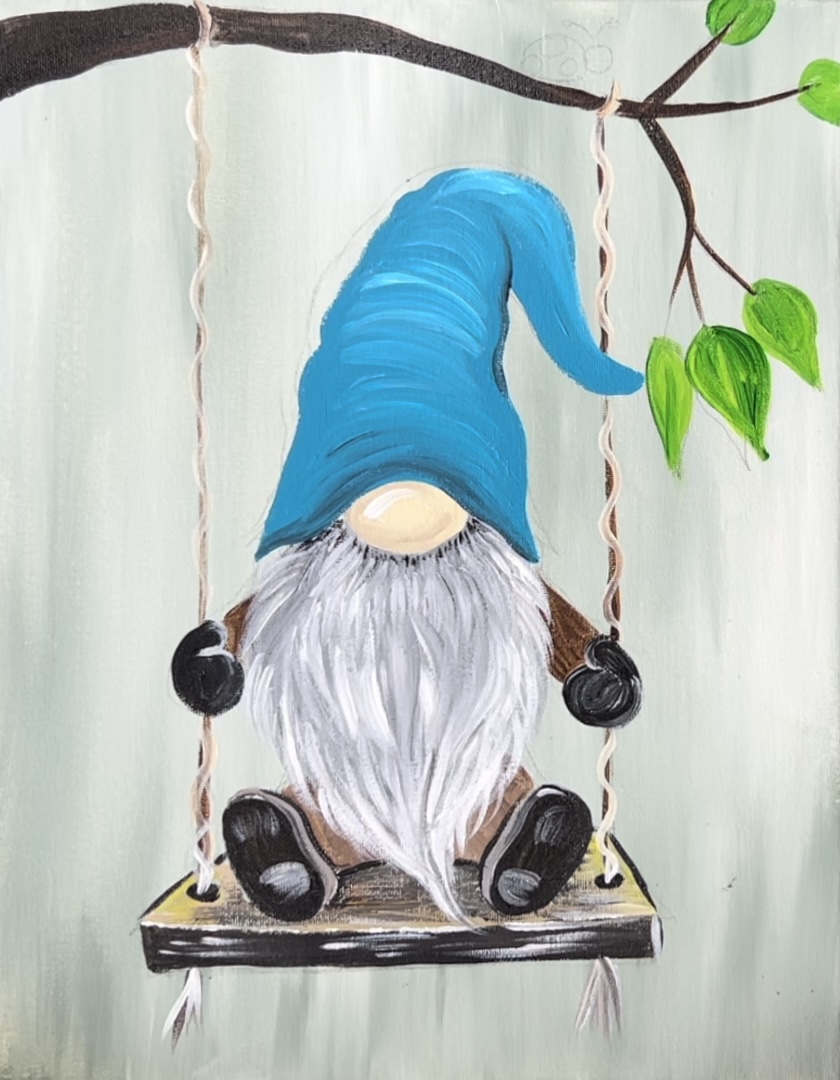
3. Paint nose
Load your palette with unbleached titanium, burnt umber and titanium white. Start by using the #4 round brush to paint the nose a solid coat of unbleached titanium.
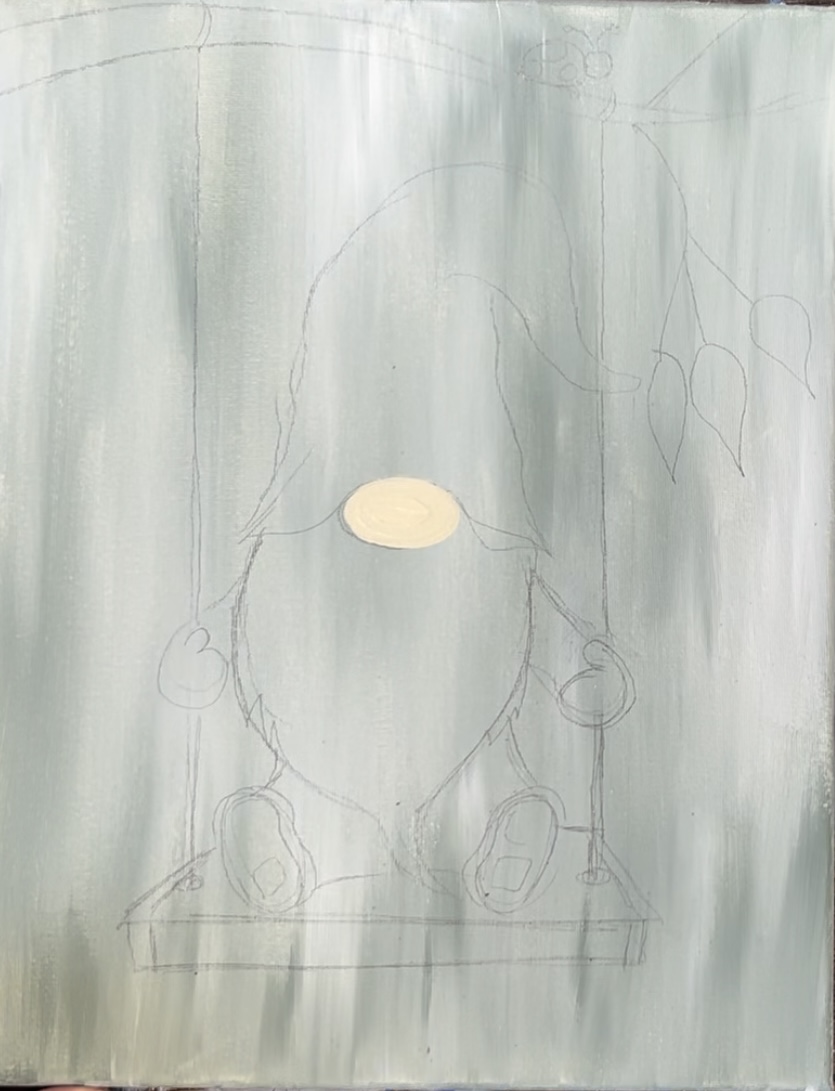
Next, mix a small amount of burnt umber in with the unbleached titanium to make a light brown.
Paint just the outer part of the nose with this brown but leave the center part lighter. Blend that brown in with the paint on the canvas.
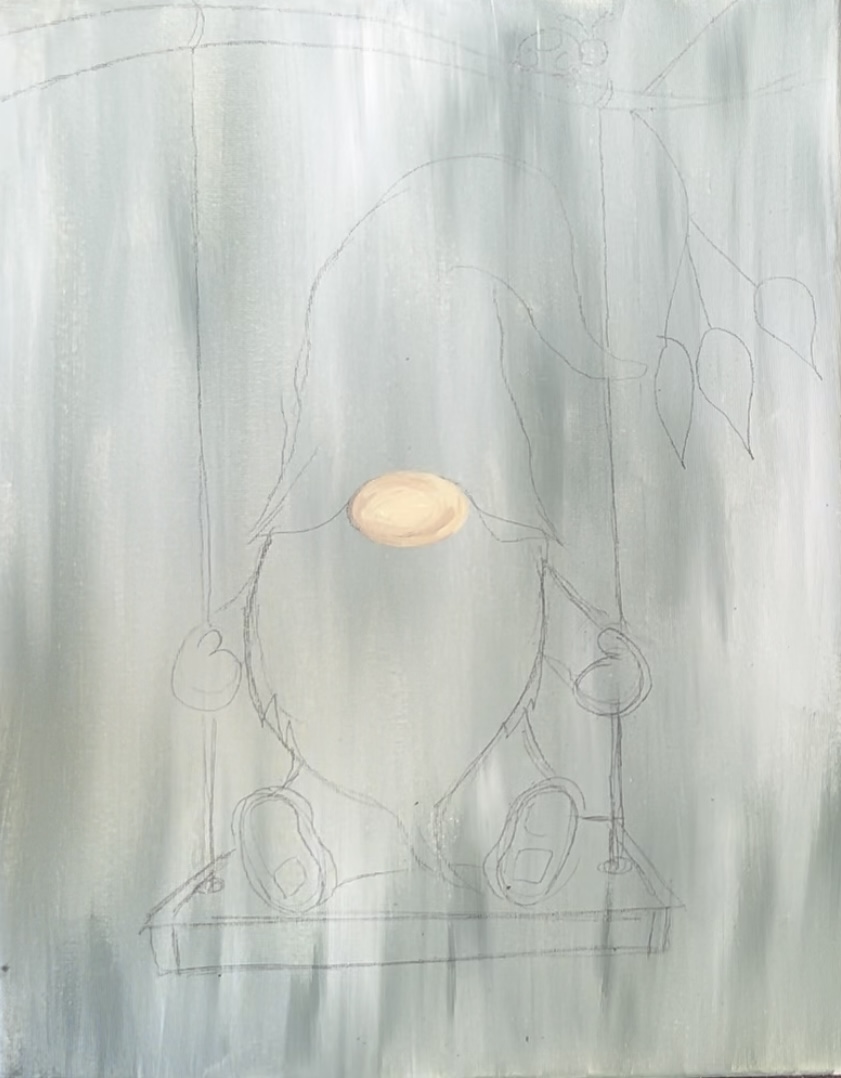
Then completely rinse and wipe the brush. Load it into just the titanium white. Paint a titanium white curve in the upper left part of the nose.

4. Paint beard
Use titanium white and mars black to paint the beard. Start out by painting textured curved strokes to form the shape of the beard.
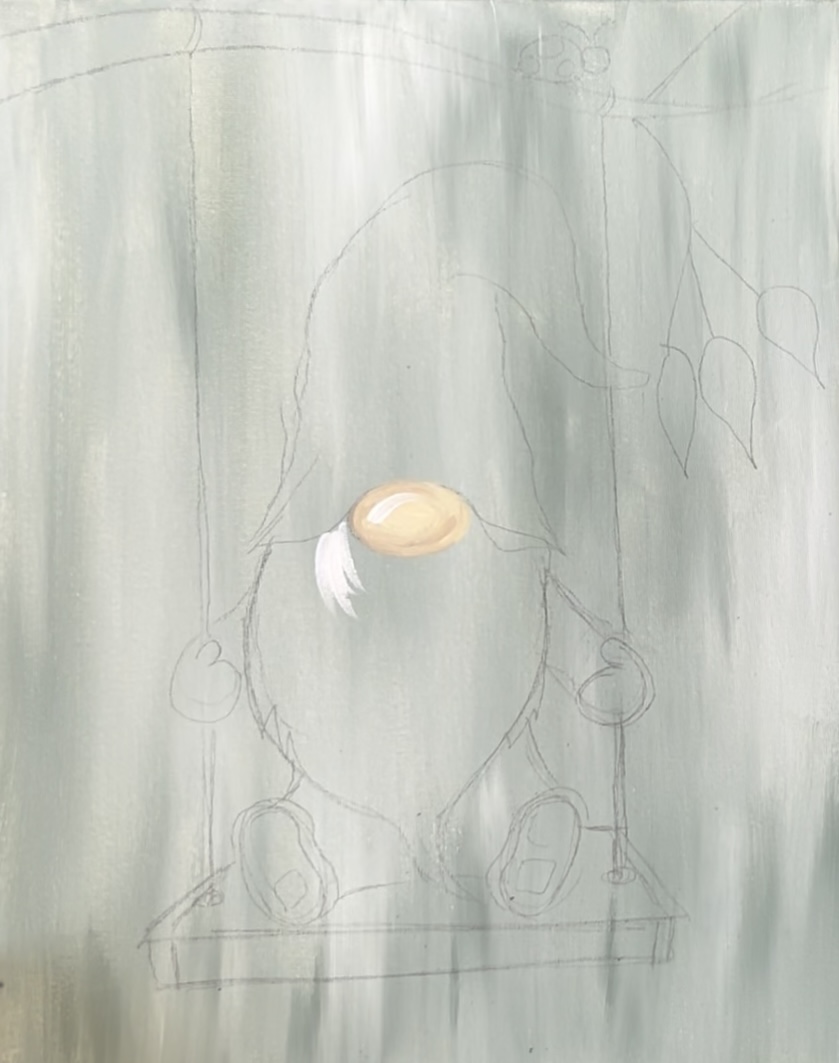
Gently blend some black into the white to make this more of a medium gray shade. However, it does not have to be the same shade of gray throughout. If it is helpful, you might want to switch to a #8 round brush to fill up more of the space.
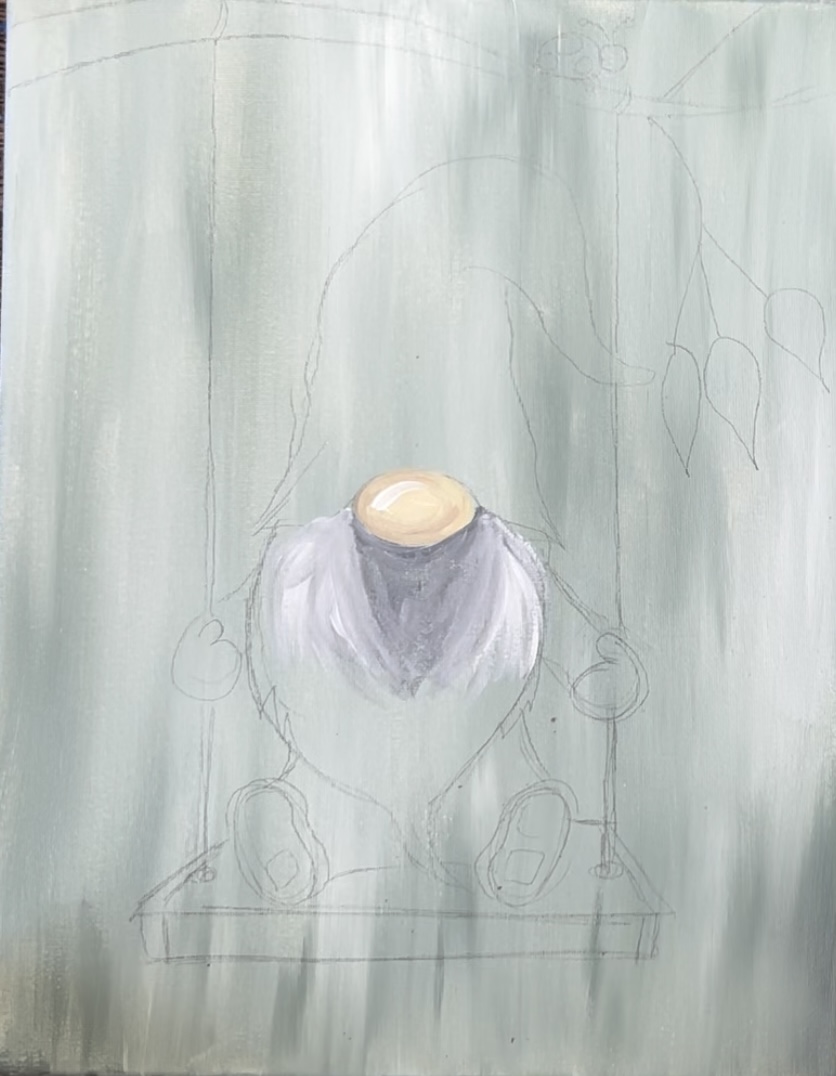
Fill in the entire beard area. Don’t worry about detailed texture just yet. This is the first layer of the beard and it is a mixture of medium gray and light gray that is kind of varied. Pay more attention to the direction of the strokes. Make sure they are going in a curved/ contoured direction in the shape of the beard.
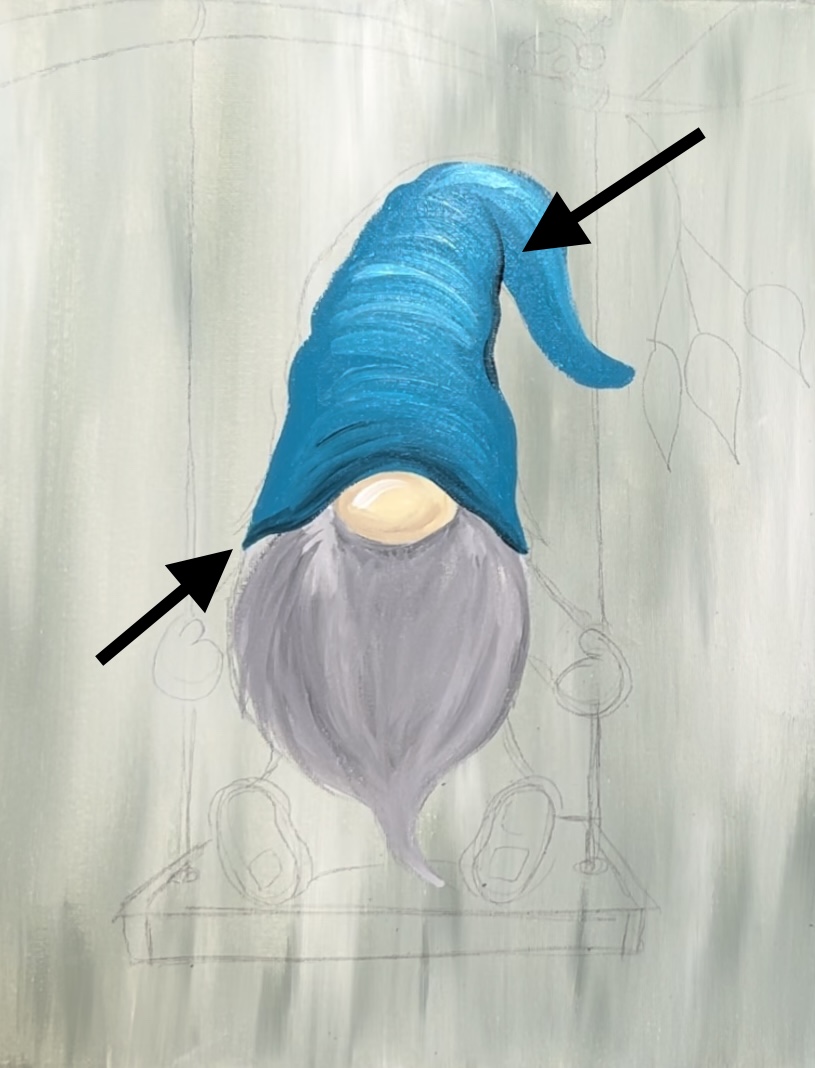
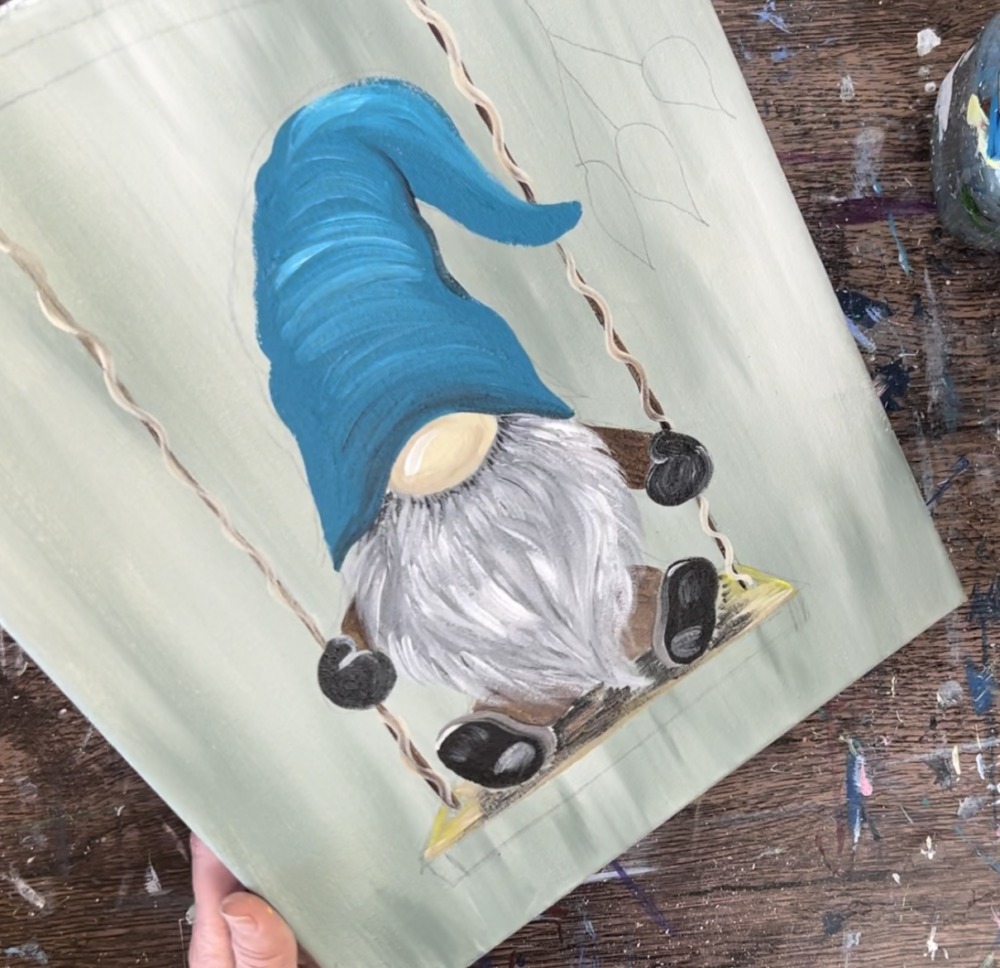
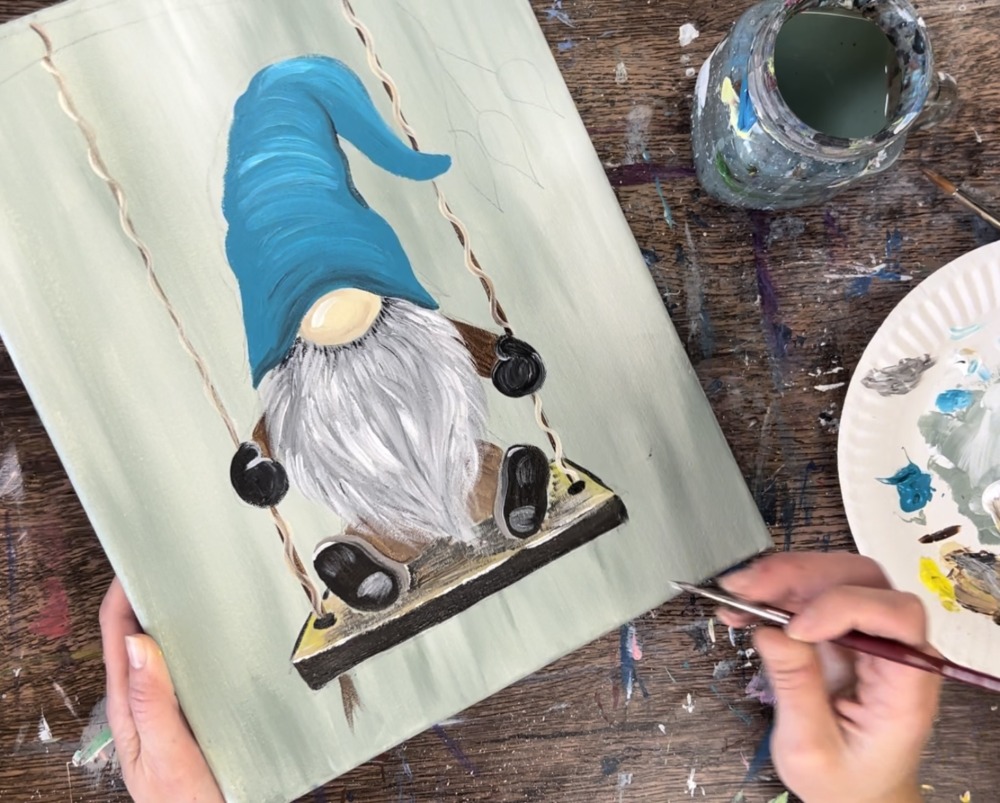
5. Paint Hat
Load your palette with the color turquoise blue. Use a #4 round brush to paint the hat a solid coat of this color. It helps to outline the hat shape first and then fill it in.

Fill the center of the hat with strokes that go in a curved direction.
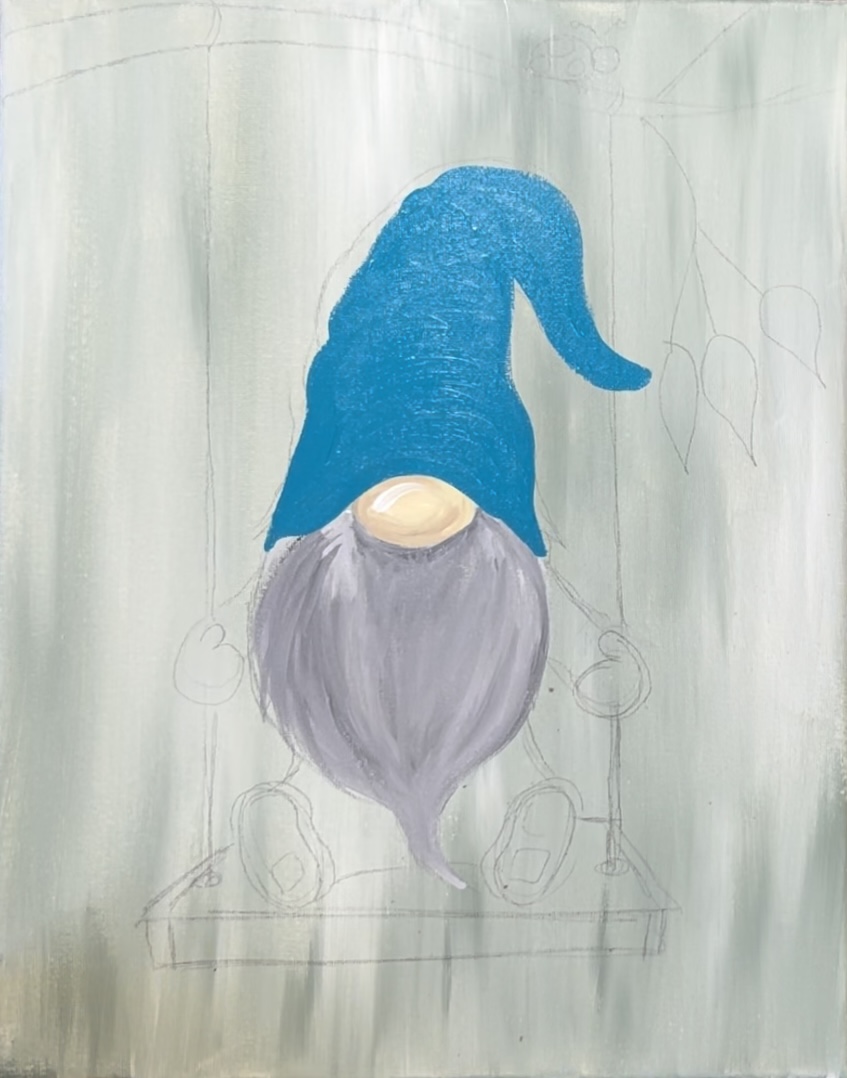
Then load a small amount of white onto your brush. Gently blend the white in with the turquoise on the canvas to highlight the hat. Do this in a curved direction so it gives the hat “form”.
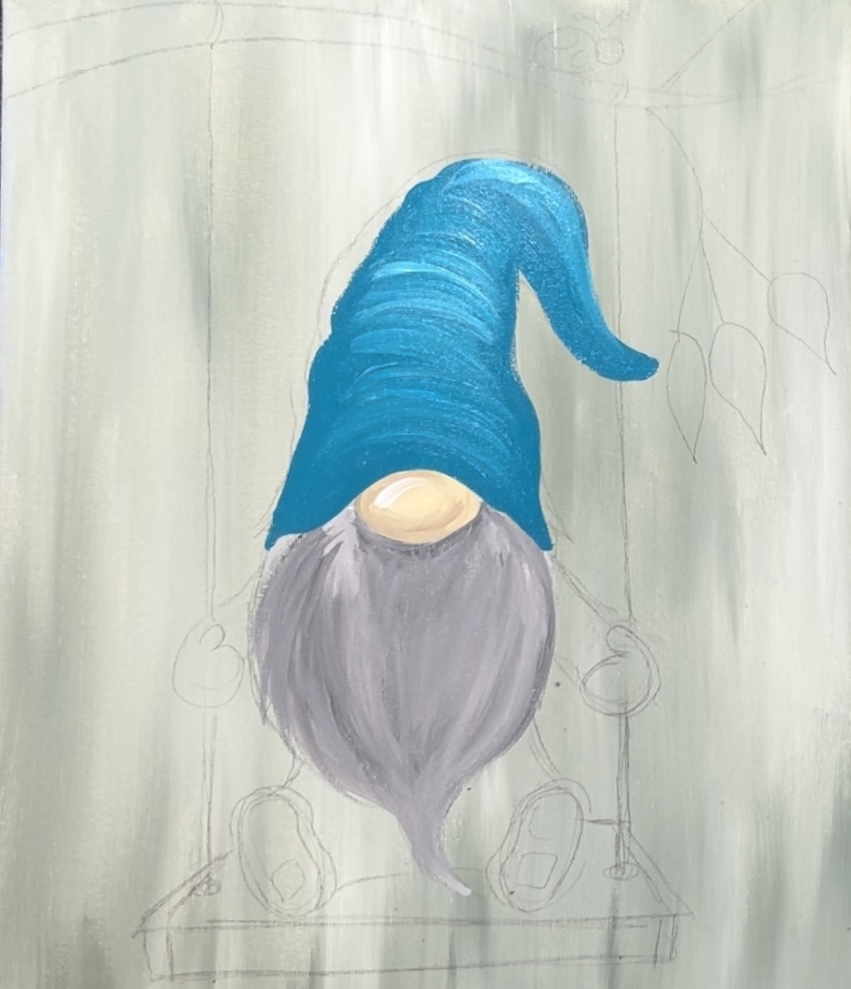
Then add shadow to the hat. To do that, mix a very tiny amount of mars black into the turquoise blue. Then use that dark turquoise to add a very thin line on the bottom of the hat just above the nose and beard. Blend it up into the rest of the turquoise. Then paint a thin line that overlaps the part of the hat that flops down.
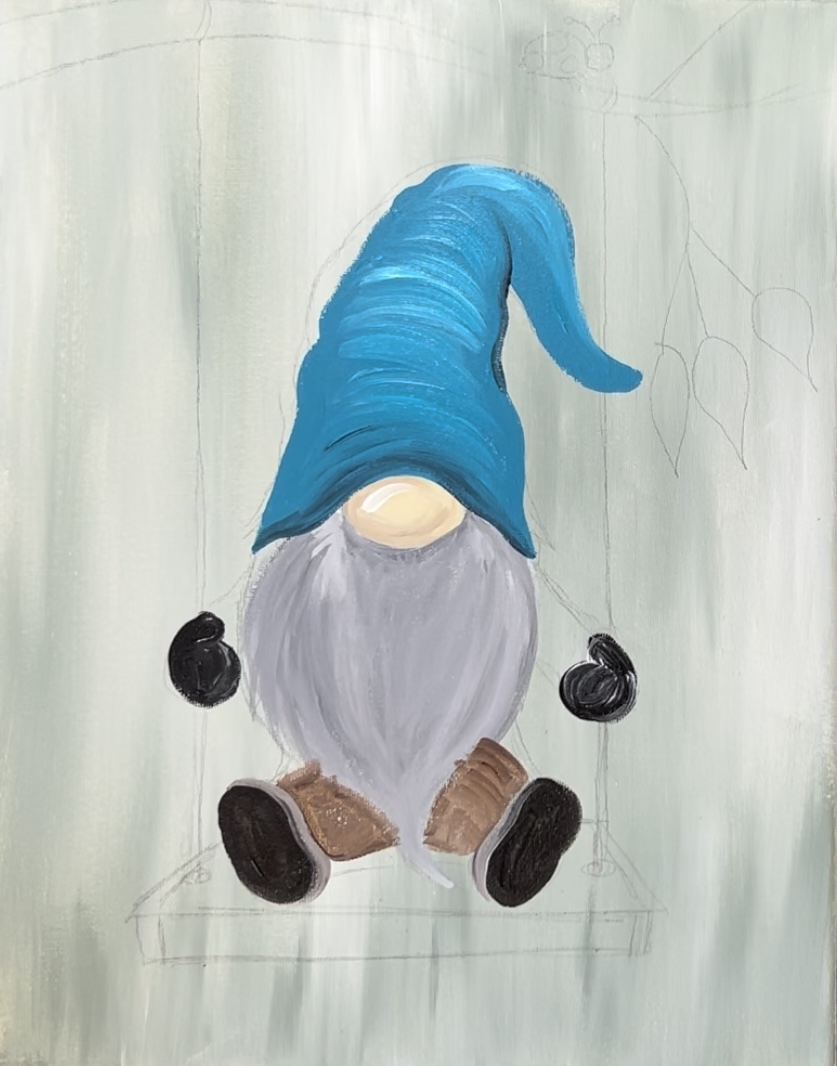
6. Paint shoes and clothing
Use mars black mixed with burnt umber to paint the bottom of his shoes. Do this with the #4 round brush.
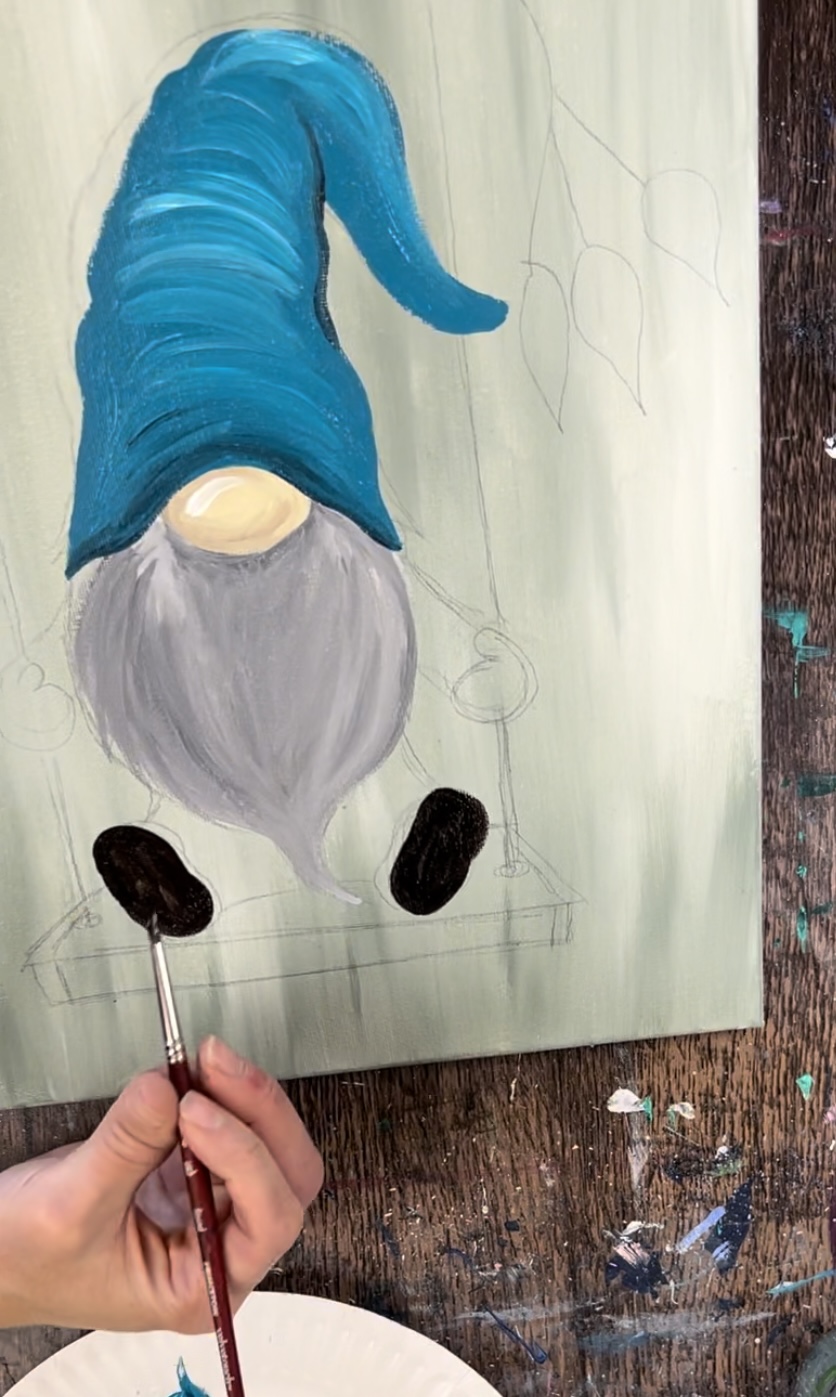
Then mix white with the brown and black (to make a gray-brown color). Paint the sides of both of the shoes (just on the inside of the shoe soles).
Next, paint the pants. Mix unbleached titanium in with the burnt Sienna to make a lighter brown.

Then use mars black to paint the mittens.
7. Paint swing rope
Next, use burnt umber and mix a little bit of the unbleached titanium in with it. Use the #4 round brush to paint the two rope lines and attach them to the tree branch.
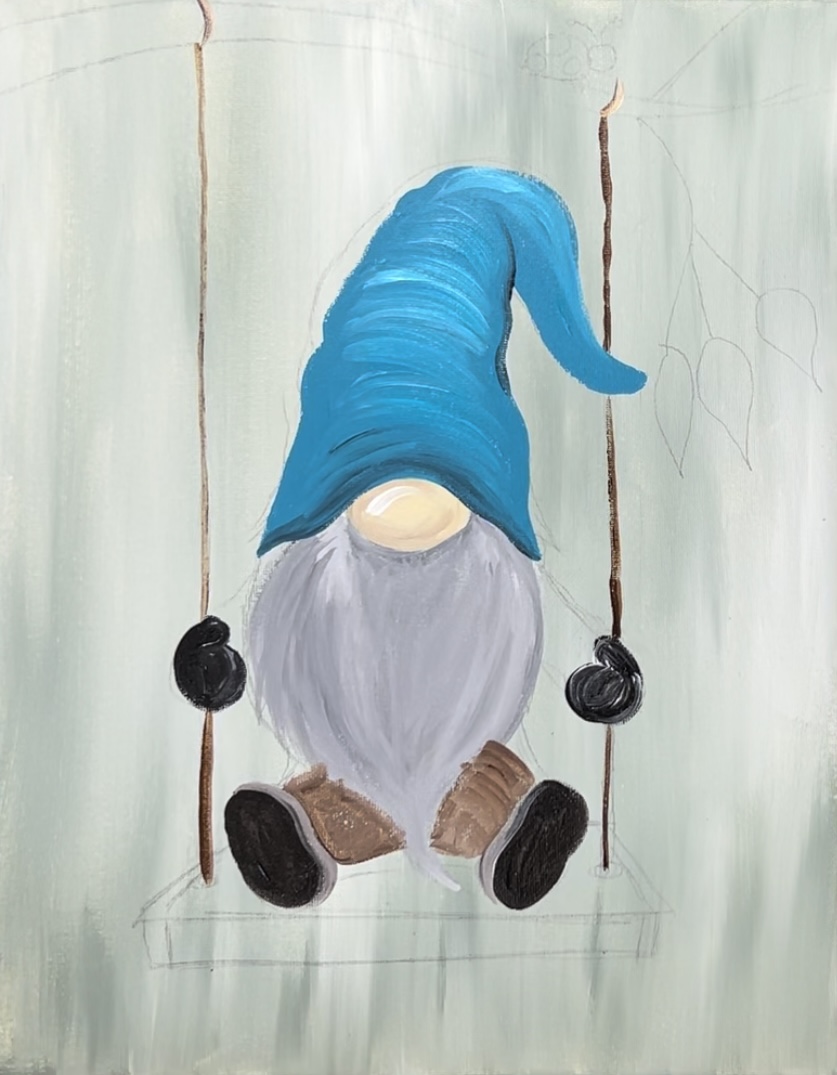
Then use unbleached titanium to paint a wavy line going in a vertical direction over the two darker brown lines to create the rope texture.
8. Add more texture detail to beard
Use a #4 round brush to paint more texture detail on the beard. Start at just below the nose and paint very fine hair strokes going in a downward, curved direction. This allows the beard to be slightly darker just under the nose where it would be a bit more shadowy.
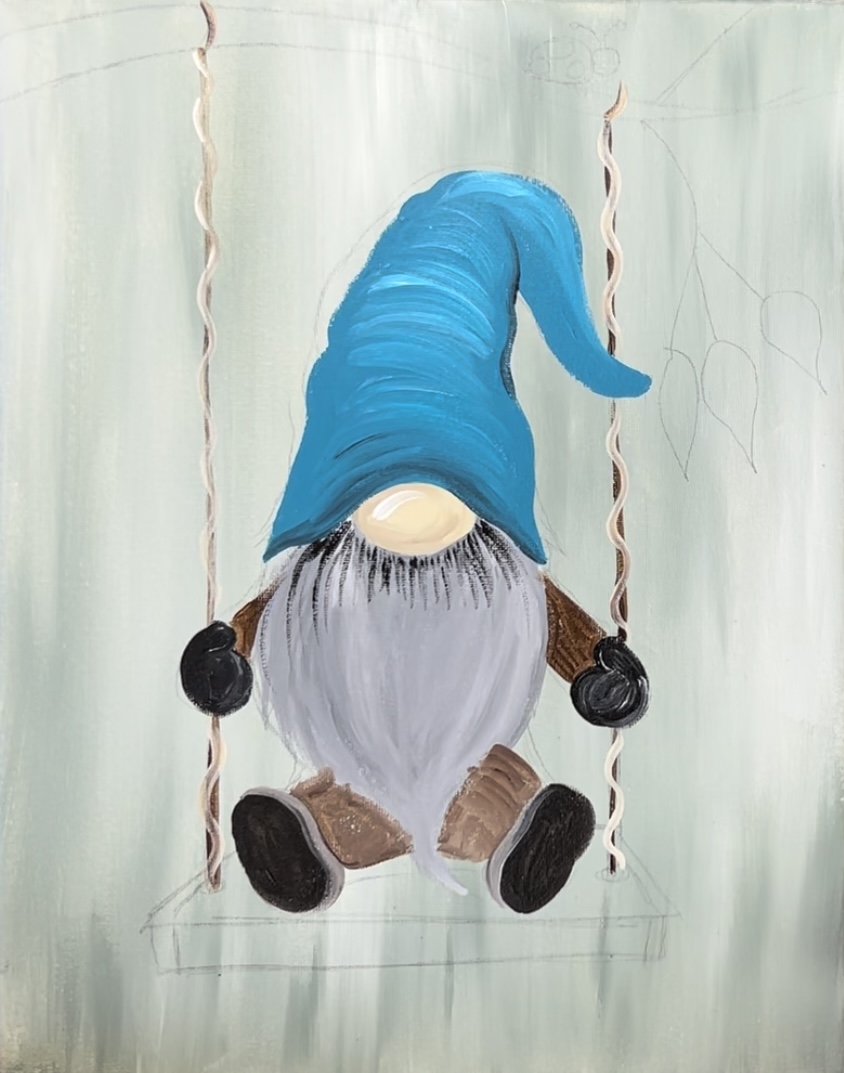
Then use titanium white to paint more beard texture. Paint short curved strokes that go in the direction of the flow of the beard. I found it easiest to start at the top and work my way down.
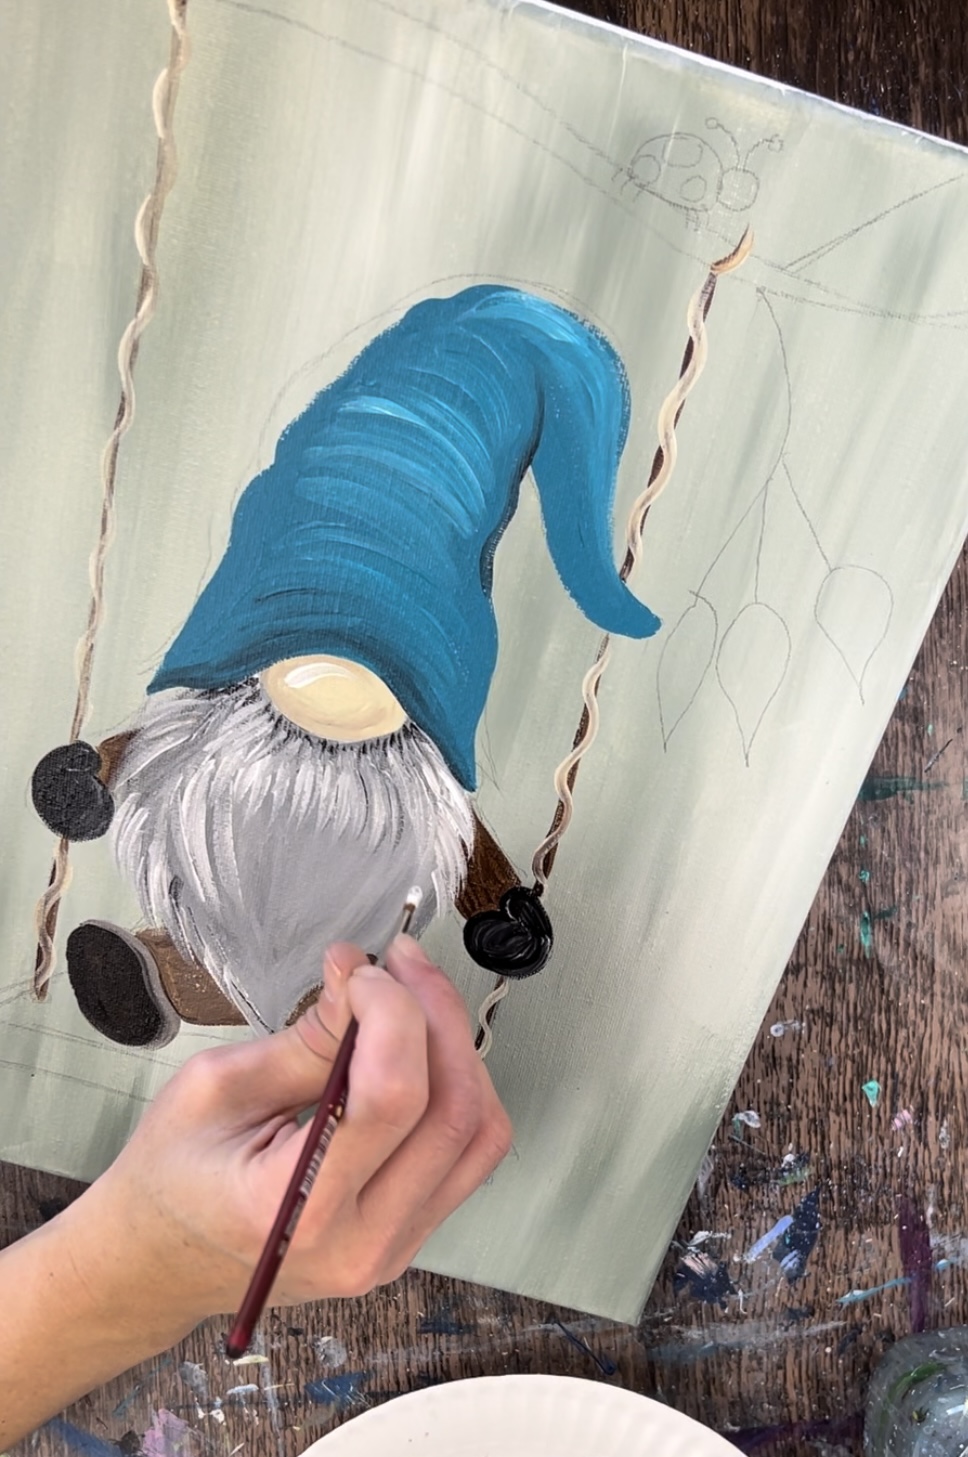
Pay special attention to the edges of the beard so the hairs slightly stick out and overlap parts of the gnomes legs and arms.
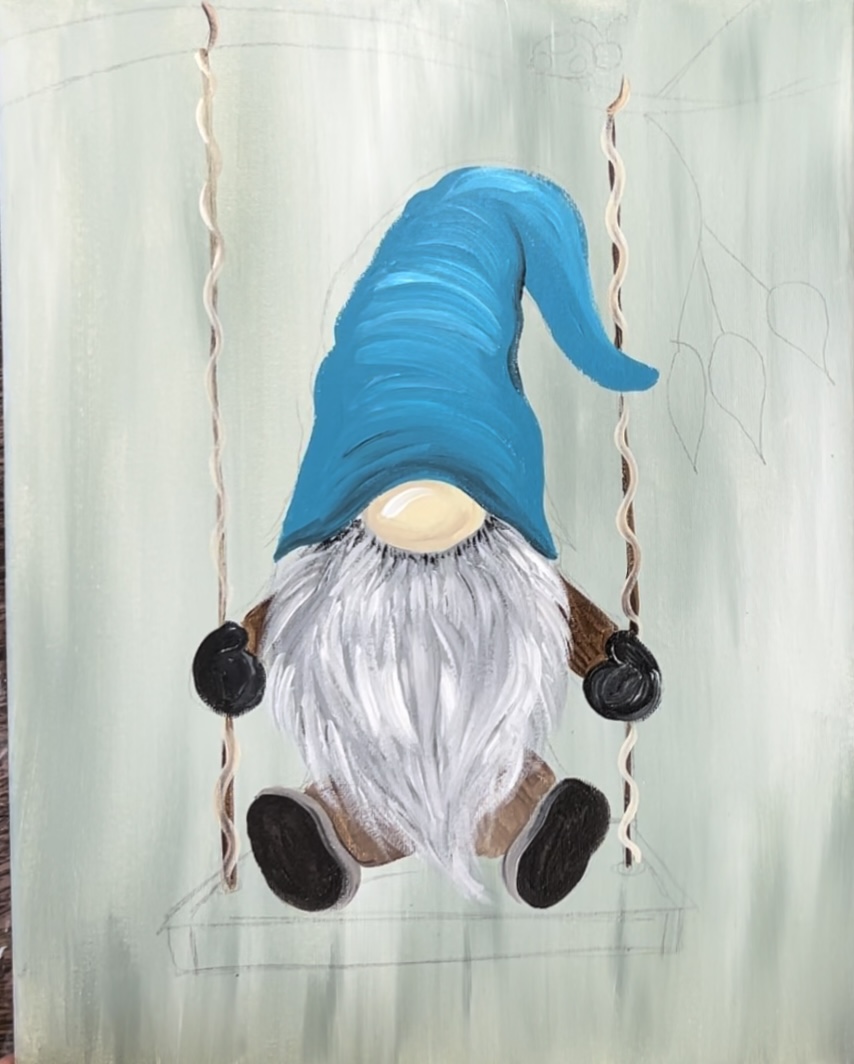
9. Paint swing seat
Next, use the #4 round brush to paint the swing. Since the swing is brown, I added cad yellow light to it to help the brown look different and stand out against the brown of the gnome’s paints.
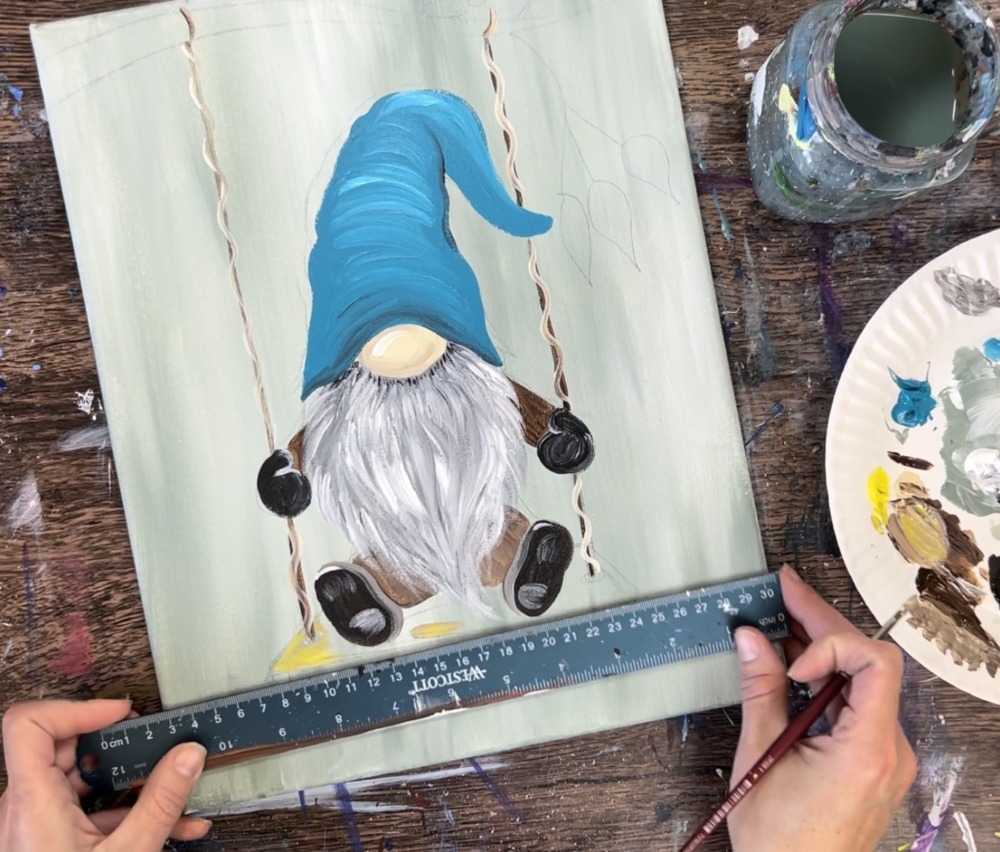
Mix your yellow in with the burnt umber and unbleached titanium. Fill the swing shape with short horizontal strokes.
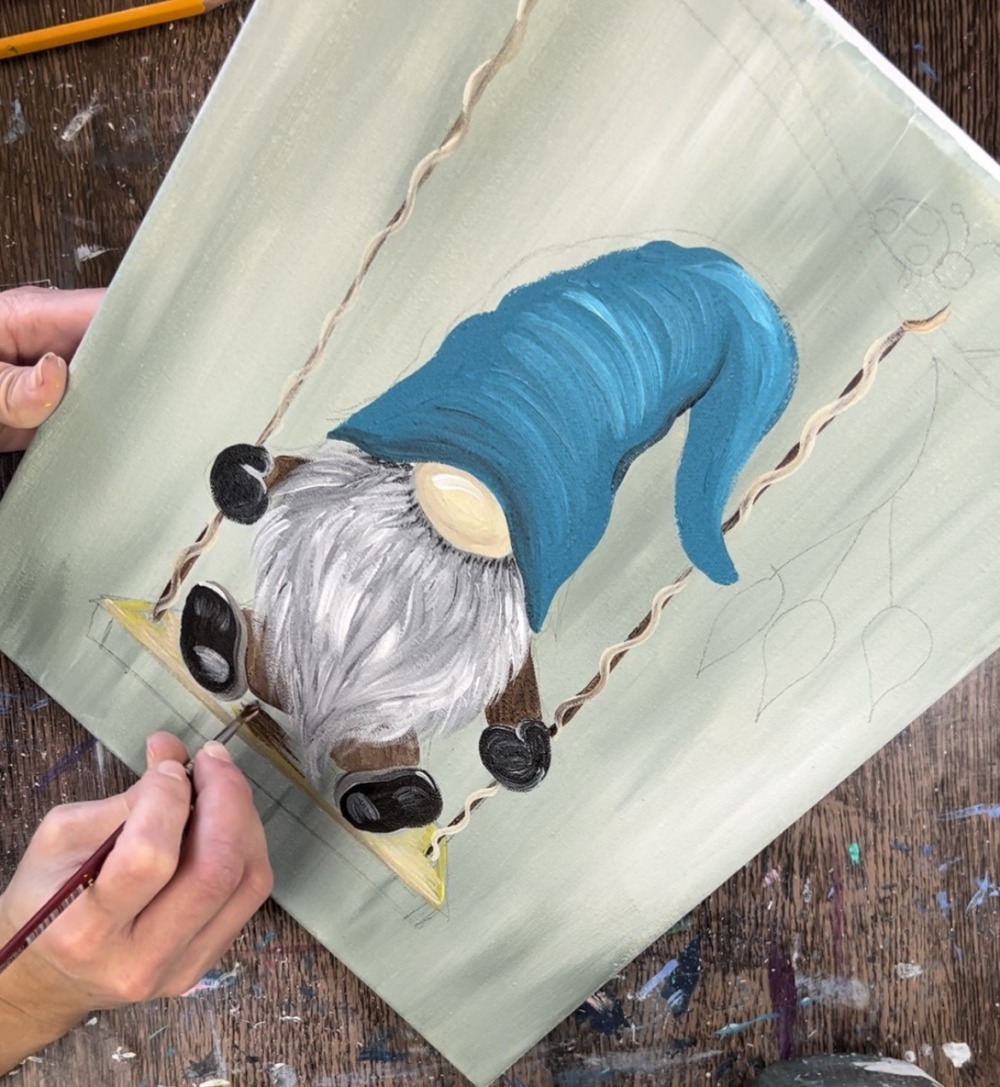
Add a little black in the area under the gnome to make this area more shadowy.
Then paint the front part of the swing using black mixed with burnt umber. This part of the swing is much darker.
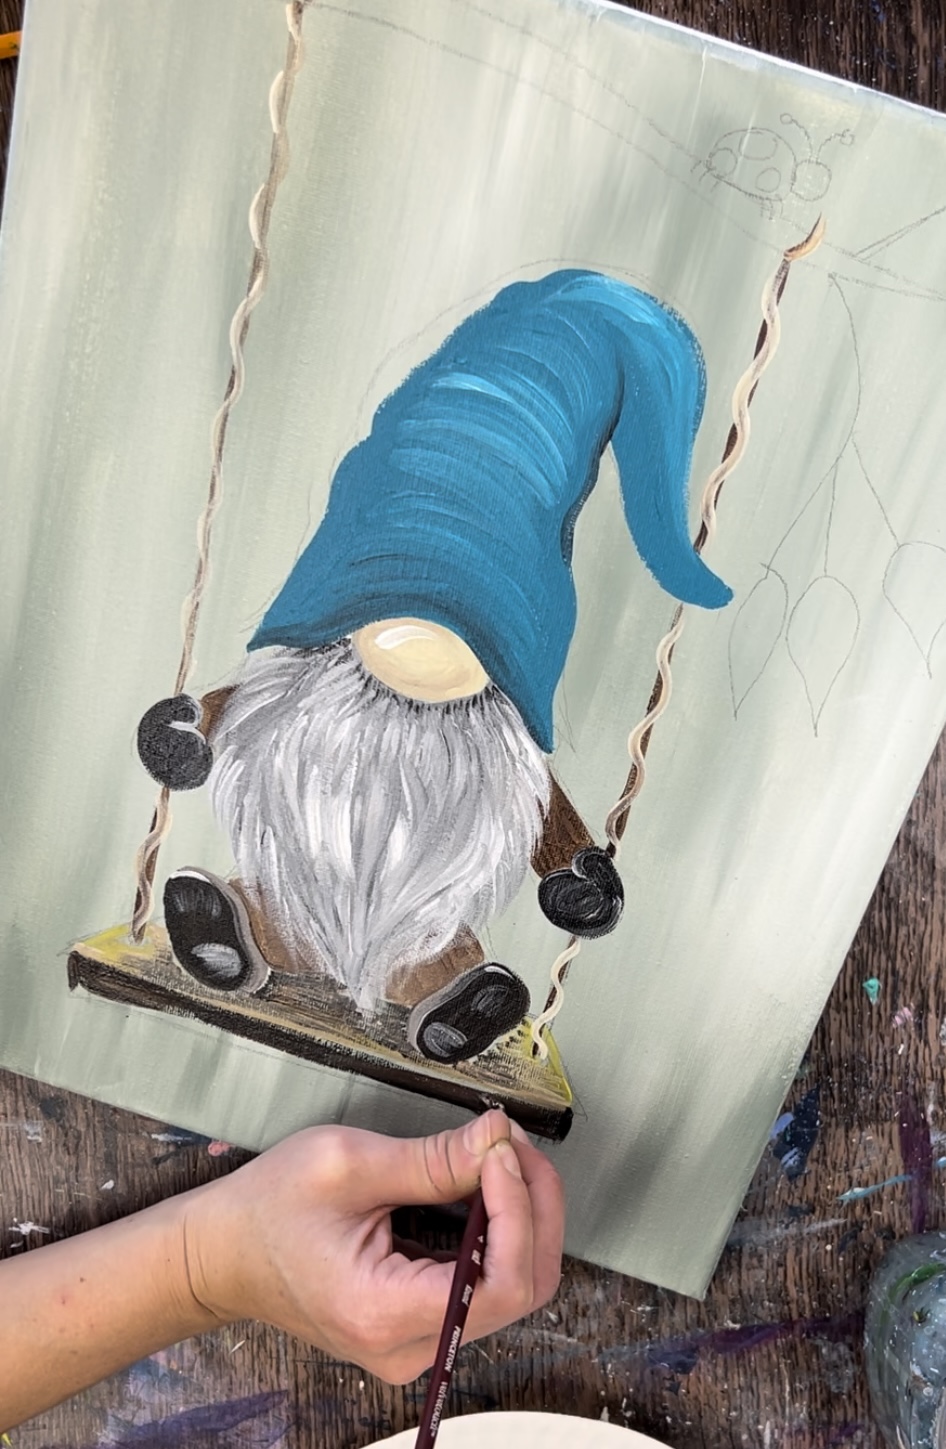
Then paint more details on the swing such as the holes the ropes are going through (do this with black). Also, outline the shape of the swing (the two diagonal lines on each side) with the black.
Paint the bottom heel of his boot with gray (black and white mixed together). Paint a small semi-circle on the bottom and a very faint square area at the top.
Then loosely outline some parts with titanium white such as the horizontal front line of the swing and the tops of his shoes.
Next, use the #4 round brush to paint the rope fringe that is hanging down from the bottom of the swing. Do this with a mixture of the browns and white.
10. Paint tree branch & leaves
Use the #8 round brush to paint the branch. Mix burnt umber and mars black together and water it down slightly. Start out on the left and make the branch thicker. Then paint it so that it goes thinner and to a point on the far right.

Next, paint the leaves. Use the #8 round brush and mix cad yellow light with hooker’s green hue permanent. Then paint leaves on the ends of each of the branches.
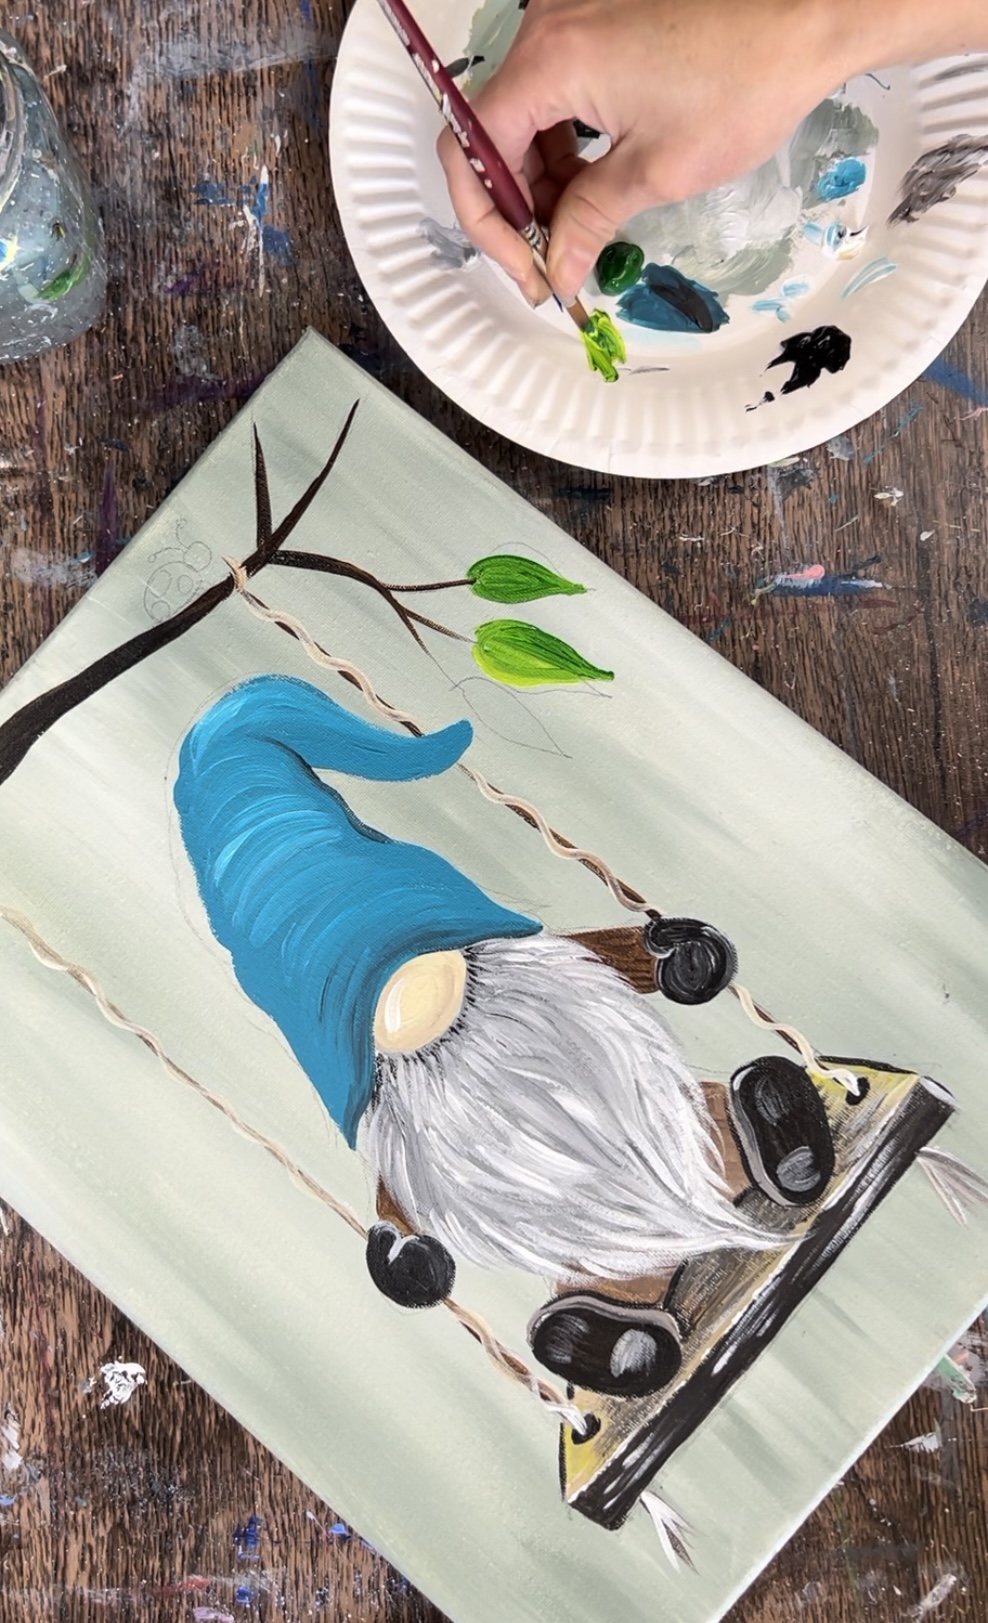
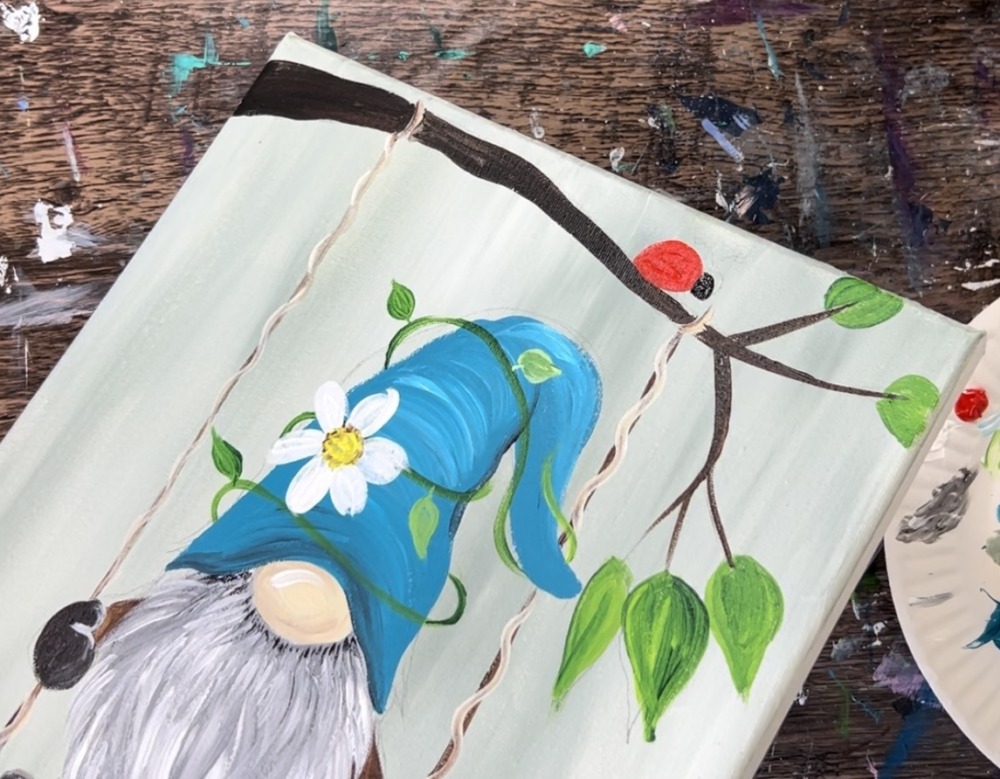
11. Paint vine around hat
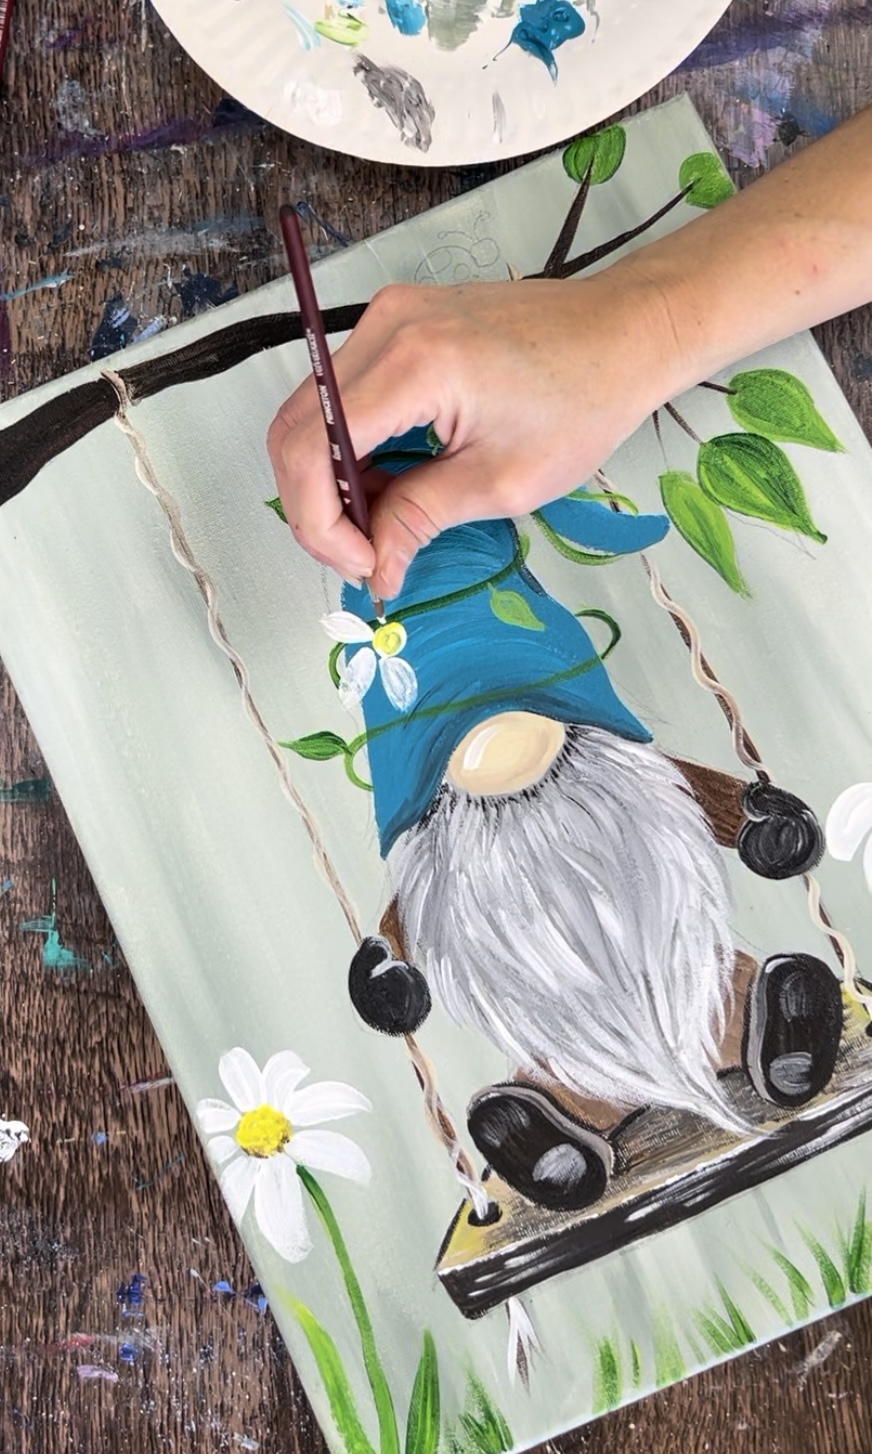
Use a #4 round brush and hooker’s green hue to paint a vine that wraps around the gnome’s hat.
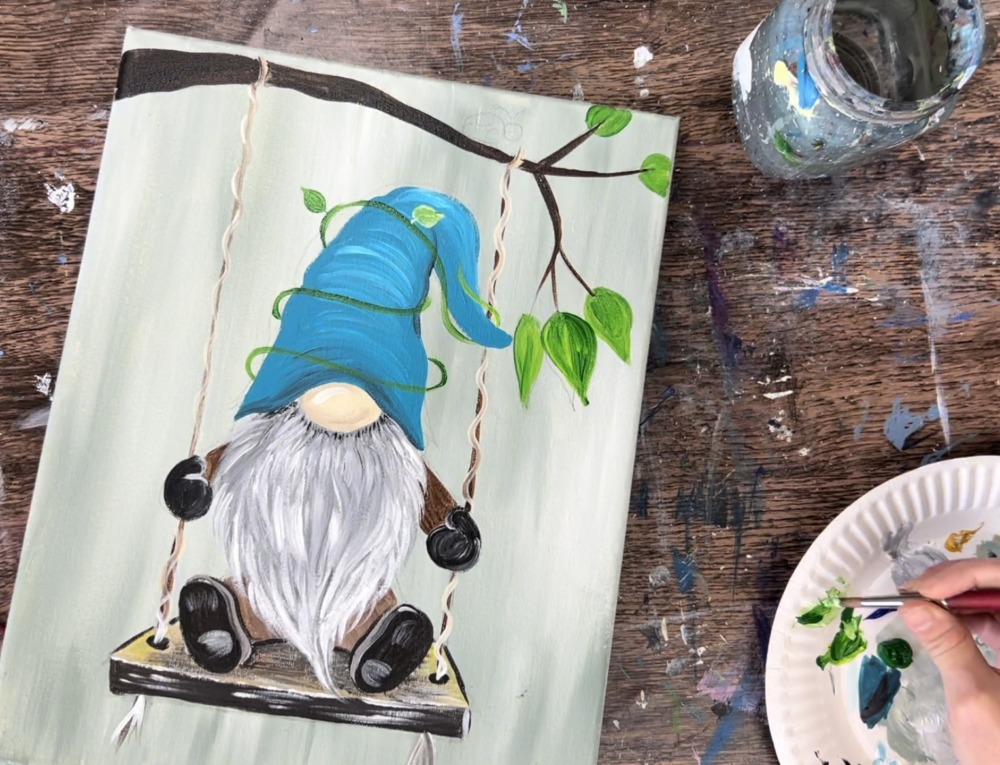
Then paint small leaves on the vine. To make the leaves lighter, mix a little titanium white into the green. This will help the leaf to stand out against the dark turquoise hat.
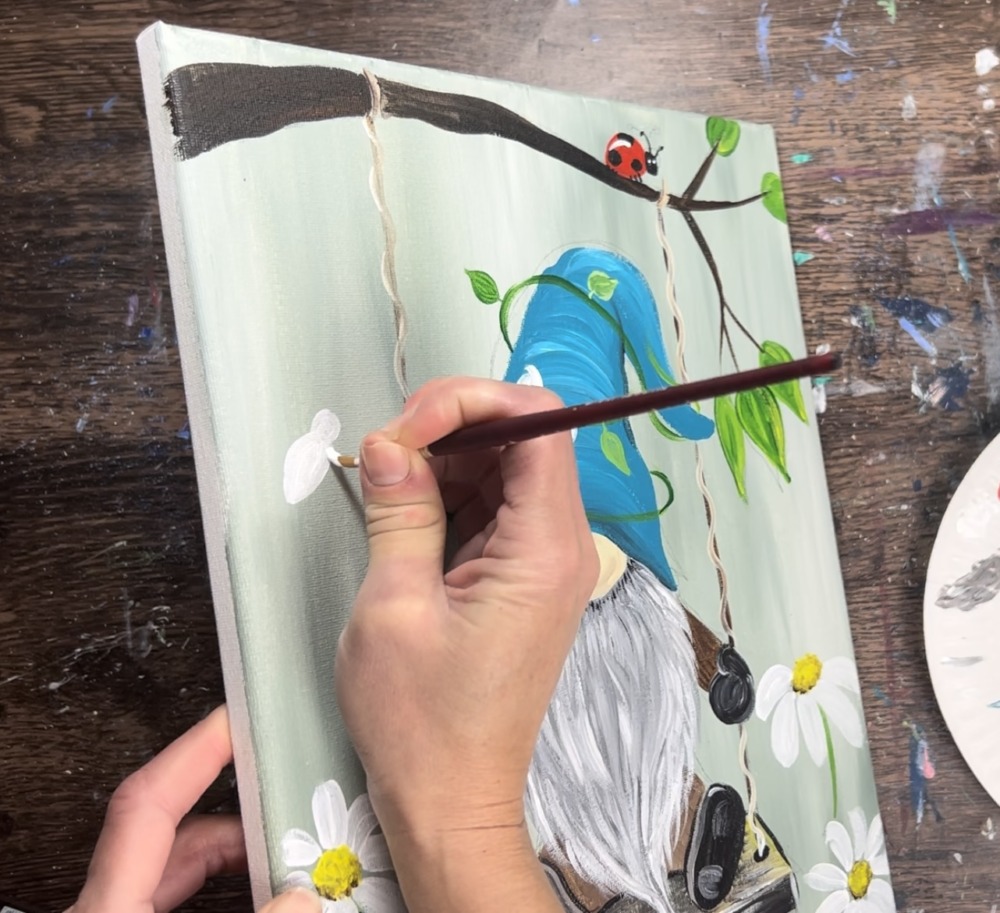
12. Paint daisies
Paint the yellow center of the daisies first. Use a #4 round brush to paint two yellow circles and one yellow semi-circle (for the daisy with just the side view).
Rinse and dry your #4 round brush. Then load it into just titanium white. Paint the petals of the daisies. Paint each petal so it is slightly more narrow at the base and curves down and is rounded at the edges.
For the side-view daisy, paint only petals on the bottom.
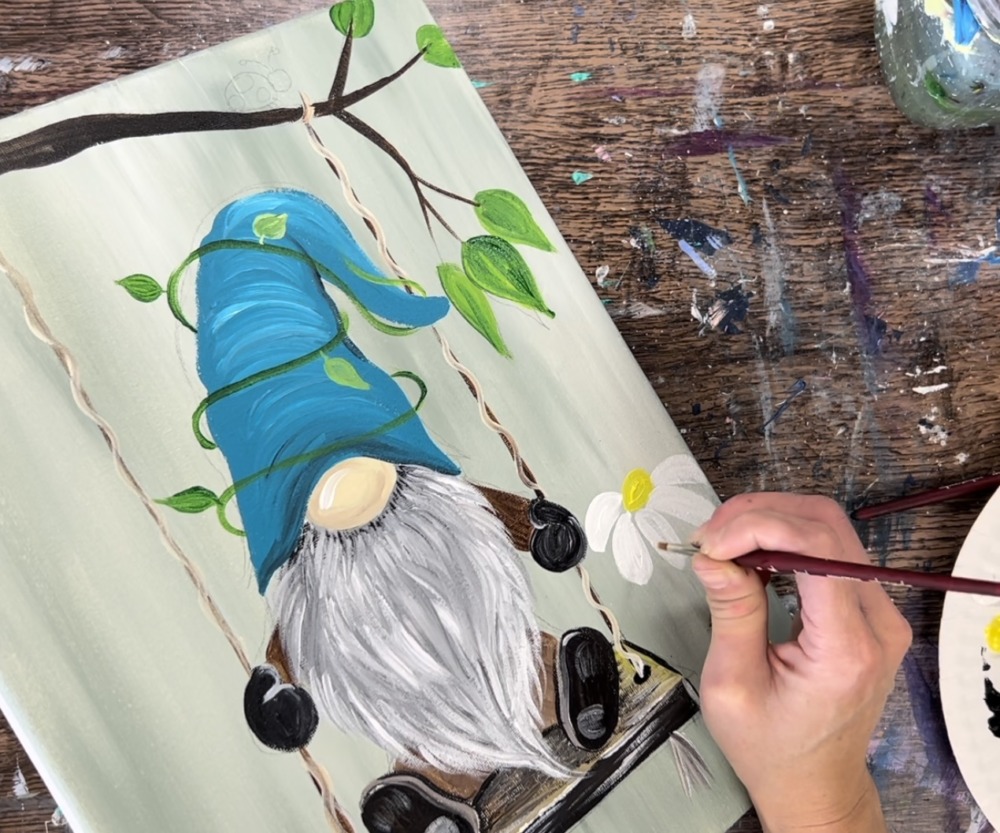
Then paint the petals on the other two daisies so they go completely around the circle.
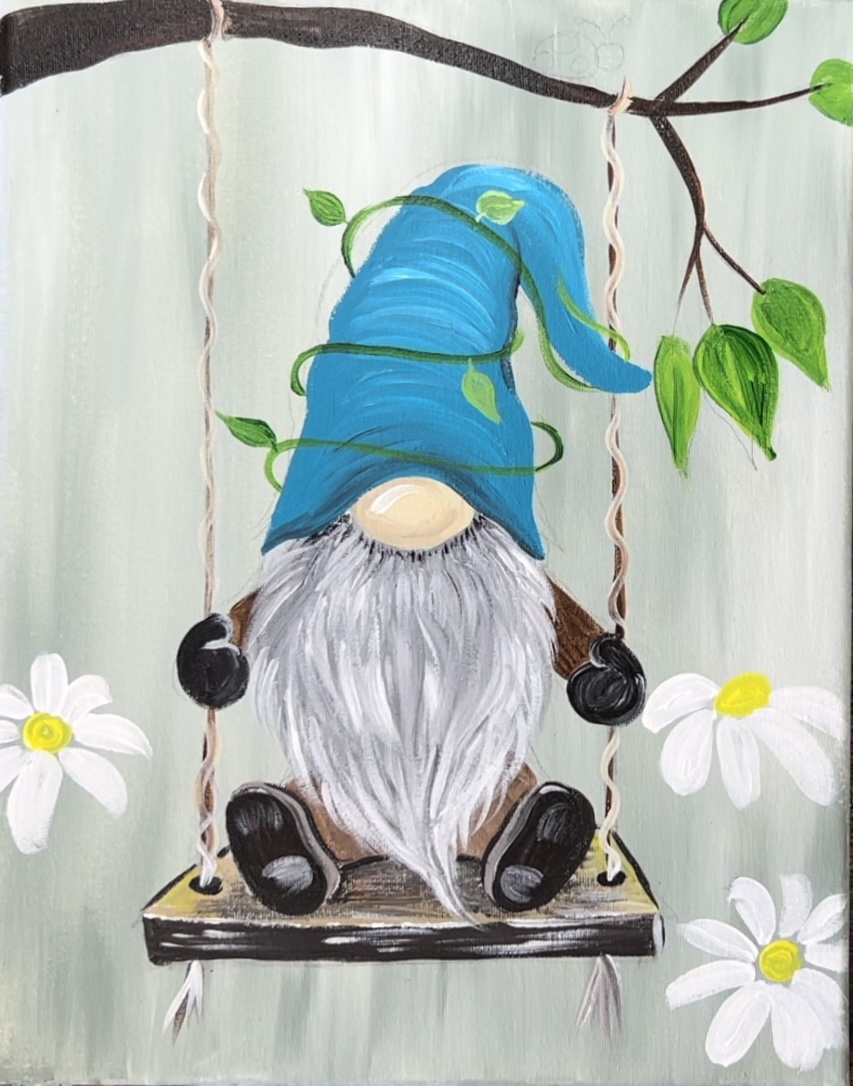
Next, load the tip of your #4 round brush into burnt umber. Stipple small brown dots on the outside edge of each of the yellow circles.
Then paint the stems of each of the daisies. Do this with the #4 round brush and the green. Paint each stem so that it slightly bends and then connects to part of each of the daisies.
Next, you can paint small grass blades on the bottom of the canvas. Do this with a variety of the hookers green and yellow. Paint small, angled strokes that go in different directions.
Next, paint the flower on the gnome’s hat that is attached to the vine.
13. Paint ladybug and bee
Use the color pyrrole red and the #4 round brush to paint the body of the ladybug. Paint a semi-circle shape just slightly above the branch. Then paint the head using mars black.
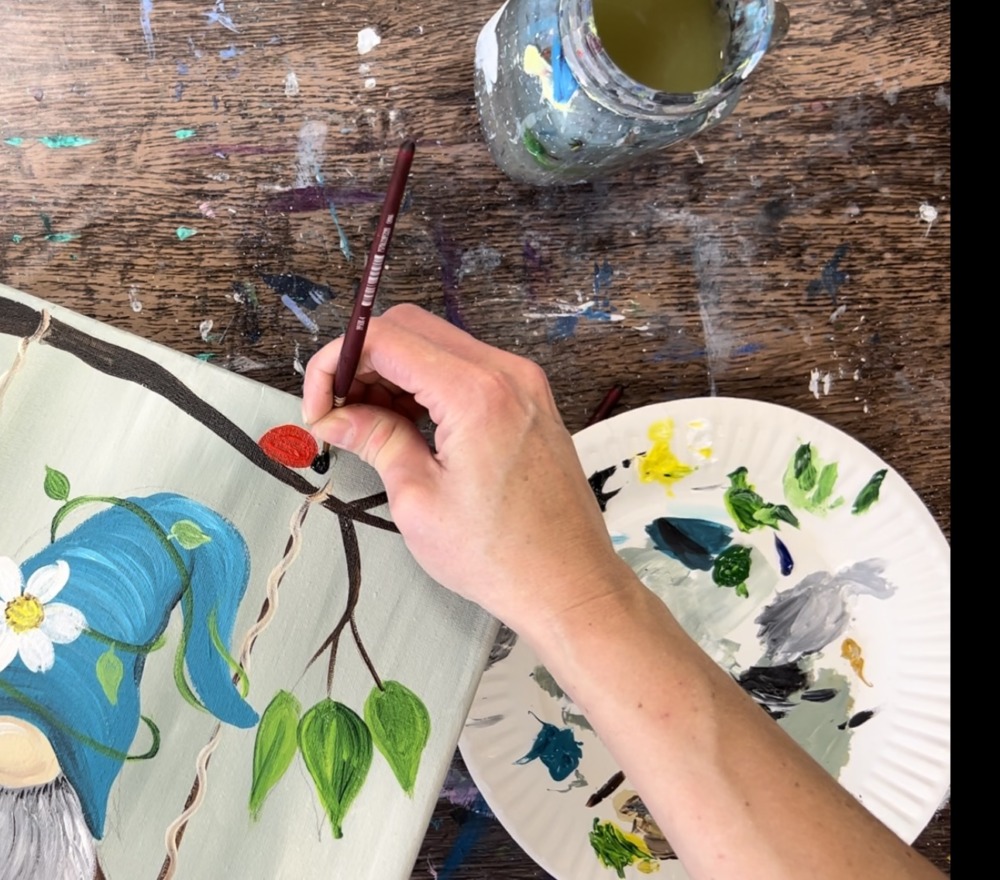
Then paint the antenna using mars black.
After the red dries, paint the spots with mars black. Also, paint small legs attached to the bottom of the body and on top of the stem.
After the black spots dry, paint a curved white highlight on the top of the body. Then paint two white dots for eyes.
Next, paint the bee. First paint the body and head with a layer of titanium white. Paint a tear drop shape for the body and a small circle for the head.
Then after the white dries, paint a layer of cadmium yellow light hue over it.
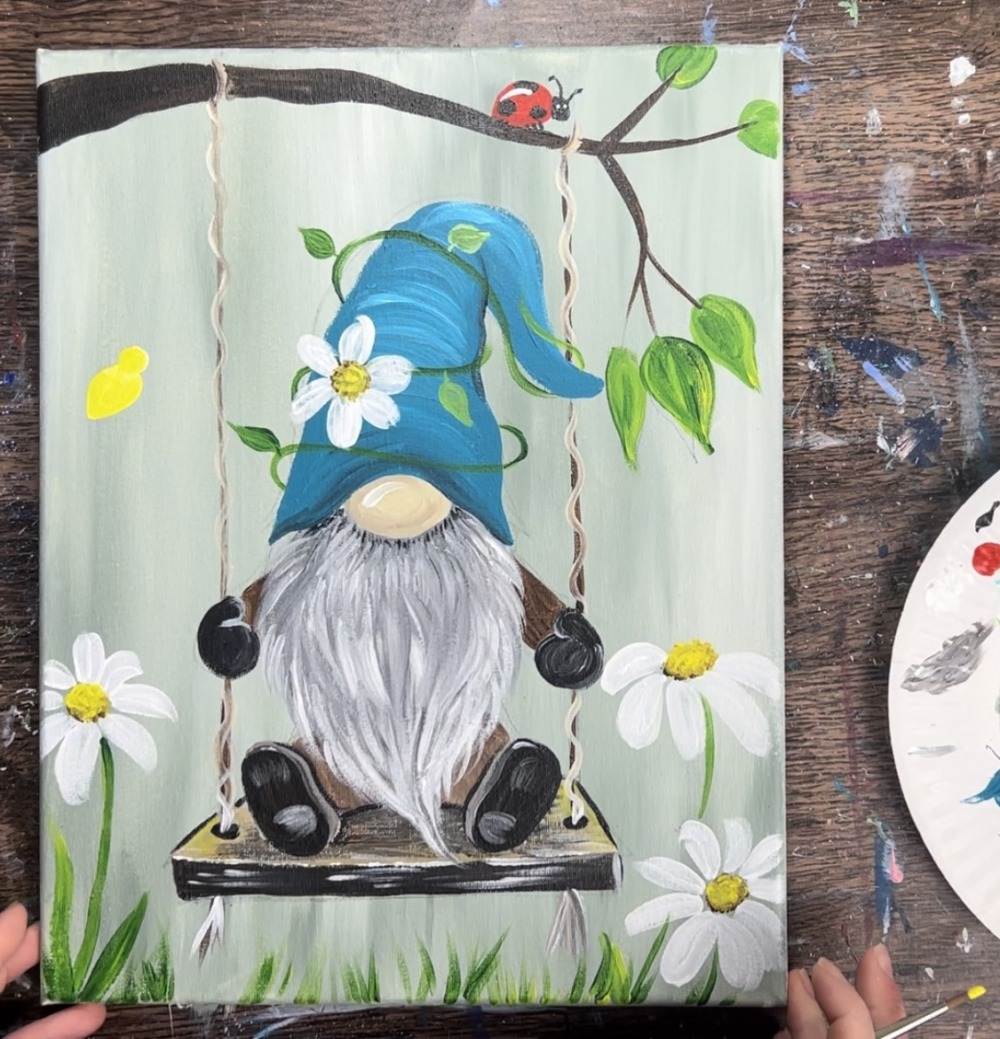
Wait for the yellow to dry. Then paint the stinger and three stripes. Use mars black and the #4 round brush. To give it more of a fuzzy look, paint little vertical marks for the stripes.
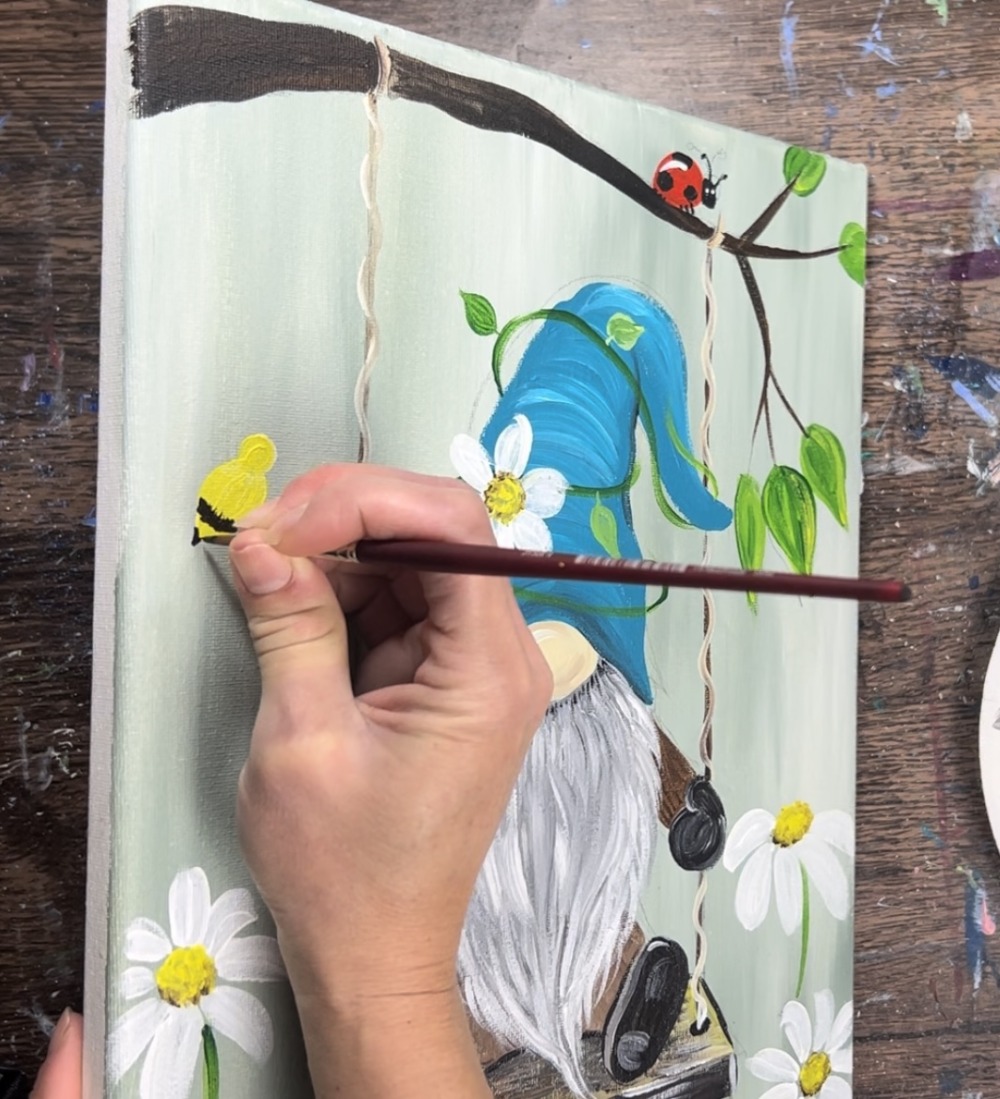
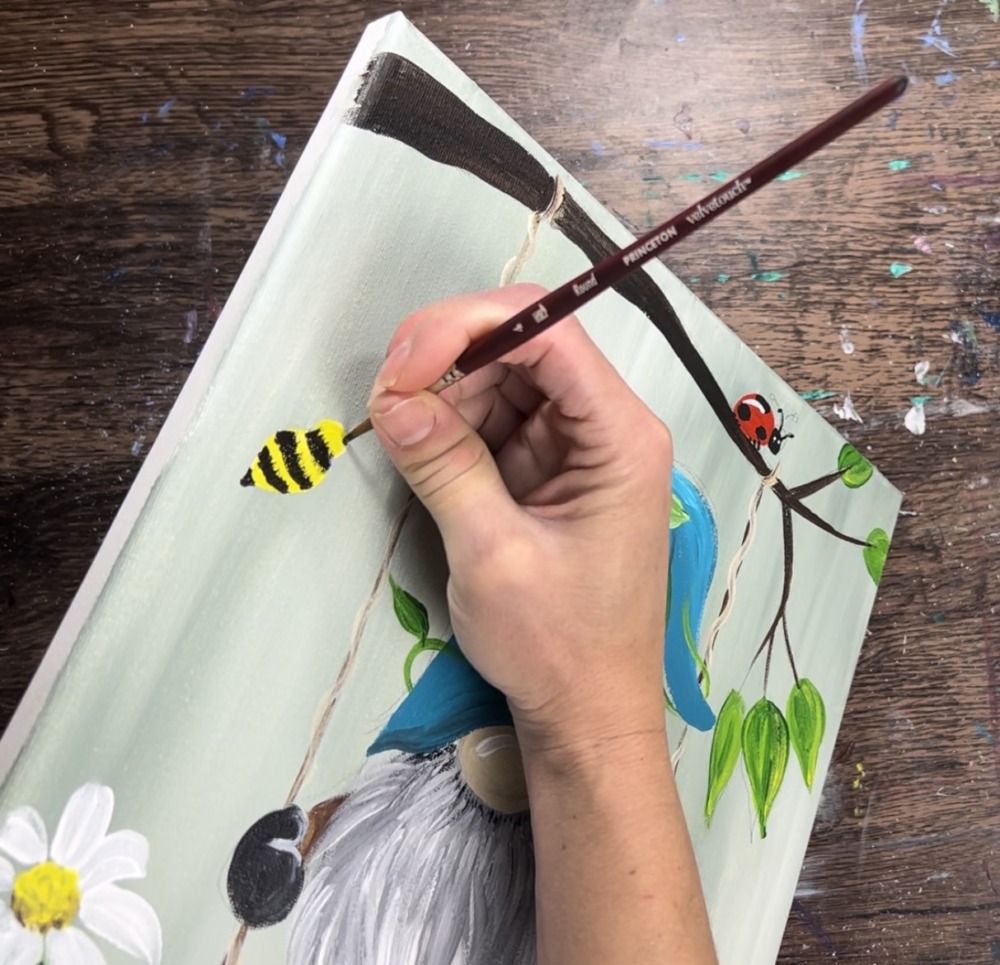
Paint the head black and then paint two antennae.
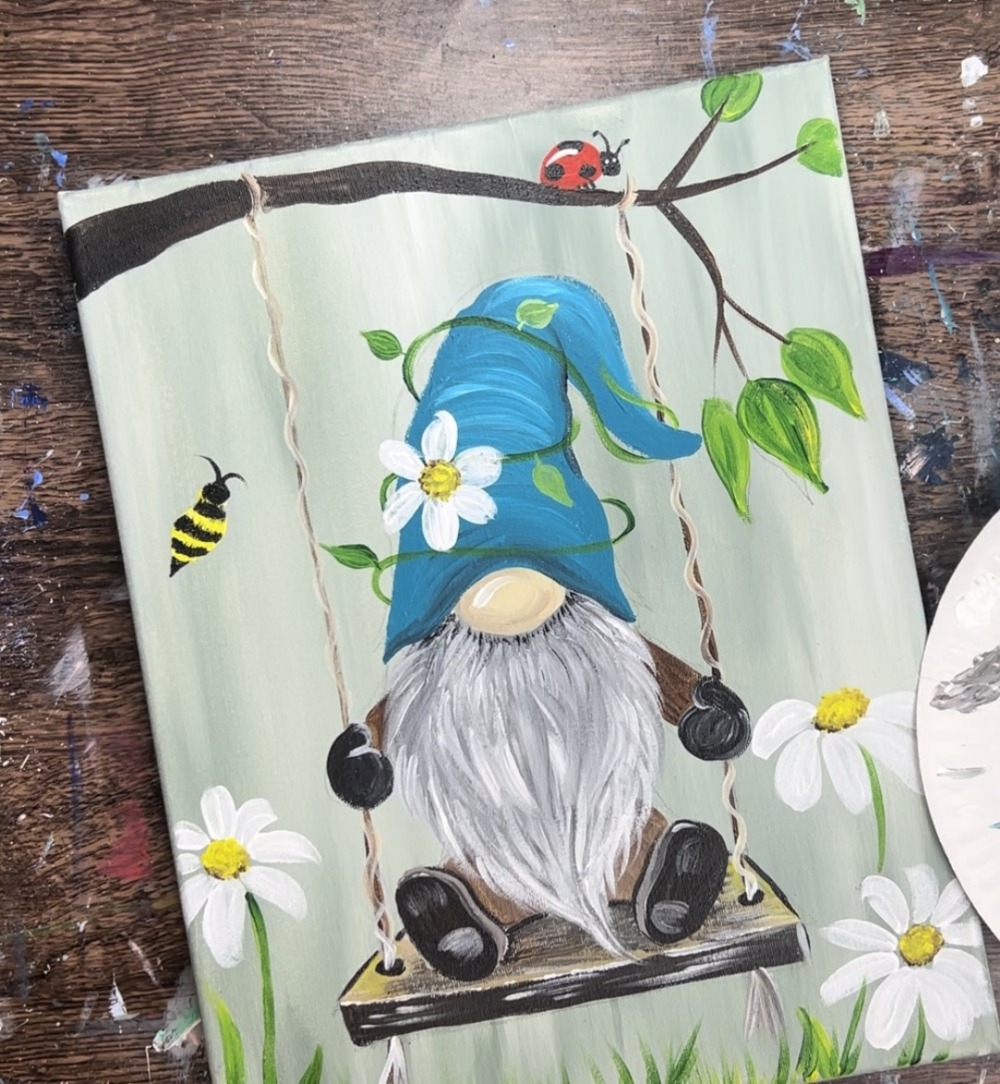
Then paint two wings. These are almost heart-like shapes that meet at a point in the middle top area of the bee. Use the #4 round brush and titanium white to outline the shapes.
Then fill in the wing using a very thin layer of white.

Next, loosely outline the wings with mars black and then paint a few diagonal lines over the wings.
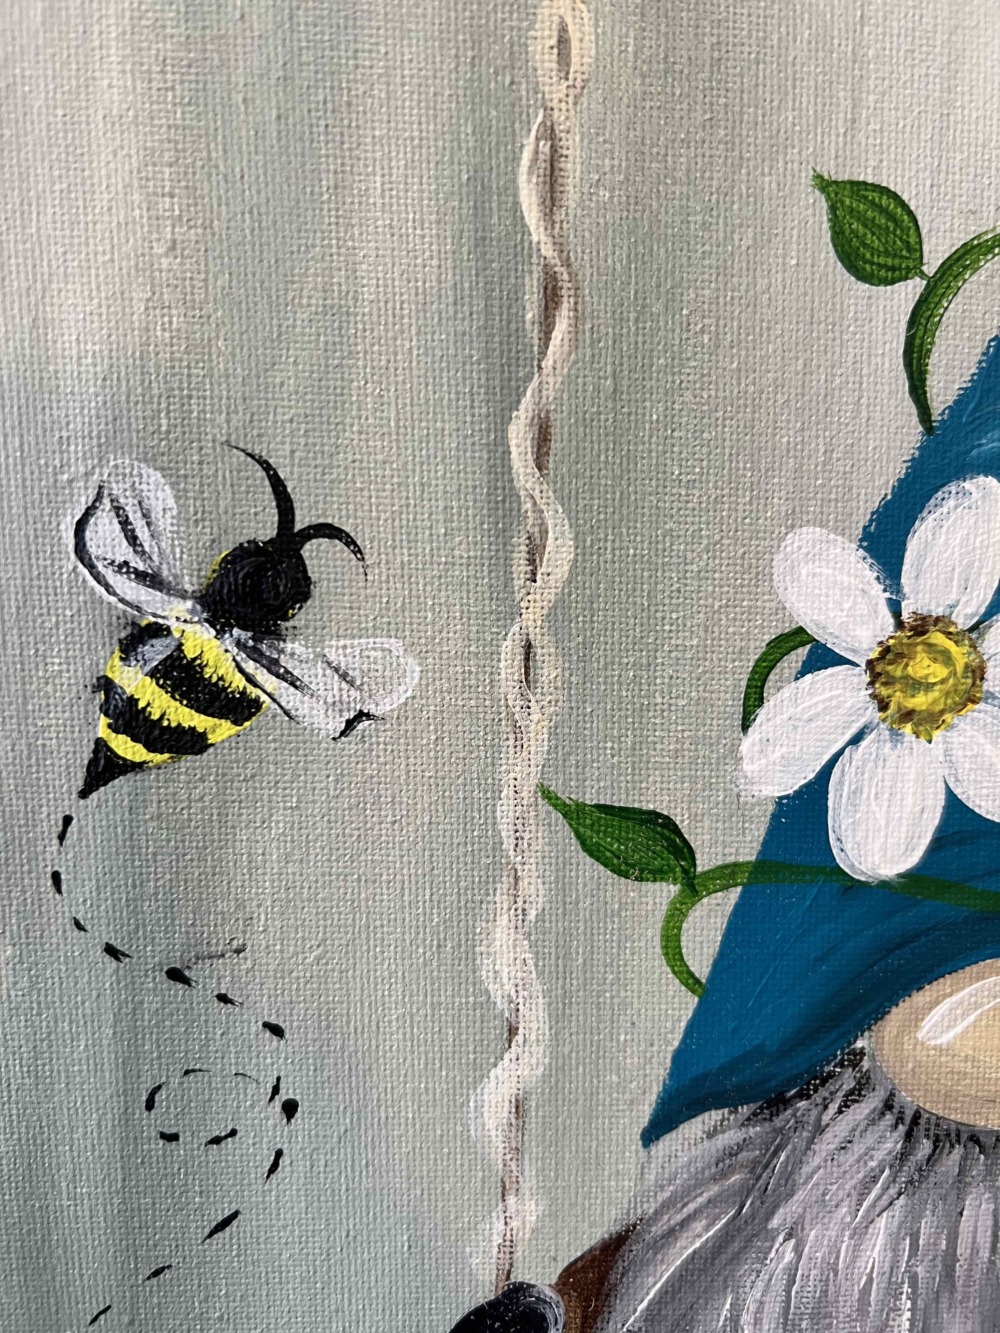
Paint little dash lines for the trail of the flying bee. Also, paint a white highlight line on the left side of the bee’s body.
Finished!