
Would you like to save this?
The tutorial includes a traceable of the mushroom house although I will demonstrate in the direction and the video how to draw the simple design.
Enjoy and happy painting!
Materials
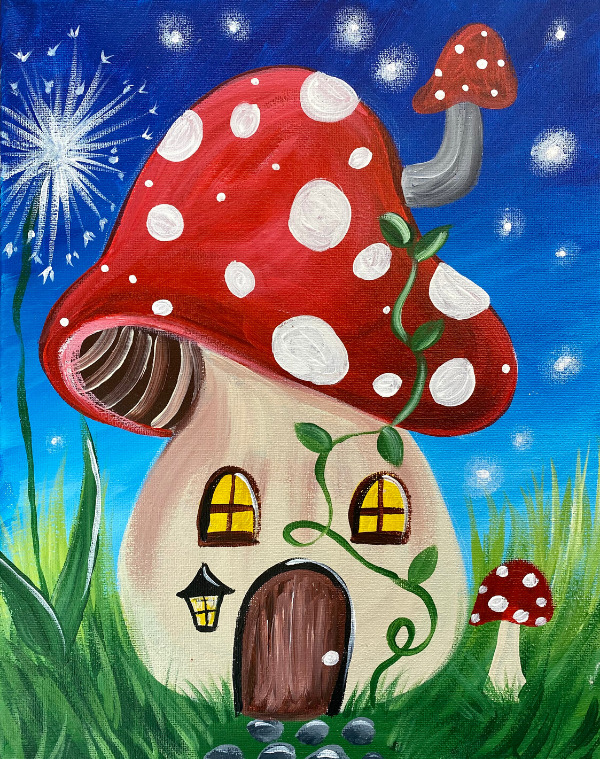
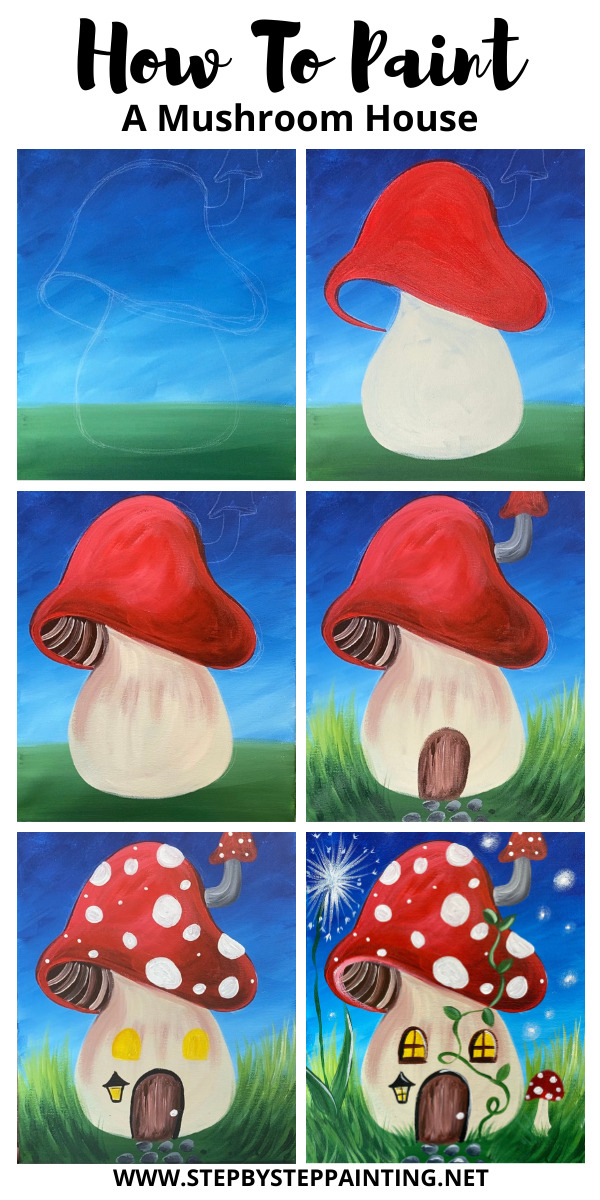
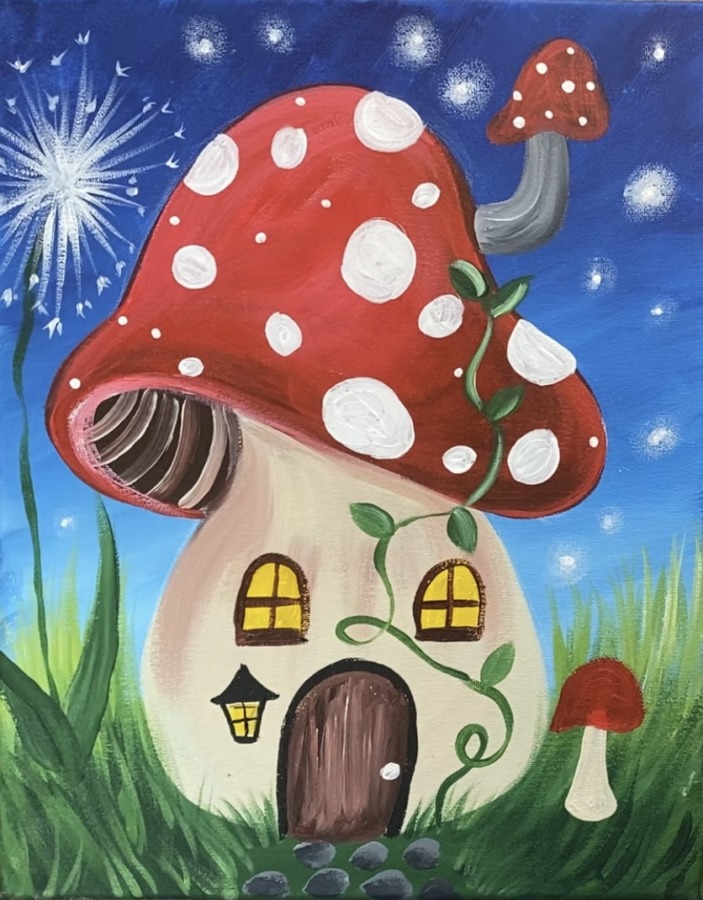
Mushroom House Painting Tutorial
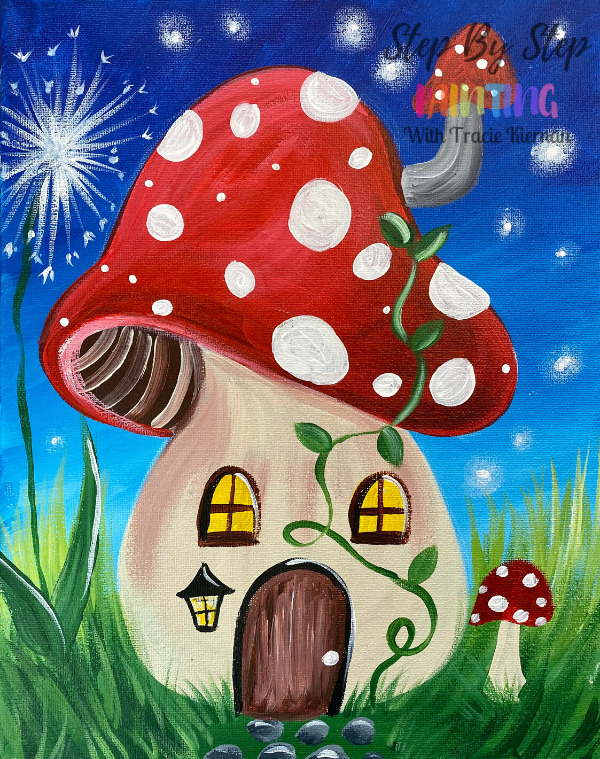
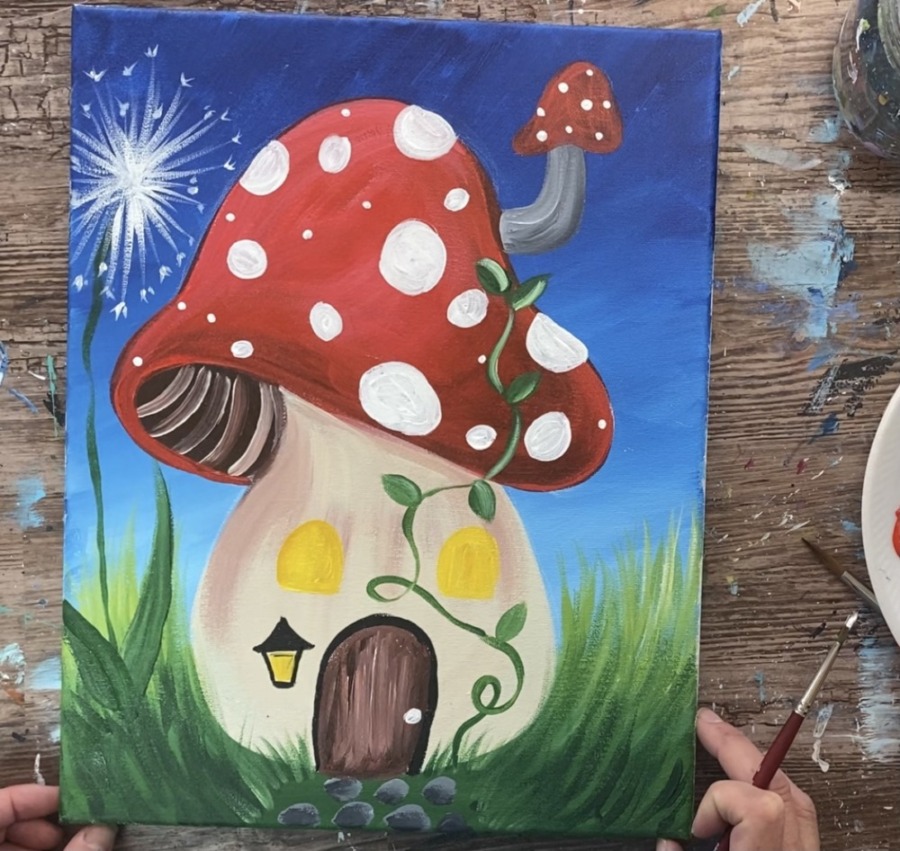
Learn how to paint a mushroom fairy (or gnome) house with acrylics on an 11 x 14 canvas.
Materials
- 11 x 14 Canvas
- Acrylic Paint
- Brushes
- White Chalk Pencil (or white chalk)
- Optional Traceable & Transfer Paper
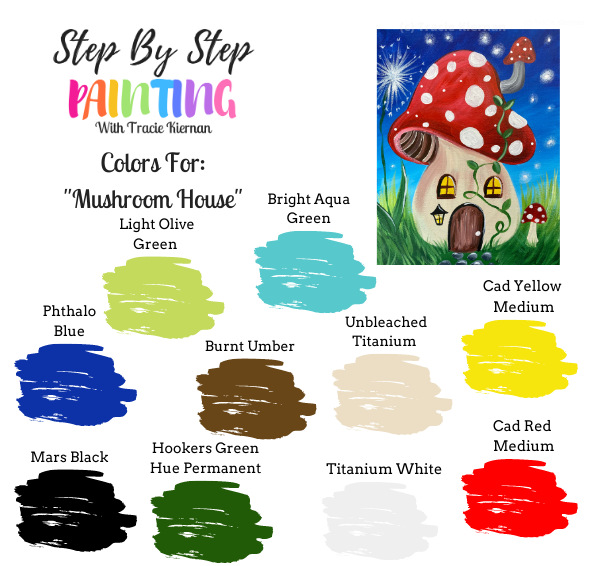
Colors
- Cadmium Red Medium Hue
- Cadmium Yellow Medium Hue
- Hooker's Green Hue Permanent
- Phthalo Blue
- Light Olive Green
- Mars Black
- Burnt Umber
- Unbleached Titanium
Brushes
- 3/4" Flat Wash
- #8 Round
- #4 Round
Instructions
- See tutorial on www.stepbysteppainting.net for full instructions!
Color Palette
Craft Paint Color Suggestions:
- White
- Black
- Bright Yellow
- Too Blue
- Flag Red
- New Shamrock
- Holly Branch
- Melted Chocolate
- Bimini Blue
Directions At A Glance:
Traceable

Video
Step By Step Directions
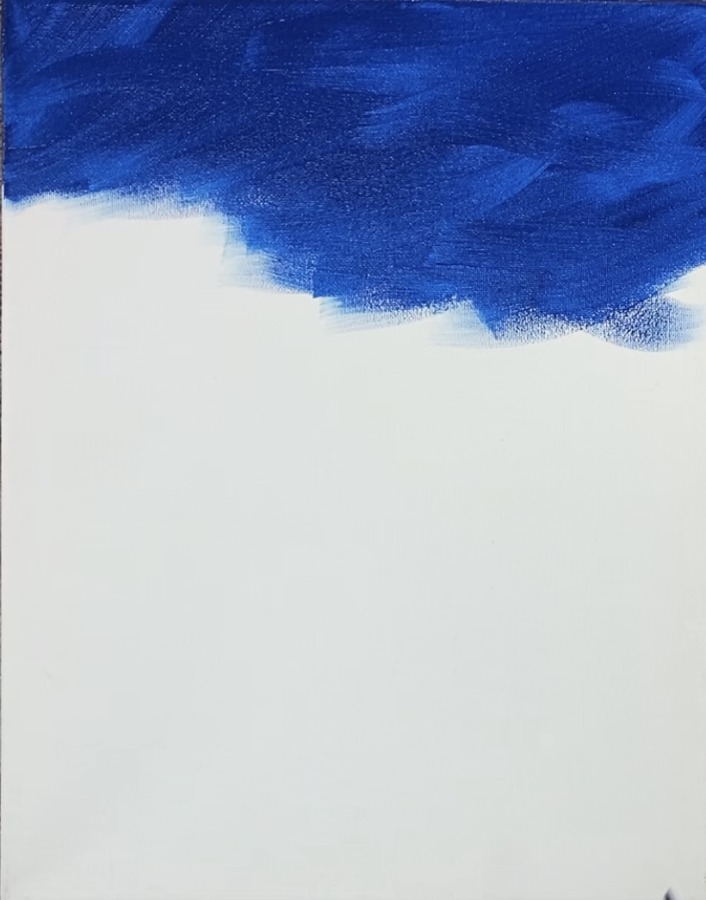
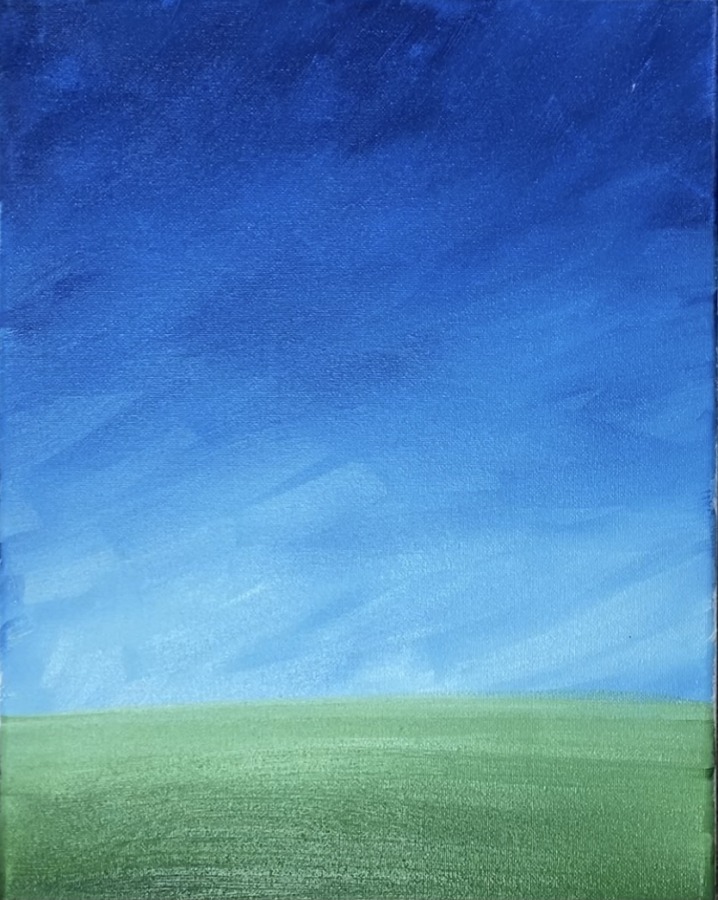
1. Paint The Background
Position your 11 x 14 canvas so it is vertical. Load your palette with phthalo blue and titanium white acrylic paint. Use a 3/4″ flat wash brush and dip it in the water but pat it dry.
Load the 3/4″ flat was brush in phthalo blue. Paint textured angle strokes starting at the top of the canvas. Go about a quarter of the way down the canvas.
Then load a little bit of titanium white to your brush. Continue to paint textured strokes down the canvas blending the titanium white into the phthalo blue so the blue gets lighter and lighter as you work your way down.
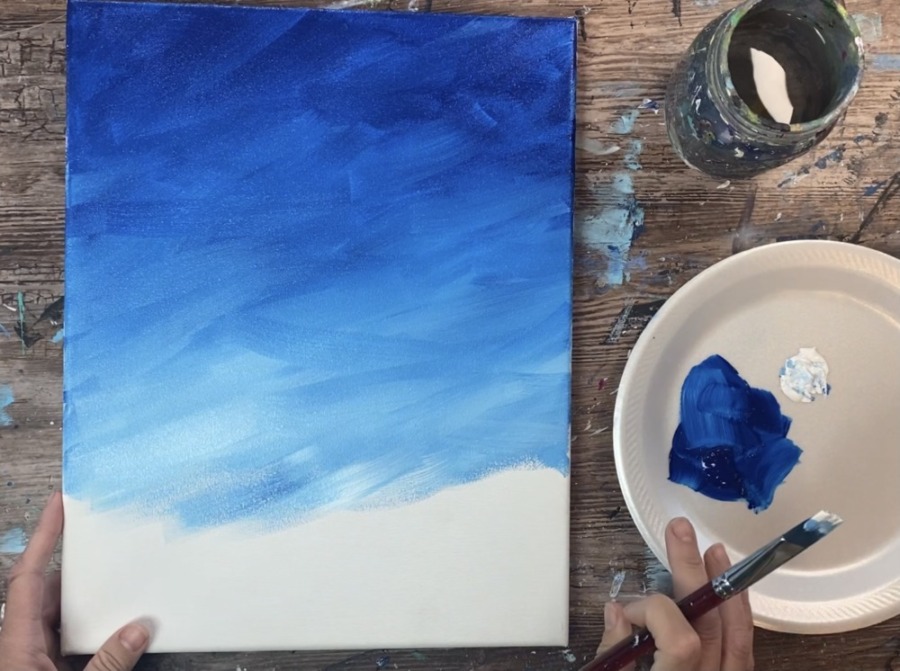
Leave about 2-3 inches of space at the bottom.
Tip: as an alternative to this technique, you can paint horizontal strokes instead of textured strokes. The trick is to get the top to be darker and the bottom to be slightly lighter. This creates contrast in the background.
2. Paint The Ground
Load your palette with hookers green hue permanent (dark green) and light olive green (light green). Add more titanium white to your palette as well.
Start with the dark green. Use your 3/4″ flat wash brush and paint left and right strokes starting at the bottom.
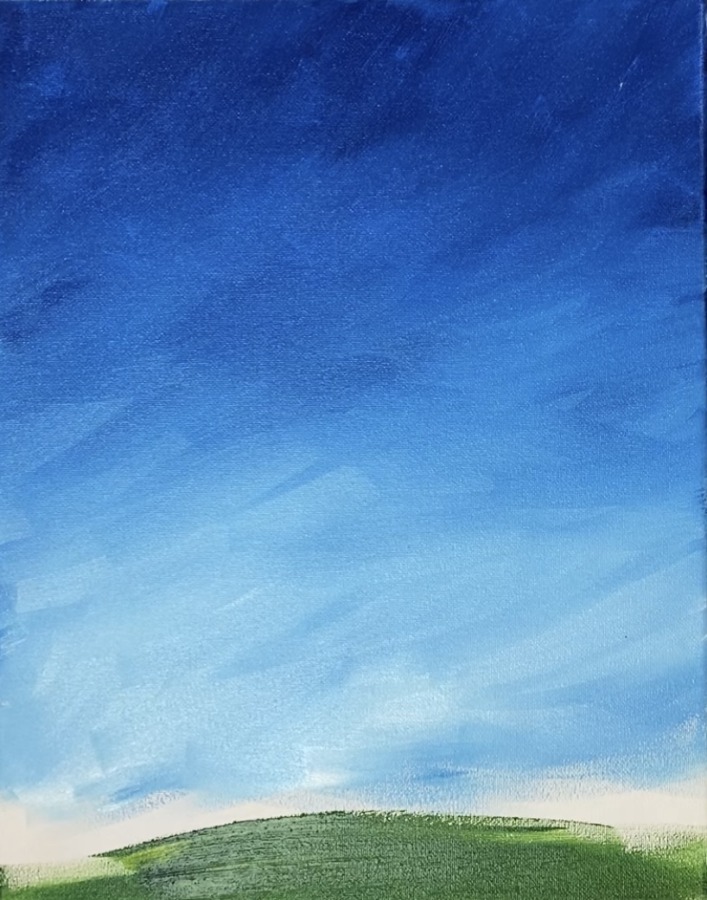
Then lightly blend in some of the lighter green and white at the top. Form a grass area about 3-4 inches at the bottom of the canvas. This should be a thin layer. Later on in this tutorial, the grass blade textures will be painted but for now this is the first layer.
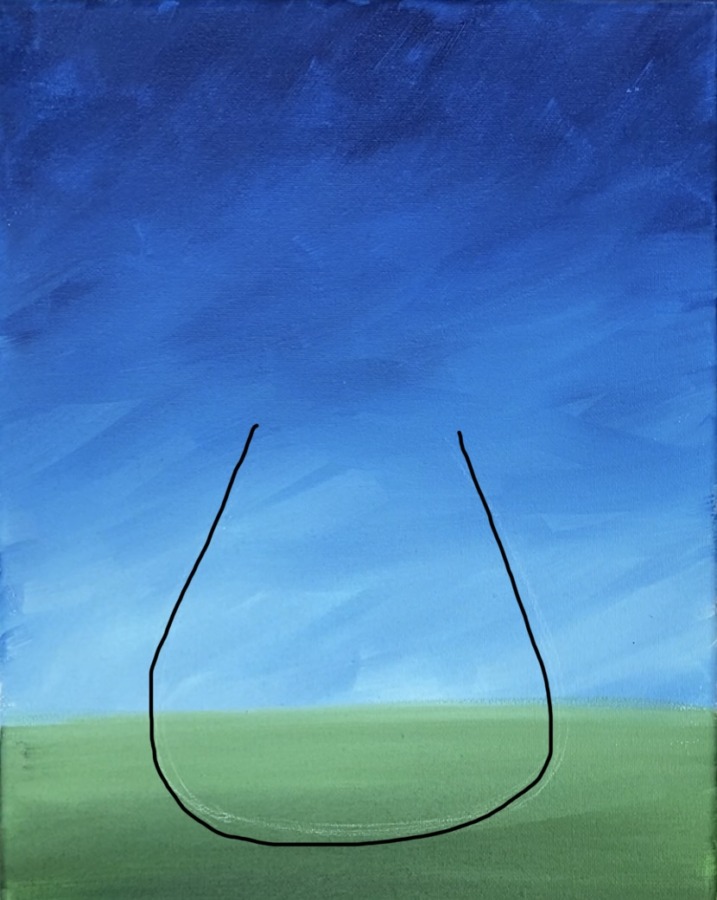
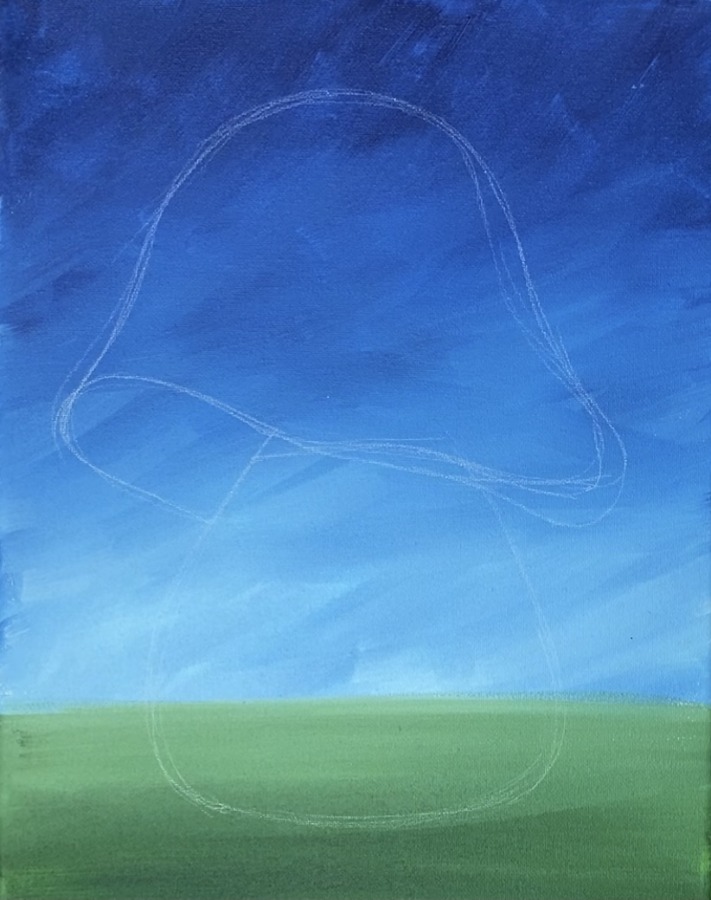
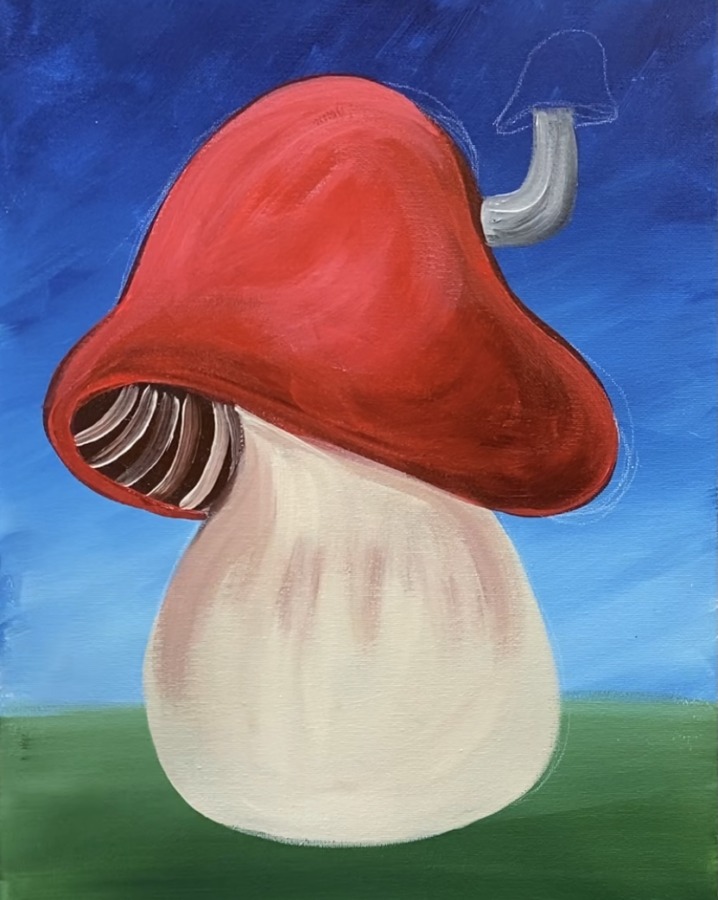
3. Draw The Mushroom House
Use the provided traceable or draw the mushroom house lightly with a piece of chalk or chalk pencil. I used a chalk pencil so the lines of my mushroom house would be thin.
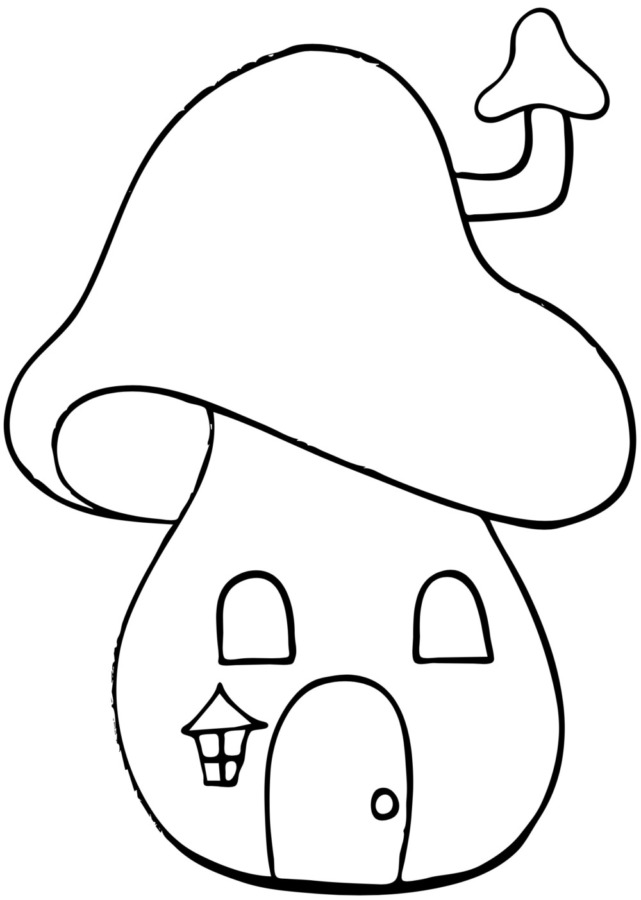
Start at the bottom and sketch the base of the mushroom. It should be large and wide on the bottom and get more narrow at the top.
Tip: your drawing does not need to be perfect because when you paint this in you can always adjust it! Chalk will erase with a wet paint brush or wet wipe.
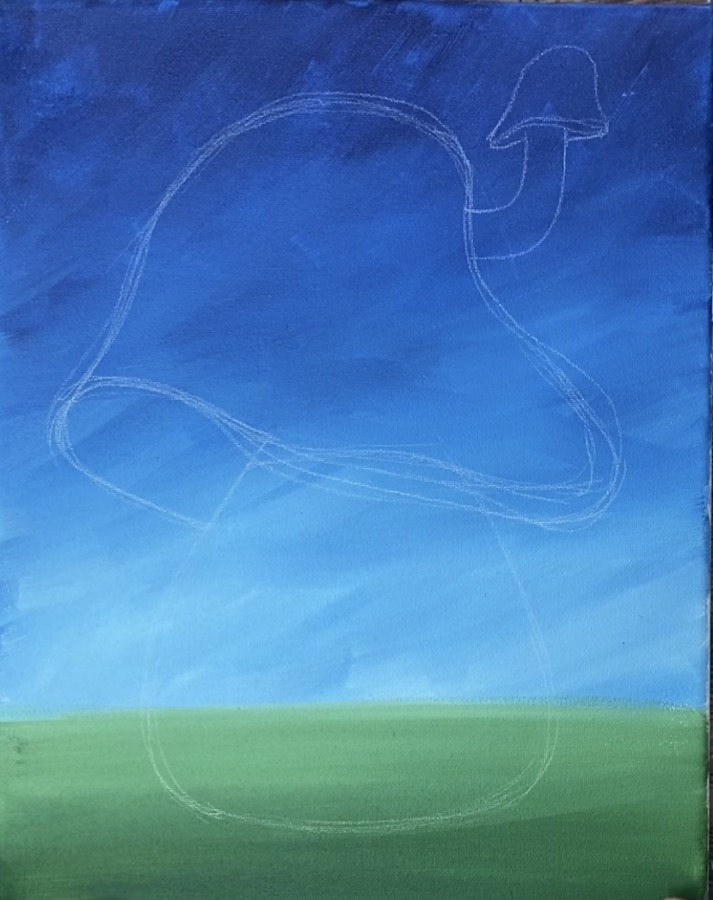
Then lightly draw the top of the mushroom so it curves down on the lower left and then curves upwards.
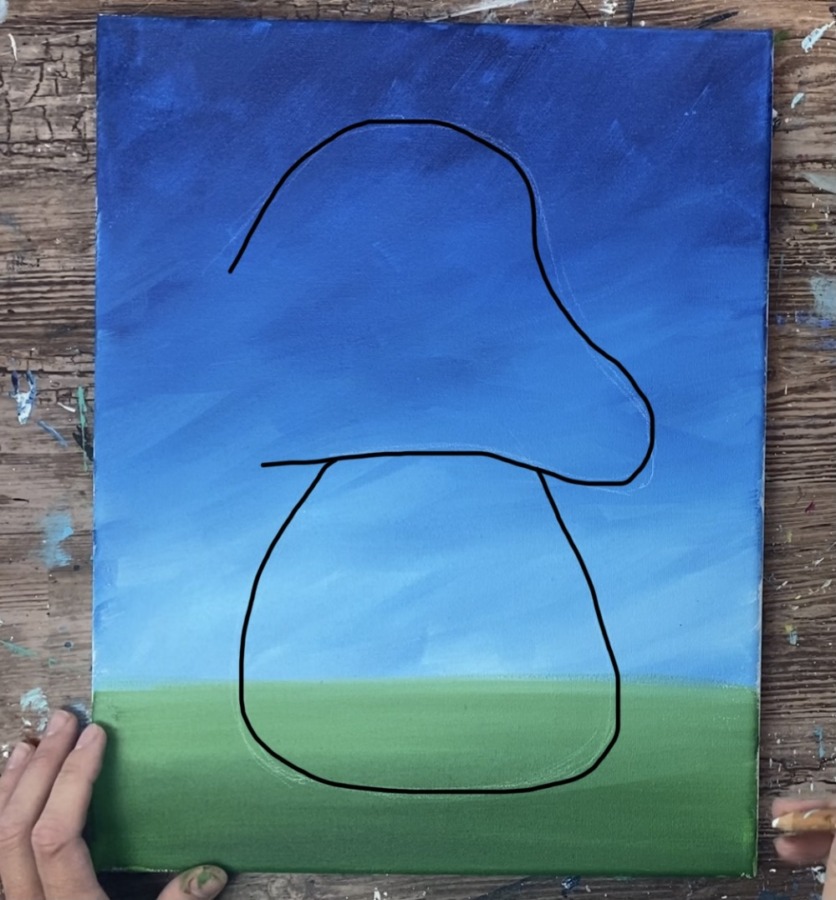
Then draw the mushroom top so the bottom left area goes upwards so you can see the underneath area of the mushroom.

Then draw the chimney so it bends upwards at a 90 degree angle. Draw a mushroom top on that piece.
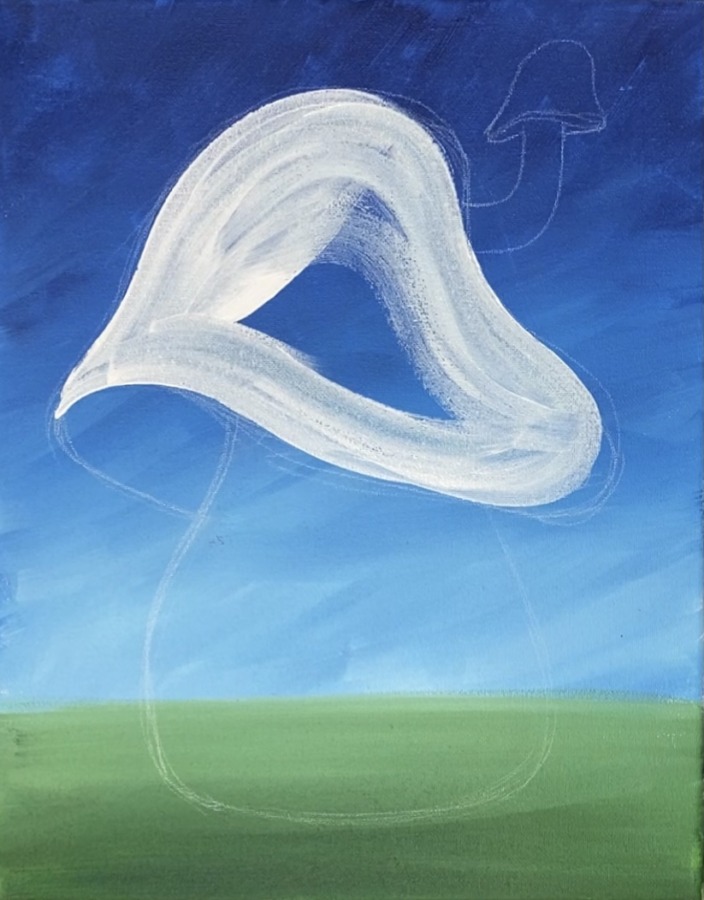
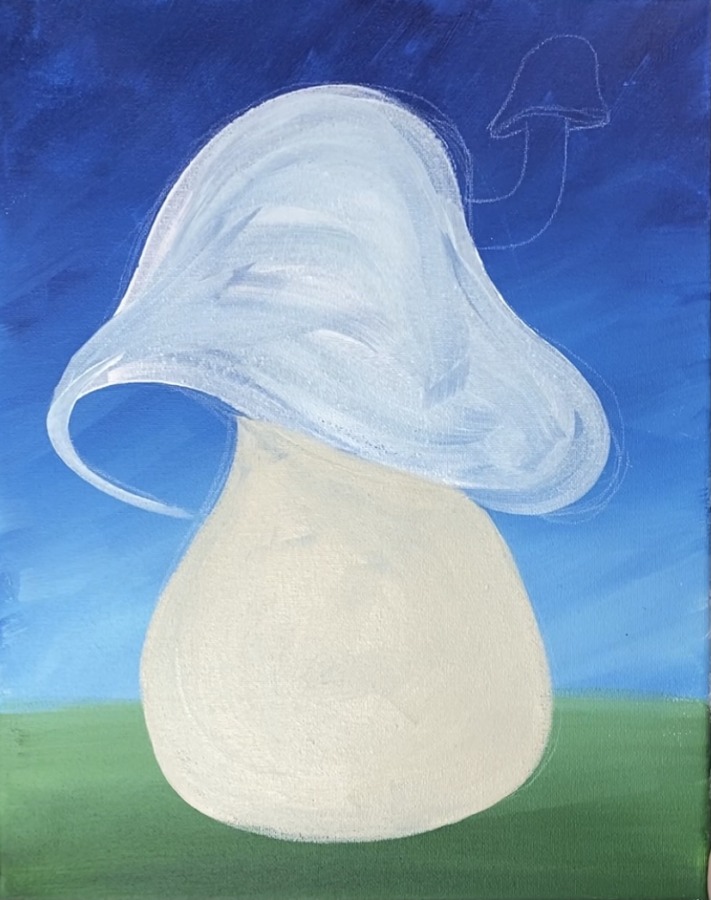
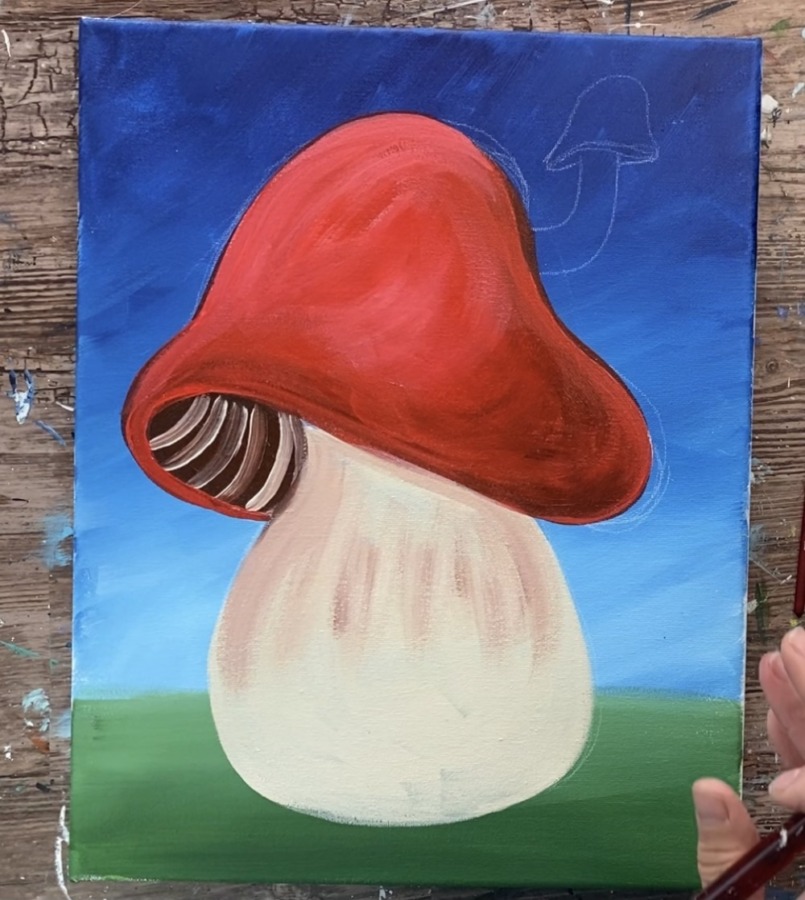
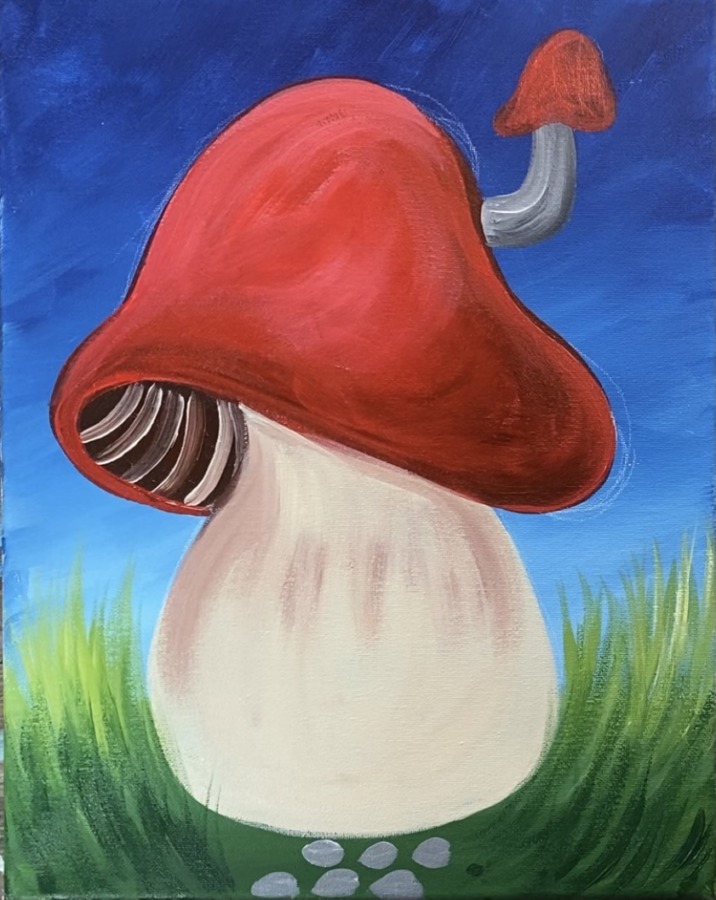
4. Paint The Top White & Bottom Of Mushroom
In order to get good “coverage” with the red I recommend painting the top of the mushroom white first and then painting the red over it after it dries. This will allow your red to show up brighter against the dark background.
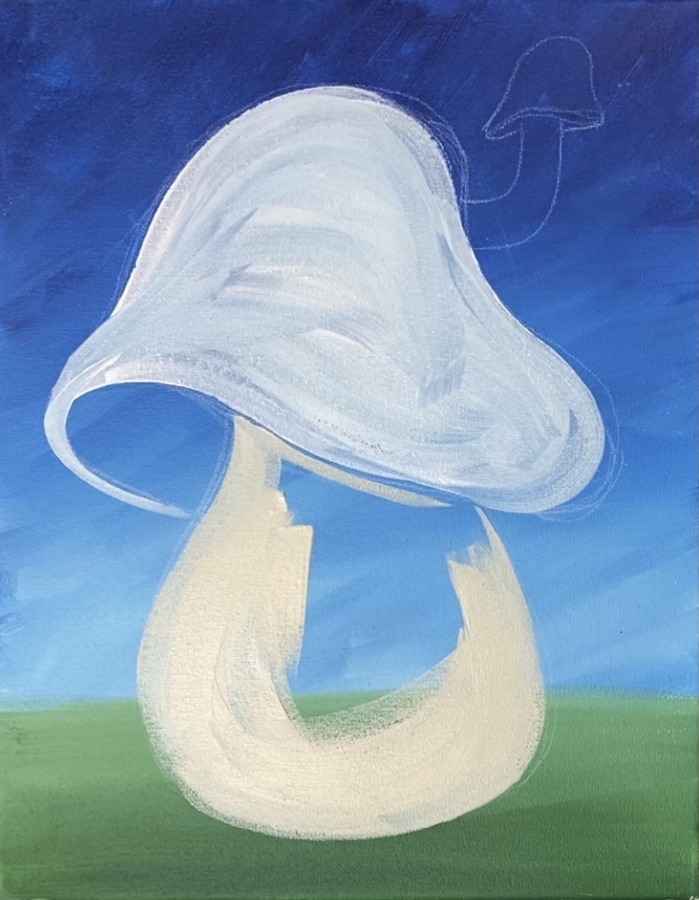
Use a 3/4″ Flat Wash brush and Titanium White. Paint the top of the mushroom a thin coat of white.
Next paint the bottom of the mushroom with unbleached titanium. You can also use the 3/4″ flat wash brush for this step.
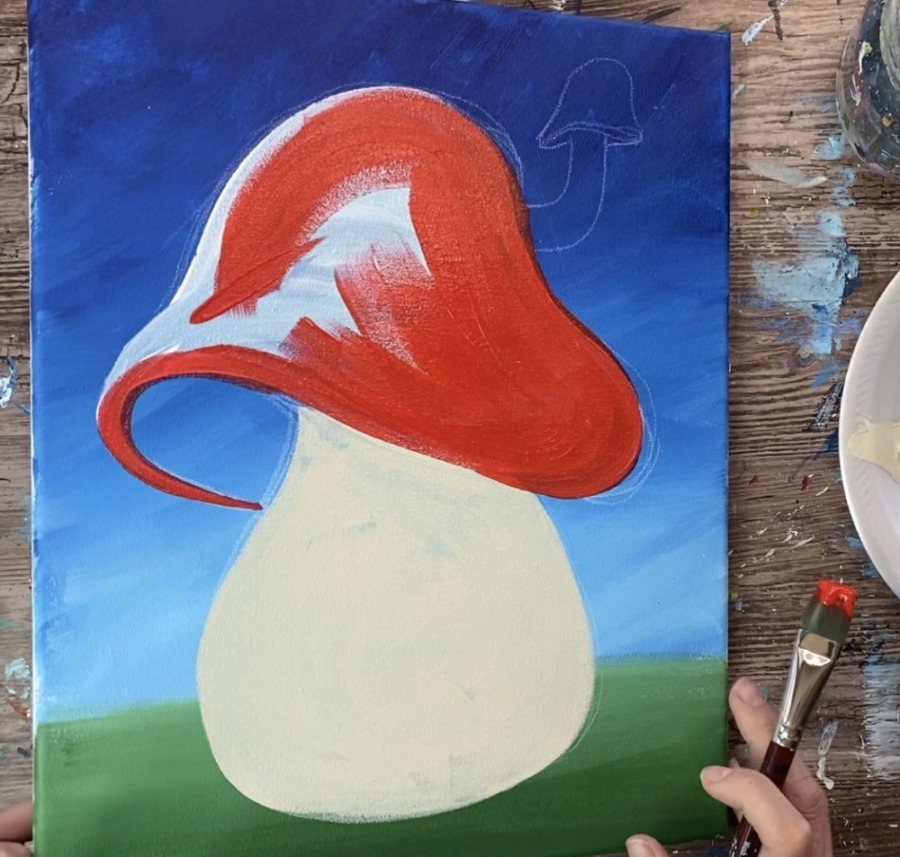
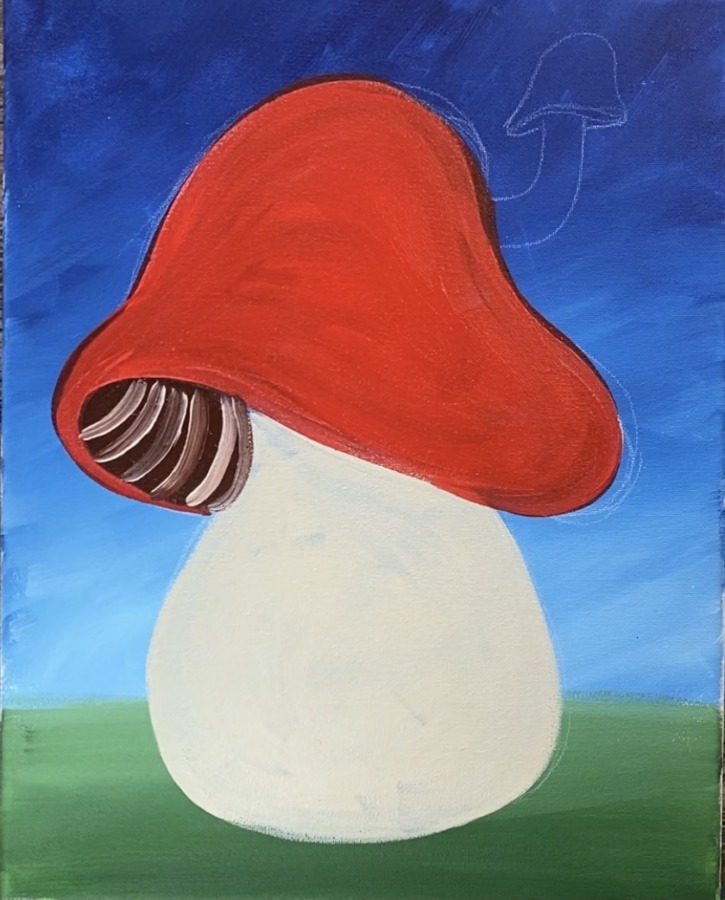
5. Paint the top red
Make sure the white layer on the top of the mushroom is dry. Load your 3/4″ wash brush in cadmium red medium hue. Paint this a solid coat of red. Do this in contouring/ curving strokes.
6. Paint under part of mushroom top
Use a #4 round brush and load burnt umber onto your palette. Paint the under part of the mushroom this dark brown color.
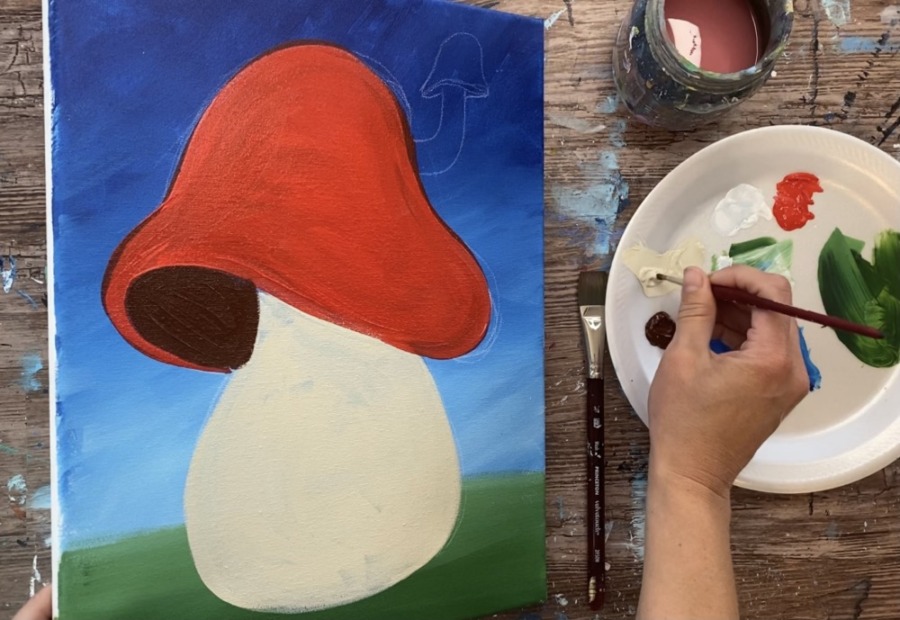
Then wipe off your round brush and load it into unbleached titanium. Paint curved diagonal lines in the brown area to represent the texture in the under part of the mushroom top.
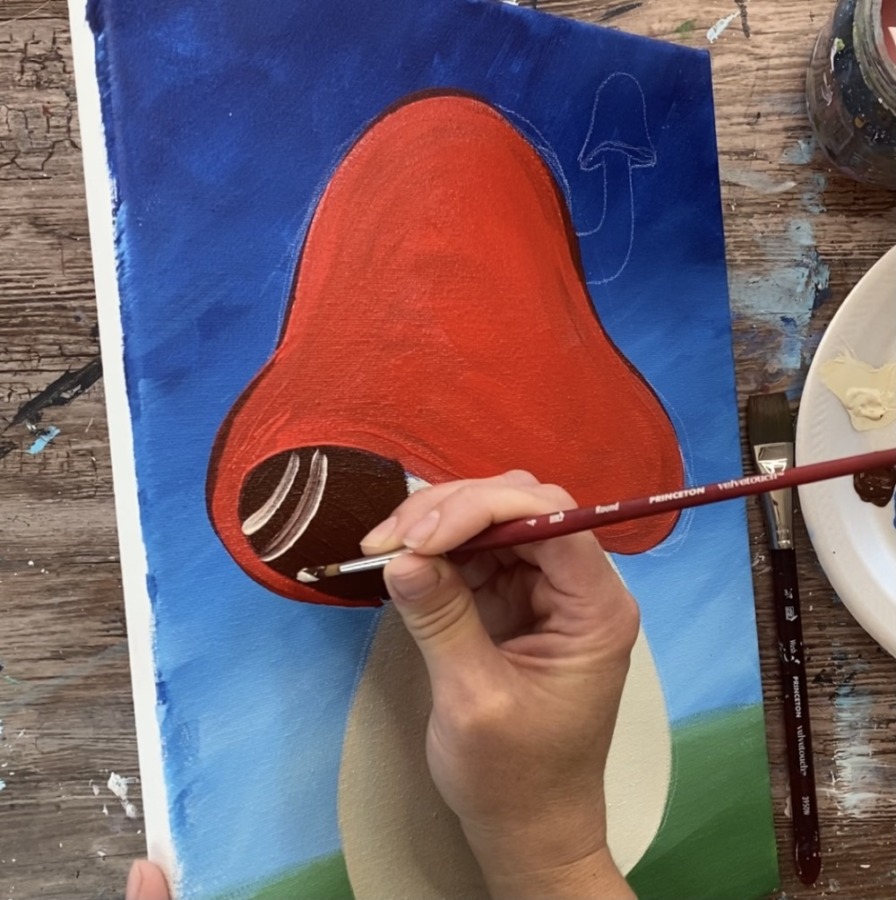
Your unbleached titanium color will slightly mix with the brown when you do this.
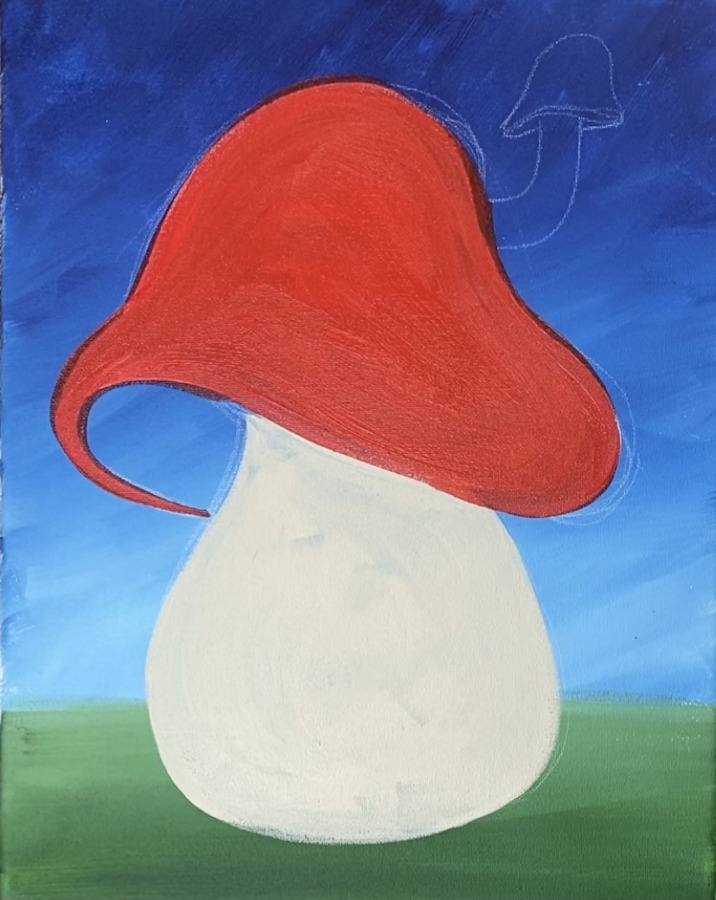
7. Shade mushroom (optional/ advanced step)
Make a darker shade of red by mixing a tiny bit of burnt umber into red so that it is about two shades darker. Add some darker red in the area of the mushroom on the lower right and blend it back into the red. Do this in curved, contouring strokes.
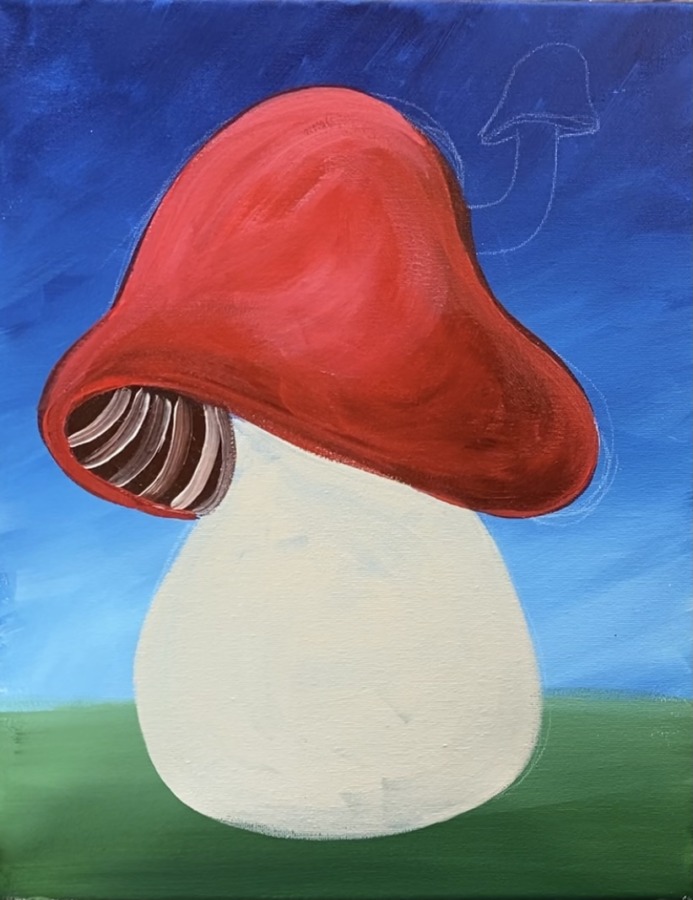
Then make a slightly lighter red by mixing a little bit of titanium white into the red (so it is about two tints lighter). Blend some of that lighter red in the upper left area of the mushroom and at the rounded top.
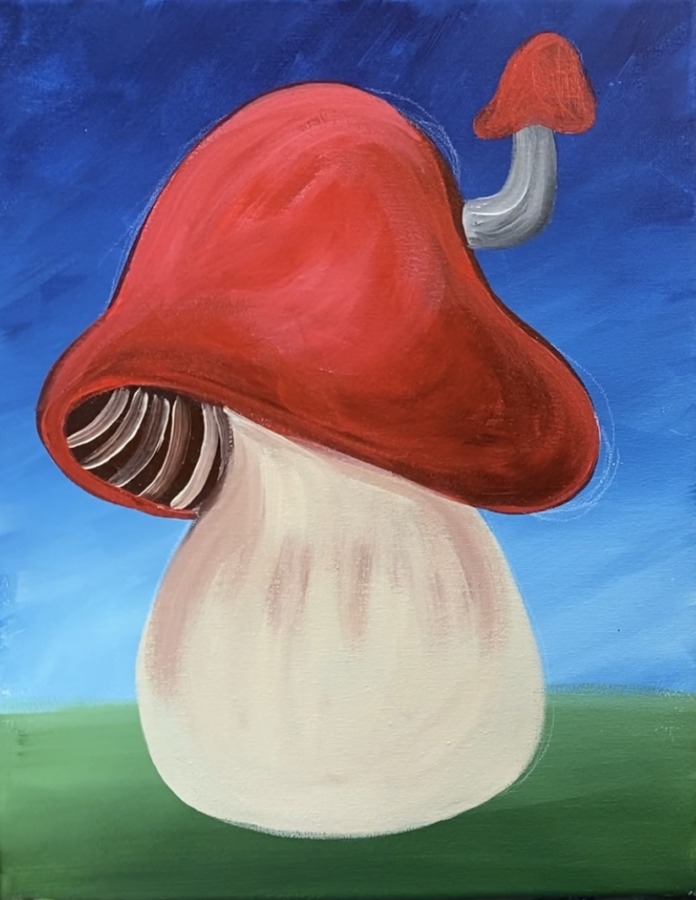
8. Paint The Chimney
Mix a gray on your palette by mixing a little bit of mars black into titanium white. Use a #4 round brush to paint the chimney pipe.
Then paint the mushroom top red. You can “white out” this shape first if you want your red brighter but I chose not to do this.
9. Paint The Grass
Use a #8 round brush to paint the grass. On your palette mix a little white into light olive green so that it is lighter.
Paint your grass so that it sways to the right on the right side and sways to the left on the left side. Start in the back just under the horizon line and create large grass blade strokes.
Create your strokes so they go to a point. Do this by flicking the brush really quick. Apply more pressure to start your grass blade stroke and then release the pressure so that it goes to a point.
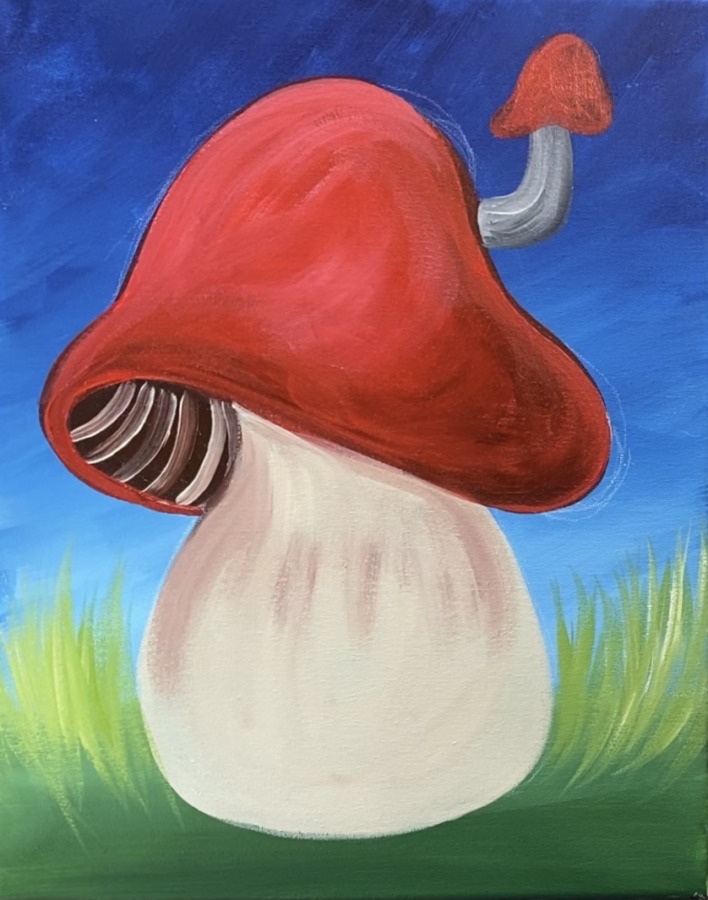
This first layer of grass is in the back. Your next layer of grass will start lower on the canvas. Add a darker green to your brush so your second layer of grass is darker and will stand out against the lighter grass layer.
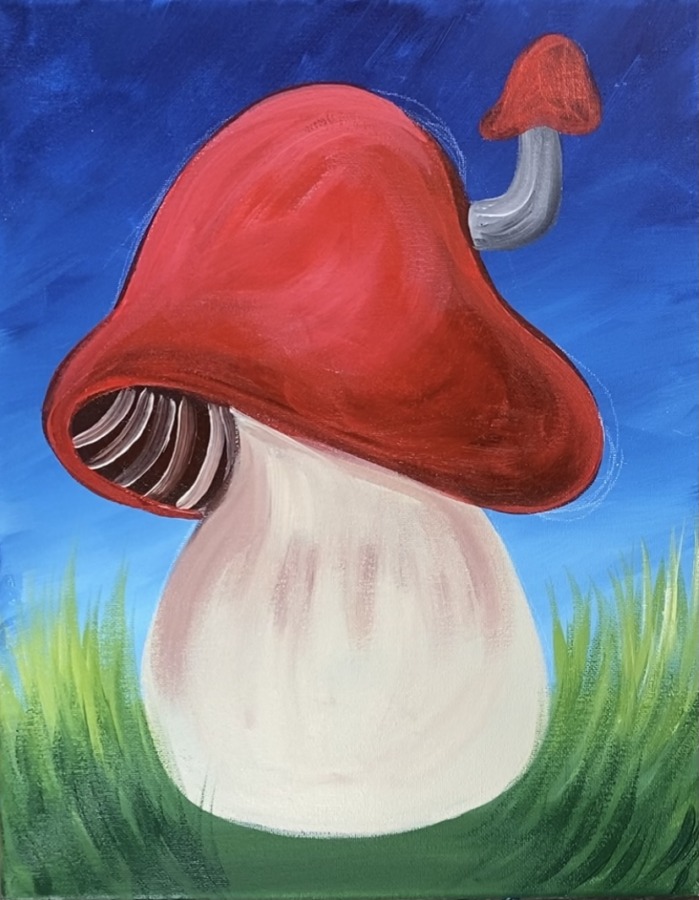
Continue to paint more layers of grass blades working your way to the bottom of the canvas. Leave the area under the base of the mushroom blank. This is where the cobblestone steps will be.
10. Paint The Door & Cobblestone
Use the gray on your palette to make small stones that form a walkway under the base of the mushroom. Do this with the #4 round brush.
Then paint a door with burnt umber and the #4 round brush.
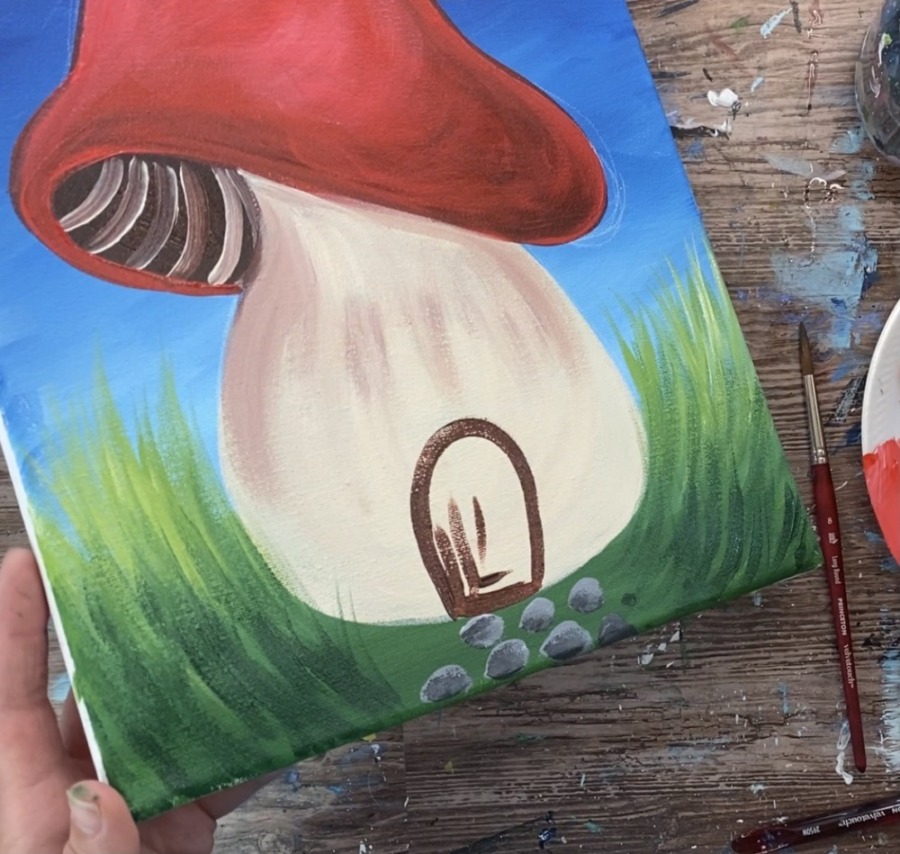
To create the wood look impression on the door, add some white to your brush with the burnt umber. Paint up and down strokes so the brown and white mix together.

11. Paint Light & Windows
Use the #4 round brush and mars black. Outline the outer edge of the door.
Then paint the shape of the light that is to the left of the door.
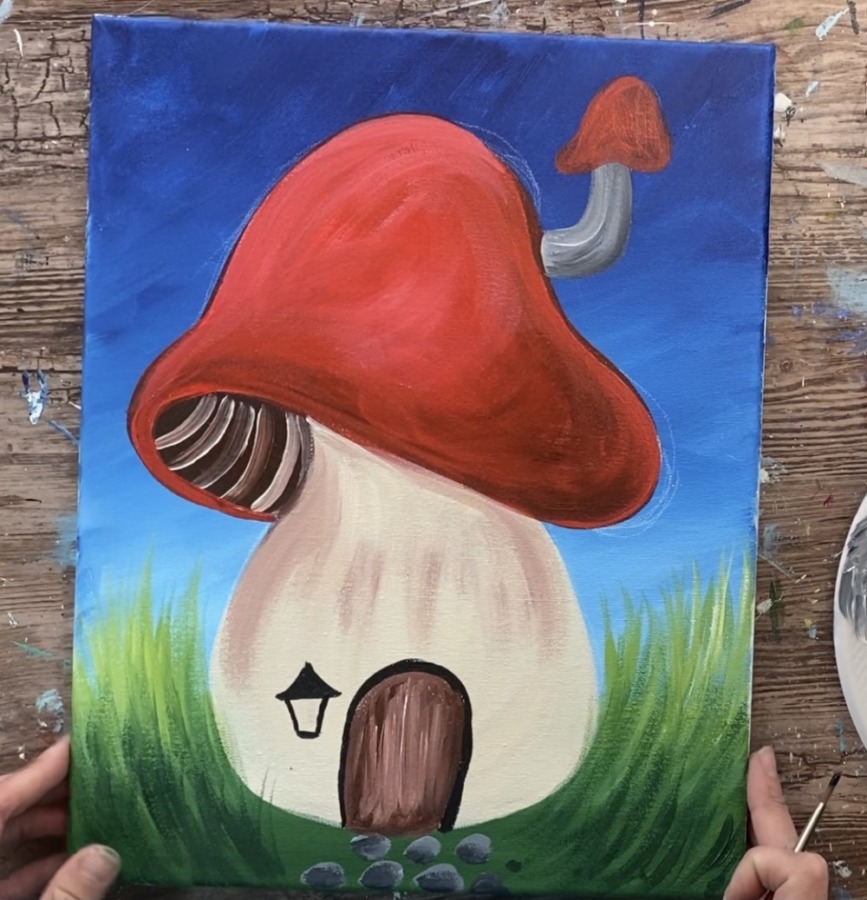
Then paint the windows. Do this first with a coat of cadmium yellow medium hue mixed with titanium white. Paint the inside of the light with this color too. You will need to wait for the yellow to dry before painting the frame.
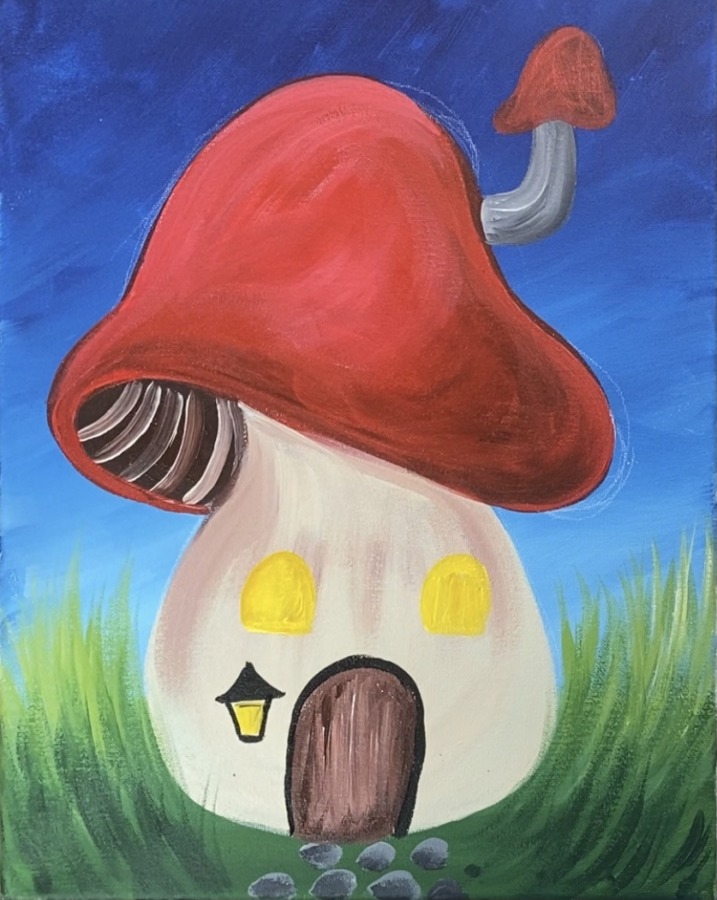
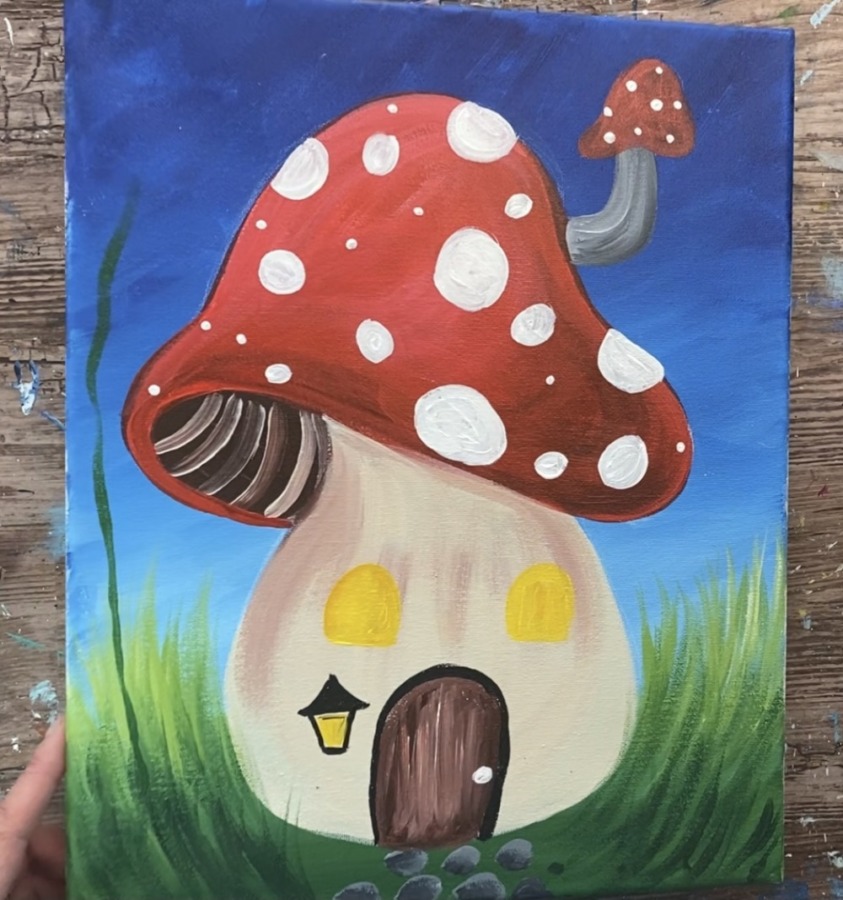
12. Paint White Spots On Mushroom Top
Use a #8 round brush with titanium white. Paint different size spots all over the mushroom top.

Paint the small dots on the smaller mushroom on the chimney.
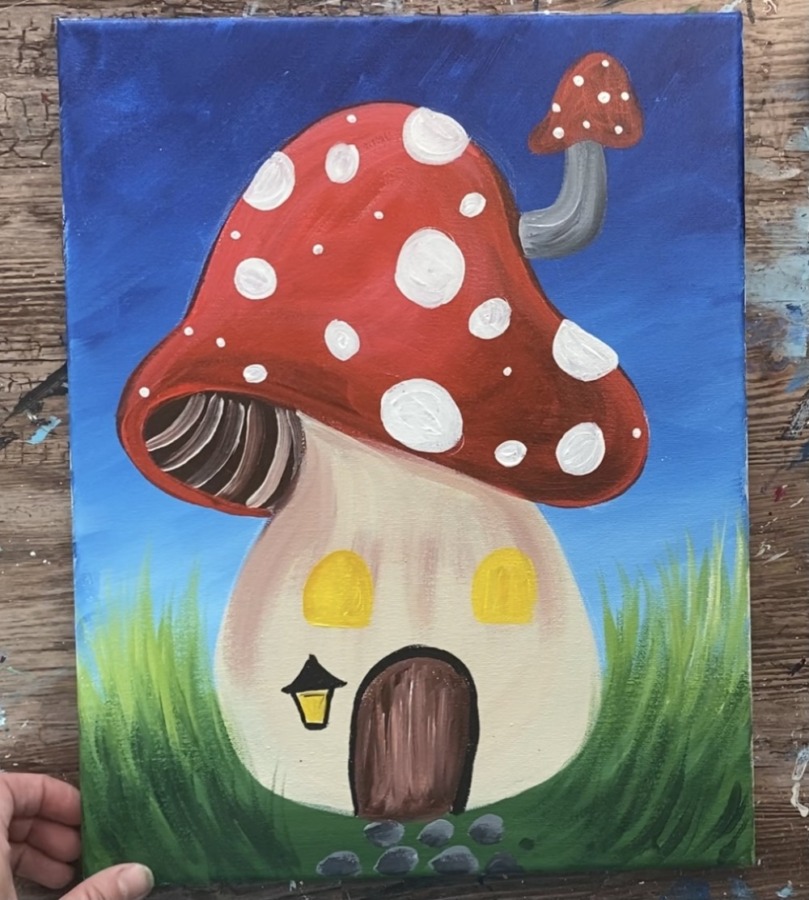
Paint a white circle for the doorknob.
13. Paint Vine & Dandelion Stem
Use a #4 round brush and the dark green to paint the stem. Paint a very loose line from the bottom of the grass area to the top. Tip: add a small amount of water to the green to get it to flow well.
Paint the leaves of the dandelion. Then paint the vine. Do this with that same dark green color and loosely paint a spiral vine that grows on the side of the mushroom house up to the top of the roof.
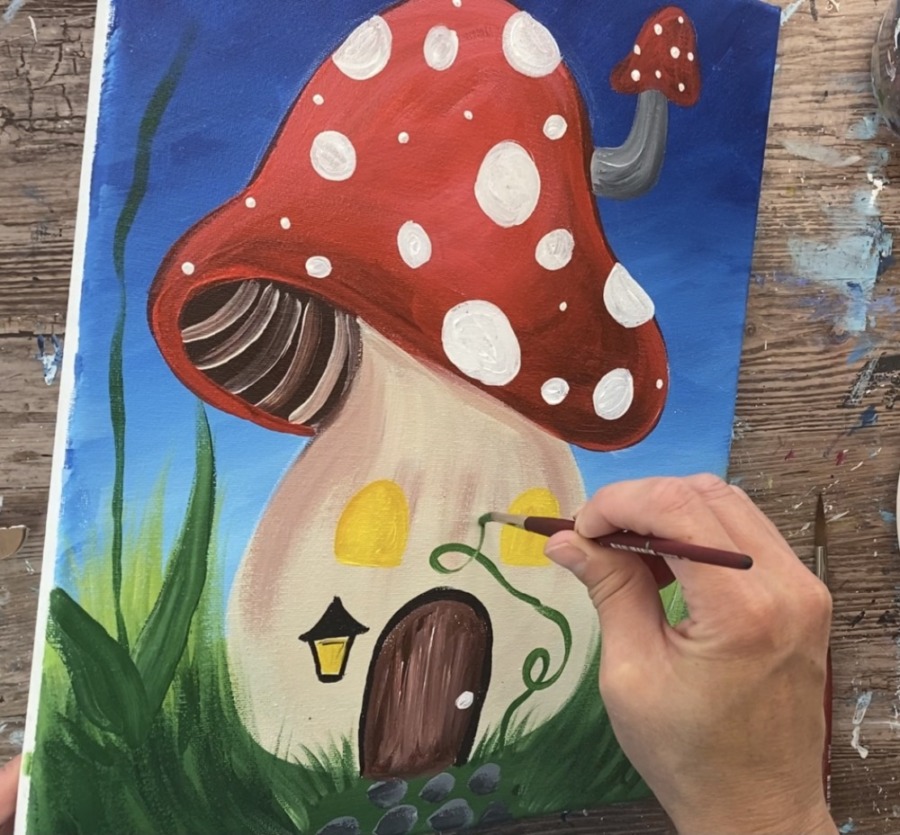
Then paint leaves on vine. To give them “highlight”, add a little bit of titanium white into the green. Paint some of that lighter green on the right side of the vine and leaves.
14. Paint Dandelion Seeds
Use a #4 round brush and titanium white. Start at the end of the stem (middle of dandelion flower) and stroke outwards. Let each stroke go to a point as you create the “starburst” design.
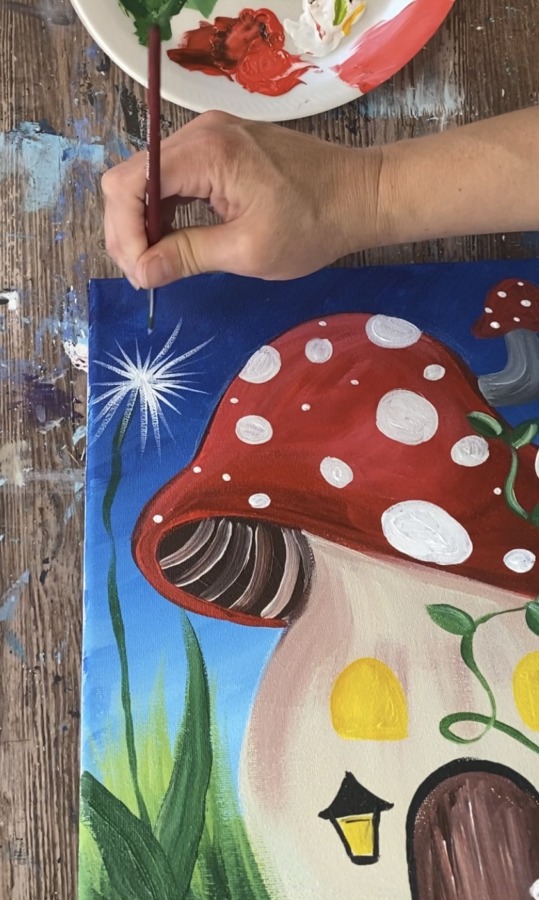
Keep painting more strokes of these dandelion seeds as you paint outwards. Then paint little “tick marks” on the tips of some of the dandelion seeds. If you want, you can also paint some dandelion seeds flying away.
15. Paint Orbs/ Fairy Lights In Background
To create the “orbs” in the background, make a small mark with titanium white using the round brush. Then take your index finger and “blur” or “smudge” the mark outwards creating a blurry light effect. Do this all over the sky.
16. Outline Window Frames
Then use burnt umber and a small round brush to outline the outer shape of the window. Then make a window frame on the inside of each of the windows.
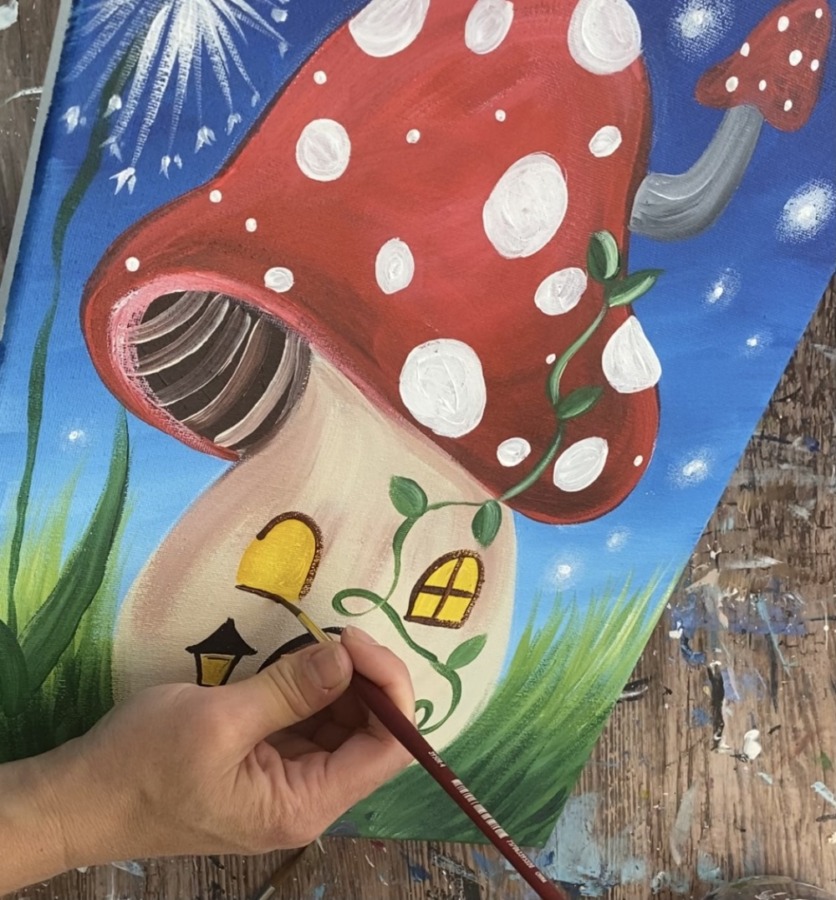
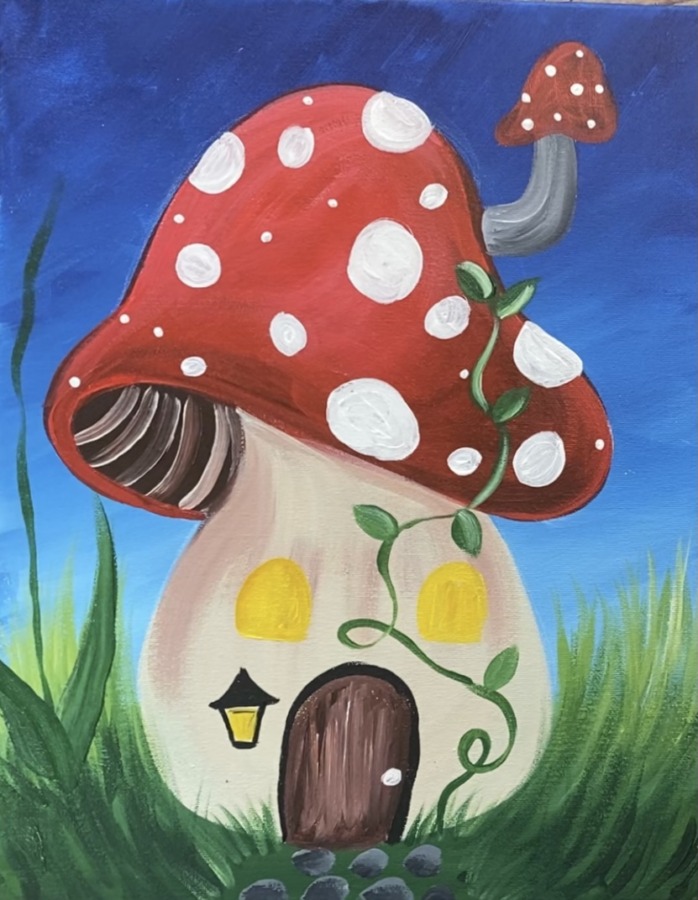
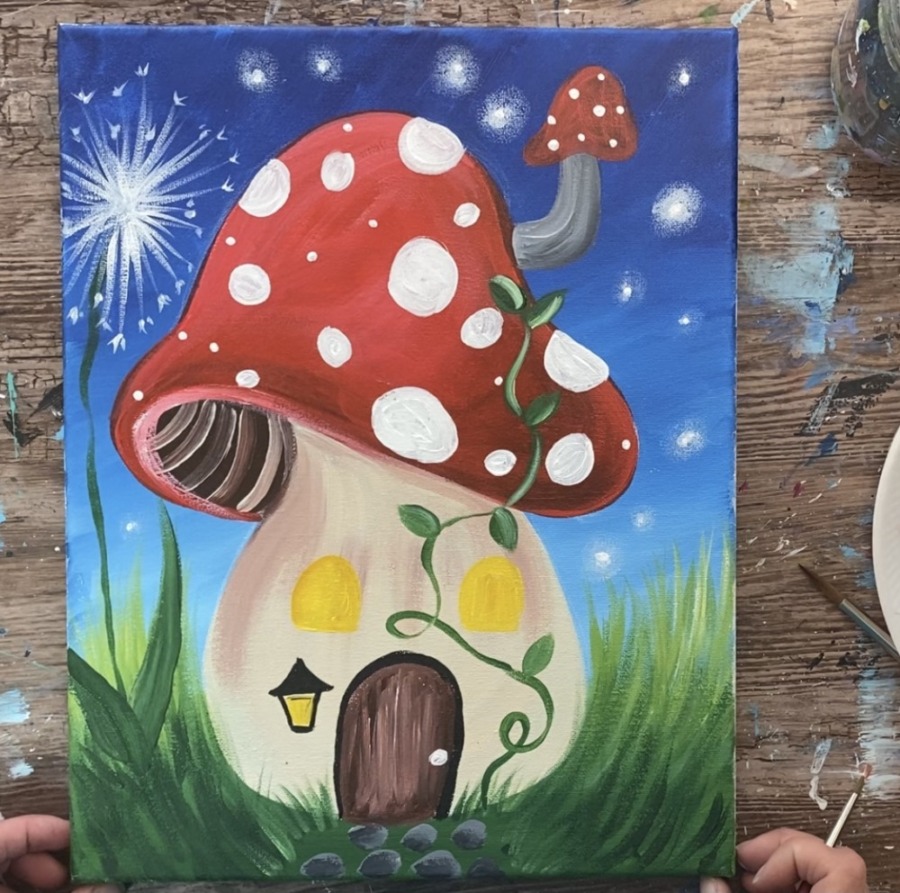
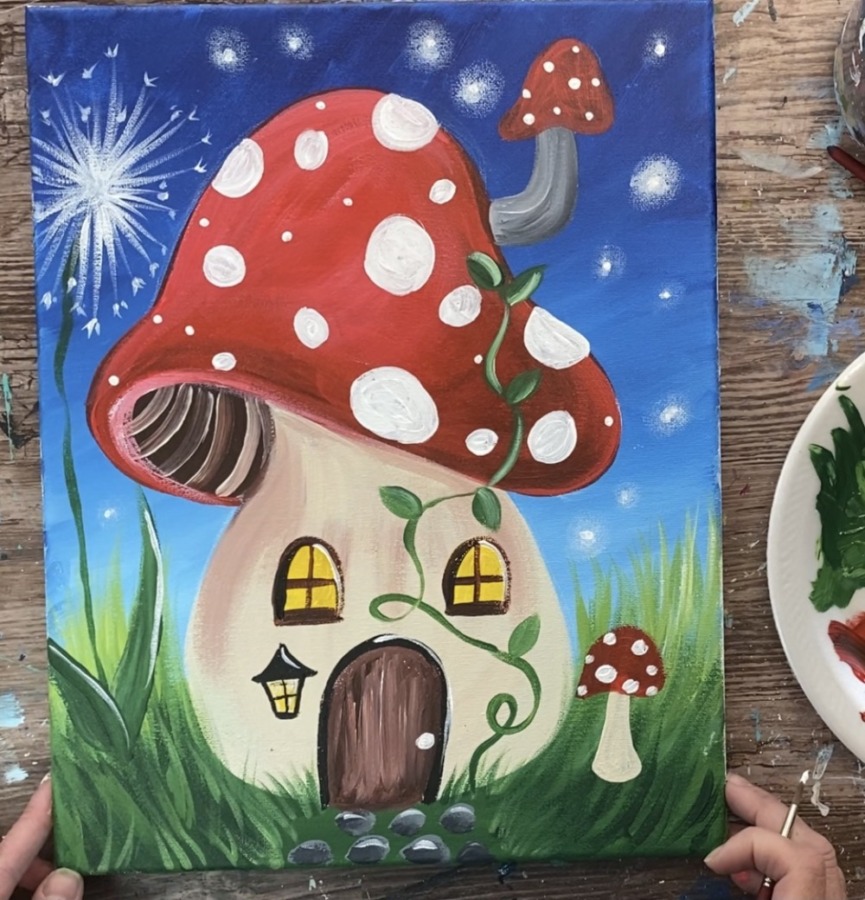
17. Paint More Details
Paint another smaller mushroom on the bottom right using the same colors used in the large mushroom. Paint other custom details if you want! There are so many fun accessories you can add to this painting design!
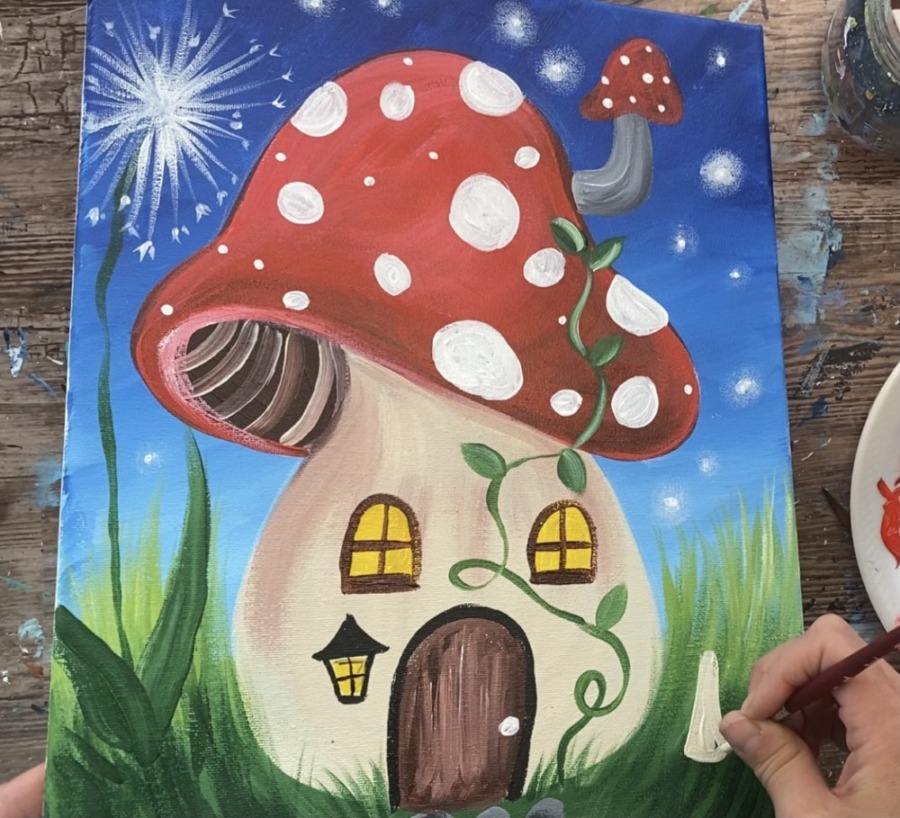
Add some highlight to the rocks, right side of the window frames and right side of the door frame.
Finished!
Share Your Art Here:


This painting is so magical! Can’t wait to try it!
Awesome painting. My 7 year old grandchild tried it and it turned out cute. You are an awesome teacher
Thanks!! Glad she enjoyed doing this painting!
I can’t wait to do this one!!! I I’ve finished 3 others so far and I’m kinda proud of myself, lol!! Thank you, Tracie, you’re the best!
You’re welcome Emily!!!
My husband and I had an art date yesterday afternoon to paint this one ?. We love how you teach! Thank you so much! We will be following you now and can’t wait to decide what to paint next.
That’s so great to hear Katrina! Glad you enjoyed your painting date yesterday!
Just painted this over the course of 2 days, it’s such a great tutorial, and it looks awesome! I love the detail + explanation of how the brushes work when you try to use them on canvas. Thank you!!! 😀
You’re welcome Anne! Glad you enjoyed painting this!
Loved this!! Great tutorial, easy to follow. It came out great!
Thanks Tess! Glad you liked it!