
How To Paint Daisies In A Jar
Would you like to save this?
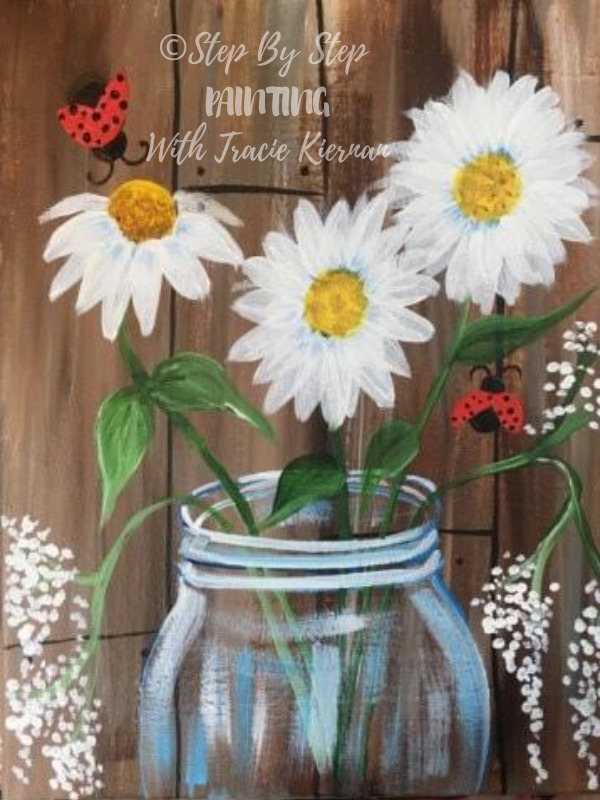
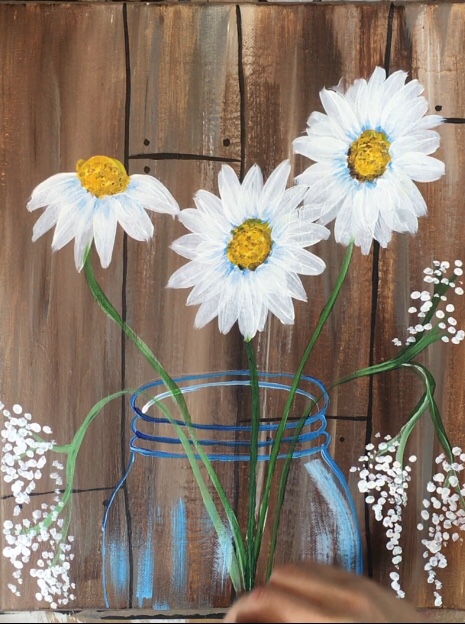
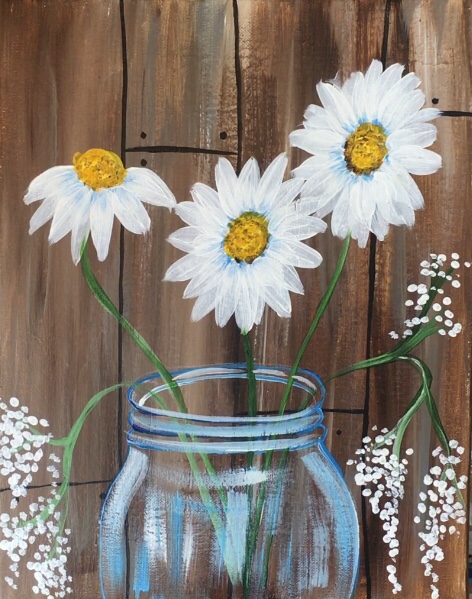
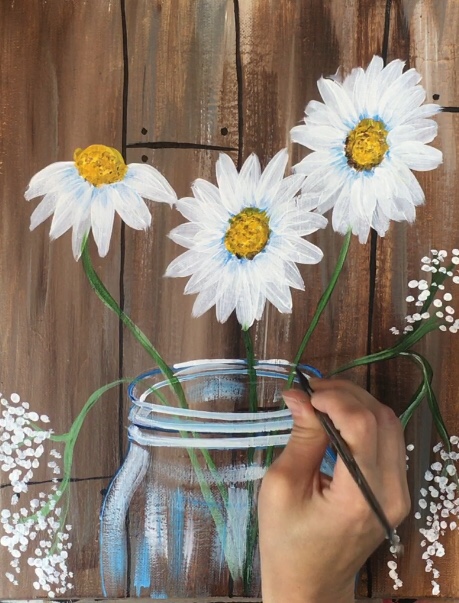
Learn how to paint daisies in a jar!
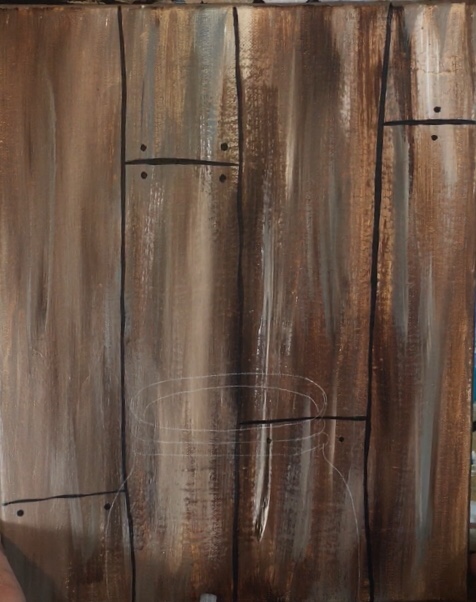
This acrylic painting was done on a regular 11″ x 14″ canvas and a painted faux wood background with the colors: burnt sienna, titanium white and neutral gray value 5.

Painting a faux wood background is so easy, you CAN paint it too!
In this tutorial you will learn how to do just that plus the rustic looking Mason Jar and simple white daisies with two cute ladybugs.
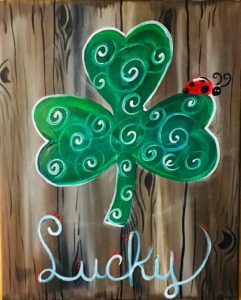
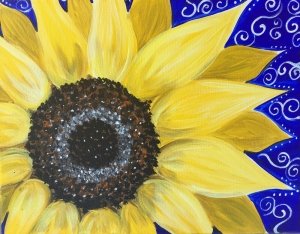
See Similar Paintings:
Materials:
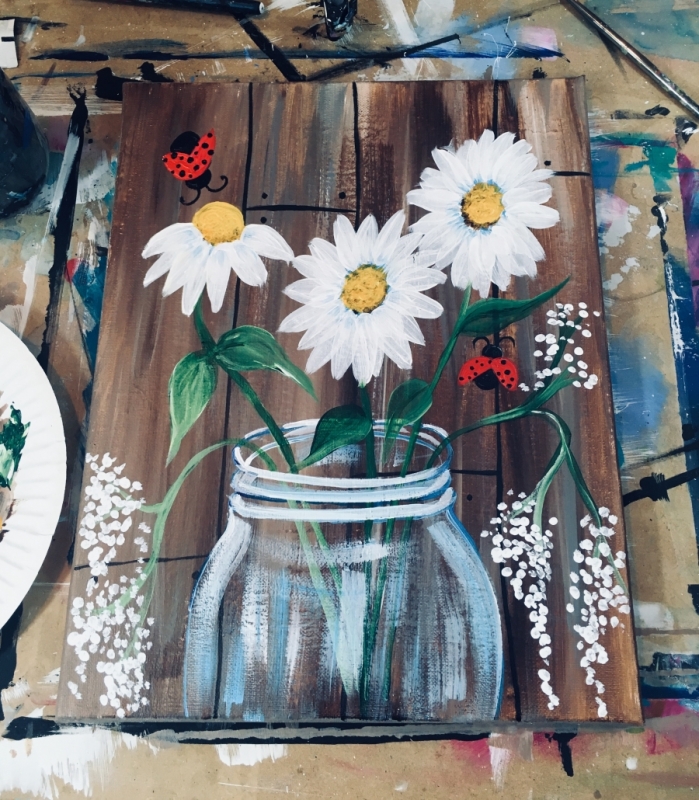
How To Paint A Rustic Jar Of Daisies
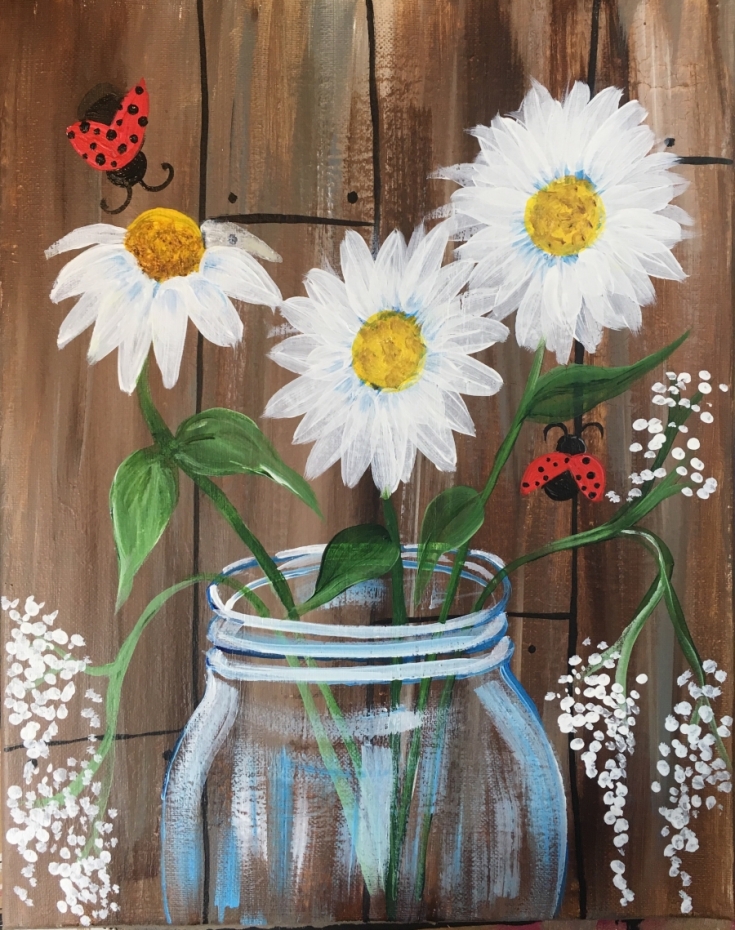
This tutorial will teach you how to paint a faux wood background on canvas with a mason jar of daisies.
Materials
Basic Supplies
- 11" x 14" Canvas
- Acrylic Paint (I use Liquitex BASICS)
- Brushes (I use Royal Zen Brushes Bought From Michael's)
- Jar Of Water For Rinsing Brushes
- Traceable
- Graphite Paper (White)
Colors
- Titanium White
- Mars Black
- Burnt Umber
- Neutral Gray Value 5
- Primary Blue
- Naphthol Crimson
- Cadmium Yellow Deep Hue
- Hooker's Green Hue Permanent
Brush Sizes
- 3/4" Flat Wash Brush (or larger)
- #4 Round
- #10/0 Liner
- #12 Bright
Color Palette:
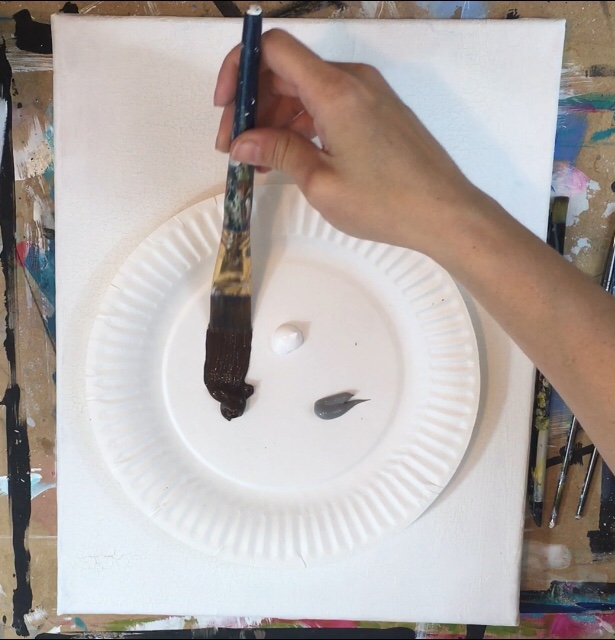
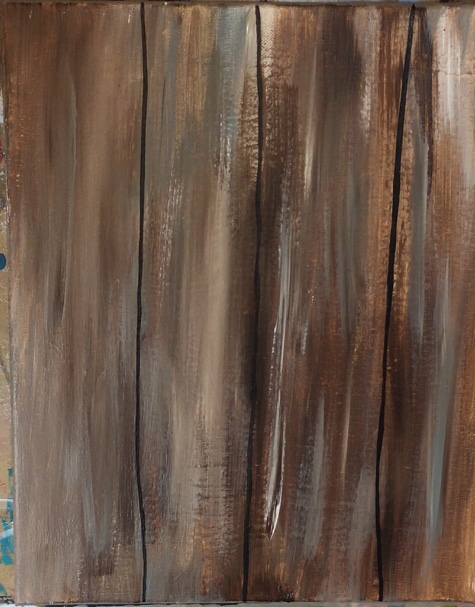
The colors in the faux wood background consist of three neutrals: burnt sienna, titanium white and neutral gray value 5.
I triple loaded my wash brush in those three colors with burnt sienna being the main color and white and gray on the corners.
When you paint up and down, you get the faux wood look as the colors mix and “streak” on the canvas.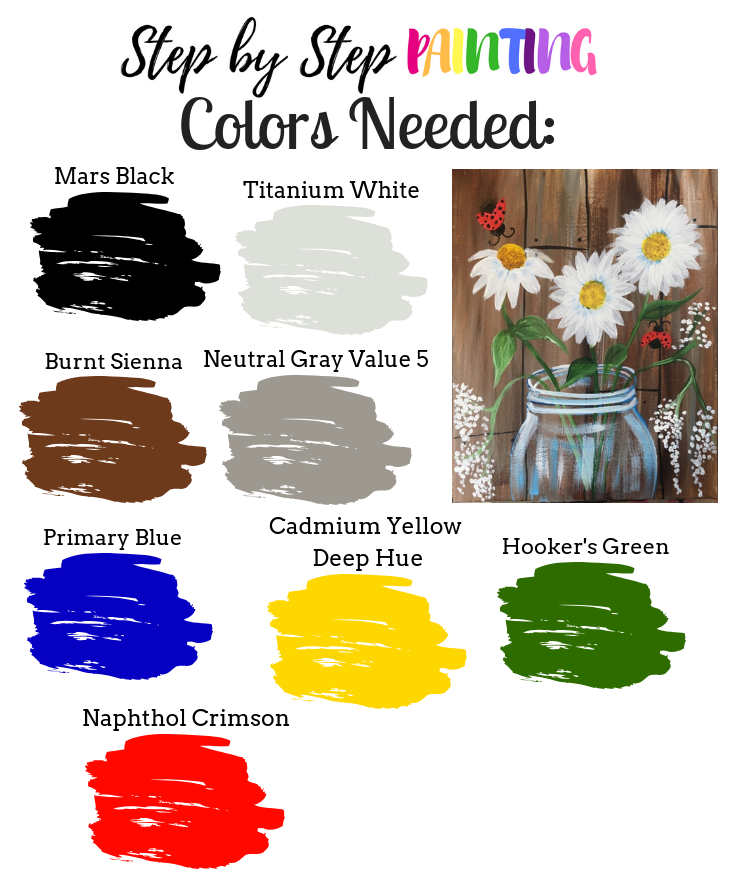
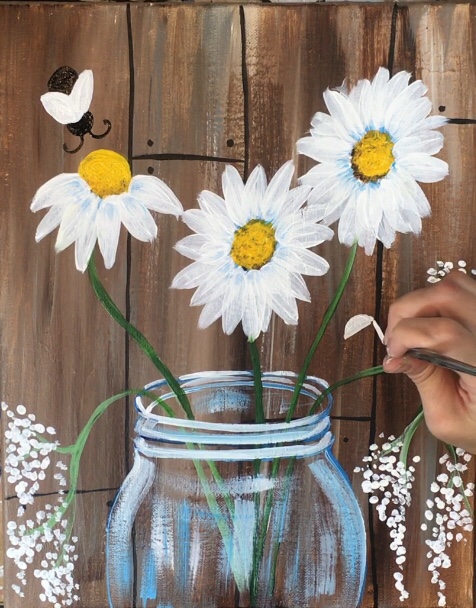
The colors in the jar are titanium white and primary blue. To create the glass effect, I used the “dry brush” technique so that the paint looks translucent and you can see through the jar.
The daisies are mostly titanium white with a touch of primary blue and the middle is cadmium yellow deep with a little bit of burnt sienna.
The stems of the daisies consist of both hookers green and titanium white. I double loaded my brush in those two colors to create the green/light green effect.
Finally the ladybugs are simply naphthol crimson and mars black.
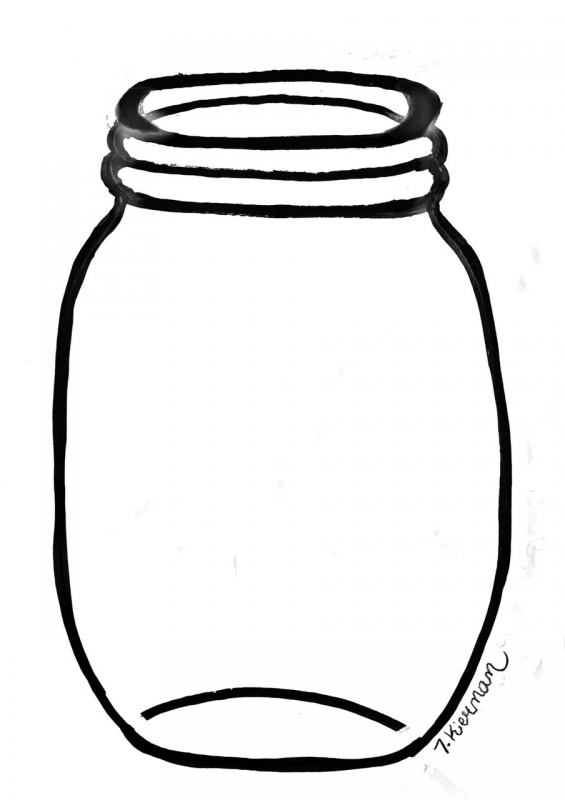
Traceable:
I have a mason jar traceable in my library.
You can find the PDF for this traceable in my library here.
Directions At A Glance: 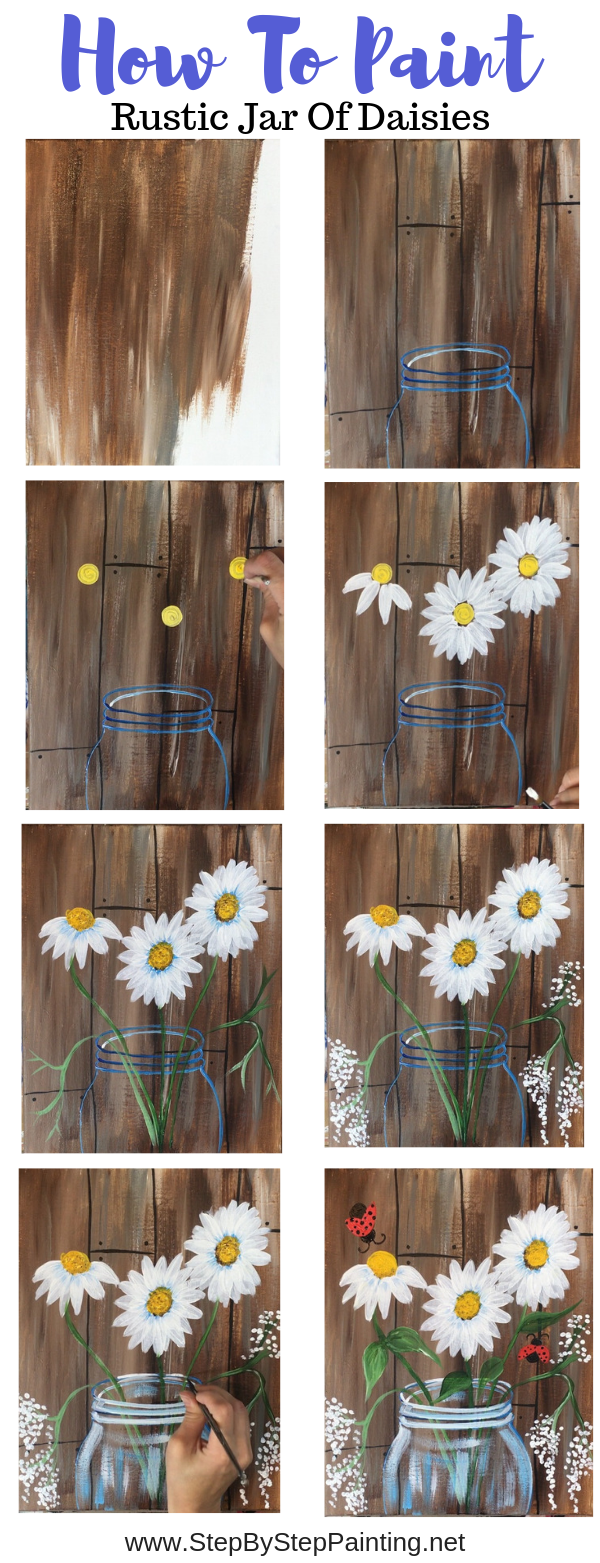

Video:
Step By Step Directions:
1. Paint the faux wood background
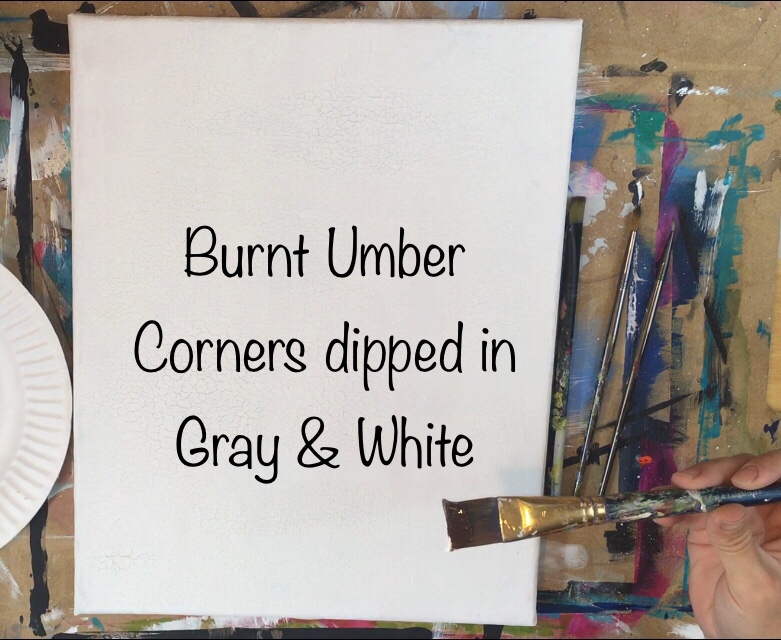
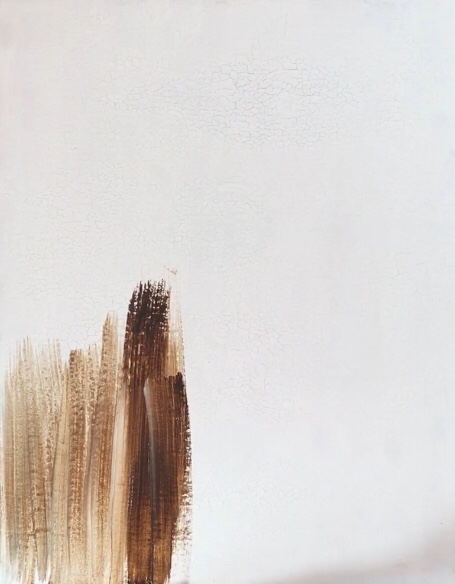
Using a 3/4″ flat brush and the colors: burnt sienna, titanium white & neutral gray value 5.
Dip the brush in burnt sienna but dip the corners in the white and the gray.
Then paint up and down.
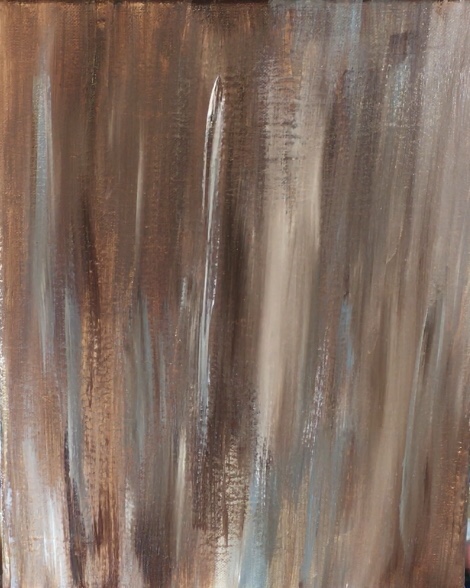
The colors will blend together on the canvas and look “streaky”. Let them blend and do their thing to create a faux wood effect.
Note: the picture below says “burnt umber” but I definitely used “burnt sienna”. I get those two colors mixed up ALL THE TIME!! 😉
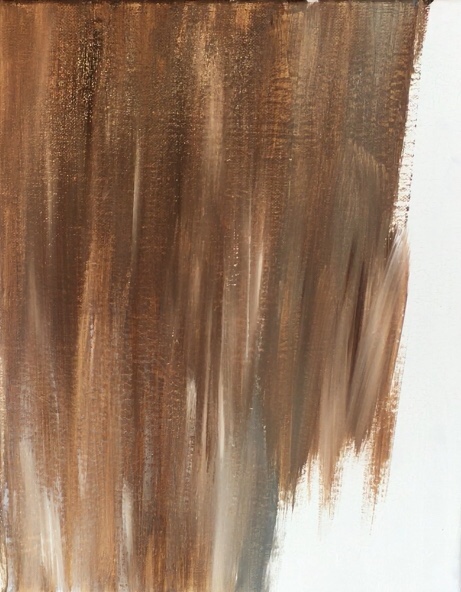
You may decide that you like the look of the white and/or the gray in the wood. You can choose to add more of those colors (or less).
I did a few dry brush strokes of the white to make it look a little more rustic.
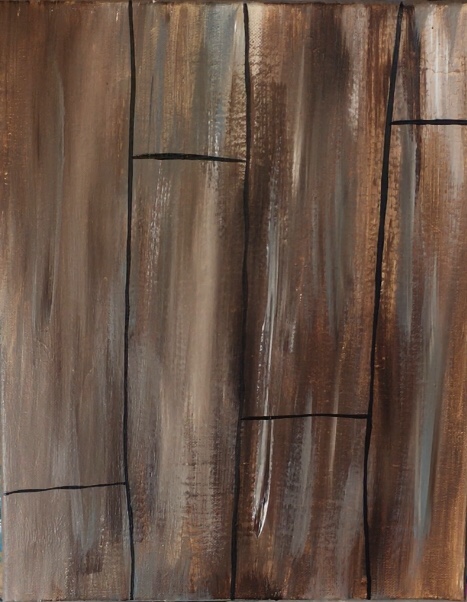
Next I painted the wood panel lines. To do this, I used mars black and a number 12 flat brush on its side.
Make sure your background is dry or almost dry. Then paint three lines to divide the wood into fourths.
You can certainly use a ruler for this but I free handed it!
Then to make the wood look like it has paneling, paint some horizontal staggered lines.
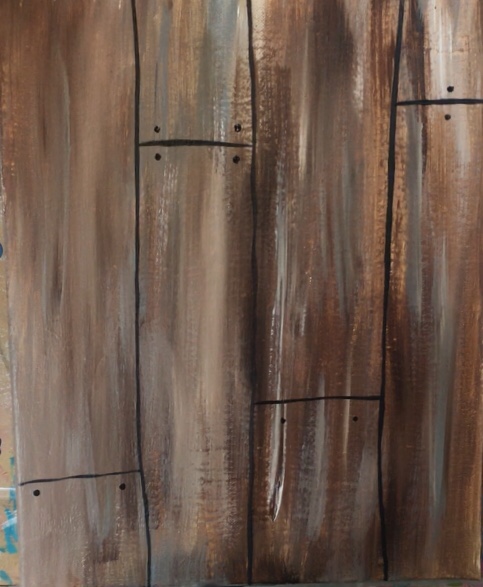
Finally, I used a round brush to paint little mars black dots for the nails.
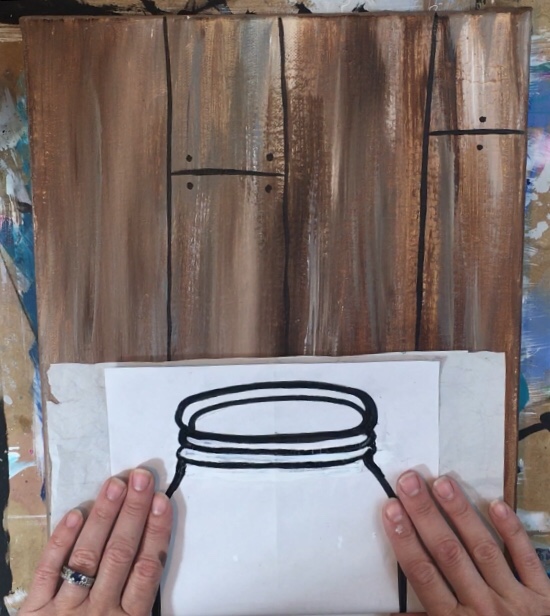
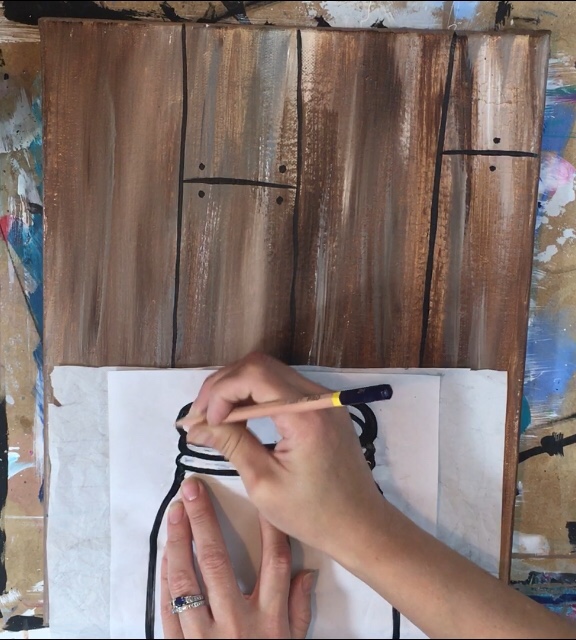
2. Dry your painting. Transfer the jar drawing onto the canvas
To speed up drying time you can use a hairdryer or take a break and come back!
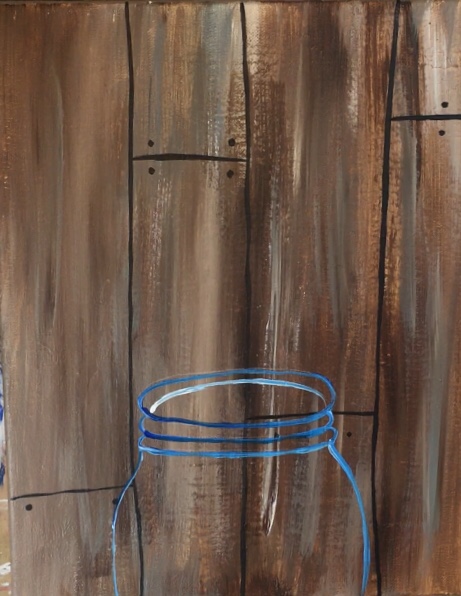
I used my traceable of this jar and white graphite paper to transfer half of the jar onto the canvas.
As far as location, it was an estimate of about half the jar and at the very bottom. You can make it higher or lower to your liking.
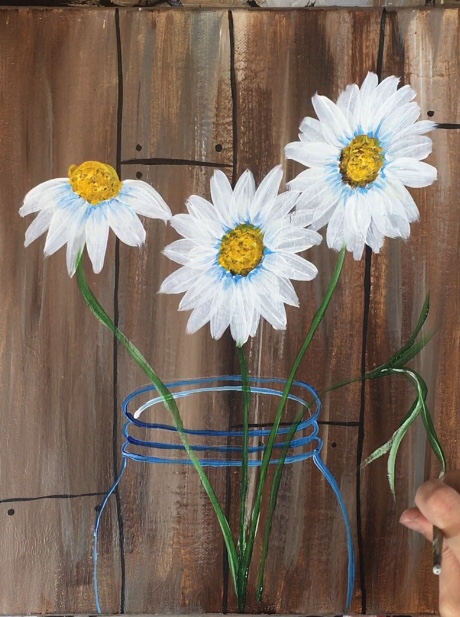
3. Outline the jar with titanium white & primary blue
I used a #4 round brush for this step. Basically double load it in both the white and the primary blue.
I just kind of swirled both the colors on my palette.
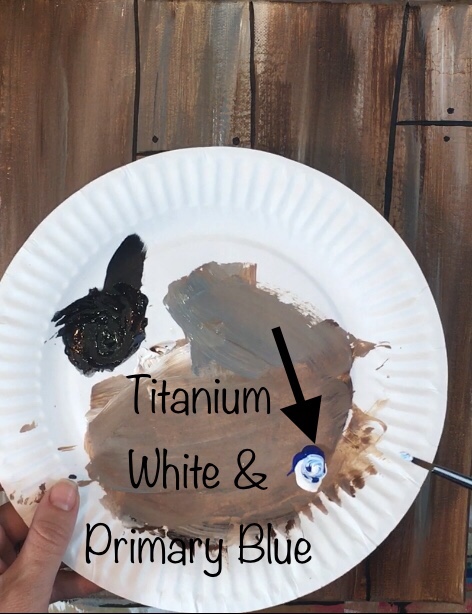
Then outline the jar with that color combo. You will get a mix of white & blue and not one solid color.
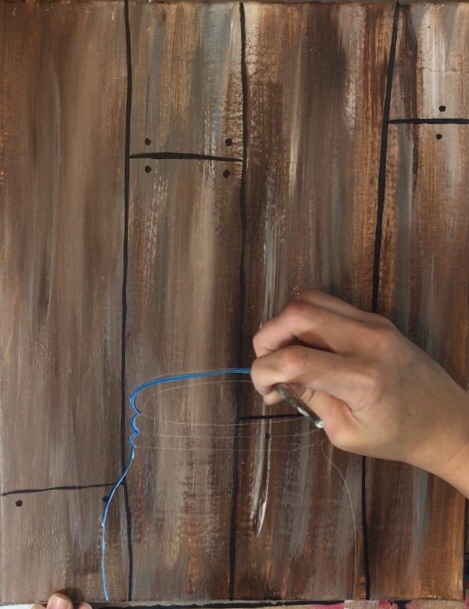
Outline the entire jar drawing and don’t worry about the glass or anything else with the jar for now.
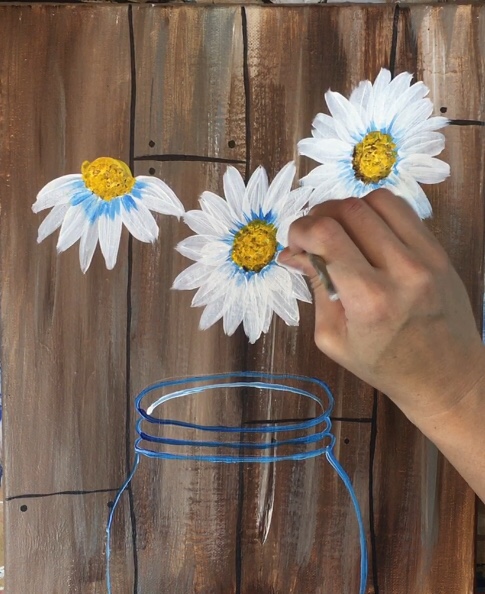
4. Paint the daisy centers & petals
Using that same #4 round brush, double load it in titanium white and cadmium yellow deep hue.
The white makes it so the yellow isn’t so translucent. Paint three circles of different heights above the jar.

Next paint the petals. I used the #4 round and titanium white. Basically paint the typical petal shape around the circles.
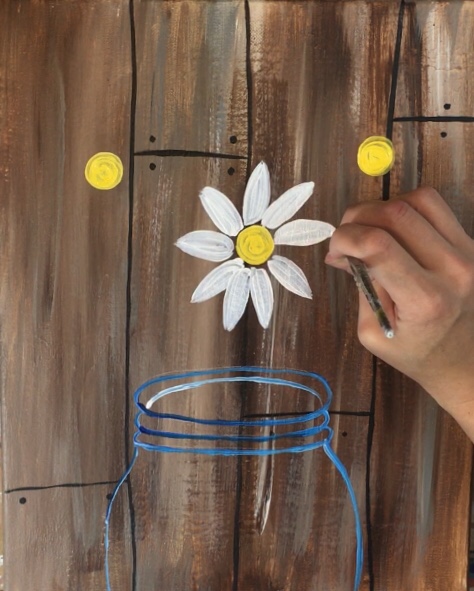
Then layer more petals so they are overlapping the behind ones. Do this for all three circles.

To make it look like the flower is facing up (the one on the left) only paint the petals on the bottom.
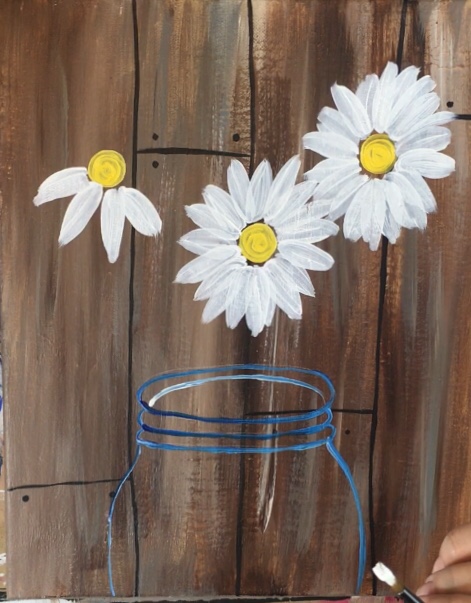
And form the circle into more of a dome shape. Now…you can leave the flowers like this (simplified)! Or if you’re feeling a little daring, you can add a little bit of shading to the petals and details in the flower centers.
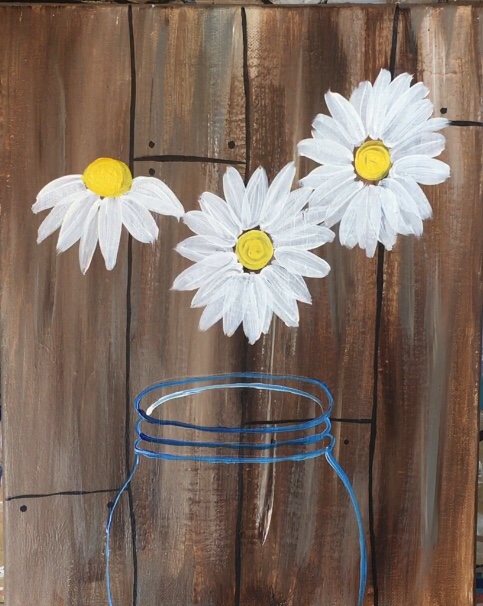
For shading, I took a little bit of primary blue and painted little streaks of blue just in the center around the circles.
(As stated above, you can keep it simplified and not do the blue.)
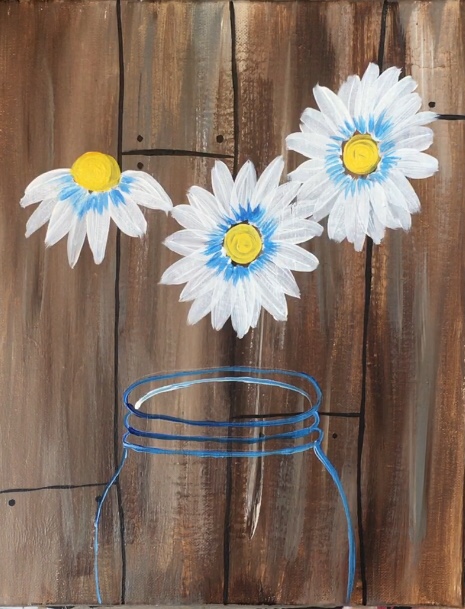
And then with the round brush, I made little burnt sienna dots on the circles.
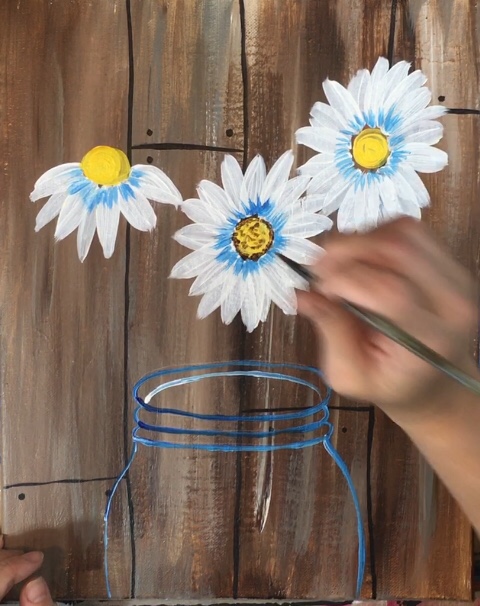
Then I added more white over the petals to wash that blue out but make it look like it was still sort of there.
You can still see the blue closest to the center. All I did was paint another white layer over the entire petals.
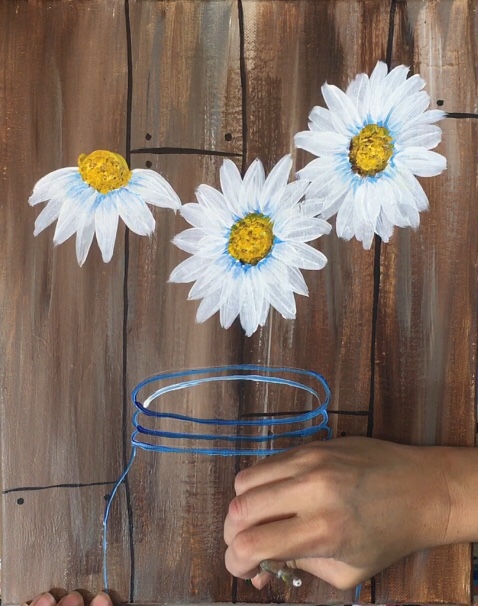
5. Paint the daisy stems
For the stems I used a #4 round brush double loaded in hooker’s green with a little bit of white.
Basically paint the stem from the flower to the inside of the jar and all the way to the bottom of the canvas. I made my stems kind of gather together in a bundle inside the jar.
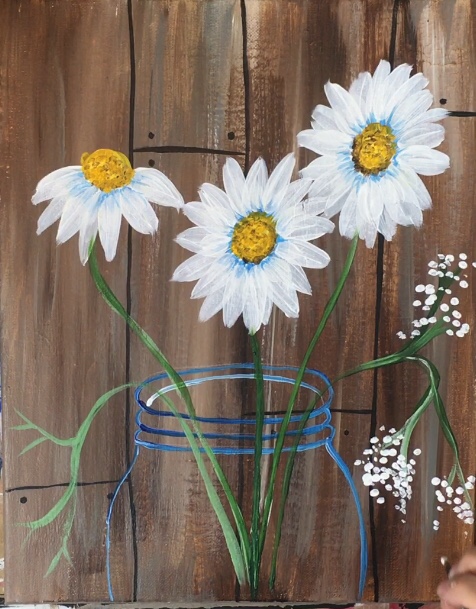
6. Paint the baby breath flowers
To do this I simply used the same colors I used for the stem. This time I made them drooping down out of the vase and branching out (like tree branches).
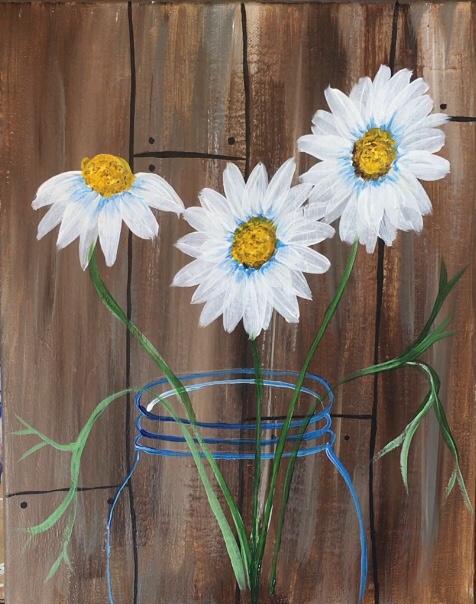
Then I completely rinsed my brush off (and dried).
I painted the little dots with titanium white using the tip of my brush. Basically just make little bundles of dots.

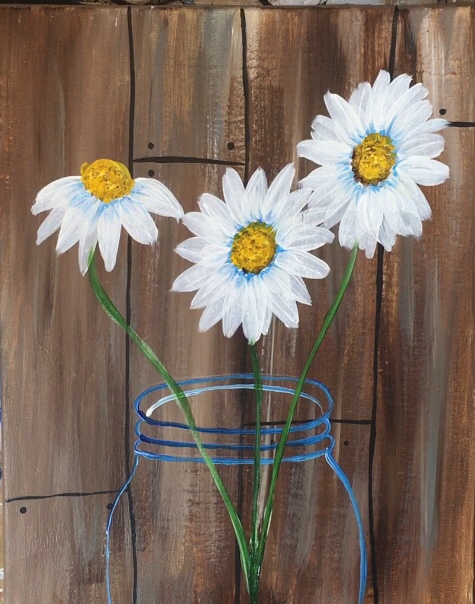
7. Dry brush the jars to create glass effect
To do this effect, you will need a paper towel, your 3/4″ flat brush and titanium white & primary blue.
Double load your brush in both colors. I dipped in about 50-50 of both colors, however, you may want more or less blue on your jar depending on your preference.
After loading your brush, wipe off most of it with a paper towel.
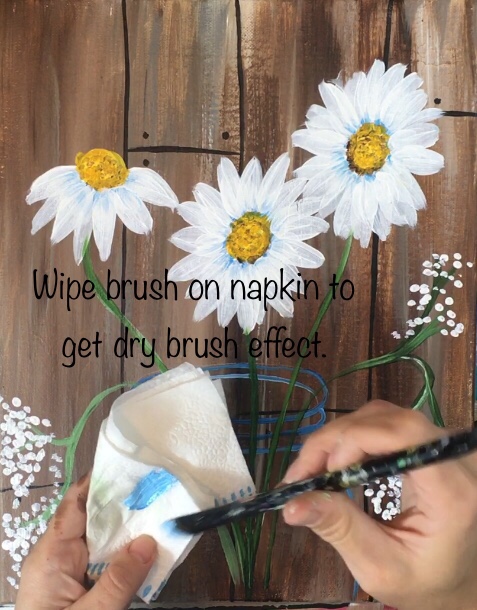
Gently brush on stokes on the front main part of the jar. These strokes should be going vertical and on the sides of the jar, they kind of contour with the shape.
The strokes should be dry and translucent.
Do a curved stroke right on the top just below the jar ridges.
Then use the tip of the brush on its side to gently paint the ridges on the top. It may also help to switch to a round brush and do the dry brush for this part since it’s a smaller area.
At this point you will also need to paint the part that overlaps the stems so they look like they are inside the jar.
Switching to a round brush helps with the smaller areas of the jar ridges. Make sure the rim is behind the stems in the back and in front of the stems in the front.
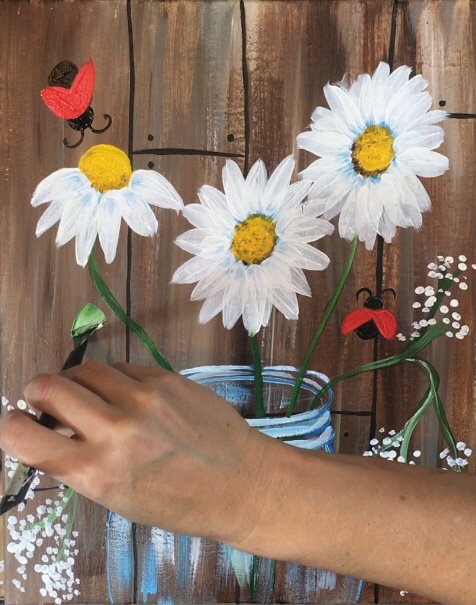
8. Paint the ladybugs
To do the ladybugs, I first painted two semi circles of the wings. Because red is translucent, I did this first layer in white and then when the white dried, I painted them red.
Then I used mars black for the head, antennae and abdomen.
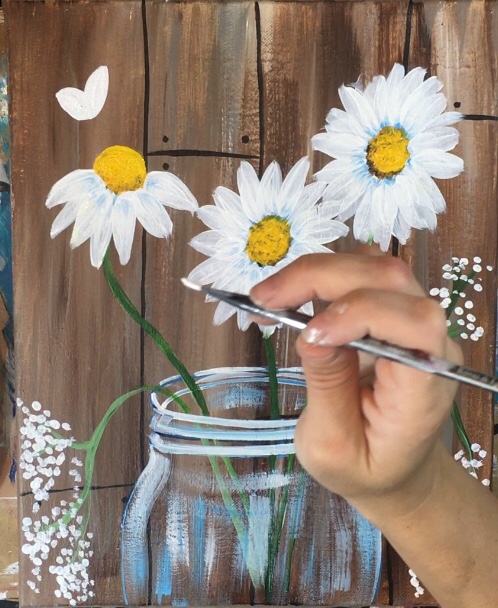
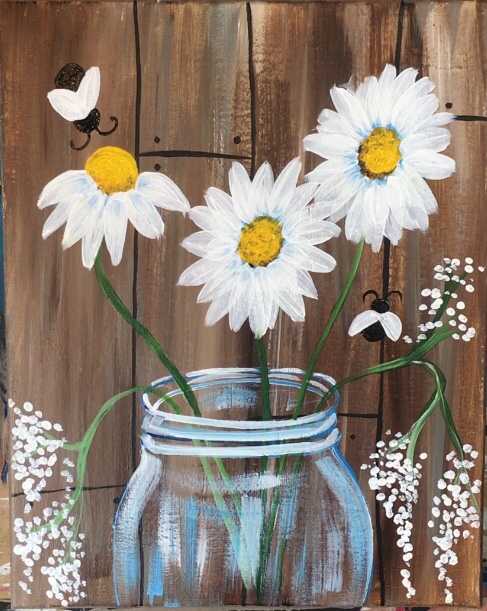
Note: I did not do the spots until the very end because that red was thick and wet at that point…

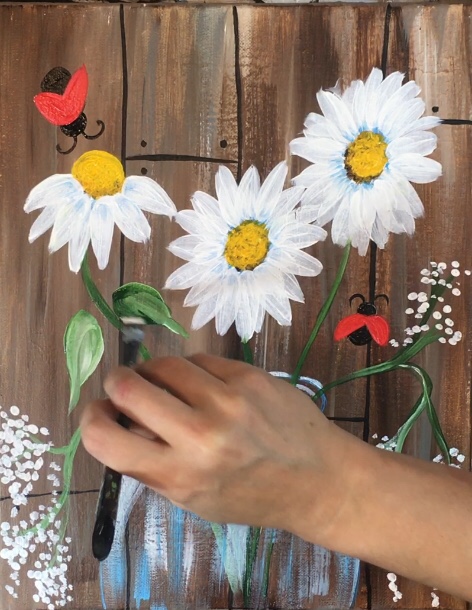
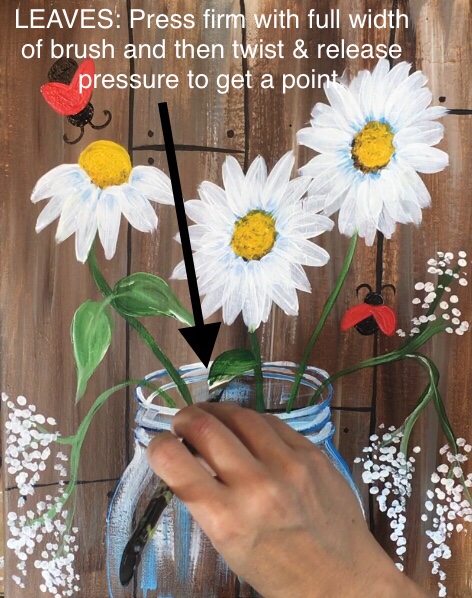
9. Paint the leaves
To do the leaves, I used a #12 flat brush double loaded in hooker’s green and titanium white (meaning dipped in both colors).
To form a leaf, press firm using the full width of the flat brush and then twist and release pressure. This forms a leaf shape.
Last, but not least, I did the little dots on the ladybug wings using a round brush and mars black.
Finished!
I love your paintings. I plan on trying some.
Is there anyway you could help me make the wood in the back like a white with grey accents and instead of daisy’s make them hydrangeas for my moms birthday?
Hi Christi!
To get the background to look more like a gray wood, load your brush in the titanium white with a tiny bit of black on the corner of the brush and a tiny bit of burnt umber on the other corner. It should turn to a washed gray color when you paint. You can also try gray with white on the corner.
As for the hydrangeas, I don’t have a tutorial for that but I did a brief search and found this one that you may be able to implement into the painting: https://plaidonline.com/articles/how-to-paint-hydrangeas
This is my fourth painting ever and just wanted to thank you for teaching me how to paint! Something I never thought I could do. Mine started to look a bit too orange so I have added in some burnt umber. I’m waiting for it to dry now and hope it’s not going to be too dark.
I also just purchased black graphite paper so not sure how the remainder of this painting will work out, but again thank you so much for your tutorials. They have been life changing for me.
I love your tutorials and recently finished painting your bubbles on a black canvas and it came out great. I’m going to try these daisies next. Thank you for your patient way you explain everything. Some tutorials go too fast for me. I like the slower approach better.
Hi Sheri thanks, glad you liked the bubbles! And thanks for the feedback!
In your supply list you say Burnt Umber but in the video you say Burnt Sienna. Which is correct?
It would be burnt Sienna not burnt umber
Hi
I have doing your paintings for awhile now through the library here in Austin and am loving it. My favorites are the red truck, the gingerbread house, and of course the daisy’s.
Karen
That’s amazing Karen! Glad you love those paintings!!
Hi Tracie,
I’m wondering on this tutorial and I realized I put the jar down too low and so I have a larger space at the top, should I put another daisy or more of the dots up there?