
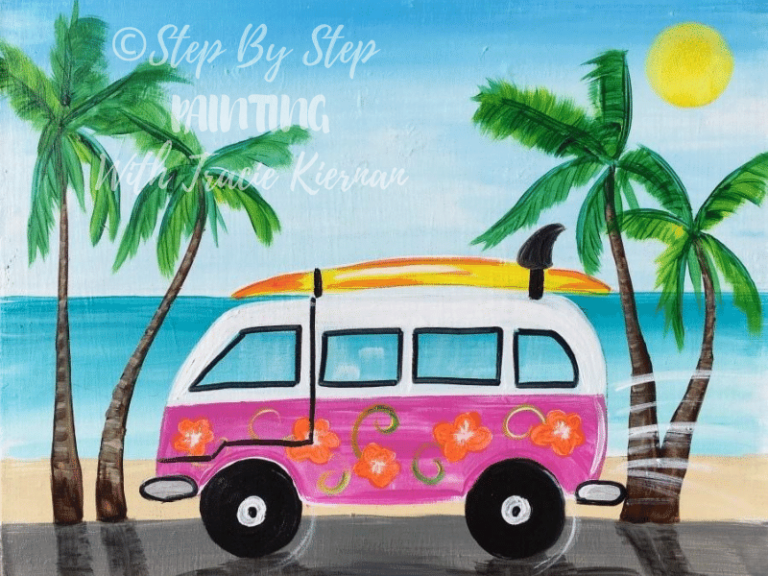
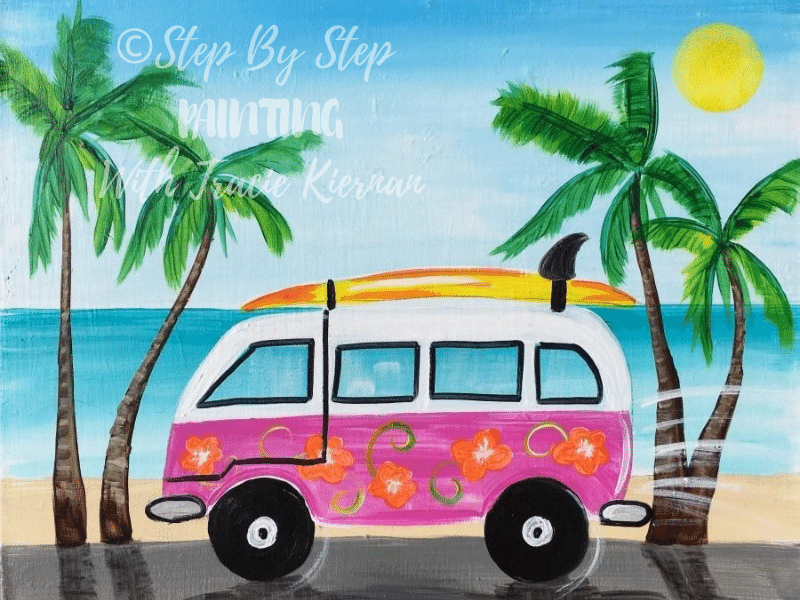
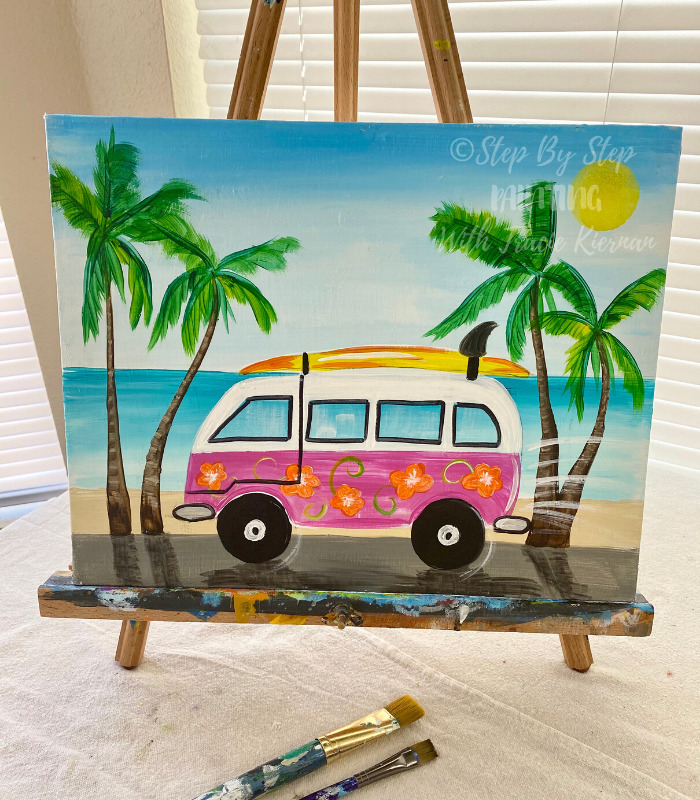
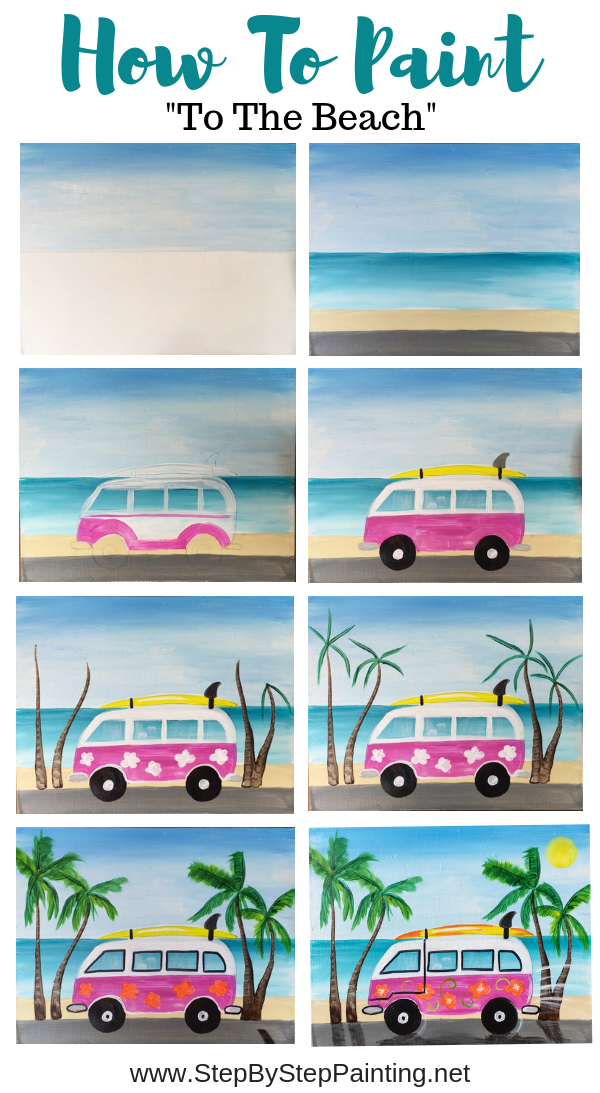
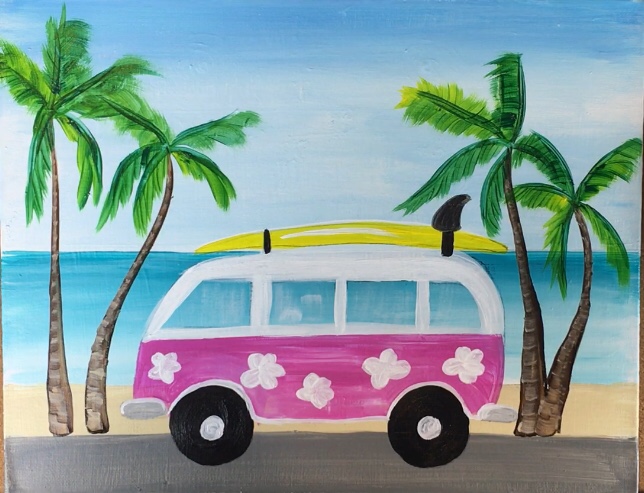
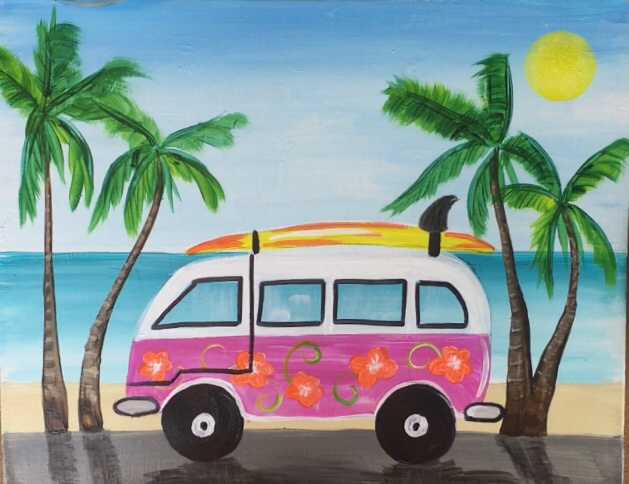
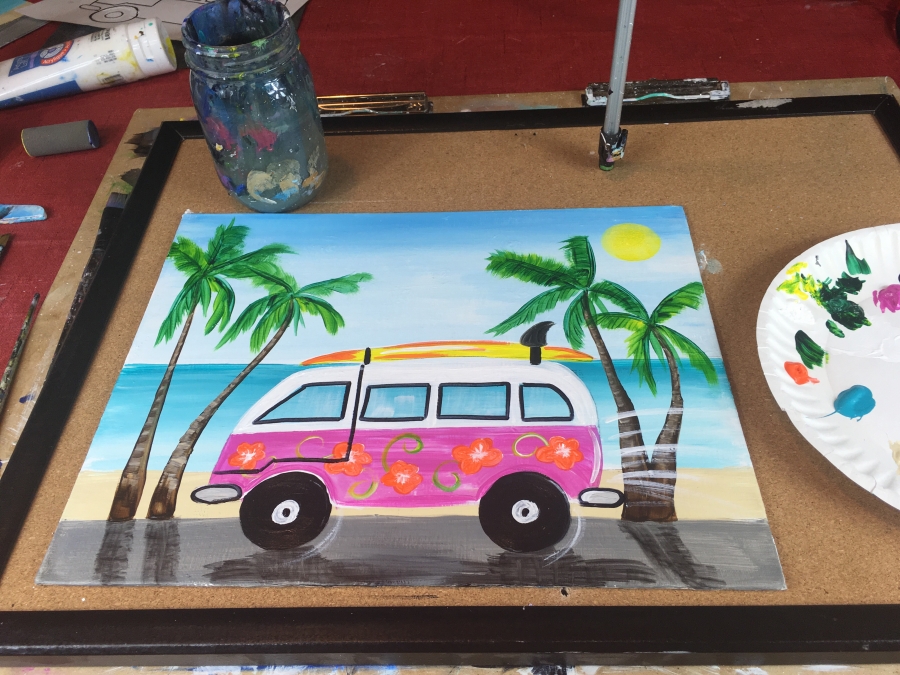
How to Paint A Beach Van
Learn how to paint a fun colorful beach van on the road aside the ocean. This step by step acrylic painting tutorial includes a traceable of the beach van as well as detailed steps on how to do the painting.
Materials:
11″ x 14″ Canvas
Acrylic Paints
Paint Brushes
Sharpie or Black Paint Pen
Optional: medium round pouncer for circles
Traceable
Graphite Paper
T-Square Ruler (Or paint tape if you prefer)
Pencil
Colors:
Titanium White
Mars Black
Cerulean Blue
Turquoise Blue*
Unbleached Titanium
Neutral Gray Value 5
Raw Umber
Cadmium Orange Hue
Deep Green Permanent
Primary Yellow
Brush Sizes
3/4″ Flat
#12 Flat
#4 Round
#10/0 Round (tiny brush)
Color Palette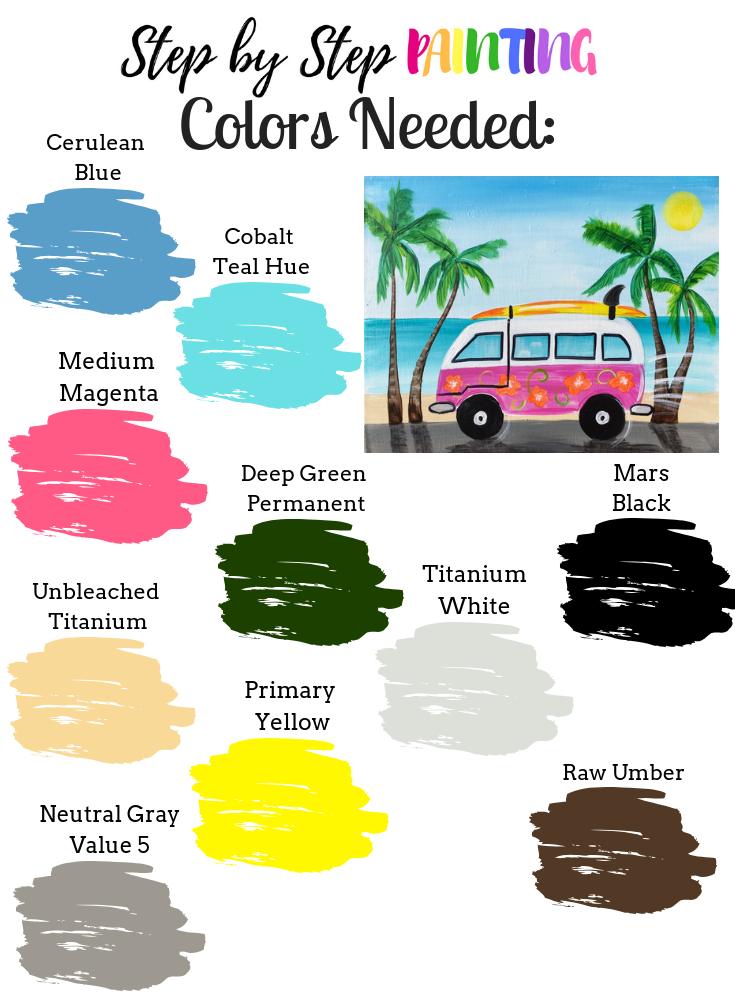

*Note: if you don’t have “Cobalt Teal Hue”, which is a DecoArt Americana brand, you can use Turquoise by Liquitex BASICS.

You may also wish to customize the color of your beach van, however, I recommend a warm bright color so your painting will “pop” against the blues in the background.
Traceable
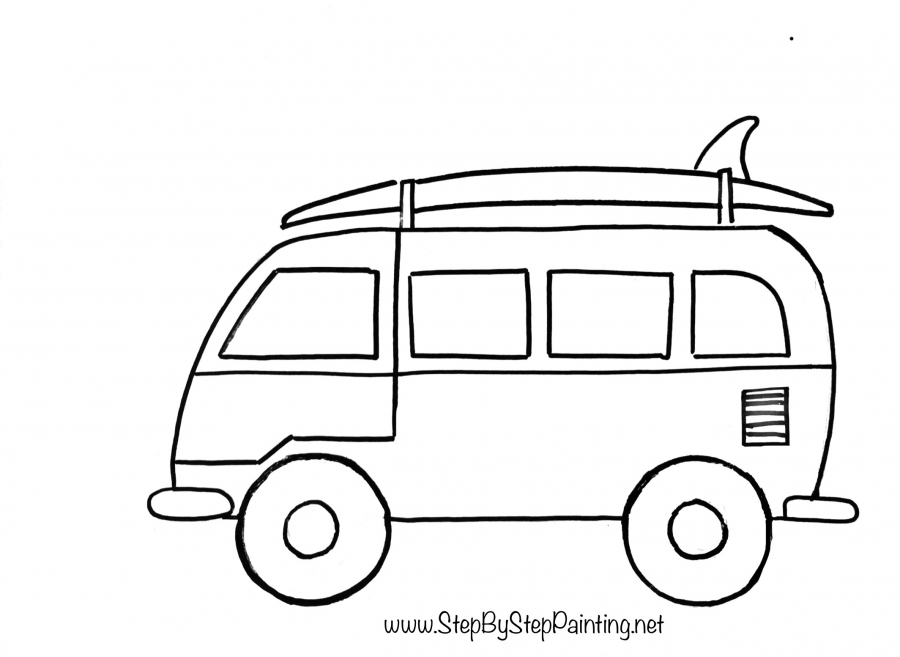

This tradable gets traced over the background layers of the ocean/beach/pavement. Use a sheet of graphite paper below the template.
Directions At A Glance
Video
Step By Step Directions
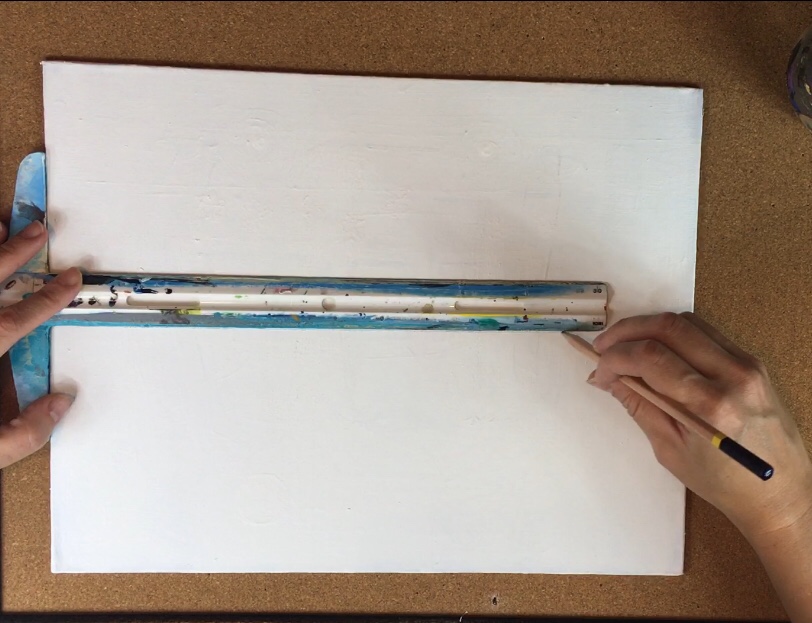
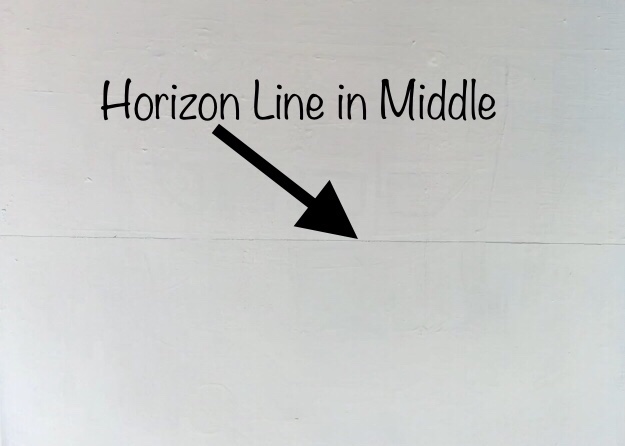
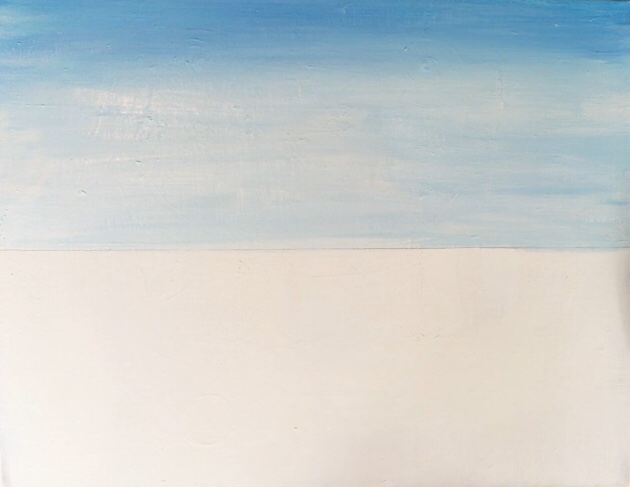
1. Draw the horizon line exactly in the middle (with canvas in landscape mode)
Using a T-Square ruler, estimate the center of the canvas and then lightly draw a horizon line with a regular pencil.
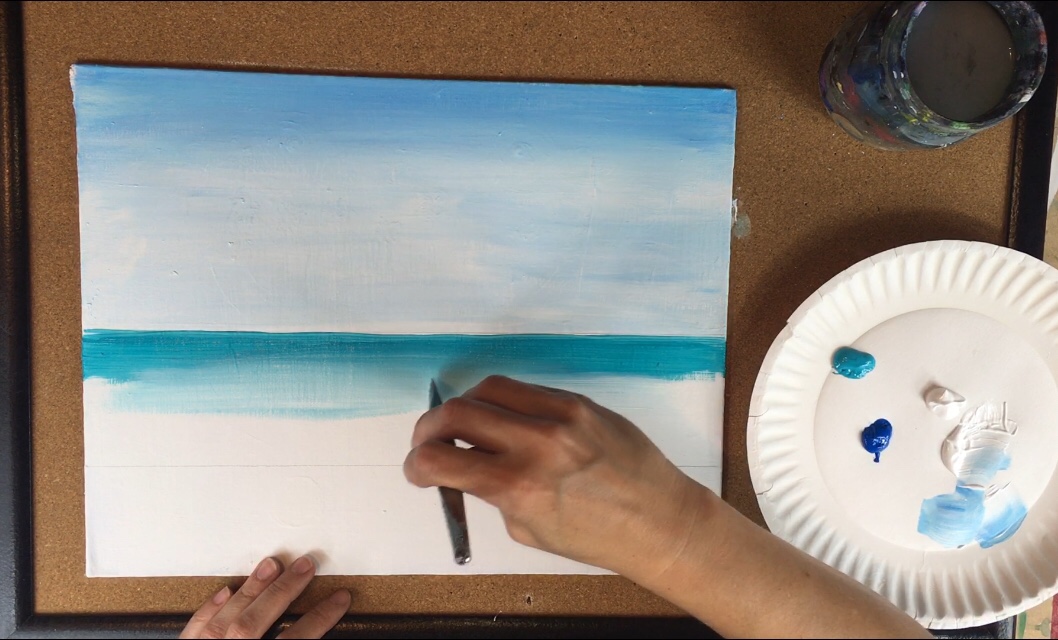
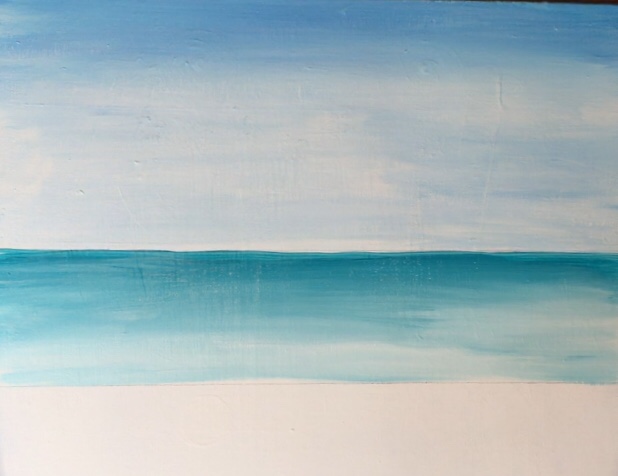
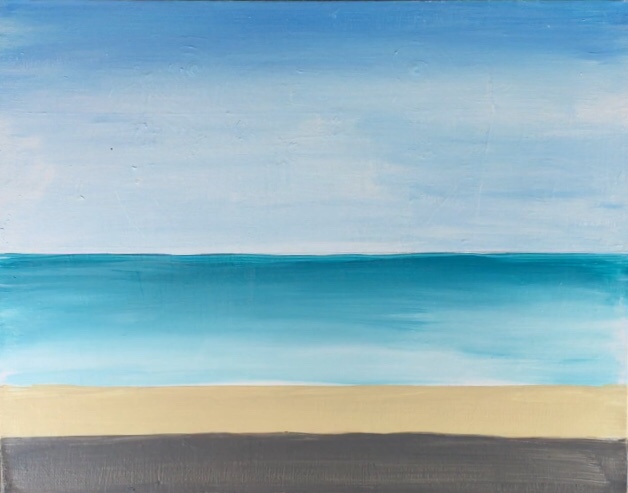
2. Paint the sky cerulean blue and titanium white using a 3/4″ flat brush
First dip your 3/4″ flat brush in water and pat it dry. Start with titanium white and add a layer of white at the very top. Paint long left and right horizontal strokes.

Then add in cerulean blue without rinsing your brush. The cerulean blue should make the top a light blue as it blends with the titanium white.
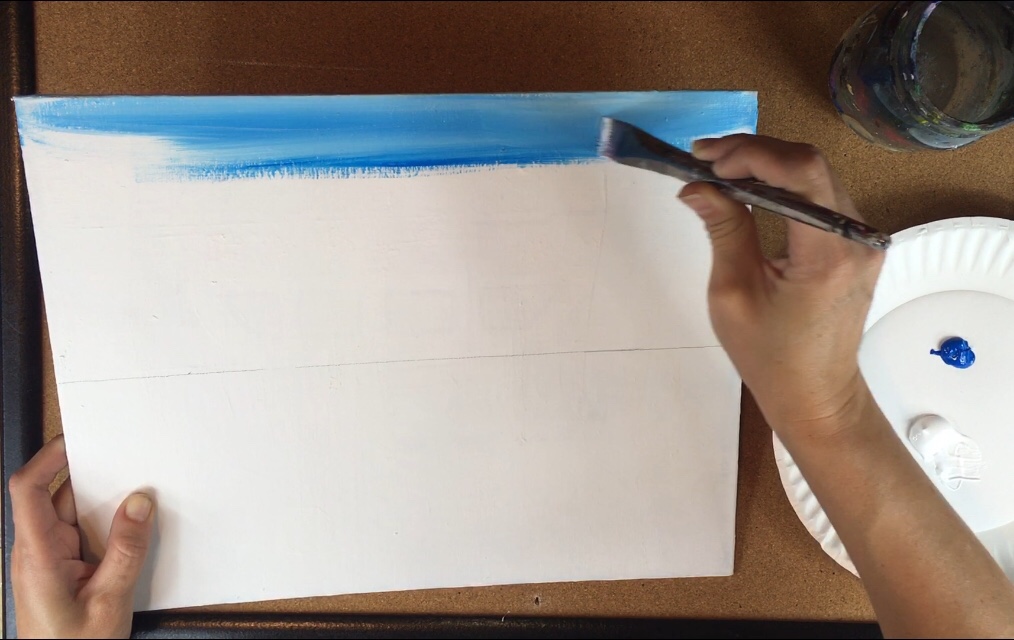
As you work your way down the canvas, add more white to your brush. The blue should be lighter and lighter as it approaches the horizon line and then turns very light blue.
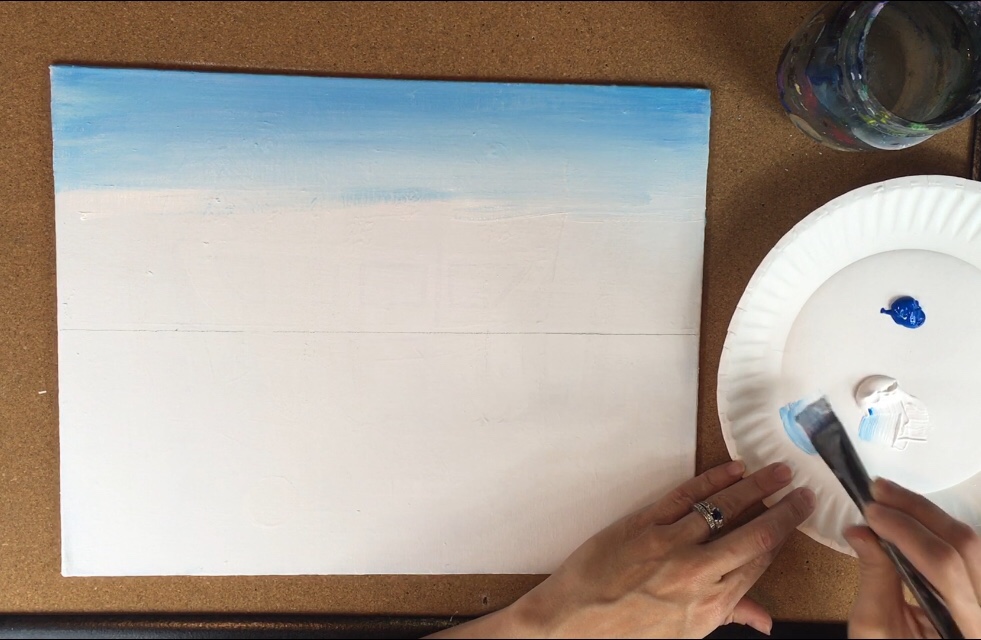
Go all the way to the horizon line, the color should be very light blue almost white along the horizon line.

3. Paint the water
First I estimated about 3-4 inches of space and drew another horizontal line with a pencil. This line will be where the water ends and where the sand begins.
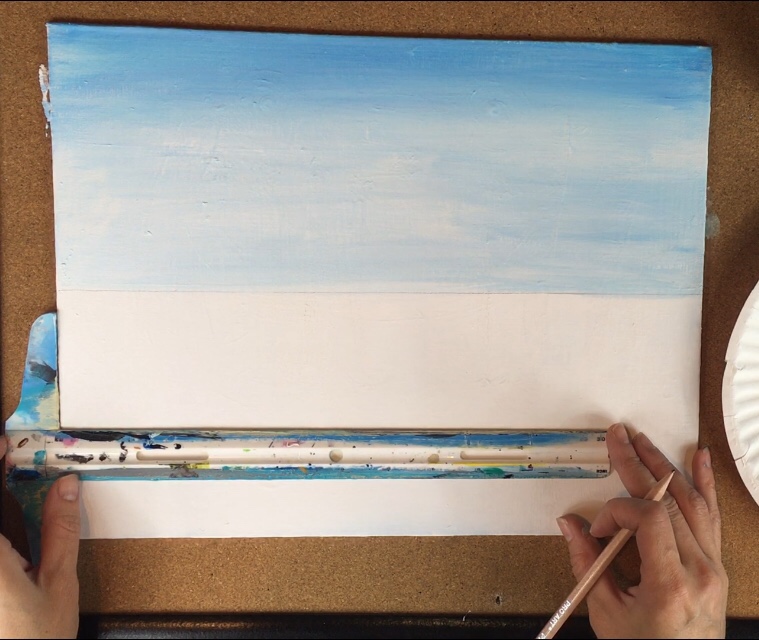
Then I used my 3/4″ flat brush (cleaned and rinsed off) and the color cobalt teal hue. Paint horizontal strokes at the top and go down about an inch.
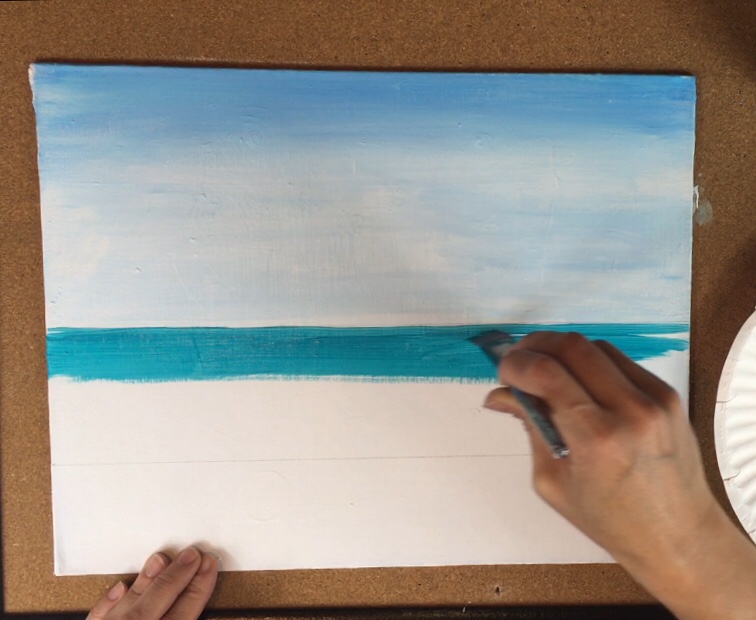
Then add titanium white on your brush without rinsing. In the same way you did the sky, do the same with the ocean. The cobalt teal hue starts out dark and pure and then you gradually add white to it to lighten the color as you work your way down. The blue should be lightest on the bottom.
4. Paint the sand and road
Again draw another horizontal line using the T-Square ruler. I estimated about half of the space that was leftover.
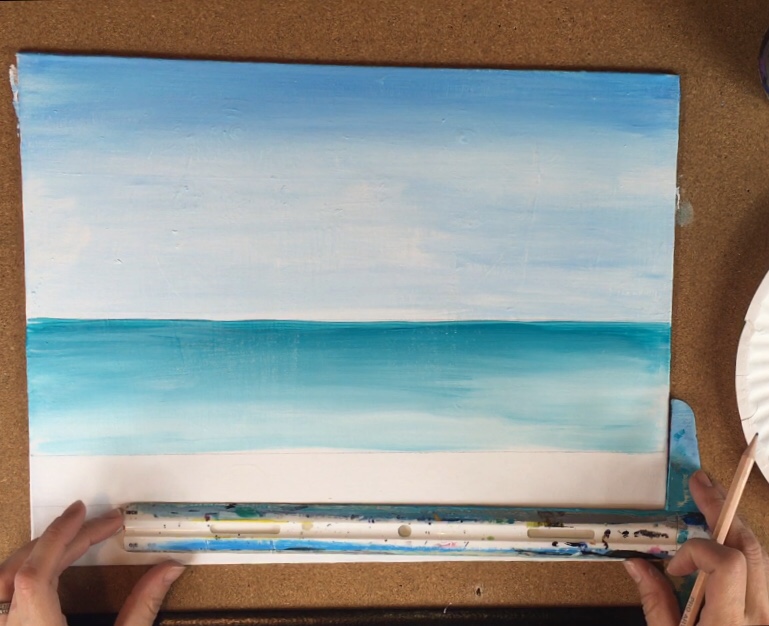
Then I used unbleached titanium and a 3/4″ flat brush to paint the top of the space.
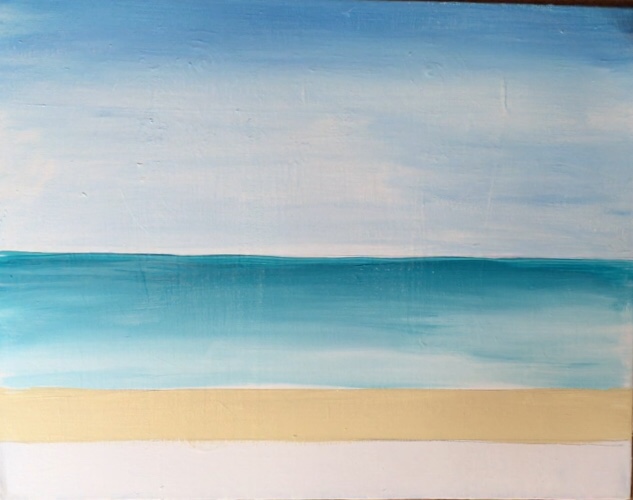
The road area was painted with neutral gray value 5.
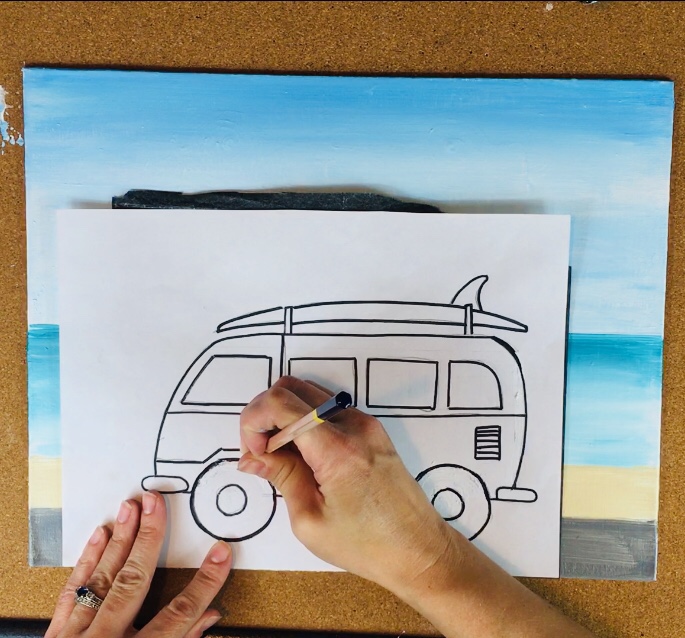
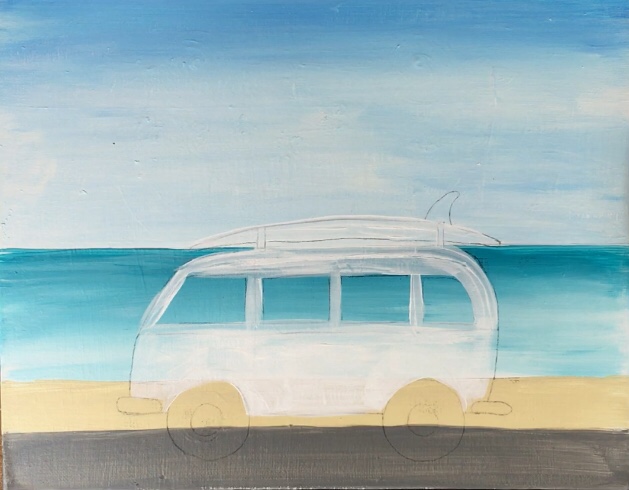
5. Transfer the traceable
Use a sheet of graphite paper in between the traceable and canvas. Use a regular pencil to trace the van.
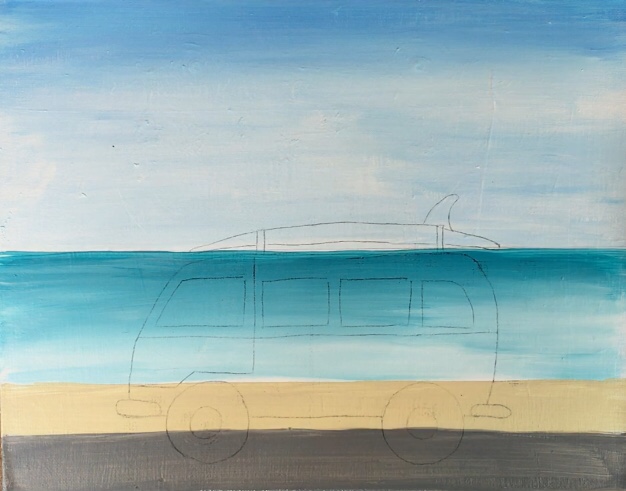
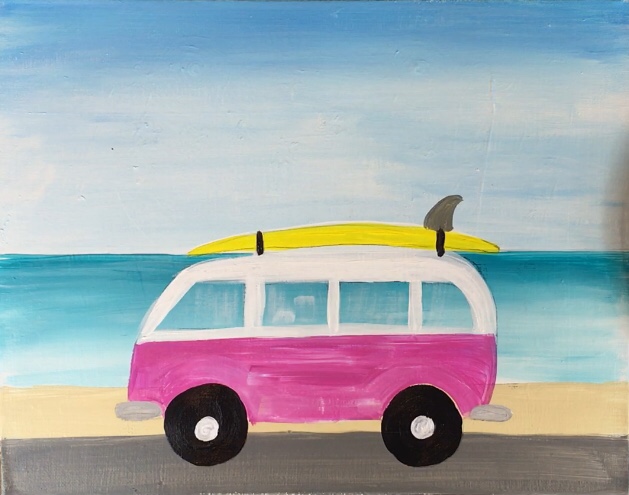
6. White out most of the van
Using a #12 flat brush (because it’s smaller) and titanium white, paint most of the van as well as the surfboard on top white.
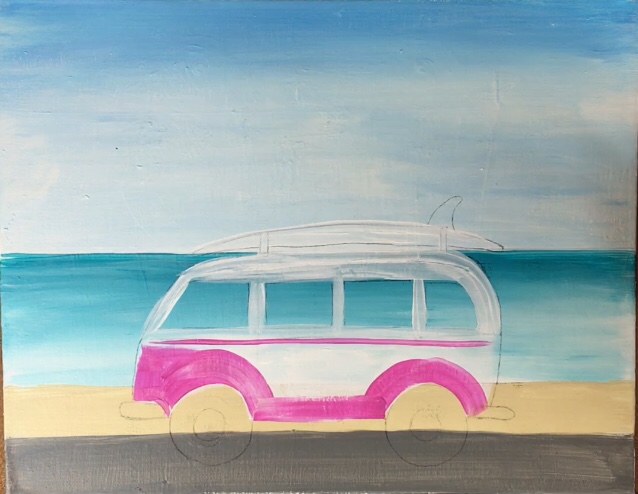
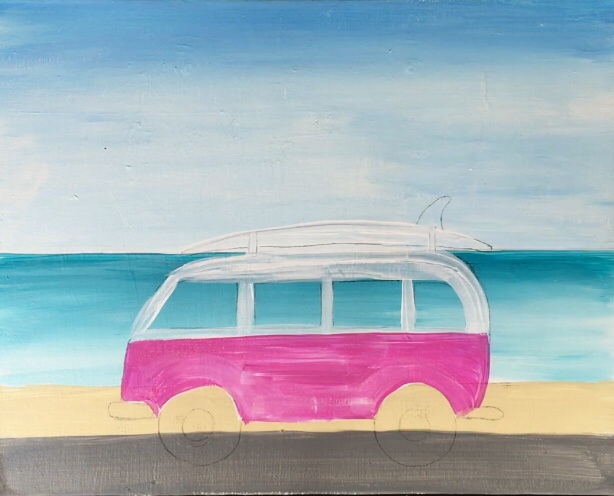
7. Paint the bottom medium magenta (or your color choice)
You may want to wait for your white to dry completely. Mine kind of mixed with the white because it wasn’t dry all the way but I liked the effect so I “went with it”. Basically I painted the bottom half of the van with medium magenta. Tip: make your strokes “contour” with the shape. In other words, the direction of the strokes should go in the direction of the shape you are filling in.
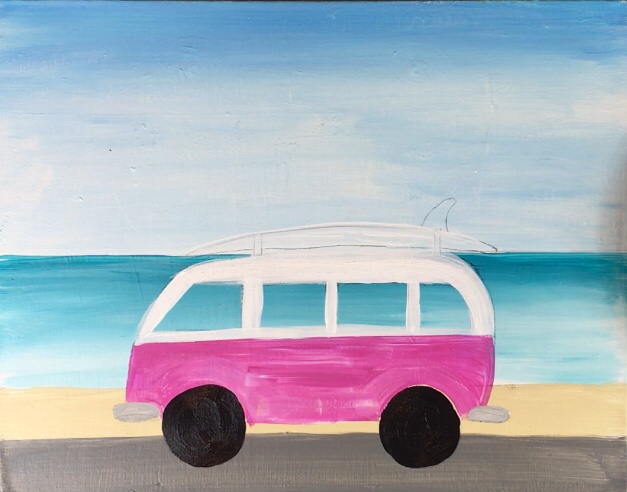
8. Paint the wheels
For the wheels, I used mars black and a #4 round brush. You may wish to use the flat brush or even a foam pouncer for the circles – whichever you feel more comfortable with. I also painted the front bumper and back bumber (or exhaust) with neutral gray value five.
9. Paint the surfboard
I used primary yellow and neutral gray value five for the surfboard. I also added white circles on the wheels. I also added some “dry brush marks” on the window with titanium white. To get that dry brush effect, dip you brush in white and then wipe off most the paint with a paper towel. Paint little up and down strokes to get the dry, translucent effect on the windows.
Then I used a 10/0 round brush (a very tiny brush) to add the base layer of titanium white for the flowers.
10. Paint the palm trees
Do do the palm trees, I used raw umber and my #12 flat brush. Start at the bottom of the trunk and make kind of a thick line. Then twist your brush to make the line go thinner as you go to the top of the trunk. Also make this line look kind of wavy.

I did two trunks on each side of the van. Each trunk is slightly different in height and is curved differently.
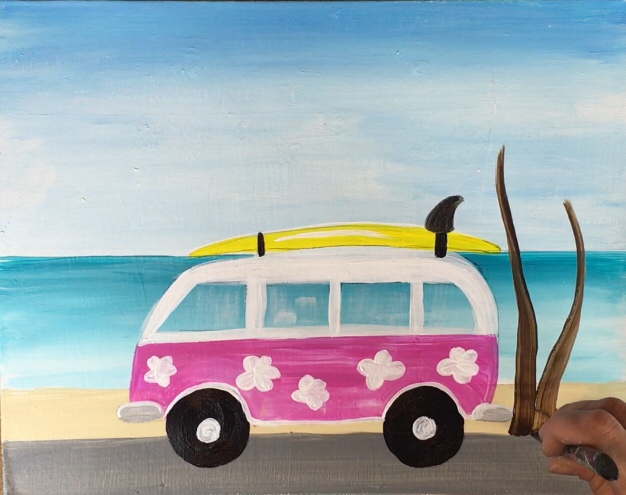
To add the texture to the trunk, dip your not rinsed brush in unbleached titanium. Use the full width of the brush to draw little strokes on the trunk. The unbleached titanium should blend with the raw umber. Make these little strokes kind of curved to make the trunk look a little 3D.
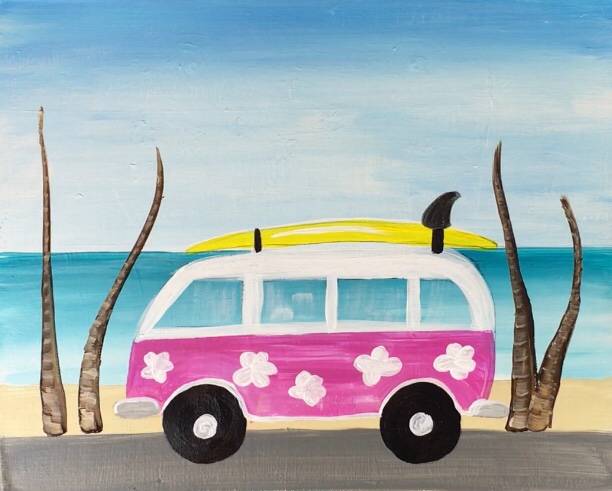
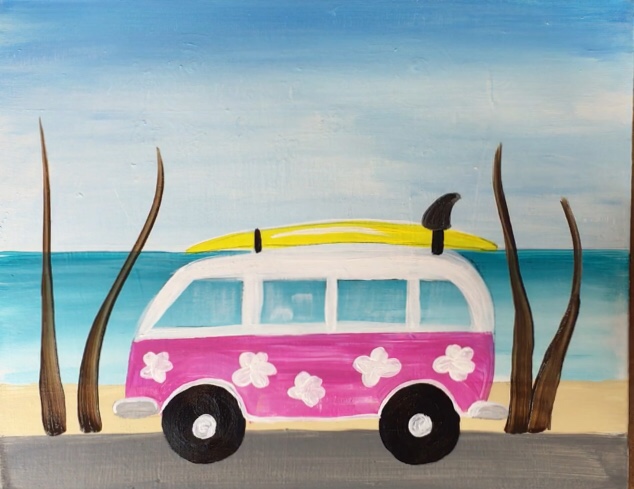
For the branches, I used my #12 flat brush and deep green permanent. Use the tip of the brush to paint the middle part of the branches.
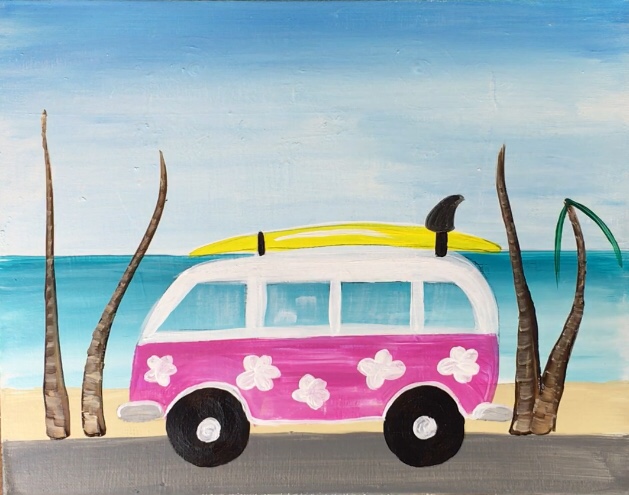
On each palm tree I painted five lines going in all different directions.
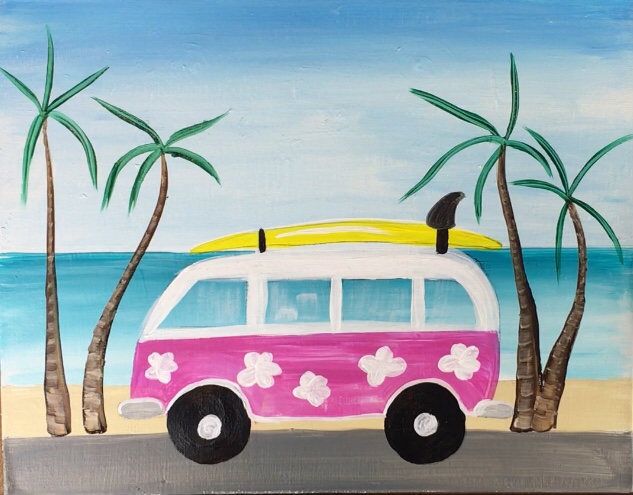
To paint the palms, I double loaded my brush in both deep green permanent and primary yellow. Double loading means to dip it in both colors (I did about equal amounts). Use the full width of the brush to drag each stroke starting from the middle palm line and “whisping” down. The colors should blend together to create a yellow-green and the stroke will look like a palm. Try easing up on the amount of pressure you are holding the brush with as you go down with each stroke.
As you reload your brush, try to grab different amounts of green and yellow. This will create variety in the colors so all the palms aren’t the exact shade of green.
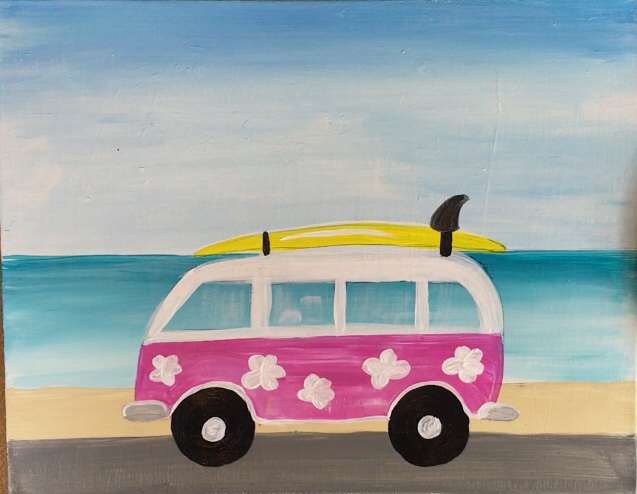
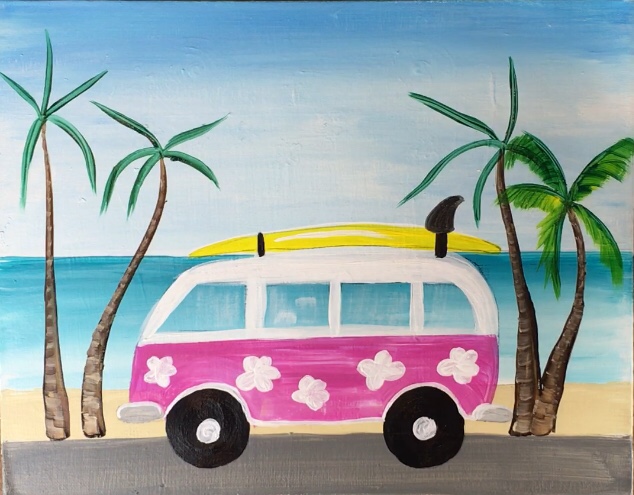
11. Continue to add details to the van
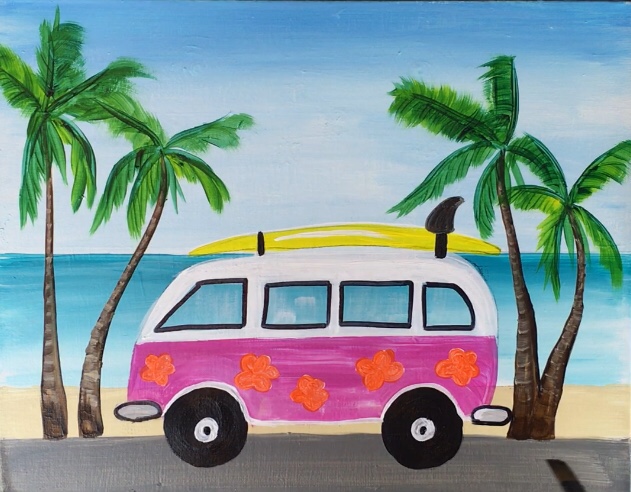
Next I painted the flowers in with the 10/0 round and cadmium orange hue.
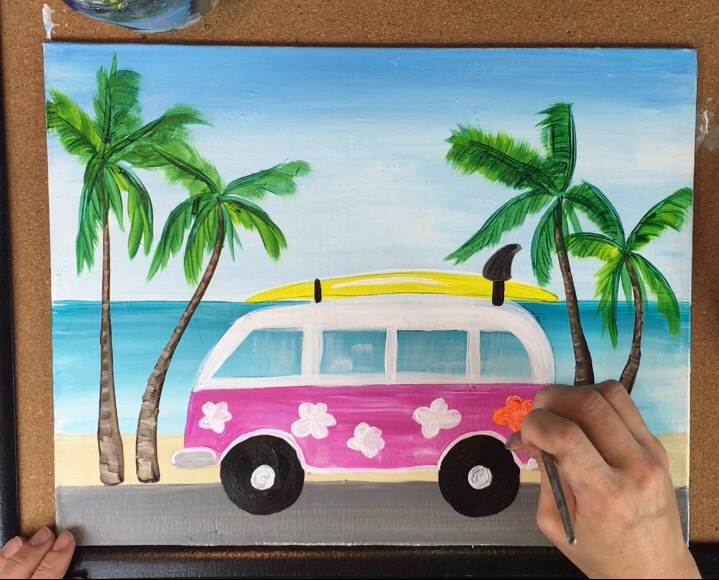
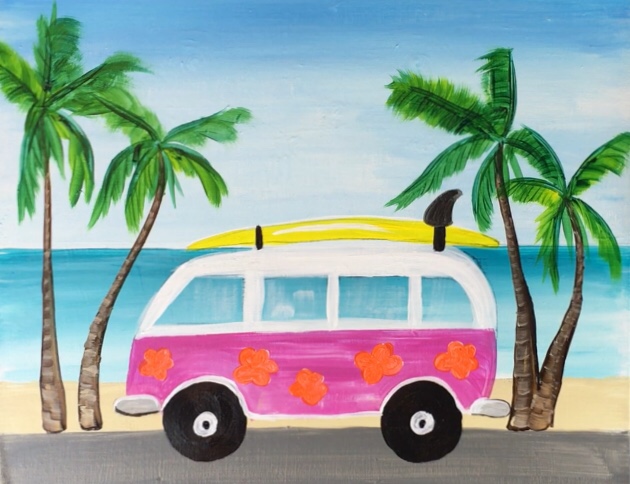
I also outlined the inside window frame using a black sharpie and outlined the front and back bumper.
Underneath the van, I added some shadowing. To do the shadows, I used my #12 flat brush and mars black. I watered down the paint slightly to get it to be thin and translucent.

The shadows were painted under the palm tree trunks, the tires and the van.
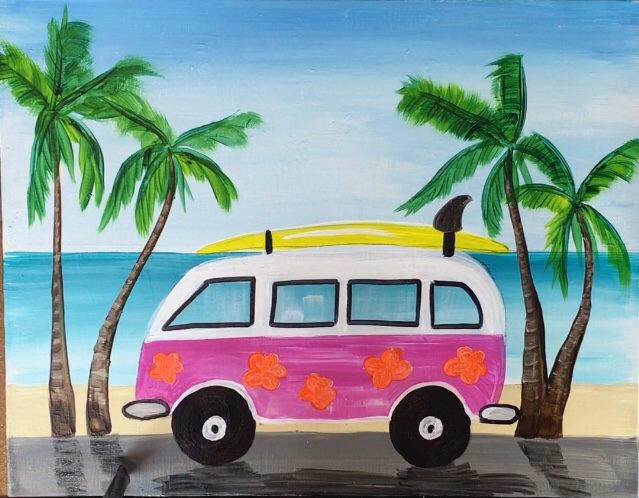
I also added a few more details on the van including vines connecting the flowers and a line defining the door on the side of the van. The sun was painted using a round pouncer sponge dipped in titanium white and primary yellow.
Finally, I painted some motion lines in the back of the van and around the tires using titanium white and a dry brush #4 round.
Finished
