

Would you like to save this?
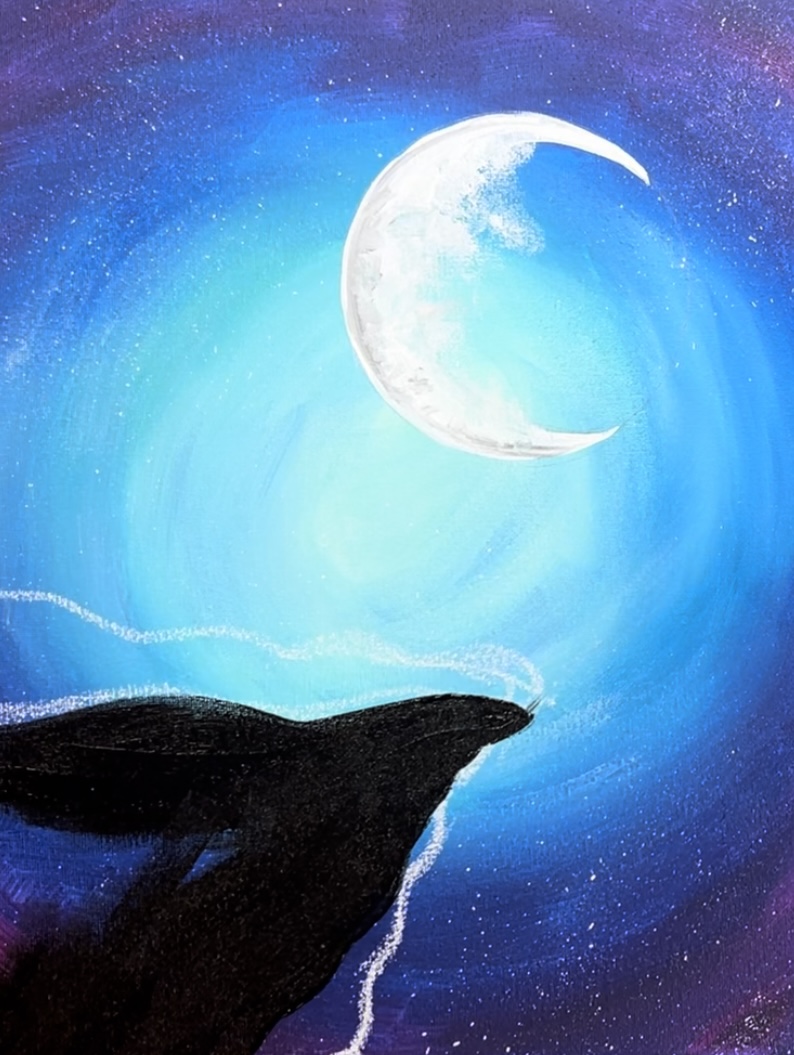
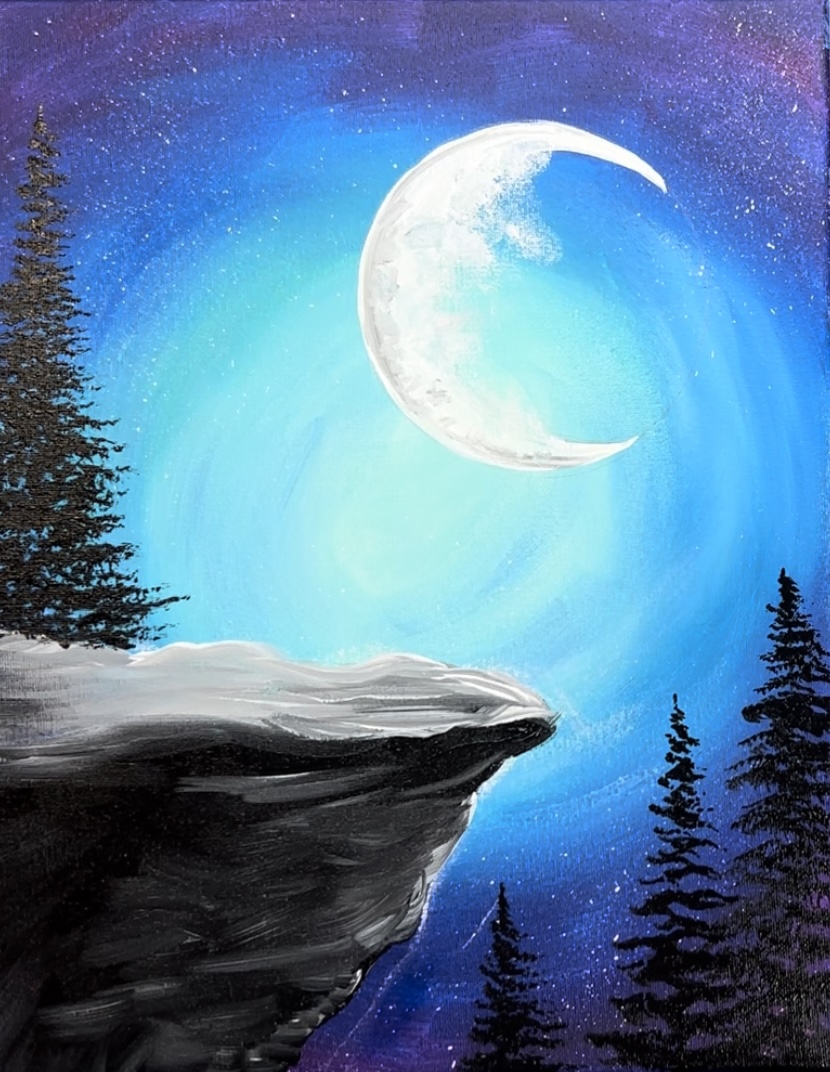
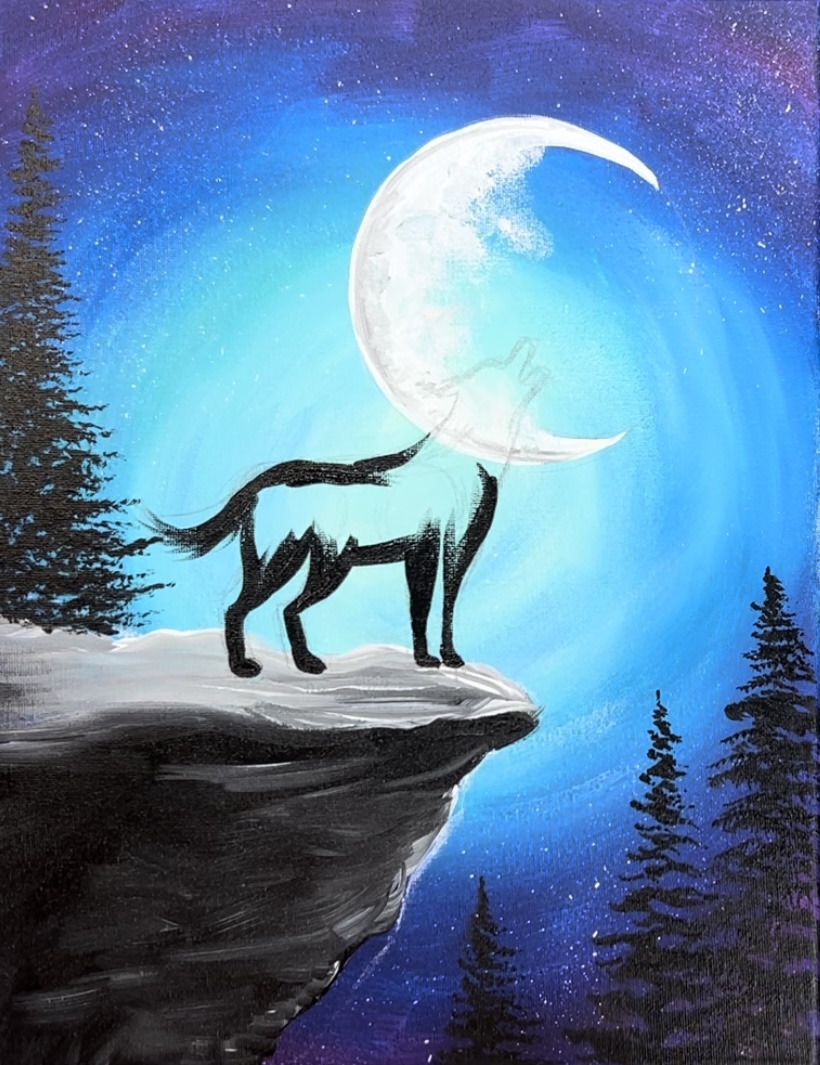
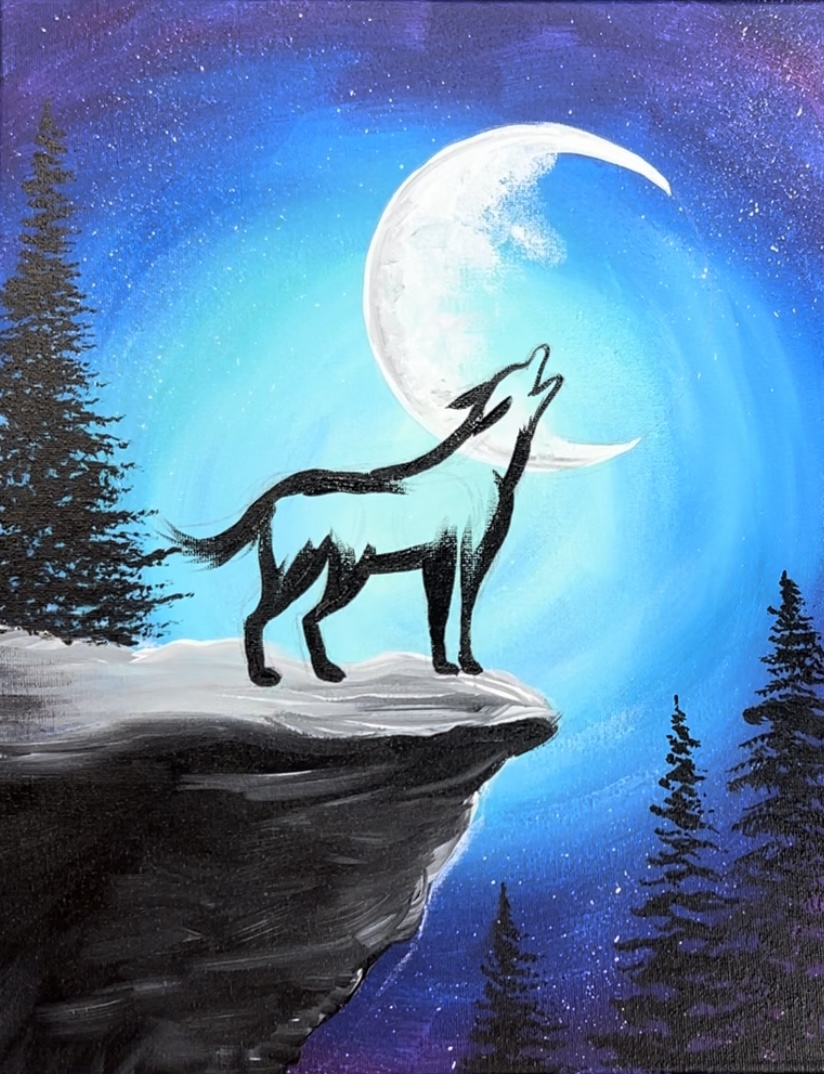
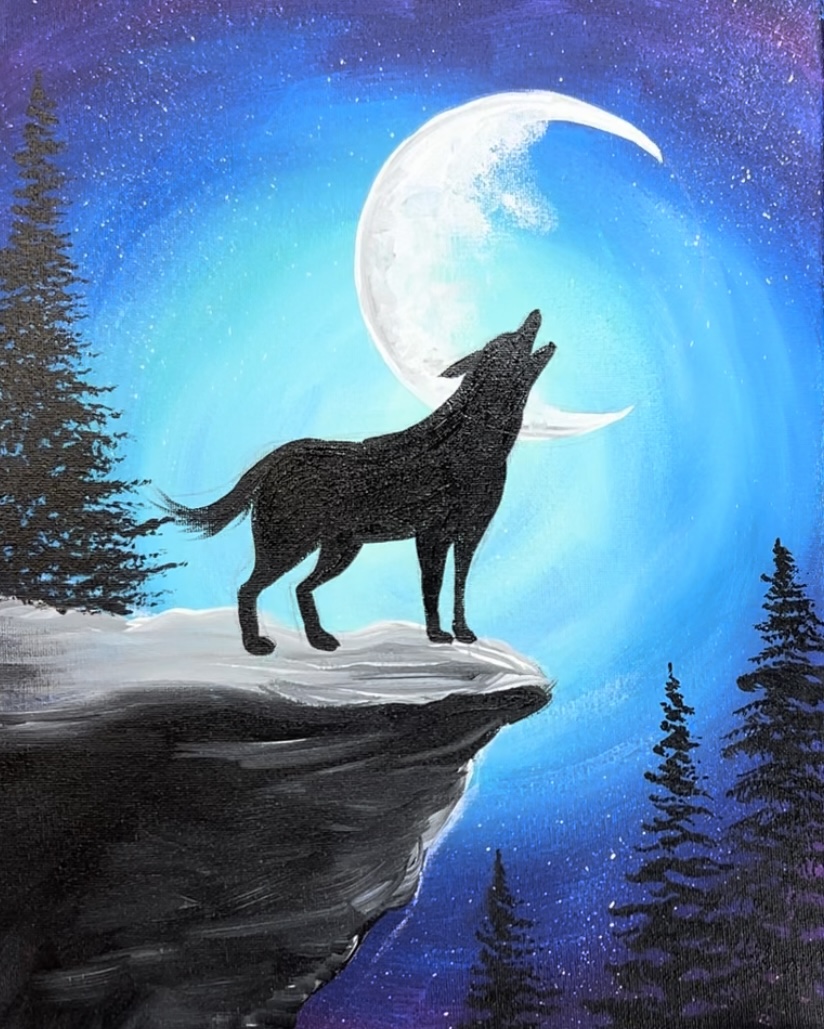
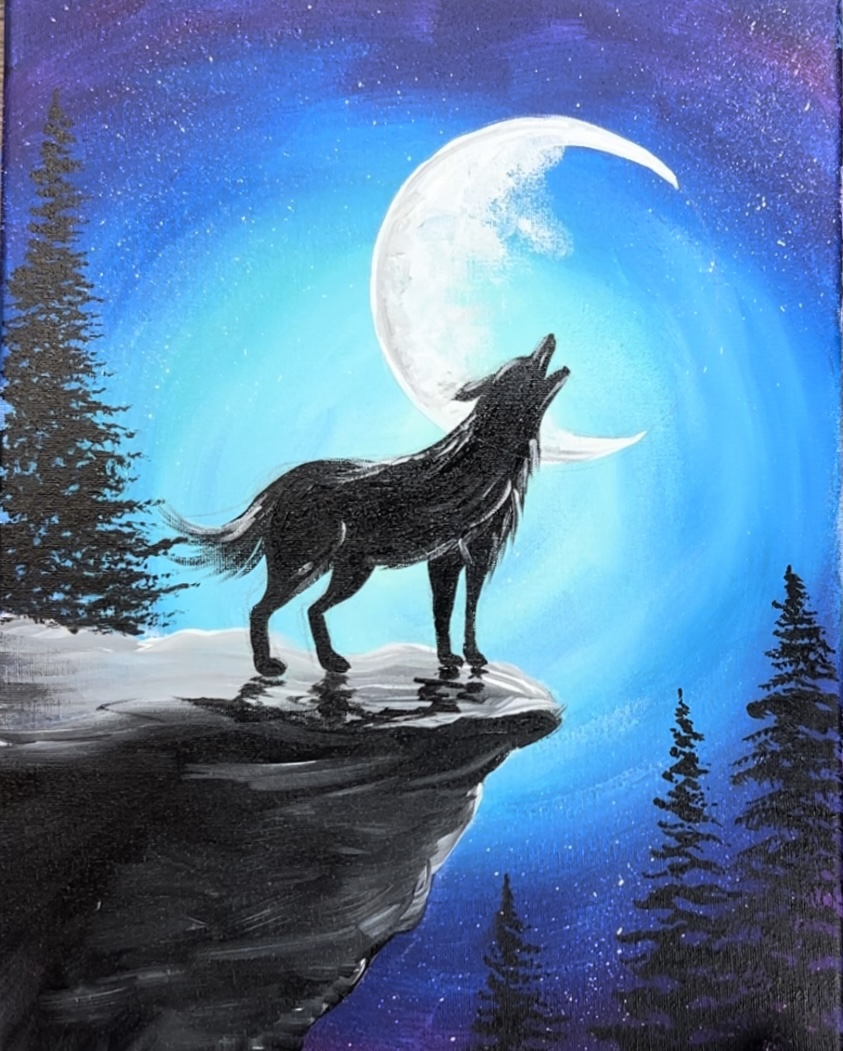
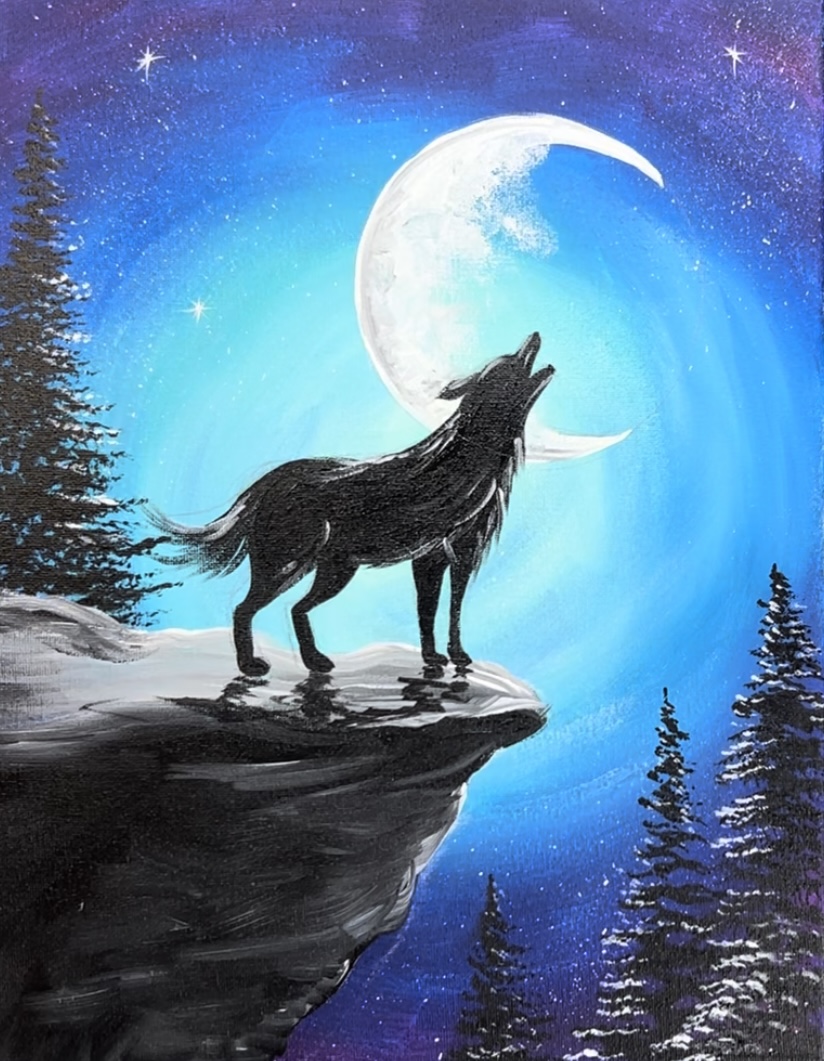
This acrylic painting tutorial for beginners will show you how to paint a howling wolf on a cliff with a large whimsical crescent moon in the sky!

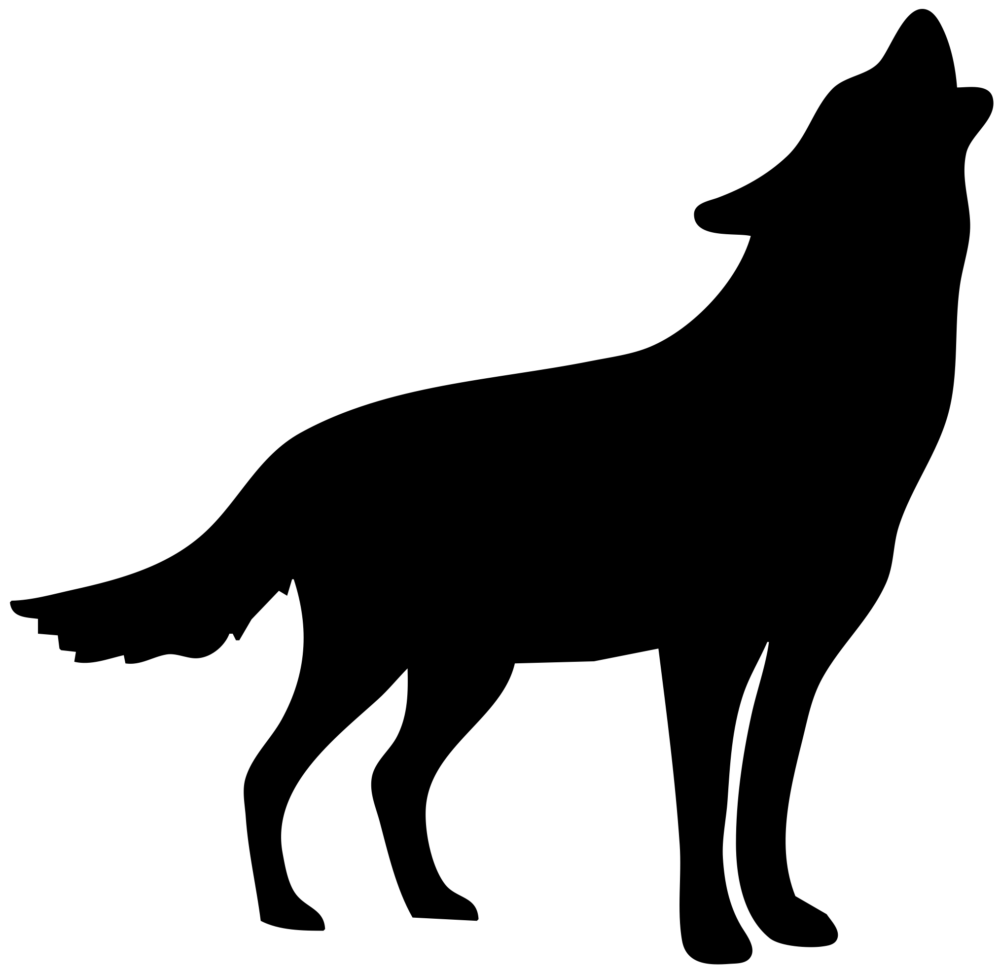
There is a template for the wolf and also instructions for how to draw a wolf!
Enjoy and happy painting!
Materials Needed:
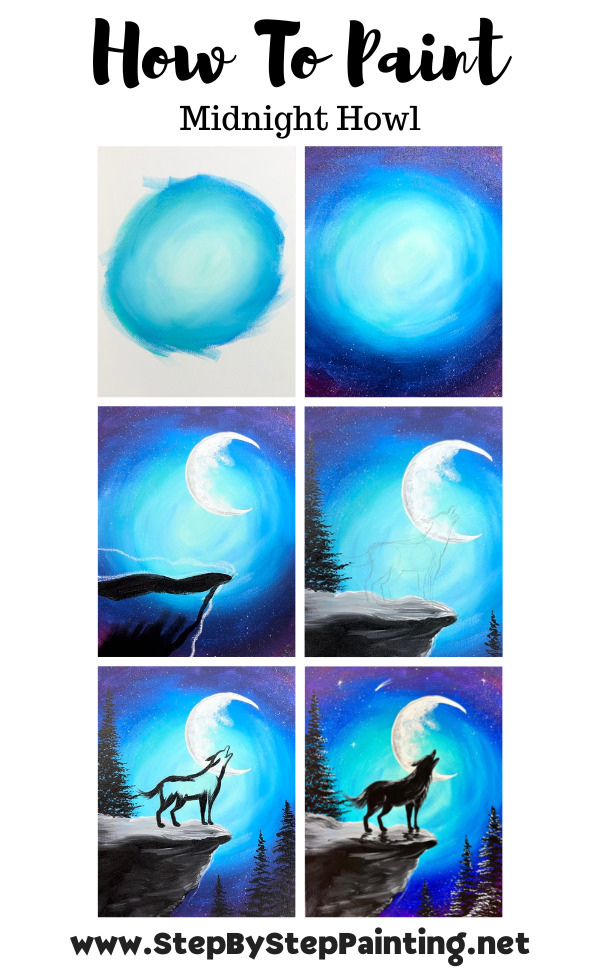
"Midnight Howl" Acrylic Painting Tutorial
This acrylic painting tutorial demonstrates how to paint a wolf howling at a crescent moon on a cliff.
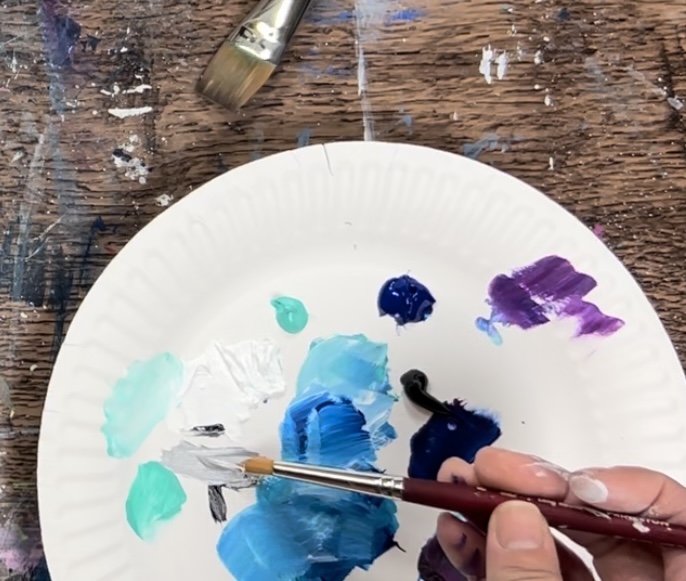
Materials
- 11 x 14 Canvas
- Acrylic Paint
- Brushes
- Pencil
- Ruler
- White Chalk
- Optional Traceable Template For Wolf
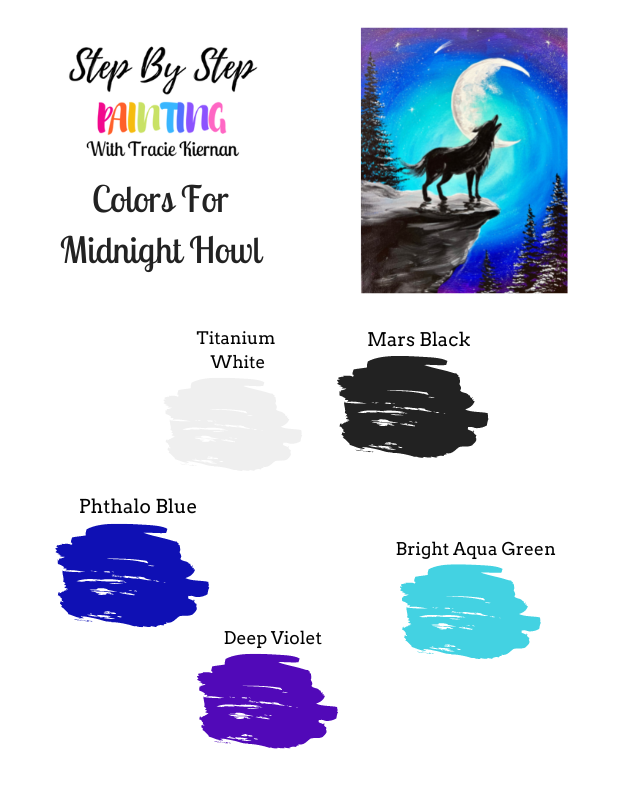
Paint Colors
- Titanium White
- Mars Black
- Phthalo Blue
- Bright Aqua Green
- Deep Violet
Paint Brushes
- 3/4" Flat Wash
- 12 Bright
- 8 Round
- 4 Round

Color Palette
This painting was done with Liquitex BASICS acrylic paints. If you are using a different brand, use the color chart below to help match colors.
Craft Paint Conversion
If you are using craft paints such as the Apple Barrel craft paints, I would recommend subbing to these colors:
- Black
- White
- Too Blue
- Purple Iris
- Bimini Blue
Traceable
This is optional. In the video, Tracie will be drawing the wolf. You are welcome to use this silhouette template to download and trace onto your canvas.
Directions At A Glance
Video
Step By Step Directions
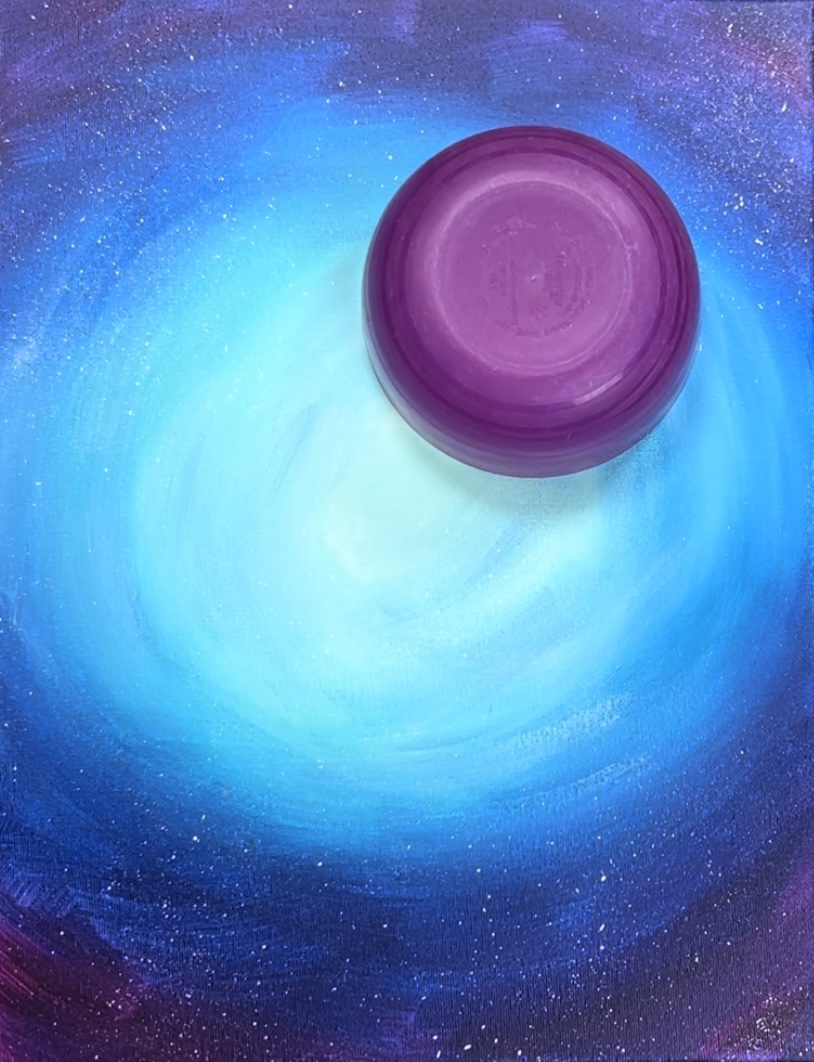
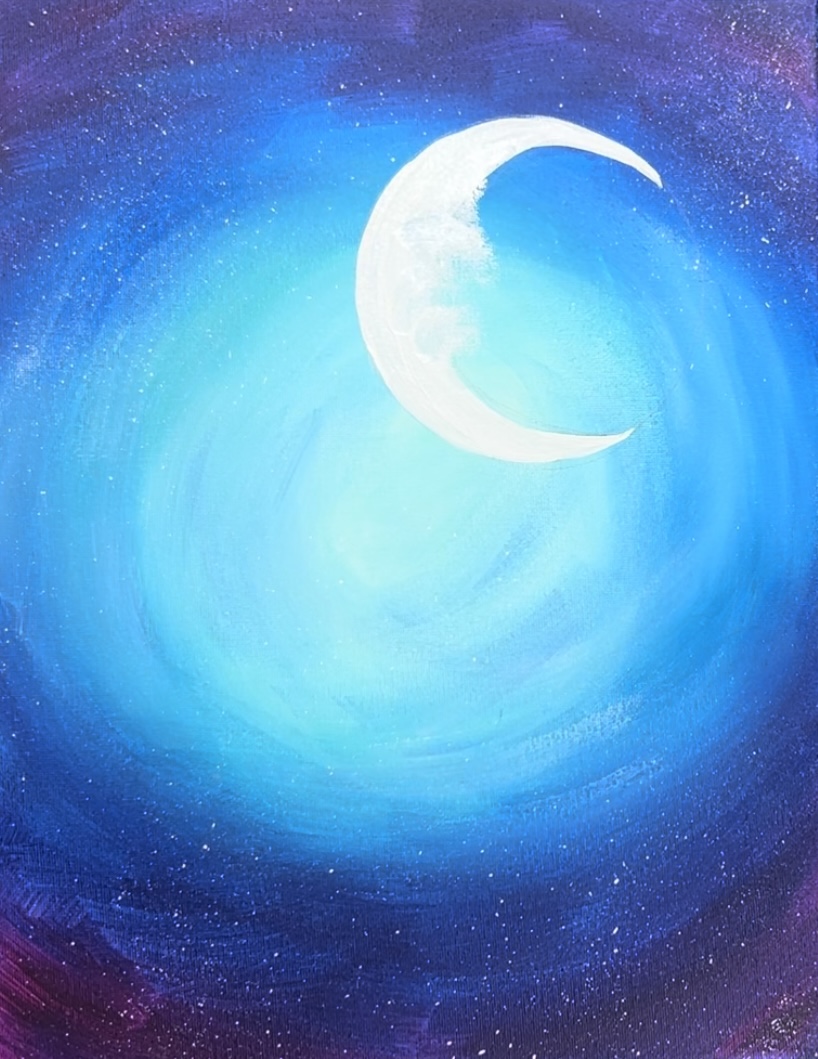
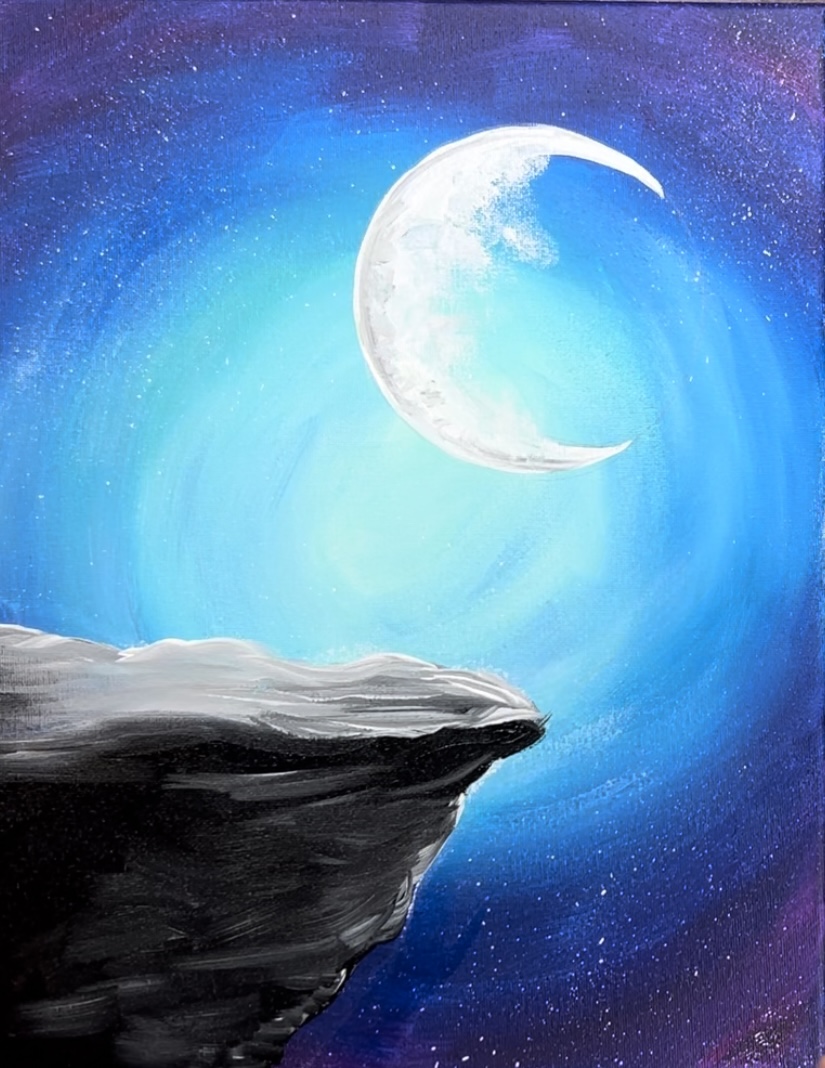
1. Paint sky
Load your palette with the colors: titanium white, bright aqua green, phthalo blue and mars black.

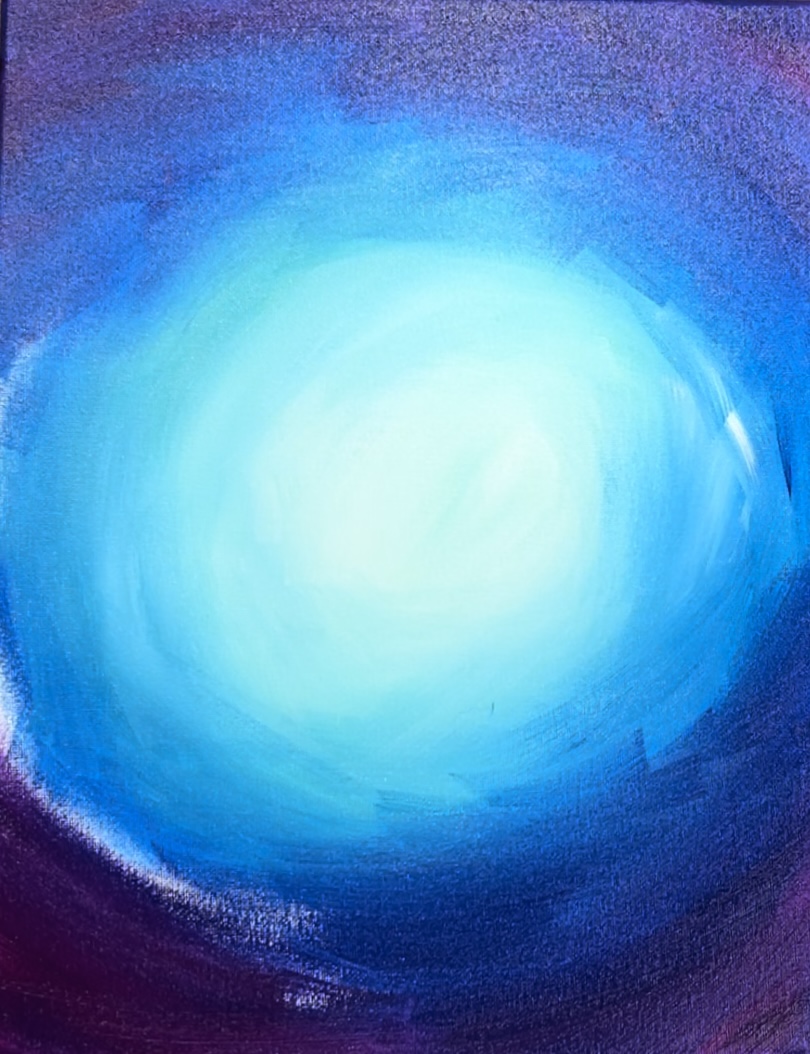
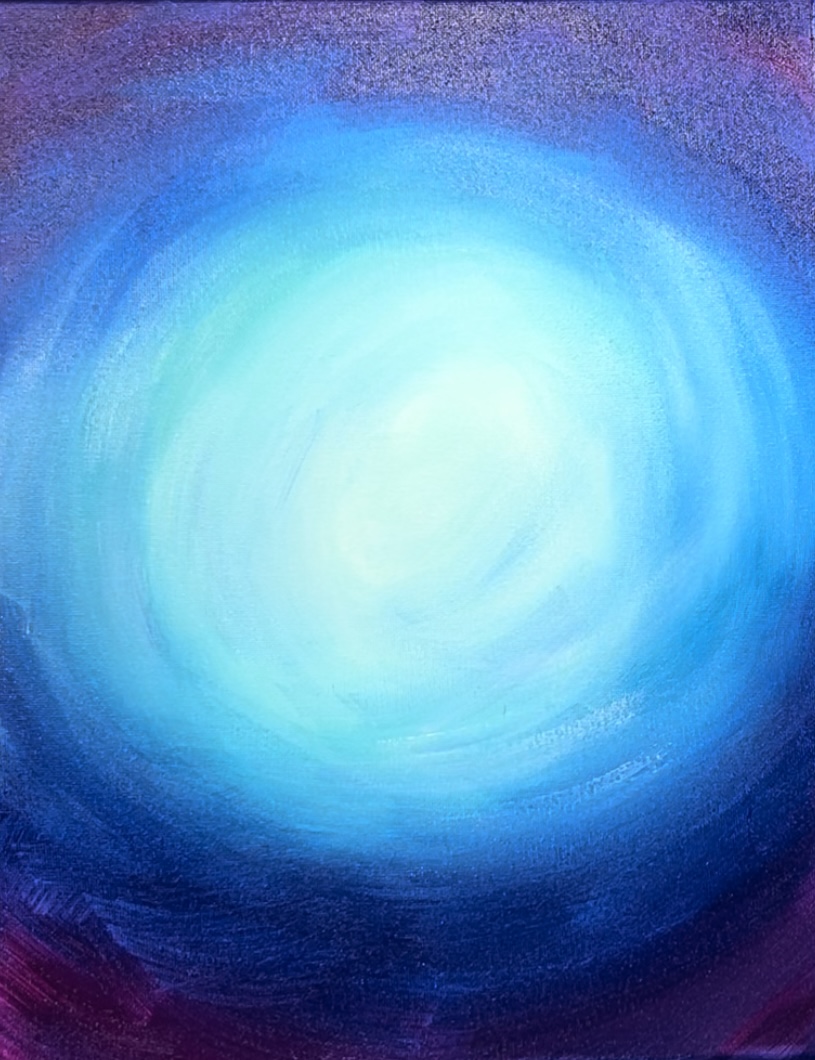
Use the 3/4″ flat wash brush to paint a large “blob” of white in the middle of the canvas. Do this with short, choppy strokes.
Next, load a very small amount of bright aqua green onto the corners of your 3/4″ flat wash brush. Do this without rinsing the white off of your brush.
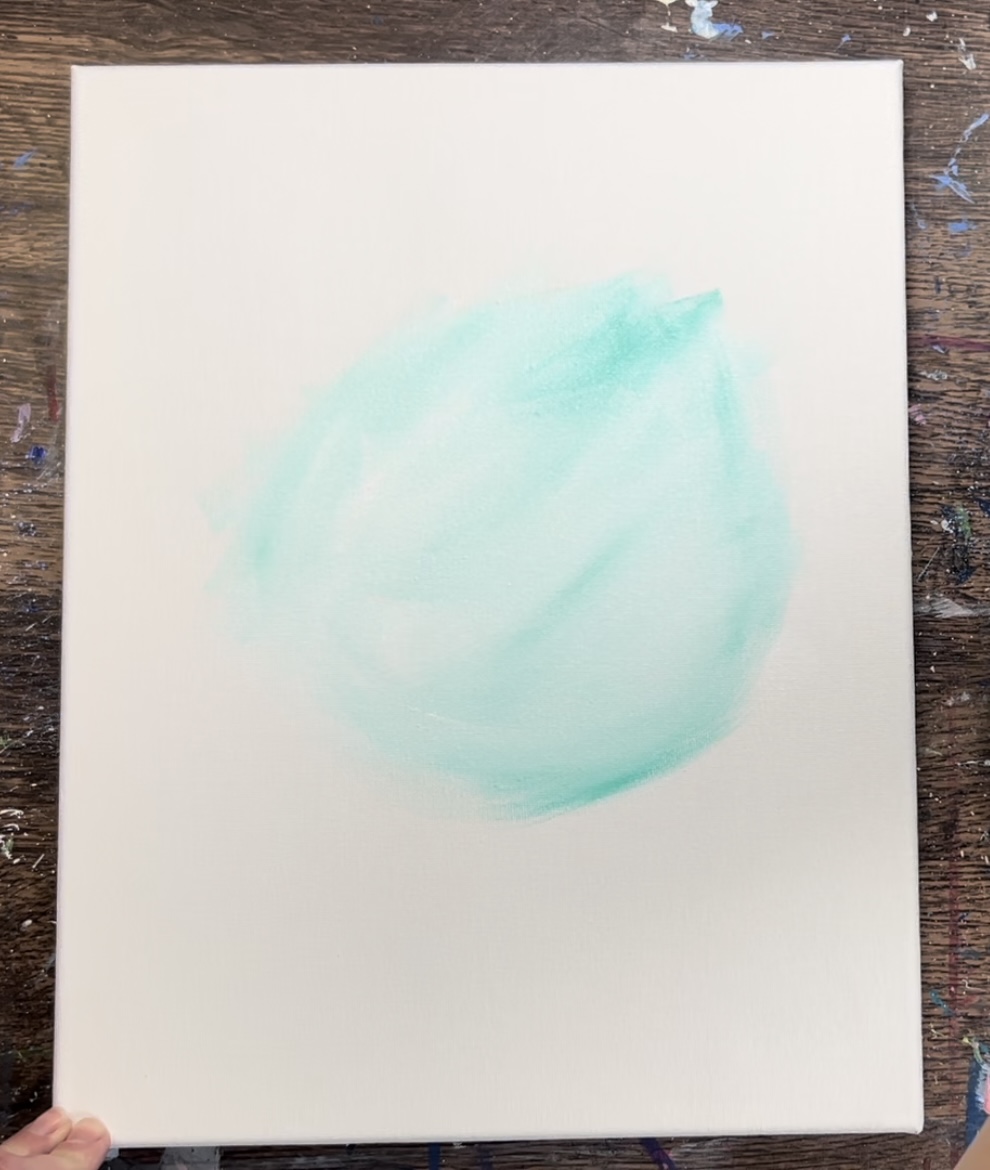
Blend the bright aqua green in the center so the center “blob” area turns a very light aqua color. Note: you don’t want this center to be “pure white” or the crescent moon won’t show up very well.
Then blend more of the aqua color outwards. You will want this “circle” to get darker as you work your way to the edges of the canvas.

Next, without rinsing your brush, mix a small amount of phthalo blue into bright aqua green on your palette. Then blend this color gently on the outer part of that circle.
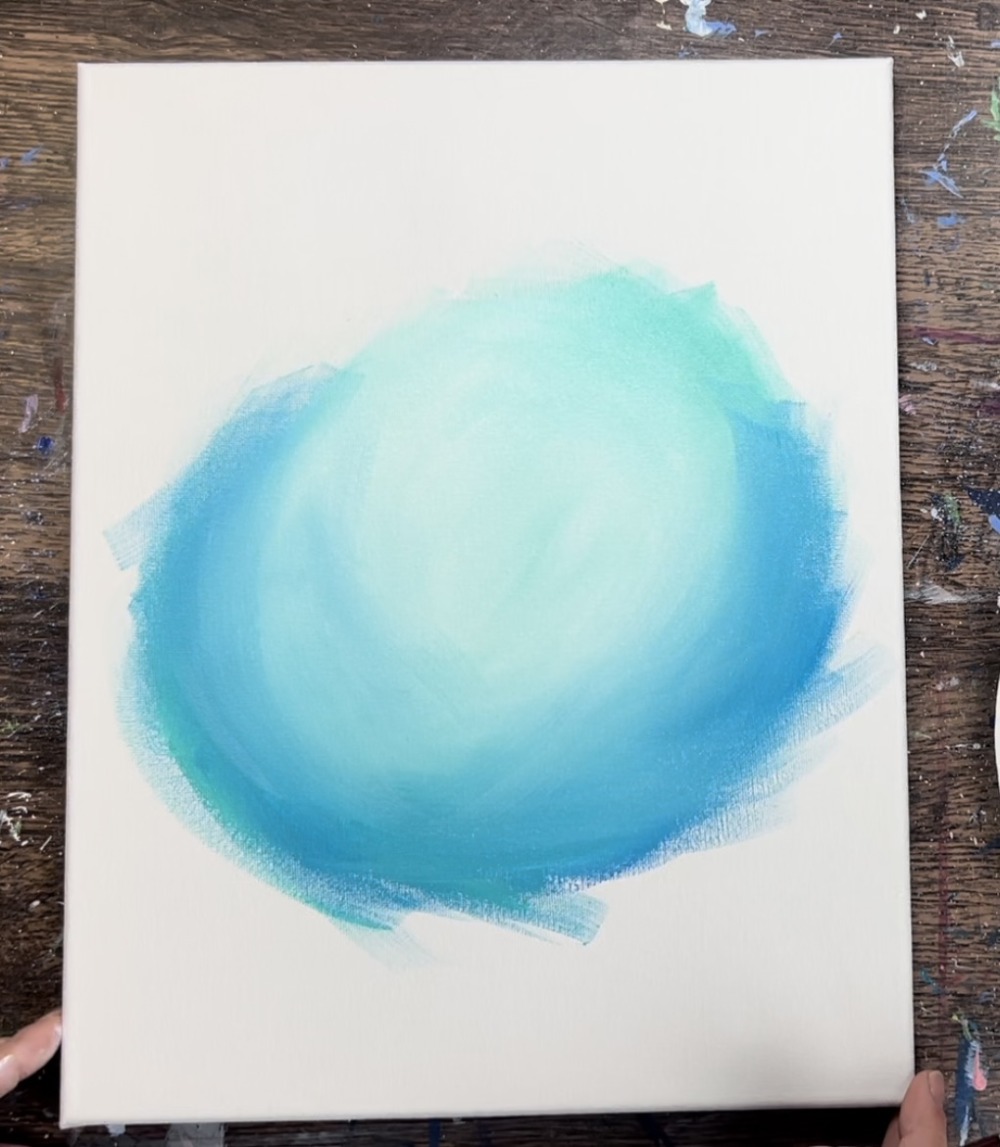
Blend more of the phthalo blue outwards so that it gradually gets darker.
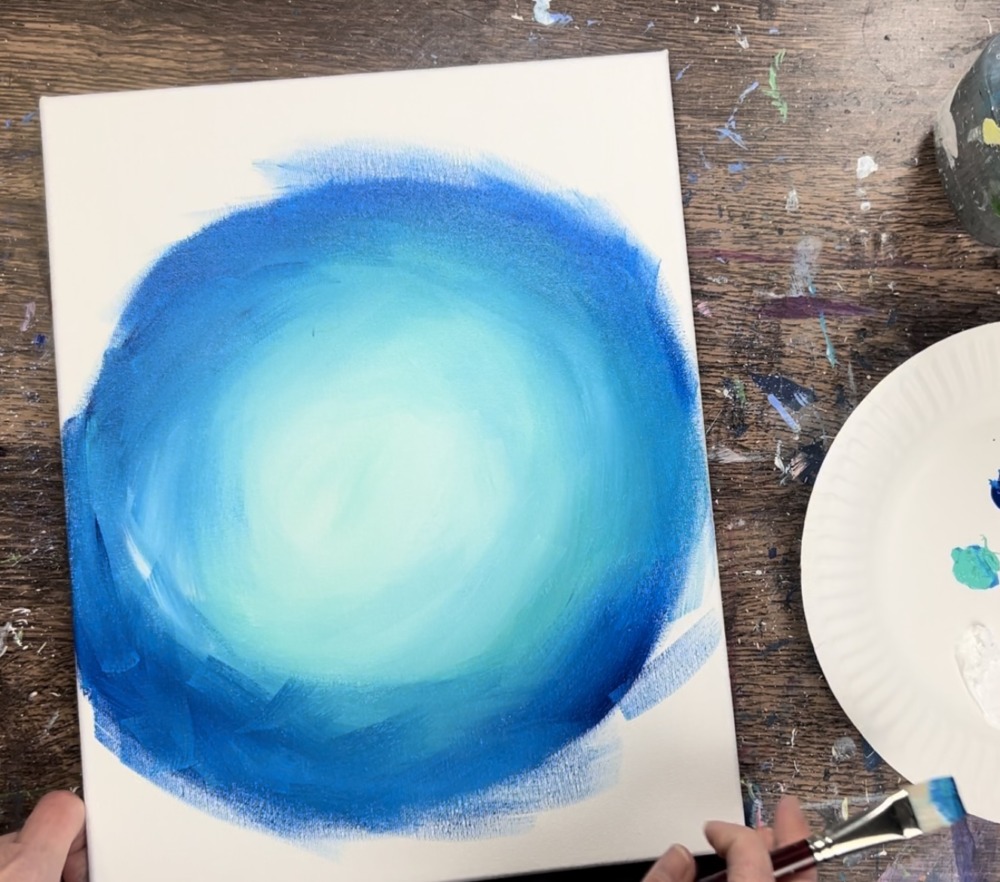
Then as you approach the edge of the canvas, blend deep violet into the blue.
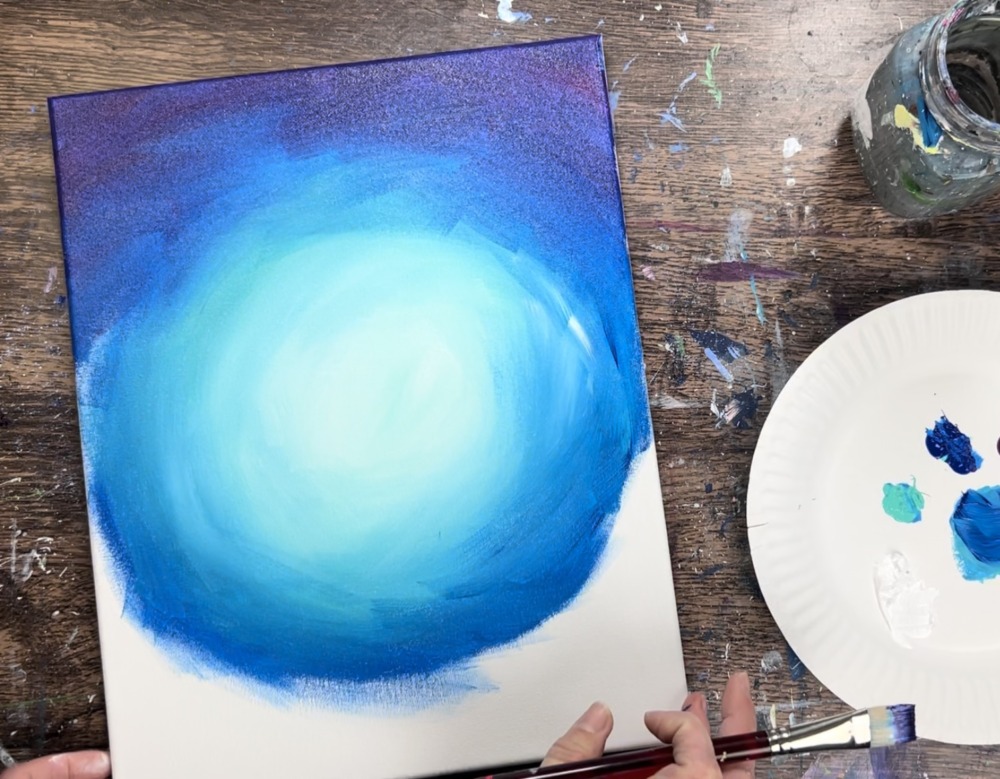
Fill the rest of the edges of the canvas with the deep violet. If needed, add more phthalo blue to help the deep violet blend more.

2. Splatter stars
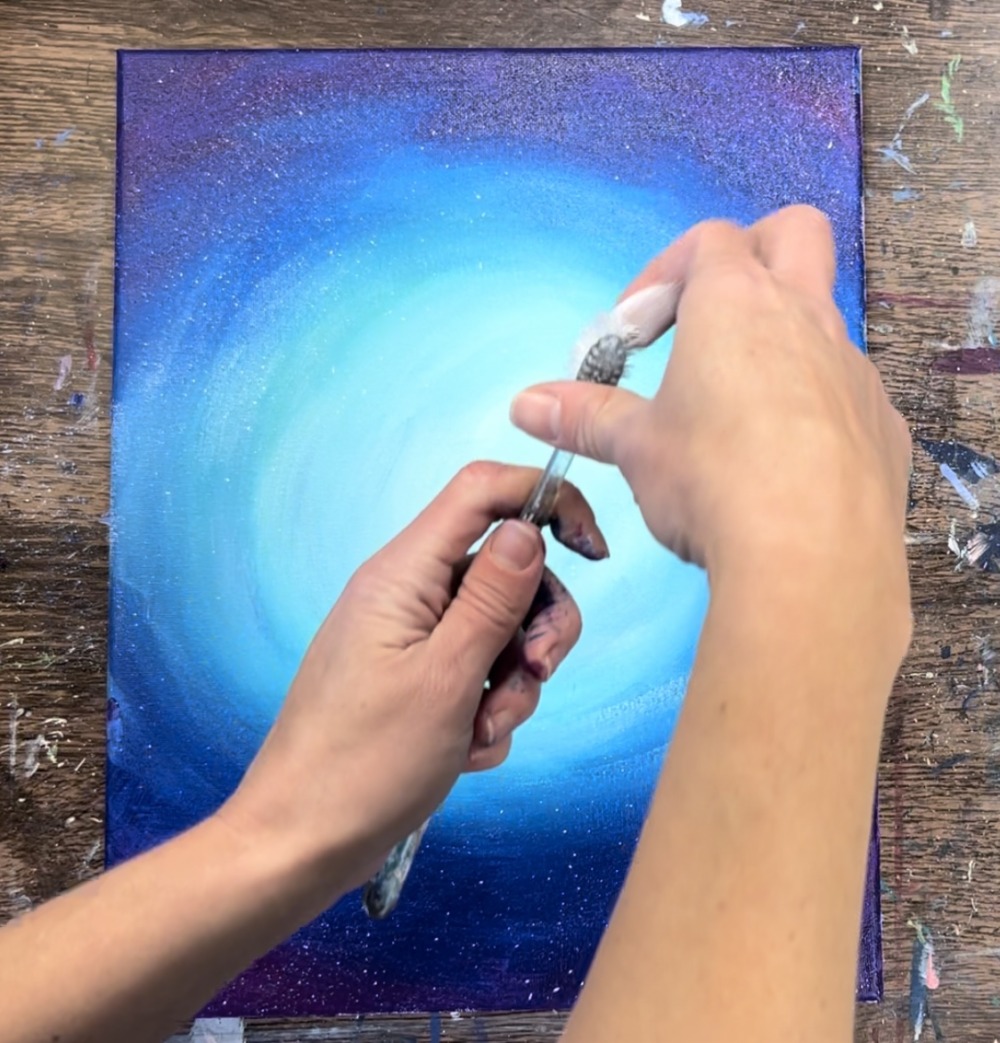
Next, use a toothbrush to flick small white dots all over the sky for stars.

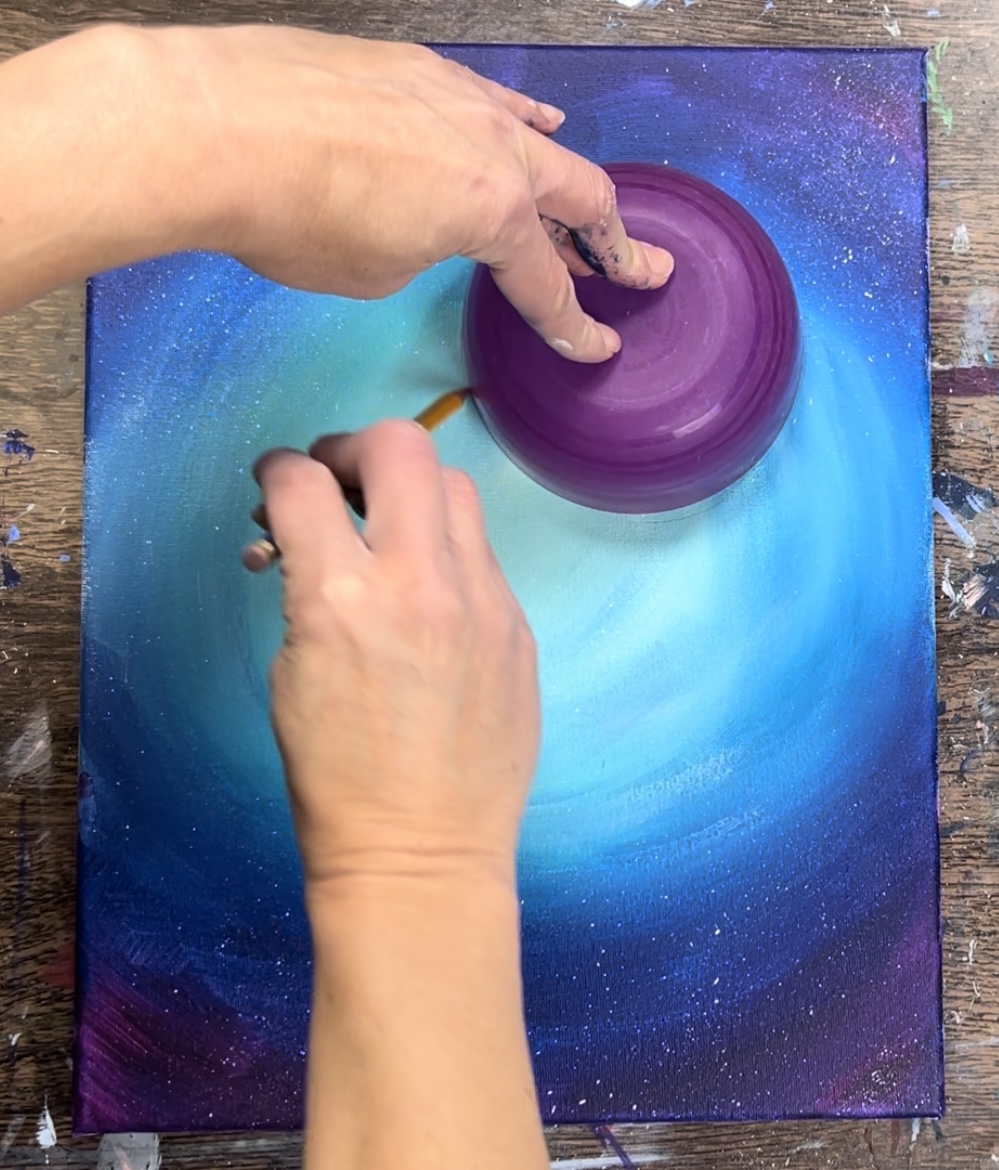
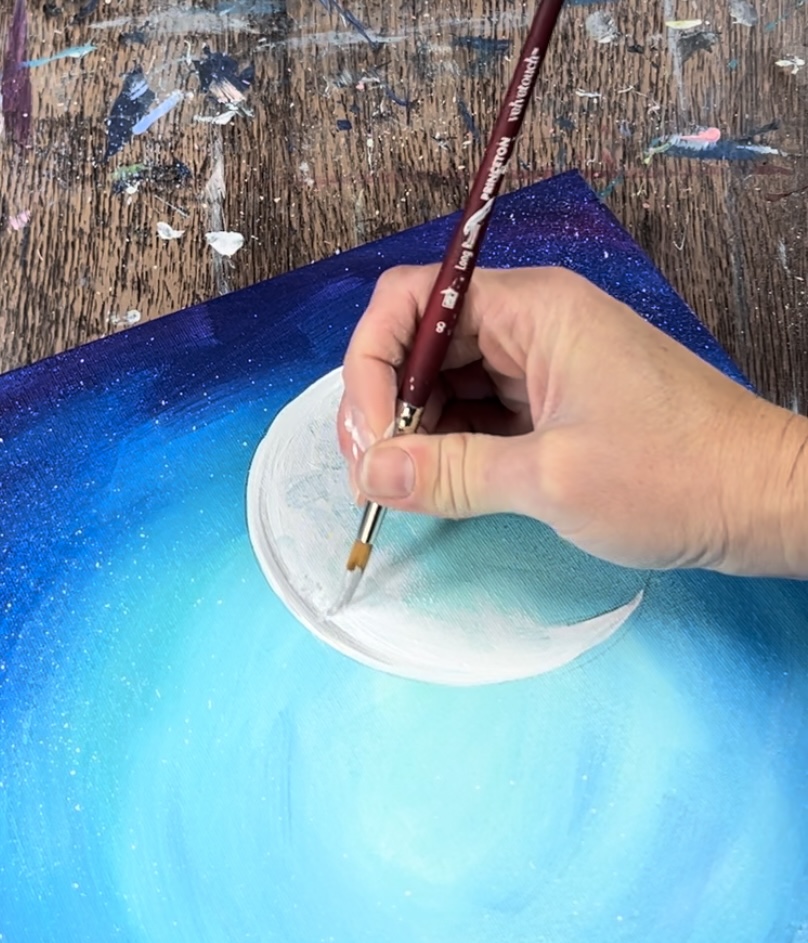
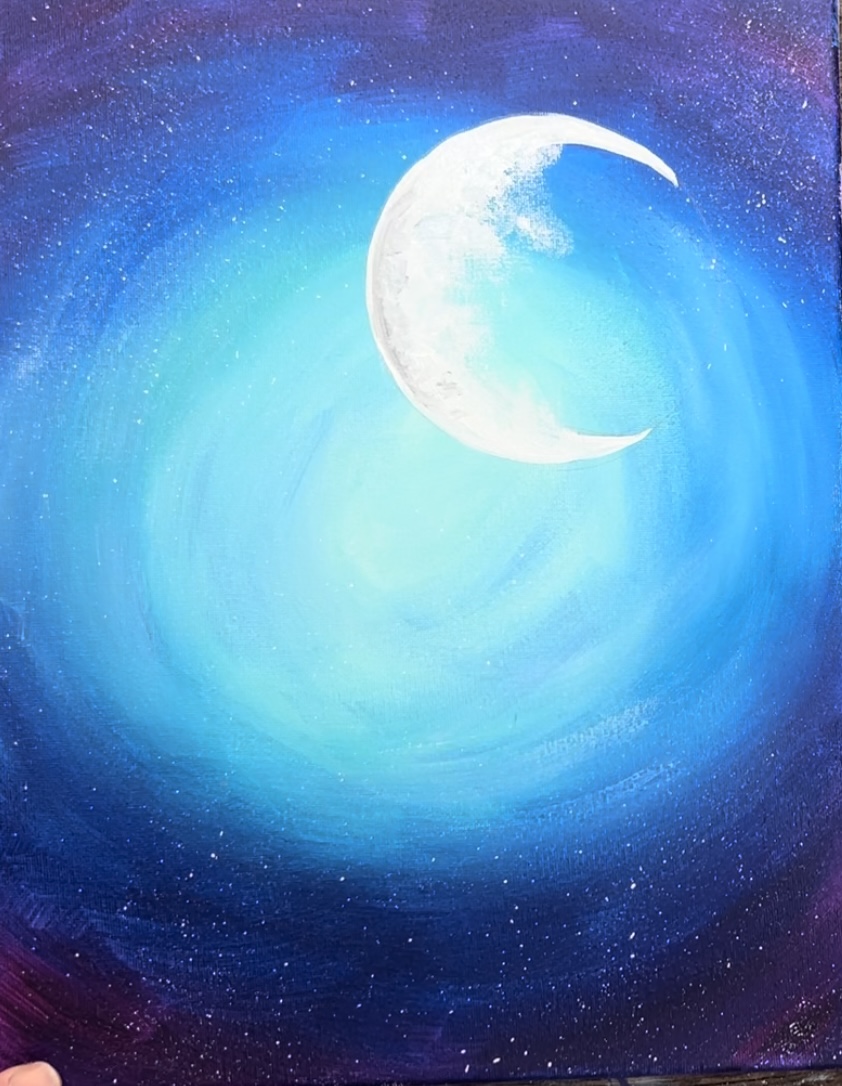
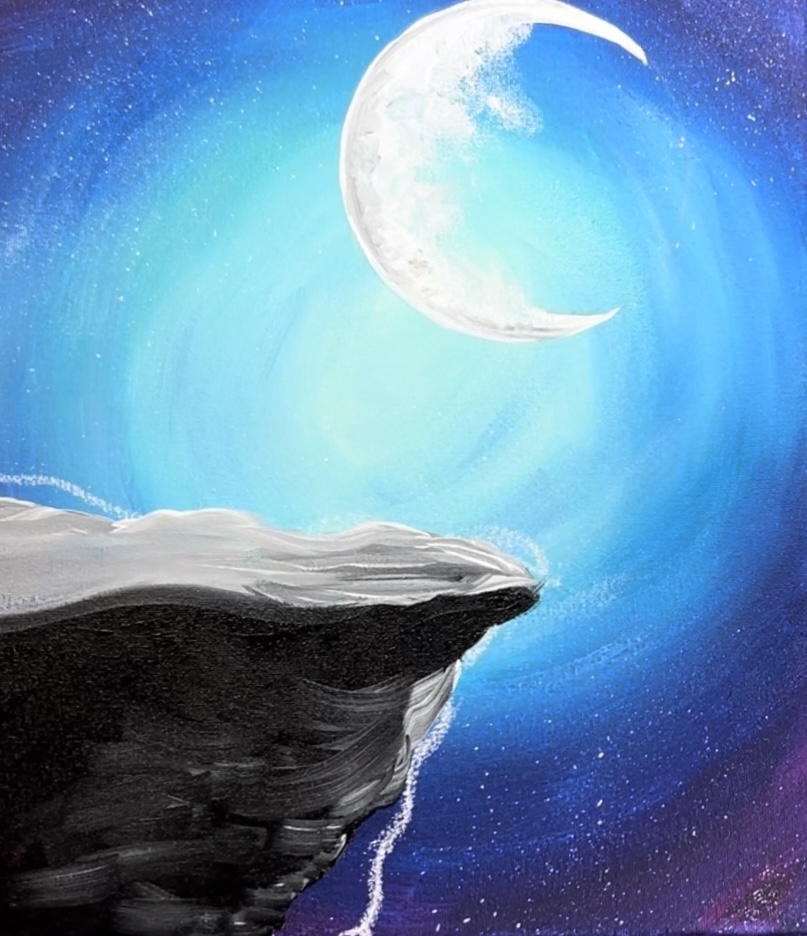
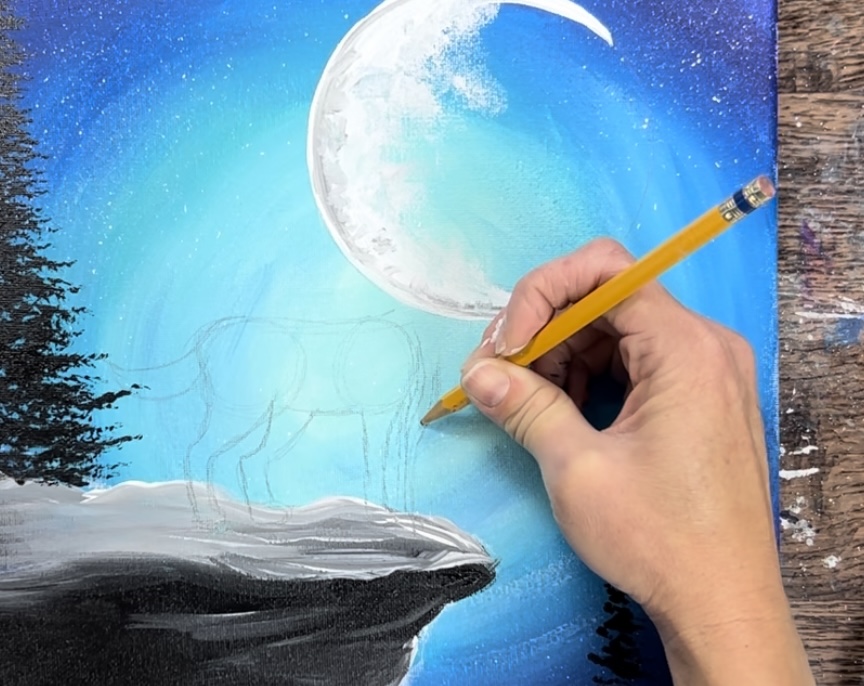
3. Draw & Paint Moon
Use a compass or trace a similar size circle. I traced a small purple bowl that was approximately 4.5″ in diameter.
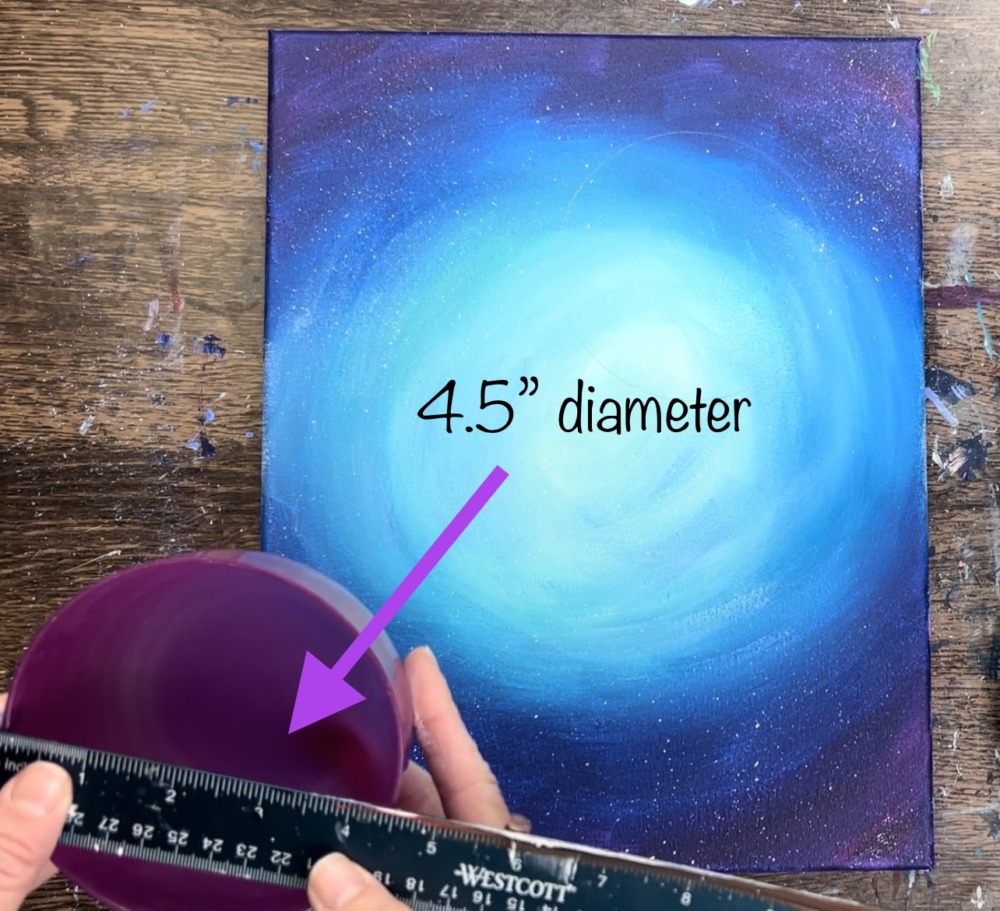
Place it in the upper right area of the canvas.
Then trace the circle with a pencil.
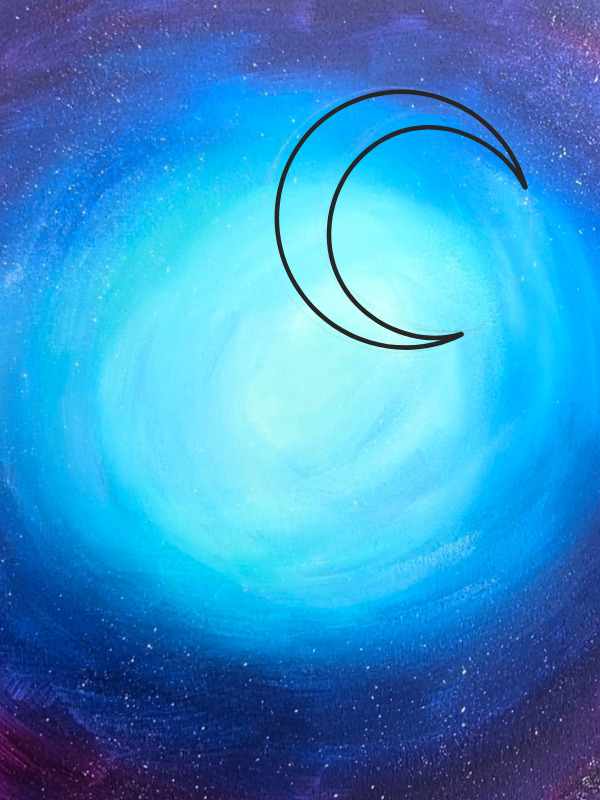
Then draw the inner part of moon to form a crescent shape.
Next, use the #8 round brush and titanium white to paint the moon solid white.
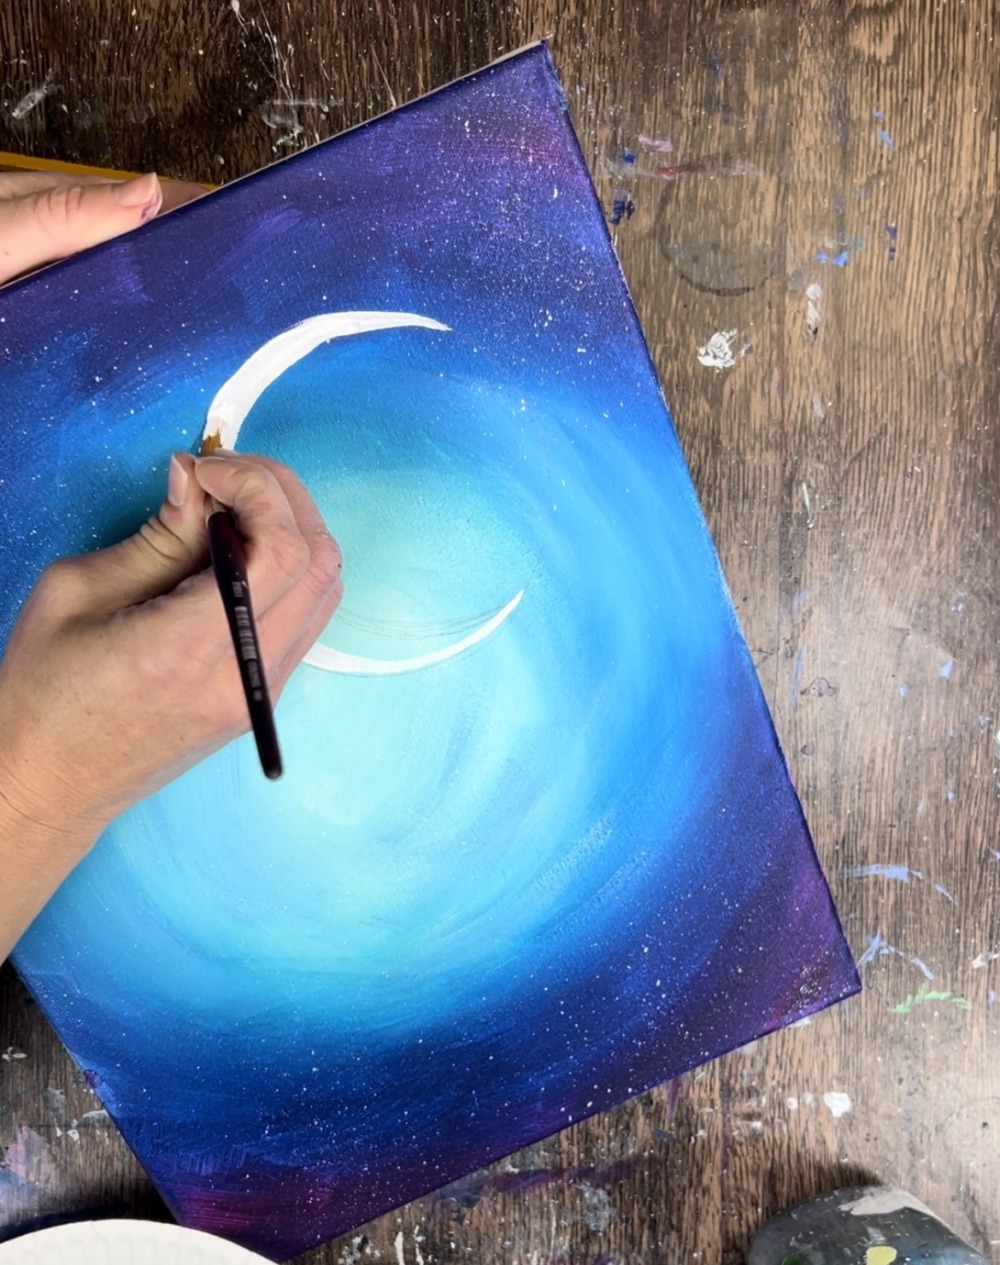

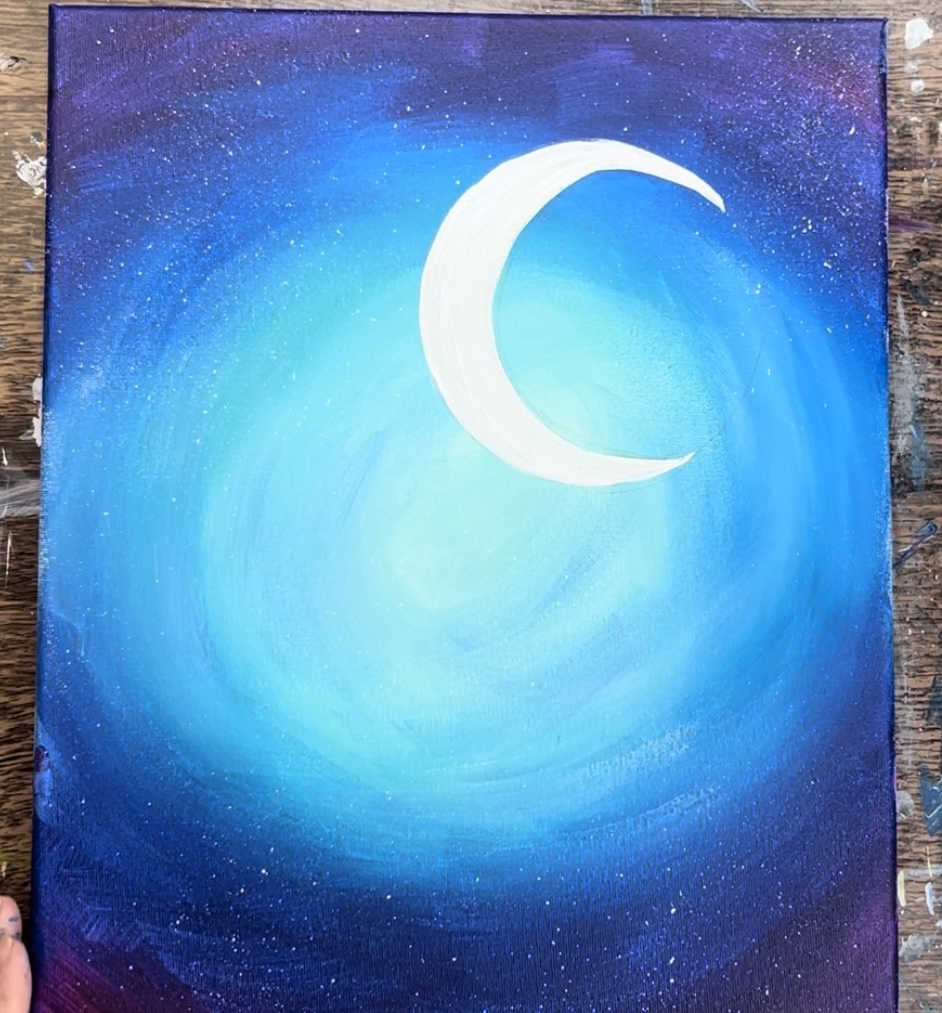
Then, before the moon dries, use your finger to smudge the inner part of the moon.
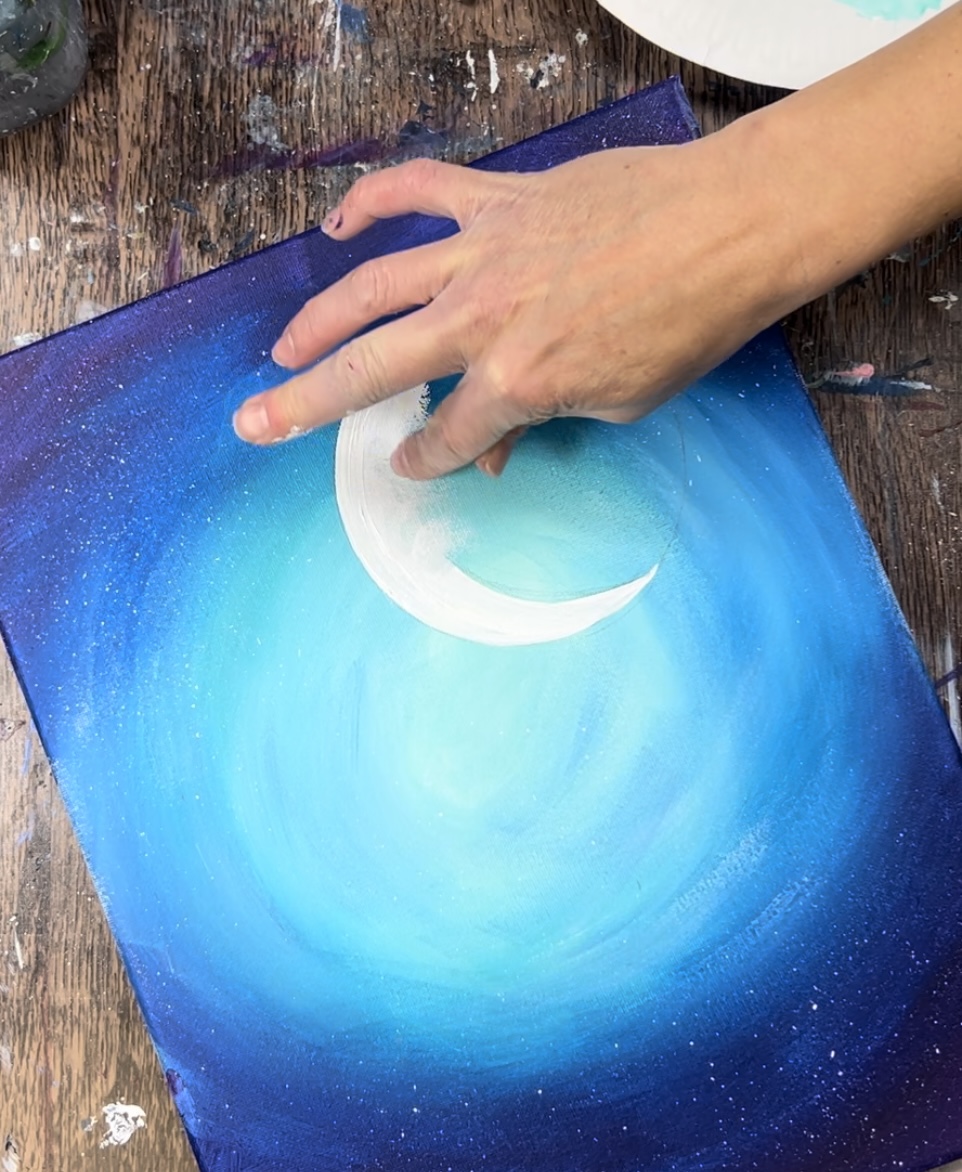
Drag the wet paint outwards so that it looks like that portion of the crescent shape is fading.
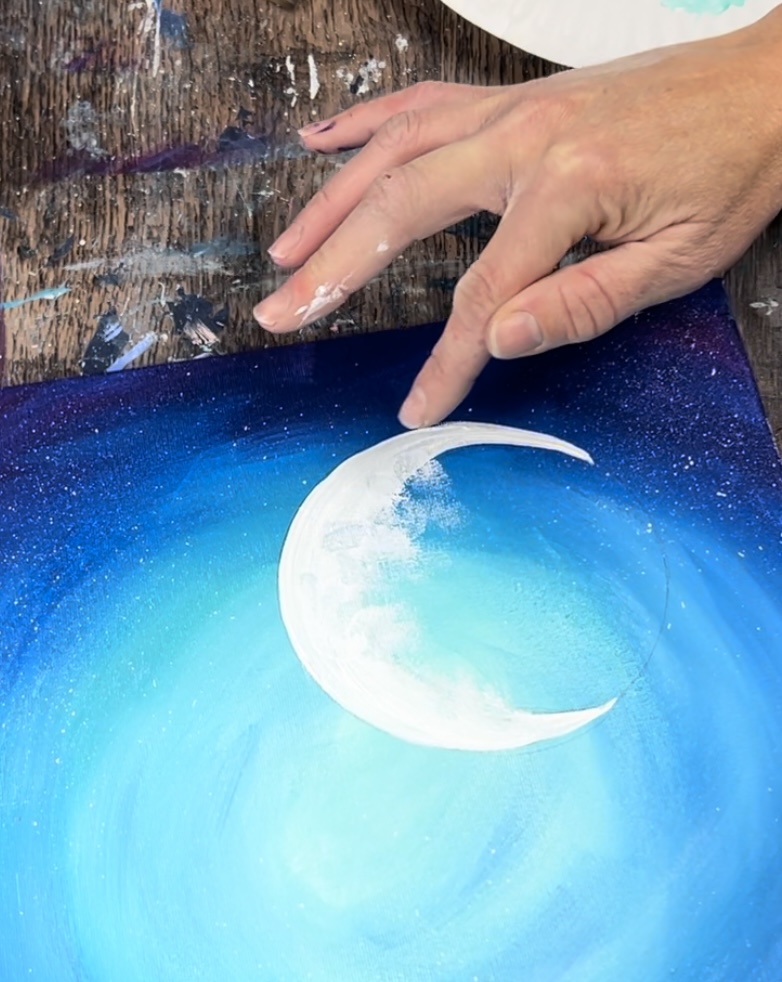
Do this to just the middle part but leave the edges of the moon crescent as pointed tips.
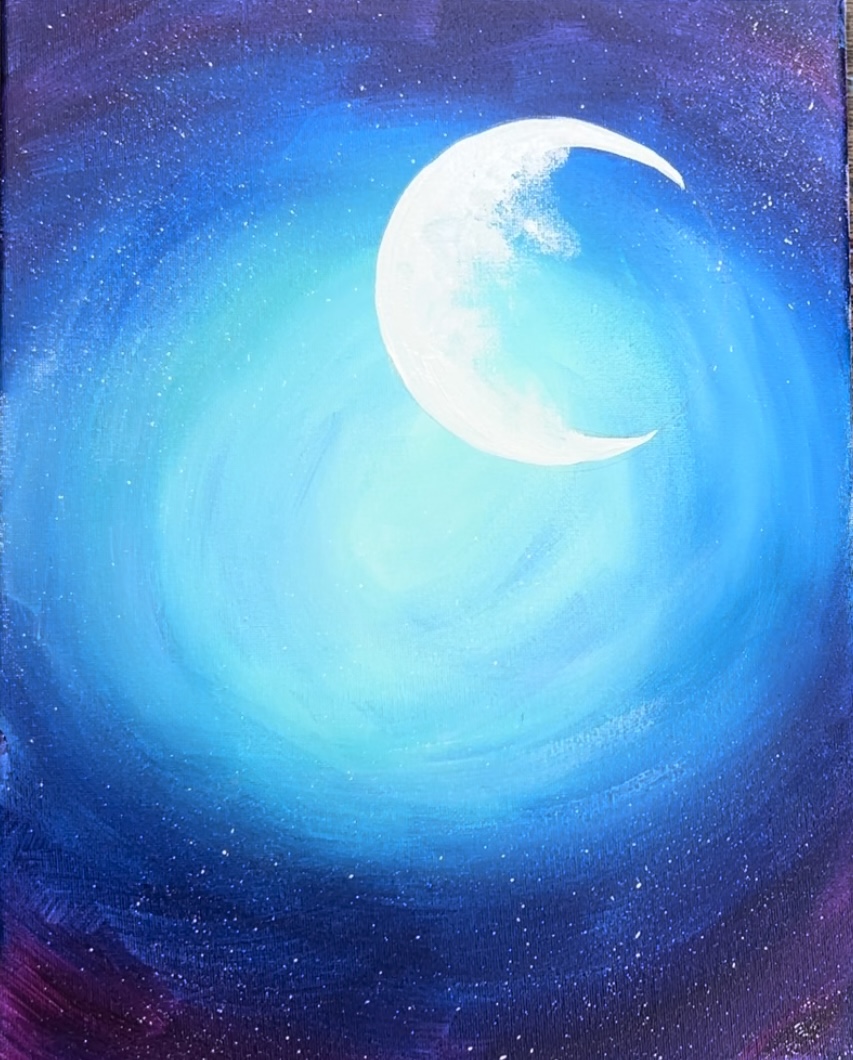
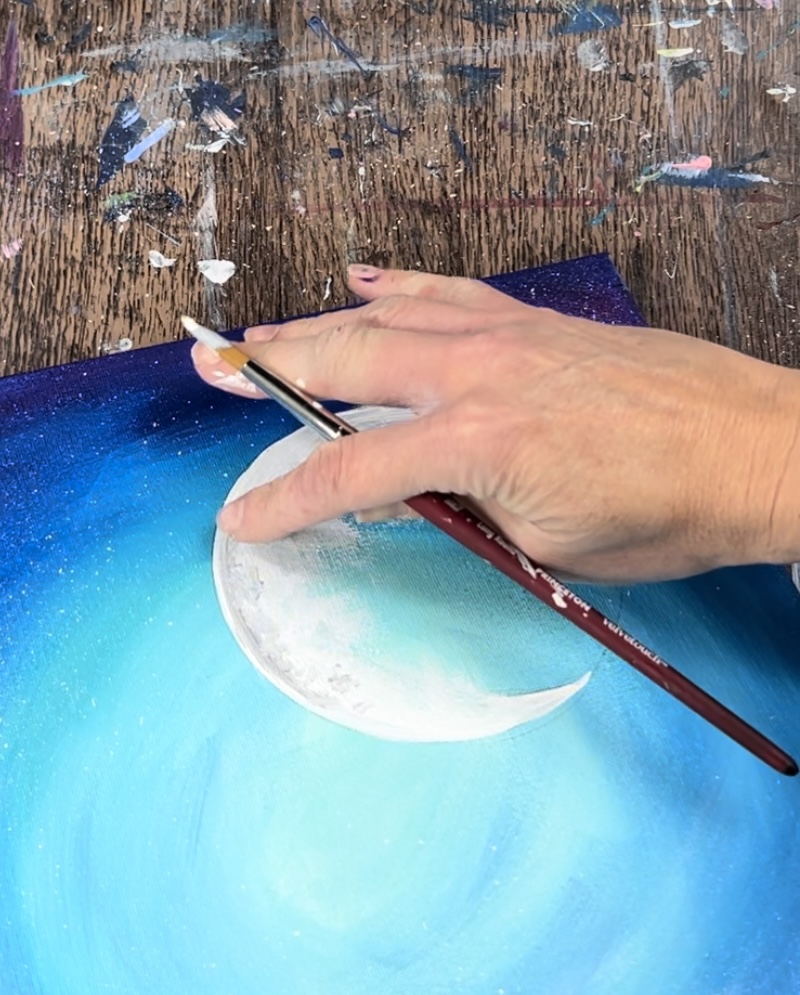
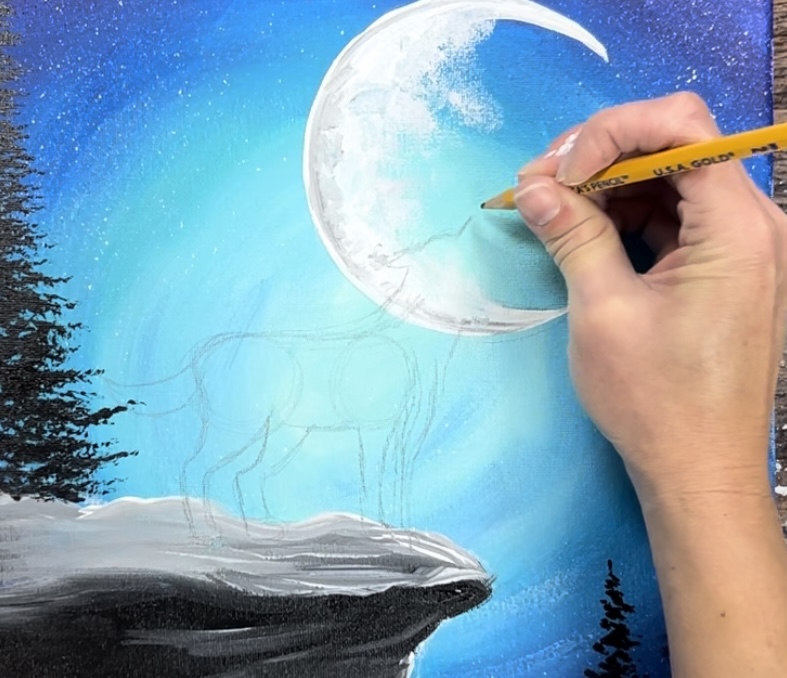
Next, mix a light to medium gray on your palette by mixing 1 part mars black to 3 parts titanium white.
Use the #8 round brush to lightly outline the inner edge of the moon on the left.
Stipple light gray marks to make “craters”. You can also use your finger to sort of smudge and blend some of that gray.
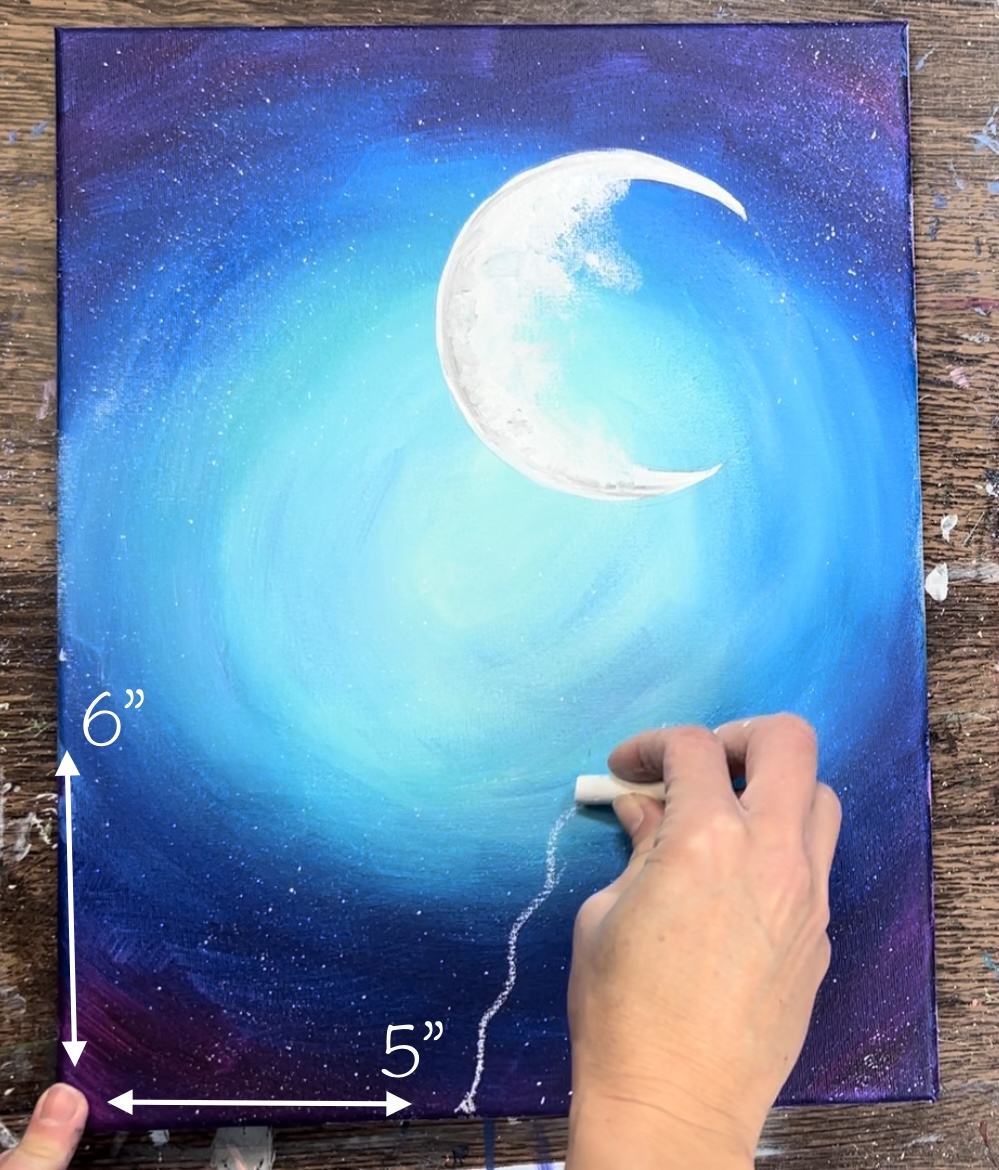
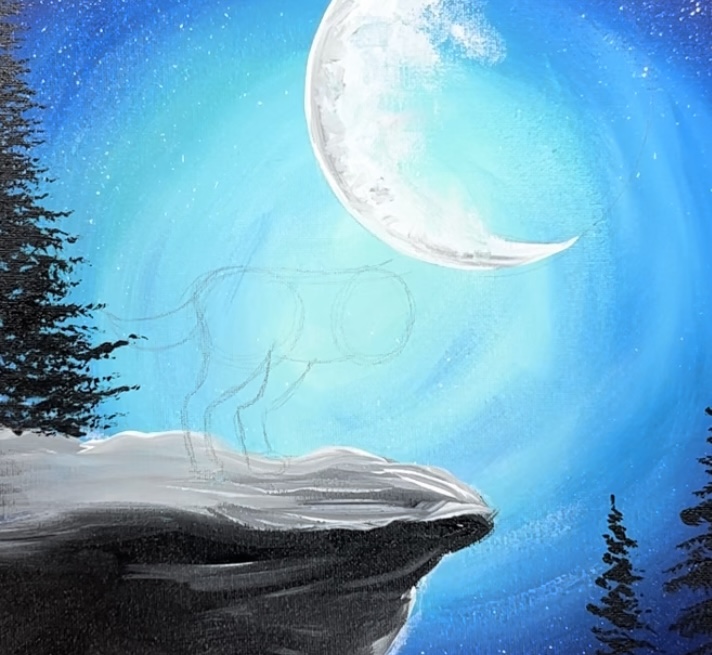
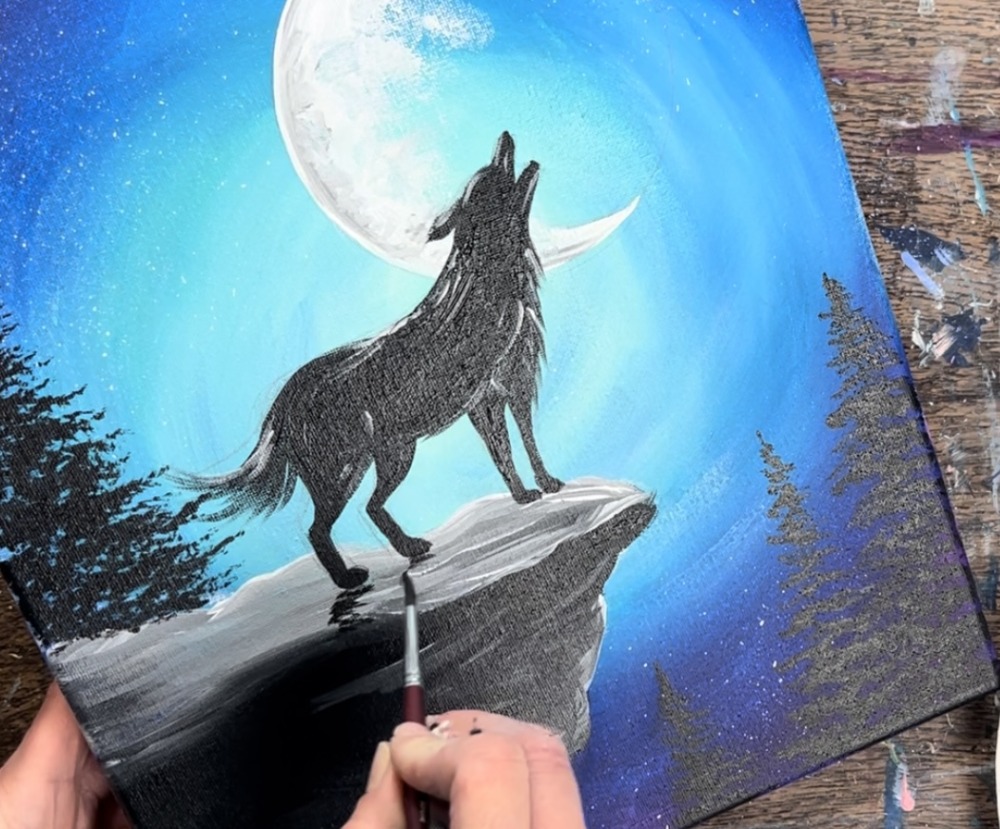
4. Draw & Paint Cliff
Use a piece of white chalk to draw the layout of the cliff. Mark 5″ on the bottom edge of the canvas and 6″ on the left edge of the canvas. This will help you with the size and placement of the cliff.
Then start at the bottom and draw a wavy line going in a diagonal direction. This will be the right edge of the cliff.

Then draw the horizontal top part of the cliff. Make it slightly open at the top so that it looks like there is a flat surface on the top of this cliff.
Next, use a 12 bright brush (1/2″ flat brush) to paint the cliff. Start with just mars black and paint the bottom area solid black. Do this in short, angled strokes.
Next, add a little white to the brush without rinsing it off. Paint the top flat part of the cliff with this light to medium gray. Do so in short, angle strokes going in the direction of the cliff shape.
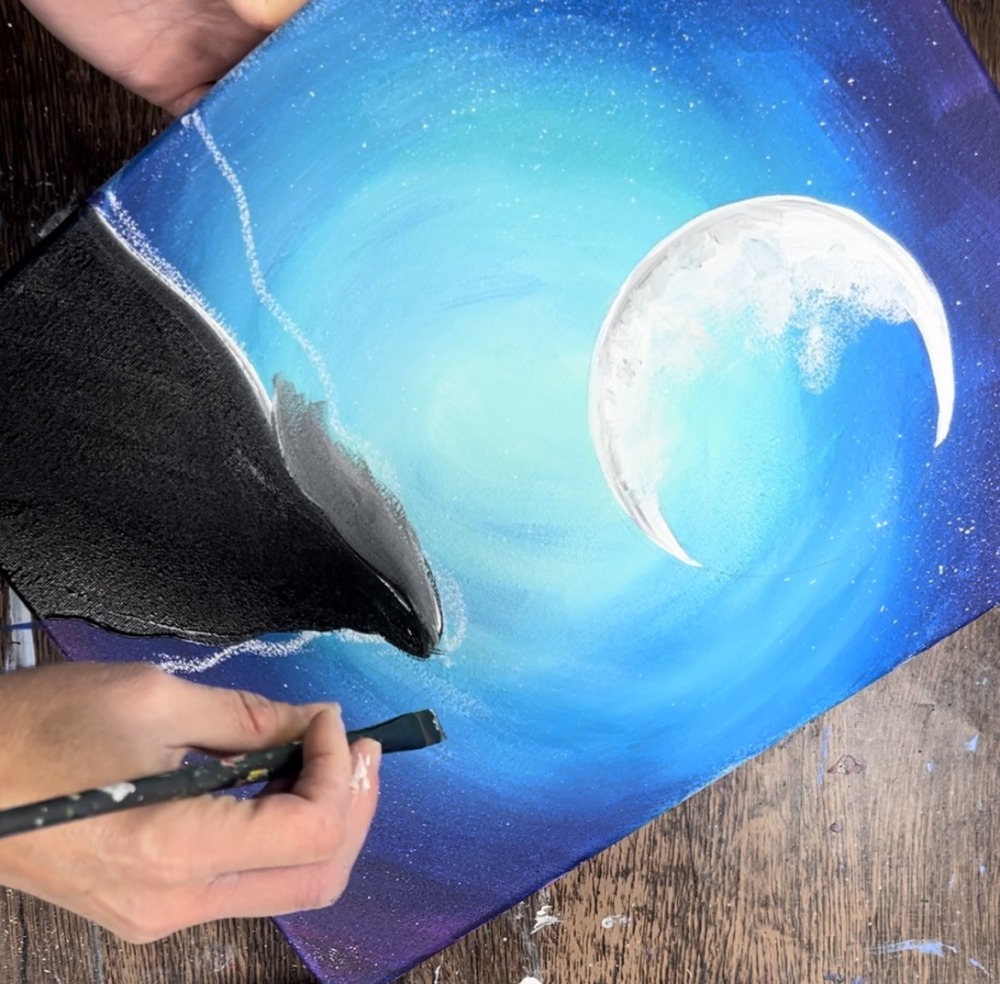
Then drag some of this gray paint on the right far edge of the cliff.
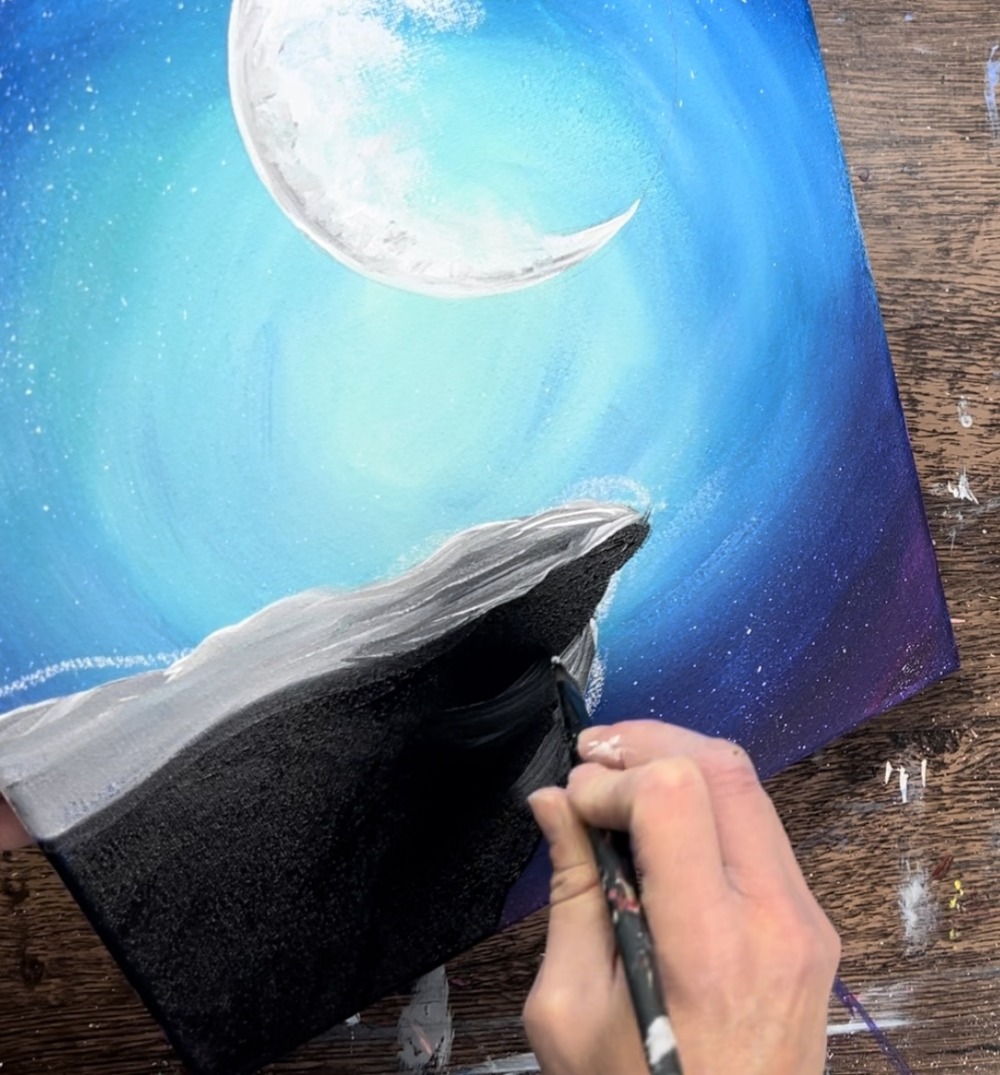
Erase any leftover chalk marks from the drawing.
5. Paint Trees With Fan Brush
Sometimes it is helpful to paint a vertical line for the middle part of the tree. You can do this with a round brush and a ruler.

Then load your fan brush in mars black. Make sure the bristles are evenly spread apart. It is also helpful to slightly water the black down.
Start at the top. Hold the brush at an angle and paint small branches at first. As you work your way down, stamp just the tip of the fan brush. Work in a left and right zig-zag direction forming the conical shape of the tree.
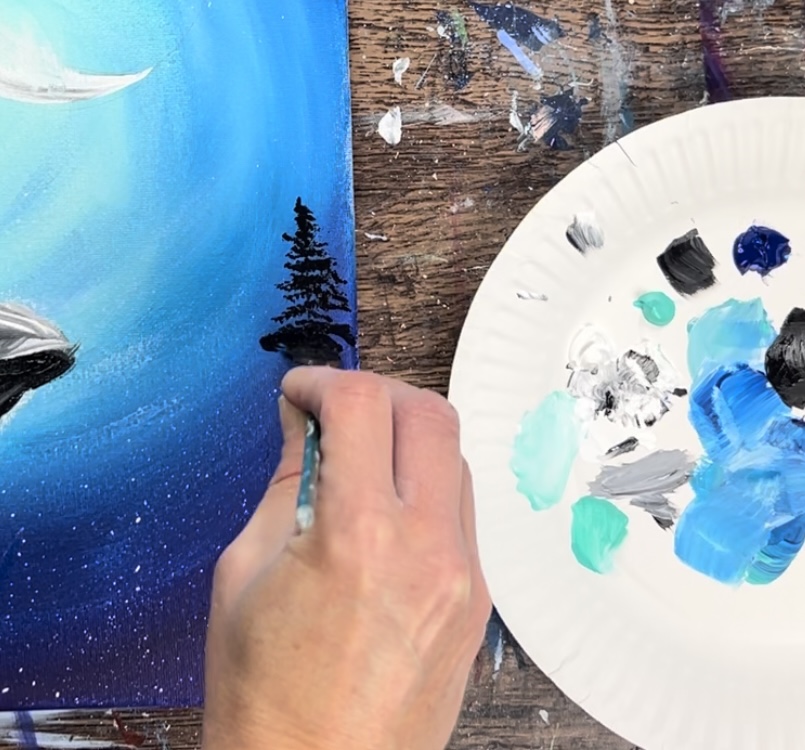
Work your way down to the bottom of the canvas.
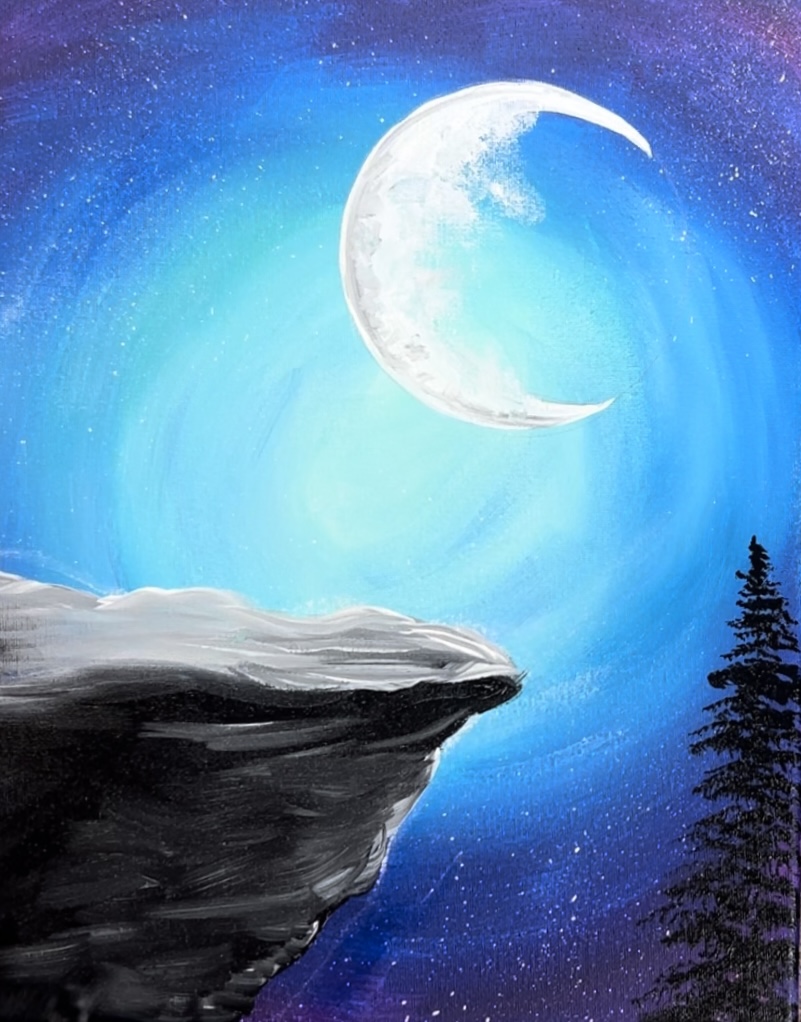
Then repeat this to create two more trees to the left of this tree. Each tree is shorter in height than the one next to it.
Need more practice on these fan brush trees? You can see my tutorial that is very specific to this technique here!
Then paint another large tree on the far left of the cliff.
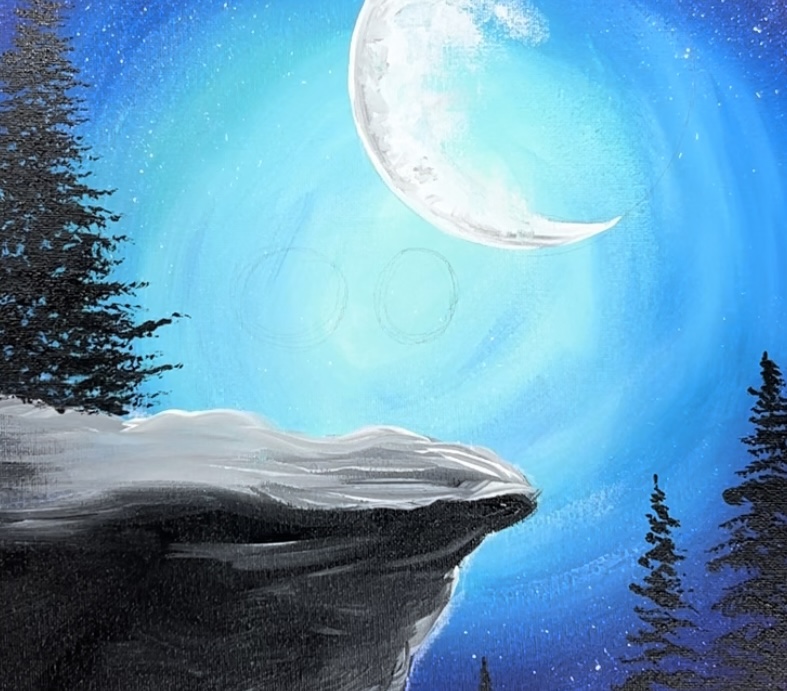
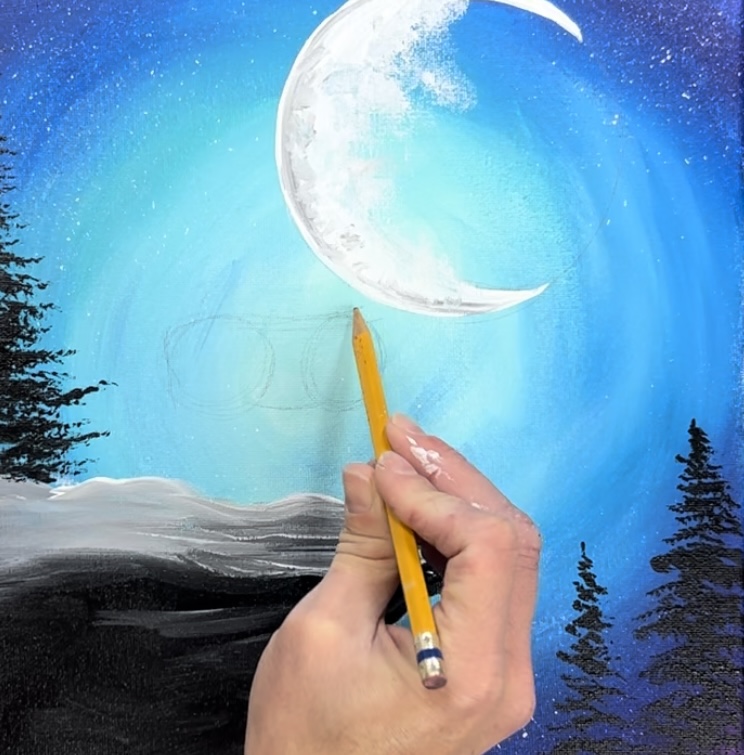
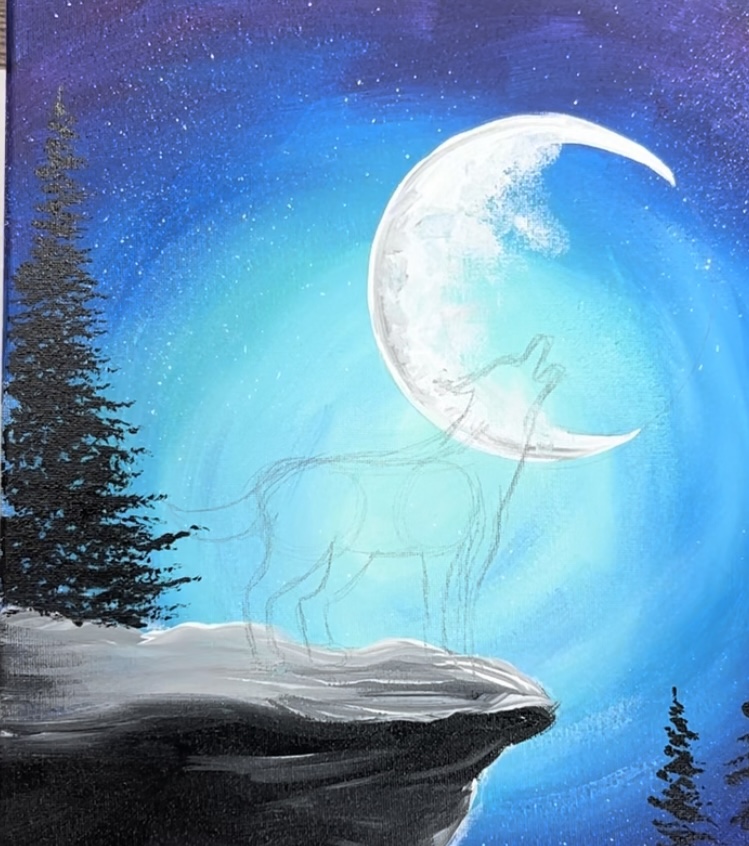
6. Draw or trace wolf
For this step, you are welcome to print out the wolf silhouette and trace it onto your canvas. You can also draw the wolf. I found it helpful to look at the wolf template as a guide for drawing the wolf.
You can break this wolf down into simple shapes and lines. Try practicing it on a separate paper first…
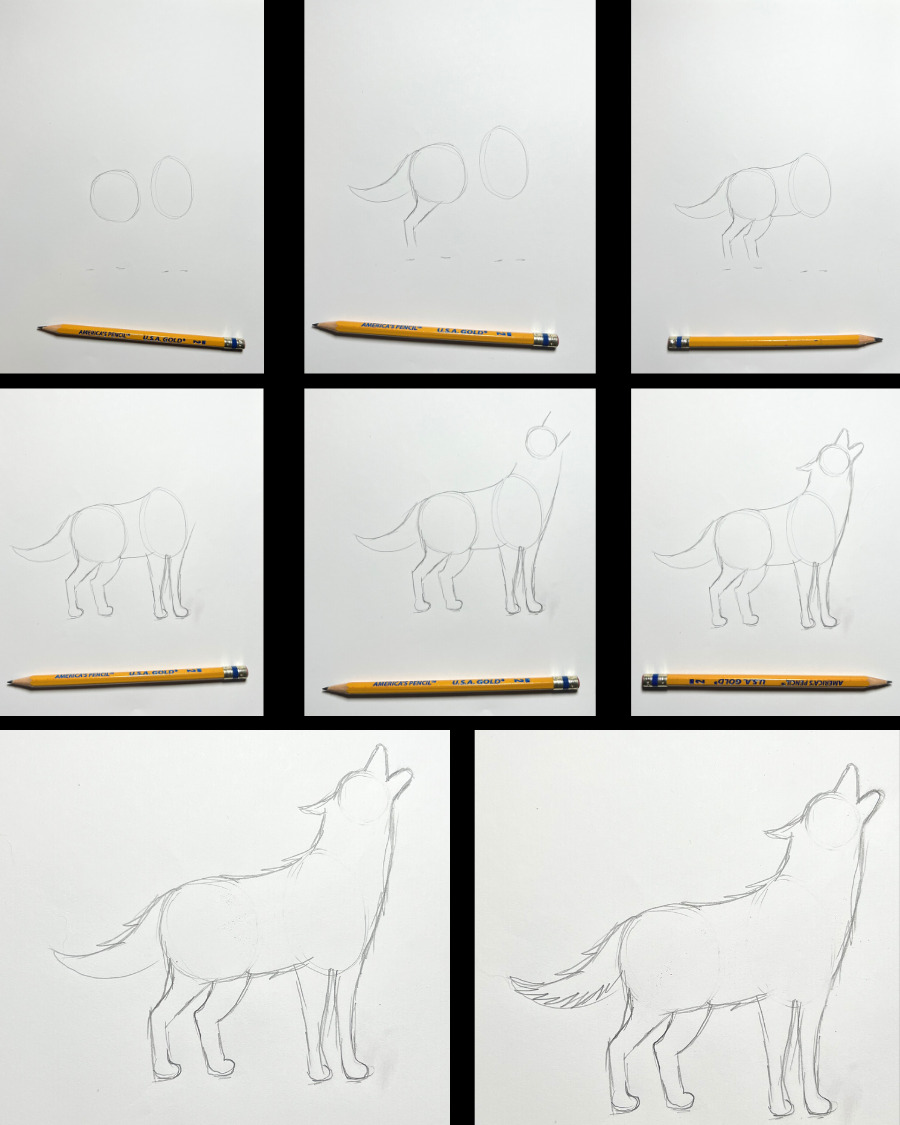
Note the proportions of the wolf. The height of the legs have the same height as the body area. Then the height of the legs is the same as the front torso area and from the neck to the tip of his snout.

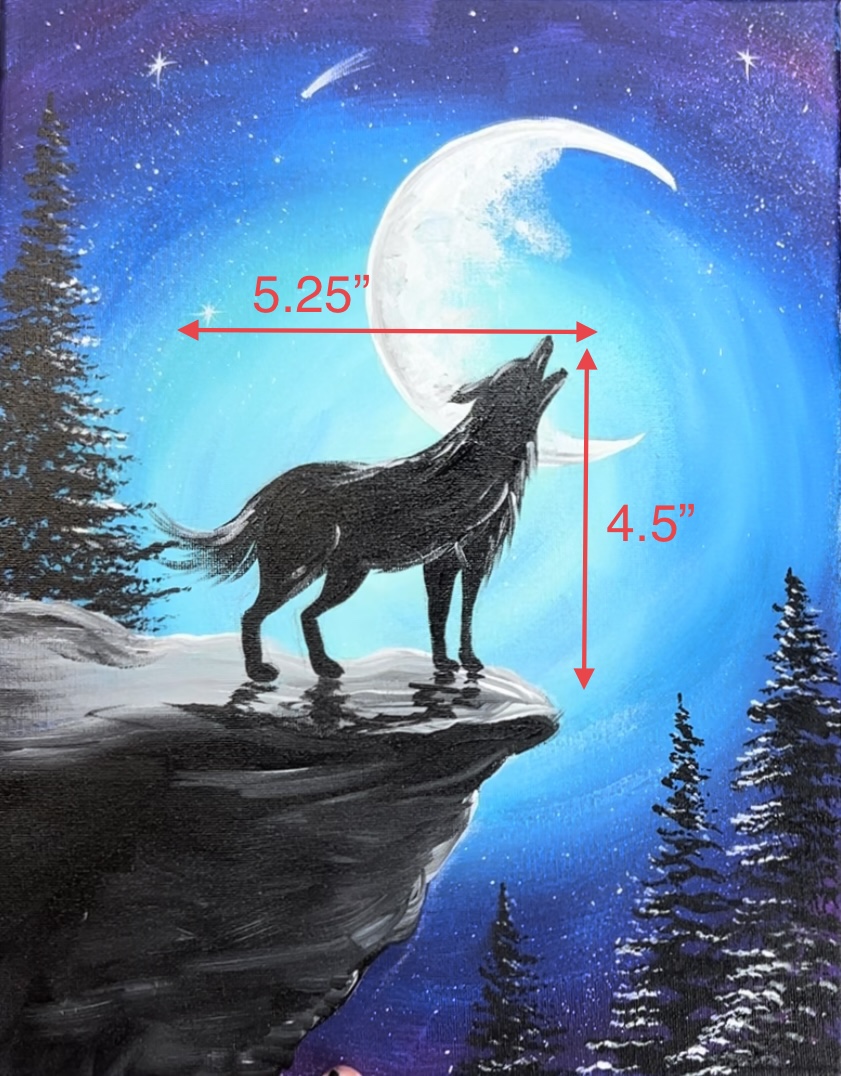
Then draw the wolf onto the cliff. Refer to the graphic above to help with the sketching of this wolf. If it’s helpful, the wolf that I created is about 4.5″ high and 5.25″ wide. Note: the dimensions of my wolf drawing are slightly different than the dimension of the traceable.
Start out by drawing the circle and oval. Make sure you are positioning it so that the wolf’s feet will be flat on the cliff surface.
Then draw a curve that goes slightly downwards on the top and connects the two circles together. Then draw a second curve on the bottom of the belly of the wolf that also connects both circles together.
Draw the wolf’s tail.
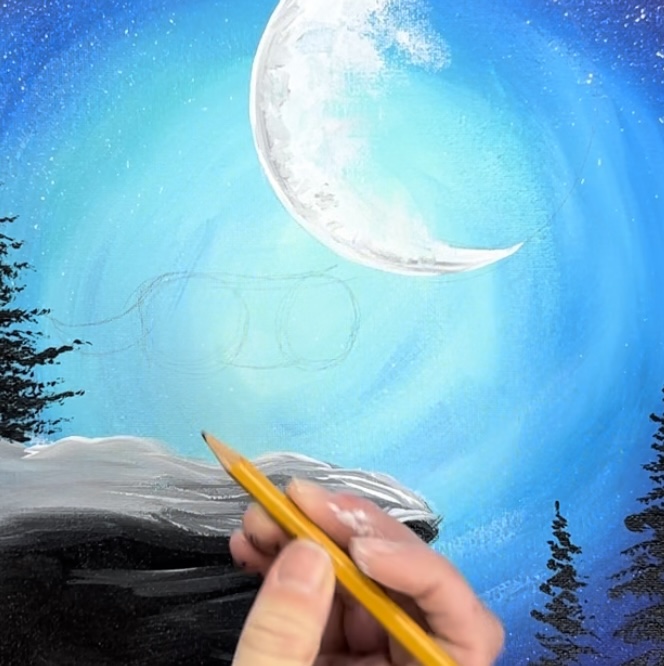
Then sketch the back hind leg and the second back hind leg.
Draw the front two legs.
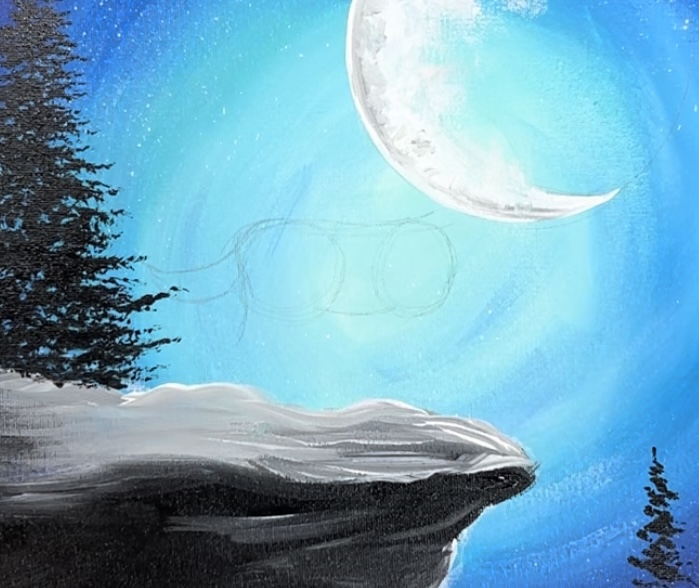
Then sketch the neck and head area.

Draw the ear and snout.
Draw the open part of the mouth and the front part of the chest.
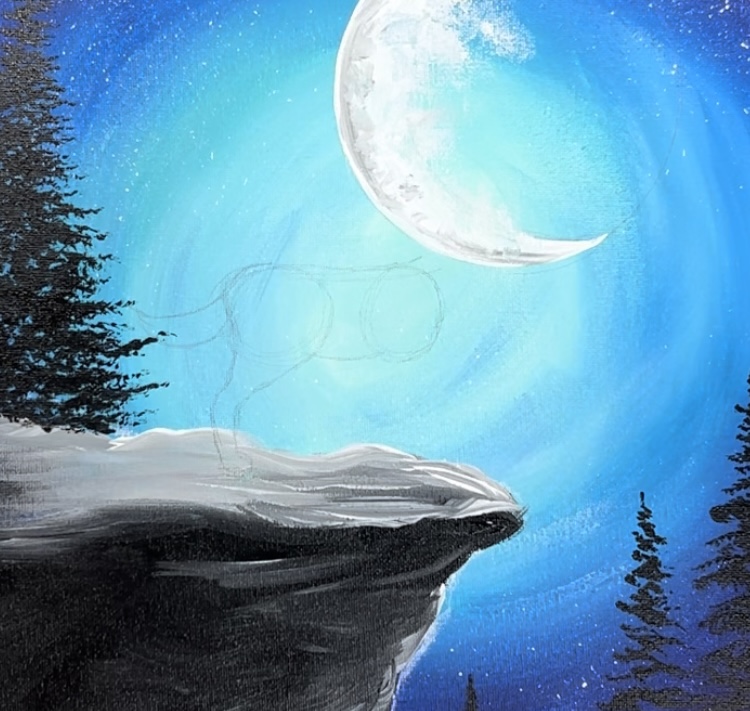
You can make your sketch darker if needed. Also, as you paint this in, you can adjust the shape of this wolf.
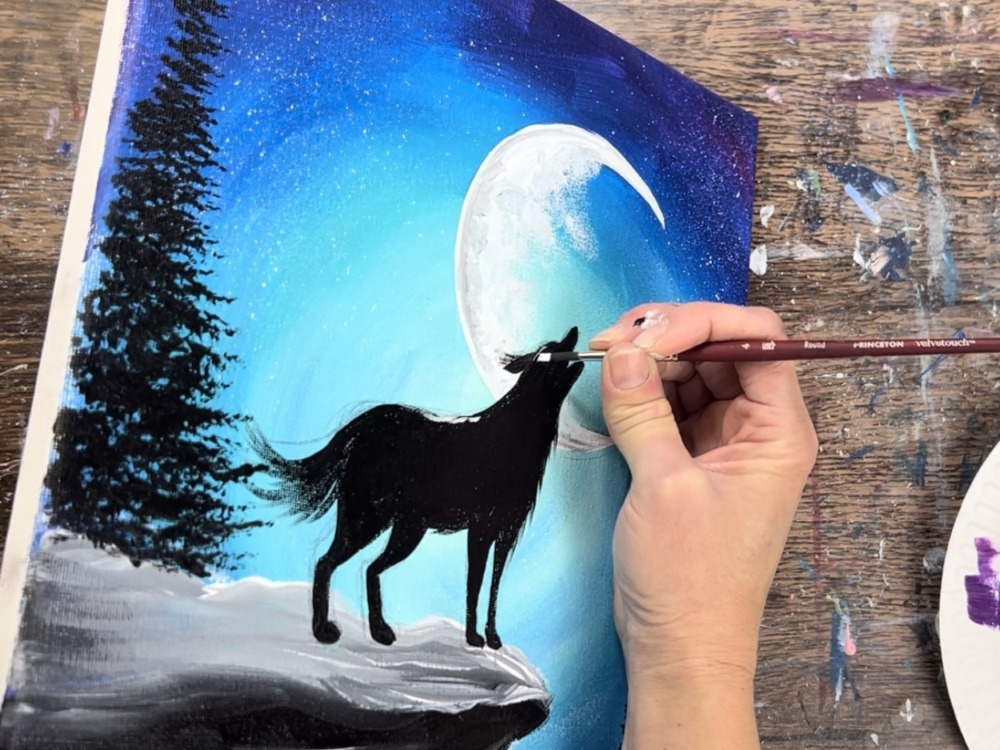
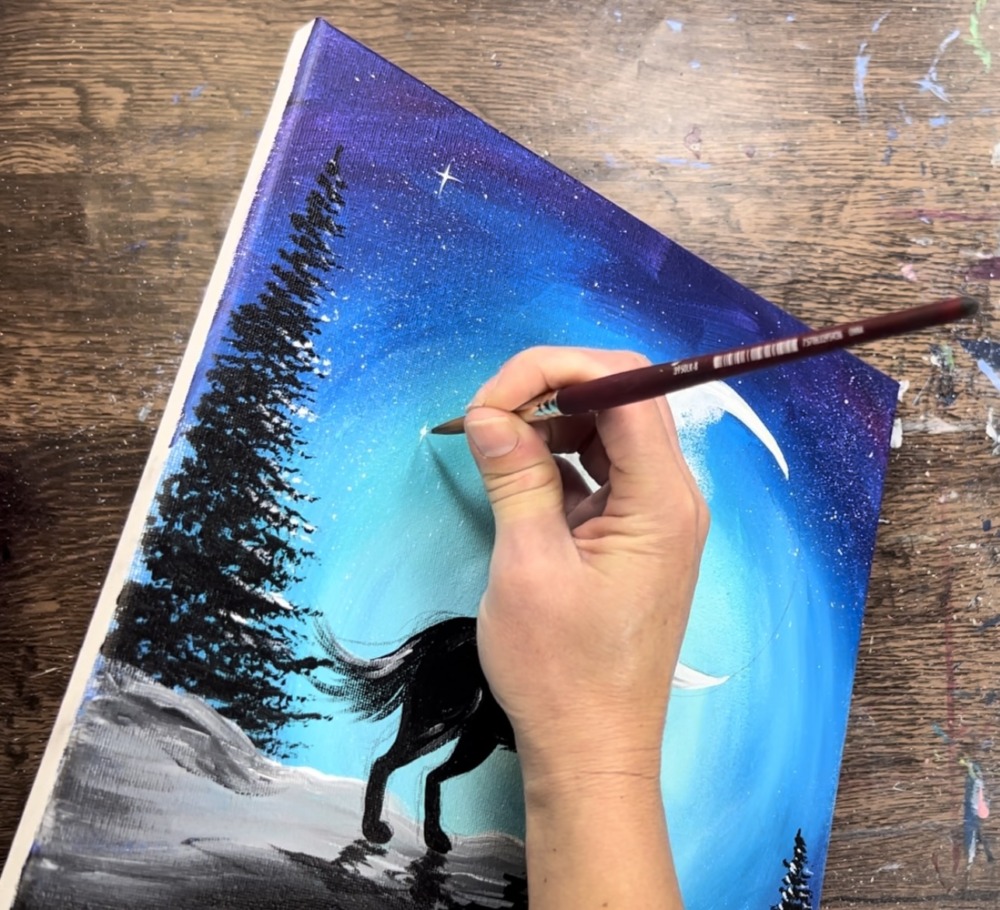
7. Paint wolf
After you are finished drawing or tracing the wolf, use a #4 round brush and mars black to paint it in. I recommend outlining the shape of the wolf first and then filling the inside solid.
You might need to switch to a smaller brush or even a black paint pen for the more intricate areas such as the head and ears.
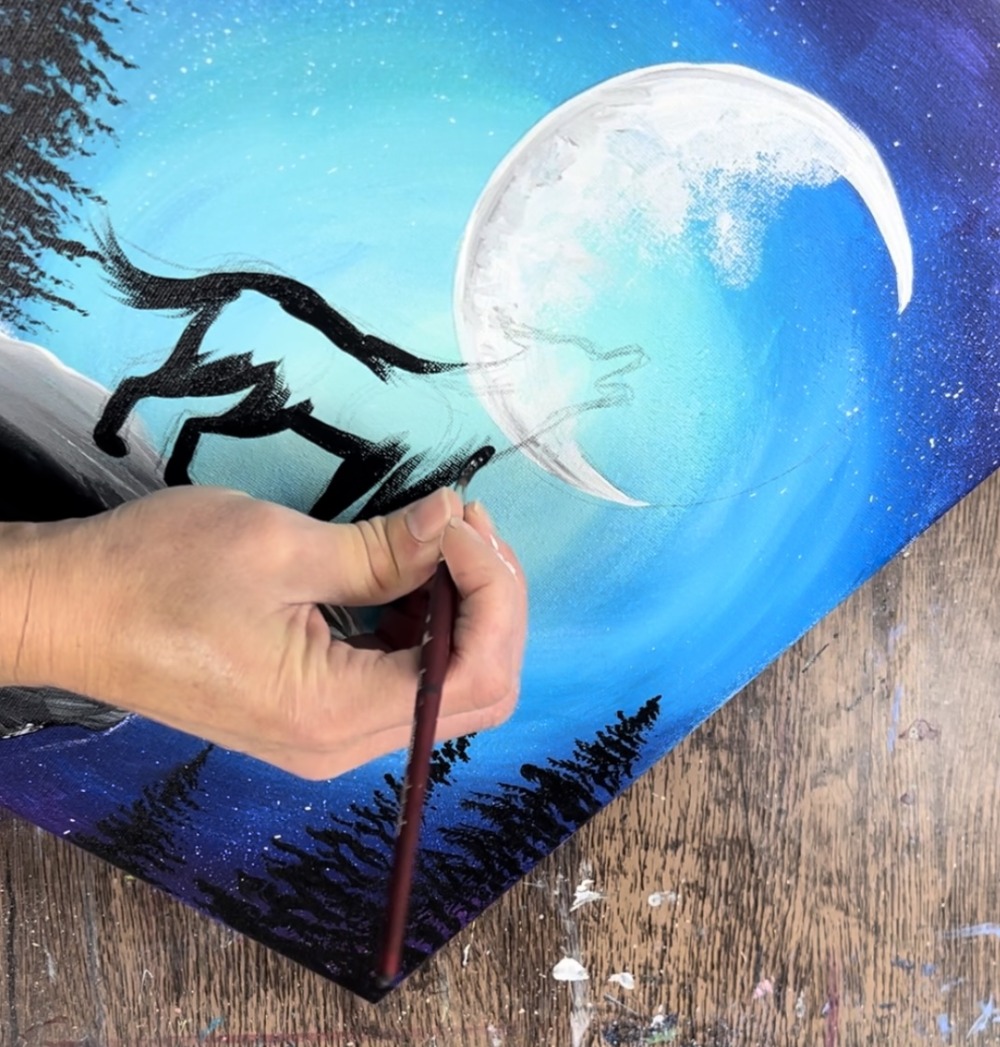
Also, it is okay to adjust your drawing as you are filling in the shape.
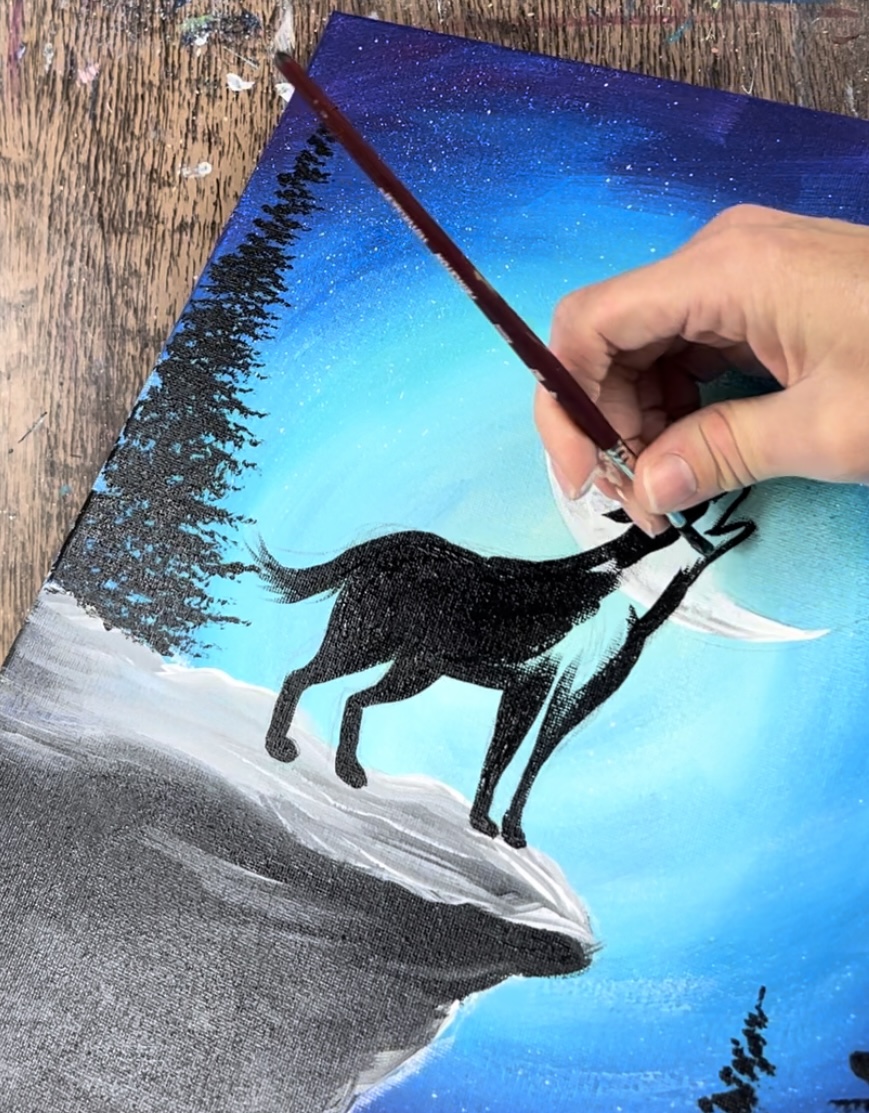
Then add some texture on the edges of the wolf using the 4 round brush. Paint little diagonal fur lines that point downwards on the chest area and fur lines that point to the left on the back area.
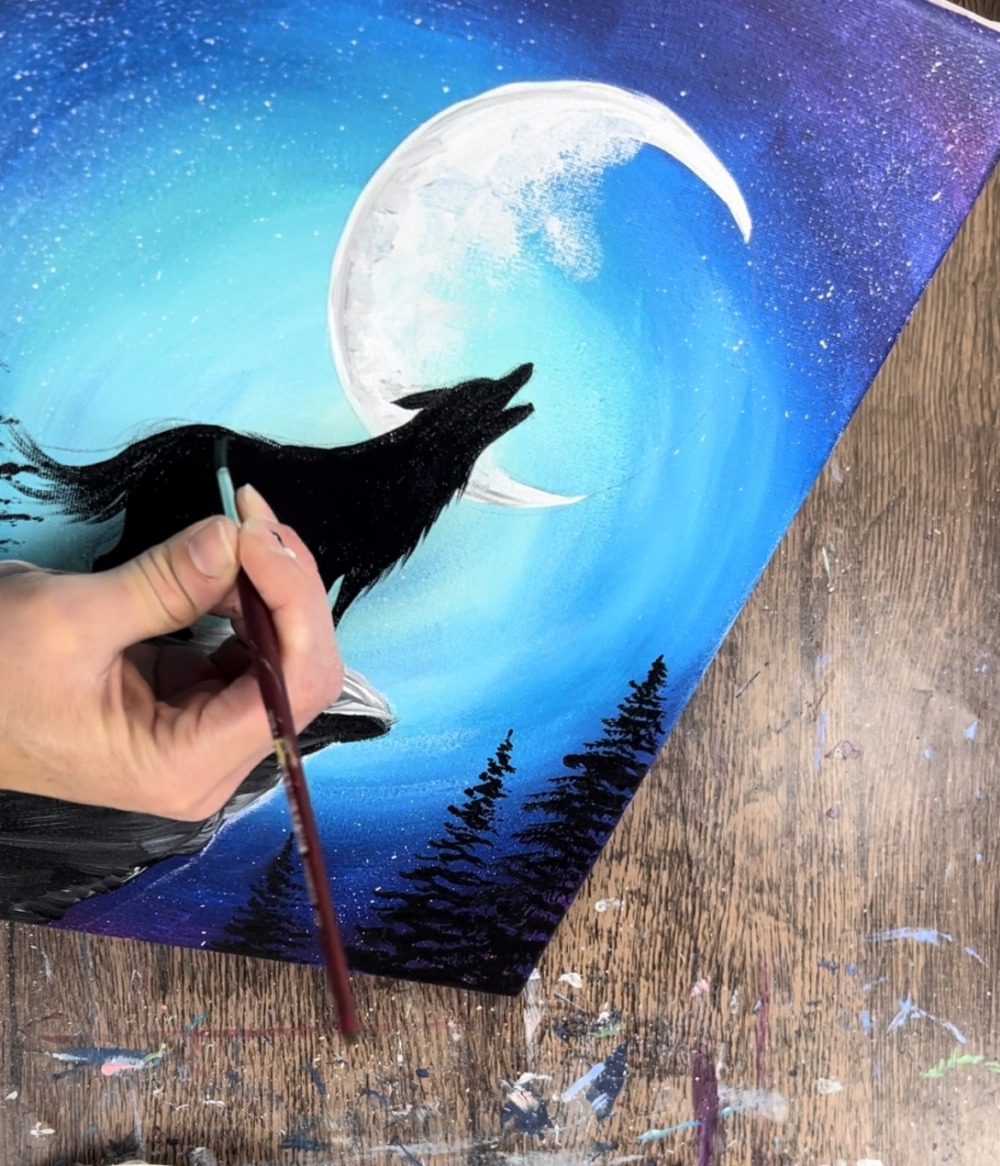
Highlighting this wolf silhouette is optional but it is an opportunity to give it some dimension so the silhouette does not look entirely flat. To do this, wipe your round brush off. Then load it into a tiny amount of titanium white (just on the tip of the brush).
Loosely outline just the outer edge of the wolf silhouette.
Paint short fur strokes on the edge of the back, the tail and the front chest areas. Loosely outline the top portions of the head and nose area.
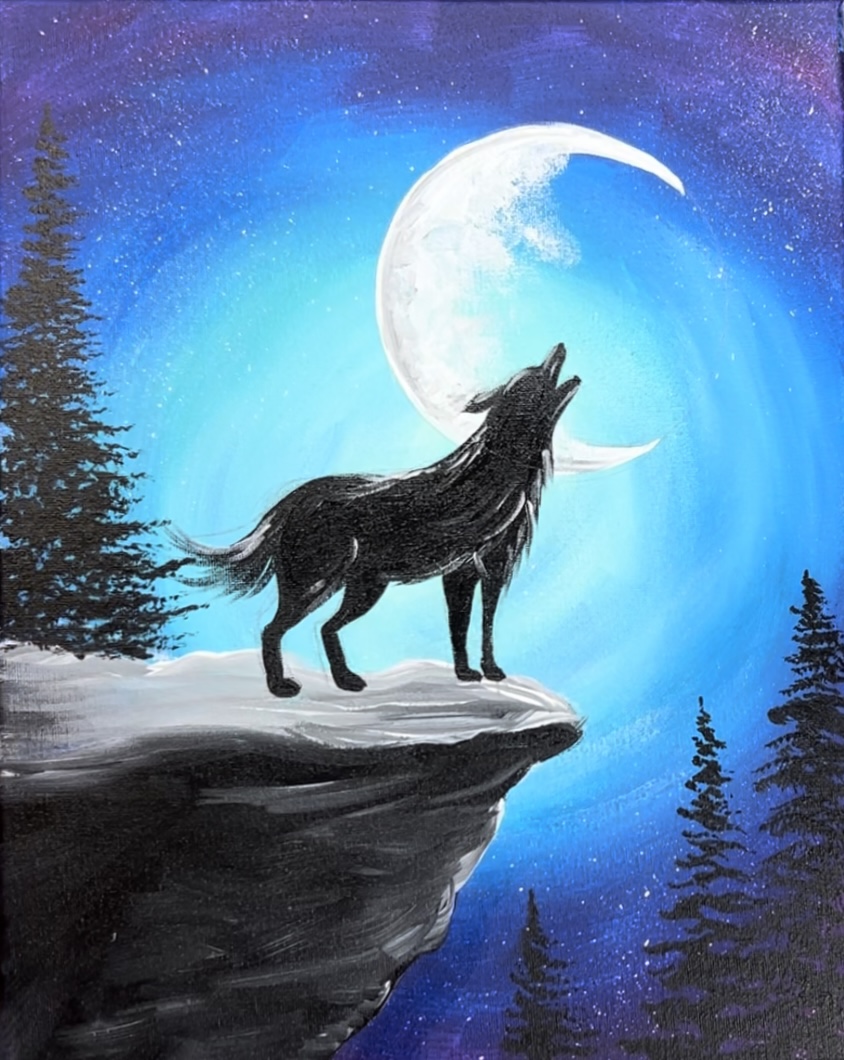
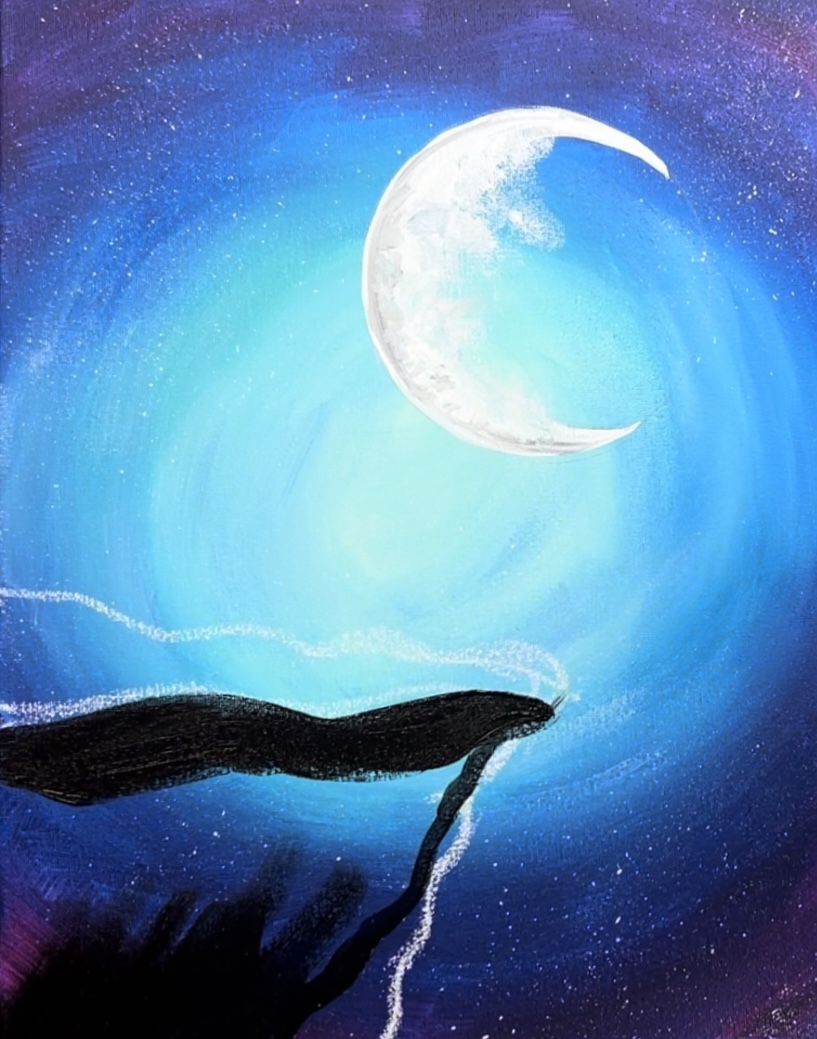
8. Paint shadow
Use the #4 round brush and mars black to loosely paint shadow under the wolf’s feet. Paint left and right strokes that go in a diagonal direction all the way down and off the side of the cliff.
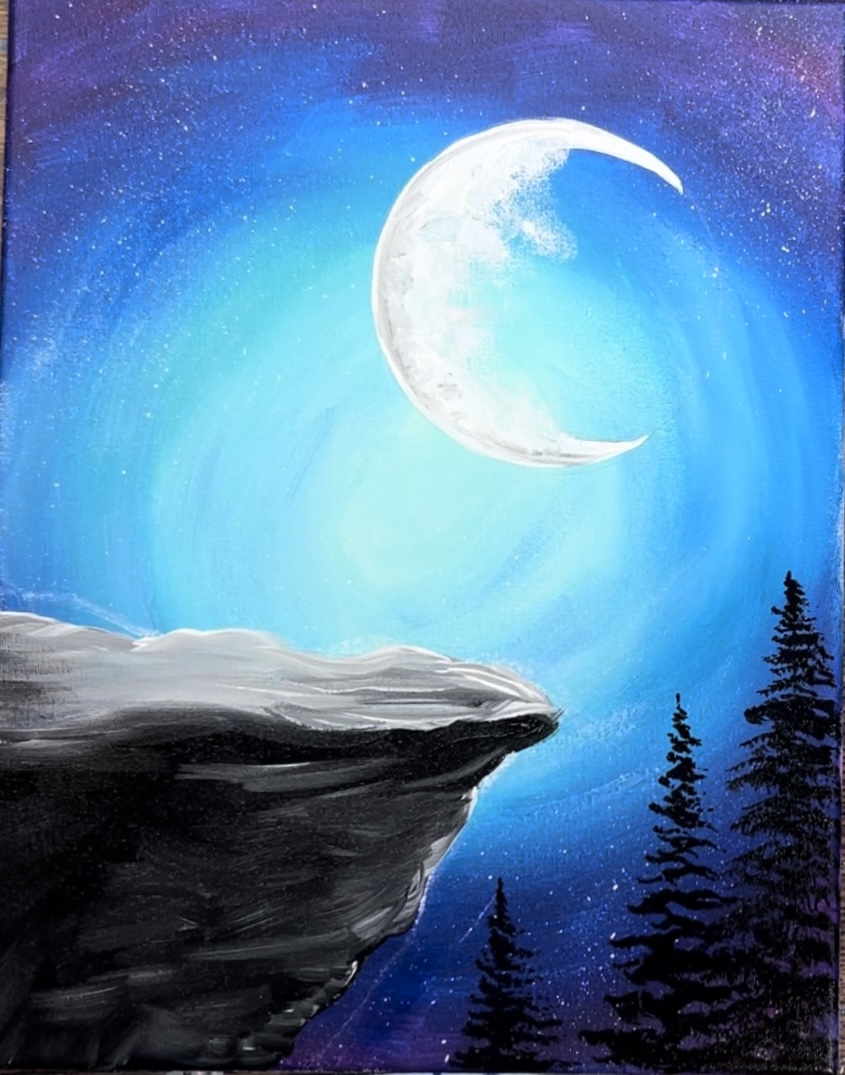
9. Highlight Trees
To highlight the trees, load a clean, dry fan brush into the white. Then add a very small amount of white just to the tips of the branches where the moonlight may be hitting.
Do the same “fan brush” technique but only allow the paint to touch the sides of the branches. For the trees on the bottom, I did the white on both sides of the trees. For the upper left tree, I did white just on the right side of the branches.
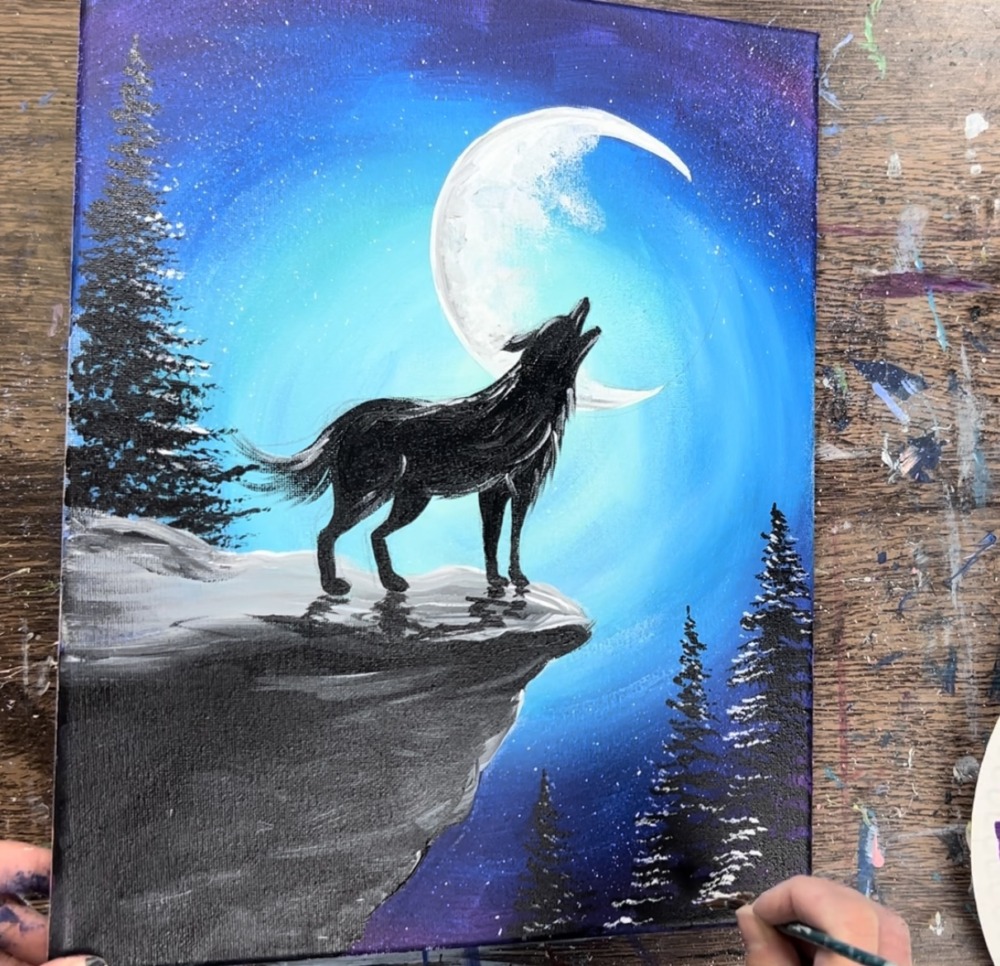
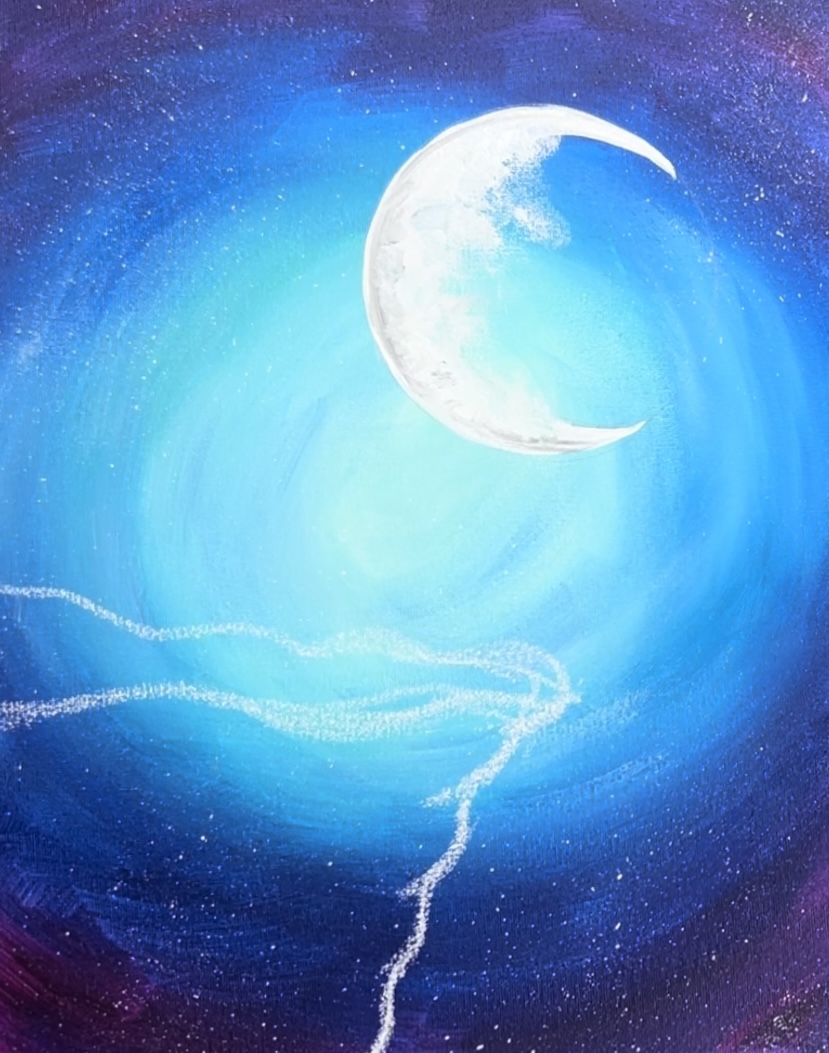
10. Paint more stars
Use a #8 round brush to paint some brighter stars in the sky. To do the “diamond” stars, paint a smallish white dot. Then wipe the tip of the brush off. Use the point of the brush to drag the paint from the dot out to form 4 points. You can also paint diagonal points on these stars as well.
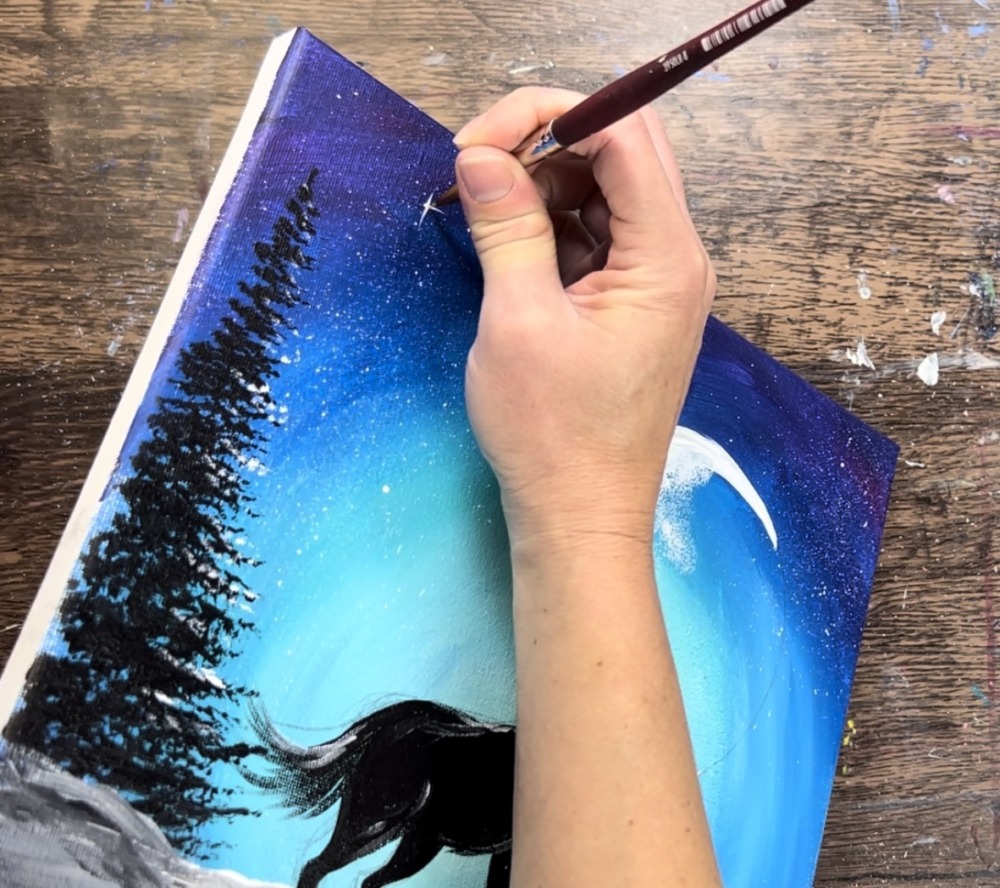
To paint the shooting star, paint a smallish dot. Then wipe the brush off. Drag the paint from the dot to the right for form a “dry brush” tail for the shooting star.
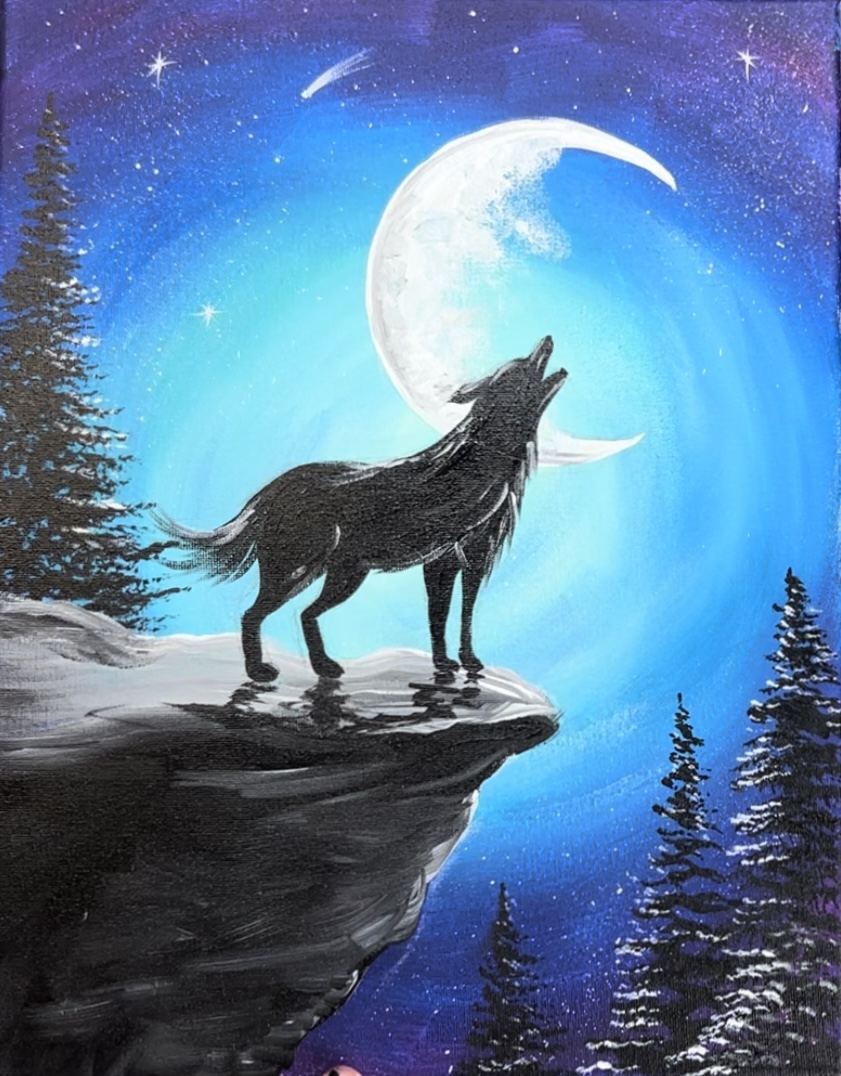
Finished
That’s it! Sign your name and show it off! Hope you enjoyed this one!
See Also:
Other similar style tutorials to check out!