
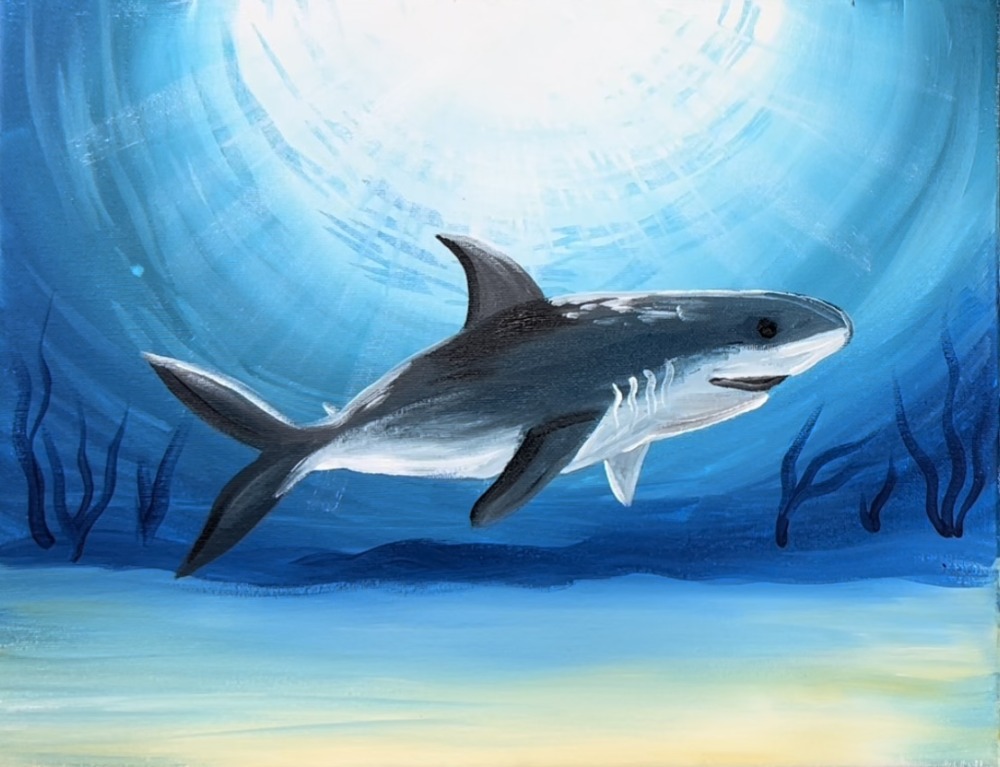
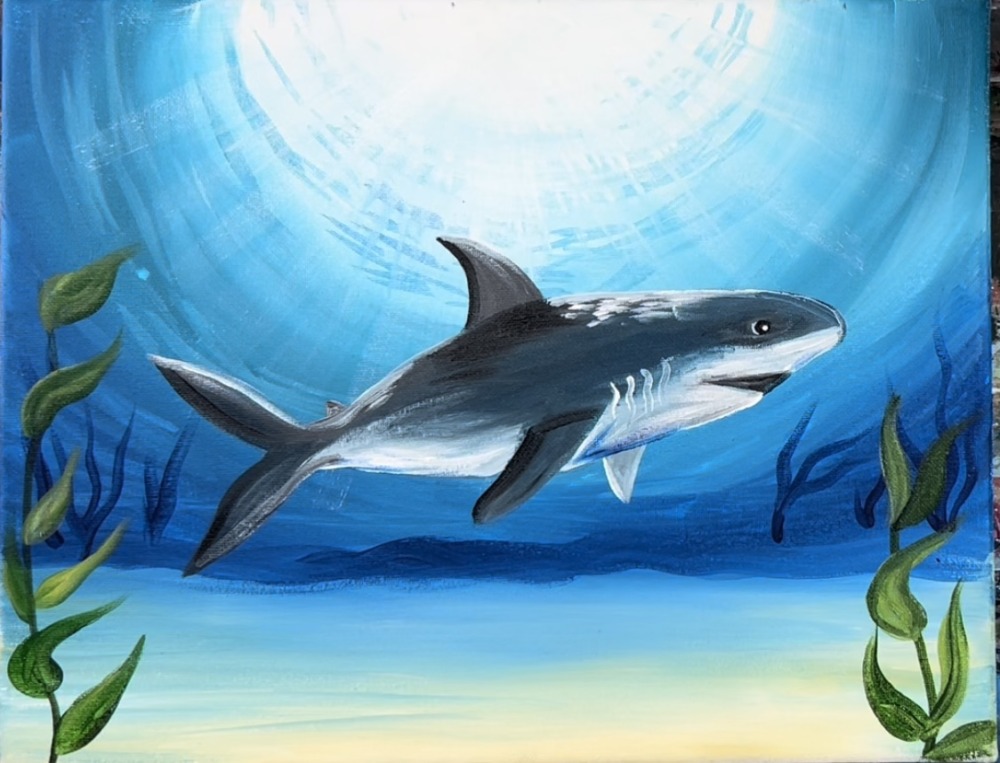
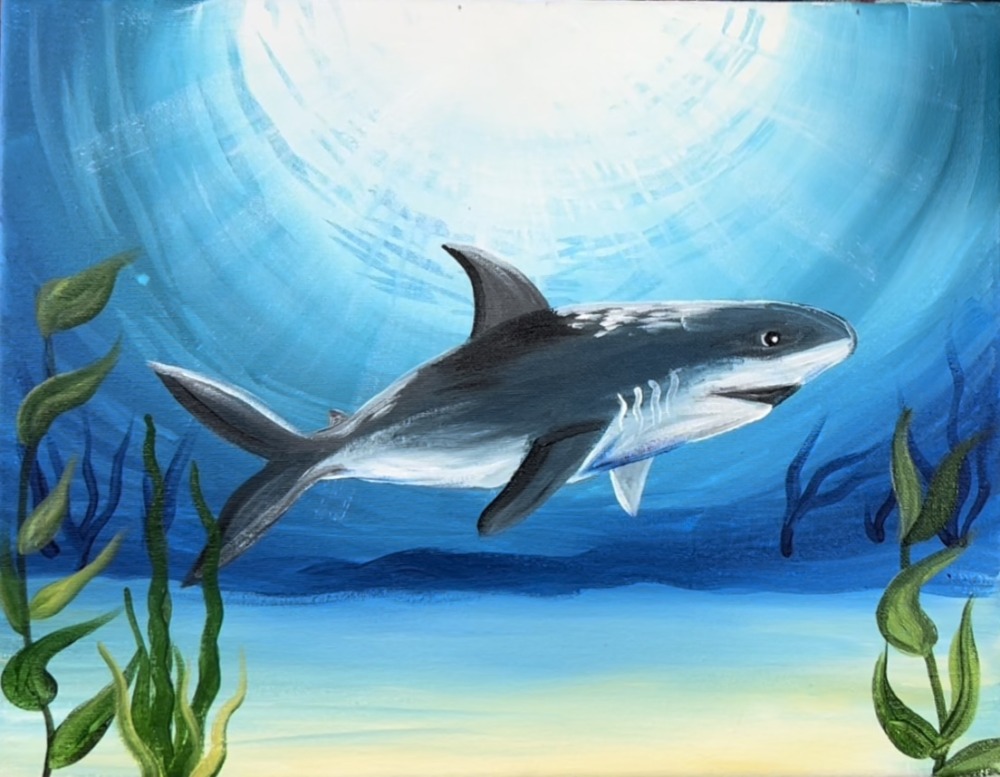
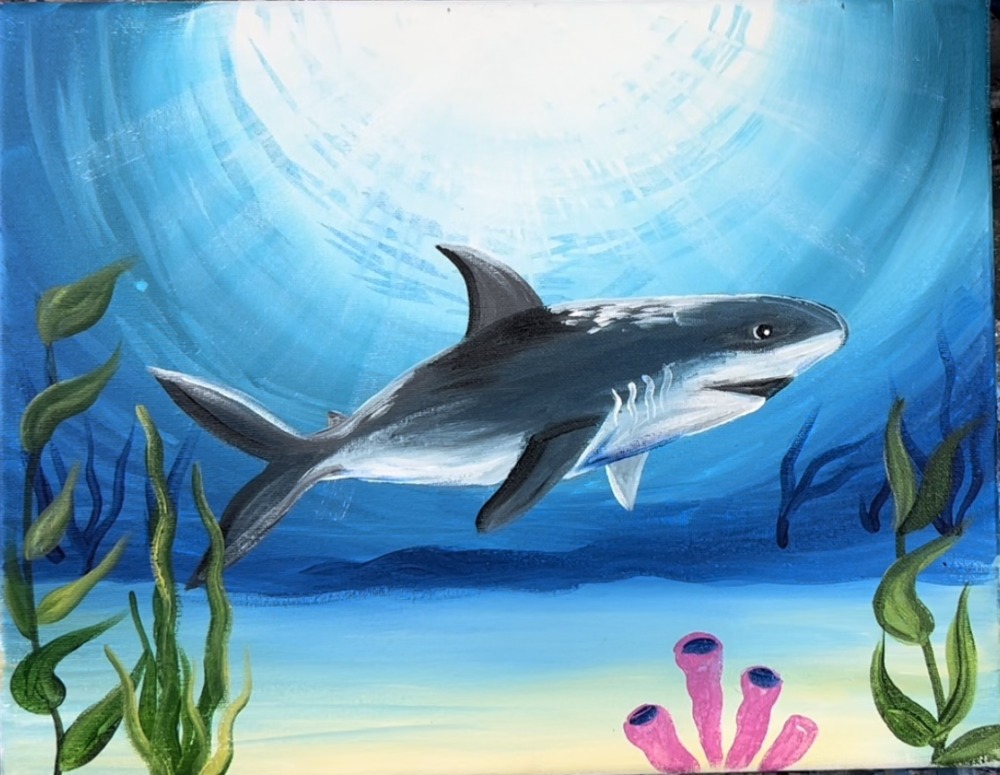
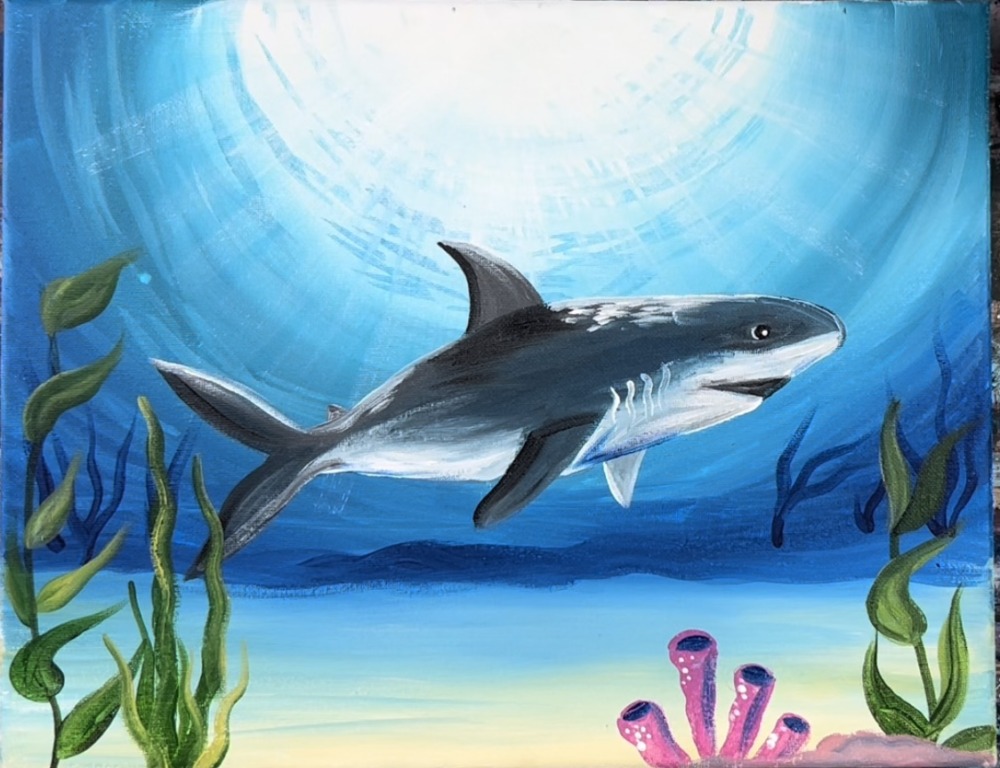
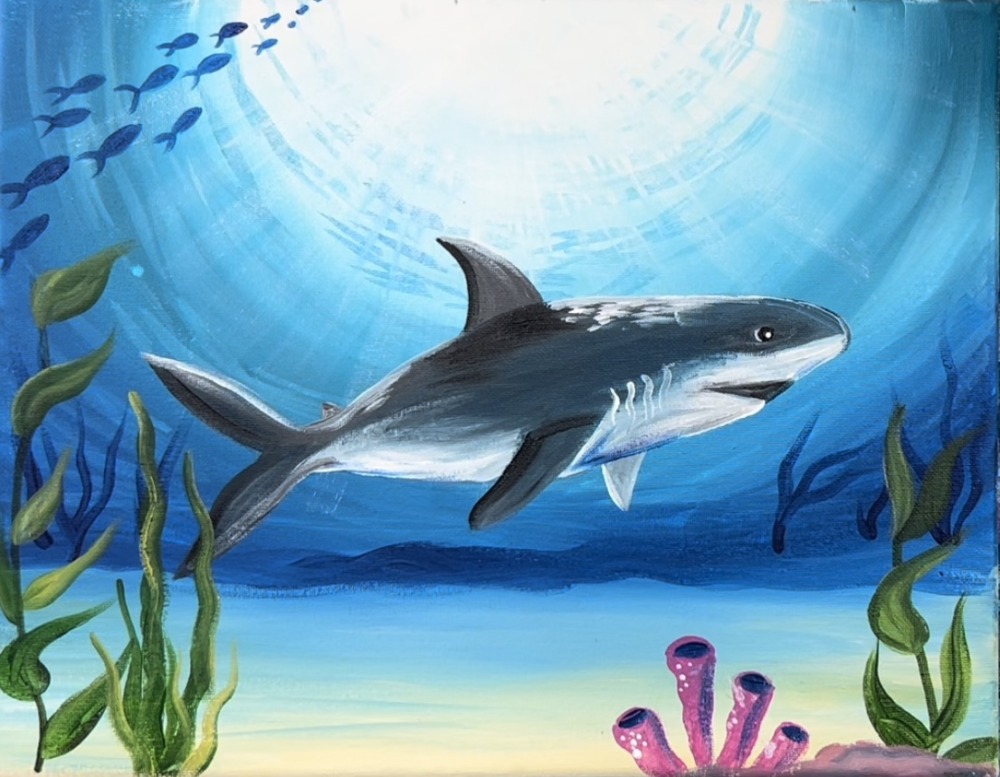
Learn how to paint a shark in a beautiful under water scene!
Would you like to save this?
This tutorial will demonstrate how to paint a sparkling ocean floor, school of fish, seaweed and coral with a shark as the main character!
I am providing a traceable template of the shark that you can use to transfer to your canvas after the ocean is painted.

Enjoy and happy painting!
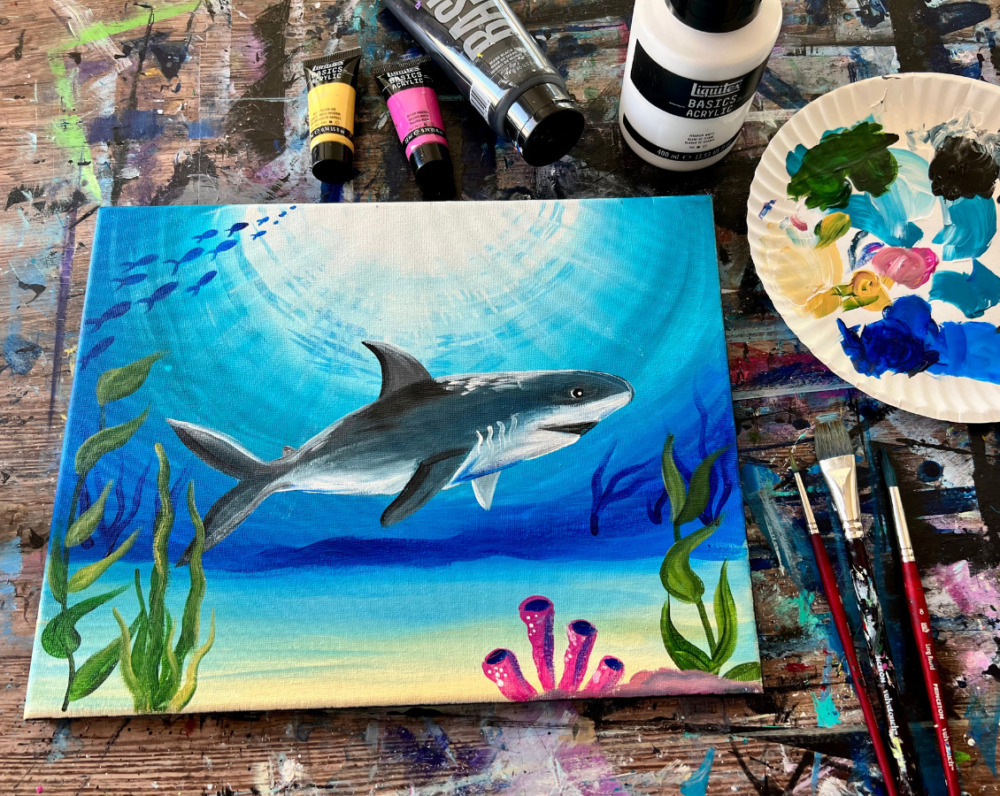
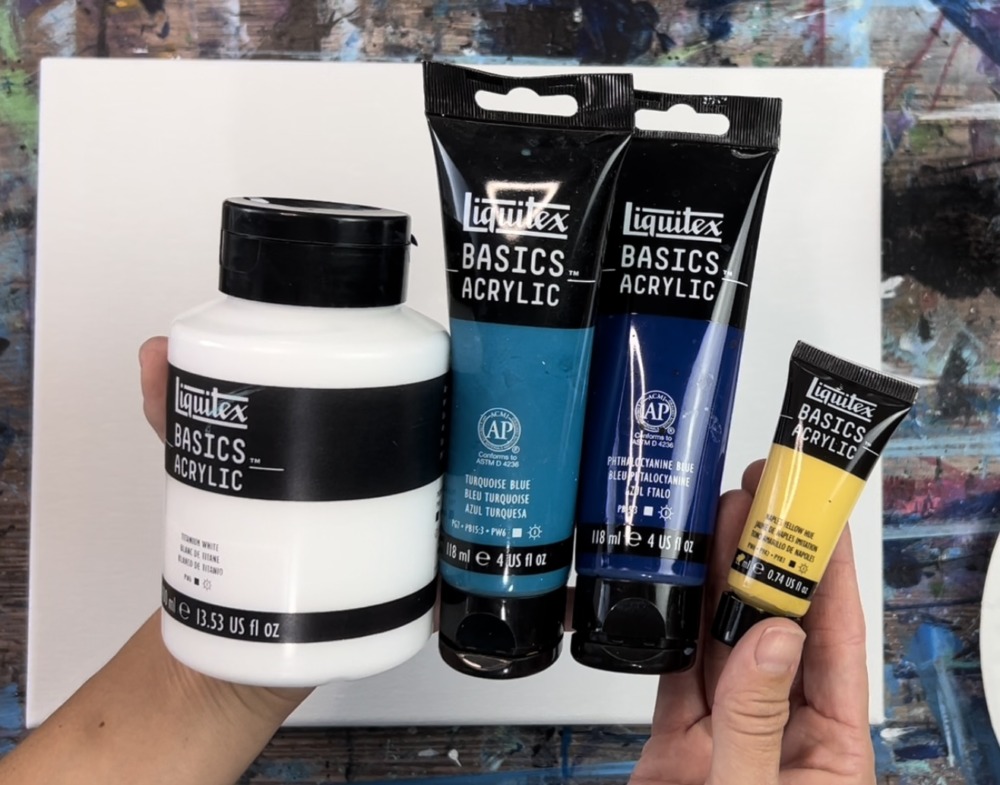
Materials Needed
How To Paint A Shark - Acrylic Painting Tutorial
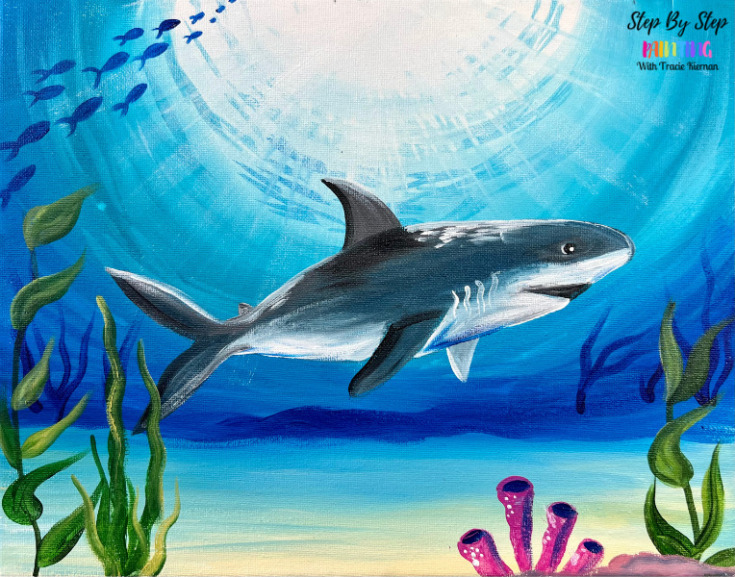
Learn to paint an underwater scene with a shark with acrylics on canvas.
Materials
- 11 x 14 Canvas
- Acrylic Paint
- Brushes
- Traceable Template
- Graphite Paper
- Optional Fine Mist Spray Bottle
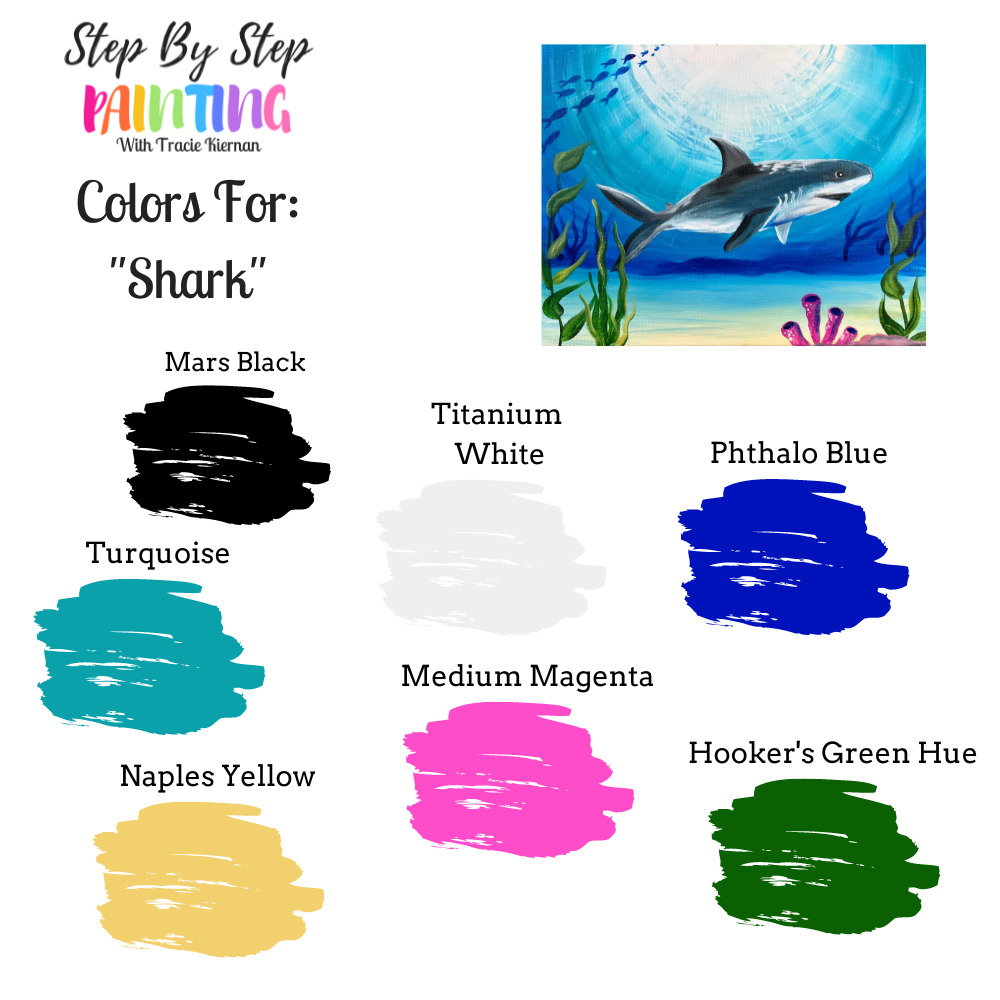
Colors
- Titanium White
- Mars Black
- Medium Magenta (optional)
- Phthalo Blue
- Turquoise Blue
- Naples Yellow Hue
- Hooker's Green Hue Permanent
Brushes
Color Palette
I used Liquitex BASICS acrylic paints for this tutorial. You are welcome to use whatever paint brands you have available. Use the color chart below to help you match your colors.
Using Craft Paints?
If you are using craft paints such as Apple Barrel Craft paints, I would recommend subbing to these colors:
- White
- Black
- Too Blue
- Key West
- Fuchsia
- Bright Yellow (mix a little brown into it)
- New Shamrock
Traceable

Directions At A Glance
Video
Step By Step Directions
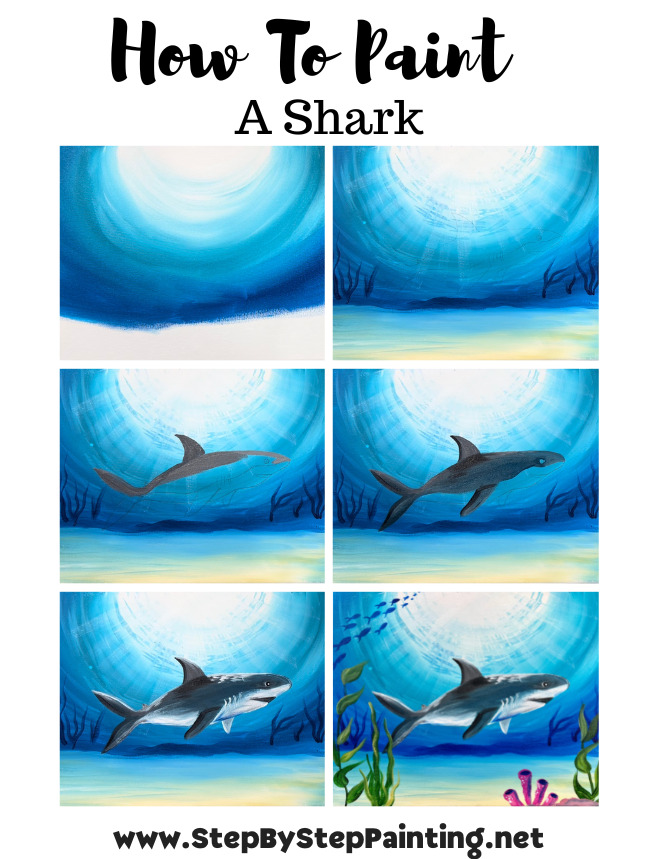
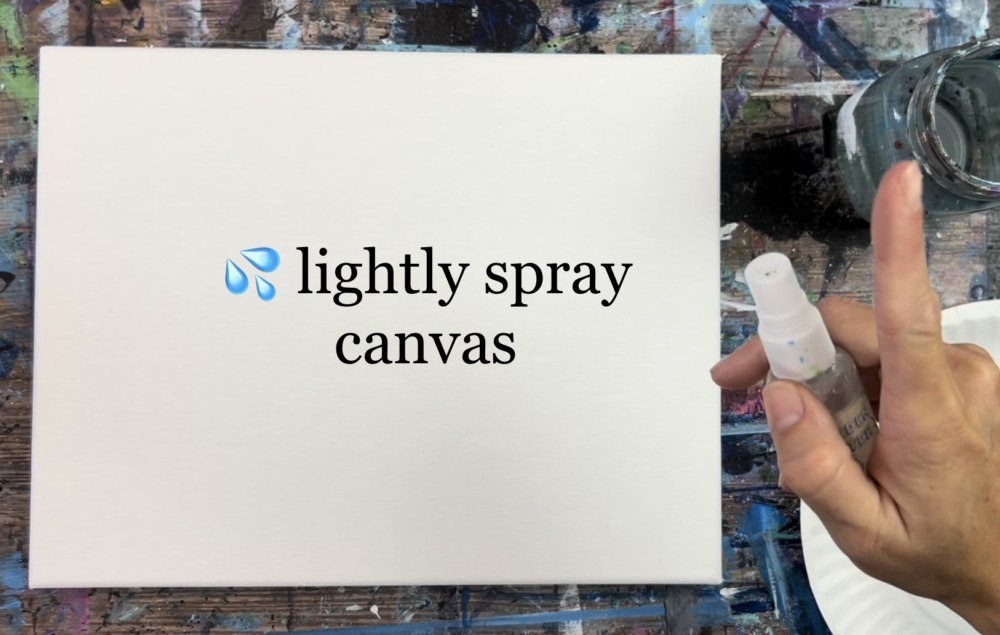
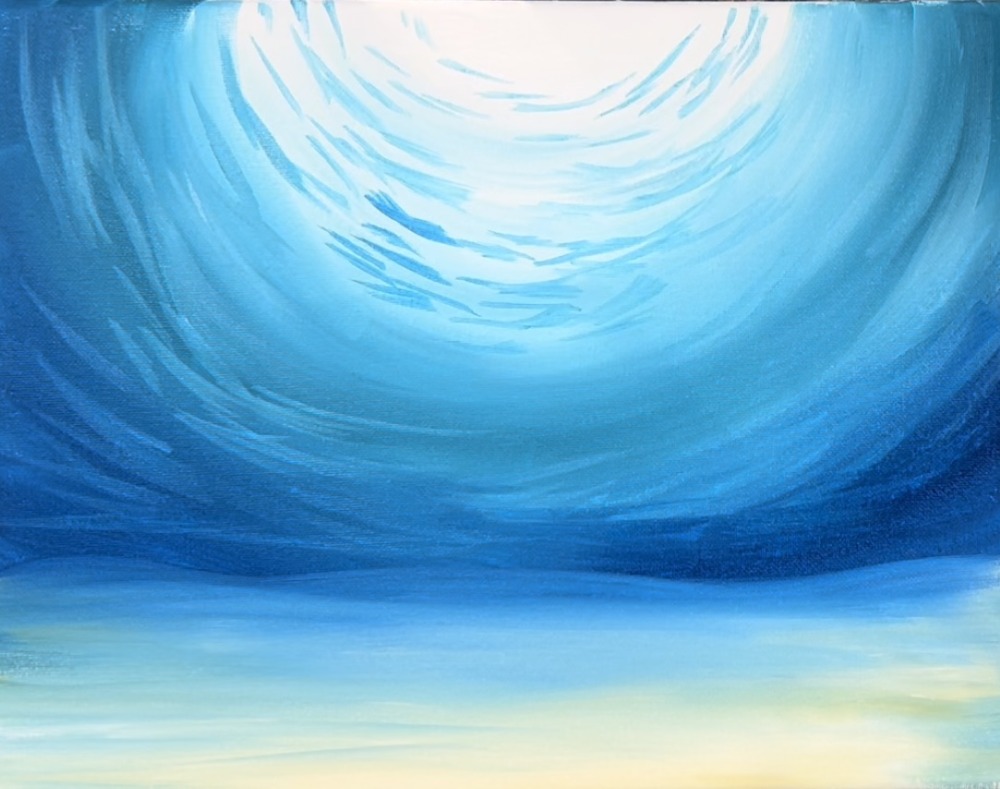
1. Paint background
Load your palette with: titanium white, turquoise blue, phthalo blue and Naples yellow hue.
Next, lightly spray the canvas so that there is a very thin layer of water. This will help with all the blending in the background.
Load the tip of your 3/4″ wash brush with just titanium white.
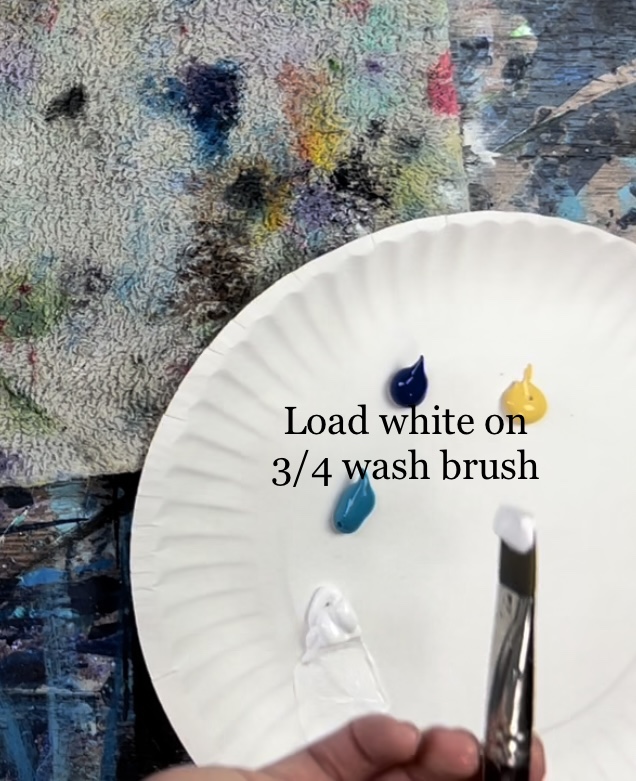
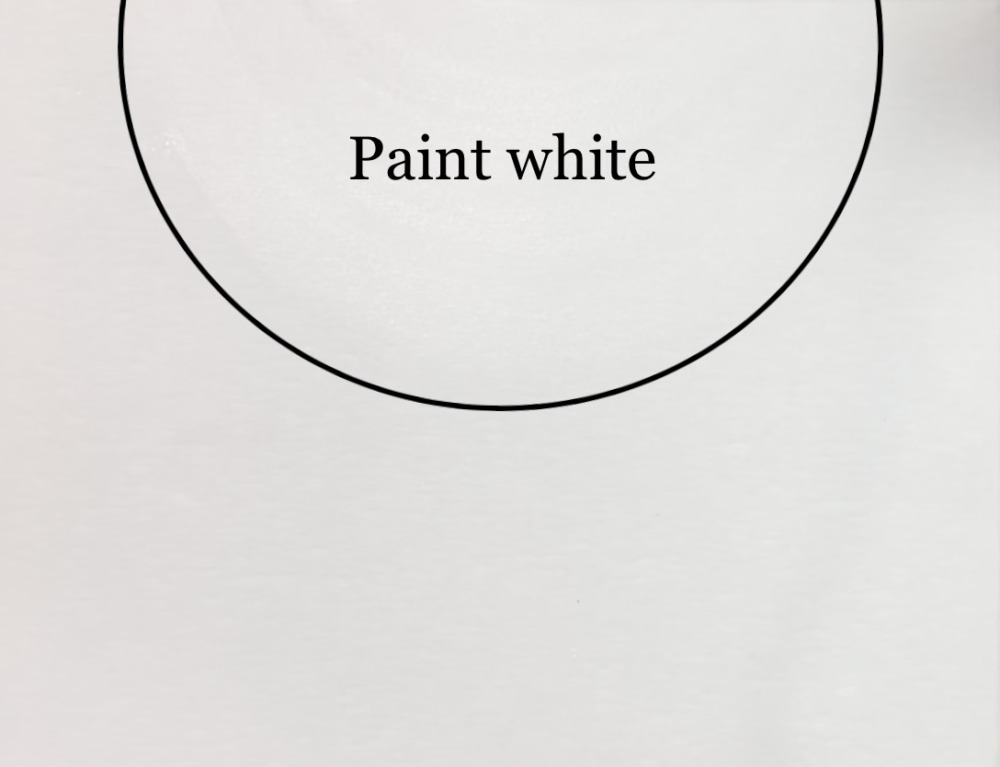
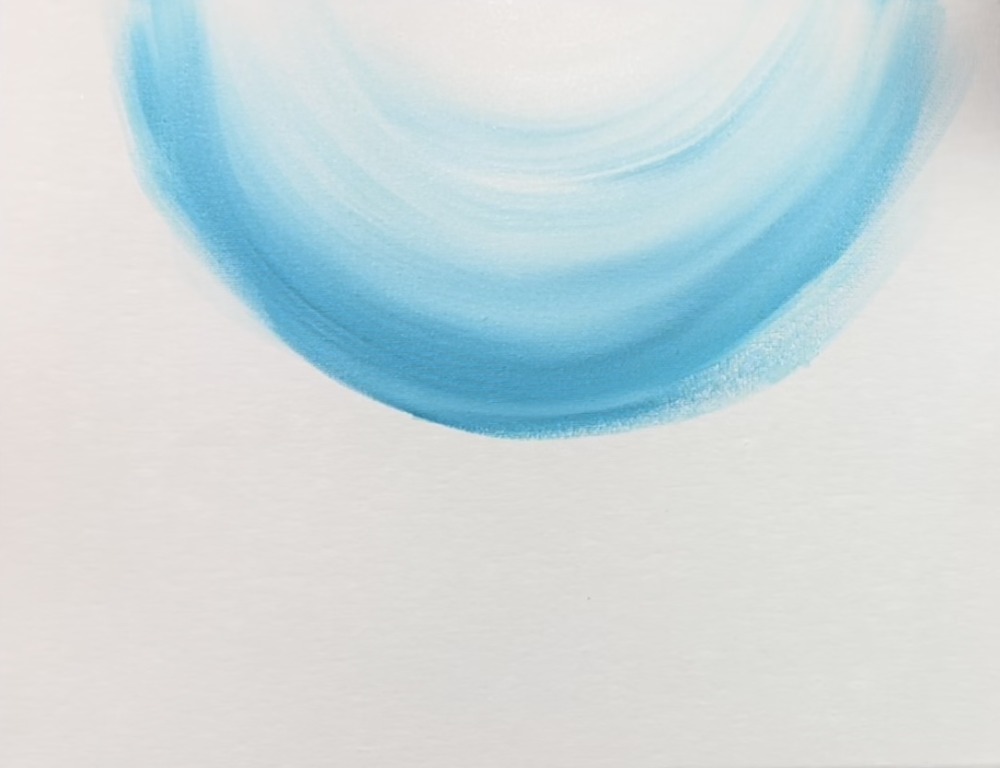
Then paint the top area of the canvas. Make your strokes go in a “semi-circle” direction. Go about halfway down the canvas with this semi-circle of titanium white (see picture below).
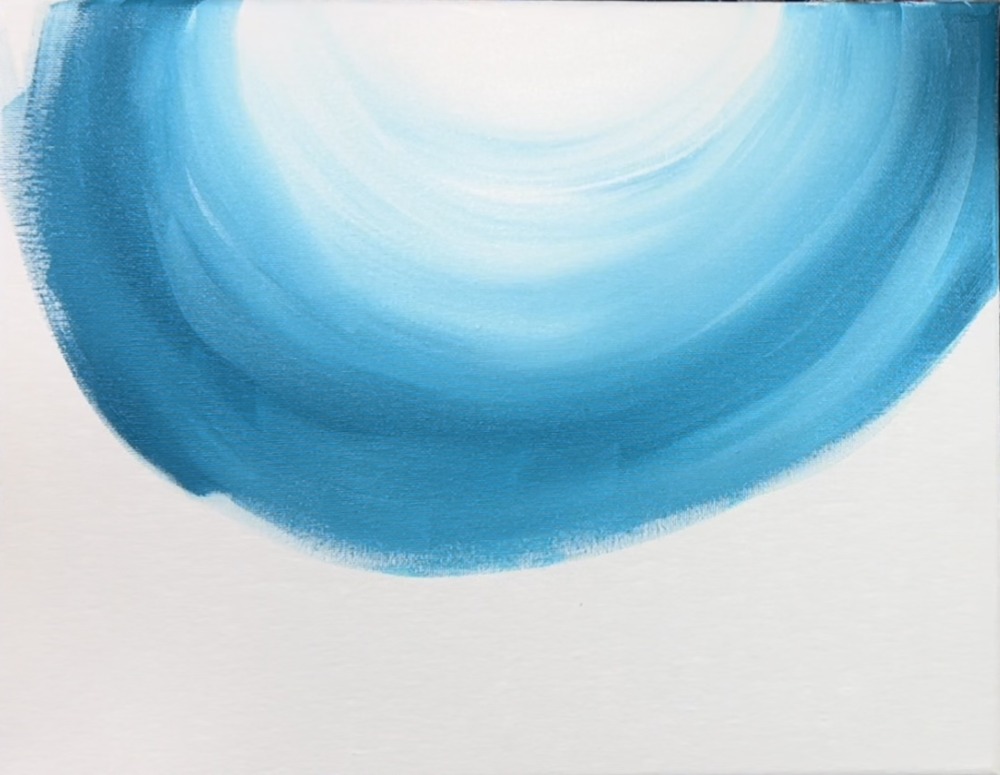
Then mix a small amount of turquoise into the white so that it becomes a light turquoise.
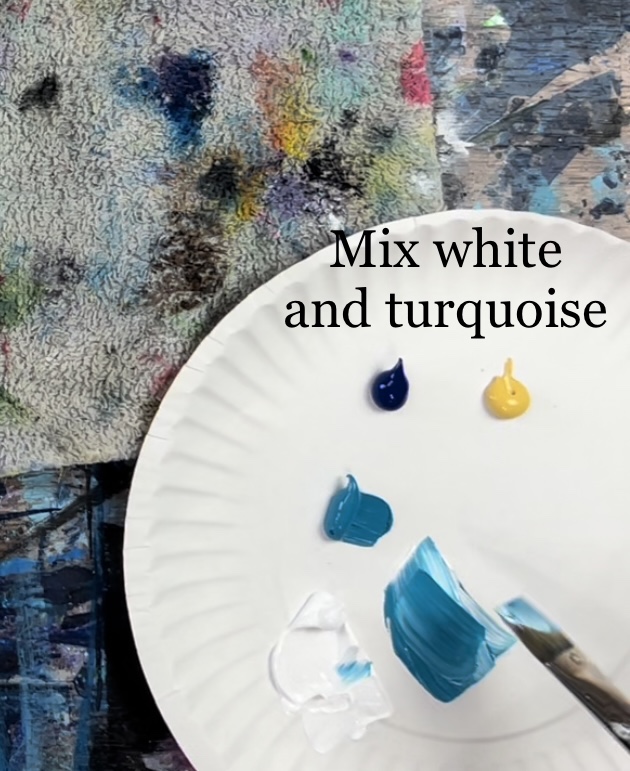
Paint in an inverted half-circle direction. Start on the outside of the white and gently blend the turquoise into the white. Leave the top center bright and white.
Next, add more turquoise to your brush. Continue to paint in that half-circle direction allowing your water to get darker as you paint the lower portions of the canvas. Keep the top middle bright and white.
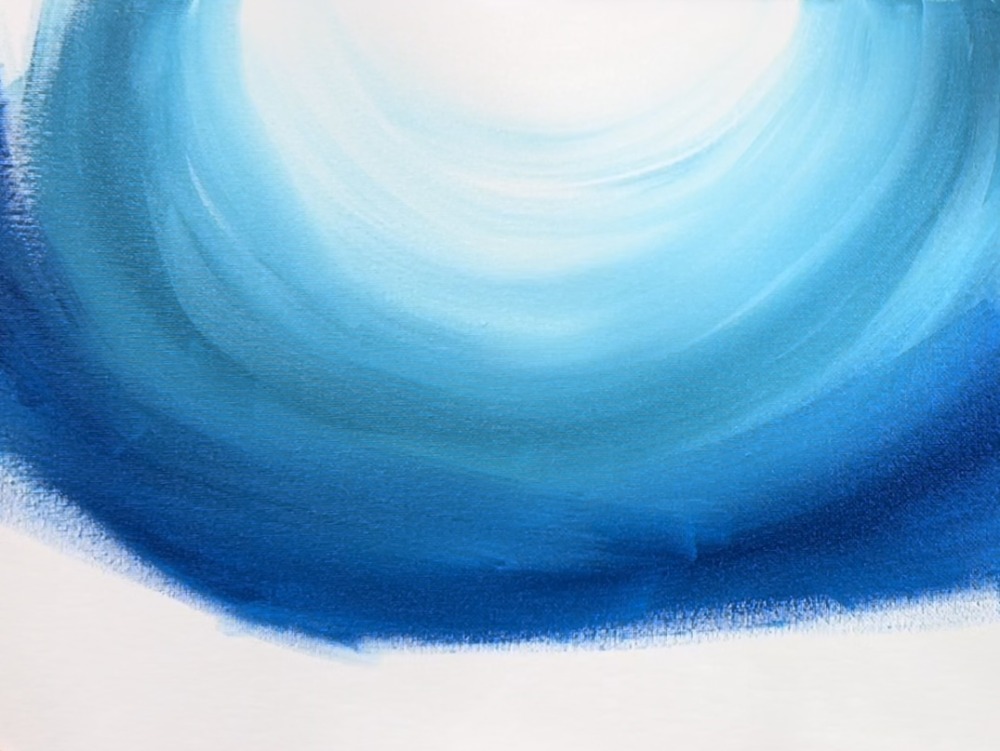
Next, wipe off your brush. Load it into phthalo blue. Gently blend the blue on the outside of the turquoise and blend it gently into the turquoise. Be careful because phthalo blue is a strong color so you don’t want to over load your brush with too much of it.
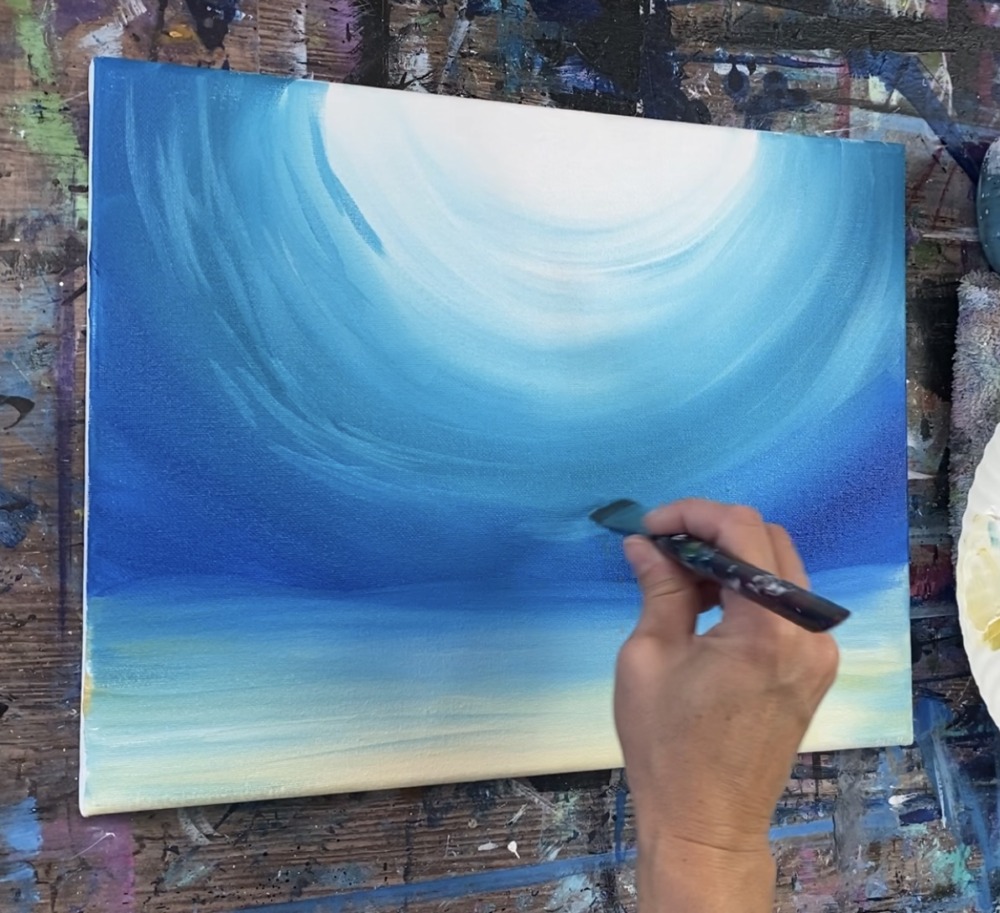
As you approach the bottom of your canvas (about 2 inches from the bottom), start painting in a horizontal direction. Then mix white with the blue to make a lighter blue. Use your flat brush to define a horizontal line on the bottom of the canvas where the sea floor will be.
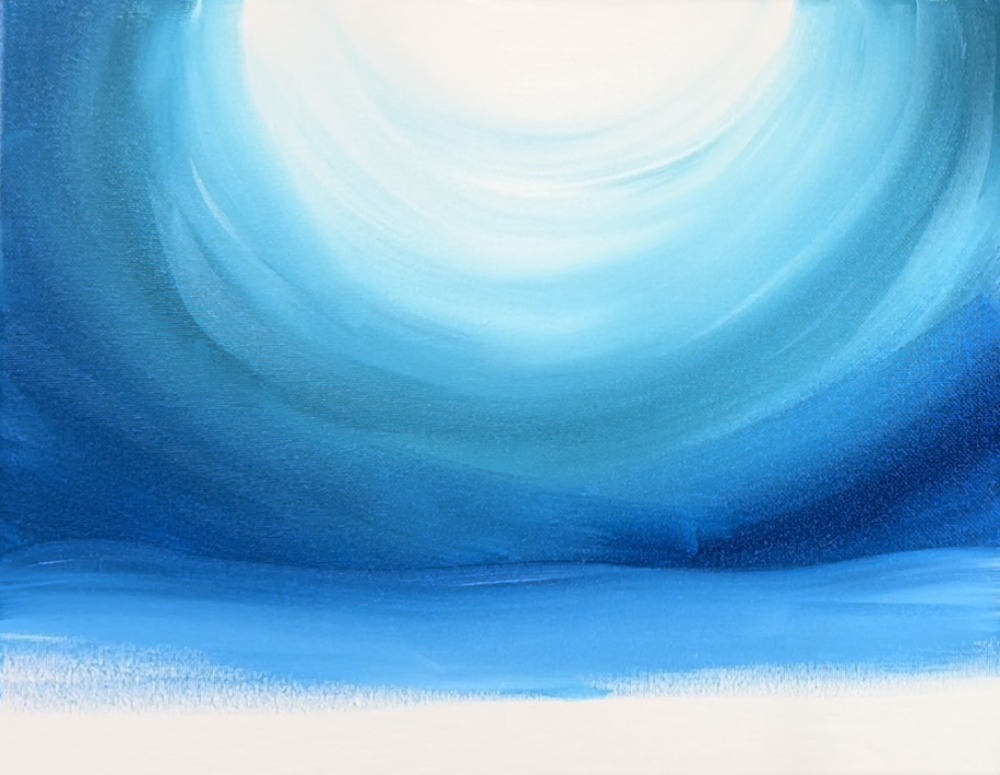
Gently paint about 3/4 inch of this light blue color but leave the bottom blank.
Then completely rinse your brush off. Mix about 1 part Naples yellow and 3 parts titanium white. This will make a light, pale yellow color.
Paint this pale yellow on the bottom half of the sea floor and gently blend it up into the light blue area.
This next step is optional…
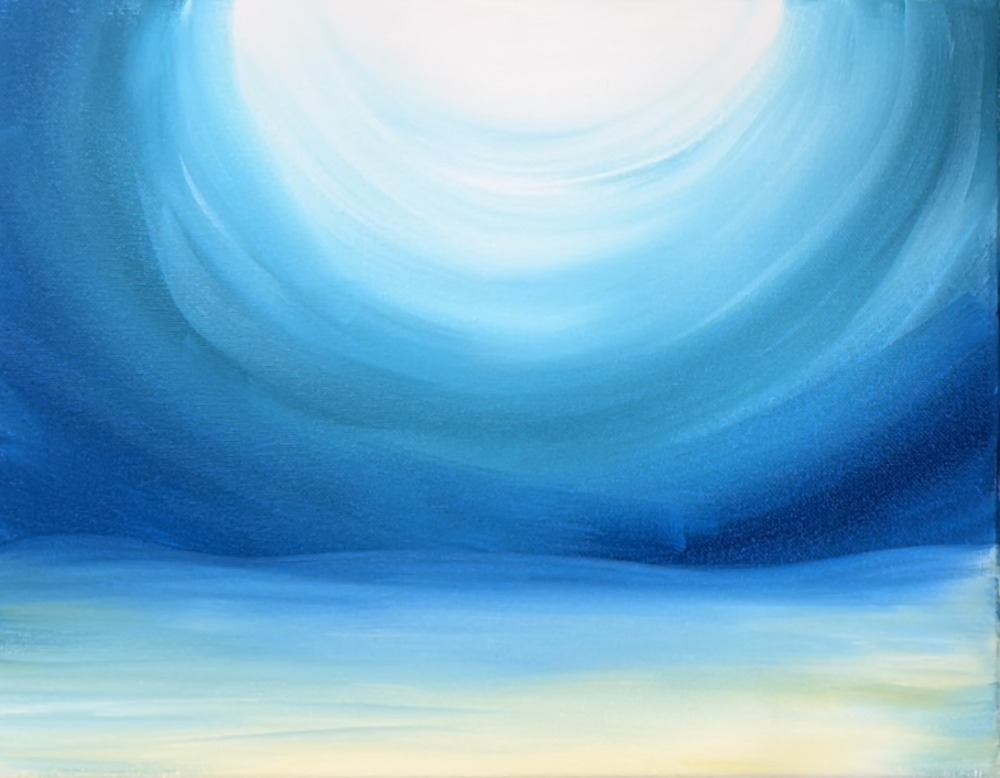
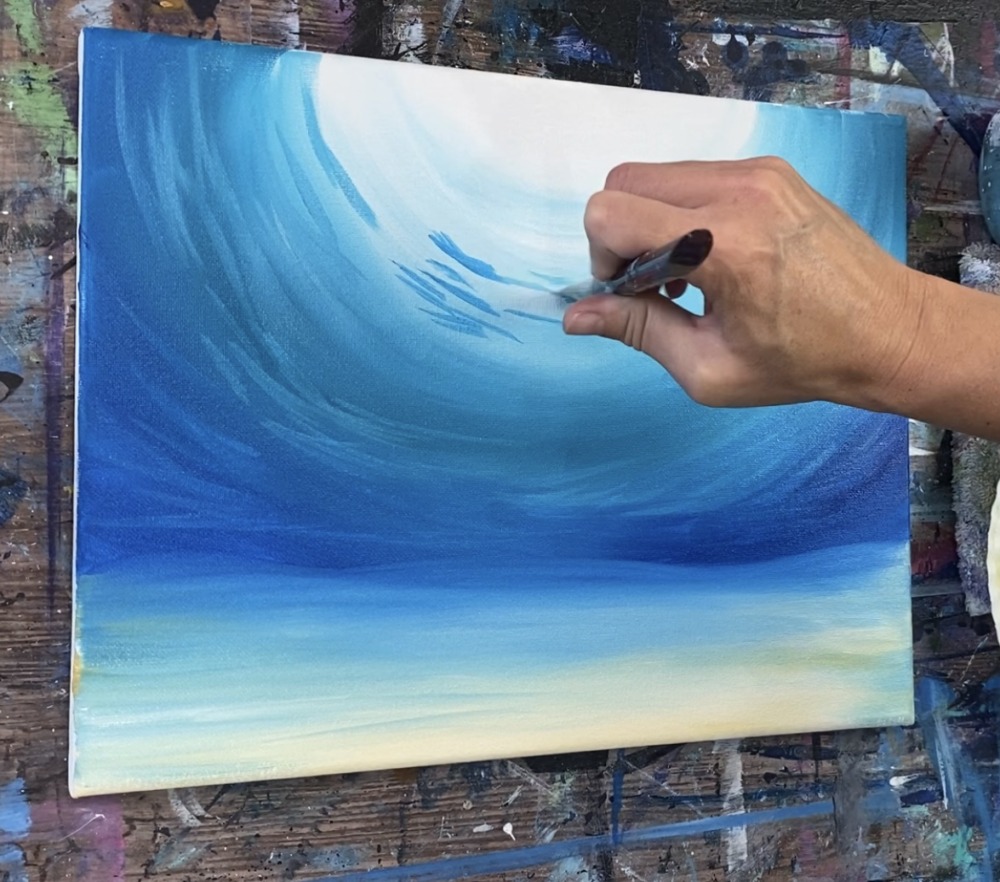
Next, mix white with turquoise on your palette (about 3 parts white to 1 part turquoise). Use the tip of your 3/4″ wash brush to paint small lines that go in that semi-circle direction.
These lines create water texture in the water. Paint a few up in the bright white area as well.
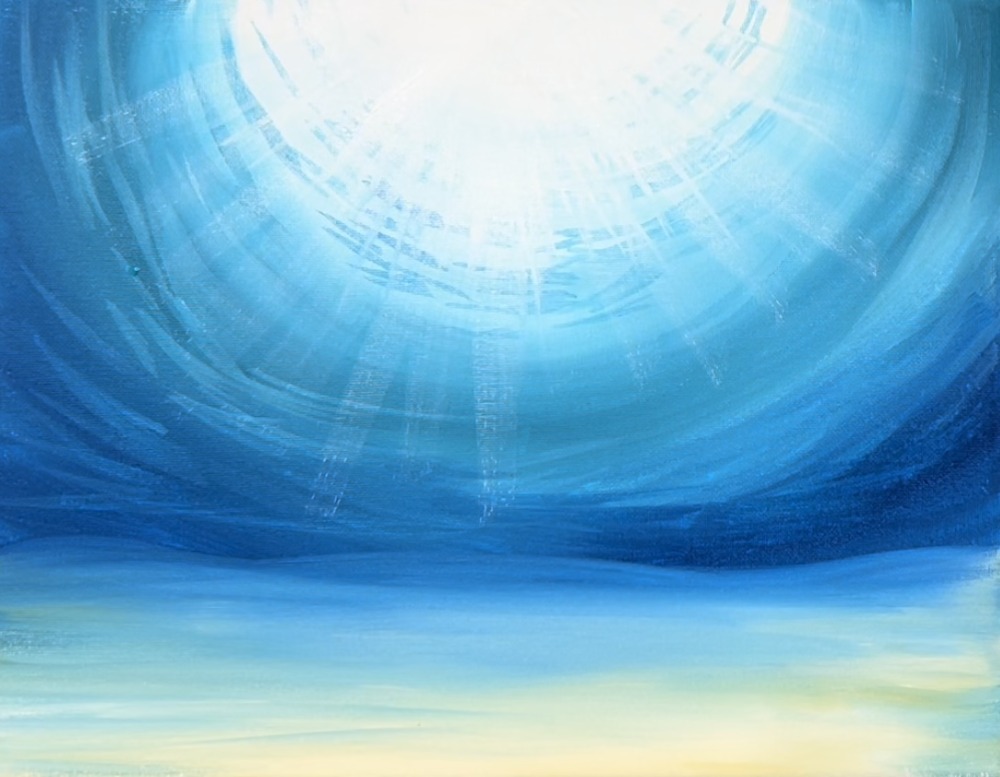
Then completely rinse your 3/4 wash brush and load it into titanium white. Paint light rays that meet in the top center of the canvas. Use just the tip of your 3/4 wash brush to paint these lines. Let the line fade out as you reach the middle part of the blue area. Tip: only load small amounts of white on the tip of the brush.
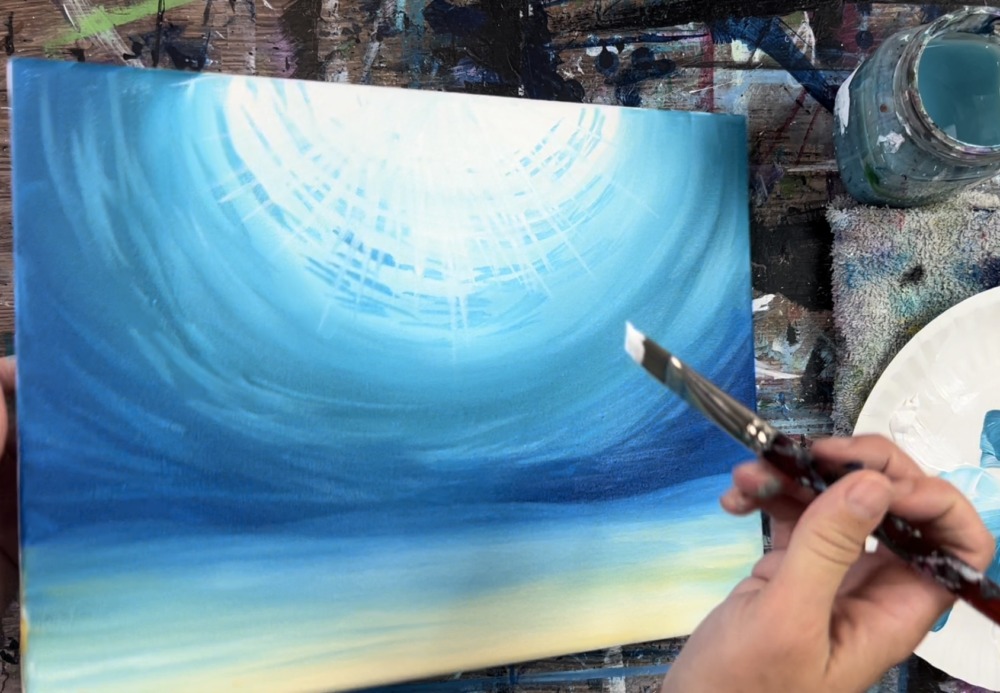
Then dry brush the titanium white so that you create some thicker light ray strokes. To do the dry brush style, load the white on your brush and then wipe some of it off. Then bring some of the light rays further down. These ray lines should show up very translucent and not overpower the blue area.
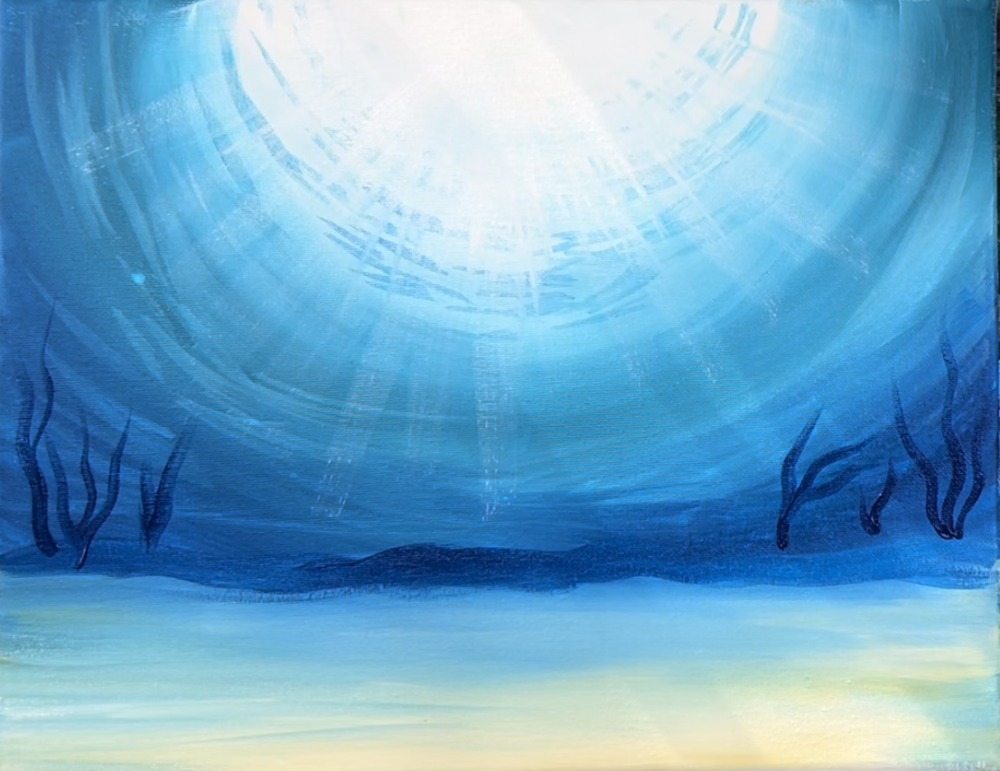
2. Paint blue seaweed
Use a #8 round brush (or #4 round brush) to paint seaweed
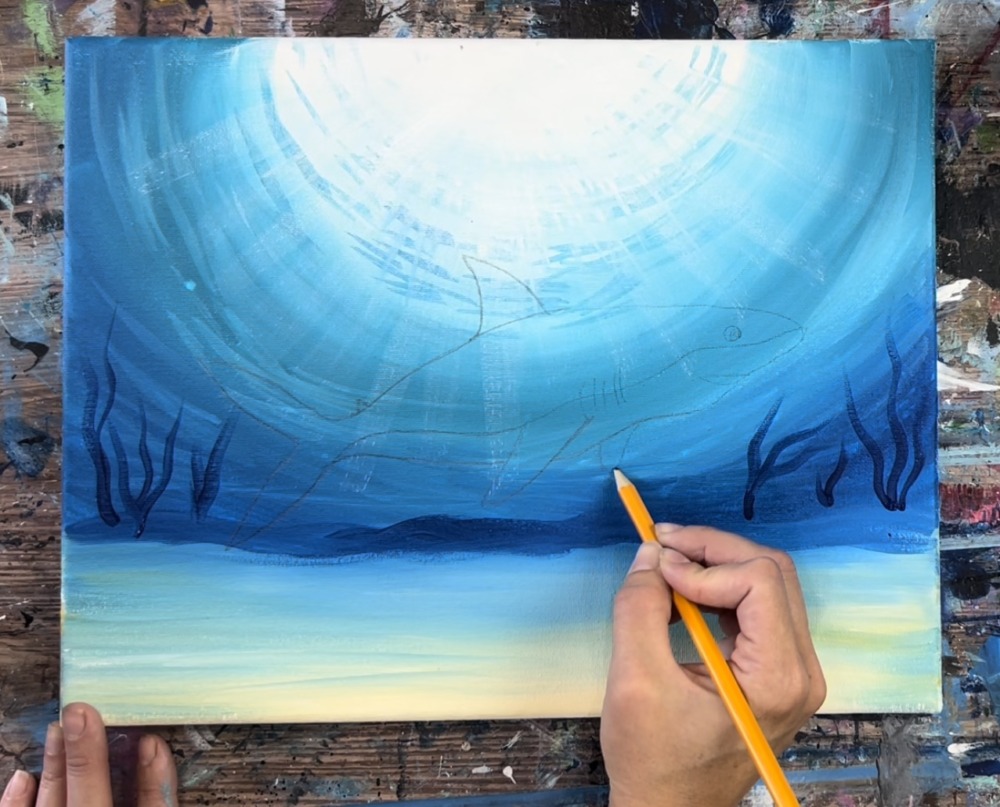
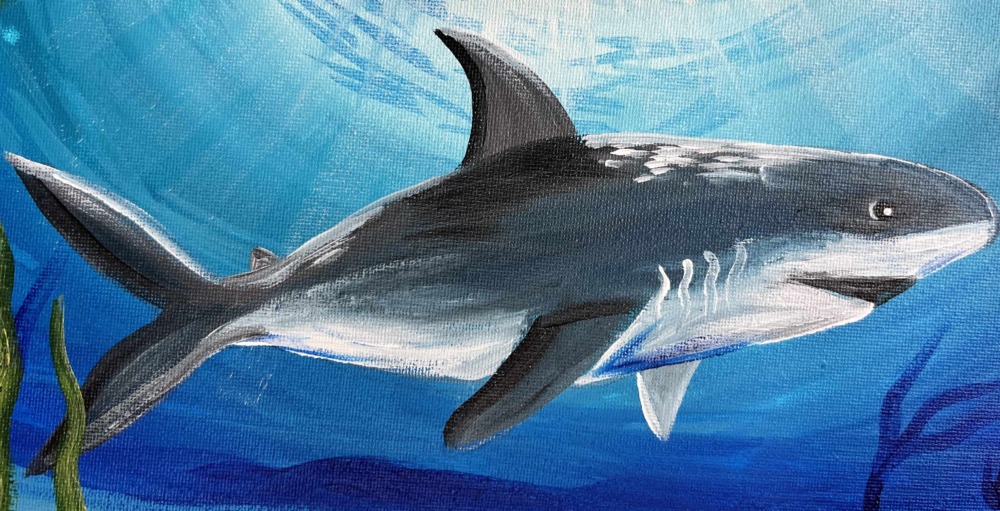
3. Trace Shark Onto Dry Painting
Wait for the painting to dry or use a blow dryer to dry the painting. Then print out the shark template on standard size printer paper.
Position the shark so that it is center on the canvas. (Note: the top of the dorsal fin is about 3.5″ down from the top edge of the canvas)
Place a sheet of graphite paper under the shark template. Then trace the shark.
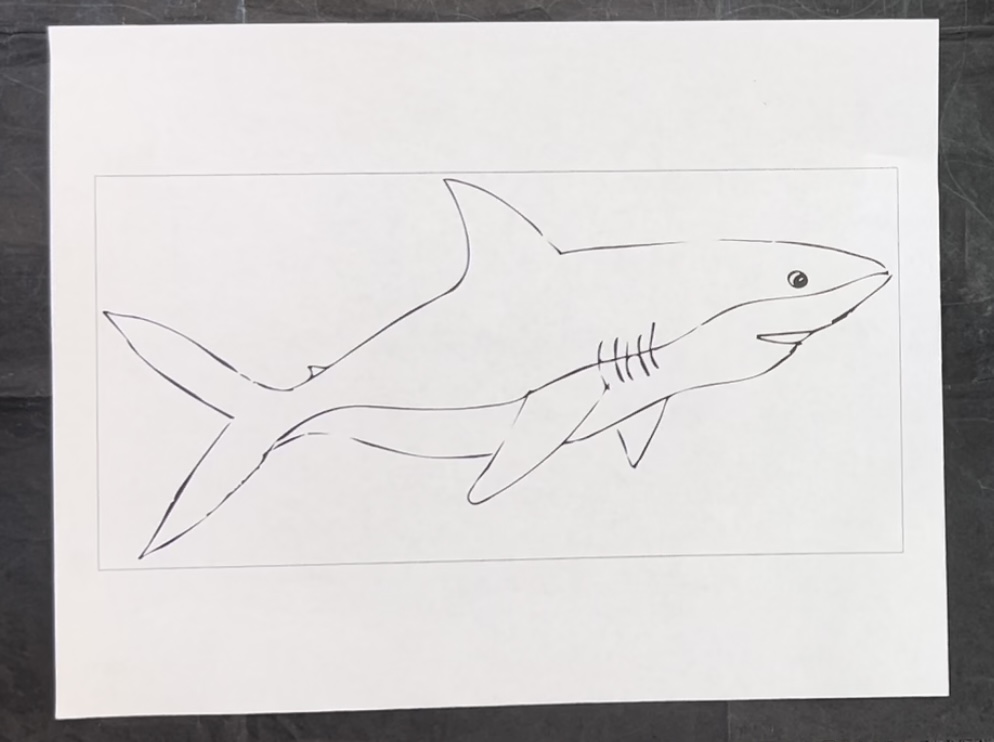
You’ll want to press firmly so the line shows up nice and dark on the blue painted background. If needed, go back and retrace some of the main lines.
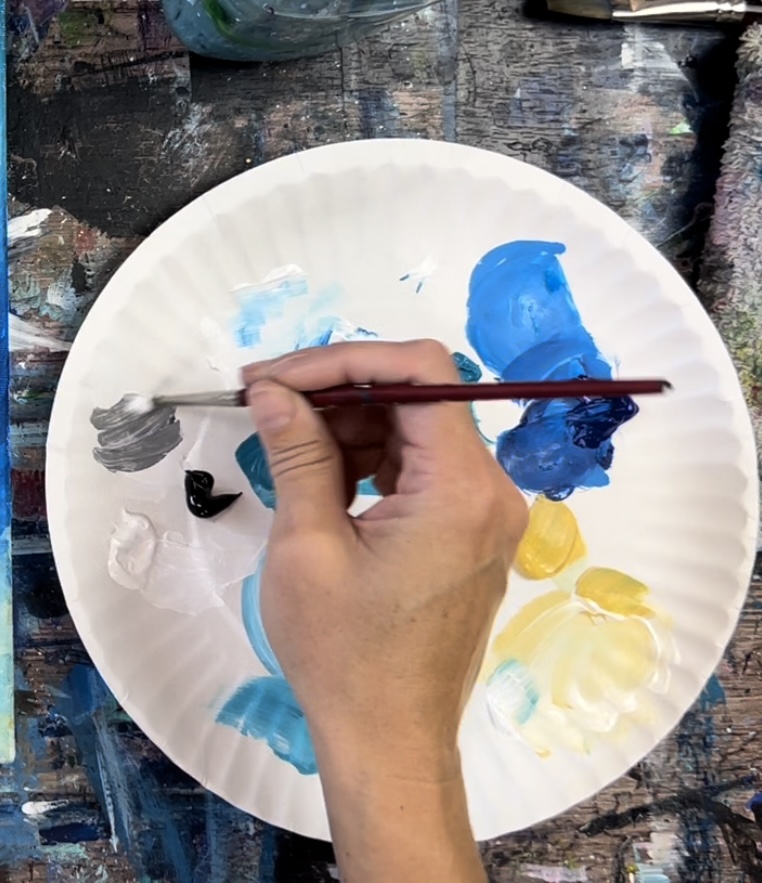
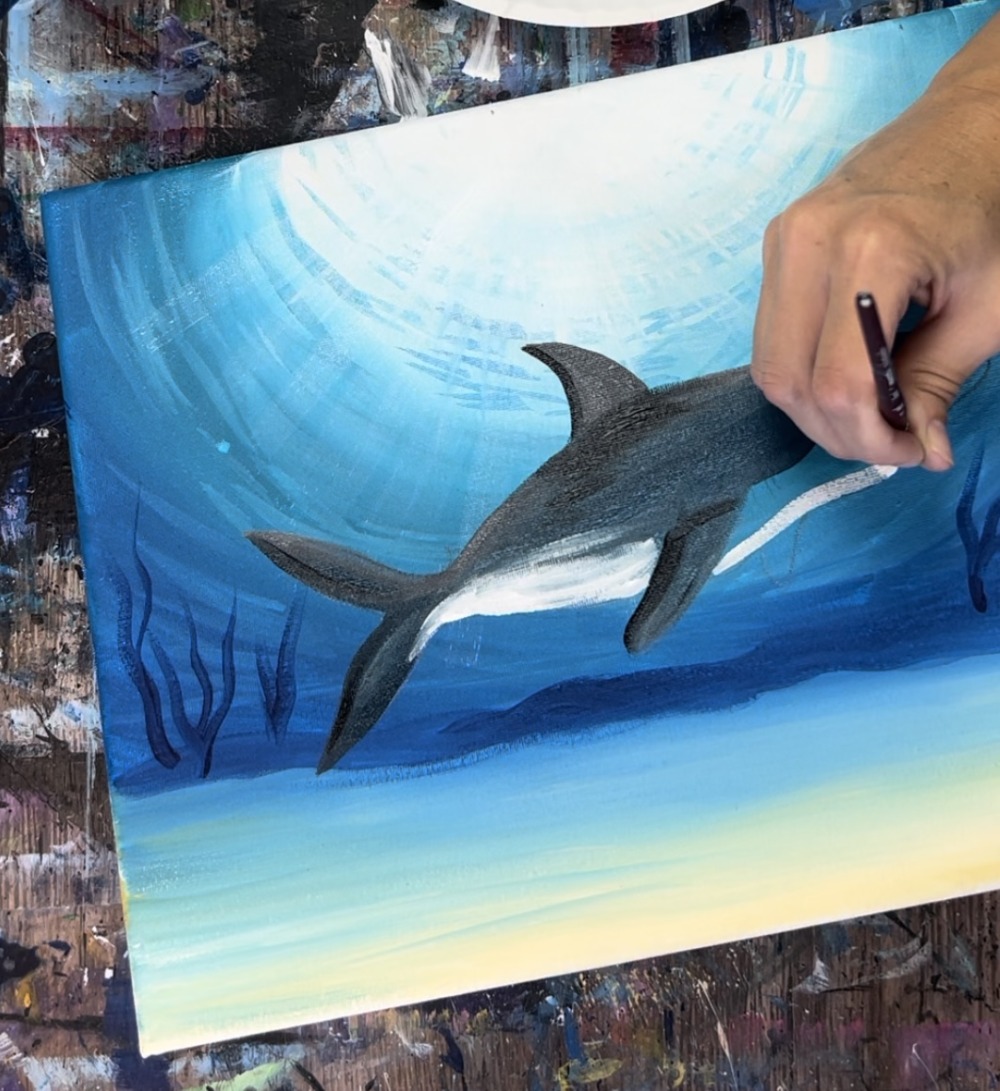
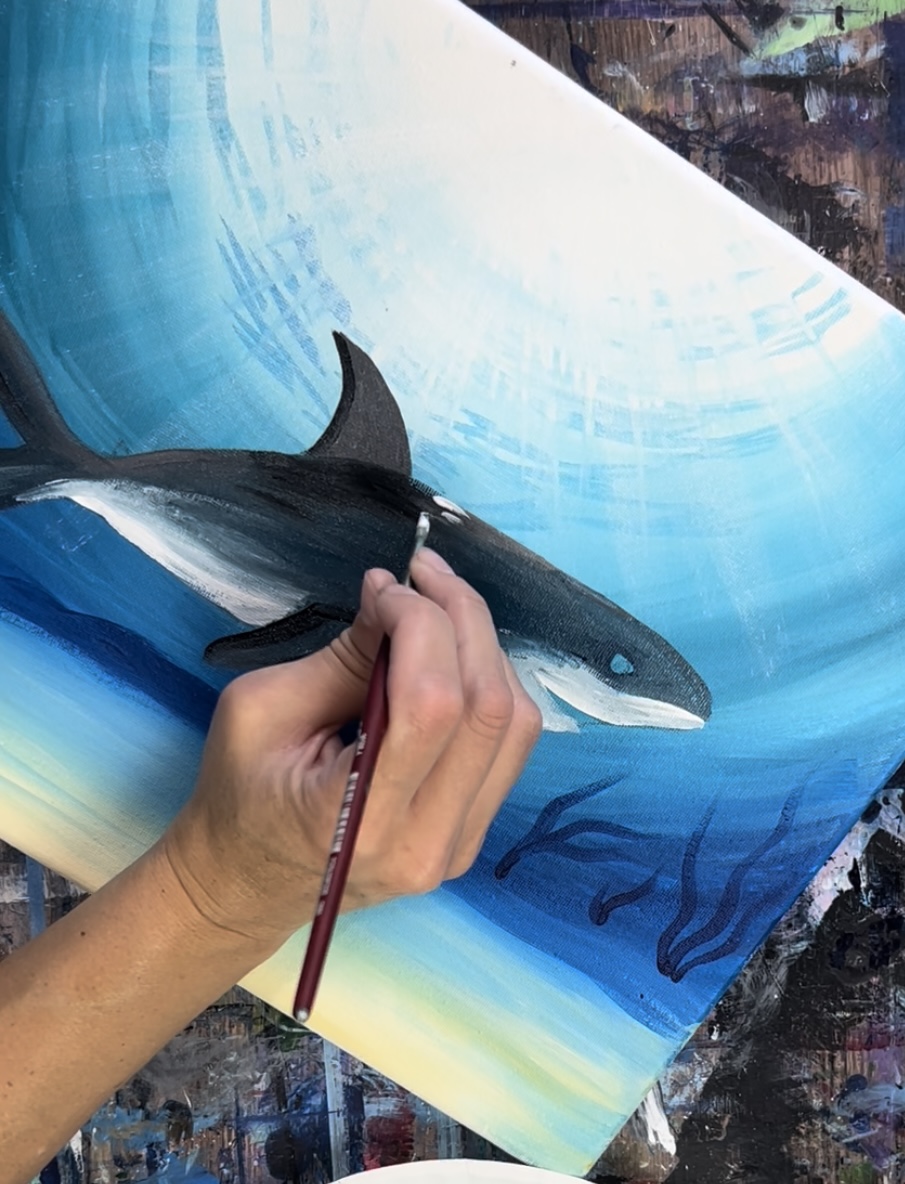
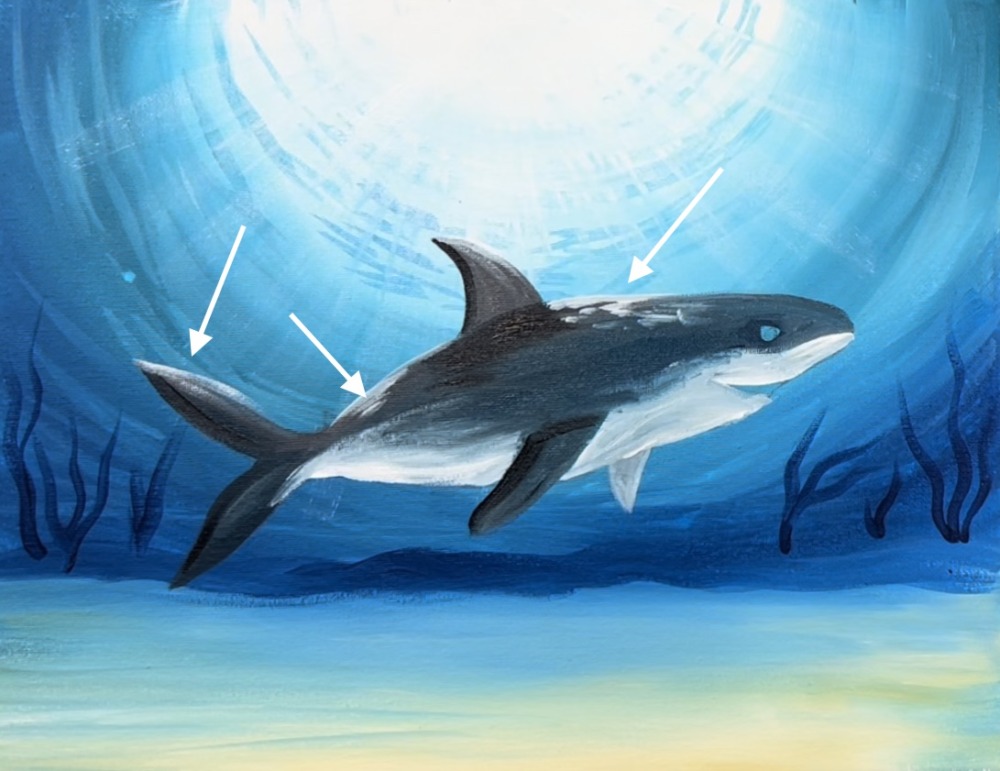
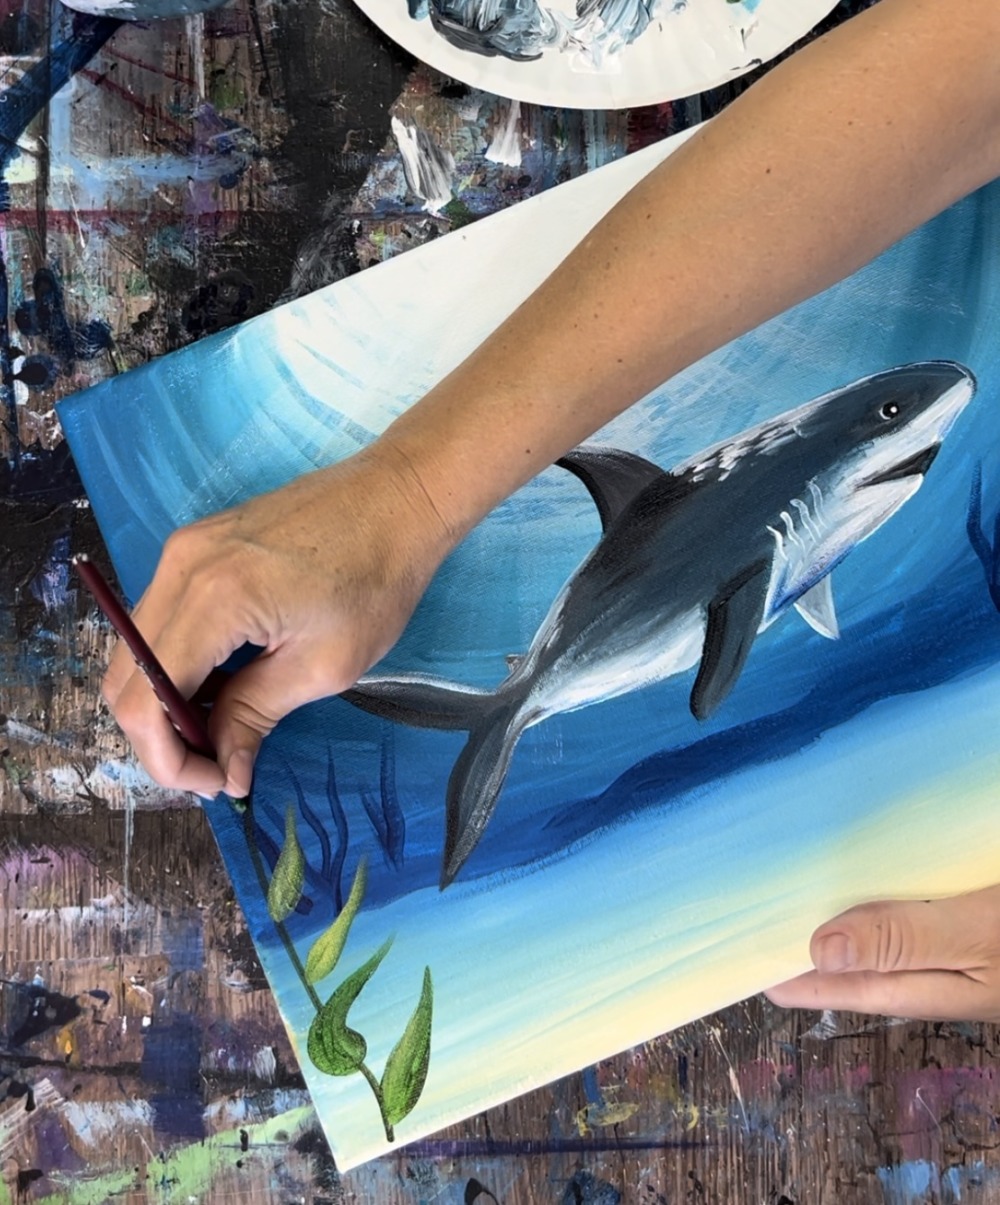
4. Paint Shark Gray Areas
Load your palette with mars black. Then mix about 1 part black to 3 parts white to make a medium gray color.
Use your #4 round brush to paint the dorsal fin. Outline the shape and then paint in a curved direction.

Then paint the tail of the shark. Again, outline the shape and then paint in the direction of the shape. Paint the back with this medium gray color. As you go to re-load the brush, you can add different amounts of white to make the gray kind of vary and blend on the canvas. This creates color variation in the shark so it doesn’t look all solid the same shade of gray.
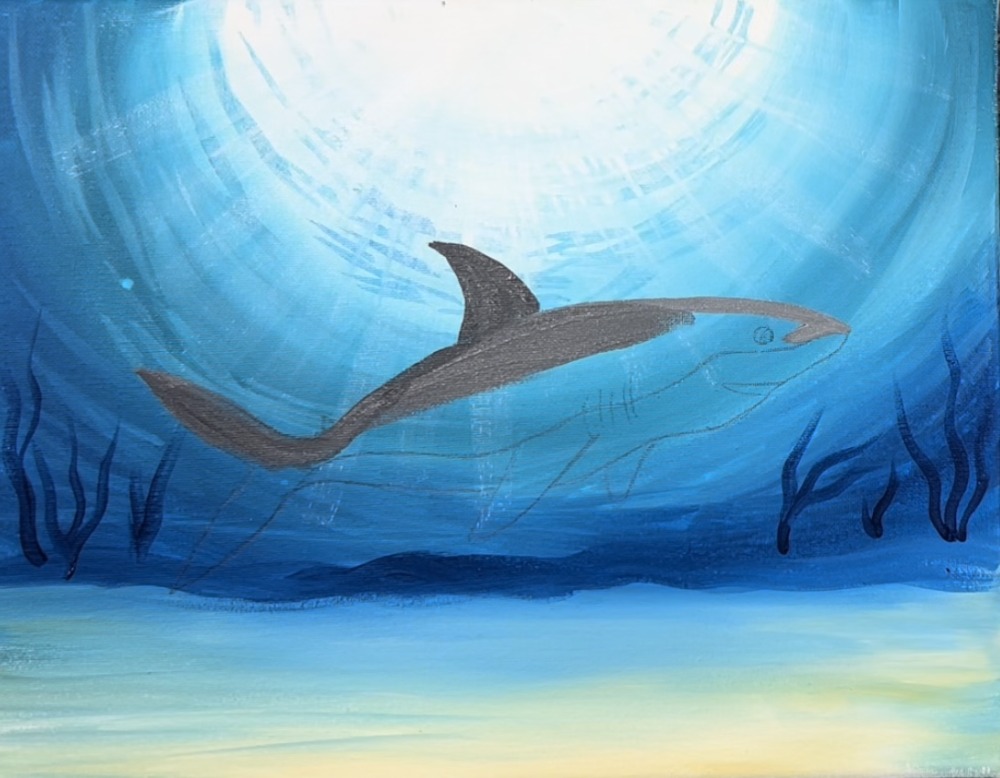
Next, mix phthalo blue (just a small amount) into your medium gray color on your palette. Gently blend some of this blue gray color into the gray area of the shark.
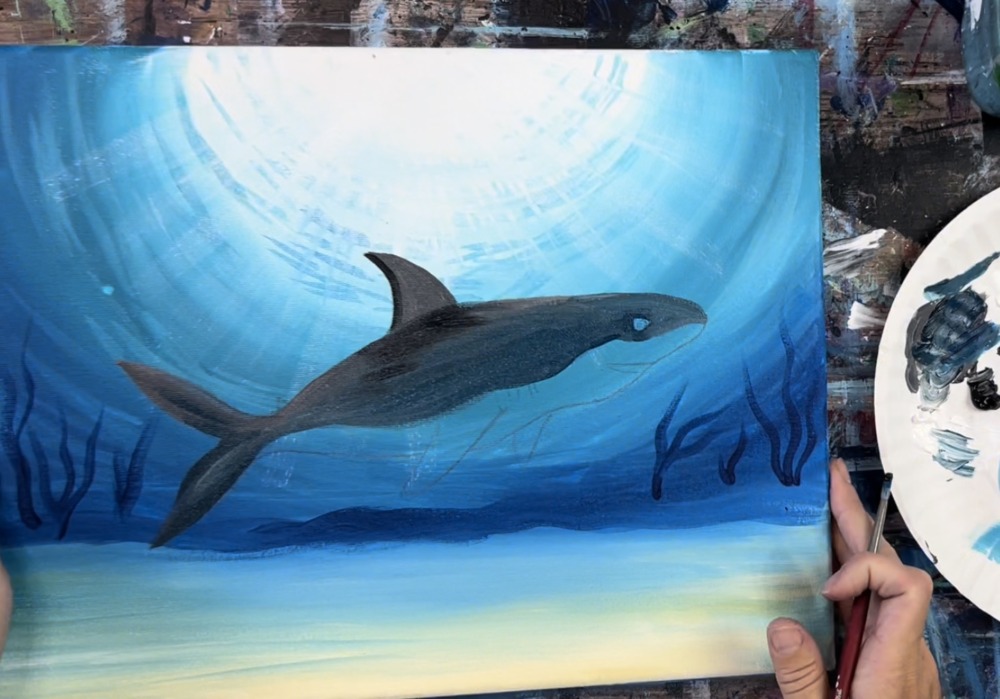
Loosely outline the left part of the dorsal fin, the left part of the tail and the left line of the pectoral fin with mars black. Gently blend some black just under the dorsal fin to create a shadowy area.
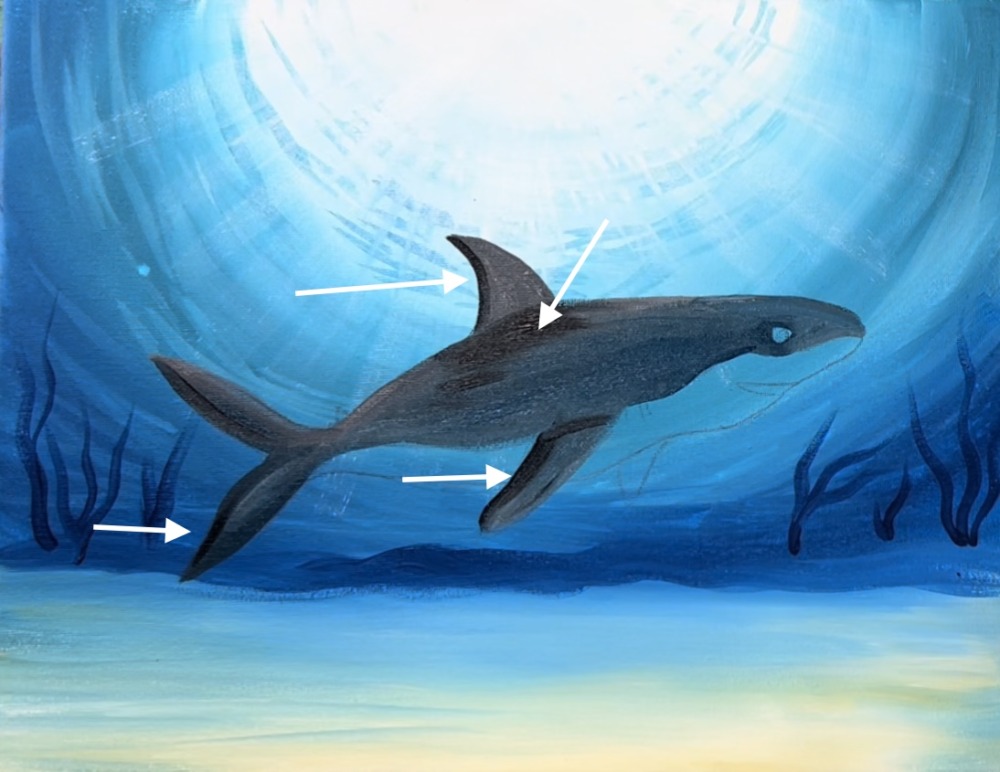
5. Paint shark white areas
Next, completely rinse and dry your #4 round brush. Then load the tip of it into titanium white. Paint the under part of the shark with the white. Go in the direction of the shape.
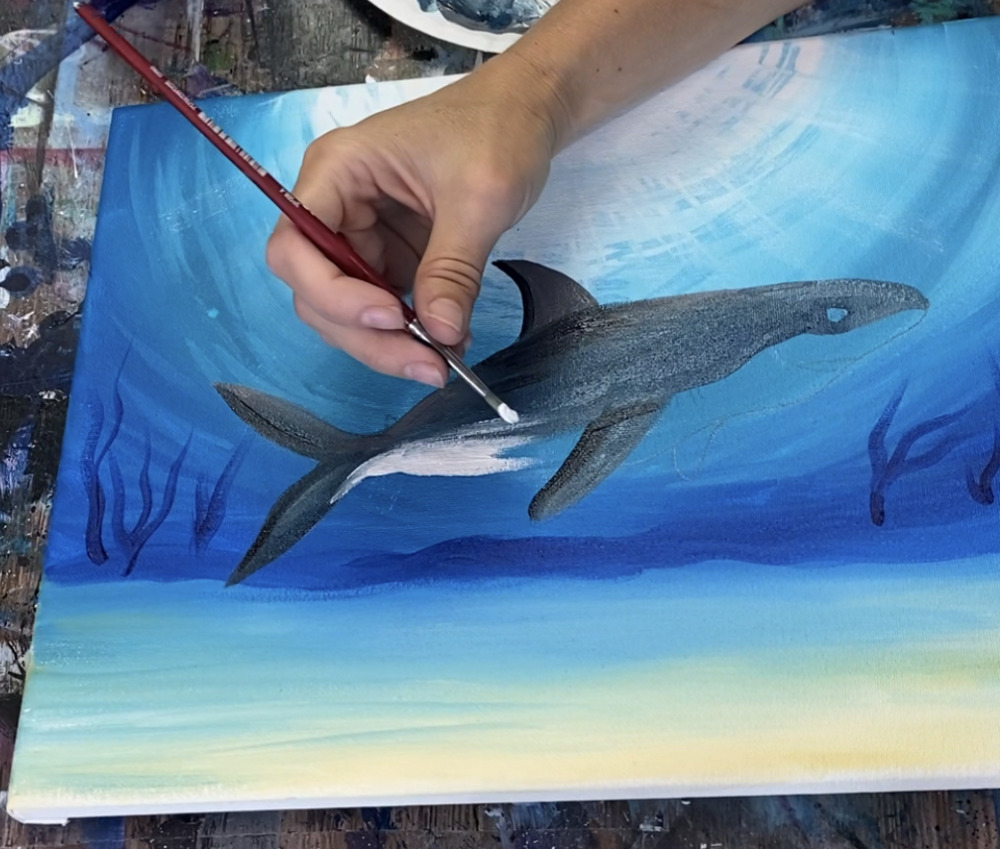
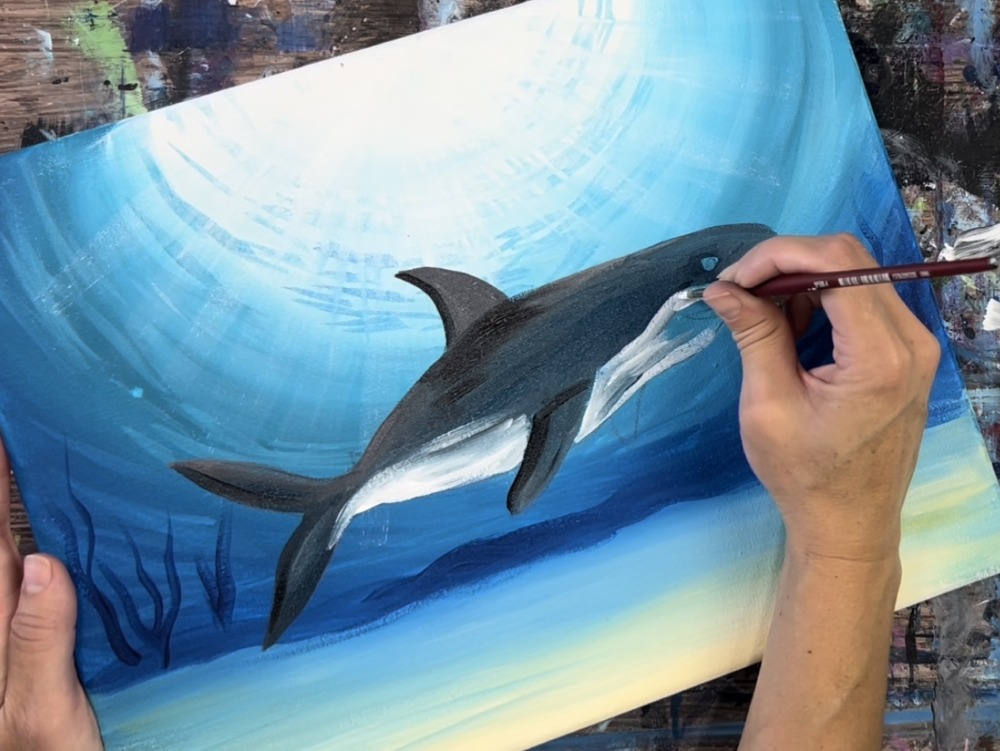
Add small amounts of gray into the white area but try not to make this area too dark. It should be much lighter than the top dark gray area of the shark.
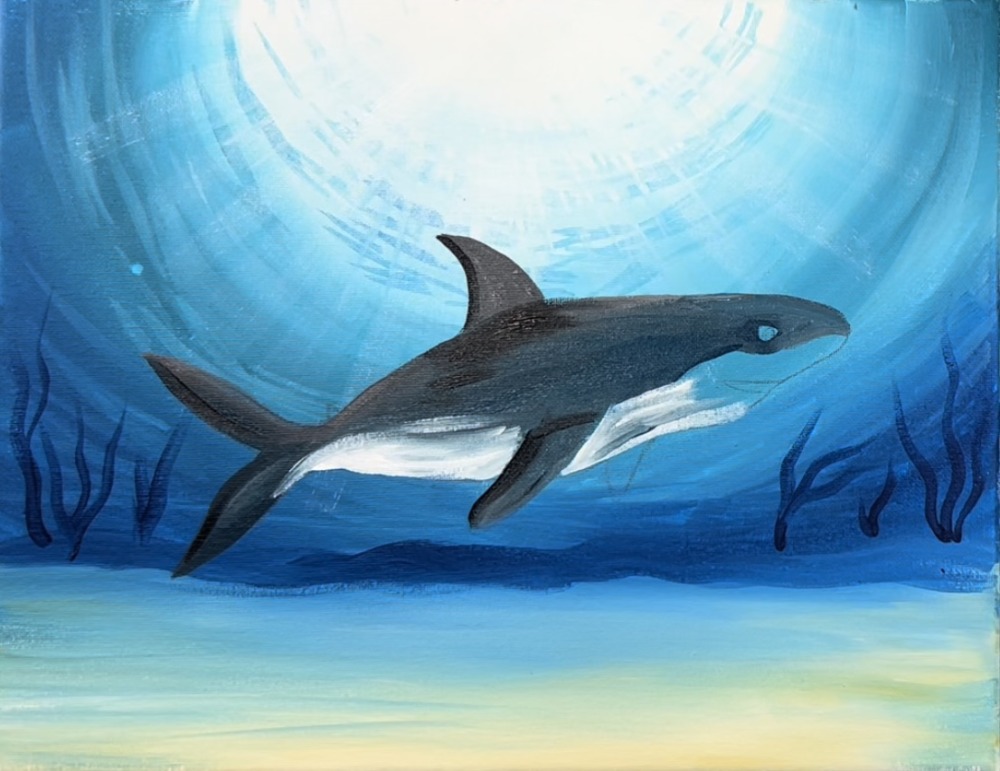
Blend the division of the white and dark gray in so the two colors sort of mesh together. If your dark gray has dried, you can mix a light gray and add that to the top of the white part and blend it down.
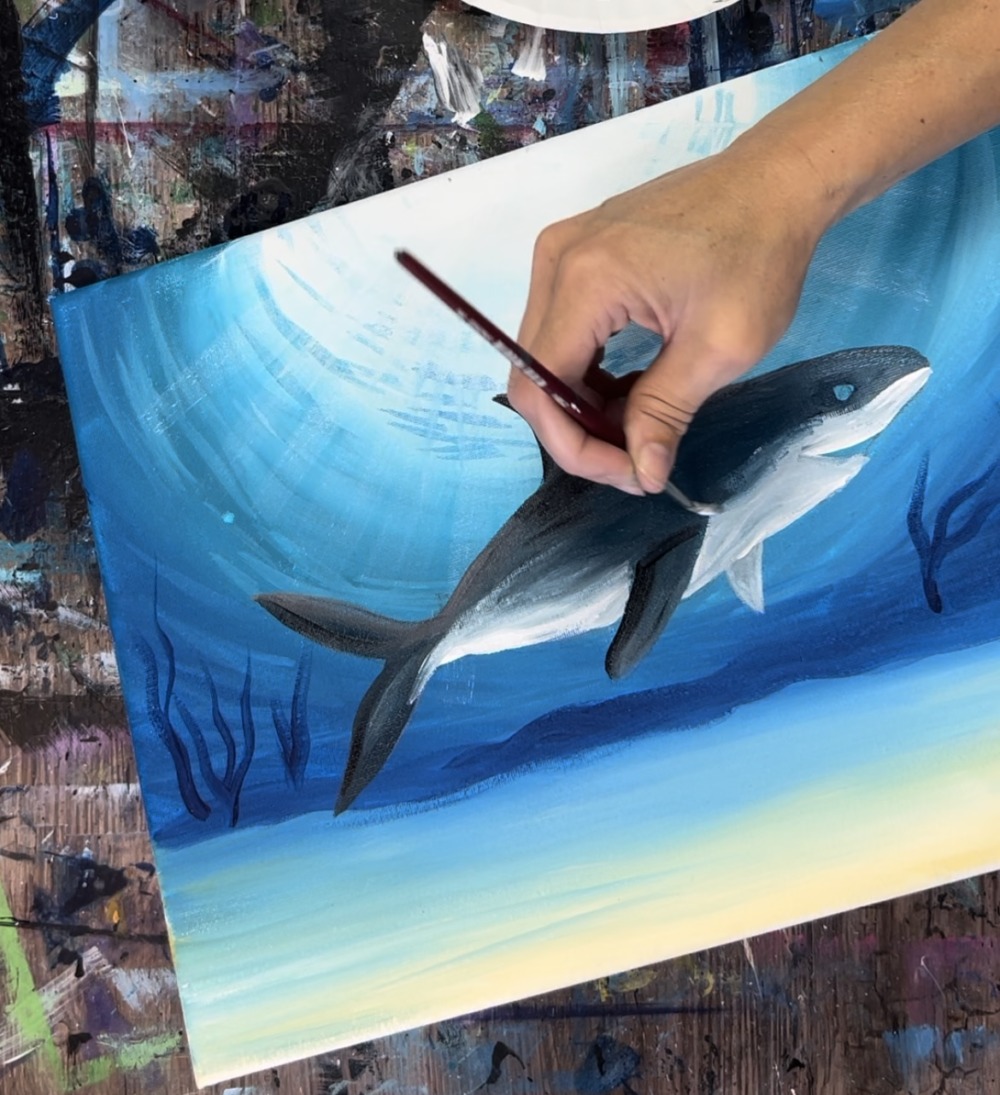
Then add some small white highlight marks on the top right part of the dorsal fin. Load you brush in just titanium white and paint small white marks on the top of this area to represent the reflecting water on the shark’s back.
Highlight the back to the left of the dorsal fin and highlight the top part of the tail fin.
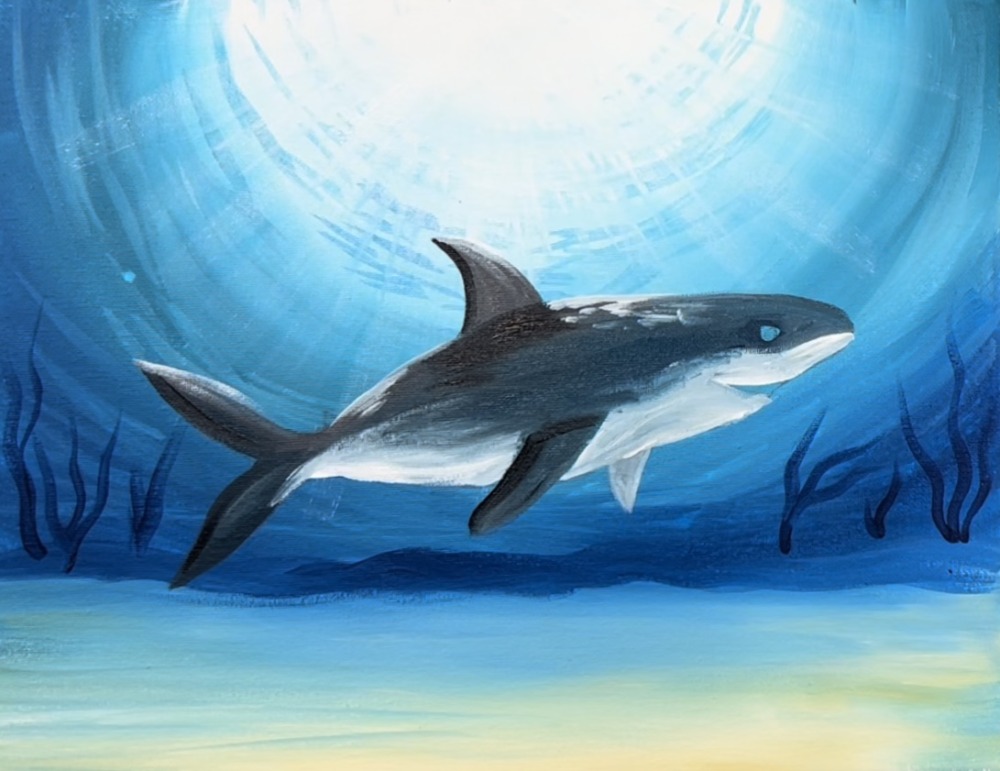
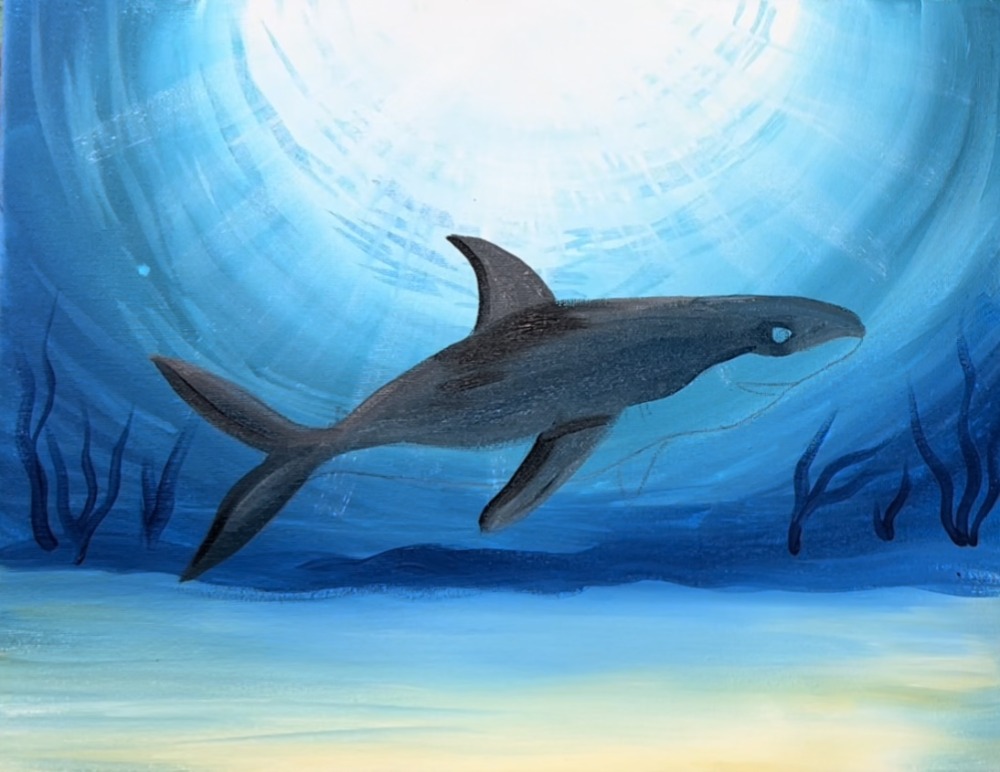
6. Paint eye, mouth and gills
Next, use mars black on the tip of your #4 round brush to paint the tiny circle of his eye solid black. Then paint his mouth. This is a triangular shape. Tip: you can also try using a tiny round brush, toothpick or black paint pen for these small details.
Then use a #4 round brush to paint the gills. Paint four squiggly/vertical lines to the right of the pectoral fin.
Paint a tiny second dorsal fin to the right of the tail with gray.
Then paint the shark eye white part. Load a tiny amount of titanium white on your brush and paint a tiny dot on the right part of the black circle. Then paint a white curve on the left part of the eye.
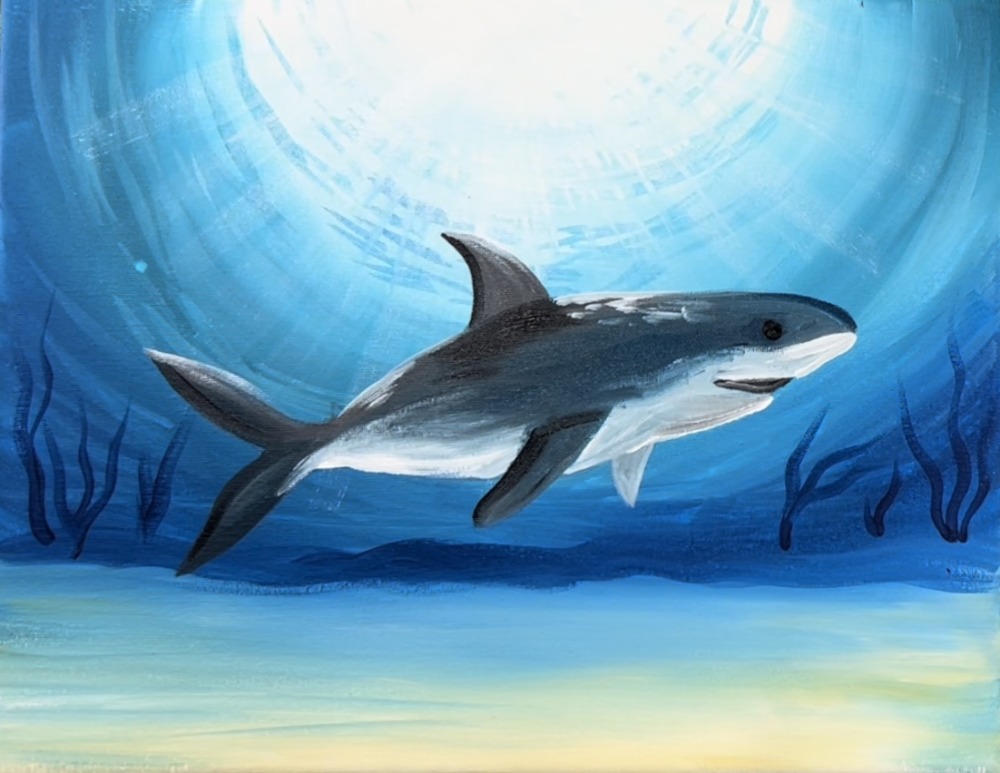
7. Paint Seaweed & Choral in front
Next, load your palette with hooker’s green hue permanent. You will use this color in painting the seaweed. Mix a very tiny amount of mars black with the green on your palette to make the green darker. Then use your #4 round brush to paint a wavy long vertical line on the bottom left.
Next, paint the leaves of the seaweed. Paint the leaves so they are swaying to the right. Use variations of green by mixing some black in the green to make it darker and some Naples yellow into the green to make it lighter.
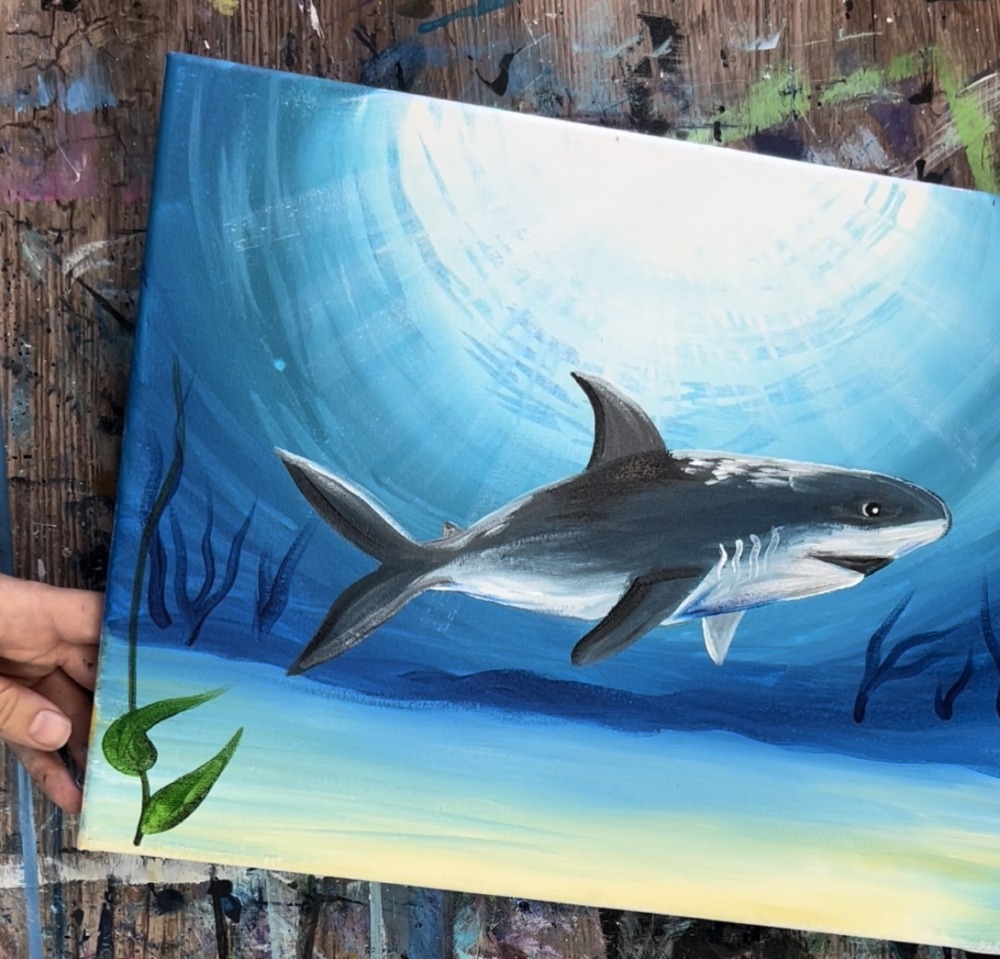
Paint several leaves attached to the middle stem piece. Blend the colors on the canvas so that the greens vary with lights and darks (using black and the Naples yellow).
Repeat this on the right with another strand of seaweed. I made this one a little shorter.
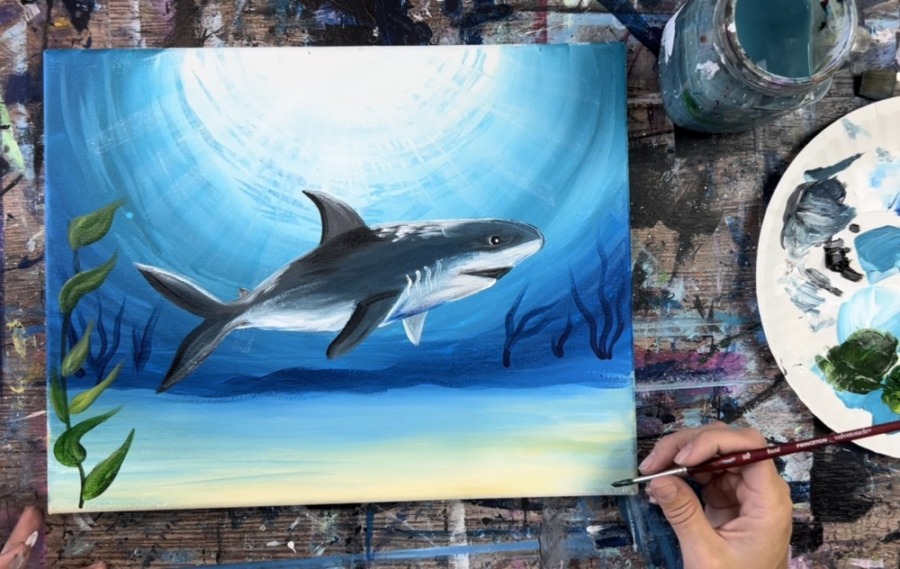
Paint multiple leaves that sway gently to the right.
Then paint another set of seaweed on the bottom left of the painting. Use a variety of greens that were mixed on your palette. Paint loose wavy lines going in a vertical direction. This can slightly overlap the tail if needed.
Then paint the coral. Use medium magenta to loosely paint the shape of the coral. Paint a small oval opening and then columns that gather together.
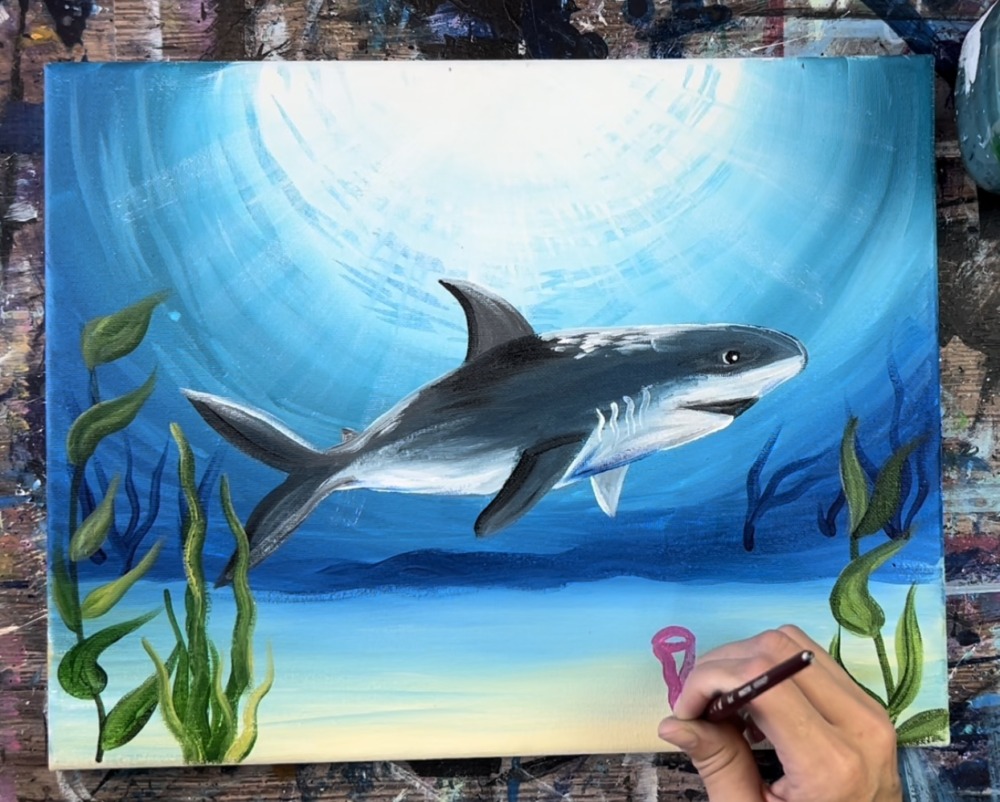
Then paint the shape of the coral in.
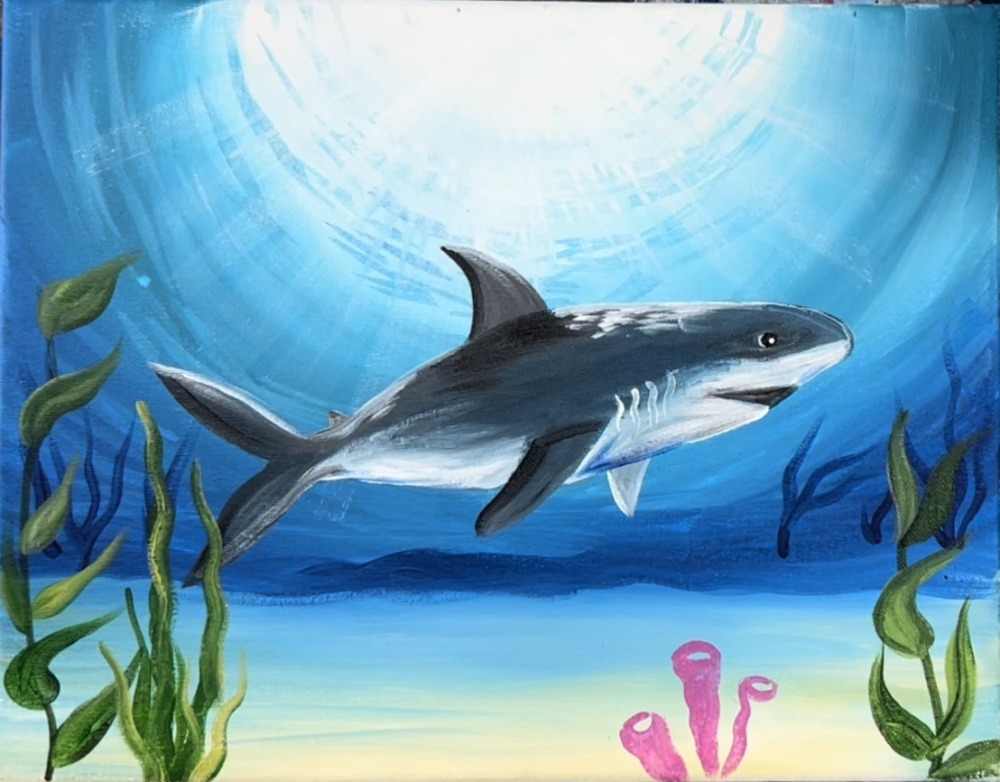
Then paint the opening with phthalo blue (or black).
Loosely paint the shadow on the right side of the coral with phthalo blue. Then paint little white dots on the left side.
You can add more seaweed, coral or even a starfish or extra fish if you want!
8. Paint school of fish
Paint the school of fish using phthalo blue. Slightly water the blue down so that it is thin. Use your #4 round brush to paint the body of the fish (a simple oval shape). Then paint the tail of the fish.
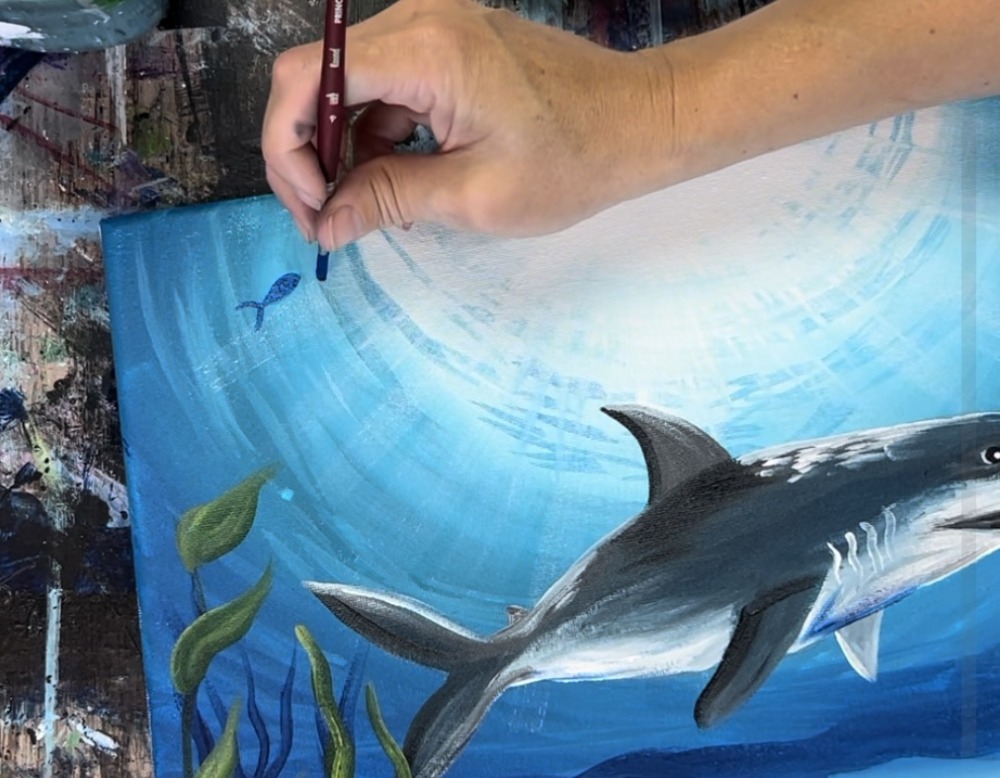
Each fish gets gradually smaller to the upper right and then much larger to the left.
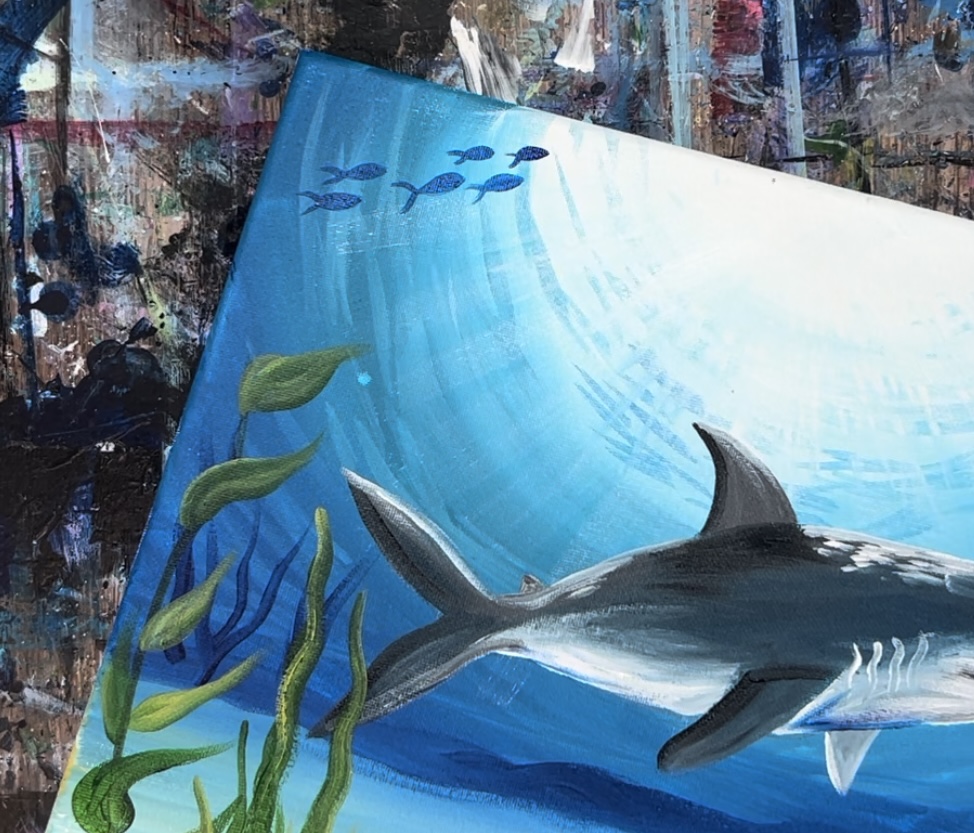
Some of the fist further in the distance may be just little dots with no visible tail because they are so far away.

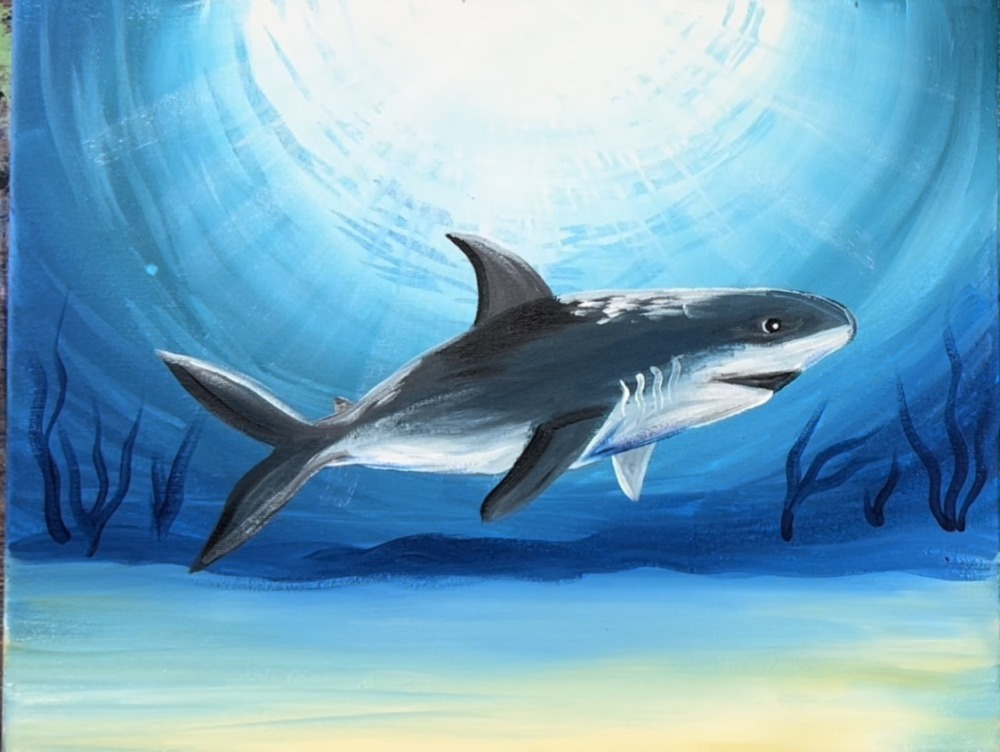
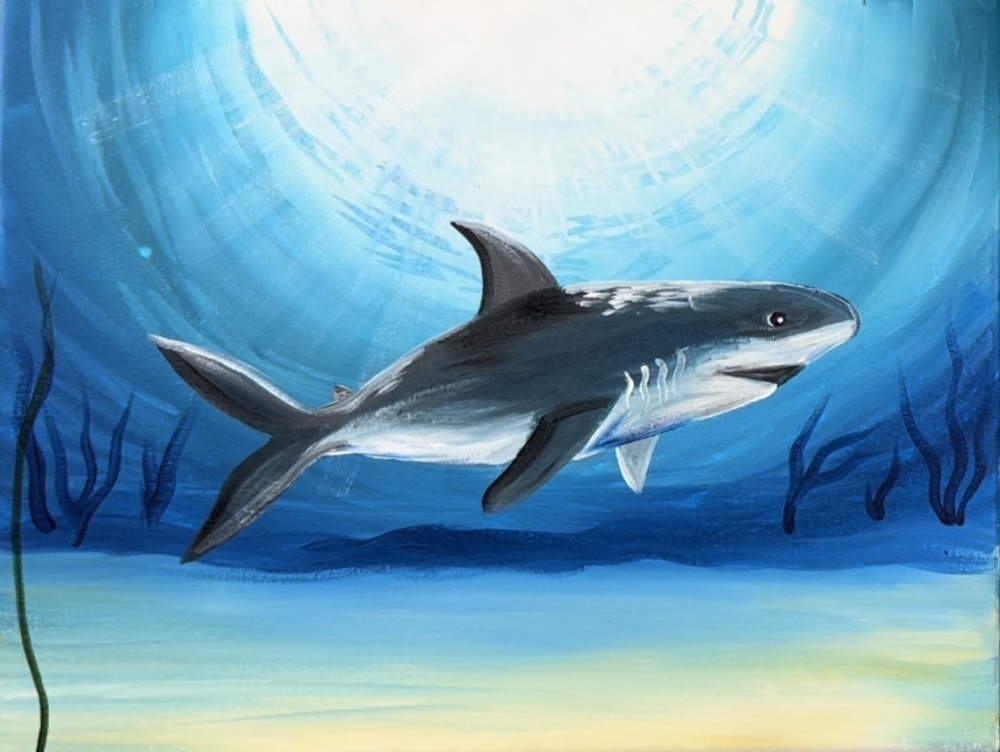
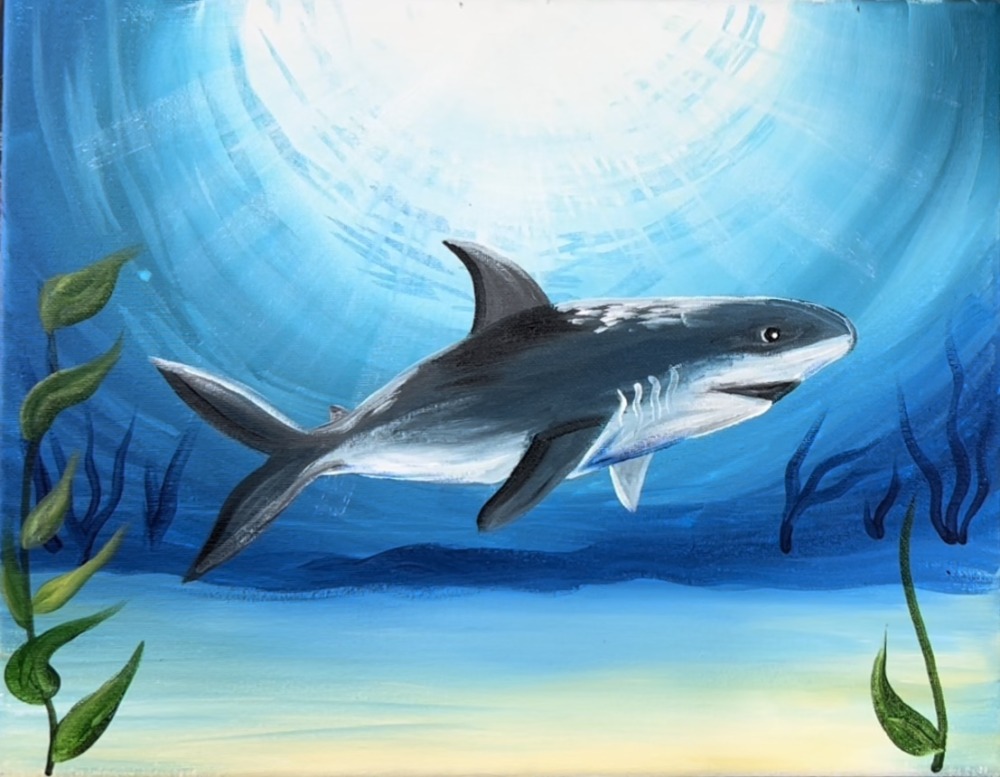
Finished!

Share Your Art Here


