
Would you like to save this?
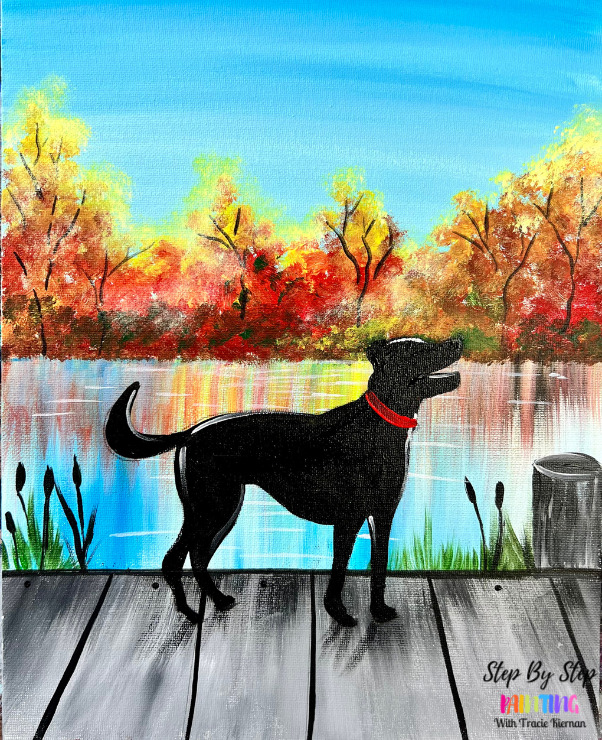
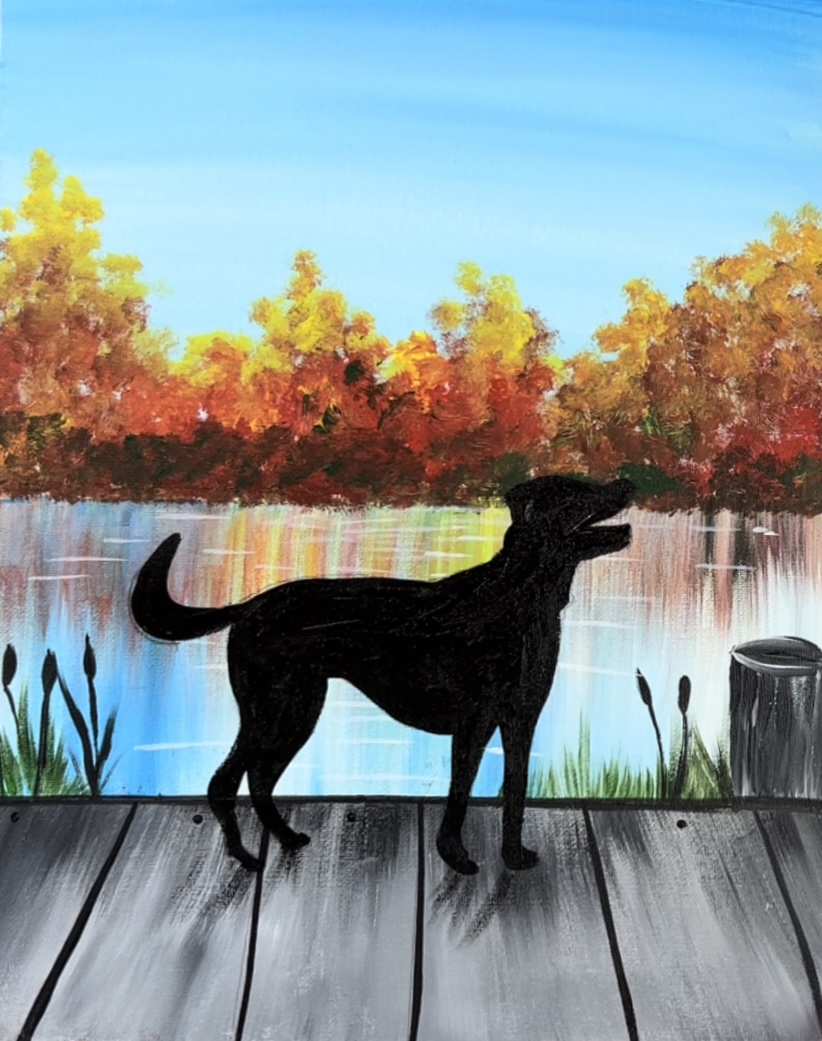
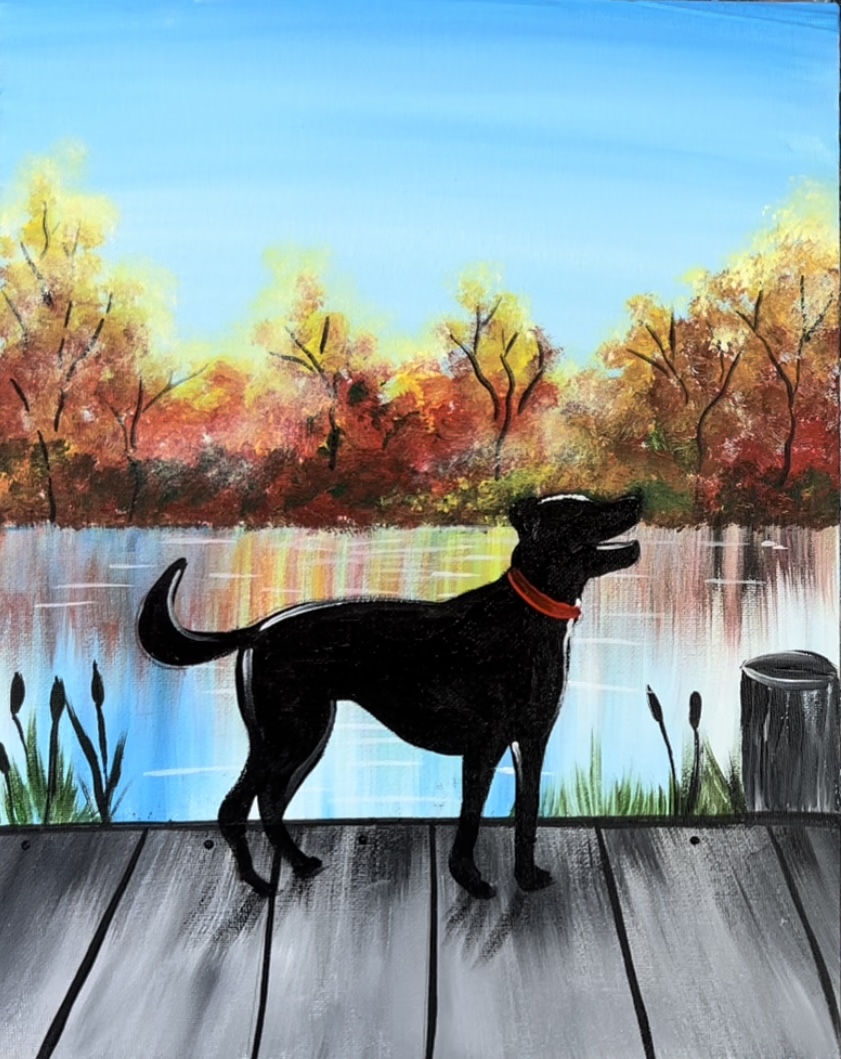
This tutorial demonstrates how to paint a colorful fall lake next to a pier and a silhouette of a dog!
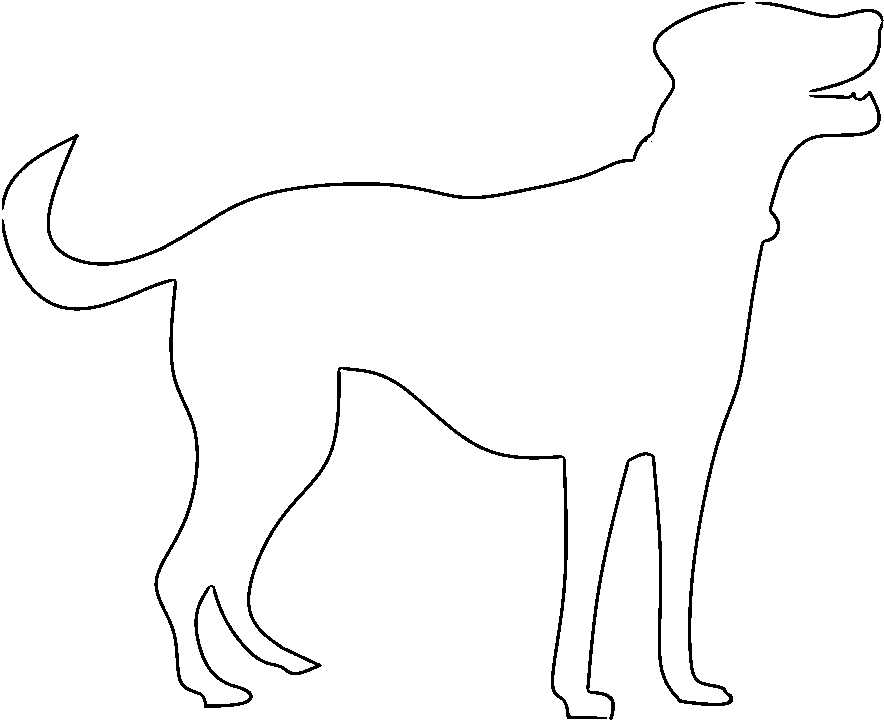
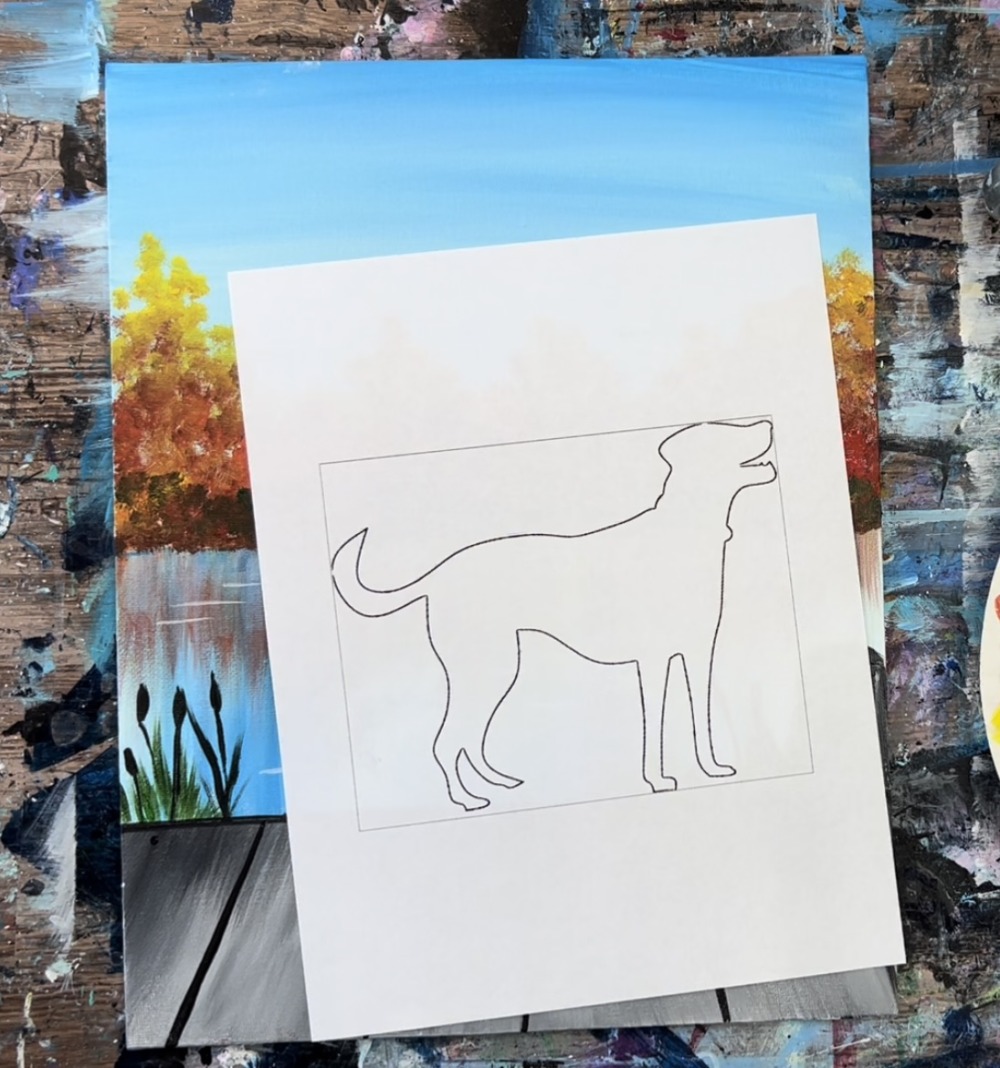
I am going to be providing you with the dog template as well as a few other dogs you can choose from to customize this painting. Also, I’ll let you know where you can find other dog templates!
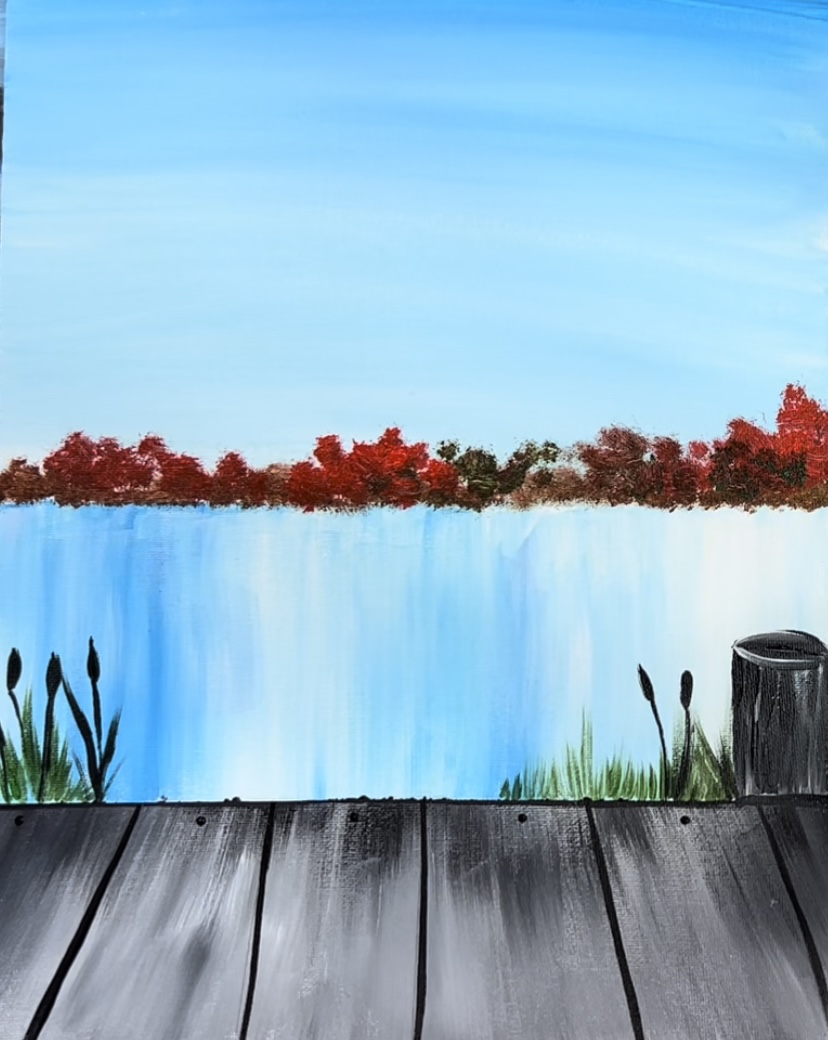
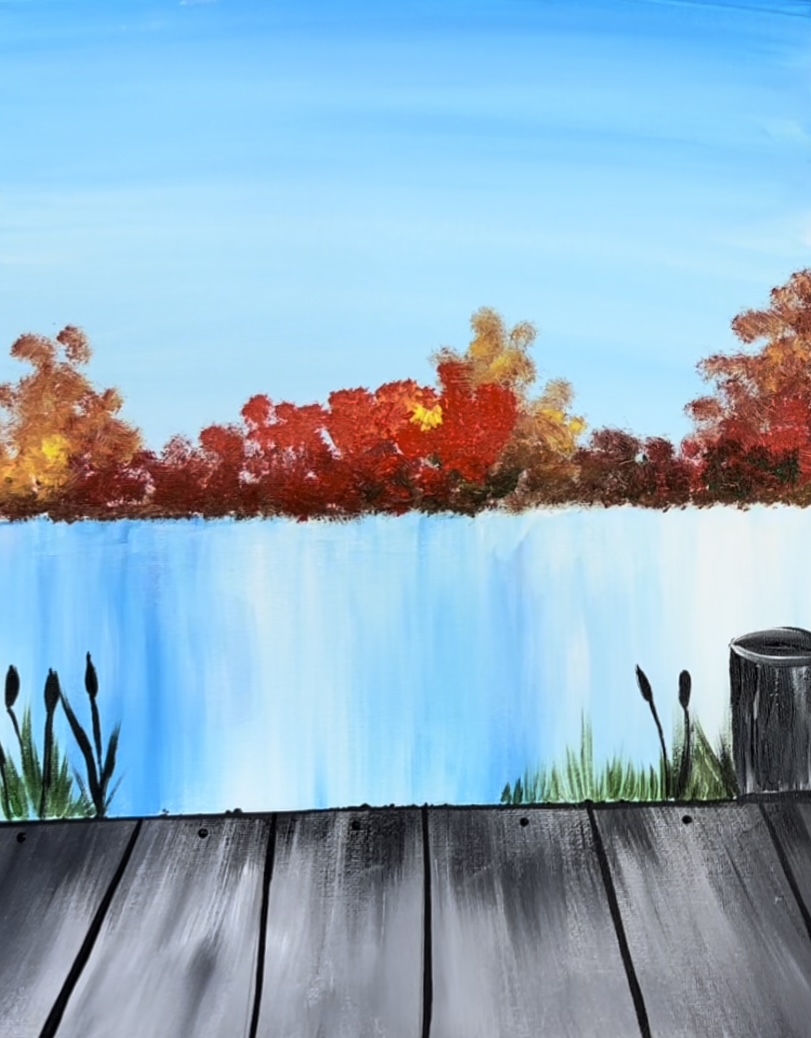
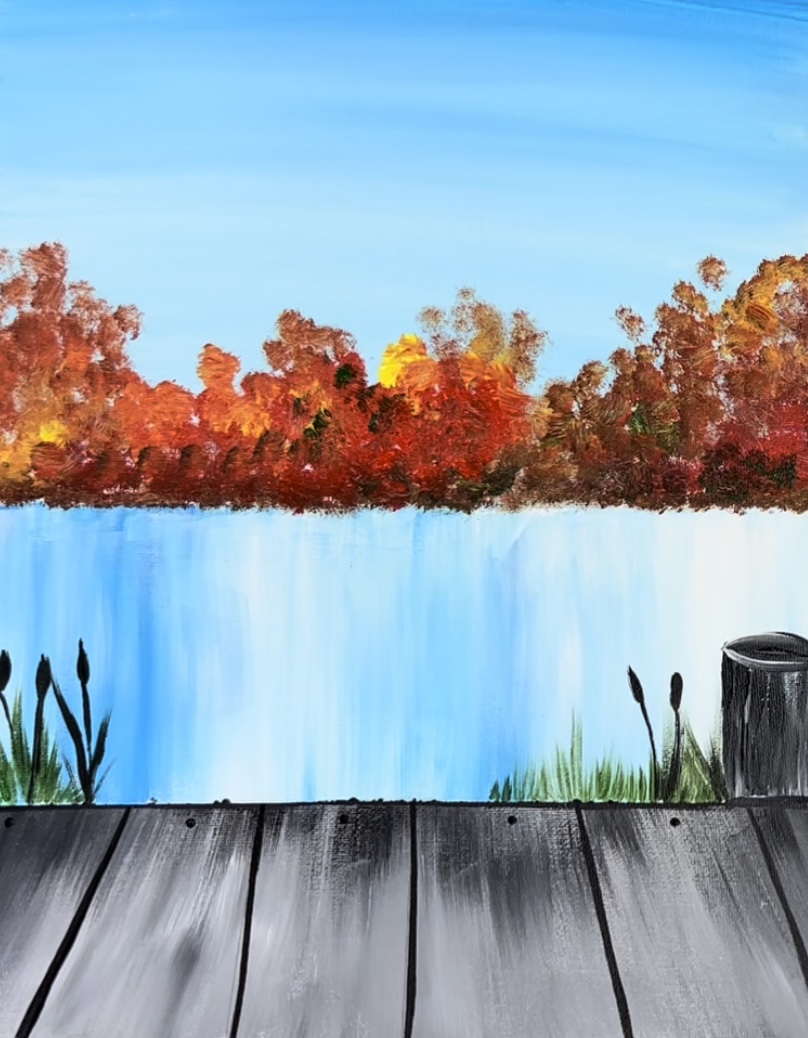
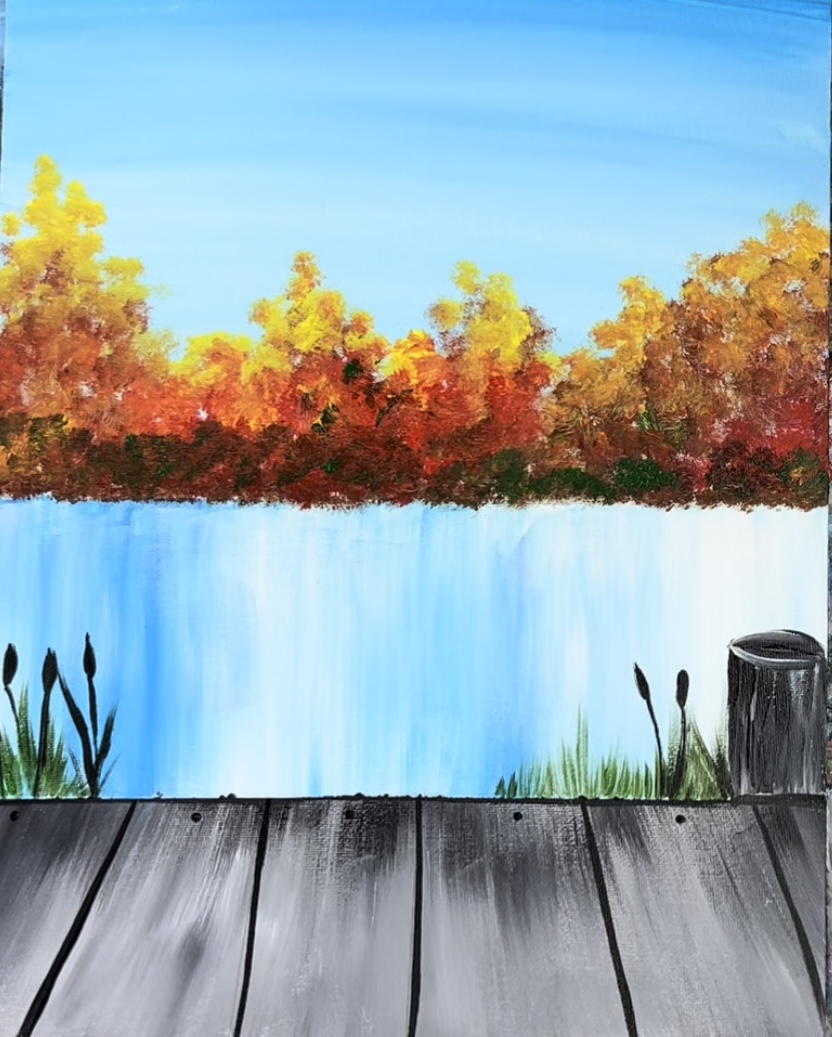
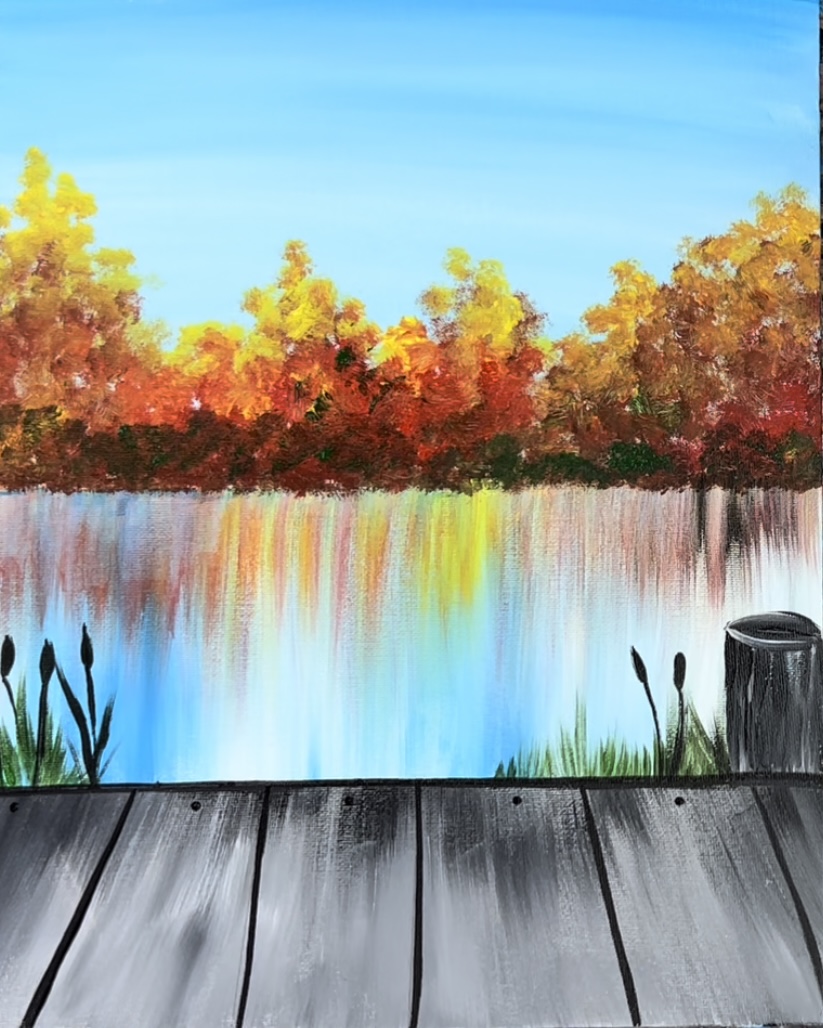
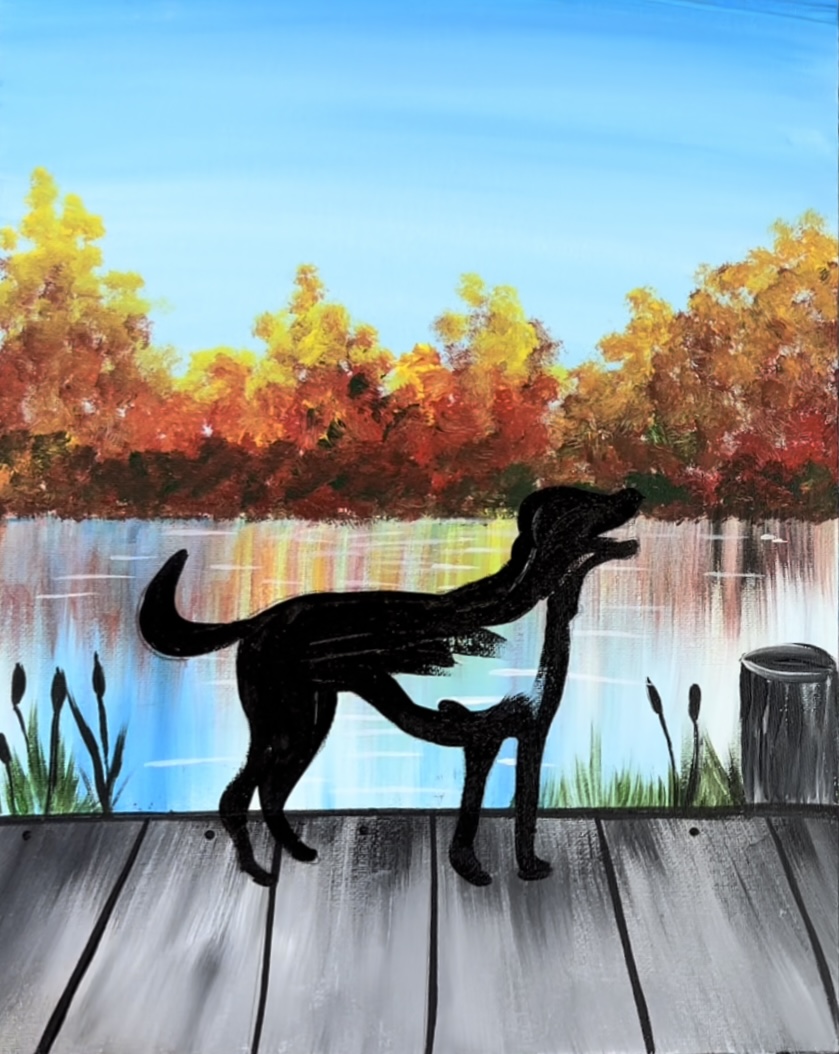
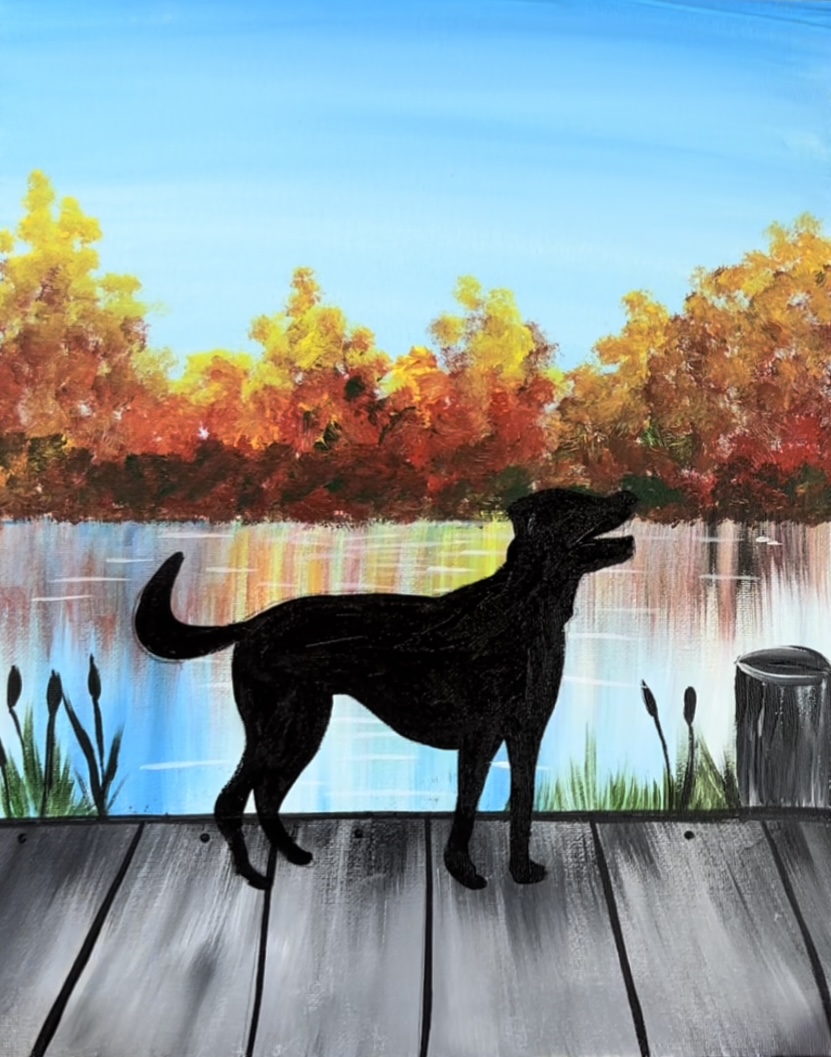
I love the colors in this painting! The lake is titled “Rainbow Lake” because it can be a memorial painting for a beloved pet much like a rainbow bridge painting. I kept the dog as a silhouette in order to simplify things.
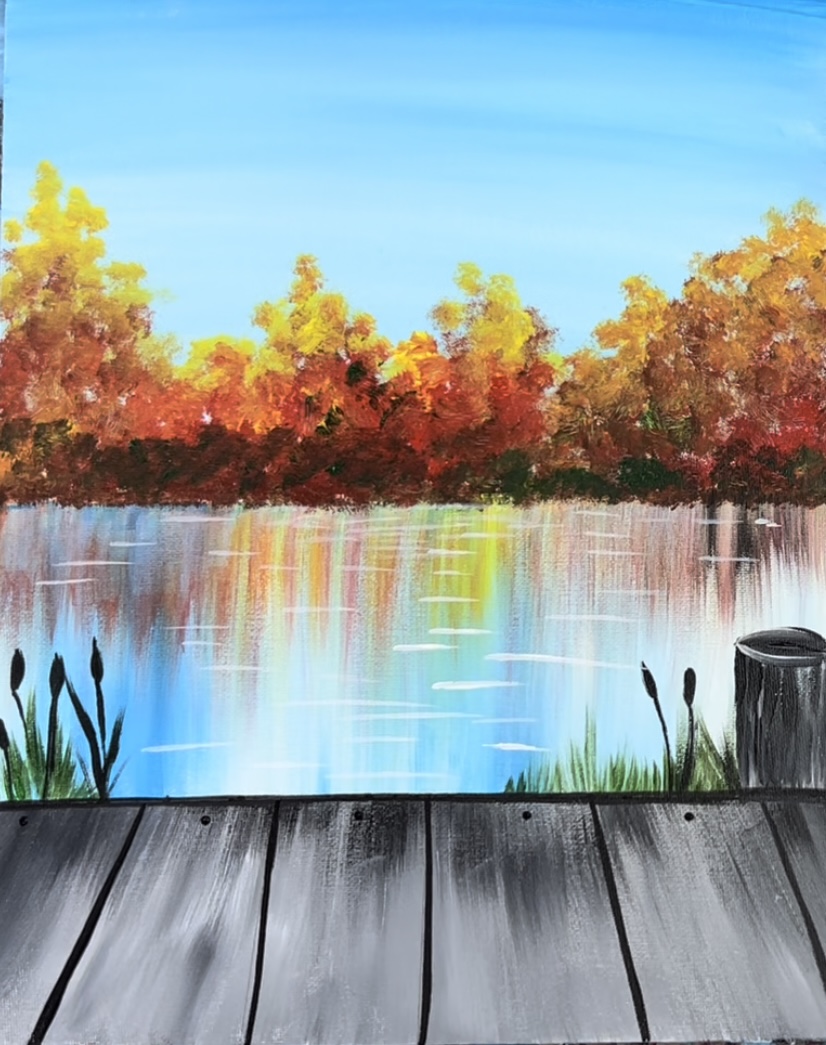
You can also do this painting without the dog! Paint a simple landscape/waterscape painting with a dock!
Enjoy and happy painting!
Materials
Rainbow Lake With Dog Painting Tutorial

Learn how to paint a dog silhouette on a rainbow lake.
Materials
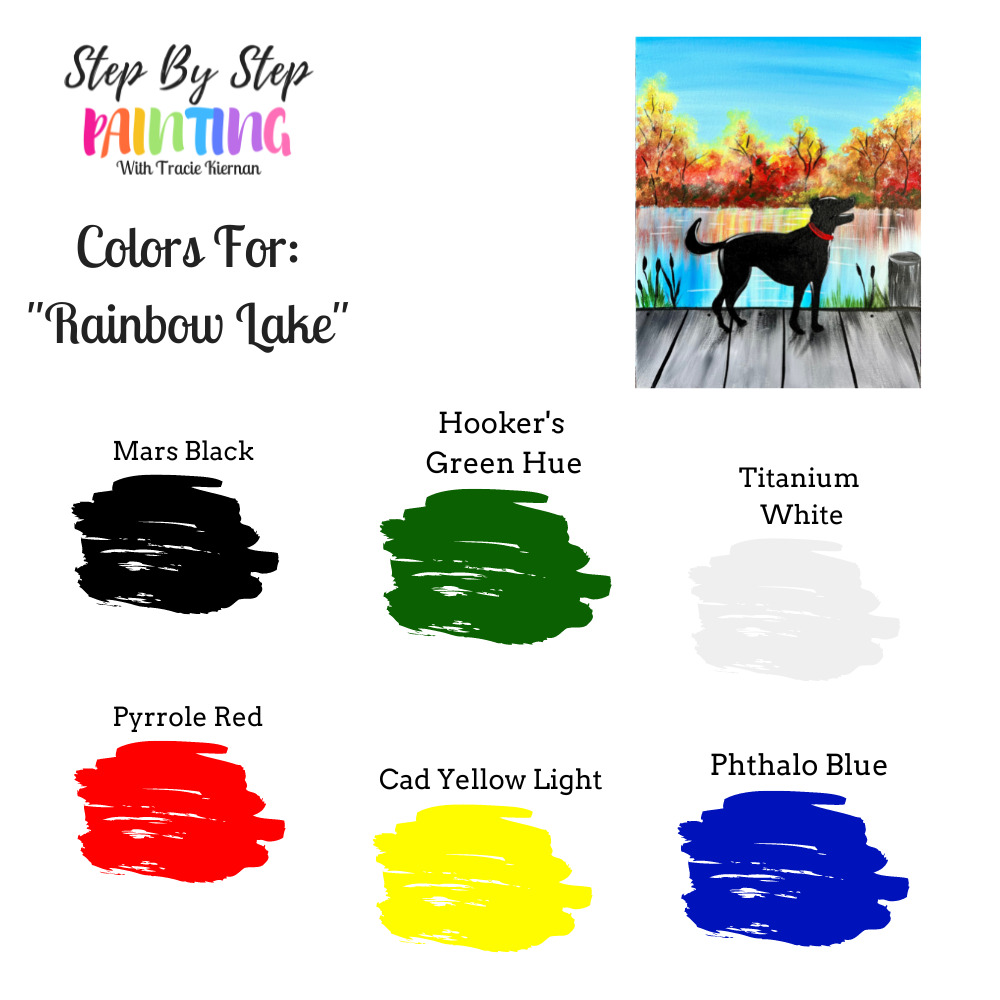
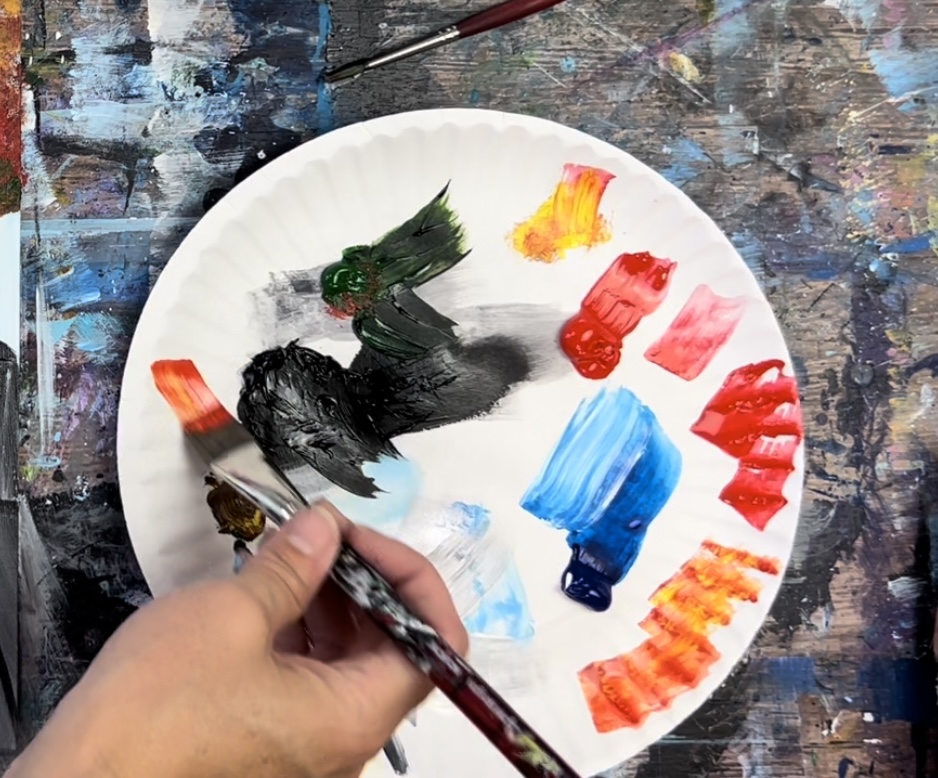
Colors
- Titanium White
- Mars Black
- Cadmium Yellow Light Hue
- Pyrrole Red (or any red)
- Phthalo Blue
- Hooker's Green Hue Permanent
Brushes
- 3/4" Flat Brush
- #4 Round Brush
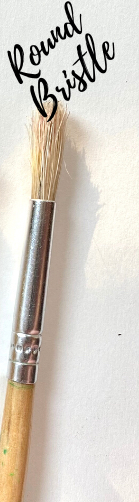
- Round Bristle Brush (AKA Stencil Brush)
Color Palette
Using Craft Paints?
If you are using craft paints such as Apple Barrel Craft paints, I recommend subbing to these colors:
- Black
- White
- New Shamrock
- Flag Red
- Bright Yellow
- Bright Blue
Traceables
These templates were found on Pixabay.com! That is a royalty free image library. There are many dog silhouettes that can be found there.
To create the outline of the template, I used the Rapidresizer.com software to transform the silhouette to an outline. Rapidresizer.com is an online software that allows you to upload an image and create a traceable template for it. It also lets you resize templates.
You can also print the silhouette as it is but I wanted to save printer ink and create just the outline.
Here is that dog silhouette you can print and use! I also am providing a second type of dog to choose from.
Directions At A Glance
Video
Step By Step Directions
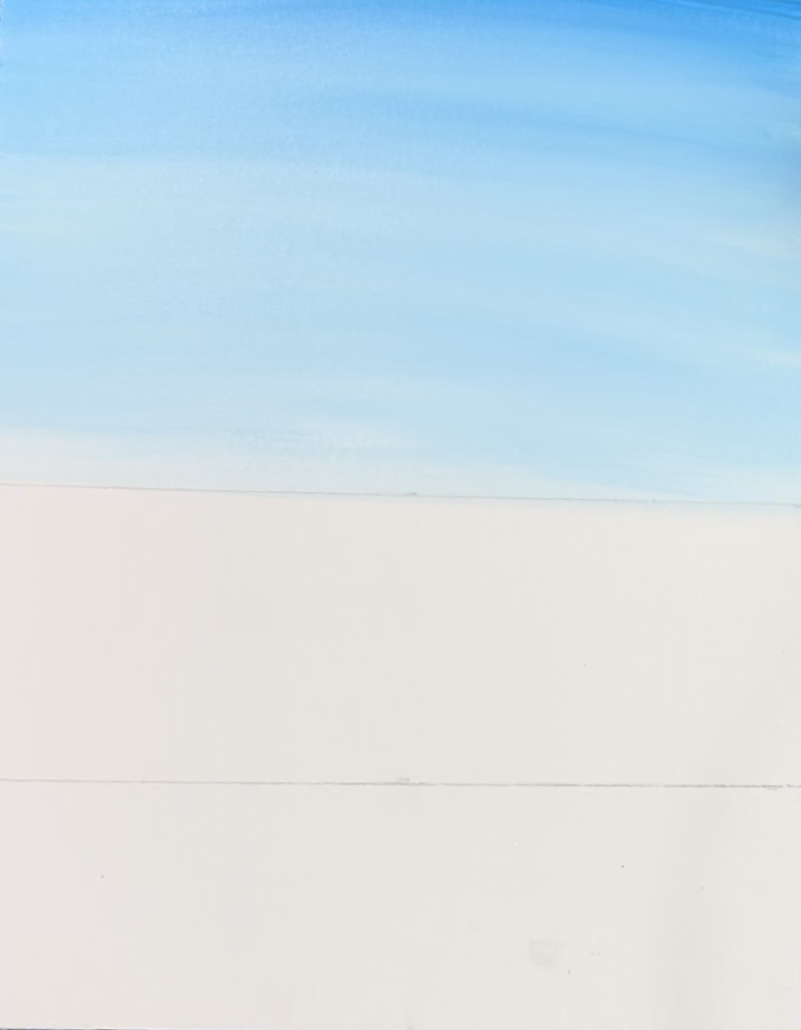
1. Divide Canvas Into Sections
Position your canvas so that it is vertical. Measure 3.25″ from the bottom and draw a horizontal line. This will be the dock line.
Then measure 7″ (the exact center of the canvas) and draw another horizontal line. This will be the horizon line (where the water ends).

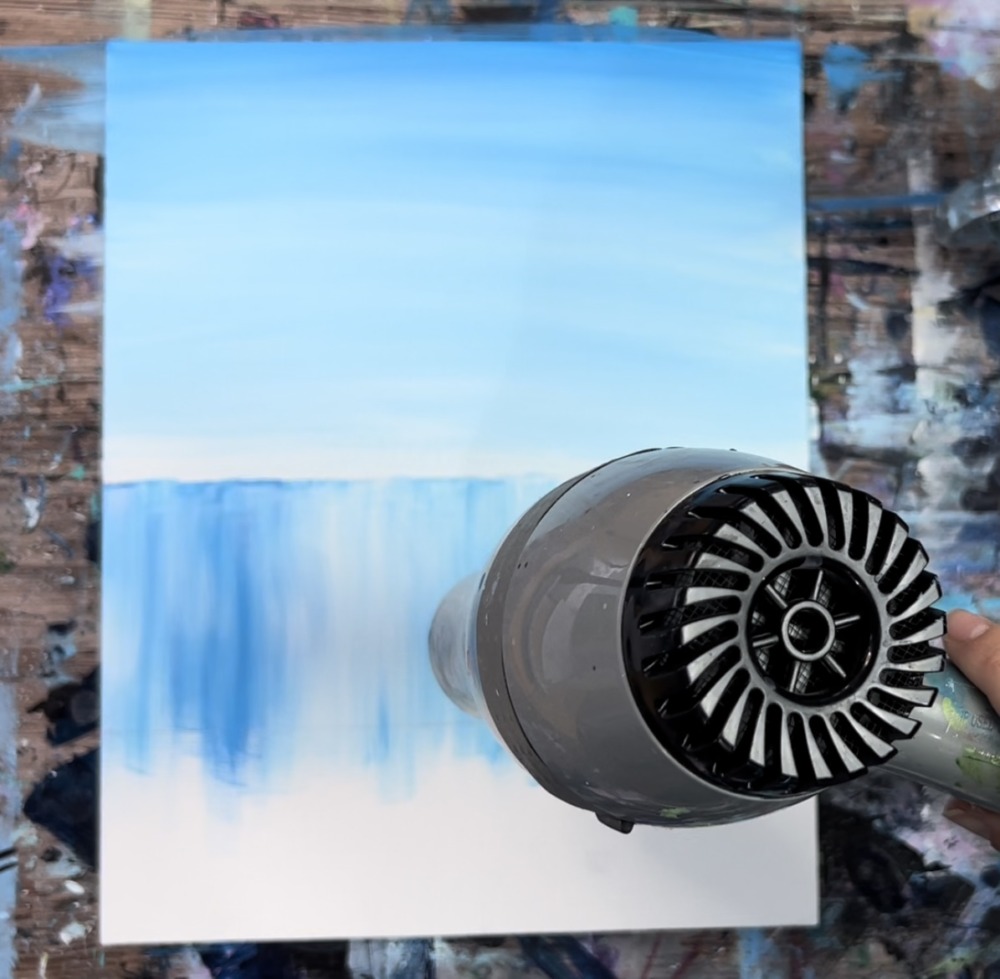
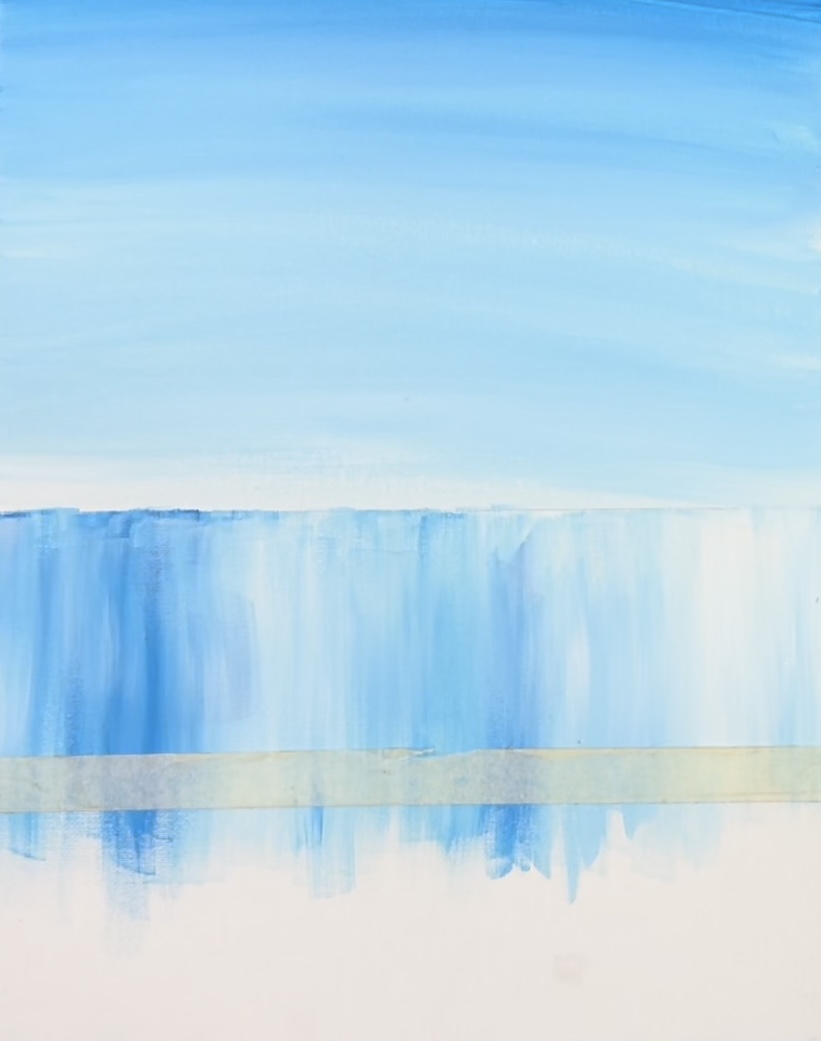
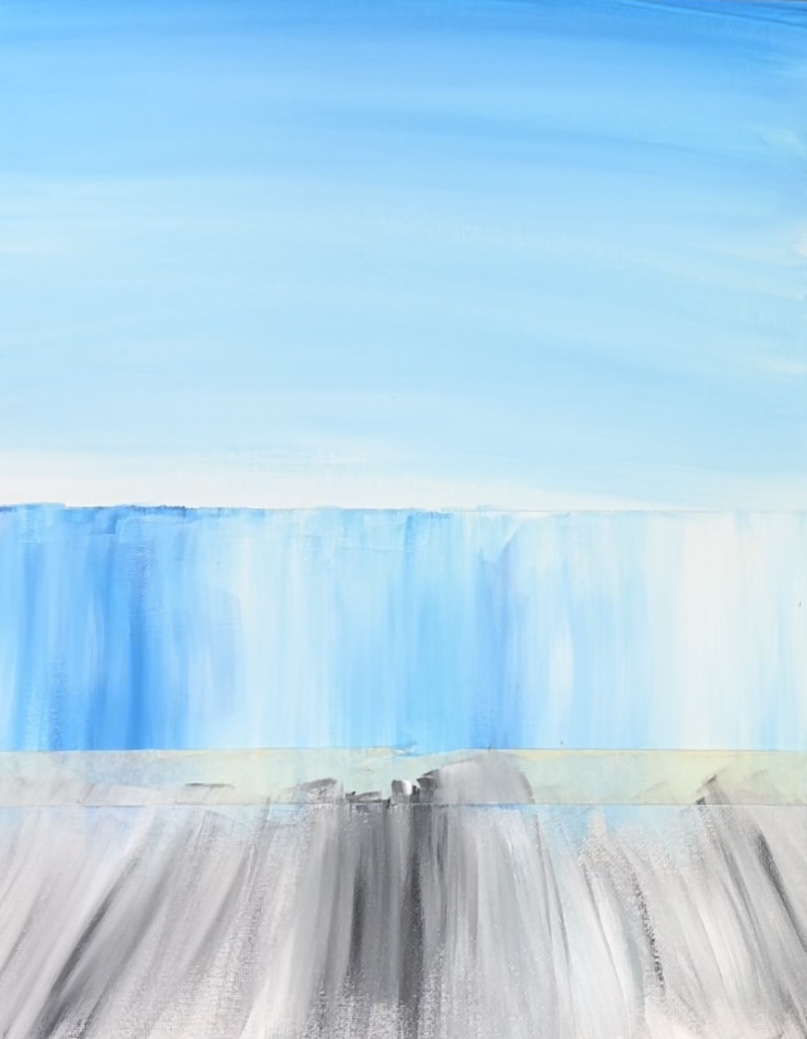
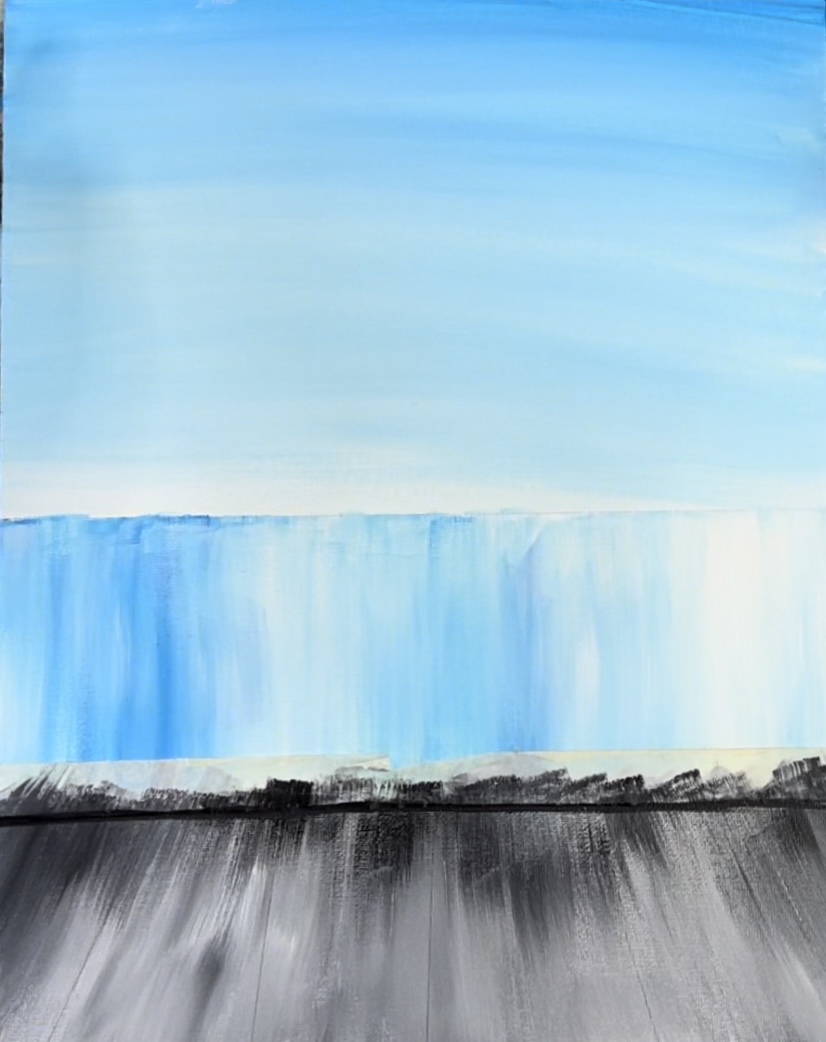
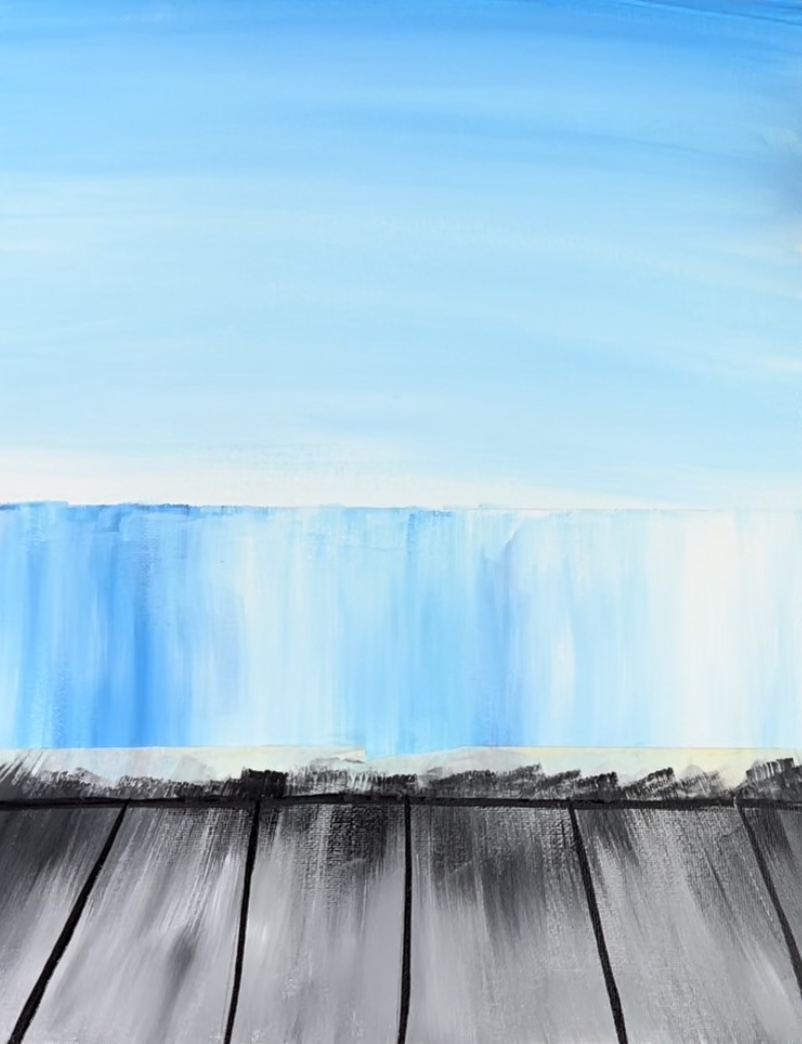
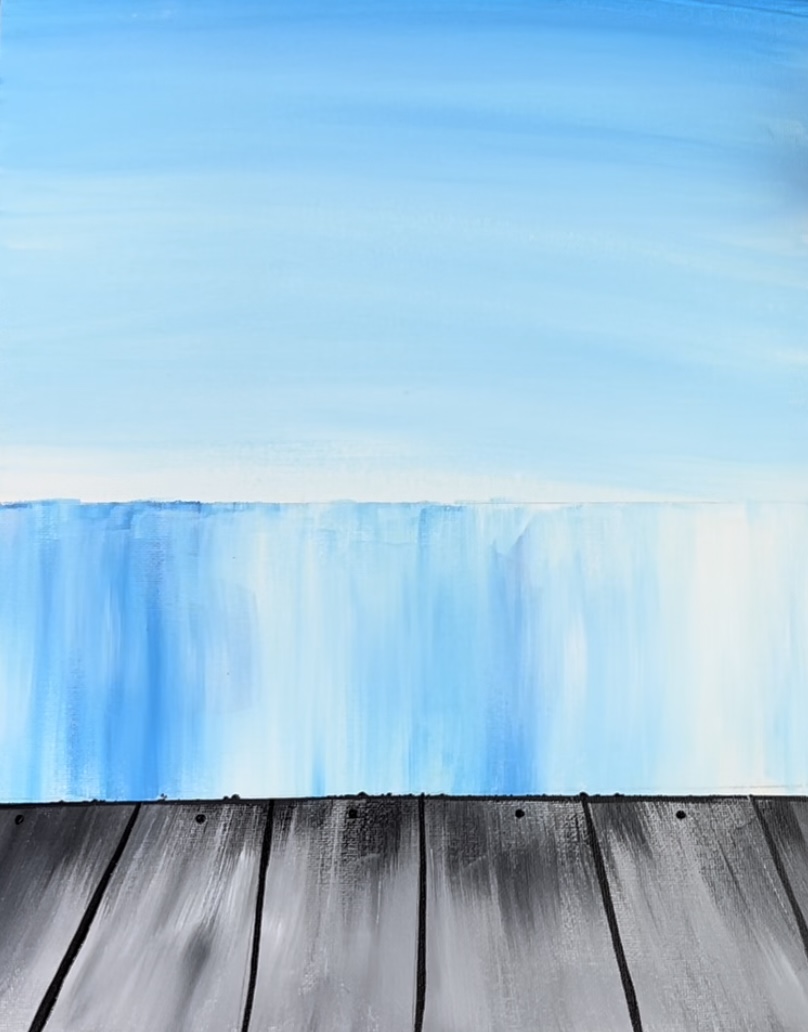
2. Paint Sky
The sky in this painting is a simple gradient of a medium blue color that slowly fades to a light blue as it approaches the horizon line.
Load your palette with phthalo blue and titanium white. Use your 3/4″ flat wash brush and double load it into both the blue and the white (equal amounts). Mix the two together on the palette.
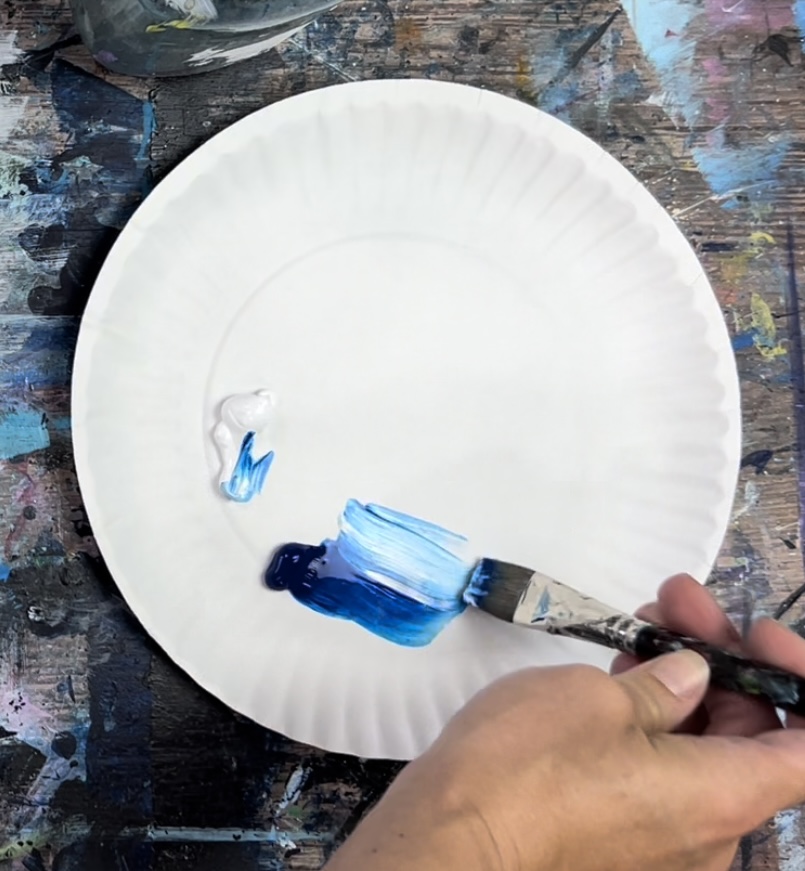
Then paint the sky. Start at the top with this medium blue color. Paint left and right strokes across the canvas using the full width of the brush. If needed, add a small amount of water into it to help it flow easier.
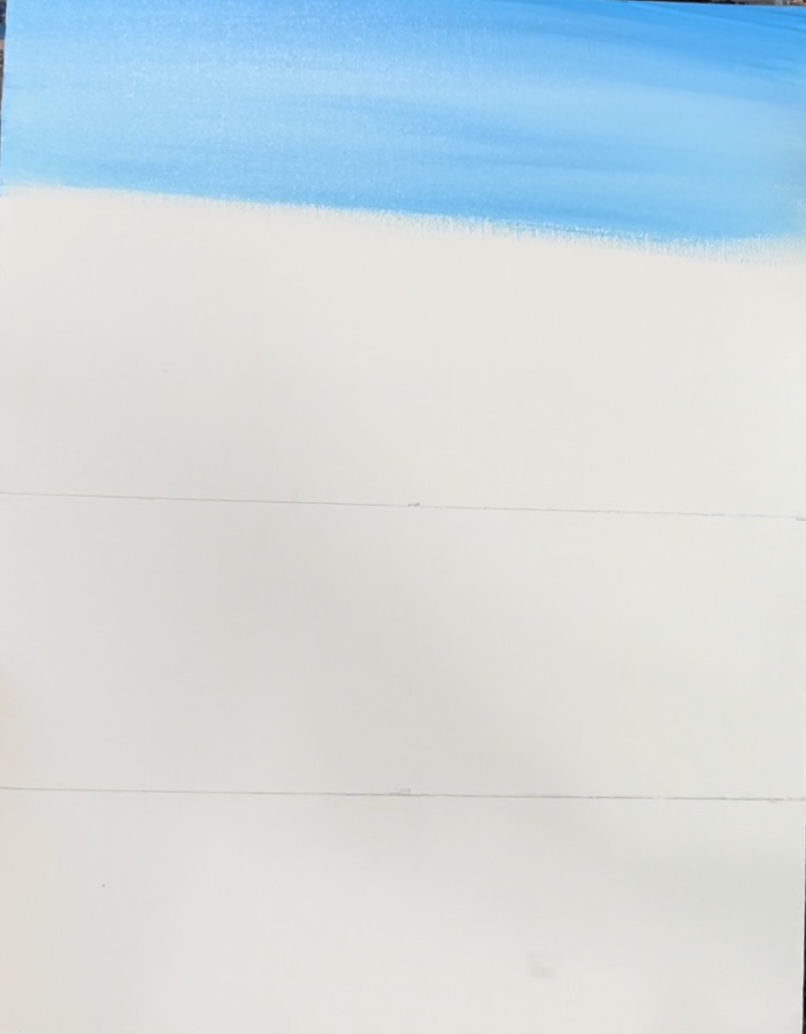
Then gradually add more white onto your brush. Continue painting the sky with left and right strokes so that the sky gets gradually lighter as you approach the horizon line.
3. Paint Water
The water in this painting is a blend of the same two colors you used in the sky. The technique is different. You will be painting vertical strokes instead of horizontal strokes. You also won’t be blending the two colors all the way together.
Rinse your brush. Then load it into titanium white and load the corners with phthalo blue. Paint vertical strokes.
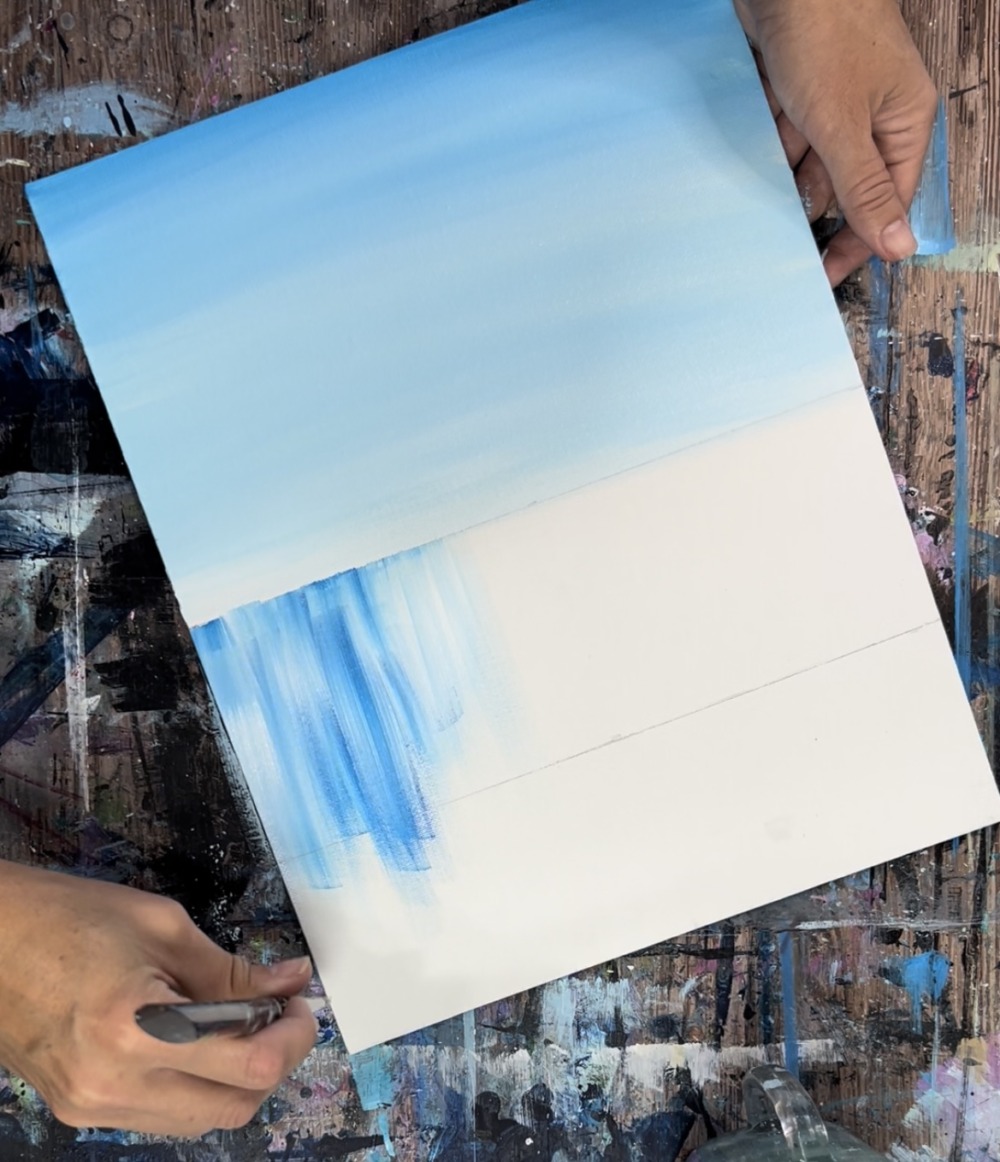
Add small amounts of water to the brush to keep the paint thin. Try not to over blend the colors. It should look like reflecting water.
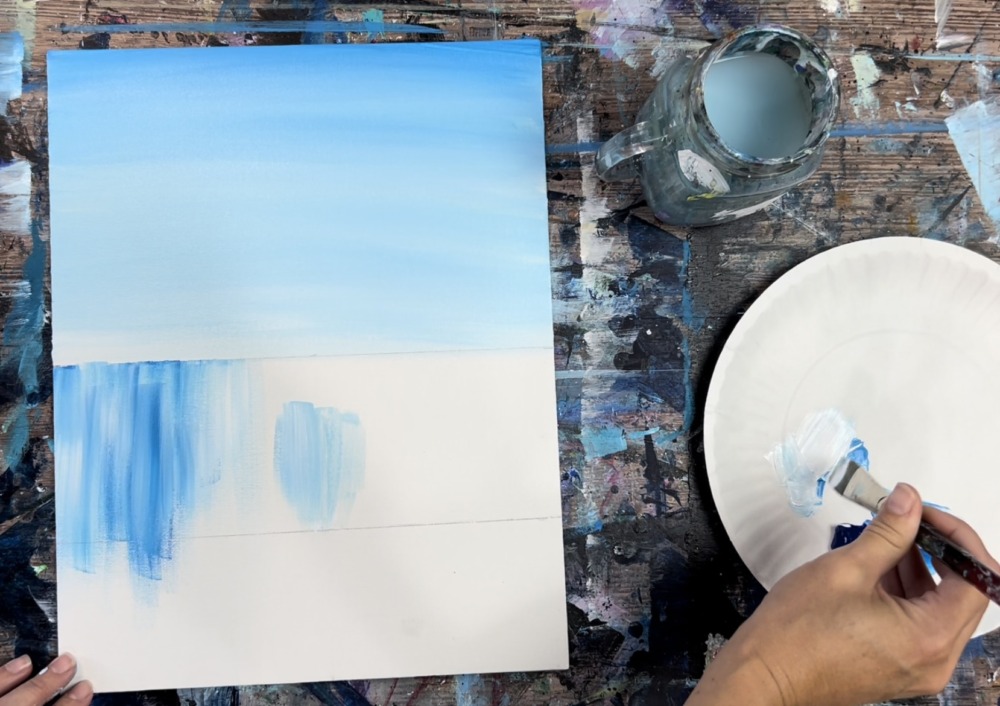
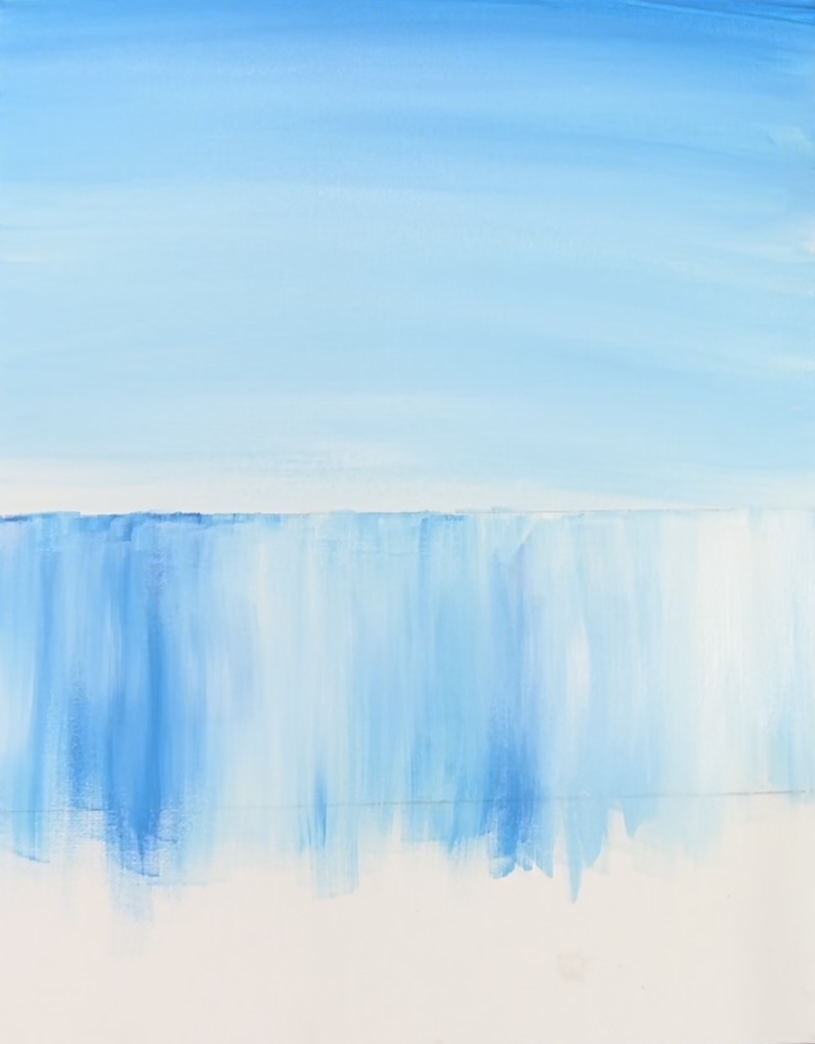
Next, dry the painting (or wait for this to dry) before going to the next step.
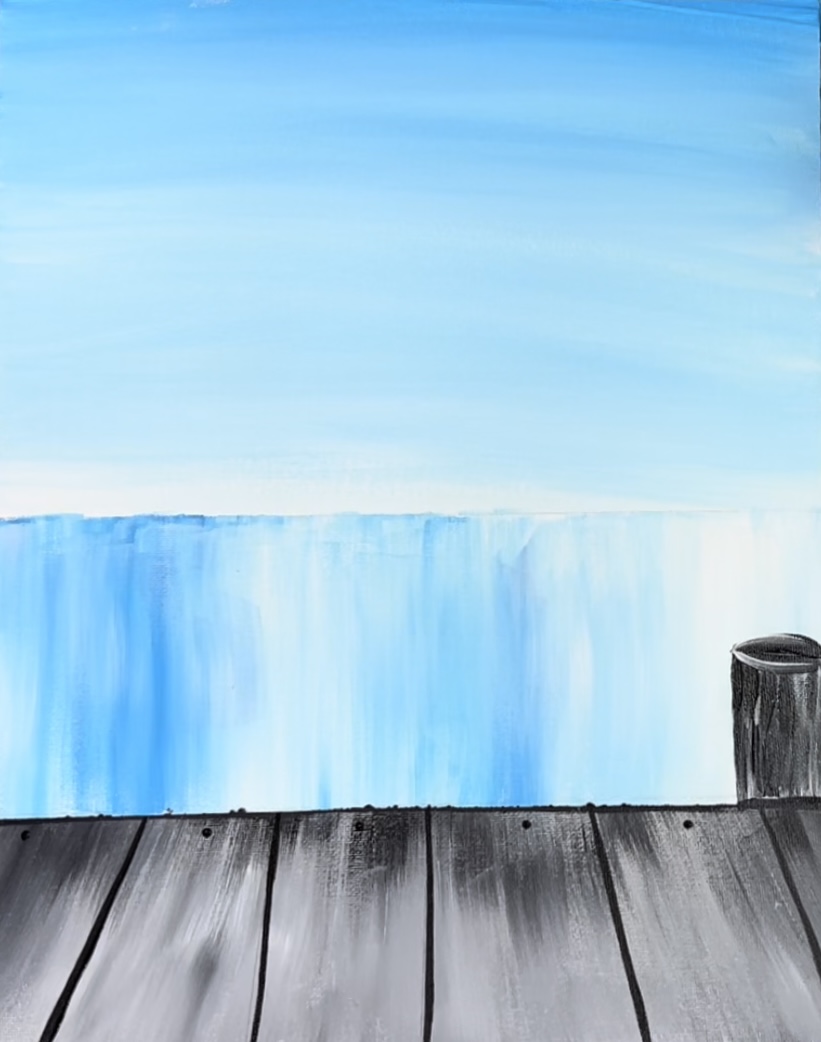
4. Paint Dock
The dock is done using a similar technique done in the water. The difference is that you are using mars black and titanium white. You are also changing the direction of your strokes to create “perspective” of the wood grain on your dock.
Mask the line that divides the dock and the water. Place a piece of tape just above the 3.25″ line.
Load your palette with mars black and titanium white. Load your brush in titanium white and load the corners in mars black. Start in the center of the dock. Paint up and down vertical strokes.
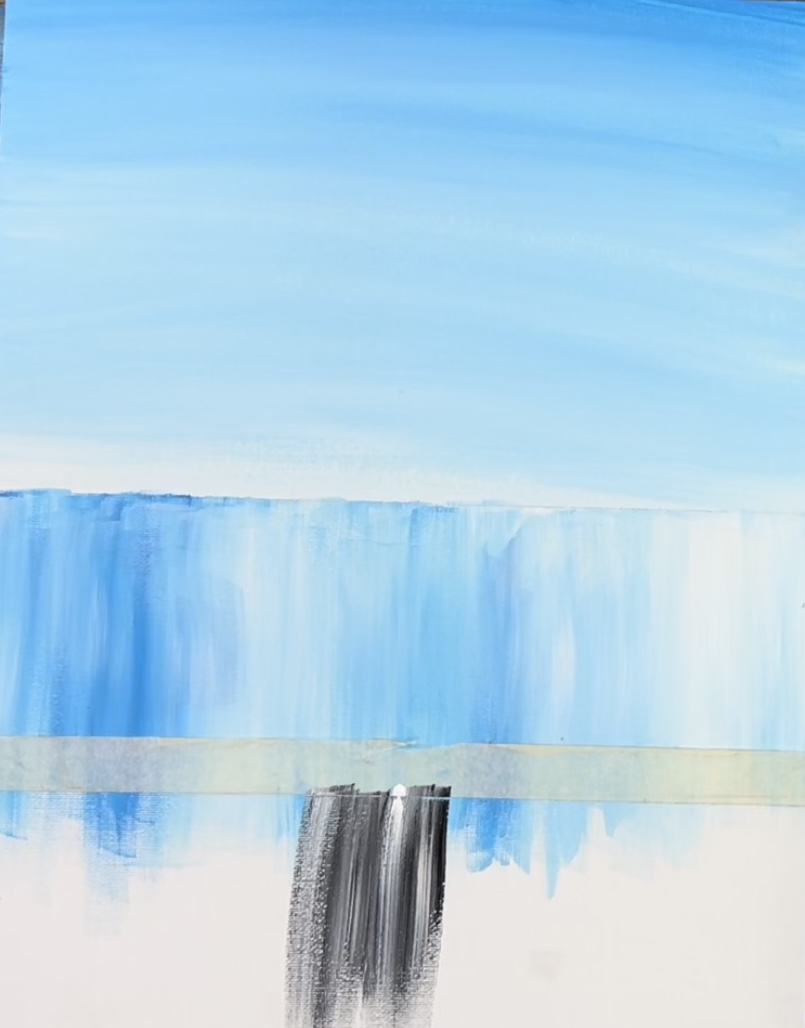
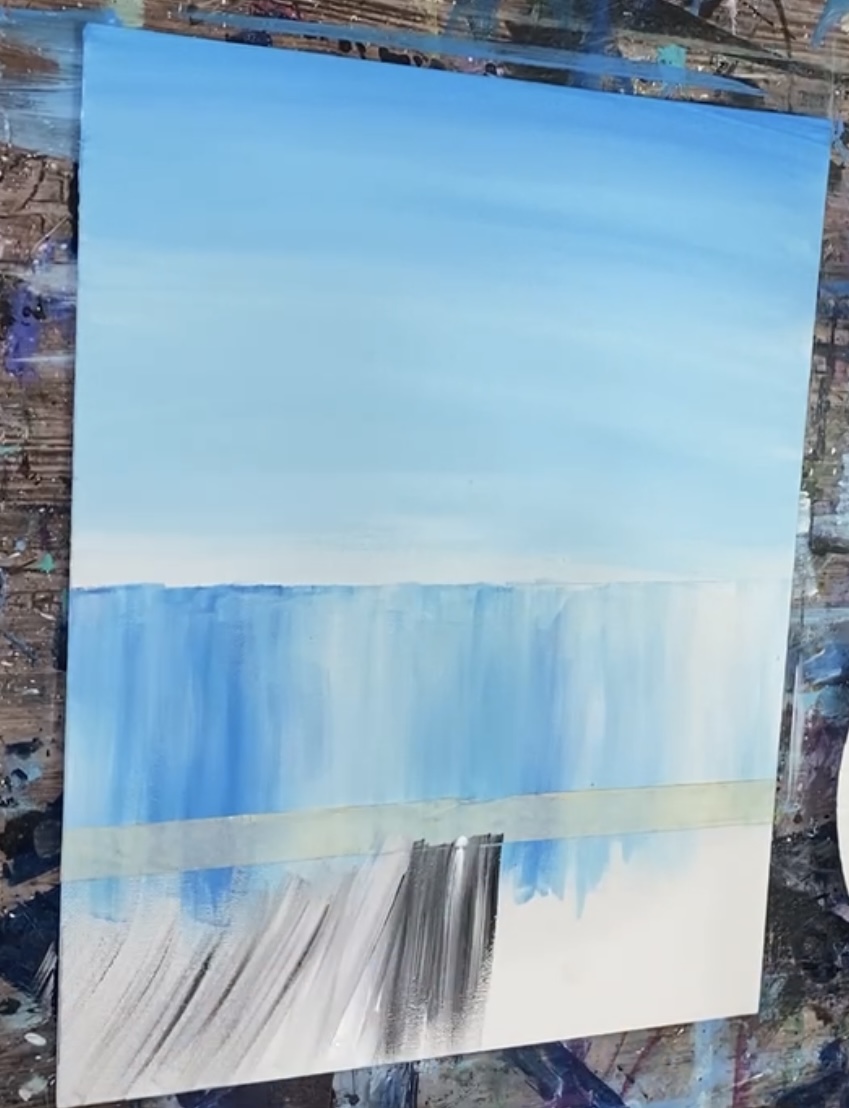
Then change the direction of your paint strokes so they go diagonal to the lower left on the left side and the opposite direction on the right side. The middle stays vertical and slowly sways to a diagonal direction as you go to the left or right.
Paint several coats on this area while gently blending the black and white. Keep a higher proportion of white to black so that the dock turns to a medium gray color.
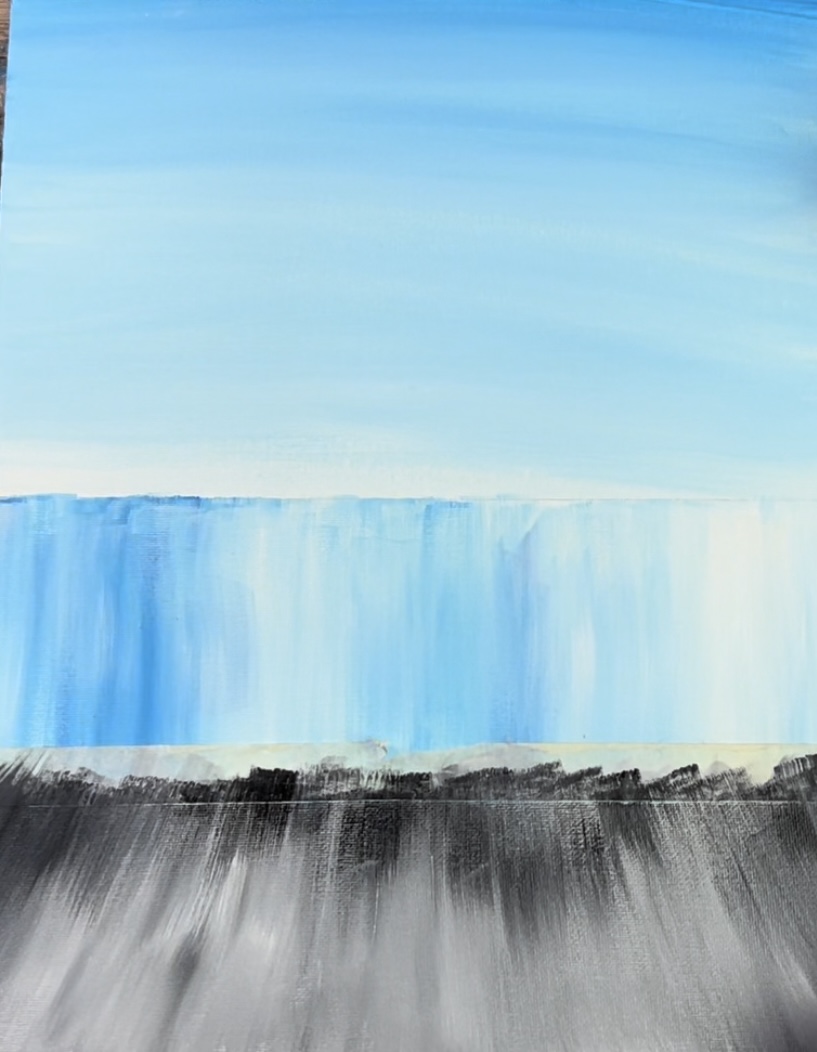
Add a little extra black on the top edge of the dock (just under the masking tape).
Then use the tip of your 3/4 wash brush and mars black to paint a black line for the edge of the dock.
Next, paint 5 lines to divide the panels on the dock. Tip: it may help to draw these lines with a pencil first so that you can space them apart and angle them right before painting them in.
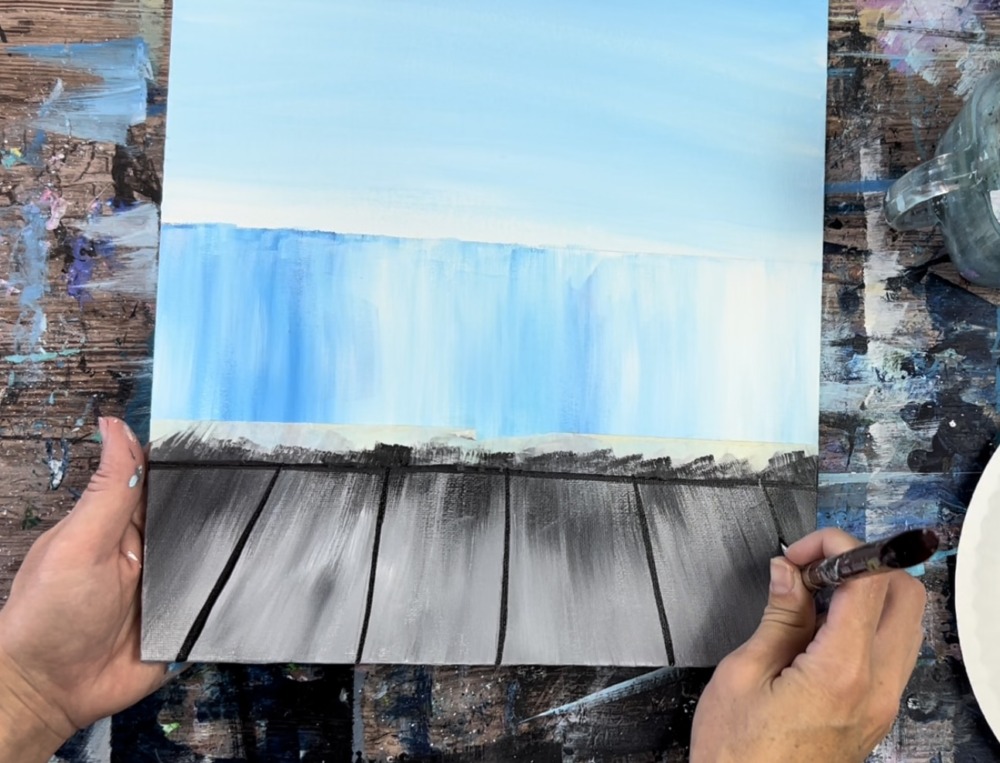
The middle line is vertical. Then each line is slightly more diagonal as it goes to the left or right. There are a total of 5 lines. Each is spaced about 3 finger widths apart. You don’t have to measure these to be exactly the same width apart, just estimate.
Then use your #4 round brush to paint a small dot on the top edge of the dock for the nails.
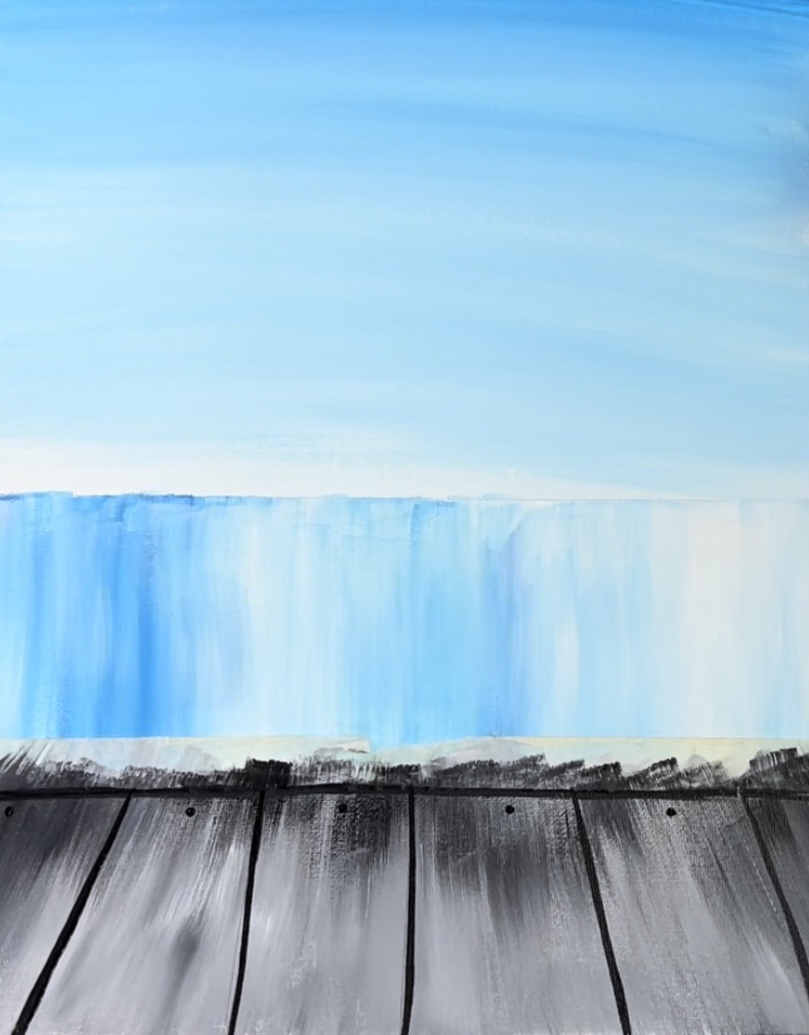
Gently lift the painters tape.
5. Paint A Dock Post
Use the round brush to paint a post on the right side of the dock. Load it into mars black and loosely paint the shape of the dock.
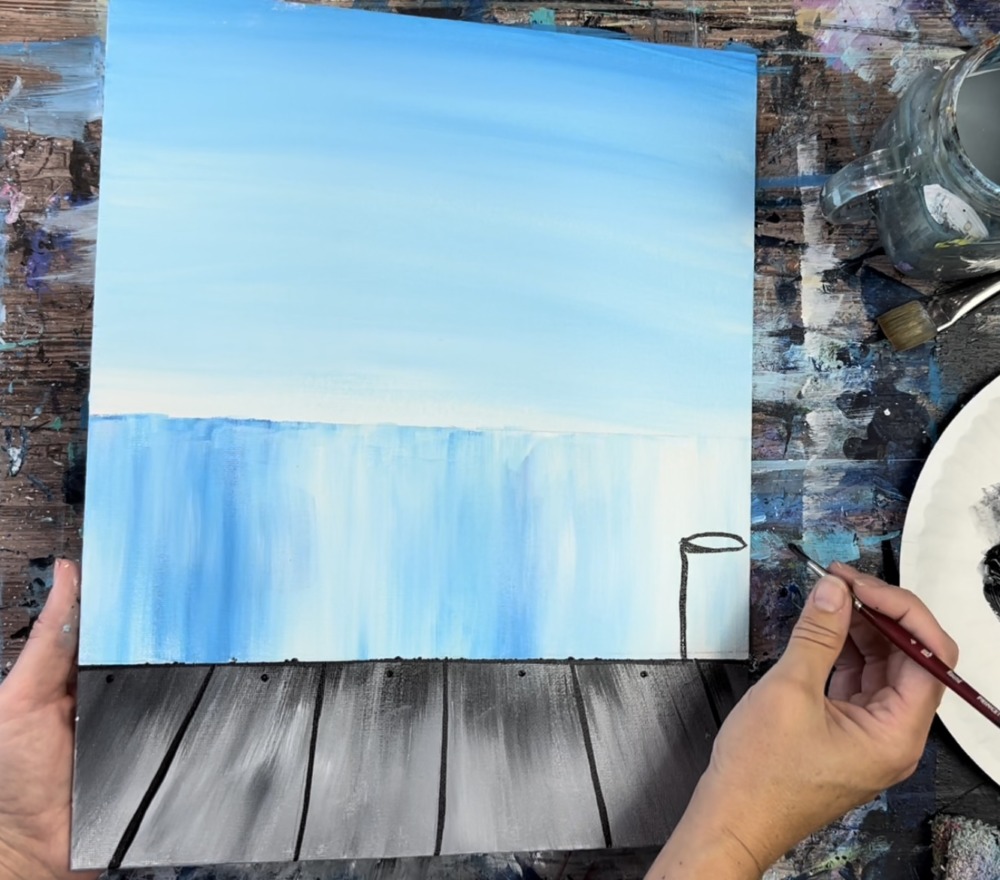
Then double load the brush in white and a little bit of black. Paint up and down vertical strokes to fill in the post.
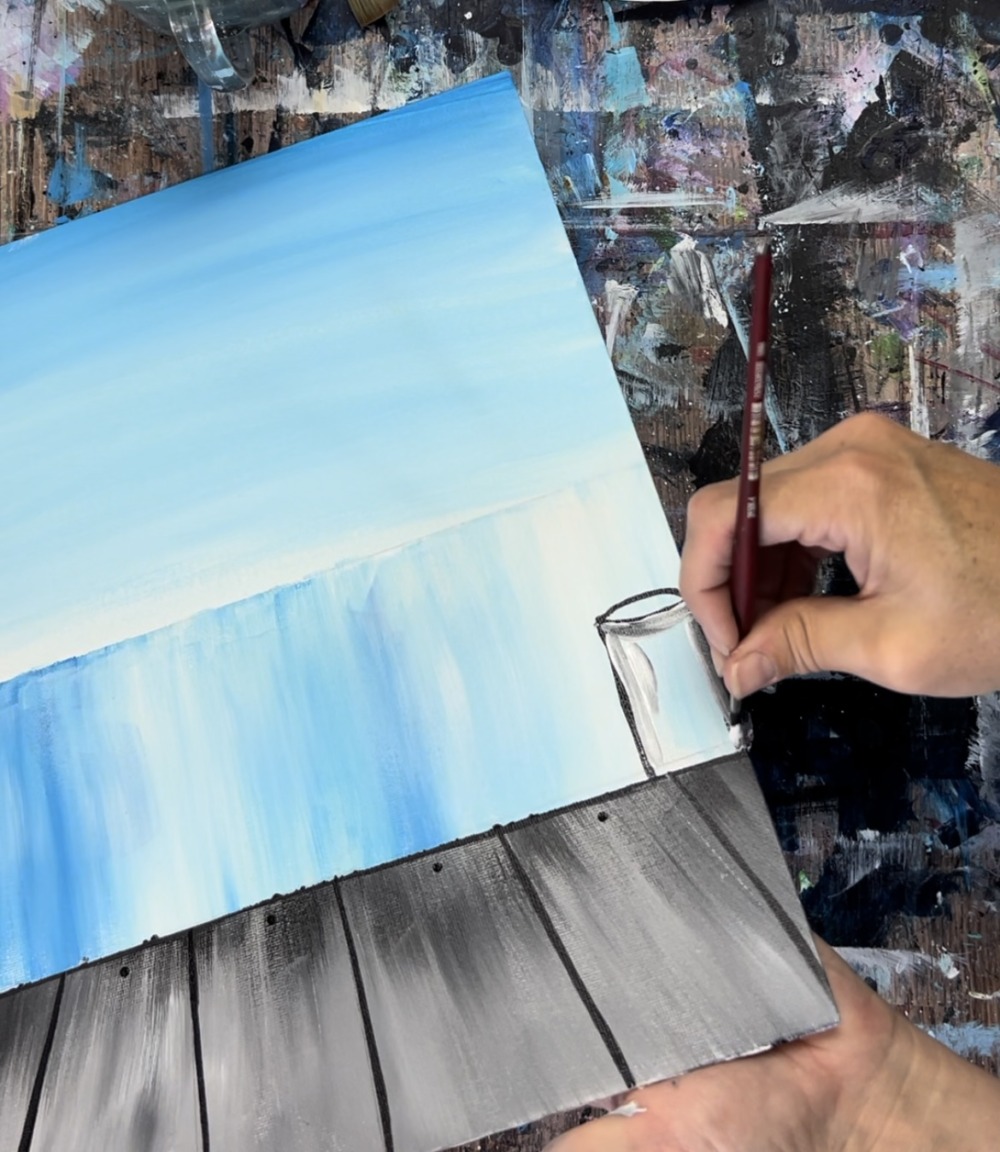
Paint the top part black and then loosely outline the shape with titanium white & black so the lines stand out.
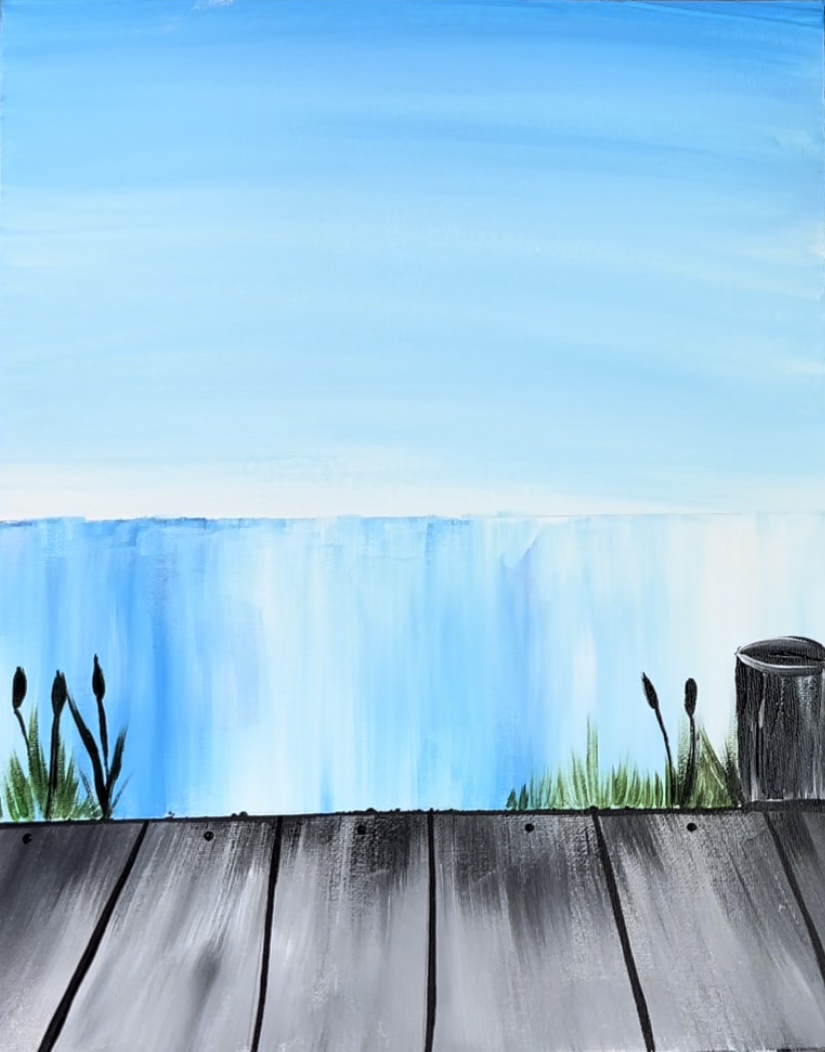
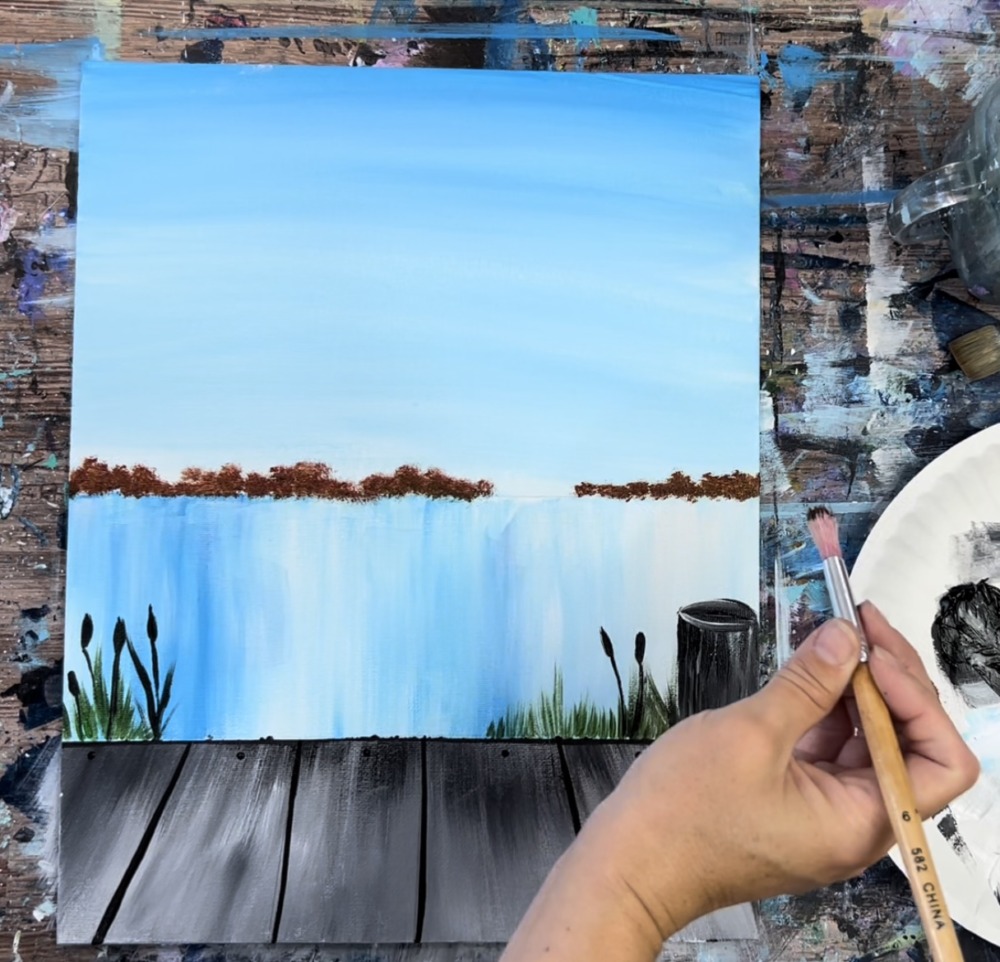
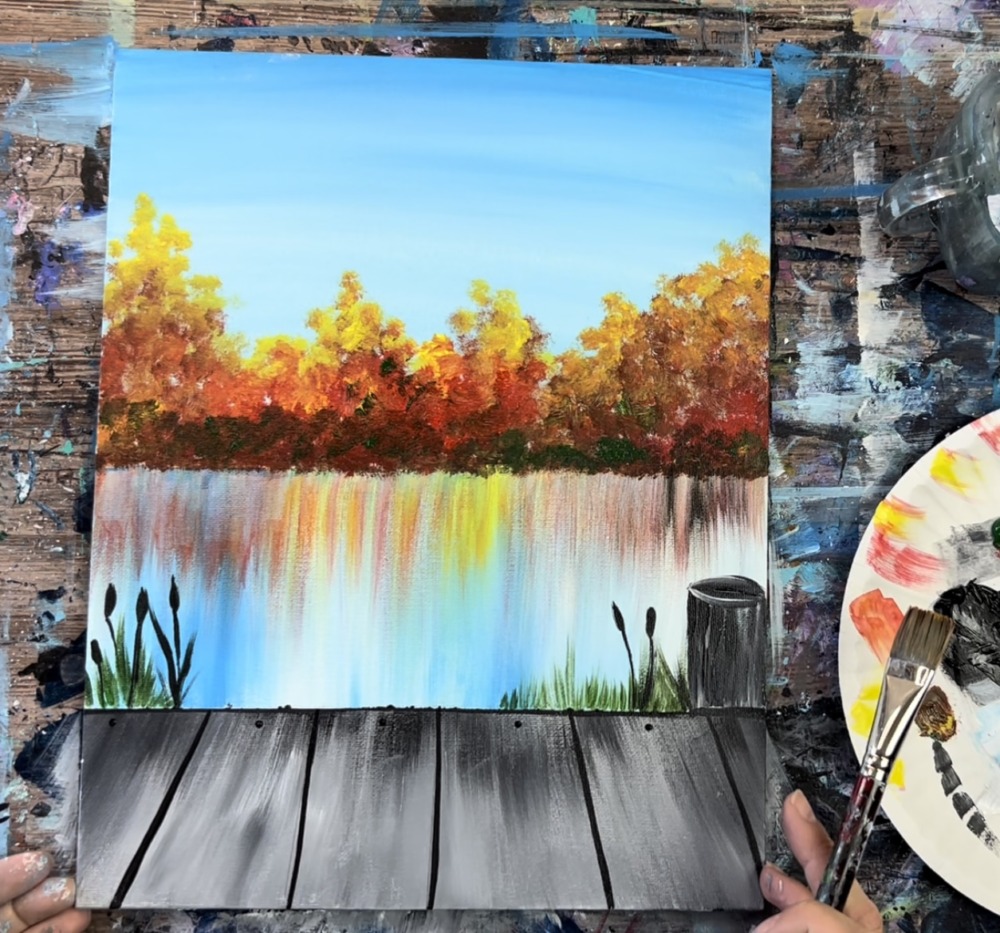
6. Paint Grass/ Cattails
Load your palette with hooker’s green hue permanent. Rinse and dry your #4 round brush. Load it into the green and paint small grass strokes on the left side of the dock above the top line. Paint some grass strokes by the dock post. Try not to paint too many grass lines in the middle because the dog will be painted there.
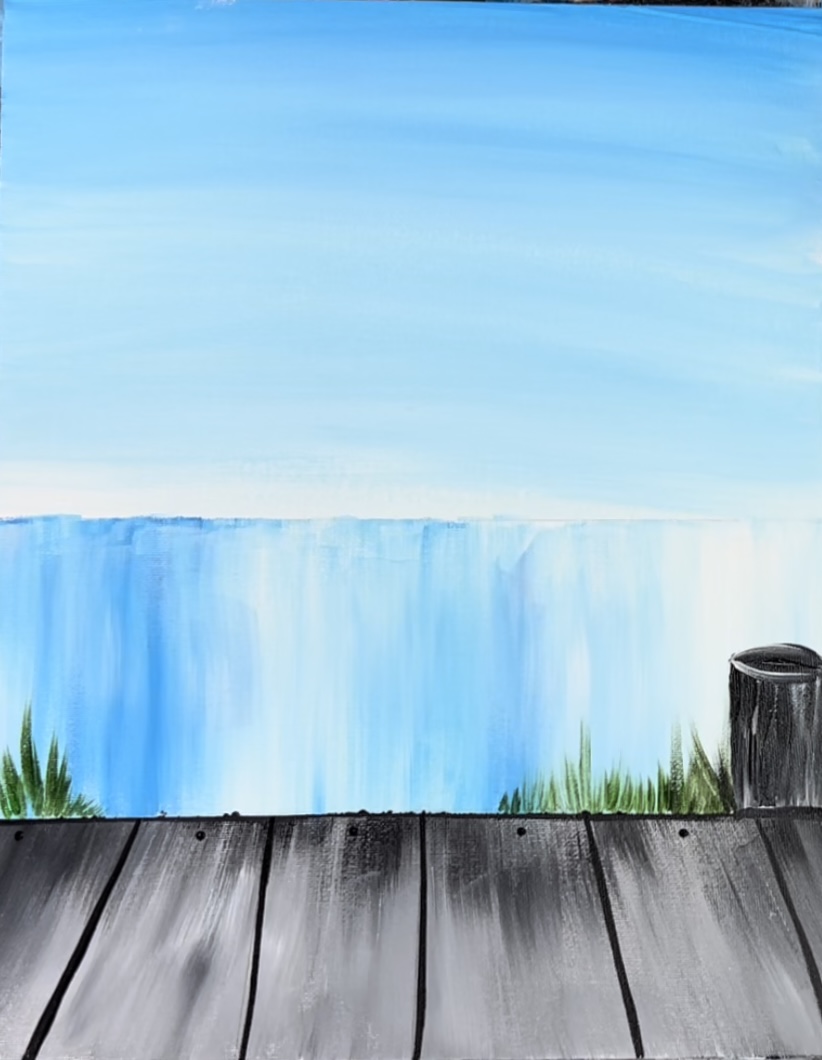
Add small amounts of mars black into the green to make some of it darker and more “shadowy”. Then paint some silhouettes of cattails. Again, try to leave the middle area above the dock blank.
7. Paint Fall Tree Foliage
For the fall tree foliage in the background, I use a round bristle brush. This is a brush that has natural/coarse texture bristles. They are also known as stencil brushes.
Load your palette with pyrrole red, cadmium yellow light hue and some fresh green if needed.
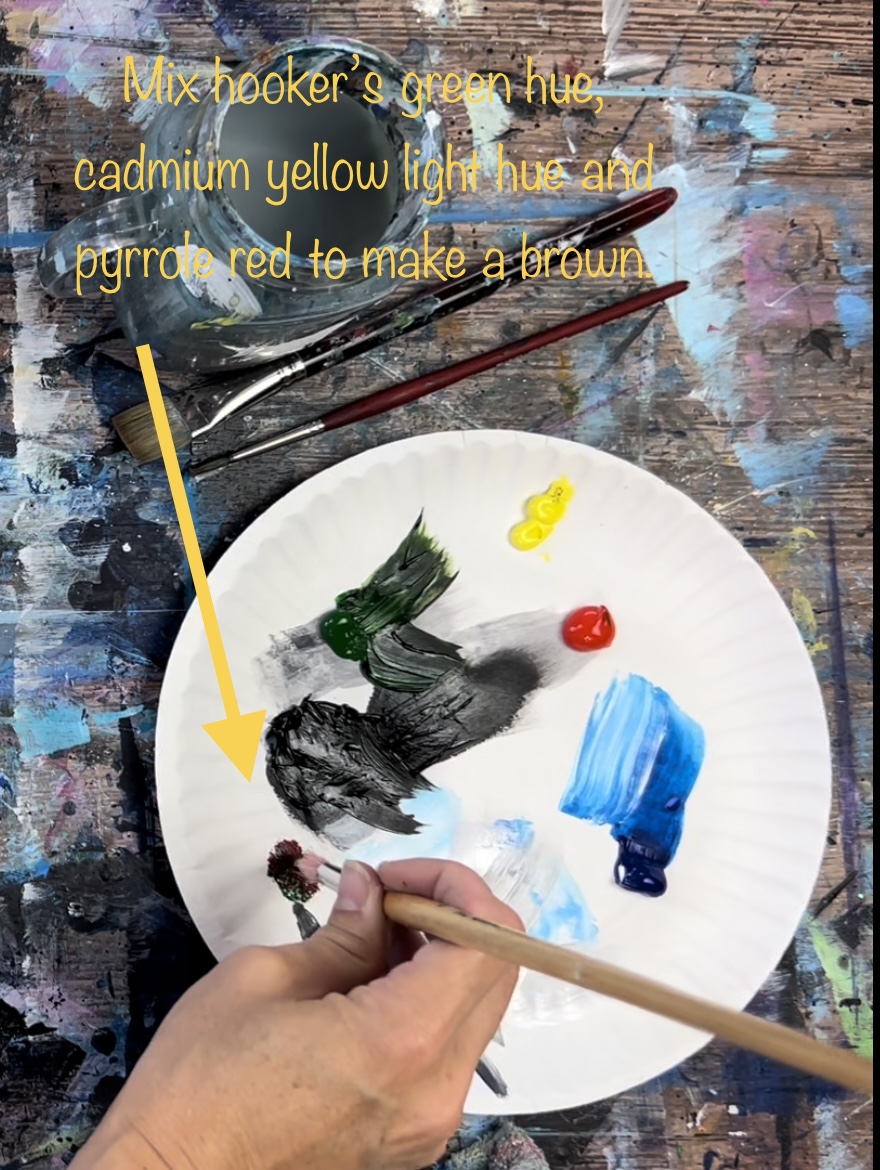
Start at just above the horizon line and “stipple” this brown texture to create the low lying bushes/parts of the trees. You are basically just tapping the end of the bristles to create this texture.
As you work your way up, gradually blend brighter colors into the foliage. Add red to your brush and build the trees/bushes up higher.
Then load your brush in the yellow. Keep adding layers of texture on your foliage. Let that yellow blend with the red to create oranges. Again, you want your trees to be brighter towards the top and more dark and shadowy towards the bottom.
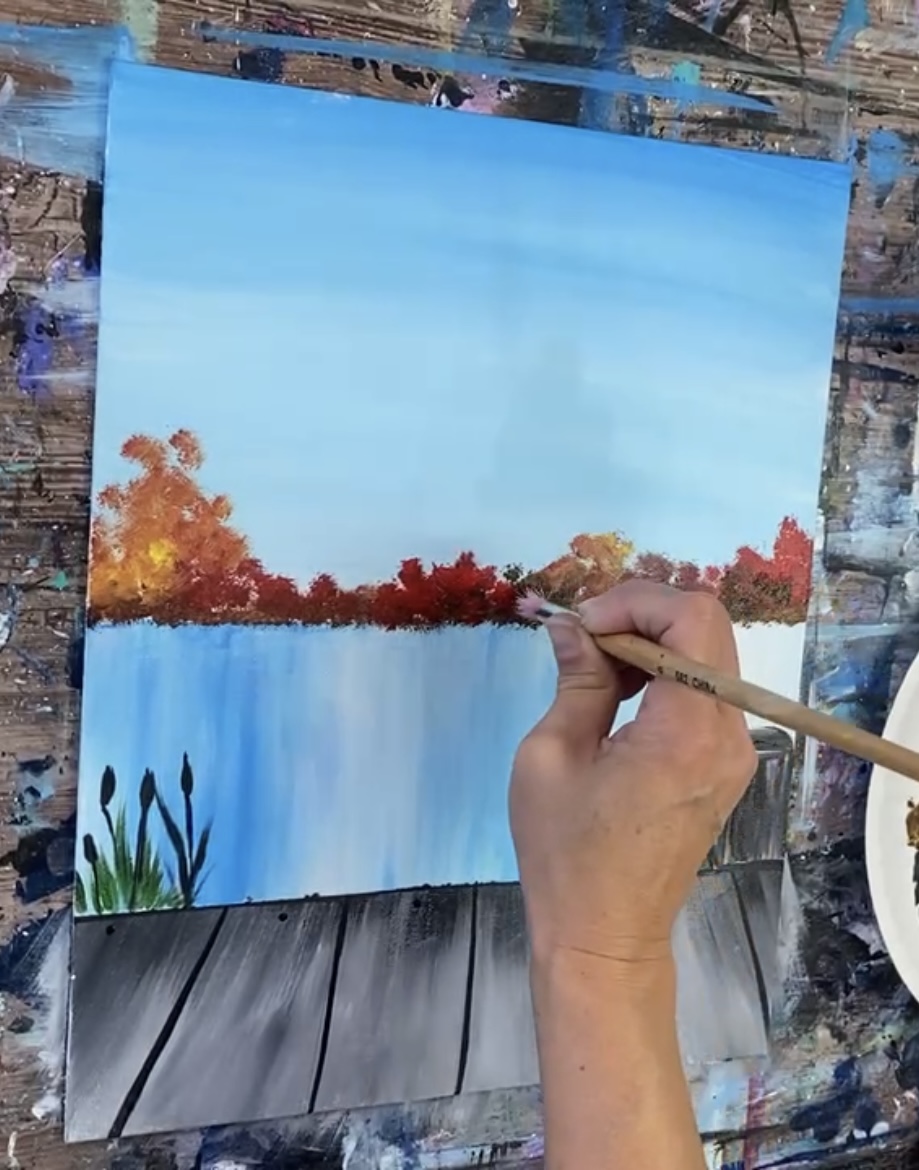
The heights of these trees will vary. The ones on the left and right are slightly taller than the ones in the middle. Some of the trees will be shorter, especially the ones in the middle.
You can also add bits of green/brown throughout the trees.
Then wipe or rinse your brush. Add just the yellow to it. Add a layer of yellow at the very tops of the trees.
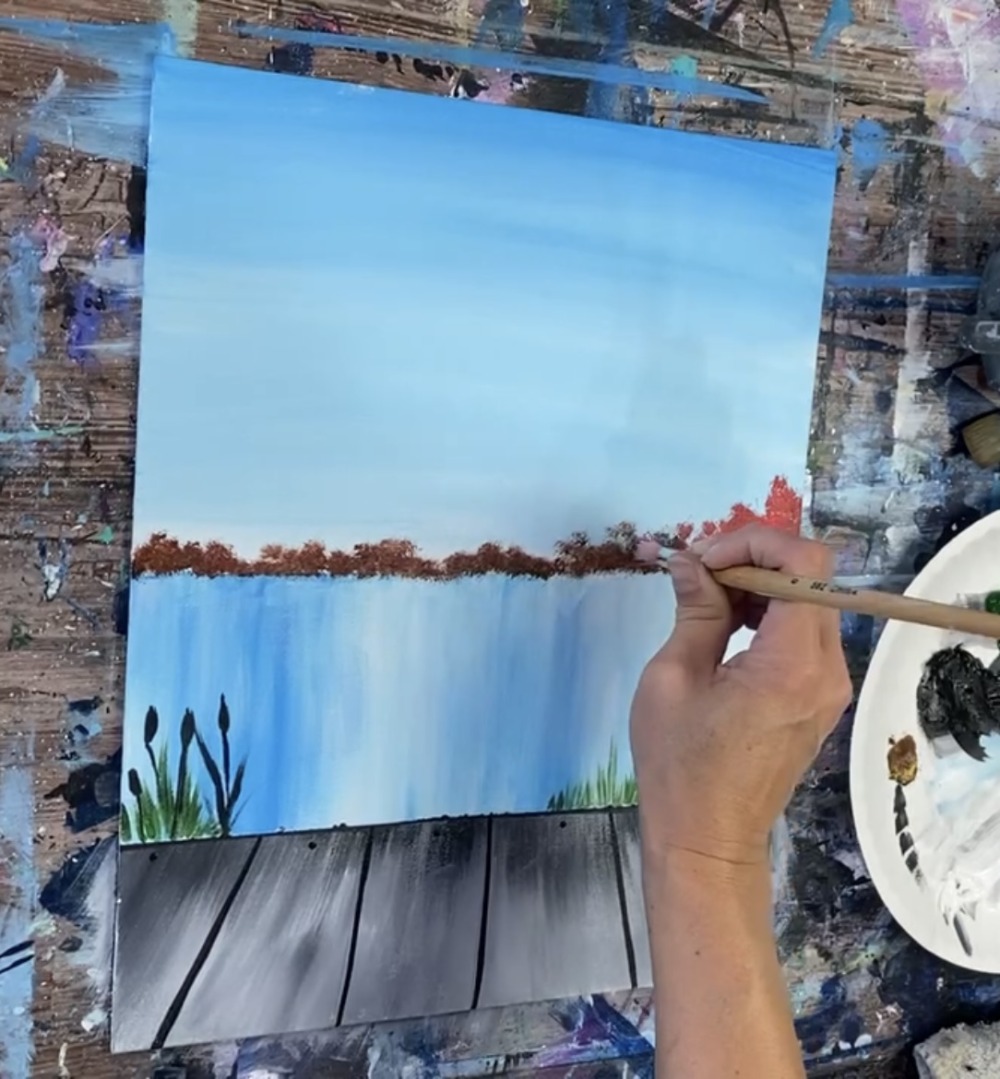
8. Paint Reflections In Water
To do the reflection, use your 3/4″ flat wash brush. Load the tip of the brush in a small amount of watered down red and yellow paint. Wipe the brush off so there isn’t a lot of paint left on the brush.
Start at the horizon line (below the trees on the top part of the water).
Stroke down to create a very thin wash of paint color. A lot of the blue painted water should be showing through.
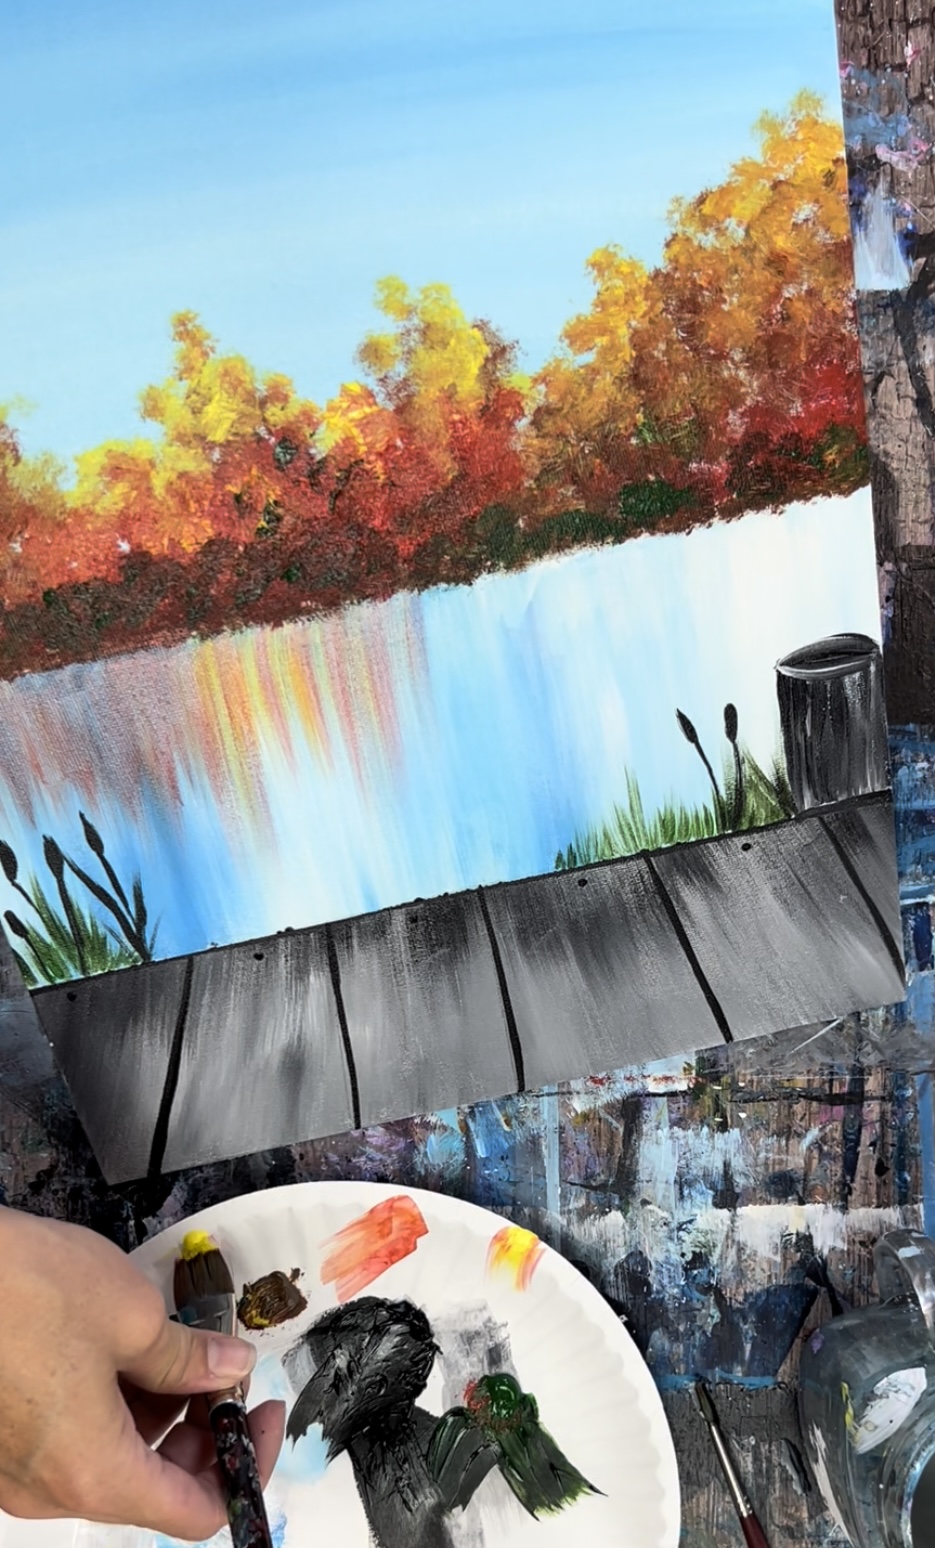
Paint streaks of color all throughout the upper water area but leave the bottom half of the water area blue without fall colors. Try to keep this as translucent as possible and vary the colors. Some areas may be brighter and some darker.
Let this dry before going onto the next step.
Next, paint white reflection lines on the water. Use the tip of your 3/4″ flat wash brush and titanium white. Paint horizontal lines all throughout the water. The ones in the back are smaller and closer together. The ones in the front are longer and more spread apart.
Let this dry before going onto the next step.
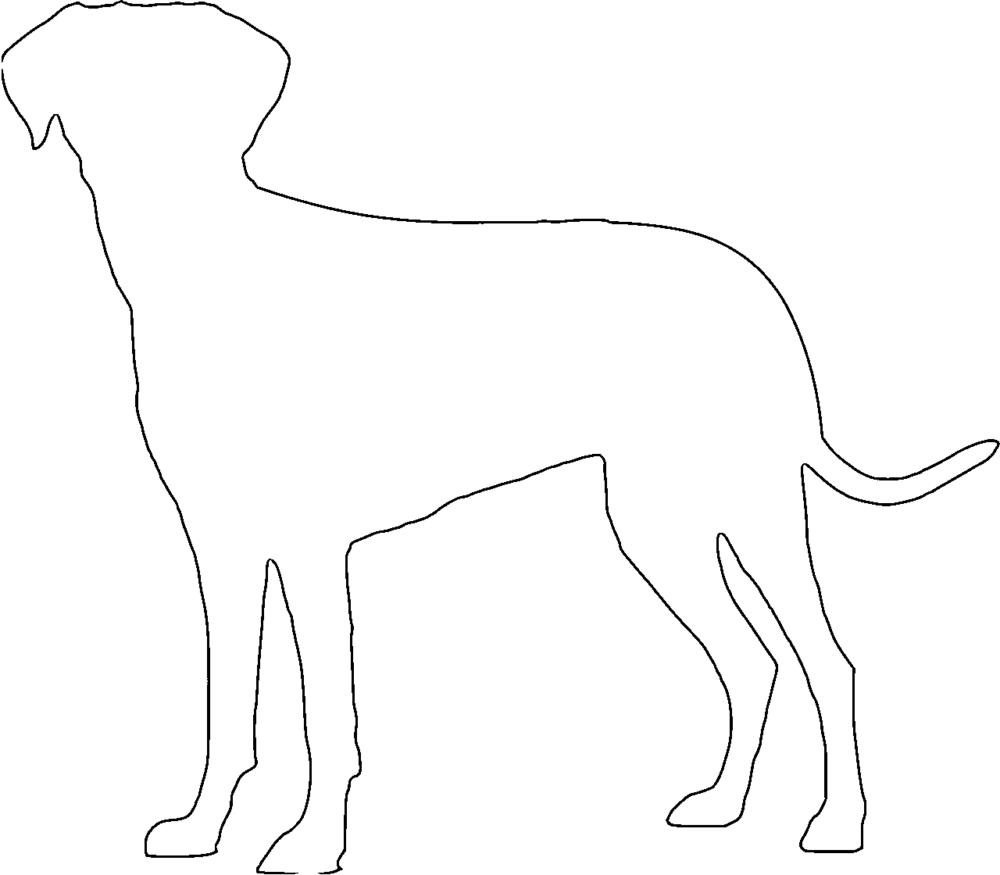
9. Draw/ Transfer Dog Template
Print out the dog template that you would like to use. For additional dog designs, you can check out Pixabay.com.
Notes about size and position of the dog:
The measurements of the dog are approximately 6.5″ wide by 5.25″ high. Position him so the head is slightly above the horizon line (although if you are making your dog smaller, this may not be possible). Also make sure the paws are a little bit below the top line of the dock. I decided to center the dog. However, you can position him off center.
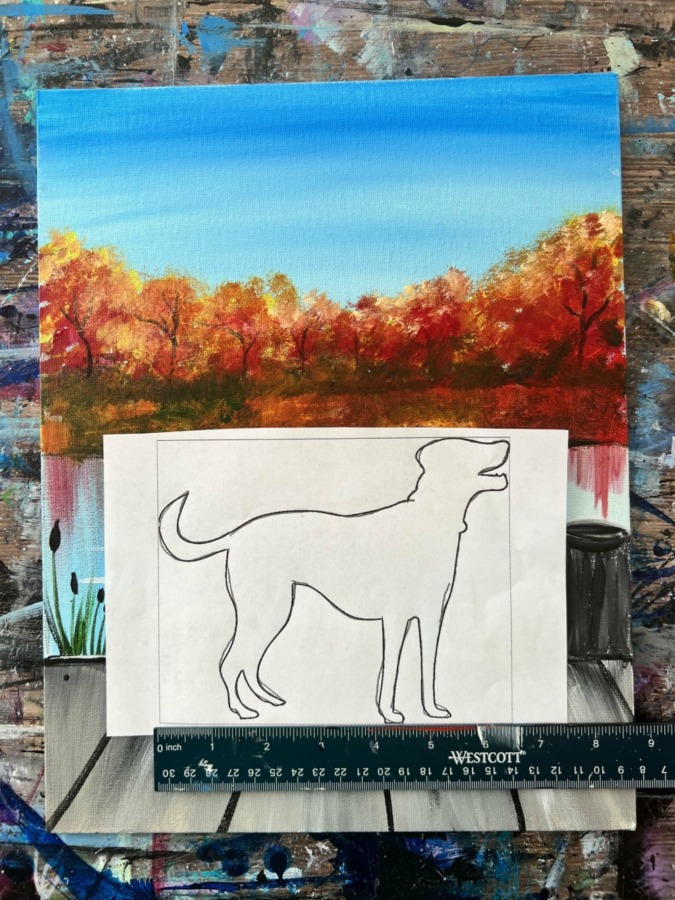
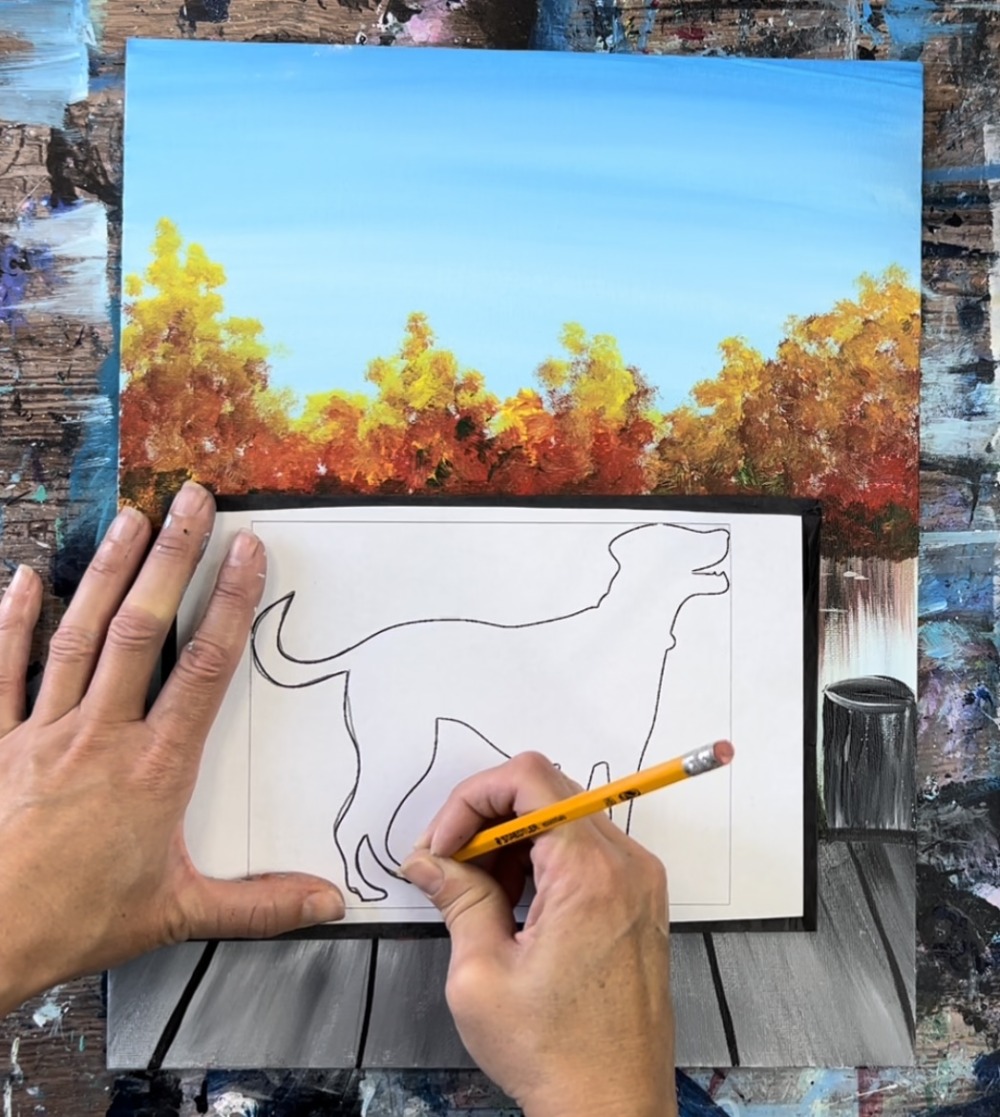
Place a sheet of graphite paper below the dog and trace. Press very firmly so the lines will show up nice and dark, especially over the dark areas of the painting.
10. Paint Dog Silhouette
Use a #4 round brush and mars black to paint in the dog silhouette. It may be helpful to add a small amount of water in the black so that it will flow easily.
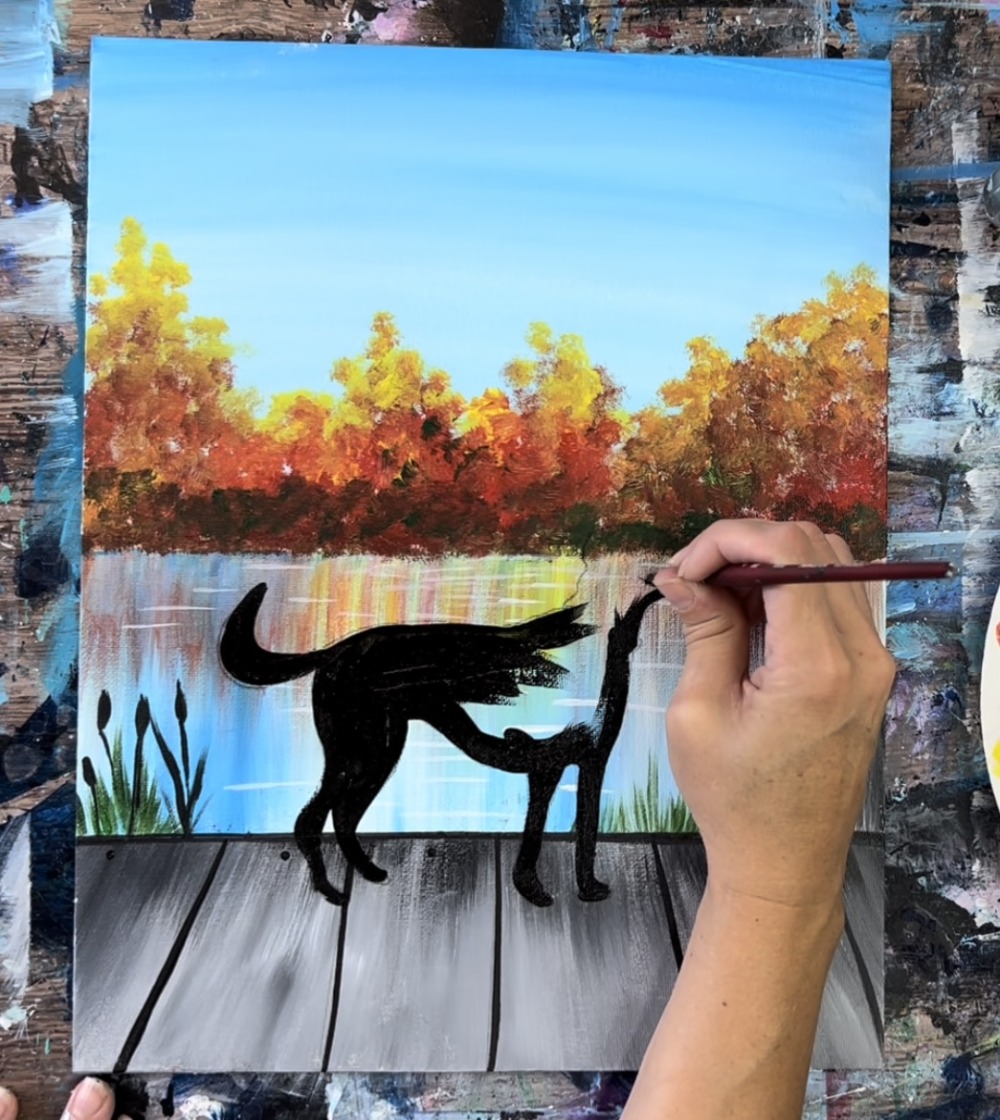
If needed, use a smaller round brush to get inside the smaller areas.
11. Paint Shadow
To do the shadow under its paws, load your brush in a small amount of black and then wipe the brush off. Then “dry brush” black paint to be used as a translucent layer of paint below the paws. Paint the shadow strokes going in diagonal directions.
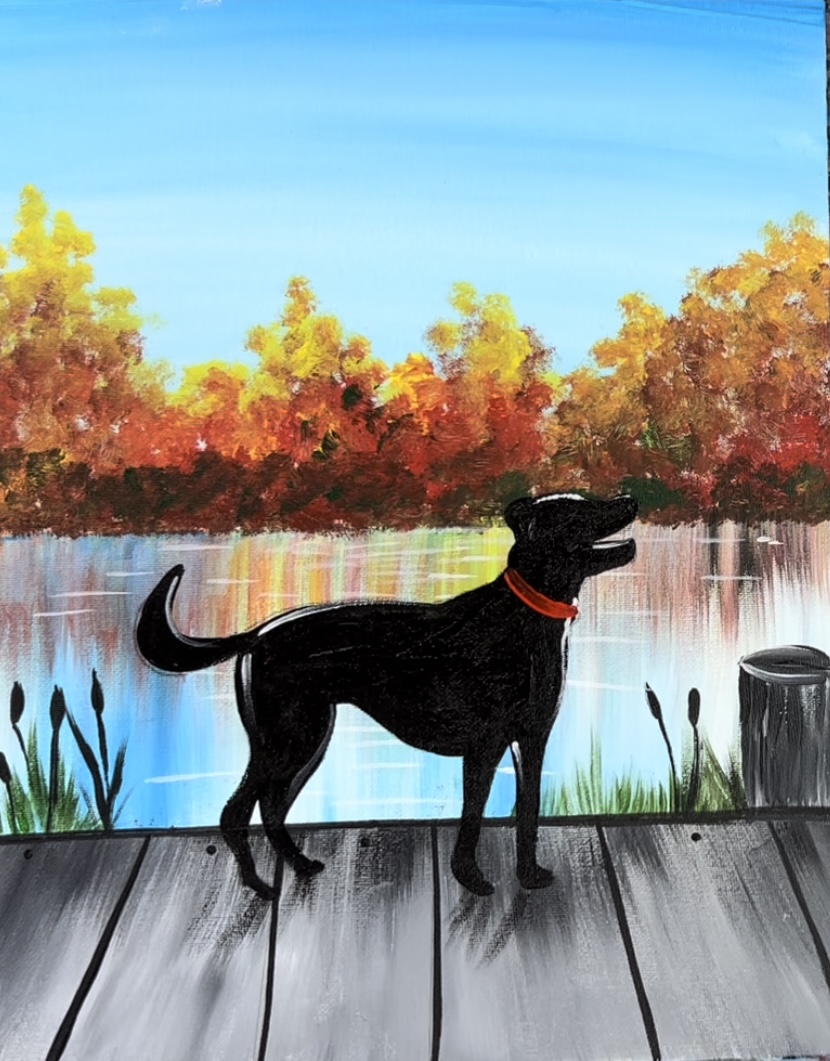
12. Highlight/ Paint Collar
If you want, you can paint the collar of the dog any color! Then, to make some of the areas stand out, loosely paint a white highlight on some of the edges of the dog silhouette. I did this on the tail, back, head, mouth, front and some of the side of the legs. This helps your silhouette pop a little bit especially in areas where the background is already dark.
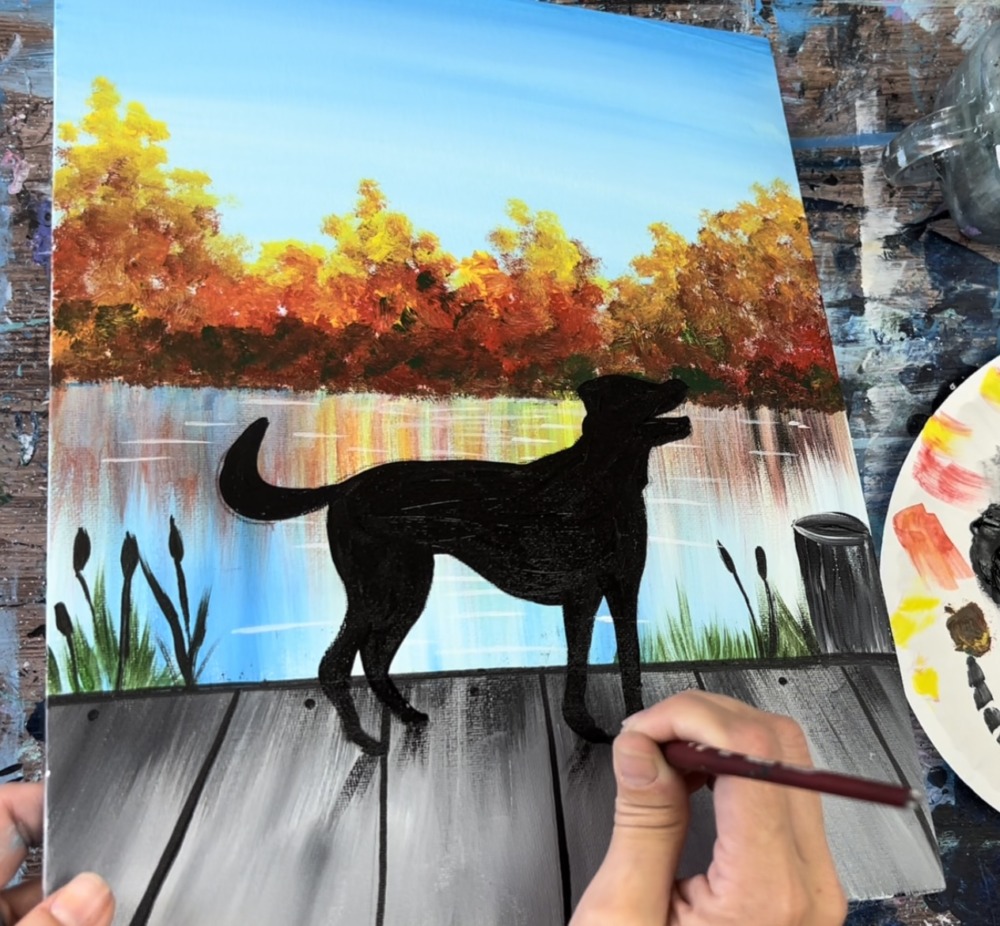
13. Final Touches/ Tree Trunks
To do the trunks, use the #4 round brush and titanium white. Loosely paint very thin tree trunk/ branch lines on the trees. You can leave a lot of open space and not paint each branch attached to the tree.
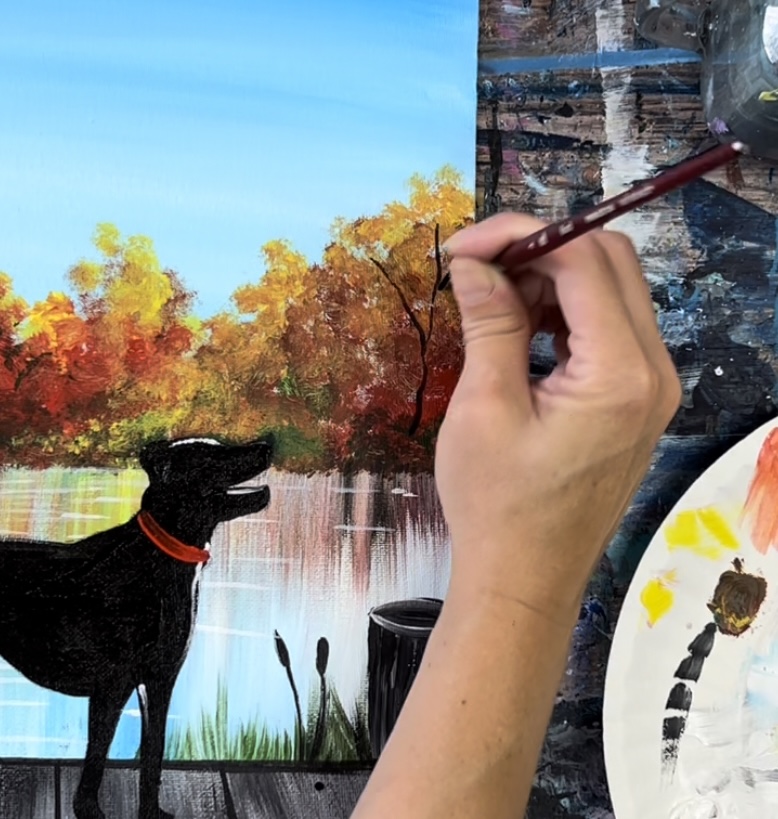
Then add one more layer of light yellow on the very top of the trees. Use your bristle brush. Load it into a small amount of white and cad yellow light. Then stipple the very tops of the trees.
This will add bright areas to the tops of the trees. Also, if needed, you can add some lighter color foliage around the dog’s head to help create more contrast.
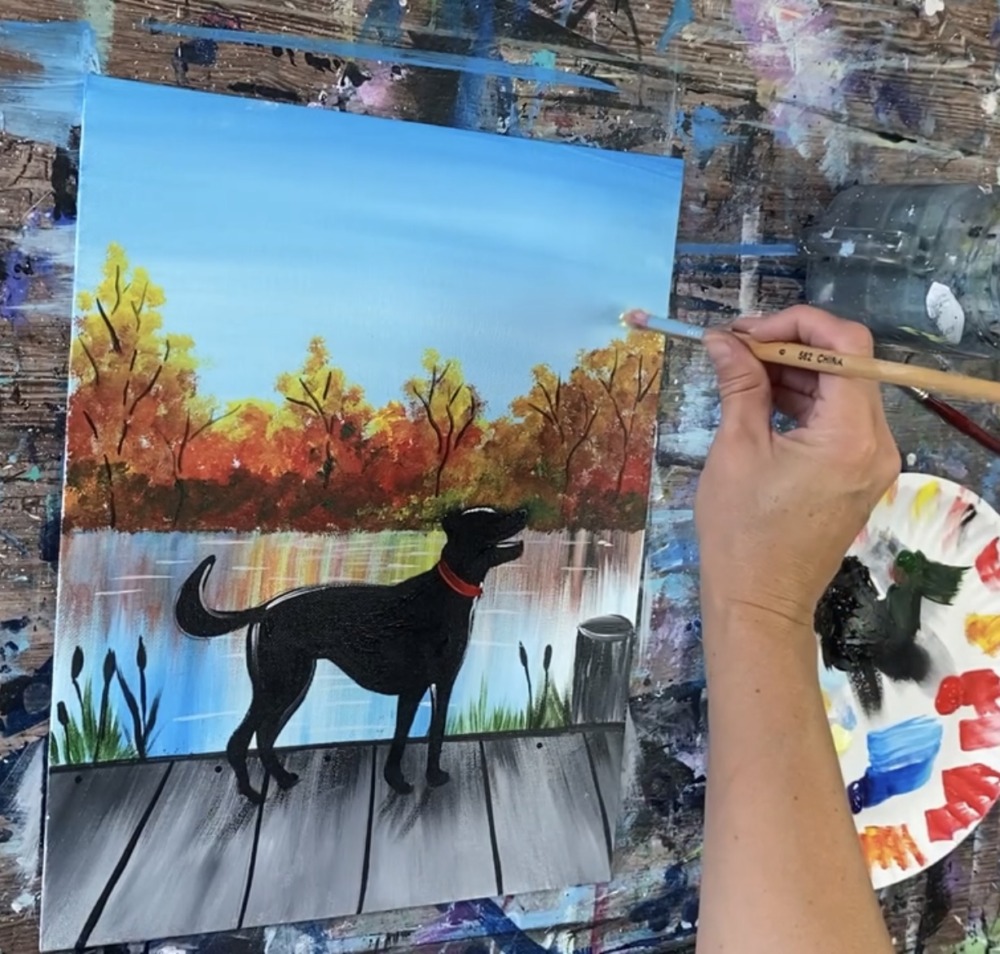
Finished!
Share Your Art Here:


