

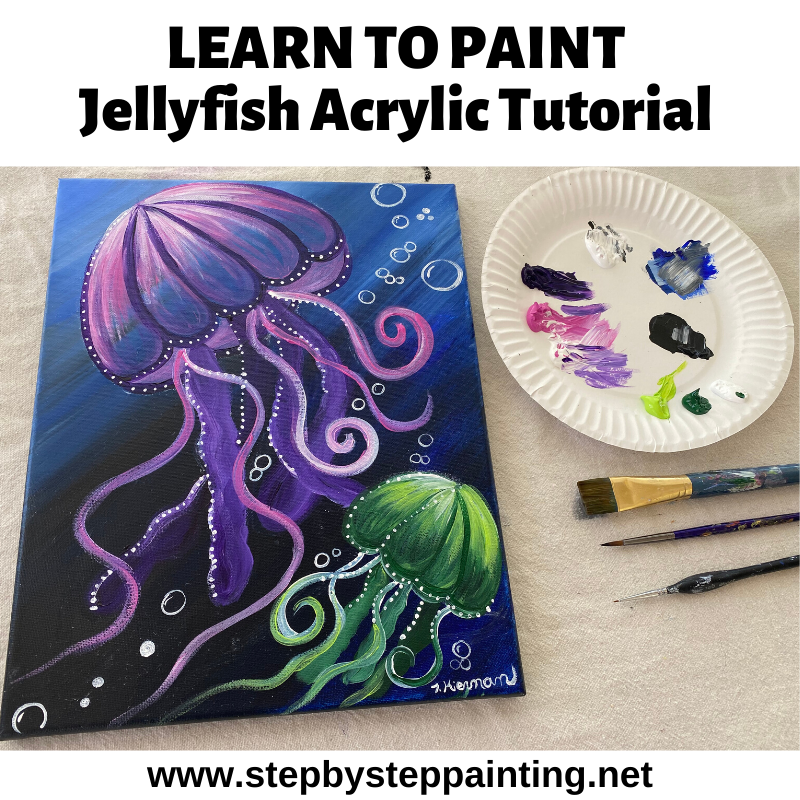
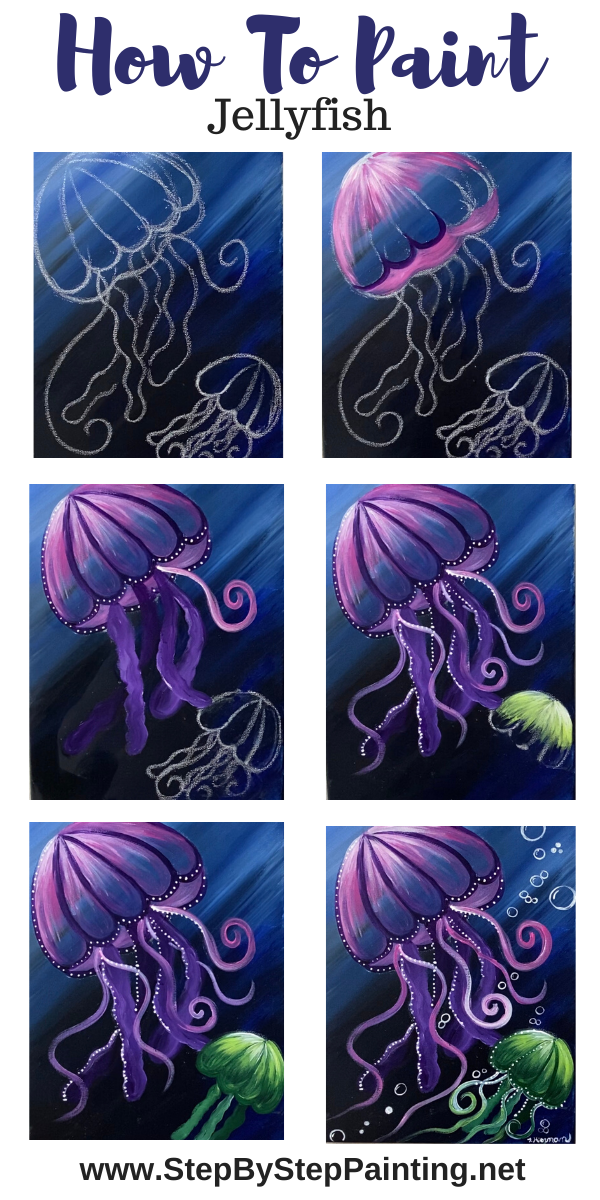
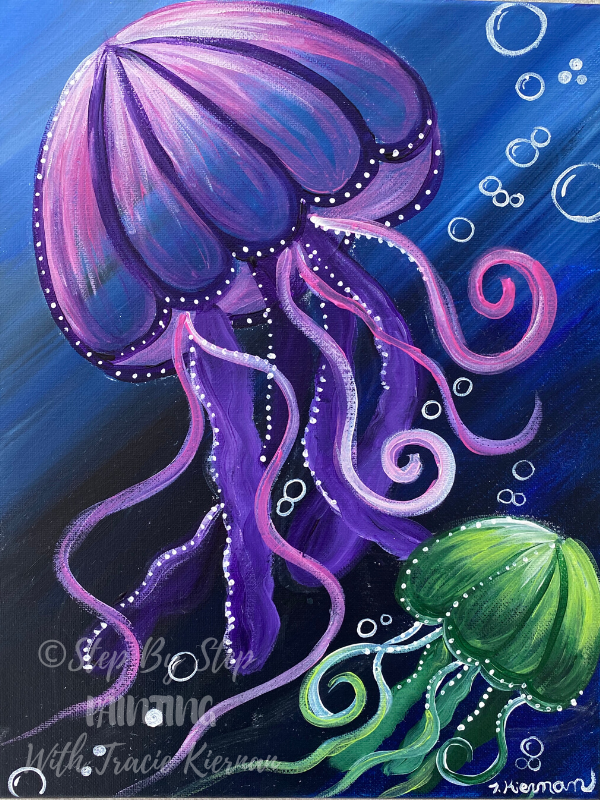
How To Paint Jellyfish – Acrylic Painting Tutorial
Learn how to create a whimsical looking jellyfish painting step by step with acrylics on canvas! This painting tutorial will guide you through each step.
Would you like to save this?
This painting is dedicated to my late brother-in-law, Timothy Kiernan who lost his battle to lymphoma cancer in April 2020.
Enjoy and happy painting!
Materials
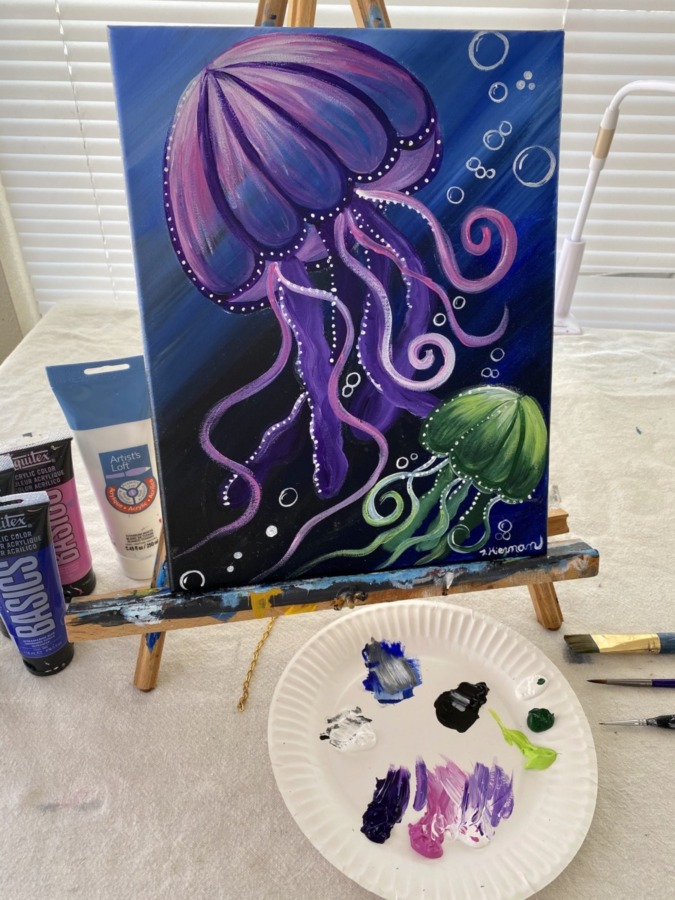
Jellyfish Painting
Learn to paint jellyfish in this easy acrylic painting tutorial!
Materials
- Acrylic Paint
- 11 x 14 Canvas
- Brushes
- White Chalk
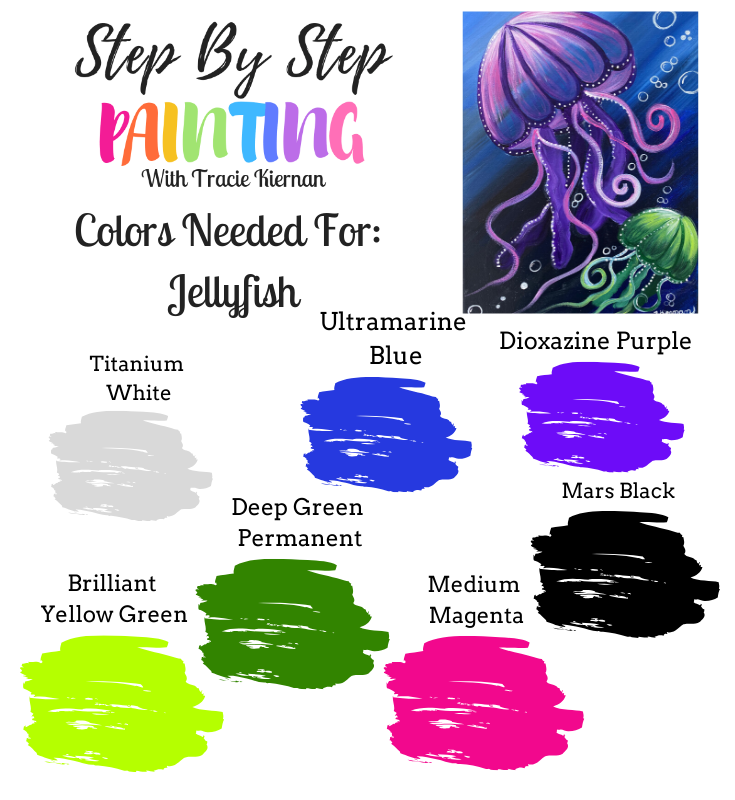
Paint Colors
- Mars Black
- Titanium White
- Ultramarine Blue (Dark blue)
- Medium Magenta (Pink)
- Brilliant Yellow Green (Lime Green)
- Deep Green Permanent (Dark Green)
- Dioxazine Purple (Dark Purple)
Brushes
Notes
Acrylic paints seem to be limited on Amazon and Michaels and most craft stores I’ve seen! Please reach out to me and I can give you suggestions based on what I see in stock.
Color Palette
Craft Paint Suggestions
If you are doing this with craft paints, here is a list of color to try to match. You can also look at the color chart above to find colors similar to the shade that you see. I am aware that paints are limited in supply almost everywhere right now so if you need help finding colors or suggestions on alternatives, please reach out!
- Black
- White
- Lime Green
- Dark Green
- Magenta
- Dark Purple
- Dark Blue
Brushes
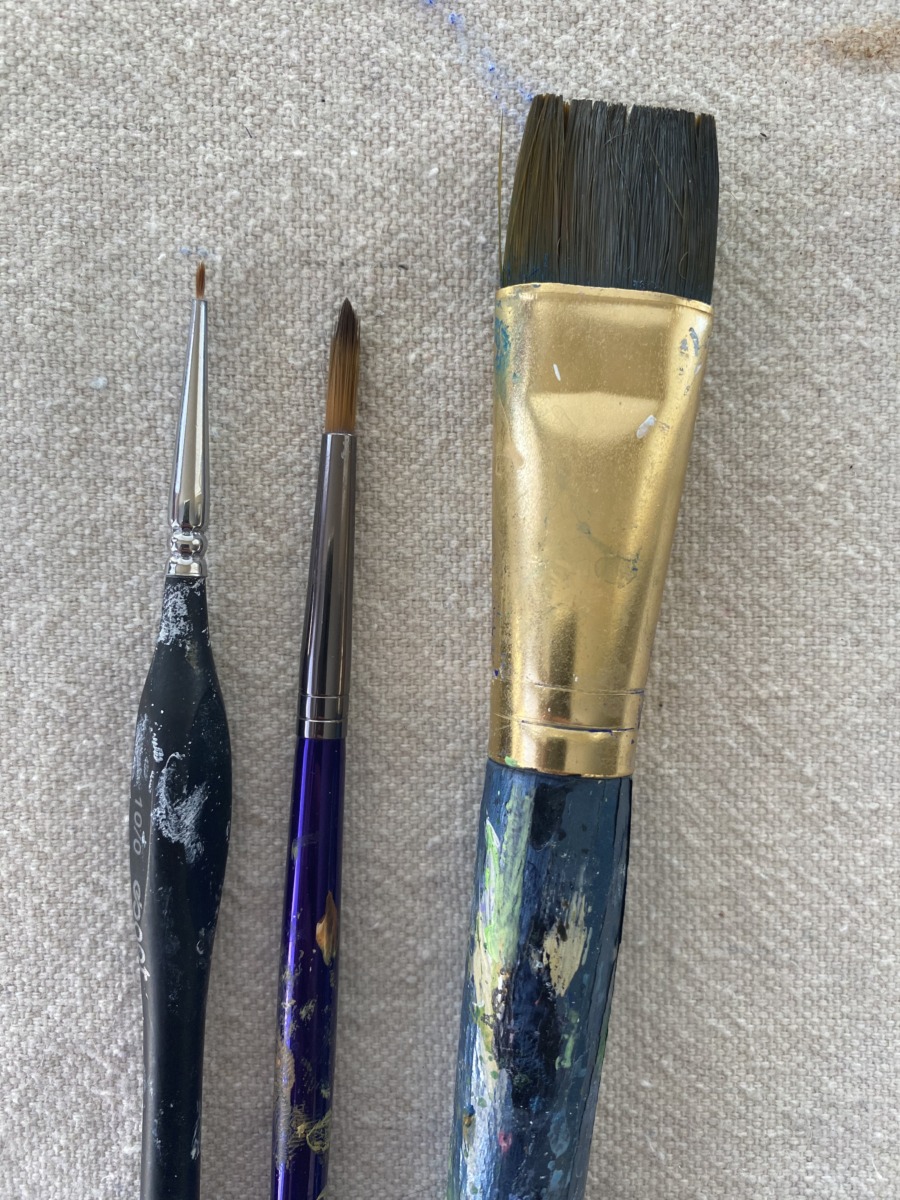
I used the following brushes:
- 3/4” Flat Wash Brush
- 4 Round or 6 Round Brush (number doesn’t matter, just find a round brush that is a medium size with a good point to it)
- 0 Spotter (a tiny round brush that will be used for the dots and bubbles).
Directions at a glance
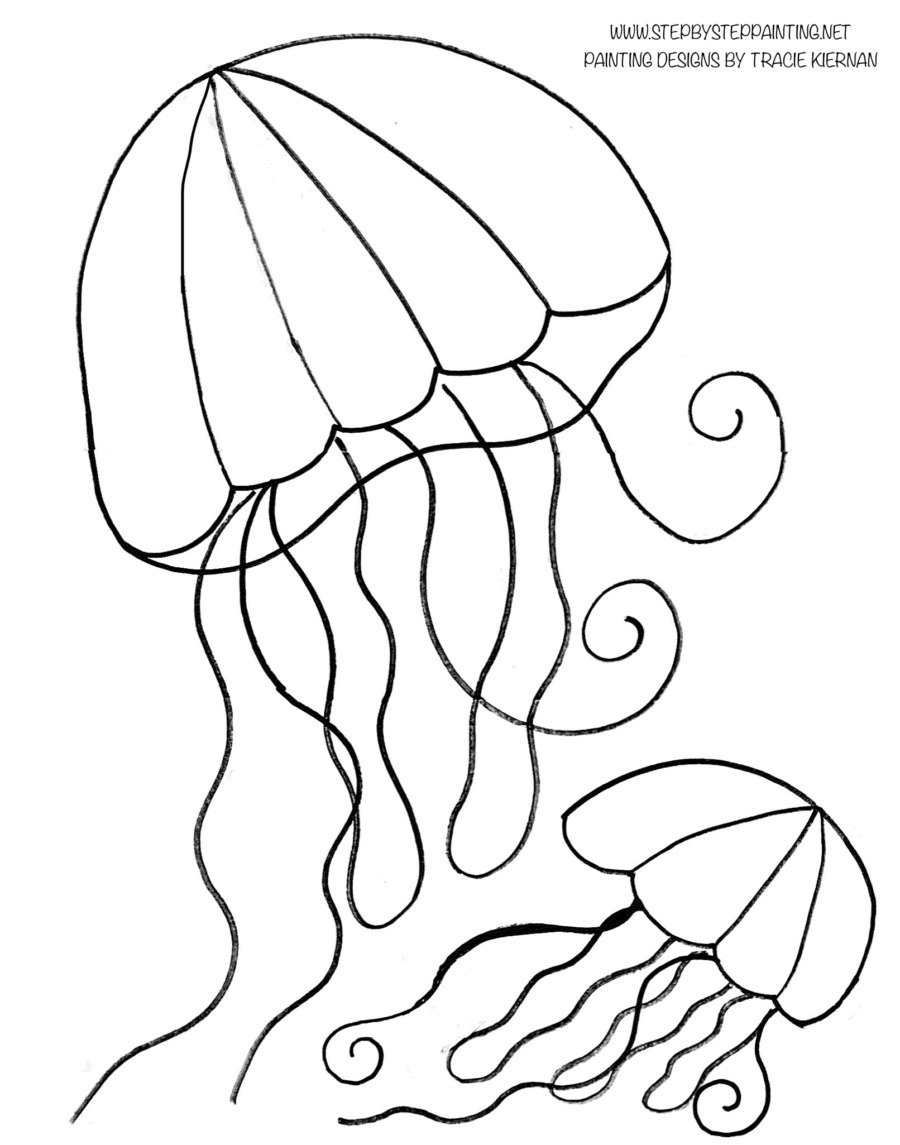
Traceable:
Video:
Step By Step Directions
1. Paint The Background
The background of this painting is pretty abstract. It consists of three colors: black, dark blue and white. I did wet on wet blending in which the colors blend themselves on the canvas to create a mix and gradient of the three colors. 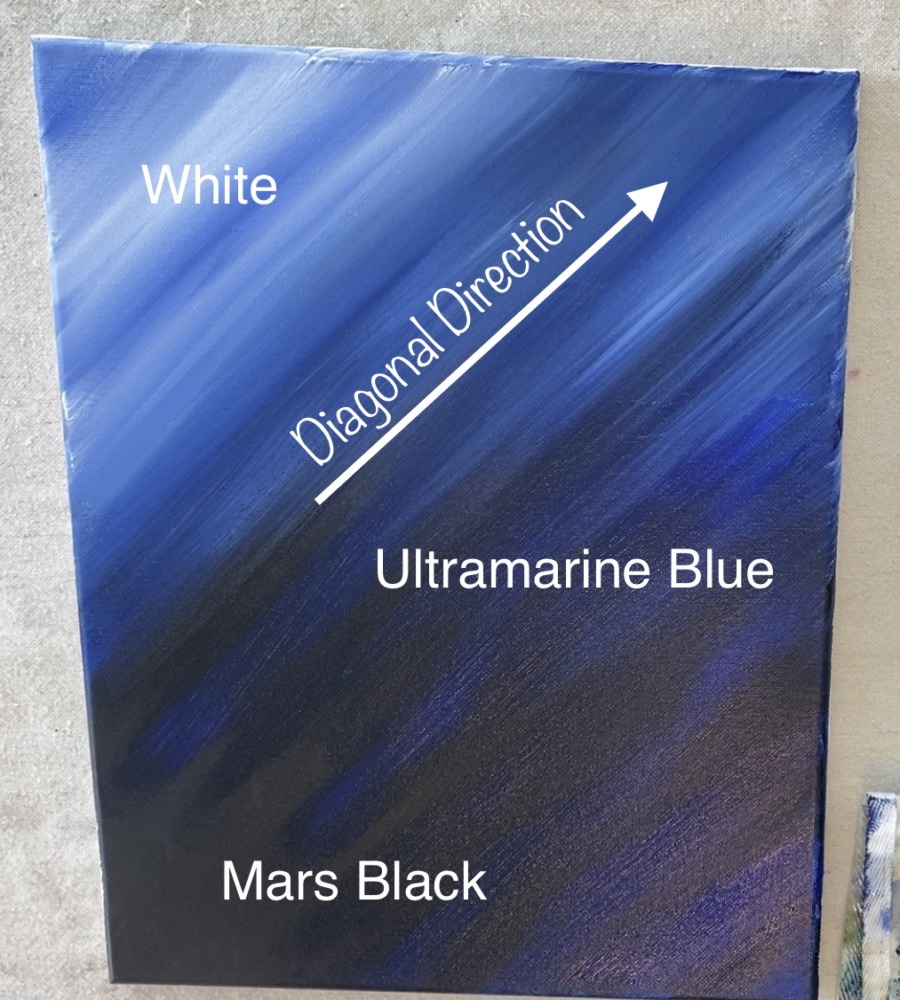
Load your palette with mars black, ultramarine blue and titanium white. You will also be using a 3/4” Flat Wash Brush.
Start at the lower left area fo the canvas and paint diagonal lines using the full width of the brush. 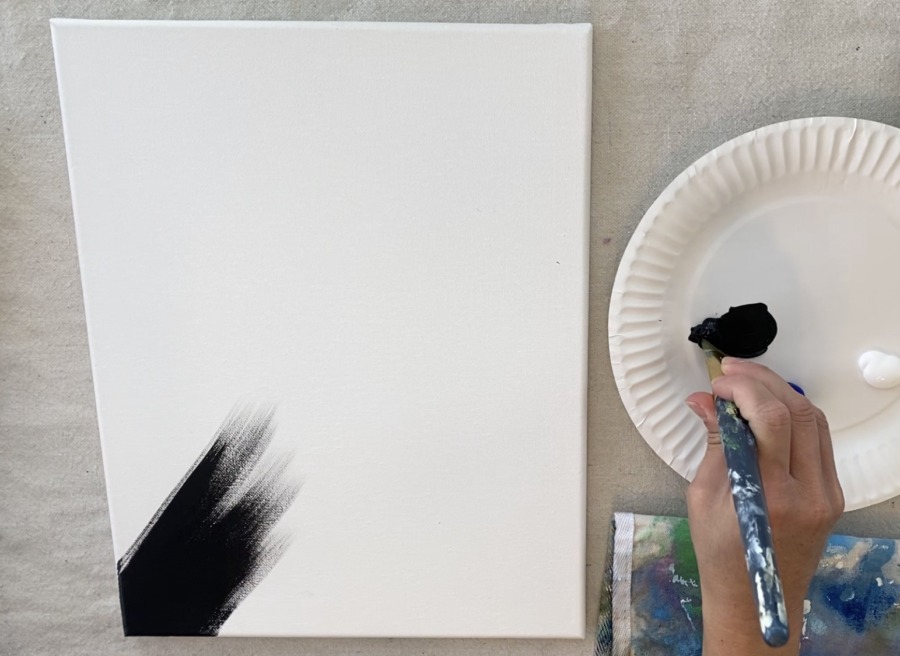
Fill about a quarter of the canvas in the lower left area this black then wipe off the black off your brush. You don’t need to rinse your brush because the little bit of black leftover will help with the blending of the blue next. 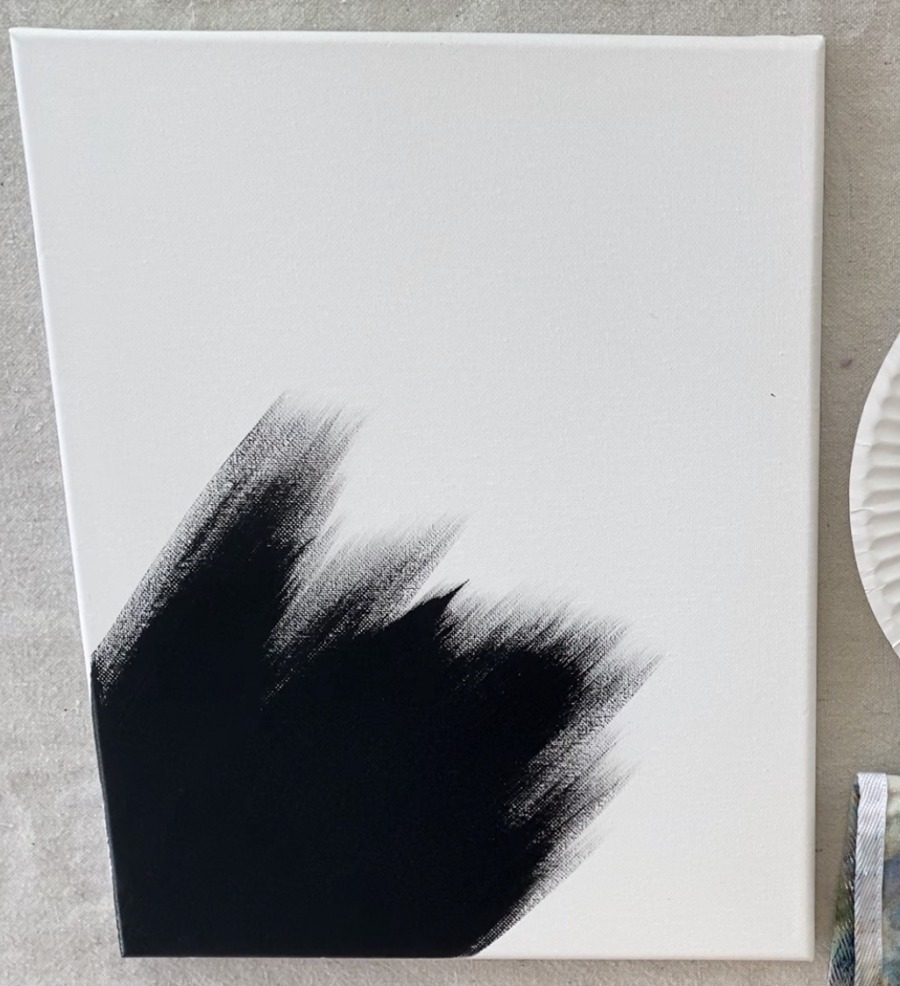
Then add ultramarine blue to your brush and continue to paint diagonal lines blending the blue with the black. Make sure you are still going in a diagonal direction.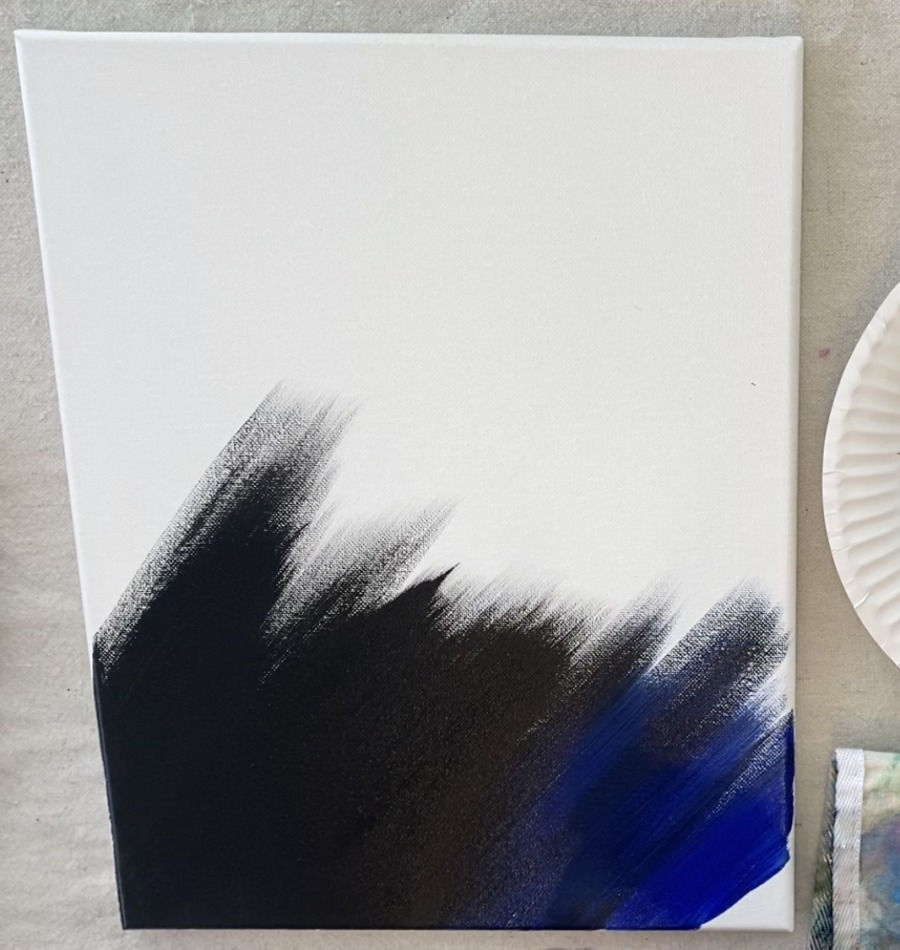
Fill the majority of the canvas with this blue/black color. If you feel you need to add more black, you can do so. You can control how dark or light it is depending on how much blue or black you ad. I left the upper left corner blank and a little bit of the upper right corner blank. 
Then rinse off your brush and dry it before introducing the titanium white.
Gently blend in the white so that it mixes with the blue. You don’t want to add too much white at first because it may take over. If you need to add more blue you can do so to help the white blend more subtly.
I made my white kind of streak downwards into the dark areas. 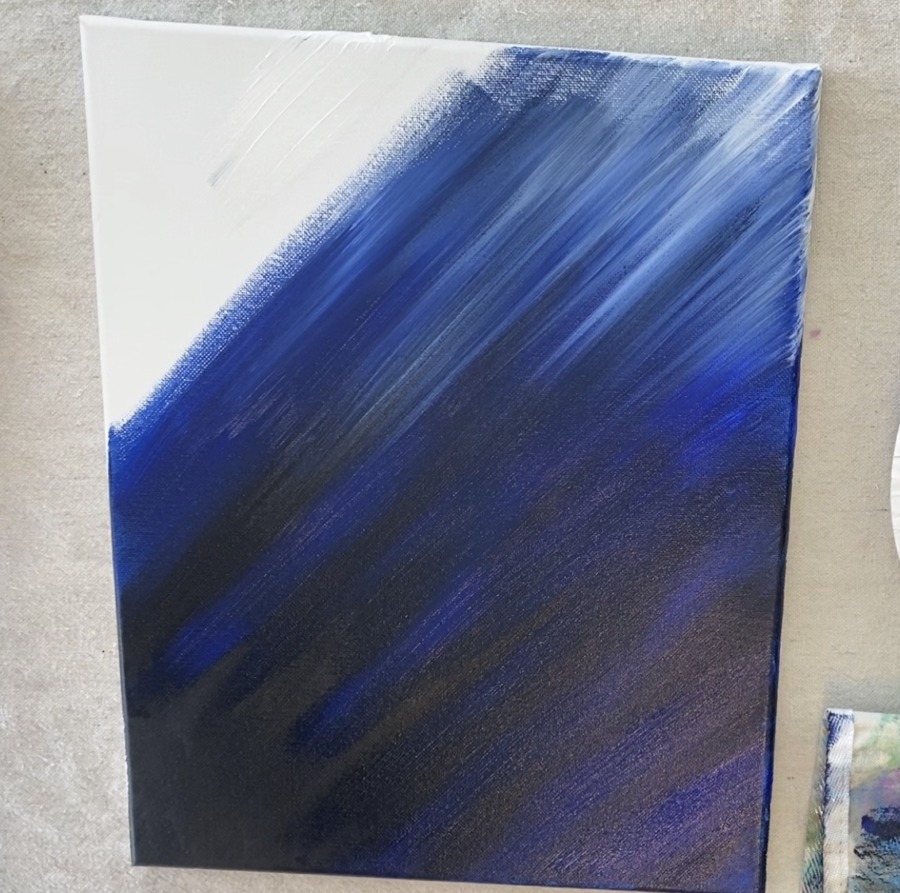
Then fill the upper left area with more white and have it blend down into the blue and black. If you need to, add more blue or black to help the white to blend. 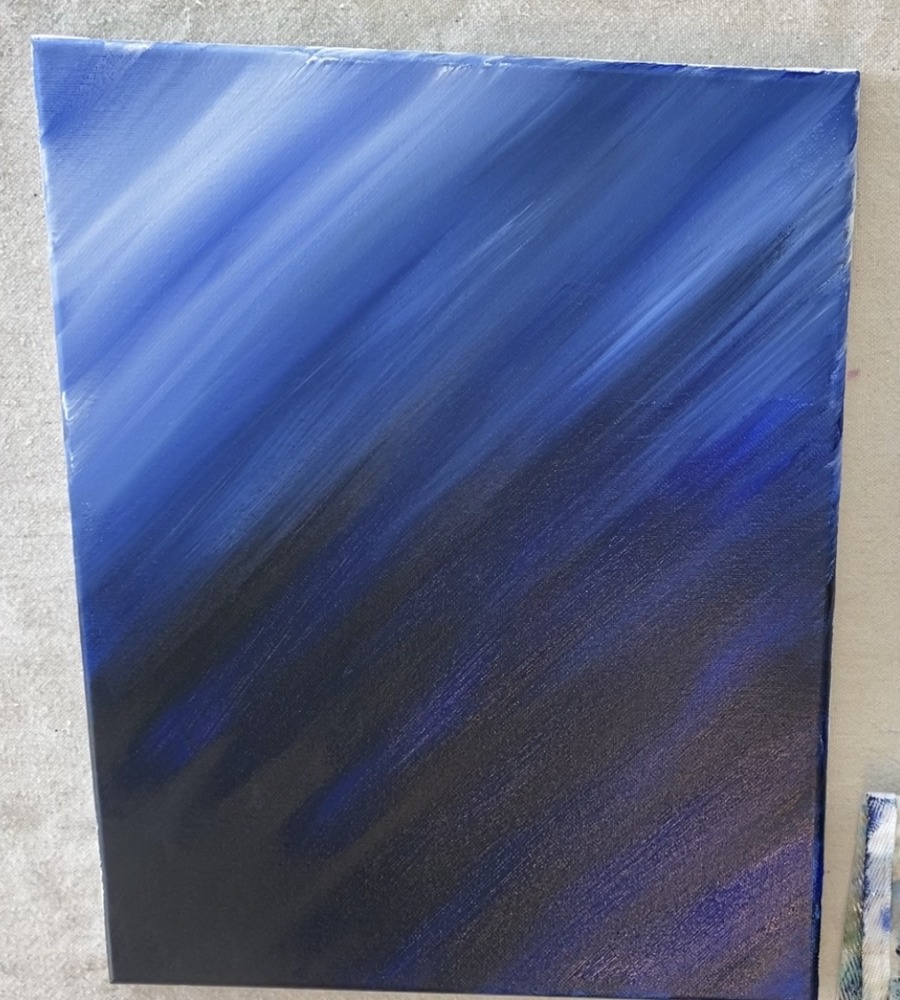
2. Draw The Jellyfish With Chalk
Let your painting dry (at least 30 minutes) before drawing anything on the canvas.
To do the jellyfish drawings, I used a piece of chalk. (Note a traceable for this will be coming soon!). Start with the large one and draw a big arc in the upper left. 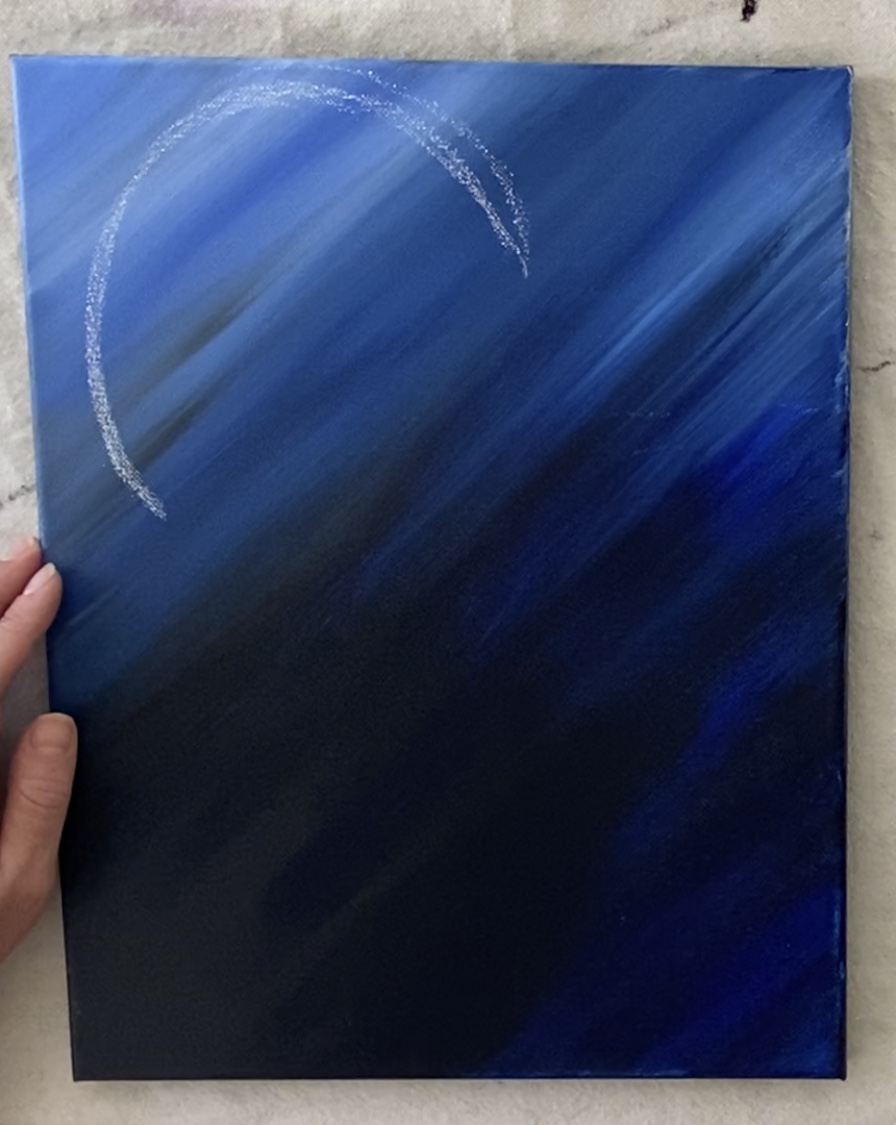
Chalk will erase so if you mess up, simply get a wet paint brush or a wet wipe and gently erase the chalk.
Then draw 4-5 bumps.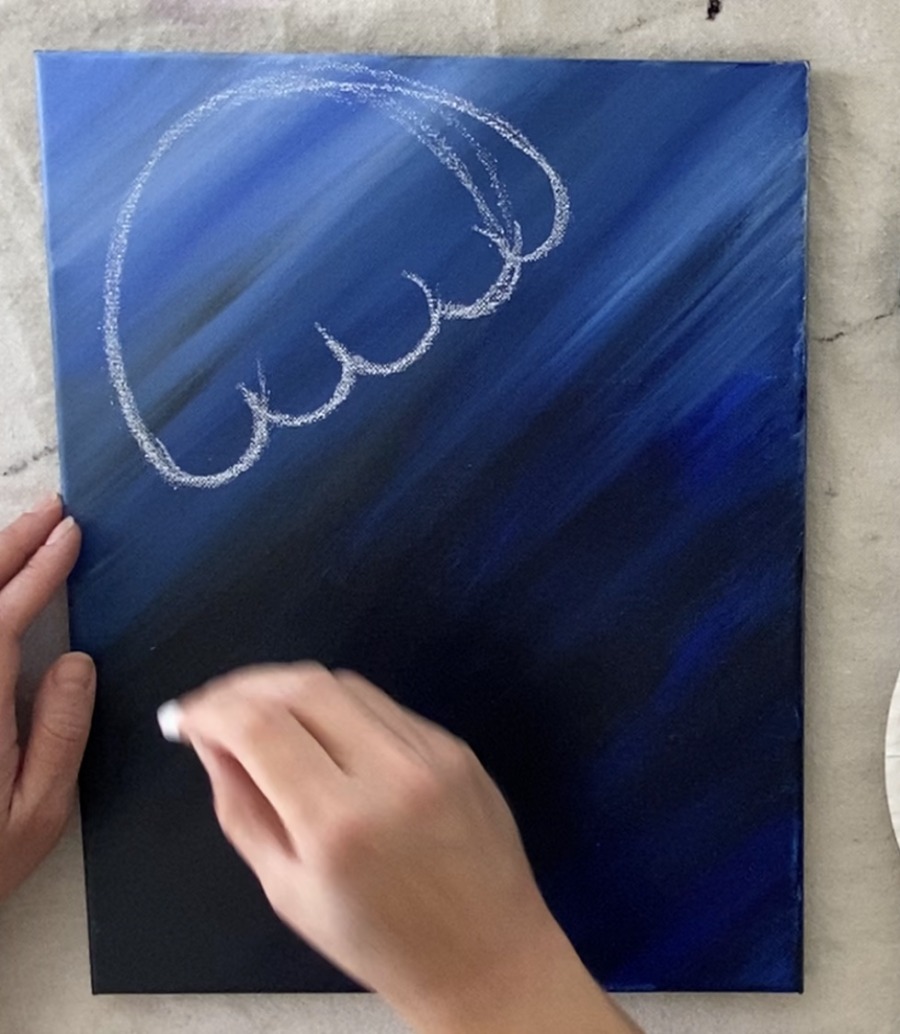
Next draw a wavy line under it to represent the under part of the jellyfish. 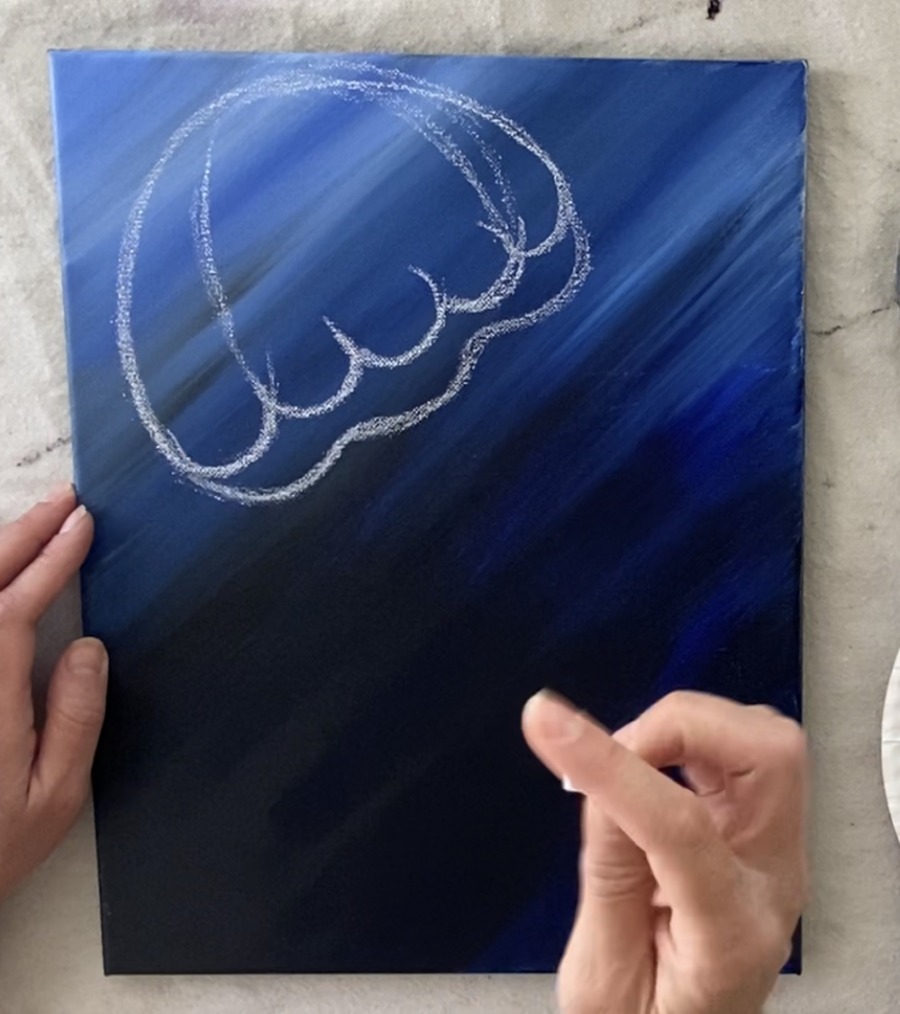
Then draw the curved lines connecting from the bumps to the top center of the jellyfish. 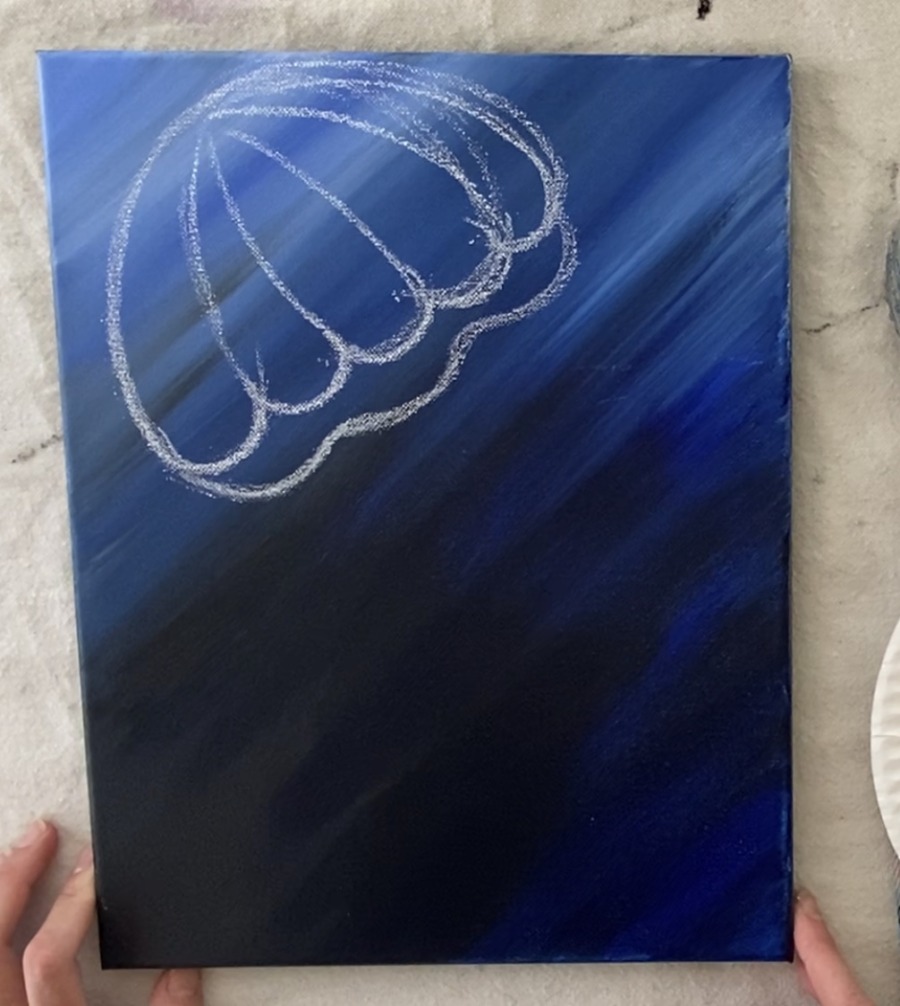
Next draw a smaller jellyfish shape in the lower right area of the canvas. 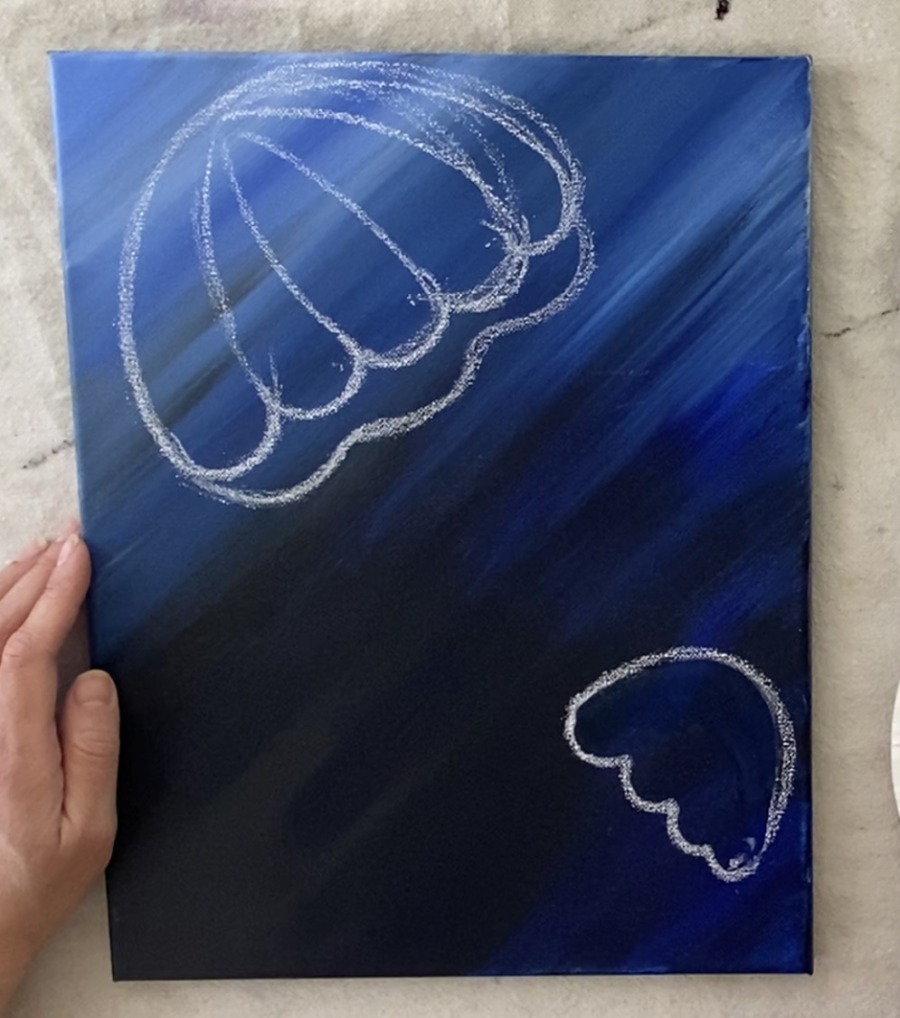
And the lines on the little jellyfish as well. 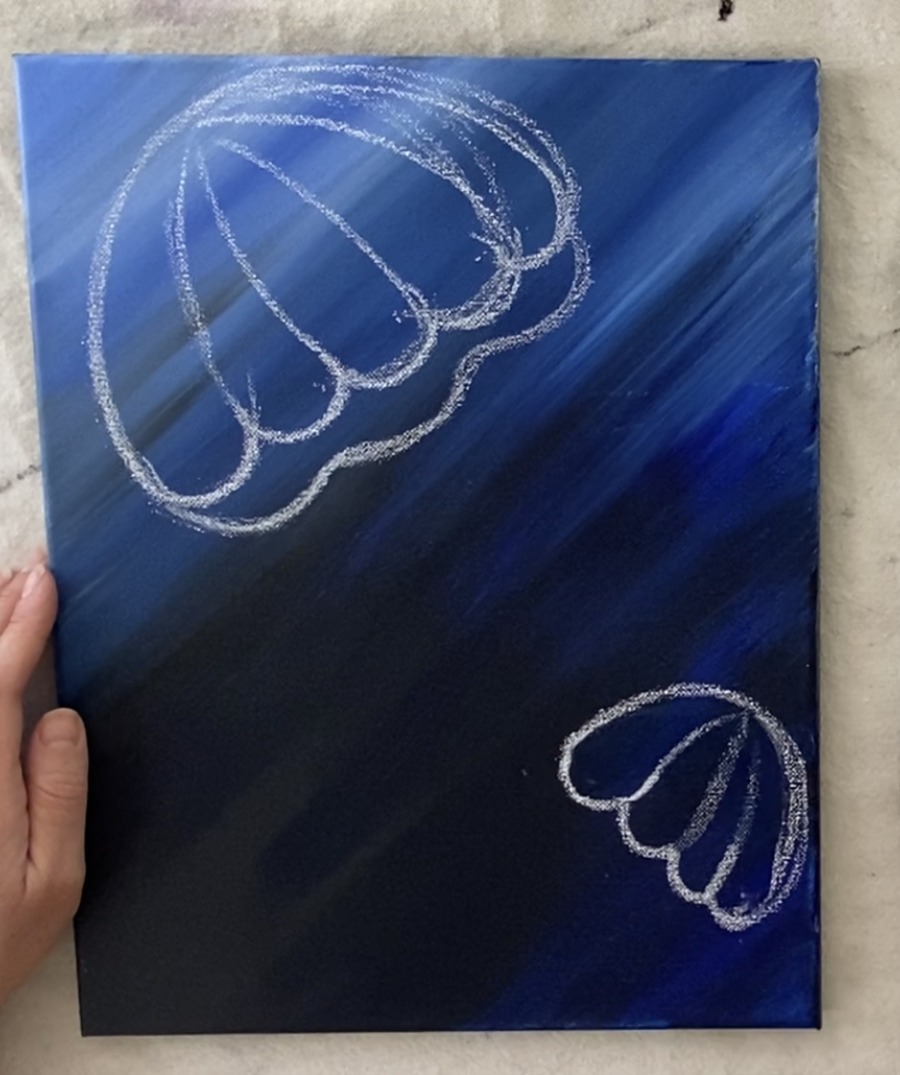
Then to help visualize the “tentacles” and “oral arms”, I drew those in with chalk as well. This step can also be optional because the chalk gets a little messy with all that drawing and painting over it.
Draw two largely wavy shapes. 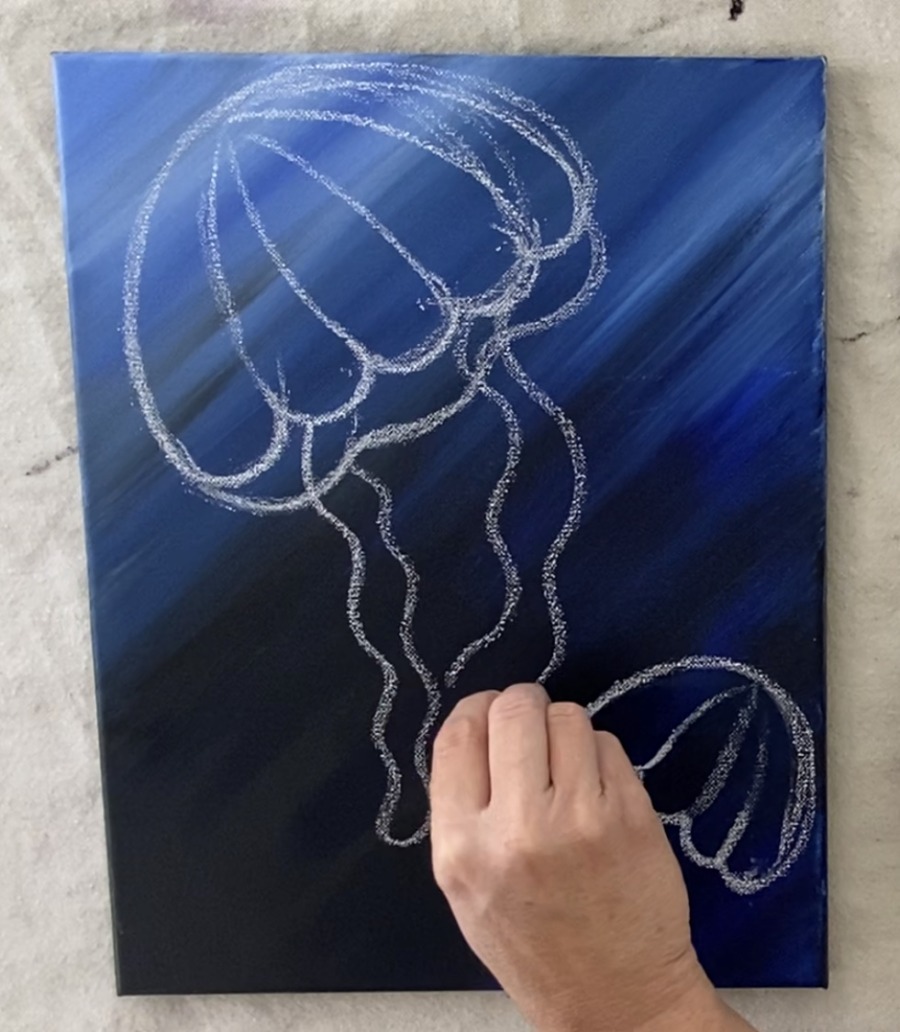
And a third one. 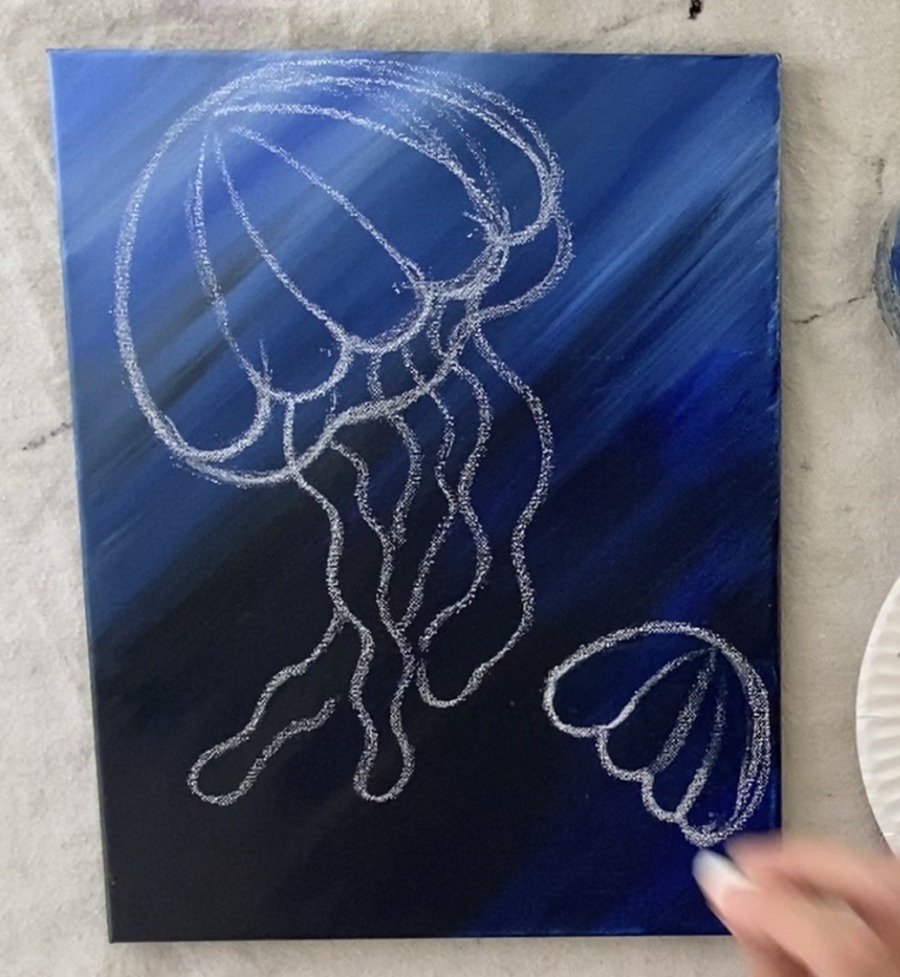
Then draw the tentacles. I made a few lines that sort of spiraled in different directions. 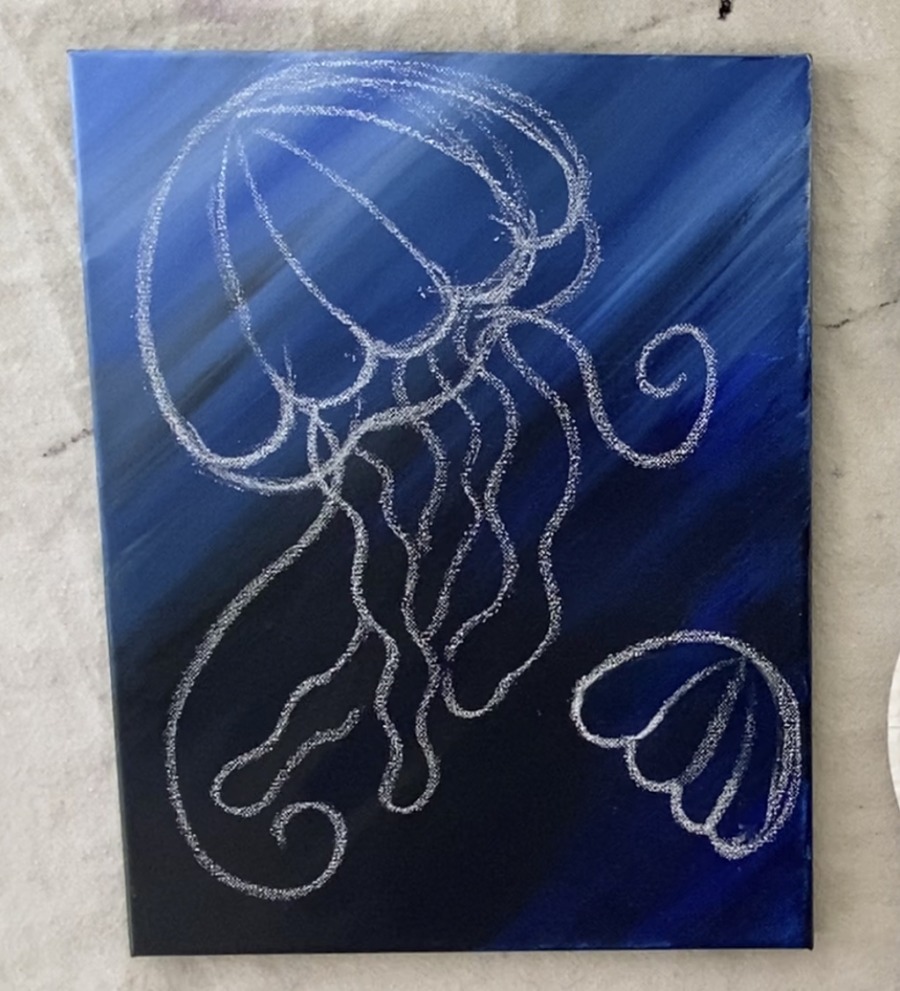
Then do the same thing to the smaller jellyfish. 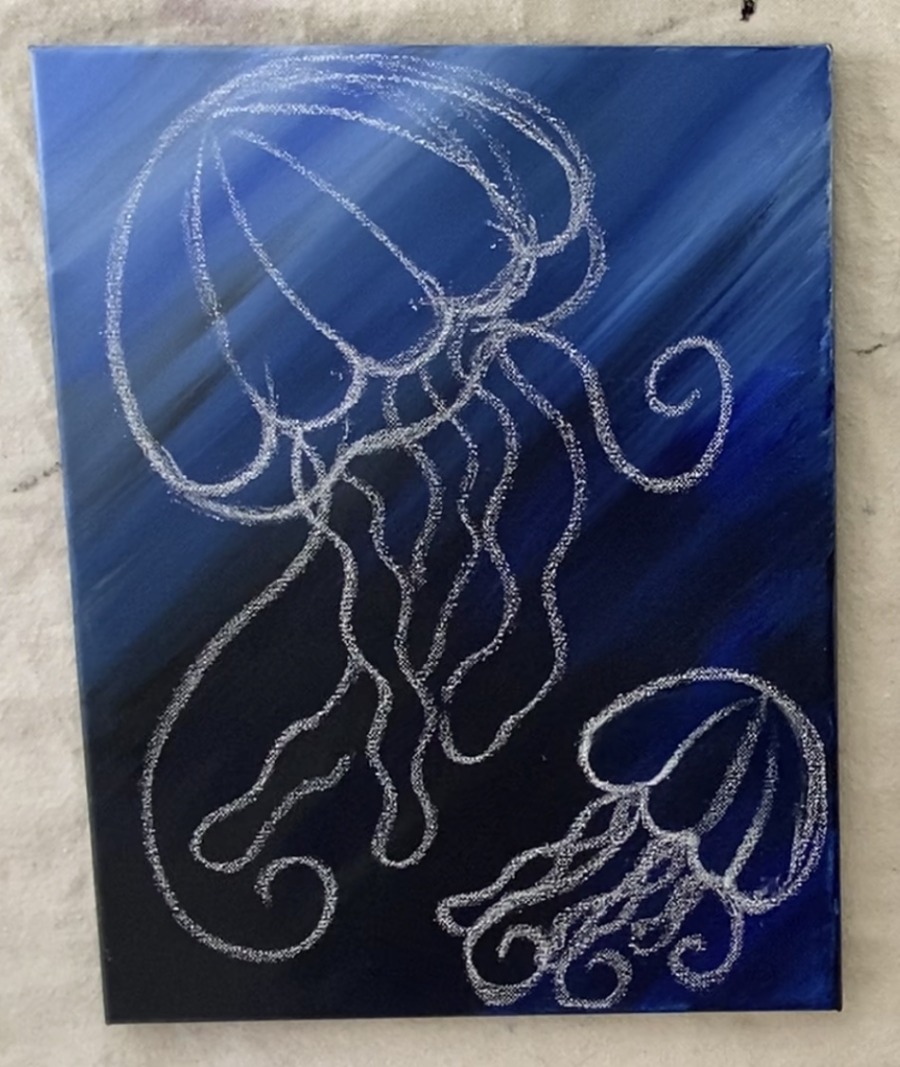
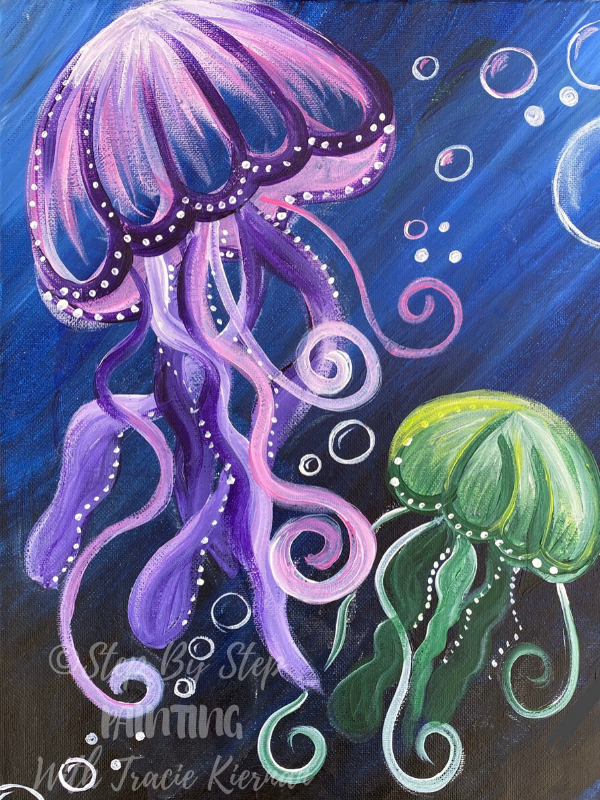
3. Paint The Large Jellyfish Bell
The colors I used in the large jellyfish were: dioxazine purple, titanium white and medium magenta. Load your palette in those three colors and use a 4 round brush. 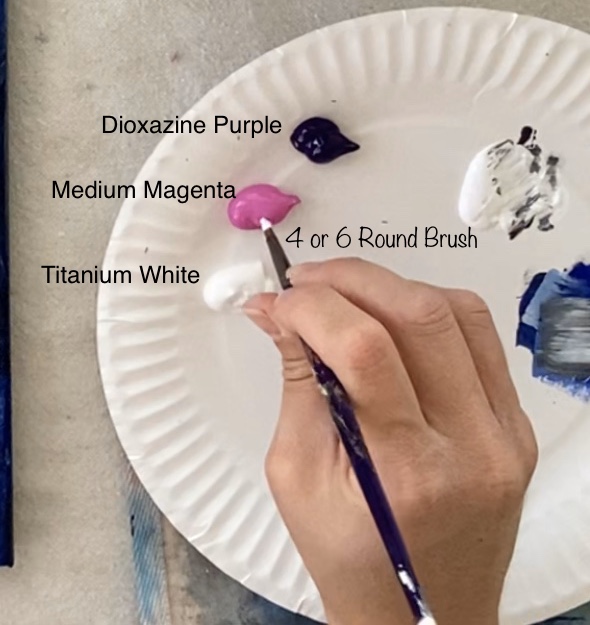
Start with the color titanium white and paint the very top of the large jellyfish. Make strokes that start at the top and stroke downward so it forms sort of a “starburst” style of stroke. 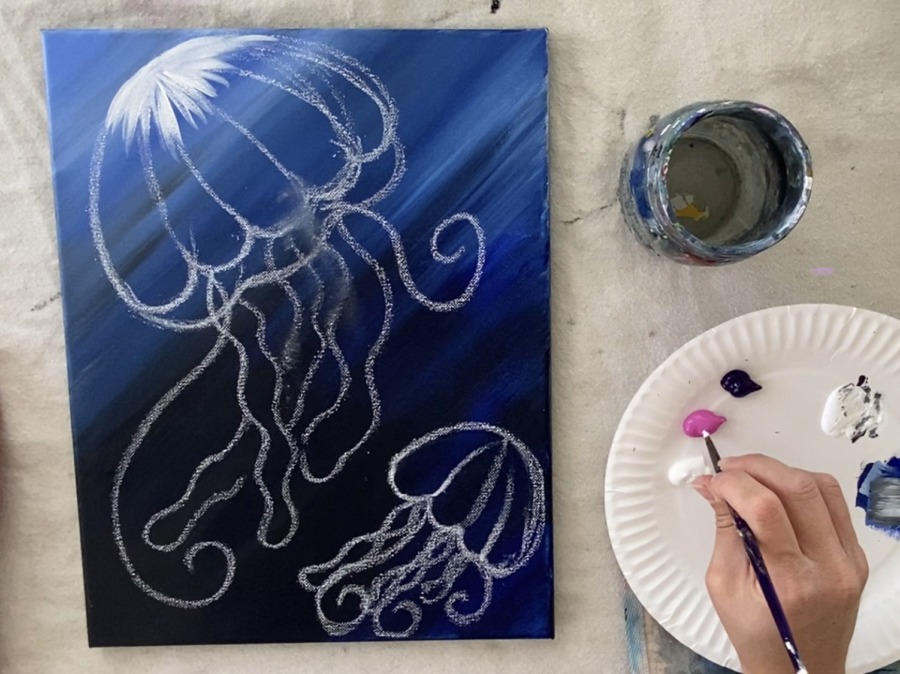
Then, without rinsing your brush, load the tip in medium magenta. Paint some medium magenta in the same curved direction so that it blends with the white. 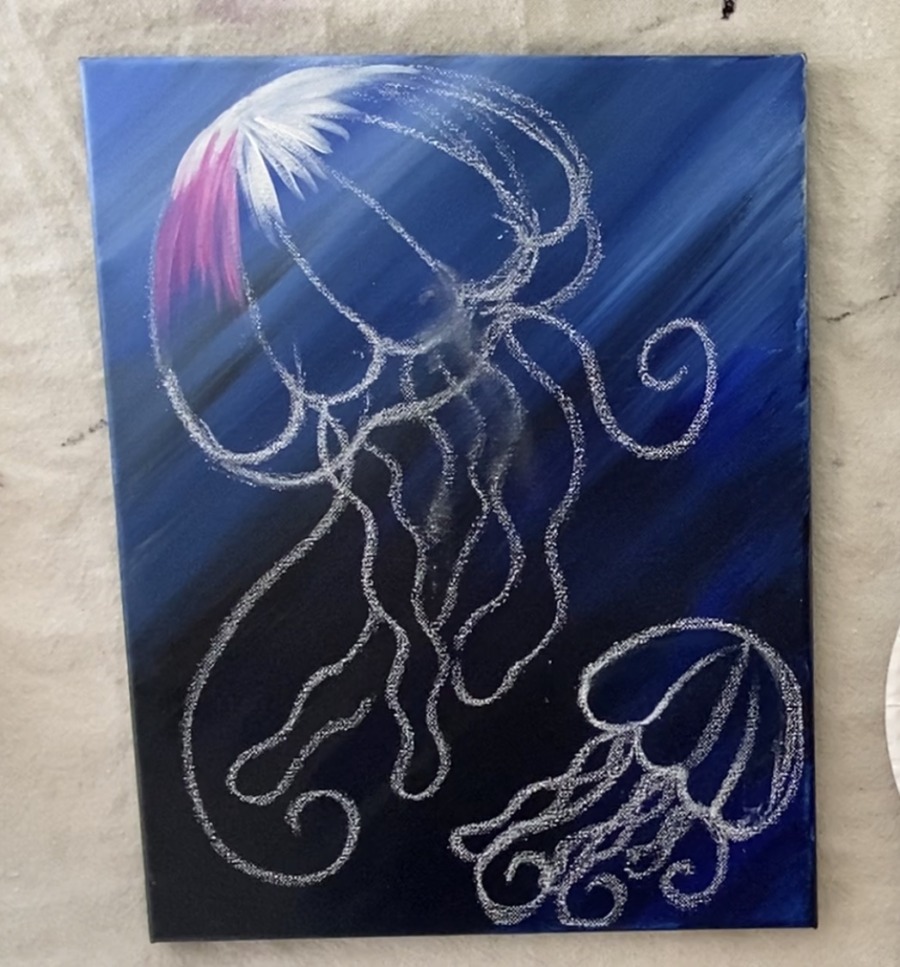
Jellyfishes are kind of translucent, meaning you will be able to see some of the color of the water through the bell shape of the body. When you paint this, you don’t want to add a lot of paint to the bell shape area so that it is completely solid/ opaque.
You want the paint to be a bit see through. To do this, I had the middle area of my jellyfish have less paint and sort of faded. You can do this by not having a lot of paint on your brush and letting it dry out and fade out when you do the paint strokes. 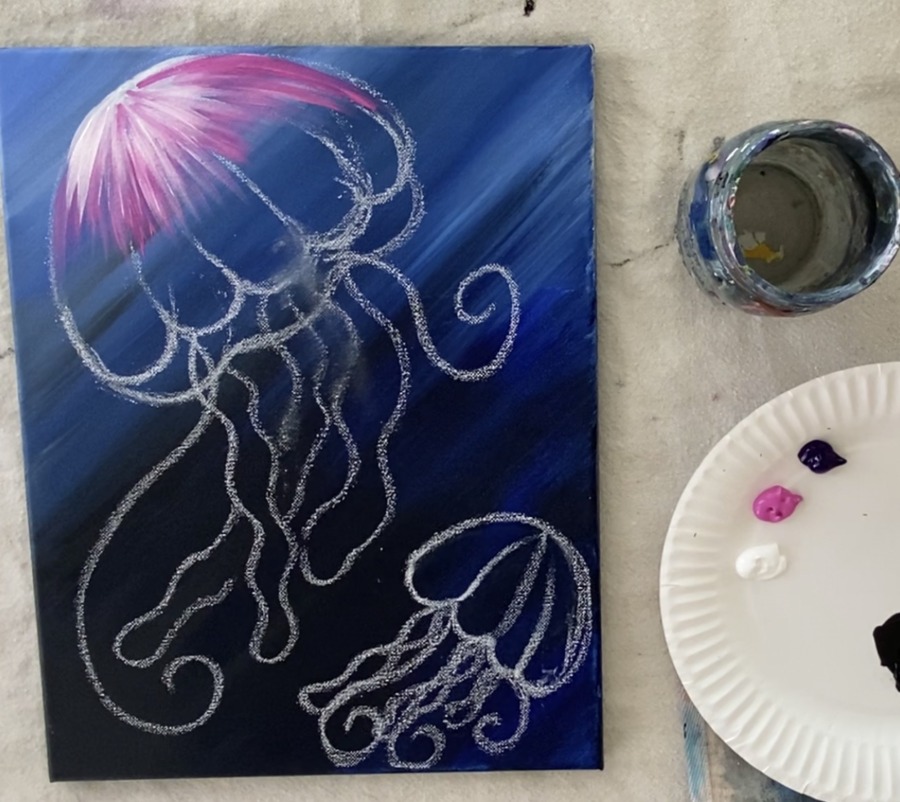
I left the bottom area blank for now but did paint the under area with medium magenta. One thin layer will do the trick.
Then you can rinse your brush and use dioxazine purple. Use the tip of your brush to outline the bottom bumps and lines with dioxazine purple. 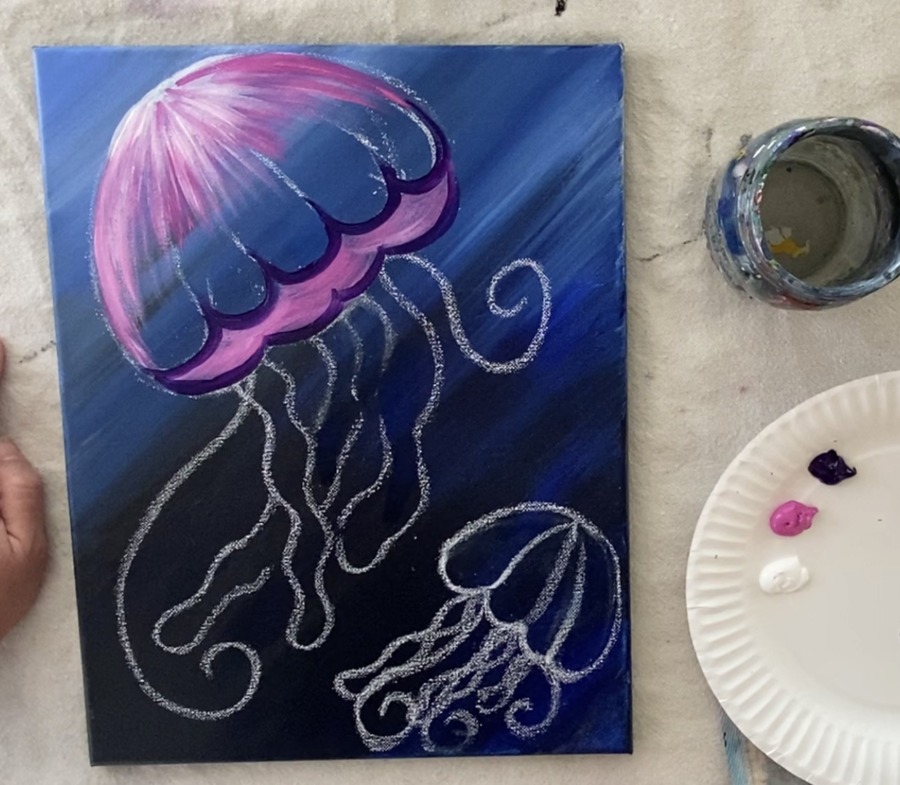
The edges and middle lines of the jellyfish bell shape are outlined with dioxazine purple. 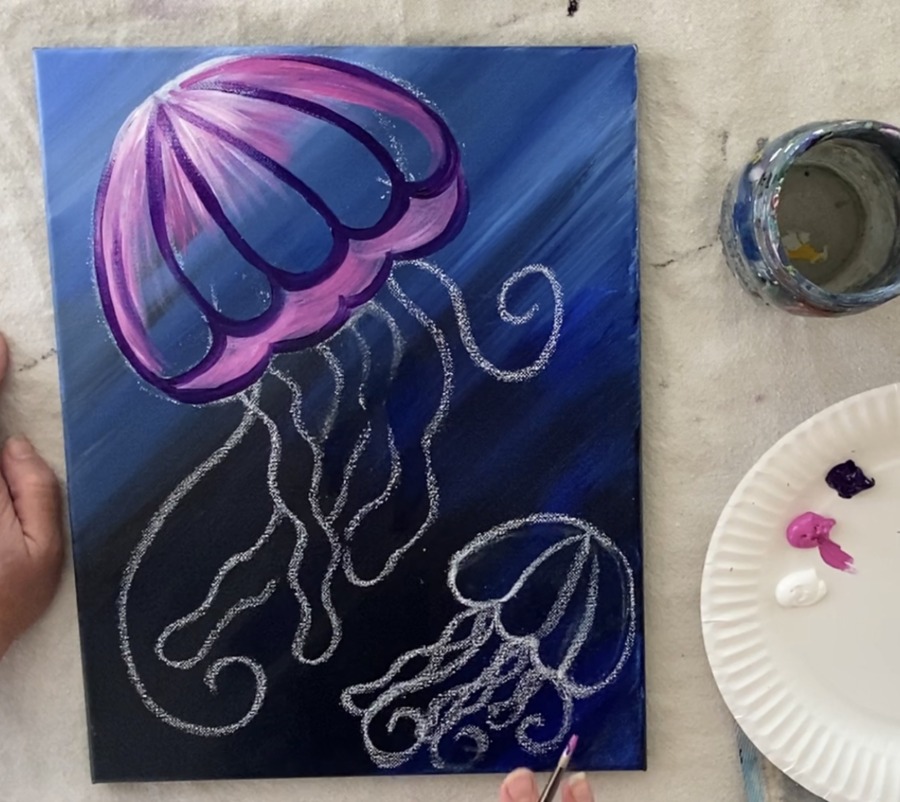
Then I filled some of the middle area with more medium magenta but made it very light and sort of dry brush style so that blue water was still showing through. Dry brush means there is not a lot of paint on your brush so when you apply it, the paint shows up thin and see through. 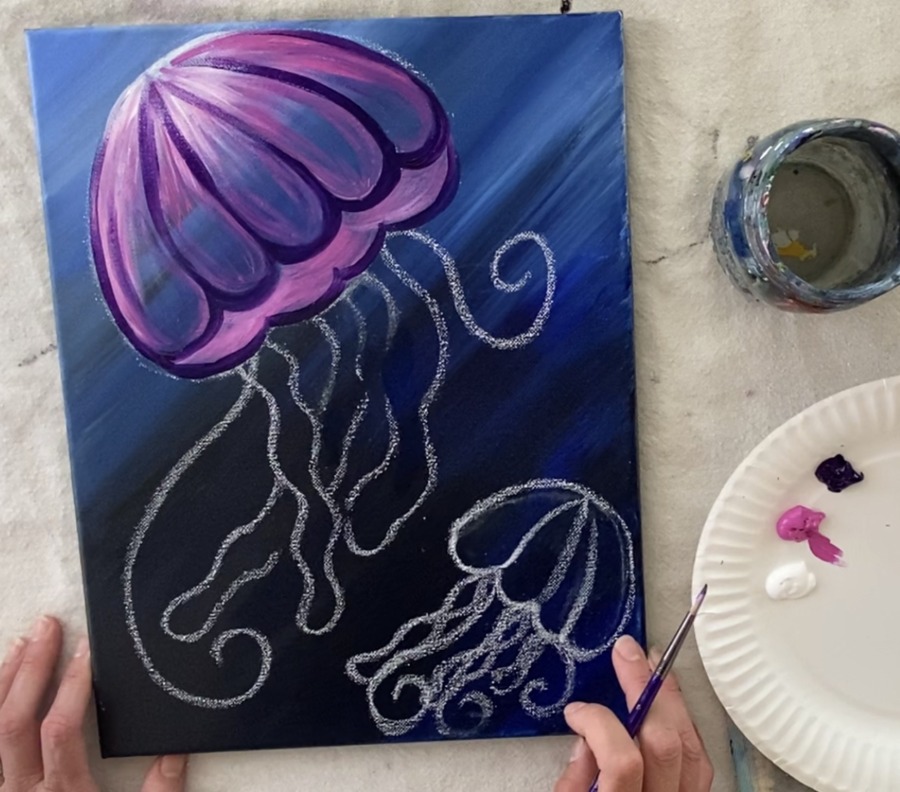
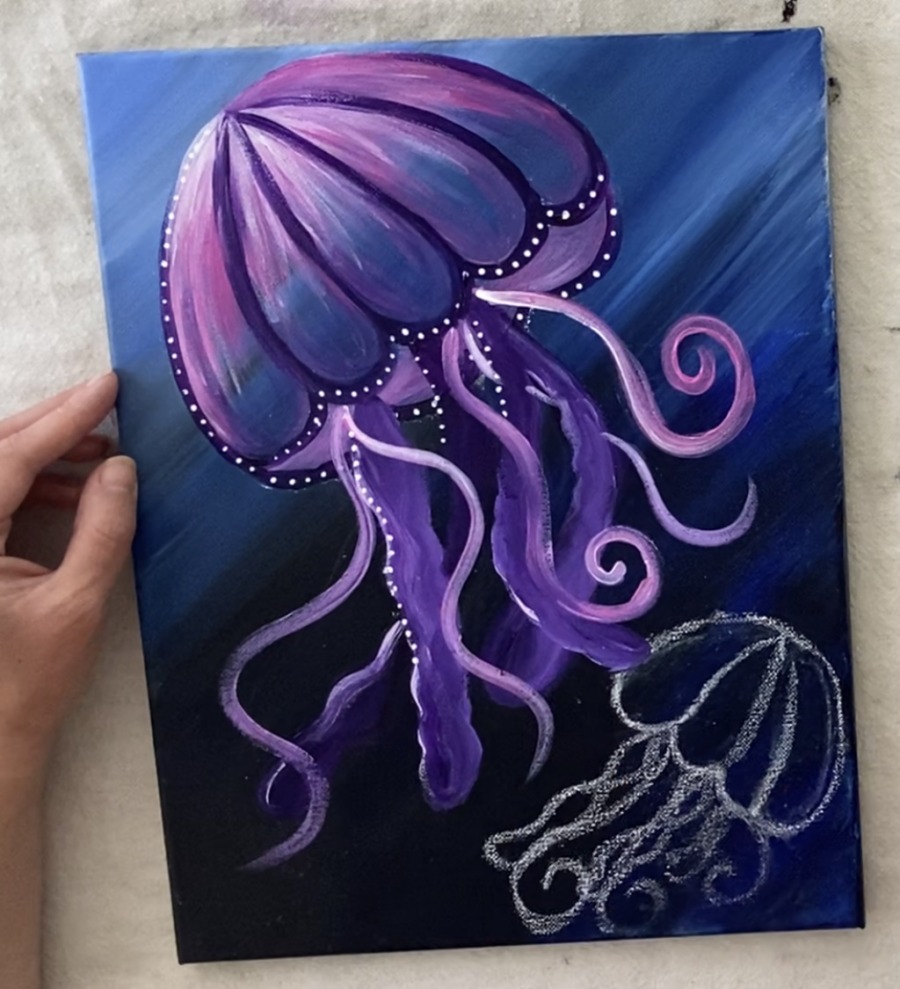
4. Paint Dots
The dots are optional but they add a neat whimsical and eye popping effect. I did dots on the bottom part of the bell and on the left part of the arc of the bell.
Use a 0 spotter brush (or the smallest brush you have) and titanium white. 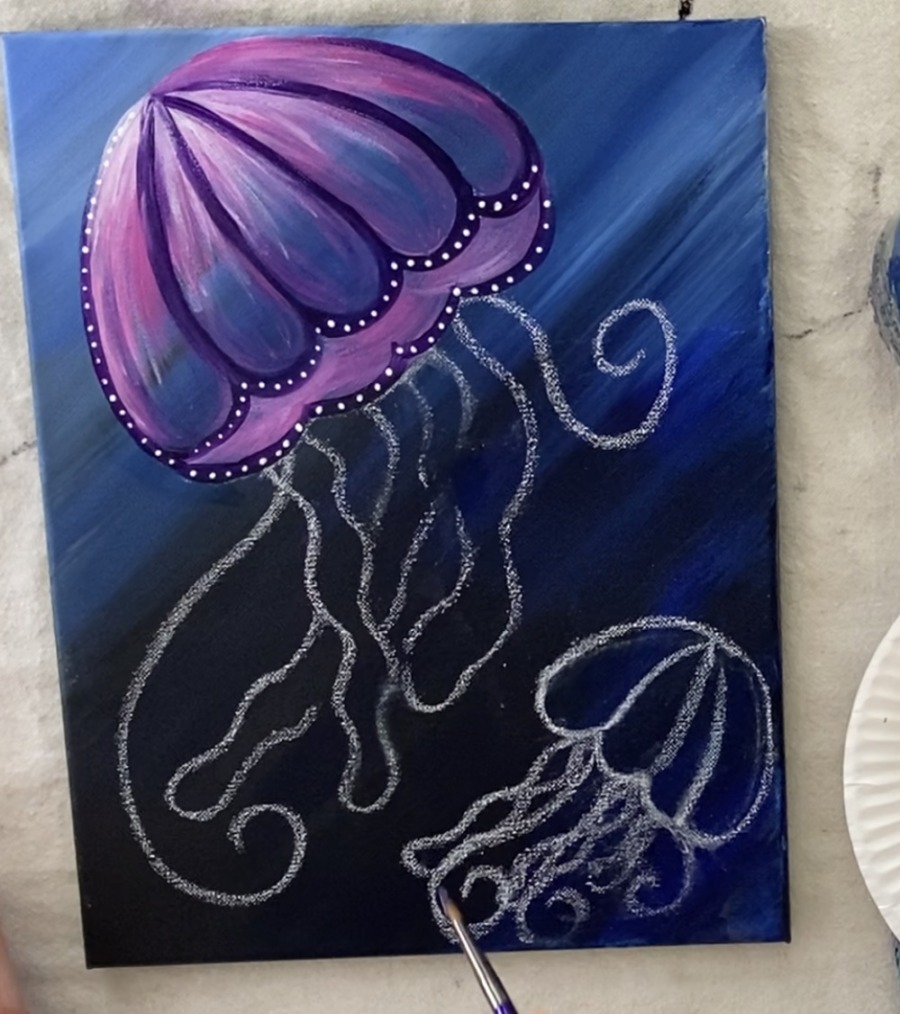
5. The Large Jellyfish Tenticles & Oral Arms
The oral arms are the larger shaped wavy lines and the tenticles are the single thin lines. I did the larger ones first and I used dioxazine purple plus titanium white. I also used my 4 round brush for this.
Double load your brush in both the purple and the white and paint the oral arms. Let the colors mix on the canvas to make a varied purple/white blended color. You can also wiggle your brush a little bit while you are painting to create texture.
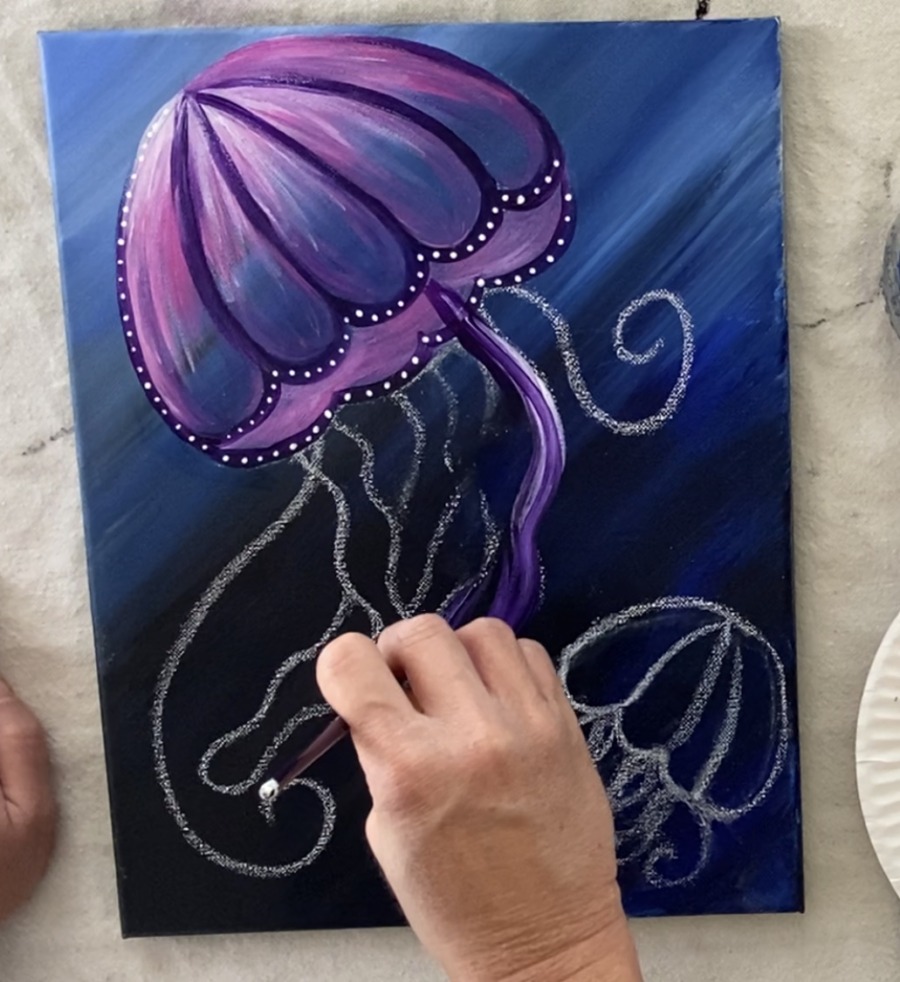
The variation of color you see in the purple was done by adding different amounts of white to the purple to create lighter and darker oral arms. You can also overlap some to give the jellyfish more depth. 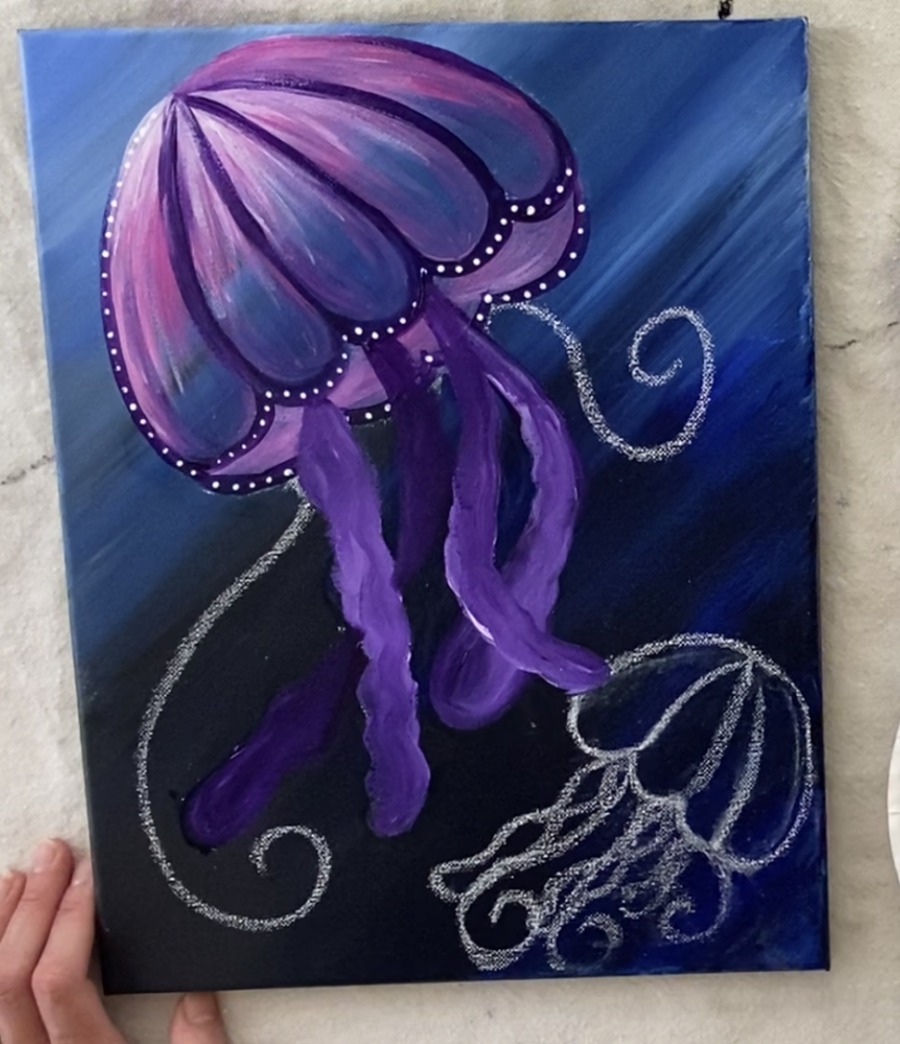
6. Paint The Large Jellyfish Tentacles
Tip: erase the chalk lines first with a wet brush or a wet wipe and then paint the tentacle lines. If you paint over the chalk line, it might get kind of messy with the chalk dust.
Using the 4 round brush, double load it in white and purple. Then paint the tentacles as a long wavy line. Some of them spiral.
Add a bit more white to your brush to get the purple to be a brighter and lighter color.
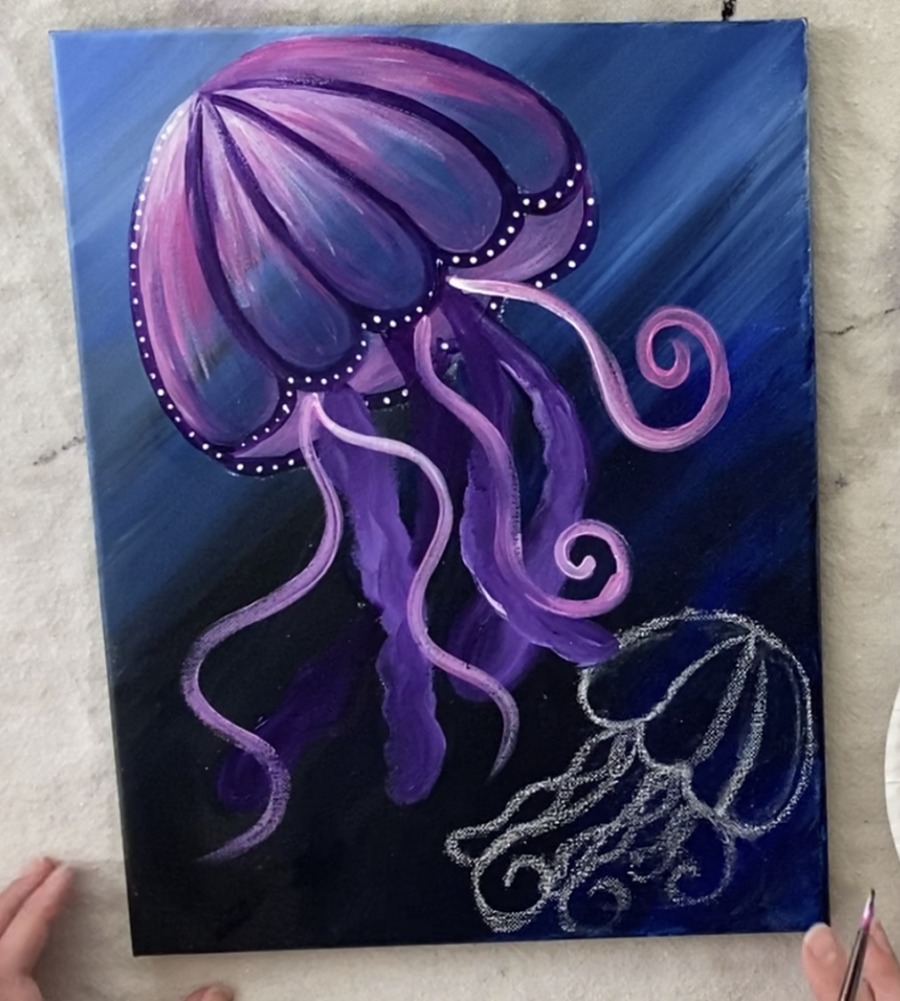
I painted 5 wavy and spiral lines going in different directions. Some of them go behind the oral arms, some overlap, etc.
You can erase any lingering chalk lines with a wet brush or a wet wipe.
I also painted more white dots along some of the oral arms and tentacles.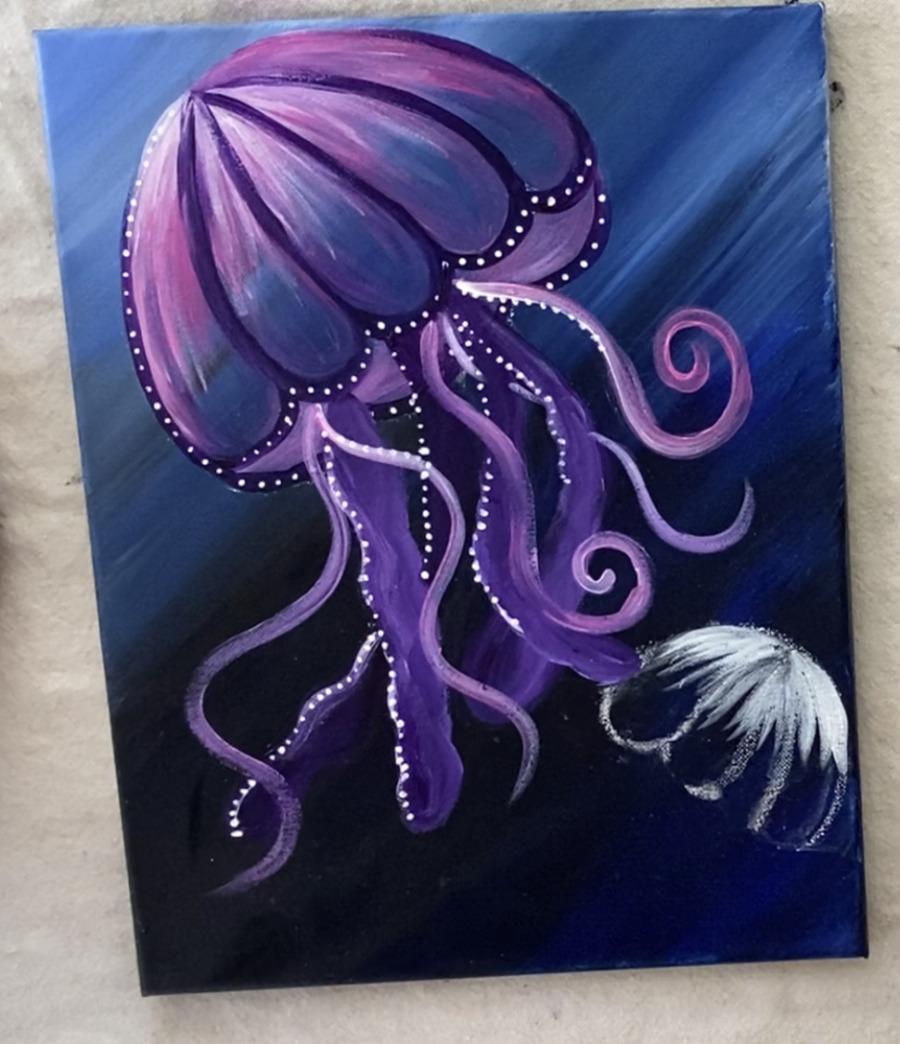
7. Paint the Oral Arms & Tentacles Of The Smaller Jellyfish
For the green jellyfish, I did the exact same technique only with the colors: deep green permanent, brilliant yellow green and titanium white. I also used my 4 round brush.
Start at the top with the titanium white and stroke downwards so it fades out.
Then blend brilliant yellow green into the white so it’s lighter at the top and blends to green.
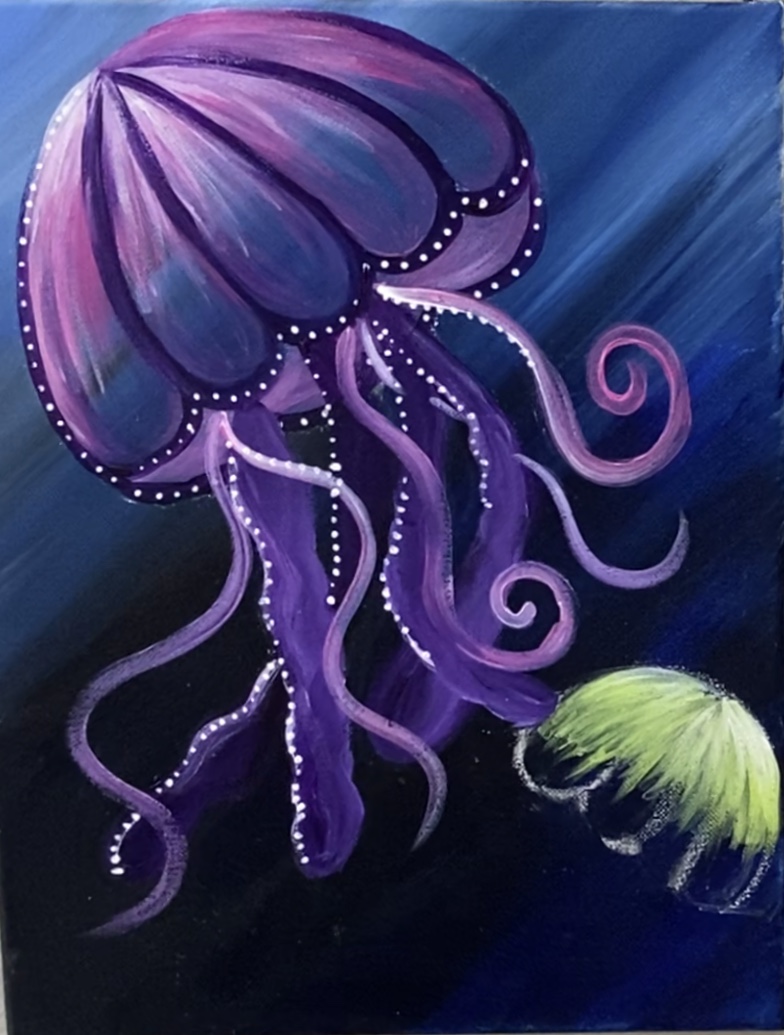
Then blend to deep green permanent. Also, outline the bumps and the lines of the bell body with deep green permanent. 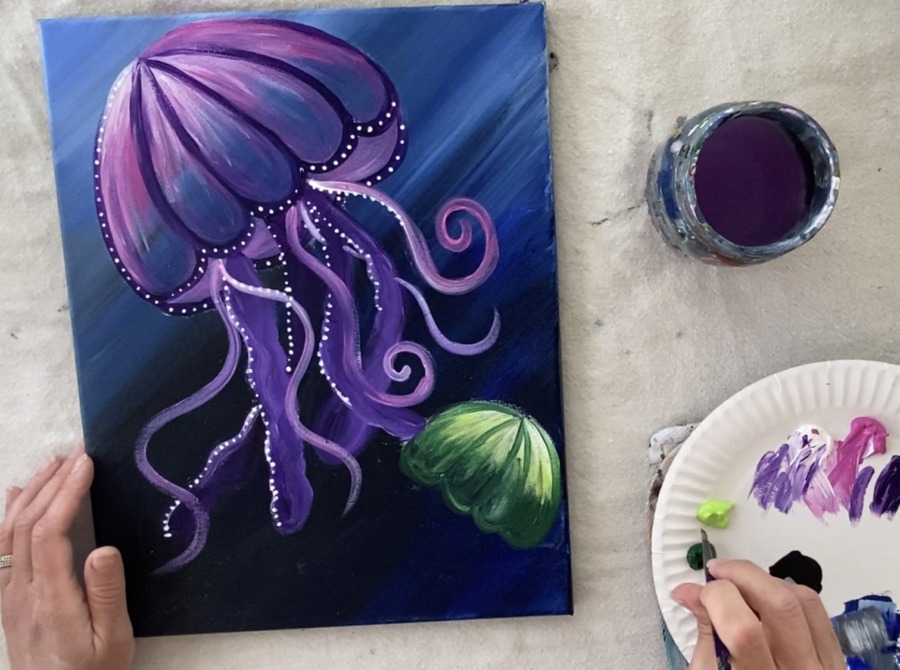
Paint the oral arms deep green permanent double loaded in white to get a mix of dark and light green.
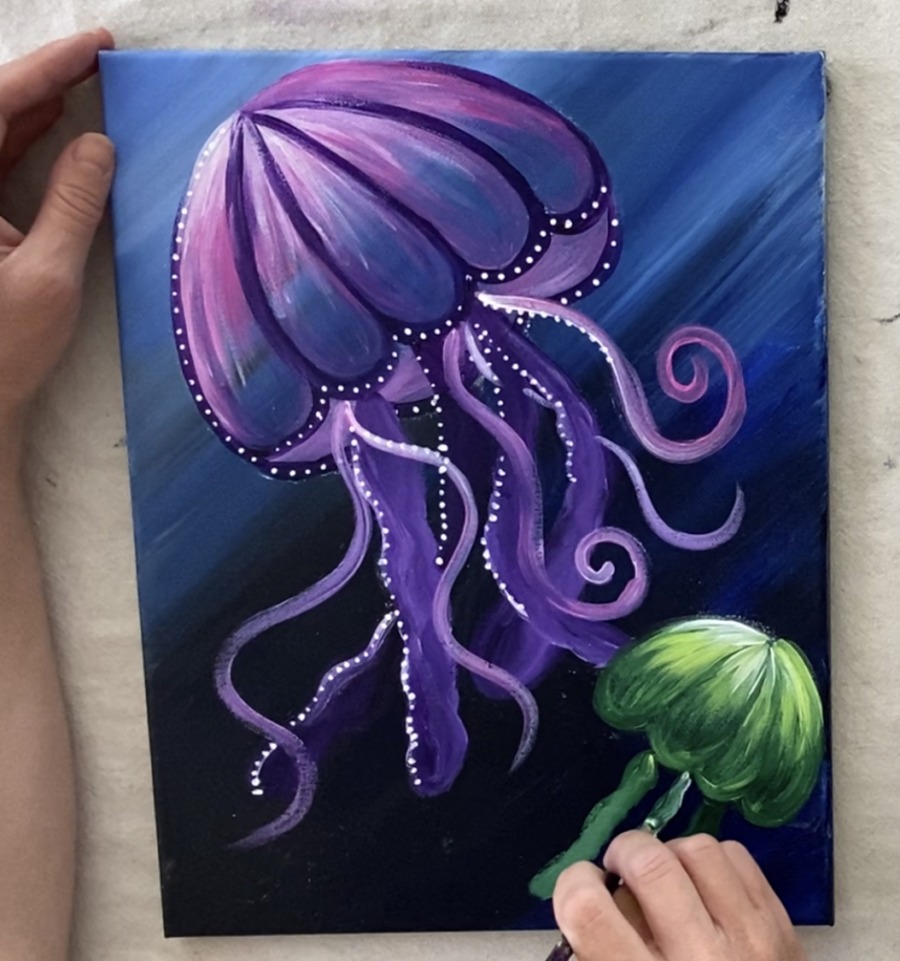
And do the tentacles with white and brilliant yellow green.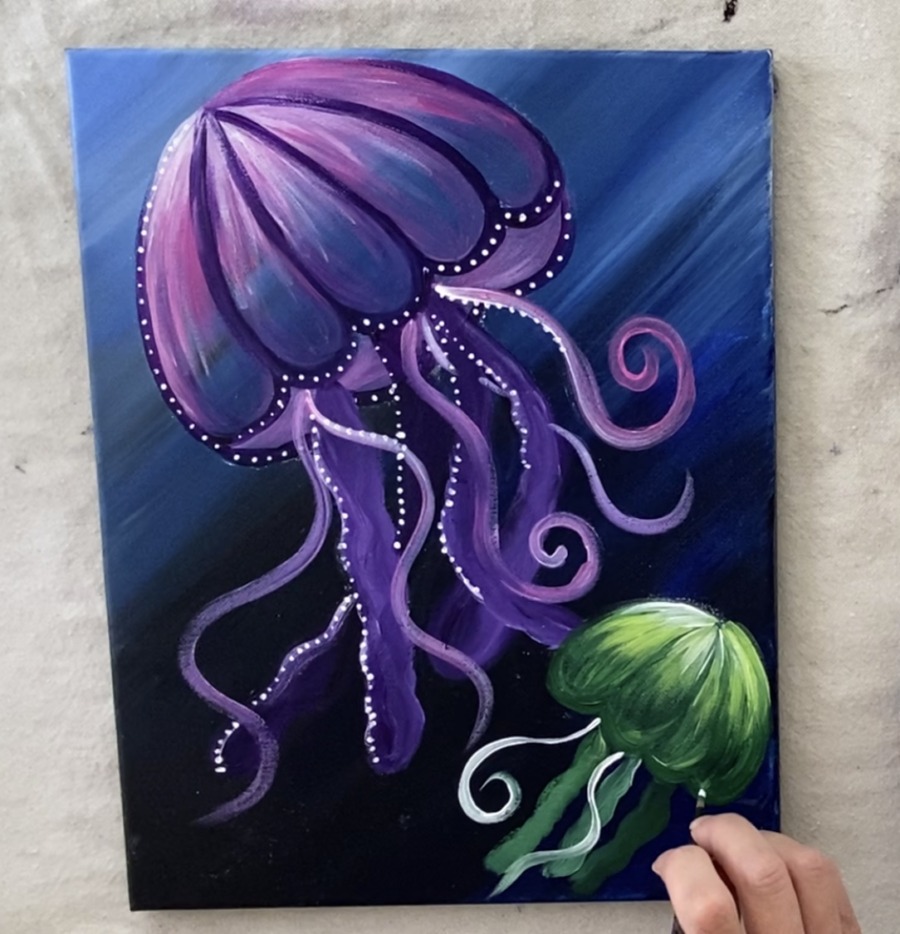

Next paint the white dots the same way you did them with the purple jellyfish. 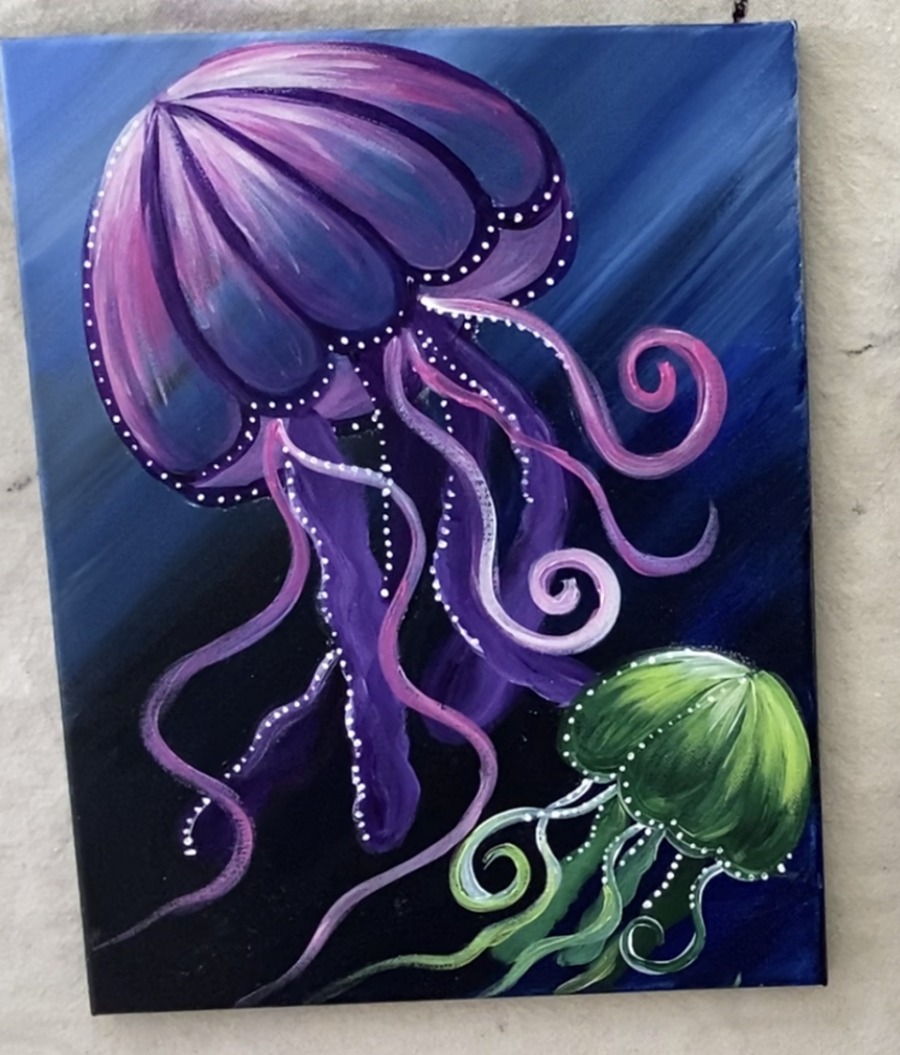
Also, if you look closely at the above photo, I made some of the tentacles longer.
8. Paint Bubbles
This last step is so much fun! Use your 0 round spotter brush (or the smallest brush you have) to paint small circles. I did this in a diagonal direction starting at the bottom left and going up to the upper right.
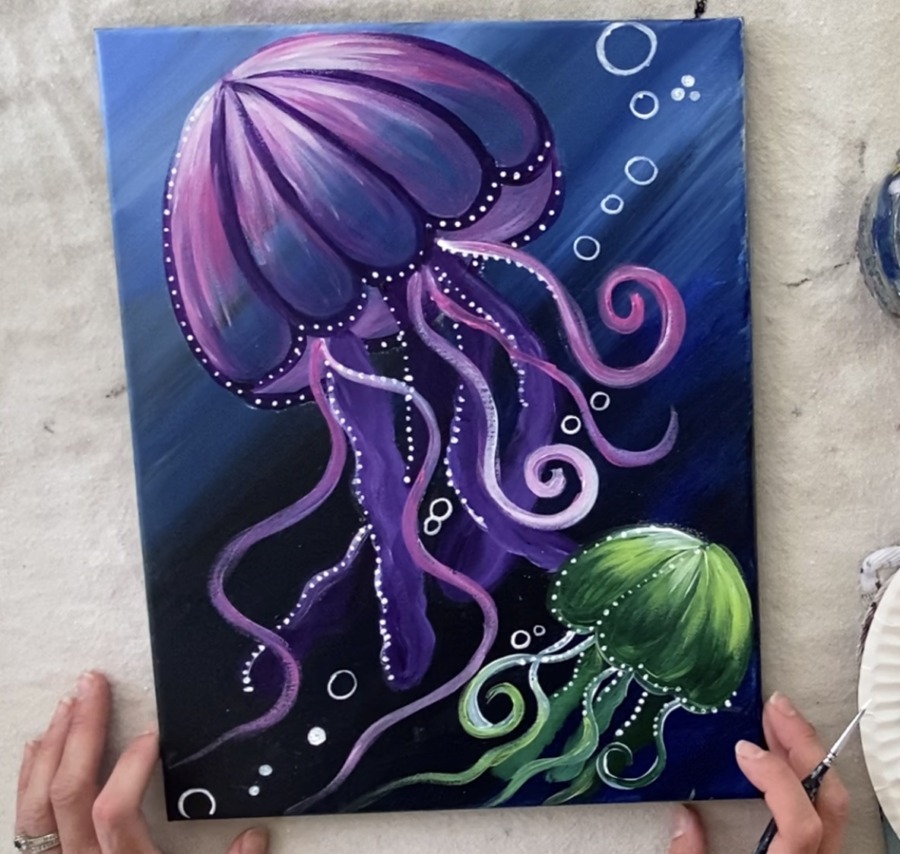
Some circles are larger, some smaller, some tiny and filled in solids and some in clusters of two and three. And don’t forget the highlight!
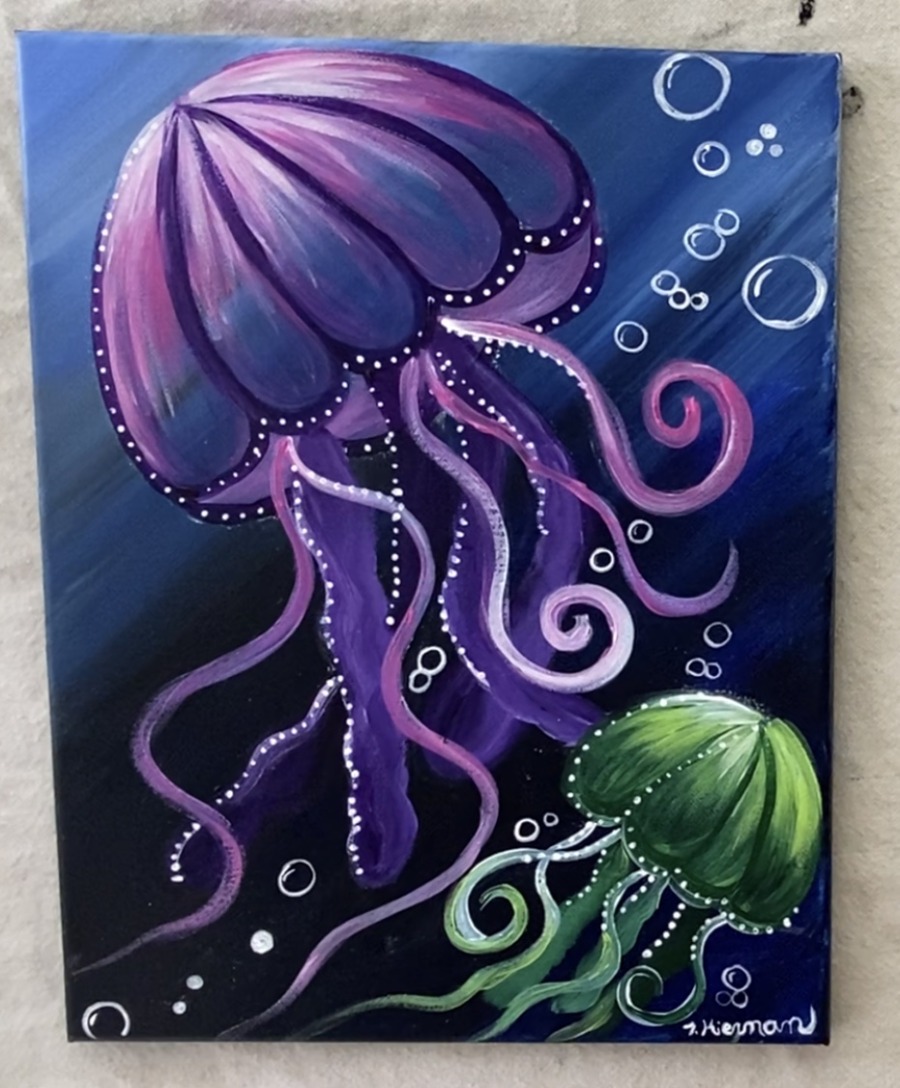
Finished
 In loving memory of Timothy Kiernan June 21, 1988 – April 17 2020
Hello, I was wondering two things, but you don’t have to answer. First of all, on the American flag, can we paint the trees without a fan brush? And second, can you do a wolf painting please? (P.S., I love all your paintings!)
Yes you can use a fan brush on the American Flag painting ? And sure I will add that to my idea list! Thanks!
No problem! ? Can we paint the trees without a fan brush because I don’t have that brush? ?
Oh yes sorry I didn’t see you meant without ?. Yes you can! I would use a round brush if you have one.
Ok, thanks a lot! ?
No problem! ? Can we make the trees without a fan brush? Because I don’t have that brush. ?
Just found your site, I want to paint every thing, lol, even though I have never painted on canvas before. I paint rocks and outdoor garden statues.
Can you tell me how long the free “summer” step by step will be available here? I have a lot of acrylic paint, just need to get a few other items & worried that I may run out of time. I want to try the Jellyfish & the Flamingo, and…lol.
Hi Lisa! The Summer painting tutorials will always be on here! You can access them anytime of year!
Thank you!!! I’m so happy.
You’re welcome!!
Thank You for all these Wonderful Tutorials ❤️
I paint rocks not on canvas but I have learned a lot from you. Thank You, Thank You!!
You’re welcome Barbara! I know a lot of rock painters love this website ?