
“Paradise Dreaming” – How To Paint Palm Trees & Hammock
I would love to be laying on that hammock right now hearing the soft waves hit the shore and smelling that salty air!
Would you like to save this?
Beach theme paintings are my favorite to do (aside from Fall Paintings)! I love the color palette of the aqua with the sand color and bright tropical colors against them. Blues are very soothing colors to work with.
Painting a simple beach scene is easy! This tutorial will show you how to do just that. I like to use a sky color and white gradient for a beach sky and then a darker blue plus aqua for the ocean. I’ll show you also how to paint simple sea foam going over the sand. 
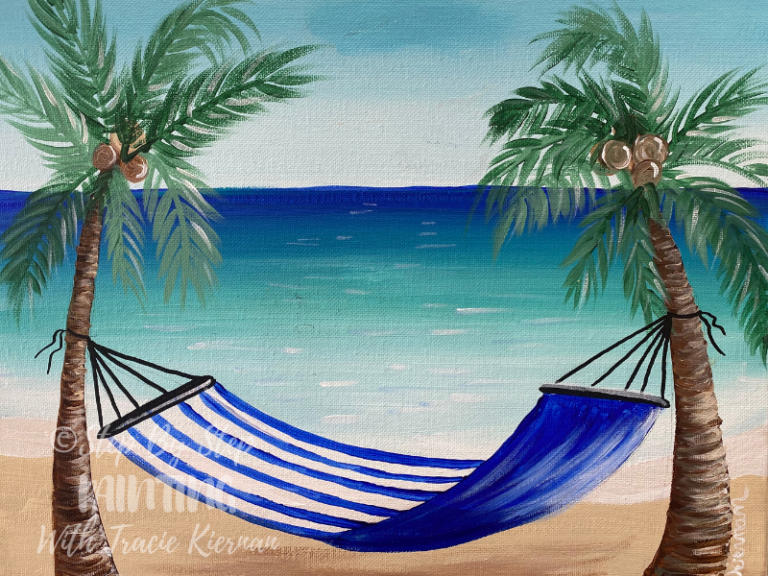
This is an acrylic painting tutorial for how to paint two palm trees, a beach and a blue striped hammock!
You can download a traceable for this painting here. It will help you especially with that hammock part, which I found kind of a challenge to draw at first.

I used six colors for this painting and only two brush sizes! You can scroll down below to find out exactly which colors and materials I used.
Enjoy and happy painting!
Materials
Hammock Palm Tree Painting

Escape to paradise on a hammock by the beach. This step by step acrylic painting tutorial will guide you through with pictures and video.
Materials
- 11 x 14 Canvas
- Acrylic Paint
- Brushes
- Traceable (If Using)
- Graphite Paper
- Black Paint Pen Or Sharpie (Optional but it’s handy for the hammock strings!)
Colors
- Deep Green Permanent
- Titanium White
- Ultramarine Blue
- Bright Aqua Green
- Burnt Umber
- Unbleached Titanium
- Light Blue Permanent
Brush Sizes
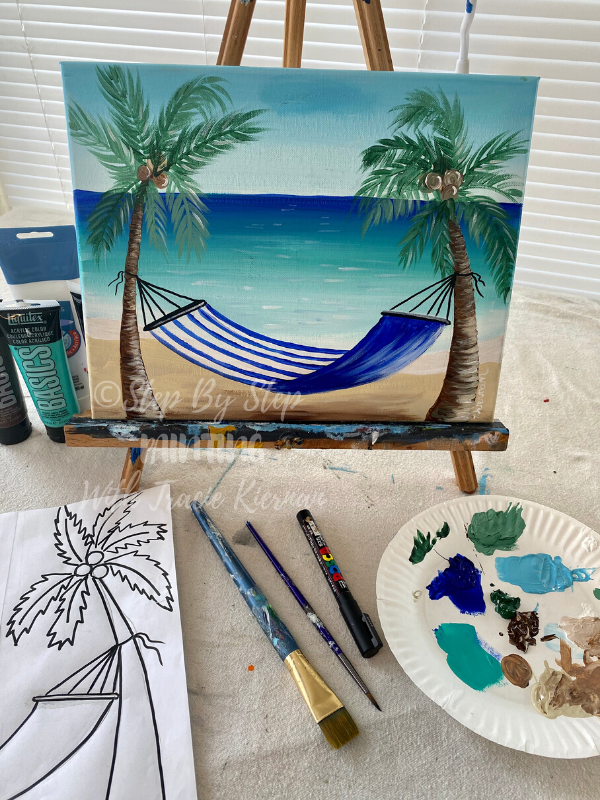
Color Palette
I used Liquitex BASICS acrylic paints. 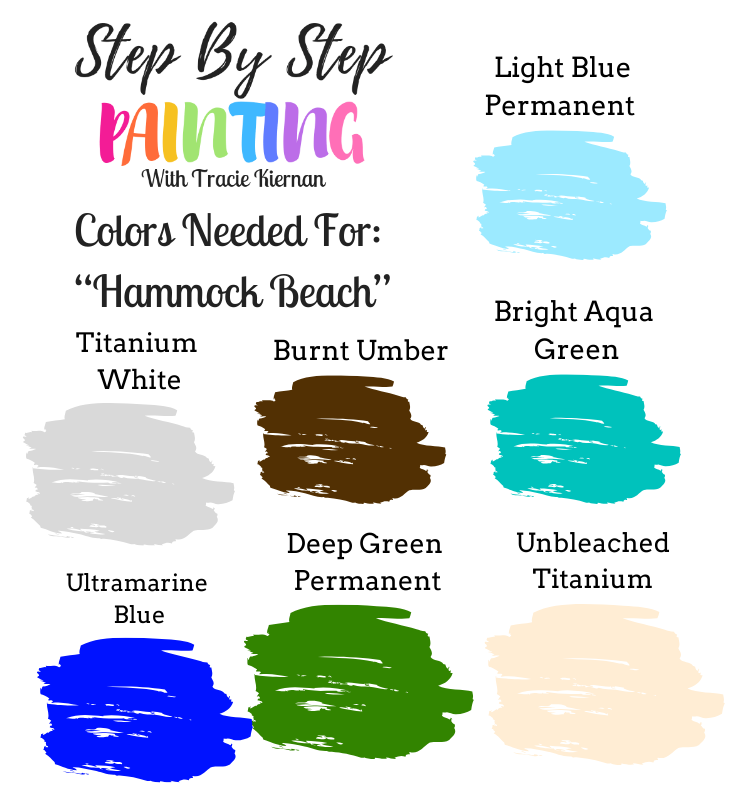
Craft Paints
If you are using craft paints, find ones similar to the color palette graphic above. Amazon is kind of limited in their paint stock right now but I’ve had a lot of luck finding supplies at Michaels! Look for any:
- White
- Dark Brown
- Any Turquoise or Aqua Color
- Medium Blue (lighter than navy but darker than sky blue)
- Any Sky Blue Color
- Any Sand Color
- Dark Green
Brushes
I only used two brushes for this painting – a 3/4” Flat Wash and a #4 round. If you don’t have those exact numbers labeled on your brushes, its fine! Find something similar to the shape and size pictured below. 
Traceable
This traceable can also be found in my traceable library. Learn more about using traceables here.

Directions At A Glance 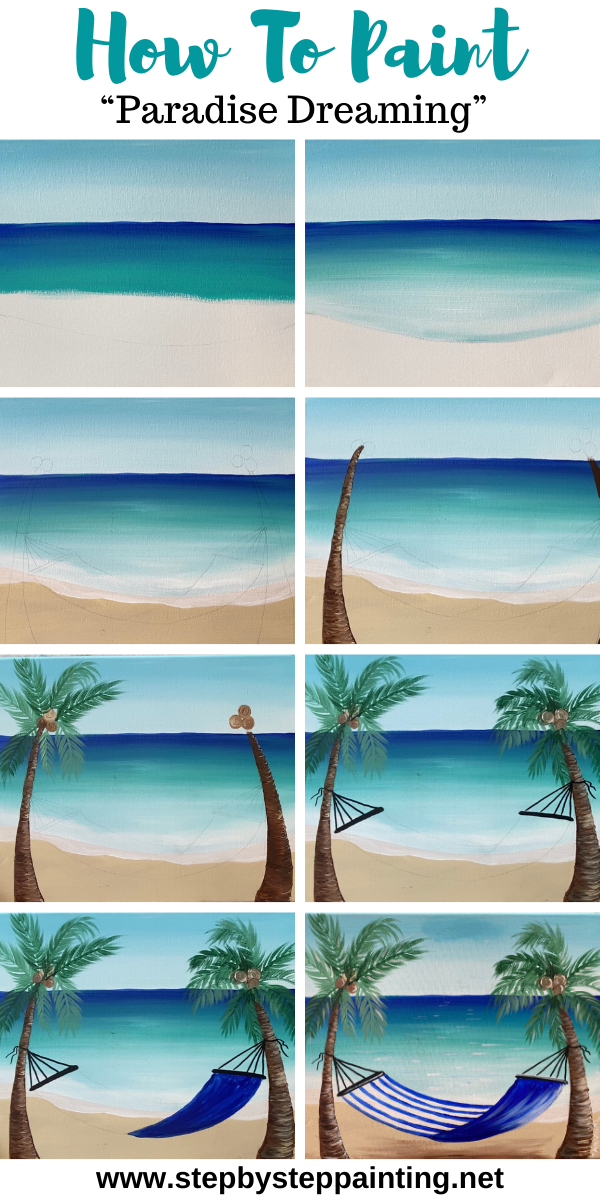

Video
Step By Step Directions
1. Paint Sky
First draw a horizon line about four inches from the top of the canvas. 
Then load your 3/4” wash brush with light blue permanent. Paint about half way down using left and right solid strokes that go all the way across the canvas on the left and right. 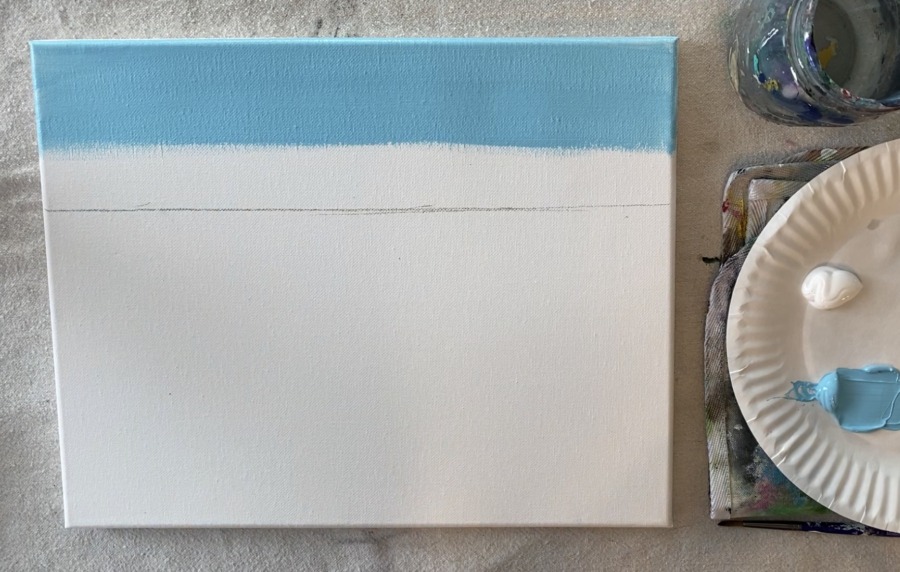
Then, wipe off excess blue from the brush and load it in titanium white. Blend the white into the blue so that the white makes a light blue. You want to make a gradient of blue that blends to very light blue along the horizon line. 
Work those colors and blend them by painting over the two colors (white and blue) until they blend smoothly together.
The lightest part of the sky should be right along the horizon line. 
2. Draw the water shore line
I estimated about a hand width (four inches) from the bottom of the canvas to where the shore line will be.

Lightly draw a curved line that dips down and back up on the right.

3. Paint The Water
Completely rinse all the blue and white off your brush. Then load it with ultramarine blue. Paint left and right strokes going all the way across the canvas. Go down about three inches. 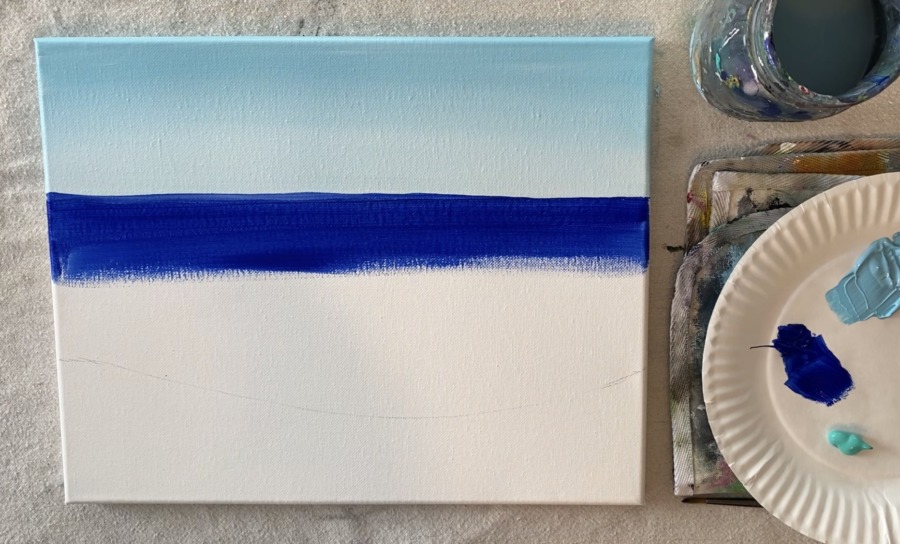
Wipe off excess ultramarine blue then load the brush in bright aqua green. Blend the bright aqua green in with the ultramarine blue. 
Go almost to the shore line and then wipe off excess paint off the brush. 
Load it into titanium white and blend the white in with the bright aqua green. The ocean water should blend from the blue to the aqua to the white-aqua. 
Make sure your shore line is the lightest part with extra white. Do not worry about waves or the sea foam at this point. 
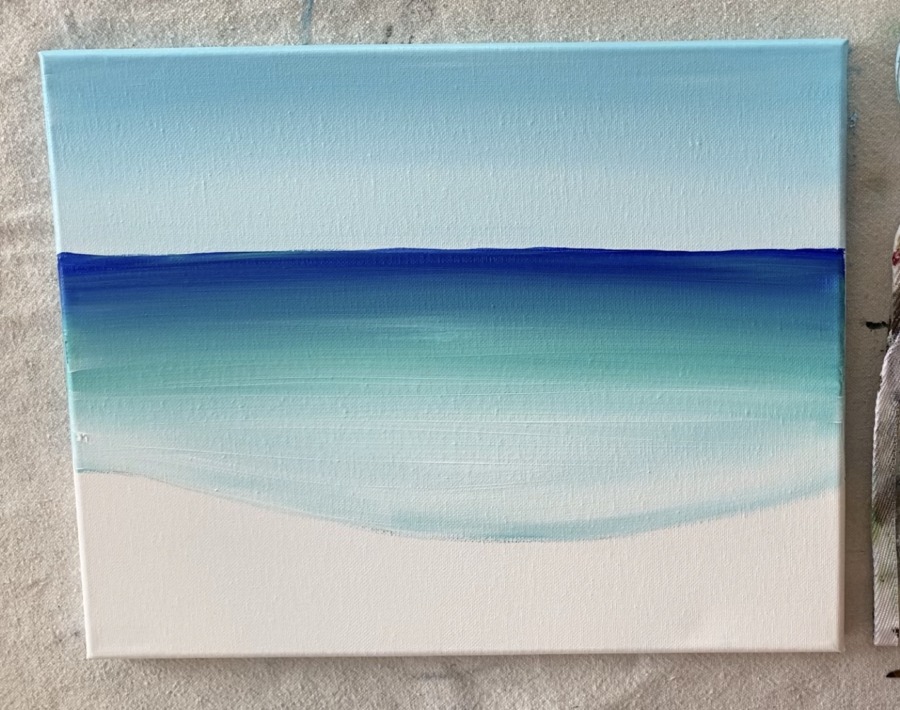
4. Paint the sand
Everything below the shore line is painted with unbleached titanium. Use a rinsed 3/4 wash brush to do this. After this sand dries, we will paint a little bit of sea foam going over the sand. 
5. Wait for sand to dry a bit then paint some sea foam
Make sure the sand color is dry. Load a completely rinsed and dried brush in titanium white. The trick to getting it look kind of translucent here is to not load a lot of paint on the brush and do only one coat. Some of the sand should show through. 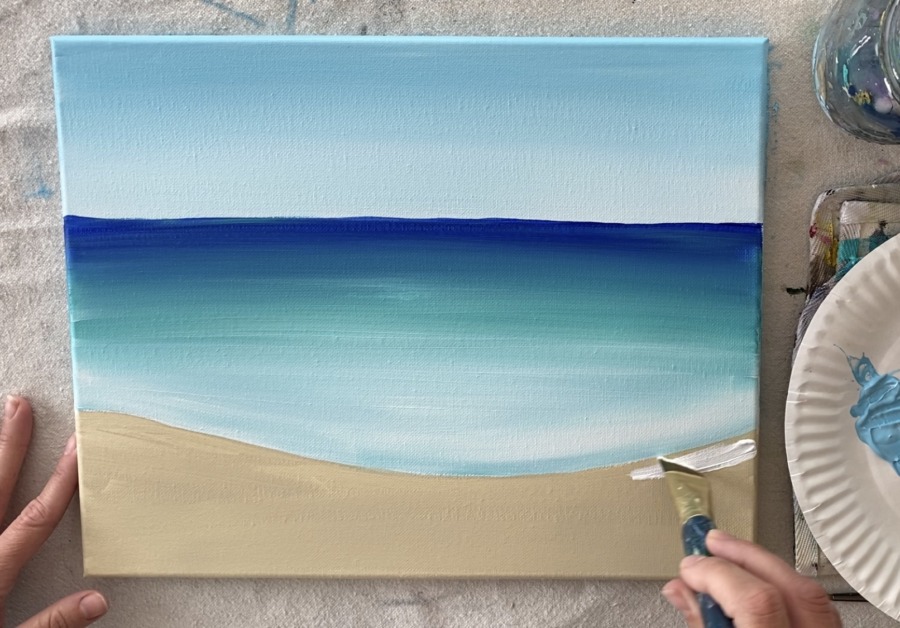
Paint your White Sea foam line all the way across so it overlaps some of the sand. You can adjust the shape of this by dipping down lower in some areas or making it look kind of wavy. 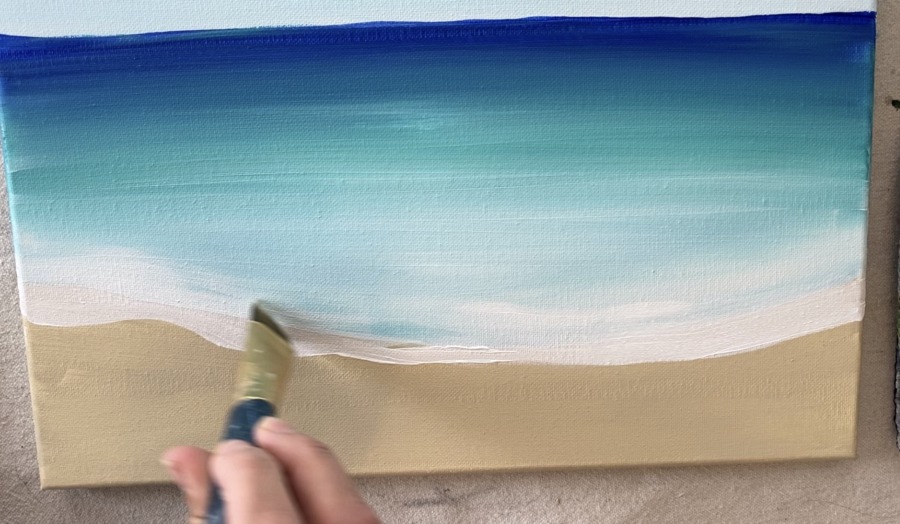

This is a basic ocean painting! I did not do any wave details because the palm trees and hammock will be covering a lot of it any way.
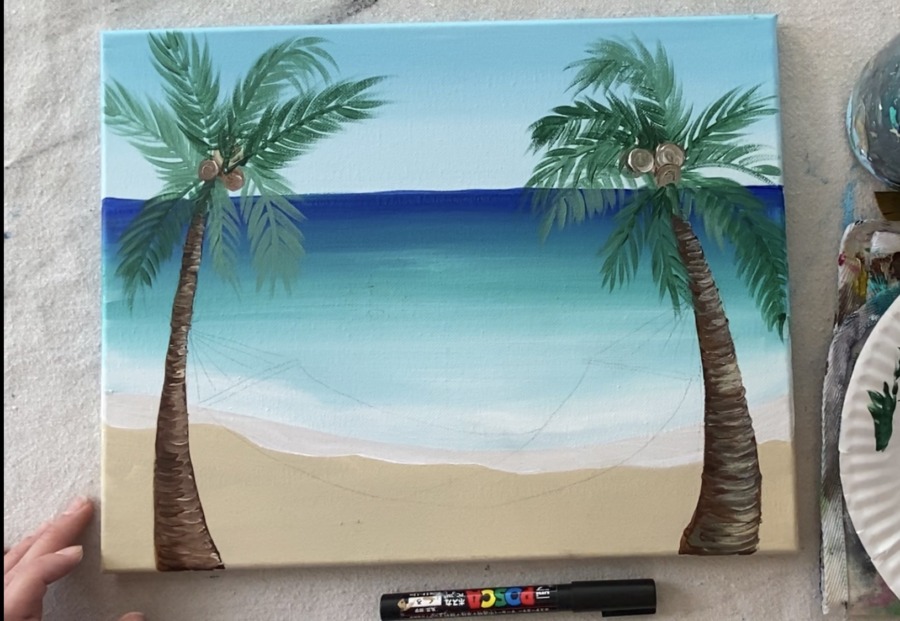
6. Let your painting dry and then draw or transfer the palm tree & hammock
You can use my traceable for this painting which can be printed on two 8.5”x11” papers and taped together. You can also easily draw the palm trees! Or if you are feeling confident, you can paint the palm trees without drawing them. 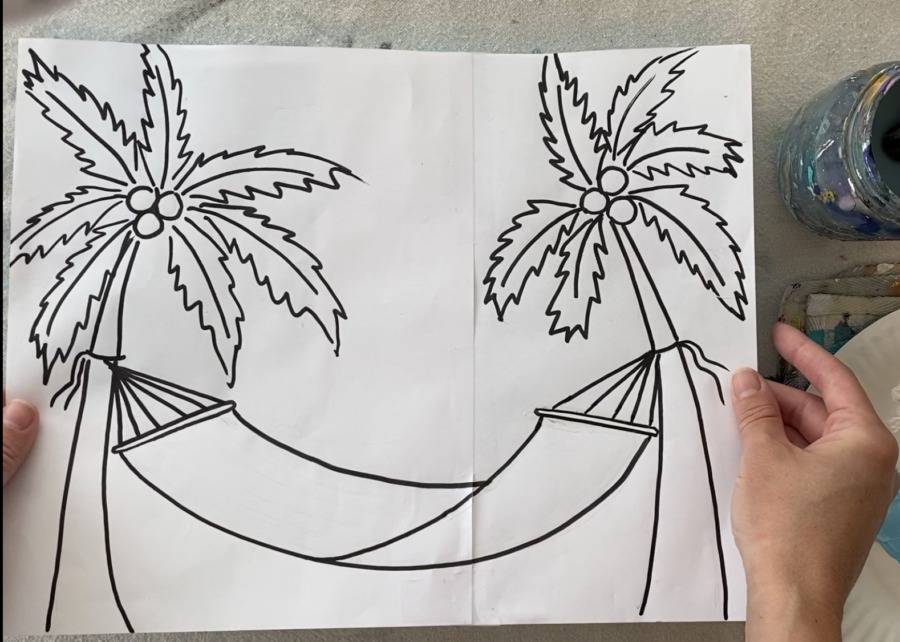
When I transferred my traceable drawing, I did the palm tree trunks, coconuts and the hammock. I did not trace the palm leaves, however, you can trace the palm leaves if you find them helpful. 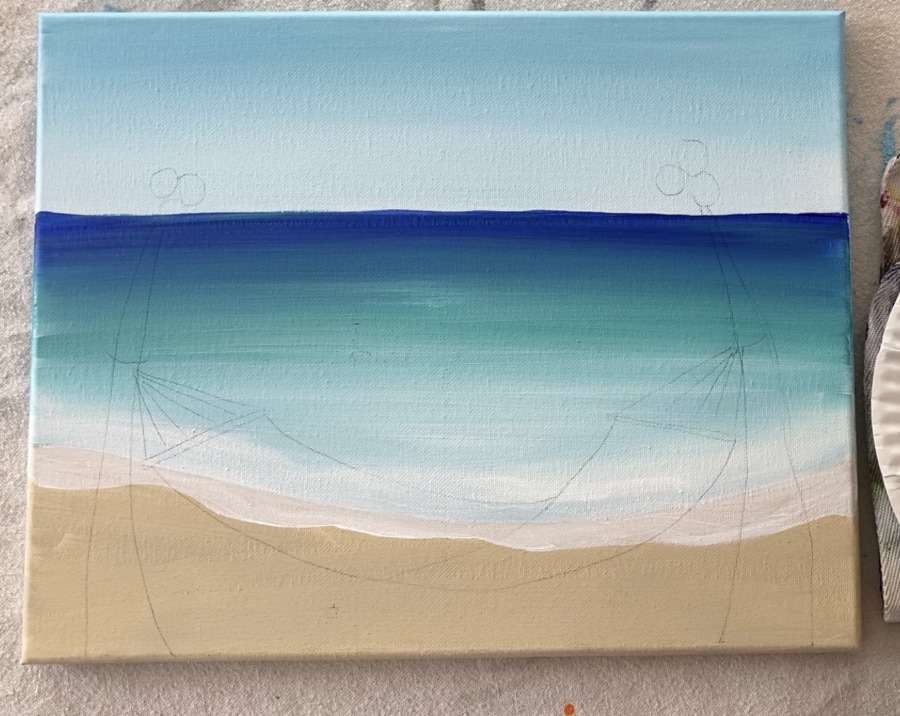
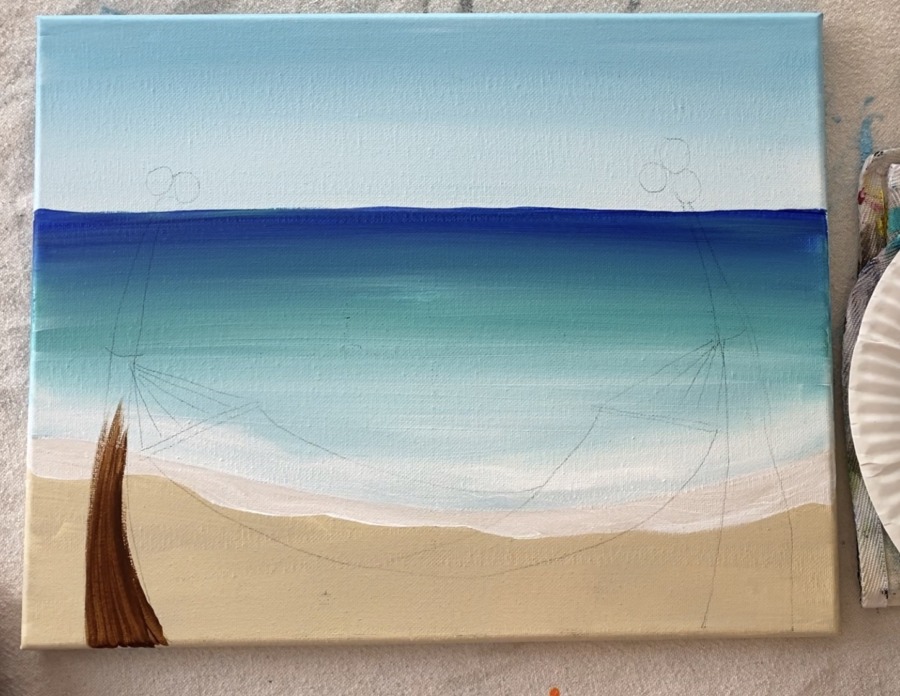
7. Paint the palm trunks
I used a #4 round brush and burnt umber to do the trunks. Start at the bottom where the trunk is wide and paint all the way to the top where the trunk gets thinner.

Then to add some highlight and texture to my palm tree trunk, I loaded my brush in some of that sand color (unbleached titanium). Paint little horizontal lines on one side of the trunk and let it blend with the brown.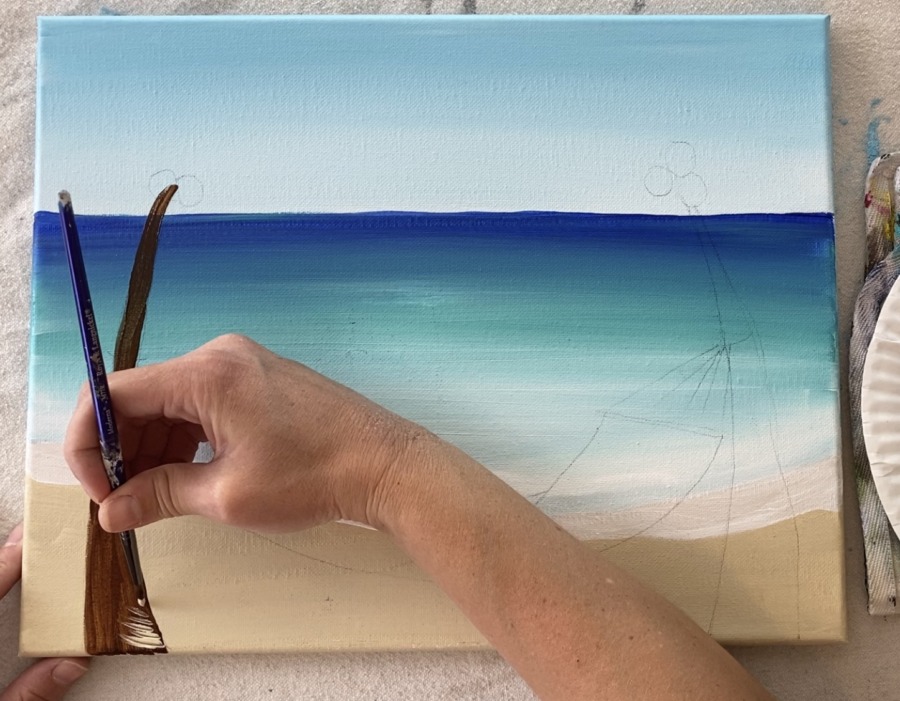
Go all the way up with the light colored marks.
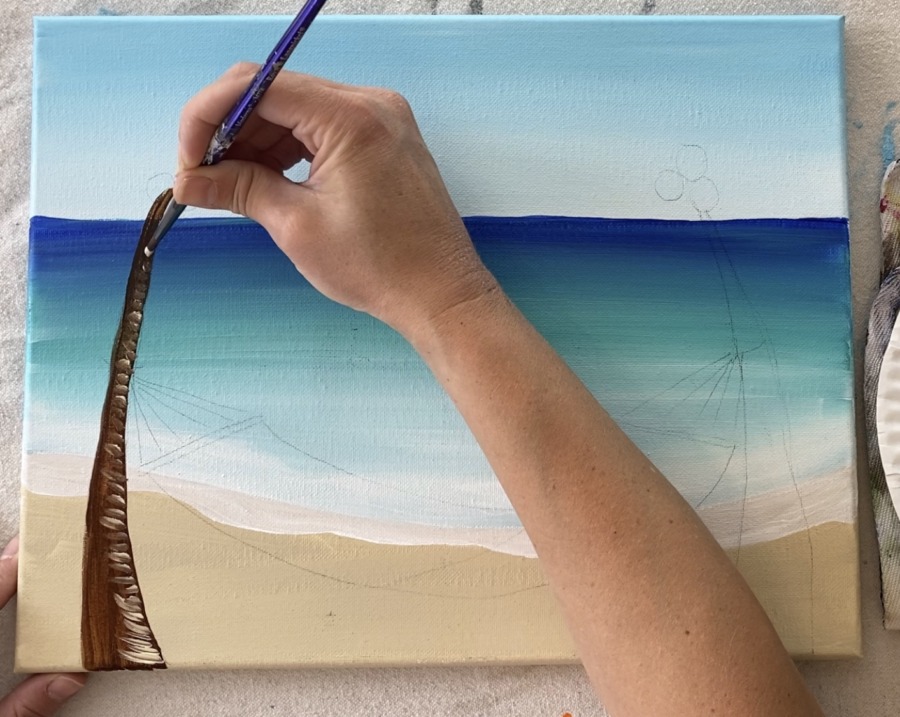
Then do burnt umber marks on the other side of the palm tree trunk. 
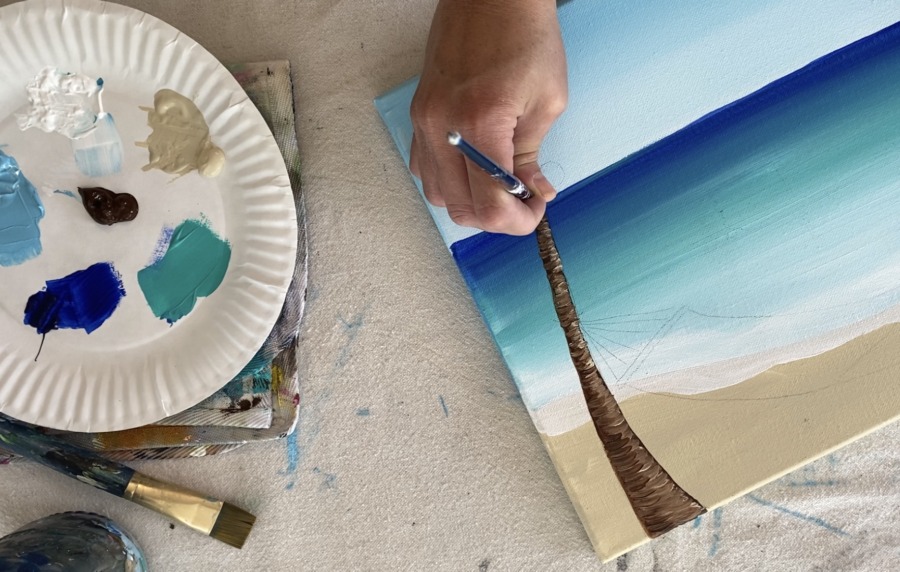
Repeat these steps for the other palm tree. 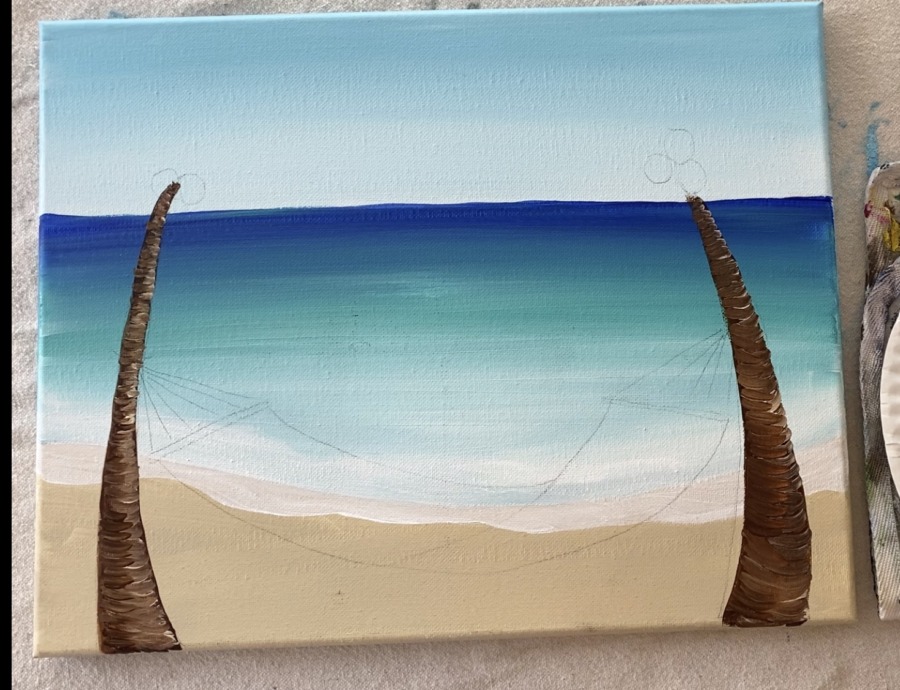
Then paint the coconut circles with a lighter shade by mixing brown with the sand color.
8. Paint the palm leaves
I used two colors for the palm leaves: deep green permanent and titanium white mixed with deep green permanent (thus light green and dark green).
On your palette, mix the green and white together to make your light green. 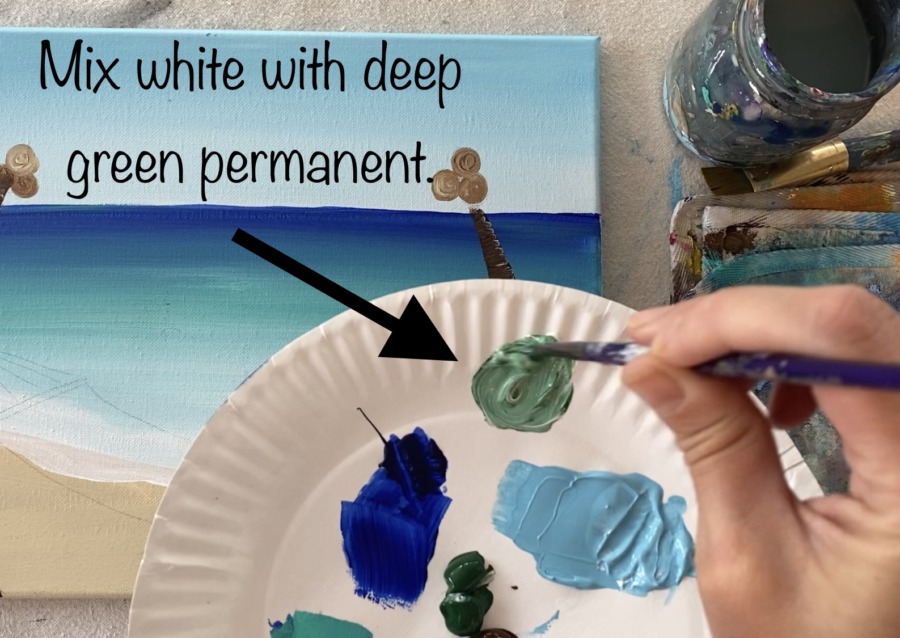
Then use a 4 round brush to paint the palms. Start by painting the middle line. 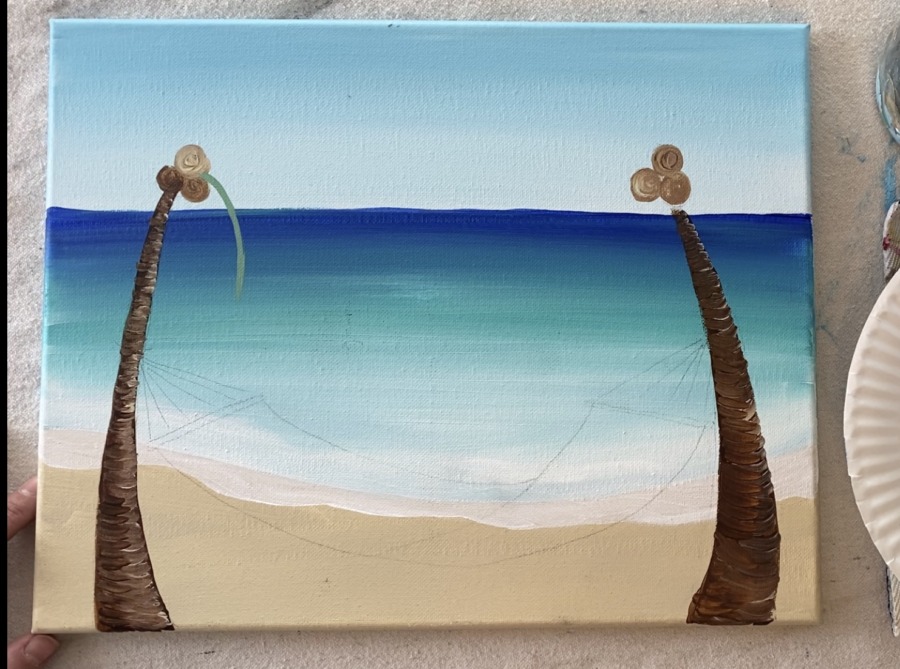
Tip: make sure you are using the very tip of your round brush to get those thin lines! Sometimes it helps to twist the brush a little in the paint to make sure it goes right to a point.
Then do the palms by stroking the brush (use the tip of that round brush) from the middle line downwards. Your stroke should sort of fade out or go to a tip as you release pressure. 
Continue to paint more palm leaves. For the next one, I didn’t rinse my brush but I dipped it in the deep green permanent so it would be darker. 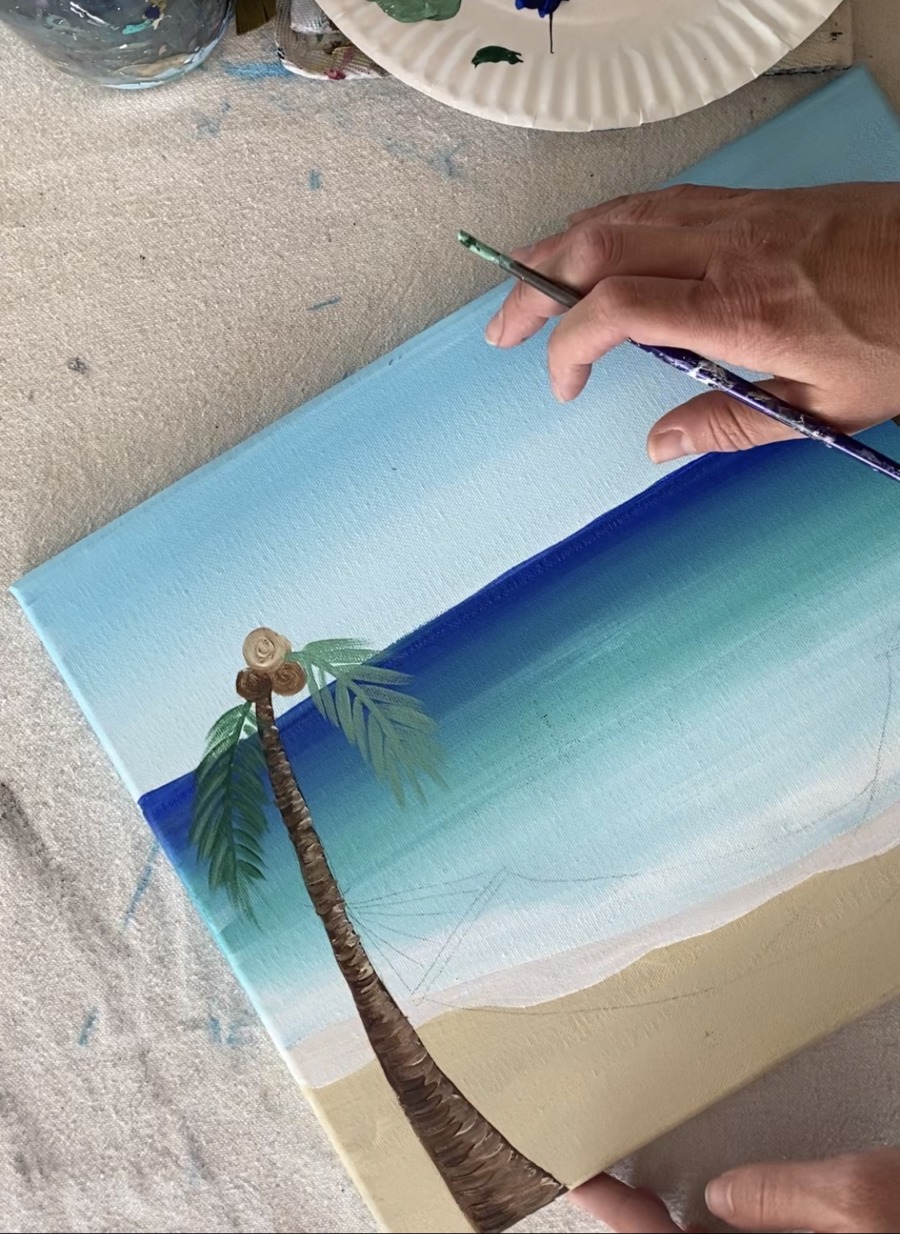
You can create different variations of green in your palms just by loading in different amounts of the light green and the dark green. 
Continue to fill the tree with palm leaves. Some of the top palm leaves are curving downwards. Some of the bottom ones are sticking straight down. You can make them go in all directions. 
Then repeat for the other palm tree. 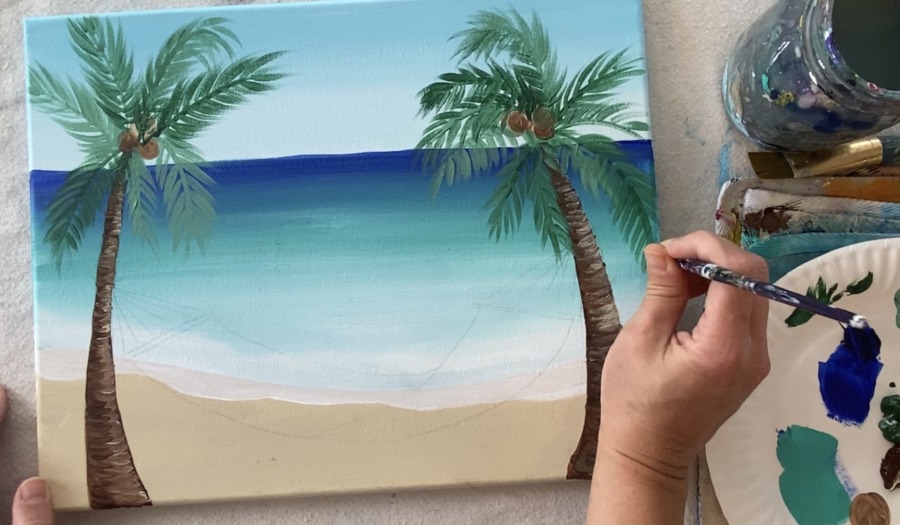
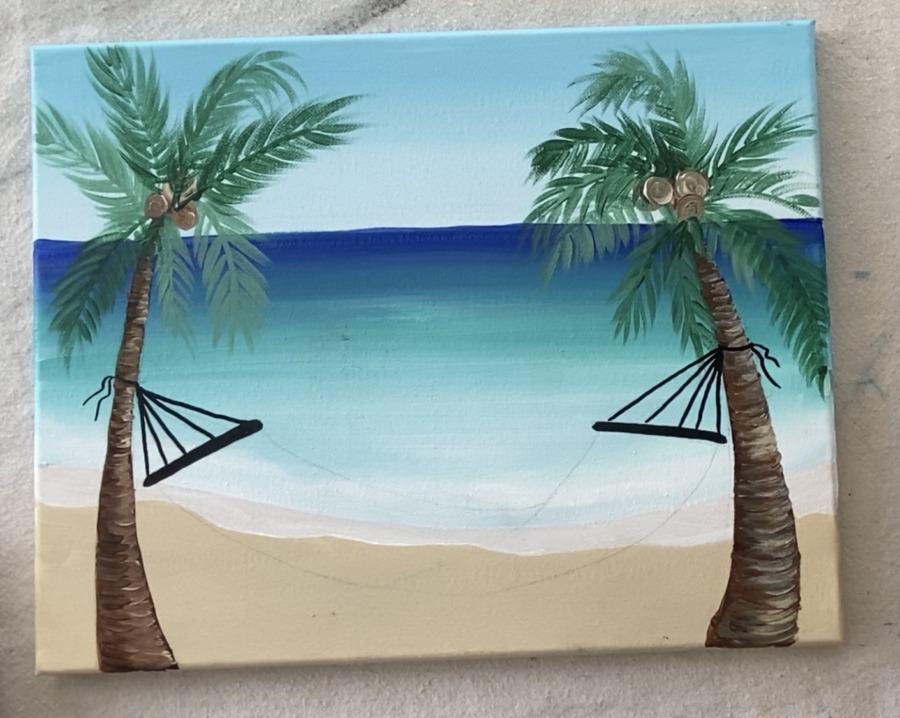
9. Paint the strings of the hammock
I highly recommend using a paint pen or sharpie for this step! I used a black POSCA paint pen. It will give you those precise lines needed for the strings. If you don’t have either of those things, a tiny round spotter brush plus mars black should do the trick.
Draw the strings of the hammock with the paint pen. 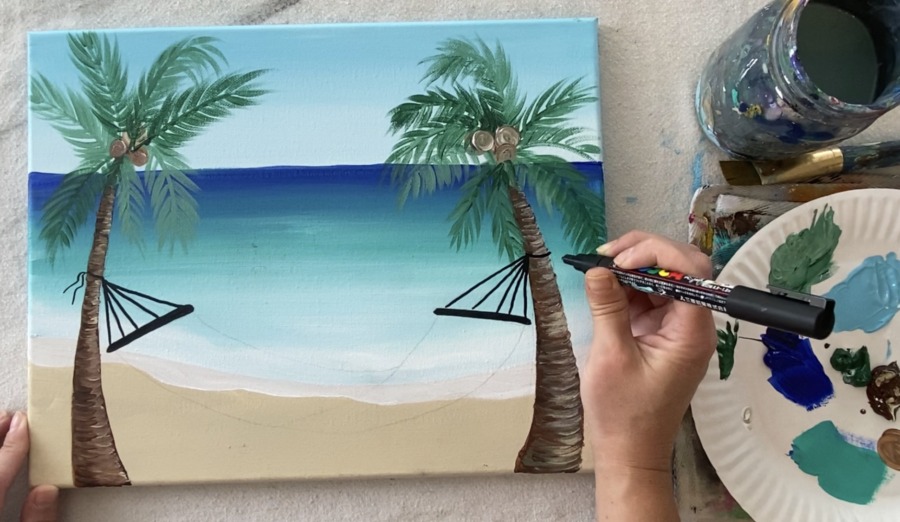
10. Paint the base colors of the hammock
On this hammock, the right side is blue and the left side is white with blue stripes. Use your #4 round brush to paint the blue and the white base. 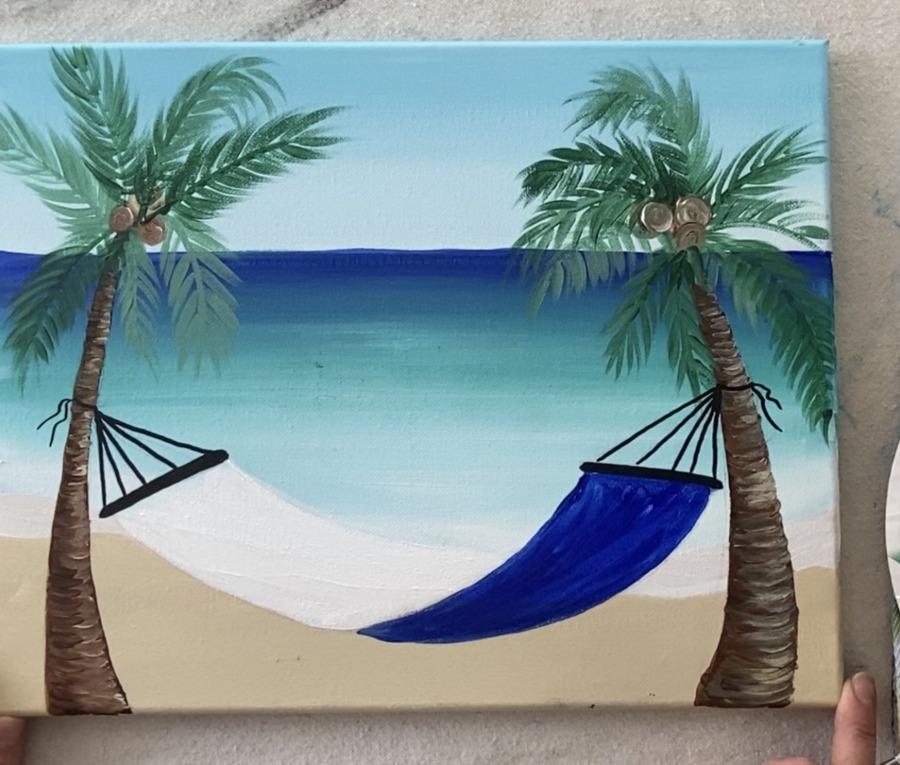
Then, before your blue dries, add some white into it on the right to give it some highlight. Also, if you look closely, I did a little white highlight on the bars on each side of the hammock. 
You’ll need to wait for the white side to dry before doing stripes. 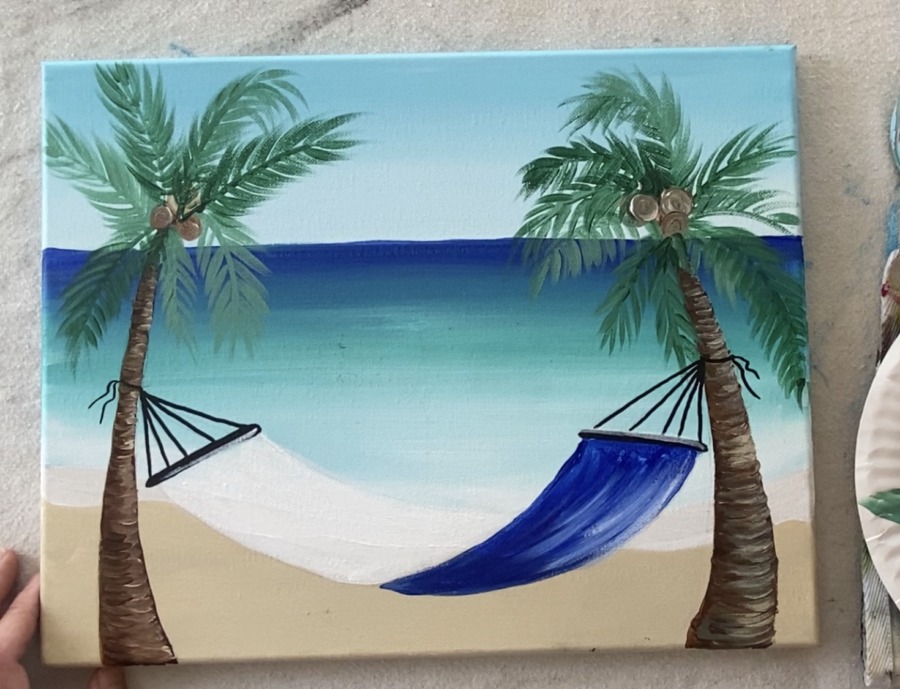
While I was waiting for it to dry, I decided to add some shadow on the sand area below the hammock. You can do this by mixing brown with the sand color and painting some left and right long strokes with your 4 round brush. 
I also decided to lighten the right side of my palm tree “texture” with some more sand color mixed with a little white. 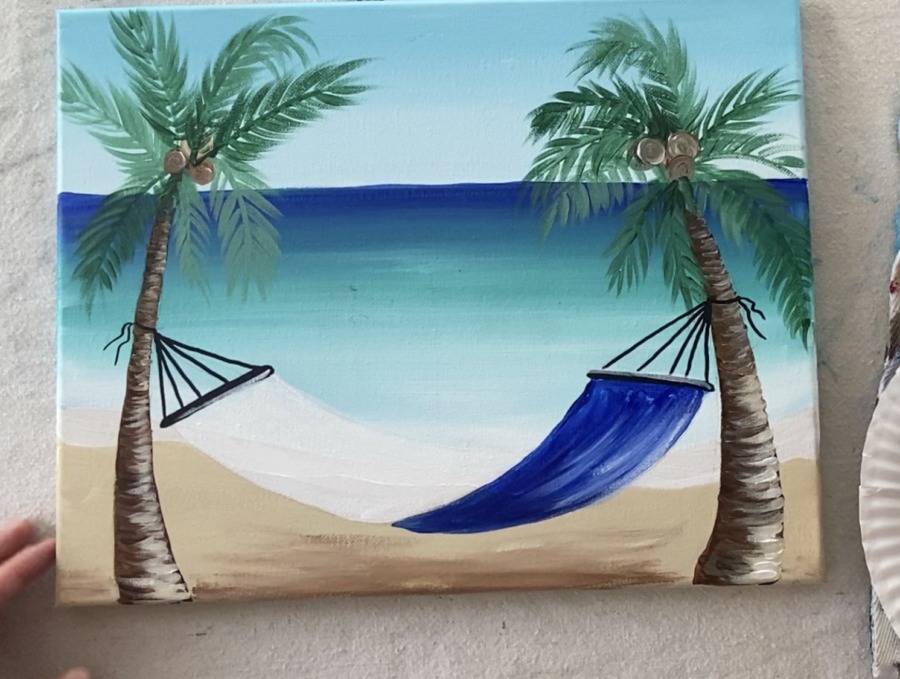
Then you can paint the stripes with the #4 round brush and ultramarine blue. Make them curve in the direction of the shape of the hammock. 
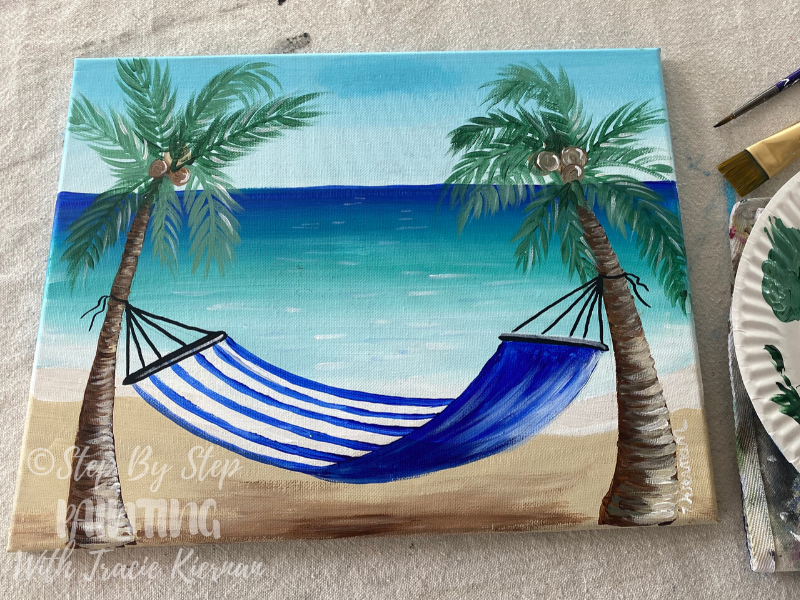
And last, but not least, I did a few white lines in the palm leaves & the water! Do this very subtly! Just a few white, very thin lines in the palms. For the water, do a few very faint white horizontal lines. The lines are longer closer to the shore and shorter far away. 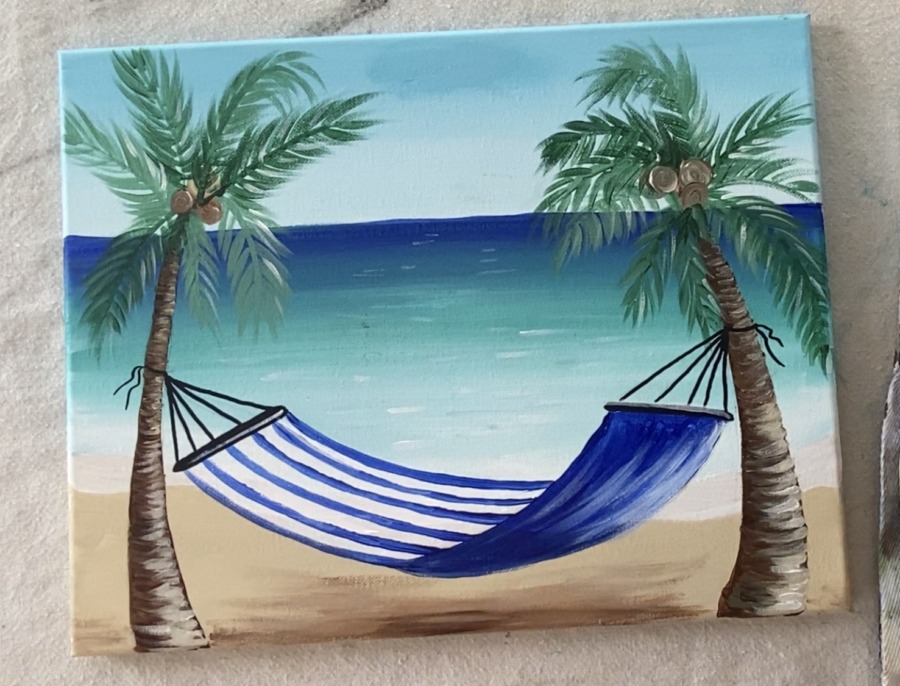
Finished!
This was a fun one! I love the beach and doing beach themed paintings. Hope you enjoyed it too!
More Beach Painting Tutorials:

Share Your Art


Thank you for continuing to post new paintings. You give us all something to look forward too during this quarantine season! As always beautiful and fun !
You’re welcome!!
I am excited for the video? So looking forward to watching it.
Yes!!! There will be a video ?Glad you’re looking forward to it!
Love this painting its beautiful! can’t wait give it a try!!?
Keep the lovely paintings coming!!?
I will keep them coming! Thanks! Glad you like this one!
This painting was a lot of fun to do. Thank you for posting these fun painting videos.
You’re welcome!
Thank you for your beautiful paintings and art lessons.
You’re welcome Pat!
Thanks Pat!!
We had great time painting this on our girls beach trip! Thanks for the tutorial!!
Thank you so much for your tutorial
I Will be painting
sail boat for my grand child .now I know how to paint ocean
Hi Tracie, I’m excited to do this with friends for my daughters birthday. I have a question I have 18 people coming and we will be painting paradise dreaming . I was wondering how much paint I need for 18 canvases? I went to Michael’s and found all the paint they come in 4 oz tubes. I was wondering how many tubes I need to purchase? Your help would be greatly appreciated. Thanks
Hi Betty! For that many people I would get 2-3 4oz tubes of each of the paint colors for the painting.