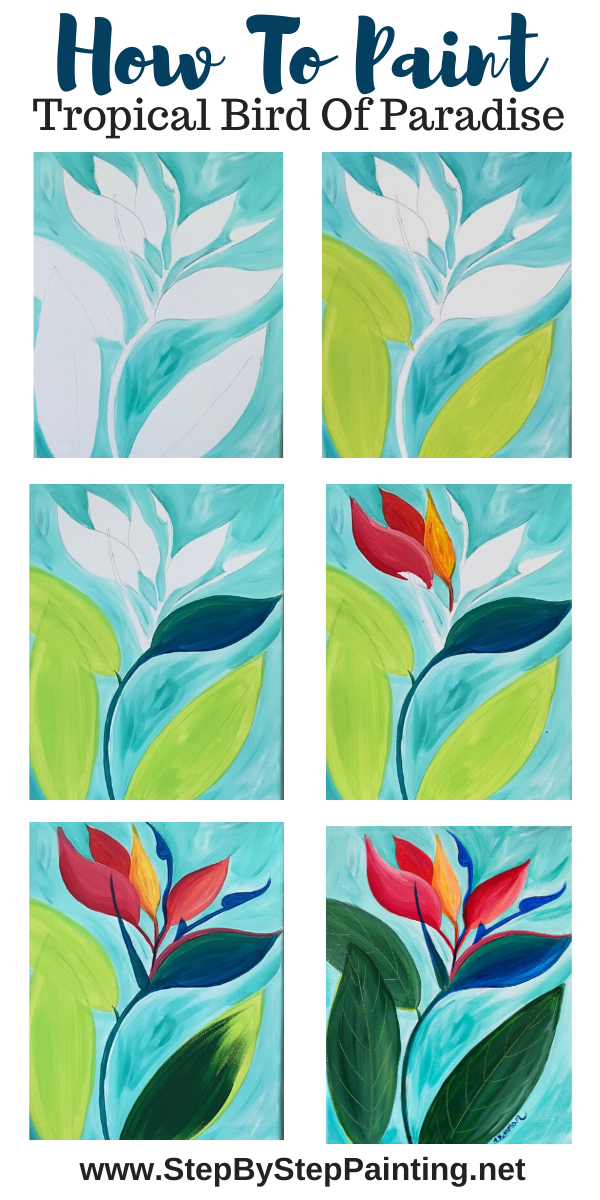
Learn To Paint A Tropical Bird Of Paradise
Would you like to save this?
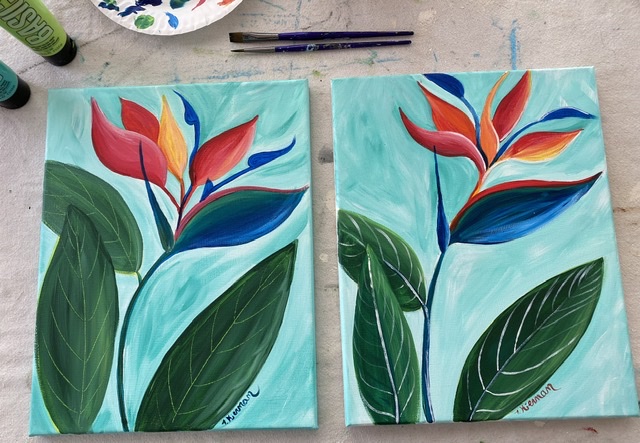
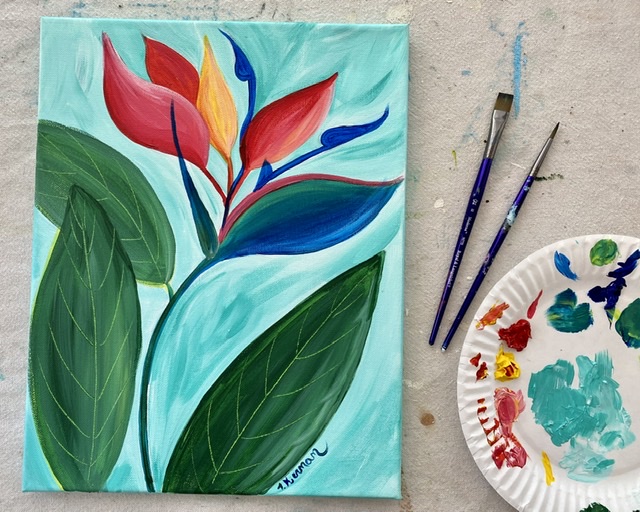
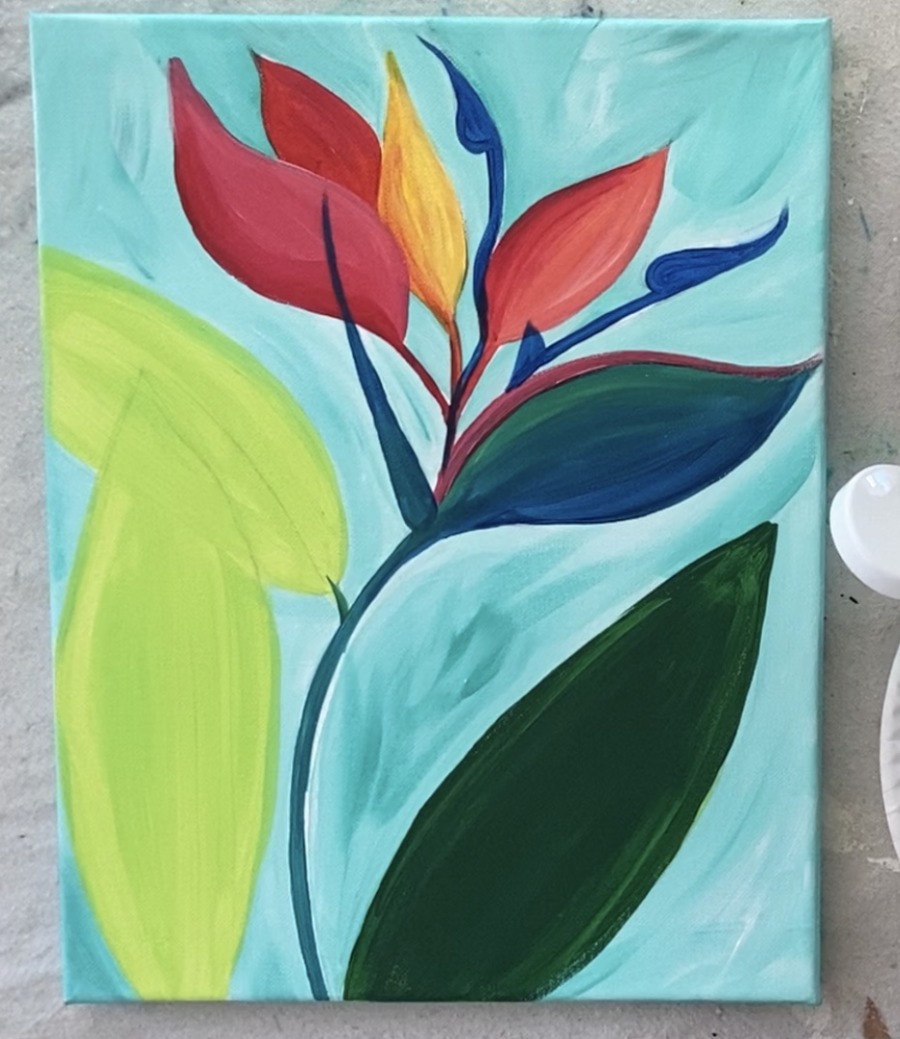
This painting has such a fun, tropical color palette!
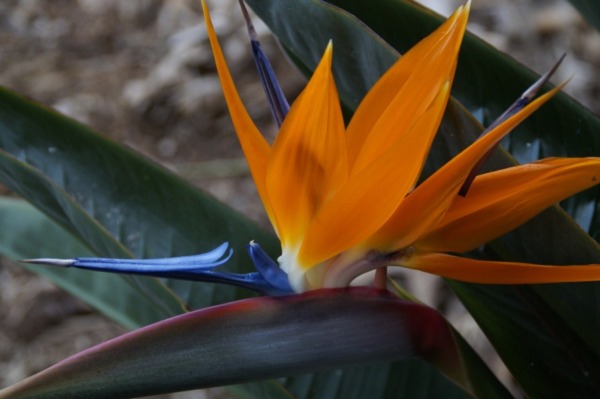
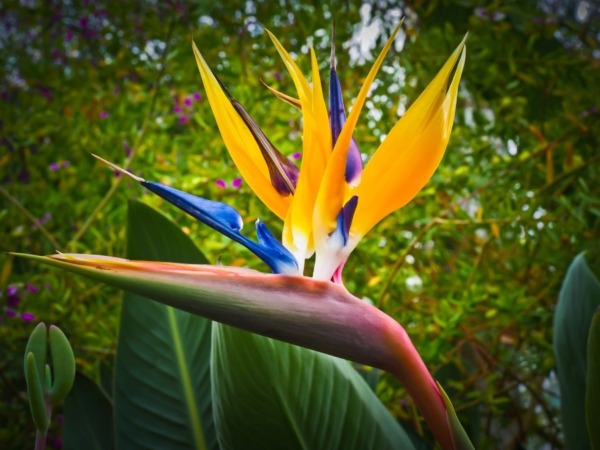
I’ve always been a fan of tropical and exotic flowers! Orchids, plumerias, hibiscus and the tropical bird of paradise are all up there on my favorite list. I just love the unusual shapes and bright happy colors.
This particular flower is probably as tropical as a flower can get! The tropical bird of paradise is native to South Africa but can be seen growing in warm climates (or on your patio or as a house plant). I have three at my home that are all young plants and have not bloomed yet. Apparently they can take several years to actually bloom!
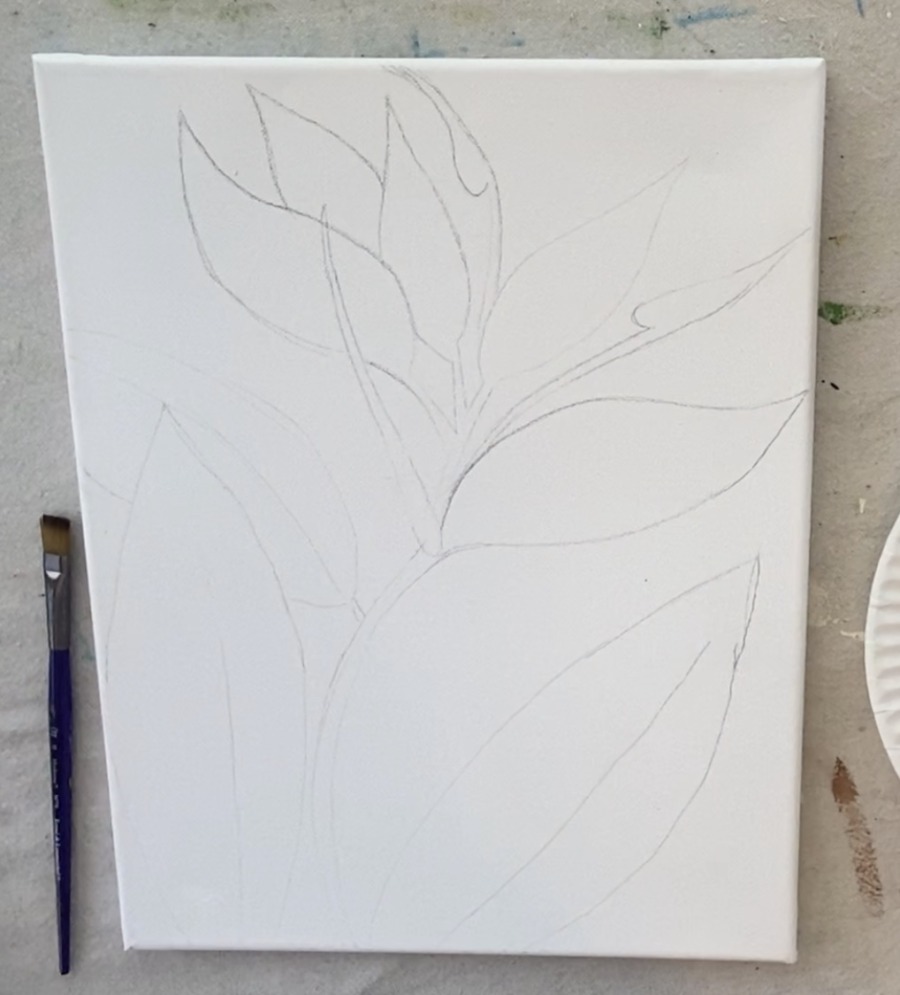
This painting tutorial includes a traceable that is to be transferred to the canvas first before the painting part begins. You can also draw this tropical bird of paradise.
I love the curves and angles in this flower as well as the large banana-like leaves! I found painting all the curves and blending the colors to be very relaxing. The color palette makes me very happy as well! I hope you will enjoy it too!
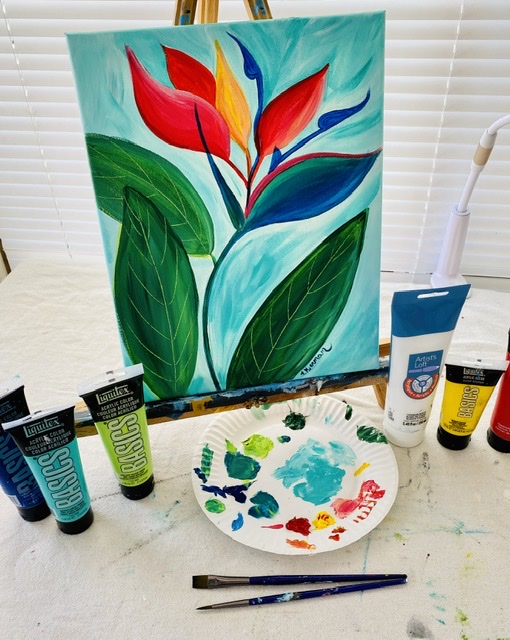
Materials
Tropical Bird Of Paradise Painting
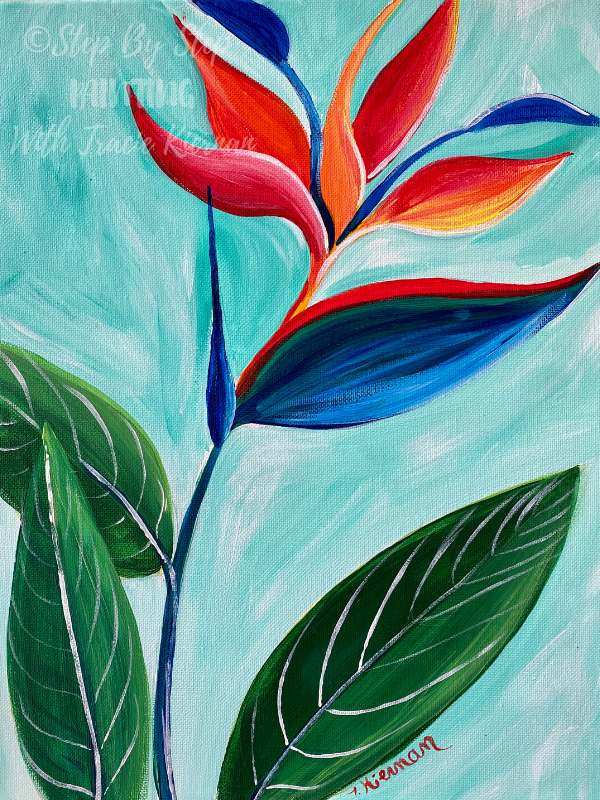
Learn to paint a tropical bird of paradise in bloom with acrylics on an 11 x 14 canvas.
Materials
- Acrylic Paint
- 11 x 14 Canvas
- Traceable
- Graphite Transfer Paper
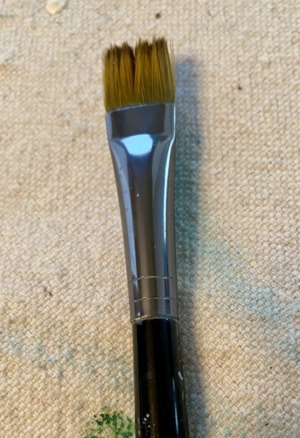
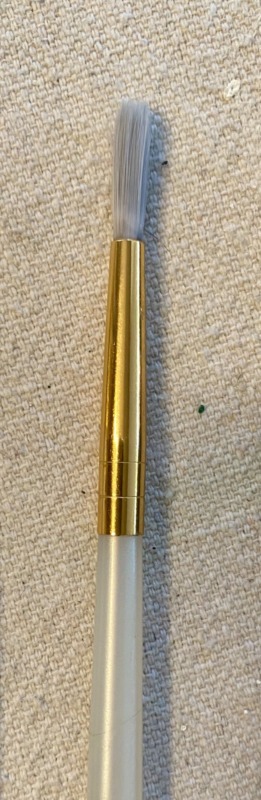
- Paint Brushes (#4 Round and #12 Bright)
Colors
- Titanium White
- Bright Aqua Green
- Brilliant Yellow Green
- Phthalo Blue
- Deep Green Permanent
- Primary Yellow
- Napthol Crimson
Brushes
Color Palette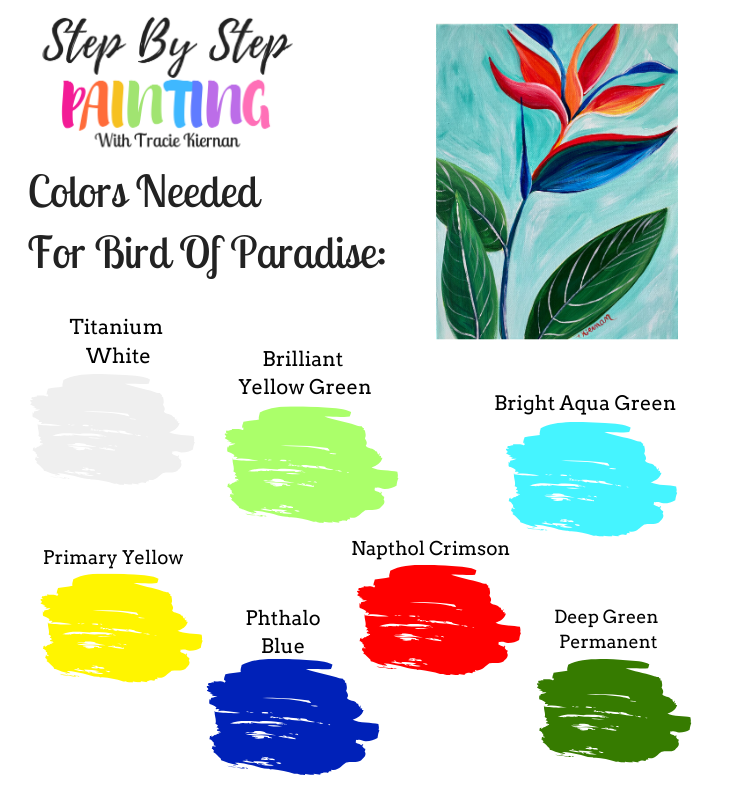

Brushes
I used a 12 bright brush and a 4 round brush. These can be found at michaels! You also do not have to get the exact size (example: you can use a 3 round or a 6 round).
Directions At A Glance
Traceable
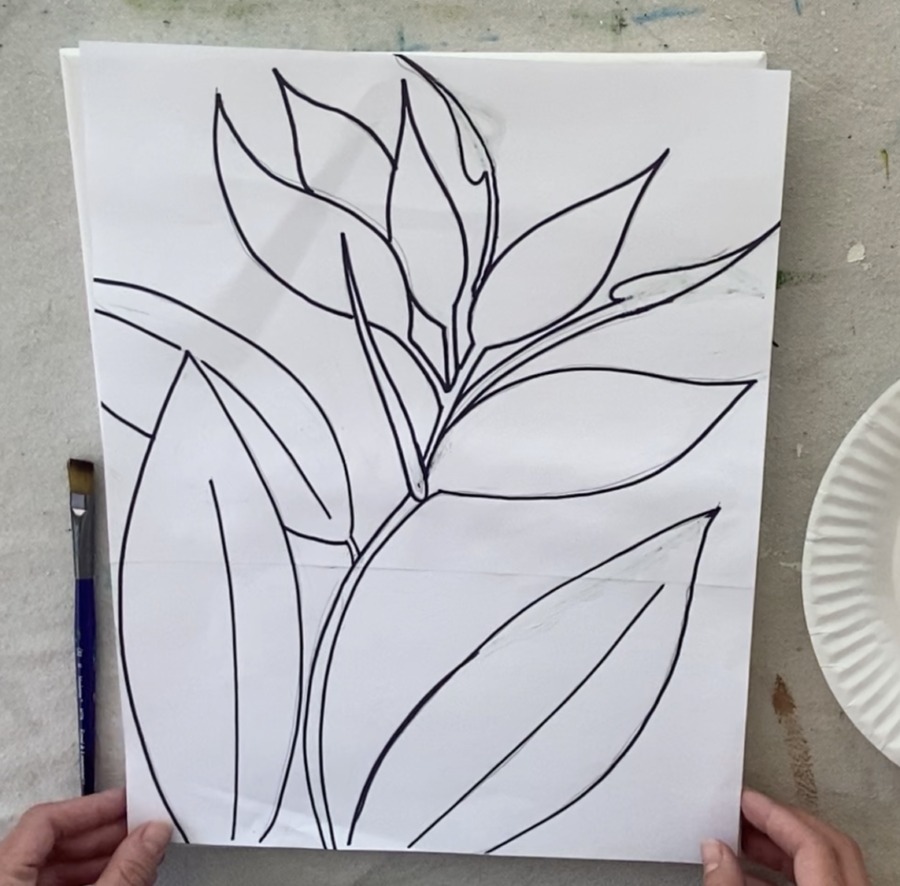
Print the traceable on standard size paper and tape together to fit your 11 x 14 canvas. You can find the PDF file in my traceable library. For more information about how to use the traceables including how to transfer and resize, you can check out my info page on that here.

Video
Step By Step Directions
1. Lightly Draw The Bird Of Paradise on the Canvas Or Use My Traceable
You can find my traceable here! Print it on two sheets and tape together to fit on an 11×14 canvas or resize it to the canvas size you are using. Use a sheet of graphite paper below the traceable to transfer the design to the canvas.
You can also lightly free hand this drawing with a pencil. Make sure to draw it large and have it fill the entire canvas!
2. Paint The Background
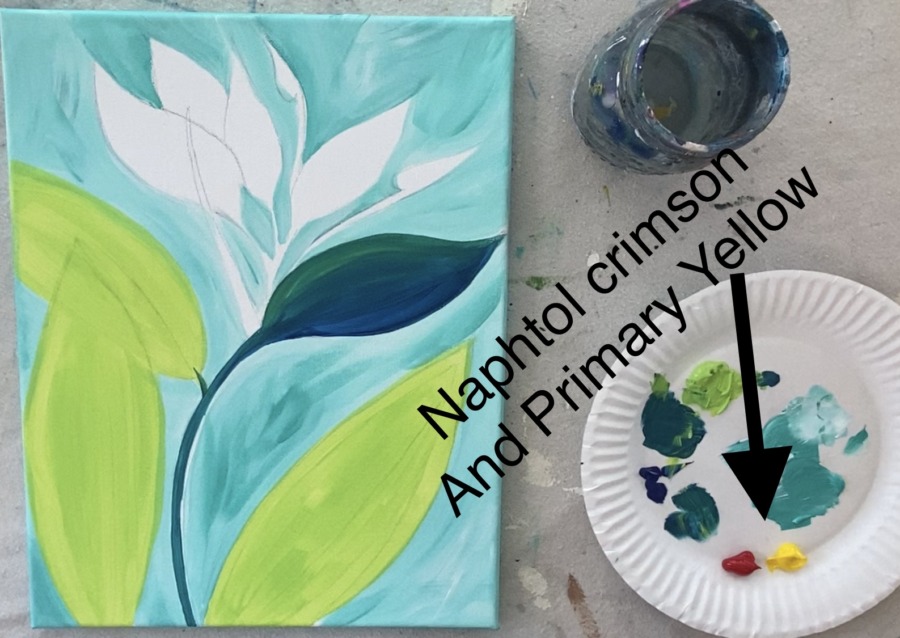
The background of this painting is a blend of bright aqua green and titanium white. I used my 12 bright brush and double loaded it in both of those colors.
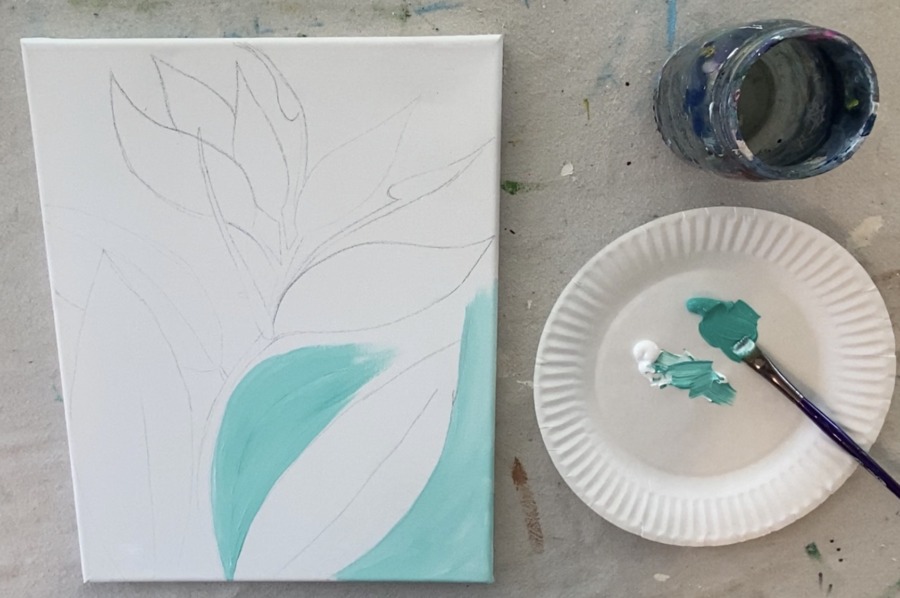
Paint with strokes that contour the shape of the leaves, stem and blossom. Use the tip of your brush to “cut in” around the shape trying your best not to go over the lines. If you do go over the lines, that is okay! Acrylic paint will go over what you painted.
I did different variations of the white and aqua, blending the two on the canvas. I also did areas of expressive strokes that kind of go in different directions!
The background of this is very simple, don’t think to hard about it.
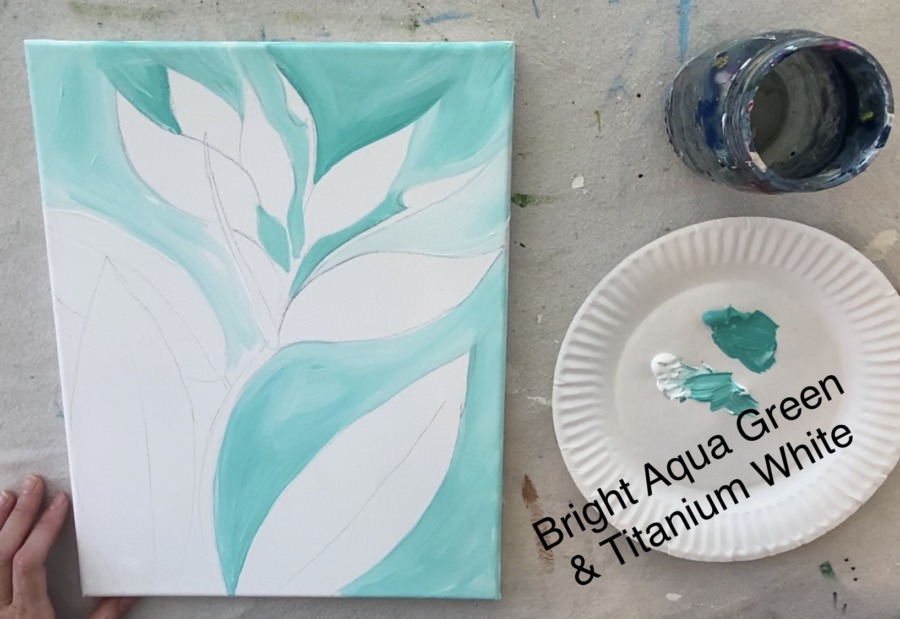
3. Paint The Large Leaves
Then paint the three large leaves. As an “undercoat”, use bright aqua green. Use your 12 bright brush to simply paint one coat of that bright green filling in the entire leaf shape. We will leave it like this and do more detail work later.
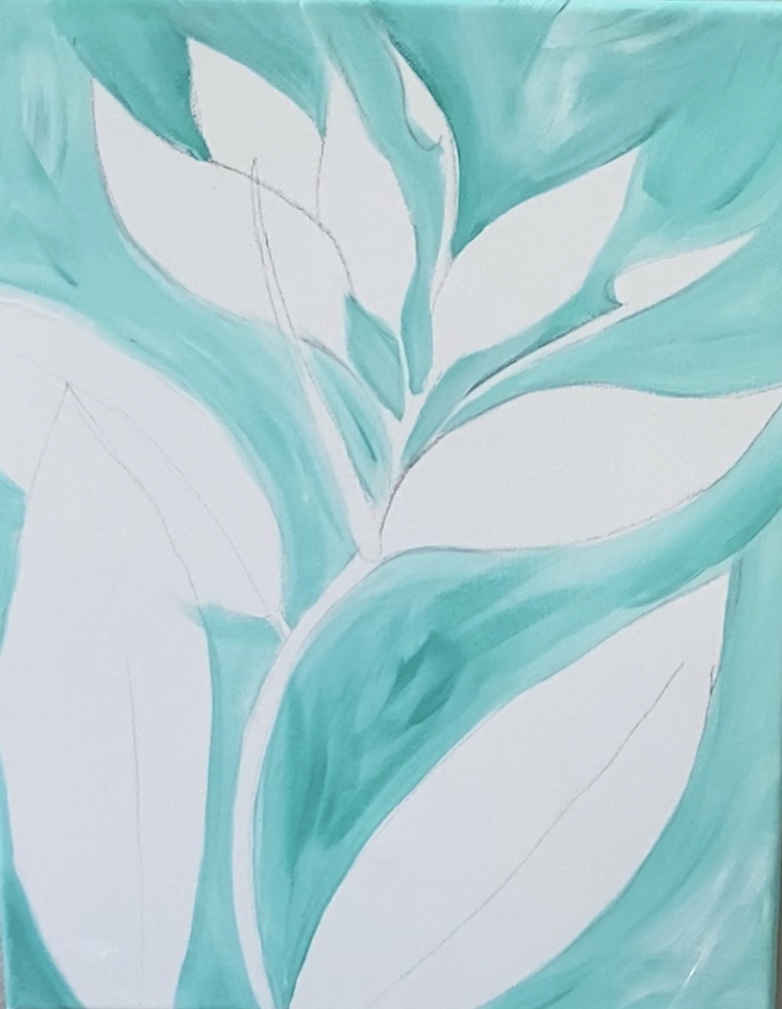
4. Paint the stem and bottom of flower
Next I made a dark turquoise color on my palette by mixing equal amounts of brilliant yellow green and phthalo blue. This dark turquoise was used to paint the stem and part of the base of the bloom.
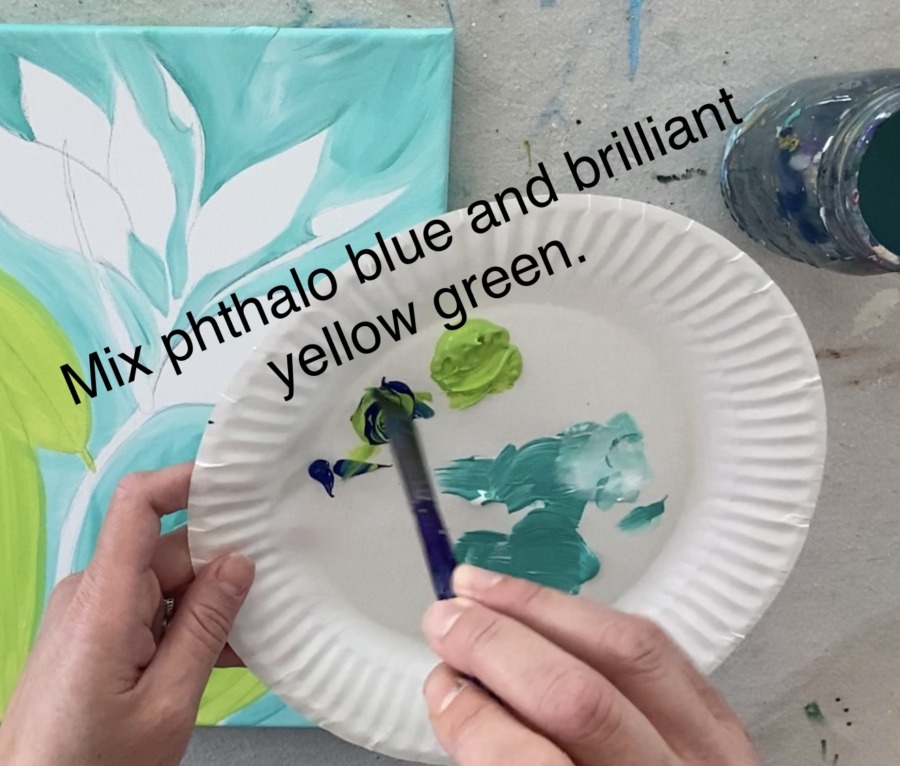
Use the tip of your 12 bright brush to paint the stem.
Then paint bottom part of the bloom (The blue/green leaf thing). Quickly add in more bright aqua green so the top part of it is more green.
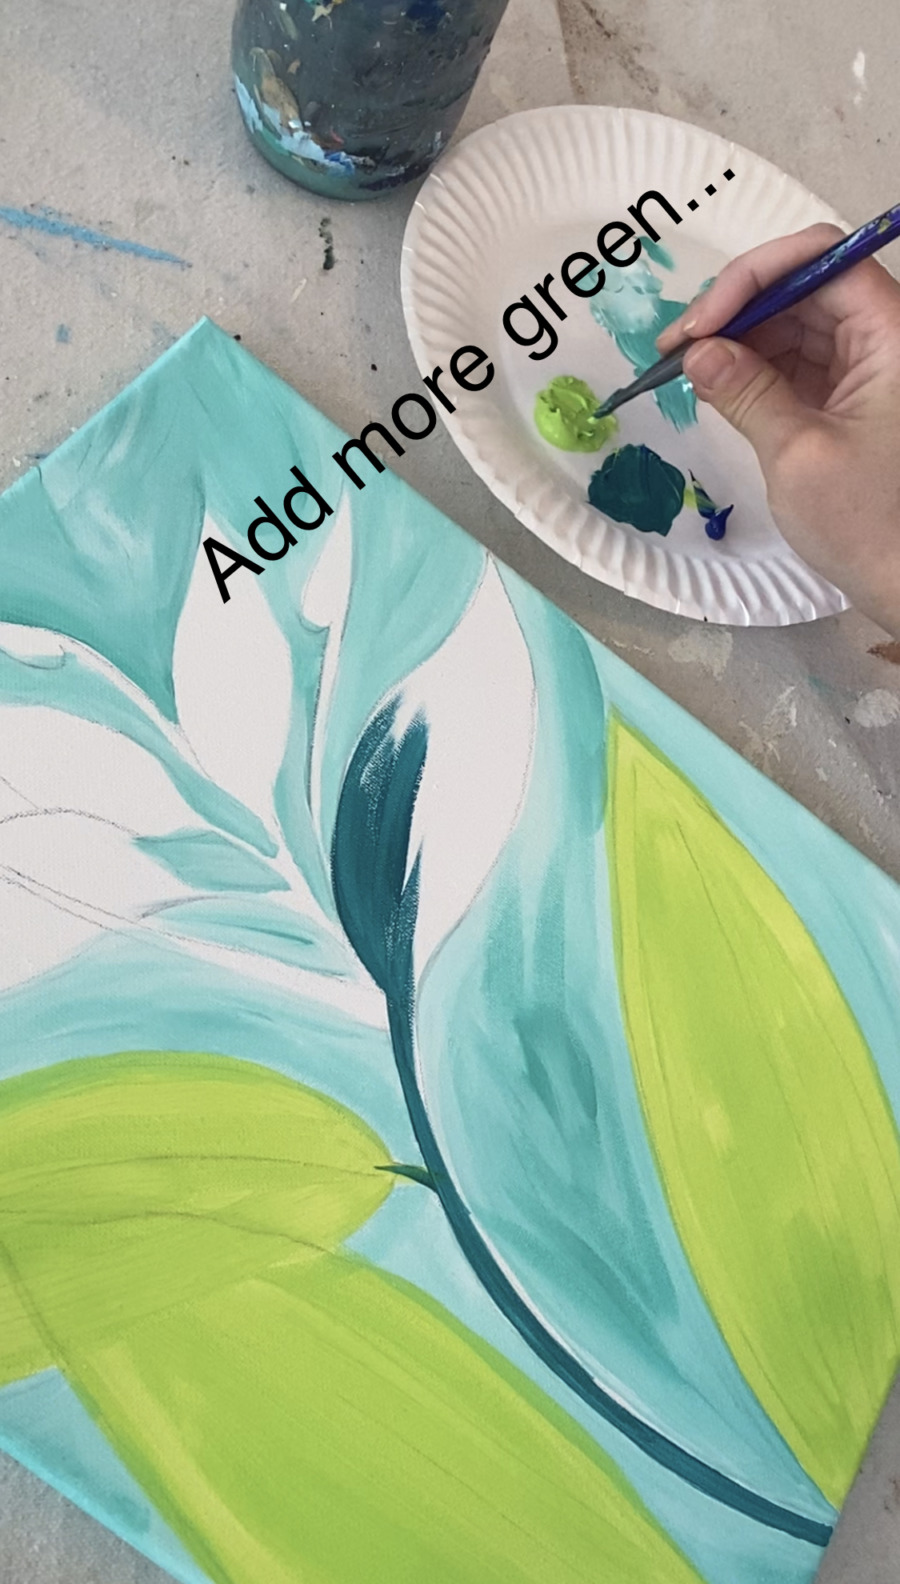
Basically I did a blend on the canvas. The top part of this leaf/bloom is green and the bottom part is more phthalo blue. Blend the colors on the canvas using wet on wet blending where you paint over the colors and they blend together to make a gradient.
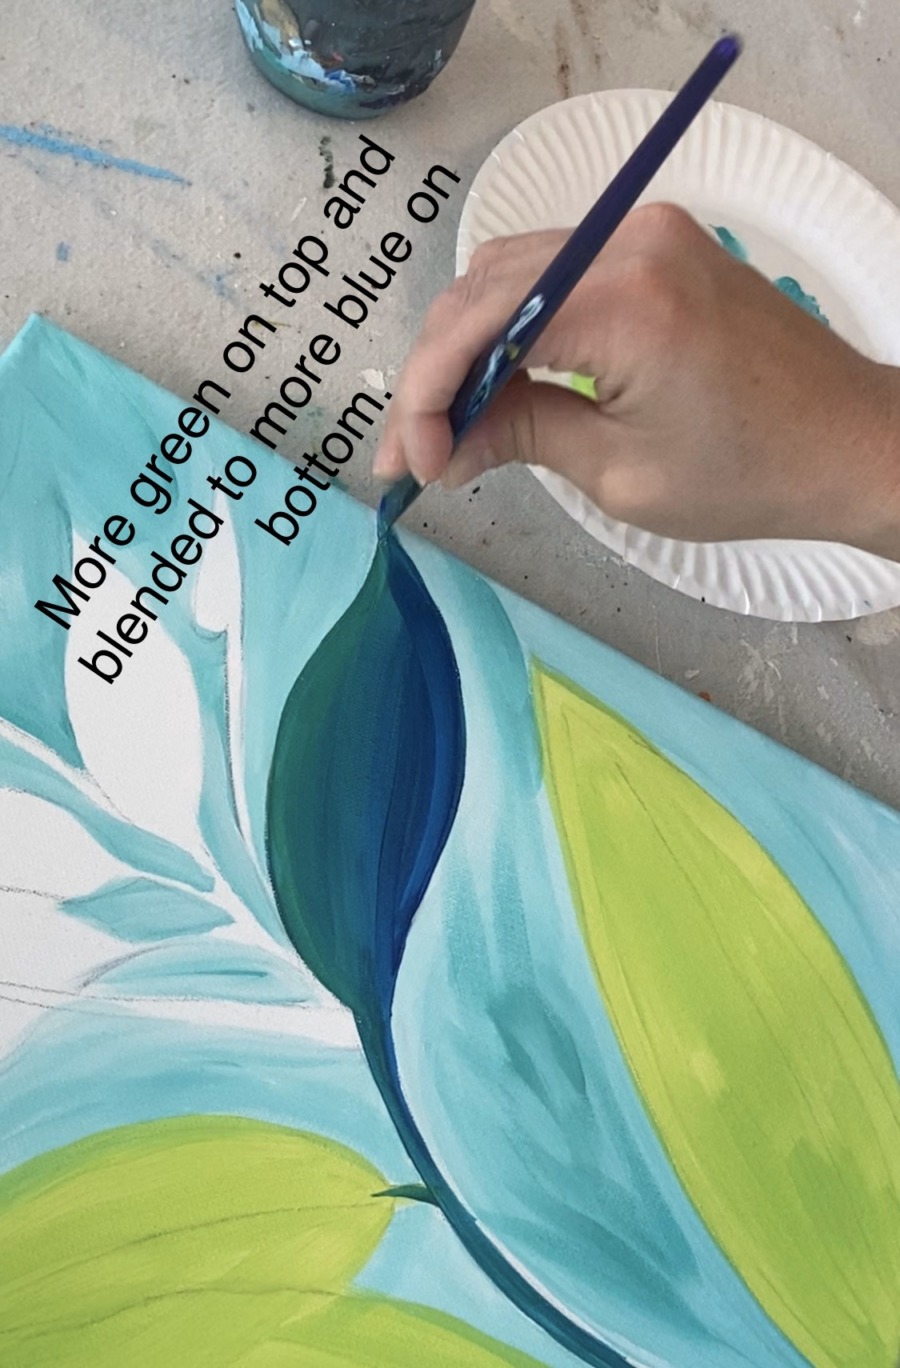
Tip: Make sure the direction of your strokes go in the direction of the shape you are paining in.
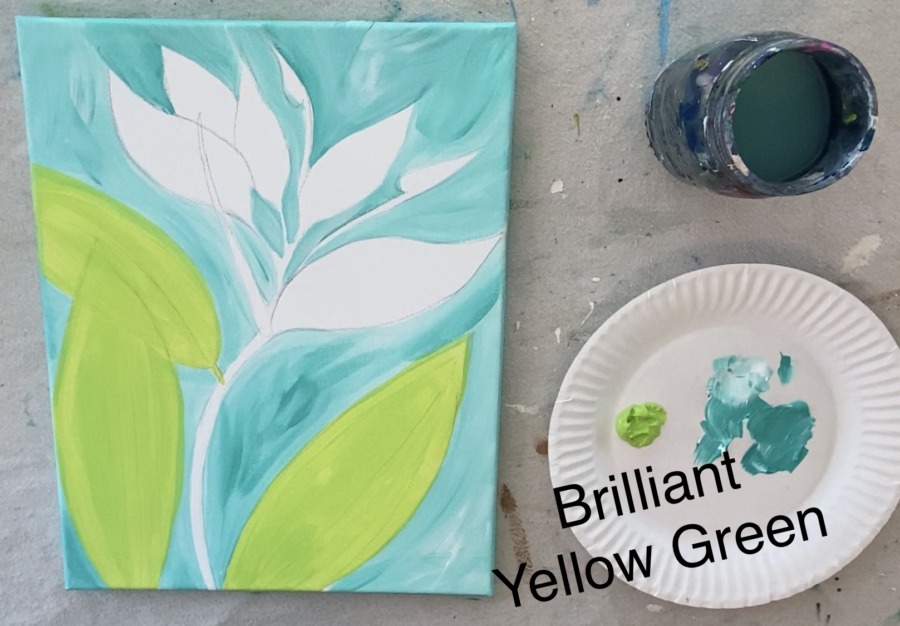
5. Paint The Red And Orange Blooms
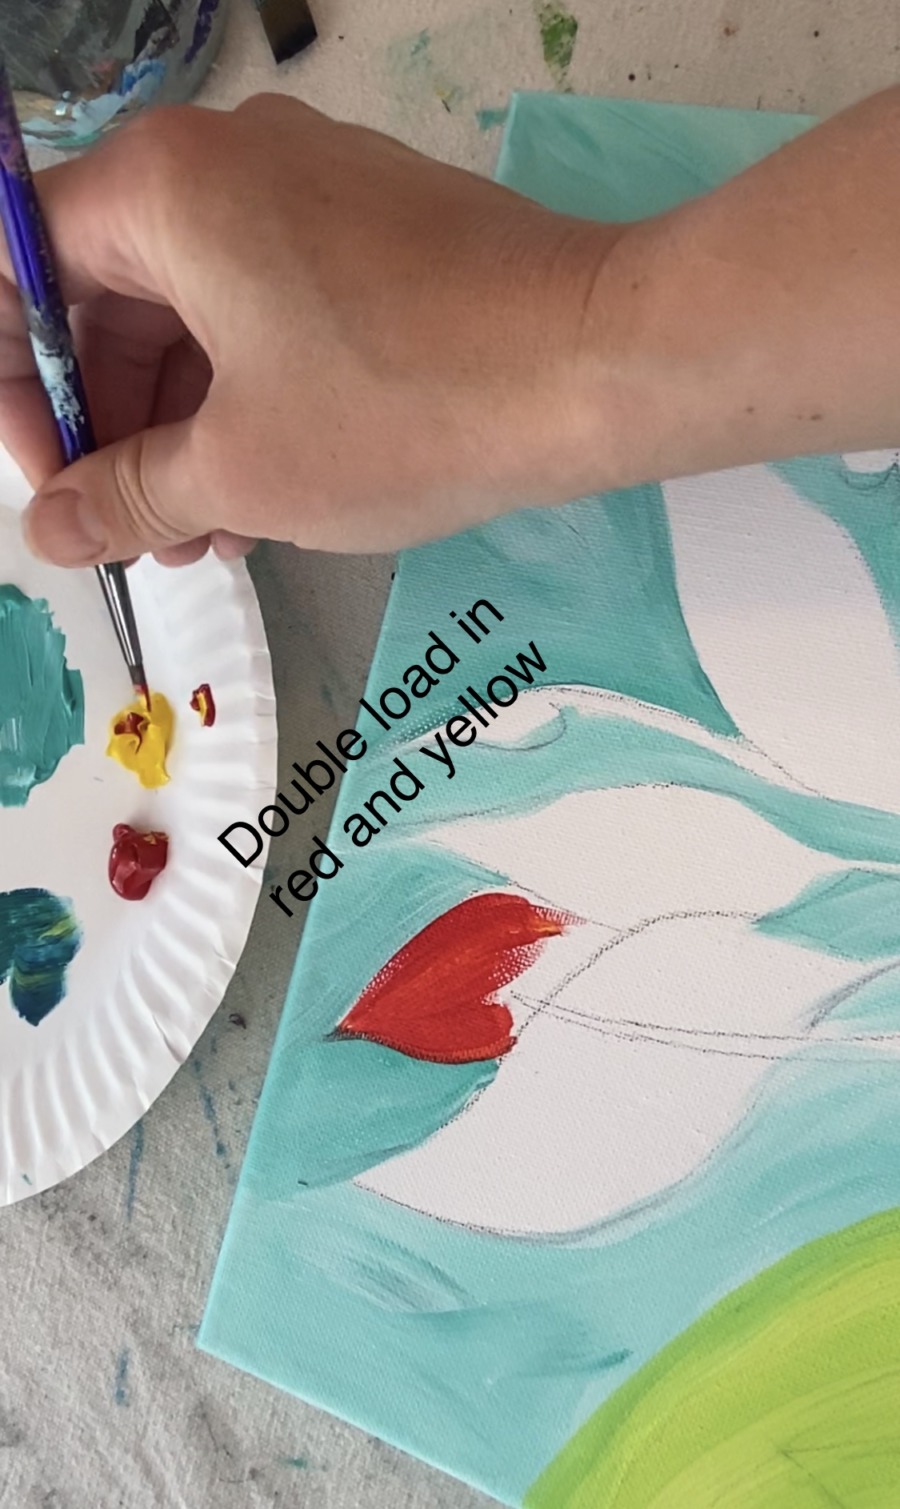
Next I did the bright red and orange blooms! For these I used primary yellow, napthol crimson and a little bit of titanium white. Each section was painted a slightly different shade of orange and red.
First I painted the bloom wavy in the back. I used my 4 round brush and double loaded in equal amounts of yellow and red to make a dark orange. Paint this a solid coat of that color.
Then the bloom in front of it was painted more of a yellow shade. Wipe off your brush and add yellow to it. Paint it and it will blend into more of a light orange/ dark yellow color.
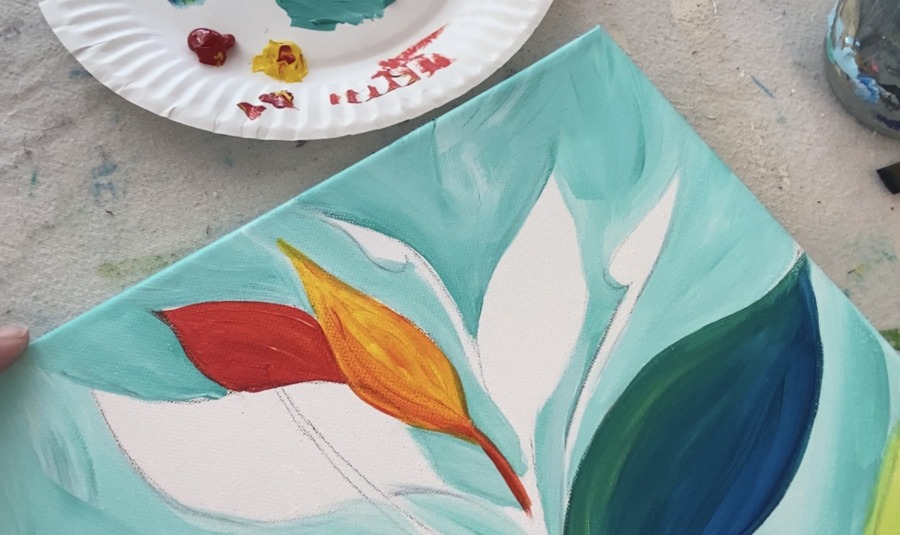
Tip: you don’t have to be exact with these colors! If you want, you can do different shades of yellow or even add in some white. The point is to make each bloom a different shade so it stands out from the other ones.
For the next bloom piece, I did naphthol crimson blended in with a little white so it is lightest on the right and blends to a darker red on the left.
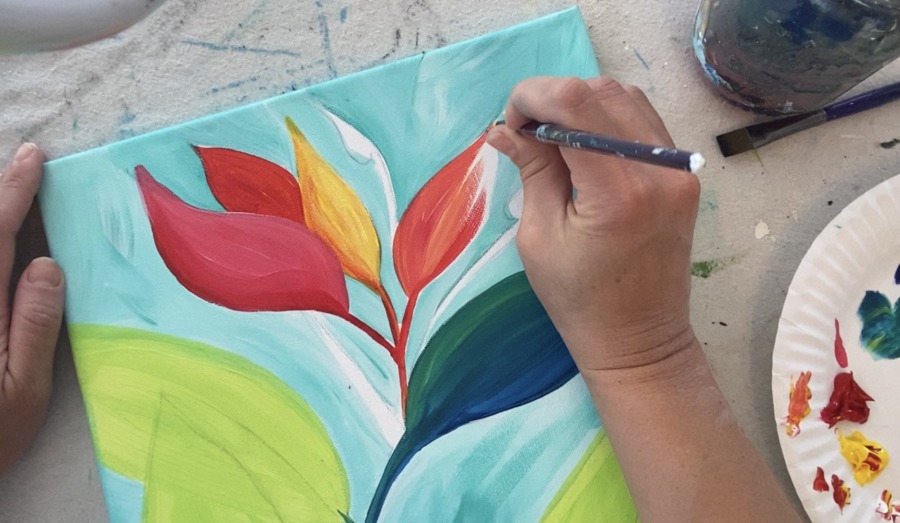
And the far right bloom was mix of the yellow, white and naphthol crimson so it turned into more of a coral color.
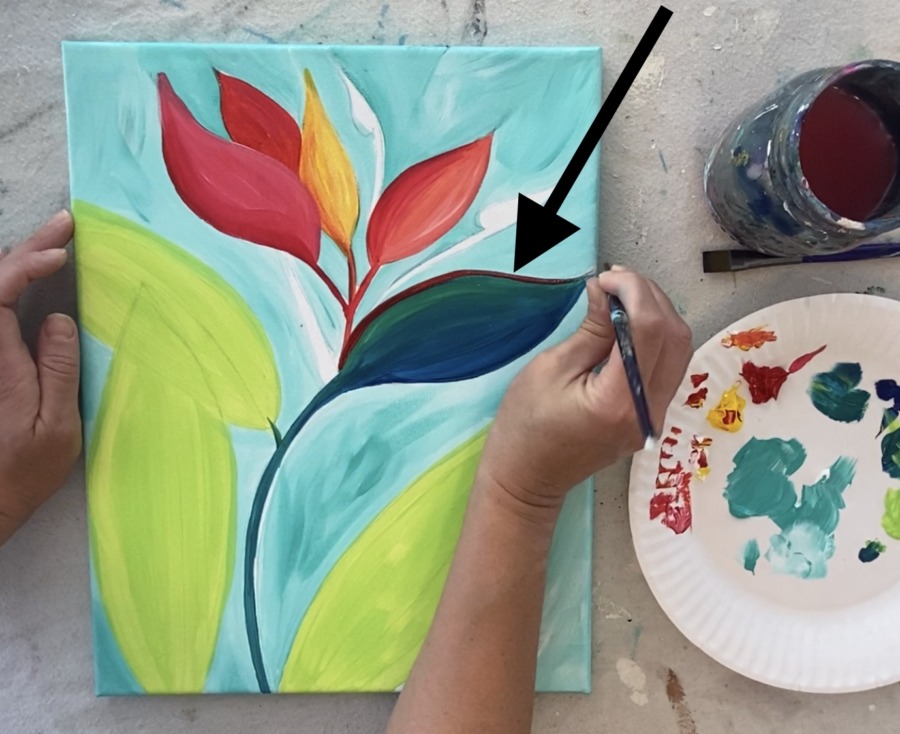
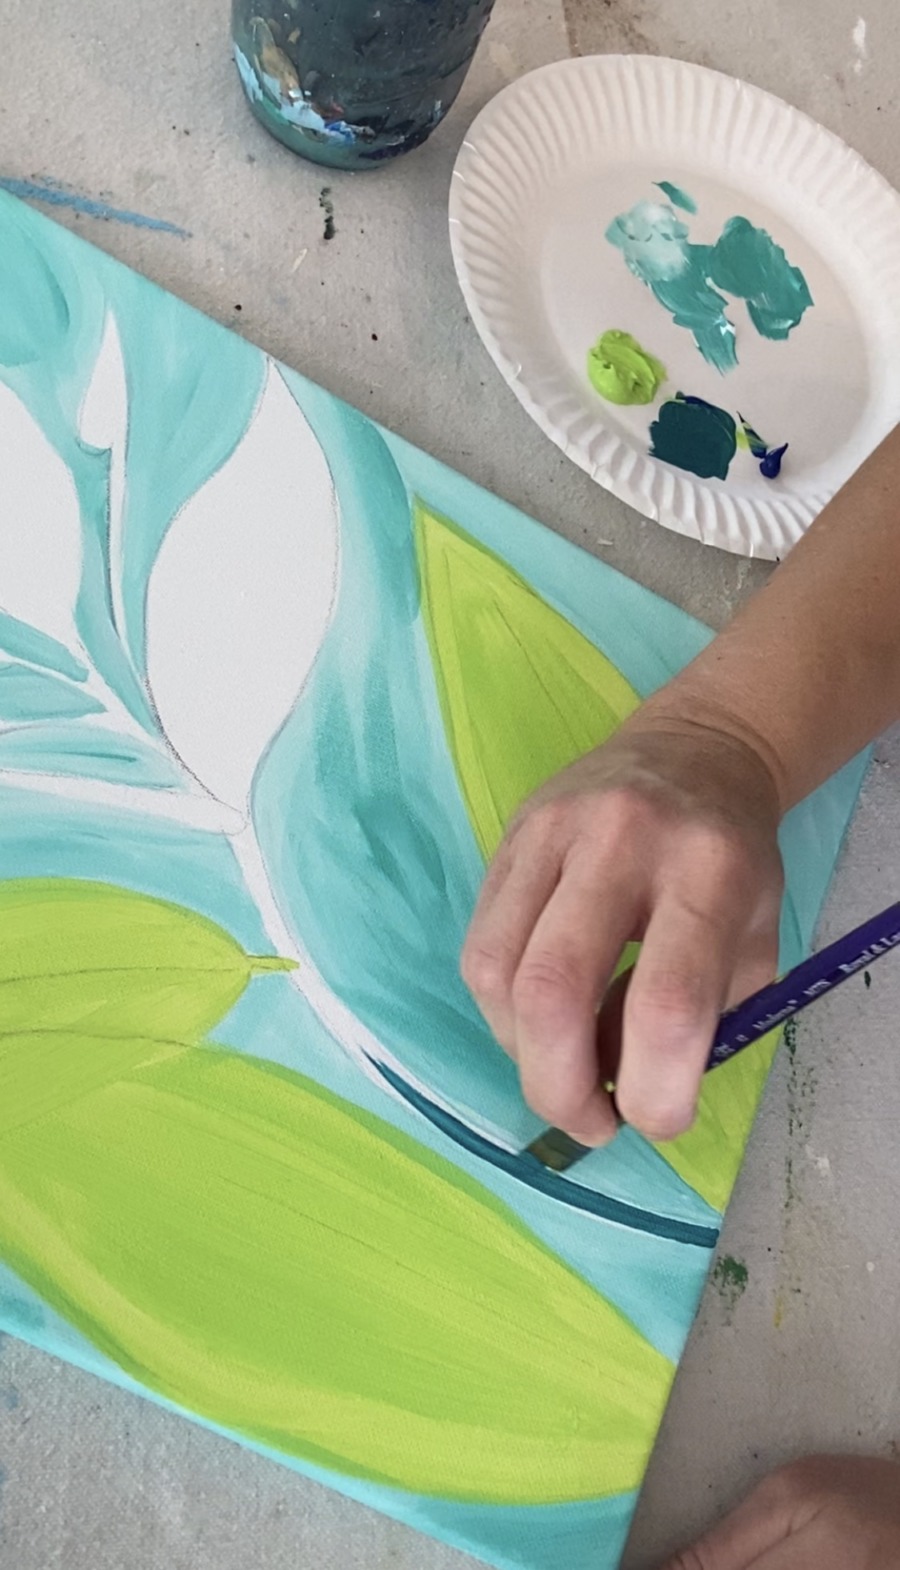
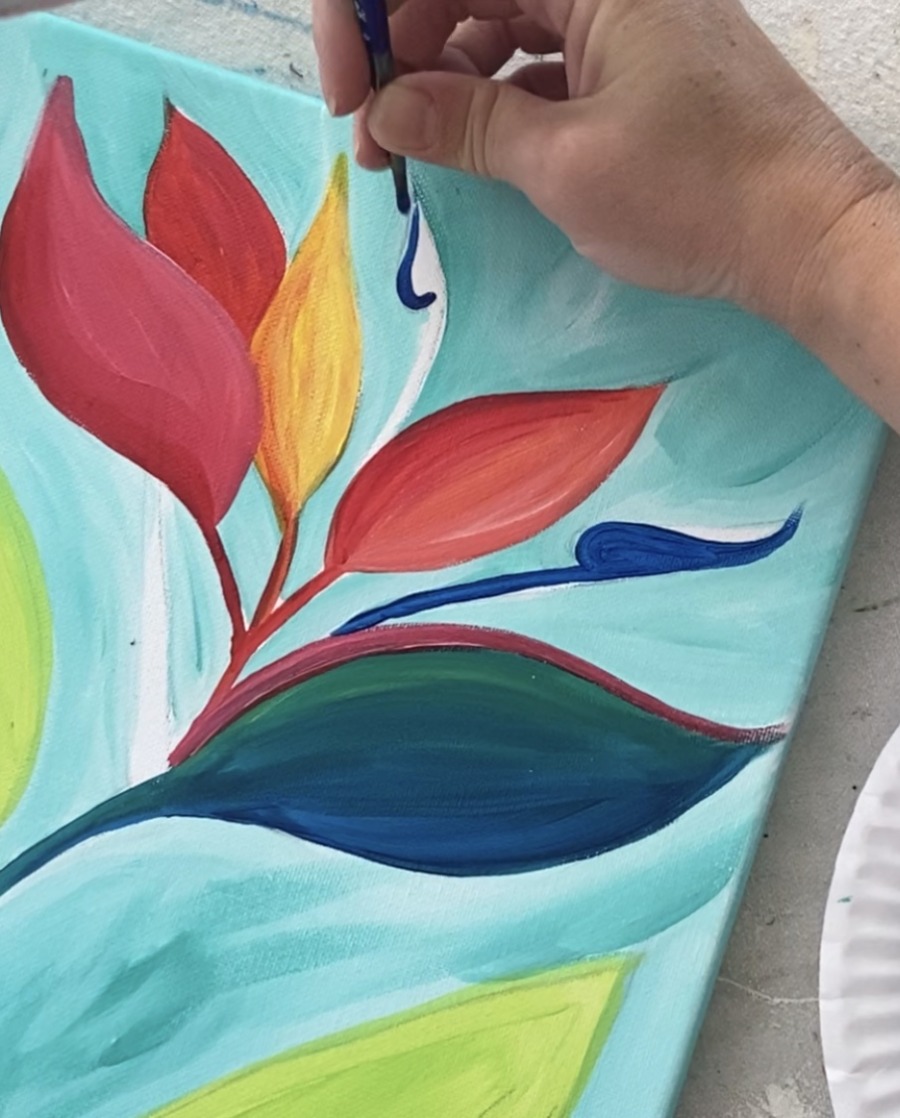
Next I outlined the top part of that green/blue piece with naphthol crimson.
Then the smaller, narrow pieces were painted with a solid Phthalo blue. You’ll need some good brush control for this step because those pieces are a little intricate! If you have a smaller round brush you can bring out, it might be helpful for this step.
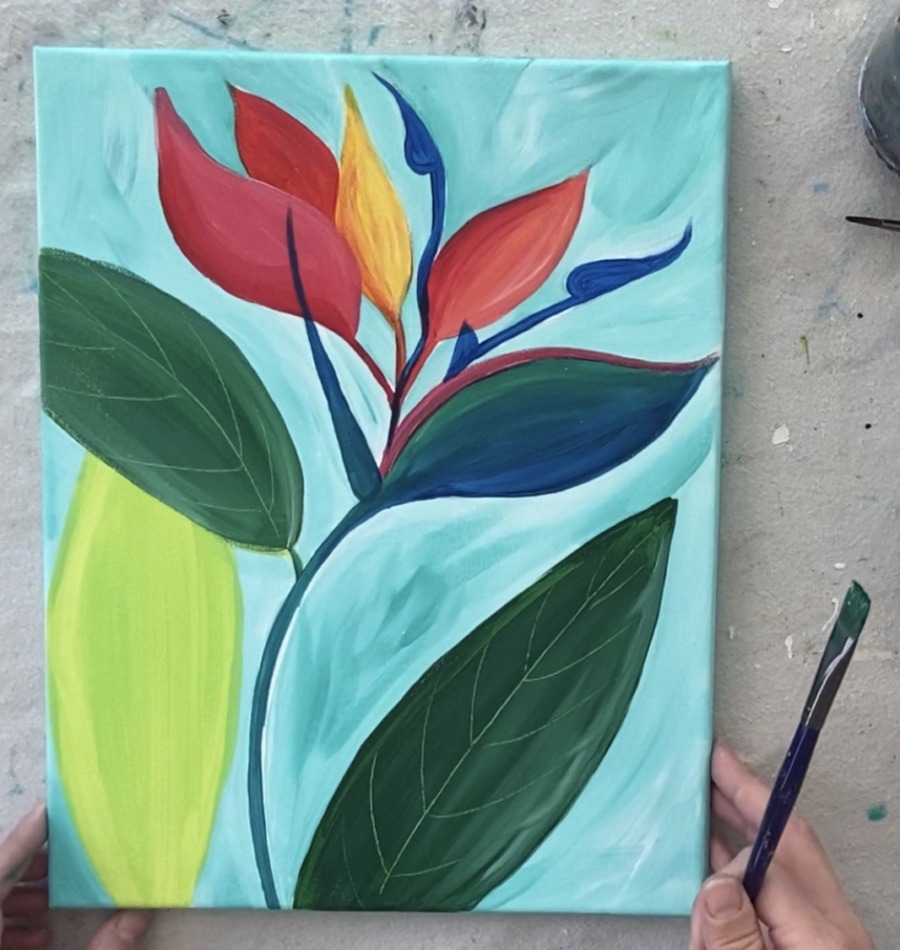
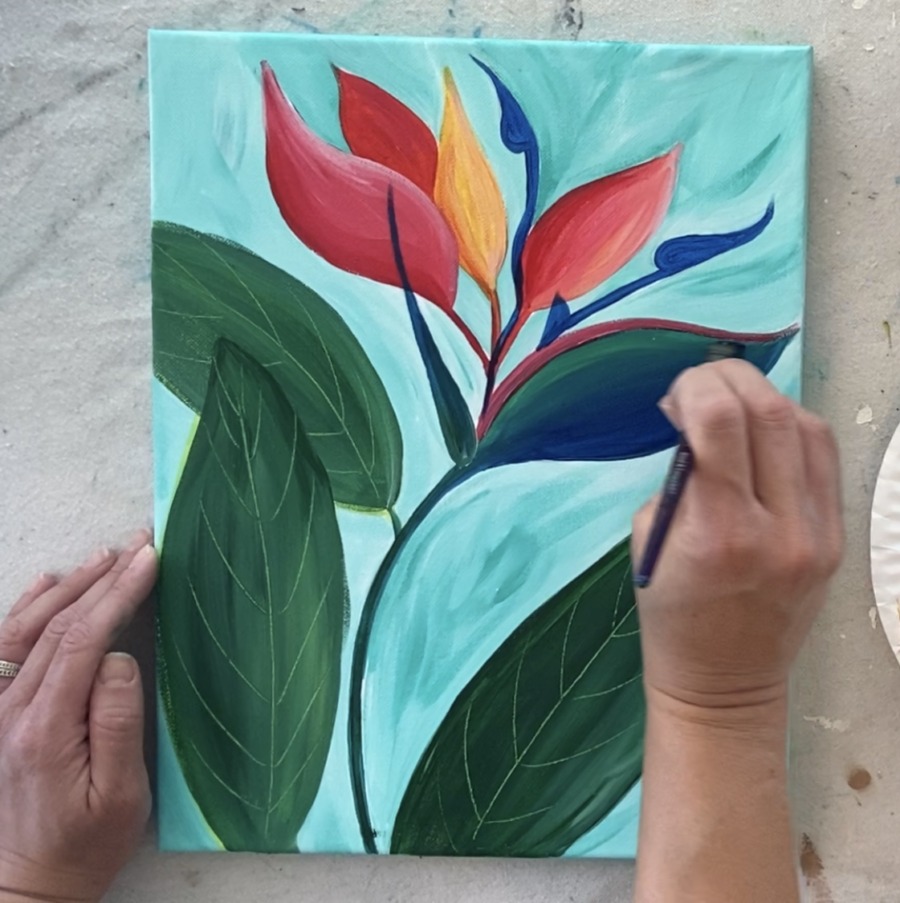
6. Paint The Leaf Detail
Next I painted the leaves! Now that the bright green undercoat is dry, I painted the next layer with deep green permanent. You do not want this to be solid because seeing some of that “undercoat” below adds to the effect. Just one thin coat will do.
Then I added just a tiny bit of white to my brush and blended it into the green so that the right part of the leaf is brighter. Do long strokes that contour the shape of the leaf as you’re blending.

Then, quickly before it dried, I used the back of my paint brush to scratch the leaf lines. You will be able to see a brilliant yellow green line from the undercoat. Fun fact, this is actually called the “sgraffito technique”. It’s when you scratch off a top layer to reveal the under color. How neat!
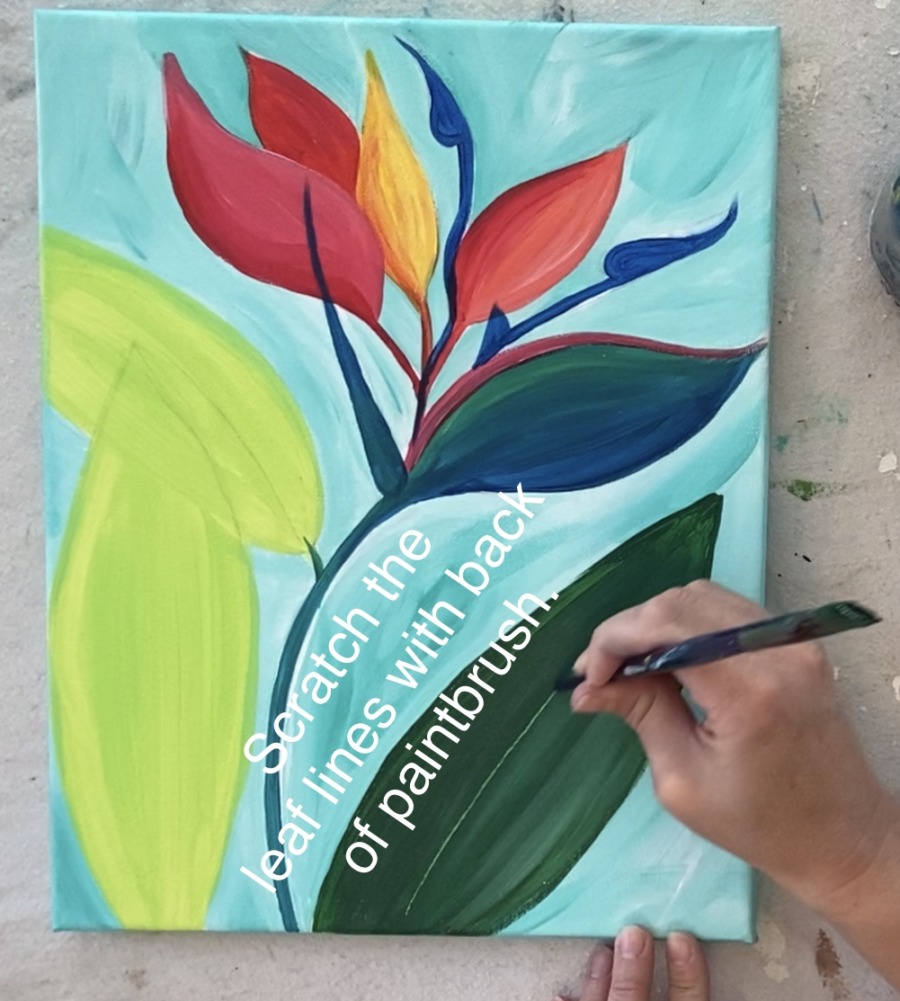
I scratched the center line and the lines that stem out.
Then repeated this same leaf painting technique to the top back leaf.
When you do the bottom leaf, it will overlap the top back one. Make it slightly darker on the edged that it overlaps so that it shows up against the back leaf.

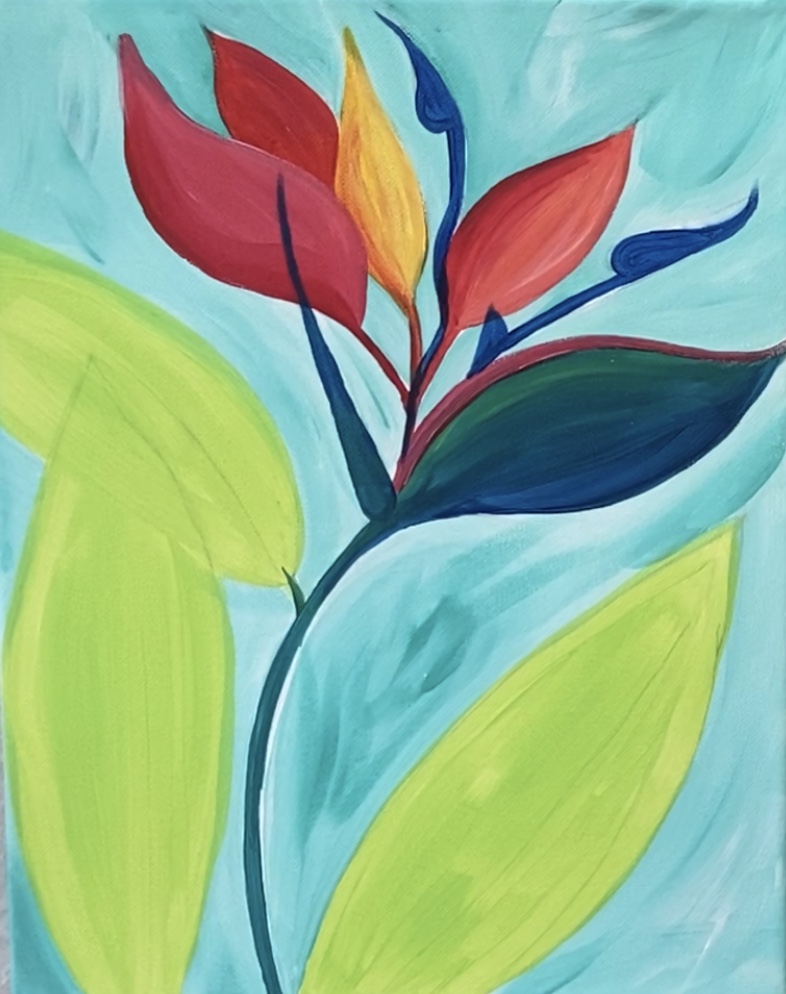
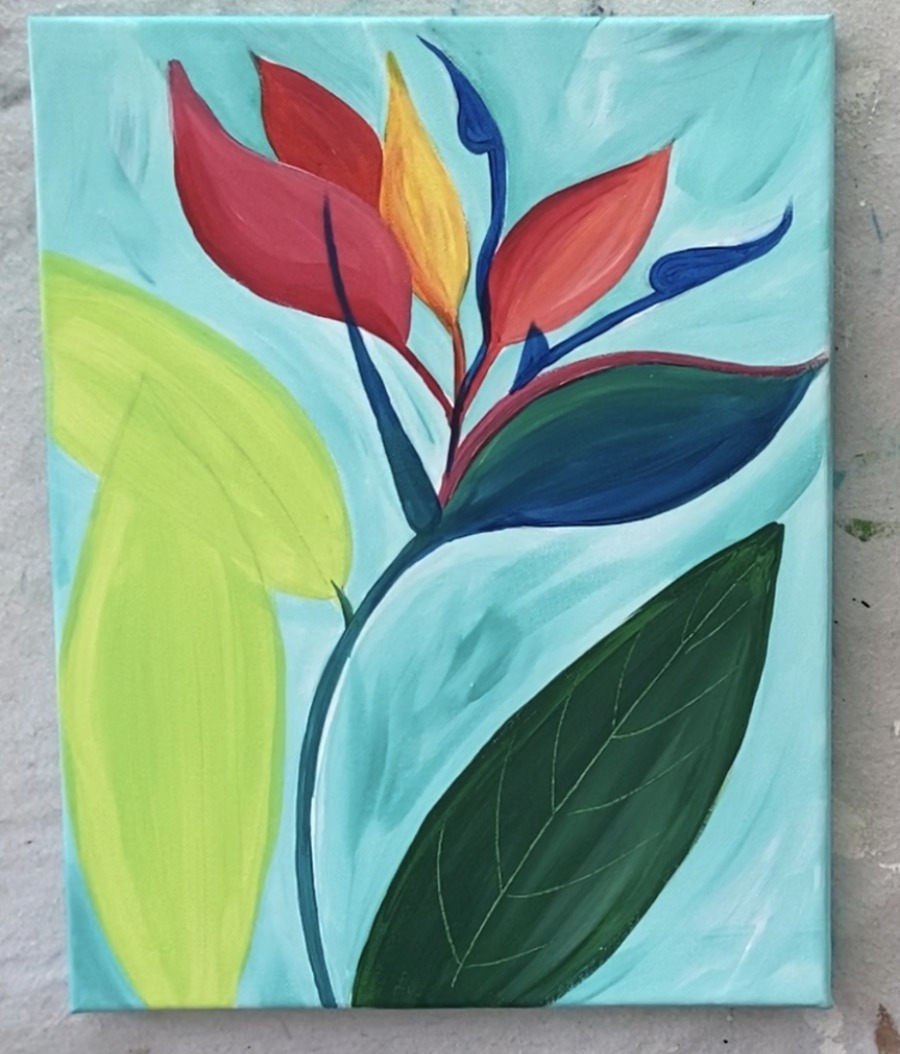
7. Final Touches/ Second Coats Of Paint
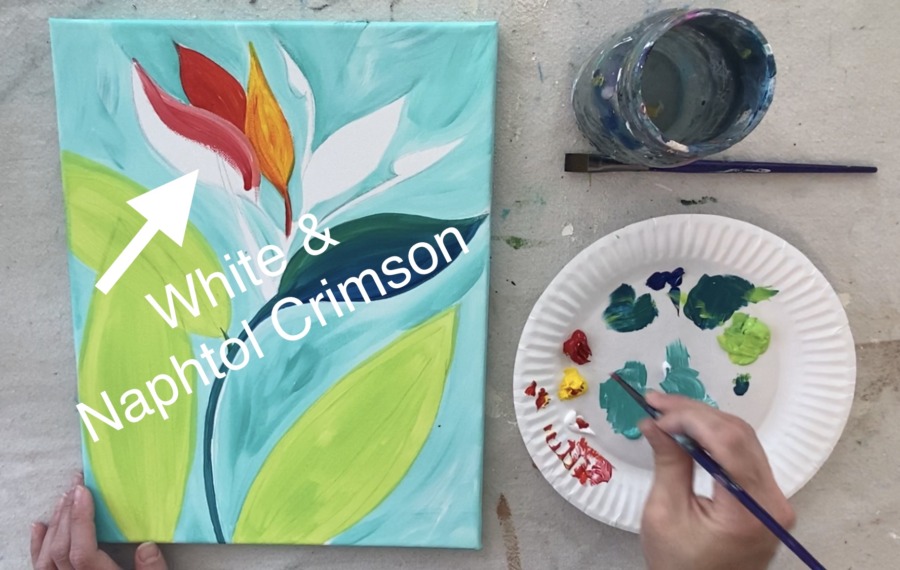
Some final steps! I went in and added some second coats to the blooms. I added more blue to blue/green bottom piece and a little bit of white highlight that blended into the blue.
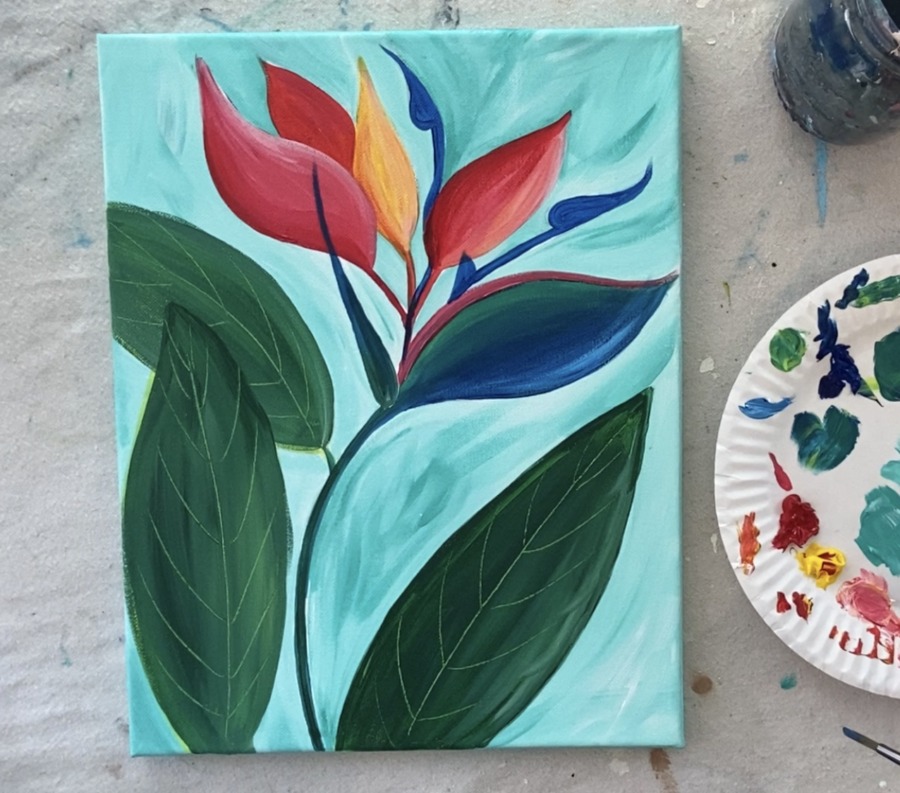
If you want, you can add more white to the leaf lines! This helped it pop a bit. The painting on the left pictured below was rendered a bit further with more white highlighting on the blooms and the leaves.
Finished