Would you like to save this?
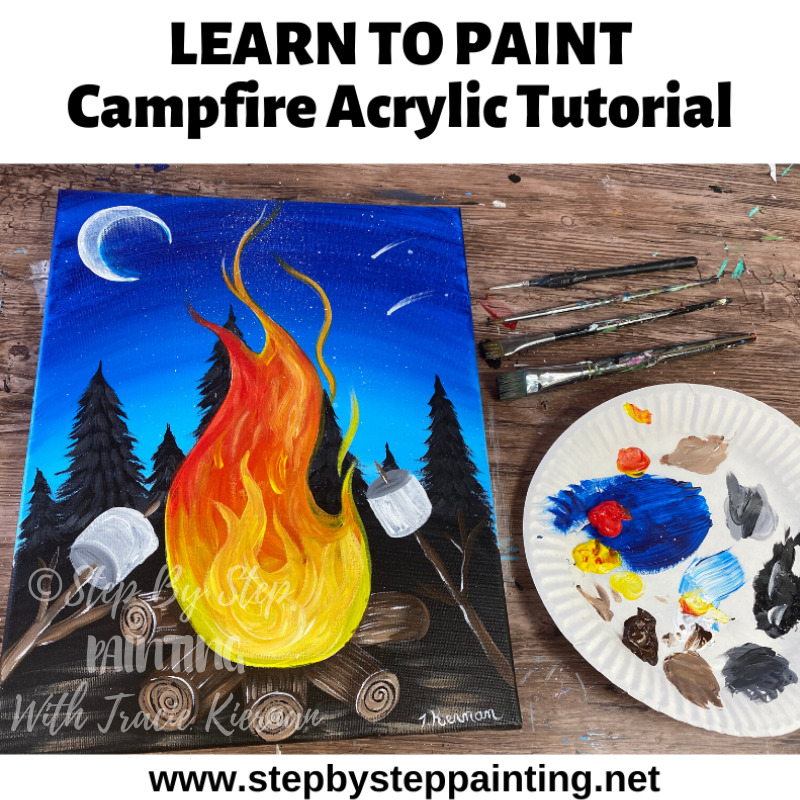
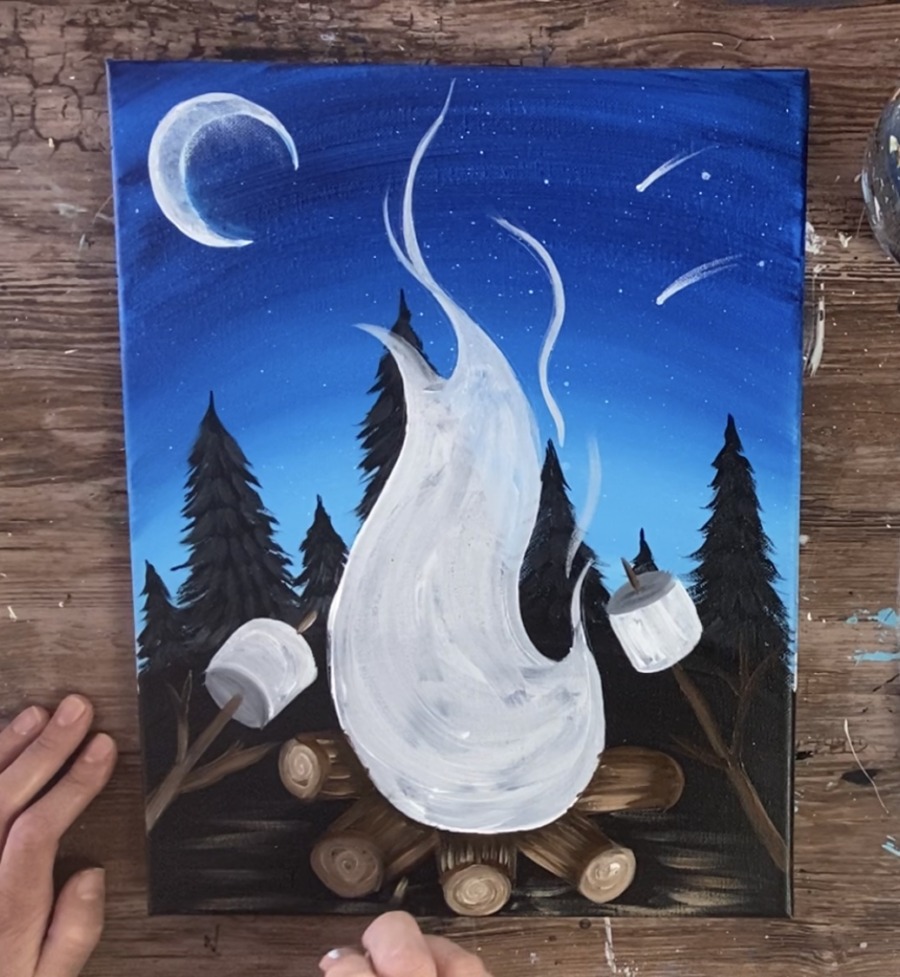
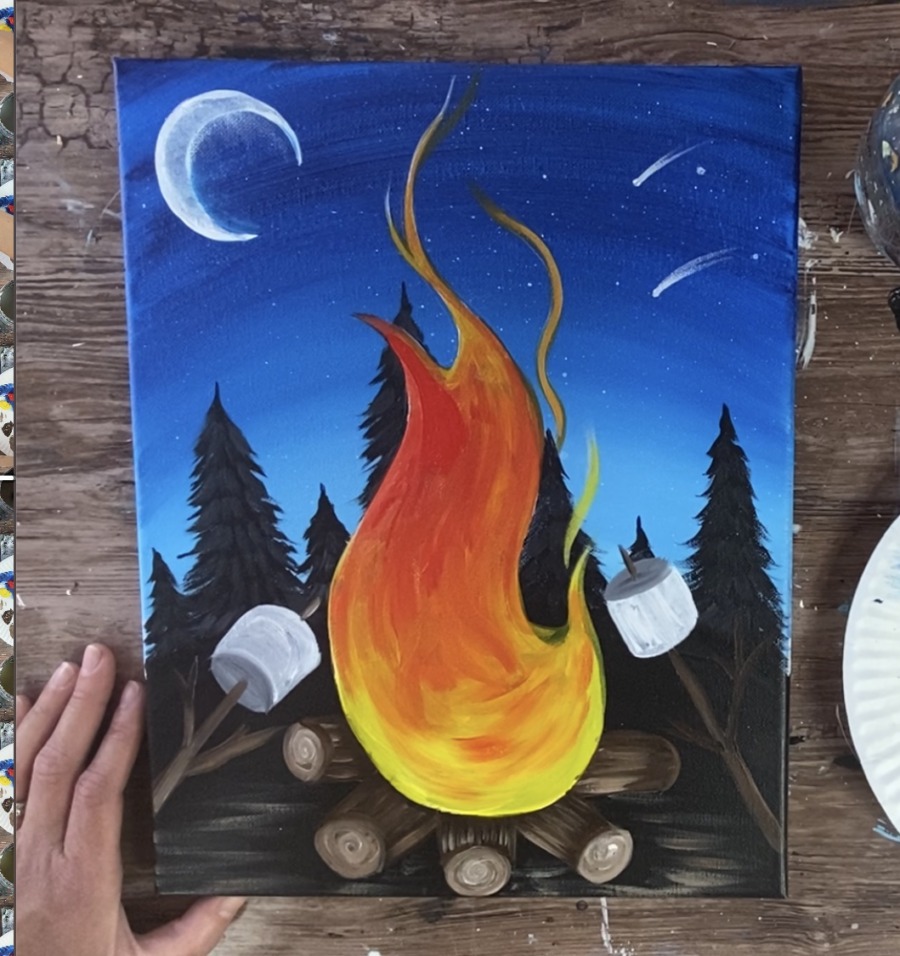
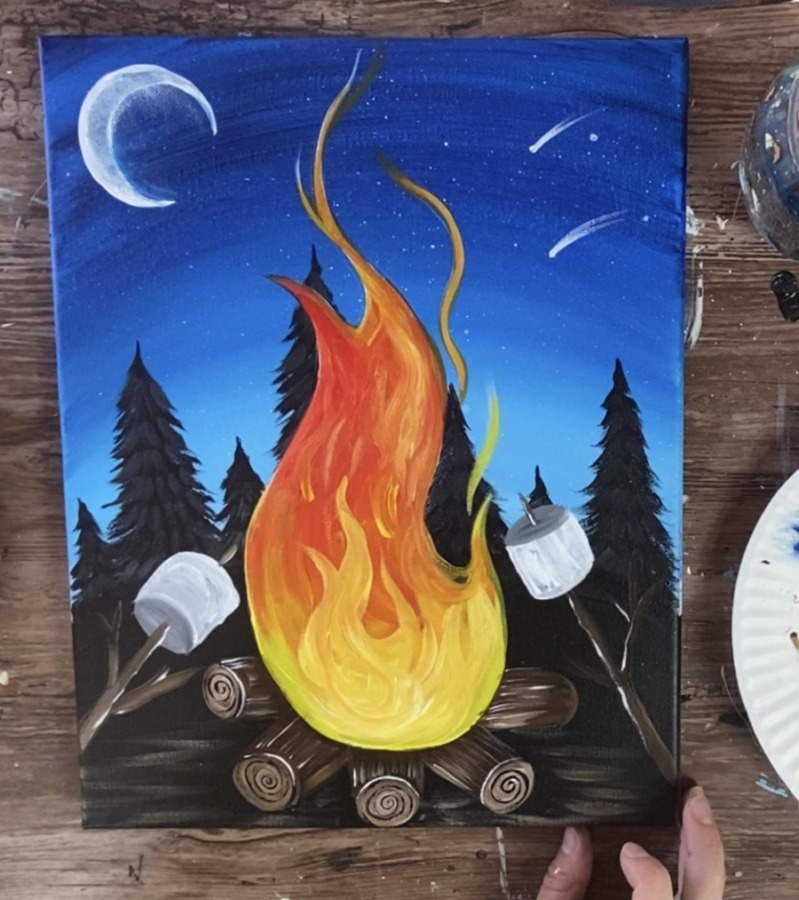
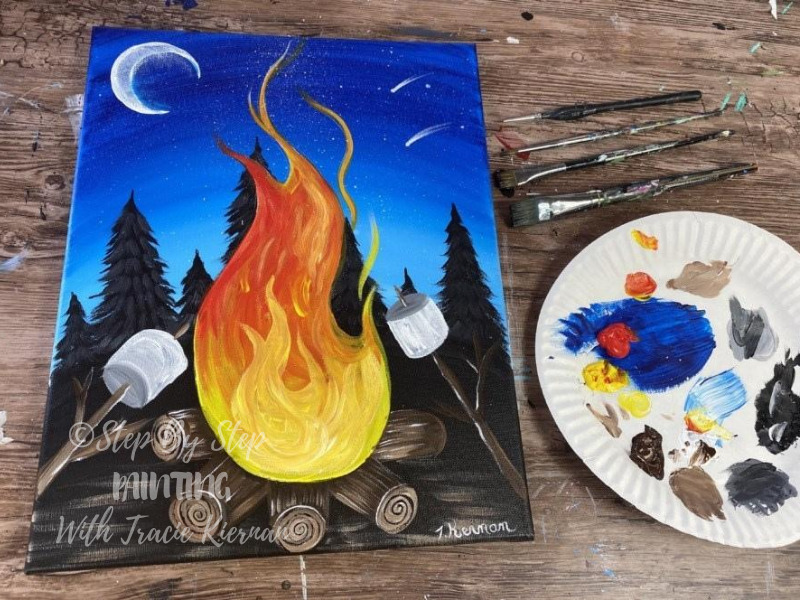
“Around The Campfire” is a fun painting for all ages that will bring back fond memories of roasting marshmallows under a starry sky.
This painting tutorial will guide you through each step with detailed directions! You can also grab the traceable for this painting over in my traceable library.
Enjoy and happy painting!
See Also
Materials
Campfire Painting
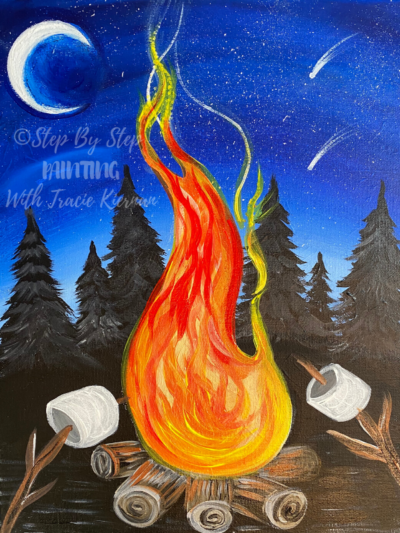
Escape to the woods under a starry sky and a crescent moon. Roasted marshmallows and the smell of the campfire! This painting will sure bring back fond memories!
Materials
- Acrylic Paint
- 11 x 14 Canvas
- Brushes
- Water Cup/Paper Towel/ Palette
- Traceable
- Chalk or White Graphite Paper
- Pencil
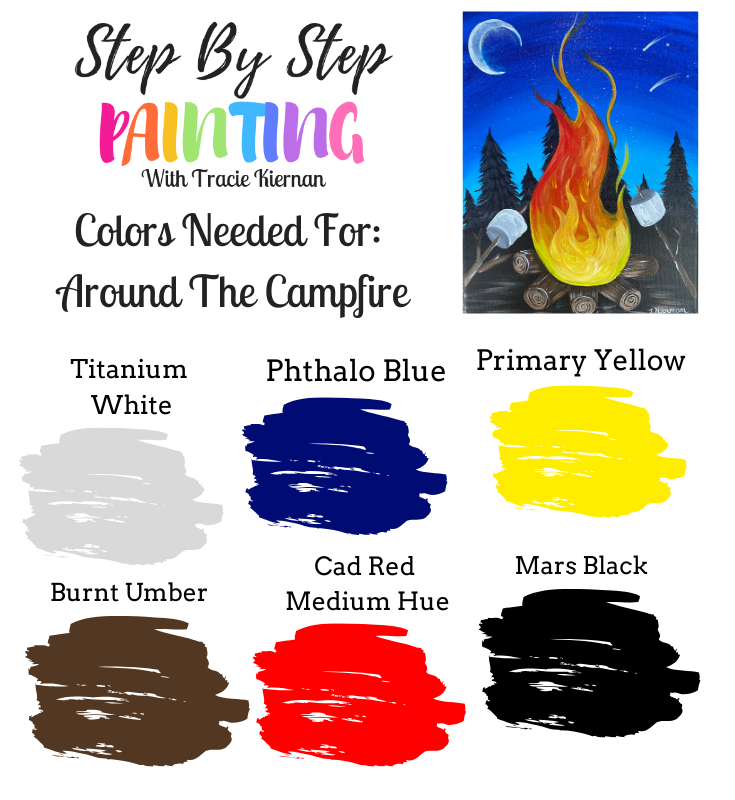
Colors
- Mars Black
- Titanium White
- Phthalo Blue
- Burnt Umber
- Primary Yellow
- Cadmium Yellow Medium HUE
Brushes
- 3/4 Flat Wash
- 4 Round
- 12 Bright
- 10/0 Round (AKA Spotter)
- Toothbrush for star splatters
Color Palette
Craft Paints?
I get so many questions about how to convert to craft paint colors if that is what you are using. Here are suggestions on what to use for the popular Apple Barrel Craft Paints.
Brushes
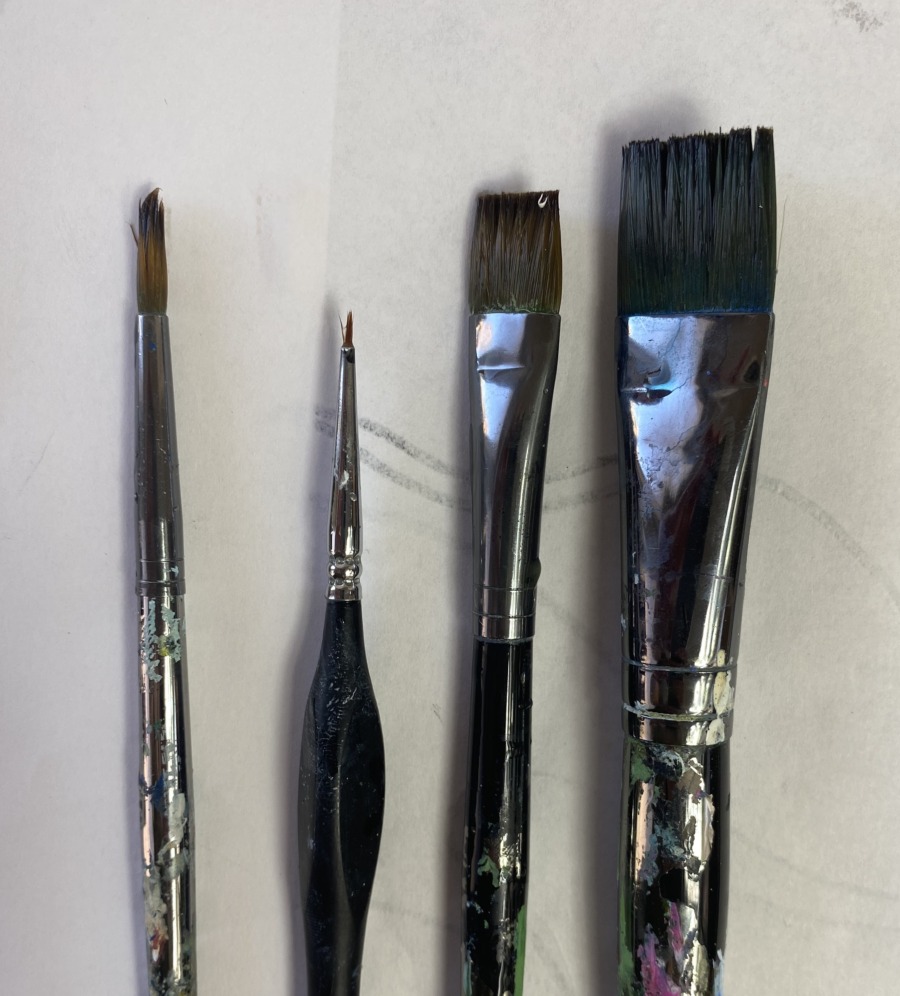
- 4 Round Brush
- 10/0 Spotter
- 12 Bright
- 3/4” Wash Brush
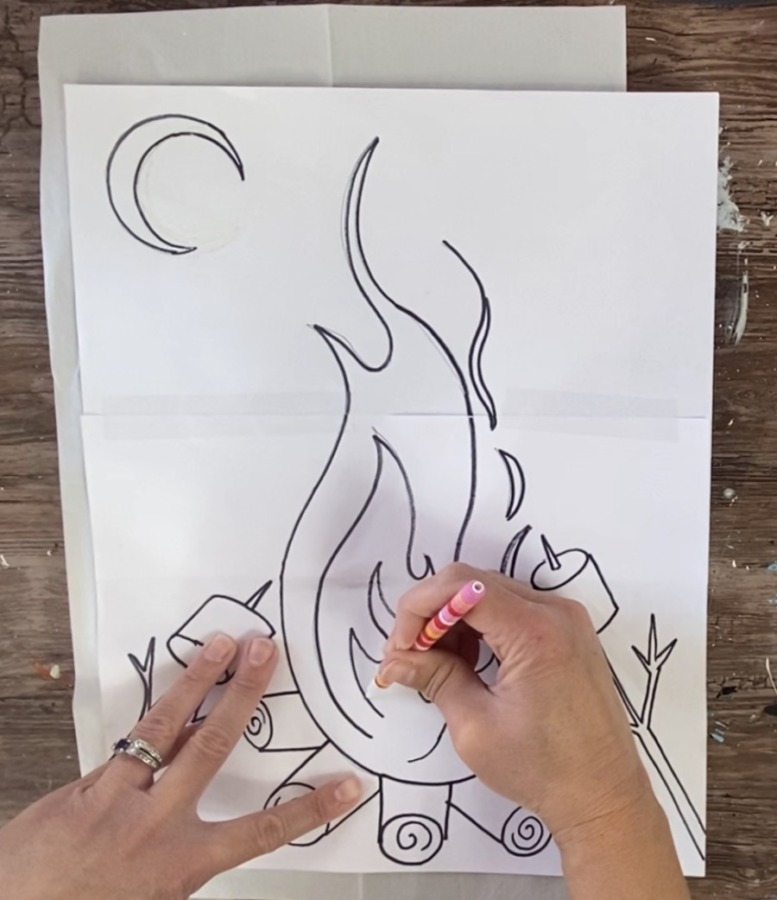
Traceable
To download the PDF for this traceable, you can go to my Traceable Library. You can also lightly draw this on your canvas using chalk.
For personal use only.

Directions At A Glance
Video
Step By Step Directions
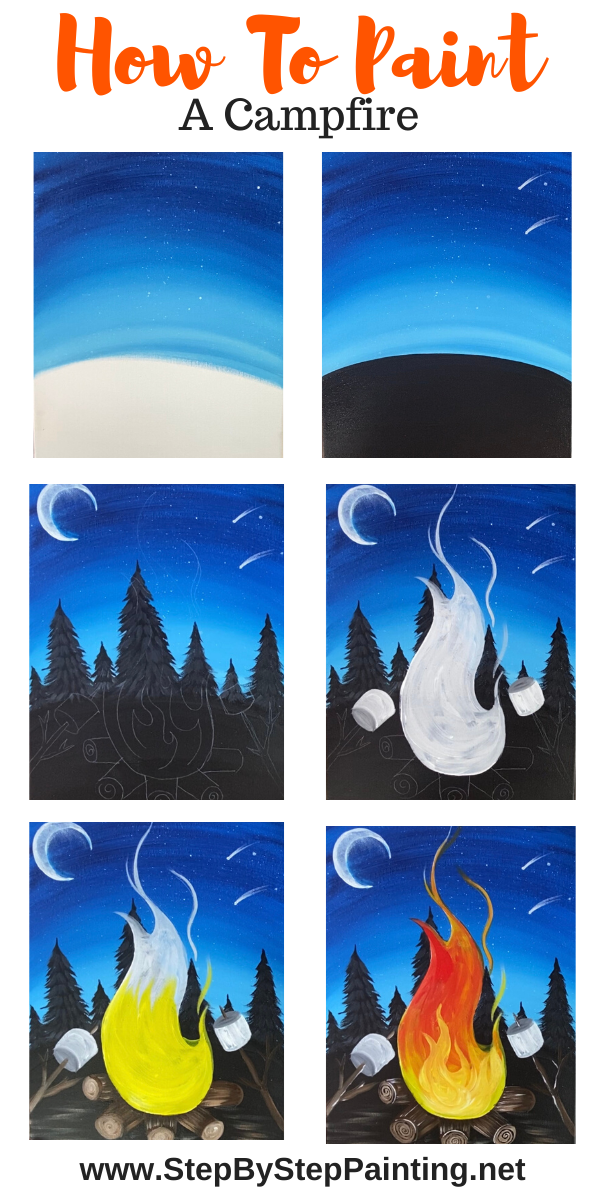
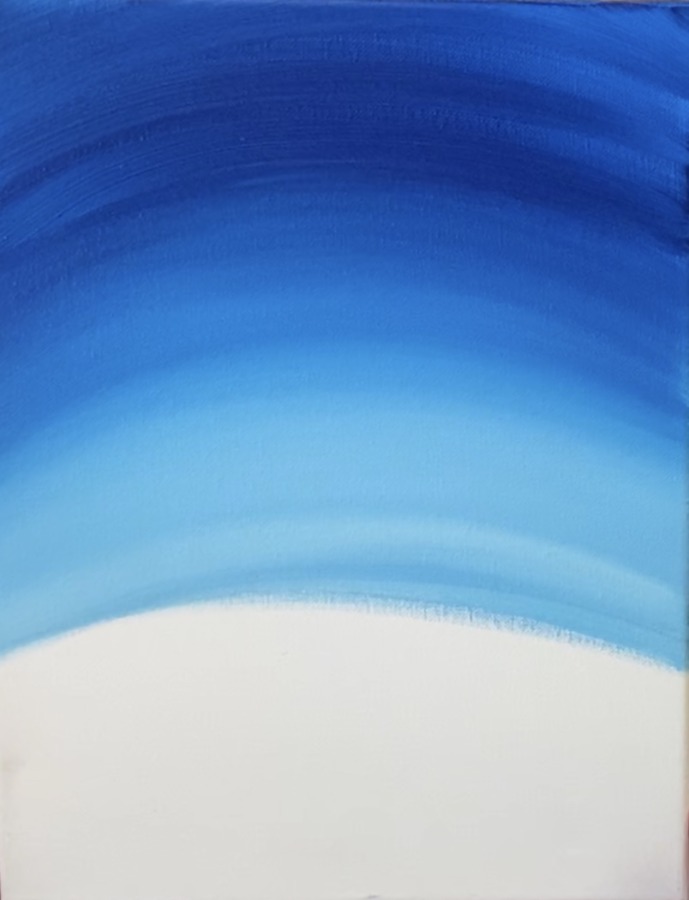
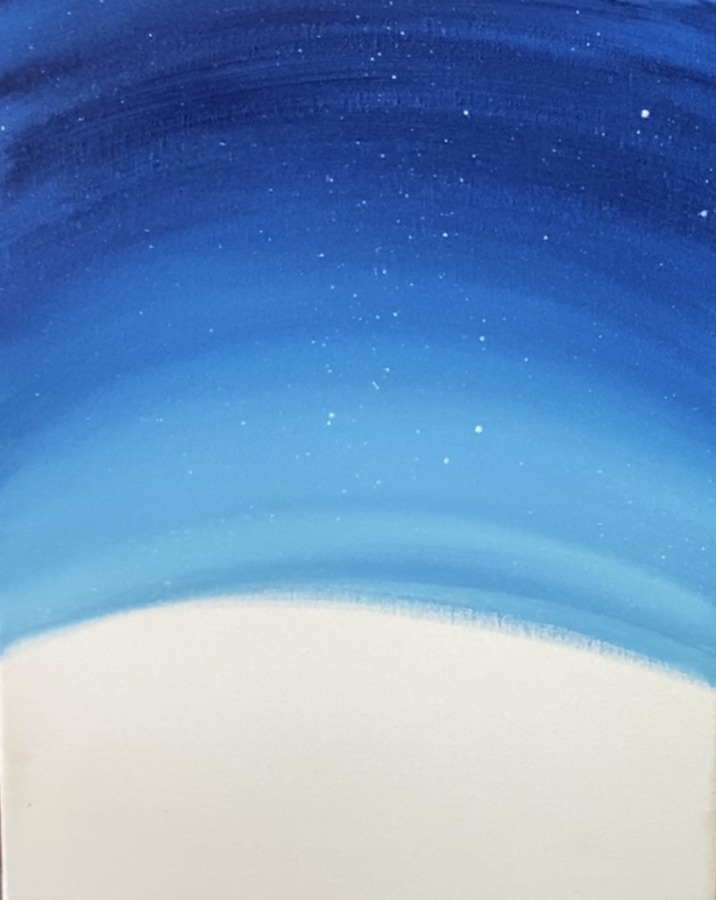
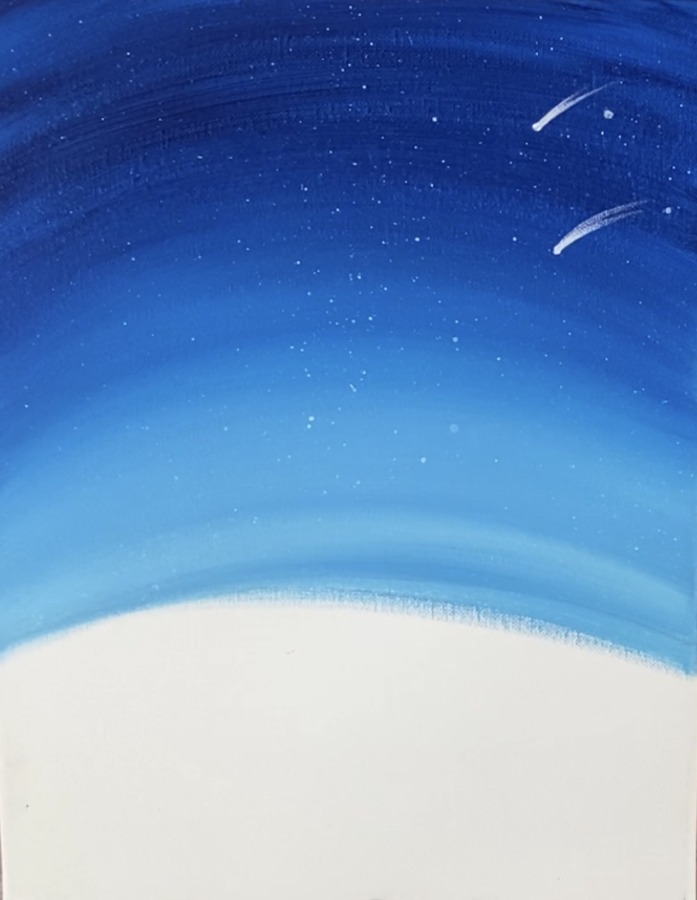
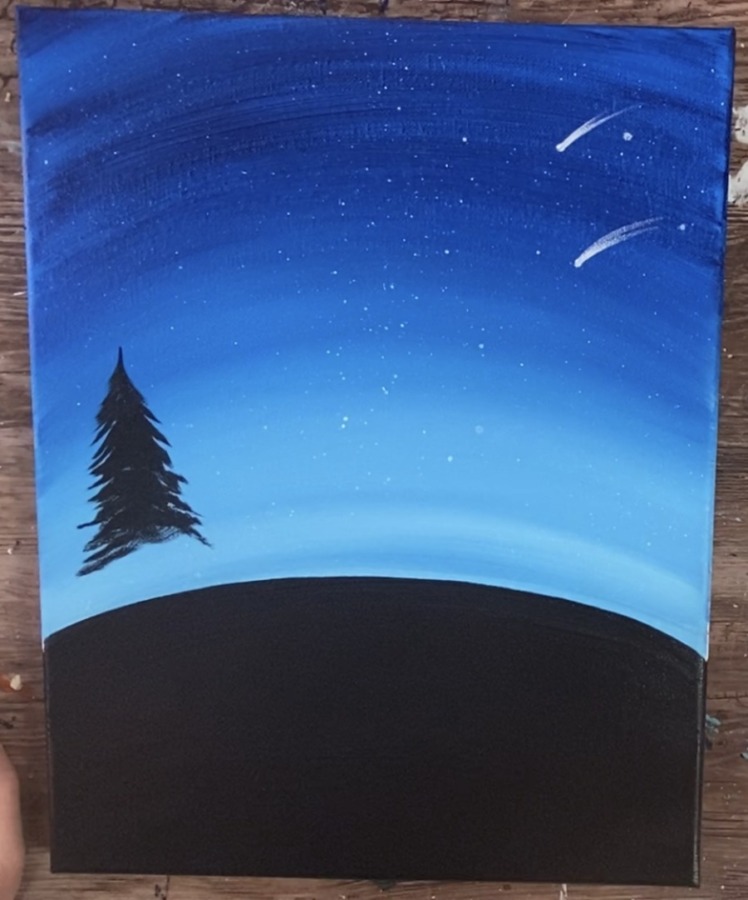
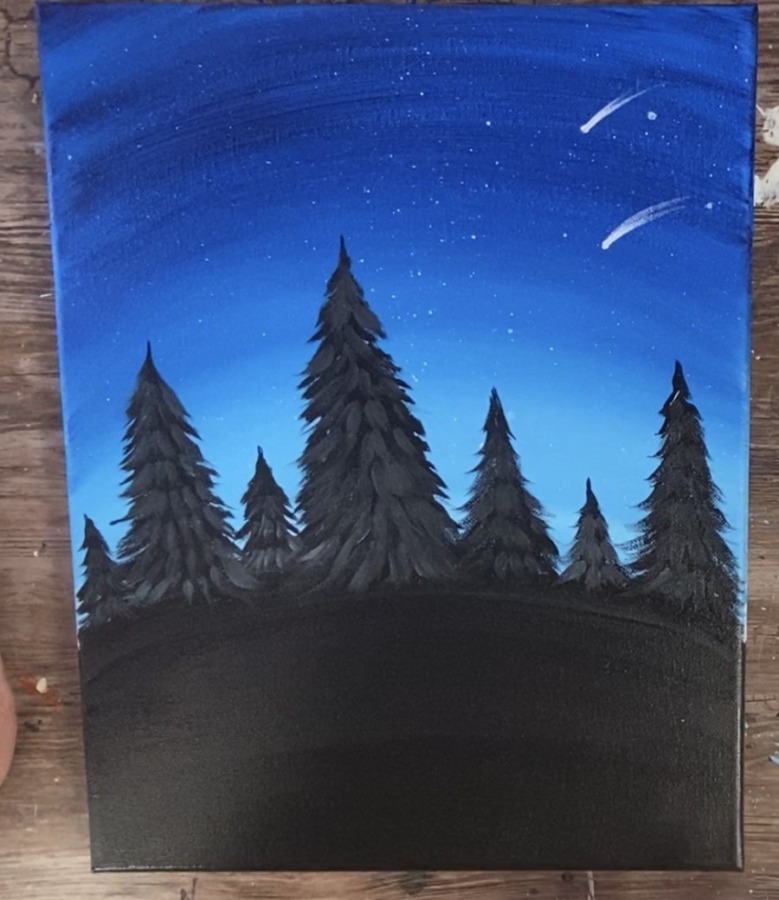
1. Paint The Sky
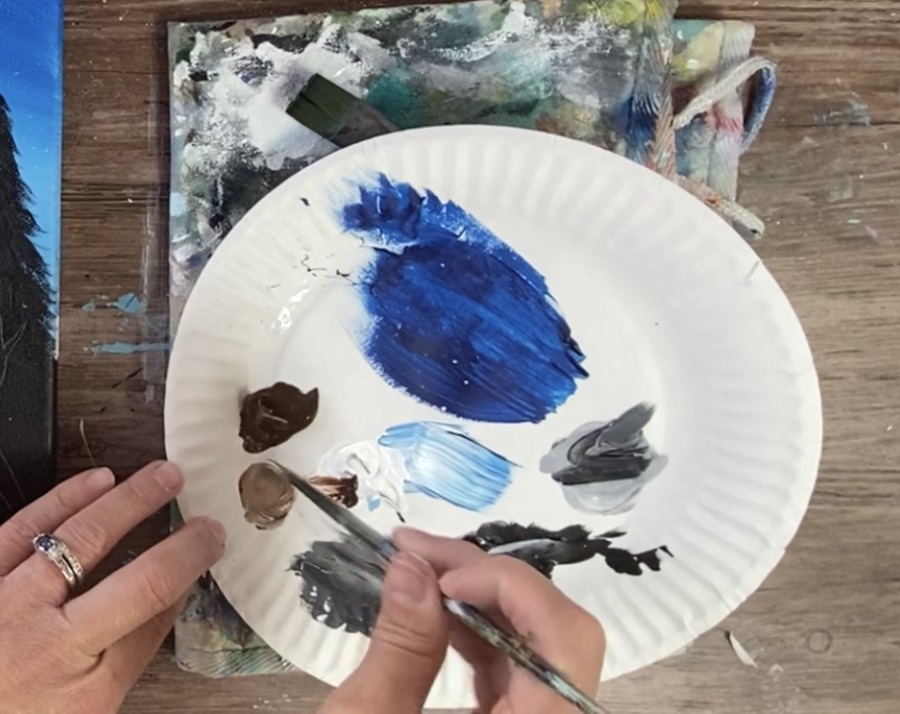
Load your palette in phthalo blue and titanium white. You will also be using a 3/4” Wash Flat Brush. Start at the top of the canvas and paint phthalo blue.
Paint in a curved direction and work your way to about a quarter down the canvas.
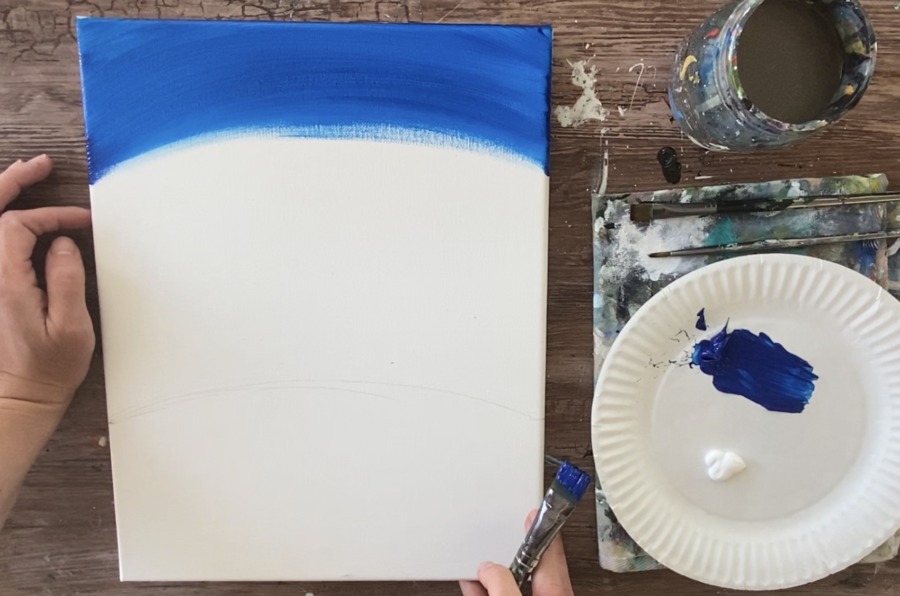
Note the pencil line towards the bottom where the horizon line is. That curve was drawn at 1/3 up the canvas.
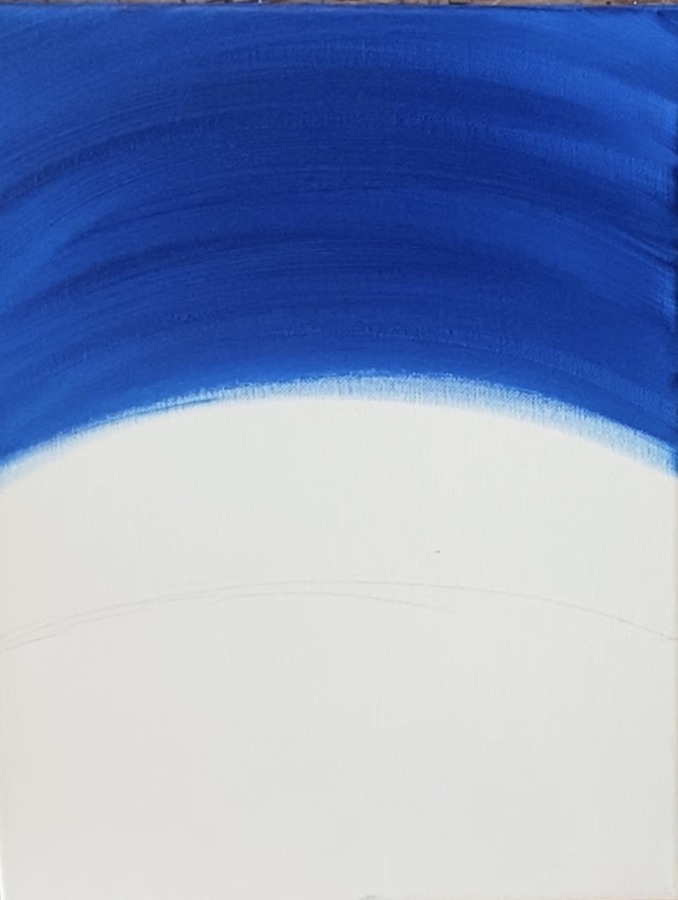
Next load your brush in titanium white but don’t rinse the phthalo blue off. Blend the titanium white up into the blue. Then work your way down with the white. The idea is to get the blue to be a gradient of dark to light with the lightest on the horizon line.
2. Paint The Stars
To do the stars, I used a toothbrush. Load it in some titanium white and then flick the brush so they splatter.
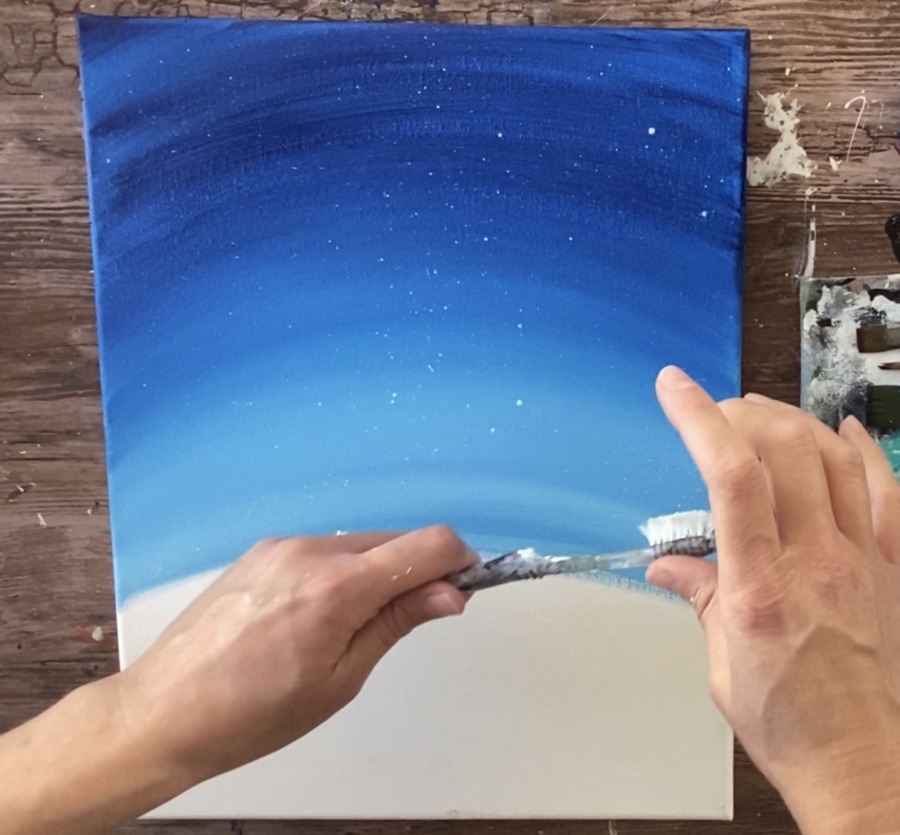
The trick with creating the right splatter is to have the consistency of the paint to be somewhat thin but not watery. If the paint is too thick you will get clumps. If it is too thin, it will create watery splatters that drip. I recommend sticking your finger in water and then applying it to the brush and then loading the white. Practice off the canvas until you get the desired splatter.
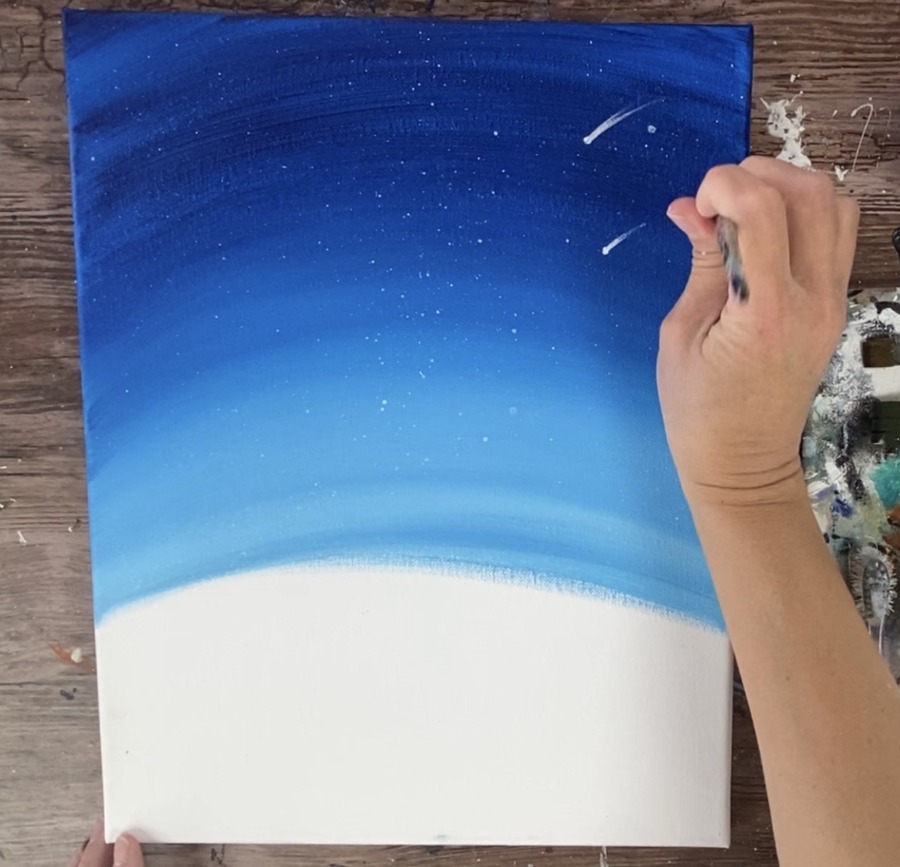
Then use a 4 round brush to paint the shooting stars. First paint a small white dot. Then wipe the brush off so only a little bit of paint is left on the brush. Paint the tail of the star as the stroke appears dry and see through.
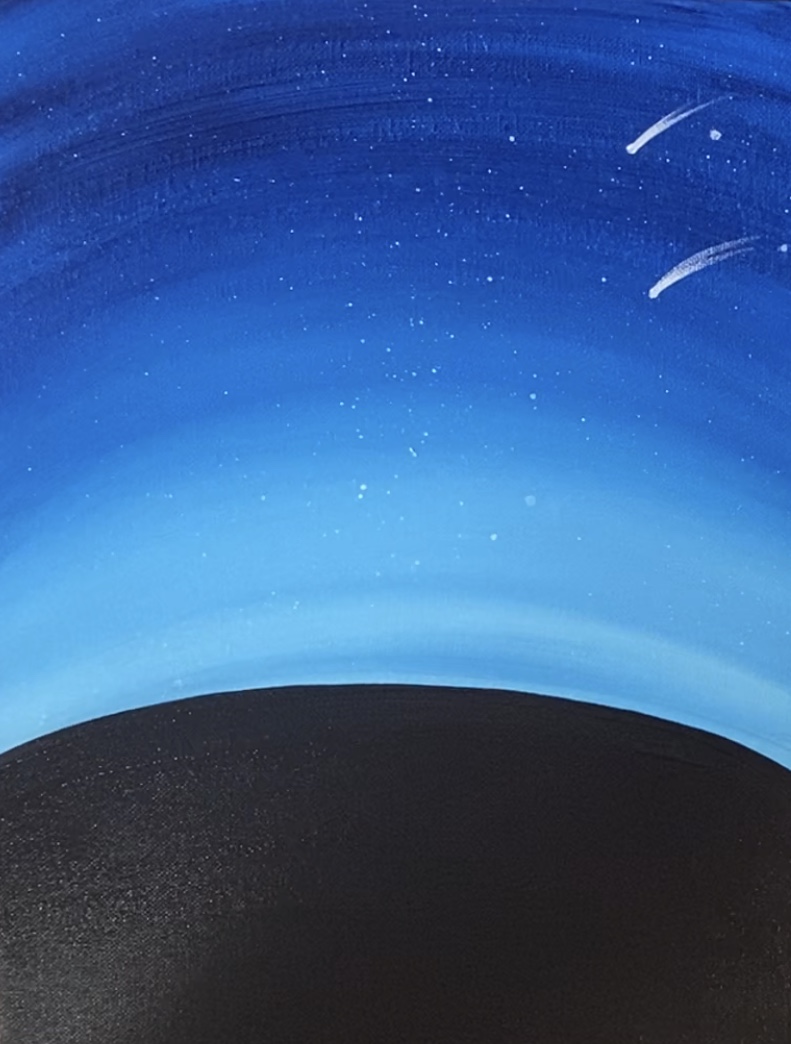
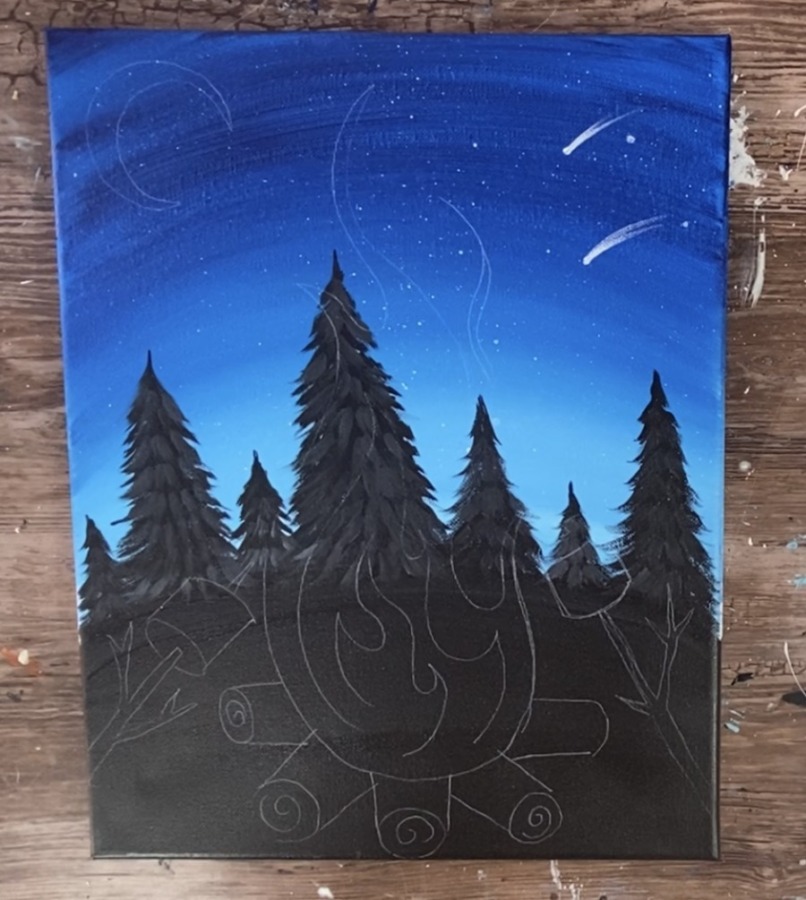
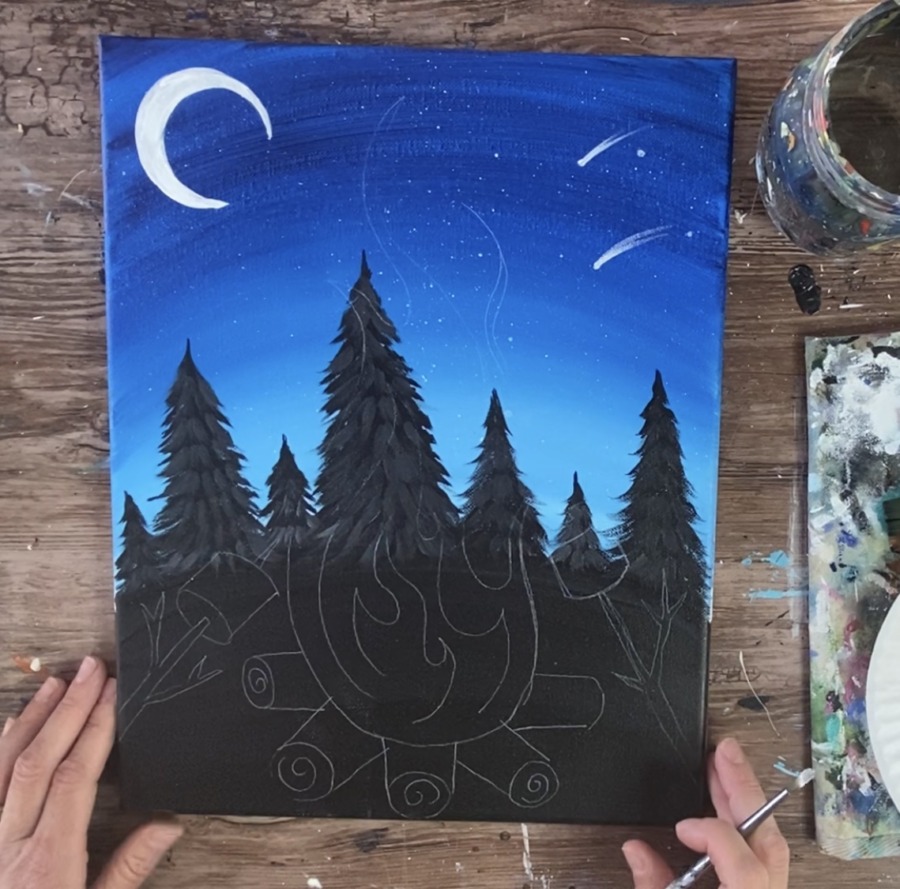
3. Paint The Ground Black
Next use mars black and a 3/4 flat wash brush to paint everything below the horizon line a solid black.
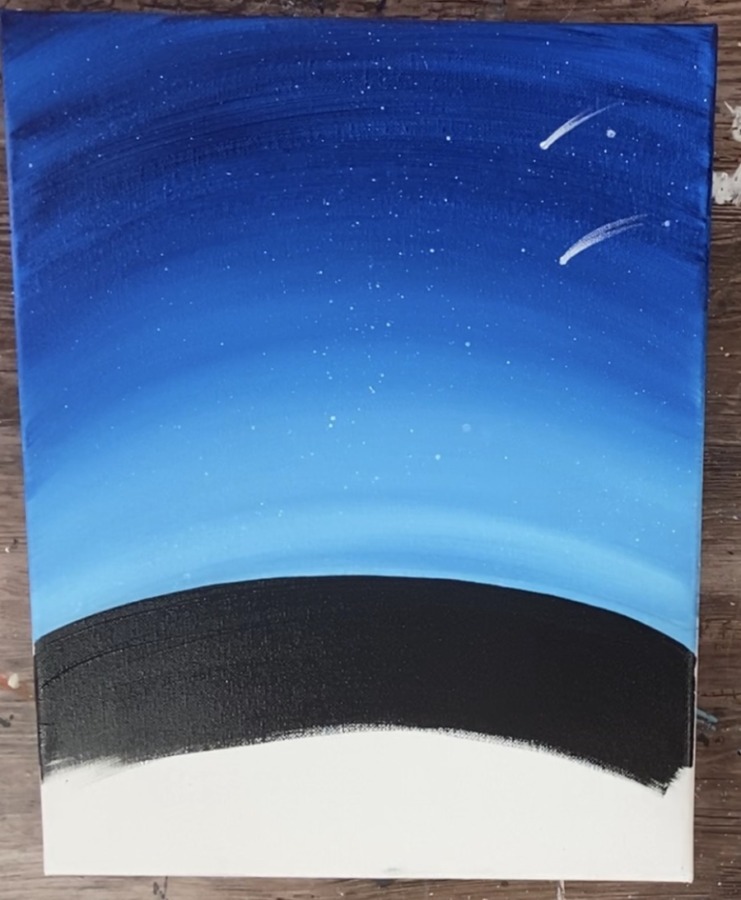
You can have the direction of your strokes go curved as well but eventually, on the bottom, they should go left and right.
4. Paint The Trees
For the trees I used a 12 bright and a round. There are several ways to do trees and I demonstrate that further in this post! You may also find that you prefer doing them with the fan brush.
Start at the top and form a point with the brush and the black. The form the tree, stroking each stroke downwards. 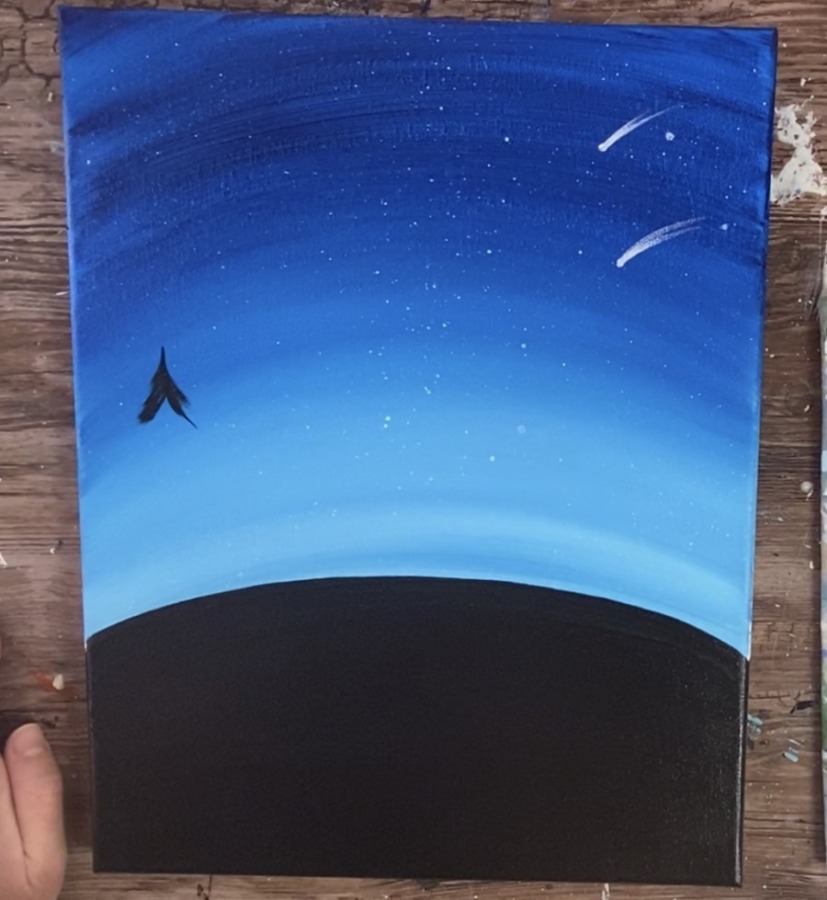
Form the shape of the tree so that it gets wider as you go to the bottom (where the curved horizon line is).
Create different heights of trees.
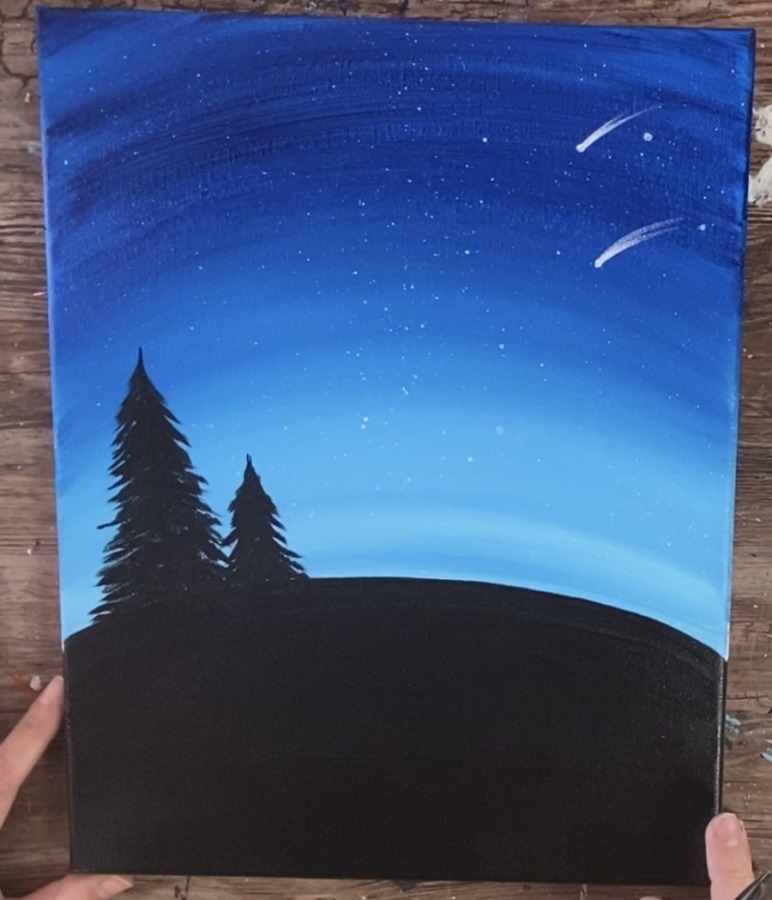
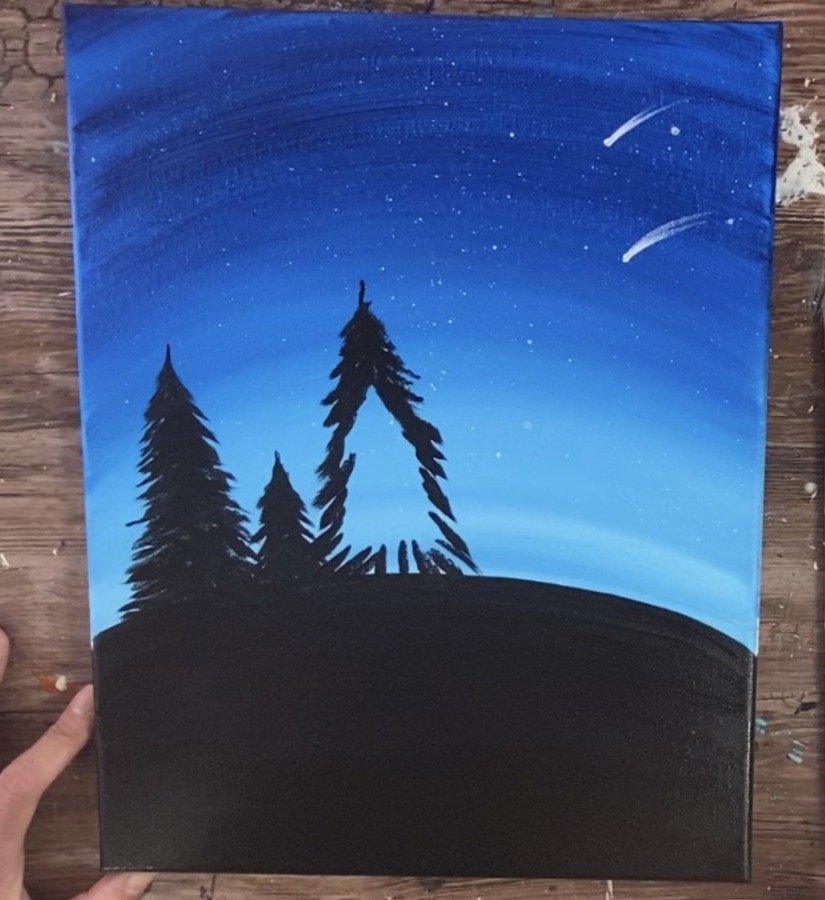
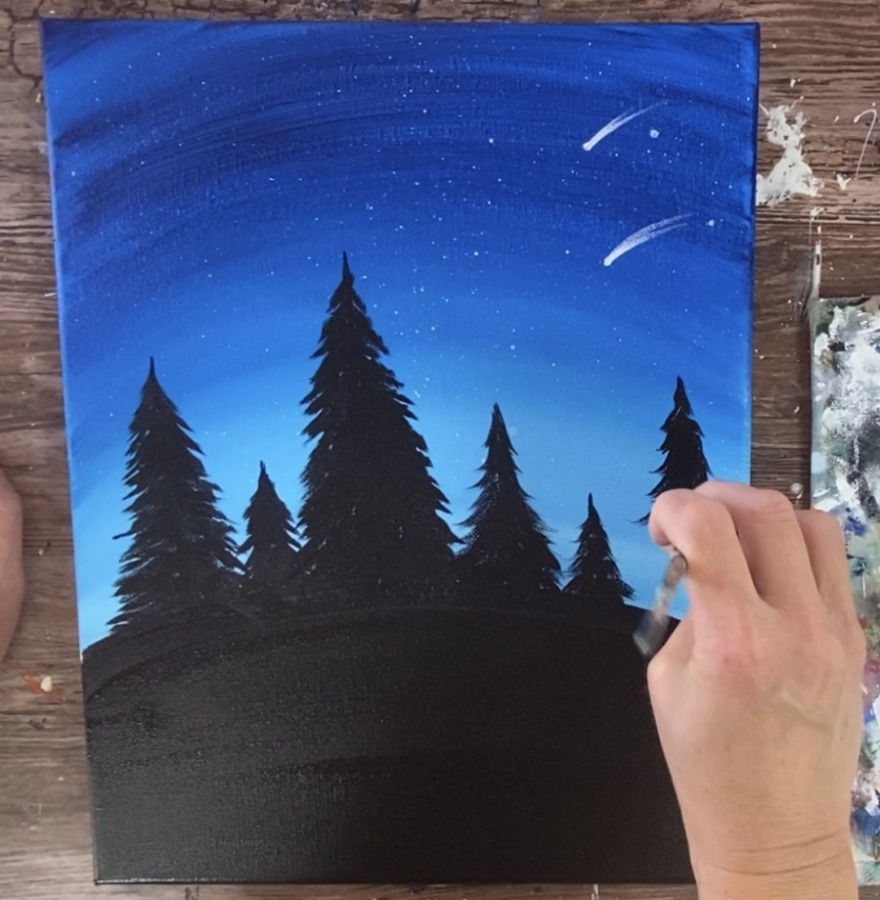
You may find that you prefer doing them with the round brush. Or you may find that the larger trees are easier to do with the bright brush but the smaller trees are easier to do with the round brush. There really is no right or wrong brush to use for silhouette trees!
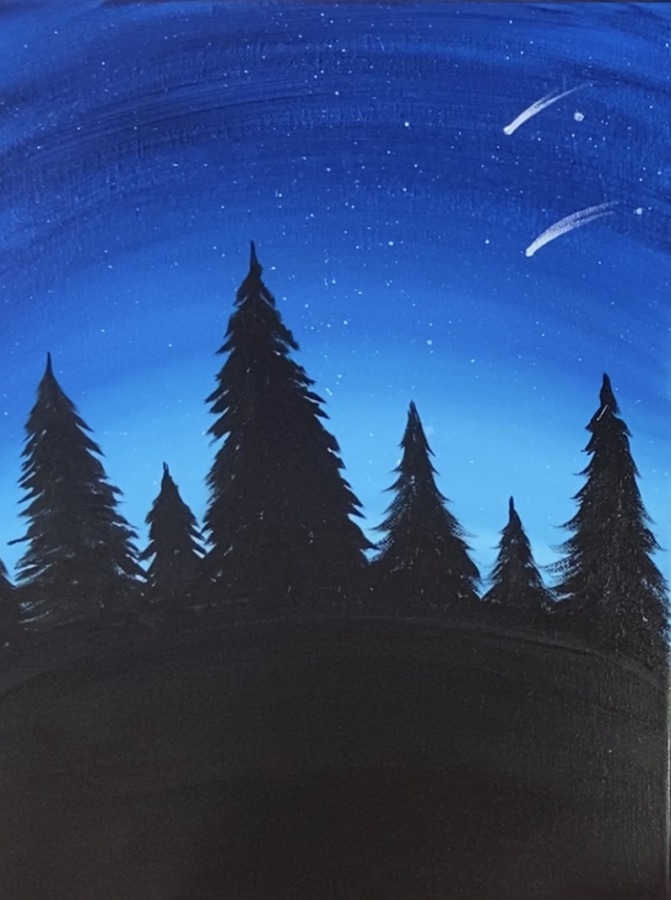
Next, you can add some subtle highlight to your trees. To do this, mix a medium shade of gray on your palette. Then take your round brush and paint strokes on the trees starting at the bottom of the tree and going up.
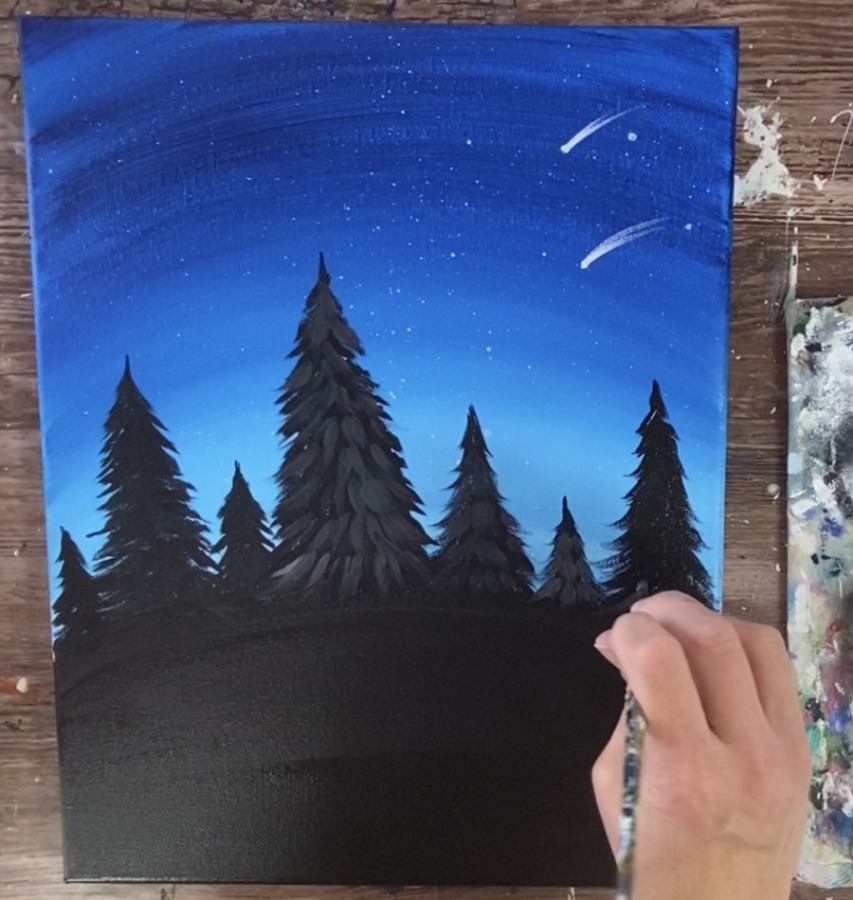
Make sure your gray is dark enough to not look like there is snow on the tree. It should be only a few shades lighter than that mars black.
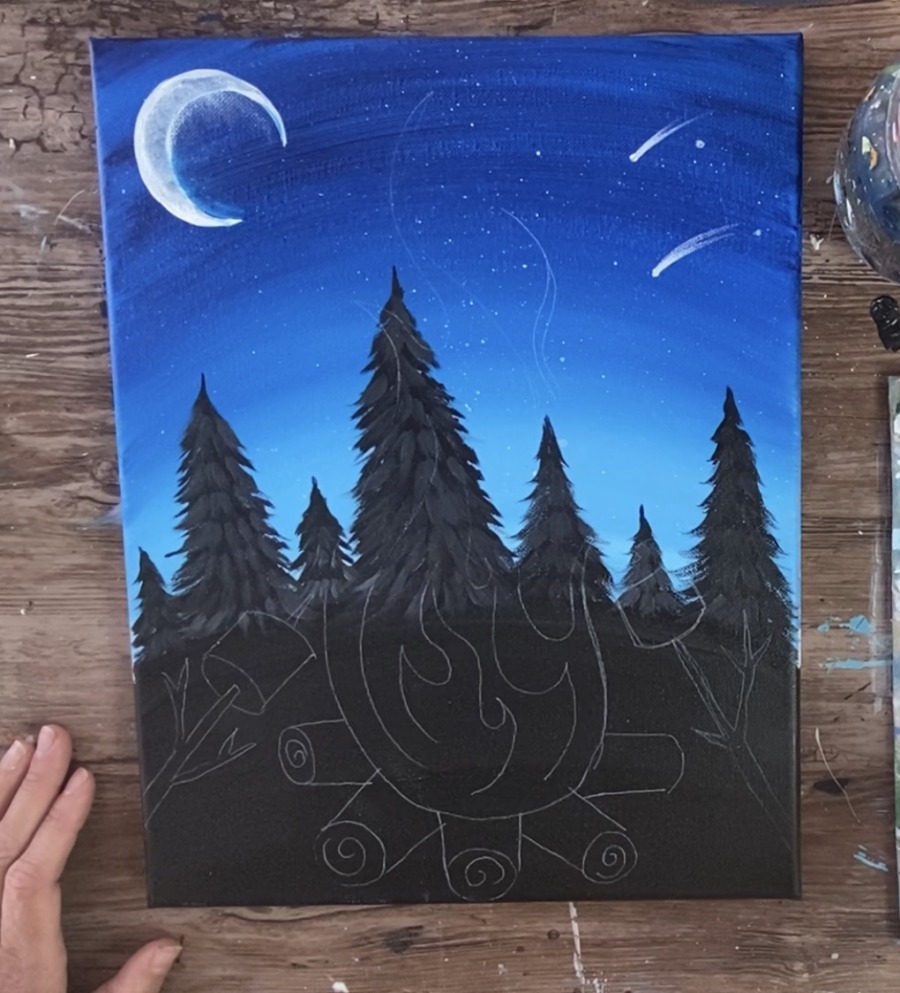
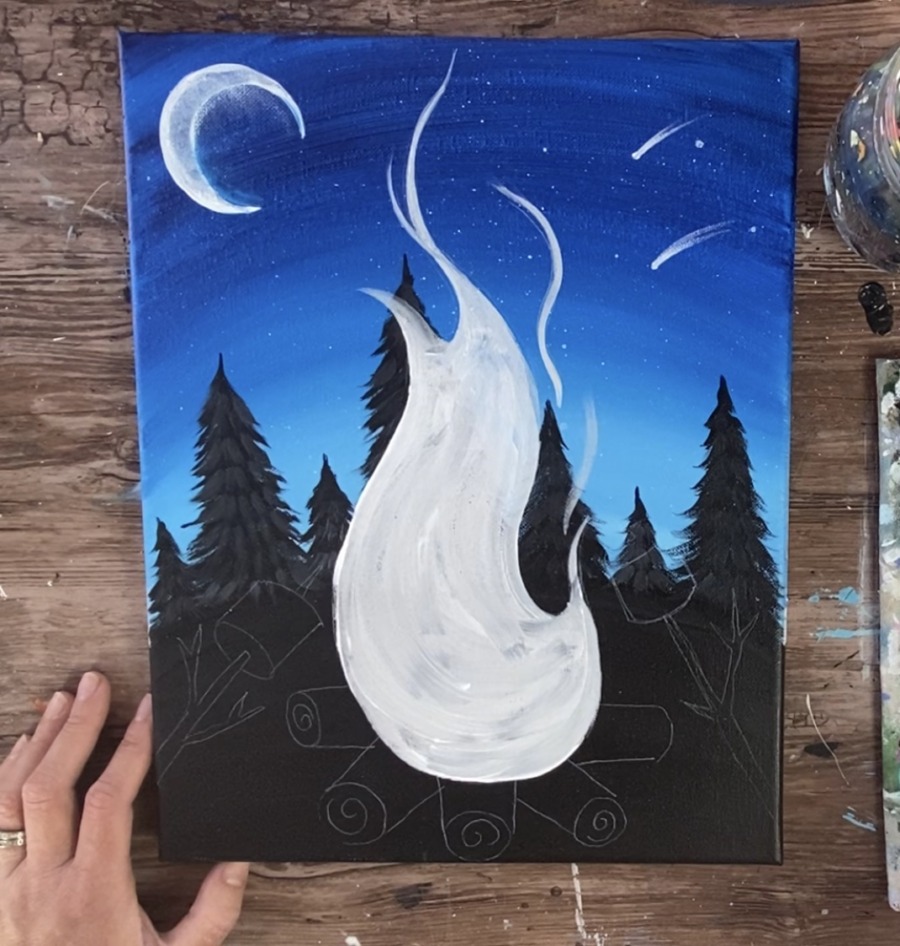
5. Draw Or Transfer Fire & Moon
Next you will need to draw the design on the canvas with chalk or use my traceable and white graphite paper. The white graphite paper helps the design show up against the dark colors. Position the traceable so that the moon is in the upper left corner of the canvas.
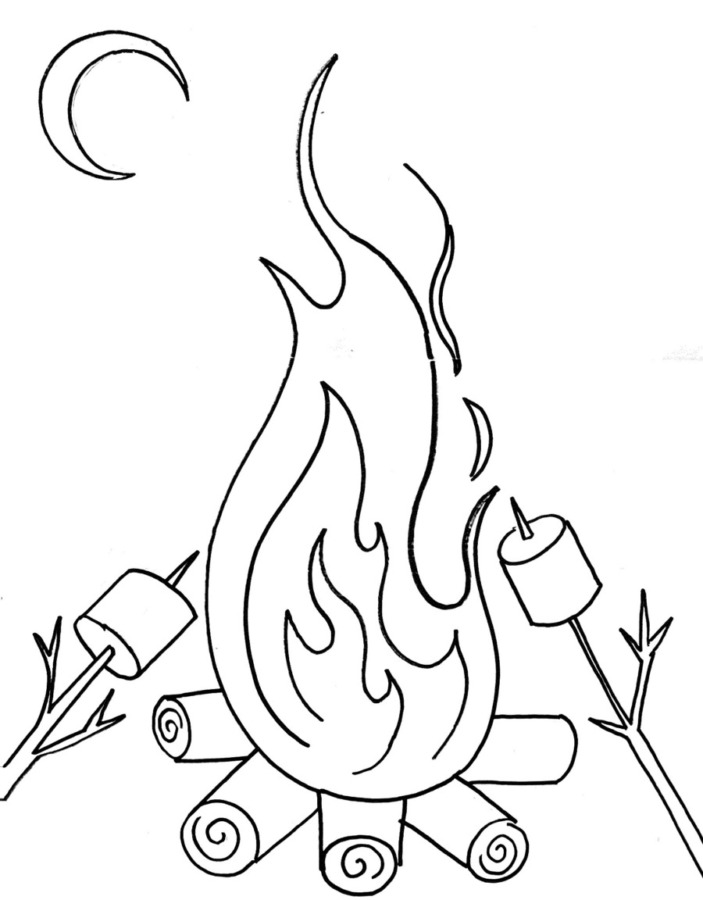
6. Paint The Moon
Next paint the moon using a round brush and titanium white.
Optional: blur the inner part of the moon by smearing the paint with your finger. Simply take your finger and drag the paint outwards a little onto the blue sky.

This creates a whimsical effect on the moon.
7. Paint The Fire White
Next use a 12 bright brush to paint the fire white. I recommend that you have the direction of your strokes contour in the direction of the flame.
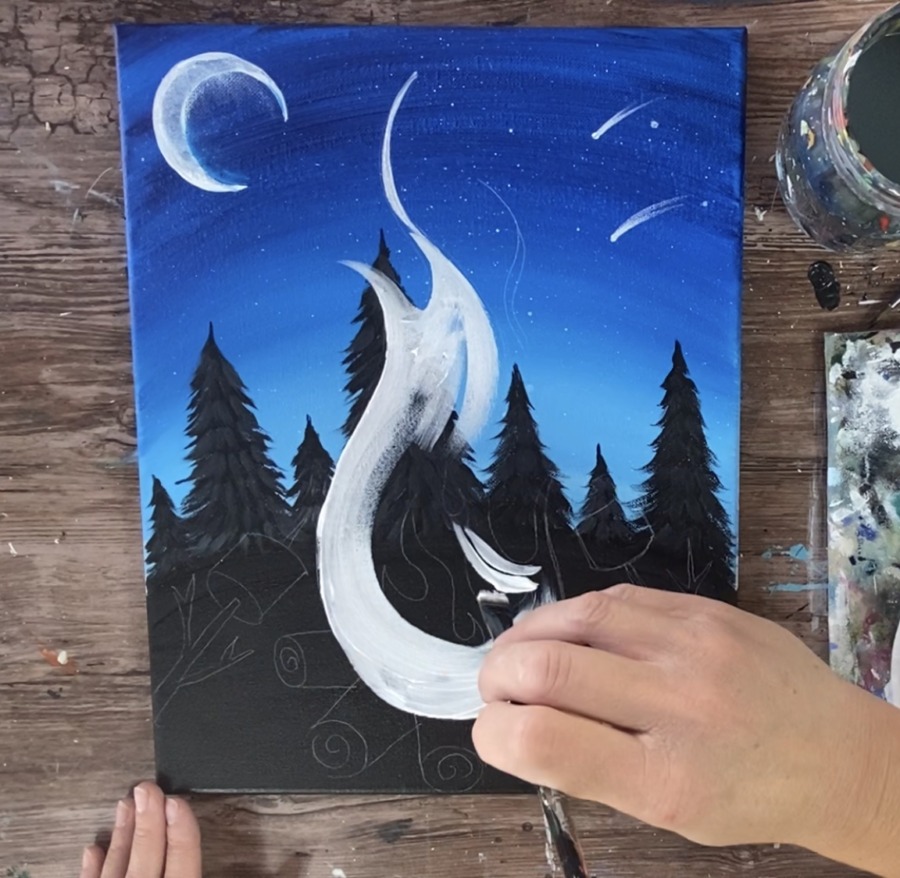
You don’t have to fill the flame with multiple coats. One coat is fine. If a little bit of the background is still showing through, that is fine too.
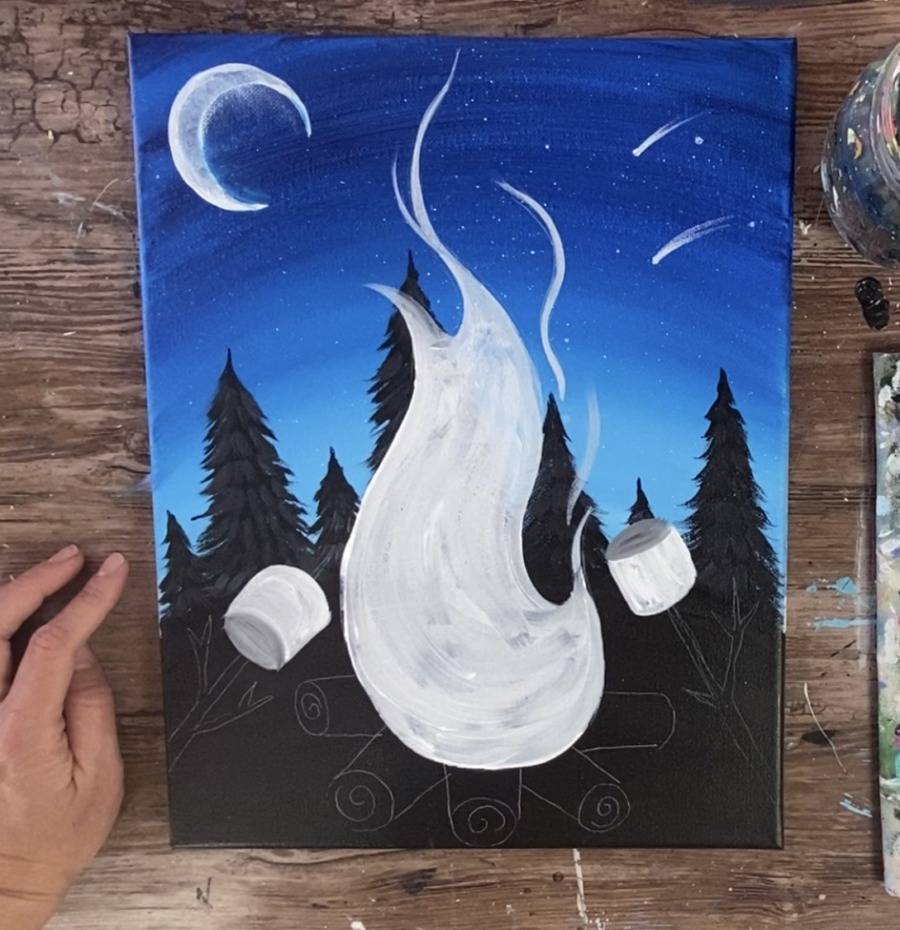
8. Paint The Marshmallows
Then use your round brush to paint the marshmallows. The main part of the marshmallows are white and the sides (oval parts) are gray. Mix white and black to make the gray.
9. Paint The Sticks
Next paint the sticks. Since burnt umber is dark and won’t show up against the black, I recommend mixing white with brown (about equal parts). This will create a light, opaque brown.
Then paint the sticks. If you want to get color variation, you can add different amounts of the brown into some of the stems. Make sure you paint the part of the stick that is going through the marshmallows.
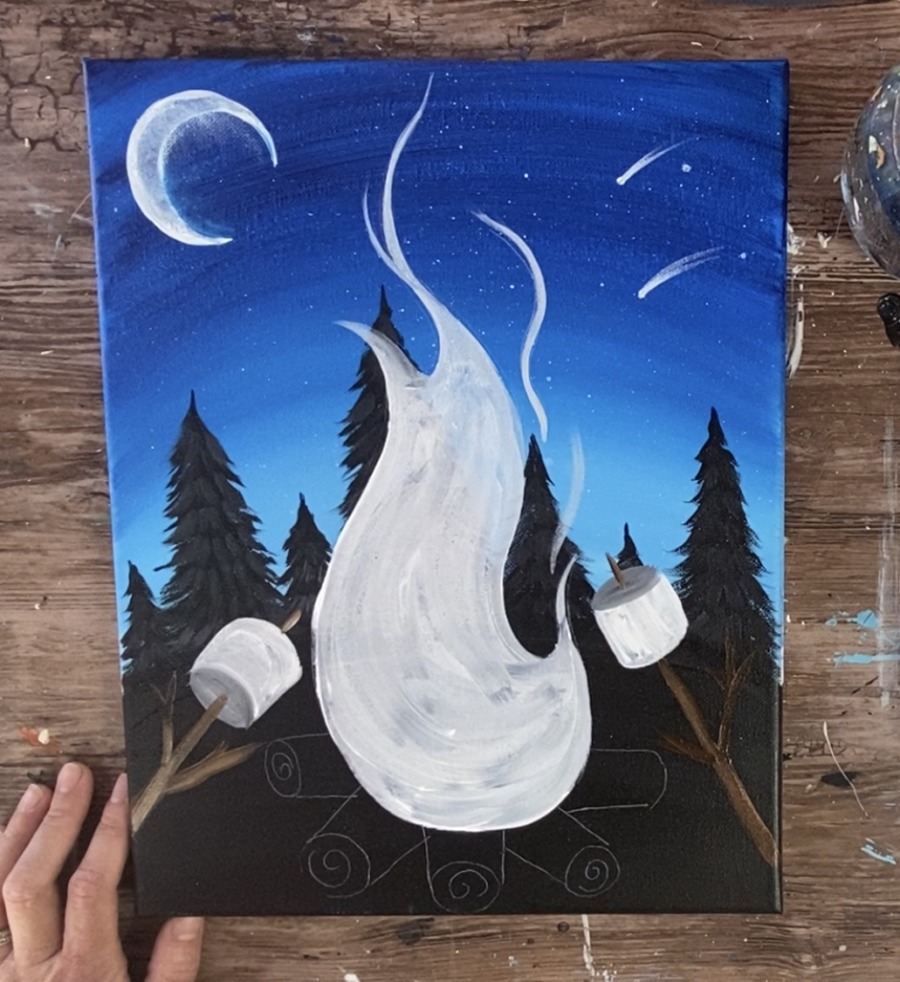
10. Paint The Logs
Paint the circle parts of the logs first with that same light brown you mixed on your palette. Use a round brush for this step.
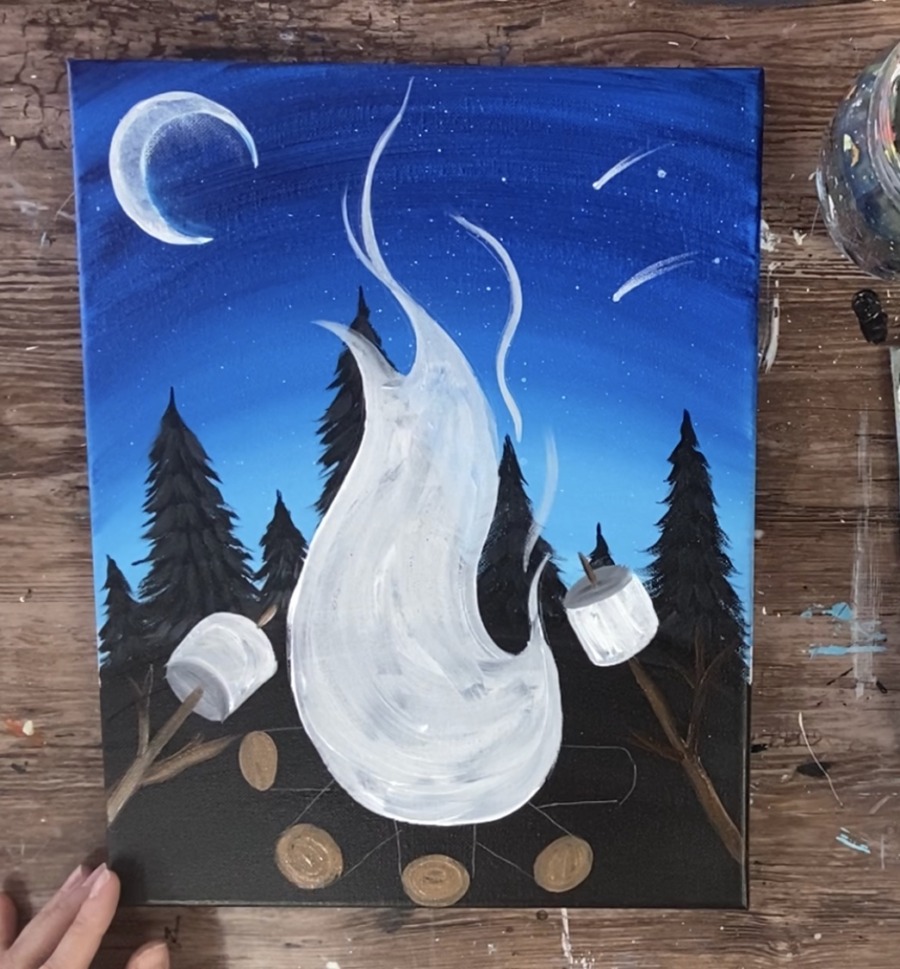
Then, without rinsing your brush, use just the burnt umber to paint the rest of the logs. Make your strokes go in the direction of the log.
Then add some lighter color over that dark color with the light brown.
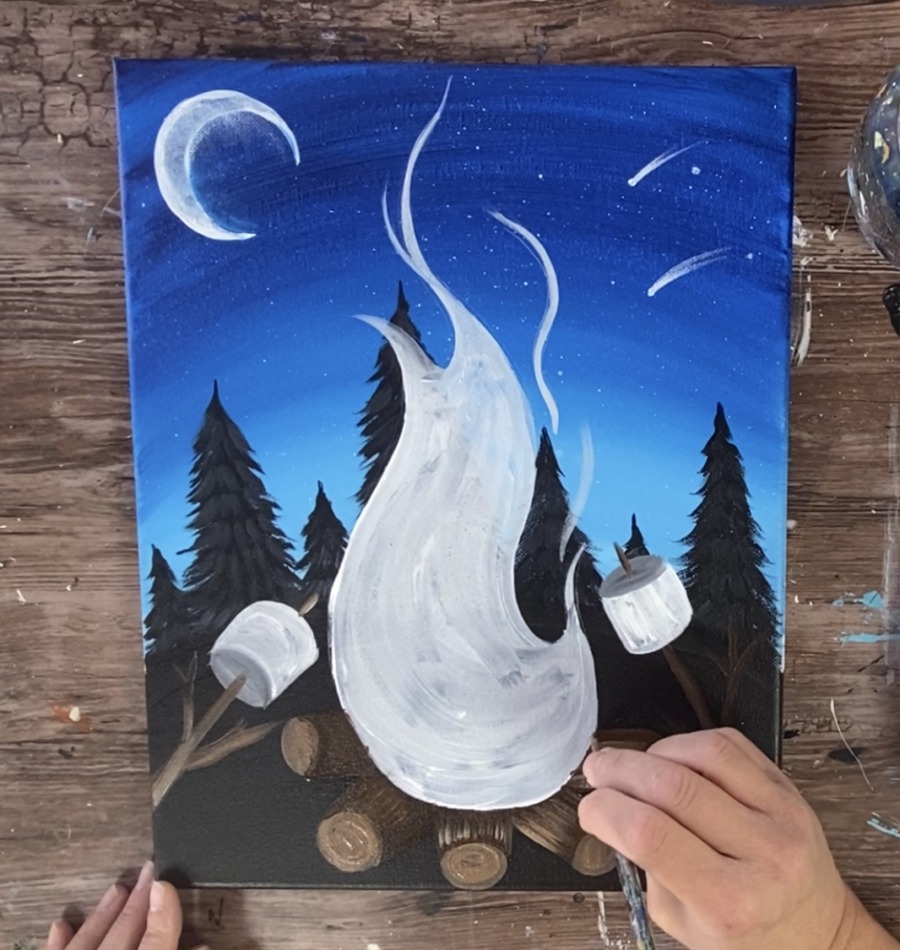
Create just a few stroke lines of this light brown. This also creates texture on the log.
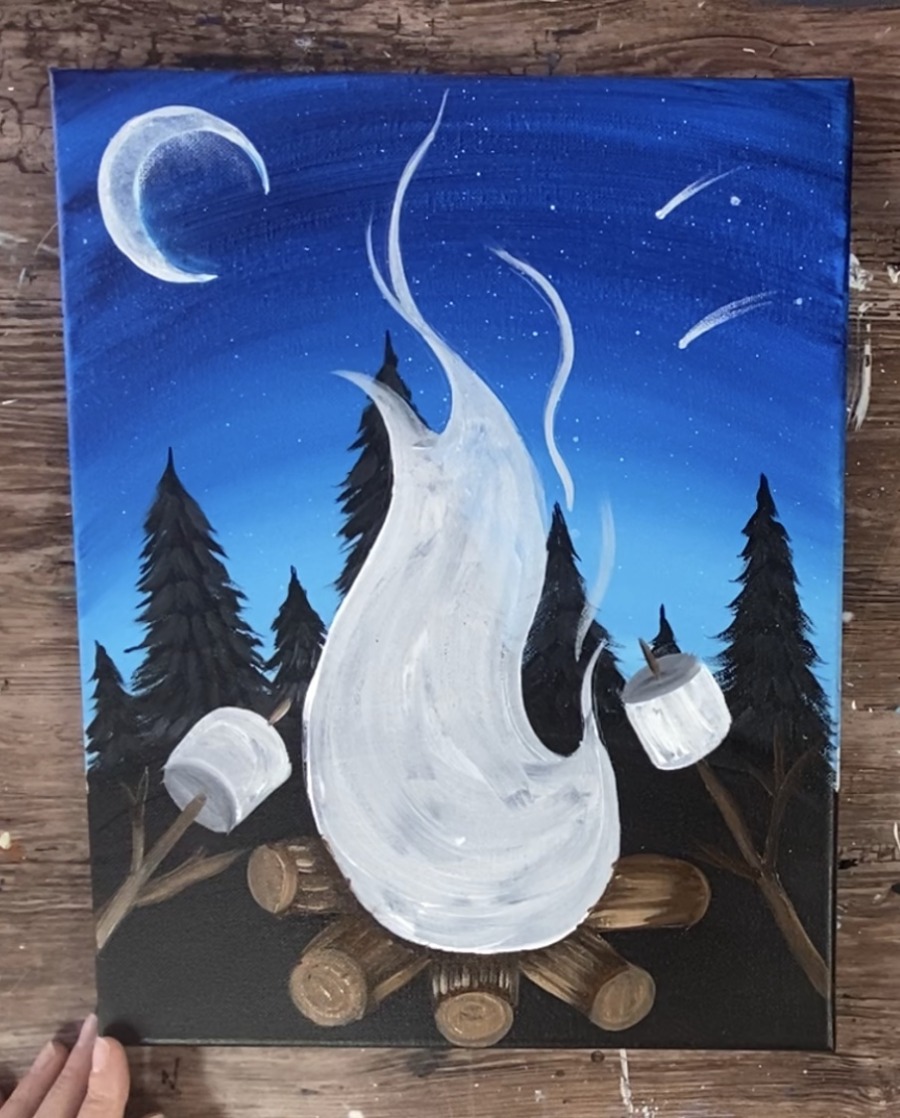
11. Paint some marks on the ground
Next use the same light brown that is on your round brush to paint some lines on the ground. Try to do this “dry brush style” by lifting off some of the paint off the brush so when you do the stroke, it looks dry.
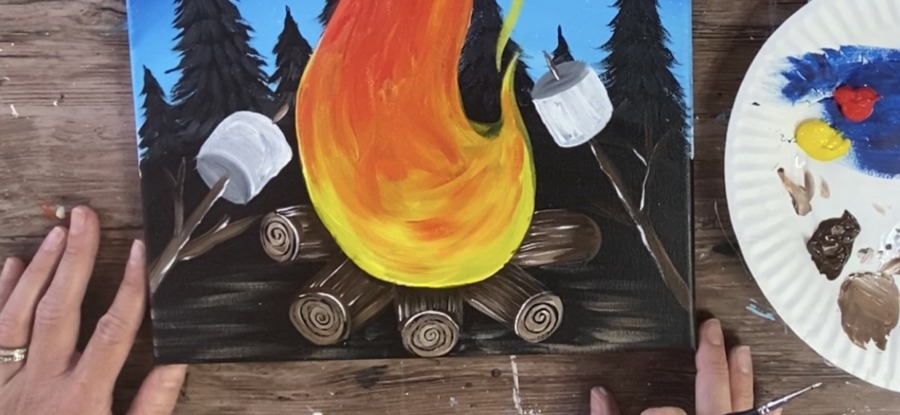
12. Paint The Fire
There are multiple ways you can paint this fire. I started with the yellow and painted the entire bottom half of the flame primary yellow. Use a 12 bright brush for this step.

Then gently blend cadmium red medium hue into the yellow so that it becomes orange in the middle and then blends to red at the top of the flame.
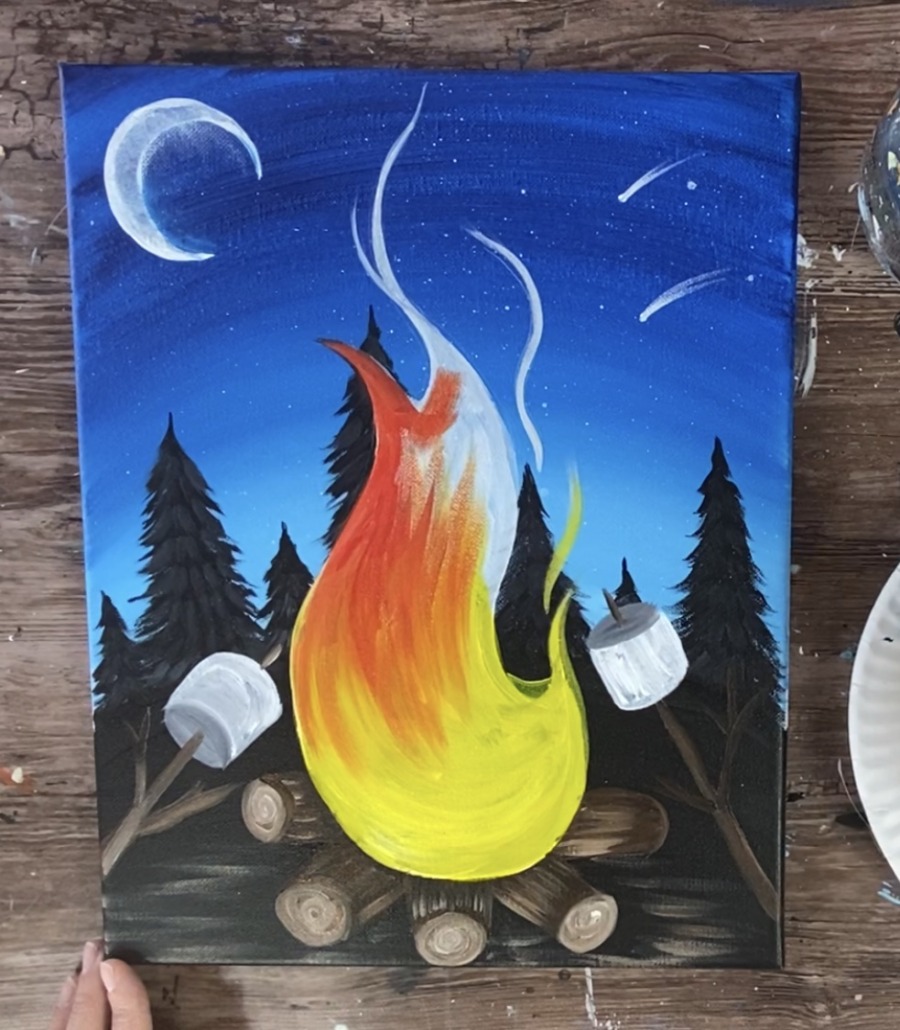
Then add a few strokes of yellow on the top of the flame.
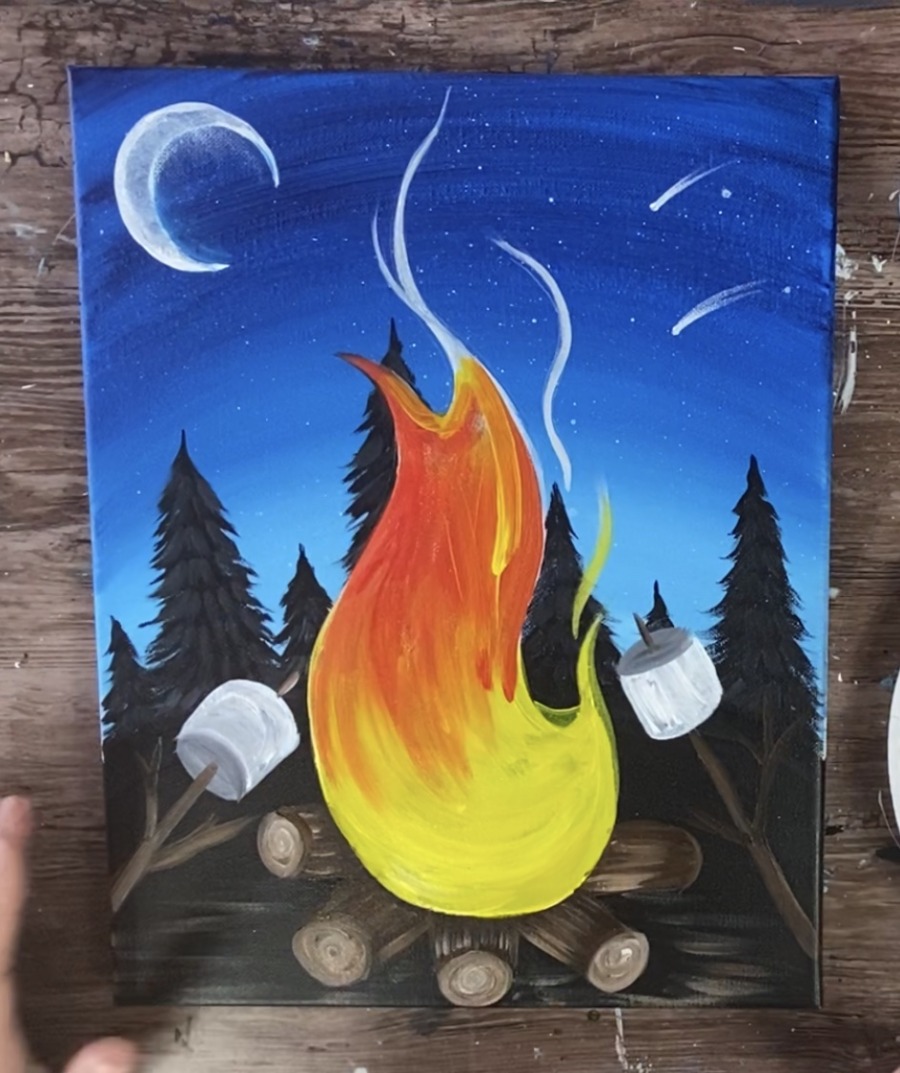
And a little bit of red on the bottom. Let the colors blend on the canvas. There is no right or wrong way to do this. Yours will look different than mine as your colors will blend differently. The trick is to get the flame to look lighter and brighter on the bottom and darker/ redder towards the top.
13. Paint More Detail Work On Logs
Then I went back in with a 10/0 spotter brush. I did black spirals on the circle parts of the logs.

And then I lightly outlined some of the edges of the logs with white. I also added a few white line “texture” on the logs.
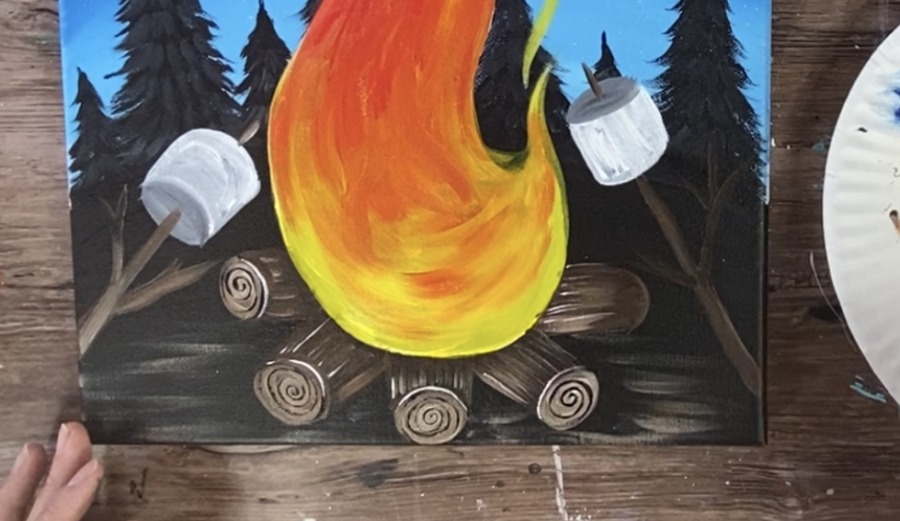
Then I did some white line highlights on the sticks that are holding the marshmallows.
14. Paint More Detail On The Fire
Next I did another layer on the bottom of the fire. I painted a smaller flame with yellow mixed with white to make the yellow even brighter.
15. Splatter Some “Sparks” Above The Fire
This was my favorite part of this painting! Splatter some more white on the top of the flame to make it look like the sparks at the top!


Finished!
Share Your Art Here: