
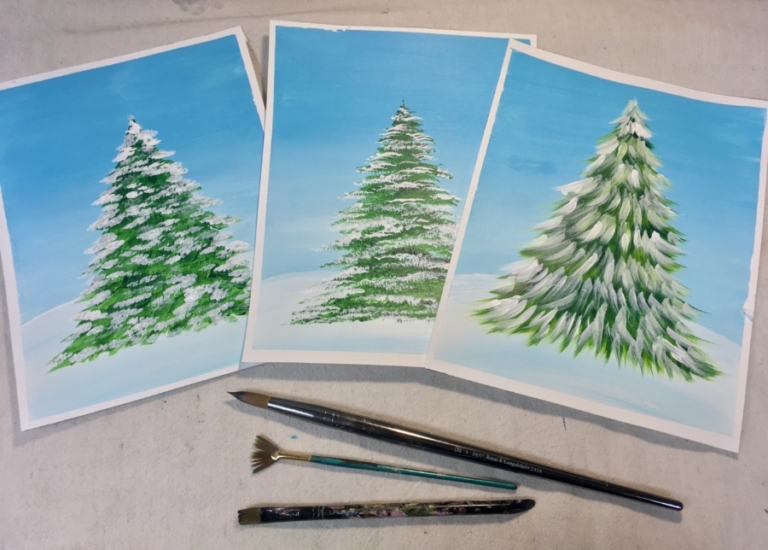
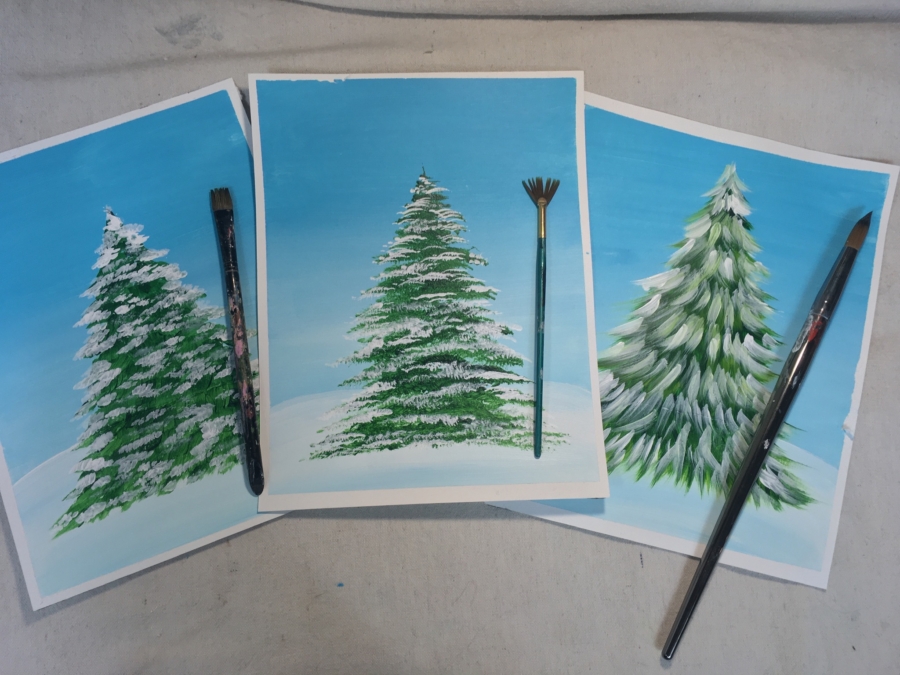
How To Paint A Christmas Tree – Three Different Ways

Are you looking to learn how to paint a Christmas Tree for your next acrylic painting project?
There’s quite a few different ways you can paint Christmas trees! Depending on what style tree you want to do, different brushes and stroke techniques will make the tree look different.
This blog post tutorial is meant to help you step by step learn how to do the tree using three different simple techniques (one with a fan brush, another with a round brush and a third with a bright brush).
I did the three demos on heavy card stock paper. However, you can paint these Christmas trees on just about any surface – canvas, wood, rock, etc.

Materials You’ll Need
- Acrylic Paints (I’m using Liquitex BASICS but you can do these in any brand)
- Paint Brushes
- Fan Brush (For fan brush trees)
- #8 Round (For round brush trees)
- #12 Bright (For flat brush trees)
- Colors (Your choice of greens can vary but I like to use a dark green and a light green for color variety)
- Hookers Green Permanent
- Light Olive Green
- Titanium White
- Light Blue Permanent (I used this to paint the blue background)
- Surface (I’m using heavy card stock but you can paint these trees on any surface)
- Want to download this tutorial?
Video Demo
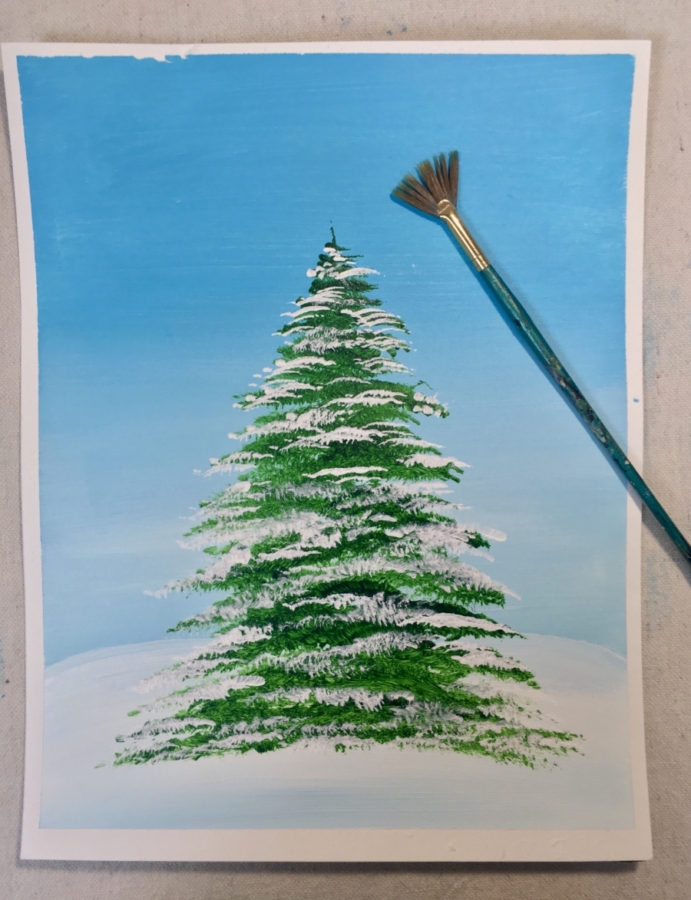
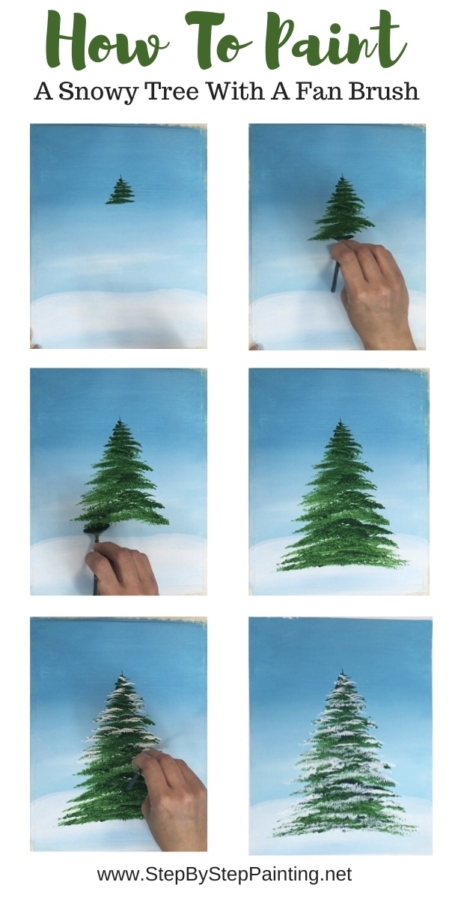
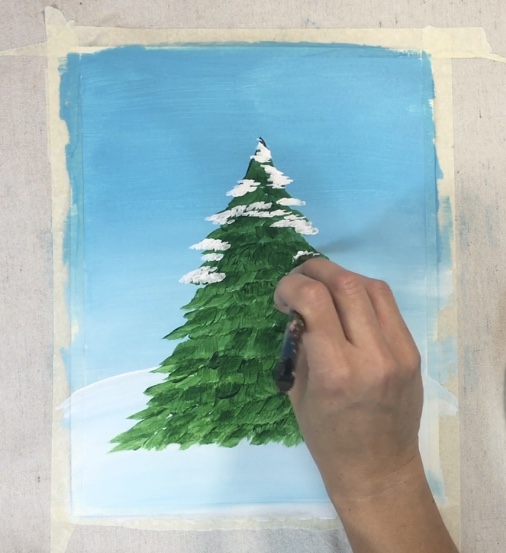
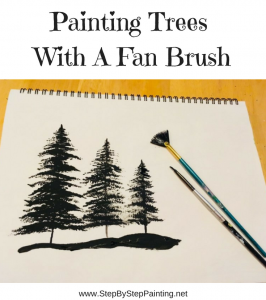
How To Paint Fan Brush Christmas Trees
Fan brush trees are a lot of fun to create and yield I high success rate because of the nature of the brush. If you haven’t checked out my post How To Paint A Tree With A Fan Brush, I encourage you to do so because I go into more depth about that over there.
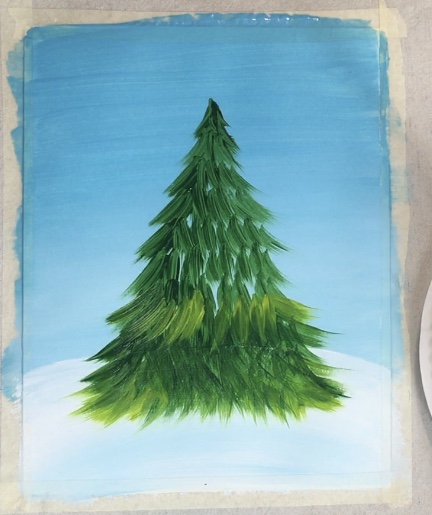
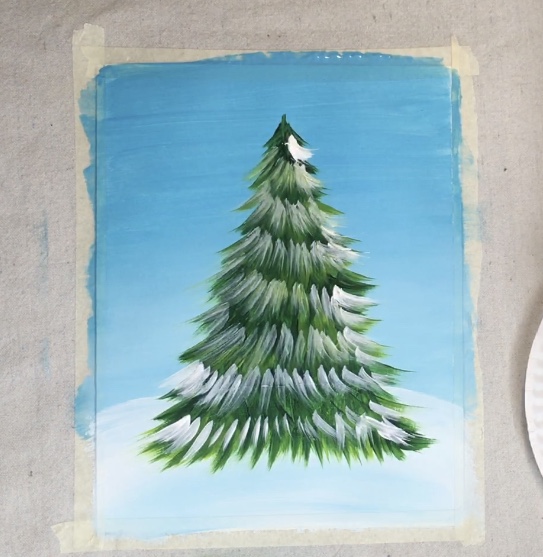
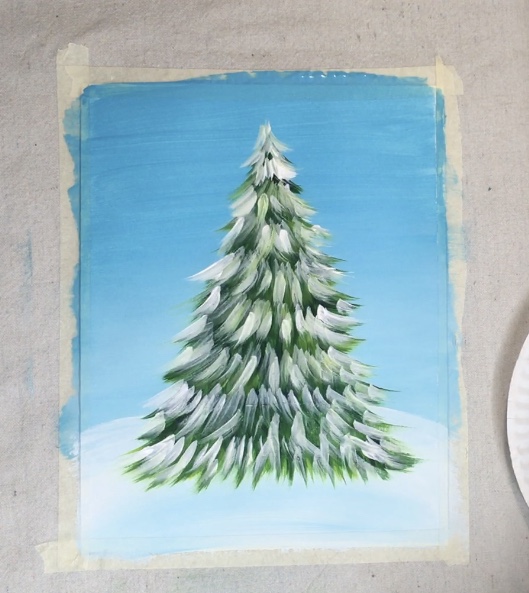
But this is specifically how to paint a green Christmas tree with snow with the fan brush!
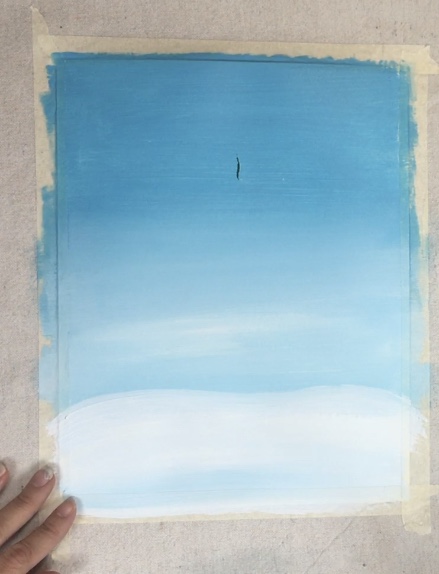
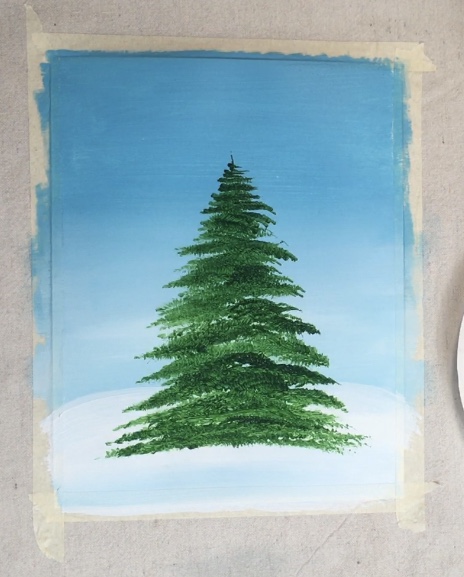
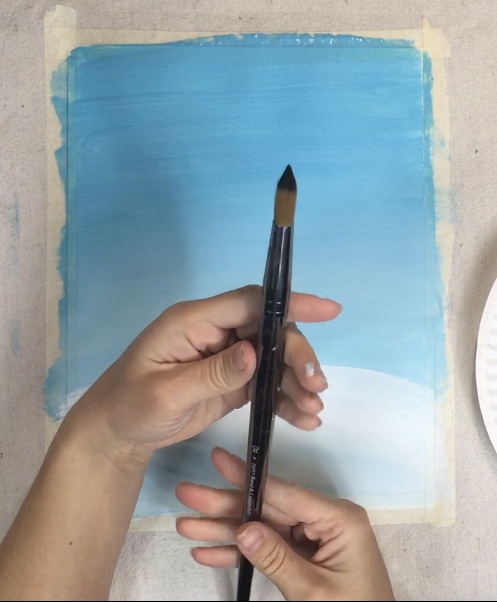
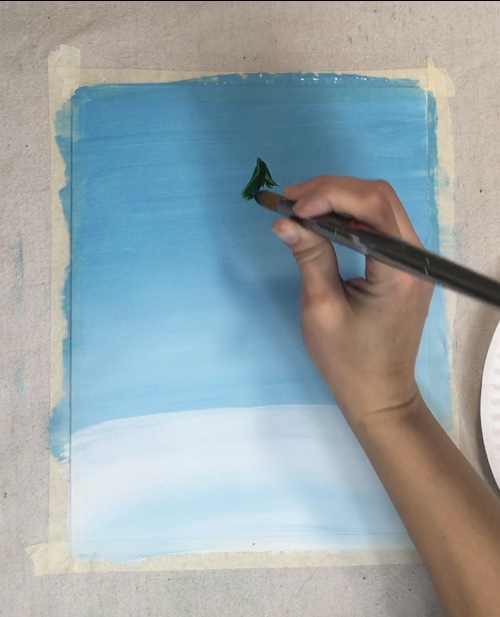
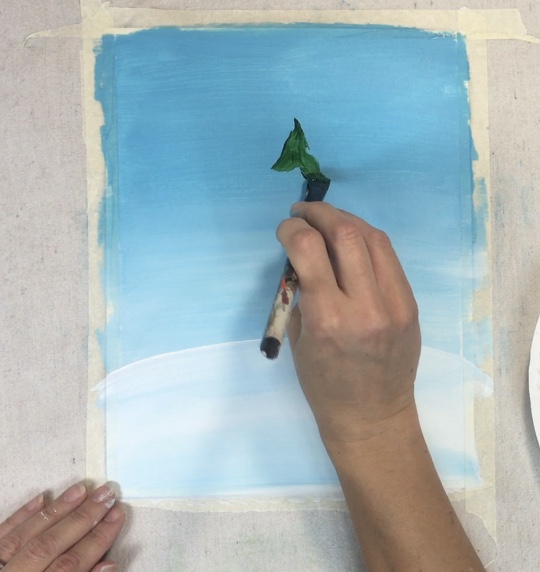
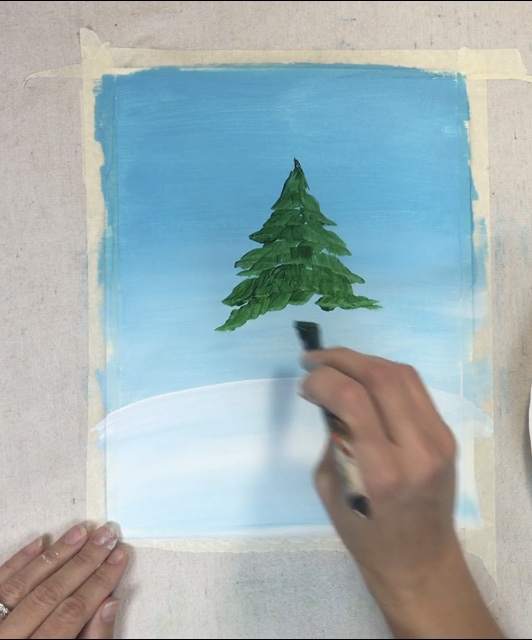
1. Paint The Background
These snow trees look best with a background that’s either dark or has enough contrast so the white snow shows up.
I did a very basic blue sky background with snow on the ground. To do that, paint an ombré sky with light blue permanent at the top (horizontal strokes) fading to titanium white. I did this with a large flat brush.
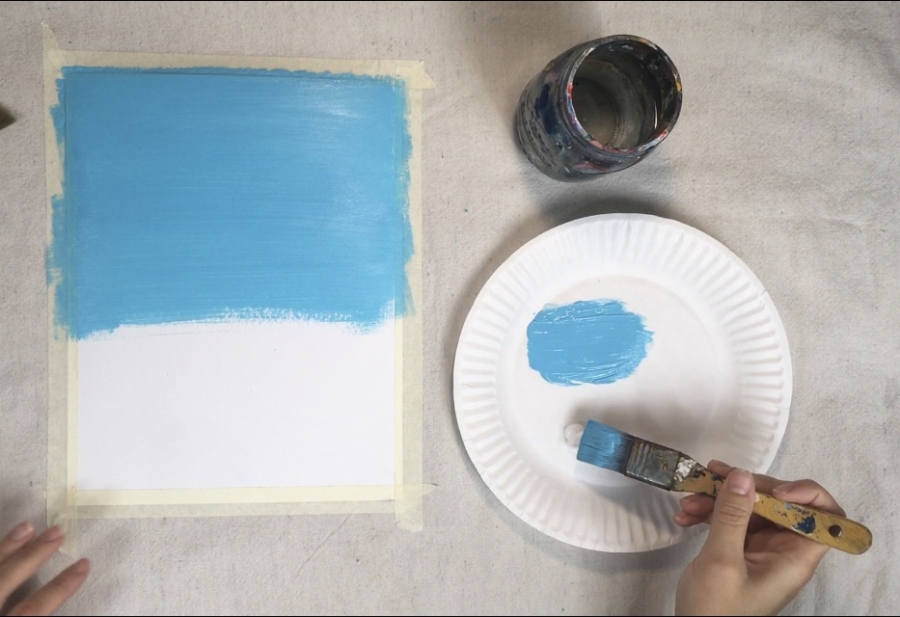
I went about 3/4 the way down with this blue and white combo.
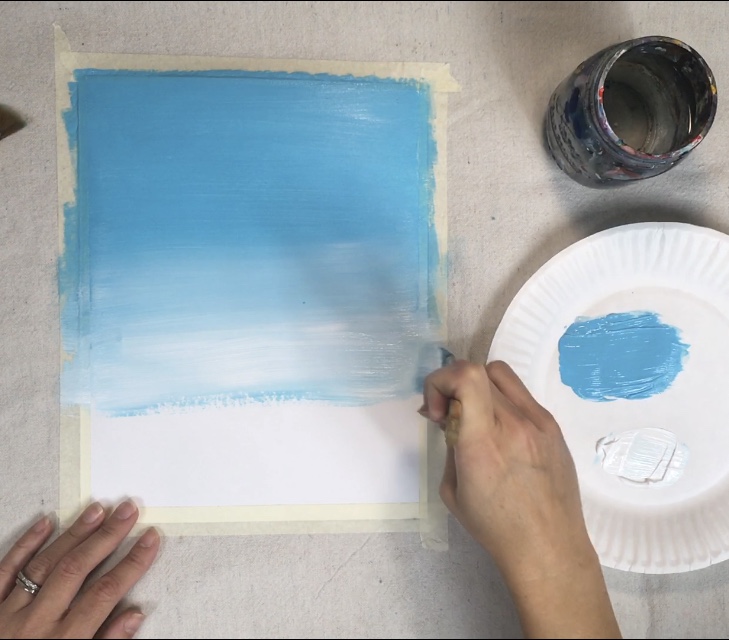
For the hill, I used pure titanium white and painted the rest of the way down the paper but making the “horizon line kind of lumpy”.
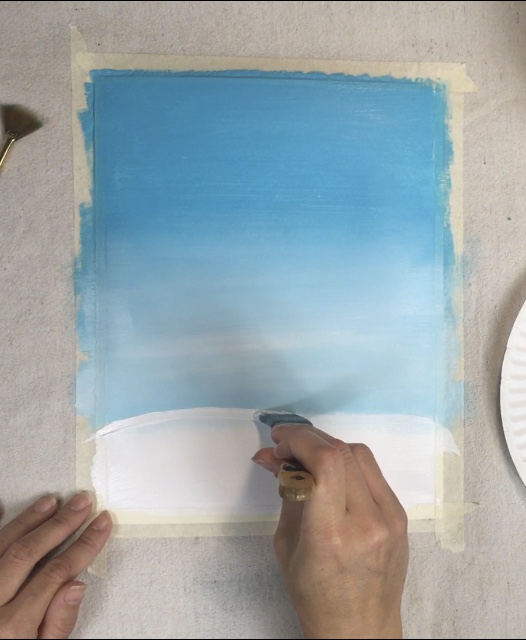
And then I did a little “shading” on the snow ground by blending a little bit of light blue permanent on the very bottom and blending it back up in the white.

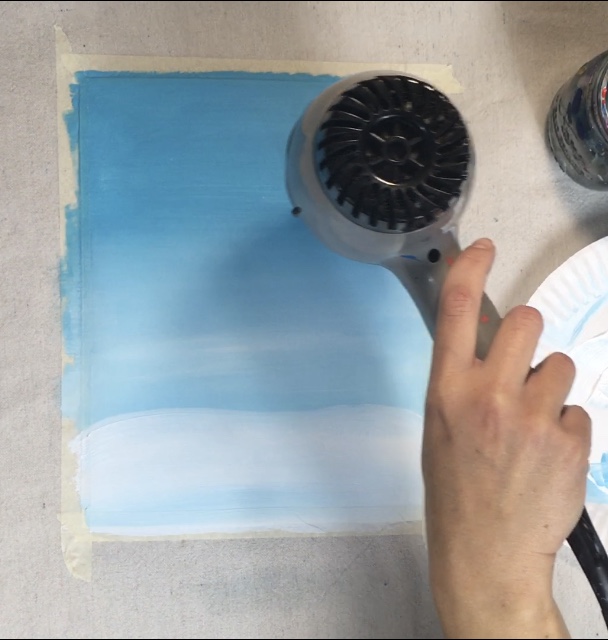
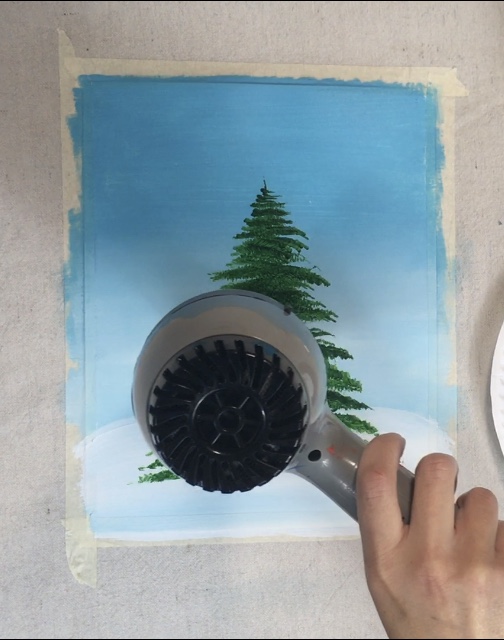
Next you’ll need to make sure your background is dry before doing the tree! Use a hairdryer or just wait for it to dry.
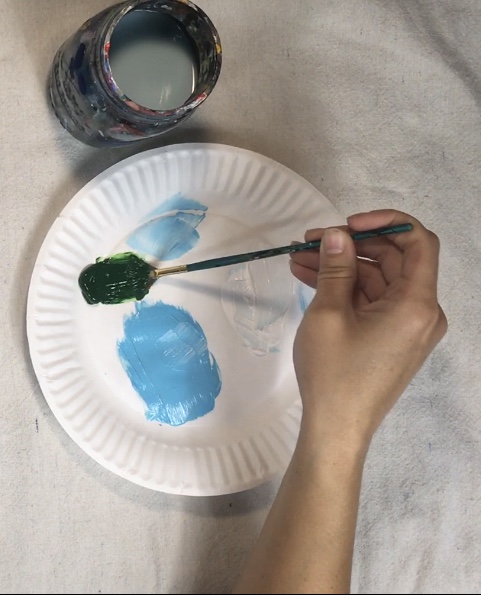
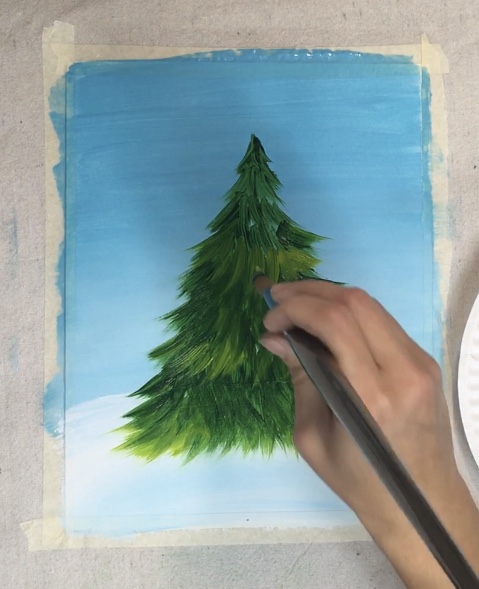
2. Load Your Fan Brush
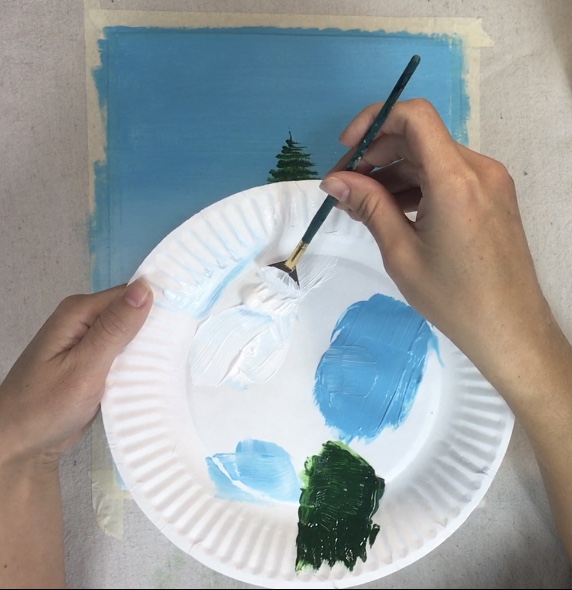
When I load my brushes, I almost always load them in water first and then I tap them dry a bit. This helps with the paint flow.
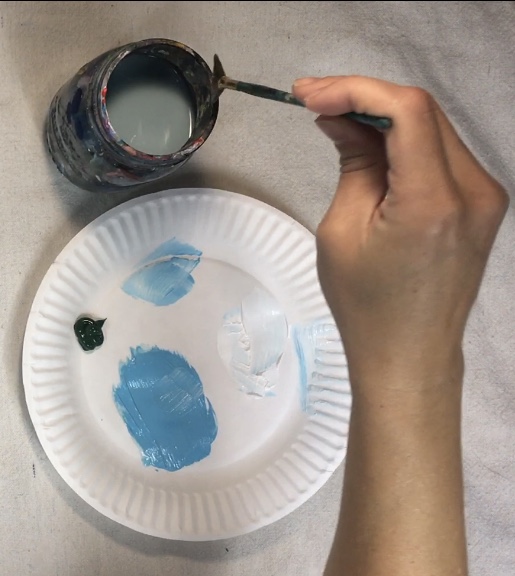
Then load your brush in Hookers Green Permanent (dark green). Stroke the paint on your palette a bit so all the bristles don’t get clumped together and there’s a nice even amount of paint on the bristles (especially on the tips).
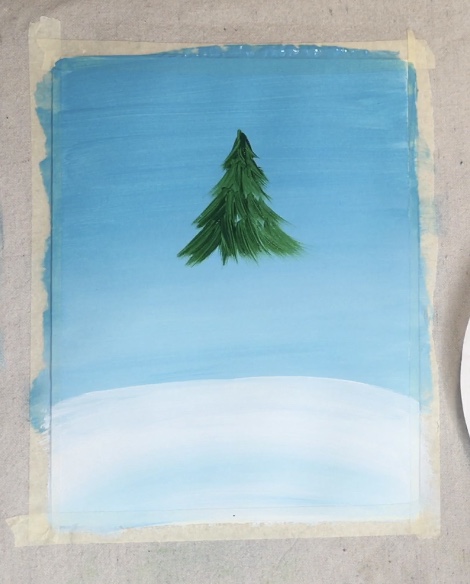
When you start your tree, start at the top and make a little vertical mark with the tip corner of the fan brush.
Then hold your fan brush horizontally and gently tap just the tip of it to create horizontal strokes.
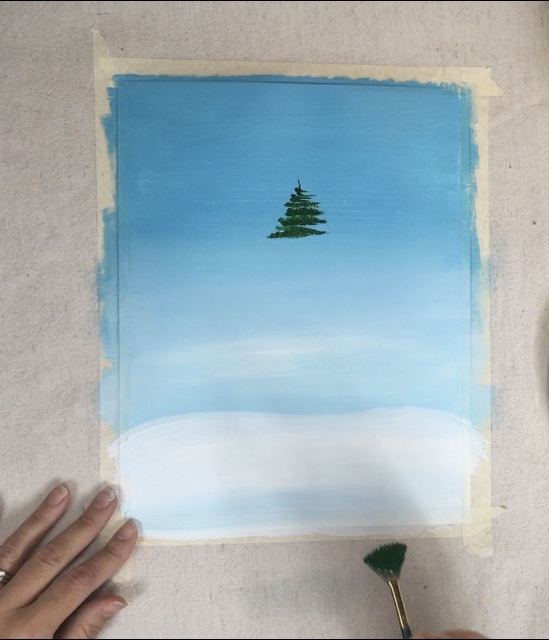
Tap gently on the tip with the fan brush working in a left and right zig zag direction. Your tree should be narrow at the top but get thicker, wider as you go down. Think of it as filling in an invisible triangle.

Try to get the branch edges on the sides of the tree to be thinner so they go to a point. And also remember that you don’t have to cover all the background up. There is still sky showing through open areas of this tree.
The bottom should be the widest part of the tree. I did not do a tree trunk in this demo.
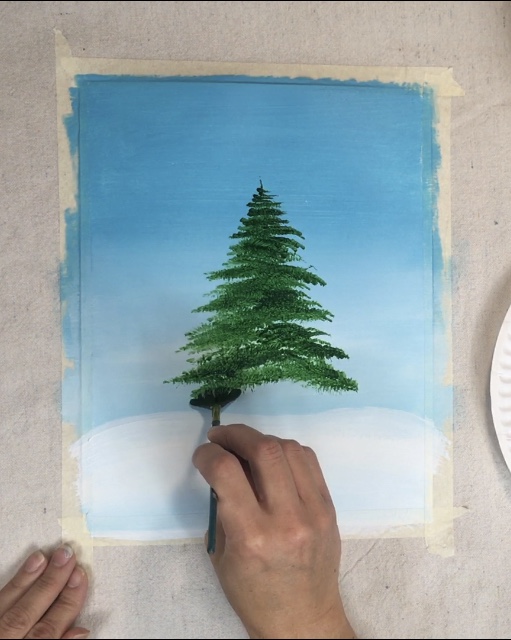
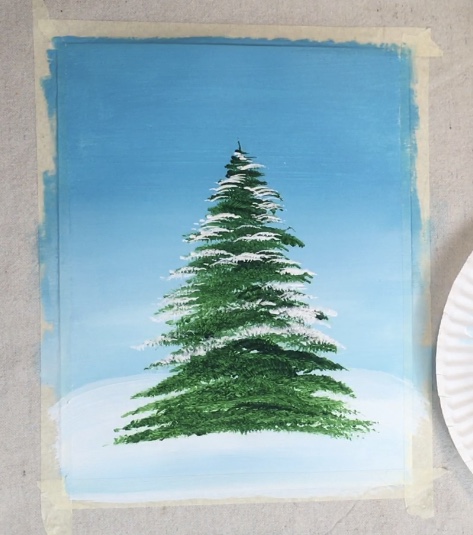
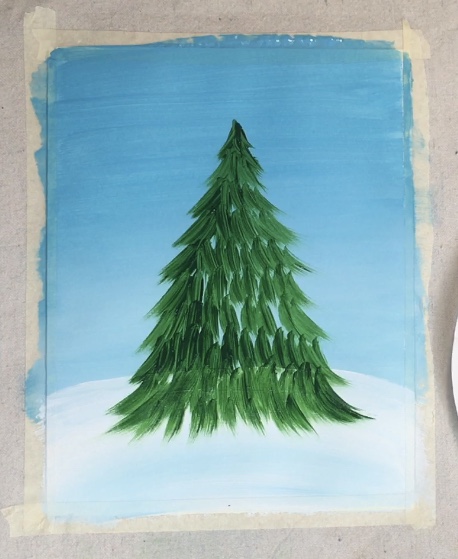
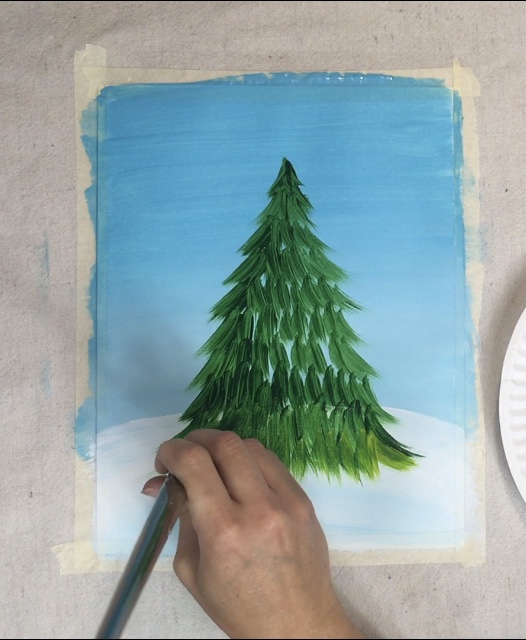
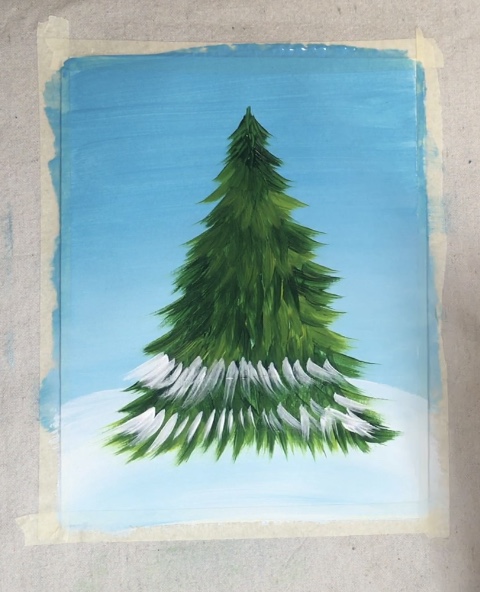
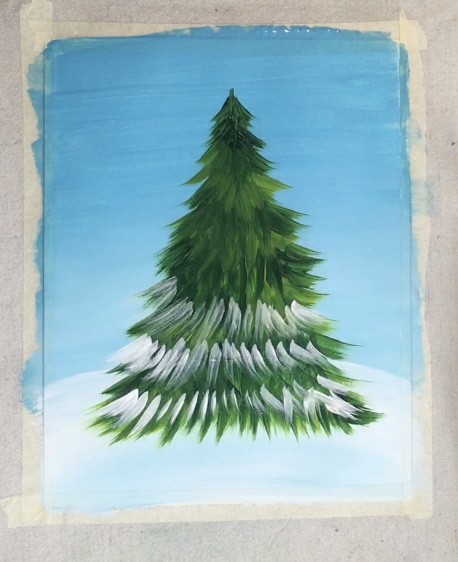
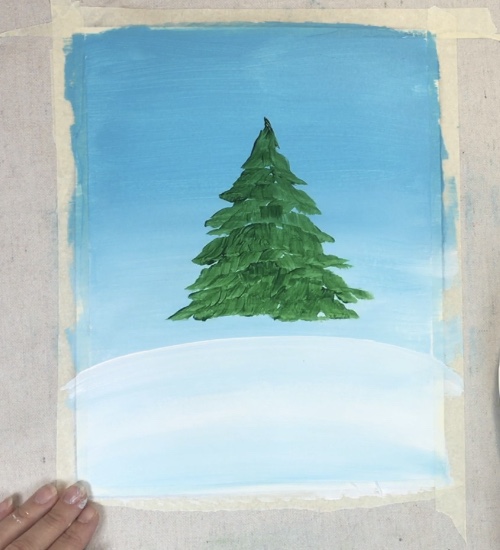
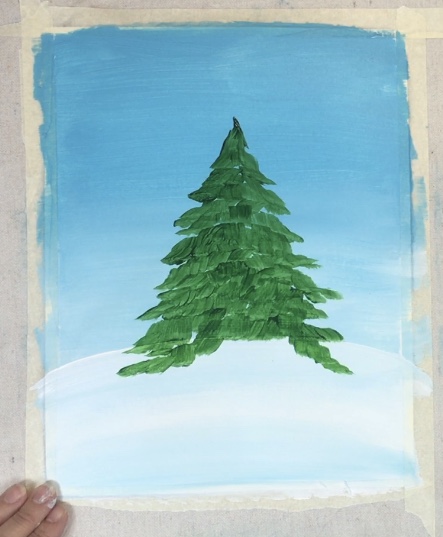
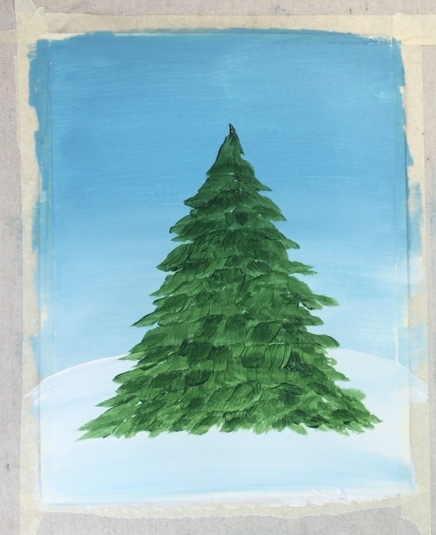
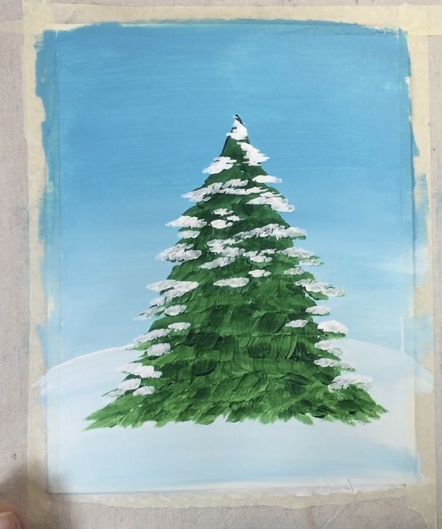
3. Paint The Snow
You’ll want to make sure your green on your tree is dry, otherwise you’ll get light green snow.
Then generously clean your fan brush in water so no green residue is left on the bristles. Load it in titanium white the same way you loaded the green.
Paint the snow using the exact same technique you used to paint the green tree. Start at the top, go left and right in a zig zag direction and tap very lightly.

You decide how much snow you want to cover your tree. I like the look of a slightly flocked Christmas Tree so I left a lot of green still showing through but you can add more or less.
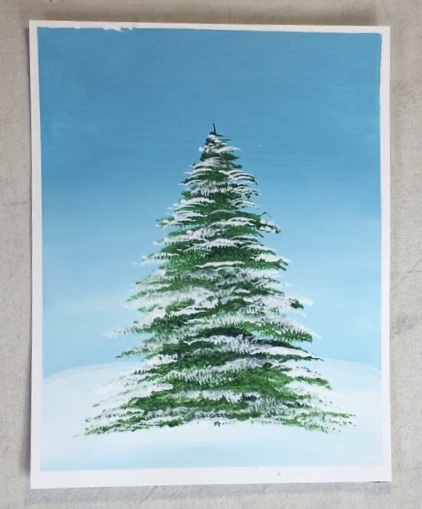
How To Paint A Round Brush Tree
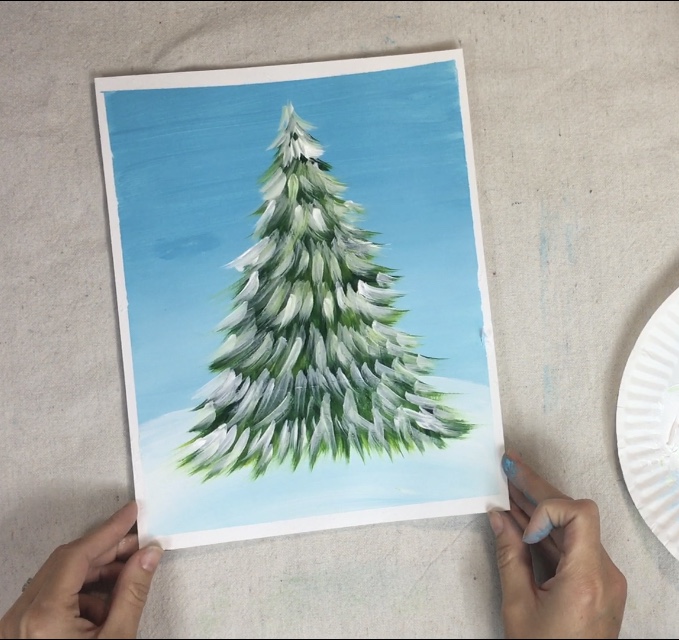
This tree reminds me of a whimsical style of Christmas Tree. It looks different from the traditional fan brush or bright brush style. I used a large #8 round brush for this but the technique itself can be done with any size round brush.
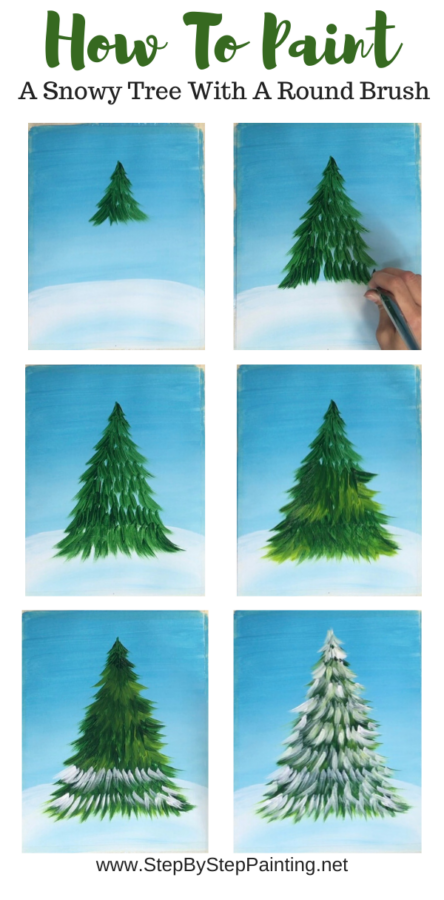
1. Set Your Background Up
I used the same background demonstrated above in the fan brush tree directions.
2. Start At The Top And Stroke Down
I loaded just the tip of my brush in hookers green permanent. Form a little triangle at the top and stroke each individual stroke downwards.
As you work your way down, your tree needs to get wider. Think of it like filling in an invisible triangle shape. Again, each individual branch stroke starts from top to bottom (stroking down).

This is a very basic tree! You can leave it like this and then proceed to the snow step. I will show you how to add some interesting color and layers in it next.
I like to take these round brush style trees a step further and add another green in there. So I loaded my brush (it still had hookers green on it) in light olive green.
Basically, re do all your strokes but start at the bottom and work your way up. When you work from bottom to top, it will make the tree branch strokes look like they are overlapping each other and give the tree some fun dimension.
When loading my brush, I alternated between light olive green and hookers green. This color variation helps with the layering effect.
Continue to do these down strokes up the tree. You don’t have to alternate the colors like a pattern, just load your brush in different variations of the green each time.

3. Paint The Snow
Make sure your tree is dry. Then clean your round brush and load it in titanium white. I recommend starting from the bottom and working your way up. Do the same type of strokes you did to paint this tree.
Leave some space between each row of snow branches.
I’m pressing very lightly with this white. You can still see green through it.
Then I did go back and added a few bolder white strokes in there for some color variation and added layers.
How To Paint Bright Brush Trees
A bright brush is a flat brush that has shorter bristles for more control. This is a great brush to paint trees with because you can do short little strokes. The technique in this demo is very similar to how I do the fan brush trees. This technique gives you a more traditional looking snowy Christmas Tree.
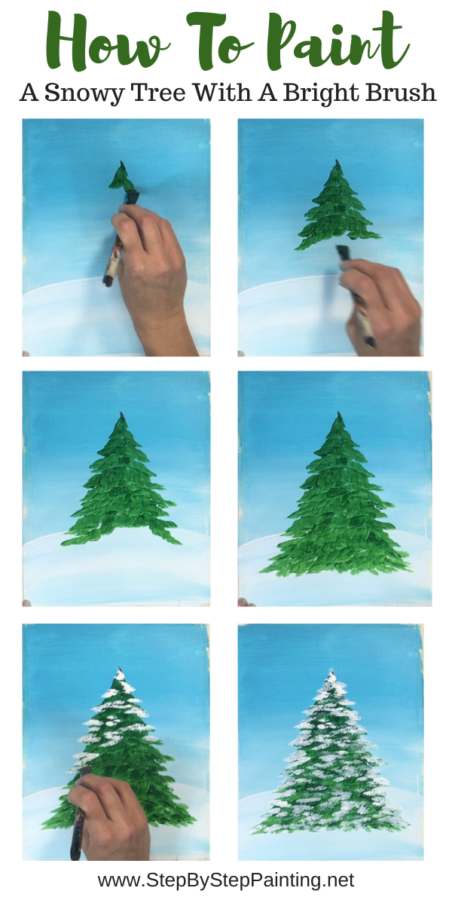
1. Start At The Top And Dab Short Little Strokes
Load just the tip of your brush in hookers green permanent. Start at the top and dab little strokes forming the shape of the tree as you work your way down.
Much like fan brush trees, I worked in a left and right zig zag direction. Pay extra attention to the branches sticking out on the left and right. They should be sort of pointed at the tips. You can make them pointed down or up but keep the direction consistent (my branches are pointing down).
When you get to the bottom, you can go back in and add a second coat of strokes sparingly throughout the tree. This gives some darker areas on the tree.
2. Paint The Snow
Let the tree dry, completely clean the bright brush and load the tip in titanium white. Then do the same kinds of strokes. Start at the top, work your way down.
Pay close attention to the branches on the left and right. Those will be extra bright and white so make sure you add extra white in those areas.
There’s plenty of snow in the middle of the tree. Think of it as working in clusters but be sure to leave green still showing.
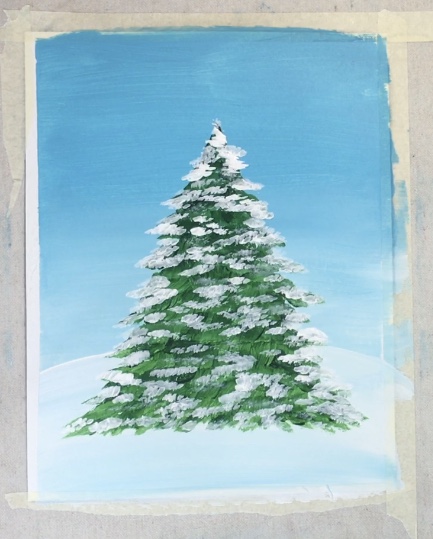
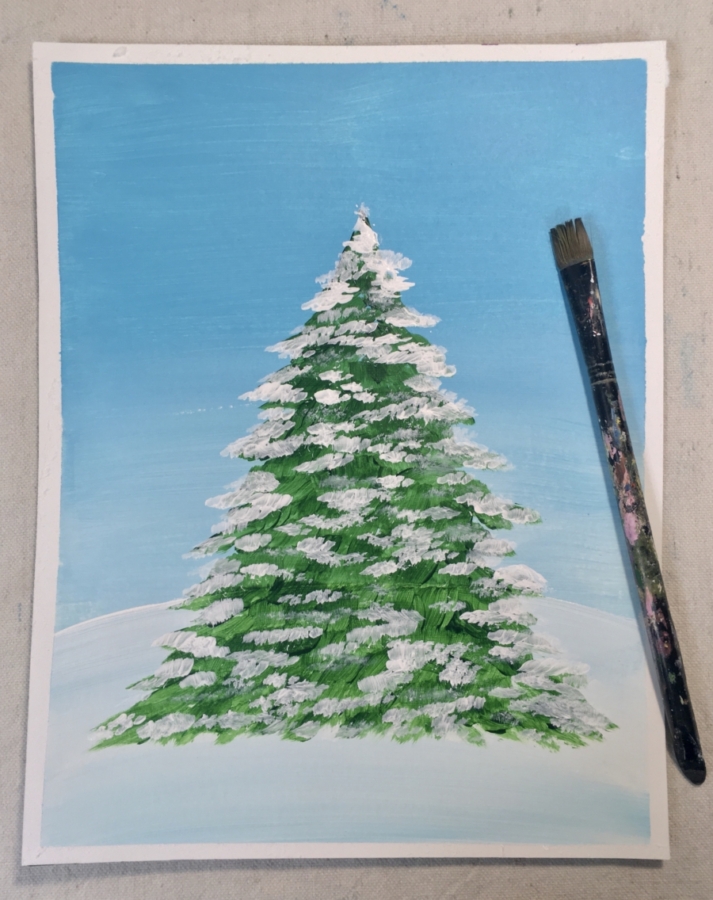
That’s It!
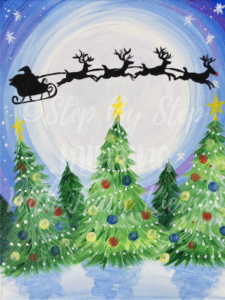
These are three techniques that I use when painting snowy Christmas Trees! Add these to your winter landscape paintings, craft projects, Christmas cards, etc.
If you wanted to decorate the trees, you can simply wait for the snow to dry and then paint ornaments, lights, a garland, etc.
Hope this tutorial helps with all your Winter Christmas art projects!
Download This As A PDF Guide!
How To Paint A Snow Pine Tree – Three Different Ways PDF Download
See Also…
This is very fantastic app so it can Solve my painting
Thank you so much! You explained it perfectly! I have a fan brush and never used it.
Thank you!
Loved your video
You make it looks so easy.
Mine would look like a stick with a blob of green.
I’ll just sit back and just enjoy your videos .Thank you
So Beautiful .Plus the music is perfect .
Hi Anne thanks! Try it, you will be surprised! And if it looks like a stick and blob, keep practicing! You’ll get there!
I would like to print out instructions for my grandson and couldn’t find an option for printing it out. Is this possible?
Thanks,
Dorinda Stanley
Hi Dorinda! There isn’t but if you email me at hello@stepbysteppainting.net I can give instructions for how to print this.
Me ha gustado mucho pero me agobia un poco la rapidez al hacerlo, no me dan de si los ojos para verlo bien. Muchas gracias.
I love this. I have only done the fan brush trees. But I’m anxious to try the others. Thanks so much!!!
I would love to use this lesson/video as an art lesson for my kids in November/December. They could make some beautiful Christmas cards for extended family members. The video is so small here, the kids wouldn’t be able to follow along. Would you consider uploading this video to your YouTube channel?