
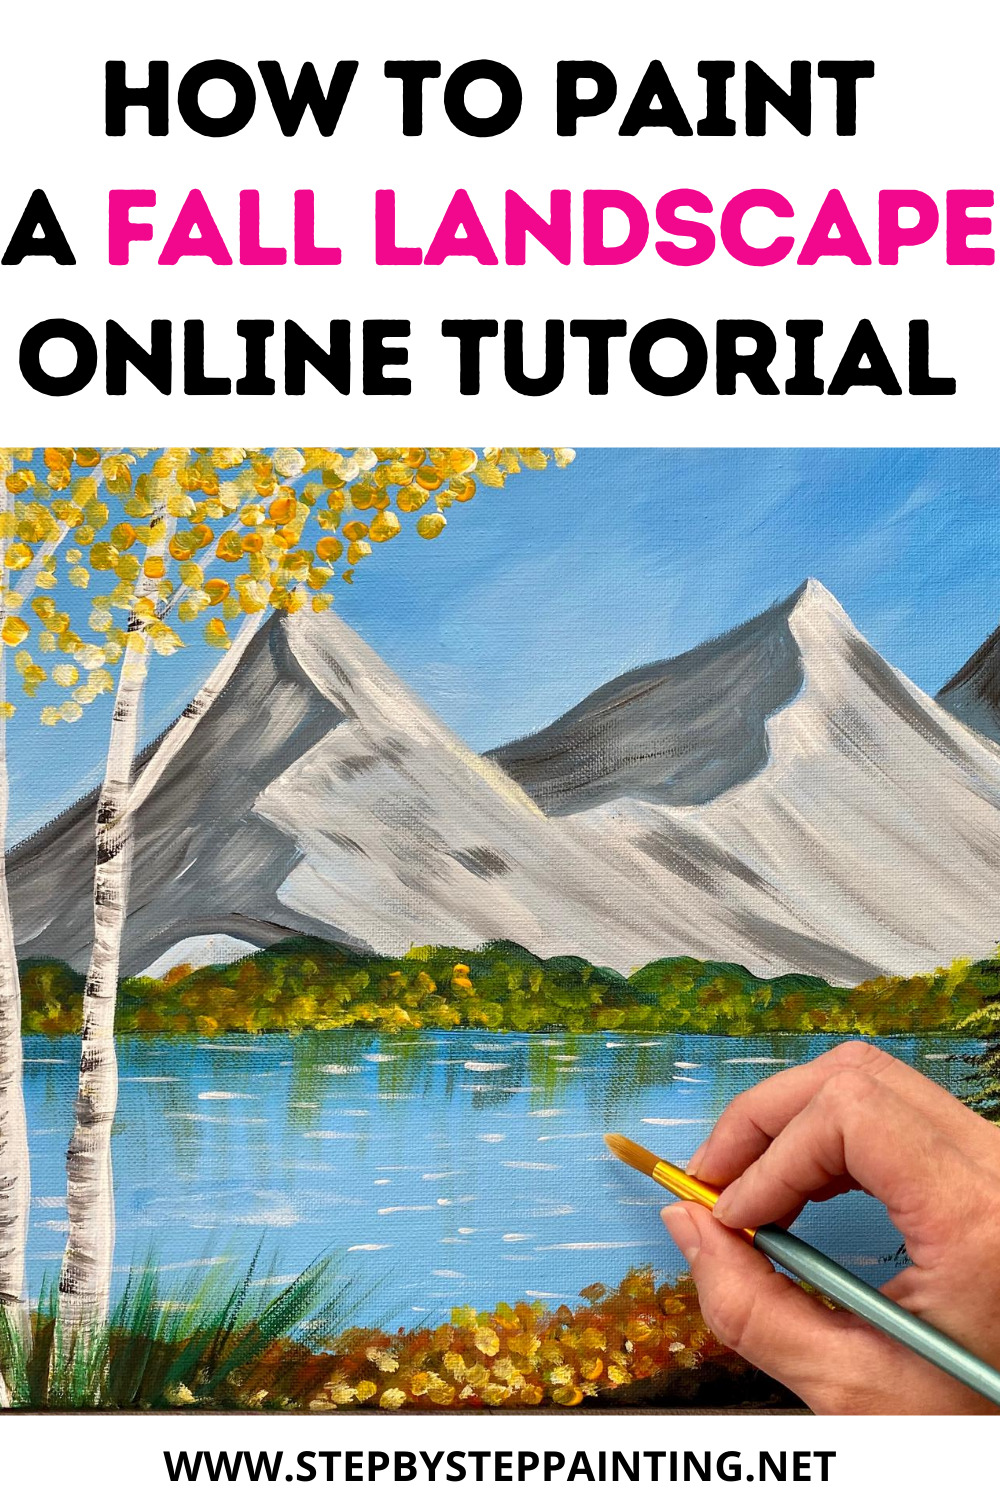
“Mountain Morning” Acrylic Painting Tutorial For Beginners
Would you like to save this?
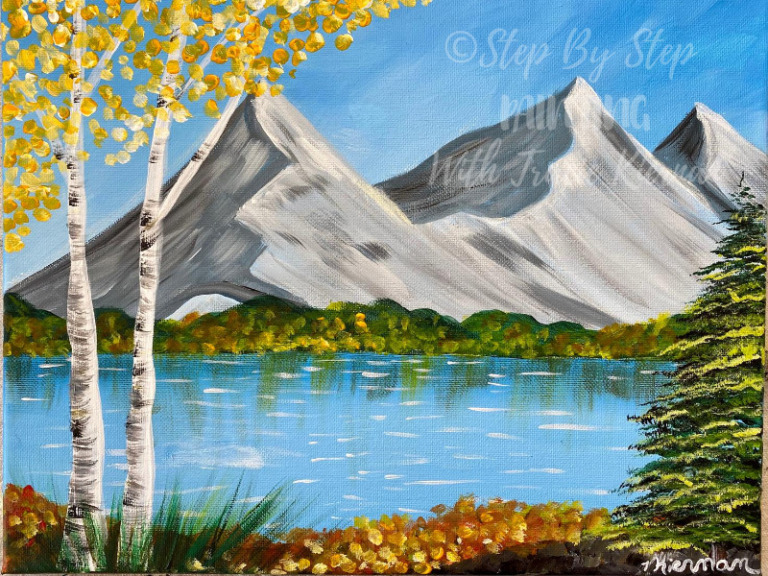
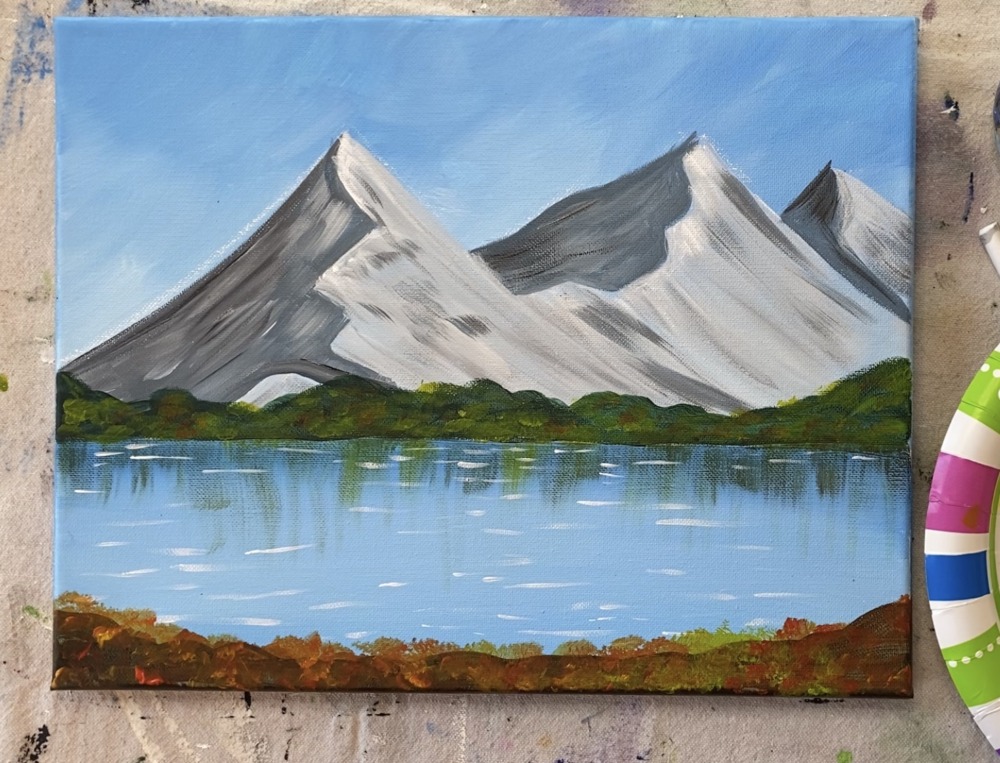
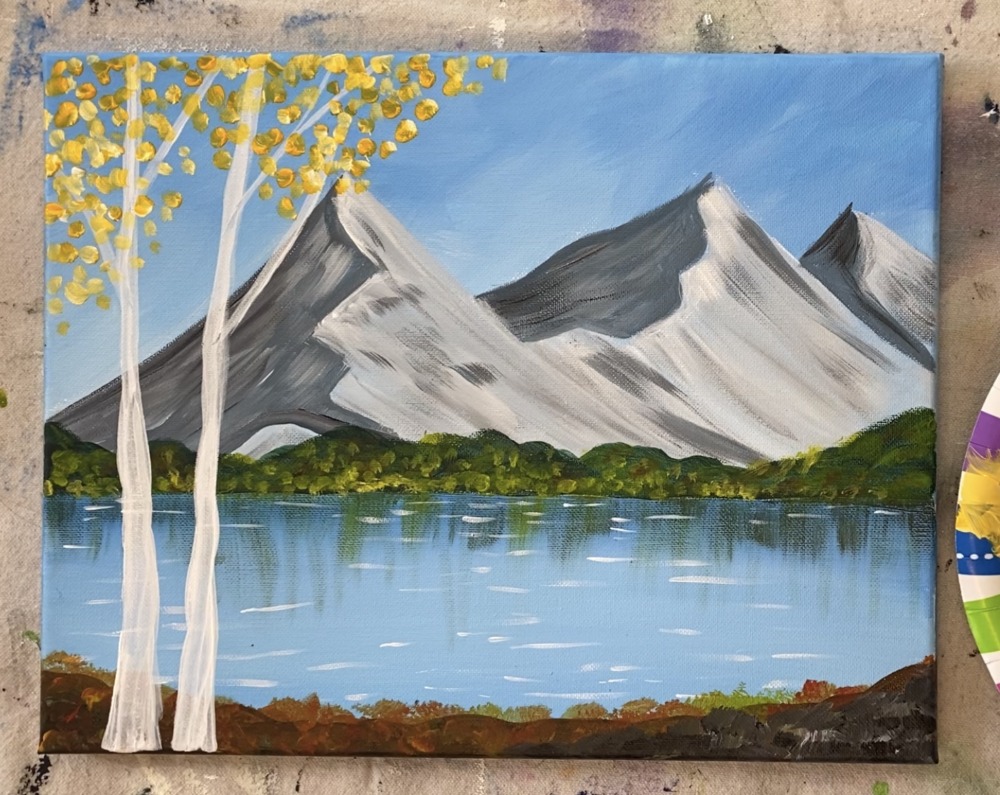
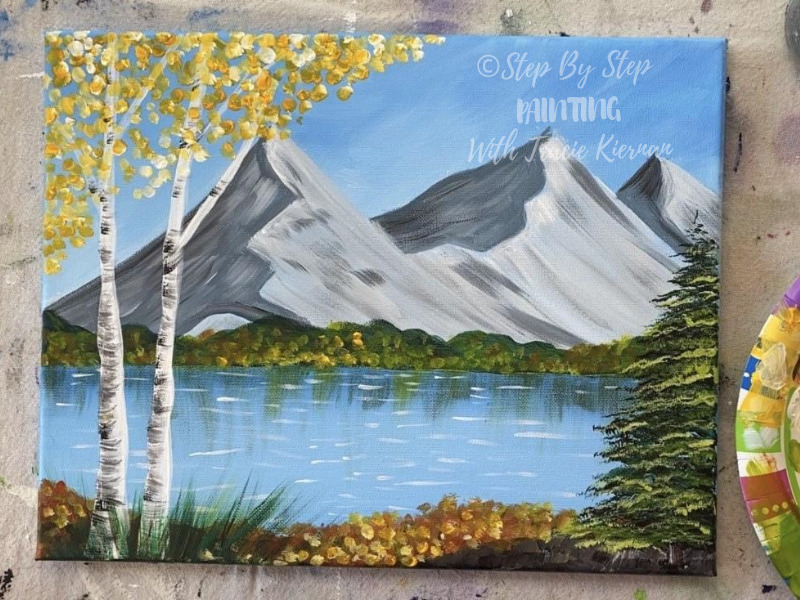
“Mountain Morning” is a Fall Landscape with Mountains, a lake and fall foliage.
Channel your inner Bob Ross with this Fall Landscape Tutorial! This is the first fall painting tutorial I am releasing for the 2020 season!
You can see a similar one here of a Spring Landscape Scene. I also have a mountain tutorial that goes a little more in depth how I like to paint mountains!
I will guide you through how to paint this landscape step by step. Enjoy and happy painting!
This tutorial contains affiliate links to products.
Materials
How To Paint “Mountain Morning” Fall Landscape

Learn how to paint a fall landscape with mountains, a lake and trees! This tutorial is intended for beginners! Tracie will guide you step by step how to paint this pretty scene.
Materials
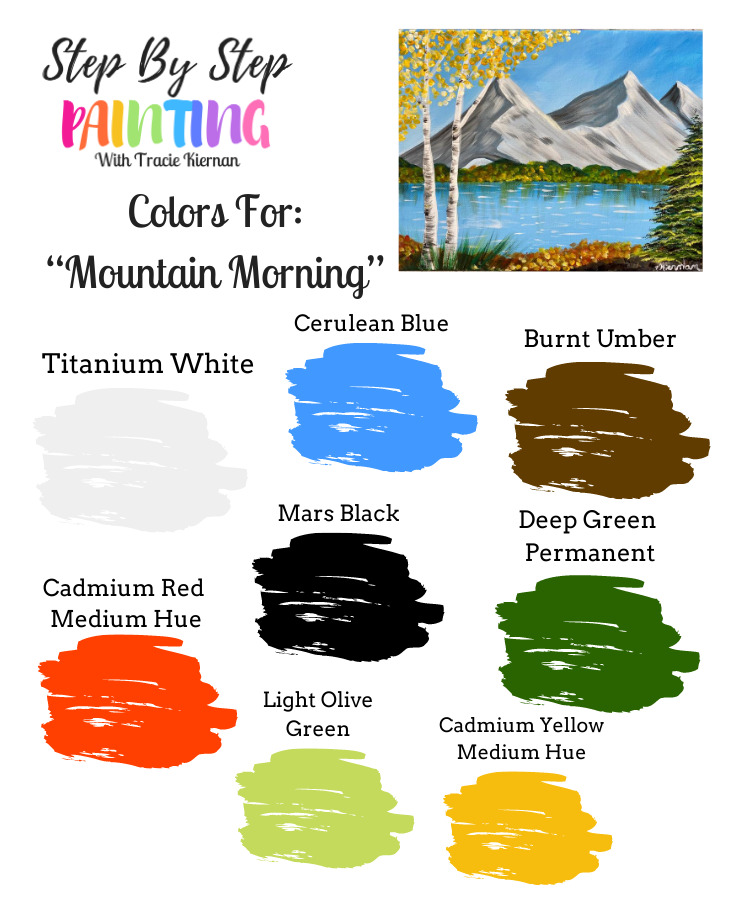
Colors
- Titanium White
- Mars Black
- Cerulean Blue
- Cadmium Yellow Medium Hue
- Light Olive Green
- Green Deep Permanent
- Burnt Umber
- Cadmium Red Medium Hue
Brushes (links to brushes are below)
- 3/4” Flat Wash
- #6 or #4 Fan Brush
- 0 Round Brush
- #4 Round Brush
- 12 Bright
Color Palette
Brushes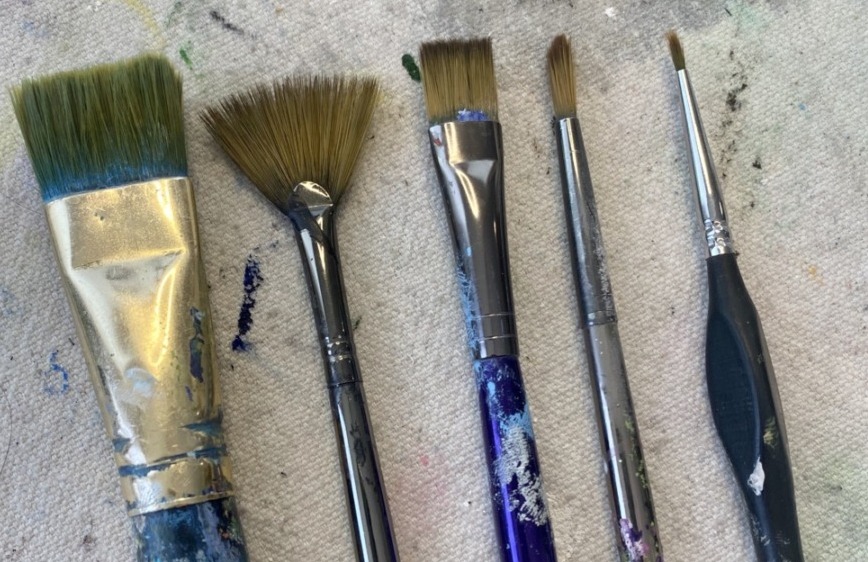

Directions At A Glance 

Video YouTube Long Version:
Step By Step Directions
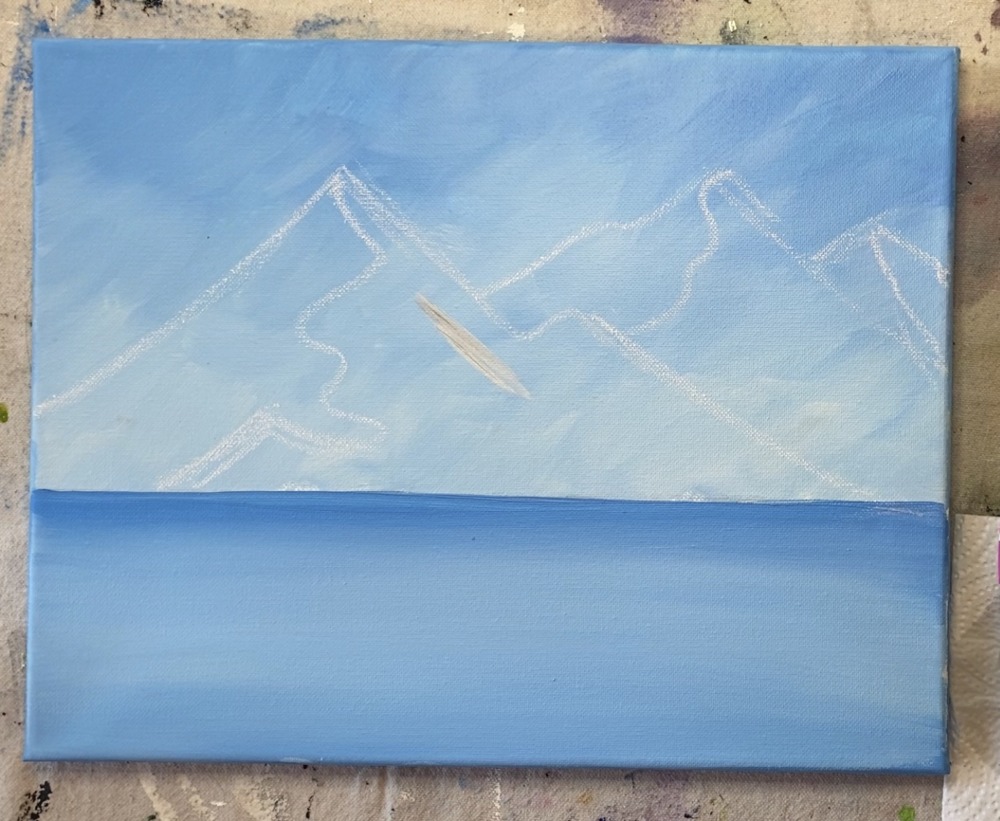
1. Define Your Horizon Line & Paint The Sky
I always start with the sky in landscape paintings! First use your T-square ruler to draw the horizon line. I did mine approximately four inches up. I am working on an 11 x 14 canvas!
Then use your 3/4” wash brush and the colors cerulean blue + titanium white. Mix the blue with a little bit of white. Then start at the top and paint “X” style strokes.
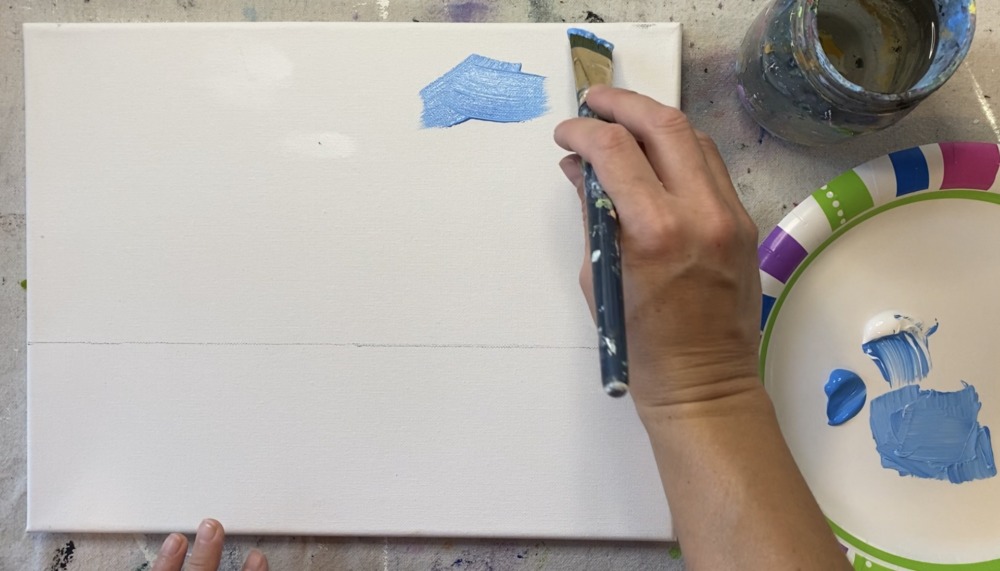
Paint the top half of the sky with this cerulean blue + white combination. It should look like a solid medium blue.
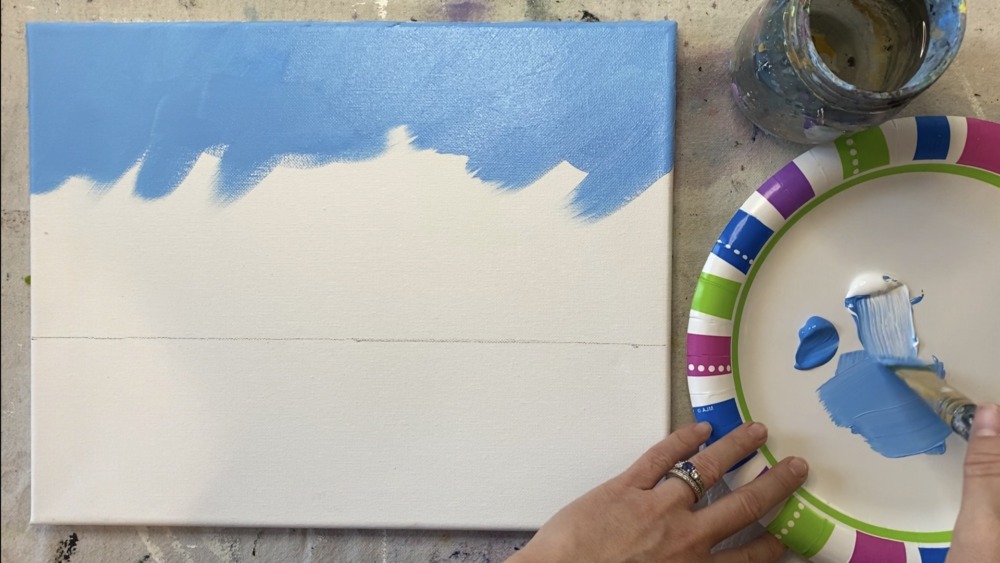
Then (without rinsing your brush) load it in titanium white. Continue painting “X” strokes in the sky and work your way down to the horizon line. Because you are doing “X” strokes, the blue and white will blend.
Essentially, you want your blue to be slightly darker at the top and lightest on the horizon line.
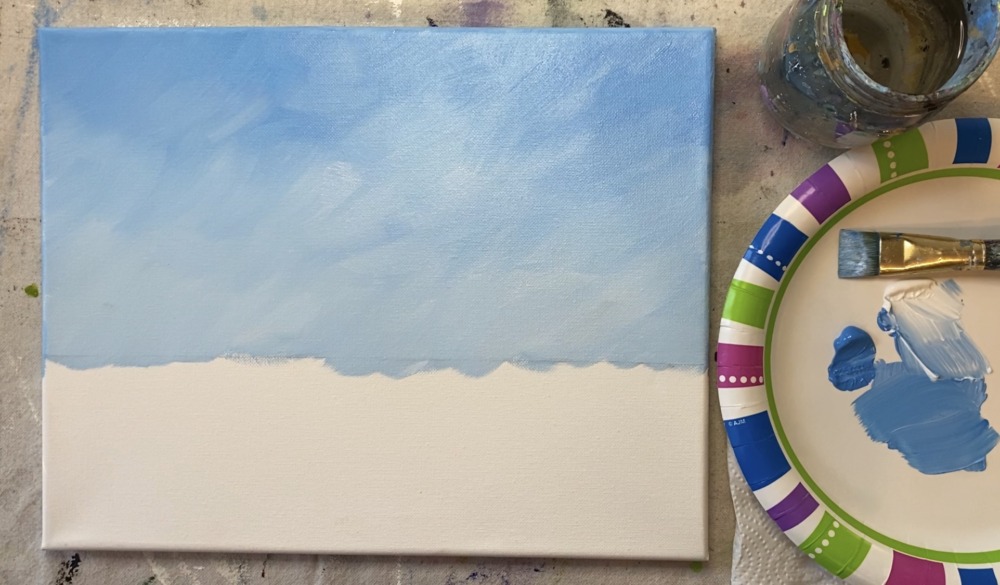
I went all the way to the horizon line. If you paint outside the line that is okay!
2. Paint The Water
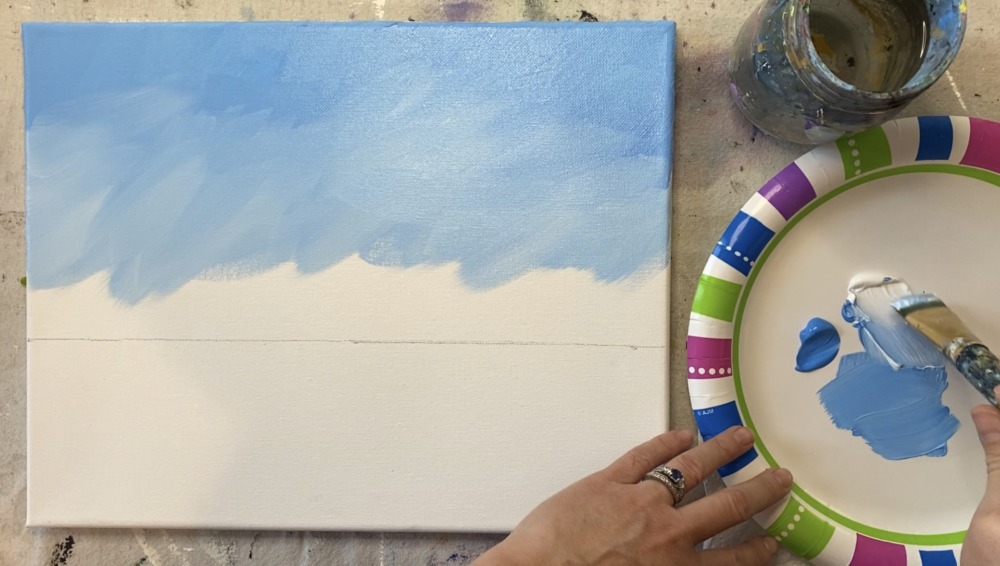
The water is done with the same two colors – cerulean blue and titanium white.
Load your 3/4” Wash brush in the Cerulean Blue. Use the tip of the brush to paint just under the horizon line. Try to make your line as straight as possible, although it doesn’t have to be perfect.
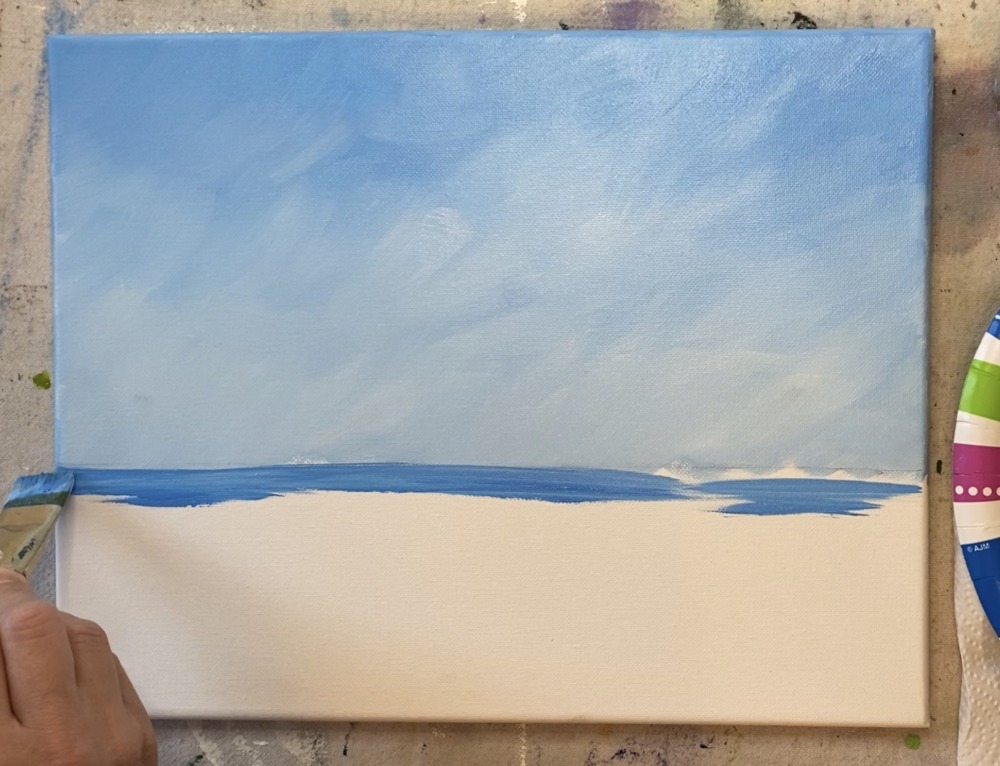
Paint left and right horizontal strokes starting with that cerulean blue.
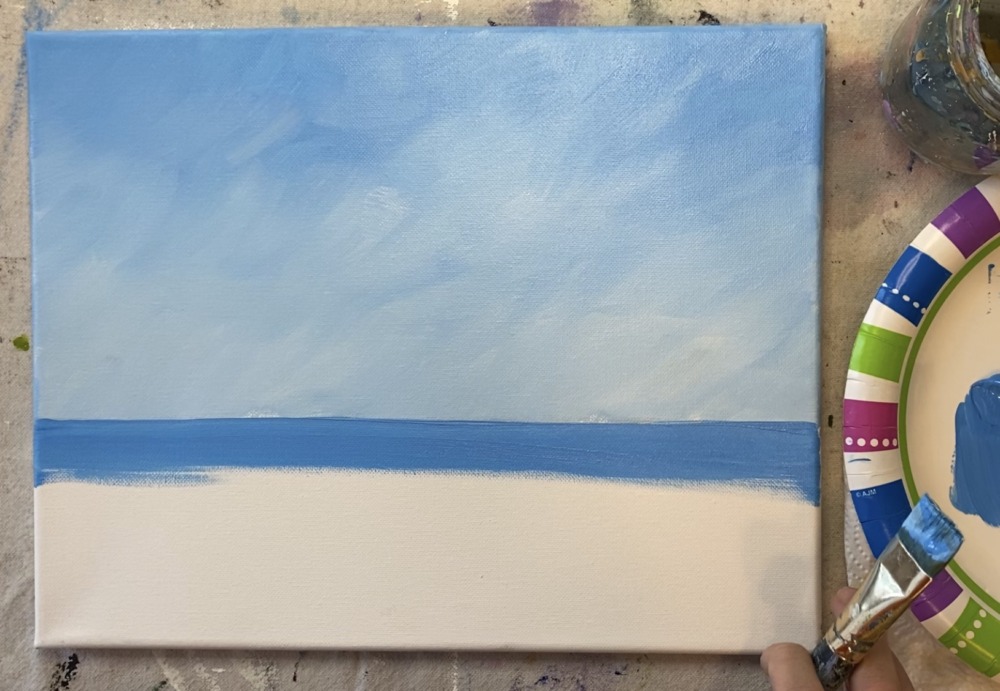
Then gradually add white into it so that the water gets lighter as you go down to the bottom of the canvas.
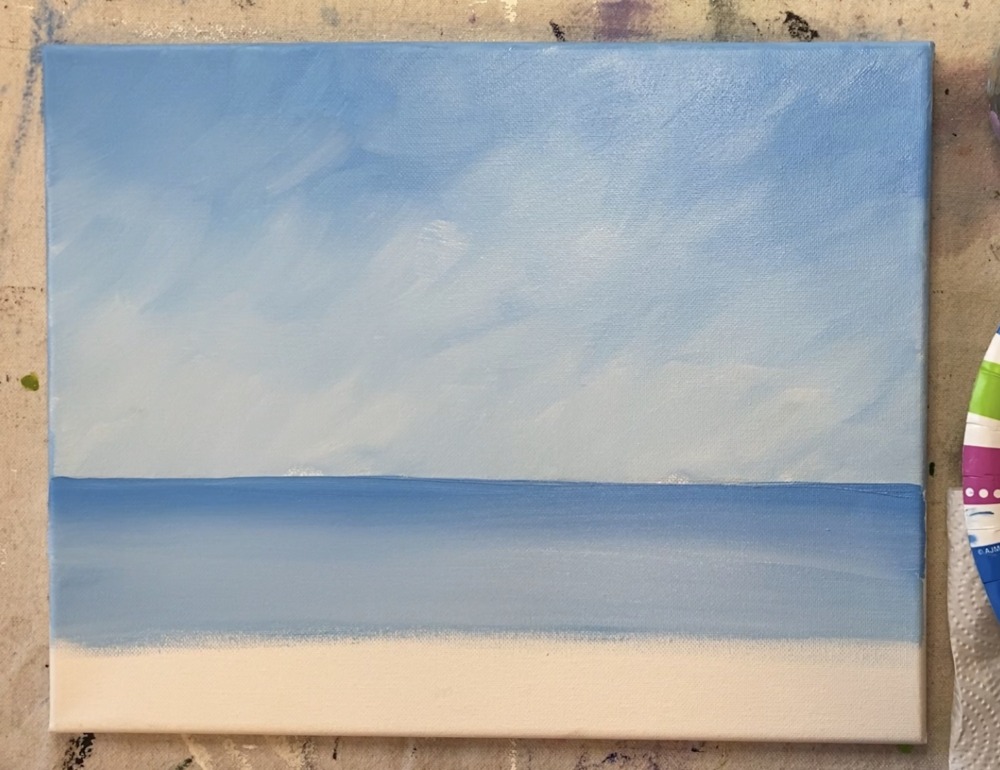
To blend the colors, simply paint over the strokes doing “wet on wet blending”. These strokes should be horizontal and go all the way from the left to the right.
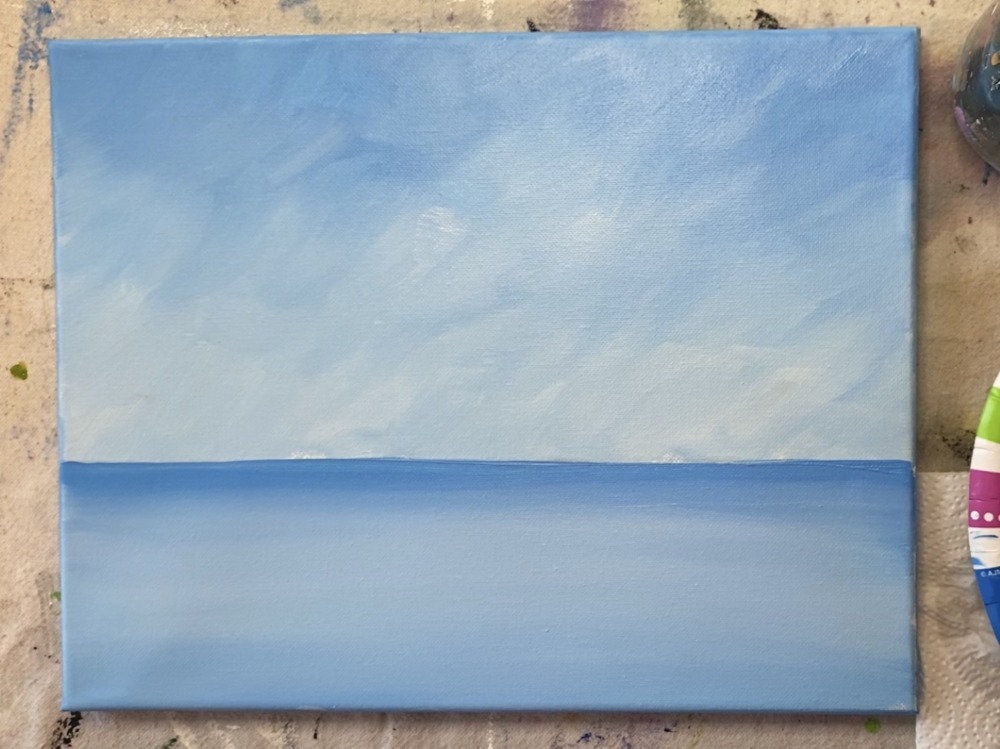
It’s okay if your blue and white aren’t blended perfectly all the way! There can be color variations of darks and lights in the water.
Now we have sky and water!
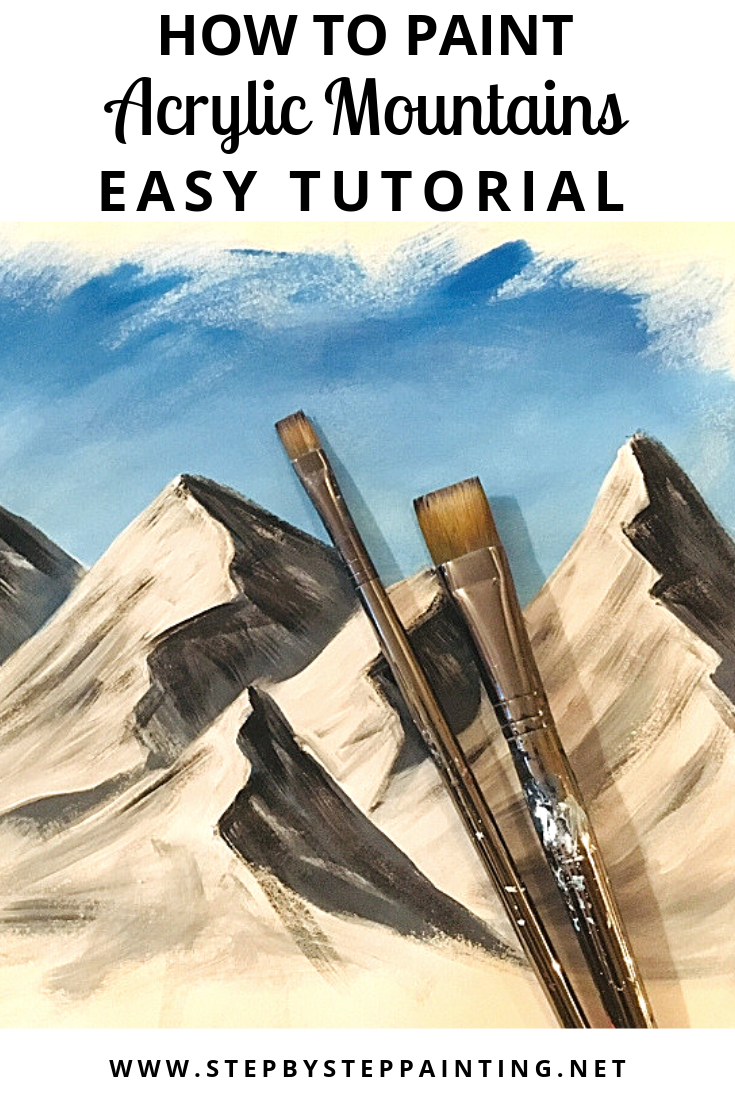
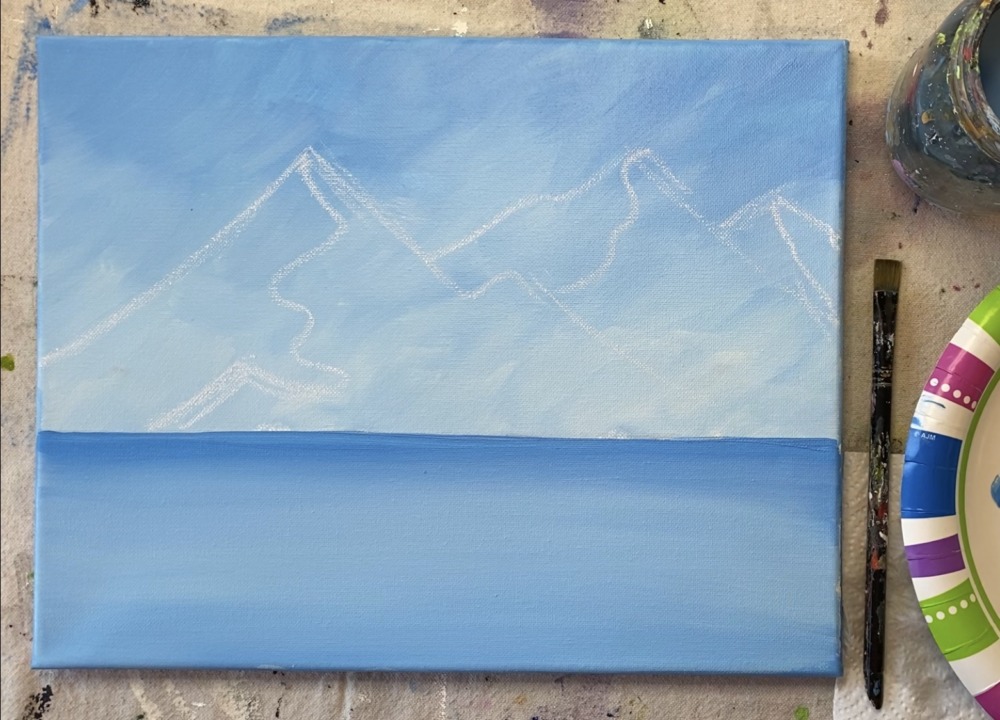
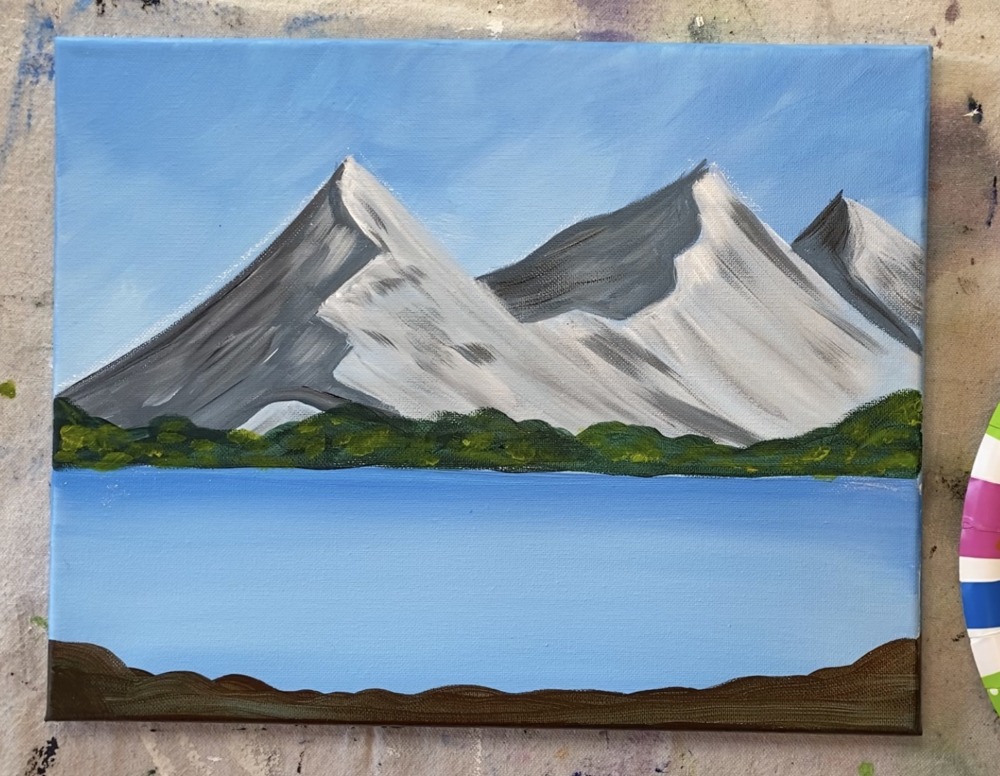
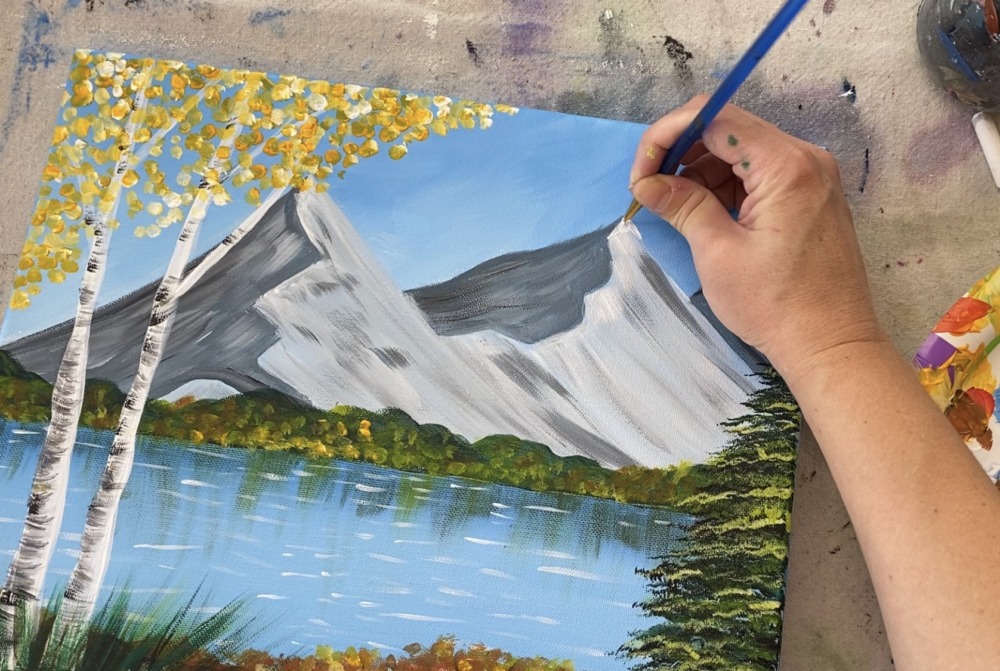
3. Draw The Mountain With Chalk (After sky is dry)
Using a piece of chalk, draw the mountains. I drew three peaks that overlapped each other.
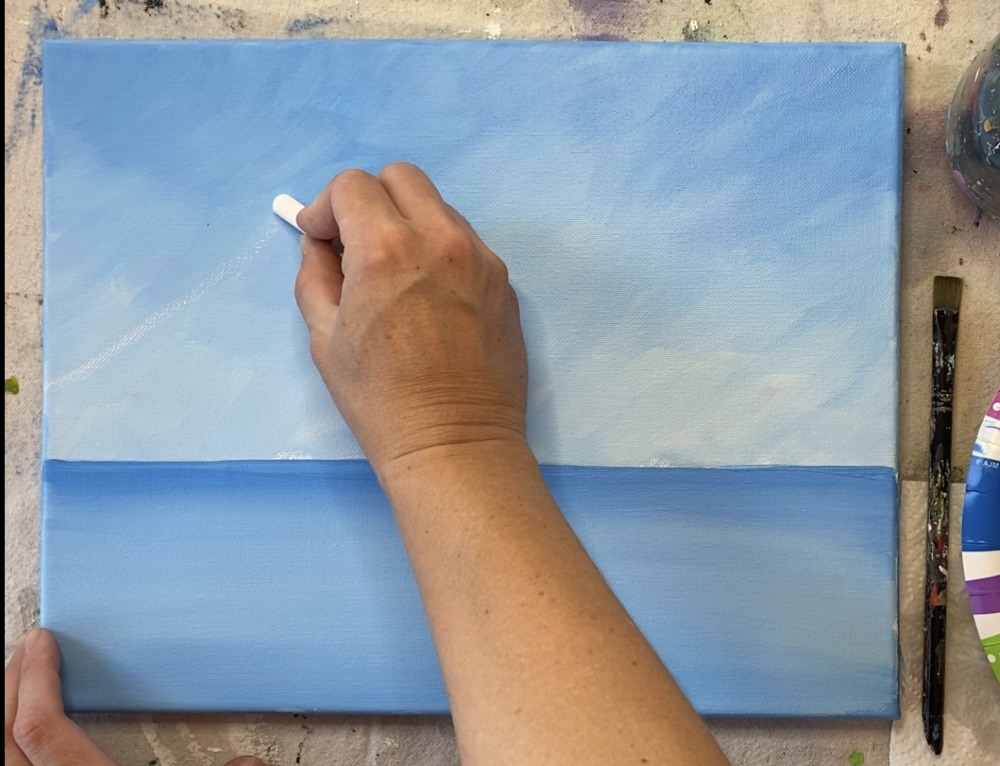
If you want a more in depth tutorial on mountains, you can see my mountain tutorial here which has these same kind of mountains!
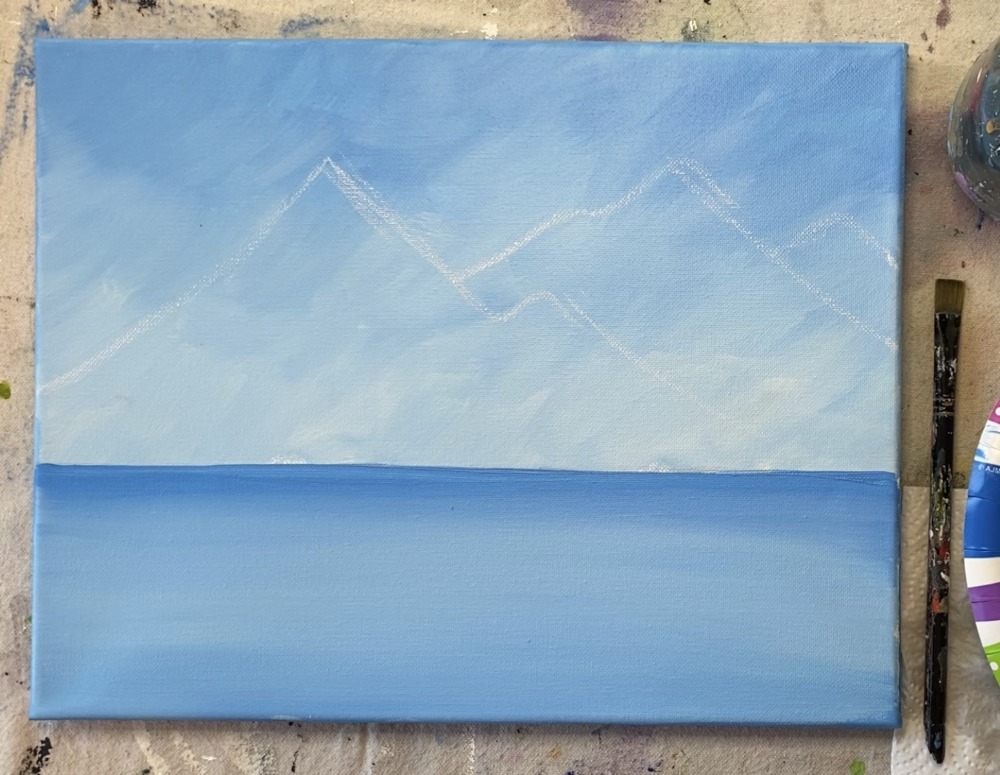
Then divide your mountains using the chalk. Start at the top point of the peak and draw a slightly zig-zag/ loose line going to the base.
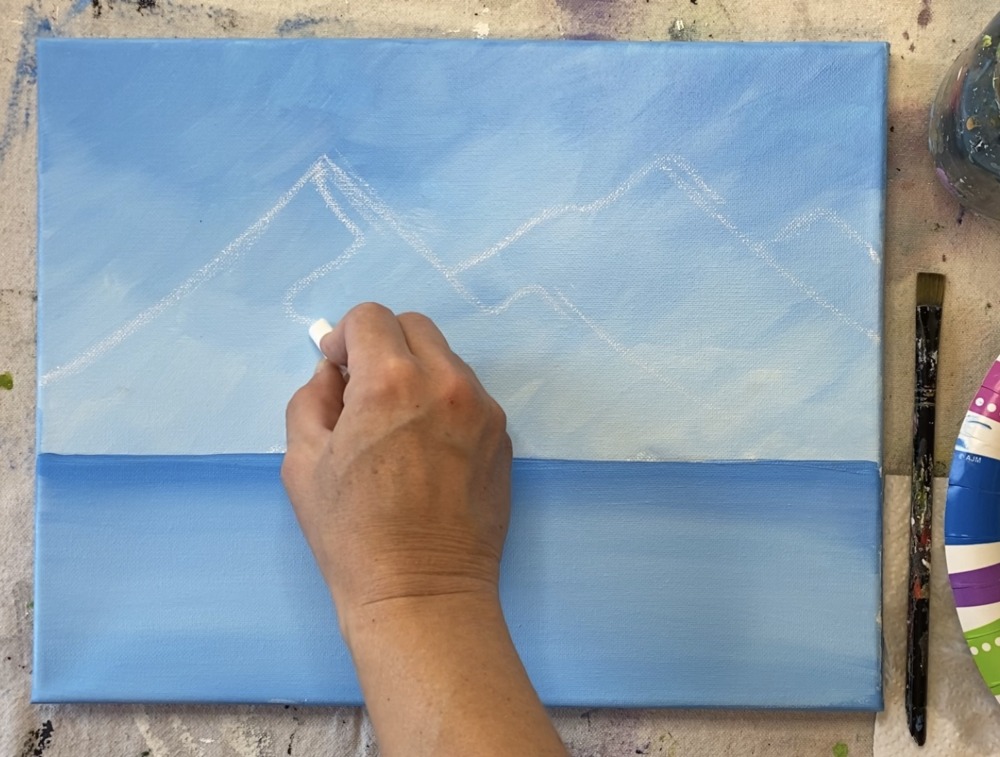
This line is going to divide the dark part of the mountain from the light part.
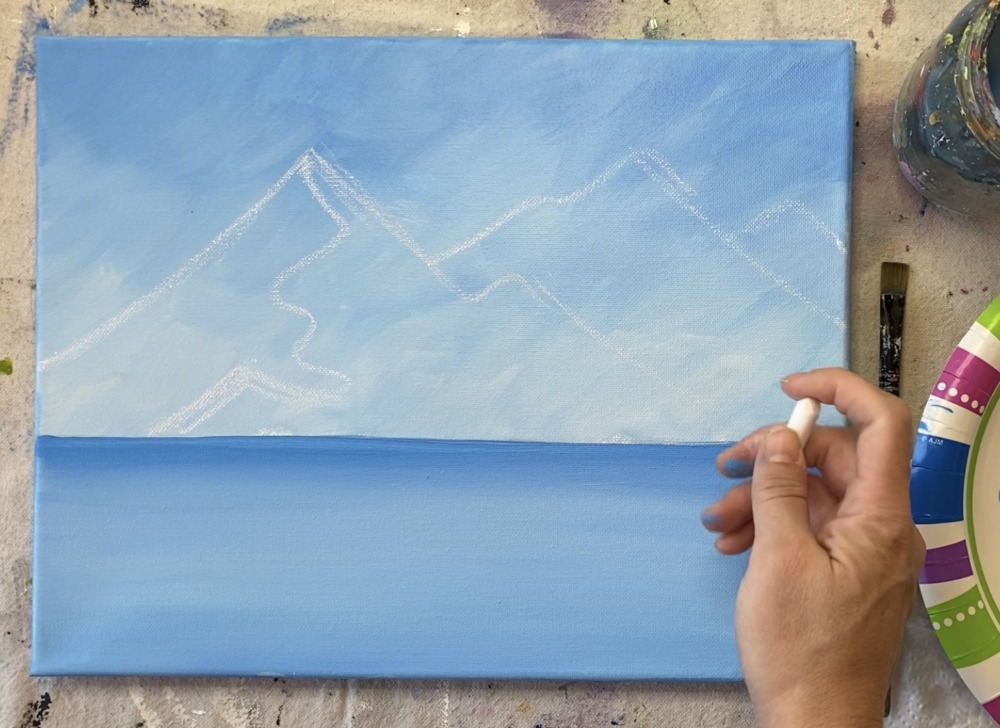
Then divide the next mountain peak. This time I made my line go slightly to the left.
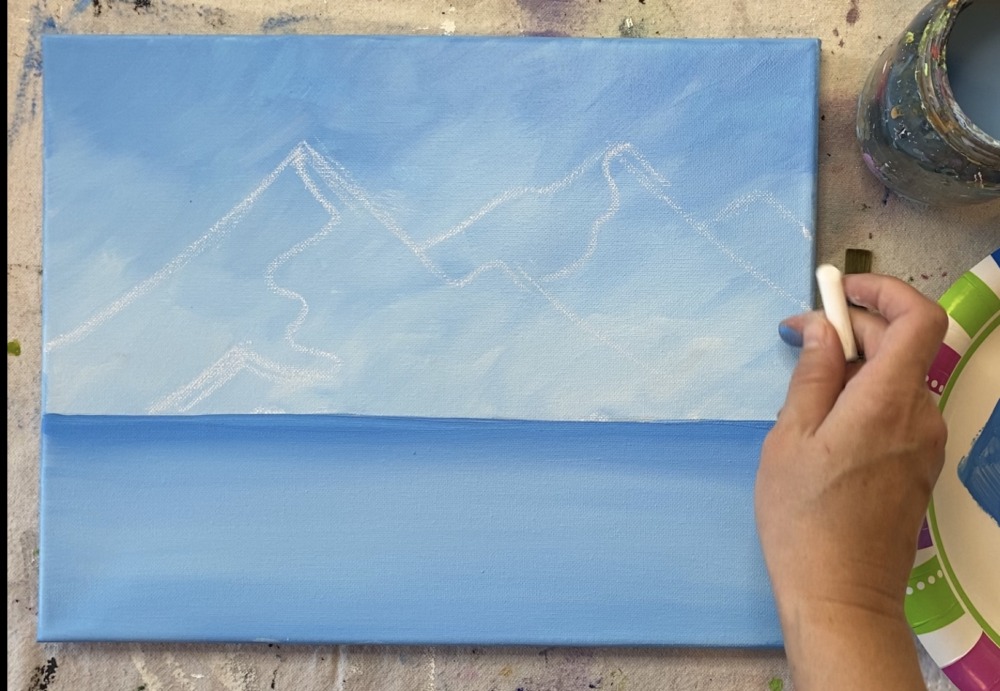
And then draw a division line on the third peak. I made that line go to the right.
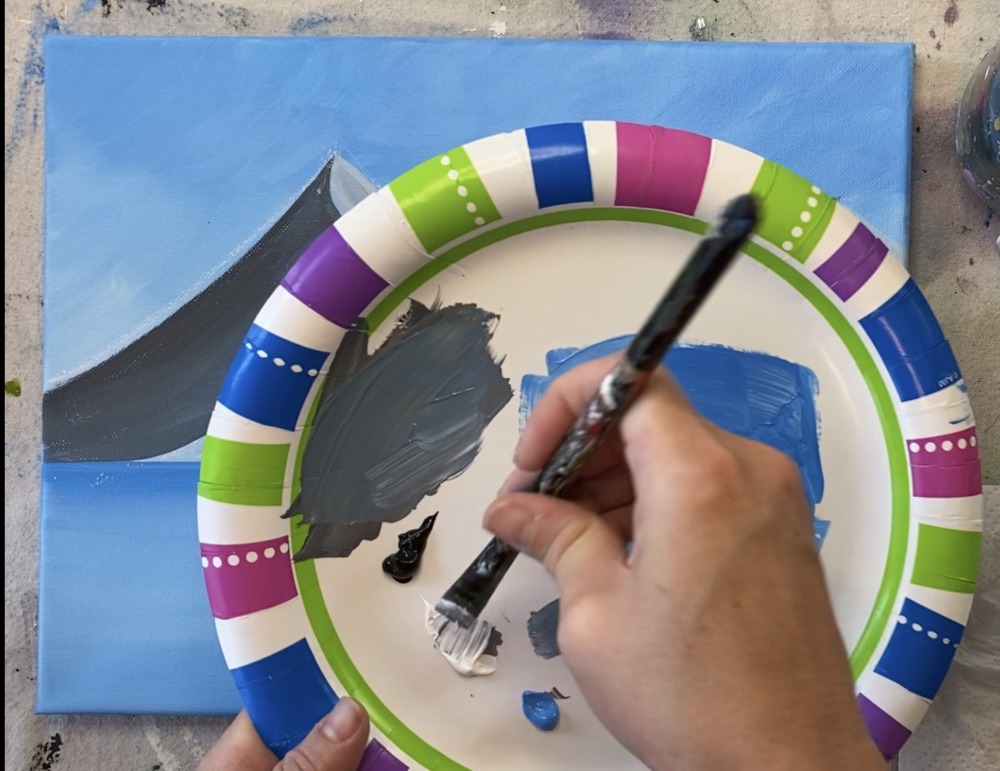
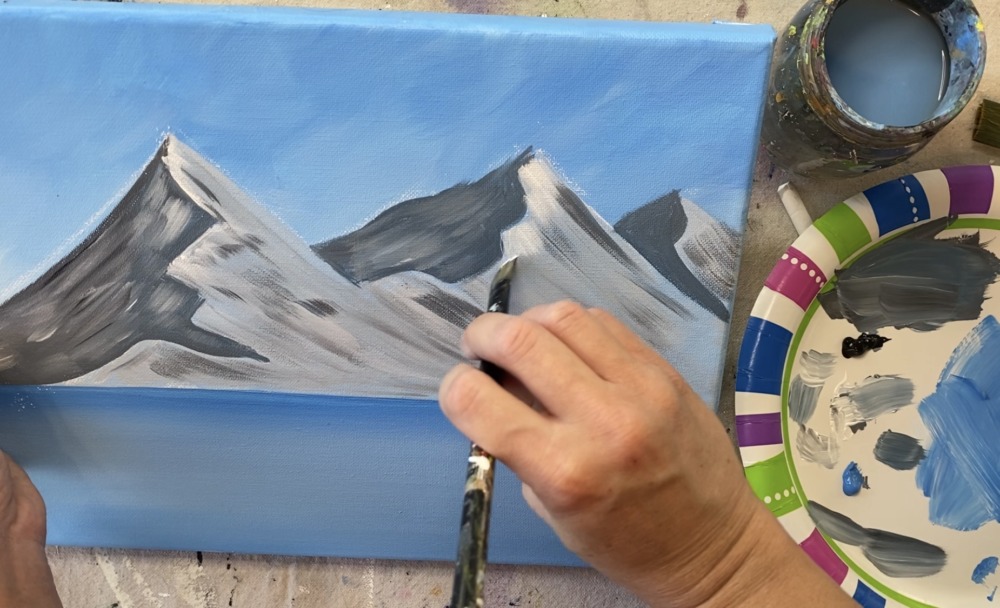
4. Paint the right side of the mountain a light gray color
I used a 12 bright brush for this! This is a smaller flat brush. On your palette, mix a light gray color. Mix about 3 parts white, 1 part cerulean blue and 1 part black.
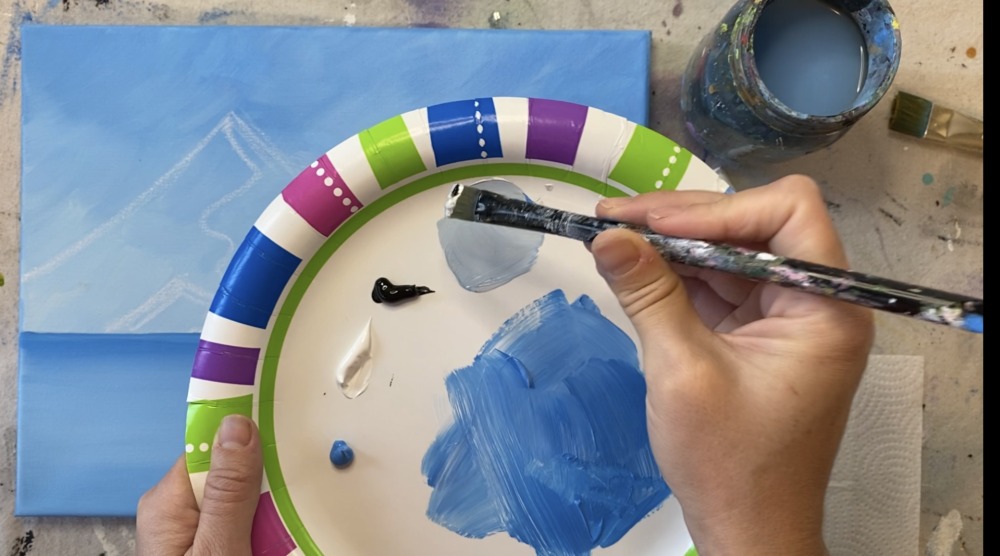
You do not have to mix your colors all the way. Then paint the right side of all the mountains going in a diagonal direction.
As you reload your brush, you can add a tiny bit of black for color variation. Continue to paint all of the right side of the mountain using diagonal strokes.

Paint the right side of each of the peaks. Again, for color variation, add bits of black or even blue in there but keep the right side very light and bright.
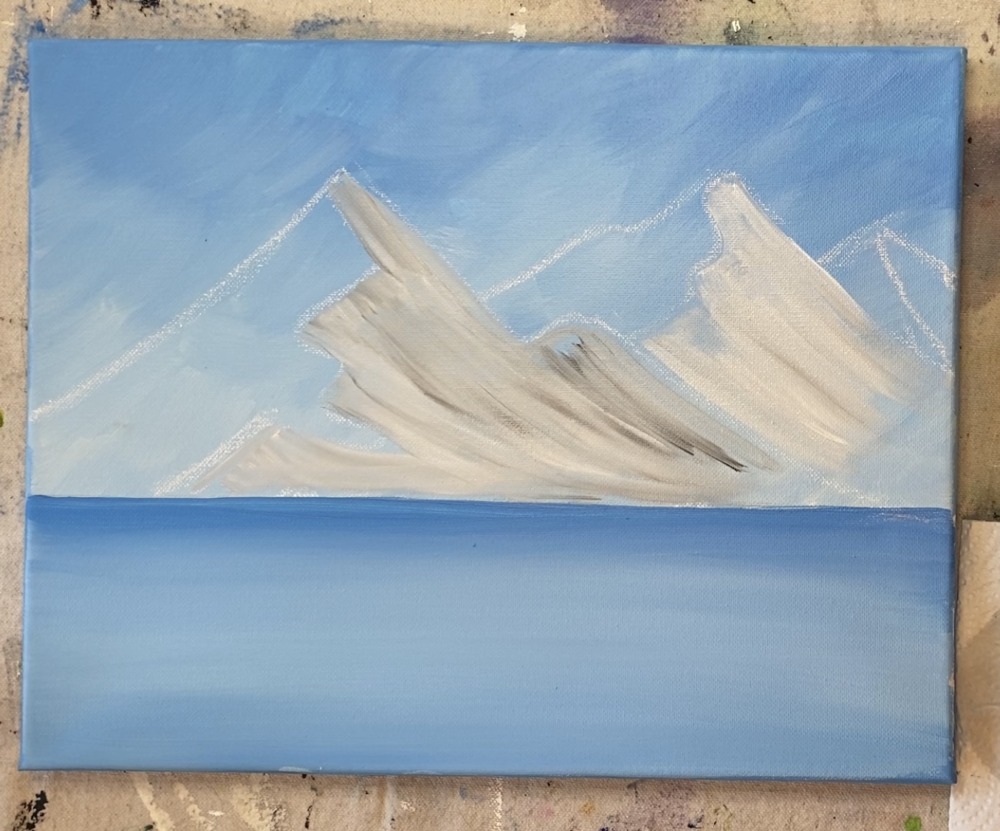
5. Paint the left side of the mountain a dark gray color
Next, without rinsing your brush, make a dark gray color on your palette by mixing 2 parts black, 2 parts cerulean blue and 1-2 parts white.
Use that same brush to paint angular strokes going the opposite direction. Paint all the left sides of each of the mountain peaks. Tip: you can use the tip of the brush to “cut in” on he curved division lines in the middle.
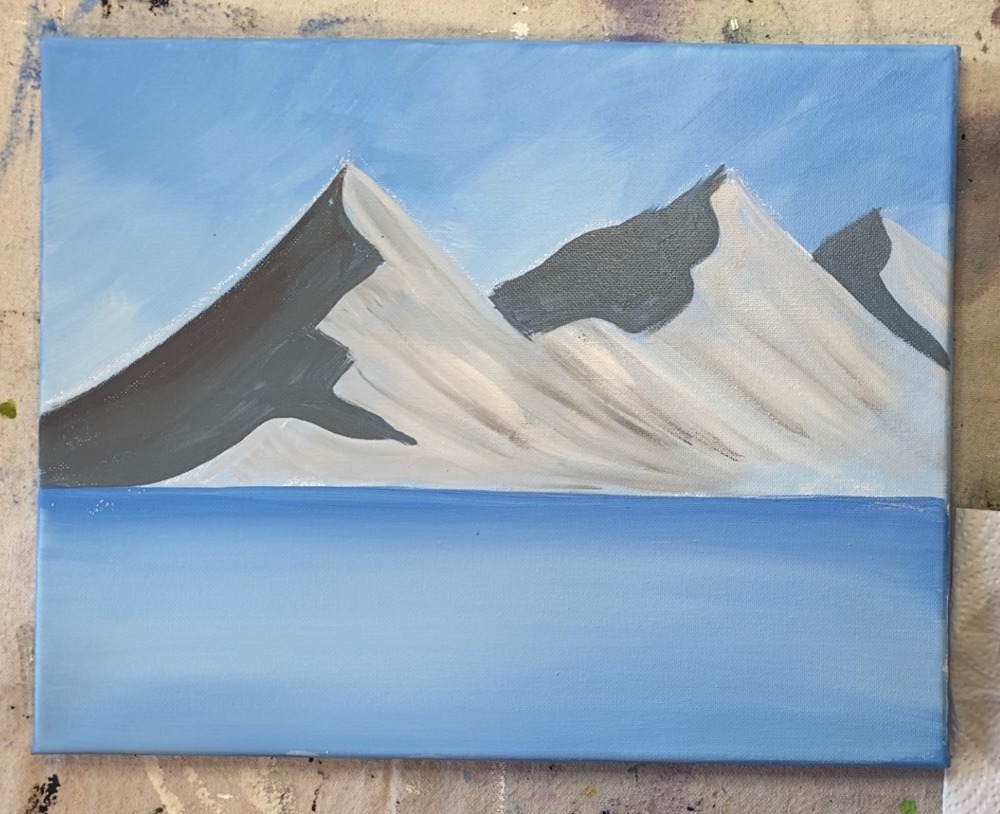
Next add some white to your brush (without rinsing it). However, if you have too much paint on your brush you can wipe the excess off.
Then paint a few strokes on the dark area going diagonally. This adds some “texture” into the dark shadowy area of the mountain.
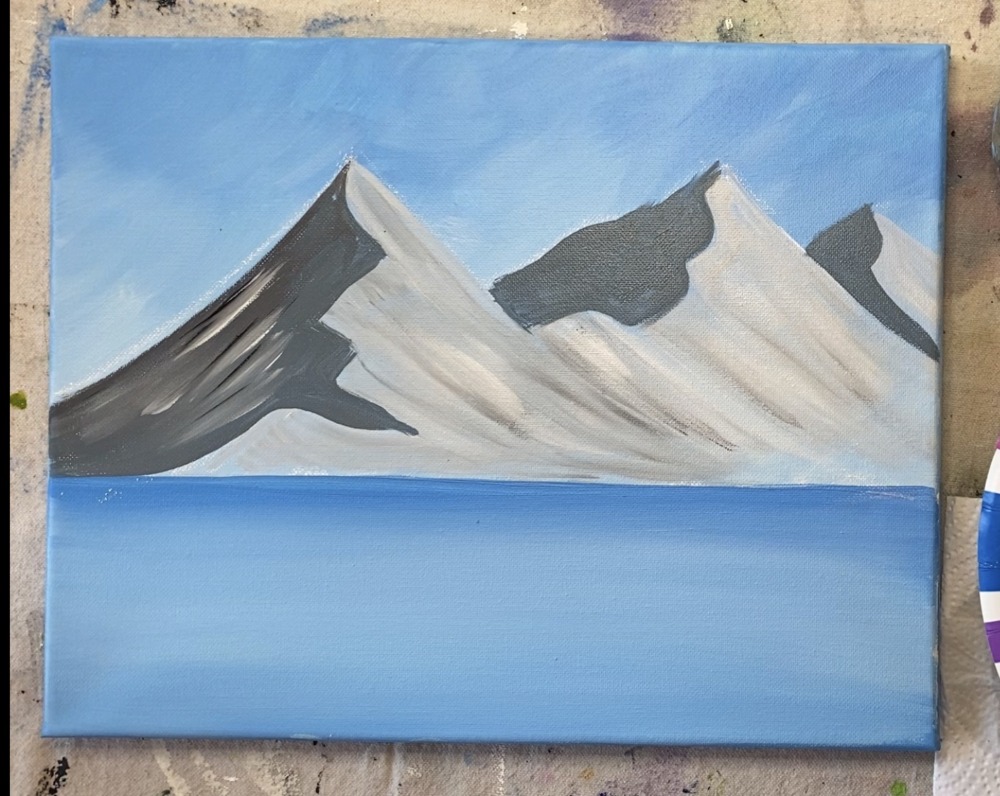
Do the same to all the dark areas of each of the peaks. Tip: only a tiny bit of white on the brush is necessary for this step! The white should blend slightly with the gray but not all the way.
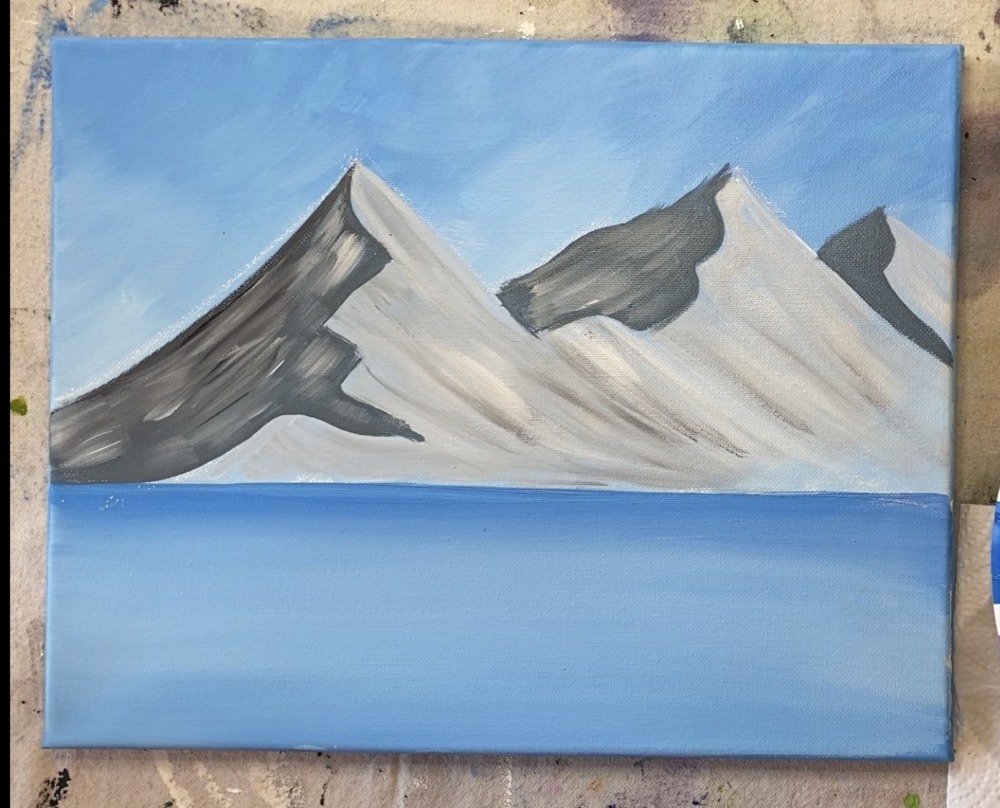
Then add some darker gray strokes to the lighter side of the mountains to give it some more texture. Just a little bit of gray and paint in an angle. Do not make the light part darker, it should still be much lighter than the dark part.
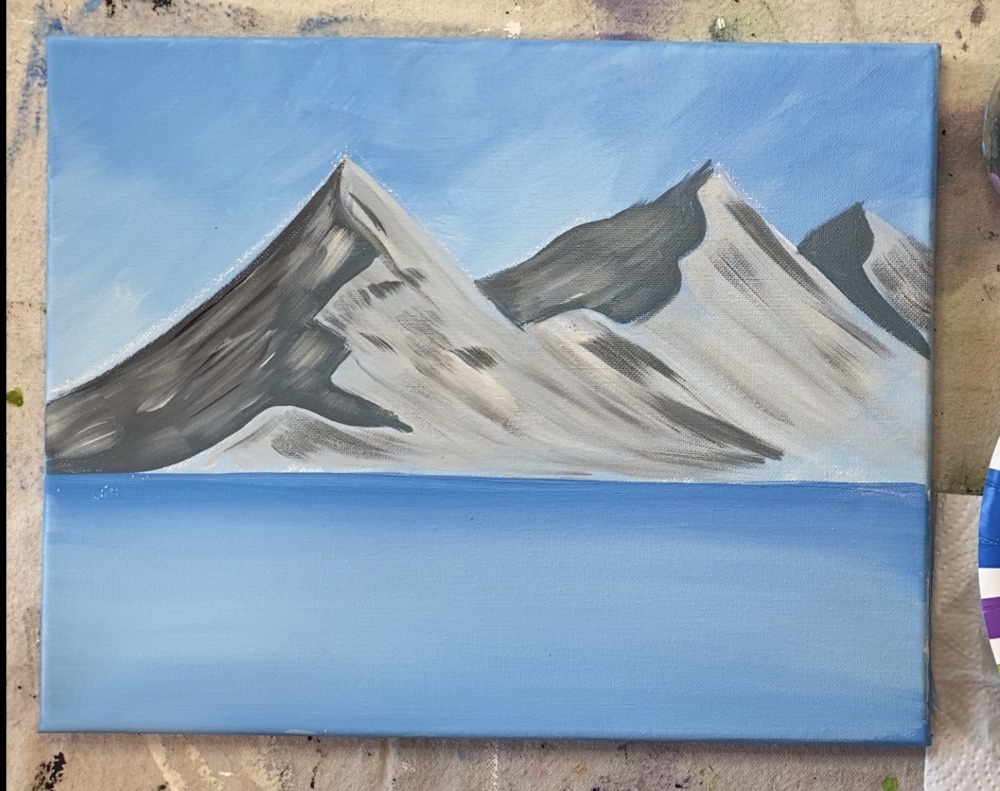
Then, along the middle point of the mountains, I added some pure white. Just a bit on the tip of the brush and drag it diagonally.
Tip: with all this mountain texture, I only loaded a tiny bit of paint on my brush. The strokes should be thin, sort of “dry brush style”. I also did not load any water on my brush.
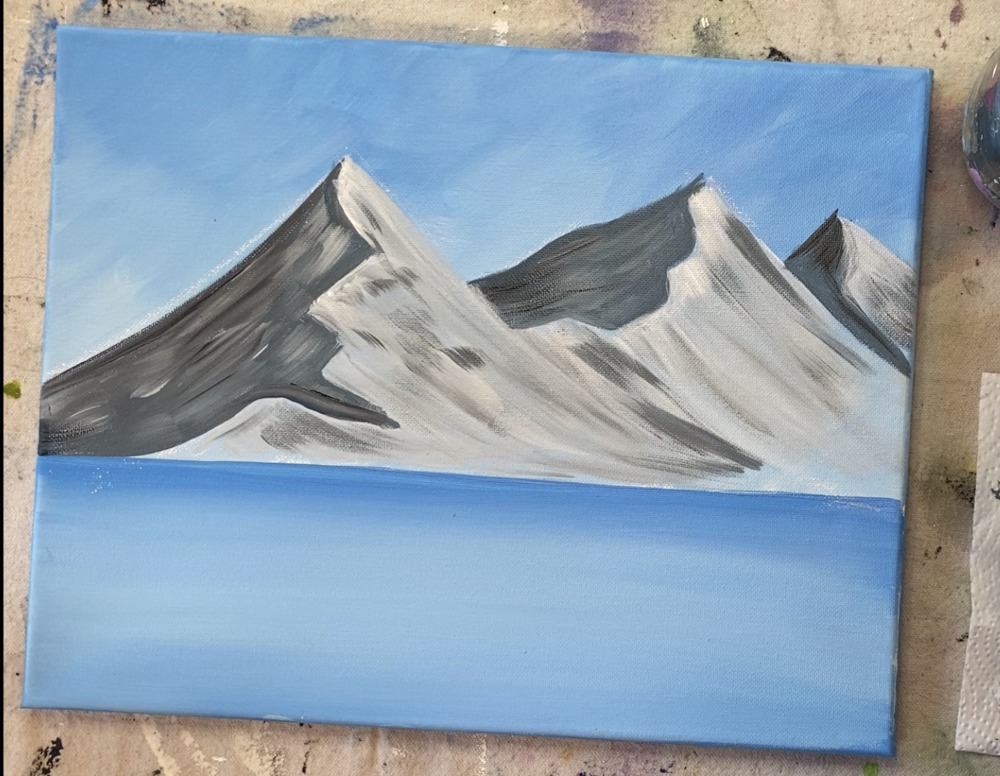
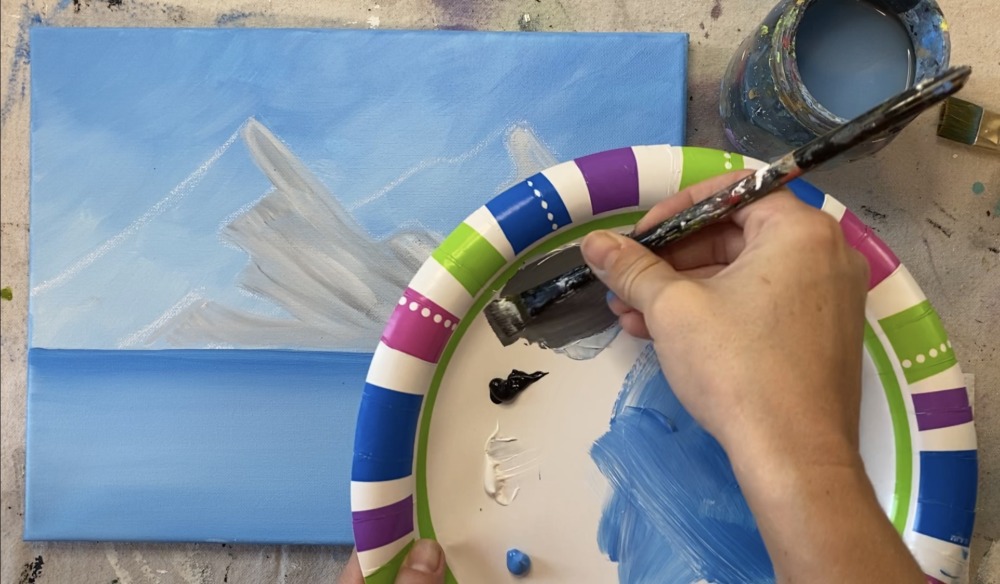
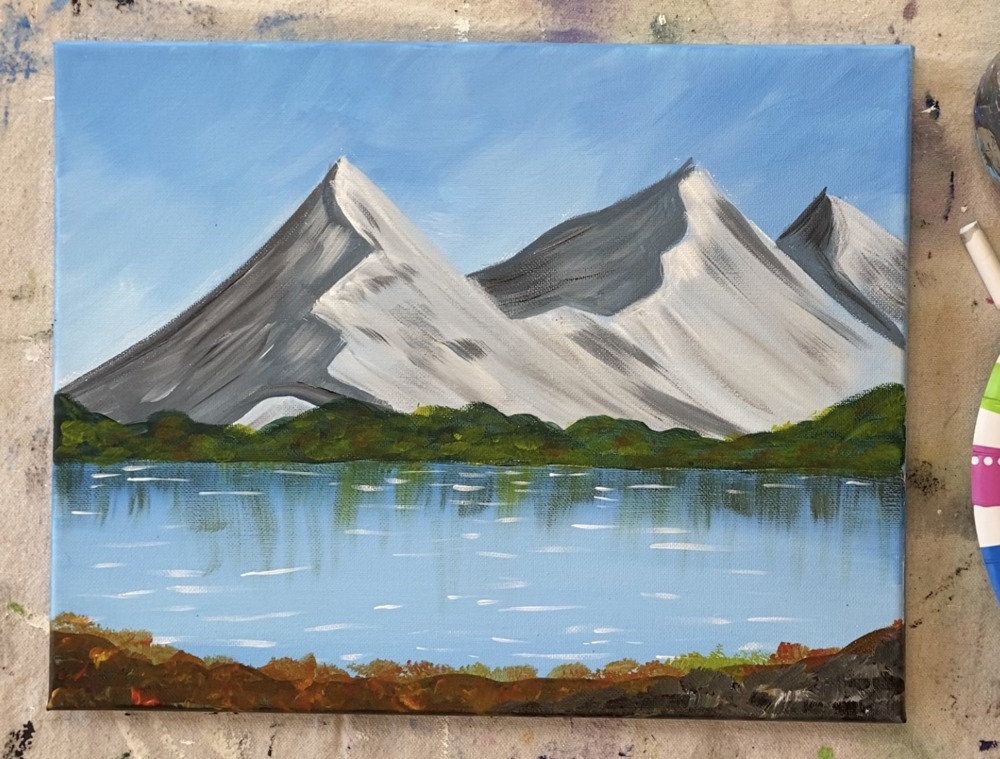
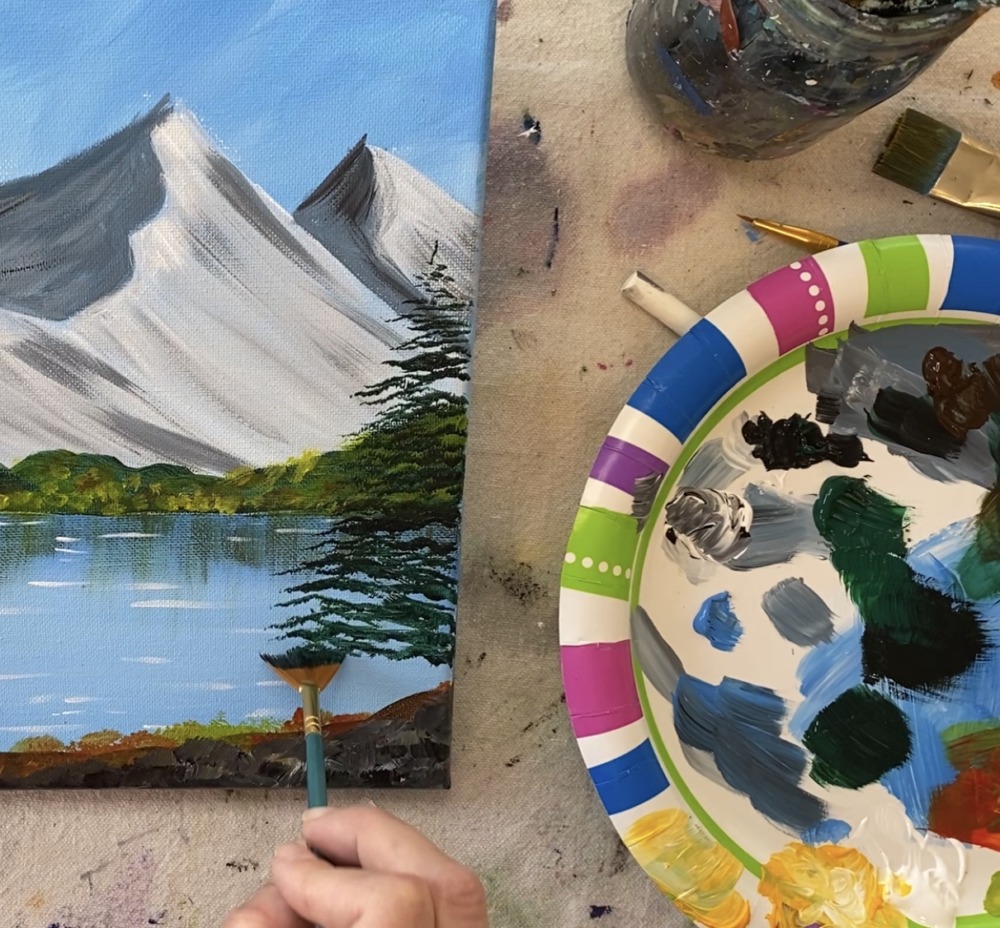
6. Paint the land at the base of the mountain and at the bottom of the painting
Completely rinse and dry your 12 bright brush. Then on your palette mix about 1 part black to 3 parts deep green permanent. Paint a wavy line at the base of the mountain.
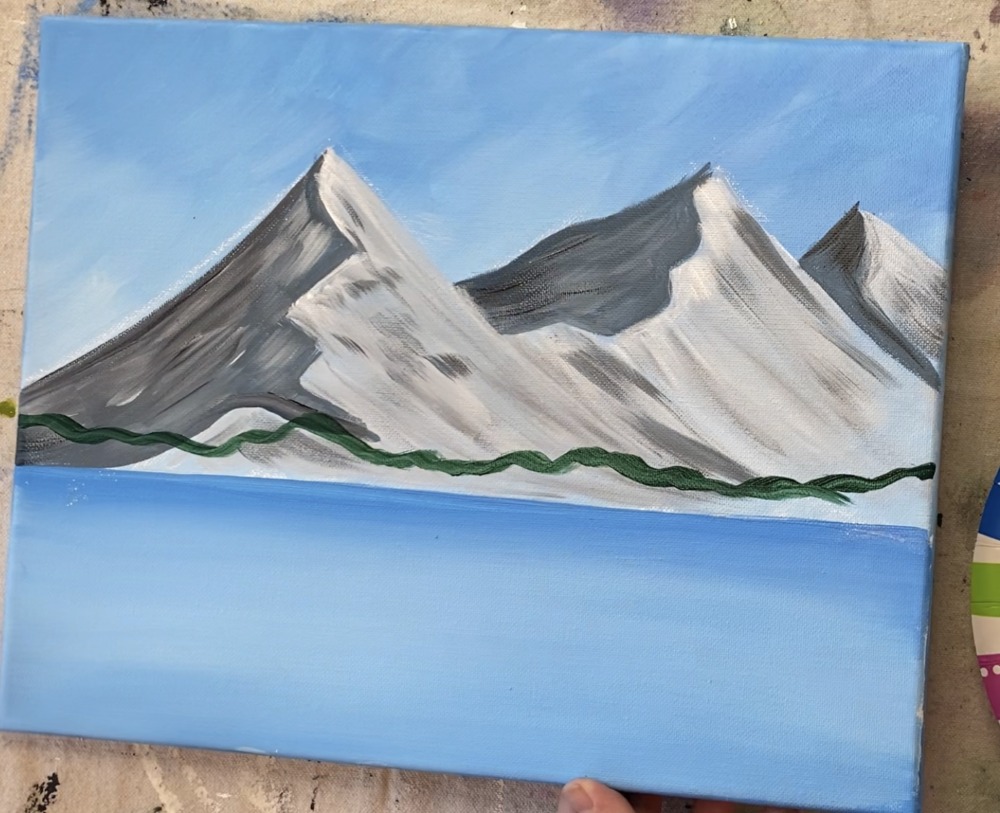
Then fill it in solid with the green using short choppy strokes.

Then do a similar bumpy land area at the bottom of your canvas with burnt umber. My land slightly dips down in the middle and then up on the left and right.
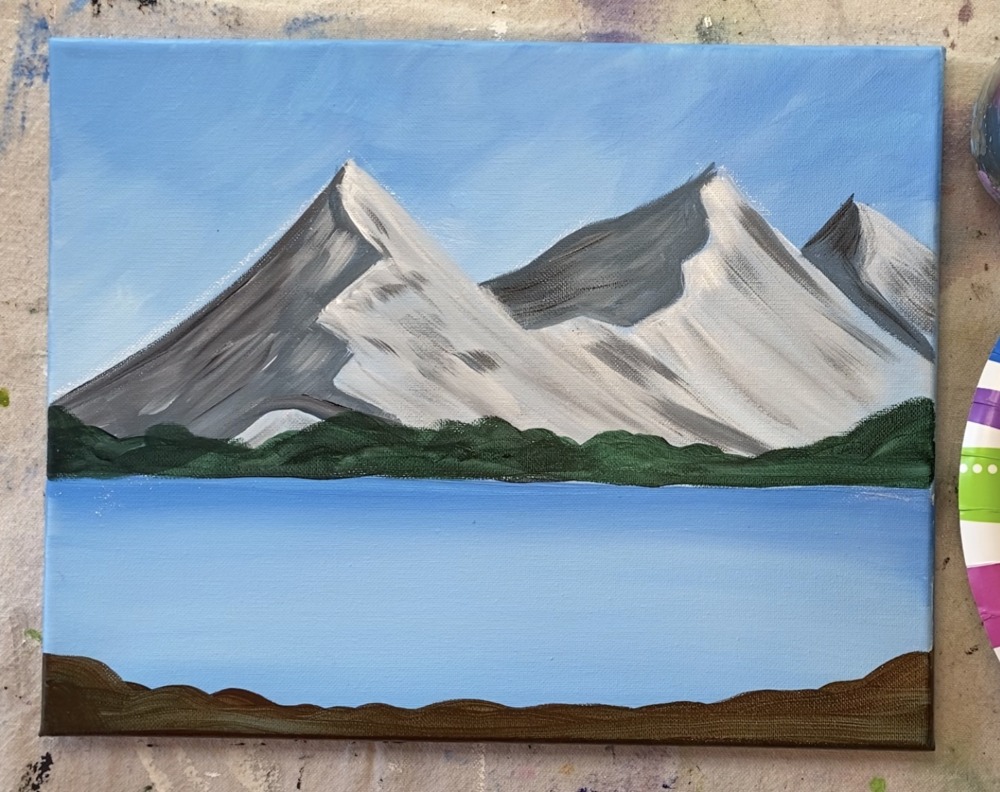
Next load some light olive green on your palette. Load the tip of your brush in the light olive green (or wipe off the brush if there is too much paint on it). Paint short choppy strokes of this light olive green.
Then load your palette with some cadmium yellow medium hue and cadmium red medium hue (red and yellow). Paint the same short choppy strokes with the red and yellow (ideally blending with the brown). The land is very abstract in this painting.
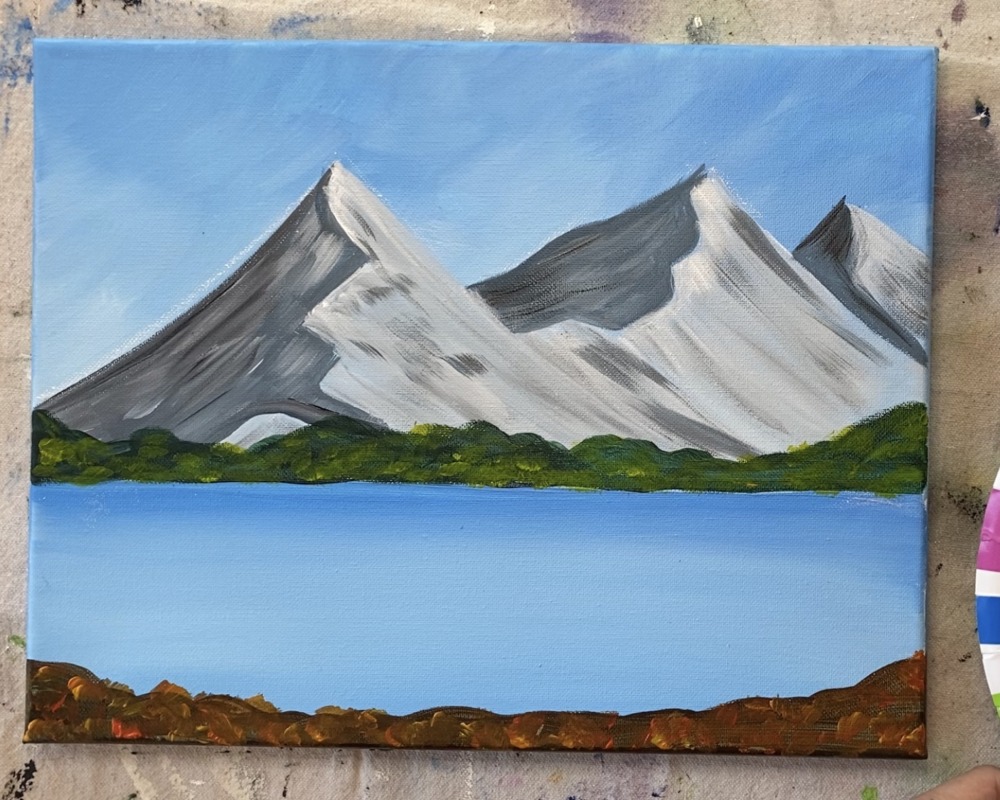
7. Paint water reflection
The reflection was done using the 12 bright brush and “dry brushing” deep green permanent and light olive green. I started with the deep green permanent. Load only a tiny bit of that green on your brush and then wipe it with a paper towel. Drag your stroke vertically down along the horizon line.
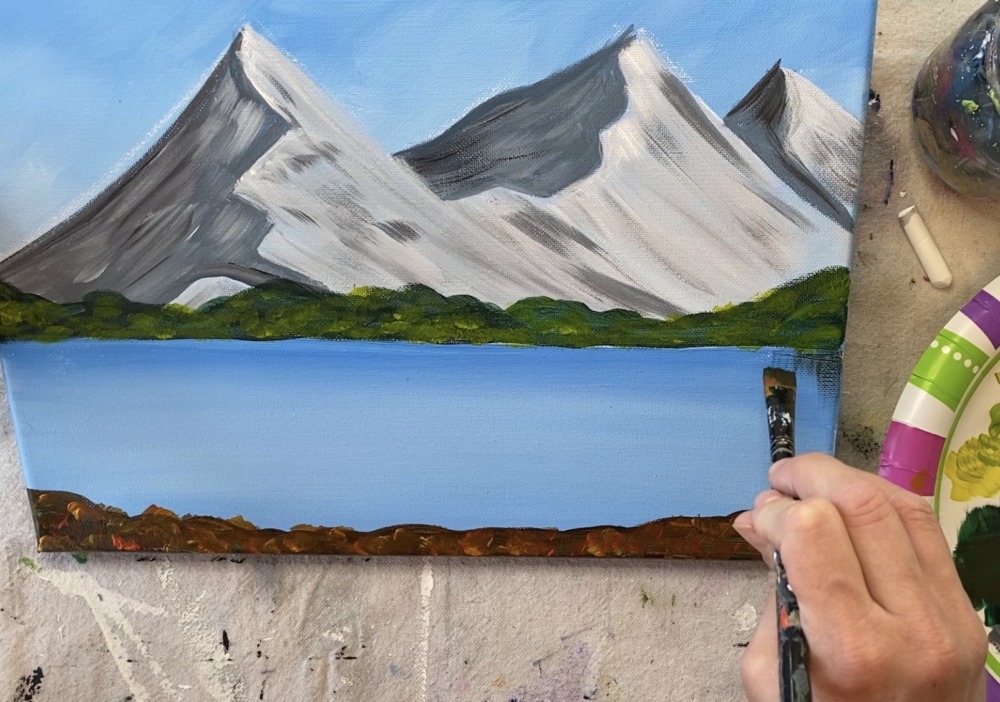
Then repeat with the light olive green. Remember, this is dry brush style so the paint should show up very dry and transparent. Go down to almost the middle area of the water, although you can vary how far you go down.
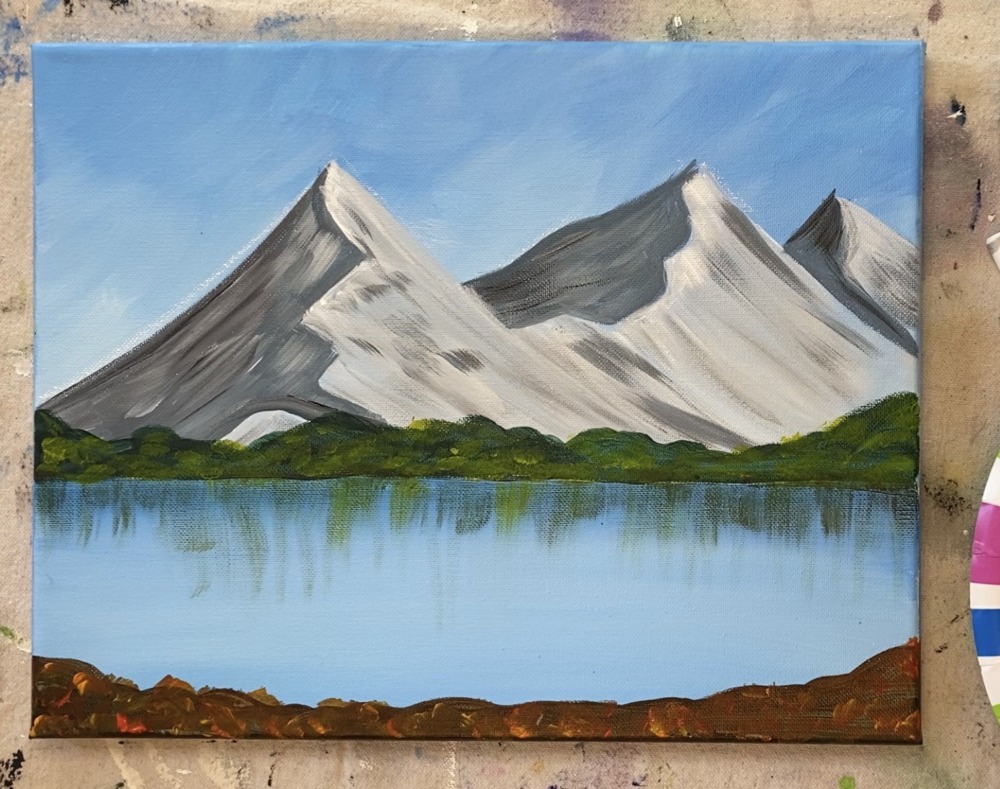
Next do the white horizontal lines. This time use a tiny 0 Round brush and titanium white. Since your green reflection was done dry brush style, it should dry very fast. If it isn’t you can use a blow dryer at this point.
Paint horizontal lines that overlap the green reflection. Make your horizontal lines closer together way in the distance and further apart and wider closer to the bottom of the canvas.

Then I decided to add a “rocky area” in the lower right portion of the painting. I double loaded my 12 bright brush with black and white. Then I did the short choppy strokes. If you look closely you can see the area in the lower right as a dark gray color. This is where the pine trees will be situated later on.
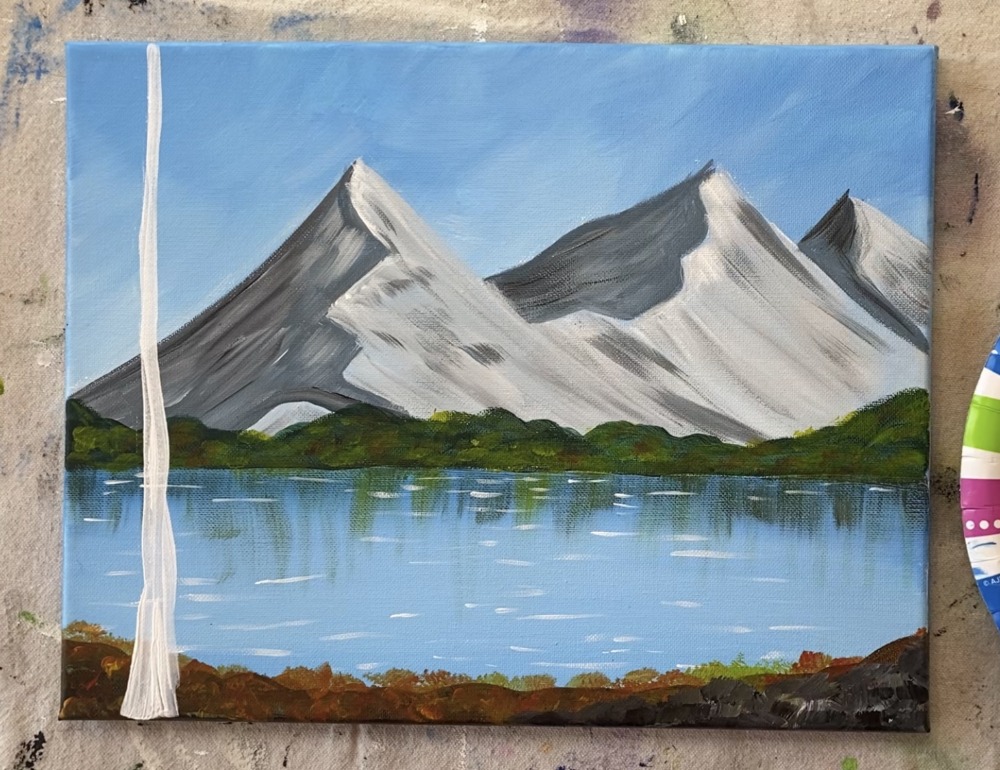
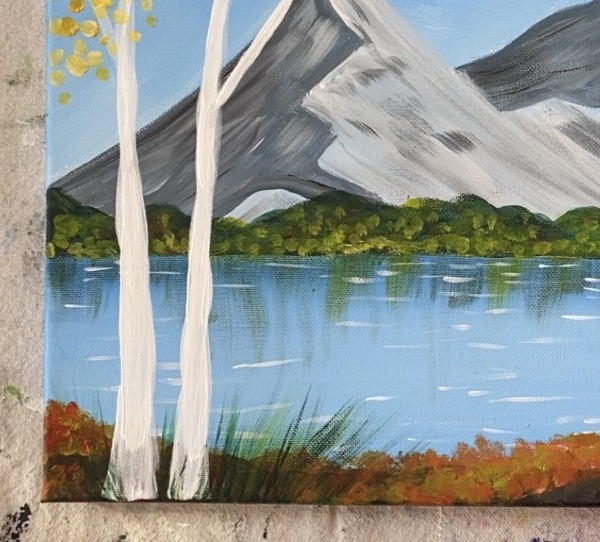
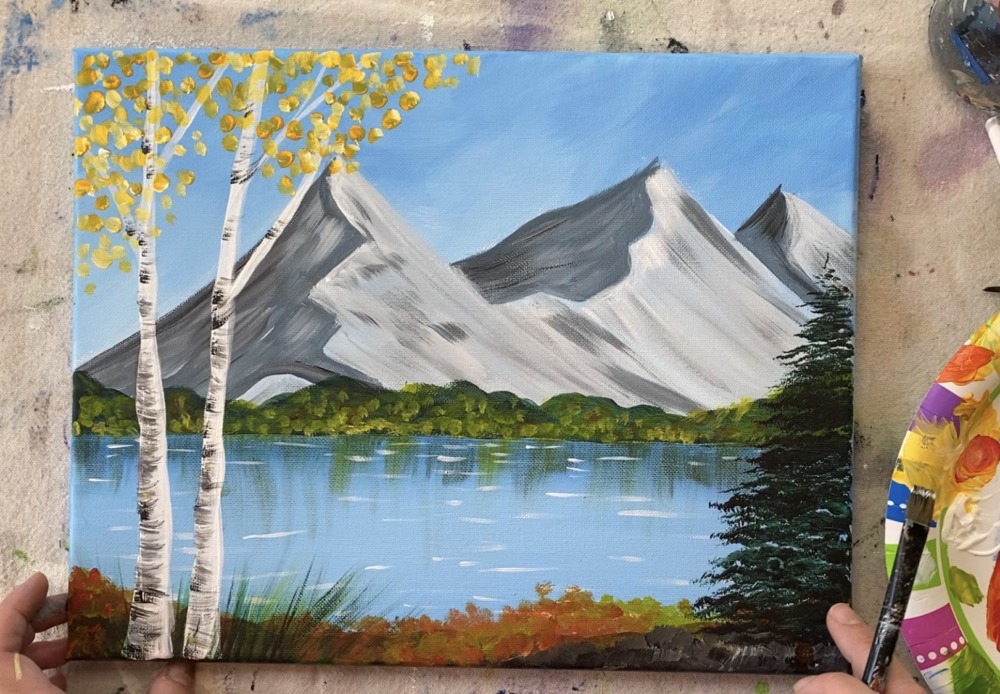
8. Paint The Aspen Trees
This was done with the 12 bright brush. Use titanium white. Start at the bottom with a slightly wider base and make your line get thinner as it approaches the top of the canvas. Make your line look a little wobbly and natural looking. Tip: you may have to go over your titanium white with a second coat to make sure it is absolutely opaque.
Then paint another tree trunk next to it but make it look slightly different. To do the branches, turn your 12 bright brush on its side and use just the tip of your brush to paint the diagonal lines. These should be much thinner than the tree trunk.
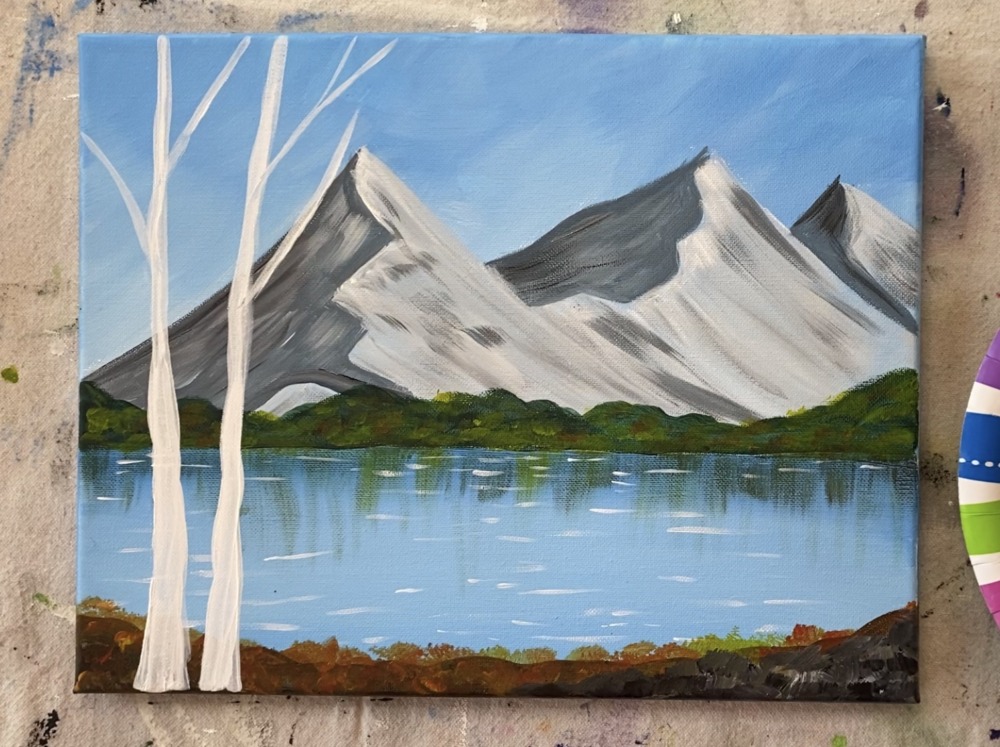
Next switch to your 4 round brush and load some fresh cadmium yellow medium onto your palette. Use the tip of your brush to paint dots on the branches to resemble leaves. These should be much thicker paint strokes to resemble the texture of the leaves.
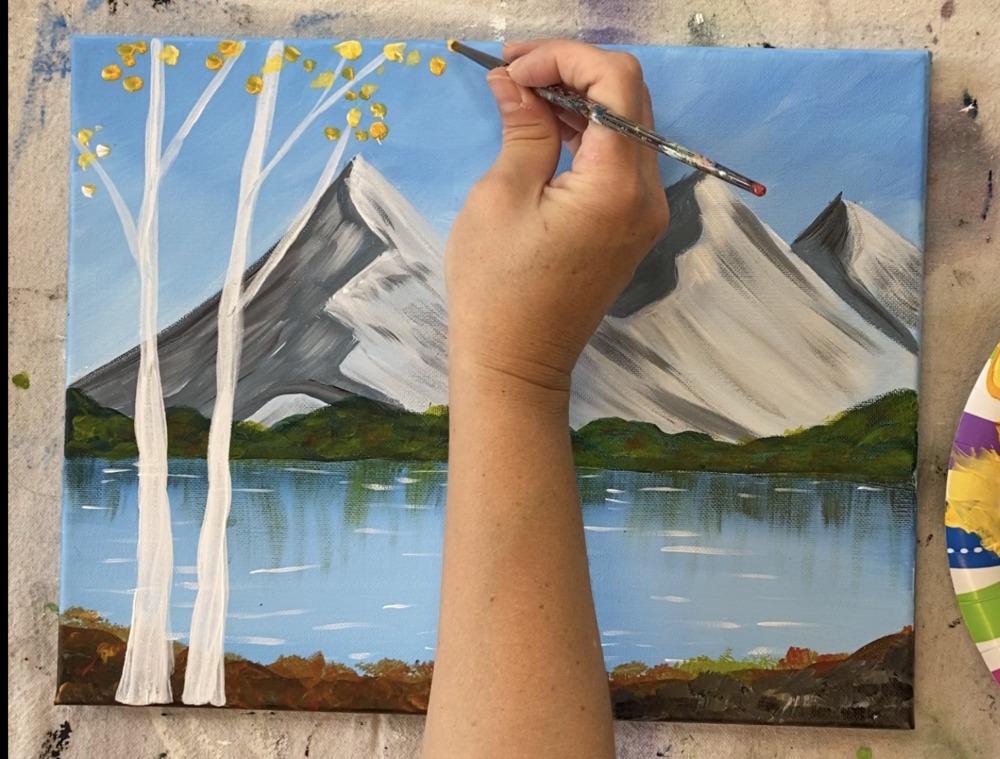
You can also double load your round brush in both the yellow and the white. This creates brighter looking leaves and some nice color variation of the light hitting the leaves in different ways.
The white trunks will need to dry before painting the black marks.
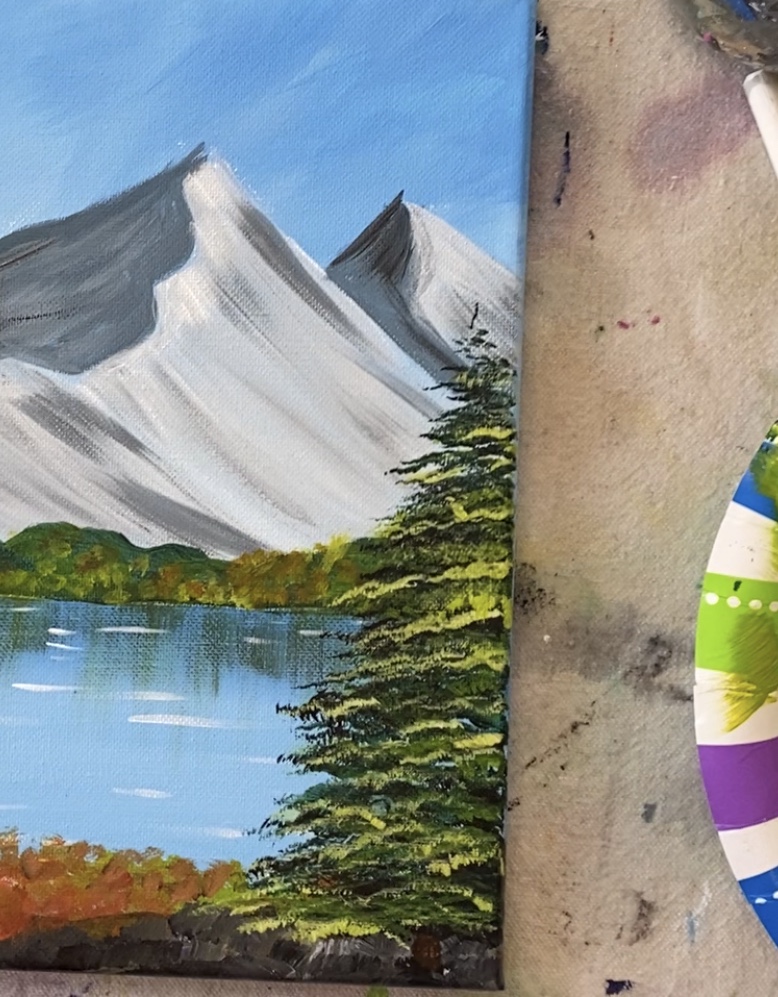
9. Paint the pine trees
Now it’s time to paint some happy trees! If you want to practice your fan brush strokes, you can check out my “Fan Brush Trees” and “How To Paint Christmas Trees” tutorials!
First mix deep green permanent with a little mars black on your palette to make a very dark green shade. Then load your fan brush with that dark green shade. 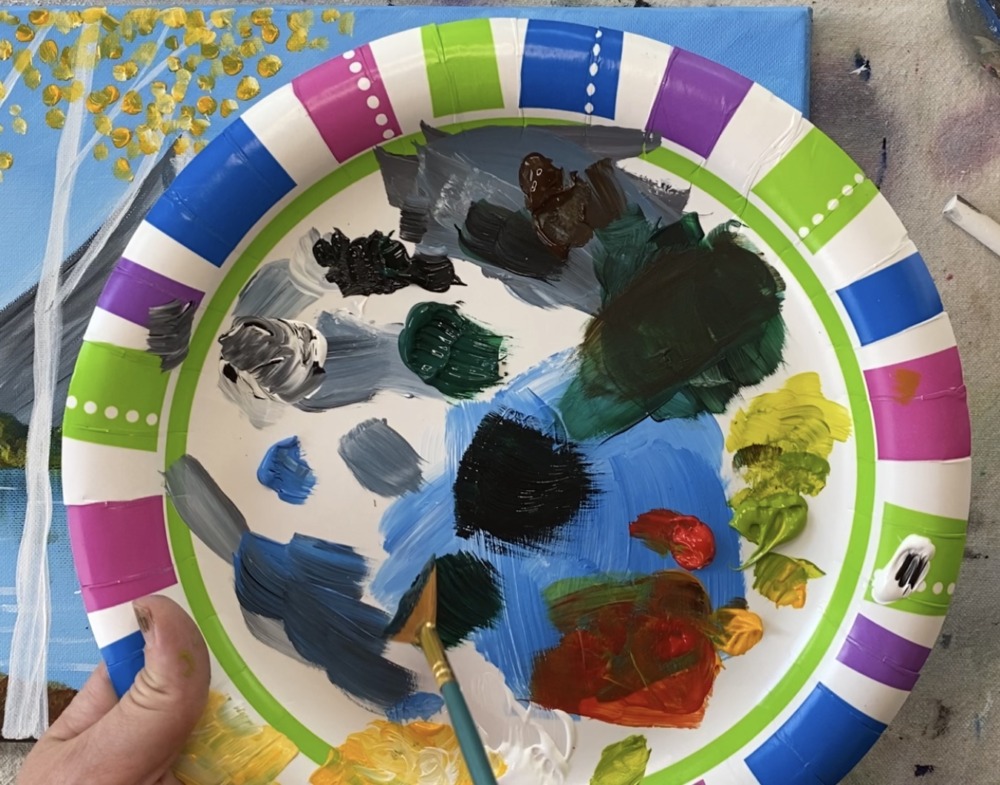
Start at the top of your tree and make little marks. Allow your marks to get wider as you work your way down.
Stamp just the tip of your brush working in a zig zag direction going left to right.
The widest part of the tree is at the bottom. Then repeat to make your tree more bushier. Just repeat the process until your tree is nice and full. If you want, you can add some variation in color by adding a bit more black or deep green permanent. We will paint a lighter highlight on the tree later.

Also if you look closely, I did a little tree trunk with burnt umber. I did that with a round brush.
10. Paint the Grass and the Black Marks on the Aspen Tree
To do the grass, either use your fan brush, round brush or even your tiny round brush. I used my fan brush for this. Load it with deep green permanent and then drag the brush up.
You can turn the brush on its side too. Create grass just at the base of the aspen trees.
To do the black marks, make sure your white is nice and dry on the aspen trees. Then load your 12 bright brush in mars black and then wipe it off. Use the tip of your brush to drag strokes from left to right dry brush style. Your mars should be very light and feathery (not opaque at all).
11. Highlight the dark tree
To get the tree to be lighter, I loaded my brush with just olive green. Then I re-did the same strokes I did with the fan brush. The goal is to not cover all of the dark part of the tree. Then you can mix a little white into the light olive green and make some even lighter branches on the tree.
12. Some final touches
Then I went back on the bottom area of the ground and added brighter strokes! I did this with yellow and a bit of red. Paint sort of circular strokes that resemble leaves on the ground (but not over the dark rocky area). If you want you can do this with a round brush.
I also painted some brighter strokes on the green land way in the distance at the base of the mountain. I did this with some yellow and light olive green. Just a bit to brighten it up!
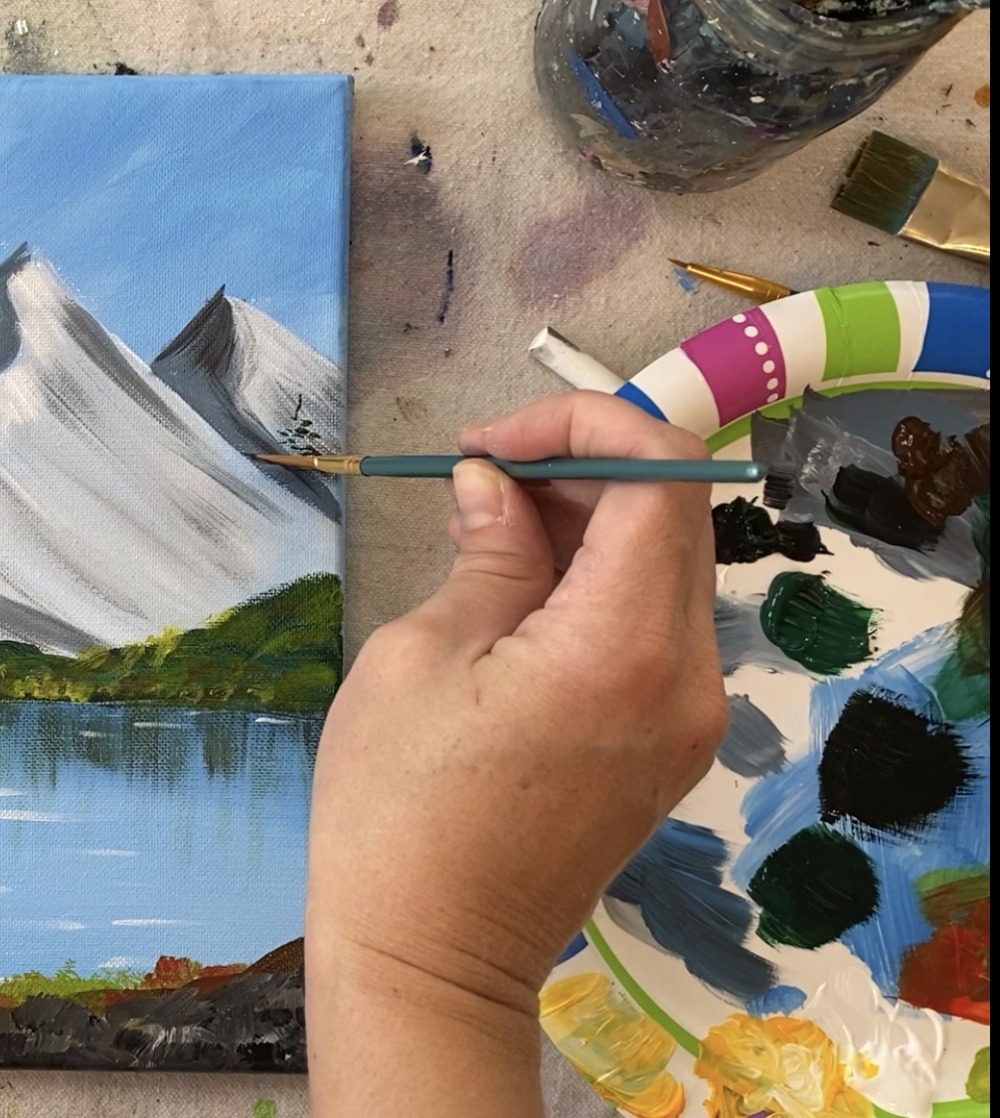
Lastly, I went in and added some more white on my mountain just along the middle division part. I did this with titanium white and my 5/0 spotter brush.
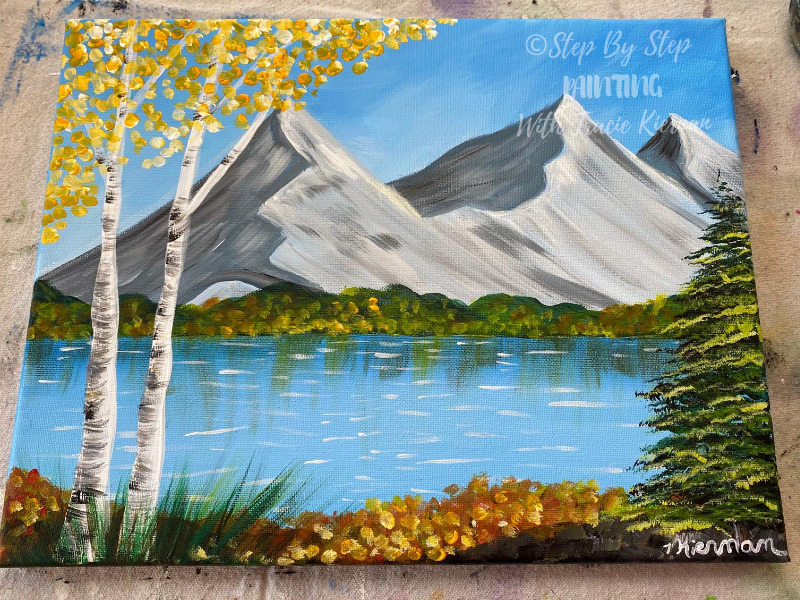
Finished!
Would you like to save this?
Share your art here:


Share This Post
Superb!
Thanks!