
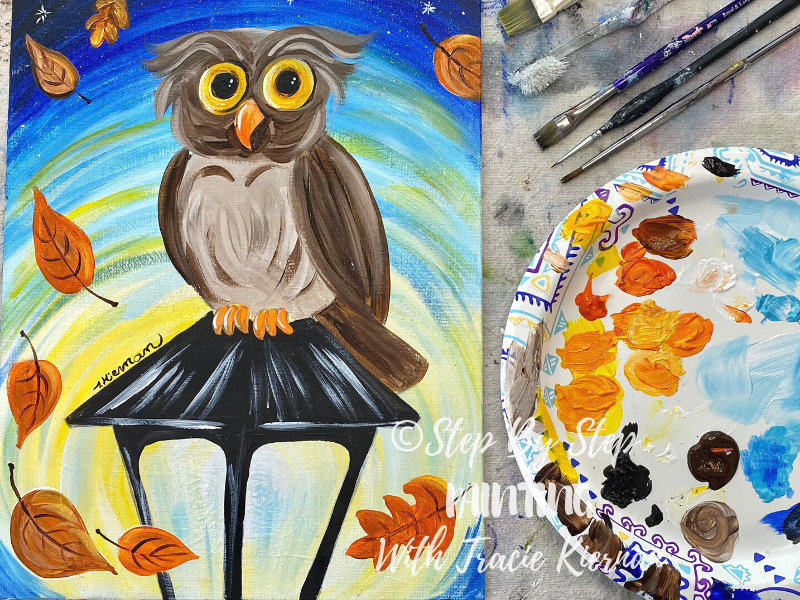
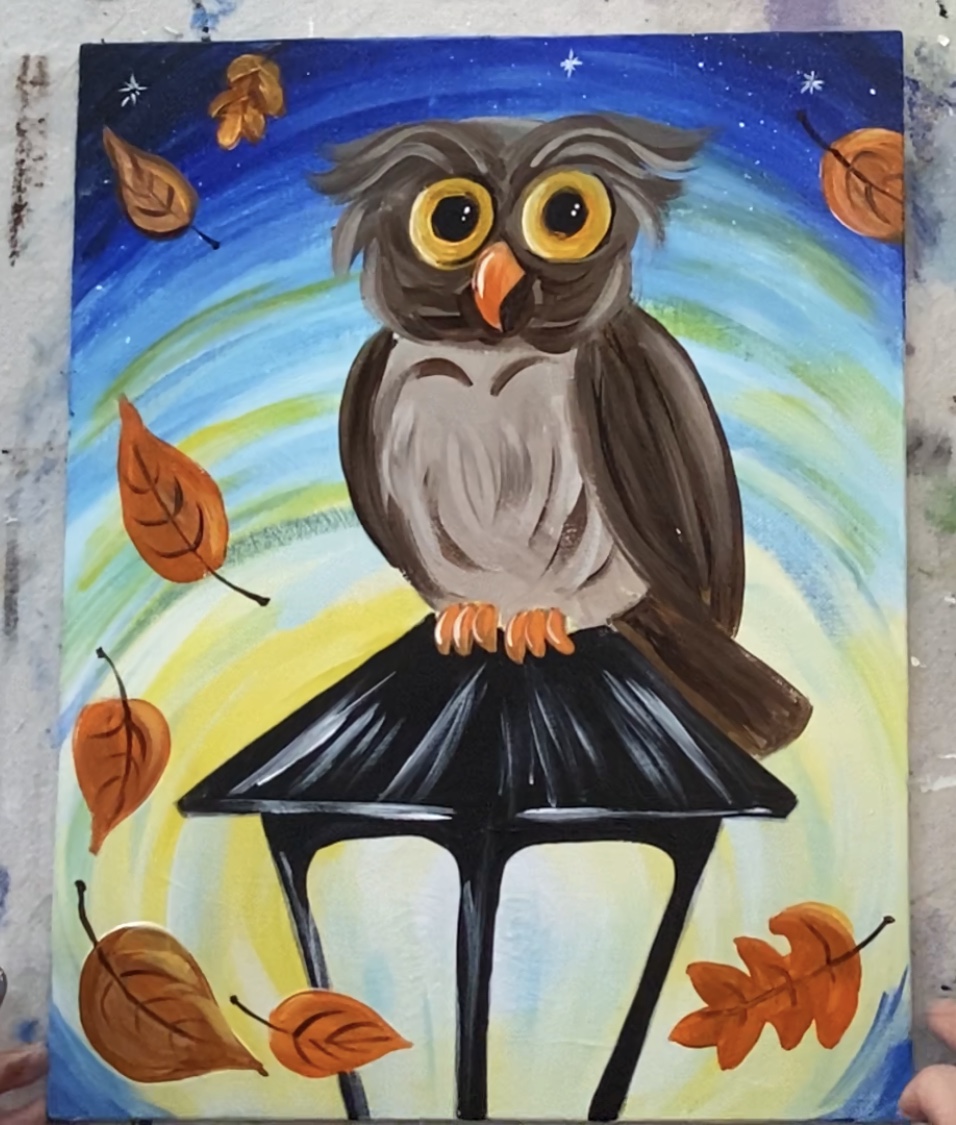
How To Paint “Owl On A Lamppost”
This acrylic tutorial for beginners will guide you through the steps on how to paint a swirly sky around a lamppost with a whimsical owl.
Would you like to save this?
Inspiration for this painting literally came from myself seeing an owl on a lamppost one early morning! Yes, here in Phoenix we get desert owls but they usually are spotted in the early morning hours. This one was on top of a similar style lamppost just chilling!
A lot of times ideas for my next painting pop in my head out of nowhere and unexpected times! The thing about being an artist and producing so many paintings all the time is having to train your mind to think creatively at all times and look for inspiration wherever you go!

Enjoy and happy painting!
This post contains affiliate links.
Materials
How To Paint “Owl on a Lamppost”
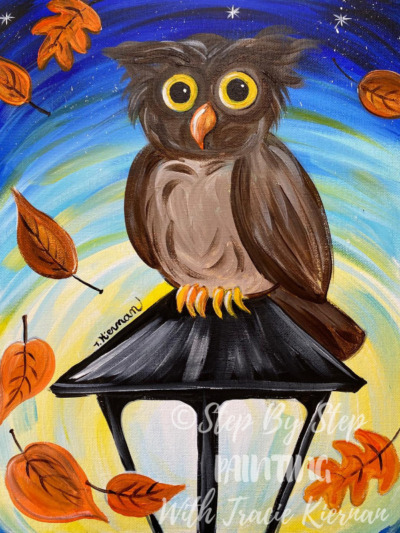
Paint a whimsical brown owl on a lamppost with a swirly sky and fall leaves falling!
Materials
- 11 x 14 Canvas
- Acrylic Paints
- Brushes
- Traceable
- Graphite or Carbon Transfer Paper
- Pencil
- Sharpie (optional)
Colors
- Titanium White
- Mars Black
- Burnt Umber
- Ultramarine Blue
- Light Blue Permanent
- Primary Yellow
- Cadmium Orange Hue
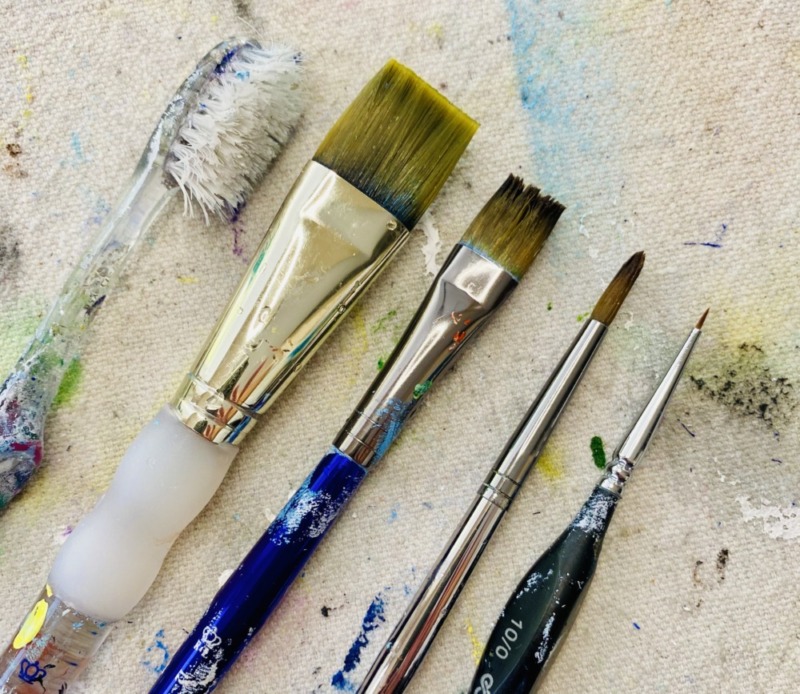
Brushes (scroll down in this post for links to brushes)
- 3/4 Wash
- 12 Bright
- 4 Round
- 5/0 Spotter
- Toothbrush
Color Palette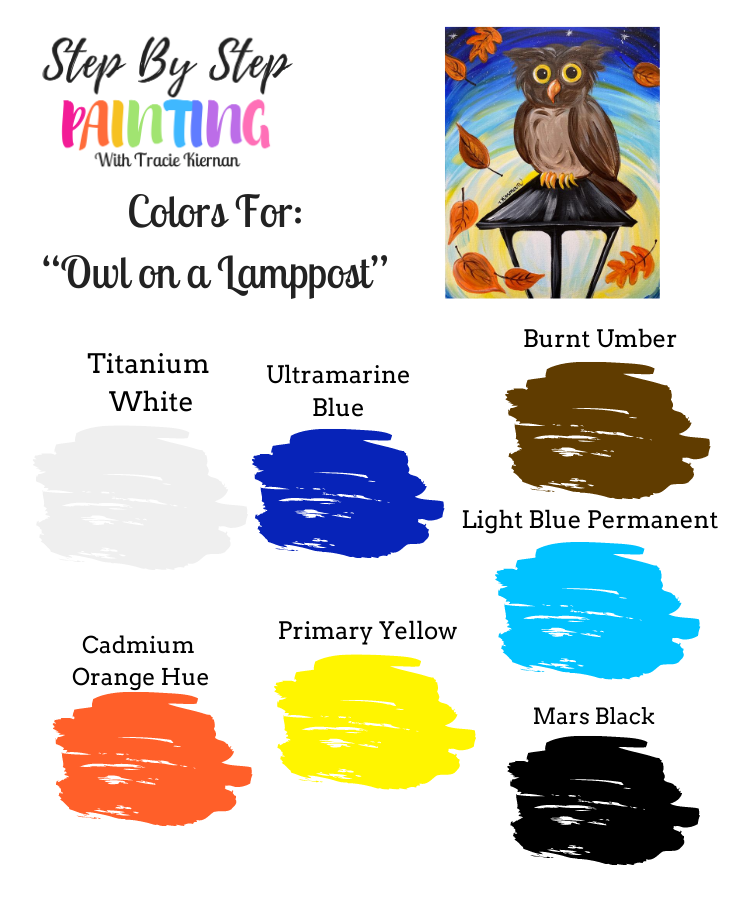

Brushes
Traceable
Click here to get the traceable or go to the traceable library. You will need to print this and tape together. Part of the lamppost on the bottom may need to be cut off. 
Directions At A Glance
Long Version Video
Step By Step Directions
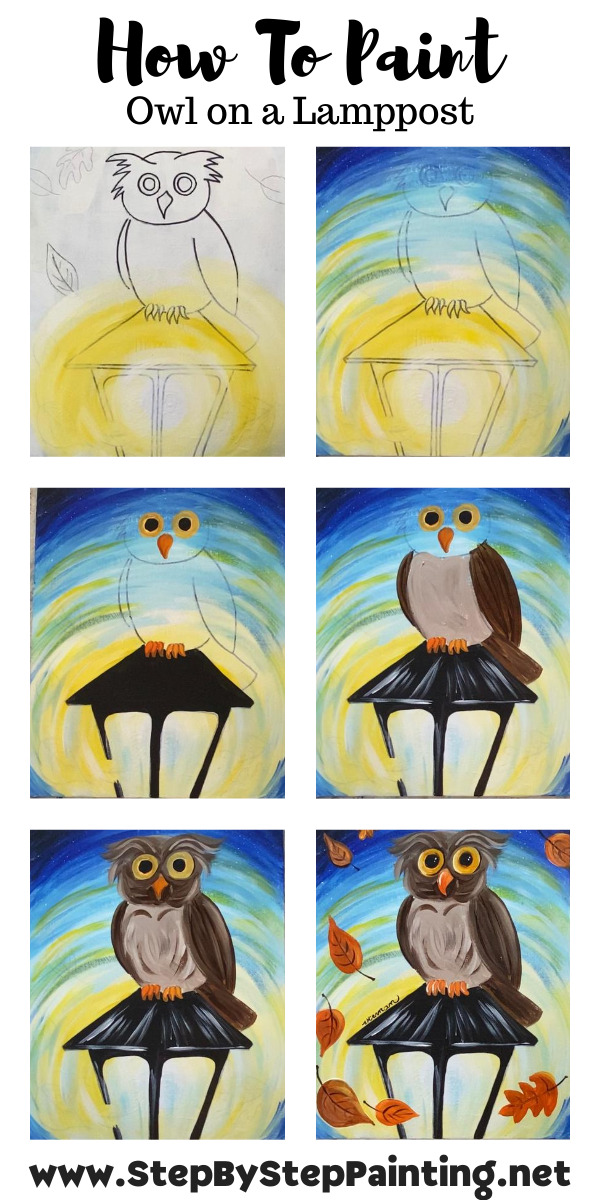
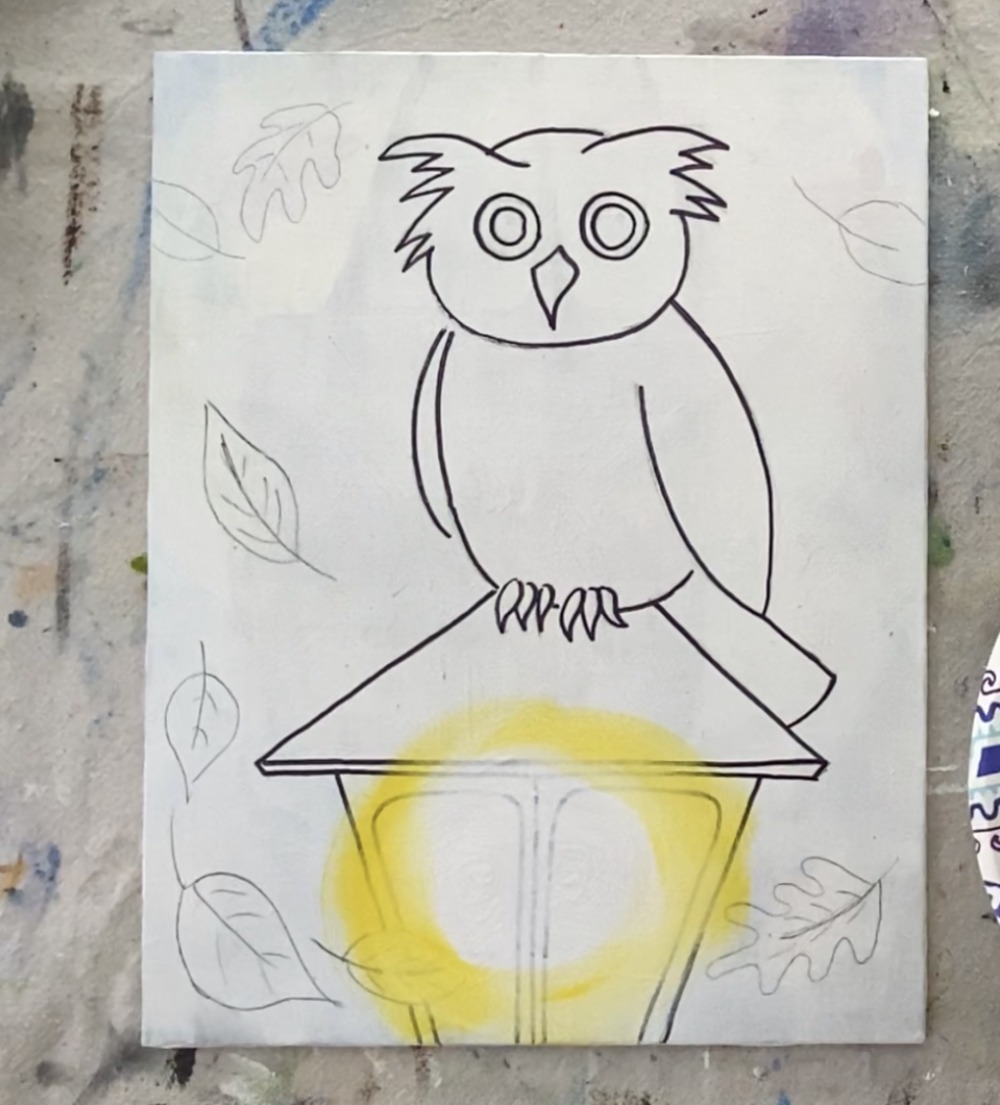
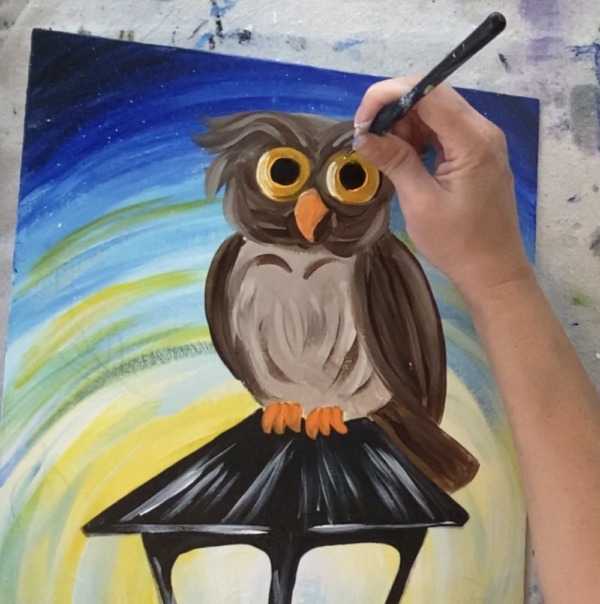
1. Draw the owl & lampost design on the canvas OR use traceable
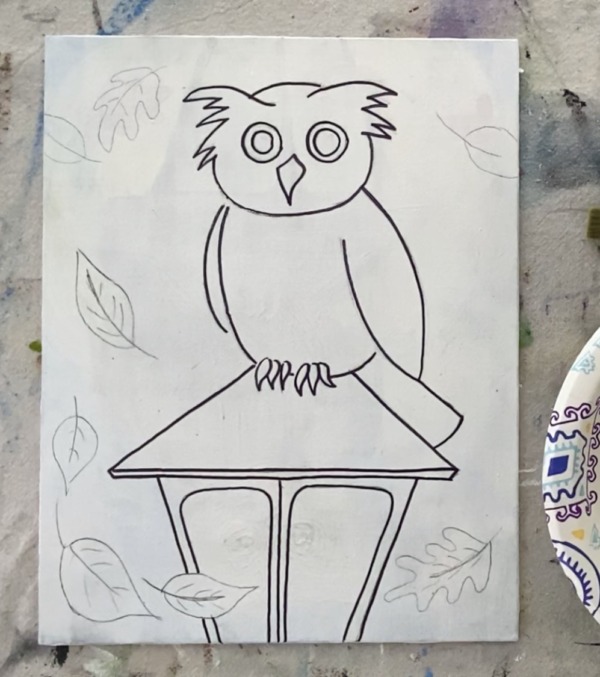
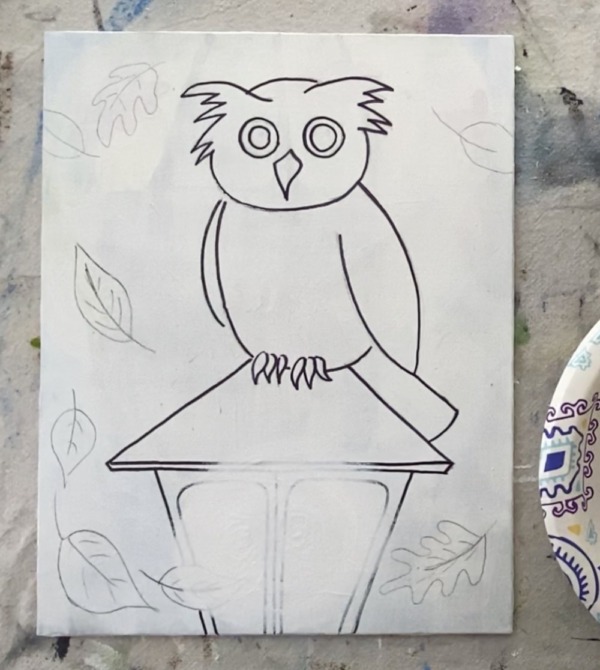
If you are drawing the owl design, lightly draw with pencil. I drew my owl on paper and then transferred it to the canvas. You can get the traceable for this here. This PDF is optimized to fit an 11 x 14 canvas if you cut on the dotted lines and tape together.
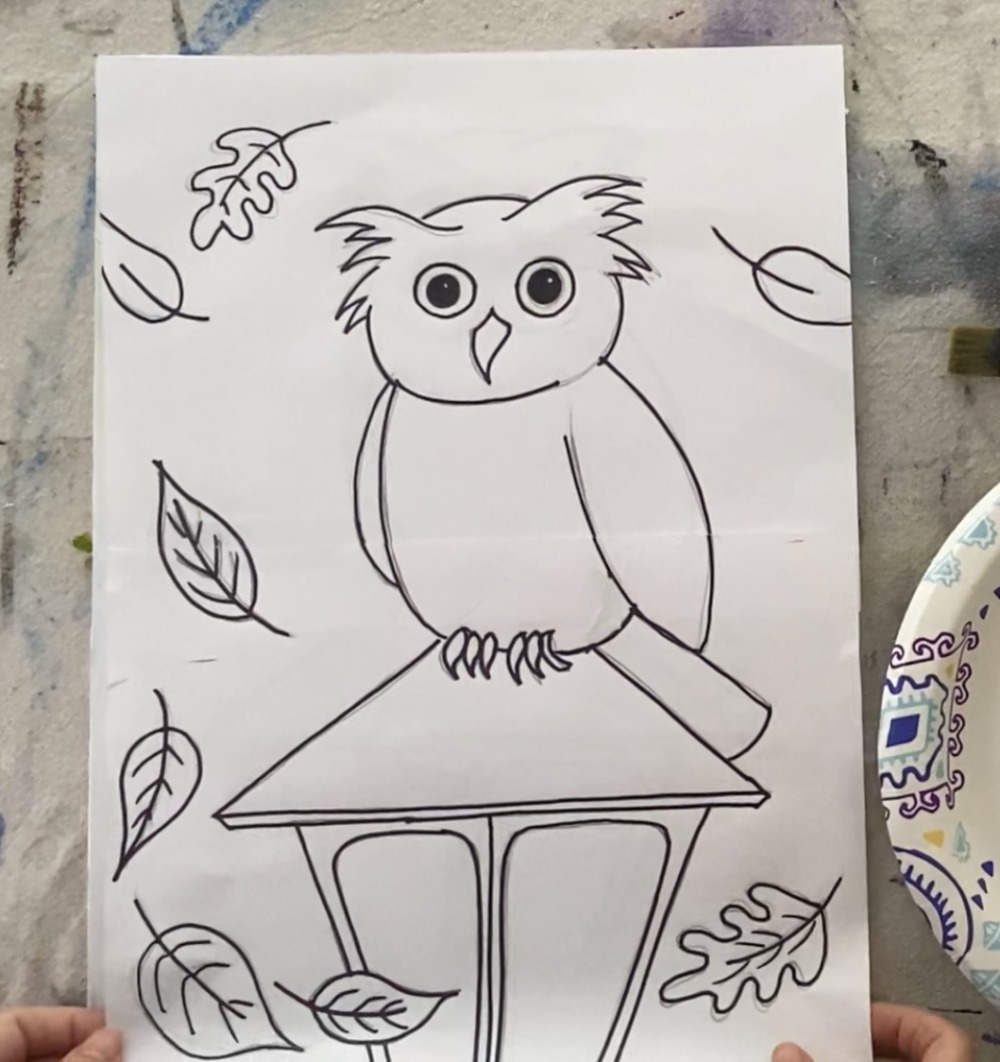
If you are using the traceable, use a sheet of graphite paper (or color on the back) and trace the owl design. Then I recommend outlining the design with a sharpie (as pictured below). This helps you to see the design when we paint the background over everything. In the picture below, I did not sharpie the leaves, however, you may choose to do that too.
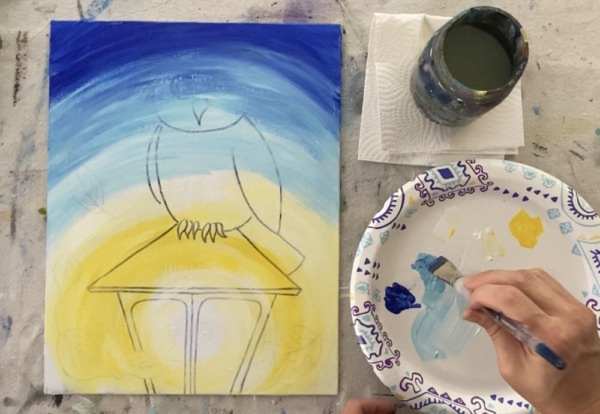
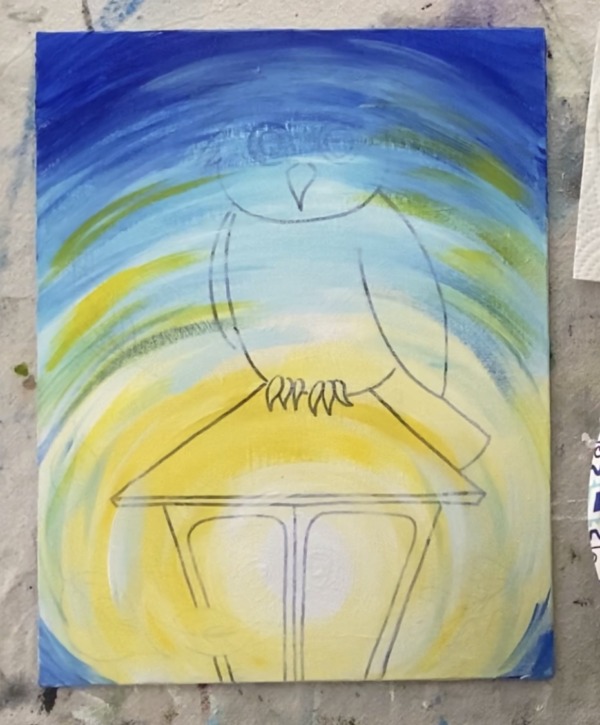
2. Paint the white and yellow party of the swirly sky
Use titanium white and primary yellow as well as your 3/4” wash brush for this first painting step. Load your brush in the water and pat dry. Start inside the lamppost about where the lightbulb would be and paint a small-medium white circle with just the white.
Then continue to paint in a circular motion making that circle larger. You will be painting over the lines of the lamppost.
Then, without rinsing your brush, grab a bit of yellow. (If your brush is overloaded you may need to wipe off some paint with a paper towel). Gradually blend in a small amount of primary yellow so your circle gets larger and turns into a light yellow color.
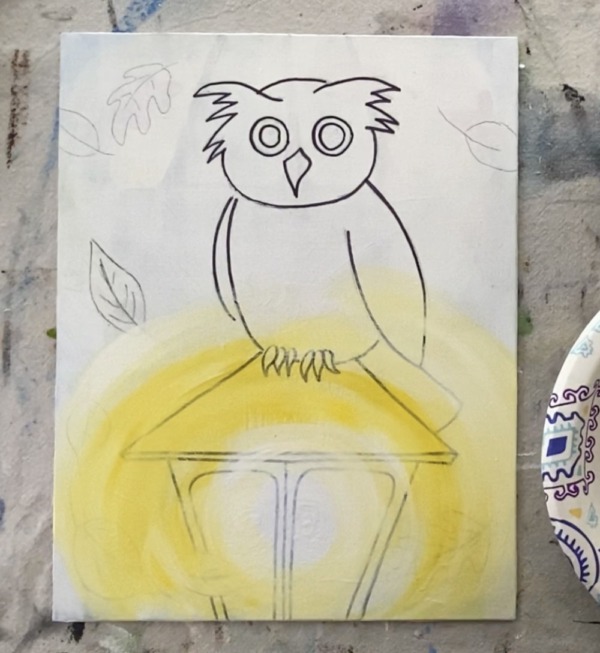
Essentially you want to your white to be pure and bright in the middle and then gradually turn to yellow. Continue to add more yellow as you continue to paint more circular strokes outwards.
Then add more white to the outer part of that circle. It is okay if you see streaky lines that are not blended all the way! In fact, I was going for that look! I got to about the halfway point of the canvas and stopped.
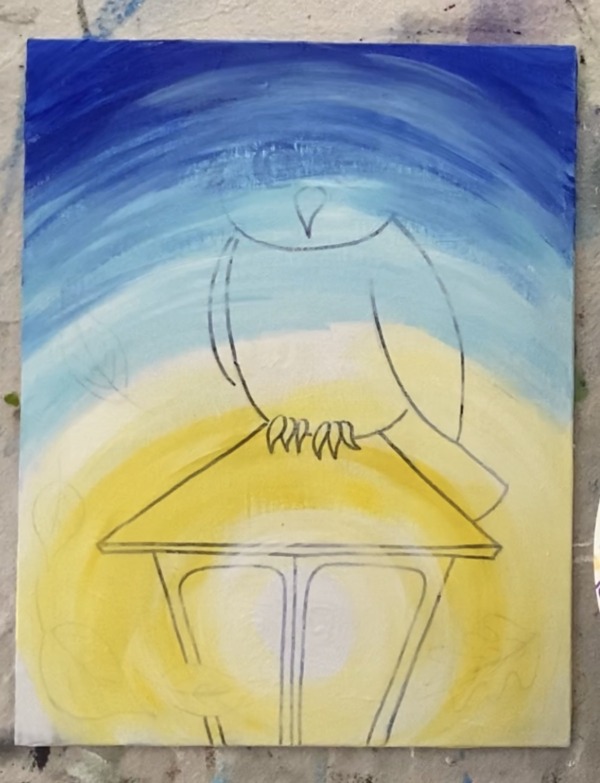
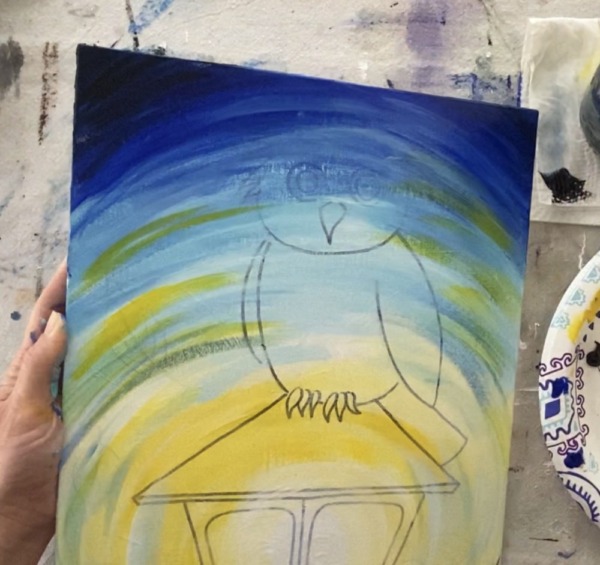
3. Paint the light blue and dark blue part of the sky
Completely rinse your brush! This sky is tricky because if we blend yellow and blue it would turn to green and we don’t really want green in the sky! To avoid this, we are going to try our best not to let the light blue touch the yellow for now.
Start by mixing a little light blue with titanium white to make it lighter. Paint this part of the sky going in the same circular formation but do not go over any of the yellow. Add some streaks of titanium white in there too!
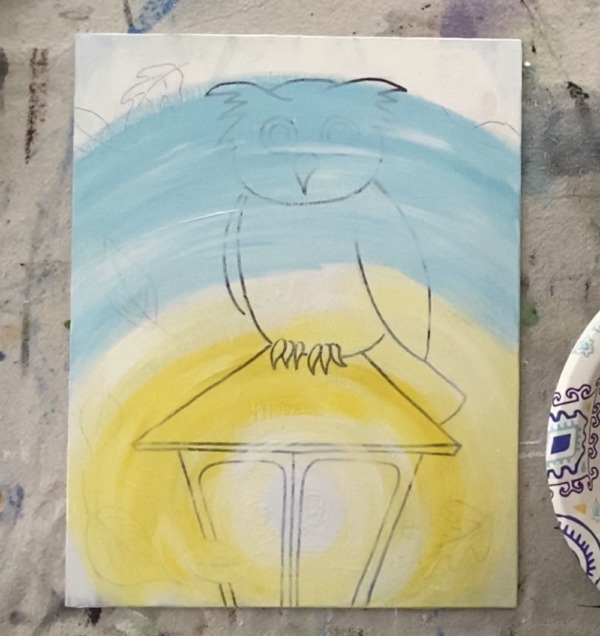
Paint almost all the way up the canvas.
Then wipe off excess paint off your brush but don’t rinse. Add a little ultramarine blue to your brush and blend that into the sky all they way to the top. The top part of the canvas is the darker blue and you want your light blue to blend to it.
To blend, simply paint over your light blue so the dark and light blue colors mix on the canvas. You want the area where the light and dark blues meet to blend a little but you do not have to blend them all the way.
4. Add some light blue streaks over the yellow
To do this step, you want to make sure your yellow is dry. Either take a break or blow dry it. We are going to trick our eyes into thinking the yellow is blending to the blue but not actually blending it!
On your palette, mix some titanium white and light blue permanent to make a light blue (about 2 parts white and 1 part light blue).
Then lightly add a few circular strokes of this light blue over the yellow. Just a few strokes! The point is to not cover the yellow but to add a little bit of light blue to make it look like the yellow is blending with the blue.
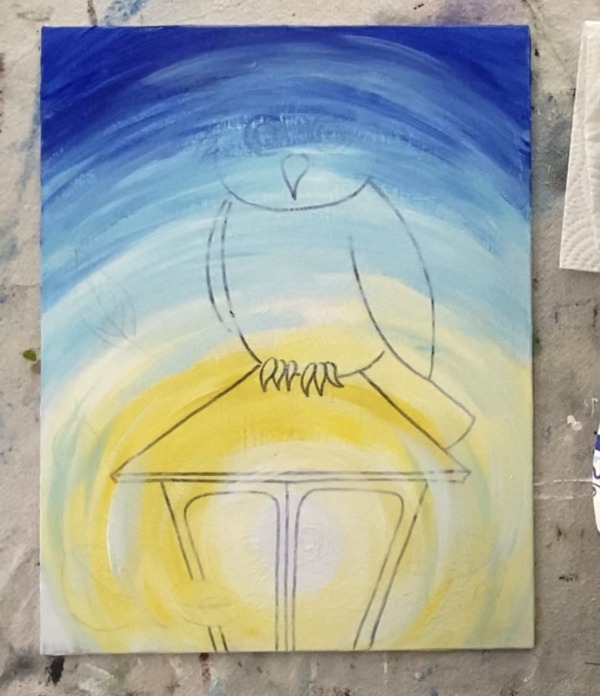
It may look slightly green but because the yellow is dry, it is not actually mixing with the yellow. Add a few streaks of just white in there as well.
5. Add some yellow strokes over the blue
Then do the same thing to the blue area that you did to the yellow area. Rinse your brush off completely and add some yellow mixed with titanium white to your brush. (About 2 parts yellow, 1 part white).
Then add a few streaks of that yellow over the blue section. This will create the impression that the yellow is blending outwards into the blue. You can turn your brush to horizontal mode to get a thinner stroke.
Also note, at the bottom left and right corners I painted some ultramarine blue and light blue permanent in there.
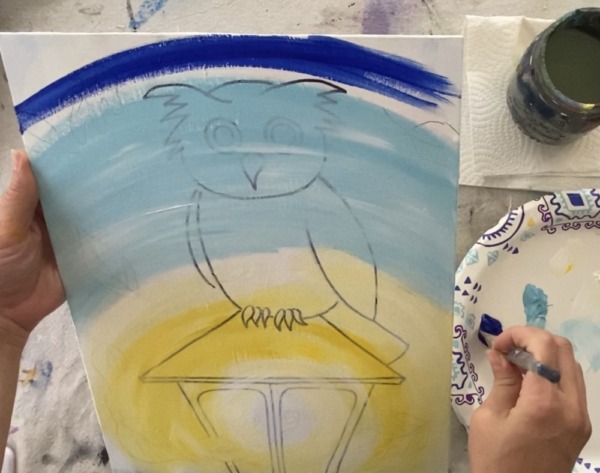
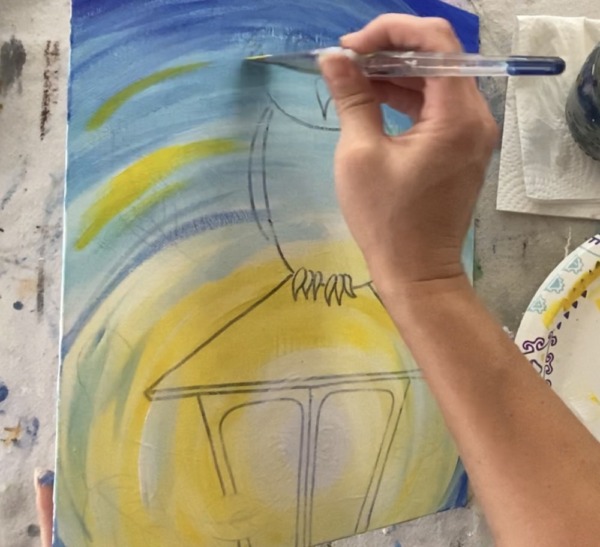
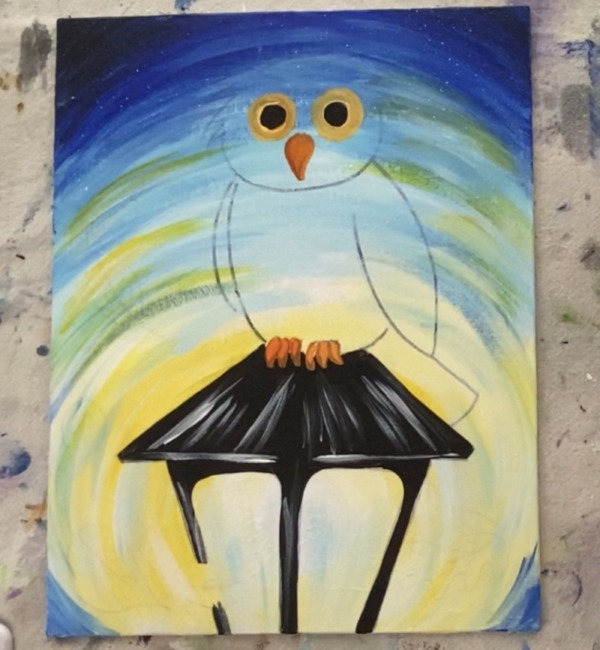
6. Add some black way up at the top
To create the ultimate impression that the sky is at night at the very top, blend a little mars black into the ultramarine blue.
To do this, completely rinse your brush. Then add a TINY bit of mars black into ultramarine blue. (About 1 part black to 4 parts ultramarine blue). You only need a tiny bit of mars black because it is a very strong color and spreads fast.
Gently paint the top corners and top edge of the painting. To help it blend with the ultramarine blue, you can add more ultramarine blue in that area and blend it. Rinse off the black on your brush if needed to help blend.
Tip: You do not have to blend everything all the way! Sometimes it looks best when things are left unblended.
7. Paint the stars
I did splatter stars for this step! Use a tooth brush and add some titanium white to it. To get the best results, water down the white slightly.
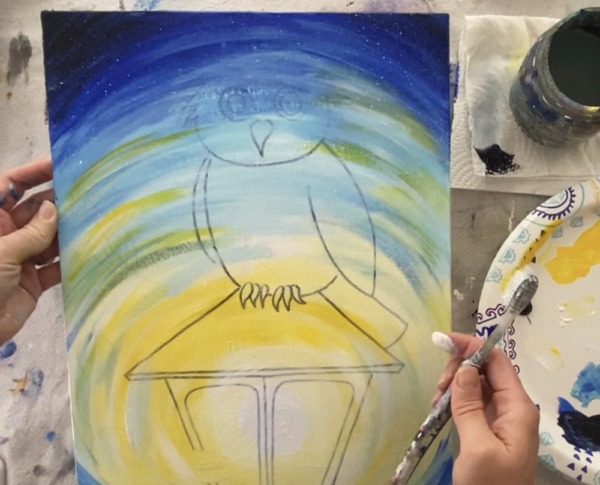
Then flick stars all over! I made sure they appeared in the dark area but it also looks nice if they appear all over.
8. Paint the lamppost
This step is super easy! You are simply painting the lamppost shape in mars black. Use a combination of your 4 round brush and 12 bright brush. The round brush is to help you get into the smaller areas and curves and the 12 bright is for the larger areas. Do not paint over the glass.
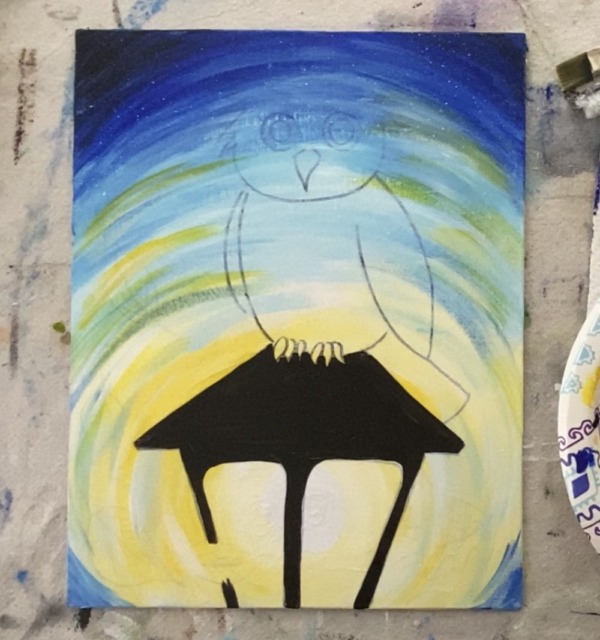
Tip: to get your black to flow a bit better, add a tiny bit of water to it.
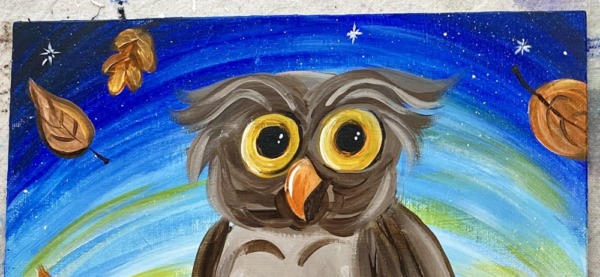
9. Paint the owl eyes, beak and talons
Start in the middle of the owl eyes and paint them mars black using a 4 round brush.
Then paint the outer part of the eyes. For this color, I mixed a combination of white with primary yellow and cadmium orange hue. (About 1 part white, 2 parts yellow and 1 part orange). It will make a light orange color but it may not be opaque and bright. I went over this later with a second coat.
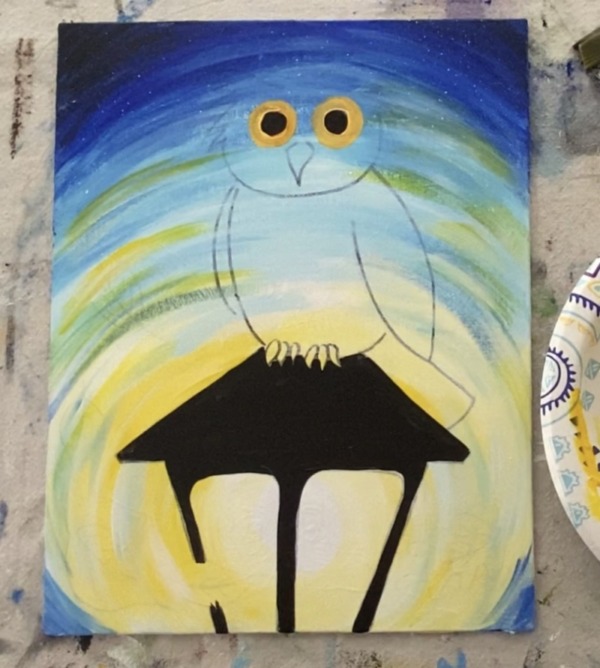
Next paint the talons and the beak orange. Mix a little yellow and white into that orange so it isn’t so strong.
10. Dry brush very very light blue over the glass area of the lantern
I like to use this dry brush effect when painting glass. I did this same technique in my Hydrangea Jar Painting.
Use your 12 bright brush for this step. Load it in white and a tiny bit of light blue permanent. Wipe off the paint so there is only a little on your brush.
Then drag your brush from the top down to create a very dry stroke resembling glass. 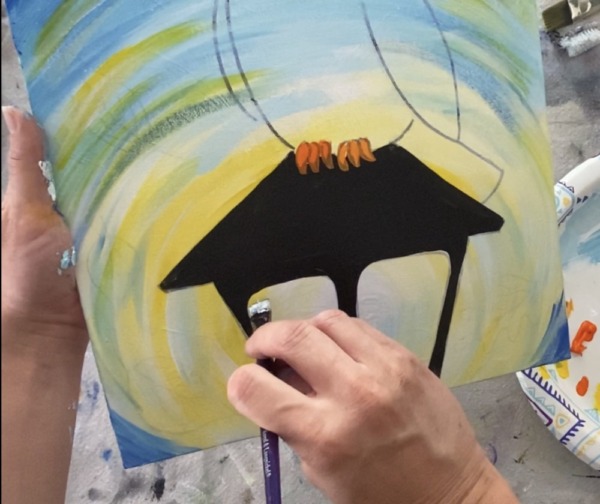
Just a few streaks is all you need! You don’t want to completely cover all of the light. Just a few streaks of blue and white to make it resemble glass. It will look very subtle.
11. Paint the highlights on the lamppost
Use your 4 round brush and titanium white for this step. Load a small amount of white on the tip of your brush. Paint some expressive diagonal lines on the lamppost and outline the bottom line of the trapezoid.
Then continue to paint more diagonal lines going in the direction of the angle on each side. These are quick expressive strokes. If your white is too bright, try wiping some off with a paper towel and doing dry brush style.
12. Paint the wings
Load your palette with some burnt umber. Completely rinse and dry your 4 round brush. Then paint the wings. The direction of your strokes should go in the direction of the shape of the wing (so curved).
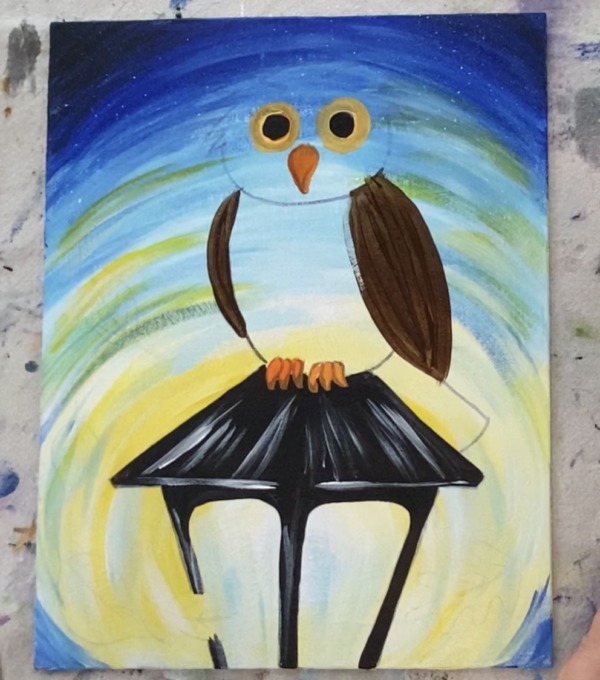
13. Paint the belly area and tail
Next mix about 2 parts white and 1 part brown together to create a light brown. Paint the belly area of the owl a solid coat of this color. Have your strokes contour and go in the shape of the belly area (rounded strokes).
Then paint the tail a solid coat of burnt umber.
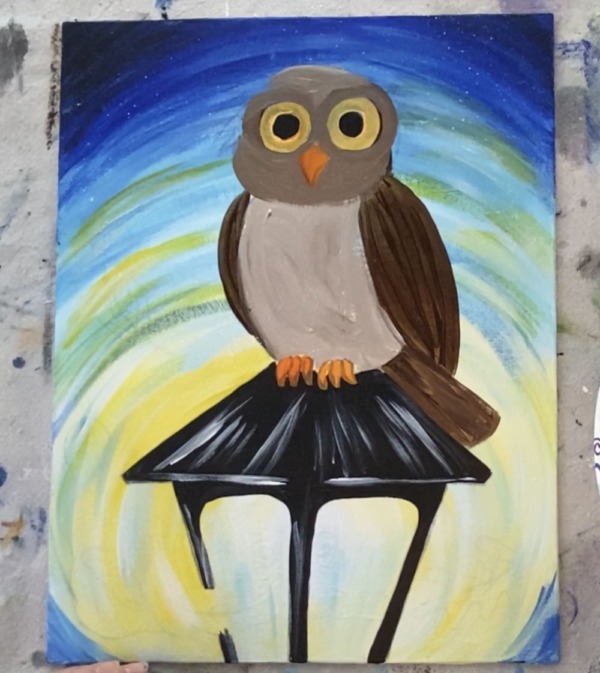
14. Paint the head
This was done with a different tint of brown. It is about 1 part brown to 1 part white (darker than the body but lighter than the wings).
Paint the head. I found it easier to start by painting around the circles of the eyes and contouring around the shape of the beak. 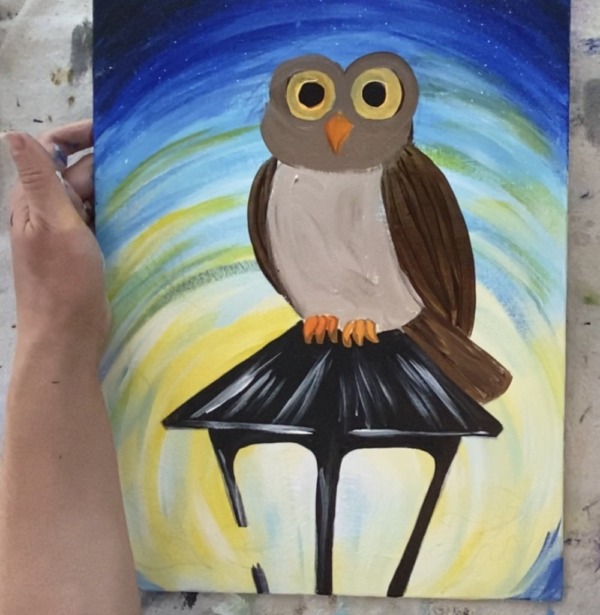
And then the top of his head.
Then for the feathers above the eyes and ear tufts, I used a round brush and some more brown. Paint 3-4 stokes that curve above the eye and go outwards.
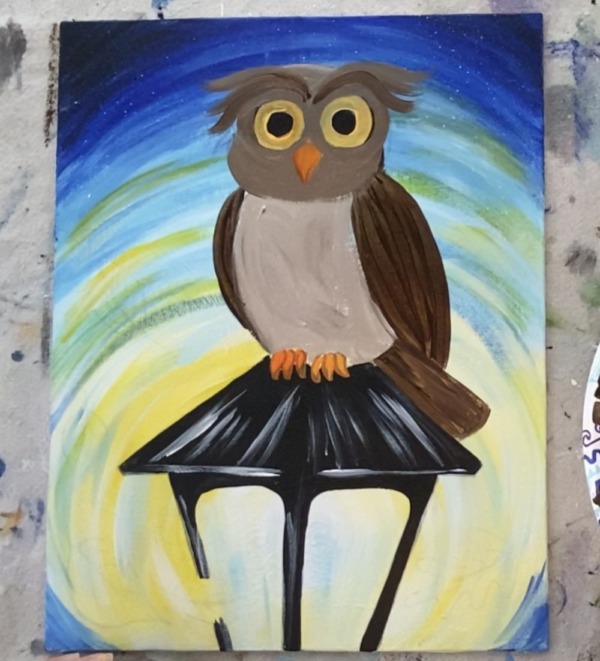
Then paint some stokes with that brown under the eyes. This is my attempt to give him some feather texture on the face!
15. Paint some feature texture on belly and more on face
Next use the same kind of brown you used for the belly. Paint the feathers again above the eyes and some on the sides of the head. Paint some more feather texture on the stomach as well. Just a few curved strokes hear and there!
Then I went back with a lighter brown and added another layer of feather texture! This was done with the same light brown I used for the belly area (2 parts white and 1 part brown). Paint over the feathers that go above the eyes and outwards for the ear tufts. Paint some of that light brown on the face and on the wing.
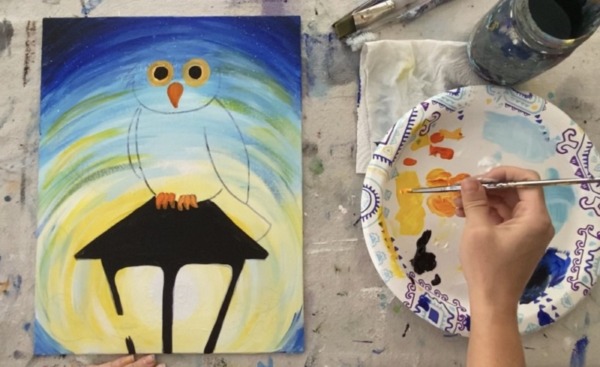
16. Paint Details in Eyes and Beak
Then I painted over the colored part of the eyes and added more color to the beak. This was because the eyes needed a second coat but also some of my brown covered the eyes and beak. Make that same orange-yellow again.
I actually decided to make my eyes bigger here! Also, I added a little bit of white on the left part of the beak so it has a highlight.
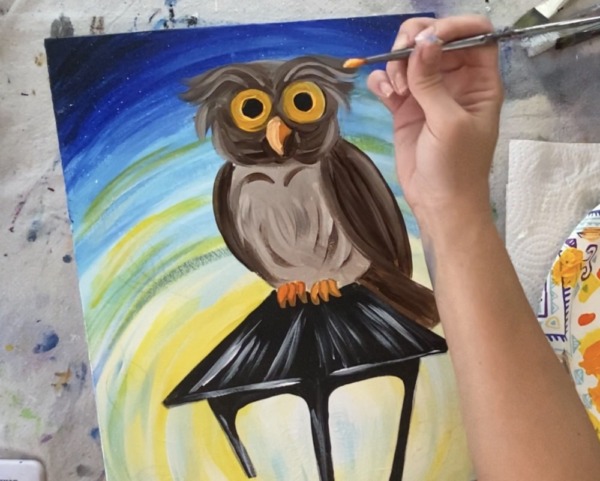
Then do some more details with the eyes! I switched to a 5/0 round brush. Then painted titanium white on the left side of the circles of both of the eyes. Try to blend it back into the yellow (or add some yellow-orange to your brush).
Next paint one or two small dots on the left side of the black part of the eyes. This gives the owl that “bubbly eye” look. Then outline the right side of the outer part of the circle black. 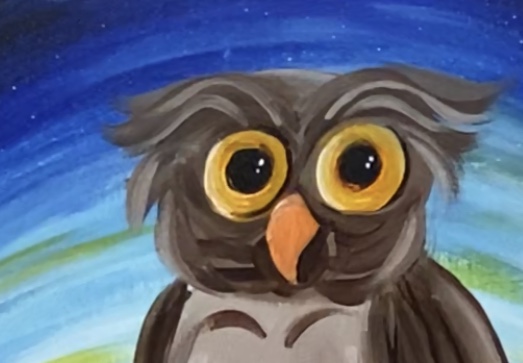
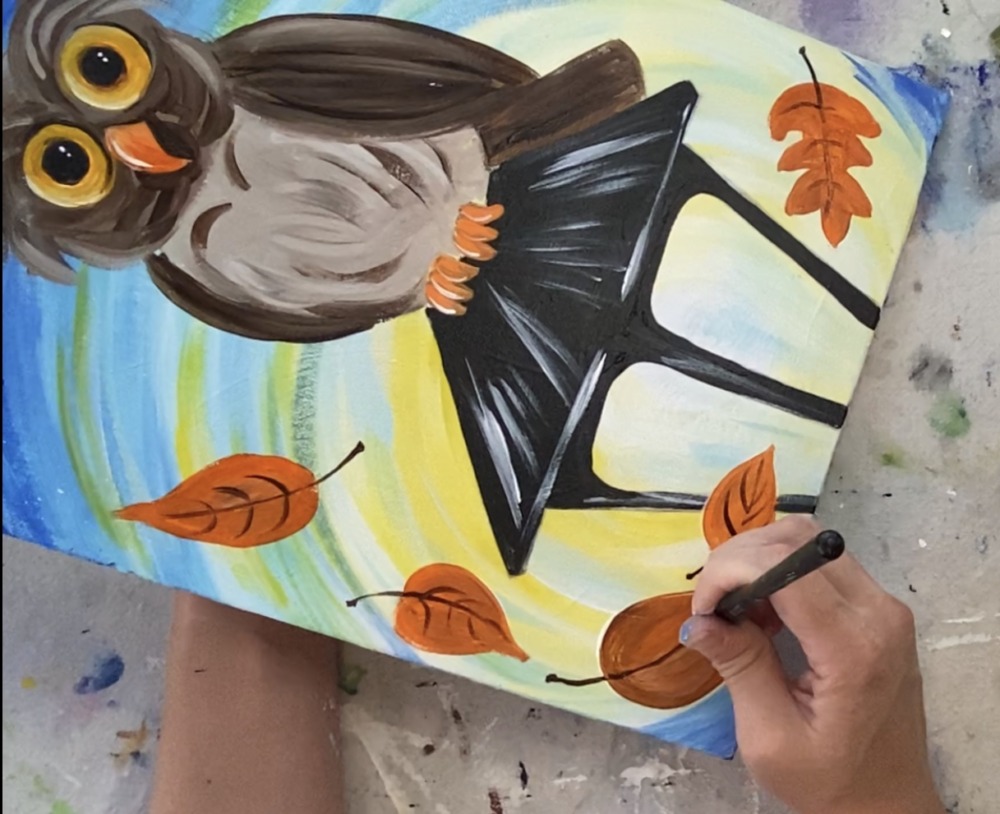
17. Paint the leaves white
If you outlined your leaves with sharpie in the beginning, most likely you will still see the outlines! You can also hand draw them with chalk or a white chalk pencil or simply paint them in free-handed.
Paint all the leaves white first so the color will be nice and bright and show up against the background blues.
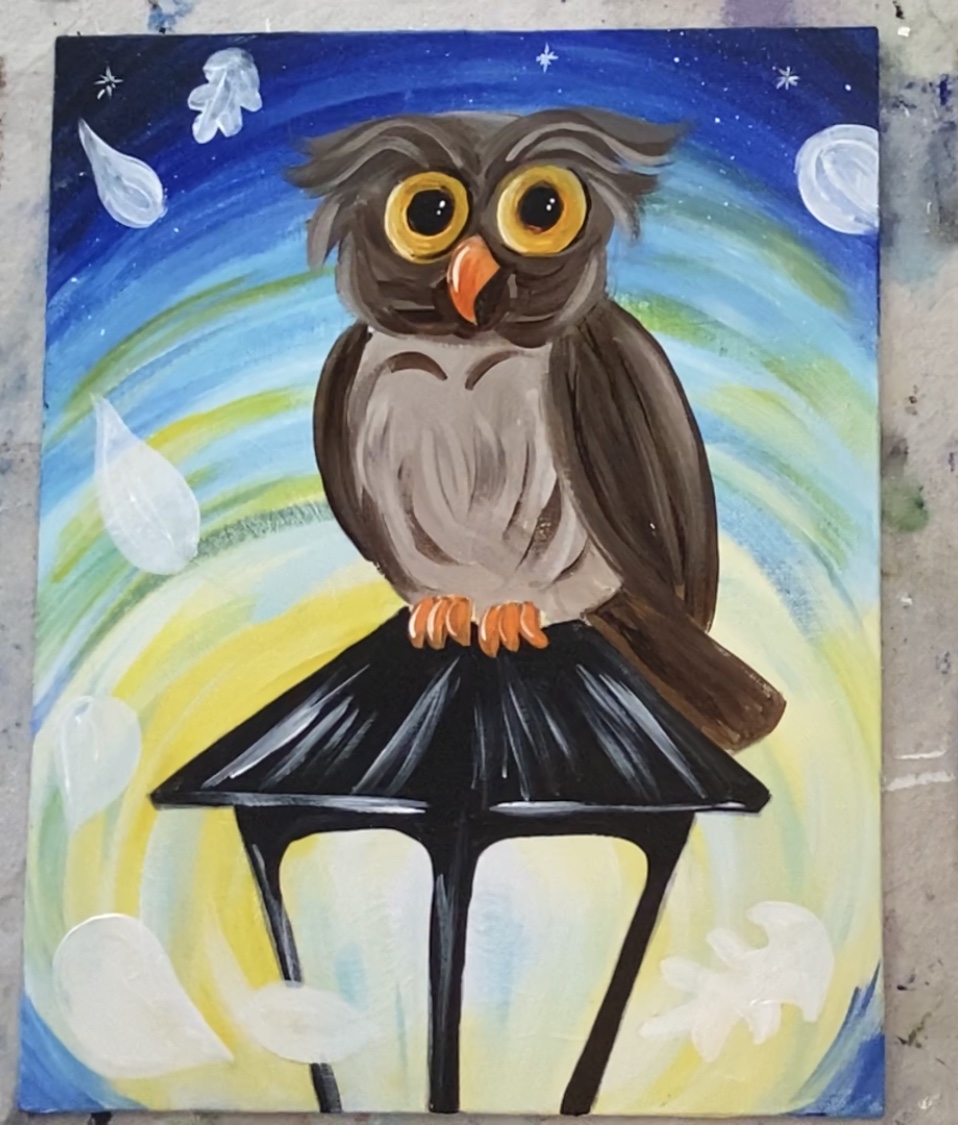
Wait for the leaves to dry or use a blow dryer.
18. Paint the leaves
I used a combination of cadmium orange hue, brunt umber and some white. Pain the leaves variations of those colors. I painted mine mostly orange and then blended a little brown and white into them.
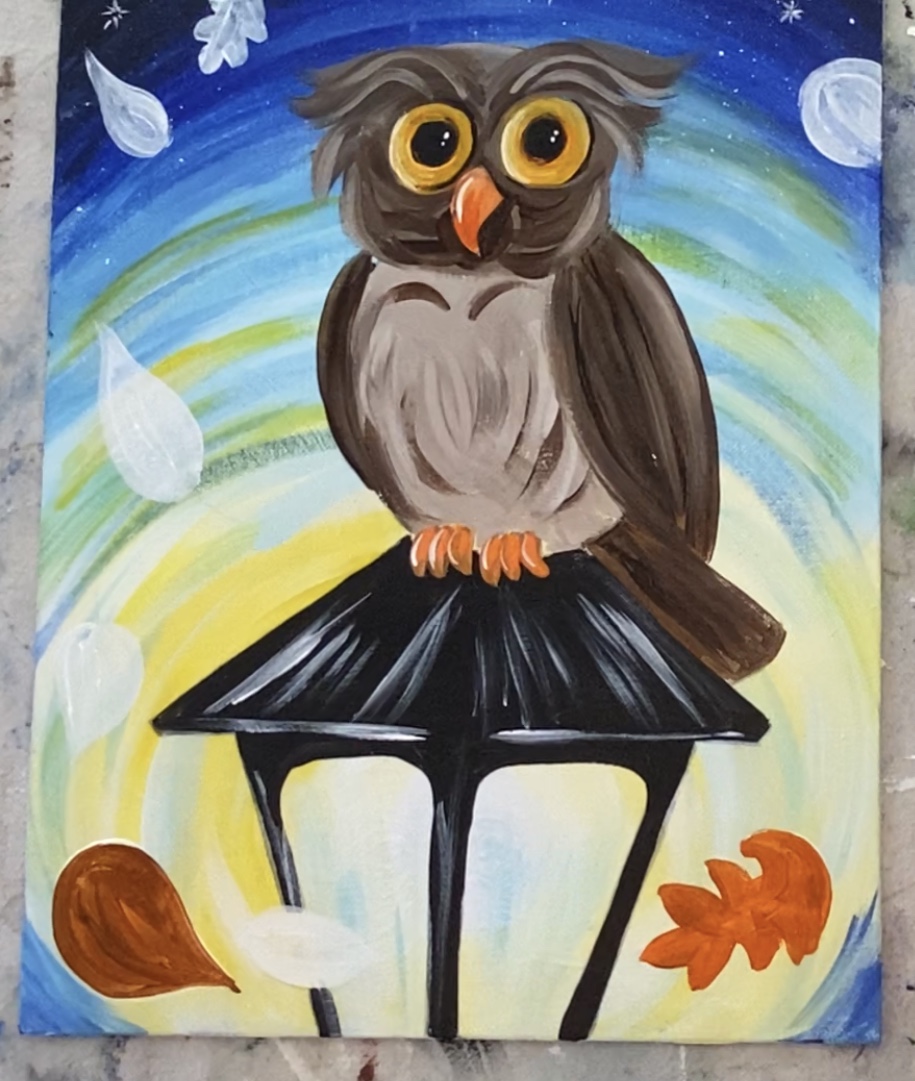
Then use your 5/0 round brush and burnt umber to paint the stems and all the veins. The base of the stem has a little dotted area and the stem itself is very thin. If your brown isn’t flowing well, you can always add a little water into it.
Also, if you look closely, there are some more stars in the dark area at the top! I used titanium white and that 5/0 round brush to paint those.
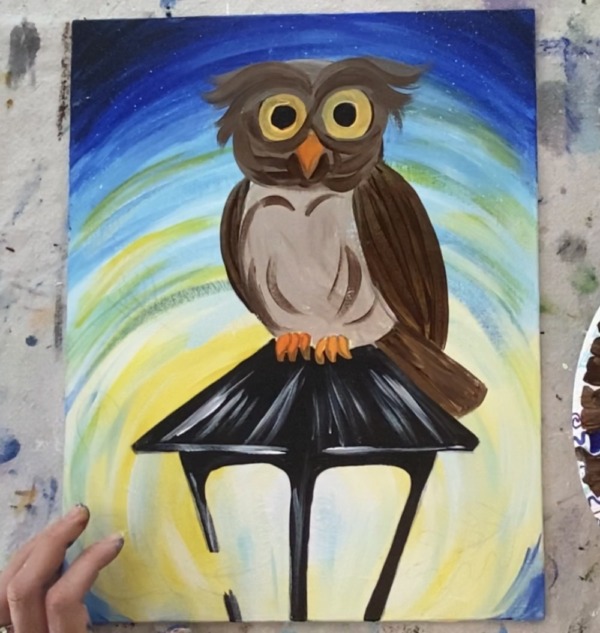
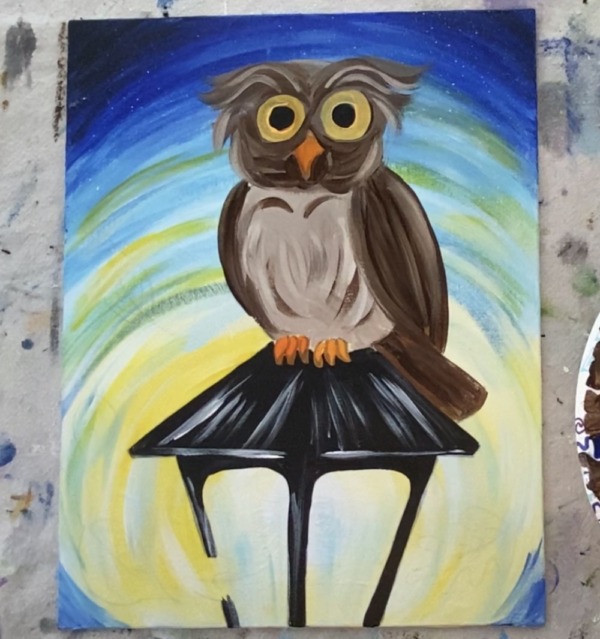
Finished!
Sign your name and show it off!
Would you like to save this?
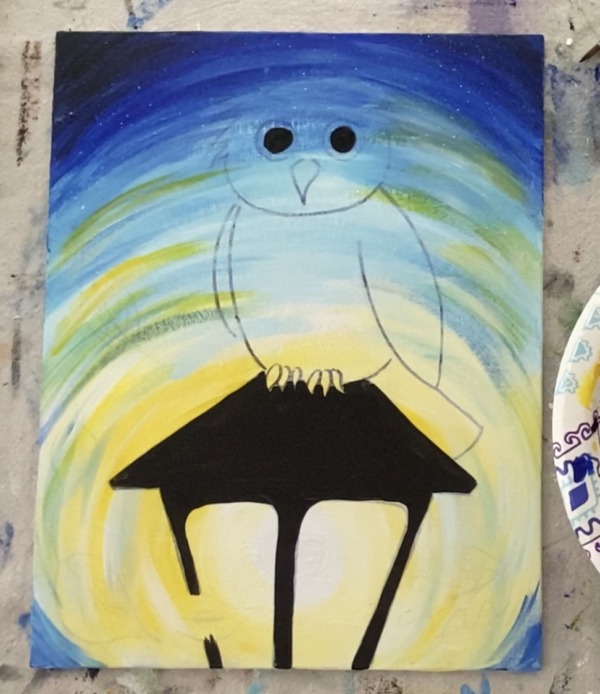
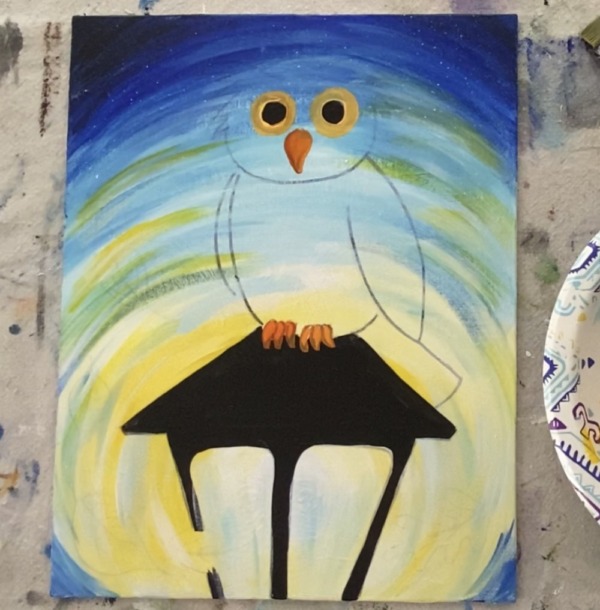
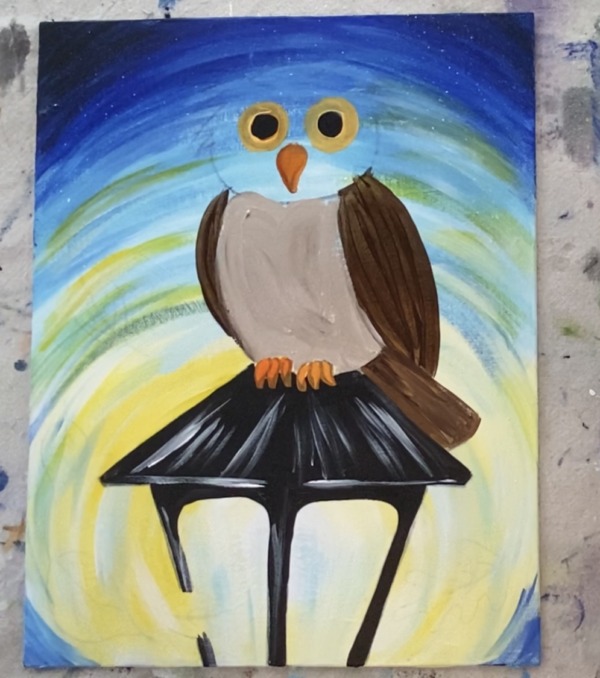
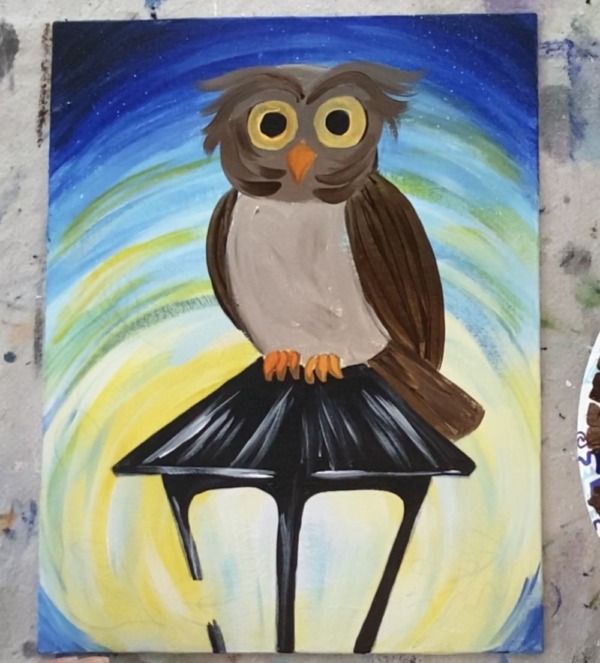
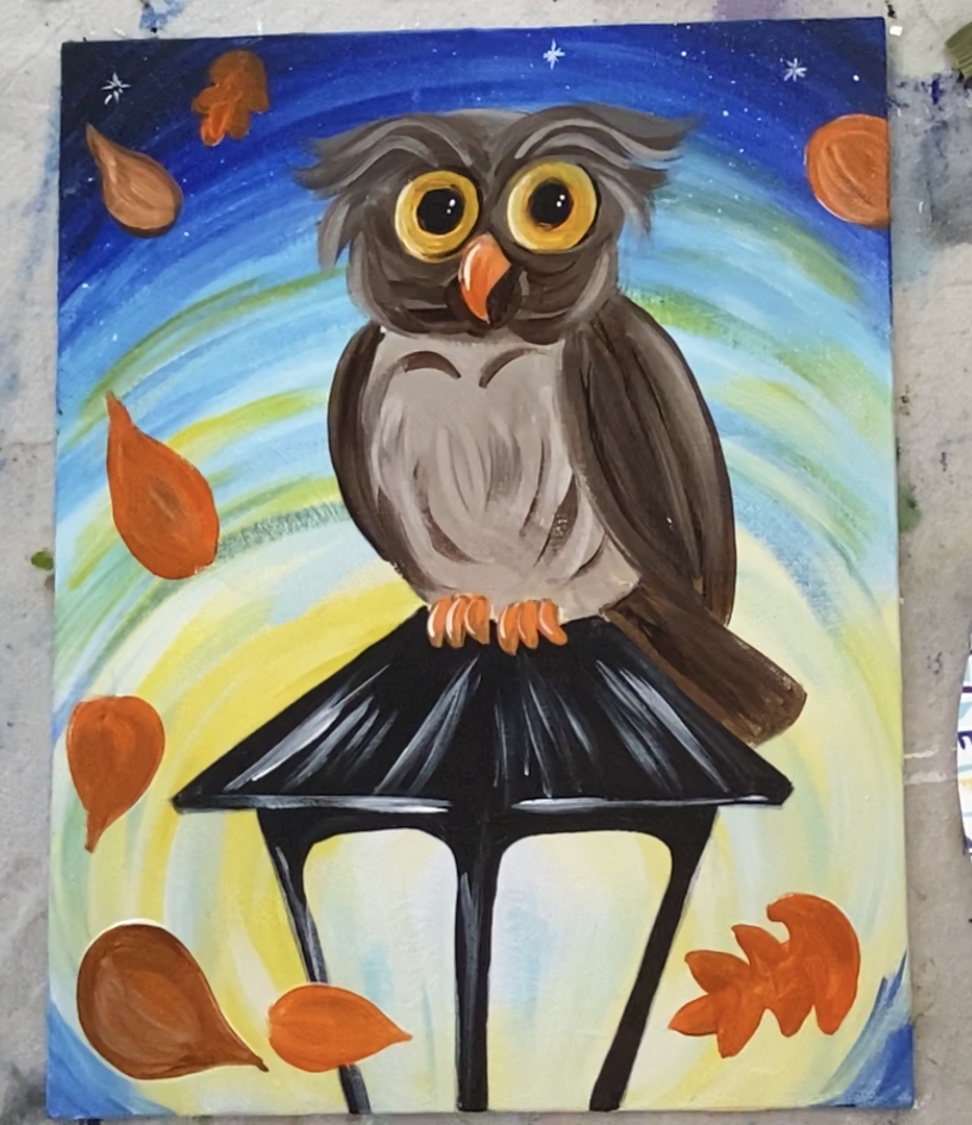
This one below is the original before I made the tutorial for it. I made the eyes smaller and the feather texture a little darker. No two paintings are ever the same! Even ones that I paint again always look different.
Share Your Art


