
Would you like to save this?
Landscape Painting Tutorial
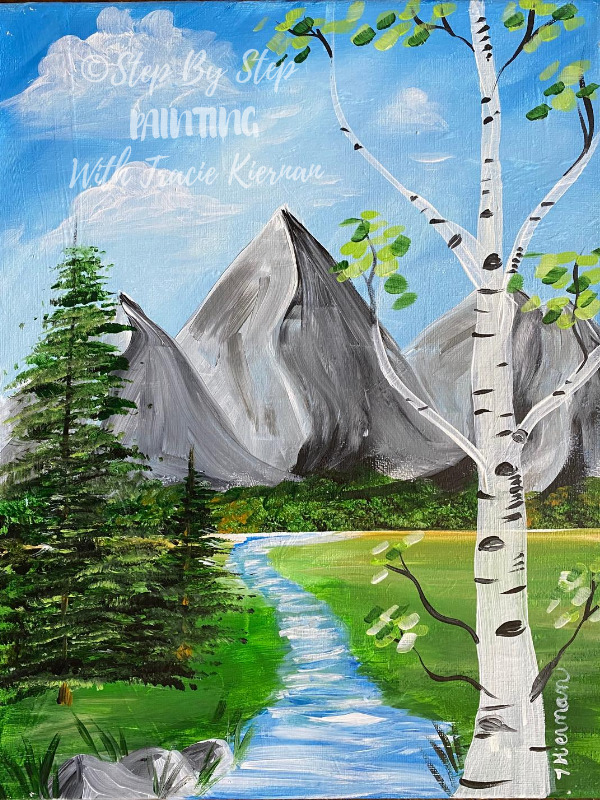
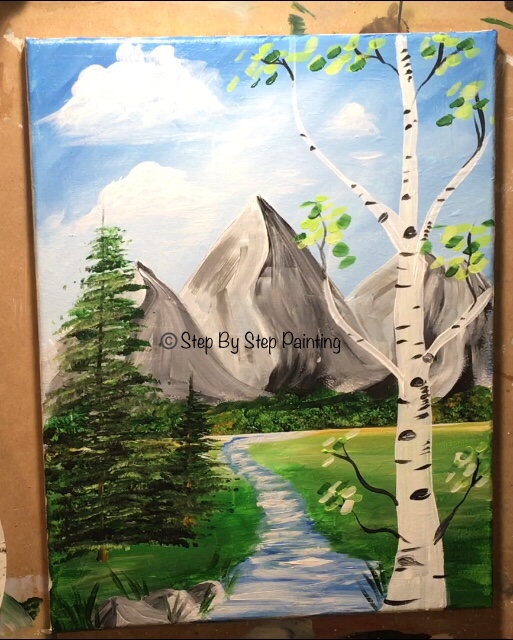
Learn how to paint a beautiful green mountain landscape step by step for beginners.
The scene of this painting reminds me of an early spring day when the leaves on the birch trees have began to grow green and the snow has melted. If you want to see fall landscape with similar mountains, you can check out my “Fall Mountain Morning” tutorial!
This tutorial introduces you to the basics of painting a landscape.
Enjoy and happy painting!
See Also:
Materials For Landscape Painting
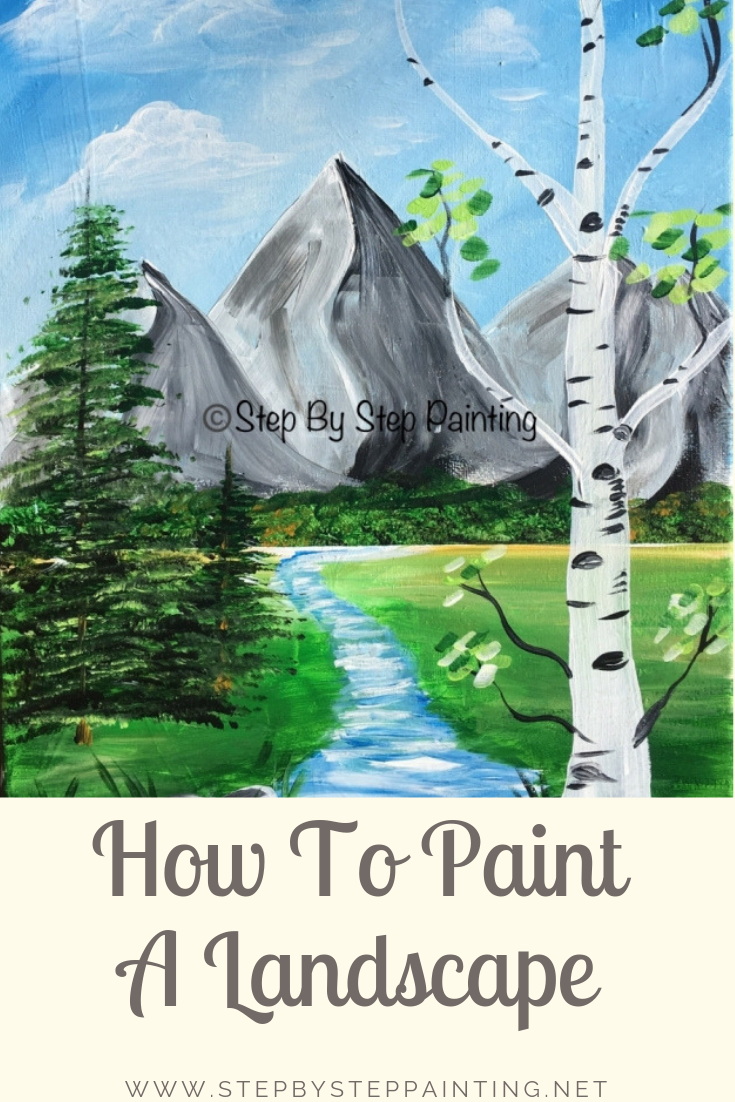
How To Paint A Landscape

Learn how to paint a landscape painting of a partly cloudy sky, mountains, a creek and trees.
Materials
Basic Materials
- Acrylic Paint
- Brushes
- Canvas
- Palette
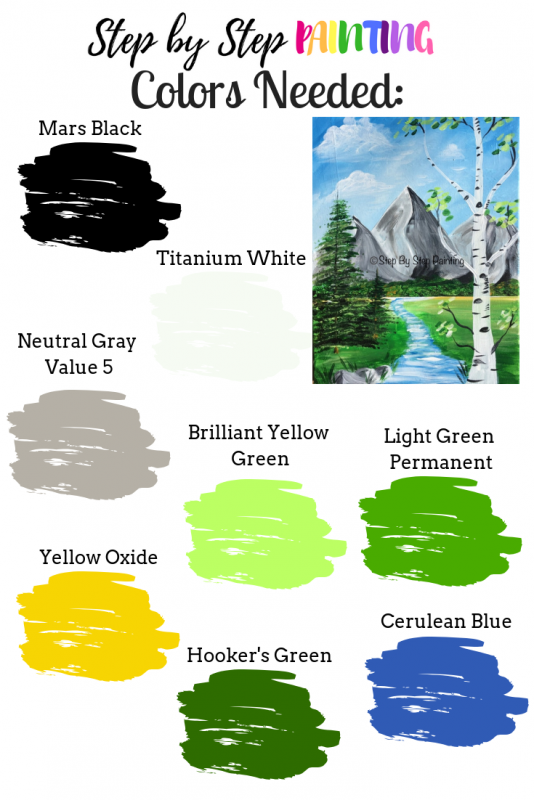
Acrylic Paint Colors
- Yellow Oxide
- Hooker's Green
- Light Green Permanent
- Brilliant Yellow Green
- Titanium White
- Mars Black
- Cerulean Blue
- Neutral Gray Value Five
Brushes
- 3/4" Wash (aka flat)
- #12 Flat (1/2")
- #4 Bright (1/4")
- #2 Fan Brush
- Filbert Brush (Or your favorite cloud brush)
- 10/0 Liner
Other
Instructions
- Apply painters tape on the horizon line 4.5" up the canvas. Note: the canvas is positioned vertically.
- Paint the sky cerulean blue + white using a 3/4" wash brush.
- Outline the mountain peaks with titanium white. (I used a #12 flat for this)
- Paint the mountains all gray.
- Divide the mountains with a vertical zig-zag line.
- Paint the left side of the mountain with white and the other side with a darker gray color. Don't let this color be solid, let it blend with the wet gray. Let the colors be inconsistent.
- Stipple with any brush (I used a filbert brush) right above the horizon line. Use hooker's green and a little bit of mars black and yellow oxide to stipple. These are bushes/ trees way in the distance.
- Remove the painters tape.
- Use cerulean blue to paint the river outline. Then paint the river solid cerulean blue.
- Add titanium white lines in the river.
- Paint the green ground starting with yellow oxide and blending it to light green permanent and then hooker's green on the bottom.
- Paint a birch tree trunk with titanium white.
- Use a 10/0 liner and mars black to paint branches and black marks on the birch tree.
- Paint leaves on the birch tree.Use a bright #4 and brilliant yellow green, titanium white and hunter's green.
- Use a fan brush to paint two pine trees with hooker's green, mars black and a little bit of brilliant yellow green.
- Paint rocks and some grass on the bottom.
- Paint clouds using a filbert (or your favorite cloud brush) and titanium white.
Scroll down further for more detailed directions!
Color Palette
Directions At A Glance: 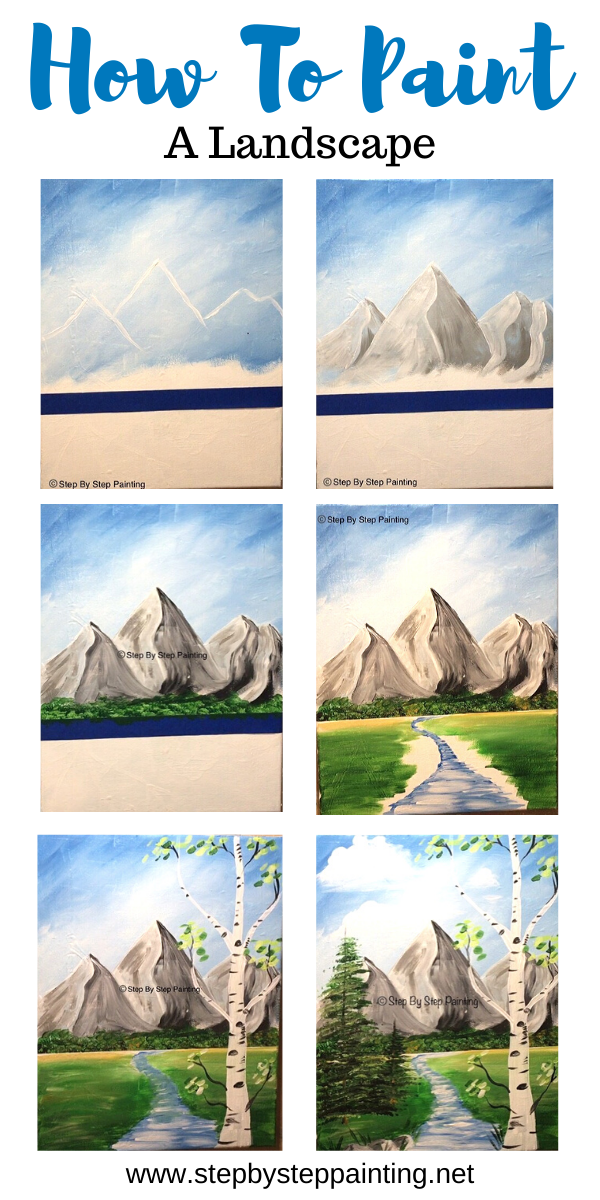

Video:
Step By Step Directions:
1. Apply painters tape on the horizon line 4.5″ up the canvas. Note: the canvas is positioned vertically.
Measure 4.5″ up the canvas (if you’re using an 11″ x 14″ canvas).
I typically like to make my horizon line 1/3rd of the canvas. Therefore, 4.5″ is “about” 1/3 of the way up.
Apply the painters tape to use as a guideline for painting the sky and mountains. 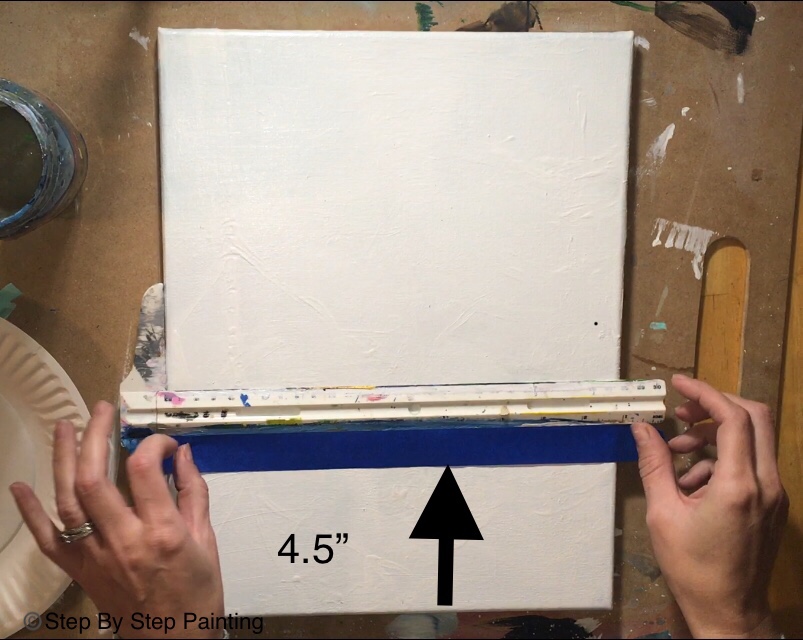
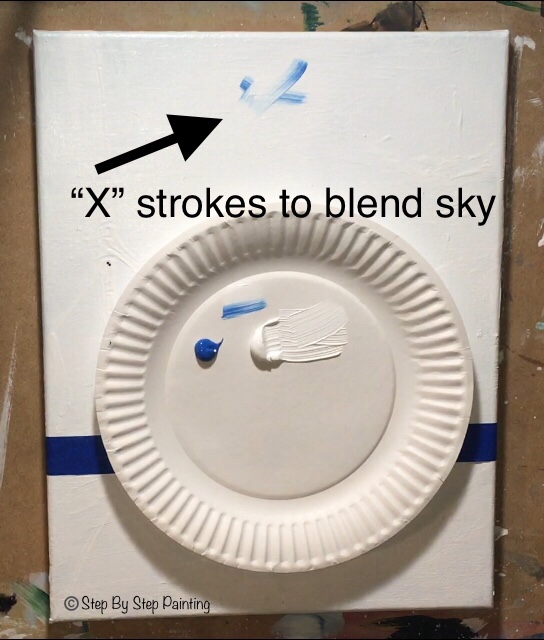
2. Paint the sky cerulean blue + white using a 3/4″ wash brush.
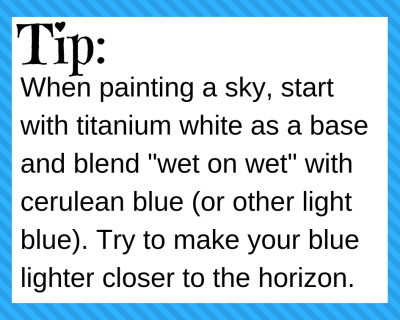
Use the colors titanium white and cerulean blue. You’ll also need a 3/4″ wash brush.
Paint the sky using a blend of the titanium white and the cerulean blue.
Basically dip your brush in the titanium white first and paint in “X” strokes.
These strokes will blend together creating a sky blue color. I started at the top.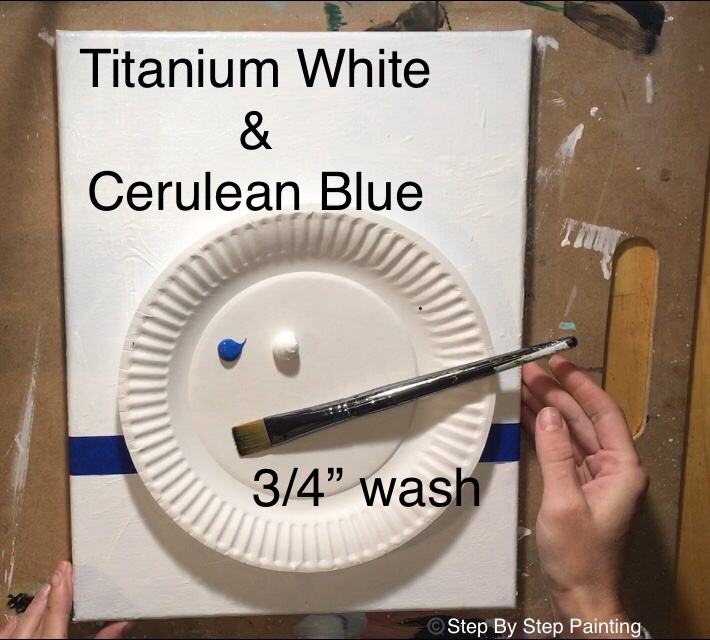
As you paint the sky, try to get your blue to be slightly darker on top and then lighter as it gets closer to the horizon line.
I didn’t make a perfect gradient for this, I let the center be brighter white. 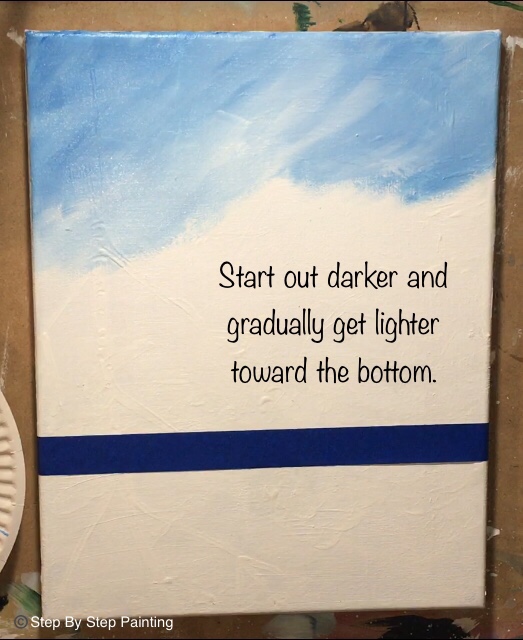
Although you can go all the way to the tape line, I left a blank area because I knew it would be mostly mountain. 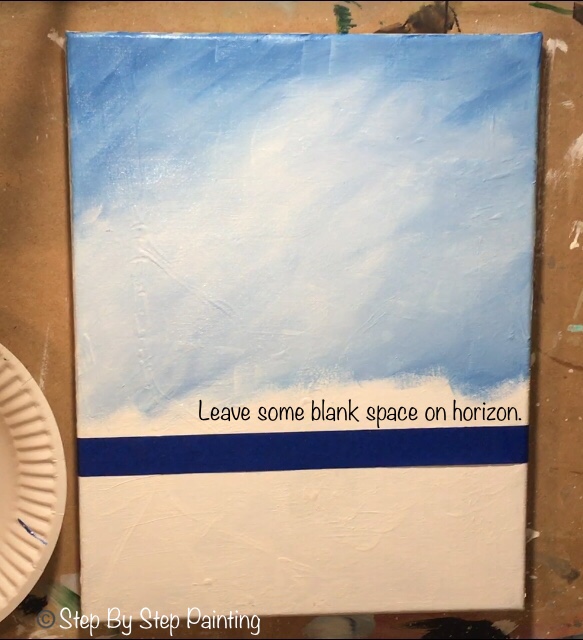
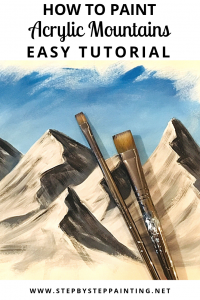
3. Outline the mountain peaks with titanium white. (I used a #12 flat for this)
You can see a whole separate tutorial for mountains here.
I used a #12 flat brush on it’s side and used the edge to paint the mountain peaks.
These mountains are large!
The largest peak is about 2/3 up the canvas. Paint some varied heights of peaks and don’t worry about overlapping at this point. 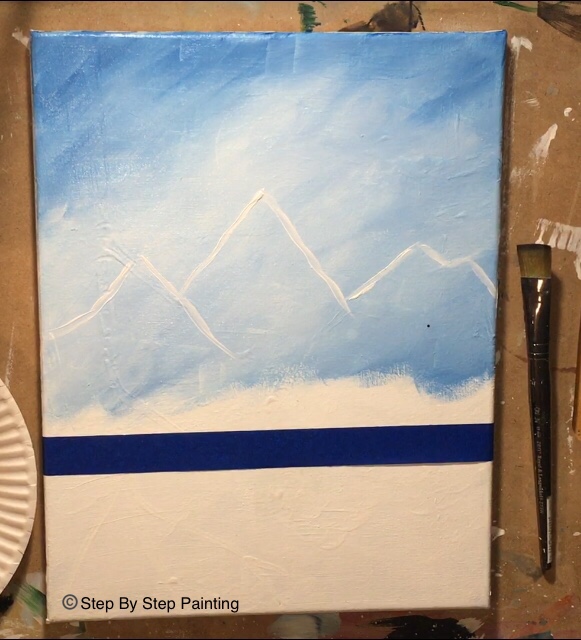
4. Paint the mountains all gray.
Next use your #12 flat brush to paint all the mountains in gray.
This is the base layer of the mountains.
Don’t worry about overlapping yet. Note: my paint underneath wasn’t dry all the way so the gray blended in with some of the underlying blue. 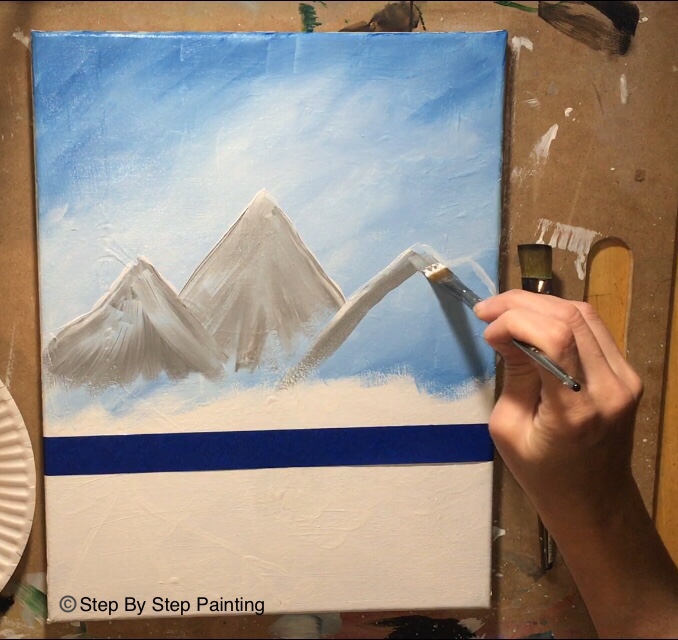
When I painted in this first gray layer, I left some blue still showing through. This was done intentionally. So don’t load your brush with too much gray!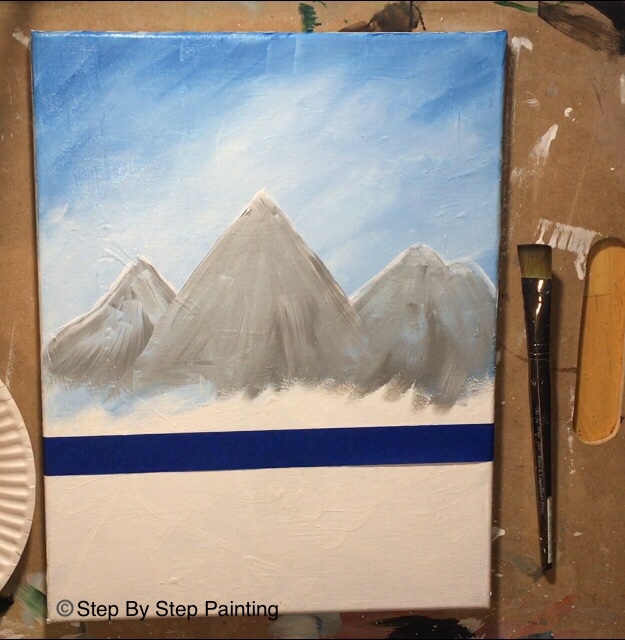
5. Divide the mountains with a vertical zig-zag line.
Next clean your brush and then dip it into the white.
Use the tip of your brush to paint lines that divide each mountain in half from the top tip to the base.
Paint these lines to almost resemble zig-zags, although they’re not necessarily angular lines. 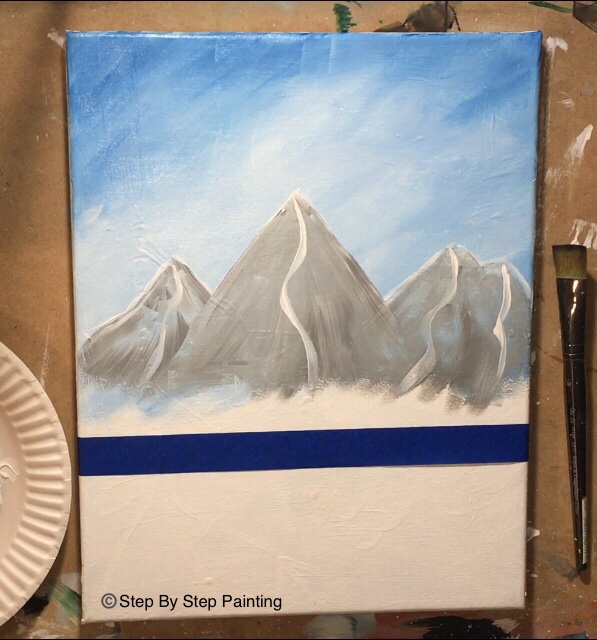
6. Paint the left side of the mountain with white and the other side with a darker gray color. Don’t let this color be solid, let it blend with the wet gray. Let the colors be inconsistent.
Next paint the left side of the mountain with white. When you apply the white, don’t fill it in completely solid.
Let the wet gray blend with the white to give it color variation. Paint in short strokes that go in the direction of the side of the mountain you are painting on. 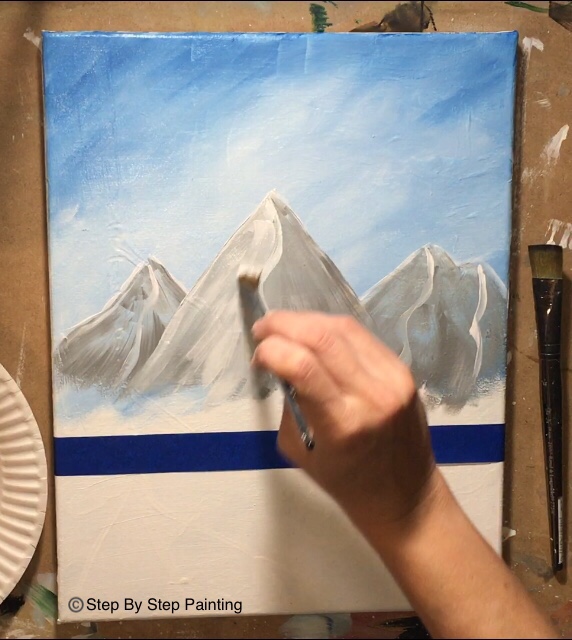
At this point you will need to decide which mountain is overlapping which.
This is decided by painting the white all the way down to the base of the mountain. 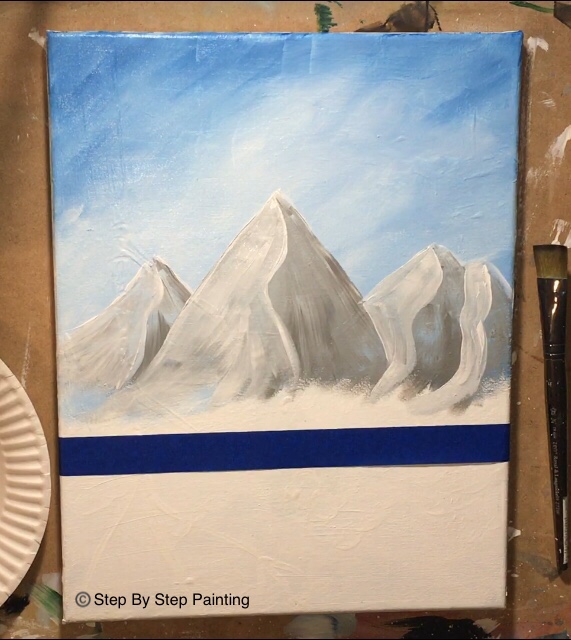
On the right side of the mountain is darker. Clean your brush off and double load it in mars black and neutral gray value five.
Paint in short angular strokes going in the opposite direction of the white. Let it blend with the wet gray beneath it.
This black/gray should not be solid, but rather choppy and inconsistent. 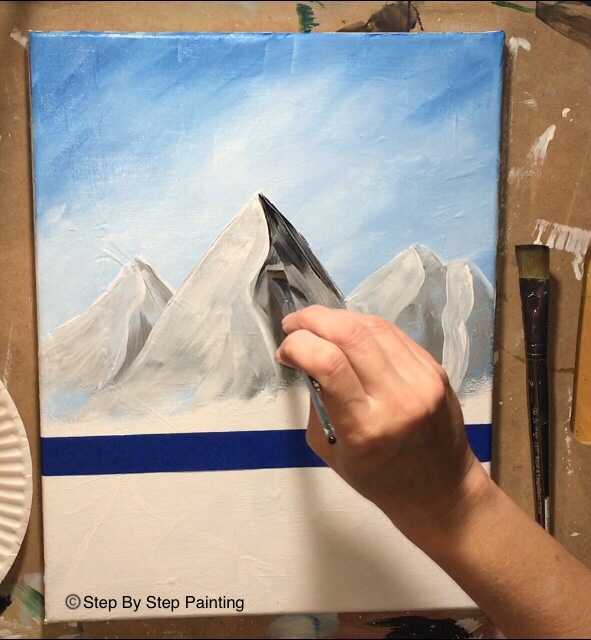
For the base of the mountain, I dragged the darker color down and then to the left. 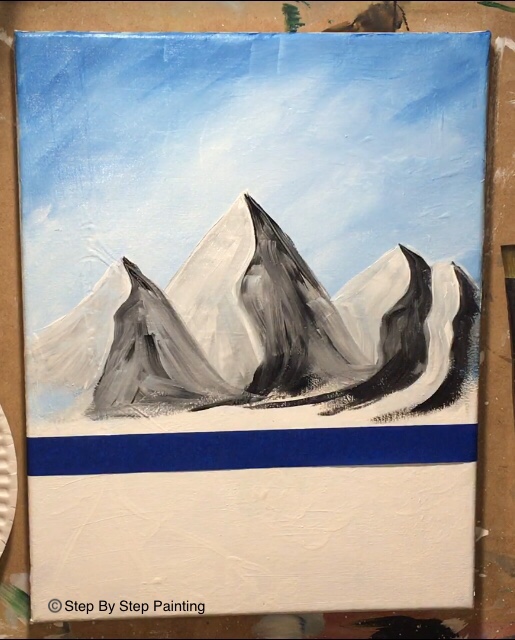
Next add some gray shadowy areas on the white side of the mountain.
To do this, clean your brush off and add just gray. Paint some short choppy strokes “here and there” on the white letting it blend on the canvas. 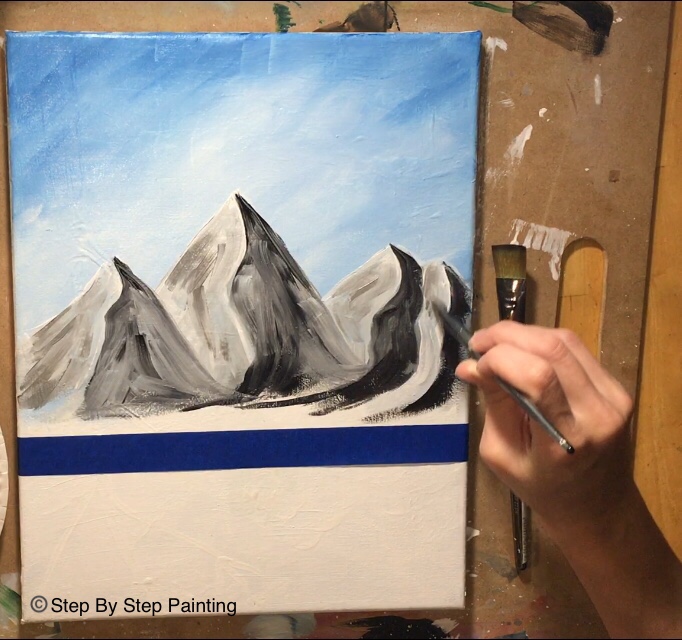
Then on the right side, add some white areas over the black/gray. Again, rinse your brush off.
Add just white.
Then paint short choppy strokes on the right side. Keep in mind this side should be darker than the left even though we’re adding a bit of white “here and there”.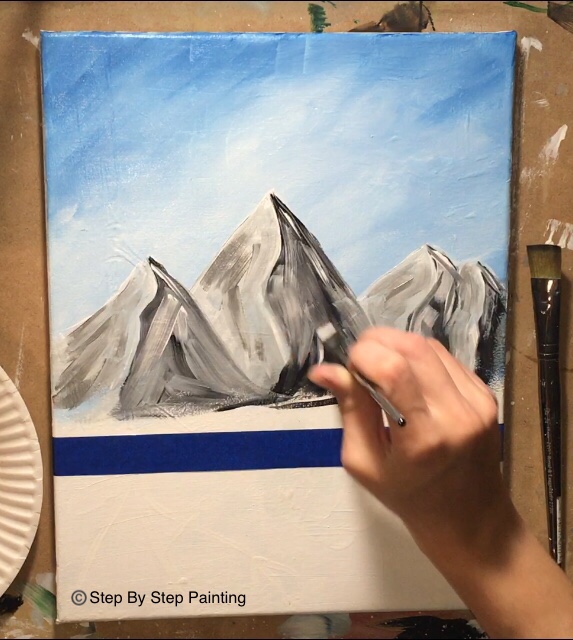
See a more detailed post about how to paint mountains here:

7. Stipple with any brush (I used a filbert brush) right above the horizon line. Use hooker’s green and a little bit of mars black and yellow oxide to stipple. These are bushes/ trees way in the distance.
I like to stipple with a round brush but this would have taken forever to do in this area.
So, I chose a filbert brush to do some stippling with.
Basically dip it in hooker’s green and dot your brush on the base of the mountain just above the horizon line tape. 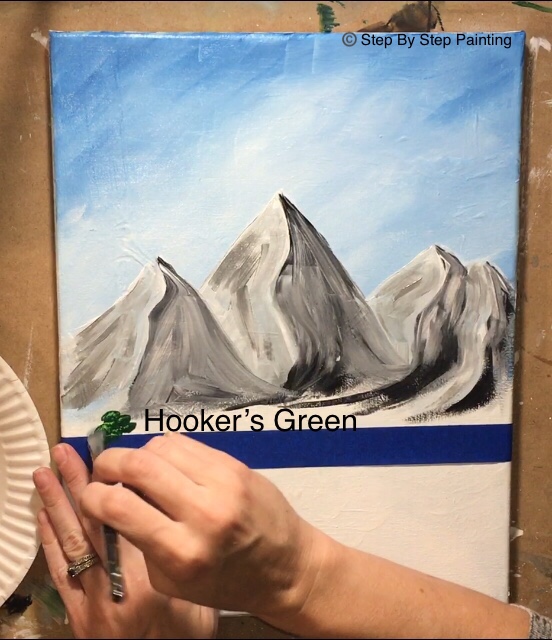
You can stop there if you like the look of just the hooker’s green.
I actually continued on and added a bit of yellow oxide and mars black into the bush area. 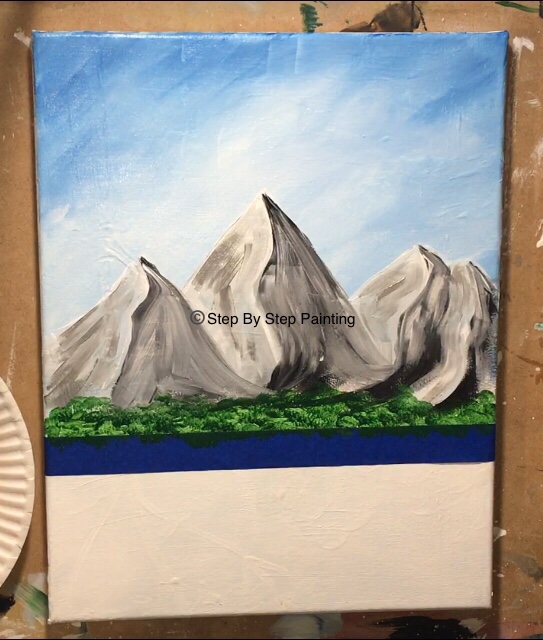
Dip your brush in a little bit of yellow oxide and dab it sparingly along the horizon line.
Then dip it in mars black (you don’t have to rinse) and dab it again.
You’ll get a nice mix of bushes/trees in the far background. Doing this helps transition from the mountain base to the actual ground. 
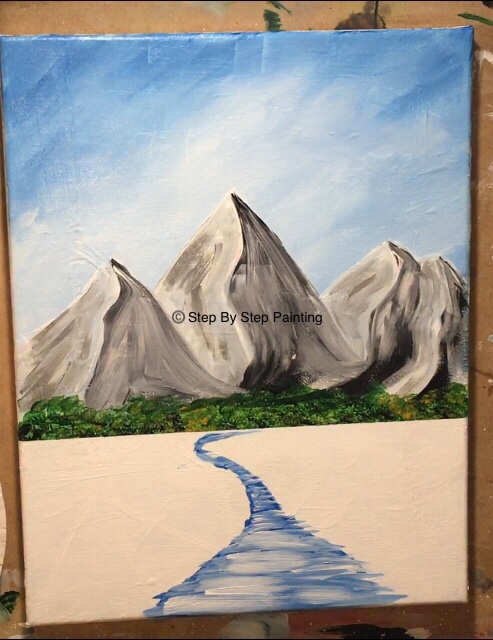
8. Remove the painters tape.
Next remove the painter’s tape carefully off your canvas. You have a nice crisp horizon line!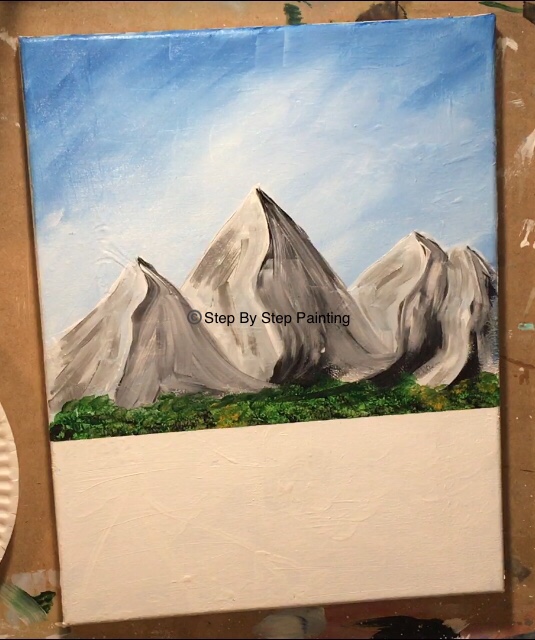
9. Use cerulean blue to paint the river outline. Then paint the river solid cerulean blue.
I used the #12 flat brush for this but you may wish to do this with a round brush since this is a small area.
Basically outline a river with cerulean blue. The river starts out wide and then vanishes to a point somewhere on the horizon. 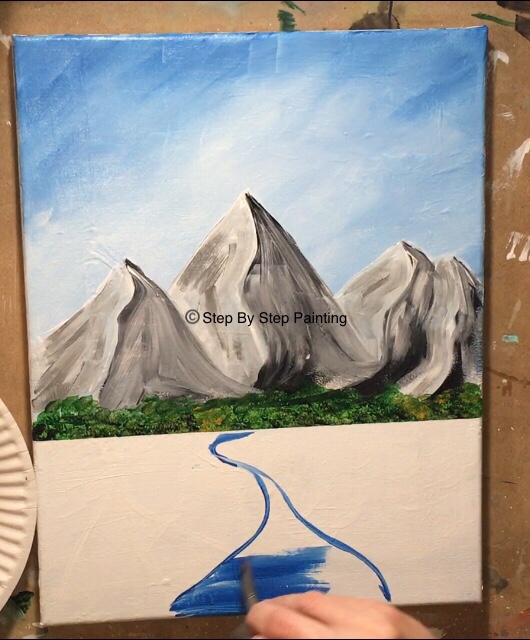
Paint your river/creek in solid cerulean blue. 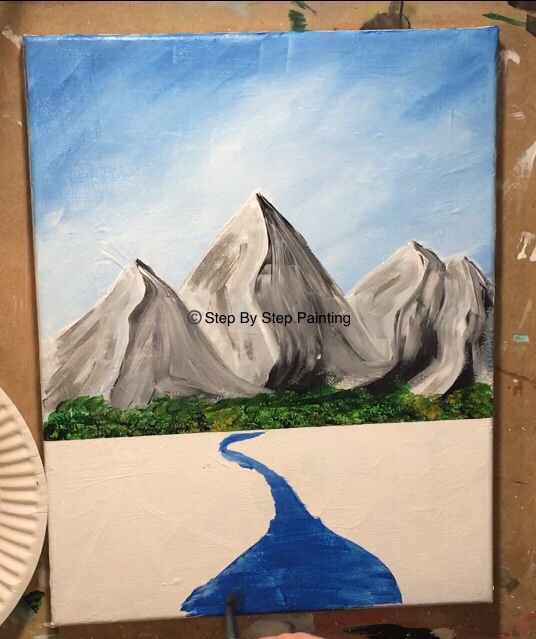
10. Add titanium white lines in the river.
Keeping that cerulean blue wet, add some white lines onto it to give it indication that it’s water. I used my #12 flat to do this as well.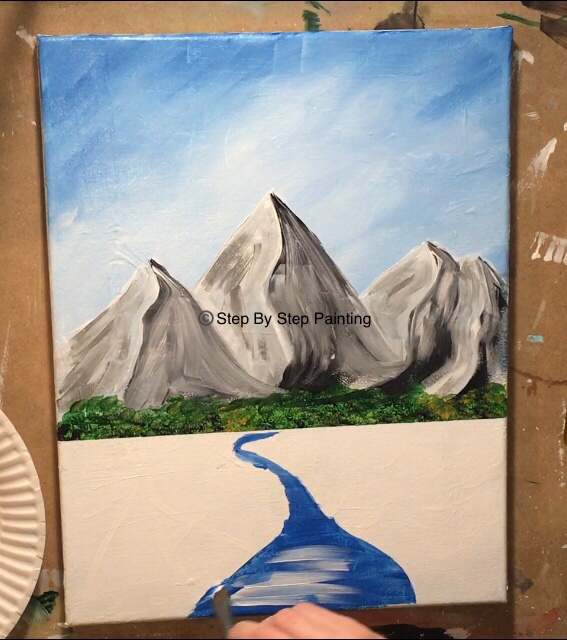
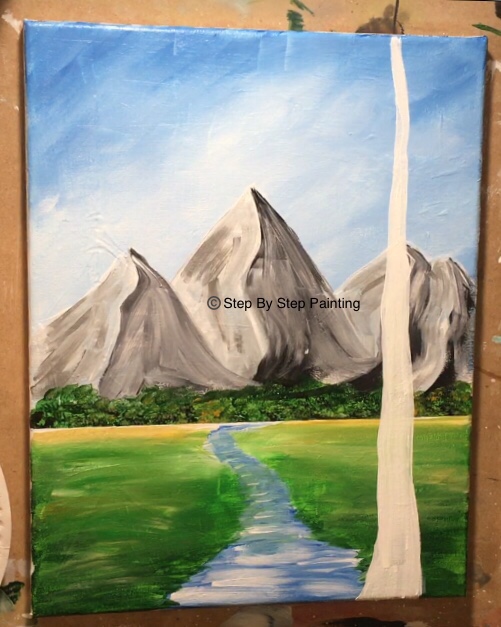
11. Paint the green ground starting with yellow oxide and blending it to light green permanent and then hooker’s green on the bottom.
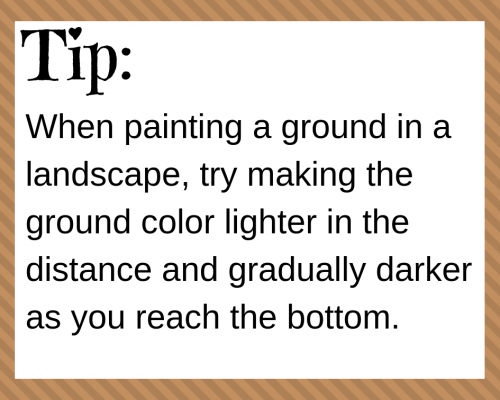
In landscapes, typically the ground is lighter in the background and gradually gets darker towards the bottom.
To demonstrate this effect, I started with yellow oxide and white (about equal parts).
I used my #12 flat brush and painted horizontally just under the horizon line. 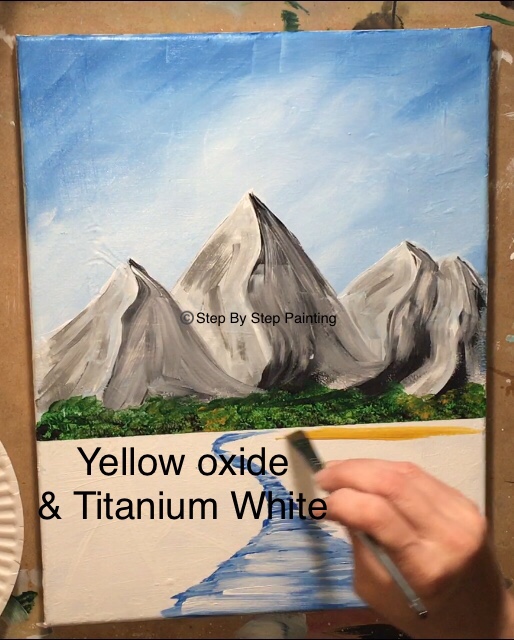
Then slowly blend in light green permanent by dipping your brush in just a bit of this green and blending.
Work your way down to the bottom of the canvas, blending and letting your green get darker. 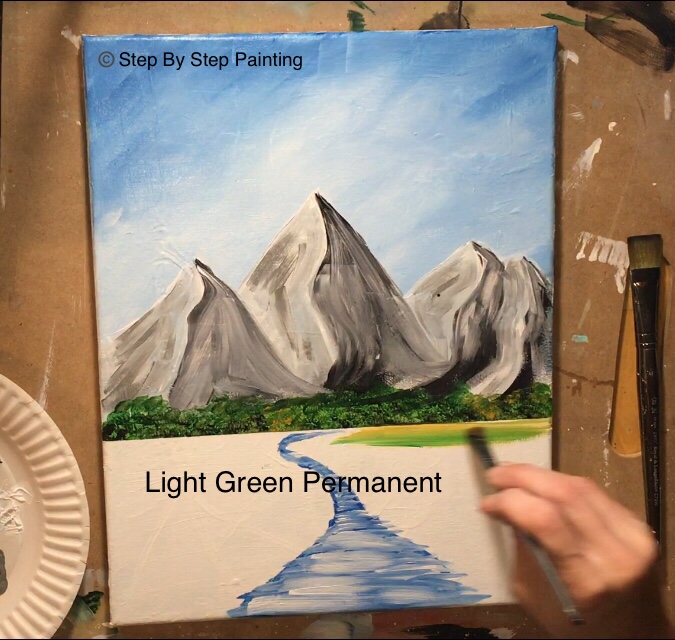
As you approach the bottom of the canvas, add hooker’s green to your brush.
You may need to rinse off your brush to get a pure hooker’s green.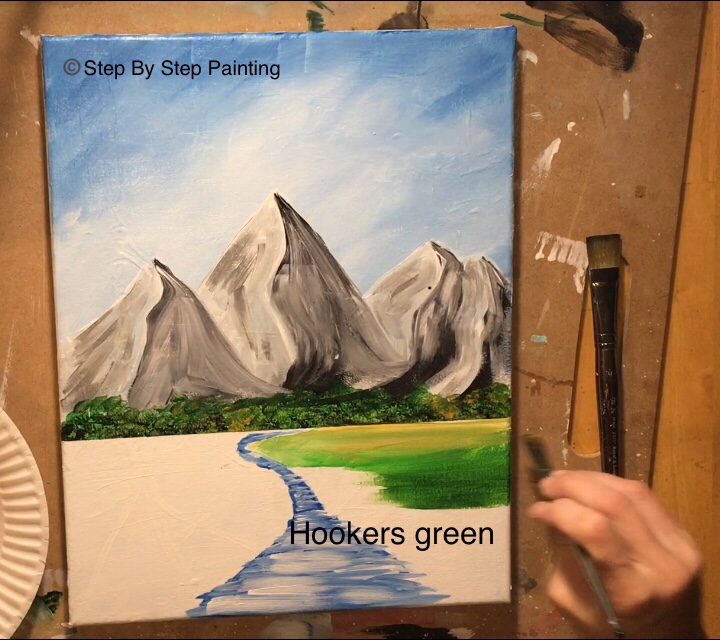
I left a gap between the land and the river for now. 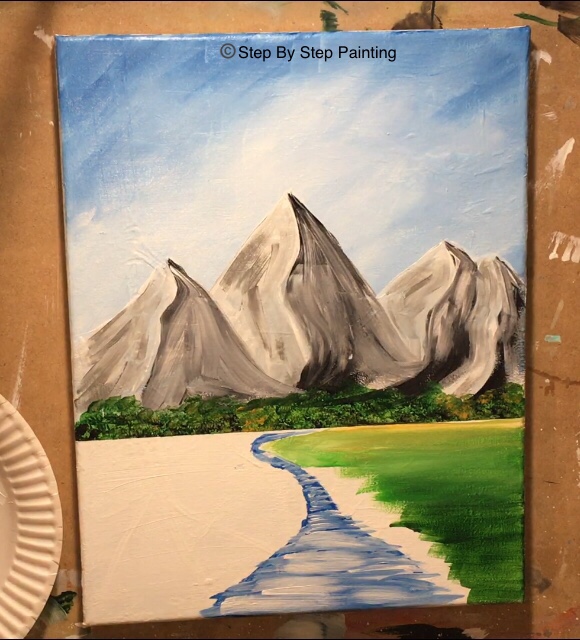
Then repeat the green gradient on the left side. 
Finally, I went back in and painted as close as possible to the river. 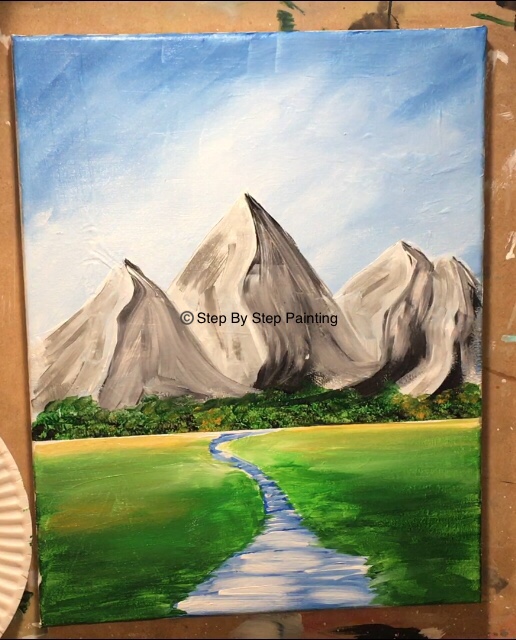
12. Paint a birch tree trunk with titanium white.
To do the birch tree, you want to make sure your painting is completely dry.
Use the #12 flat brush and start at the bottom.
The base of this tree is very thick. Then it gets thinner as it goes up to the top of the canvas and over the edge. Fill this trunk in solid titanium white. 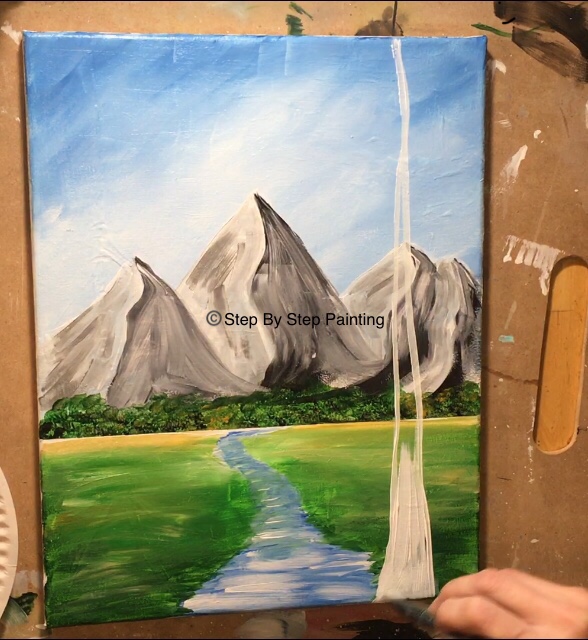
Then I used my #12 flat brush on its side to paint some smaller branches. 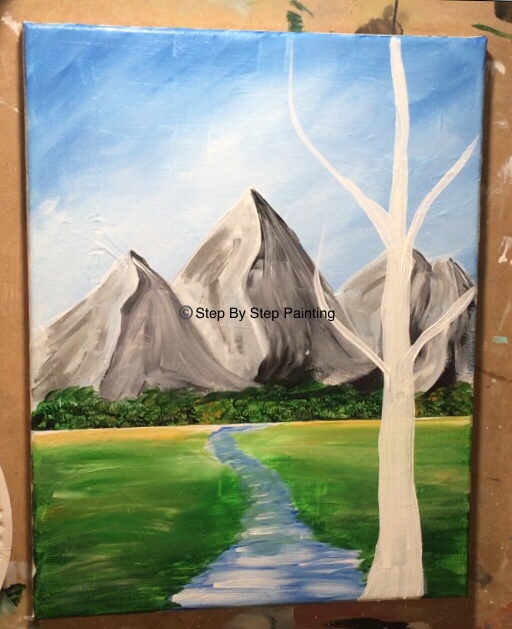
13. Use a 10/0 liner and mars black to paint branches and black marks on the birch tree.
To get the really thin, dark branches, I used my 10/0 liner brush and mars black.
It helps to water down the black slightly. Paint some very small branches on the tree.
Then use the same brush and mars black to paint the black marks on the birch tree. 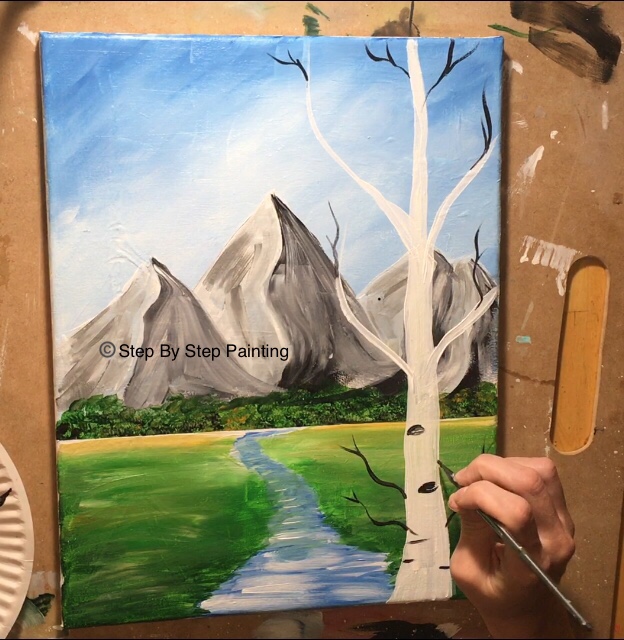
I painted a variety of dash marks and “knots” all up the tree and along the white branches. 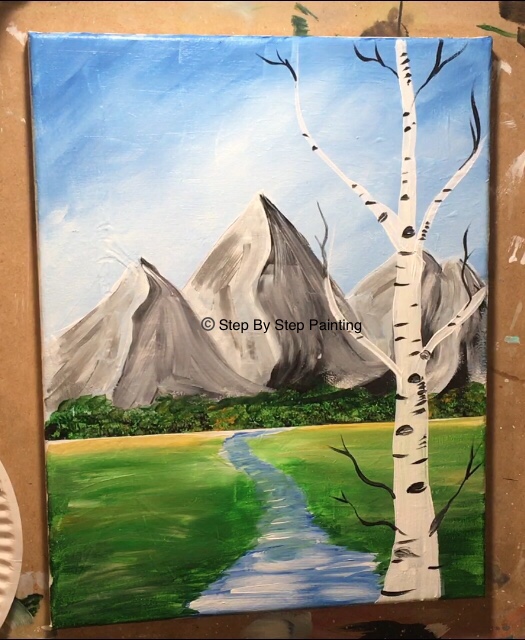
14. Paint leaves on the birch tree.Use a bright #4 and brilliant yellow green, titanium white and hunter’s green.
For this step, I grabbed my #4 bright brush. I loaded it with brilliant yellow green and stamped the brush to make “rectangular” shaped leaves.
Then I added a bit of titanium white to my brush and dabbed some more leaves. The white allowed the green to be lighter. 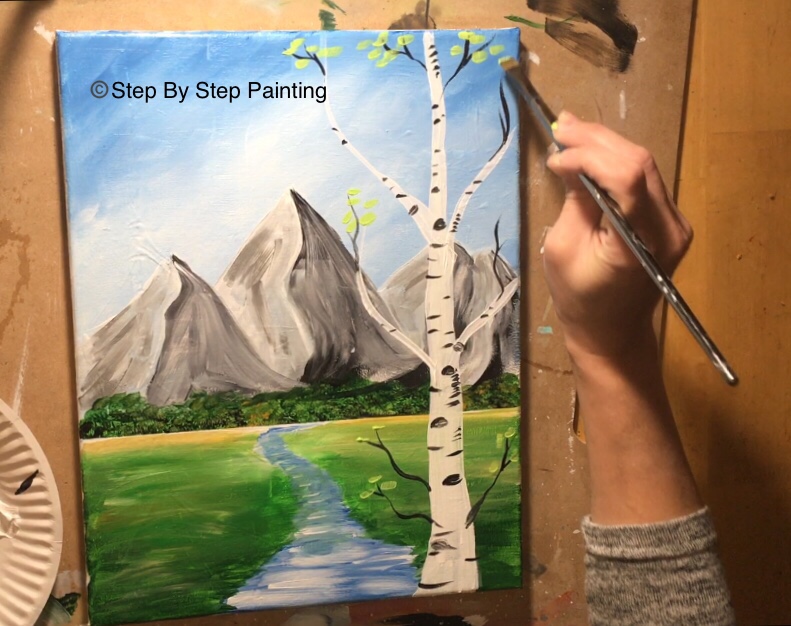
Then I added hooker’s green to my brush (without rinsing) and dabbed some more leaves. The varied colors in the leaves gives a nice effect! 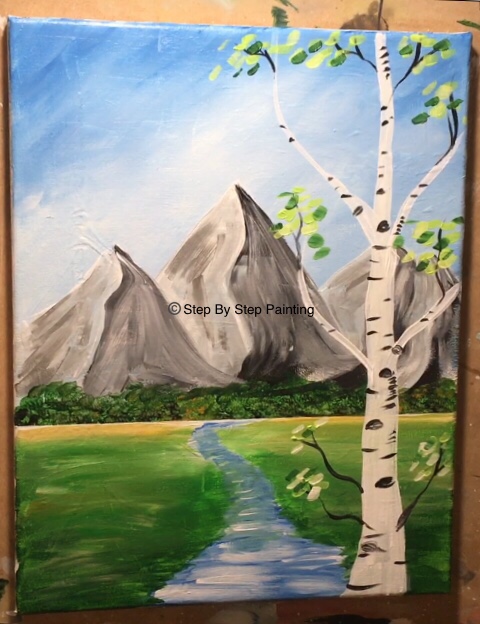
15. Use a fan brush to paint two pine trees with hooker’s green, mars black and a little bit of brilliant yellow green.
To paint the pine trees, I used my same tree fan brush technique you can find here, however, instead of just adding mars black, I added green to my brush so it wouldn’t be a silhouette.
Start by painting the middle line with a 10/0 liner brush and just mars black. 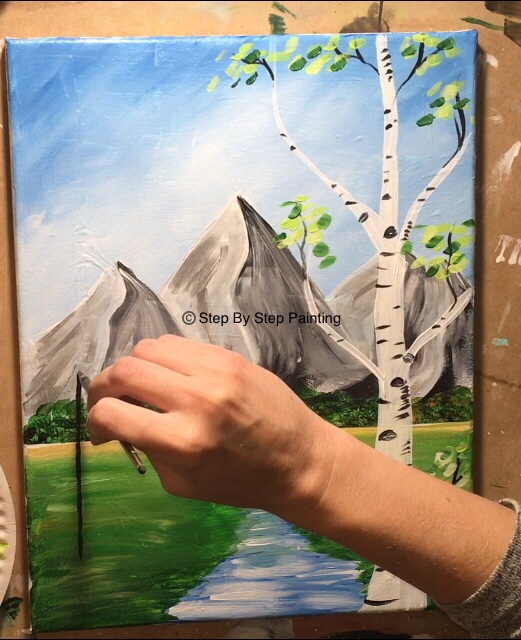
Load your #2 fan brush in hooker’s green and mars black (more green than black).
Stamp your tree starting at the top and working your way to the bottom. 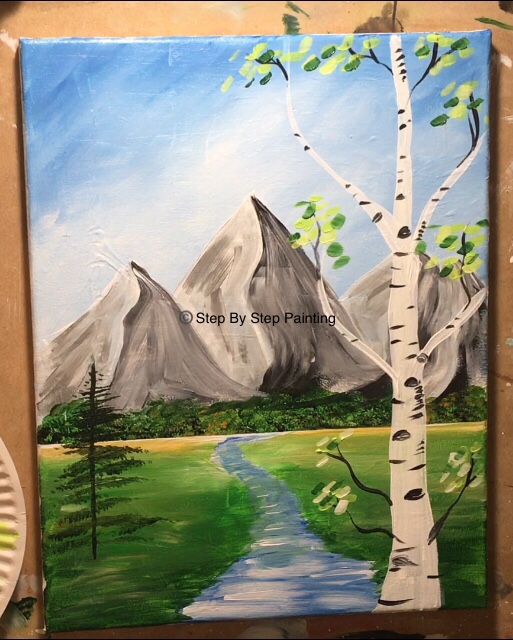

To add lighter colors/ “highlight” to the tree, load your clean fan brush in brilliant yellow green.
Stamp over the tree again and you will get lighter colors on the tree. I also painted a second smaller tree behind this tree and added a bit of yellow oxide on the trunks. 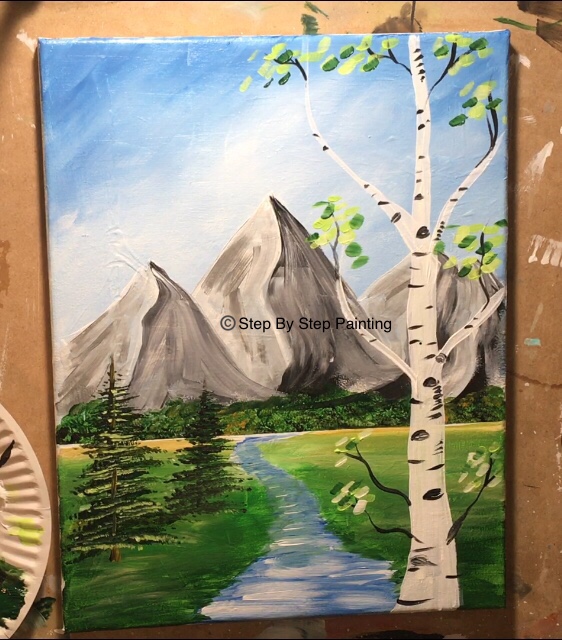
16. Paint rocks and some grass on the bottom of the painting.
The rocks were done very similar to how the mountains were painted.
I first painted the rocks solid white. Then on one side of the rock I blended mars black “wet on wet” and the other side was left white.
For the grass, I used a 10/0 liner and the color hooker’s green.
Basically I painted small grass strokes “here and there” next to the rocks and some sticking up on the bottom of the canvas. 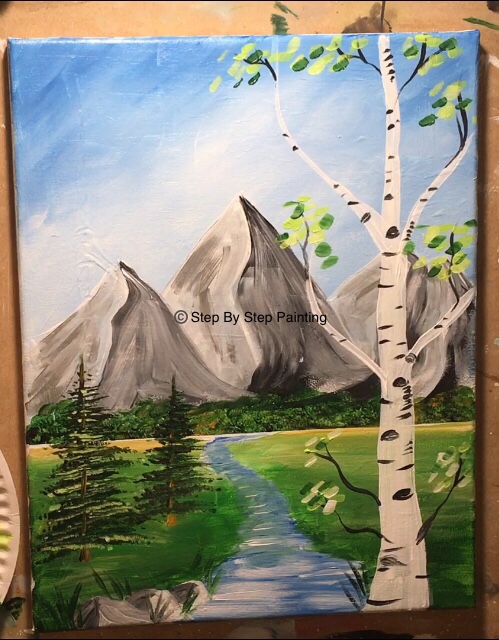
17. Paint clouds using a filbert (or your favorite cloud brush) and titanium white.
Clouds are tricky, I repeat clouds are tricky!
Here are my quick directions for how I painted clouds in this painting.
I like to use a filbert brush for clouds because the rounded edge helps shape the cloud. 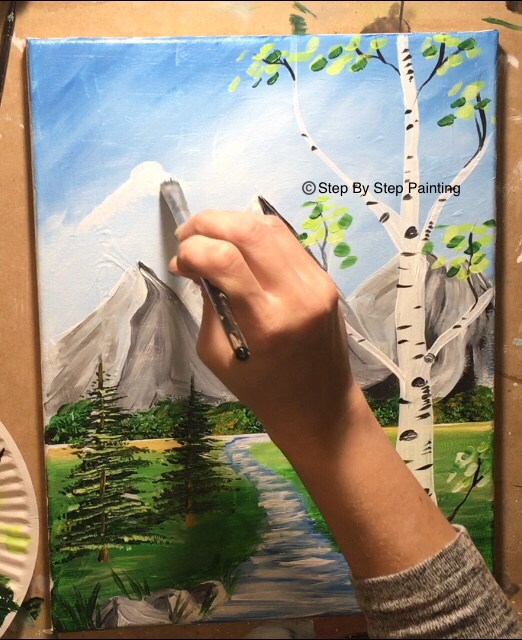
To paint the clouds, I started with titanium white and formed the tops of the clouds. Paint in small circular strokes.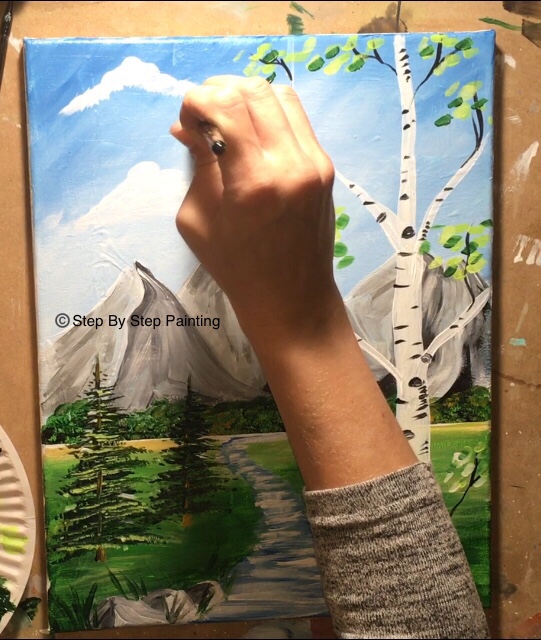
Then let your paint run dry (or wipe off some excess paint off your brush) and let the cloud get more transparent as you fill the bottom area.
Since clouds are really NOT the focus in this painting, I did not attempt to add more shading in the clouds or make them look realistic. 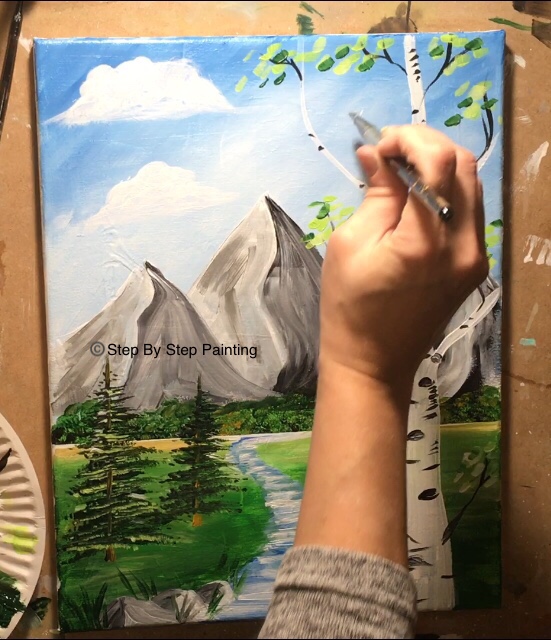
Go back with titanium white again and add some more lighter areas where the brightest part of the cloud is.
Also, paint some “wispy lines” that resemble high altitude clouds.
Tip: The clouds that are closer to the bottom should be smaller and the clouds on the top of the painting should be larger. 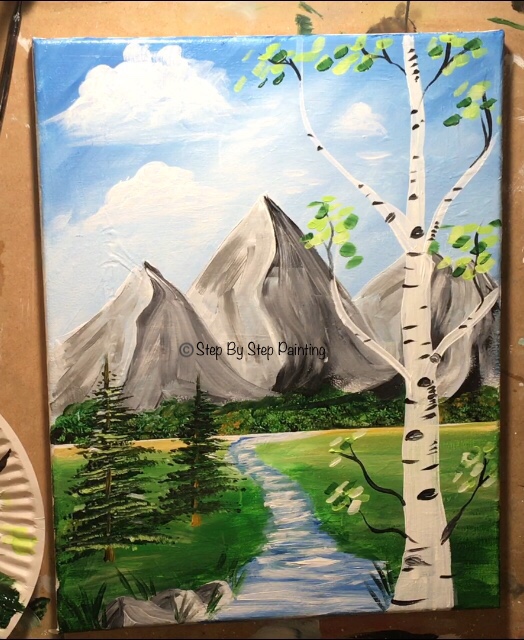
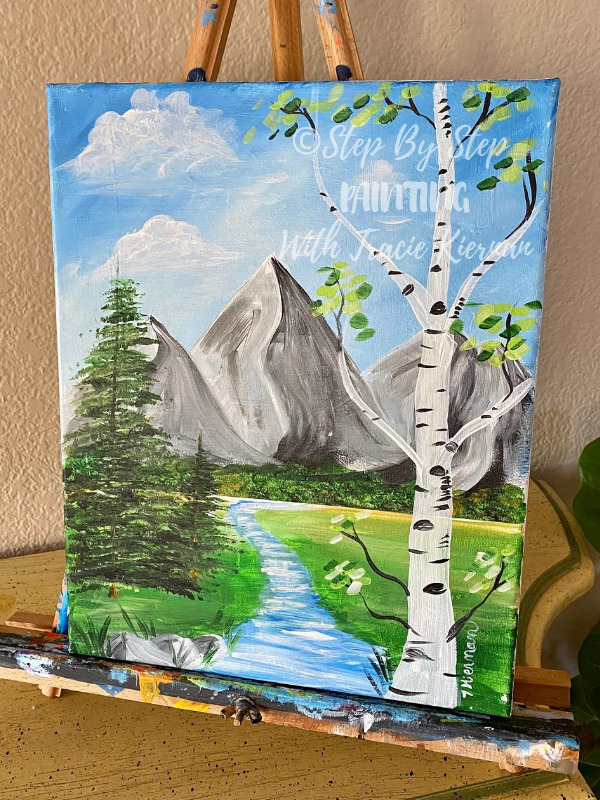
18. Some final touches (I made a tree bigger)
Totally optional! I decided at the end of this painting that I wanted to make this tree on the left to be larger.
So I did just that! I extended my line up and used the fan brush to make the tree larger and bushier. 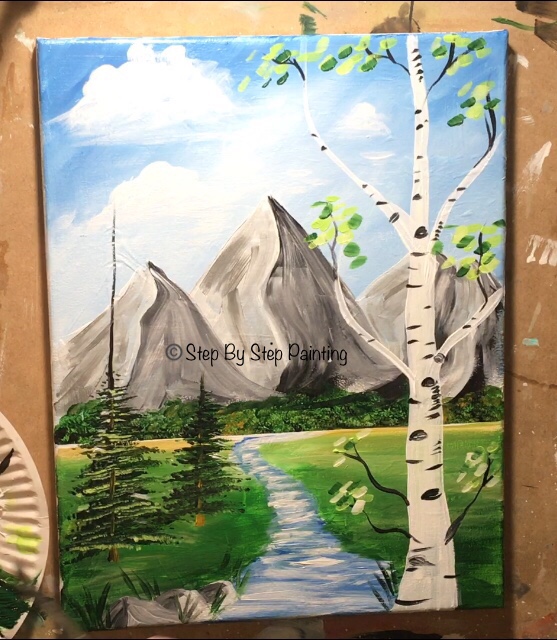
Finished!
Share Your Art!


Thank you so much for this tutorial. I have learned so much!
You’re welcome!
Thank you so much for this step by step painting, finally I got better at painting mountains!
You’re welcome!
I love this one so much! Would love to see a winter snow version with maybe a cabin on one side at night! Do you have any like that? Or are you thinking of doing that kind sometime soon?
Thanks for the tutorial.A well explained turorial!
I have used your tutorials to teach my kids how to paint. They are so easy to follow that my children, who thought they would never be able to make something “that cool” , are amazed at their own work. I beg you to please keep them coming….and can we get an owl and a snail tutorial? Please?!?
Thanks Nicole! I have a new owl one planned but I also have one here: https://stepbysteppainting.net/2018/04/28/easy-owl-painting-owl-always-love-you/
A snail is a cute idea too!
it was actually pretty easy!! i would be glad to see more nature tutorials i really enjoy them
thanks for making these available!!
Thank you! I’d be happy to paint more nature tutorials!