
Would you like to save this?
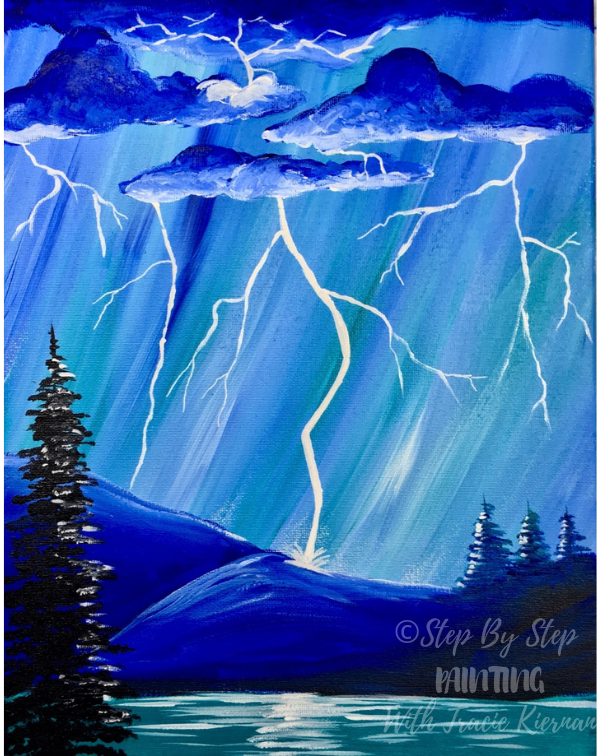
There is something extremely therapeutic about painting your own lightning storm! Maybe it’s because I’ve always had a love for storms. Lightning is such an awe inspiring part of nature. Or perhaps it’s the element of being in control of creating such a beautiful phenomena that happens in only a split second.
This acrylic painting tutorial will show you how to paint lightning using a simple color palette.

Working with a limited color palette makes things in a painting a little more simpler. It’s also a good exercise to learn how to adjust the colors to various tints and shades.
And then there’s those clouds! I realize clouds are one of the trickiest things to paint for beginners and all levels for that matter! I’ll try my best to show you how I did my clouds to create this lightning storm effect. I used a very large round brush for that step.
See Also

Enjoy and happy painting artists!!
Materials
How To Paint A Lightning Storm
This lightning storm acrylic painting has a very simple color palette of only four colors.
Materials
- 11" x 14" Canvas
- Acrylic Paint
- Brushes
- Jar Of Water
- Covered Work Space
- Paper Towel
- T-Square Ruler or straight edge
Colors
Brushes
Notes
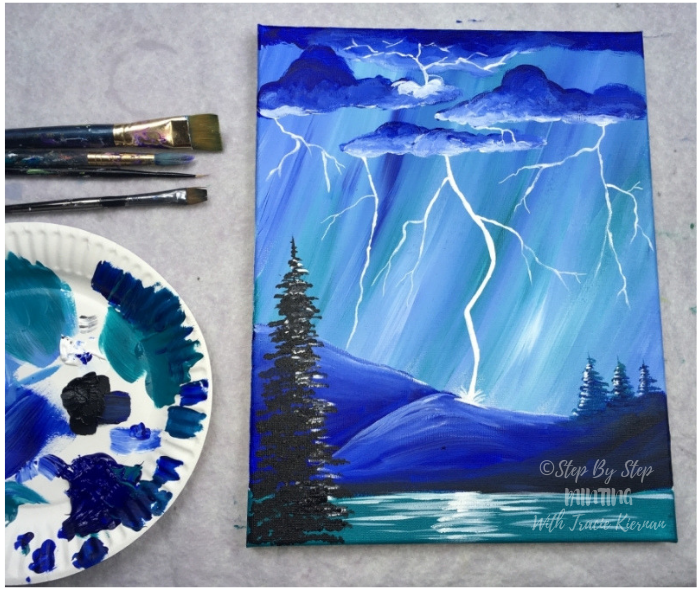
For the clouds, I used the #12 round brush in this pack of brushes. I recommend finding a very large, soft round brush. A filbert brush can work too. Or, if you have a brush you prefer to use for clouds, use that.
Color Palette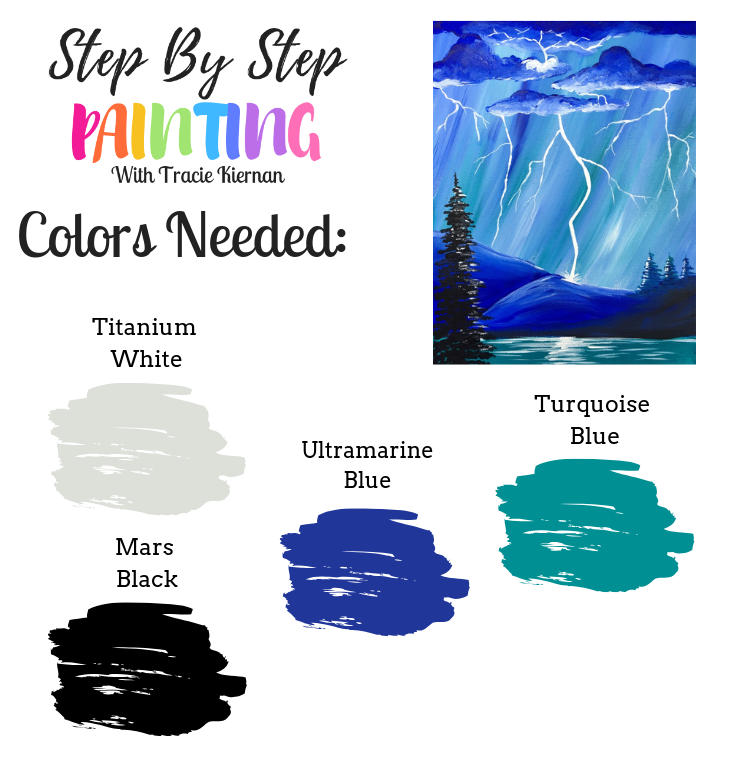

Directions At A Glance

Video:
Step By Step Directions:
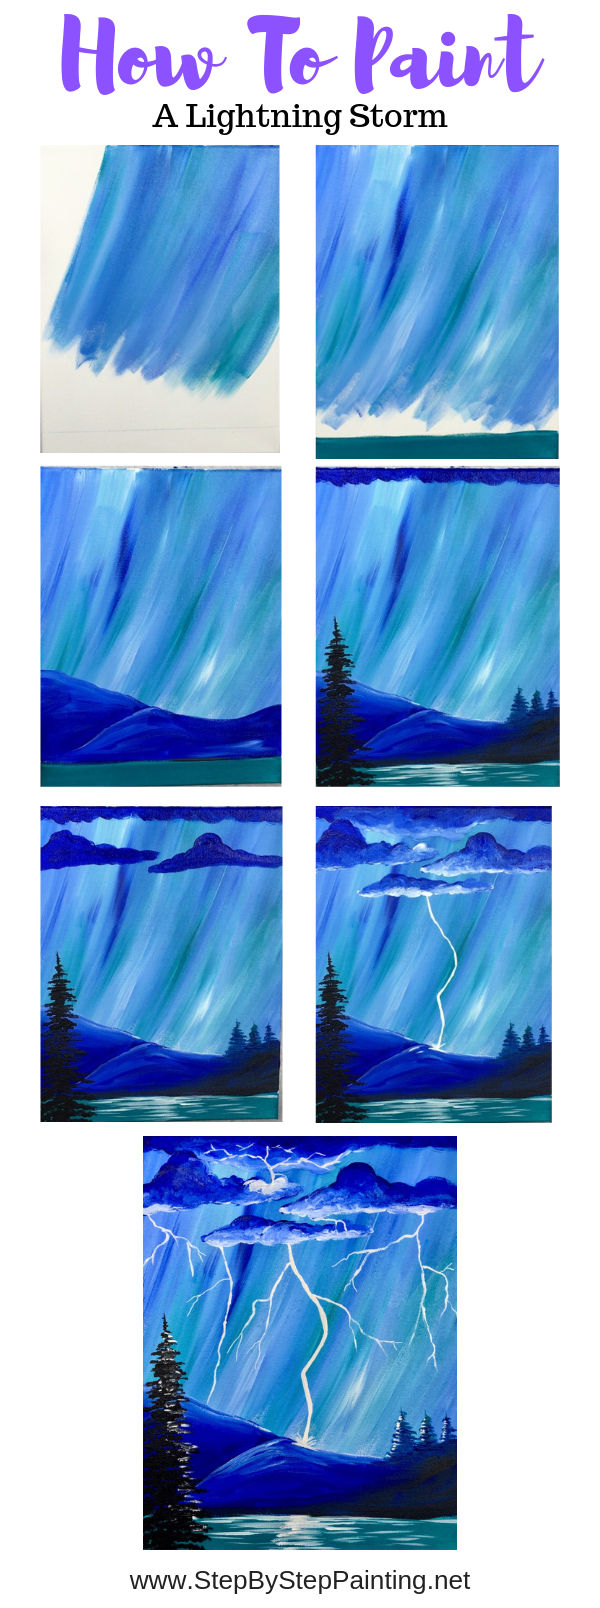
Step 1 Draw The Horizon Line
Draw the horizon line using a T-Square ruler on the bottom of the canvas. Position it about 1″ to 1.5″ up. 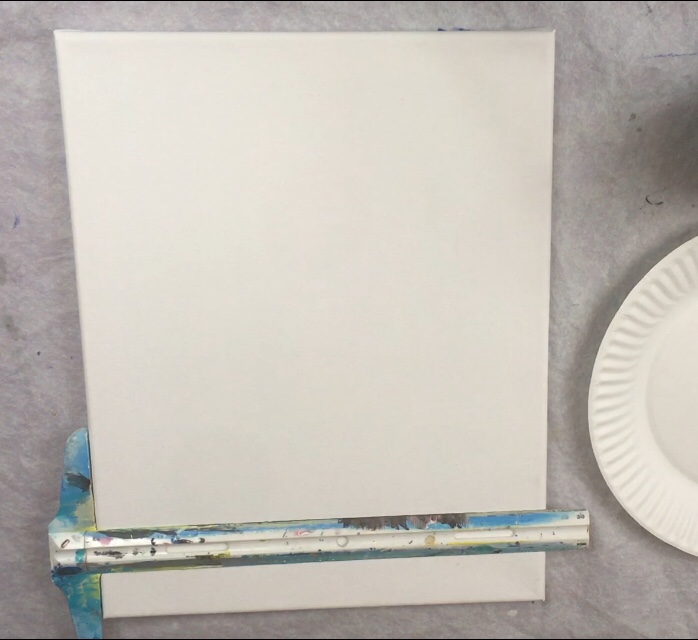
Step 2 Paint The Rain Background
Load your palette with ultramarine blue, titanium white & turquoise blue. You’ll also need a 3/4″ flat brush. 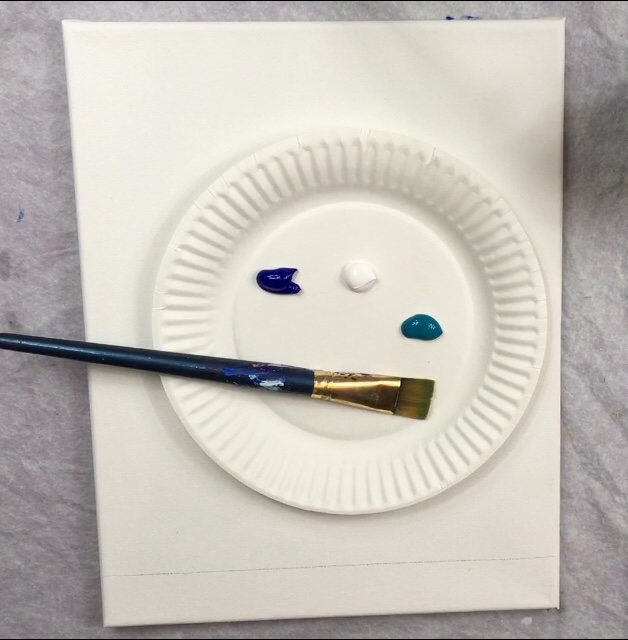
Load your 3/4″ flat brush in all three of those colors. We are going to be painting the rain background.
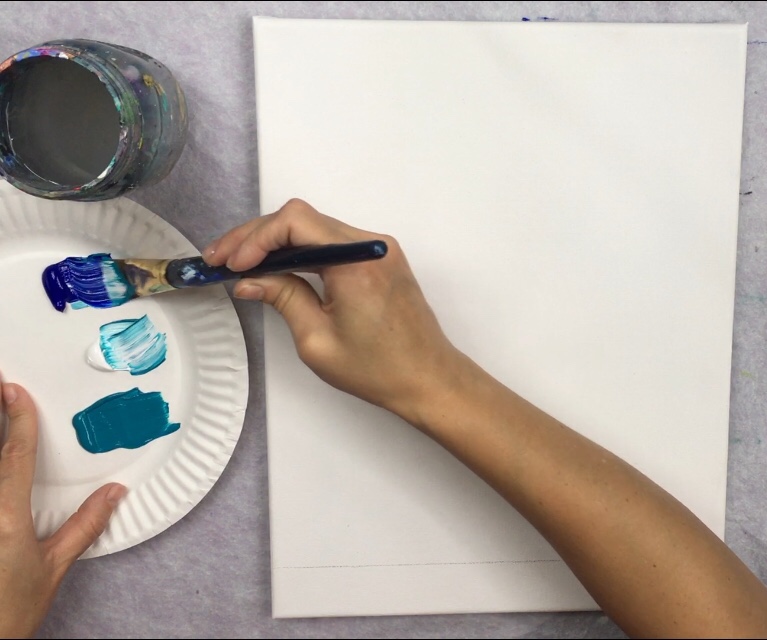
Paint using the full width of the brush going in a sort of diagonal/ curved directions. Imagine this background as a round downpour. There are areas that may be lighter or darker. 
Fill the entire area above the horizon line (but leaving some white space for the mountains). The paint blends on the canvas. Don’t blend the paint too much because everything will start to turn the same color. 
Step 3 Paint The Water
Completely rinse your brush. Paint the water using just turquoise blue and your 3/4″ flat brush. Paint the entire area solid under the horizon line. 
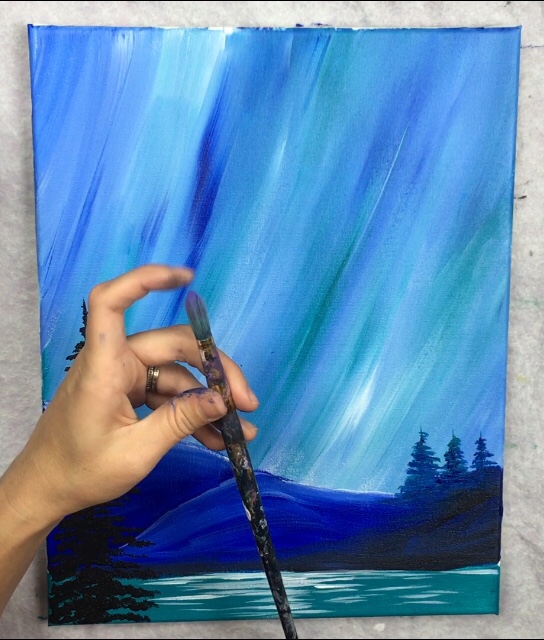
Step 4 Paint The Mountains
Using your #12 flat brush and ultramarine blue, paint the outline of the mountain. It starts out high on the left and dips down to the right. 
Then paint the entire shape of the mountain in with the ultramarine blue. 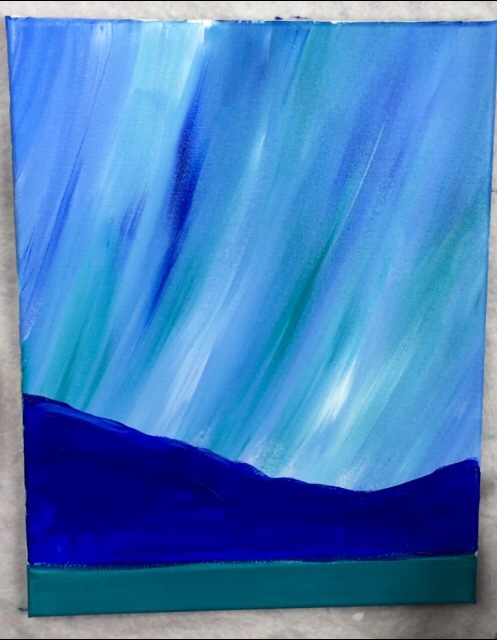
To get different values of lights in the mountains, use titanium white. Also I made the hills into two hills by painting a diagonal line. 
Blend the blue and the white in so it transitions smoothly. You can even add a bit of texture in the mountain by painting long wavy strokes while blending the white in with the blue. 
On the lower right part of the mountain, I blended mars black in with the blue. This makes this area look very dark. 
Step 5 Paint Reflection In The Water
Using your #12 Flat Brush and titanium white, paint left and right horizontal strokes on the water. 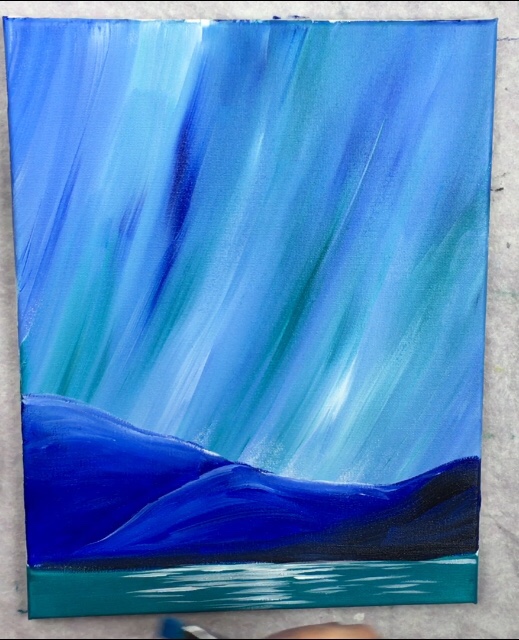
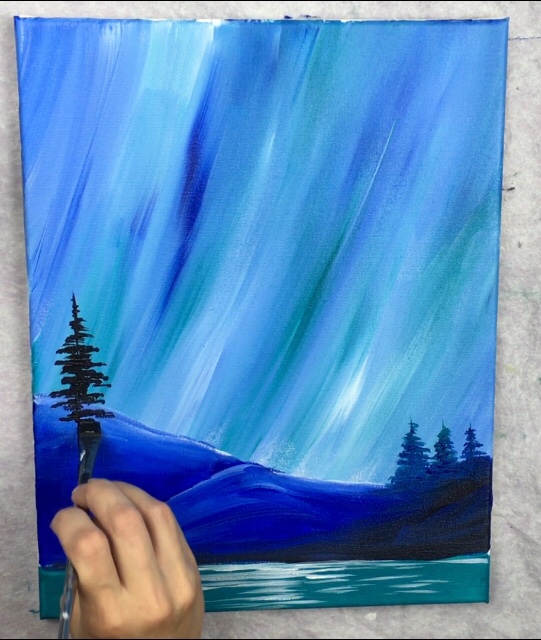
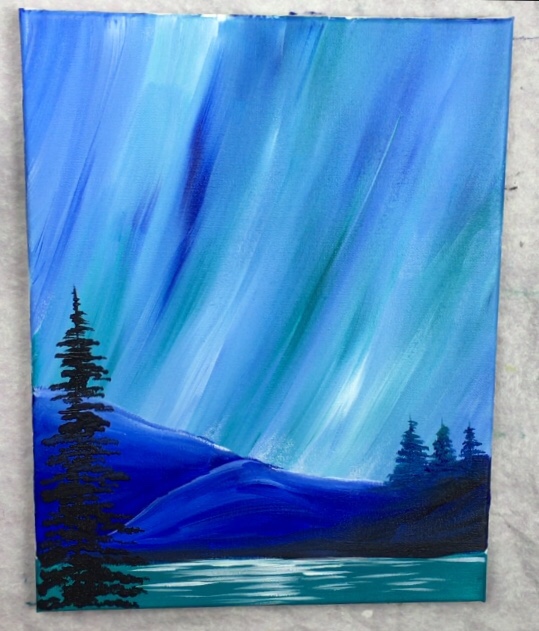
Step 6 Paint The Trees
Using your #12 flat brush and turquoise blue, paint three trunks of the small trees in the distance. I used the very tip of my brush to do these vertical lines. 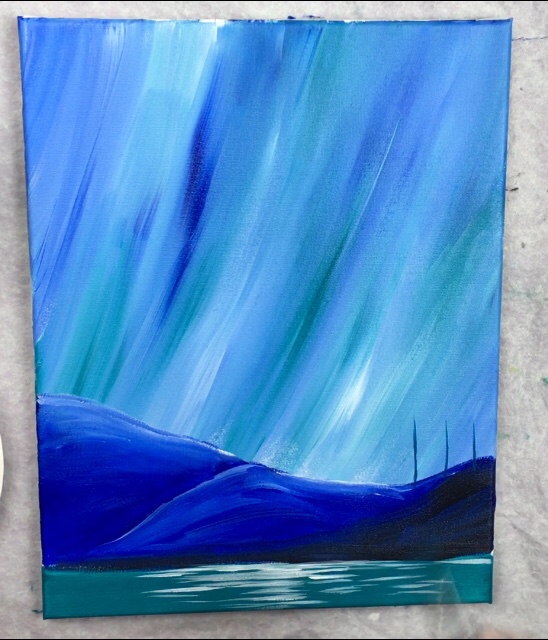
Use the tip of your brush to stamp the branches. Start at the top of the tree and stamp very lightly to create the smaller branches on top. As you work your way down, do so in a zig-zag pattern making the tree fuller on the bottom. 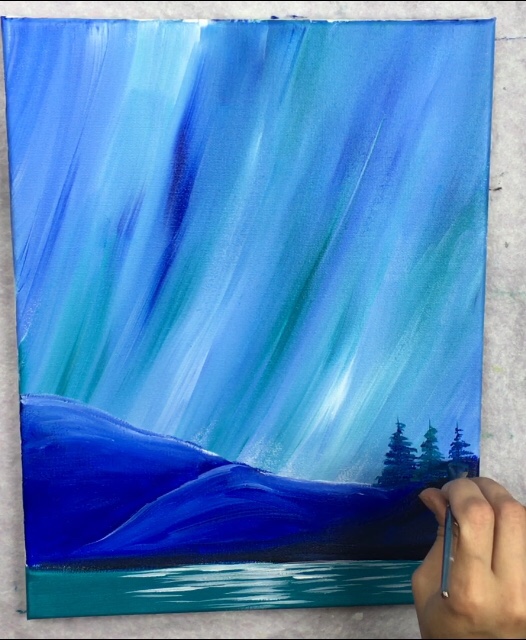
Use mars black for the large tree in the lower right. Do the same technique of painting the trunk first and working in a zig-zag stamping motion from top to bottom. You can also see my post about how to paint trees with a fan brush (which is the same technique as using the flat brush). 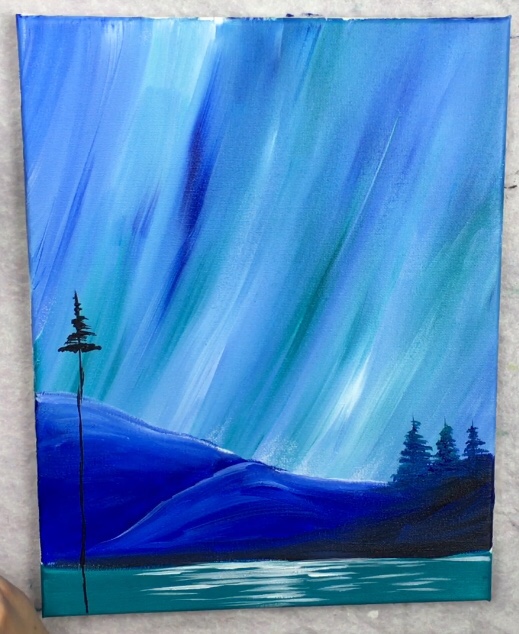
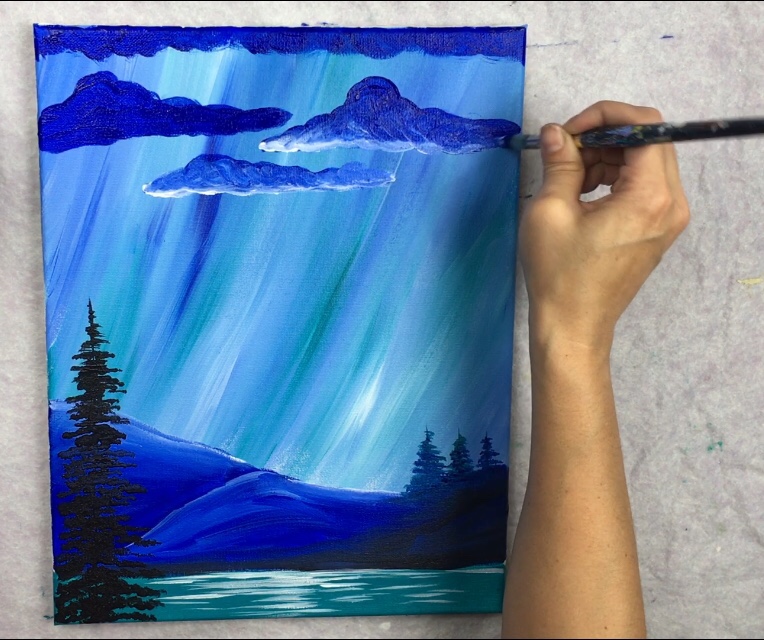
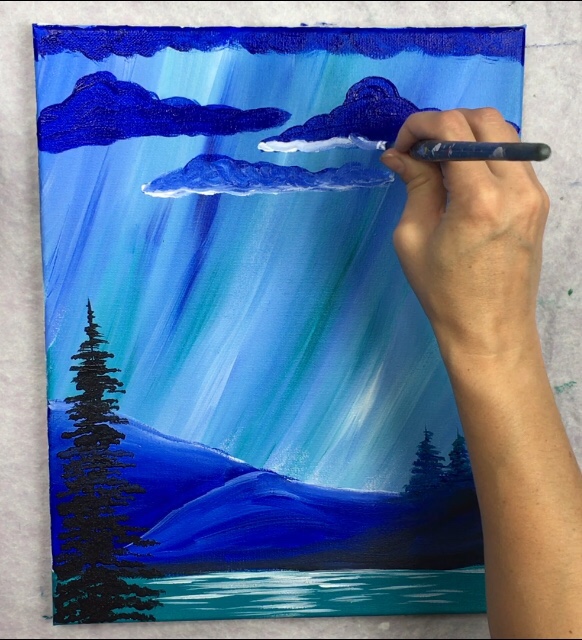
Step 7 Paint The Clouds
I used a #12 round brush in this set. You can also try this technique with a jumbo round brush or a filbert. What’s helpful about a large radius round brush is that the bristles are soft and make it easier to paint little round strokes to form the cloud shape. 
Start the color ultramarine blue. Paint a solid line of cloud at the very top of the canvas. That cloud line has a bumpy shape at the bottom. Then paint a single cloud. When you’re doing these strokes, sort of go in a small, rounded motion. 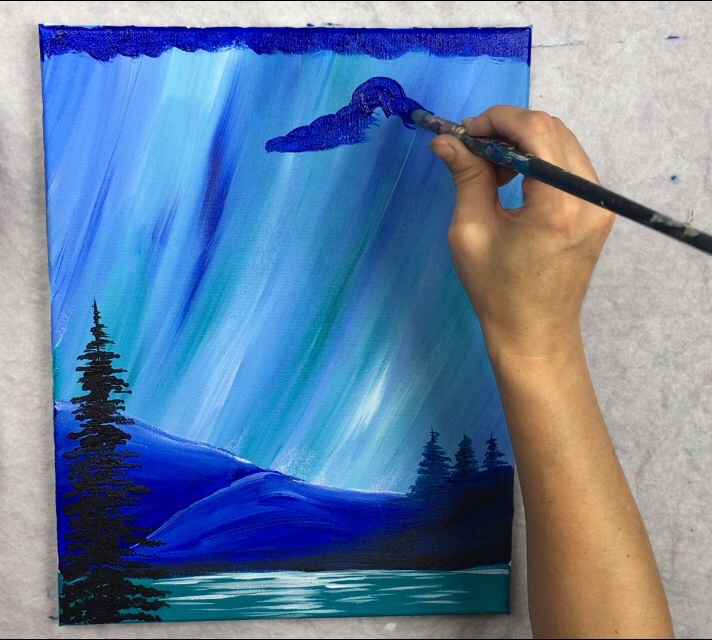
Paint another single cloud on the left, about the same size. 
And then paint another cloud below those two. 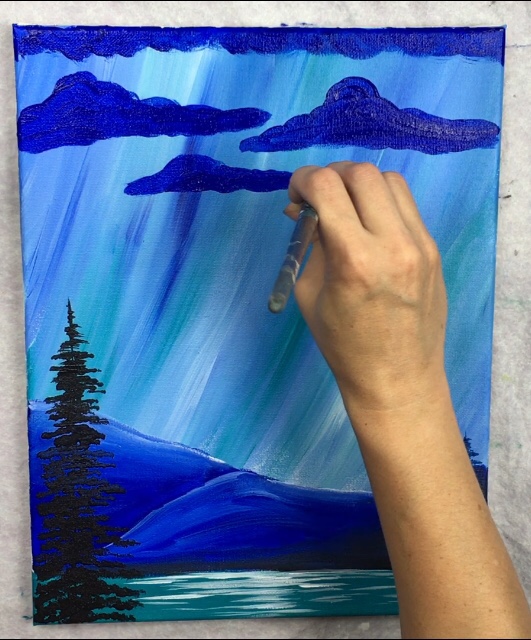
Next wipe off your brush to get most of the blue off. 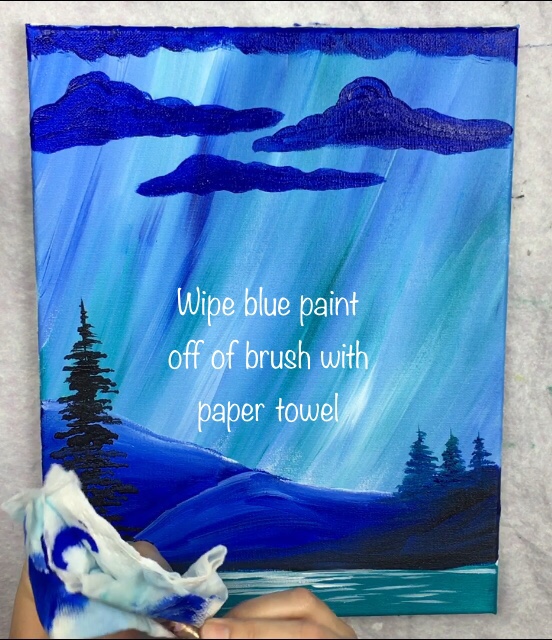
Dip the tip of the brush in titanium white. Paint the bottom of the clouds with the titanium white but allow it to blend with the ultramarine blue. 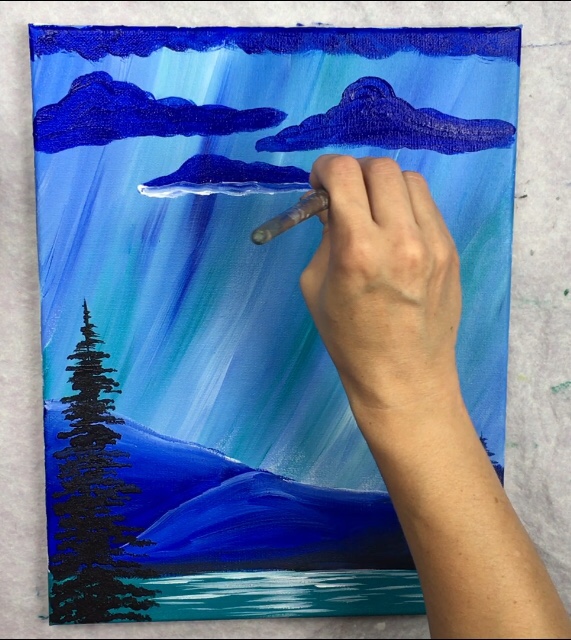
Paint in small circular strokes to blend the white back up into the blue. The clouds essentially are lightest and brightest on the bottom because of the lightning strike.
Continue to paint your white highlight on the bottom of the three clouds and blend it back up into the blue. To get that “fluffy” sort of cloud texture, paint in little circular strokes. 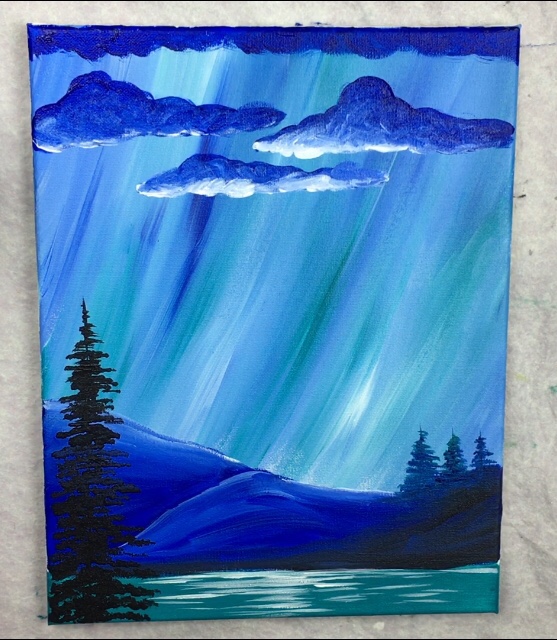
Then I brought that top cloud down a bit by adding titanium white and ultramarine blue to it. Again, it is lightest on the bottom and fades darker on top. I also added a few more brighter areas in the clouds.
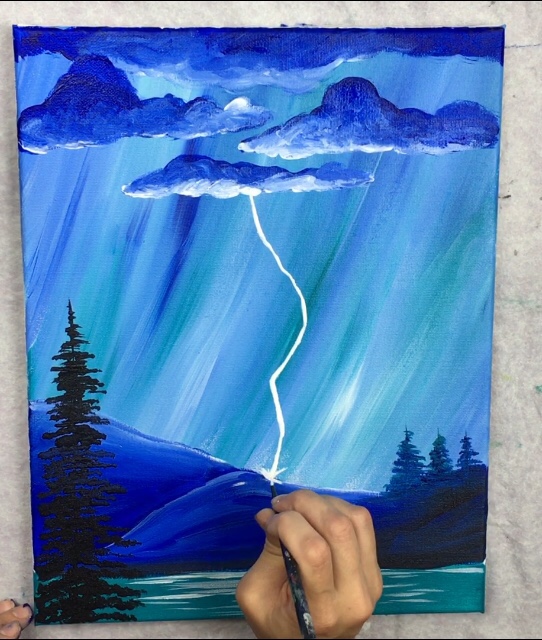
Step 9 Paint The Lightning
For the lightning strike, you’ll need a very small round brush. I used a 10/0 liner and titanium white. I started with the large lightning bolt that hits the mountain. 
Paint a line that’s sort of jagged and goes all the way to the mountain. Then paint the bright area where the lightning is touching the mountain.
Then paint lines stemming out from the main lightning strike. I found that painting lightning is similar to painting branches. You’ll want to make the thickness somewhat varied. There are parts of the lightning that look a lot thinner and others, thicker. 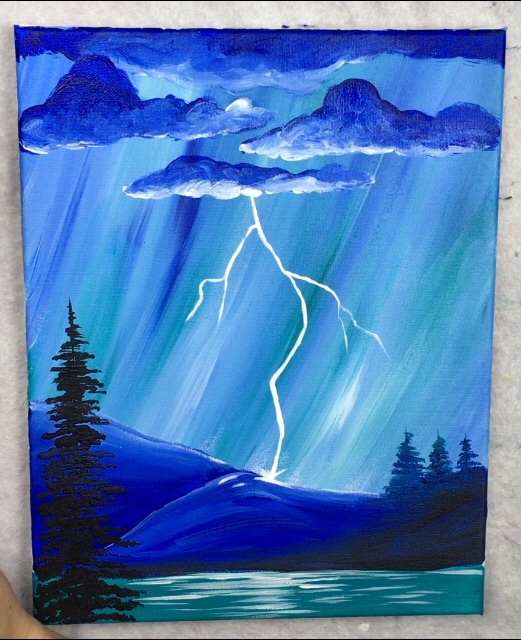
Continue to paint as many lightning strikes as you’d like. Also note that I added more white in the small area under the cloud where the lightning touches to make that area look extra bright. 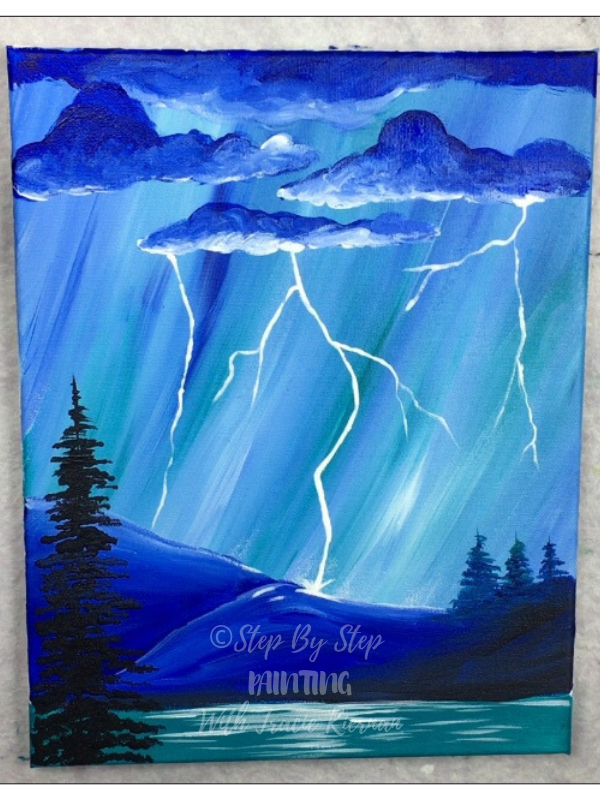
You can also paint small lightning strikes that are touching cloud to cloud, or even in the cloud. 
There would be reflection on the trees on the side facing the lightning strike. To represent this, I used that 10/0 liner and titanium white to paint white on some of the branches. I did this on the large black tree in front as well. 
I found that painting the lightning was very therapeutic! You’re in control of how many lightning strikes to paint, what shape they may be, how long they are and how many branches they may have! 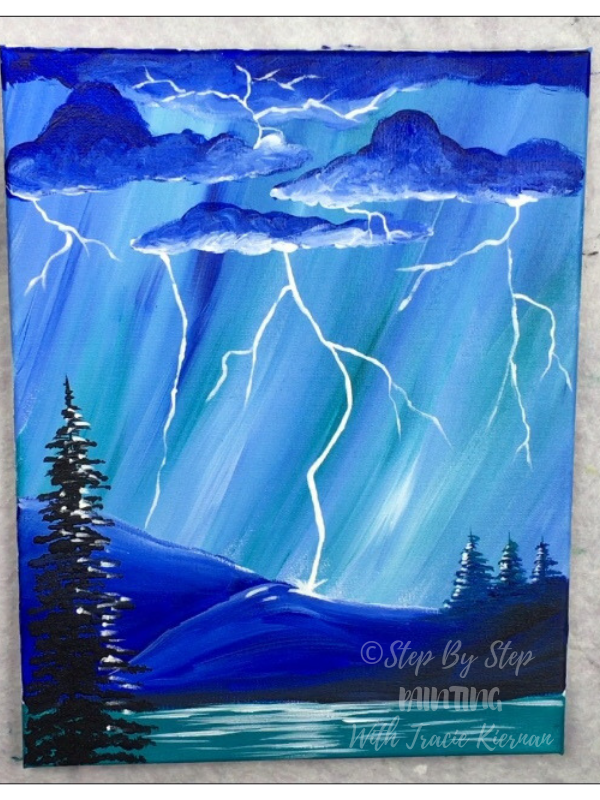
Tip: go over that large lightning strikes a few times to make sure it is nice an bright. It is also the thickest line out of all the lightning strikes.
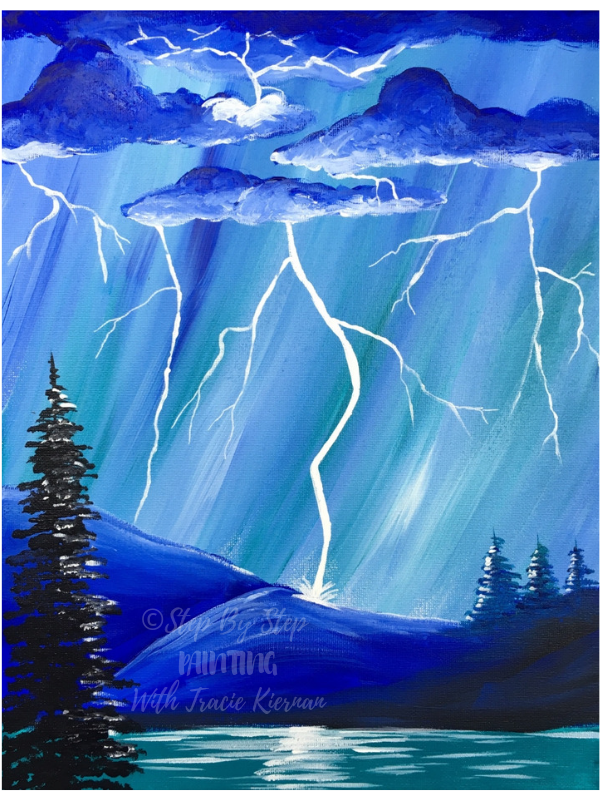
Finished
Share Your Art!


Share This Tutorial

See Also
I love the way you explain in detail everything you’re doing. And you don’t rush from step to step. I enjoyed every minute and My painting actually turned out very good.
That’s great Donna! So glad you like the instructions and you’re proud of your Lightning Painting!!