

Bear Painting Tutorial
Would you like to save this?
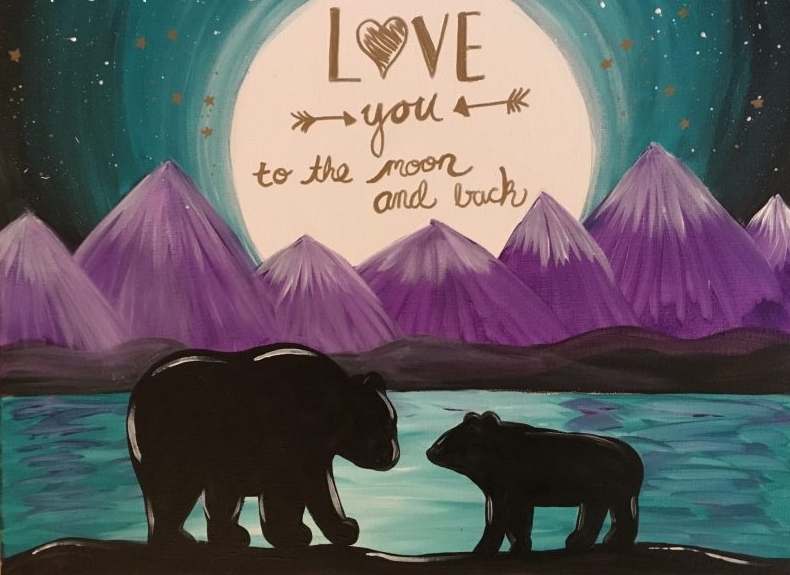
Learn how to paint this bear painting step by step! This is a very easy canvas painting for the absolute beginner!
I did this on a 16″ x 20″ canvas with economical acrylic paints.
You can do it too, no experience required! This also makes an excellent DIY paint night too.
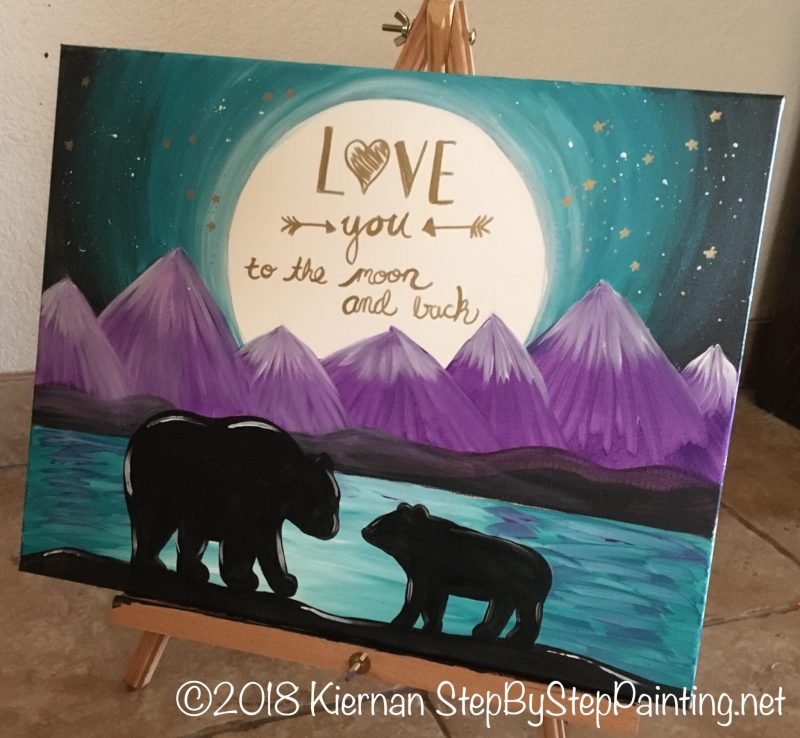
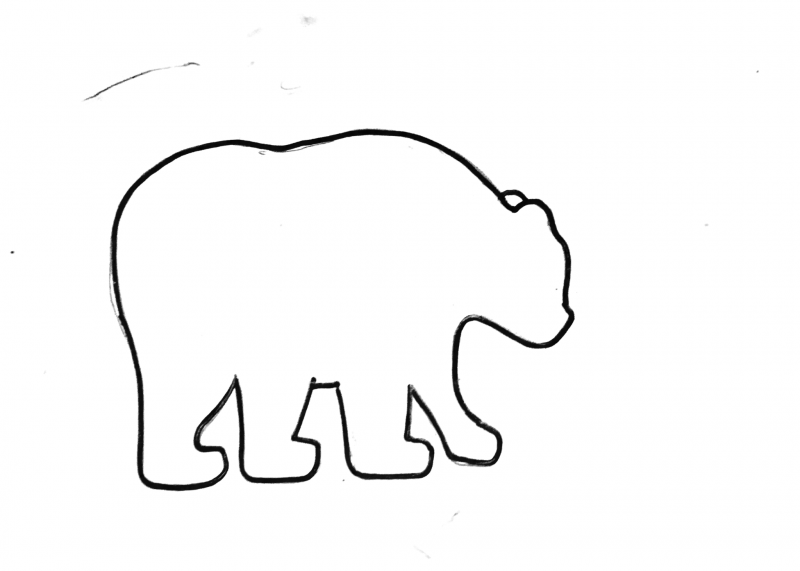
Add the bear silhouette to your painting by simply transferring the outline of the bear with white chalk or graphite!
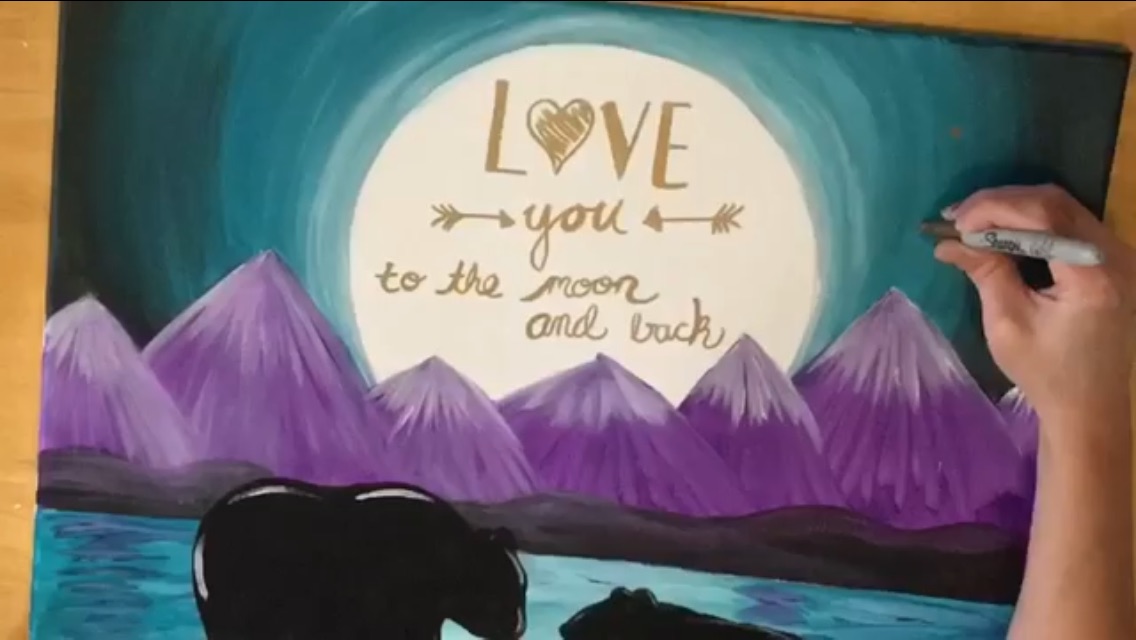
Finish your bear painting with a gold sharpie and add your favorite bear adventure quote on the moon!
If you’re feeling extra creative, you can mix and match the bear silhouettes or make a family of bears! I am providing you the template for the bears so you can adjust the sizes as needed.
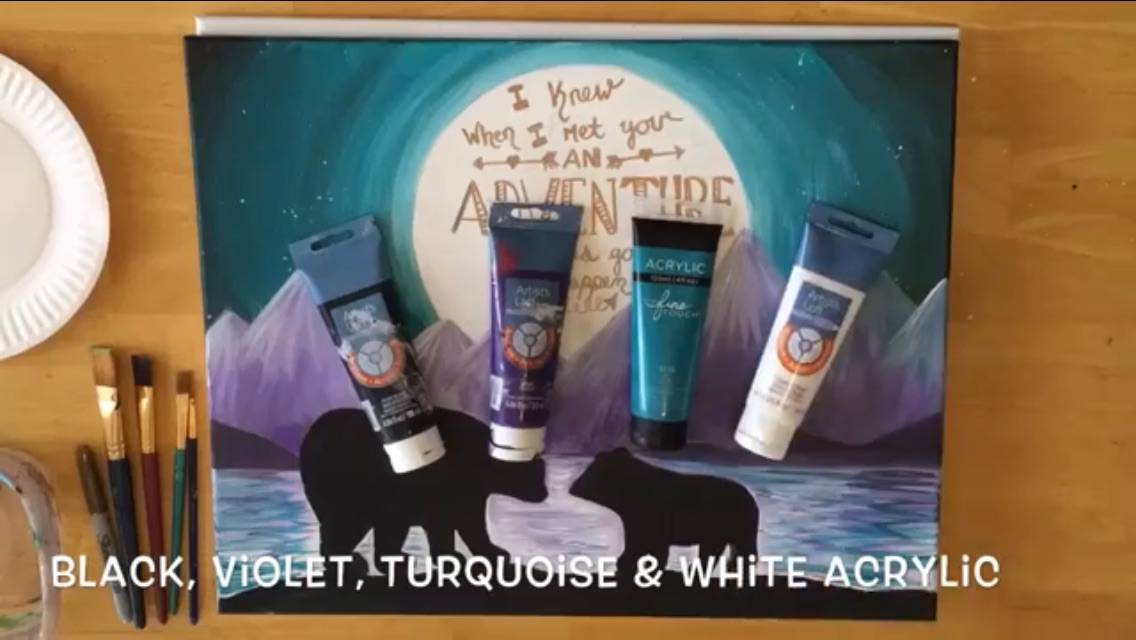
For this tutorial I used economical paint! The Artist Loft Brand can be found at Michaels and the Fine Touch Brand (turquoise) can be found at Hobby Lobby.
Materials For Bear Painting:
Bear Mountain Painting
Paint a bear silhouette scene with majestic purple mountains in the background and a turquoise sky! This beginner tutorial is easy enough for the beginner painter.
Materials
- 16 x 20 Canvas
- Acrylic Paint
- Brushes
- Chalk or Graphite Paper If Using Traceables
- Traceable of Baby Bear
- Traceable of Mommy Bear
- Gold Sharpie If Writing A Quote
- 9” Paper Plate To Trace the Moon
- Optional toothbrush if you want to splatter paint stars
Colors
- Turquoise
- Titanium White
- Mars Black
- Prism Violet
Brushes
- 3/4” Flat
- #4 Bright
- 0 Round
Instructions
- Draw The Moon & Mountains With Pencil
- Paint The Moon & Sky with 3/4″ flat, titanium white, turquoise and black
- Paint The Mountains with violet, white and 3/4″ flat
- Paint the land at bottom of mountain with violet, black and #4 flat
- Paint The Water With 3/4″ flat and turquoise + titanium white
- Paint The “Snow” on the purple mountains
- Transfer The Bears Using graphite paper
- Paint the bears in with mars black.
- Add A Quote With Gold Sharpie
Templates For Bear Painting:

Directions At A Glance:


Video For Bear Painting:
Step By Step Pictures
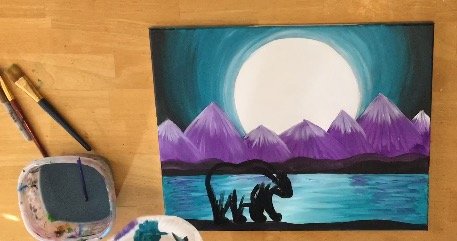
1. Draw The Moon & Mountains With Pencil
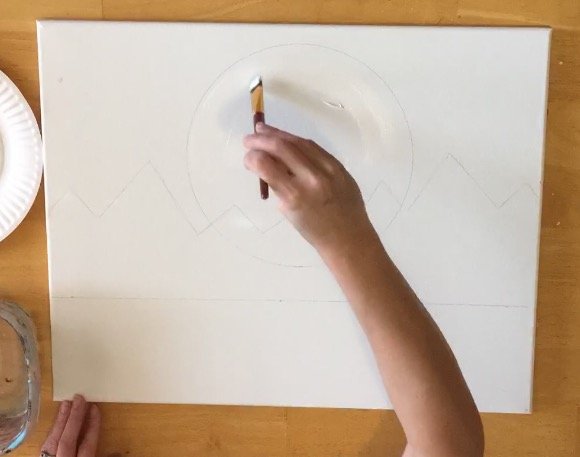
Trace a 9″ paper plate on your canvas. If you are using a smaller canvas, just find a smaller circle to trace!
Use a ruler to draw the horizon line 4.5″ from bottom. Draw mountains lightly with a pencil. See composition below.

This is not necessarily to scale. But as you can see, the mountains are a zig-zag line that do not touch the horizon line. The points are different heights as well. Remember to draw lightly with your pencil.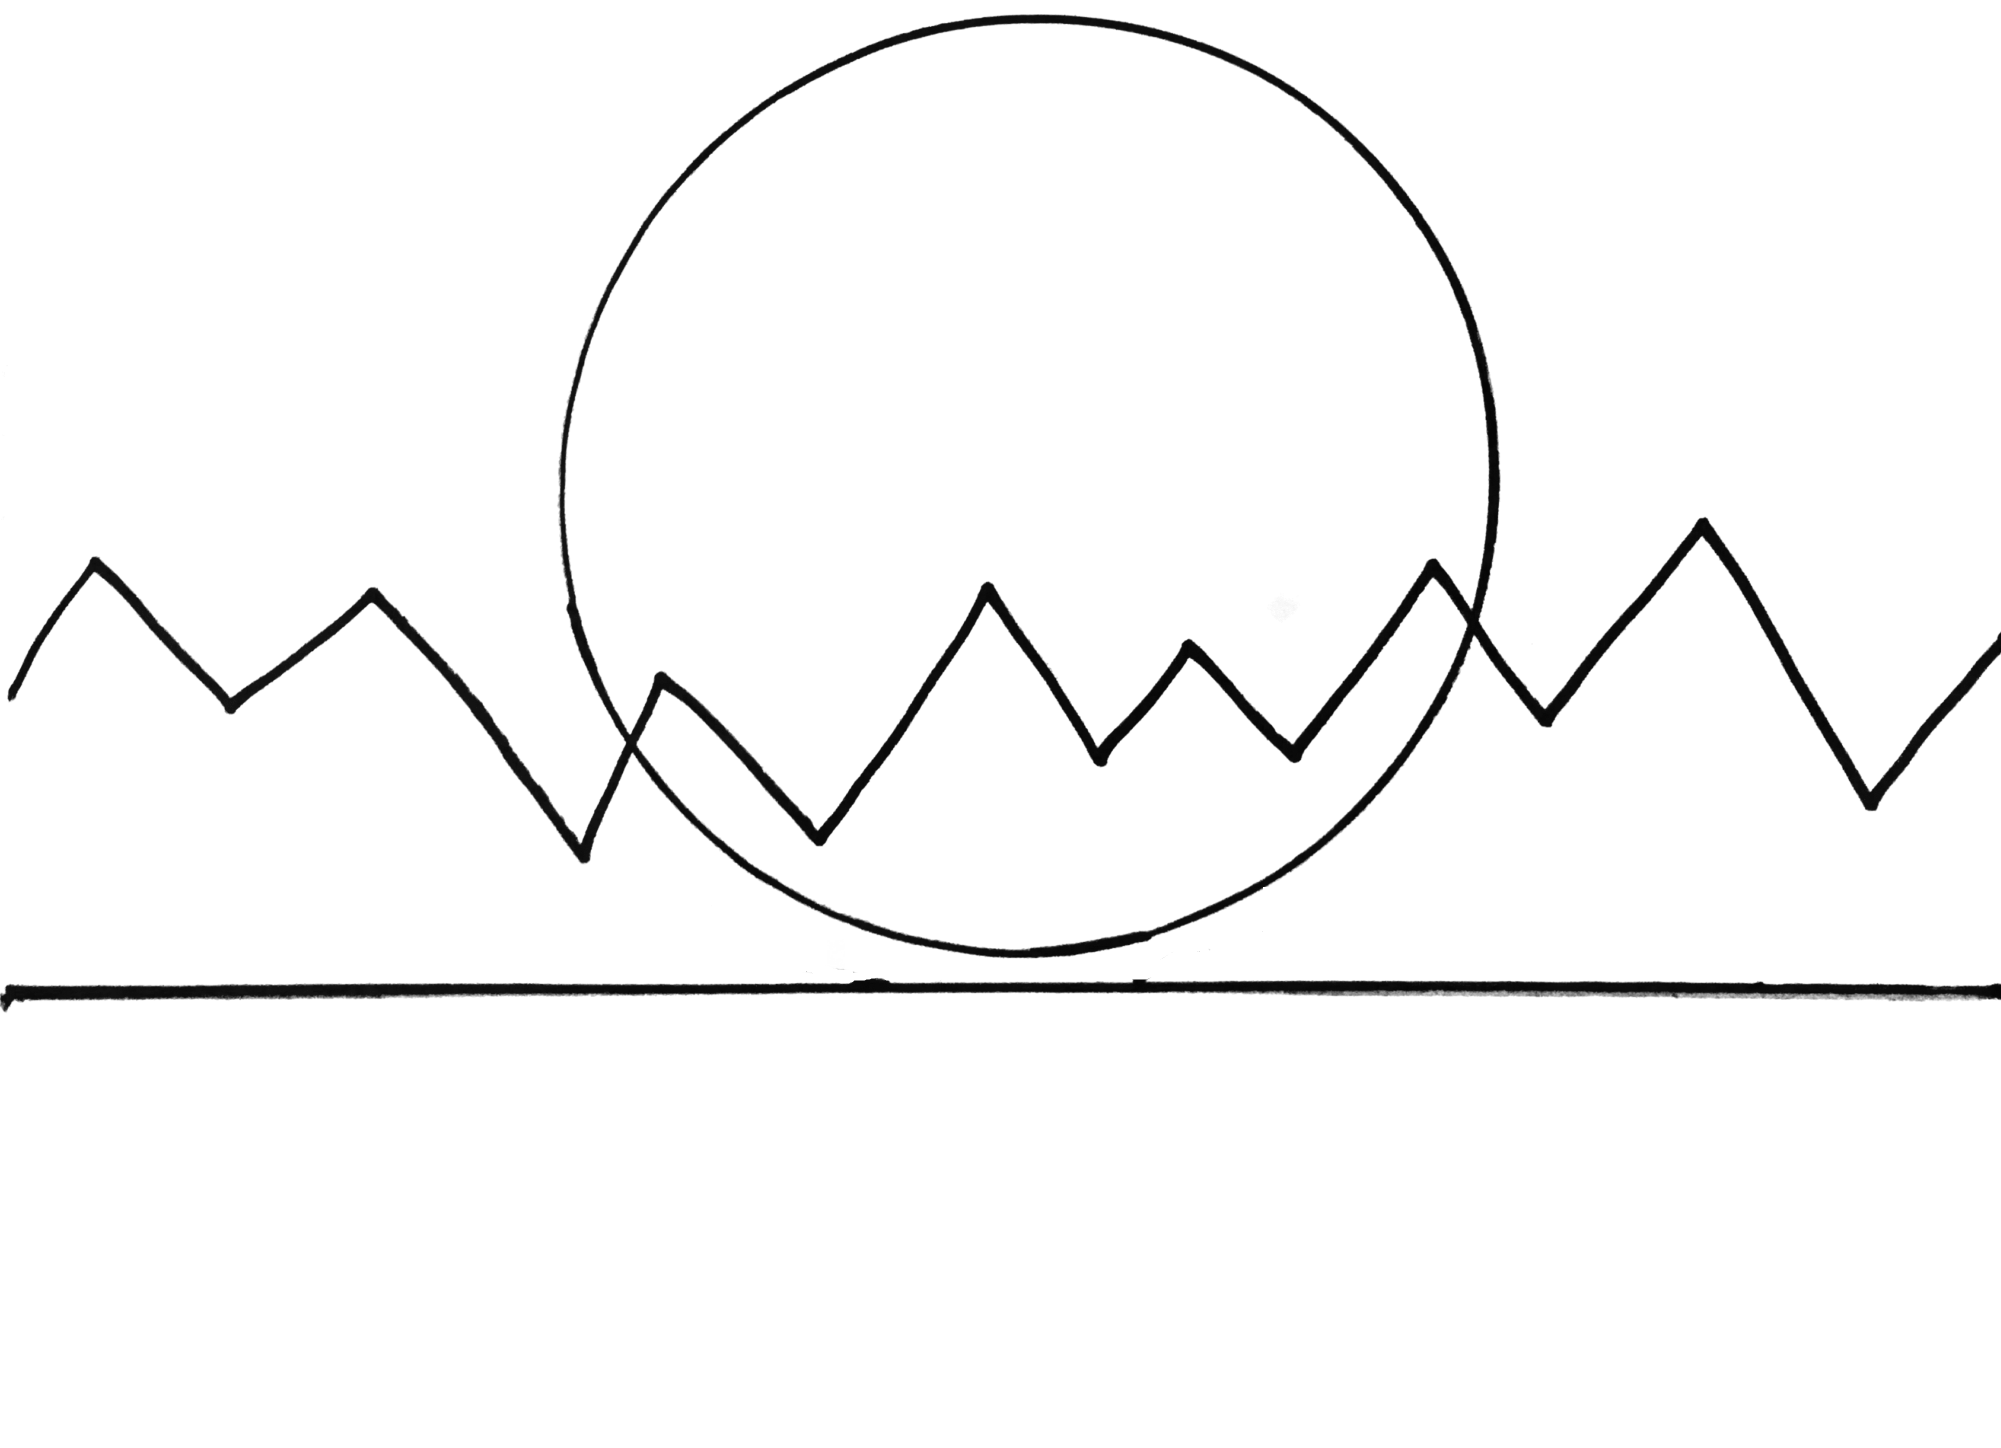
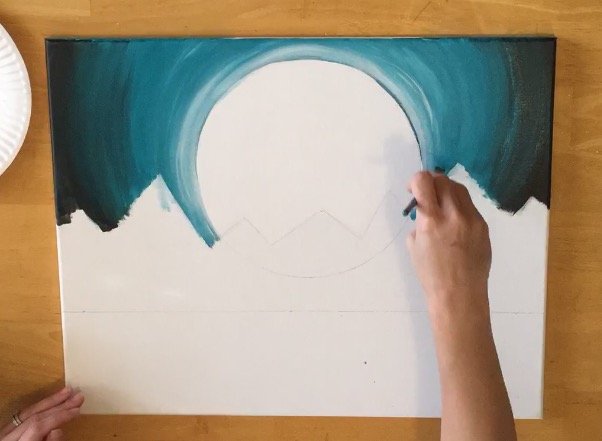
2. Paint The Moon & Sky with 3/4″ flat, titanium white, turquoise and black
Apply titanium white paint to the moon with a 3/4″ flat brush. Paint the entire circle white.
Then paint circular strokes around the moon with just turquoise paint.
Use the full width of the brush to create this effect.
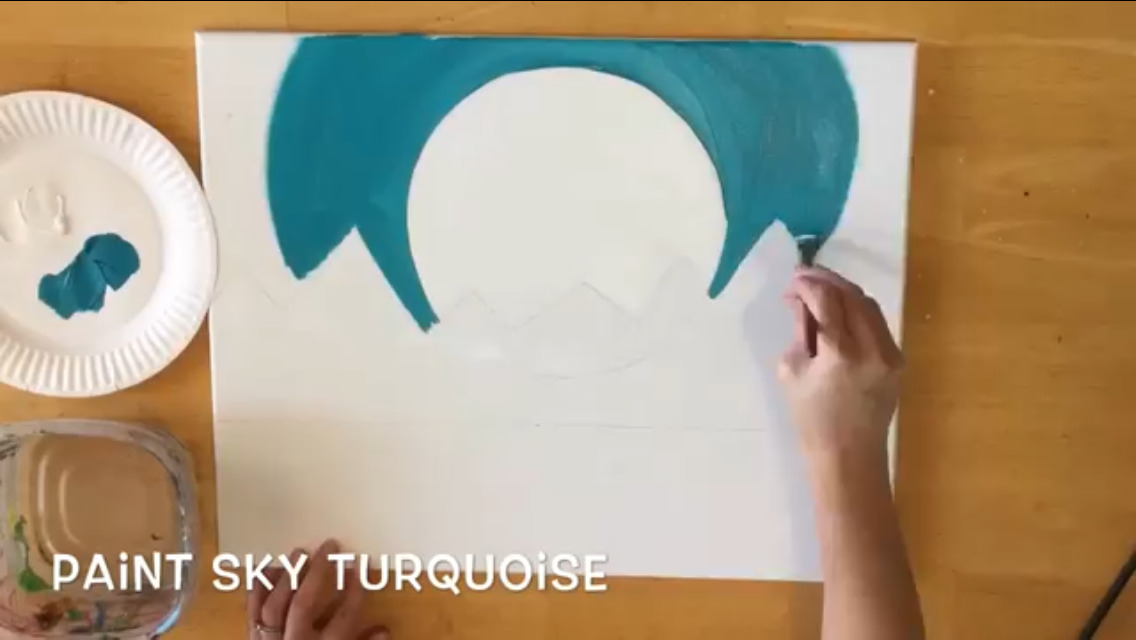
Then (without rinsing your brush) add a little bit of mars black to your brush and blend it in the turquoise on the edges.
The darkest part of the sky is at the edges of the painting.
Keep in mind that black is strong so you only need a little!
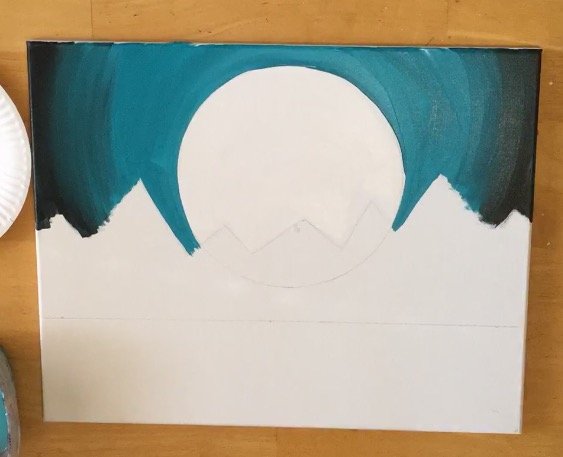
Use a clean, dry #4 flat brush to paint some solid white moon rings.
Your paint should blend with the turquoise a bit.
You also only need a tiny bit of white on this brush so that the strokes look light and “feathery” around the moon.
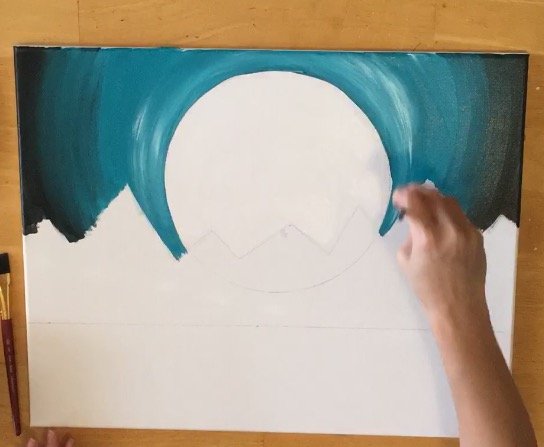
Touch up the moon if necessary with titanium white.
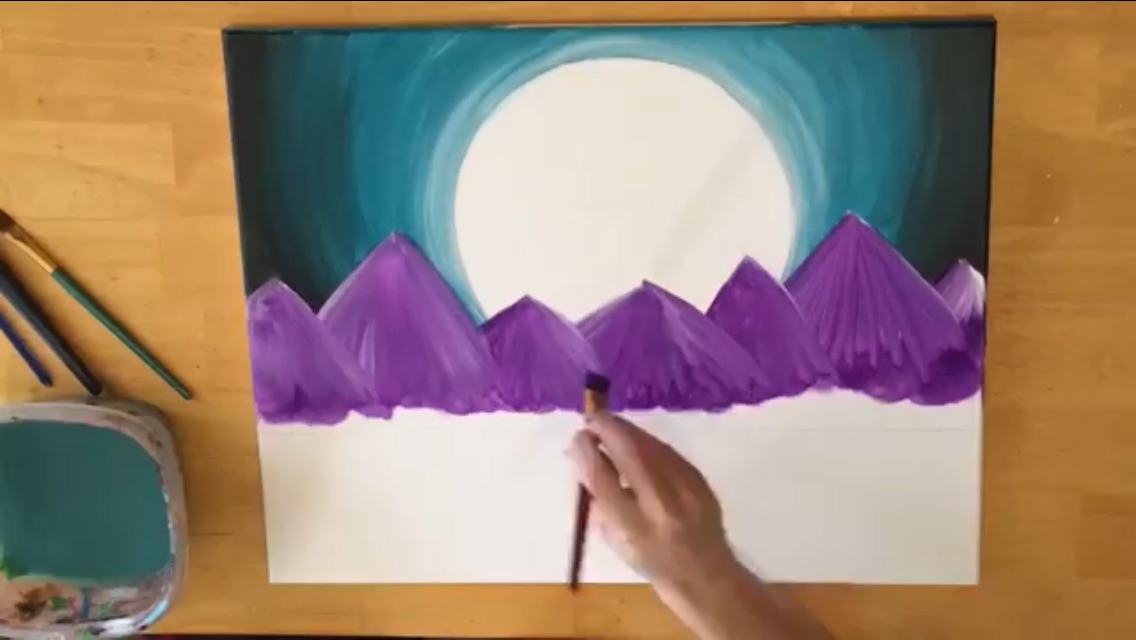
3. Paint The Mountains with violet, white and 3/4″ flat
Use a clean 3/4″ flat brush to paint the mountains violet.
Stroke down to create the sharp angular strokes seen in the mountain.
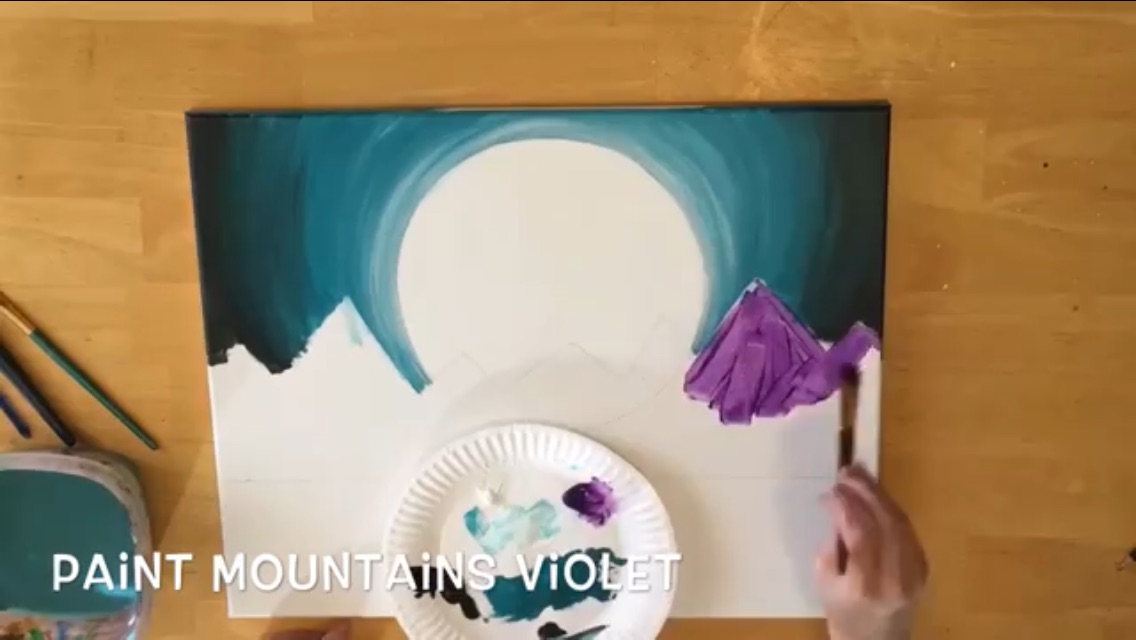
You may need to do more than one coat to make the mountains nice and solid.
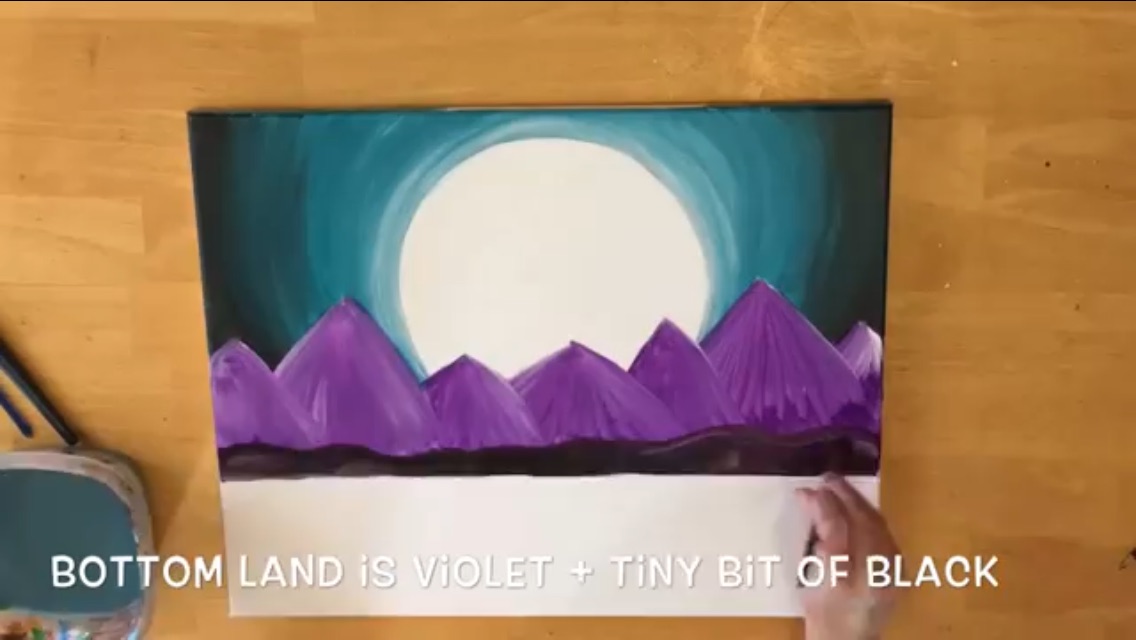
4. Paint the land at bottom of mountain with violet, black and #4 flat
Use your flat brush to paint the land under the mountain. I mixed a tiny bit of violet with the mars black to make a very dark purple.
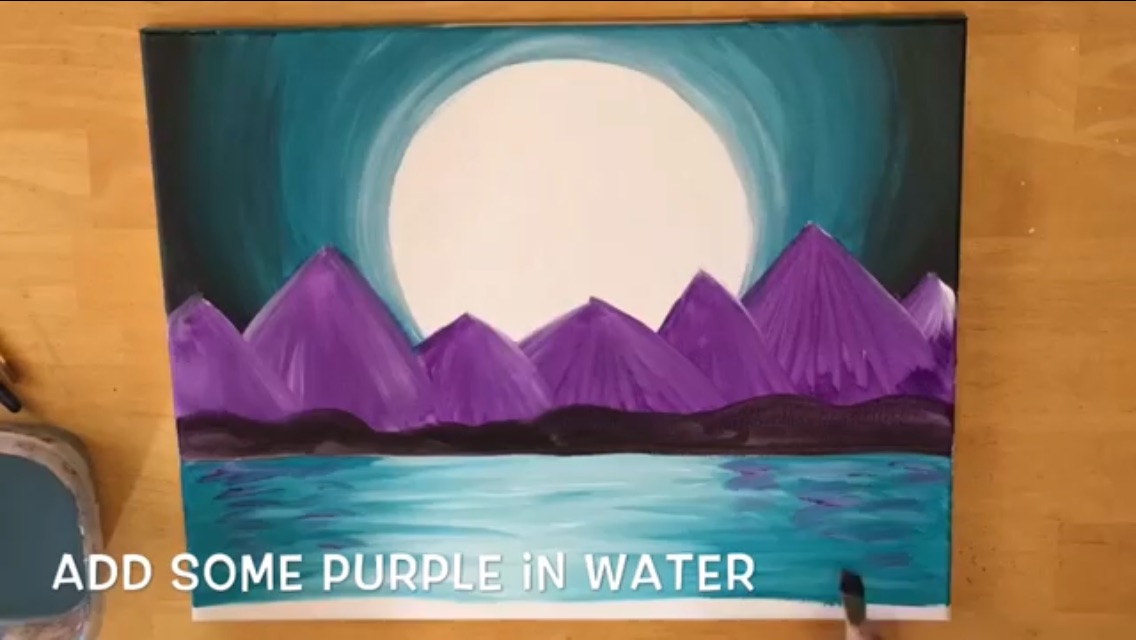
5. Paint The Water With 3/4″ flat and turquoise + titanium white and also some violet
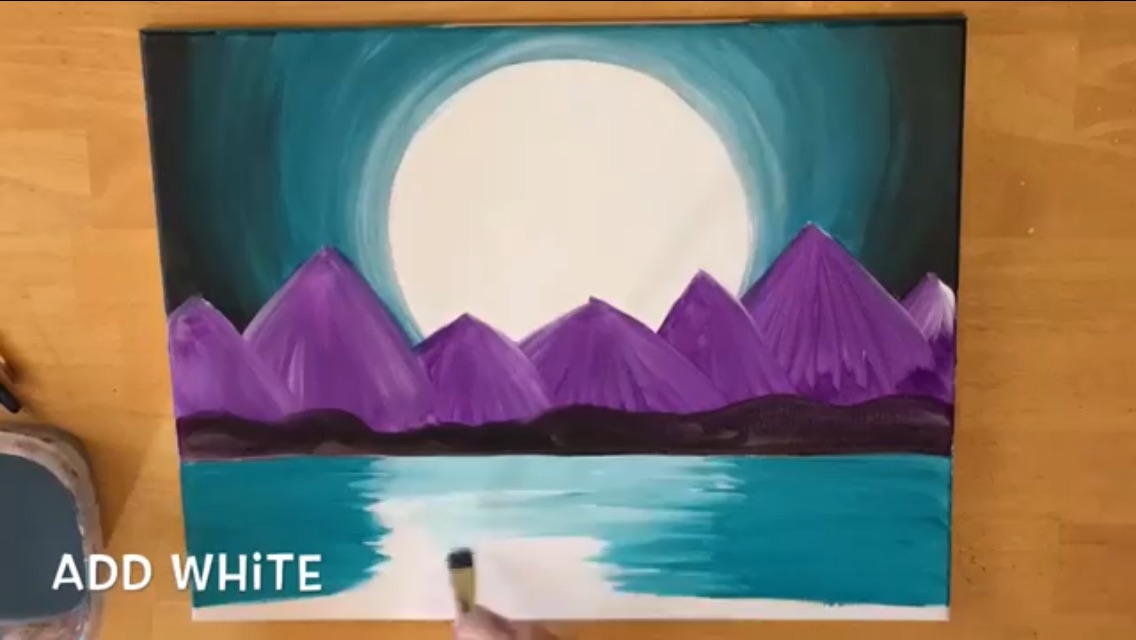
Paint the water turquoise using horizontal strokes. Leave a gap of white canvas in the middle.
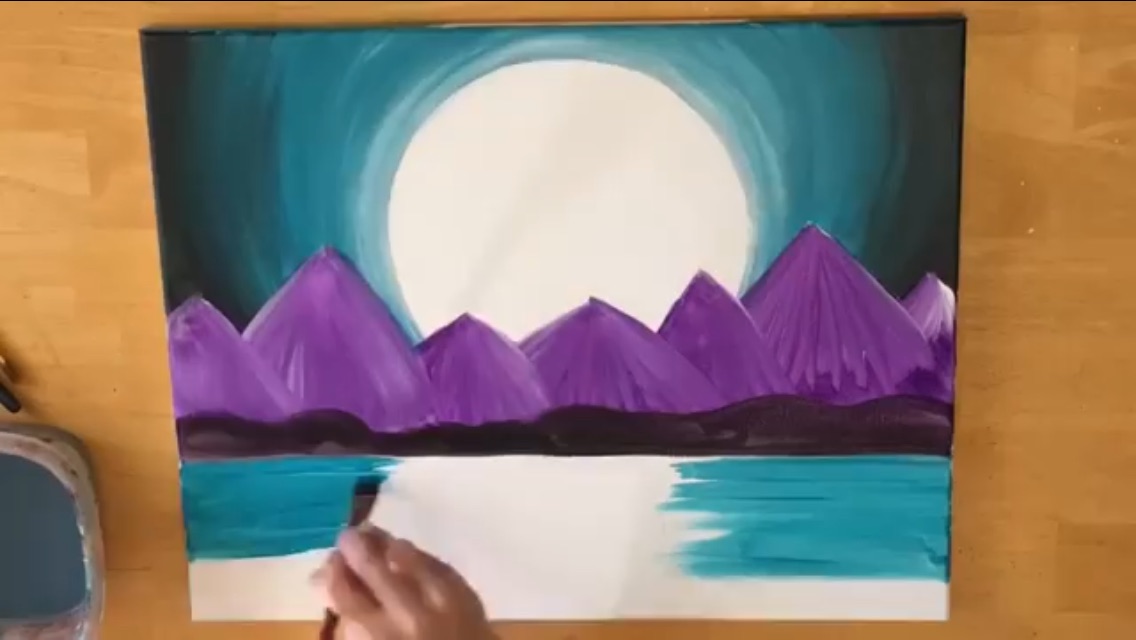
Then add white to your brush and paint white strokes in the middle to represent the moon reflecting on the water.
Then add some purple in the water by making short little horizontal strokes. This represents the mountains reflecting in the water.
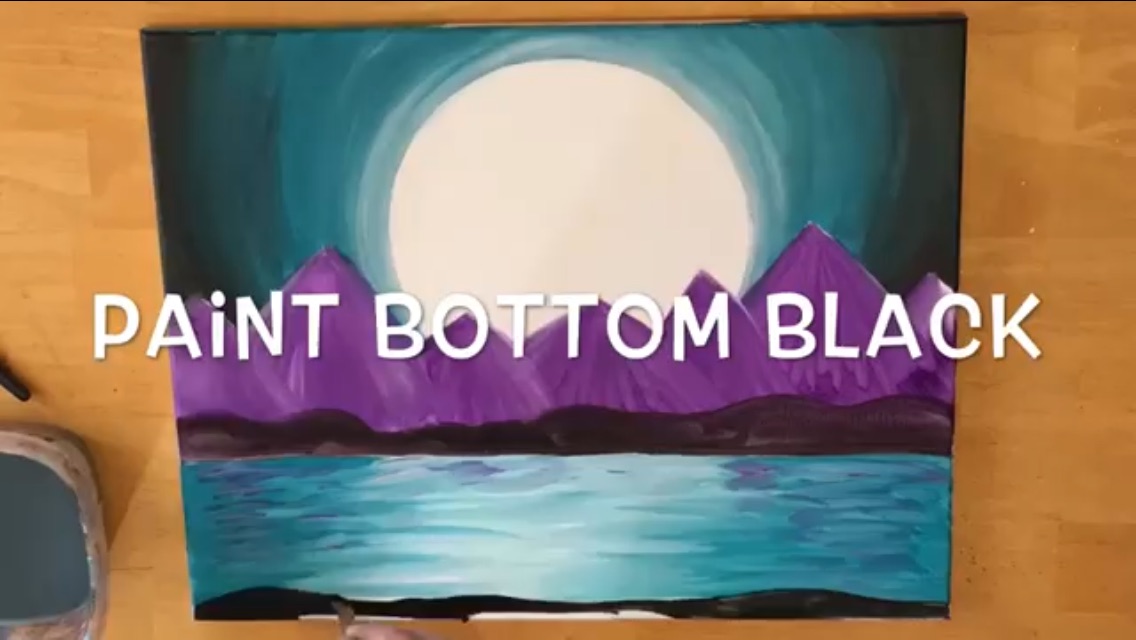
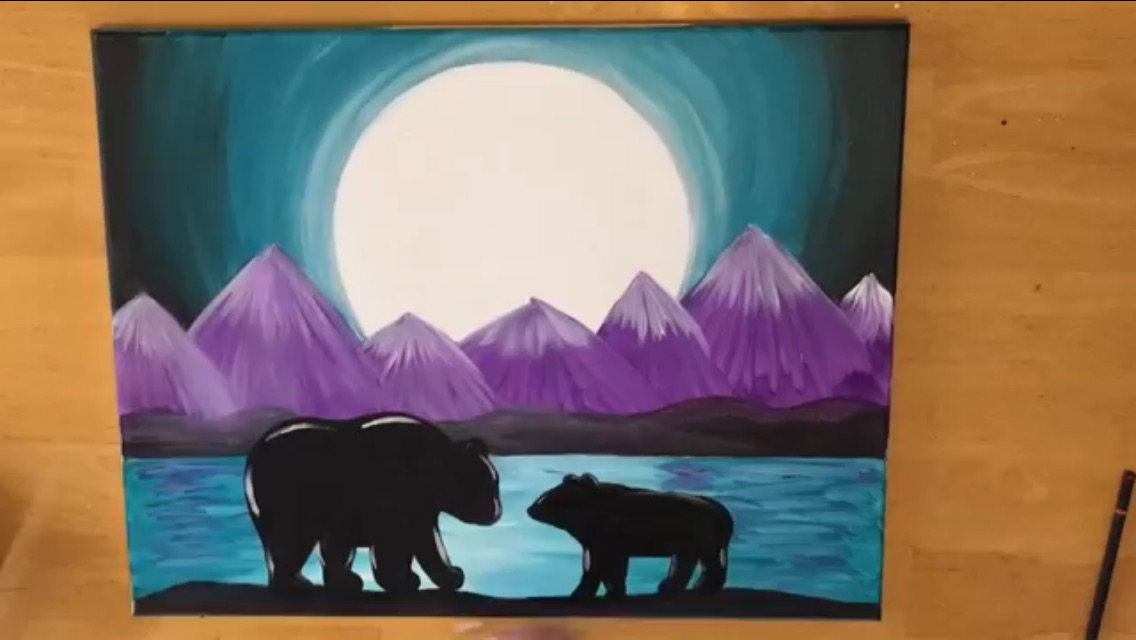
5. Paint the bottom land
Use a clean #4 flat brush to paint a lumpy land area on the bottom of the canvas. You may need to overlap your water and that is okay.
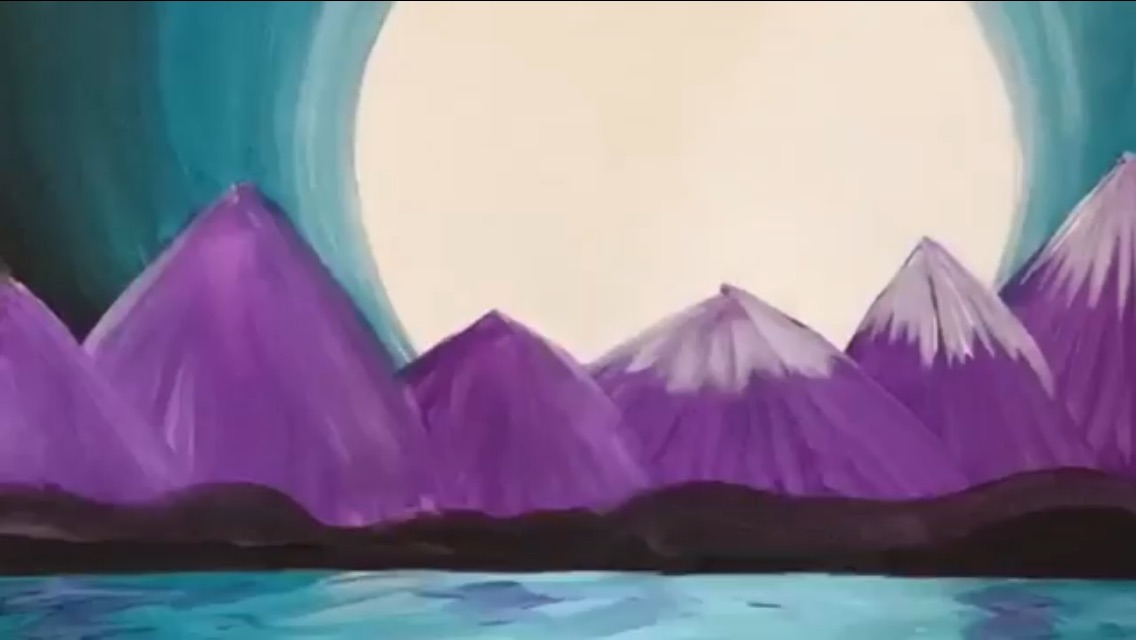
6. Paint The “Snow”
Add some streaks of white on the tops of the mountain by stroking down.
7. Transfer & Paint The Bears
To transfer the bears, use the traceables and add a sheet of graphite paper under the bear or color chalk underneath the sheet of paper.
Then trace the design to transfer to the canvas.
The bear should be positioned so it is sitting on the land.
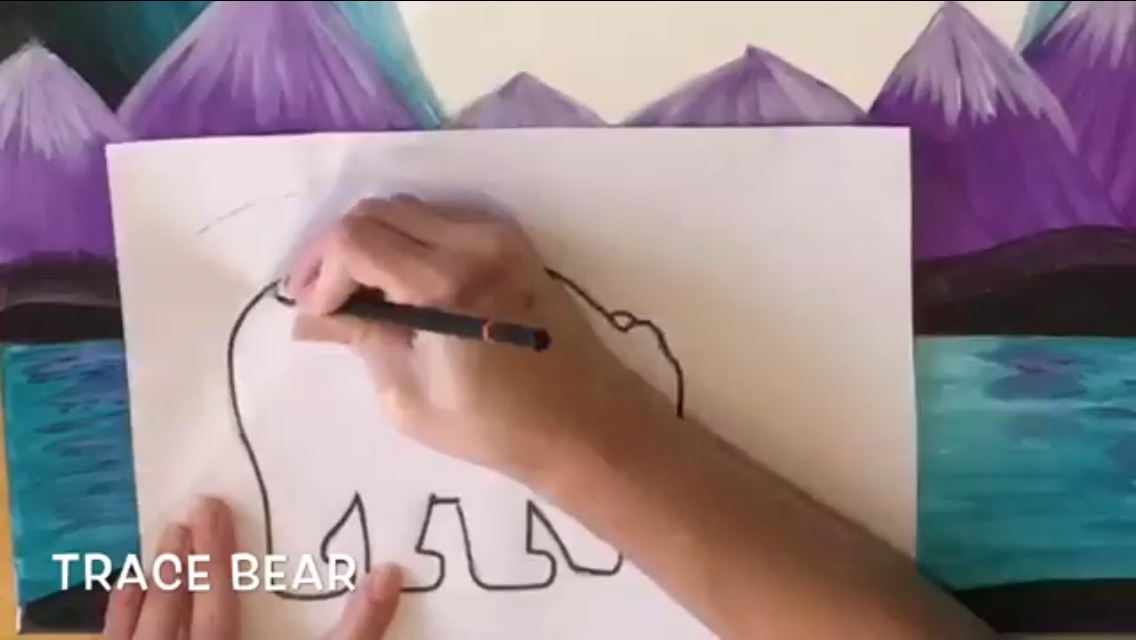
Then use a round brush and mars black to paint the silhouette in.
After you fill the bears in solid, you can add a few white highlight lines on the edges of the bears.
Don’t outline the bear, just paint a few white lines.
8. Add A Quote With Gold Sharpie
Use a gold sharpie to write the quote.
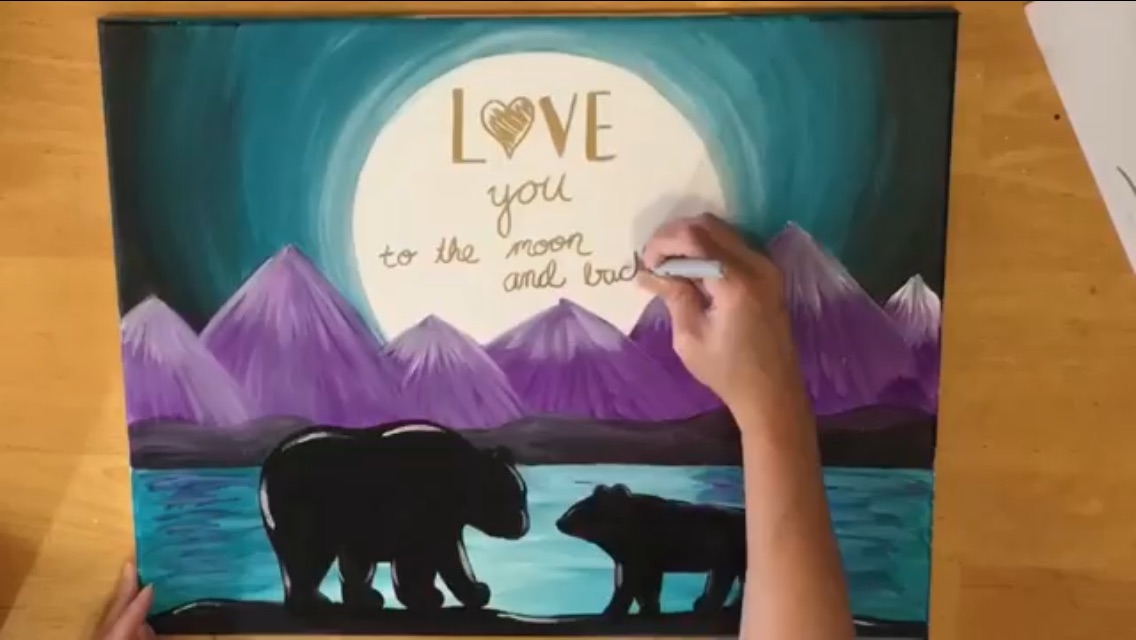
You can also draw golden stars in the sky.
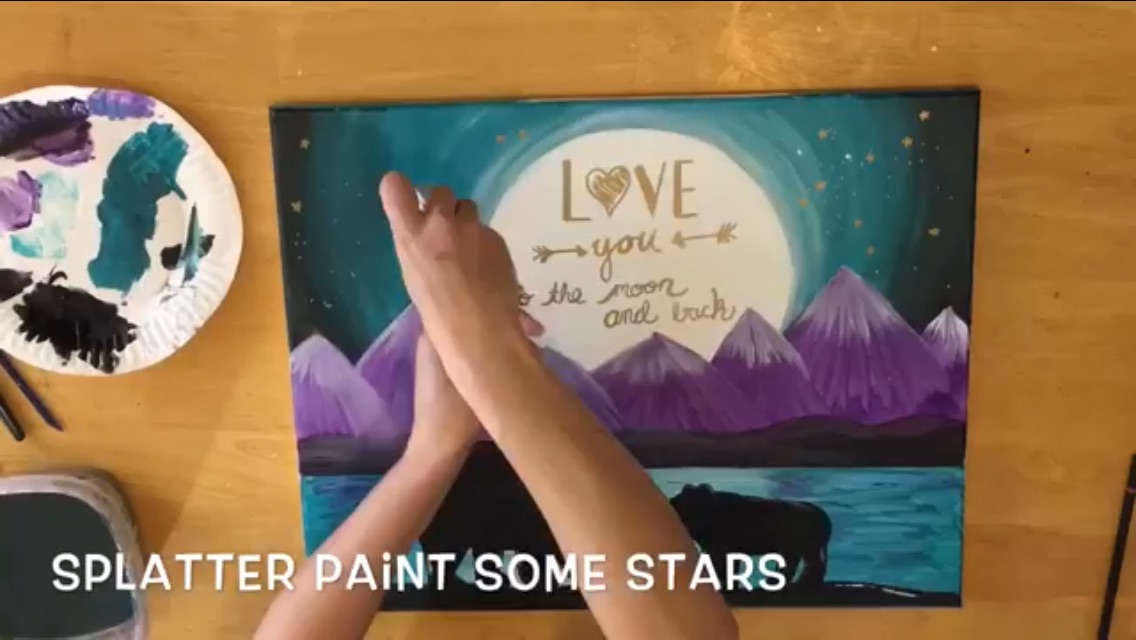
9. Optional: splatter some stars
Be careful with this step! You don’t want the splatter to mess up your painting.
Use a toothbrush and some titanium white to practice flicking the paint on a separate area from your painting.
Then splatter the white in the sky so only tiny specks show up as star in the sky.
Finished!
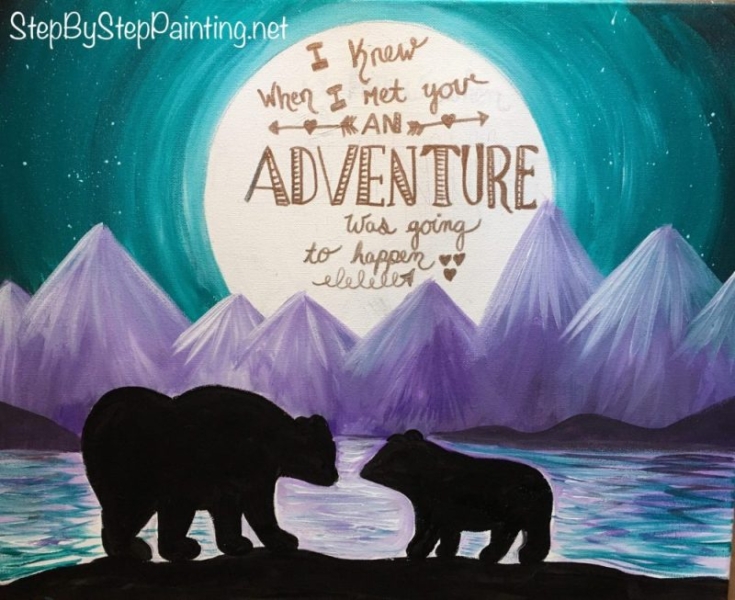
Alternate quote example.

Did you do this painting? Share Your Art!


Your paintings are beautiful and so easy to follow . Do you have any snout weddings or brides…. like the back of a car that says just married. Thank you for this website . You are AMAZING
Thank you Maya! I don’t have anything like that but can add that to my list of requests. You can try doing the truck painting and put cans or a just married sign on the back of that!
https://stepbysteppainting.net/2018/09/18/vintagepumpkintruck/
I would love to see more of your paintings you make it look so simple to do. Keep up the Good work!
Thank you Caroline!
I’m suggesting this painting for my PTO Mothers Day Paint Night! We can all relate to “Momma Bear”!
Loved the painting and did it, your instructions were great. I am going to do this at a nursing home soon. Looking forward to it. Thank you.
I started painting at the age of 66, meet with a paint group at church each week, our teacher is self taught too. Really enjoy doing it.
Beautiful painting! Going to try this with my youth group! Are there any comparable colors in the Apple Barrel brand? Doing this for around 12 and trying to keep costs low. Thanks so much for your help ?
Yes there are comparable with the Apple Barrel! I would use these Apple Barrel colors for the painting: White, Black, Turquoise and Purple Iris. ?
Ok awesome!
Thank you Tracie I really appreciate the hard work you’ve put into this. I haven’t found anything else like it. Beautiful and easy to follow; I wish you all the best and success.
Thank you!