

Bubble Painting Tutorial (Super easy!!)
Painting bubbles on canvas is actually a really easy and quick painting activity!

Would you like to save this?
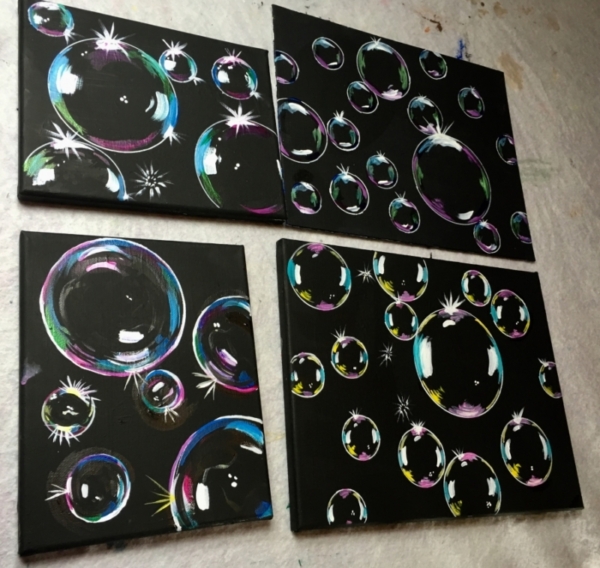
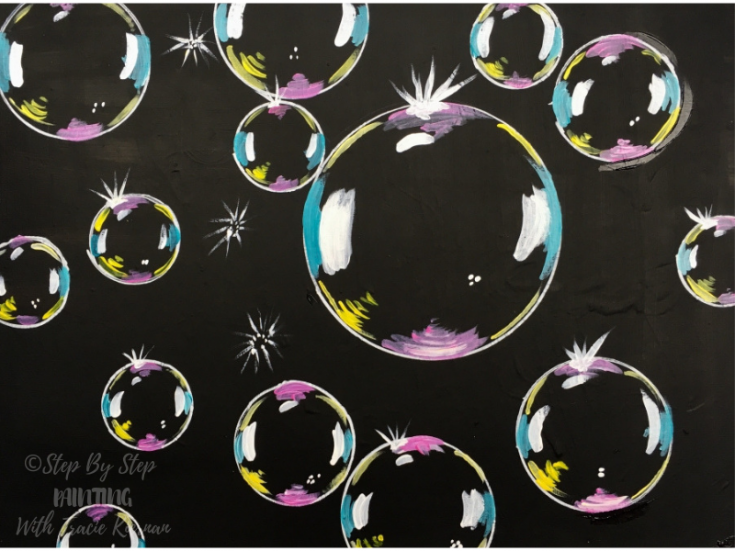
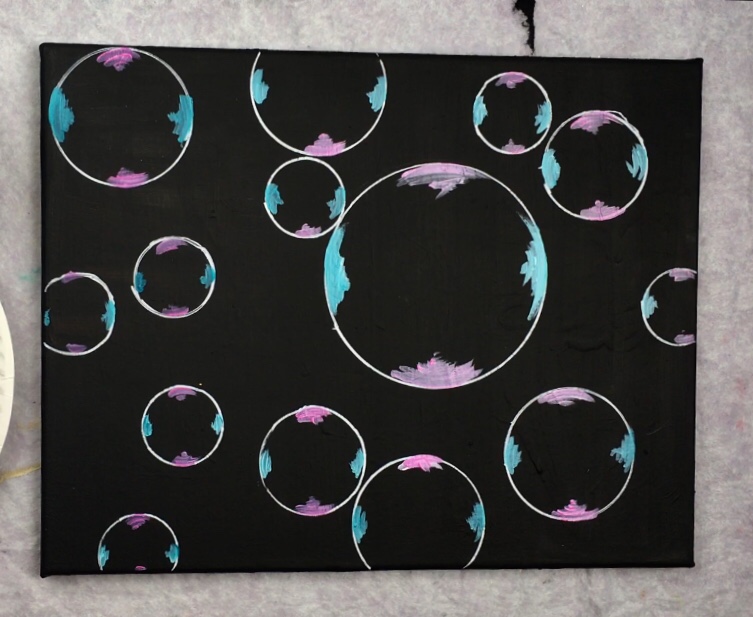
I painted this bubble painting on black canvas.
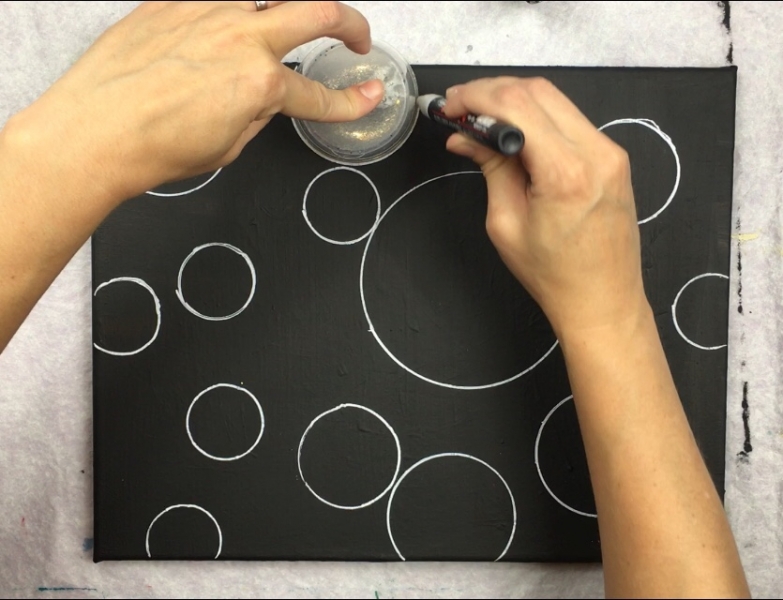
I used a white paint pen to trace various size circles to imitate the behavior of bubbles floating in the air in random locations.
Then to make the bubbles “colorful” and “reflective”, I used a few paint colors to paint curved marks along the edges of the circles.
It’s really a simple concept that yields high success rate!
This is an EXCELLENT painting for kids! When I taught Elementary Art, I would do this lesson with oil pastels (not paints). The pastels show up nice and bright against black paper and the results always yielded a high success rate for the kids.
I decided to apply the same technique and concept to acrylics on canvas and the results are actually kind of fun! 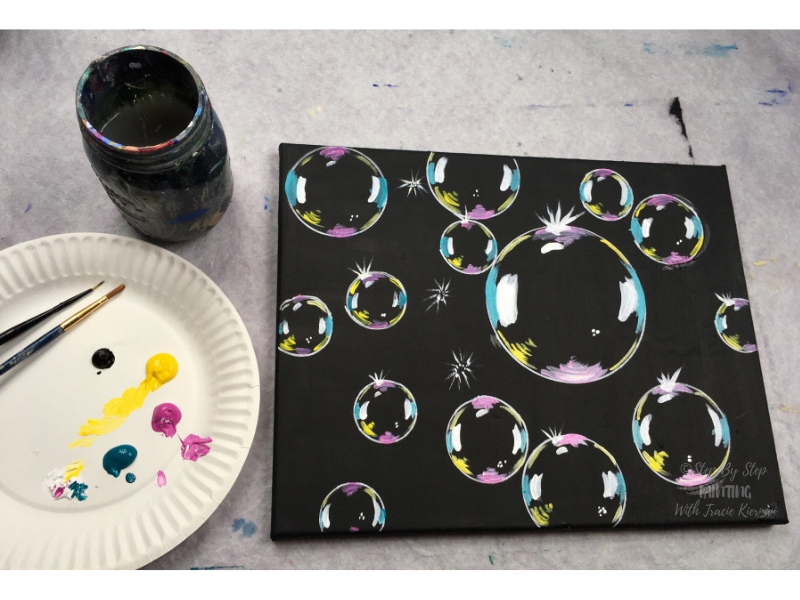
To get the acrylics to show up “opaque” against the black, you’ll need to “double load” your brush in white + the color. Some colors show up opaque against black but a lot do not.
You can do this technique on any size canvas. You can also use different color schemes. There are no right or wrong colors for this, just choose 3-4 colors. They’re so shiny and pretty!!
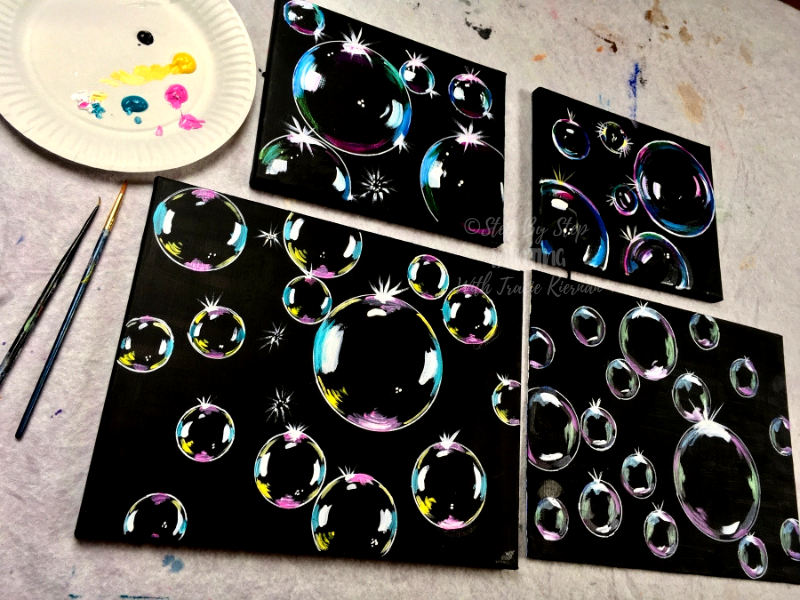
Definitely try this one with the kids, they’ll love it and everyone’s paintings look awesome all put together! Enjoy and happy painting!
Materials For Bubble Painting
How To Paint Bubbles
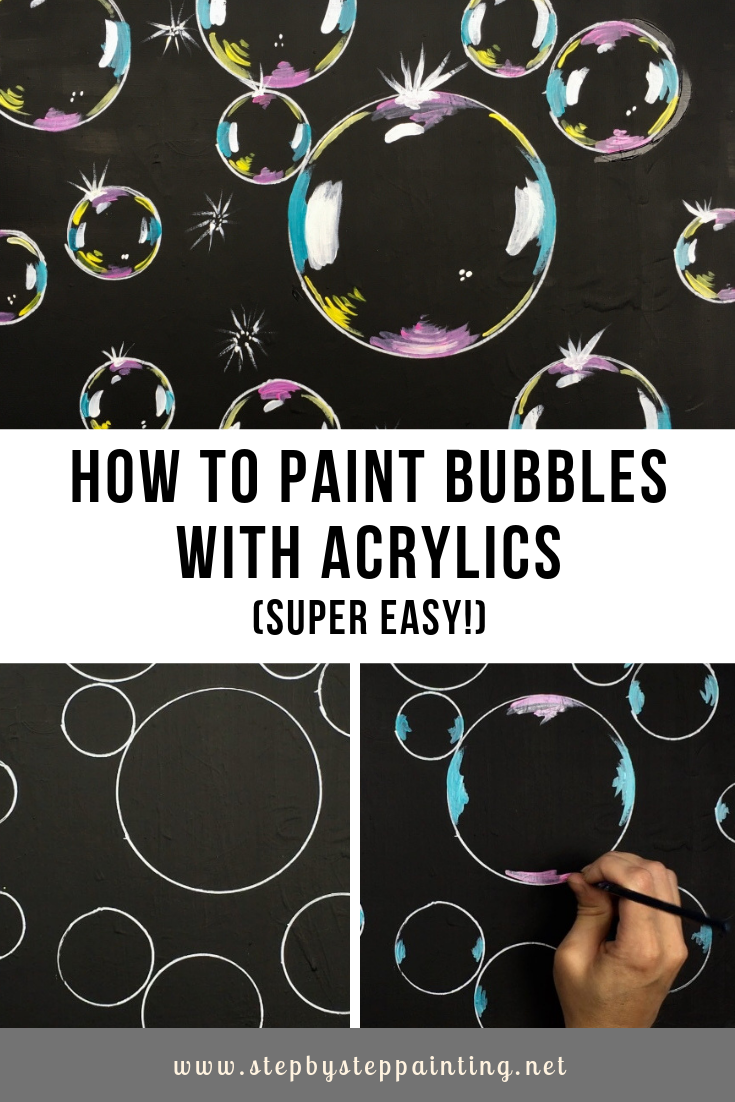
You will be amazed by how easy these bubbles are to paint! Trace some circles onto a black canvas and add the colorful reflections with a round brush. This easy and fun tutorial is a great one for the kids too!
Materials
- Canvas any size
- Black Matte Paint
- Acrylic Paint
- Brushes
- White Paint Pen
- Various Size Circles
Colors See Notes Below
Brushes
Instructions
- Start with a black canvas or paint an entirel canvas with black paint.
- Trace variou size circles using a white paint pen.
- Paint the first color reflection with turquoise and white paint. Use a round brush for this technique.
- Paint the second color reflections with magenta and white.
- Paint the third set of reflections with cadmium yellow and white.
- Use white to paint highlights on the bubbles.
- Add some shiny details on the tops of some of the bubbles and then paint some small dots representing popped bubbles.
Notes
Just about any color palette will work for this painting! The colors I chose are not exclusive. Chose 3-4 bright colors plus titanium white. I would not recommend using more than 4 colors.
Color Palette
As noted above, these colors can be changed. I recommend choosing 3-4 bright colors plus titanium white (required).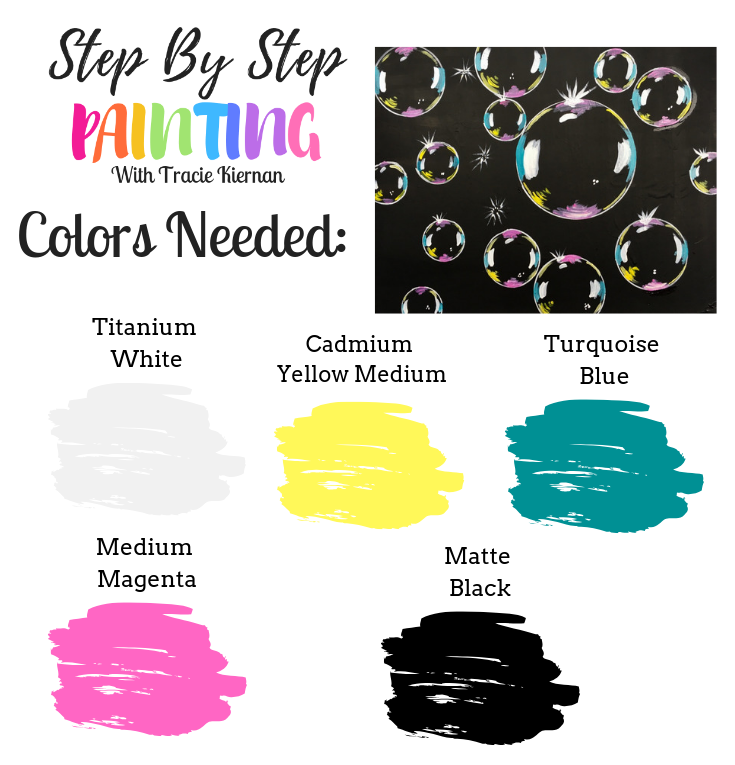
Also note that I used black to paint my canvas. I highly recommend using a “matte black” to paint the canvas so the sheen of the background does not look “satin” or shiny. I like to use apple barrel to do this, however, you can get some higher quality paints that are also matte in finish.

![]()
You can also buy a black canvas!

Directions At A Glance:


Video:
Step By Step Directions:
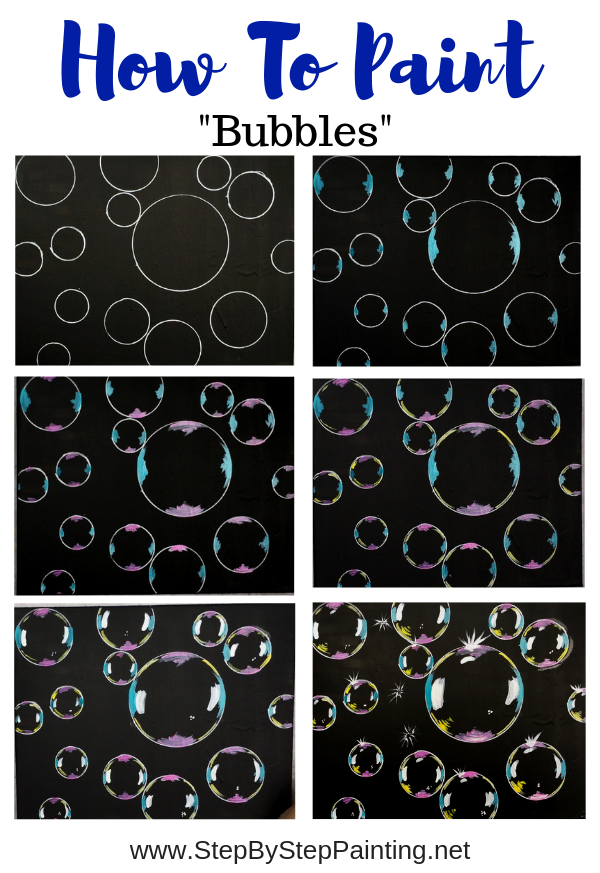
Step 1 Trace Your Circles
Start with your black canvas (or paint a canvas black using a matte black color). Find various size circles to trace the bubbles on the canvas. 
Trace using a white paint pen.
I highly recommend using the white paint pen to make things easier and to get that initial circle to be a nice thin line.
If you don’t have a white paint pen, you can try using a white color pencil and then paint the circle over with a round brush and titanium white. 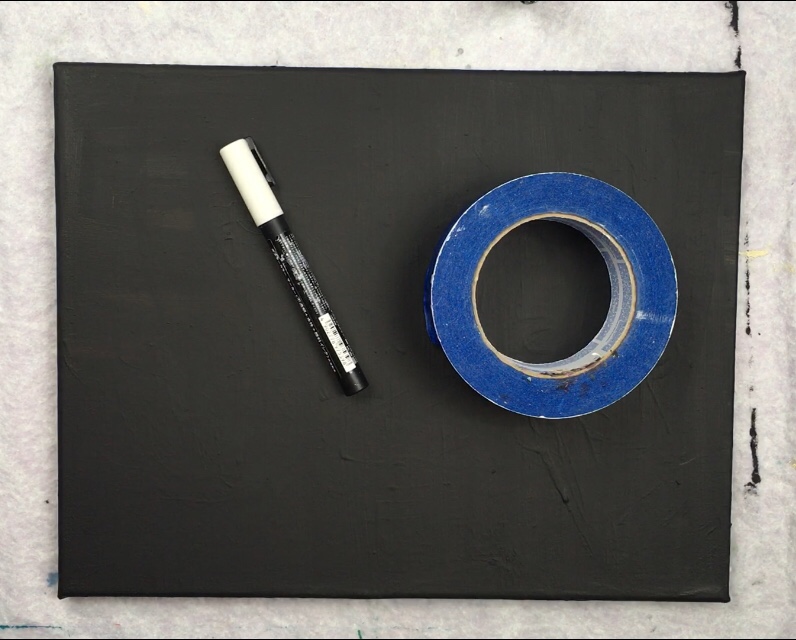
Trace your different size circles in various areas on the canvas.
Some bubbles may be going off the canvas. Some bubbles may even be touching each other. 
Step 2 Paint The First Color Reflection
Add your three to four chosen colors on your palette plus titanium white.
You will also need a #4 round brush (or similar size).
In this demo, I’m using cadmium yellow medium, medium magenta, turquoise blue and titanium white. 
Double load your round brush in both turquoise and white (basically dip the tip in both of the colors).
Then paint a sort of zig-zag line that starts out wide along the curve of the circle and goes narrow (almost like a triangular shape).
This was done on both the left and right sides. Your color should turn out to be a light turquoise because the white will blend with the turquoise.
Also, the white helps the color show up bright against the canvas. 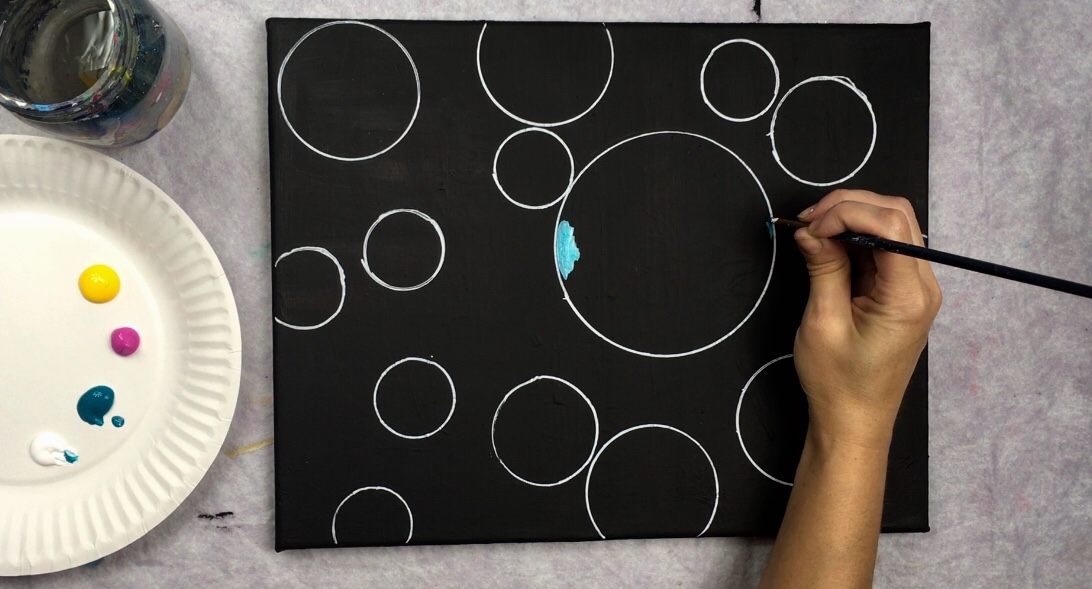
Do the same thing to all of the bubbles. Each of these bubbles will appear identical as far as color location goes.
They are all reflecting the same kind of light. Imagine if these bubbles were a mirror – they would all have the same reflection. 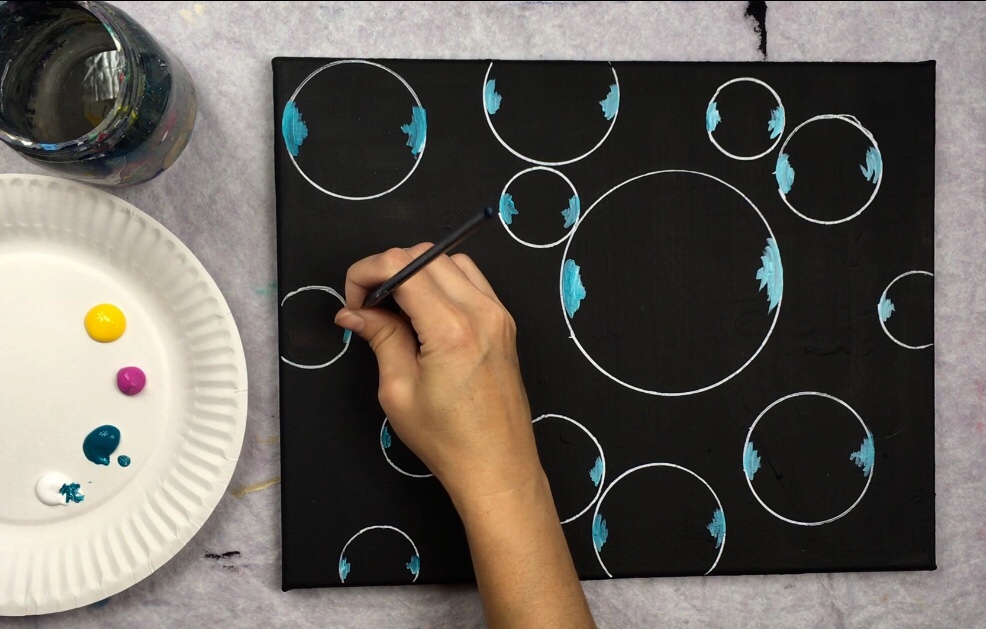
Do your best to not go outside the lines of your circles. However, if this happens, have some black paint handy for touch ups.
Keep in mind also that the reflection color will look larger on larger bubbles and smaller on smaller bubbles.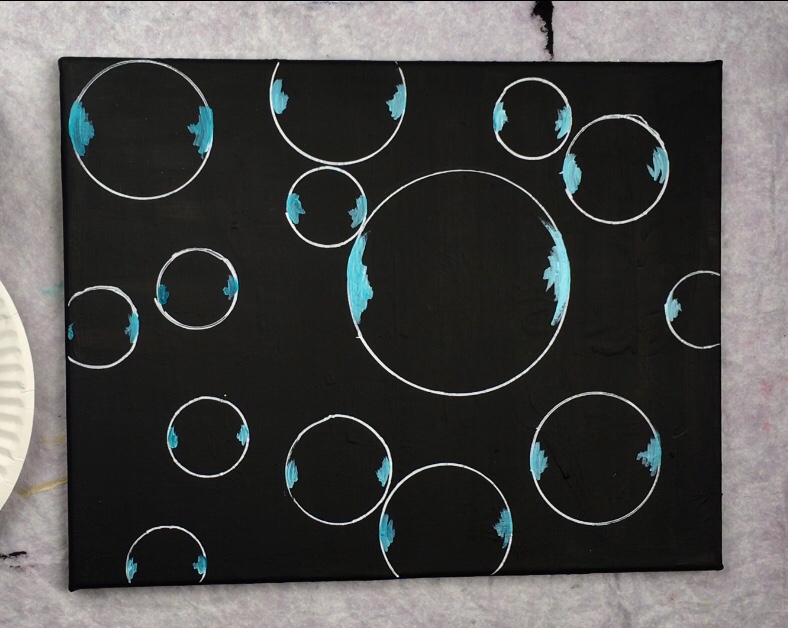
Step 3 On To The Next Color
The next color I used was medium magenta. Make sure you clean off the turquoise blue and pat your brush dry.
Double load the brush in both magenta and titanium white.
This time I painted the same kind of zig-zag line but on the top and bottom of each of the bubbles. 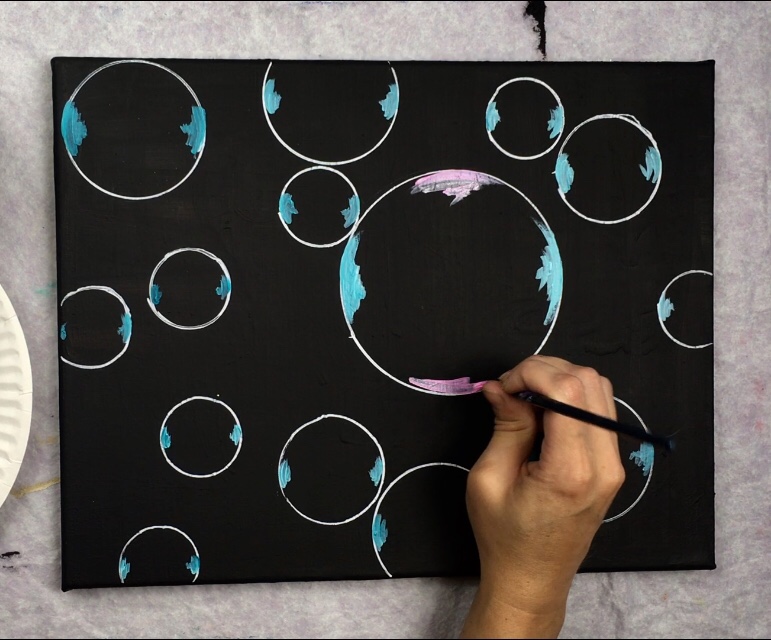
Step 4 Onto The Next Color
The next color I used was cadmium yellow medium and titanium white. Instead of doing the zig-zag, I decided to just to a curved line contouring the bubble shape. 

Step 5 Paint The White Highlights
This is when the bubbles start to look a little more “bubbly”.
I used just white on my round brush and painted some of the bubbles with a few little white dots going in clusters of 2-3. 
I also painted a thicker curved line on the left and right of each of the bubbles.
This represents the bright highlight that we usually see on bubbles. 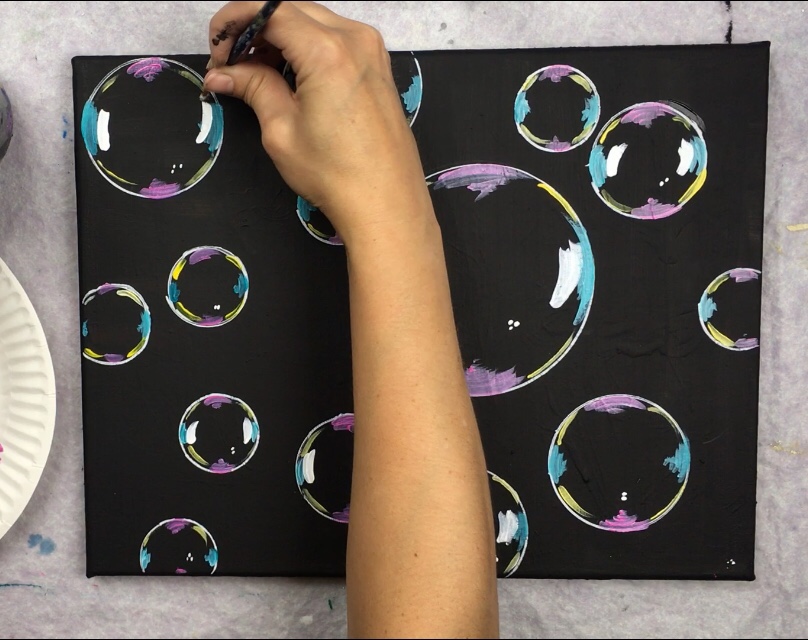
You’ll want to make this same kind of mark on each of your bubbles. 
Step 6 Paint The Shiny
The part of the bubble that “sparkles” was painted using titanium white and the round brush.
I noticed, however, that using a 10/0 round (which is tinier) gives better results.
Basically make a mark at the top of your bubble and paint small lines radiating up.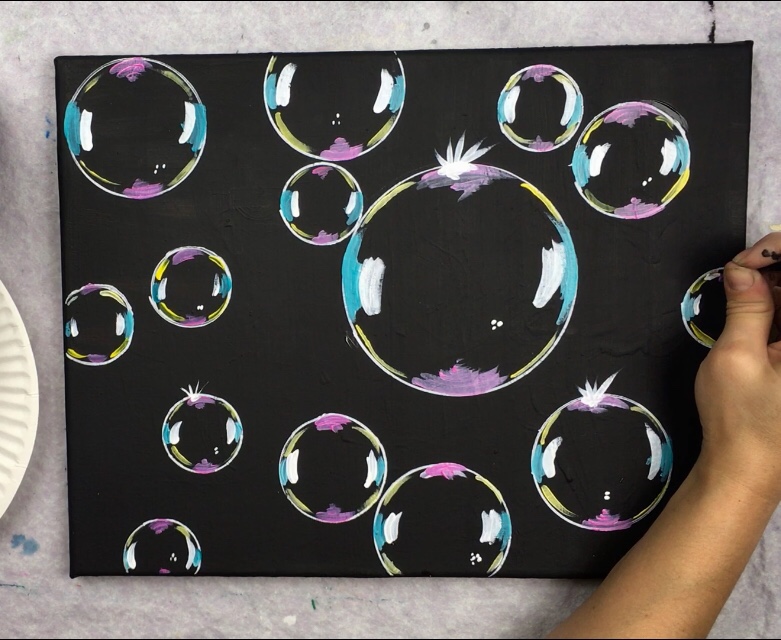
I didn’t do this to all the bubbles, just a few. I also made some “popping” bubbles by painting some asterisks with little dots in the middle of those asterisks.
And (if you noticed) I added some more yellow curved lines on the yellow areas of the bubbles. 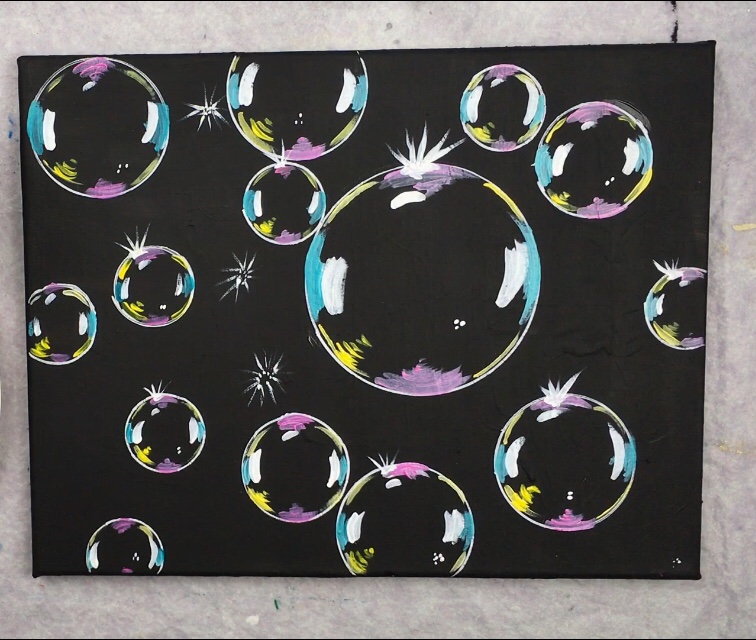
Would you like to save this?
Some Final Thoughts…
This painting was so fun to do! I experimented with different color combos and different kinds of lines on the bubbles.
Just remember that less is more with bubble painting. Don’t keep adding more and more color lines because you want to create the illusion of a crystal clear bubble. 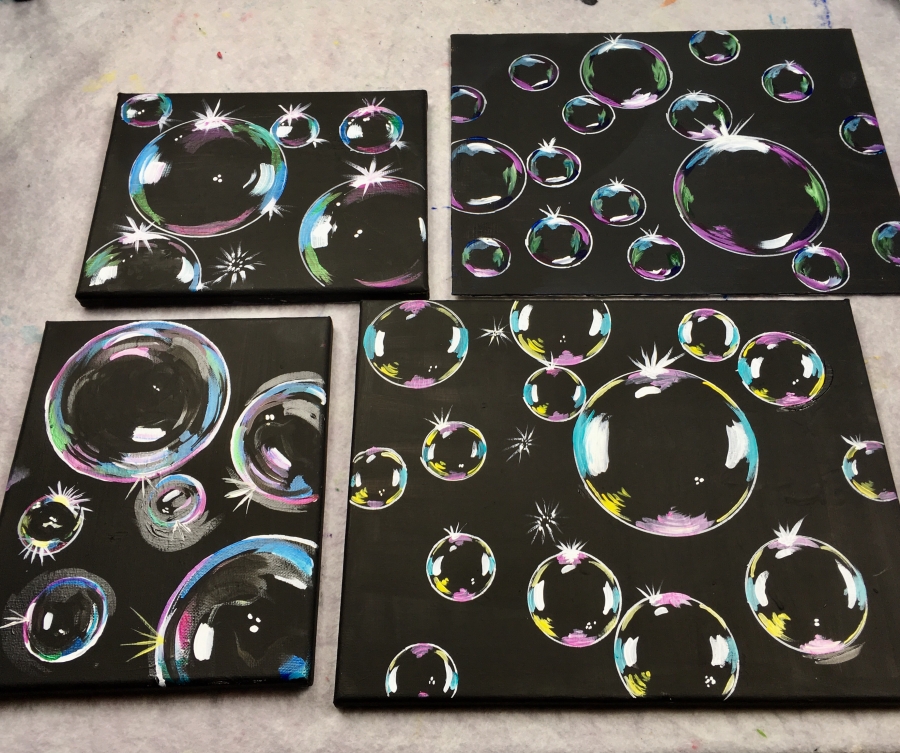
Share this post!
Share your art!


See Also:

This is the best tutorial I have ever seen,thank you for sharing your method and ideas. I can’t wait to try this.
Regards Maureen
So easy and fun! I started simple with 5 bubbles on a piece of slate. Thank you!