
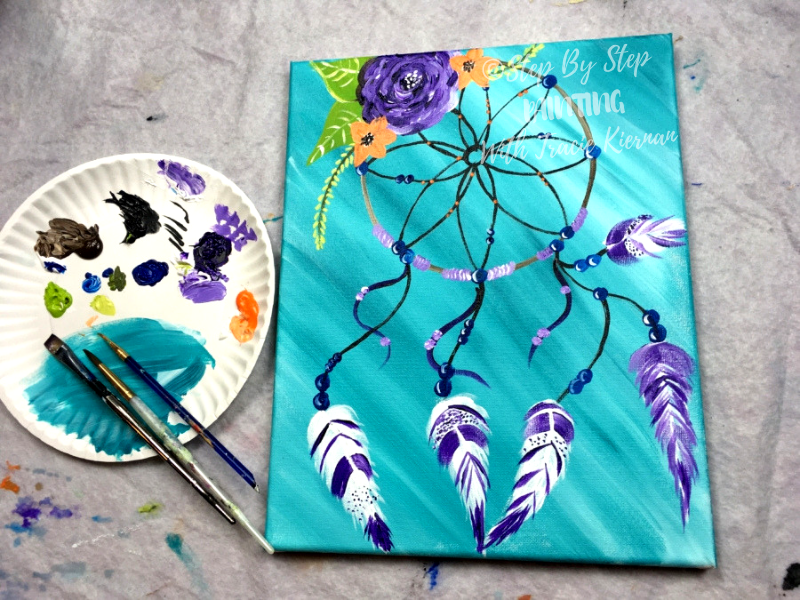
Dream Catcher Painting
This step by step acrylic painting tutorial will show you how to paint a lovely dreamcatcher with boho style flowers.
Would you like to save this?
The background on this painting was extremely easy and I only used the colors turquoise and white.
Then I traced a coffee lid (6.5″) to draw the circle of the dream catcher.
The middle arches were also drawn with a pencil first and painted over with black paint.

I found painting the feathers and the little beads to be so relaxing! You may wish to change some of the colors in this design as well.
I love dream catchers!
When I was a child, I used to collect them and hang them around my room. I love how unique each one is and I always wanted to learn how to actually make one.
I’ll just settle for how to paint a dream catcher for now.
Enjoy and happy painting!
Materials:
How To Paint A Dream Catcher
Learn how to paint a lovely dream catcher with boho style flowers. This acrylic canvas painting tutorial will guide you through the steps.
Materials
- 11x14 canvas
- Acrylic Paint
- Brushes
- 6.5" circle to trace (doesn't need to be exact)
- Chalk
Brush Sizes
Colors
Color Palette:
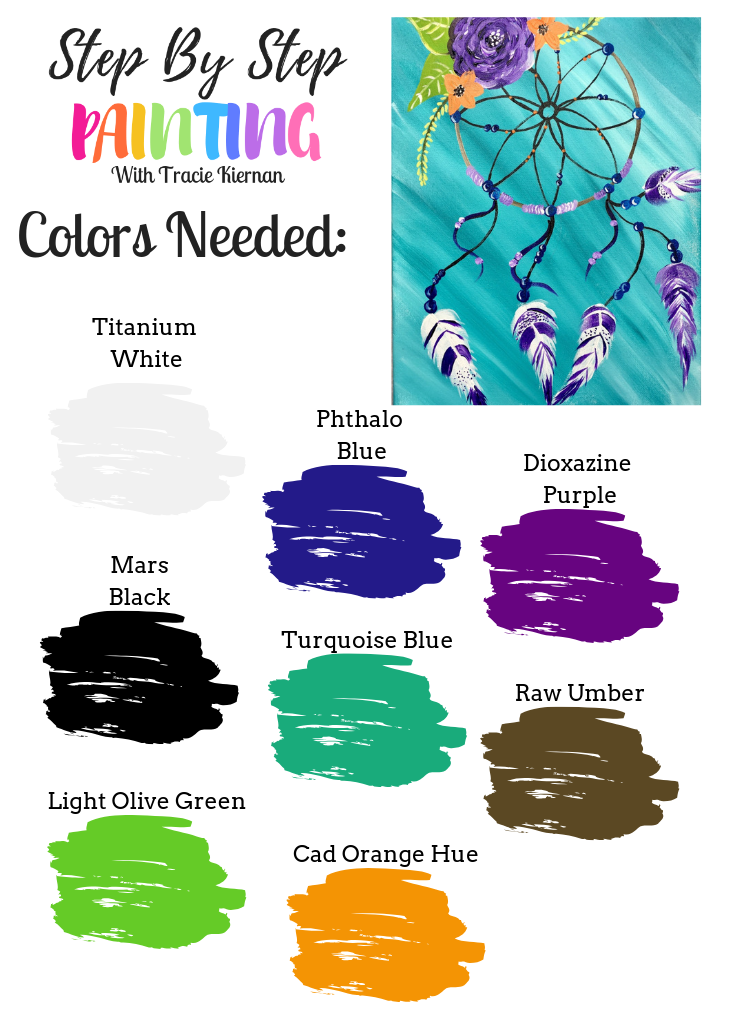
A few of these colors such as cad orange hue and light olive green were used very sparingly so you don’t need a lot of those colors. 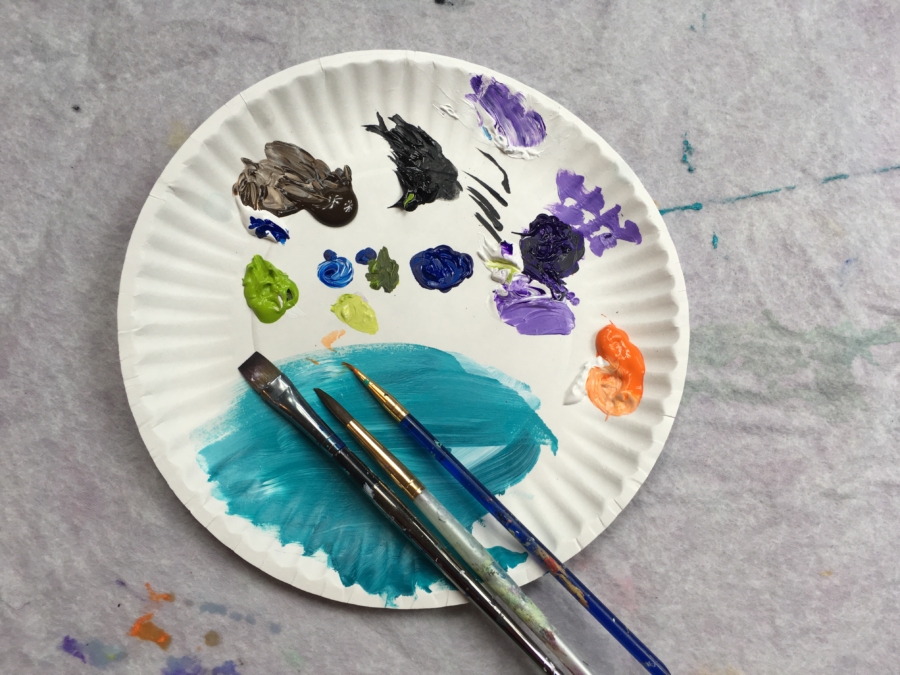
Traceable:
Go to PDF library to get the download!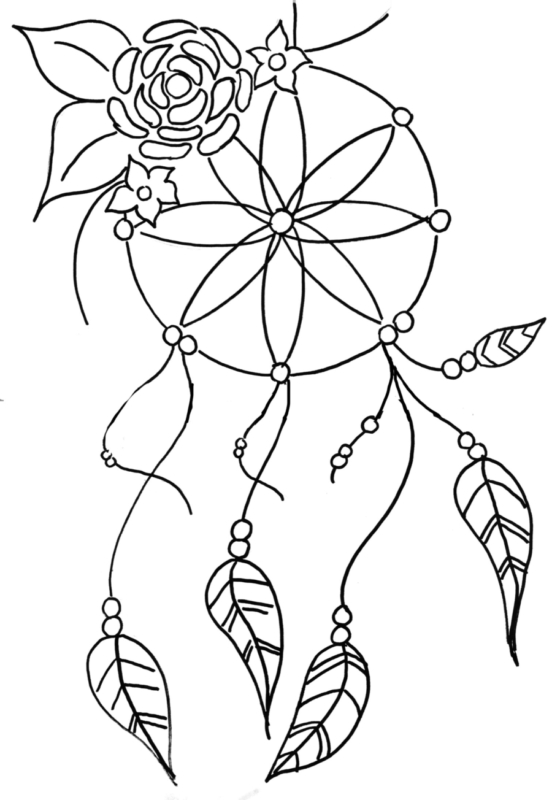
Directions At A Glance: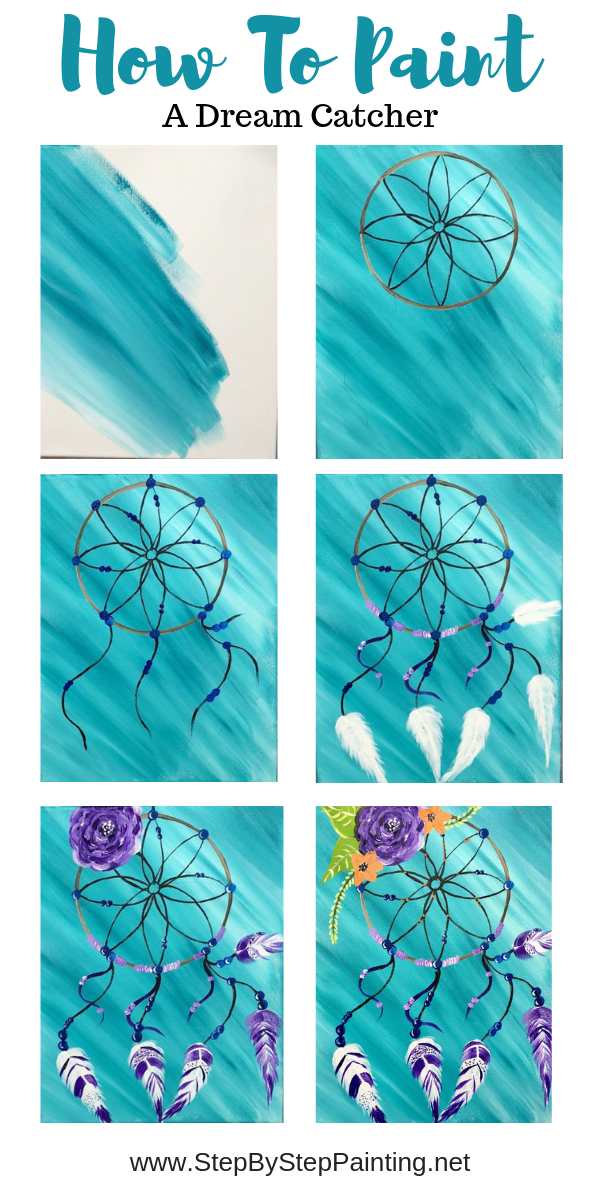

Video:
Step By Step Directions:
Step 1 Paint The Background
Using a 3/4 flat brush, double load the brush in turquoise and titanium white. Just dip the brush in equal amounts of white and turquoise. 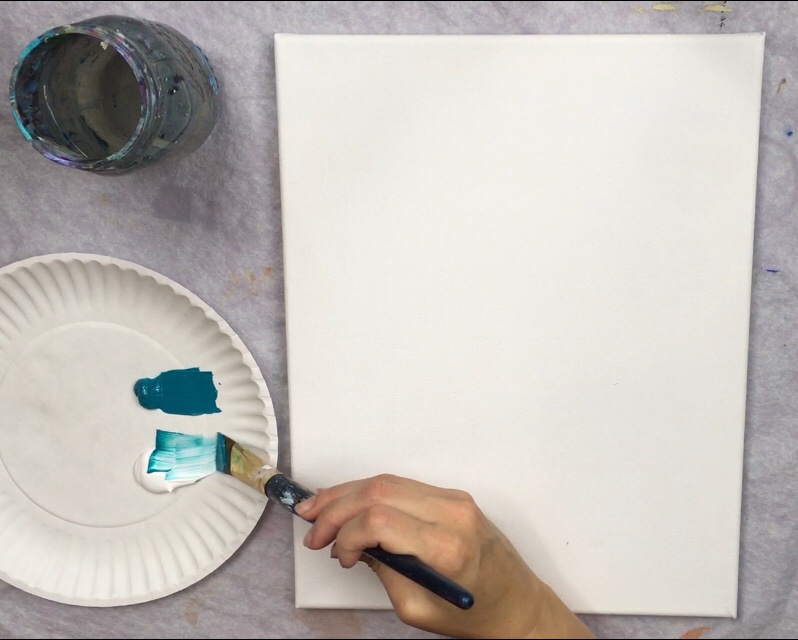
Paint long diagonal strokes using the full width of the brush letting the colors blend on the canvas. 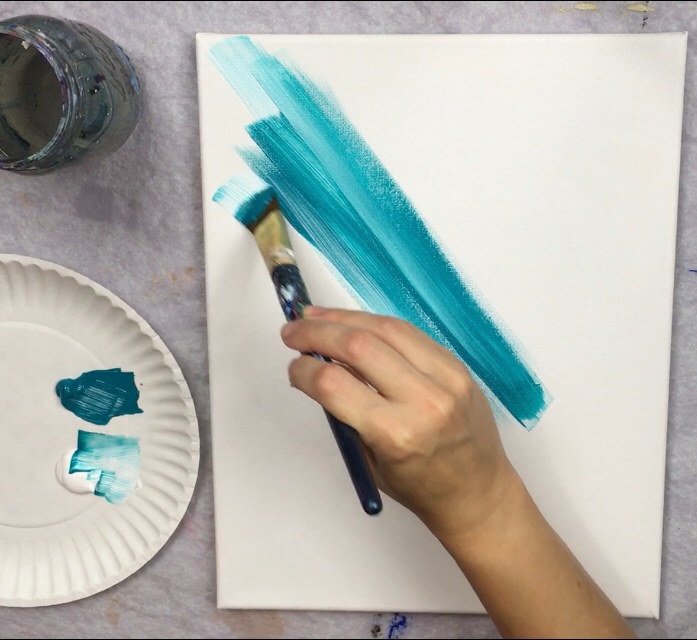
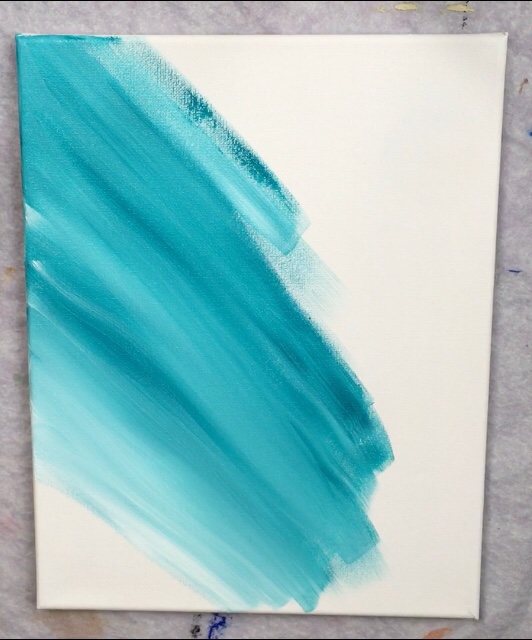
Fill the canvas with these diagonal strokes. Continue to blend the white with the turquoise but don’t over blend.
You want to see variations of the color in this background. 
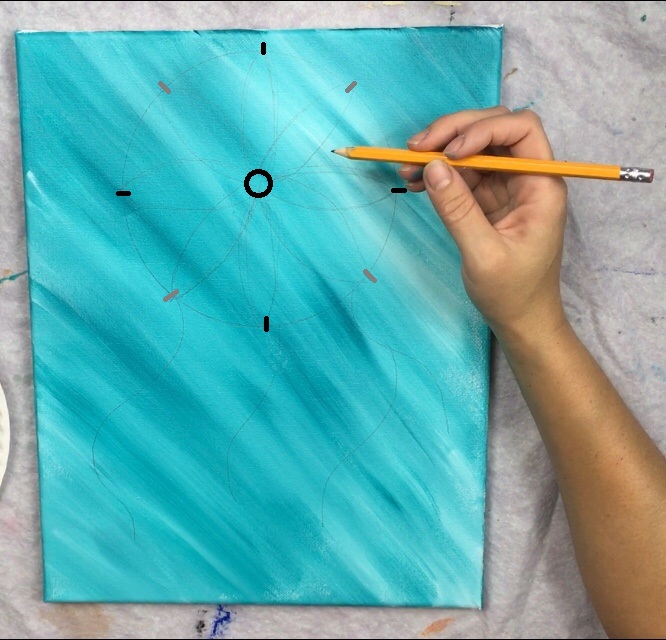
Step 2 Draw The Dream Catcher With Pencil
I used a coffee can lid with a 6.5″ diameter to trace the circle. Use a pencil to do this drawing part. 
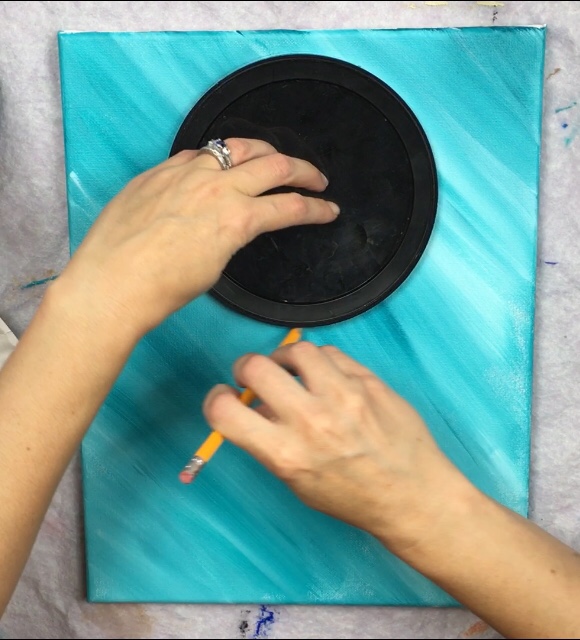
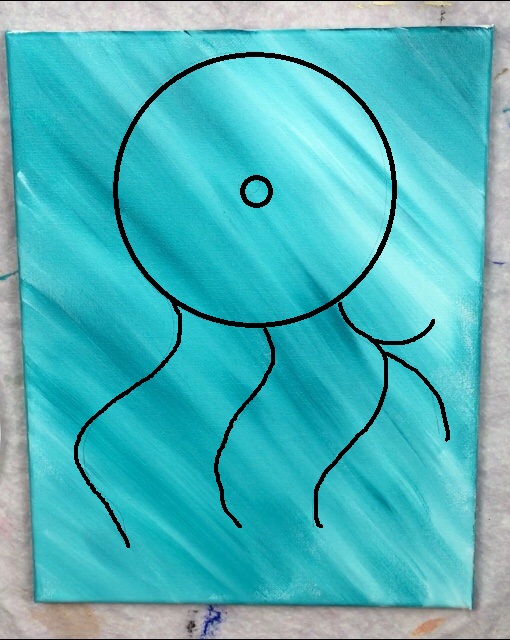
After you trace the initial circle, draw a small circle in the center. Then draw three strings going down from the large circle.
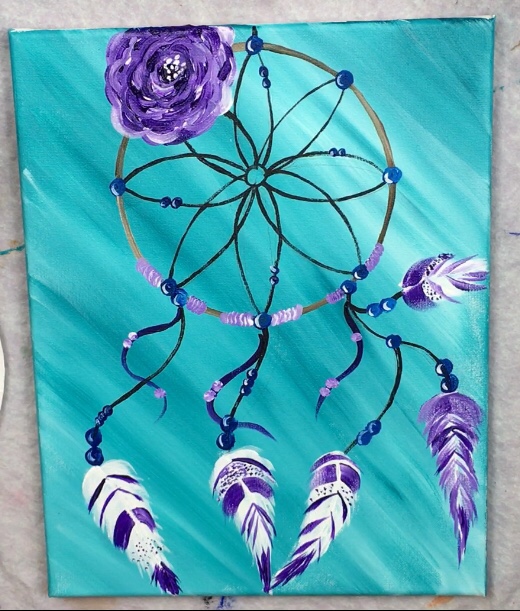
The string on the right branches off. See the image below for how the drawing looks:
To draw the design in the middle, I first marked the half way points on the circle (black marks) and then the half way points again (gray marks). These are where the tips of the “cat eye shapes” are going to be.
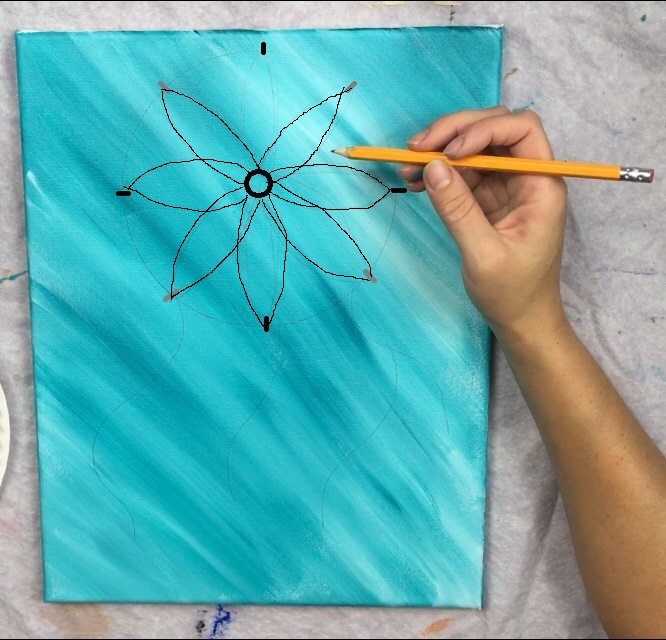
When you draw the cat eye shapes, start from the circle and go to each tick mark. Each new “cat eye shape” overlaps the previous one. You can also essentially make a “cut out template” of this cat eye shape and retrace the shape around the circle. 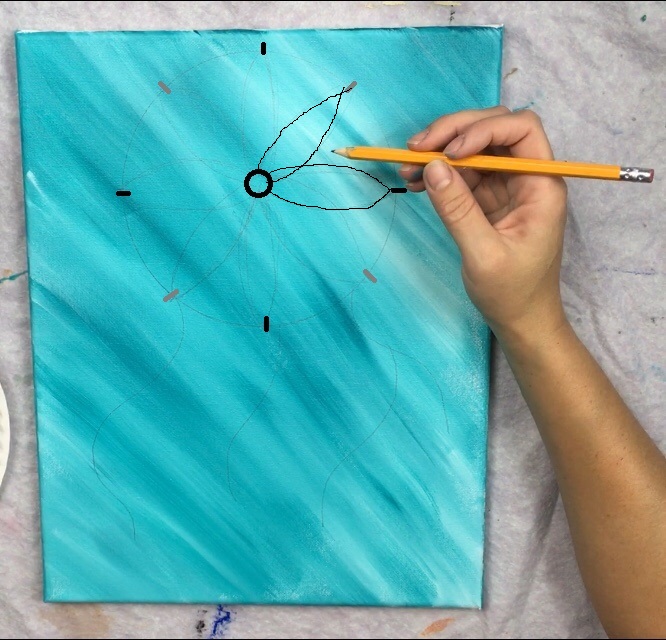
Continue drawing the cat eye shapes all the way around the circle. 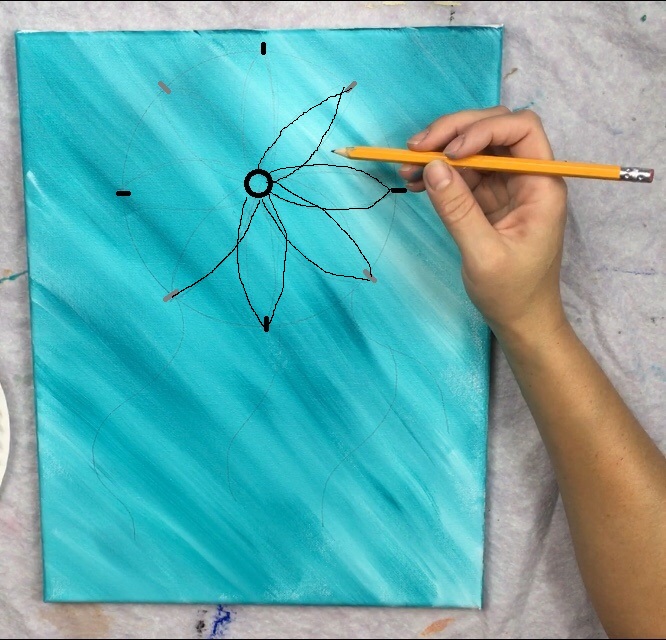
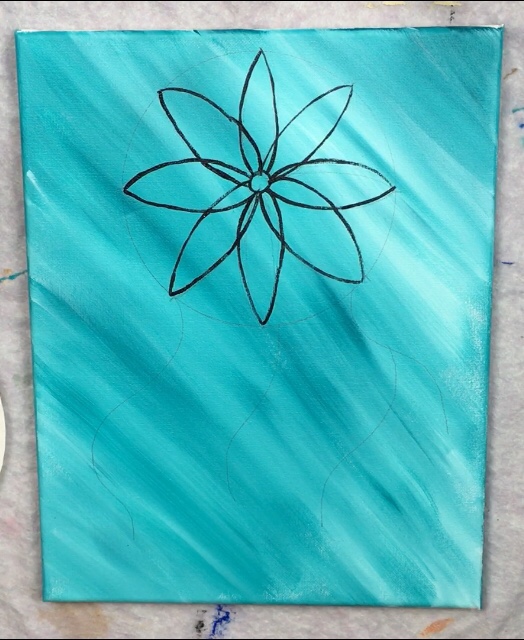
Step 3 Paint The Design Inside The Circle
Now that you have it all drawn in, it’s time to paint! Use a 10/0 round brush and mars black to paint over all the design lines inside the circle. It helps to water the black down a bit so you get a nice controllable, flowing line. 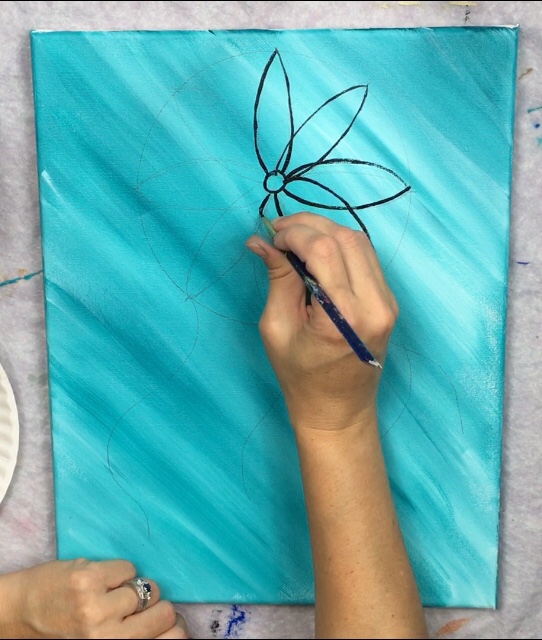
Step 4 Paint The Outer Circle
For the outer part of the circle, I used the color raw umber and titanium white as well as a #6 round brush. Double load (dip it in both brown and white) then paint the circle.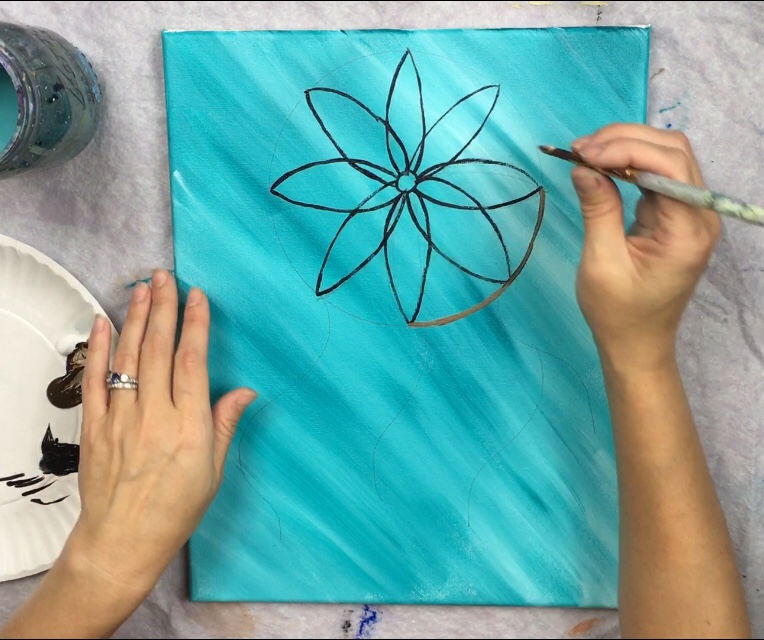
This line should be thicker than the black lines. Try to keep the line as consistent (and round) as possible. Also, that brown and white should blend nicely together on the canvas to create some color variation. 
Step 5 Paint the attached string lines
Use the 10/0 round brush for this step. Dip it in mars black and paint the straight “hanging string” line at the top of the circle. Then paint the three strings that are tied to the circle on the bottom. 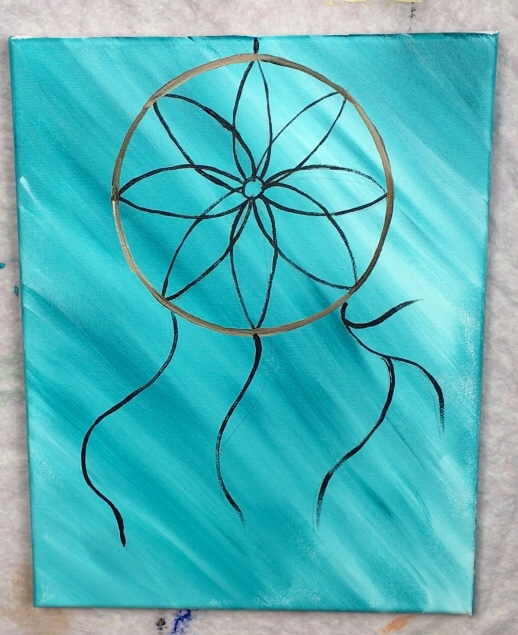
Step 6 Paint Blue Beads
For the blue beads, I used the #6 round brush. I double loaded it in phthalo blue and a little bit of titanium white and painted the small circles on the tips of all the “cat eye shapes” in the circle. I also painted some small circles on the strings. 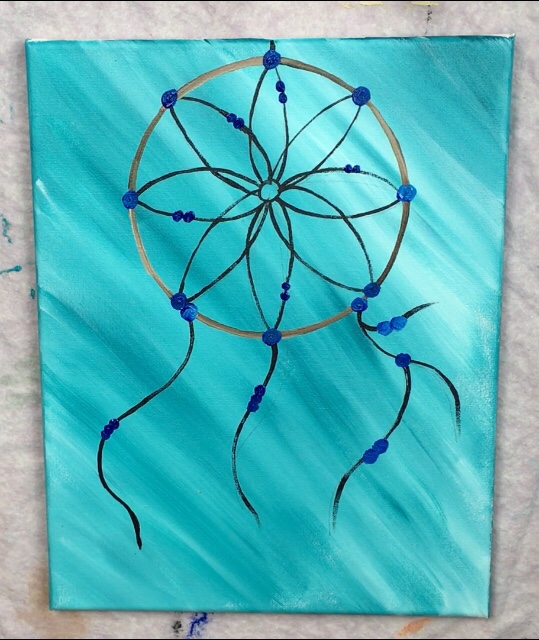
Step 7 Paint light purple string that wraps around the bottom of the circle
To make it look like light purple material is wrapped around the circle on the bottom, I double loaded my #6 brush in dioxazine purple and titanium white. The colors will blend together to create nice shading. Paine this next to the beads on the bottom of the main circle. 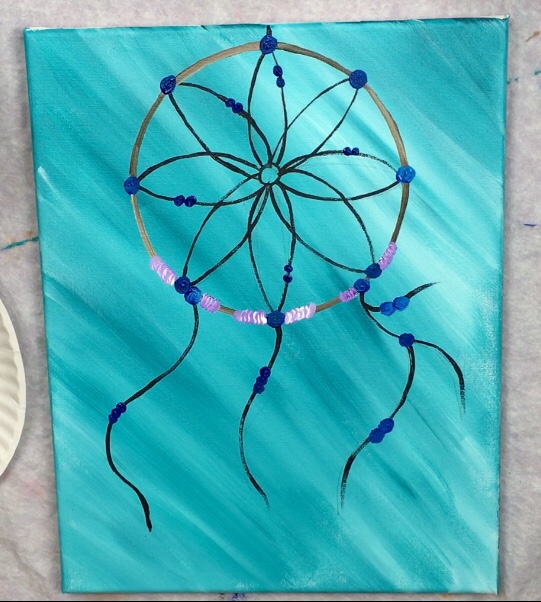
Step 8 Paint purple string & light purple beads
Then I used dioxazine purple to paint purple strings that twist down and overlap the black strings (see below),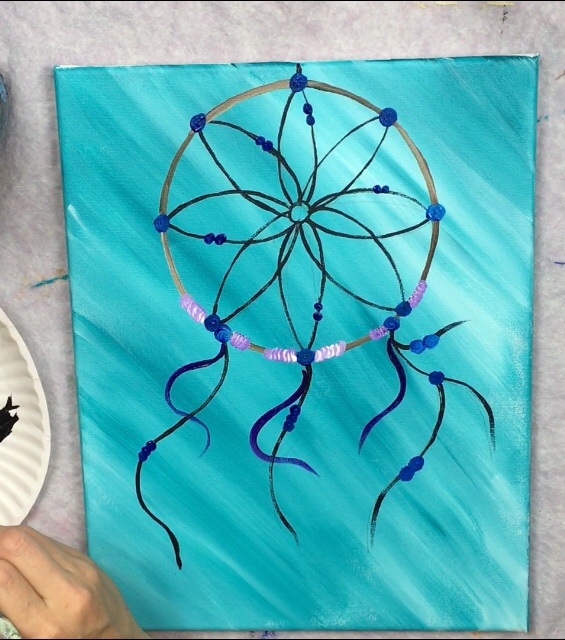
Then I painted light purple beads on the purple strings by double loading my #6 round brush in dioxazine purple and titanium white. 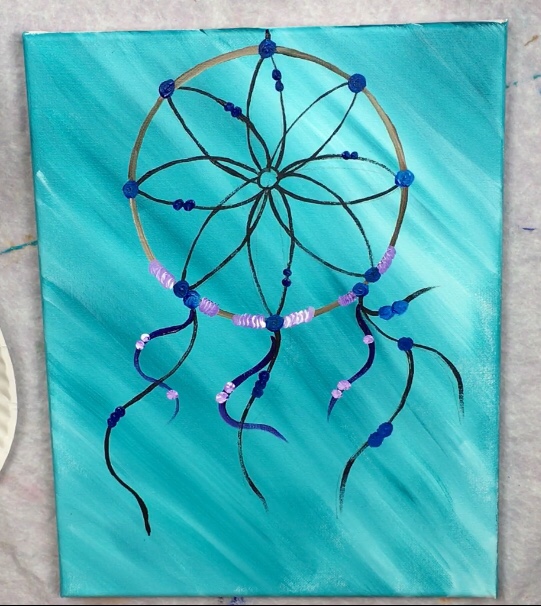
Step 9 Draw Feathers with chalk
Use a piece of chalk to draw a feather shape on the bottom of each of the strings. 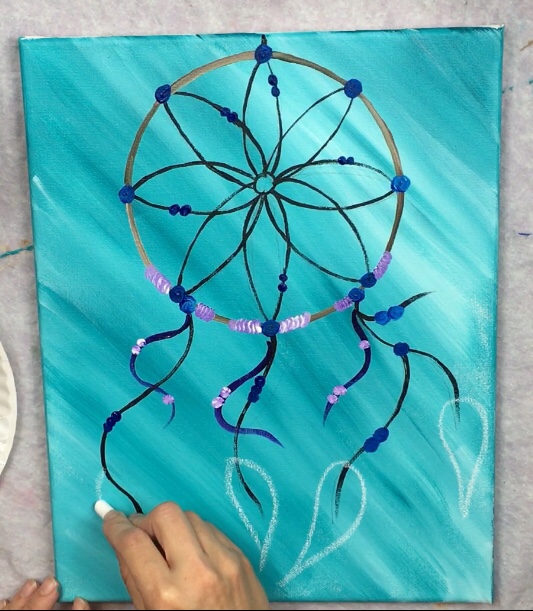

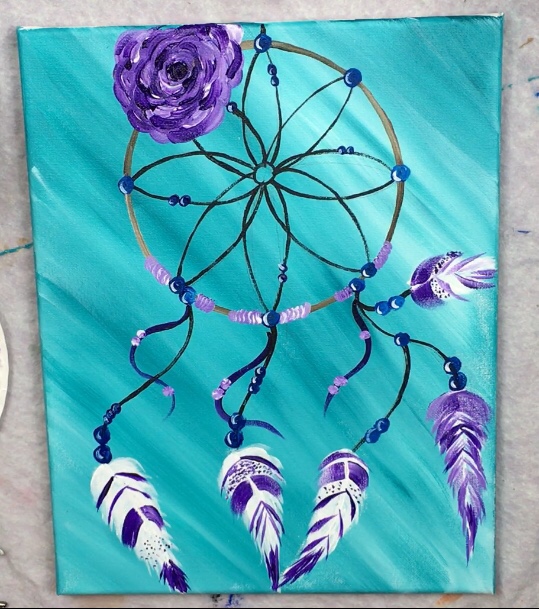
Step 10 Paint Feathers
Use a #12 bright brush and titanium white to paint the feathers. To do this, I used the full width of my brush and dragged each stroke from the center out to the edge of the feather shape. 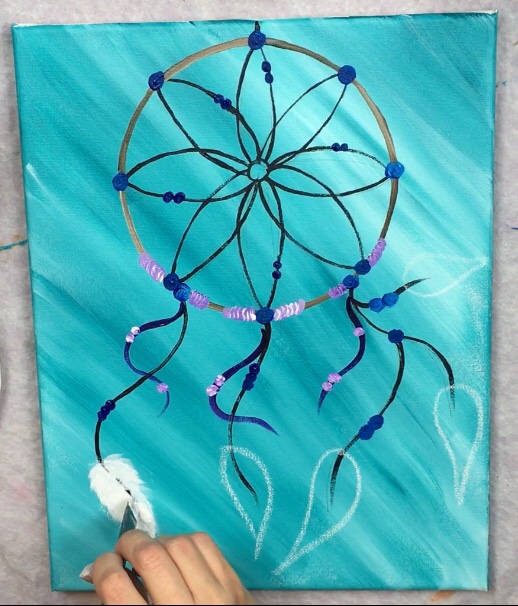
To give the feather some texture, use the tip of the brush to paint little strokes hanging out from the edges of the feathers. 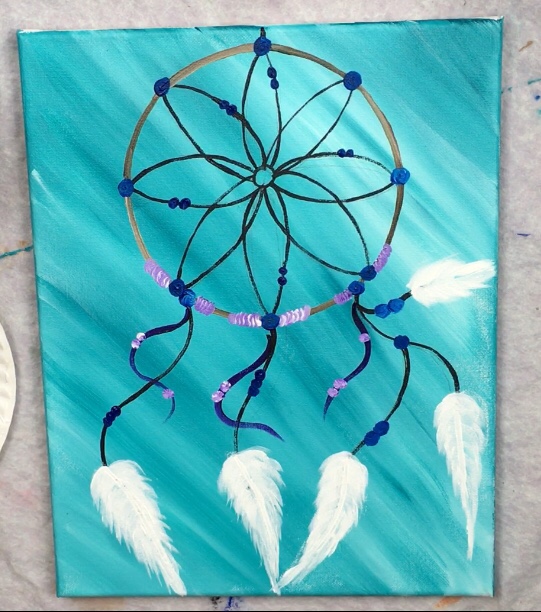
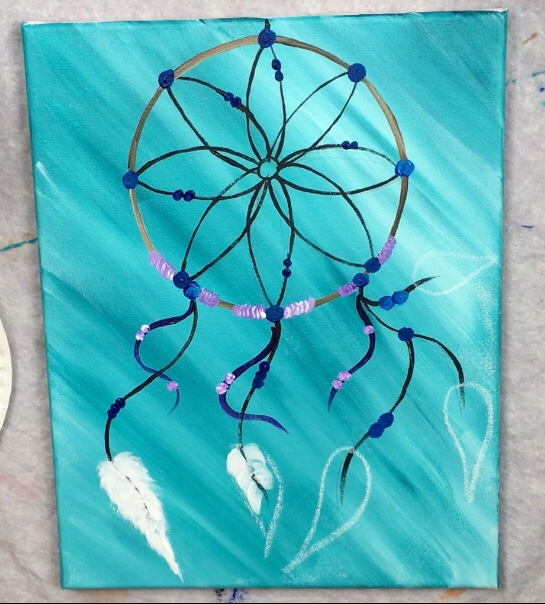
Then to give the feathers some color and patterns, I used dioxazine purple and my #12 flat brush. I made thick and thin lines on the feathers. 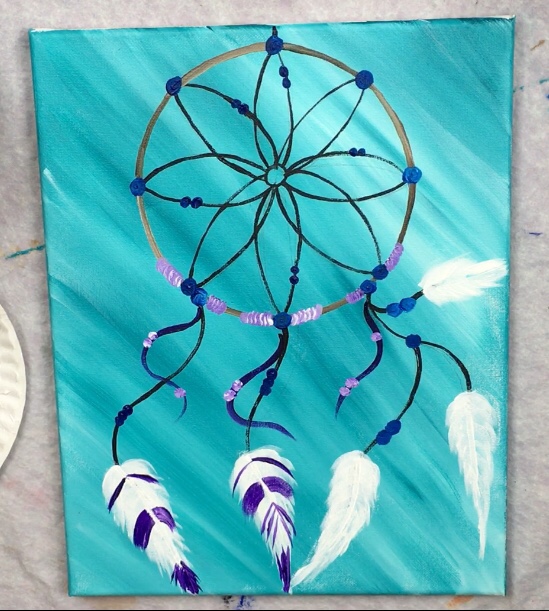
Some of the feathers had little tiny dots and I used a 10/0 round brush for that. 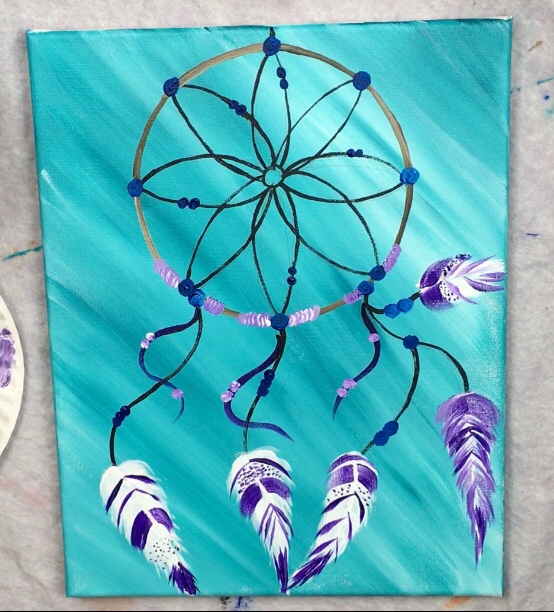
Then I painted little “highlights” on all the beads. I did this with my 10/0 round brush and titanium white. Paint a curved line only on the left side of each of the beads. 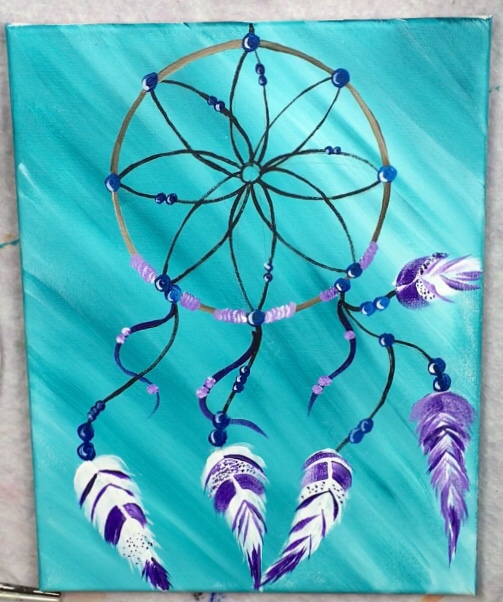
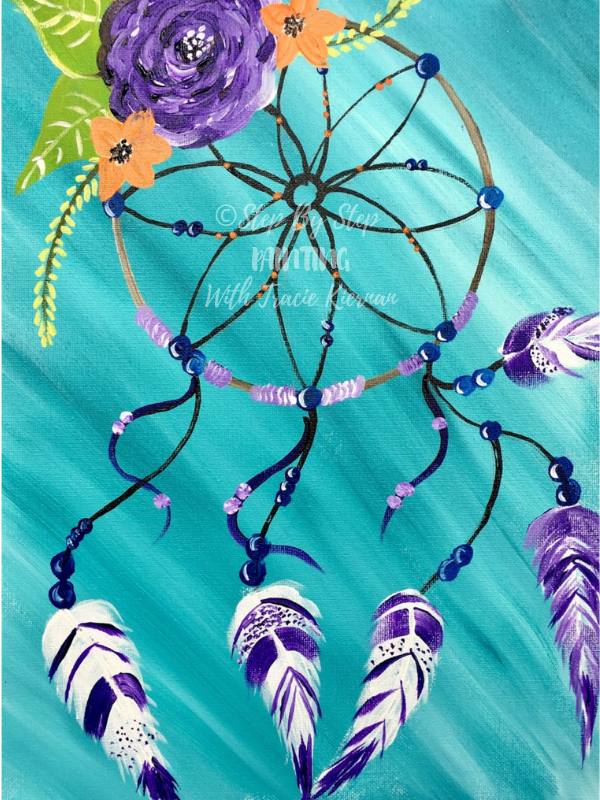
Step 11 Paint The Boho Flowers
You can leave your dream catcher like this! Simplified! However, I was going for more of a “bohemian look”. I decided to paint flowers in the upper left. To start, I did a purple rose type of flower.
First paint a small dioxazine purple circle with your #6 round brush. 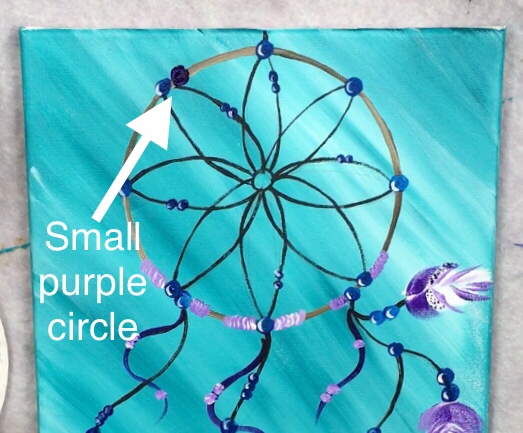
Then dip your round brush in the white (so you have purple and white on your brush. Paint little “C” strokes that go around the circle. The purple and white will blend together to create “shading”. 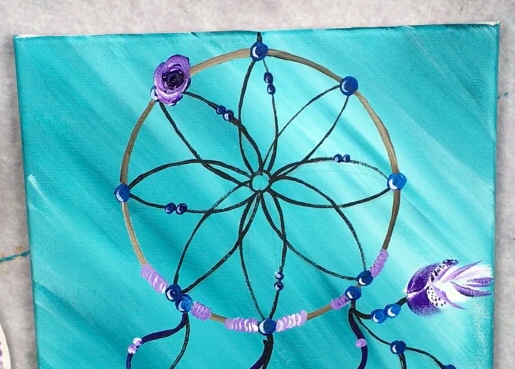
Continue with these “c strokes” that go around the initial circle. Keep building your rose outwards. To get the color variation, dip the tip of your brush in various amounts of purple and white and your stroke will blend on the canvas. 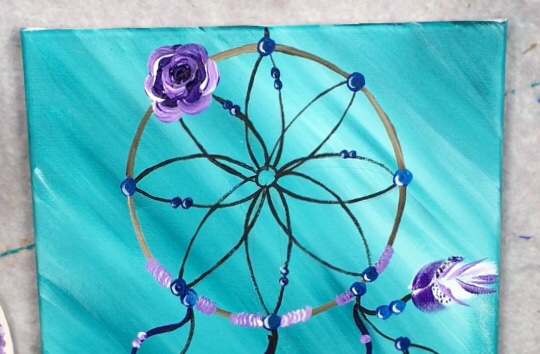
Continue to build the rose larger as you paint more “C strokes”. The different shades of purple come simply from double loading your round brush in white and purple. If you need to, go back over some of your “c” strokes to make them darker or lighter.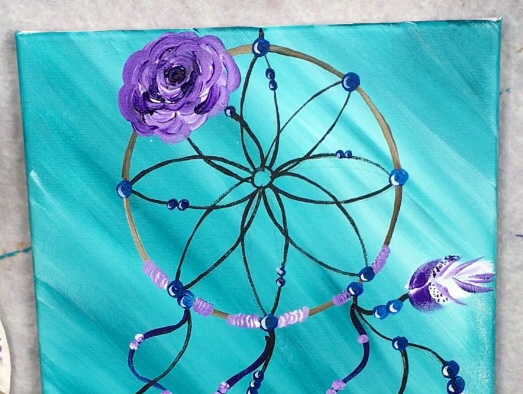
To paint the leaves, I used the same #6 round brush (cleaned all the purple off) and the color light olive green. Paint one leaf next to the rose. 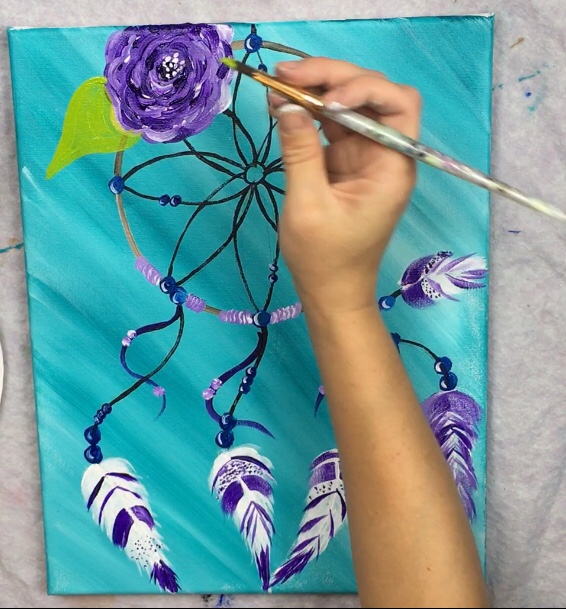
And paint another leaf. Also note; I painted little white dots in the center of my rose flower. 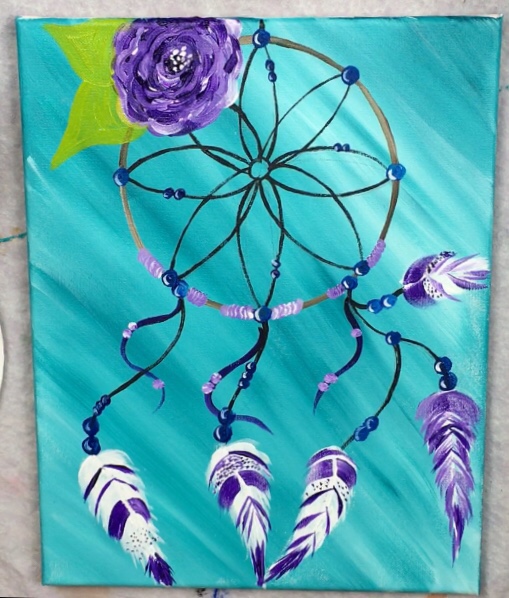
To get the veins on the leaf, I used my 10/0 round brush dipped in titanium white. Then I painted a different kind of leaf using the 10/0 round. For the center stem, I mixed light olive green with a little bit of black to create the line. For the little leaves along the stem line, I used light olive green mixed with a little titanium white. 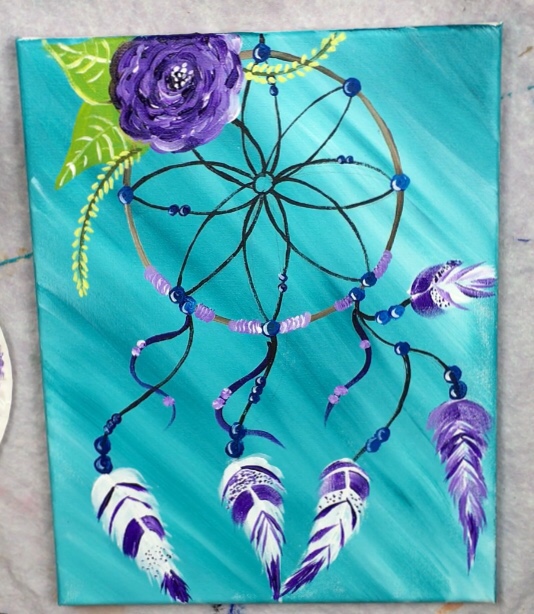
The orange flowers were painted with cadmium orange hue and titanium white mixed together. Use a #6 round brush to paint those. 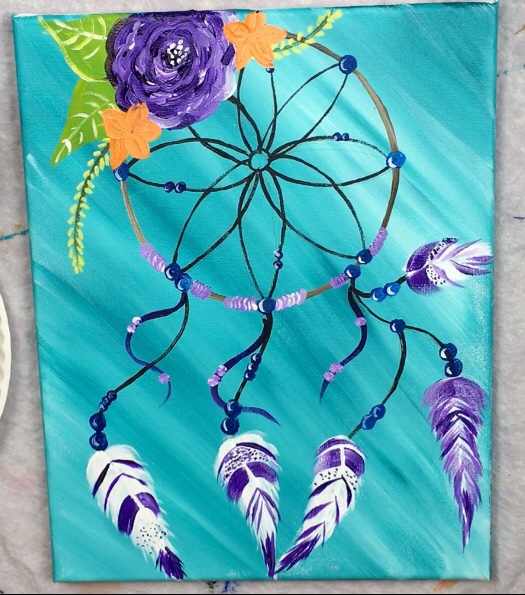
Then I painted little white dots in the center of the orange flowers. 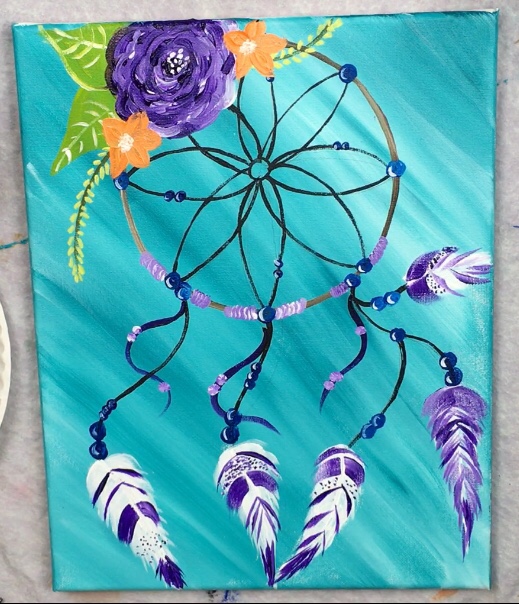
And then little black dots in the center (pending the white dots drying). 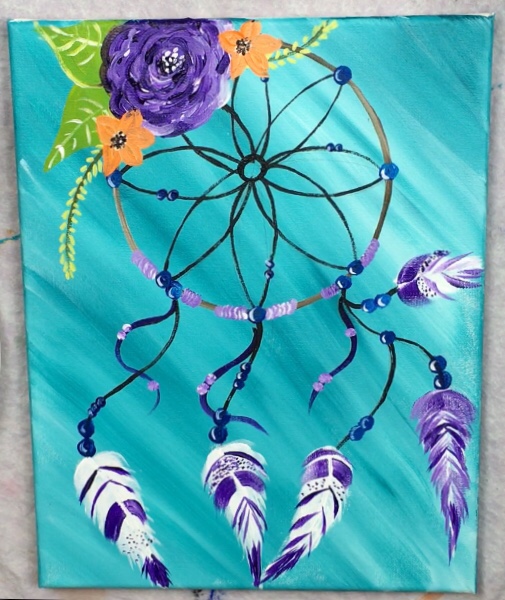
Finished!
Would you like to save this?
Share Your Art!


See Also
Well, that was hard. I definitely need the video and traceables, my feathers look awful. Let me know when the video and or traceables are ready.
Oh no! I’m actually working on the longer video right now! It should be up tomorrow sometime ?
Thank you, thank you, thank you for taking the time to post all these tutorials! I can’t even imagine all the work it must be.
You’re welcome! It’s a ton of work but I love it!!
I loved painting this, and I like that there’s room to “make it my own” with different colour choices and flower styles etc. I found the feathers harder than I thought I would – the shape and patterns on them especially. Thanks for putting these tutorials on. Me and my daughter are loving them!
Thanks Dee! Glad you enjoyed the Dreamcatcher painting and are having fun painting with your daughter!