

Would you like to save this?
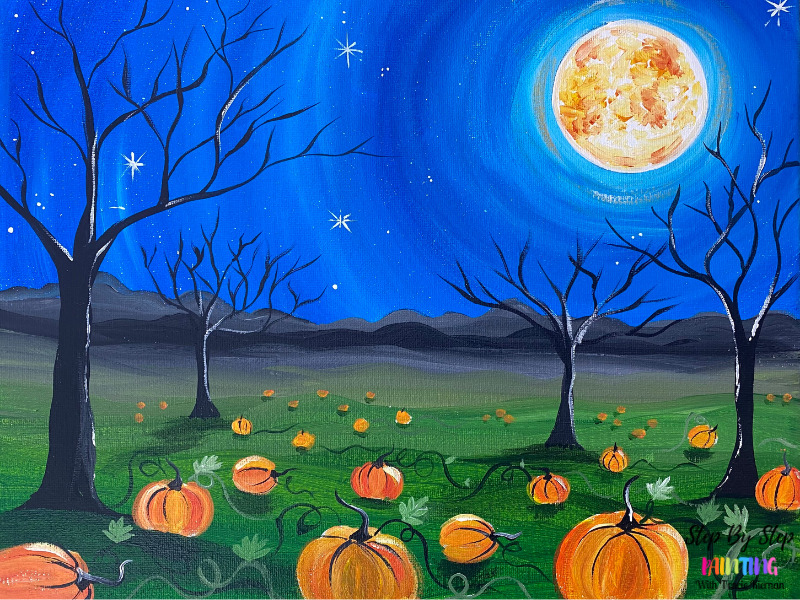
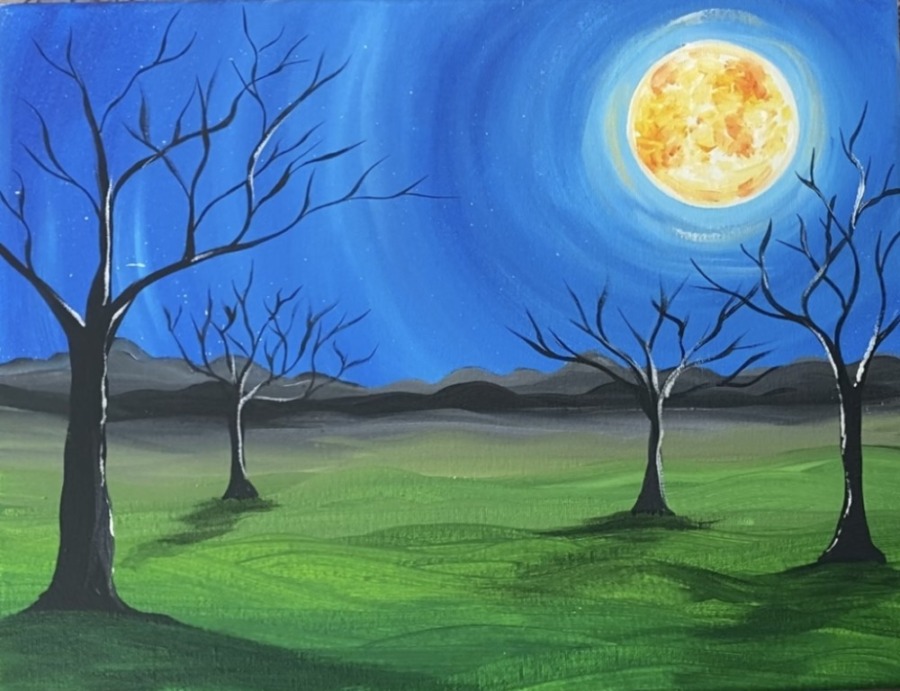
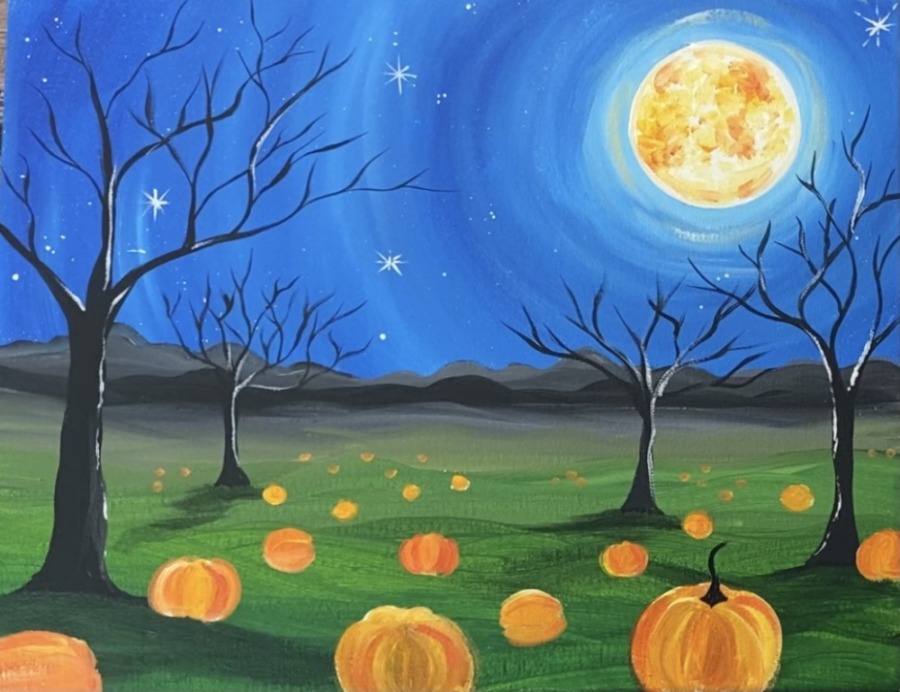
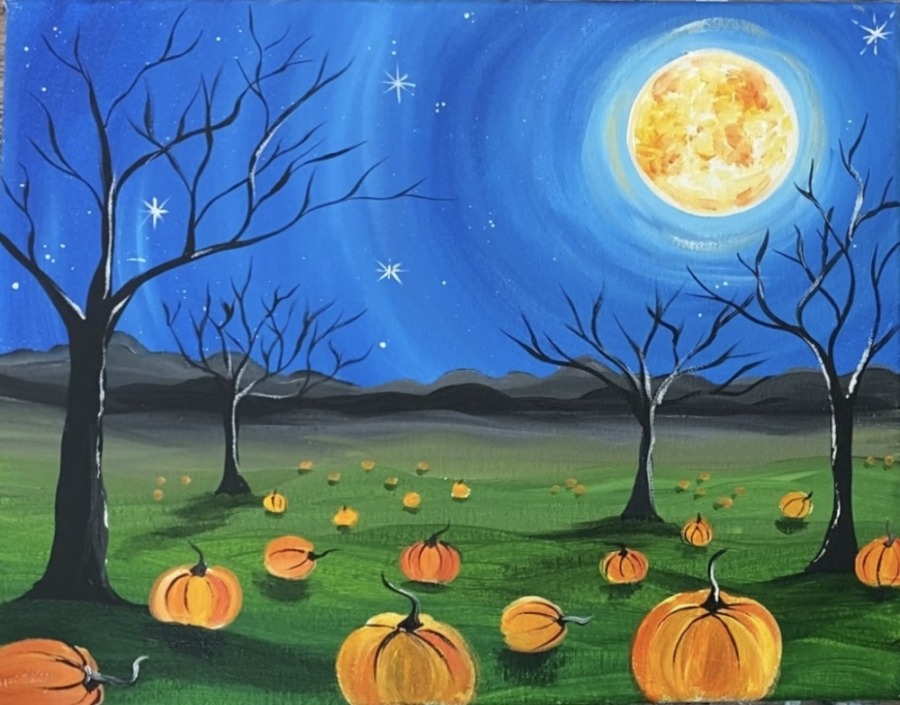
Escape to “Harvest Patch”! This acrylic painting tutorial will show you how to paint a pumpkin patch landscape on a harvest moon night.
Enjoy and happy painting!
Materials:
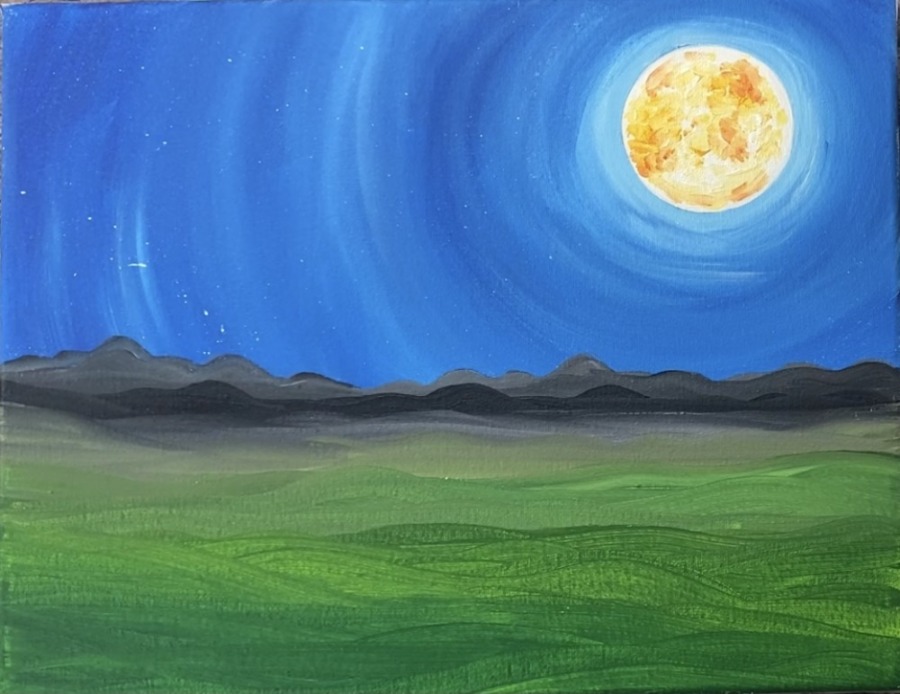
"Harvest Patch" Acrylic Painting Tutorial

Learn how to paint a pumpkin patch landscape on a harvest moon night.
Materials
- 11 x 14 Canvas
- Acrylic Paint
- Brushes
- Pencil
- Ruler
- 2.5" Circle To Trace (or similar size)
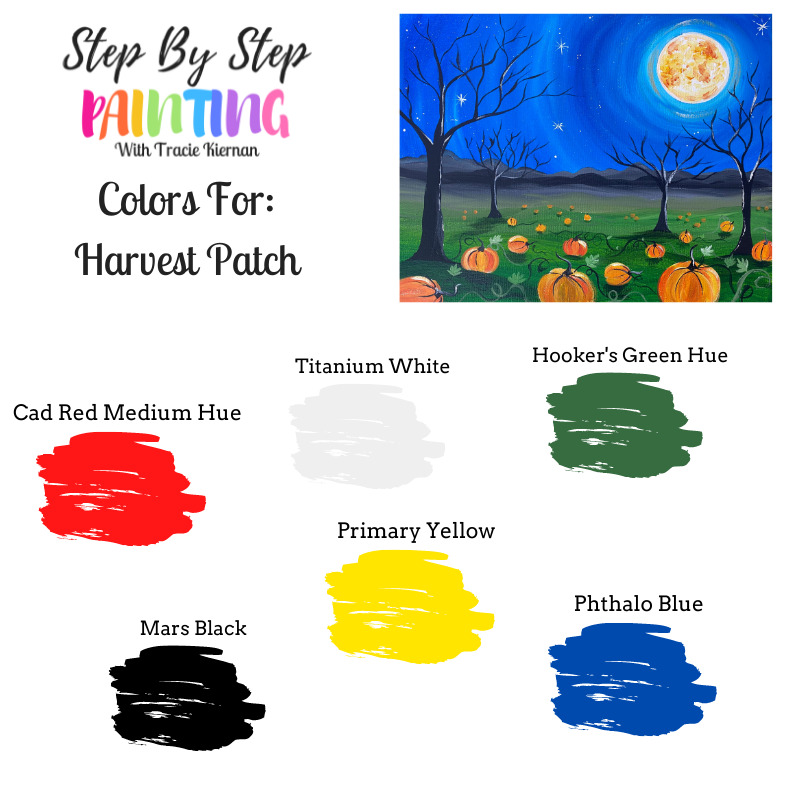
Colors
- Titanium White
- Mars Black
- Cadmium Red Medium Hue
- Primary Yellow
- Hooker's Green Hue Permanent
- Phthalo Blue
Brushes
Instructions
- See tutorial on www.stepbysteppainting.net for full isntructions!
Colors:
Using Craft Paints?
You can try substituting these Apple Barrel Craft Paint Colors:
- White
- Black
- Bright Yellow
- Jack-O-Lantern
- Bright Yellow
- Holly Branch
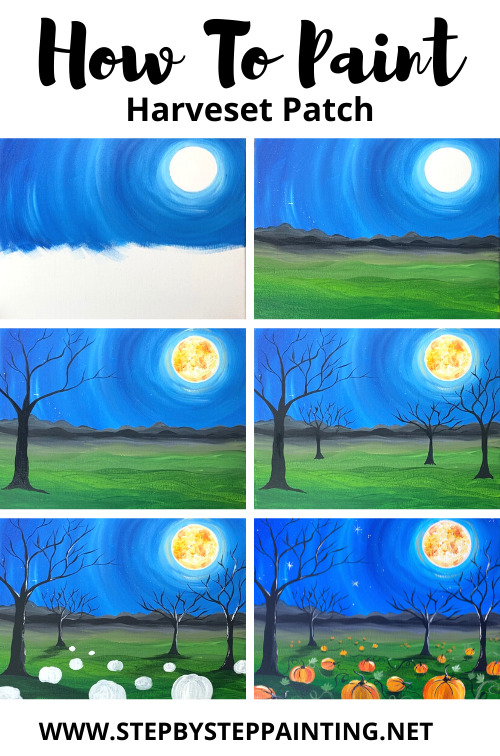
Directions At A Glance:
Video:
Step By Step Directions:
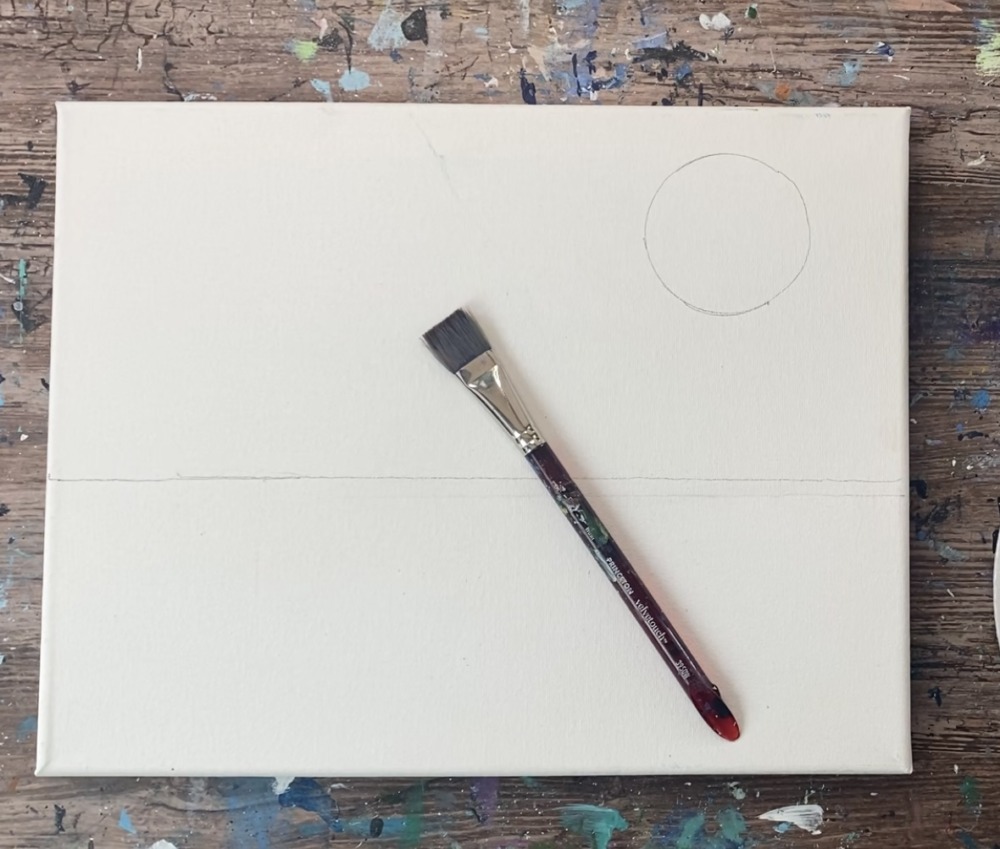
1. Draw Horizon Line & Moon Circle
Place your canvas in horizontal mode and draw your horizon line at 4.5″ from the bottom of the canvas. You can use a ruler and a pencil to draw this line.
Next draw a circle for the moon in the upper right corner area of the sky.
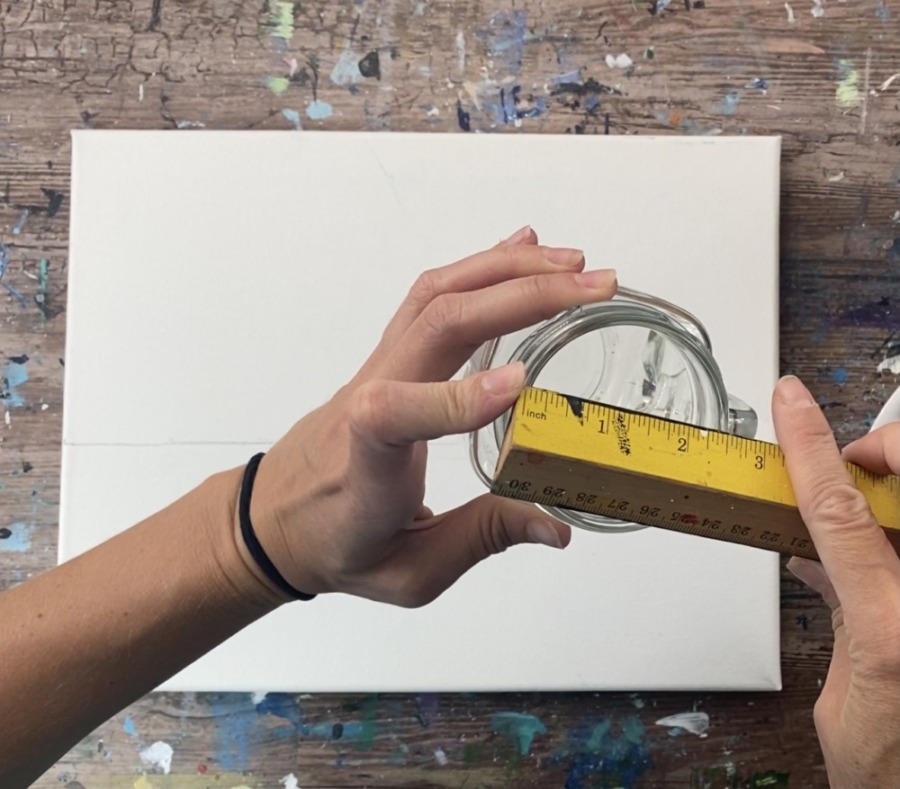
This is a 2.5″ diameter circle. I traced a mason jar top for this circle but you can find any similar size circle around the home to trace!
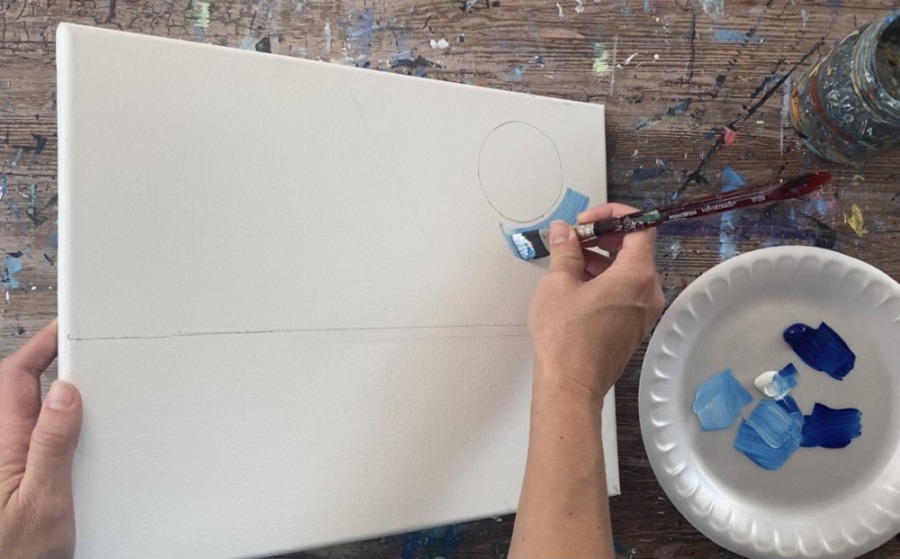
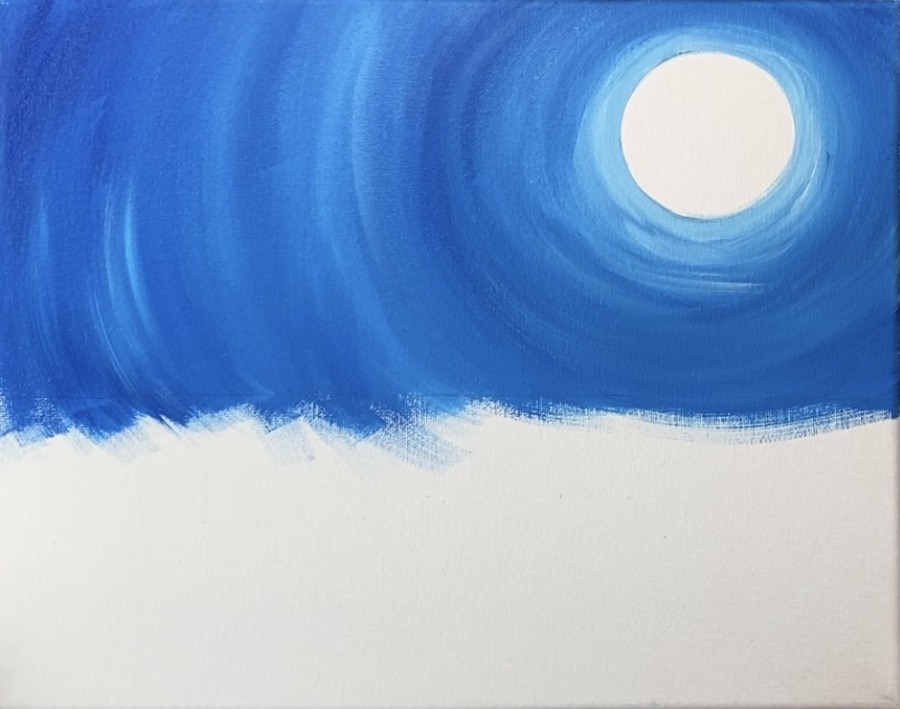
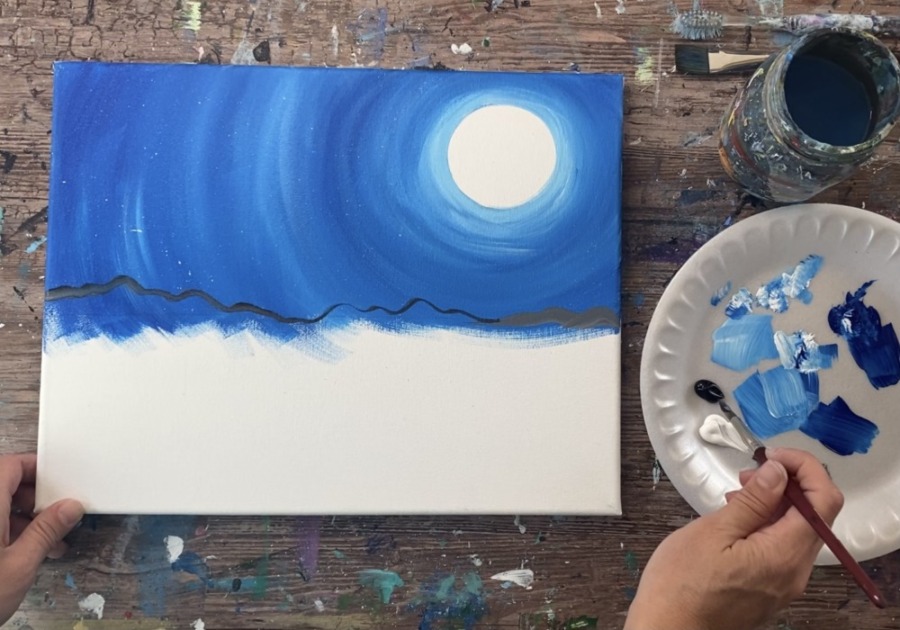
2. Paint Sky
Load your palette with phthalo blue and titanium white. Use a 3/4″ flat wash brush to paint in circular directions around the moon. This sky is a blended sky with the brightest part around the moon and the darkest part furthest away from the moon.
Start by mixing about 4 parts white to 1 part blue. Use the full width of the brush to paint a circle around the moon.
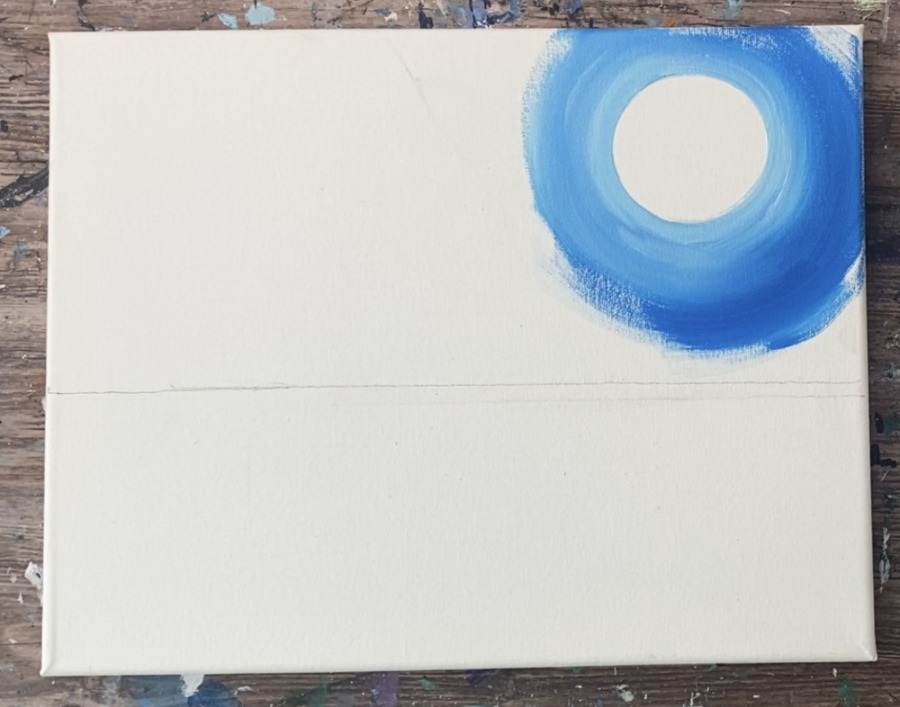
Paint in circular directions and gradually add more of the blue and less of the white as you work your way outwards. You want the sky to be brightest around the moon and darkest on the outer parts.
Tip: it may be helpful to place a piece of masking tape at your horizon line so your paint does not go below that point. Otherwise, try not to make any paint marks go under the line.
Need tips on blending? See my “how to blend acrylics post” that further explains this blending technique!
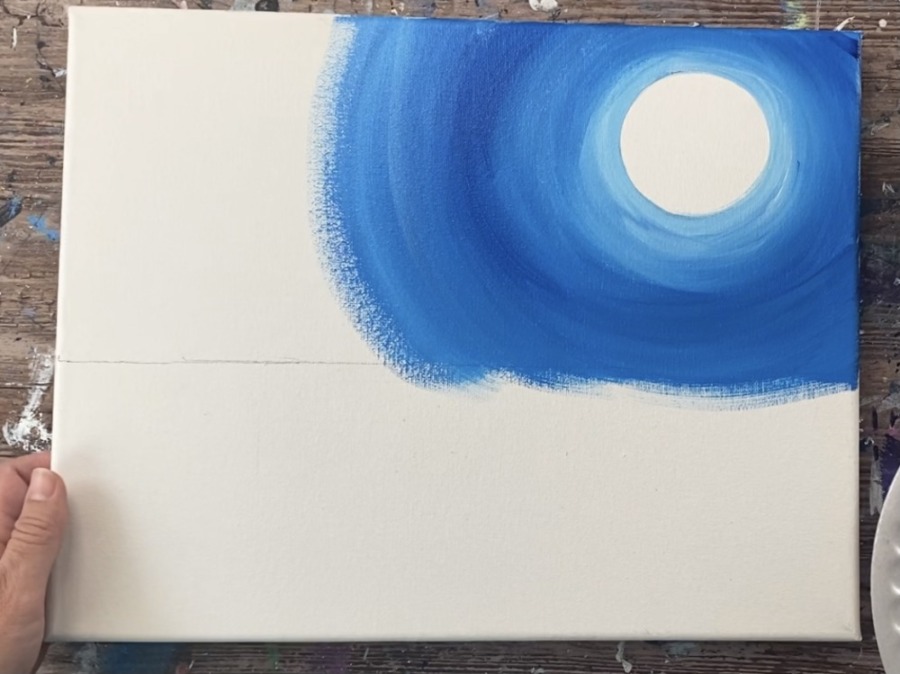
Paint the entire sky with strokes going in the same direction. You can have a few streaks of titanium white in the sky in the outer, darker area. Also, you sky does not have to fully blend all the way.
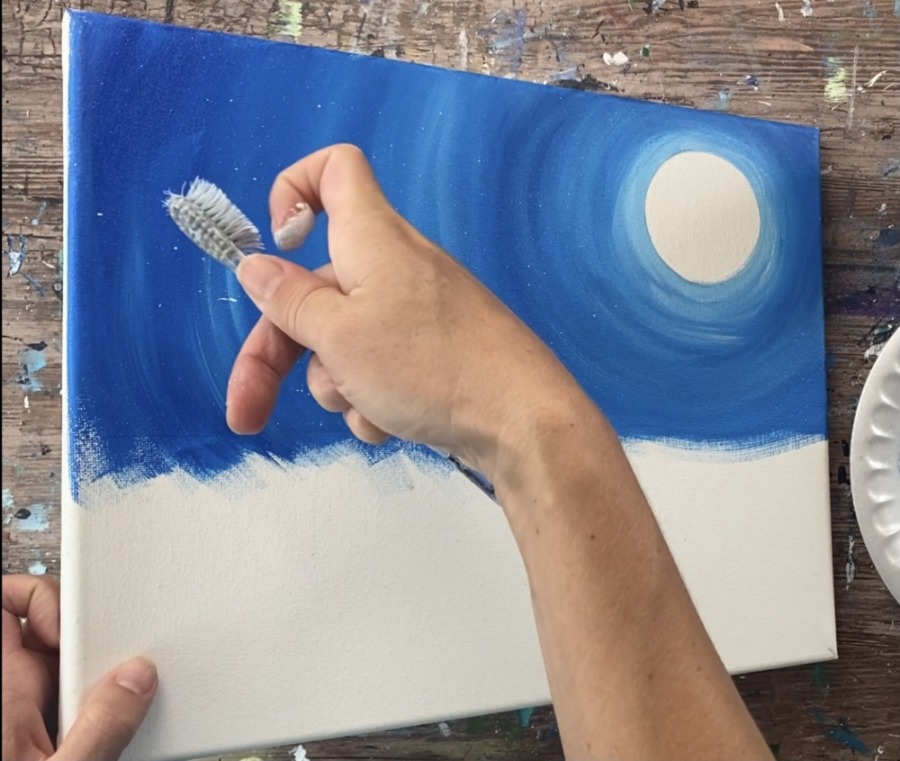
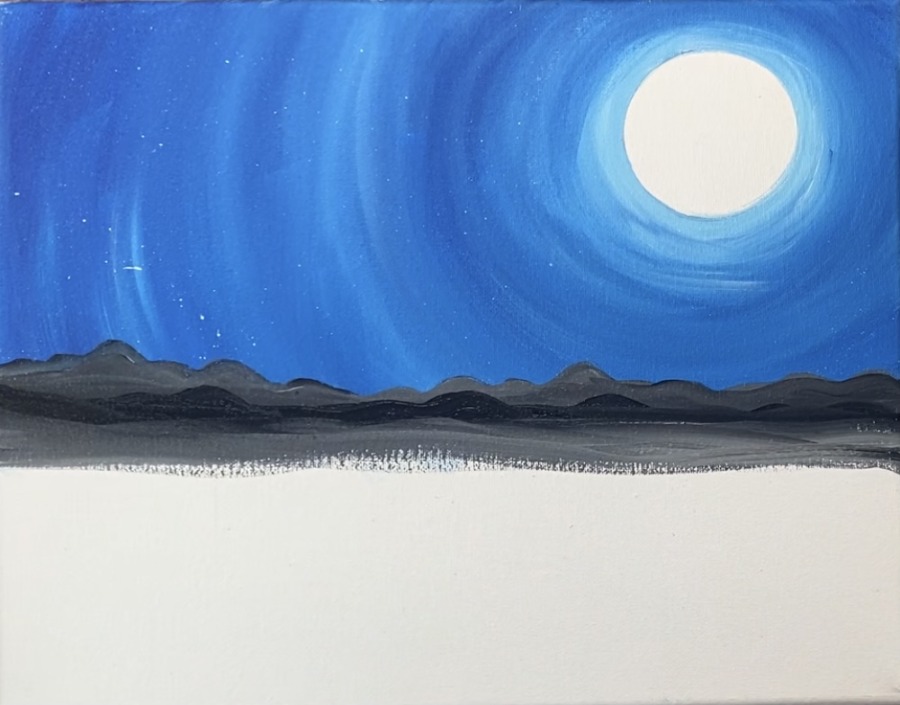
When your sky is fully painted, use a toothbrush (or a paint brush) to splatter stars. Slightly water down your white and flick the brush around the sky area to create fine little star dots.
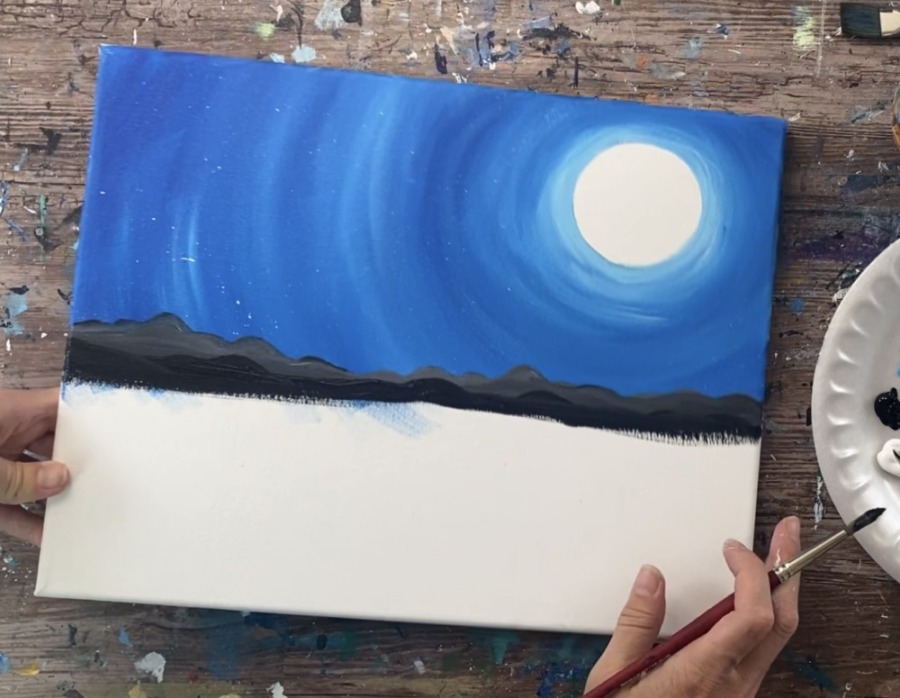
3. Paint Mountains
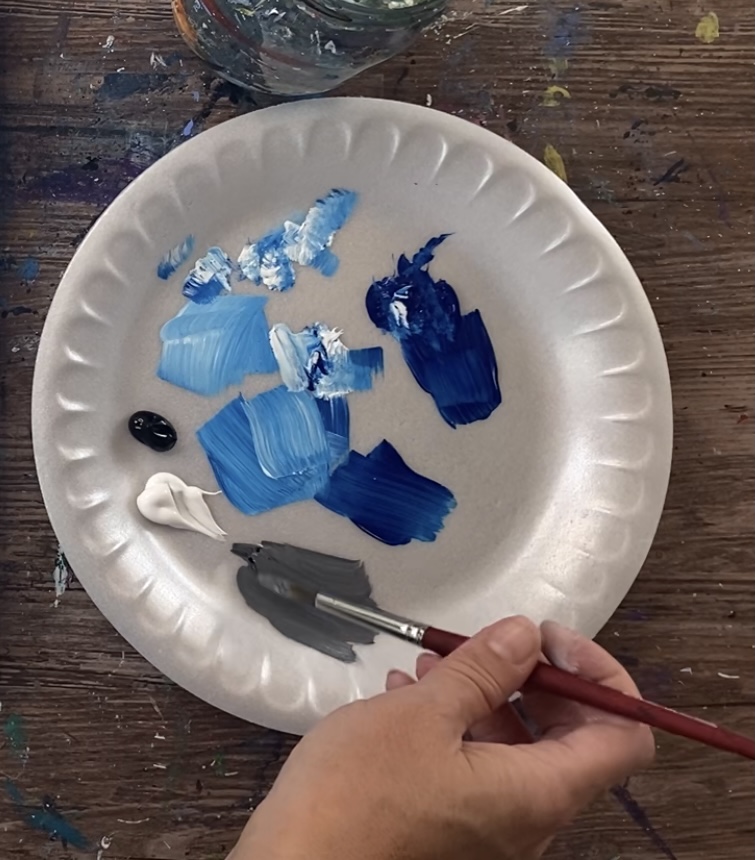
Mix about equal amounts of black and white together to make a medium gray.
Use a #8 round brush to define the mountain line above the horizon line.
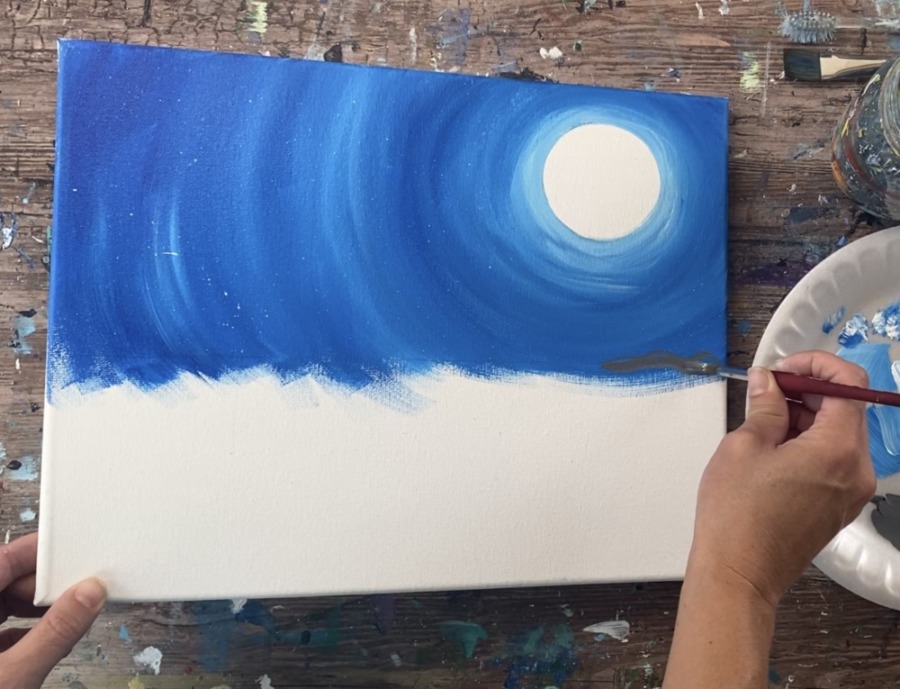
Paint a long, continuous, wavy mountain line with different heights and peaks.
Then paint the mountain solid with the medium gray color. Below that mountain line, add just black to your brush and then paint a solid black mountain range that is lower than the medium gray mountain range.
Next, blend medium gray down into the land area. Paint horizontal strokes under your mountain ranges. You will be blending a gray-green color next and transitioning your gray color of the land into the green color that is in the land.
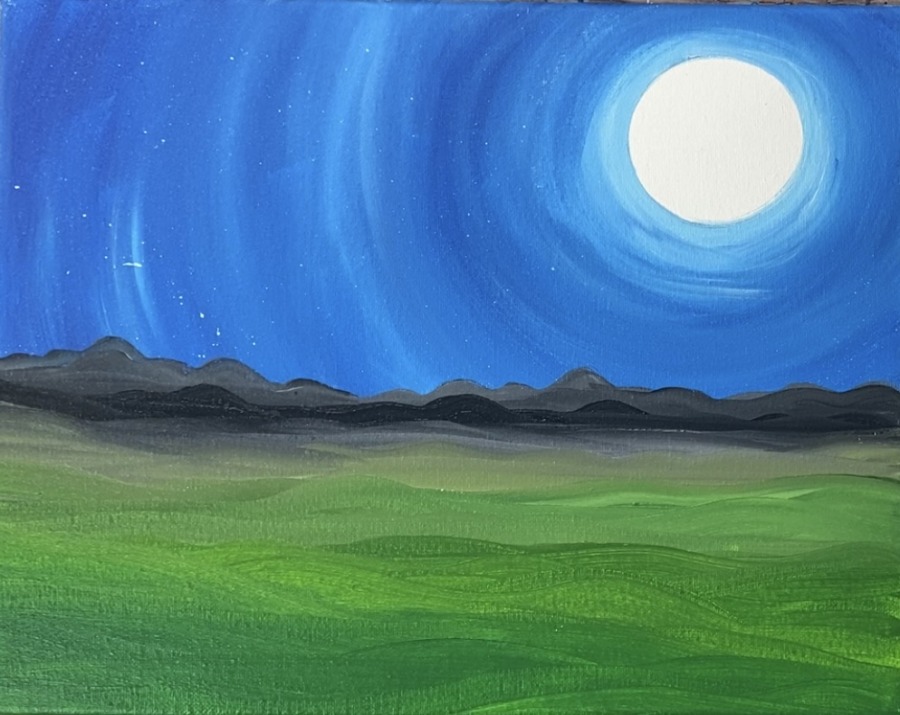
4. Paint Land
Load hooker’s green hue permanent on your palette.
Mix a gray-green color on your palette by blending about 3 parts white, 1 part black and 2 parts green. This should make a light gray/green color. Add more bits of white into it to lighten it up (if needed).
Use your 8 round brush to blend that gray-green below the gray area of the land. Paint in long, slightly wavy strokes.
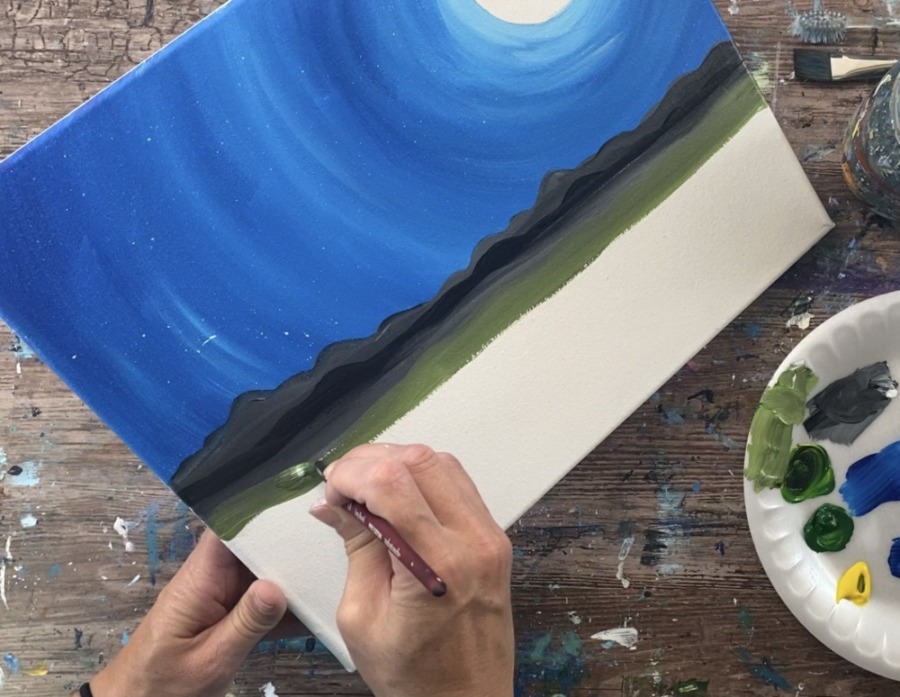
Continue a few inches down the canvas with that gray green. Then load just the hooker’s green hue permanent color on your brush and blend that down the middle part of the land.
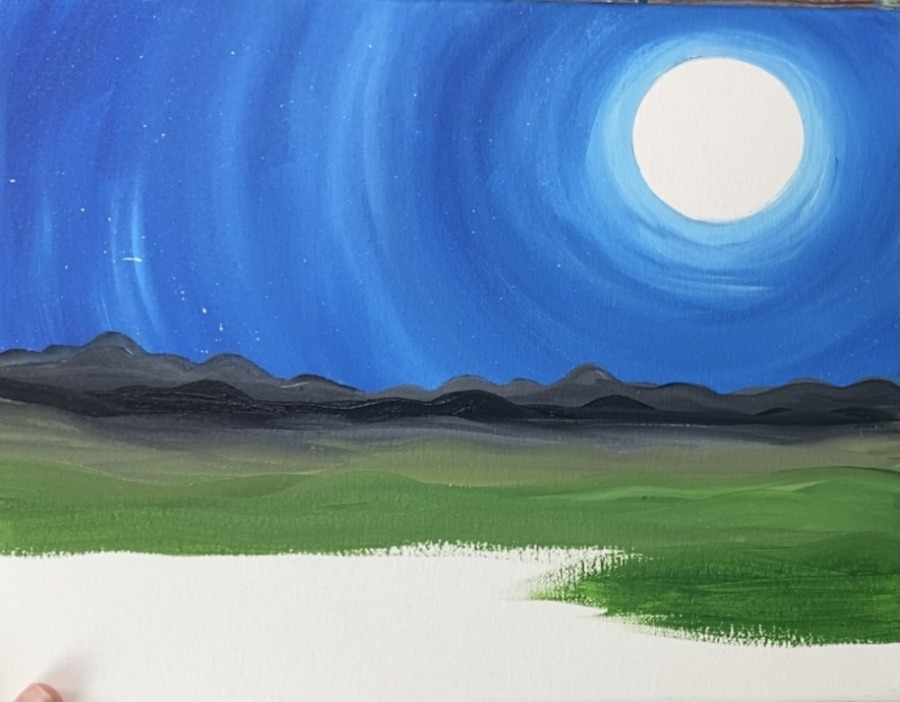
Continue to paint in long, slightly wavy strokes. This land is lighter further in the distance and gets slightly darker/more vibrant down to the bottom.
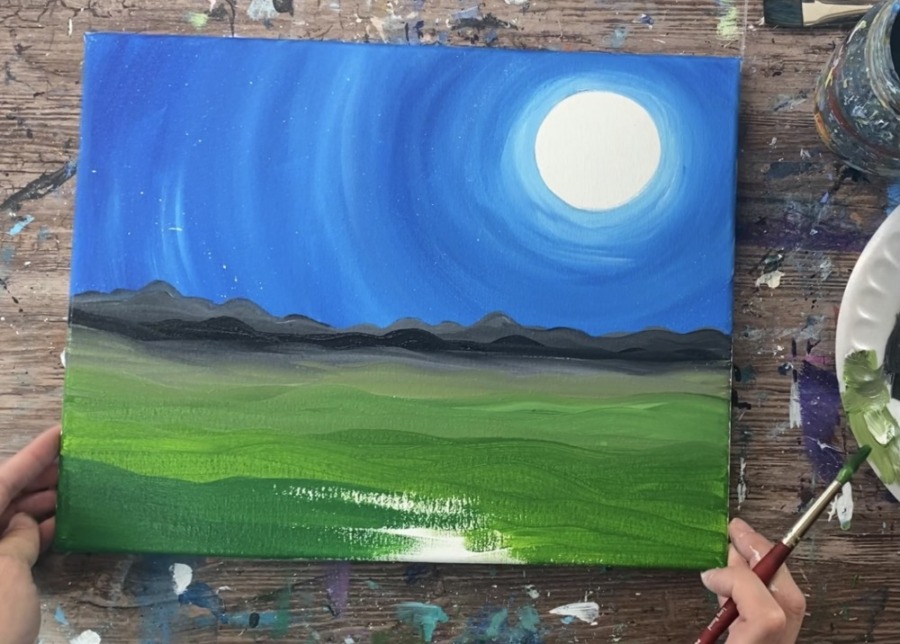
For the bottom layer of land, mix a little blue into the green to make it slightly darker. Continue to paint long, wavy strokes and fill the entire land area all the way to the bottom of the canvas.
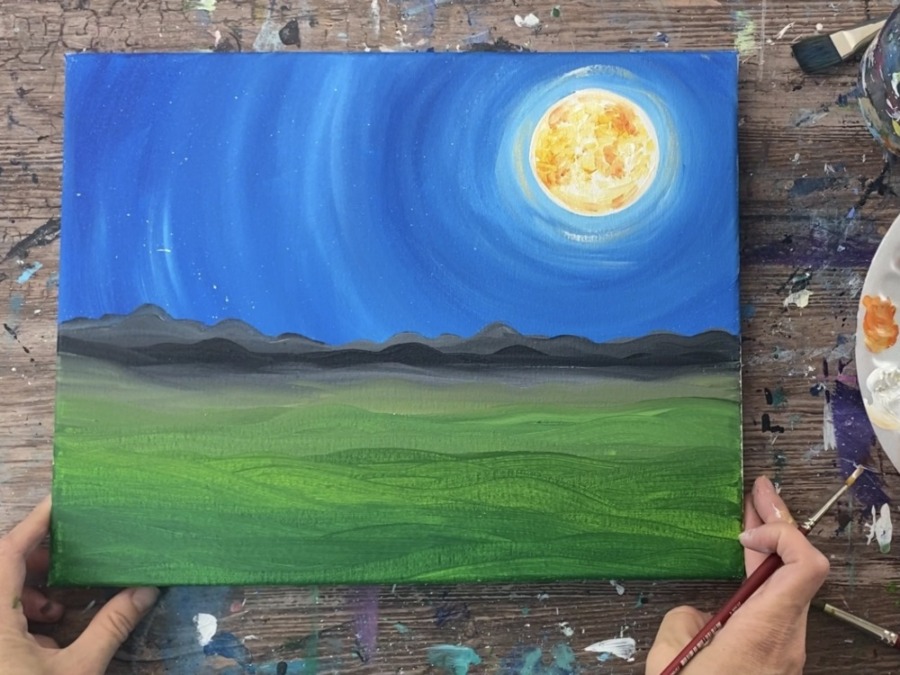
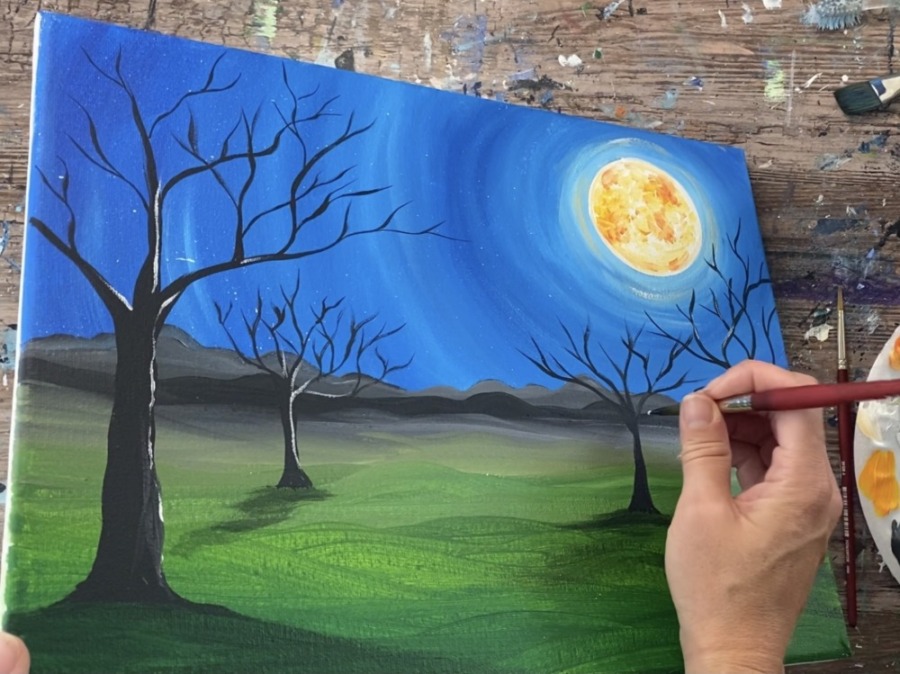
5. Paint Moon
First paint your entire moon circle with a layer of titanium white. Use your #4 round brush.
Load your palette with cad red medium hue, primary yellow and titanium white. Mix a light orange on your palette by mixing about 1 part red, 2 parts yellow and 2 parts white.
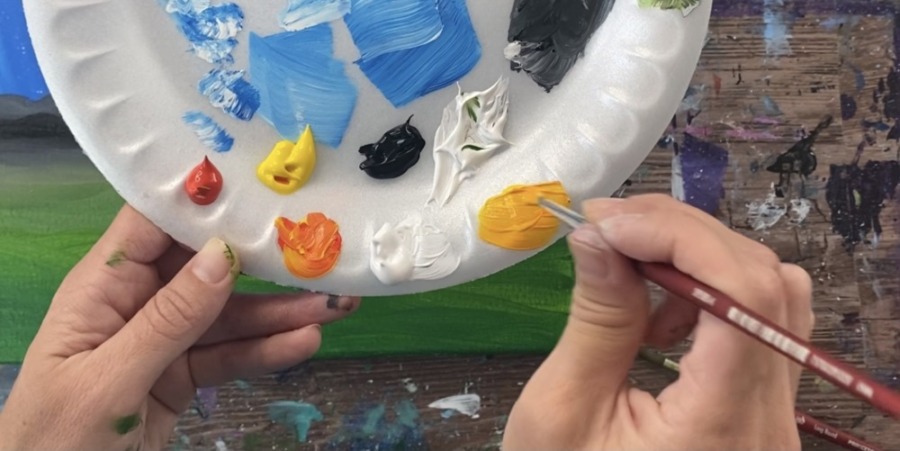
Use your #4 round brush to paint small texture strokes on the moon to create blotchy areas of the moon that are slightly darker.

Vary the colors by loading different amounts of the red, yellow, orange and white on your brush. Continue to paint more blotchy areas on the moon.
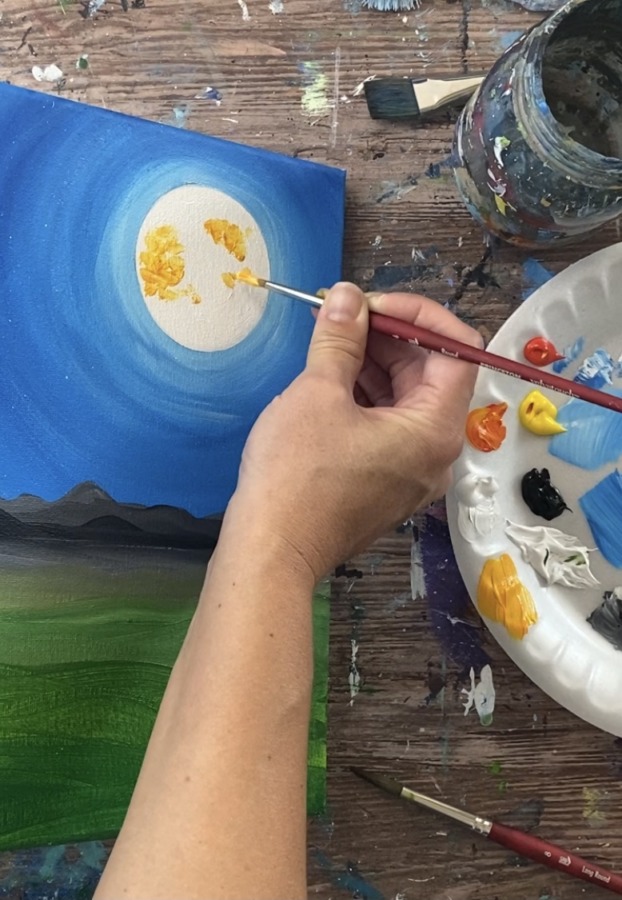
Then load titanium white on the brush and create lighter areas. Dab your brush with small strokes so the colors blend slightly together.

Next, wipe your brush off and load it into titanium white. Outline the entire moon circle with the titanium white.
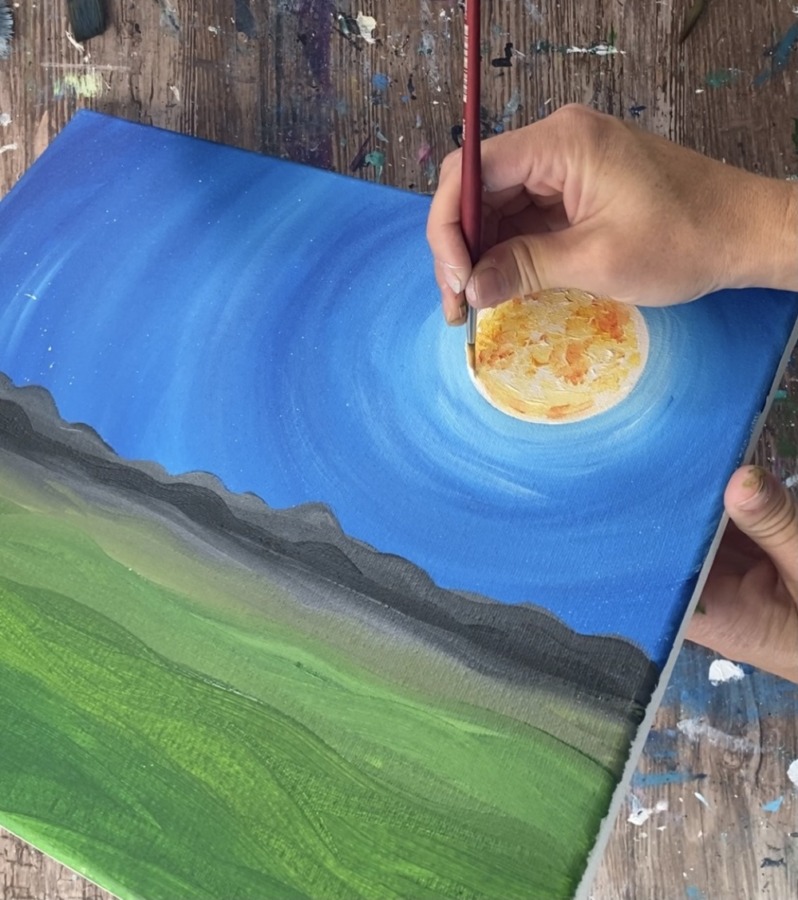
Then load your brush in a little titanium white. Wipe the brush off and do dry brush strokes around the moon.
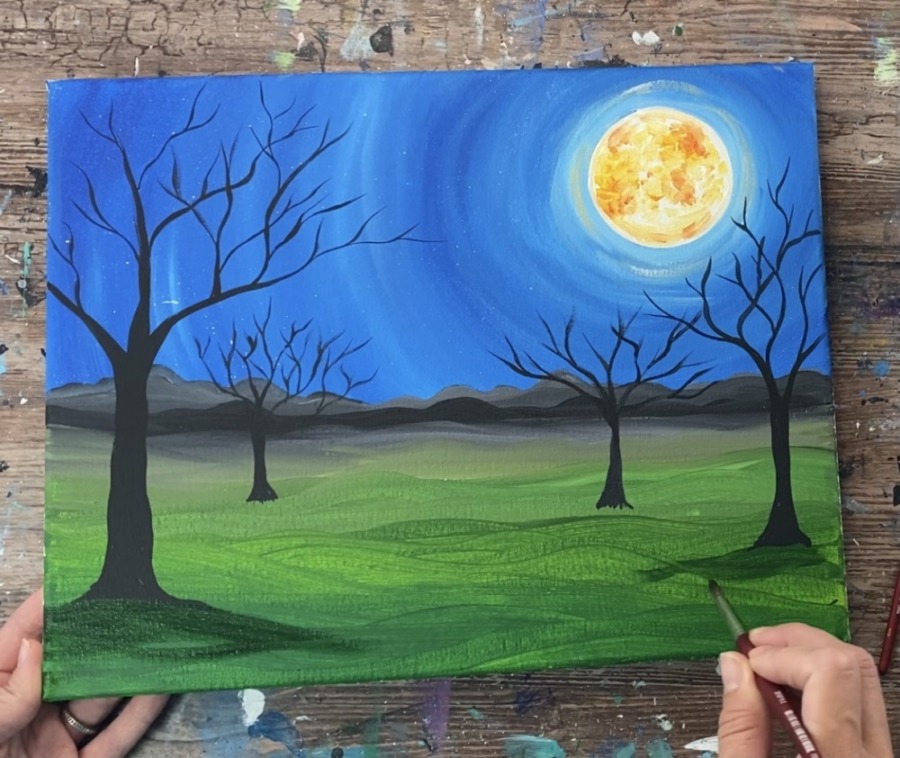
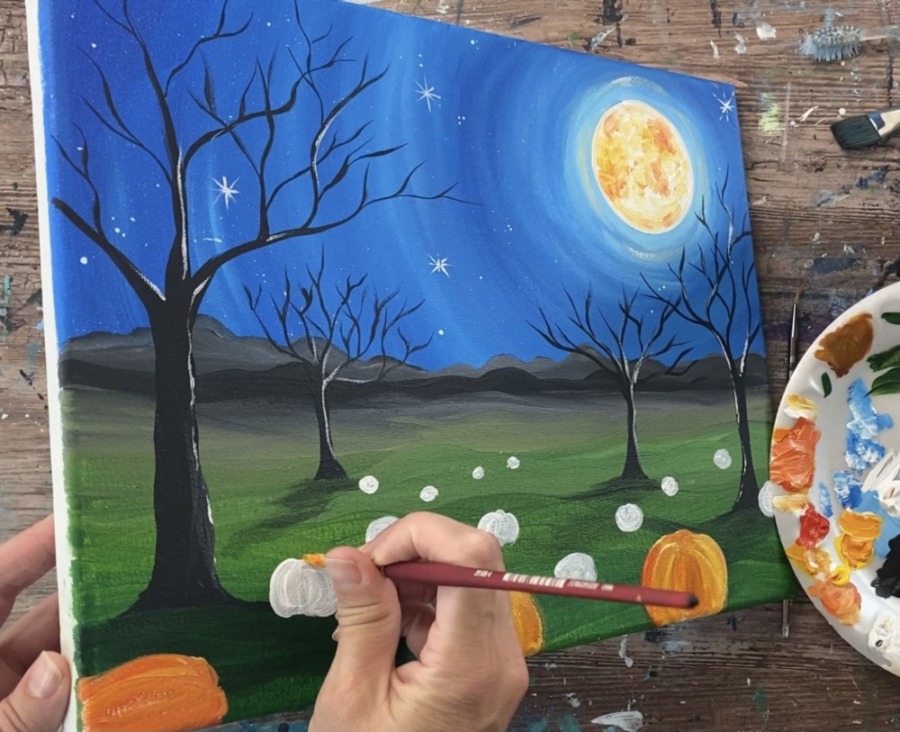
6. Paint Trees
Use a #8 round brush and mars black to paint trees in your landscape. Slightly water the black down so that it flows. Paint the base of the tree/ roots and then your first branch that goes up into the sky.
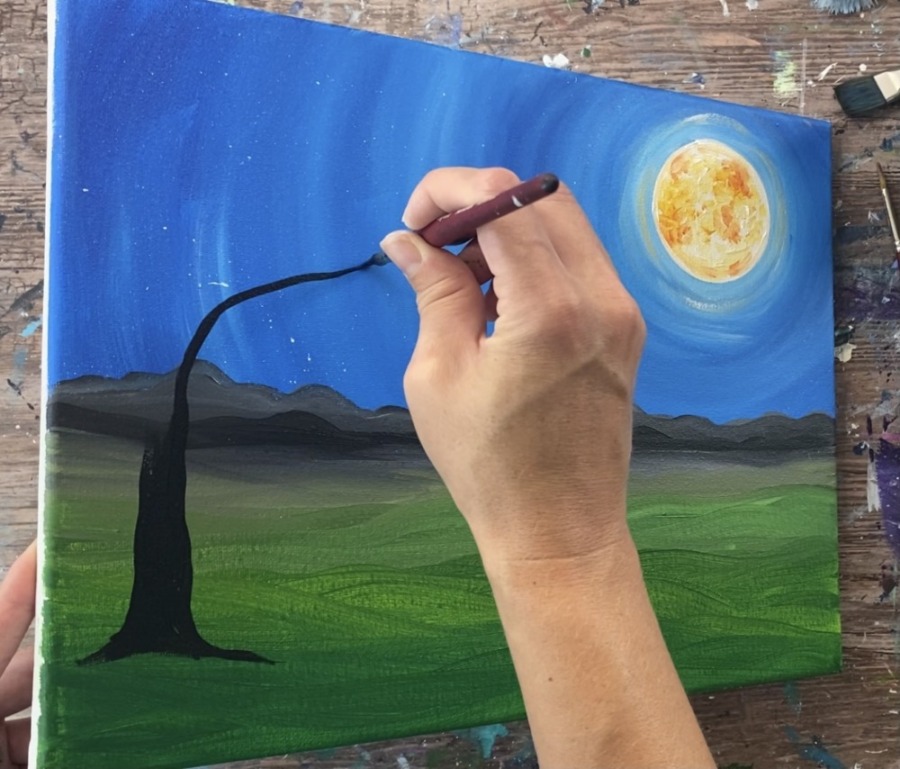
To do the thinner lines, release the pressure on the brush and use just tip of the bristles. Paint multiple wavy style branches.
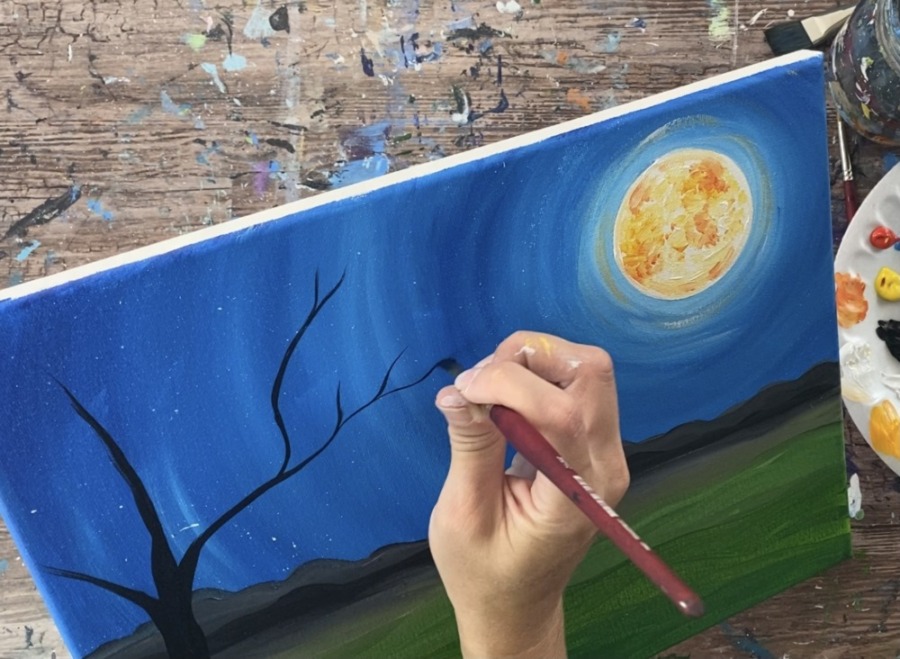
Paint smaller branches by using very light pressure on the brush and use the very tip of the bristles. Alternatively, you can switch to a small detail brush (the 10/0 liner) for this step.

Next, paint a smaller tree in the distance using the same technique. Make sure your branches still go up over the horizon line and in the sky.
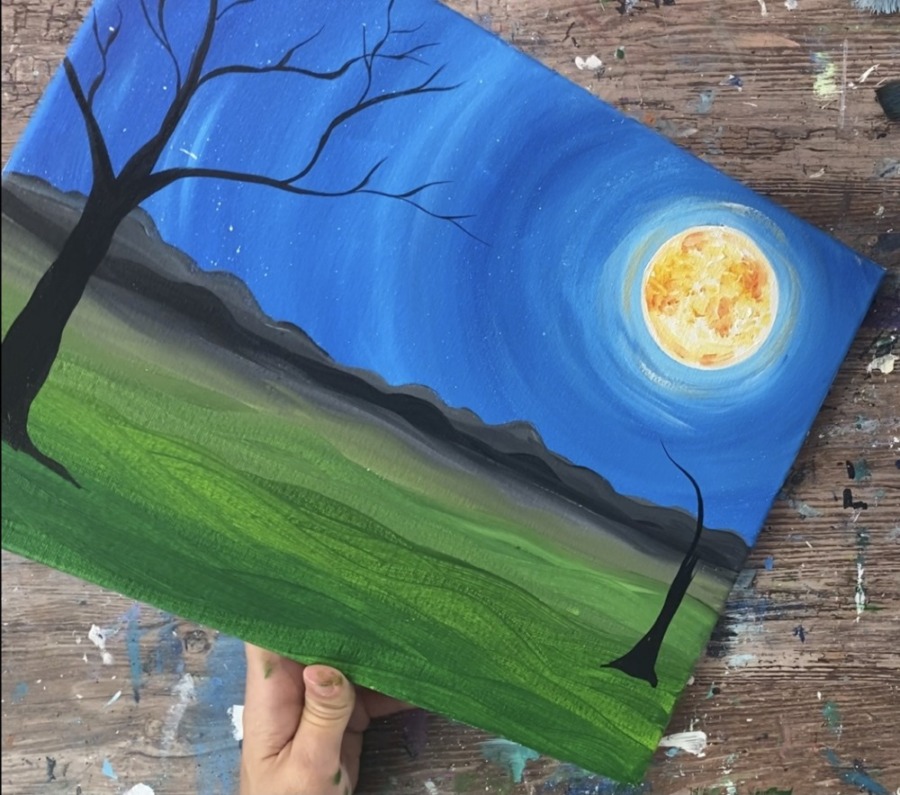
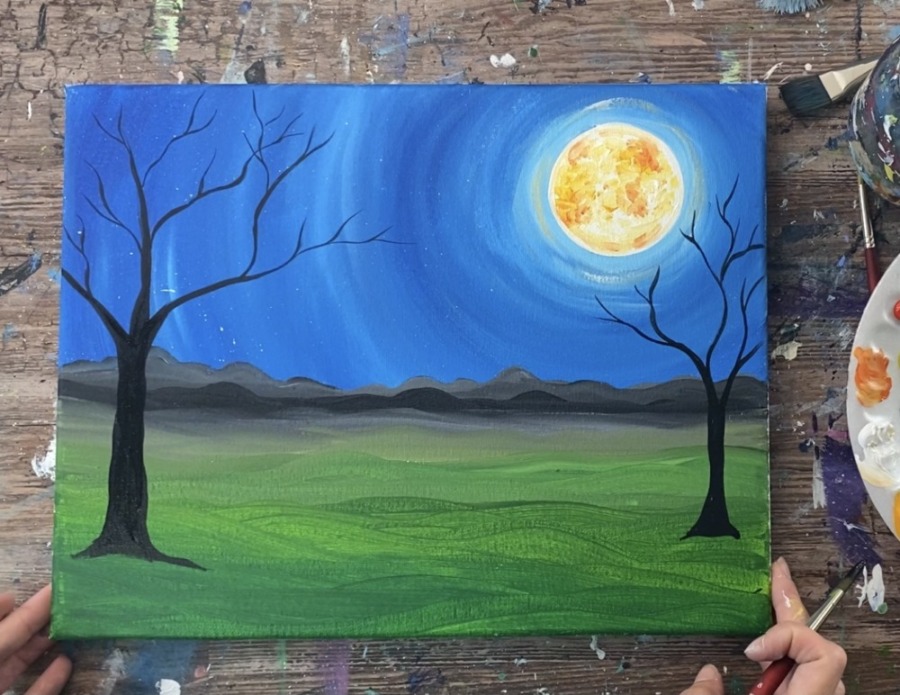
Then paint another smaller tree further in the landscape but make sure your branches still go above the mountains and in the sky.
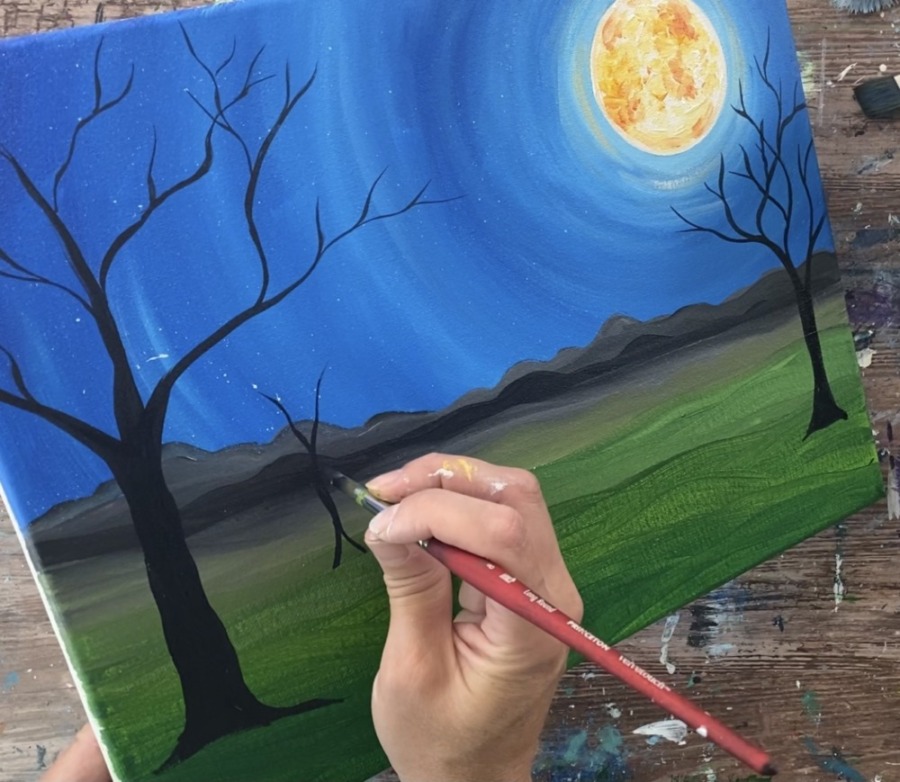
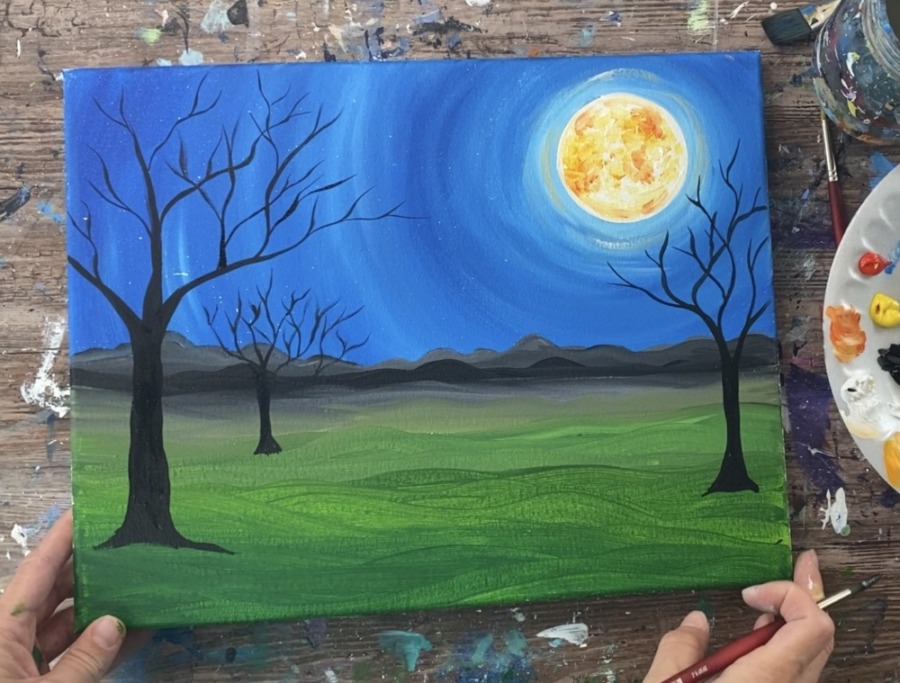
Create a fourth tree. You can choose to paint more trees if you want!
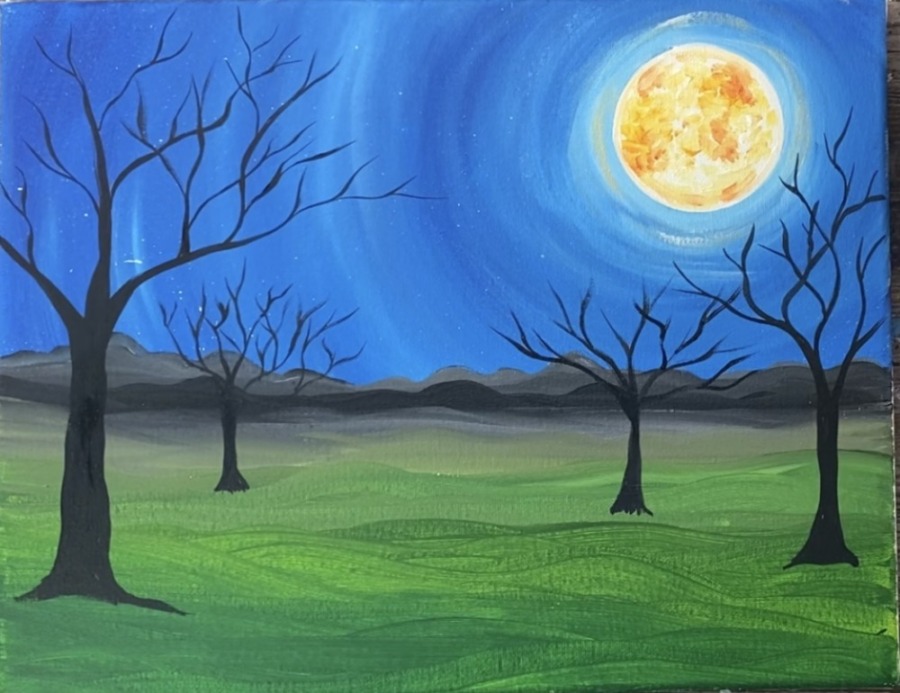
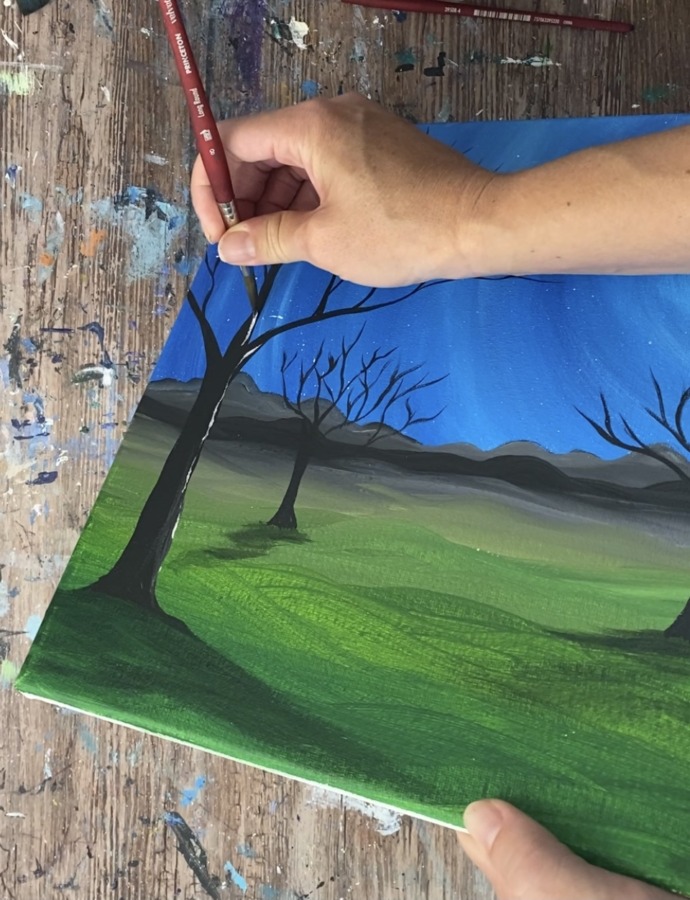
7. Paint Shadows
To do the shadows, mix a small amount of black into hooker’s green hue permanent. Then slightly water it down. Use your #8 round brush to lightly paint a shadowy area under each of the trees.
Go in a very loose, horizontal direction with slightly wavy strokes.
The shadows kind of go on a diagonal direction going to the lower left of the canvas. Paint these in loose, wavy strokes. The color should be a bit translucent and the paint should not be thick because the paint is slightly watered down.
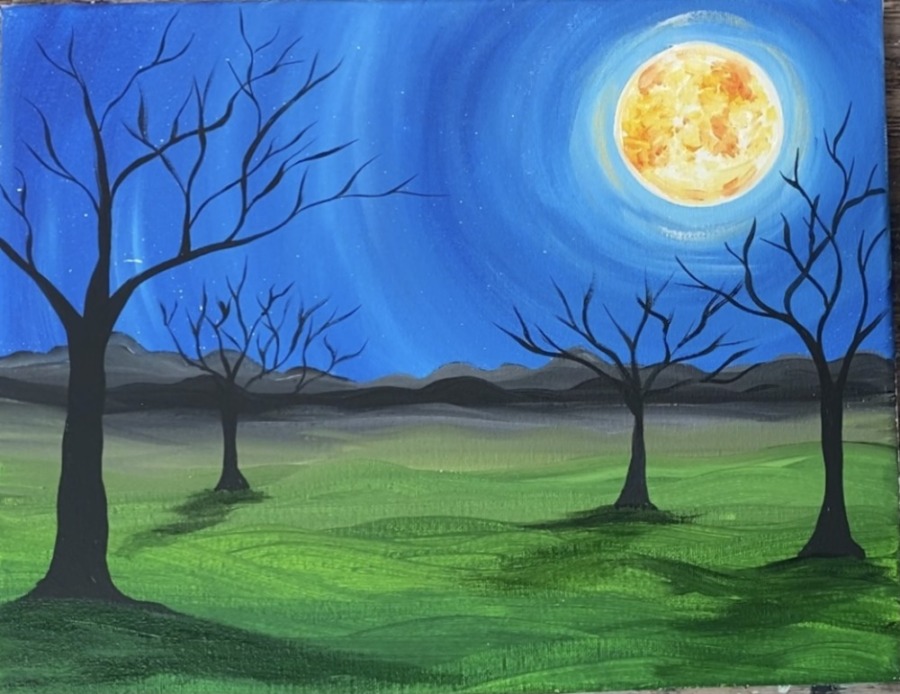
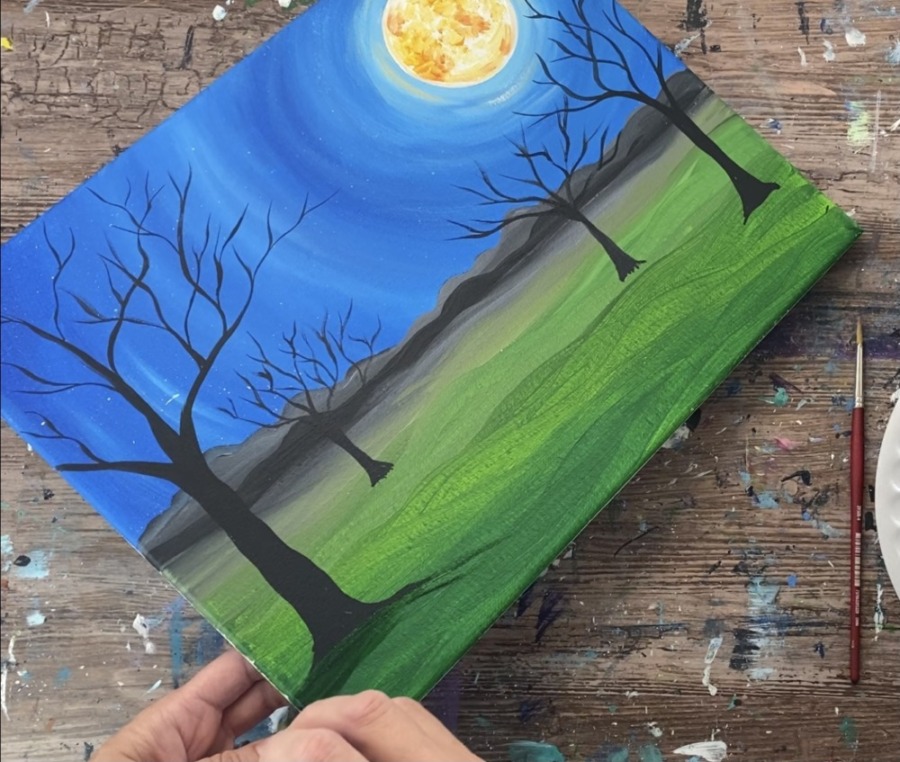
8. Paint Tree Highlights
Use either the tip of your 8 round brush or your 10/0 liner brush to paint white highlight on the right side of the large tree. Loosely paint a line on the far right but it doesn’t have to be a continuous line.
Add highlight to each of the trees.
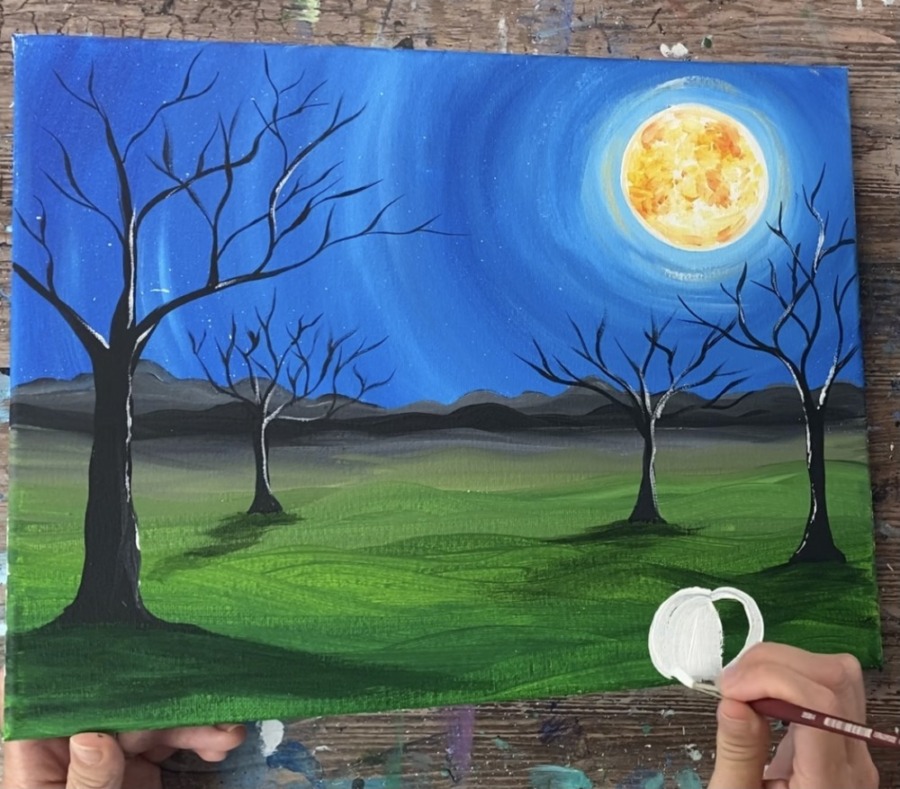
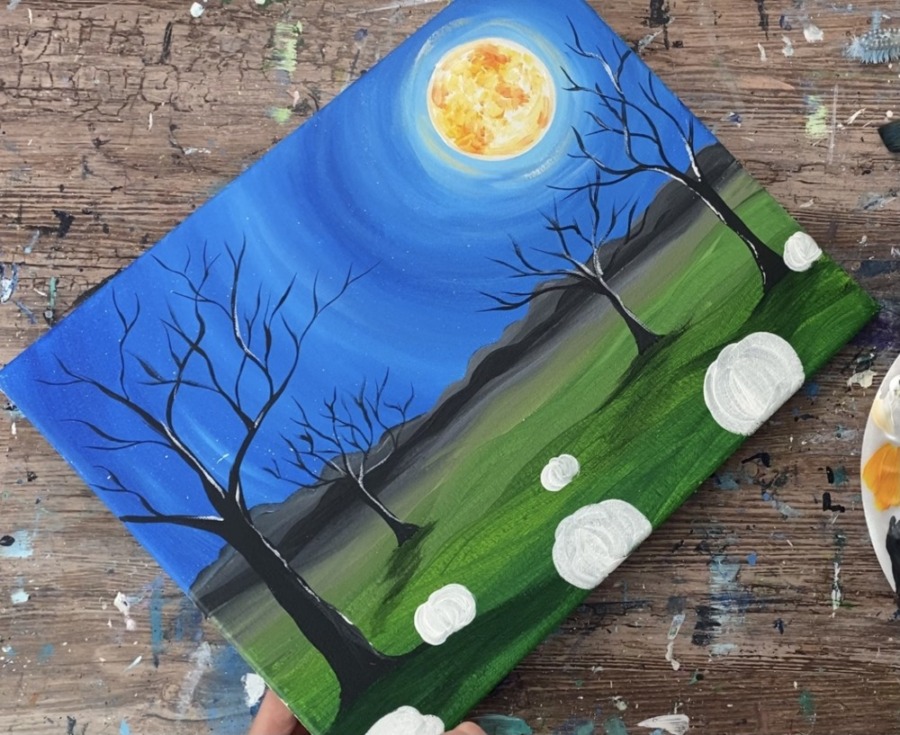
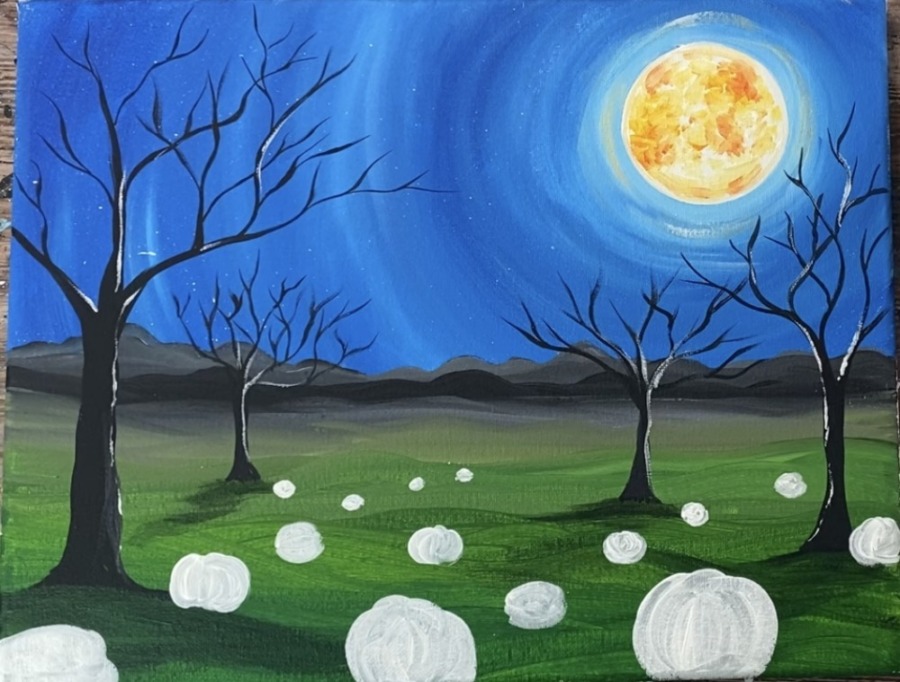
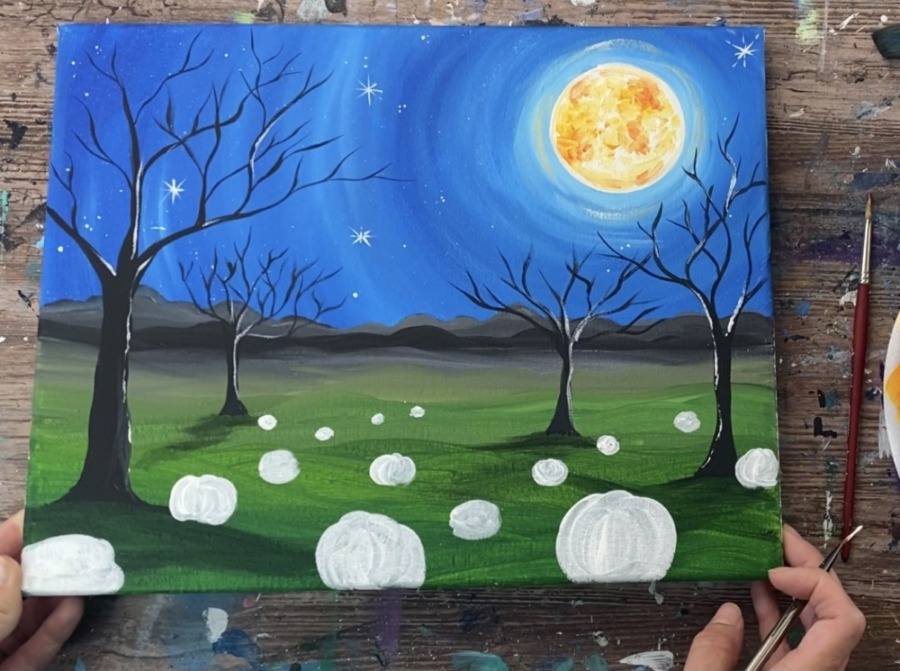
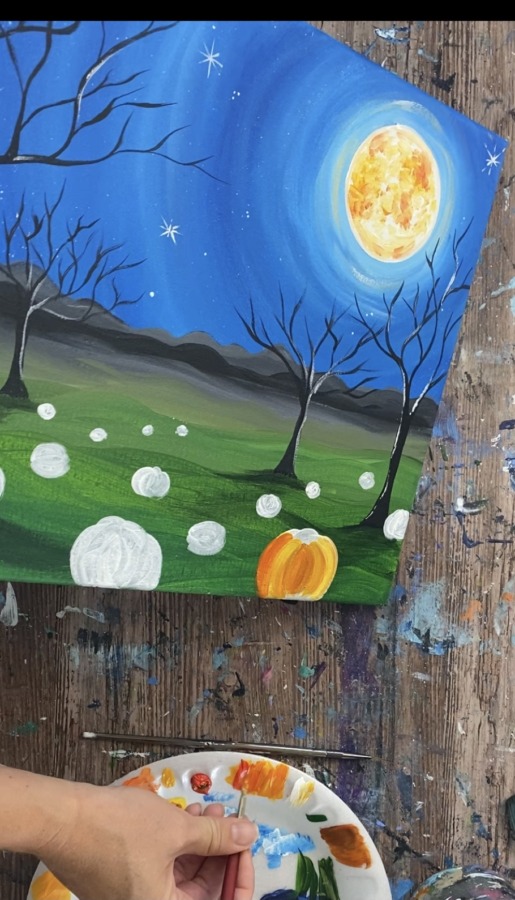
9. Paint White Base For Pumpkins
Use your #4 round brush to paint the pumpkins white. Paint larger pumpkins on the bottom of the canvas and smaller ones in the distance.
10. Paint Stars
While the white layer of the pumpkins dry, paint more stars in the sky. Use a 10/0 round brush to paint small sparkling “asterisks” in sky.
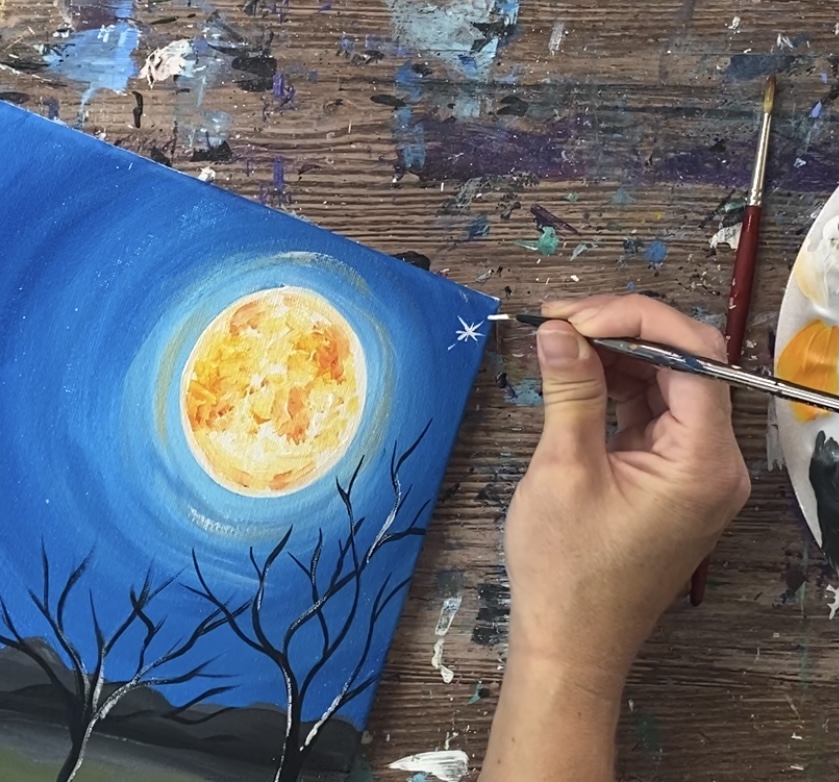
You can also paint clusters of small white dots and constellations.
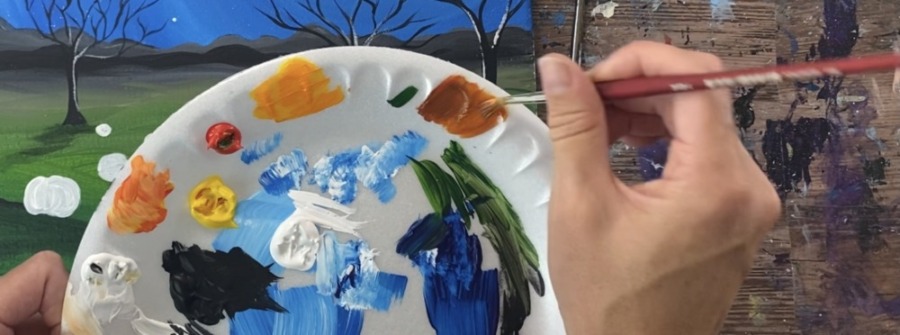
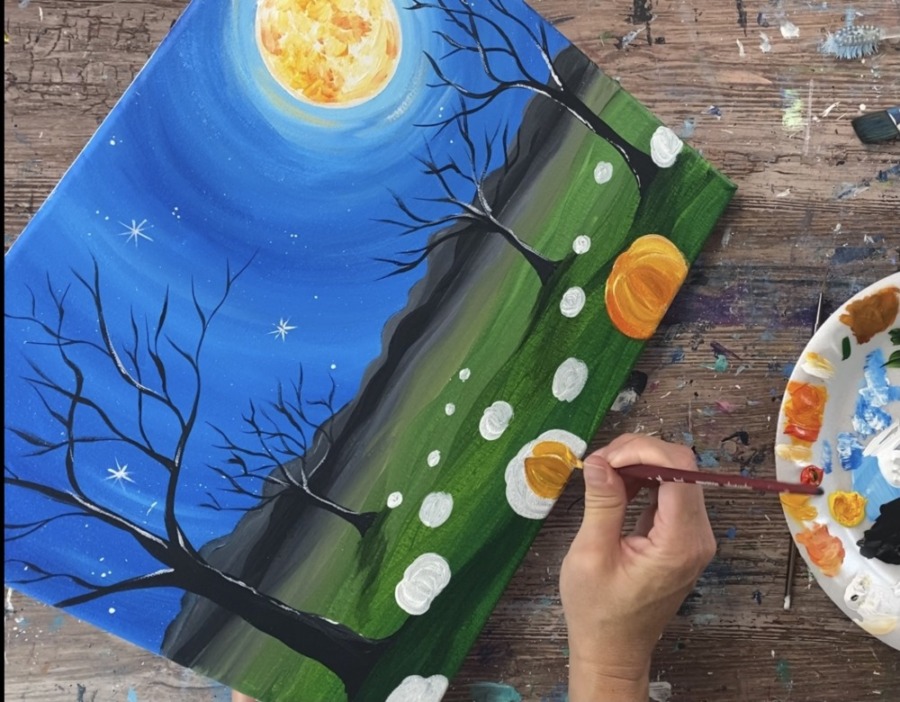
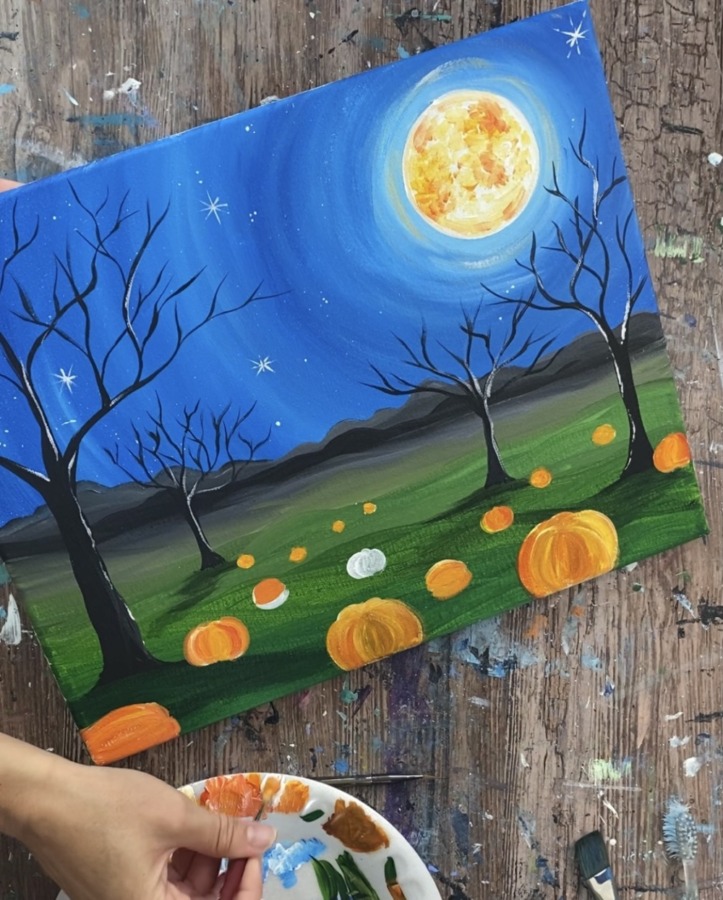
11. Paint Pumpkins Different Shades Of Orange
Need extra tips on painting a pumpkin? You can check out my “How To Paint Pumpkins” tutorial that demonstrates a simple way to do this!
The pumpkin “bumps” were painted different shades/tints of orange. Each stroke is basically painted with a different orange. Adding a bit of “green” to the orange will make the orange look a little darker and adding a bit of “white” to the orange will lighten it up.
To make the lighter orange, mix about 3 parts yellow, 1 part red and 1-2 parts white.
To make the darker orange, mix a very tiny bit of green into the lighter orange.
Paint your first pumpkin. Start in the middle and paint an oval/ pumpkin bump. You can do this with any of the oranges you mixed on your palette. Then load your brush in a lighter orange. Stroke from the top down to create the second “pumpkin bump”.
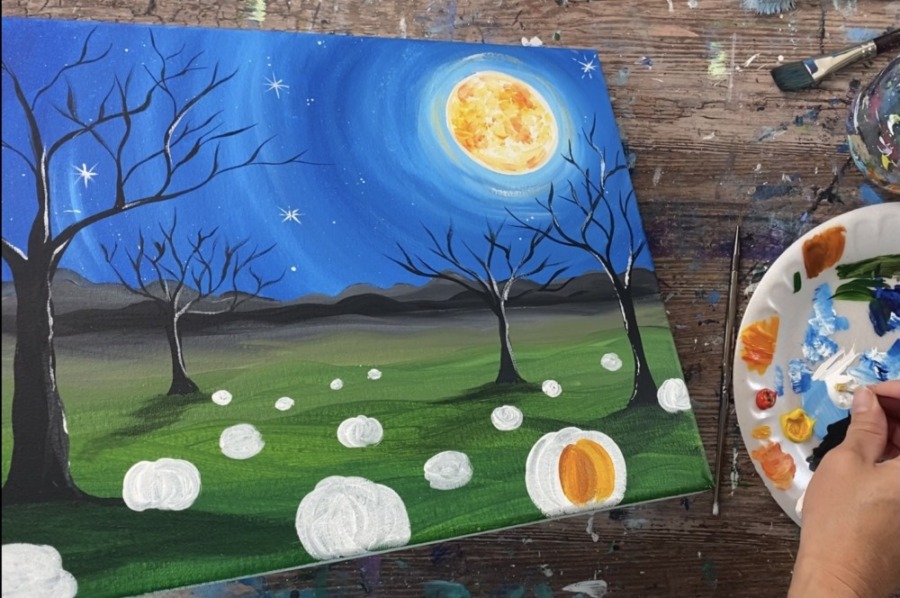
Paint more pumpkin bumps using the round brush and loading your brush in different shades or tints of orange. Then paint the bumps in the back of the pumpkin.
Repeat this technique for each of the pumpkins. Vary your “pumpkin bump” strokes by loading your brush in different amounts of the orange.
Tip: if your brush seems to get “over loaded” with paint, you may need to wipe or rinse if off.
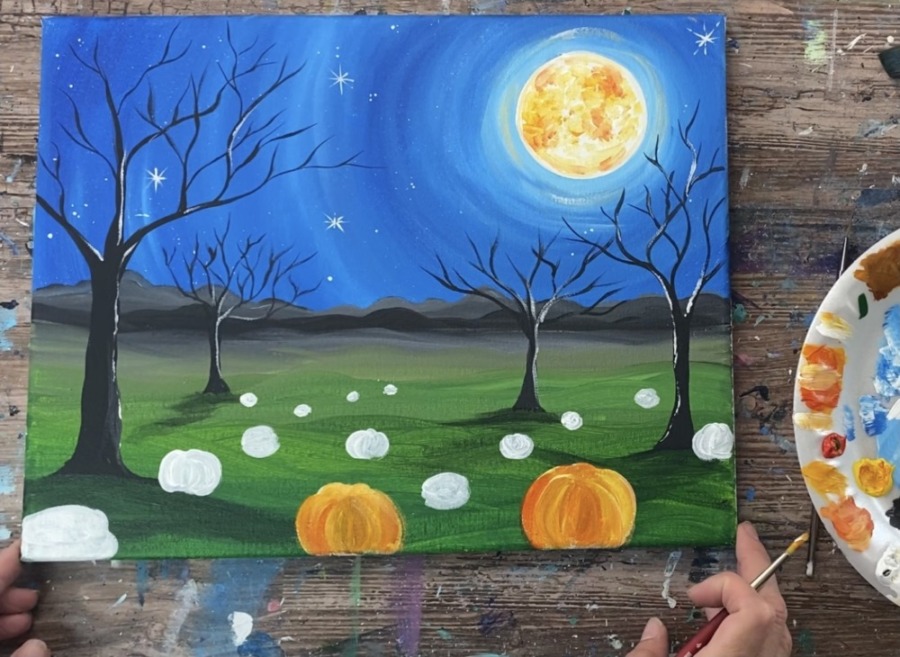
Paint each of the pumpkins! The ones that are further in the distance can be painted a solid color of orange and do not need the bump details.

12. Paint Stems
Use either your 4 round brush or a 10/0 liner. Start your stem below the top o your pumpkin. Create a “V shape” for the base of the stem. Then paint a thin/ wavy line for the point of the stem.
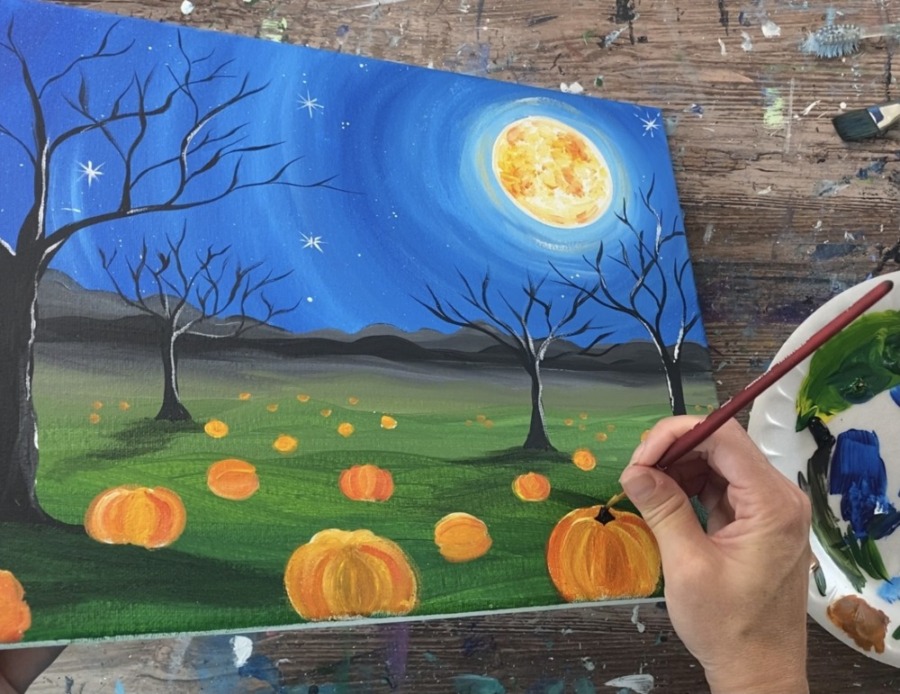
You can make your stems wavy to add to the whimsical effect of the painting. Remember to start each of your stems “below” the very top of the pumpkin.
Add highlight to your stems by painting a thin white line on the right side of the stems (similar to how your did highlights in the trees).

13. Paint Lines
Next, use your 10/0 liner brush to loosely paint black lines on the bumps of some of the pumpkins. Start at the top where the base of the stem is and loosely paint the stroke of the line down in a curved direction.
This helps to define the bumps of the pumpkins. You do not have to outline all of the pumpkins and you do not have to have your line go all the way to the bottom.
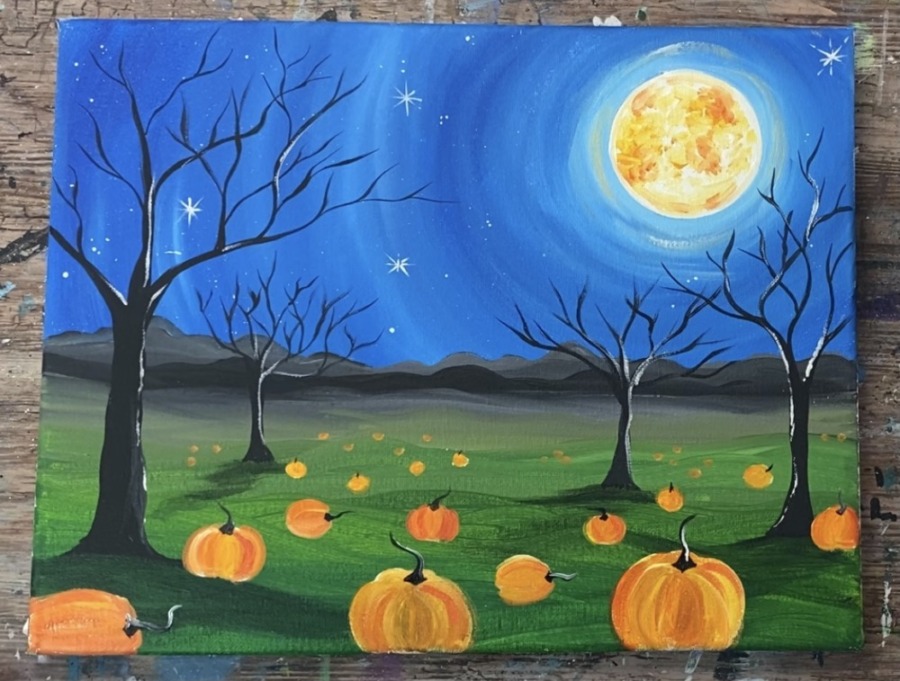
14. Paint Vines & Leaves
Make a very dark green on your palette by mixing a small amount of black into hooker’s green hue permanent. Then paint vines for each of the pumpkins using your 10/0 round brush.
Paint spiral lines to create the spirals of the pumpkin vines. Vary your vines! Some are curly, some are more wavy.
Mix a lighter green and paint lighter green vines in your landscape as well. To make the lighter green, mix a little white into the green.
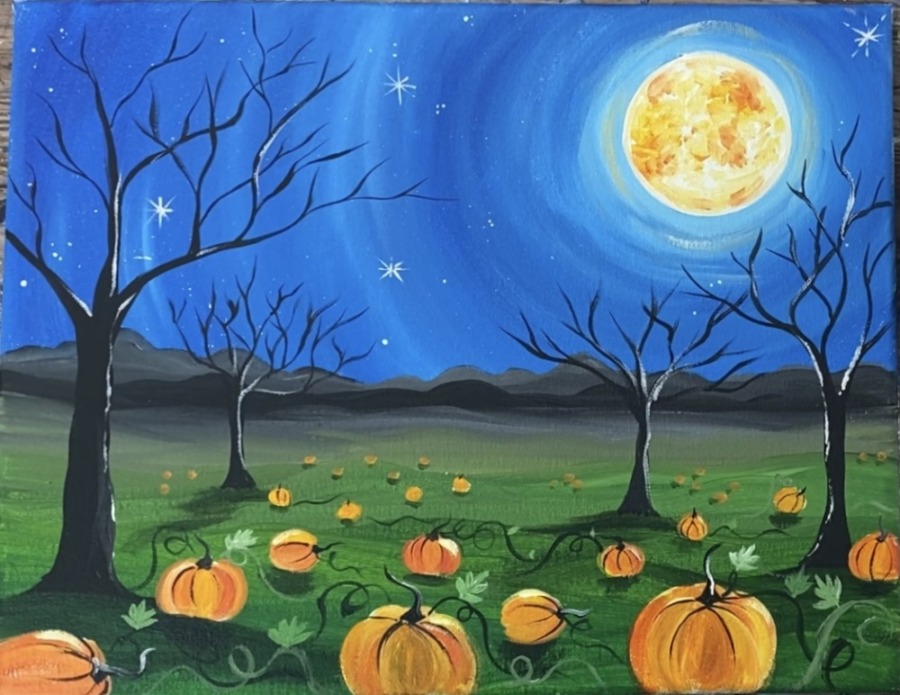
Next paint pumpkin leaves. Do this with your small brush. Paint small leaves with parted pointed shapes.
Finished!
That’s it! Sign your name and show it off!