

Would you like to save this?
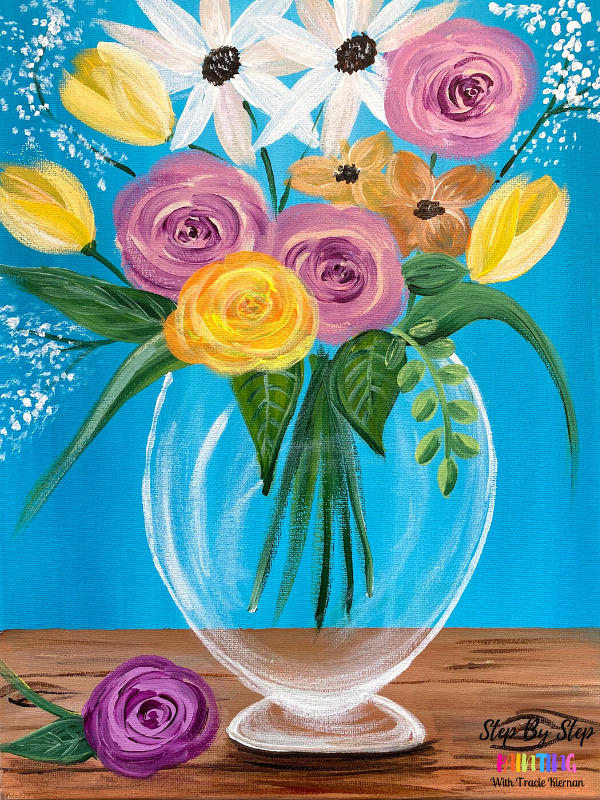
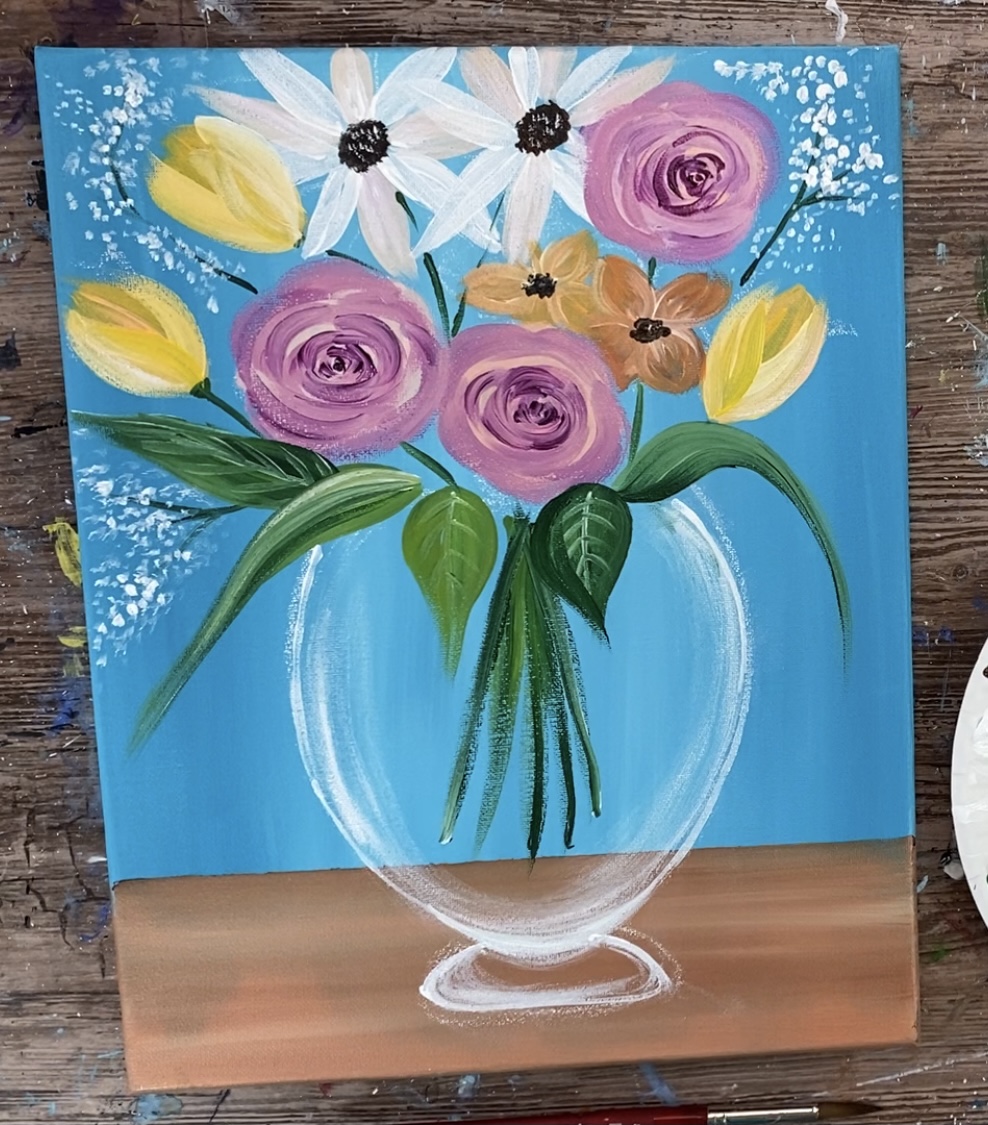
Here is an easy and fun bouquet flower vase painting design that you will learn how to paint on canvas! This is a very basic, beginner friendly tutorial! It makes for a great Easter Painting, Mother’s Day Painting or simply a Spring Design you can display with your Spring decor!
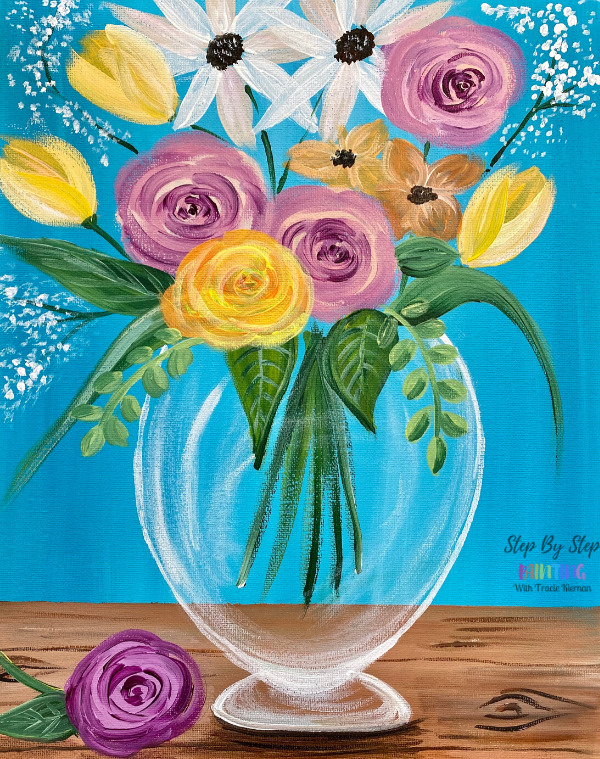
This painting was done on an 11 x 14 size canvas but can be done on any size. I will show you how to paint simple flowers arranged in a pretty glass vase on a wooden table.
Enjoy and happy painting!
Looking for more floral tutorials?
I have quite a few! You can check out all of my flower paintings here!
Materials Needed
Spring Bouquet Beginner Acrylic Painting Tutorial
Learn to paint a simple bouque of flowers in a glass vase.
Materials
- 11 x 14 Canvas
- Acrylic Paints
- Brushes
- Ruler (optional)
- White Chalk
Colors
- Mars Black (only a tiny amount needed)
- Titanium White
- Cadmium Orange Hue
- Cadmium Yellow Medium Hue
- Hooker's Green Hue Permanent
- Turquoise Blue
- Light Pink
- Deep Violet
- Burnt Sienna
Brush Sizes
- 1" Flat (or 3/4" Flat Wash)
- #8 Round Brush
- #4 Round Brush (or smaller if you prefer for the small leaves and flowers/ vase)
Instructions
- See tutorial on www.stepbysteppainting.net for full instructions!
Color Palette

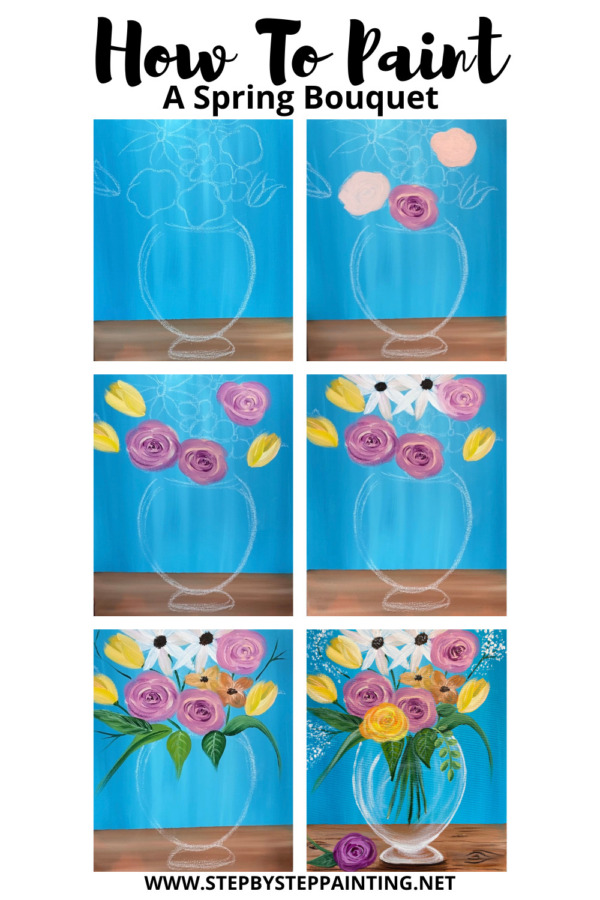
Directions At A Glance
Video
Step By Step Instructions
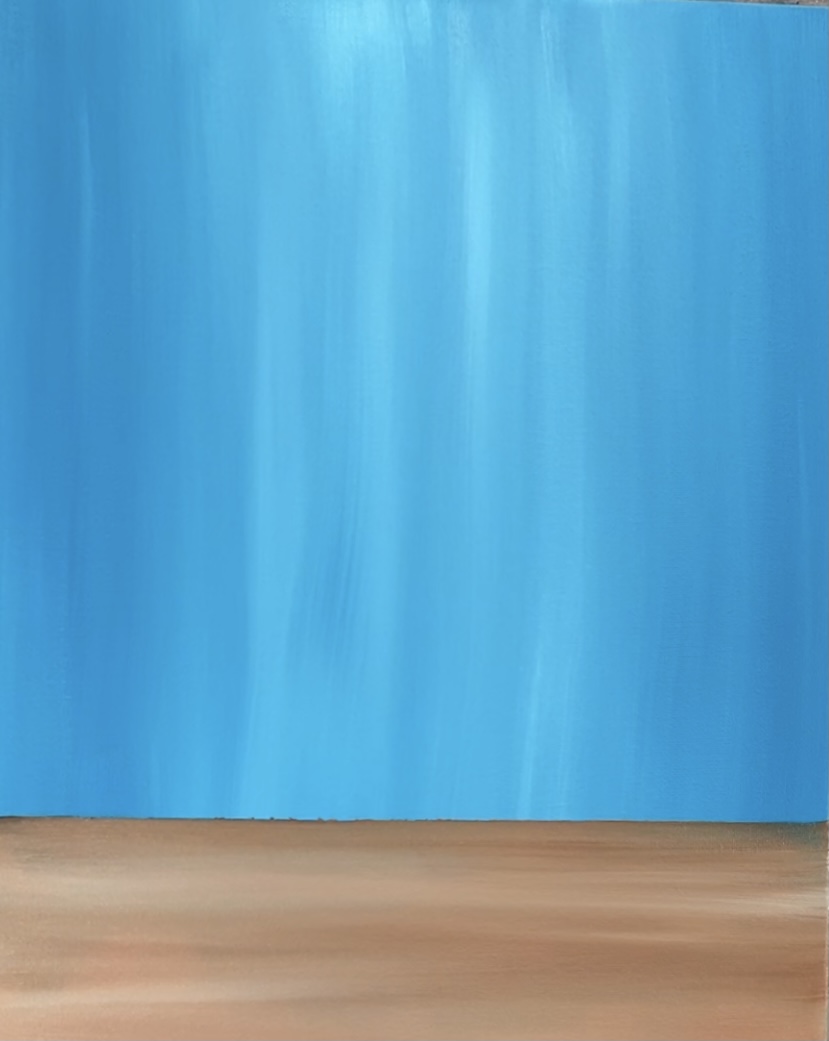
1. Paint background and table
Use a 1″ Flat Wash brush and the colors: turquoise blue and titanium white. Load the brush in the water and tap it dry. Double load it into both the turquoise and the white.
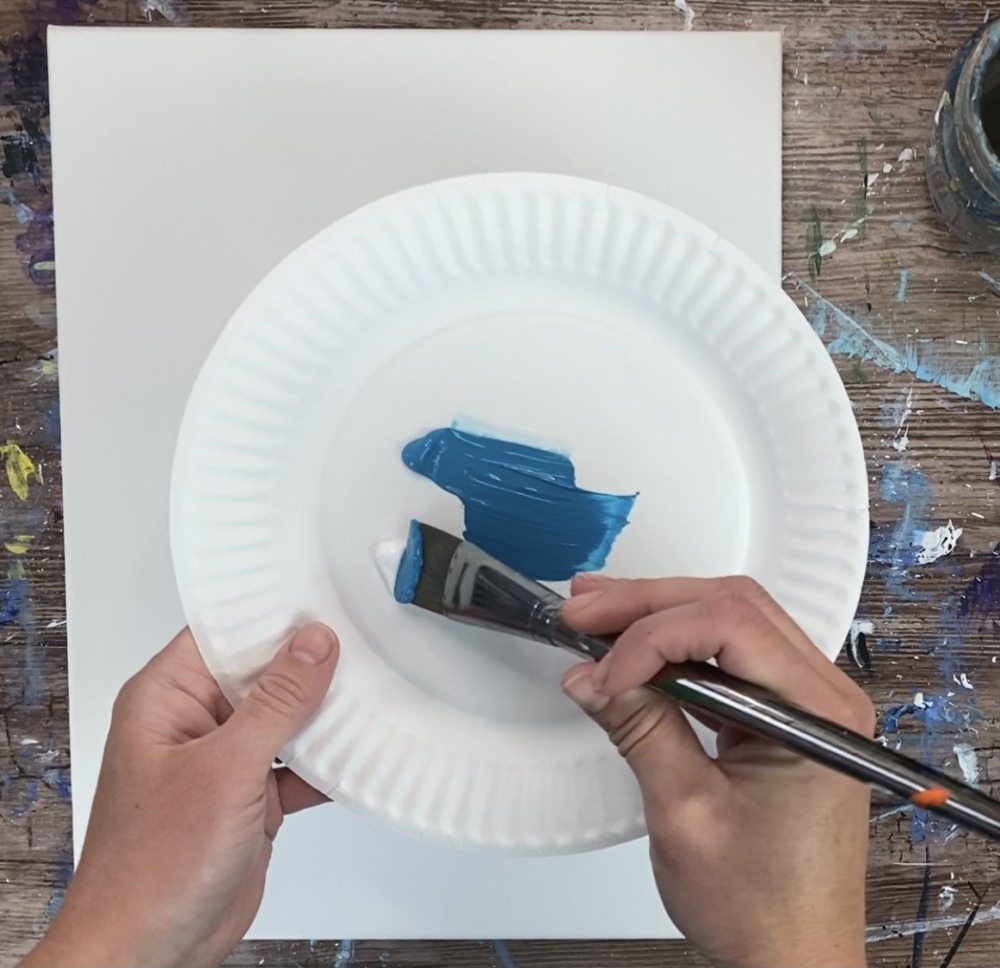
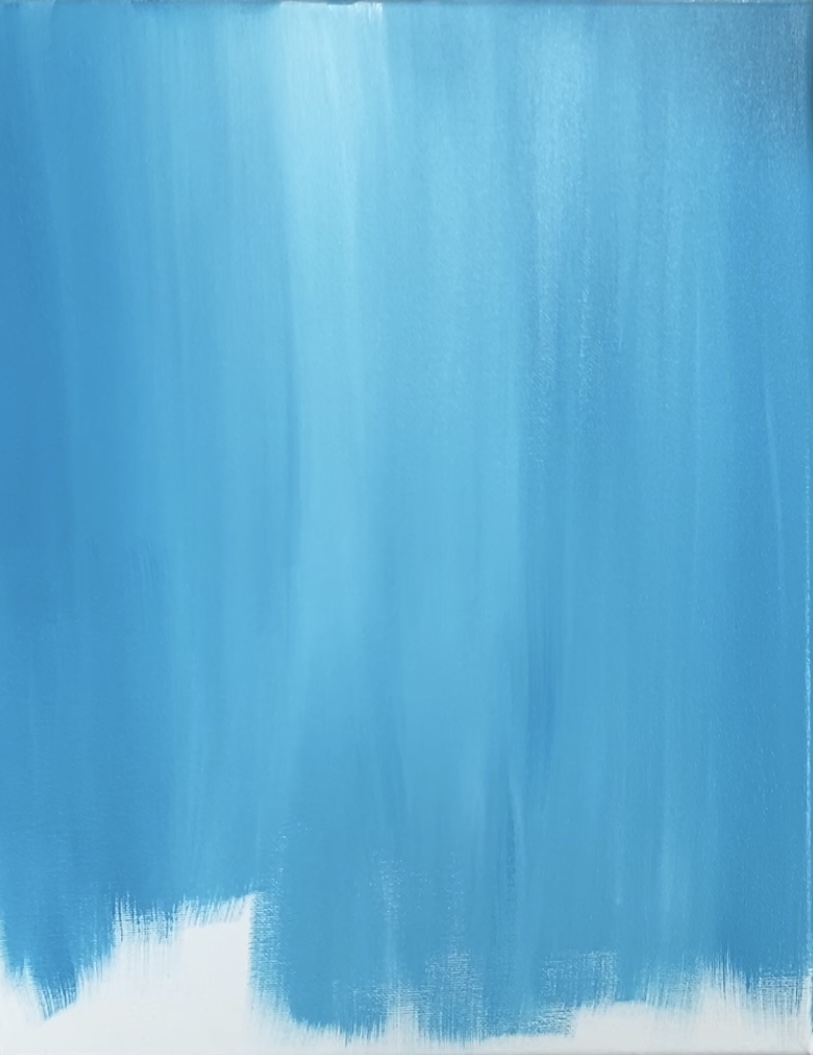
Paint up and down strokes blending the two colors together on the canvas. Let the two colors blend but not all together to create a “streaky look”.
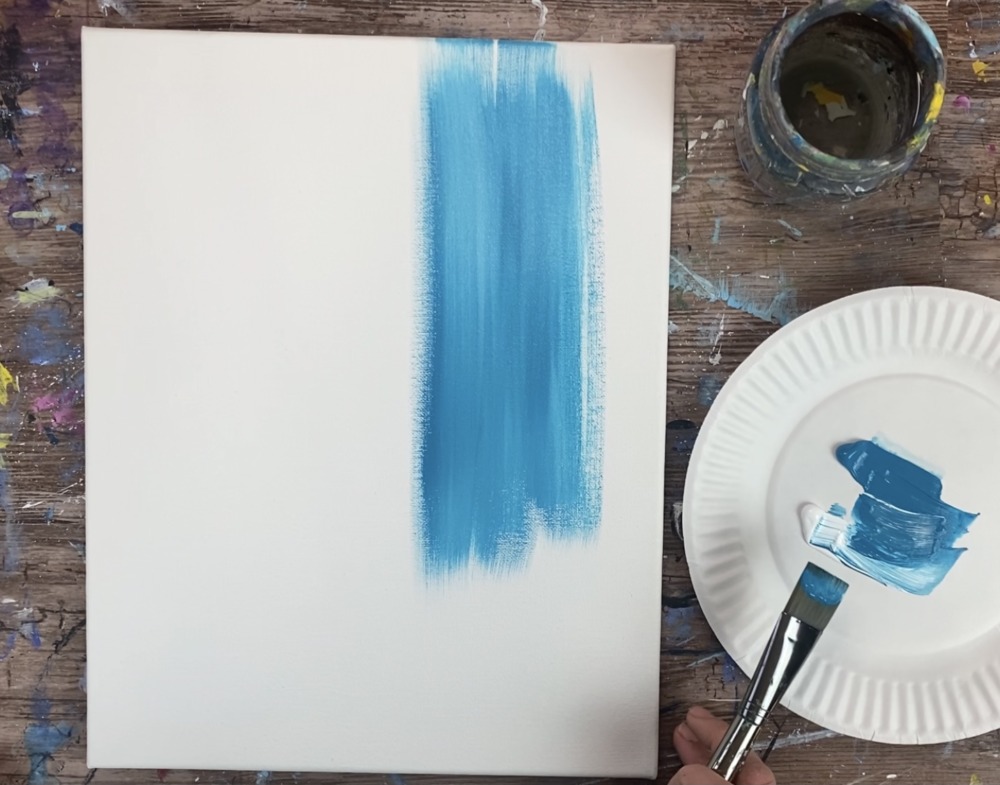
Leave about an inch of space on the bottom. Fill the entire canvas with the up and down strokes.
Next measure about three inches from the bottom of the canvas. Place a t-square ruler at that area and make a line (or leave it there to block the paint).
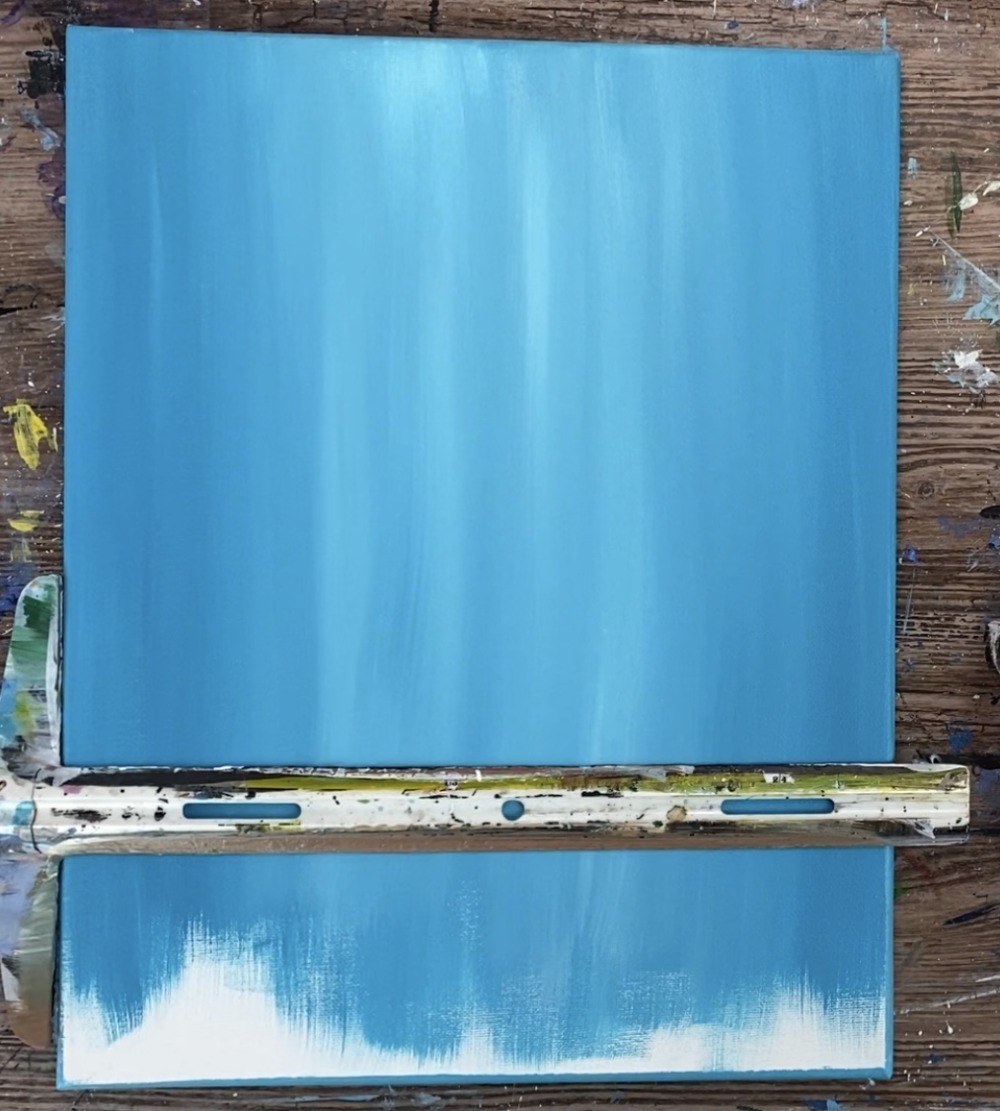
Load your palette with burnt Sienna and titanium white. Double load your 1″ flat brush in both of those colors. Paint left and right strokes filling the bottom 3″ area with the brown. Do not let the white and brown blend all the way together.
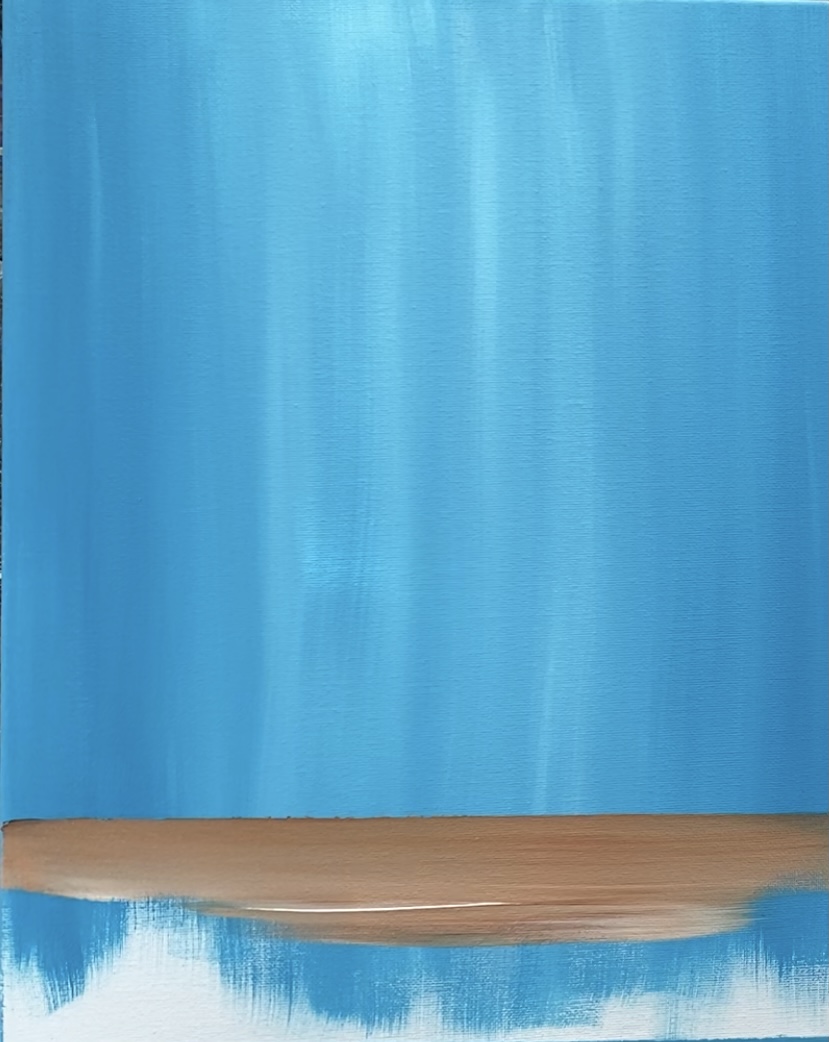
This brown and white combination will give it a “wood look”.
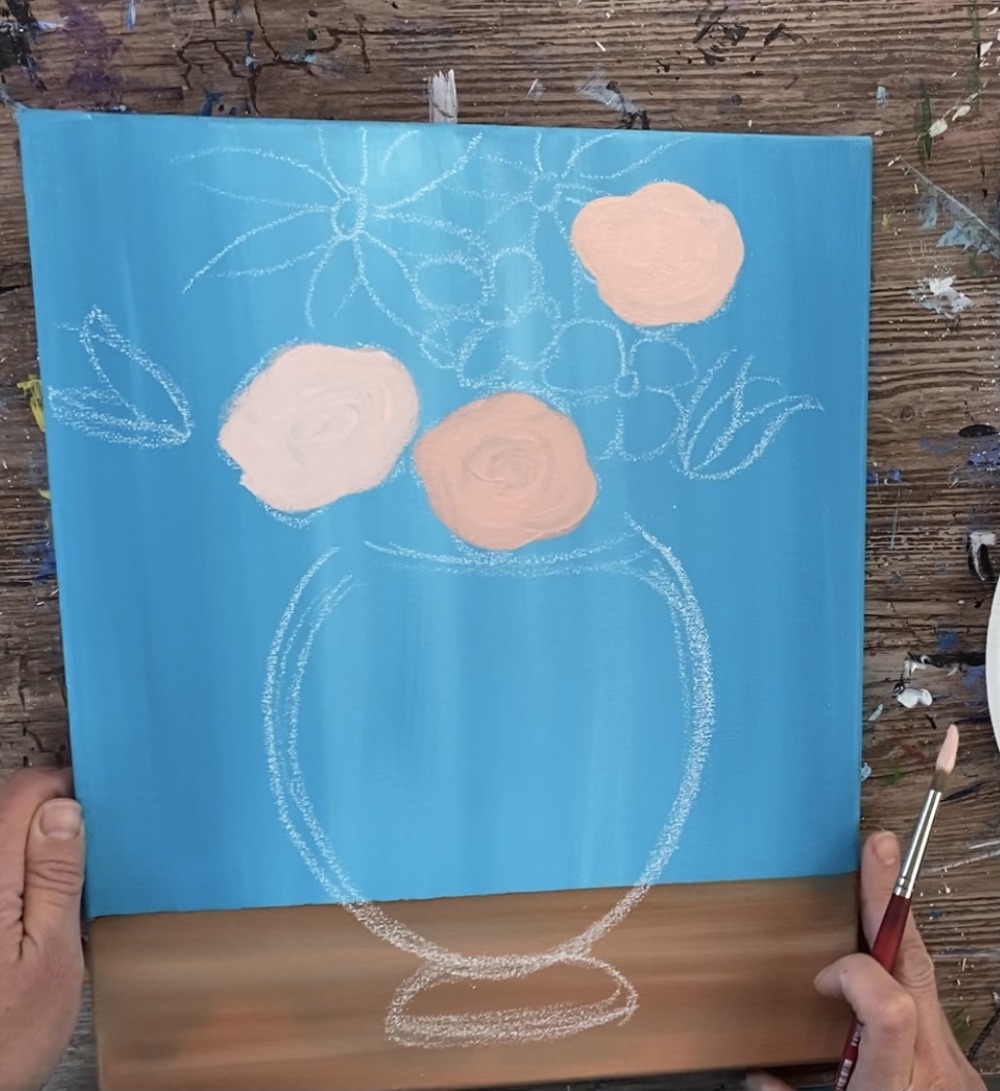
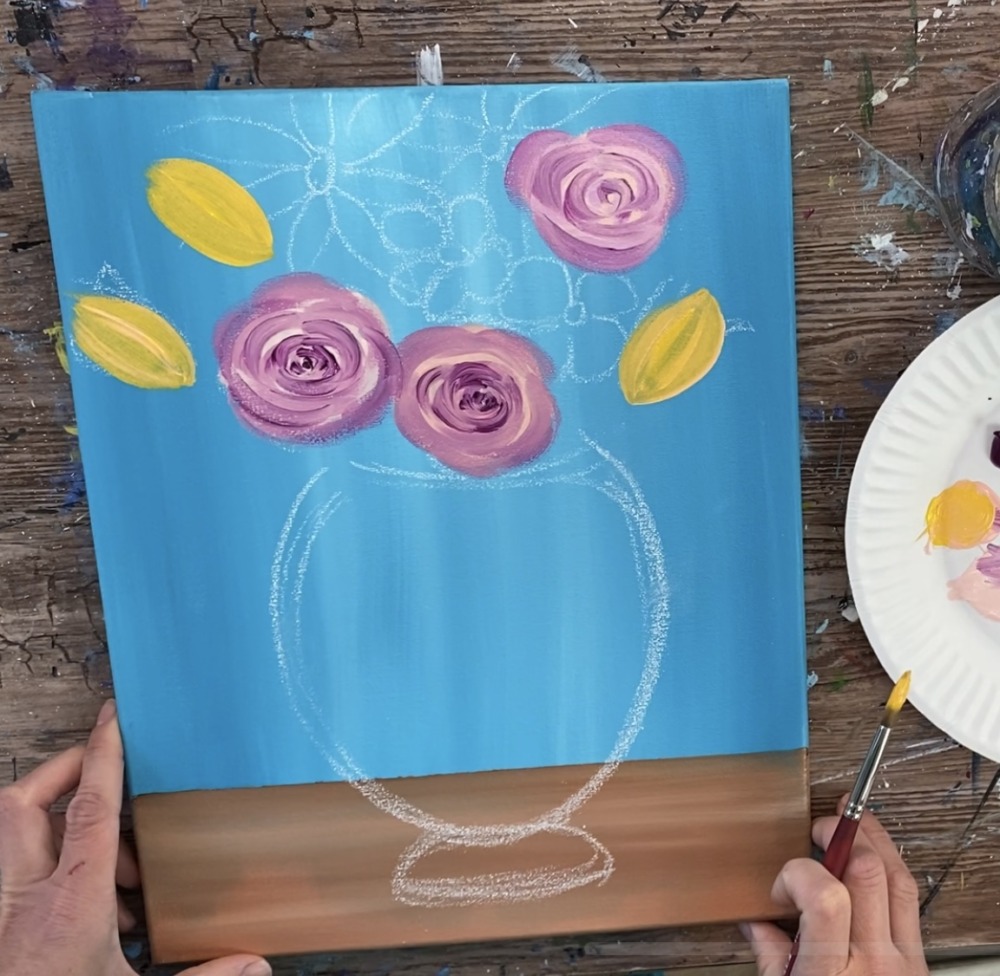
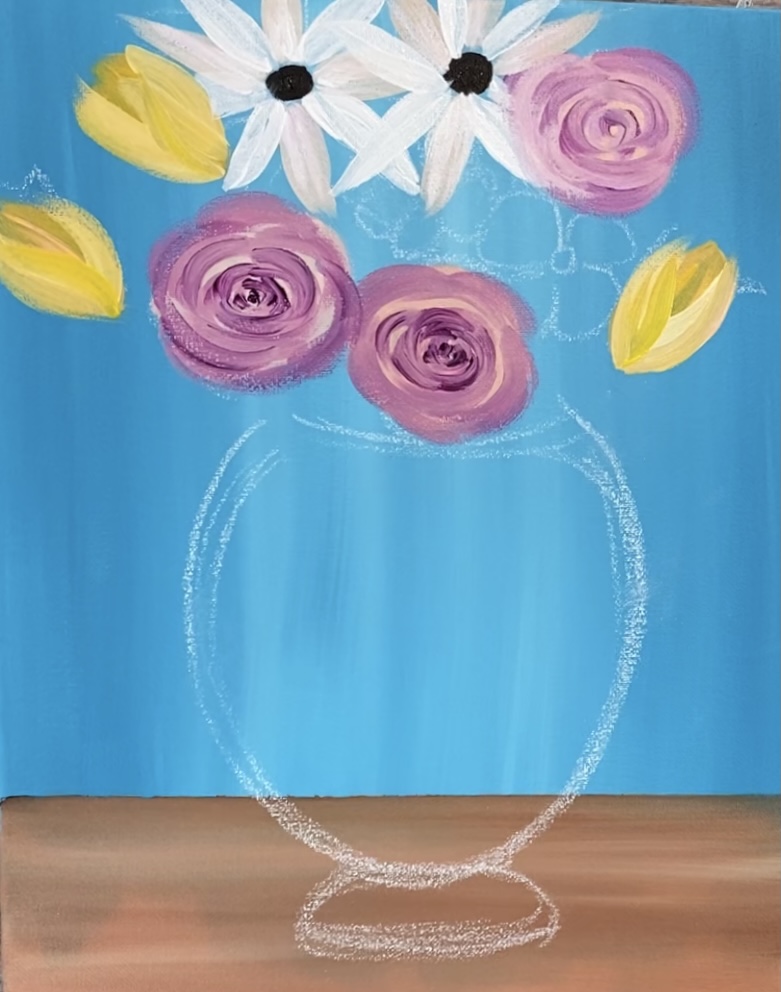
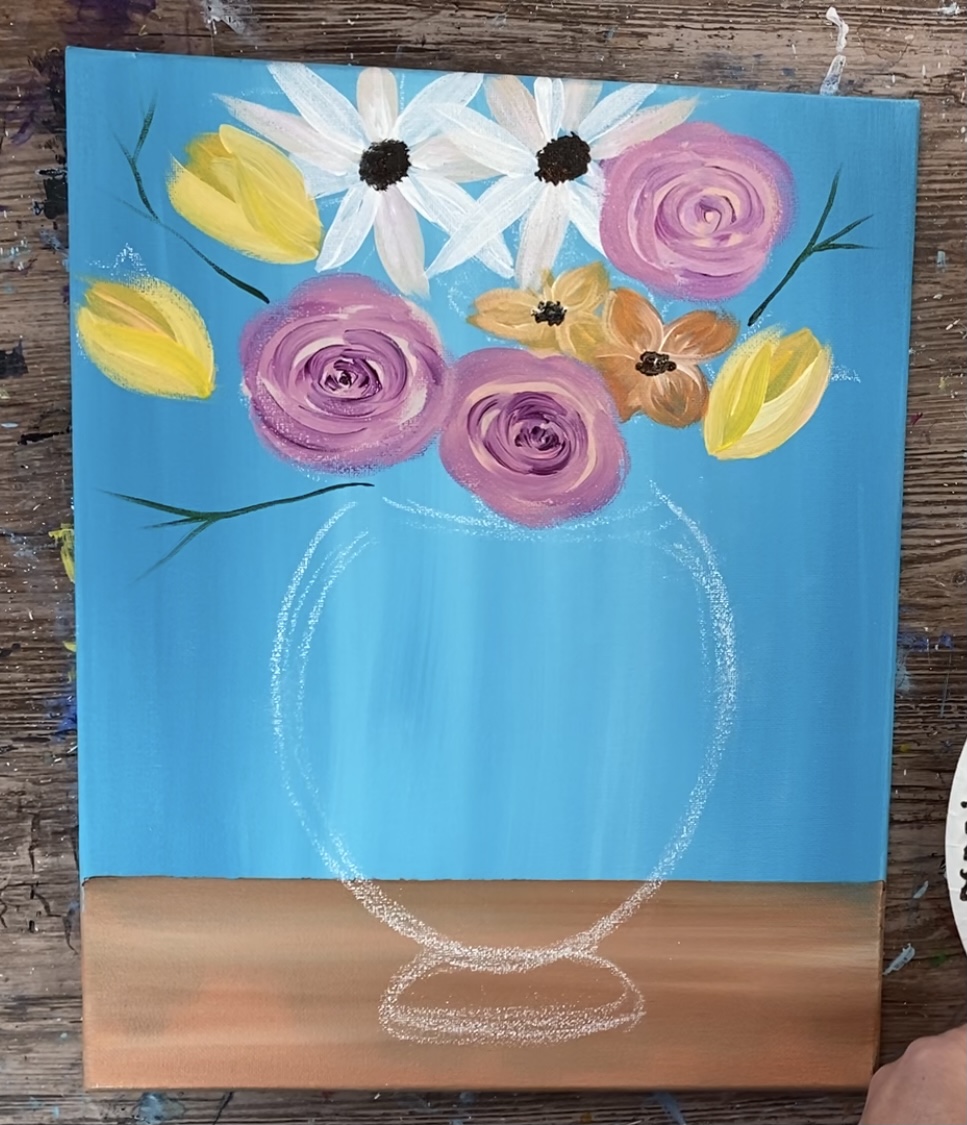
2. Draw vase and flower composition
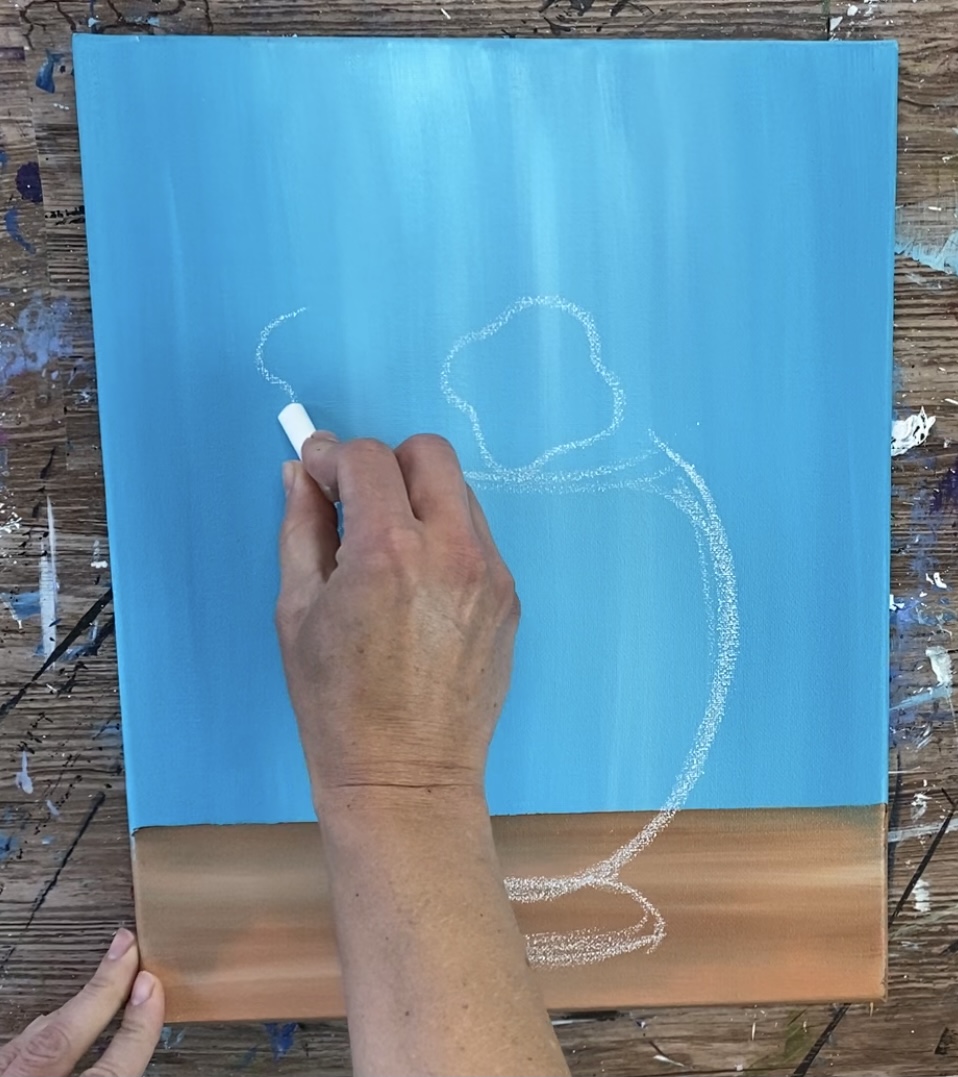
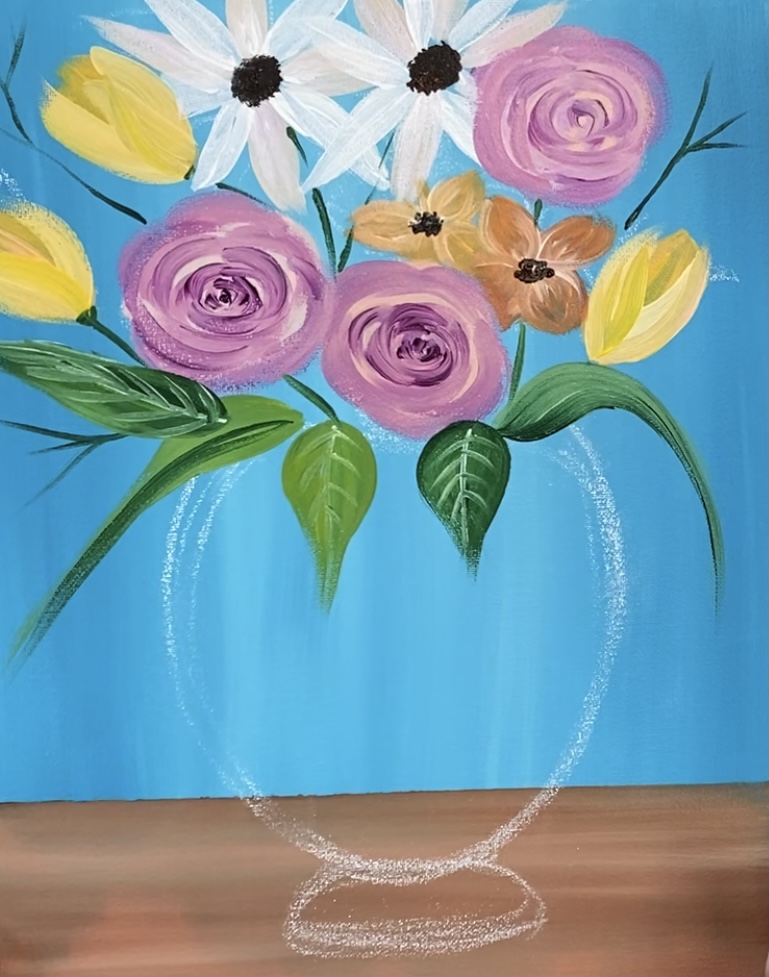
Next completely dry the painting or take a break and come back. Use a piece of chalk to draw the vase shape. This vase is a rounded shape that is kind of pointed/curved on the bottom.
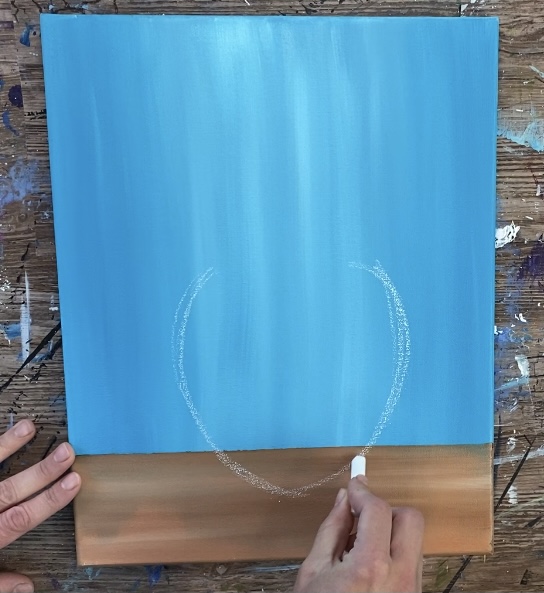
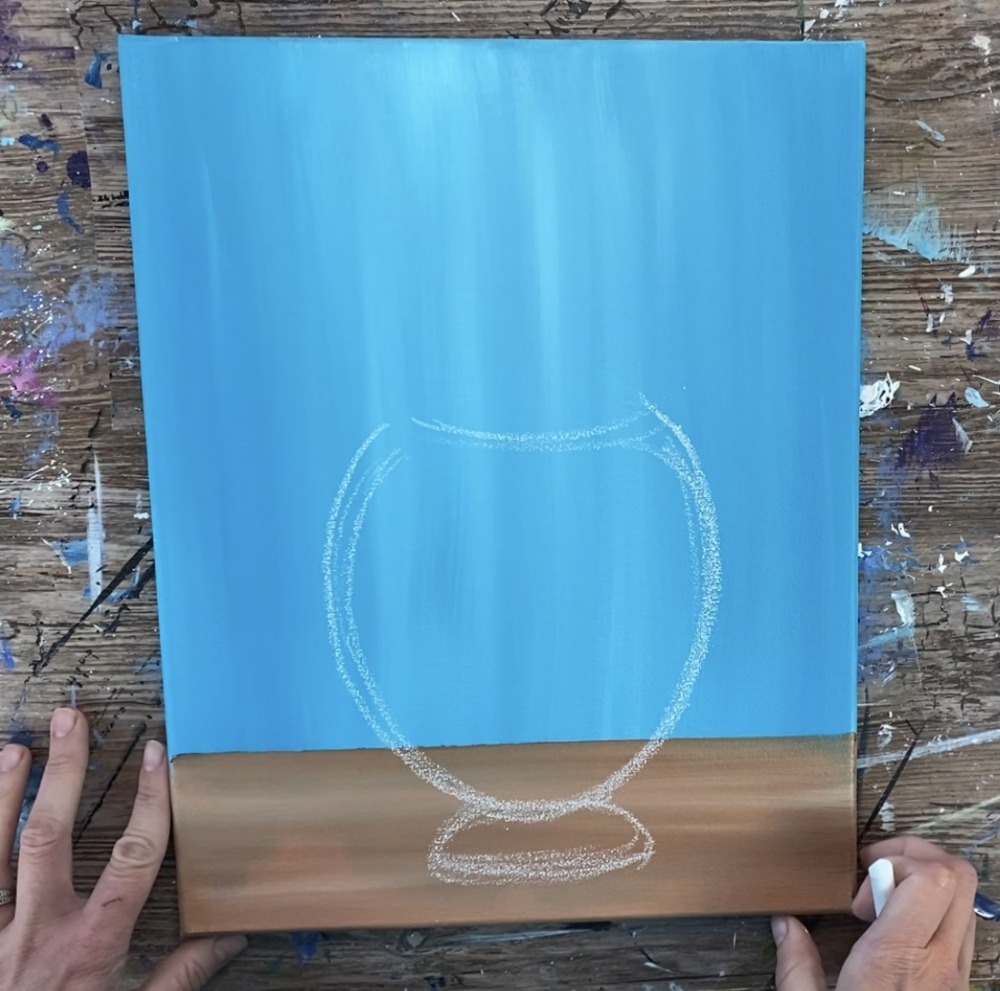
Draw the base of the vase by drawing two curved lines and a flat/ sort of curved bottom.
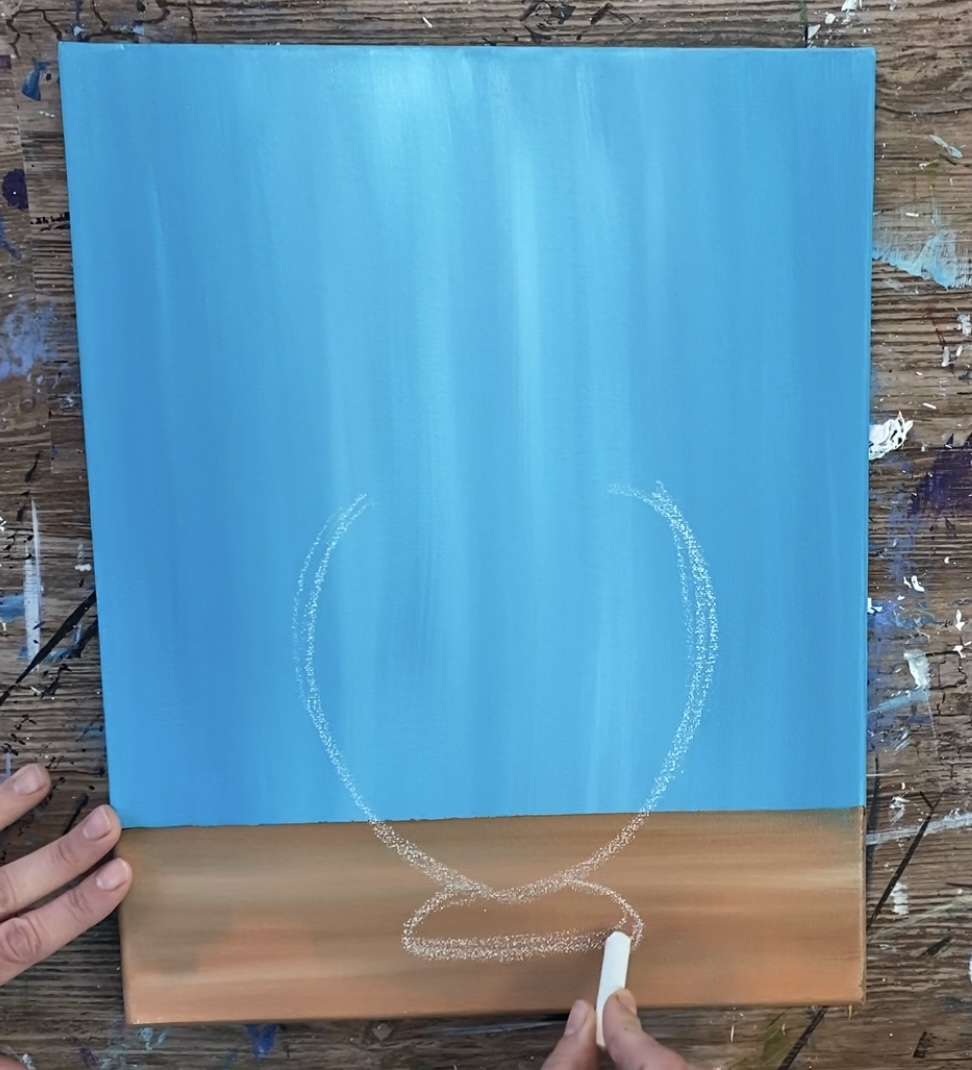
Then draw the top part of the vase that curves down a bit. Note: the flowers & leaves will cover a lot of this top area so you don’t have to worry too much about the opening.
Then draw the flowers. Drawing the flowers helps to get the composition of the bouquet so you know the placement of your flowers. You can always change this later when you paint the flowers in.
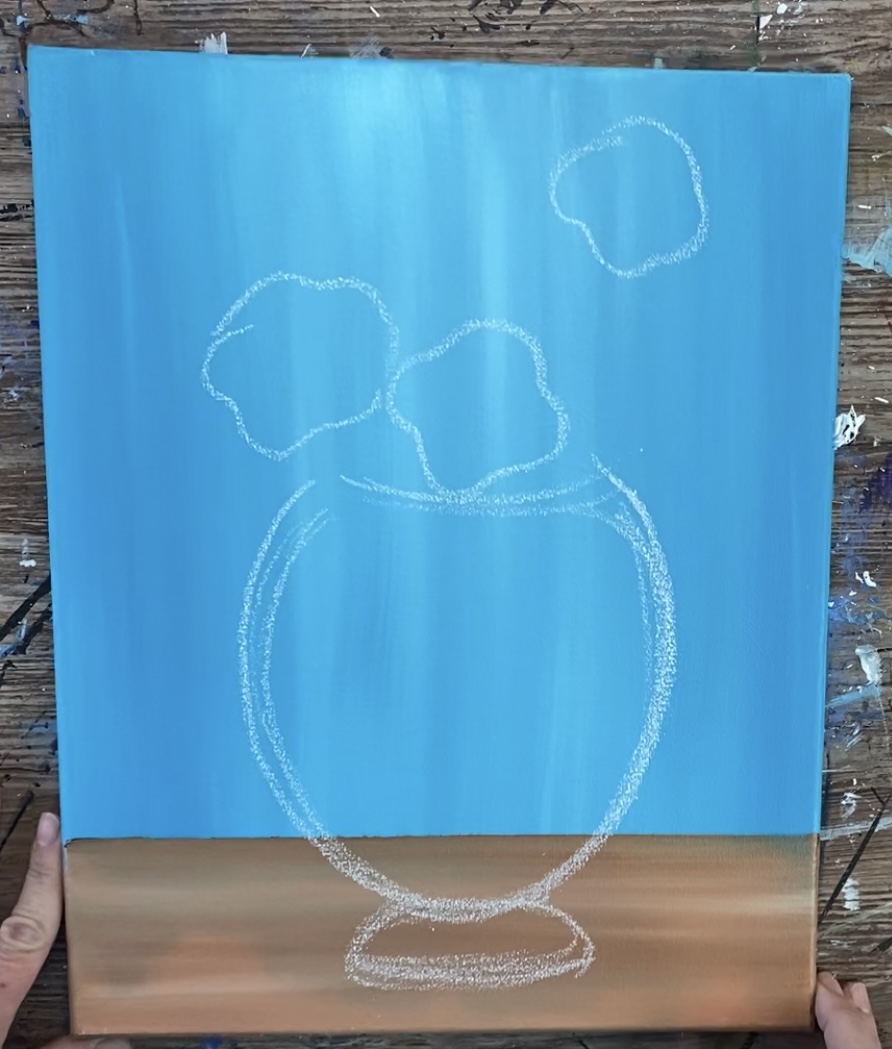
Start with the rose shapes and draw circular organic shapes.
I did three rose shapes. You can change the position of these flowers if you want!
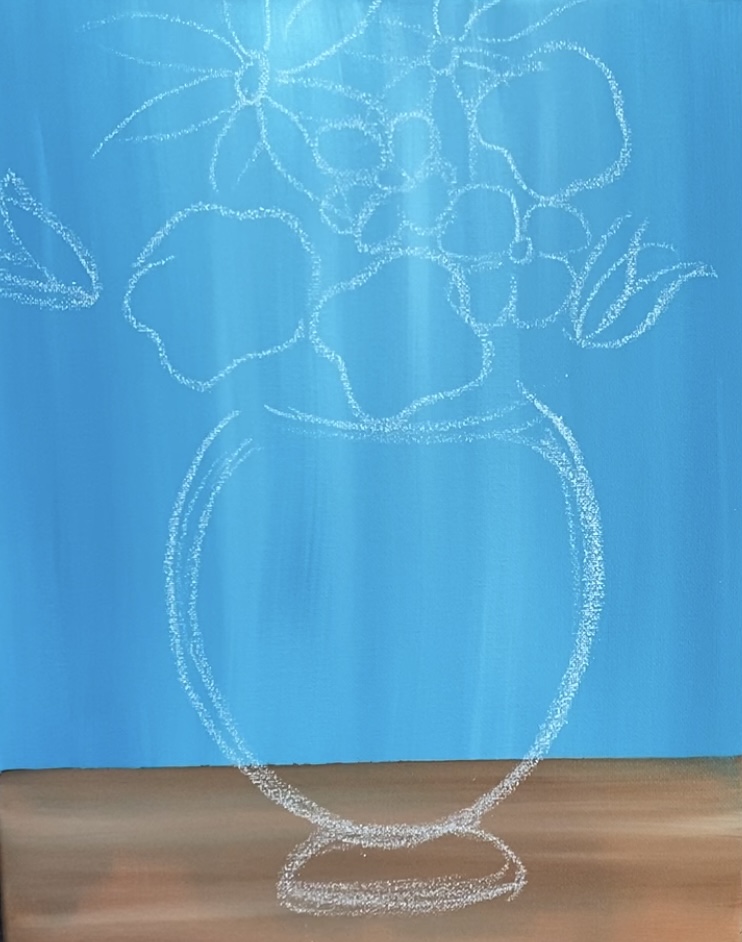
Then draw two daisies and two tulips. Some of the flowers go off the canvas which makes the composition more interesting. Try to angle the tulips diagonally.
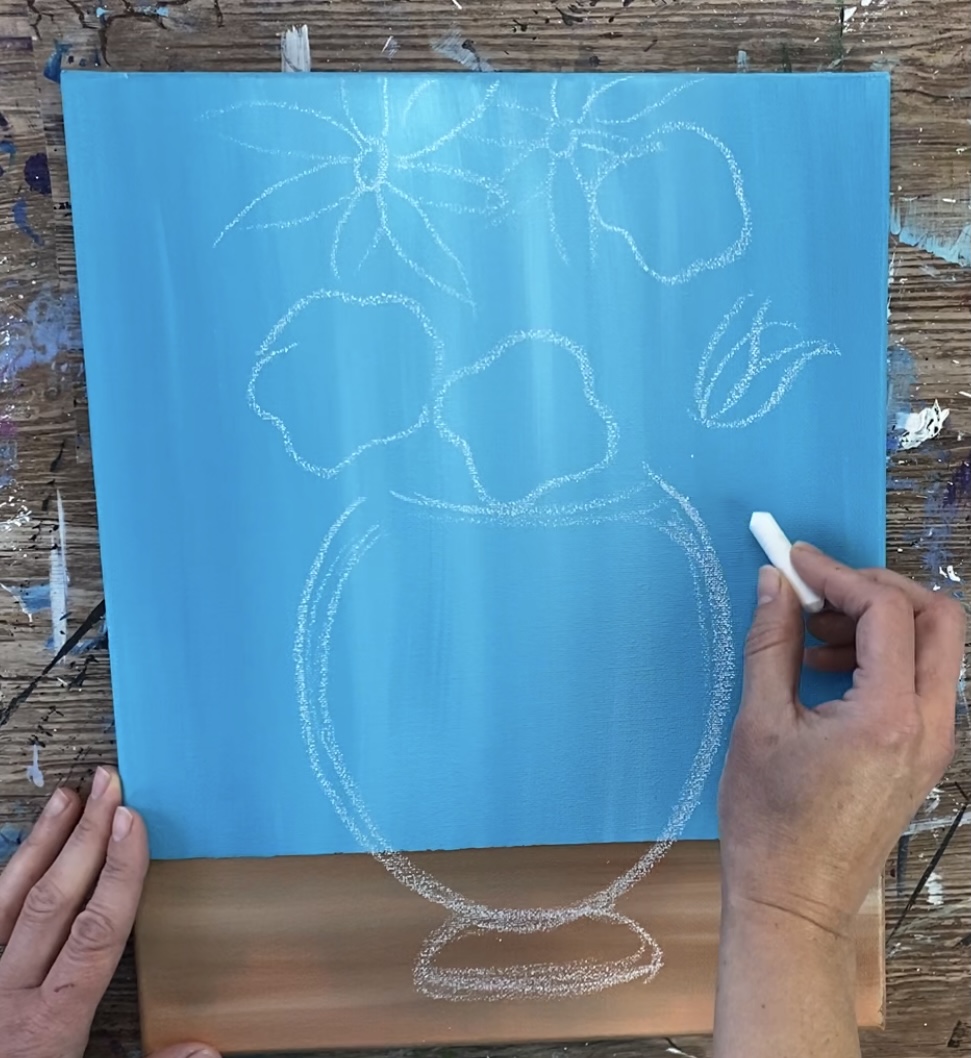
Then draw two more basic flowers. These flowers are tucked away in the open spaces between the roses. You can draw more flowers if you want or paint more flowers in later. This chalk will erase off the canvas with water.
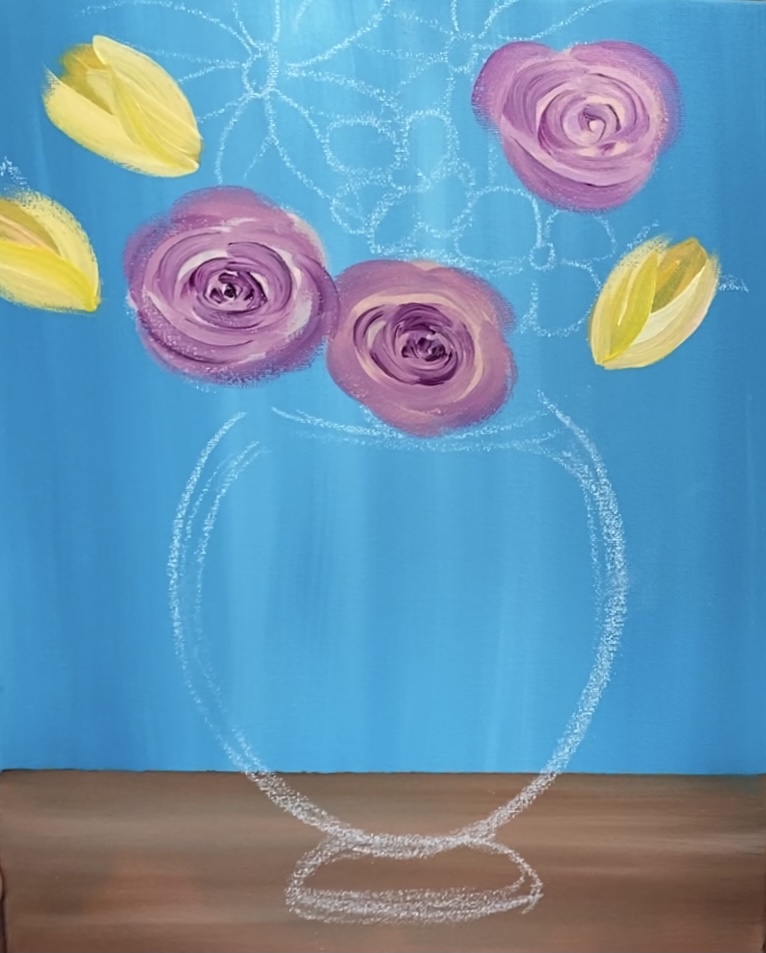
3. Paint Roses
Need practice on your roses? See my rose painting tutorial here!
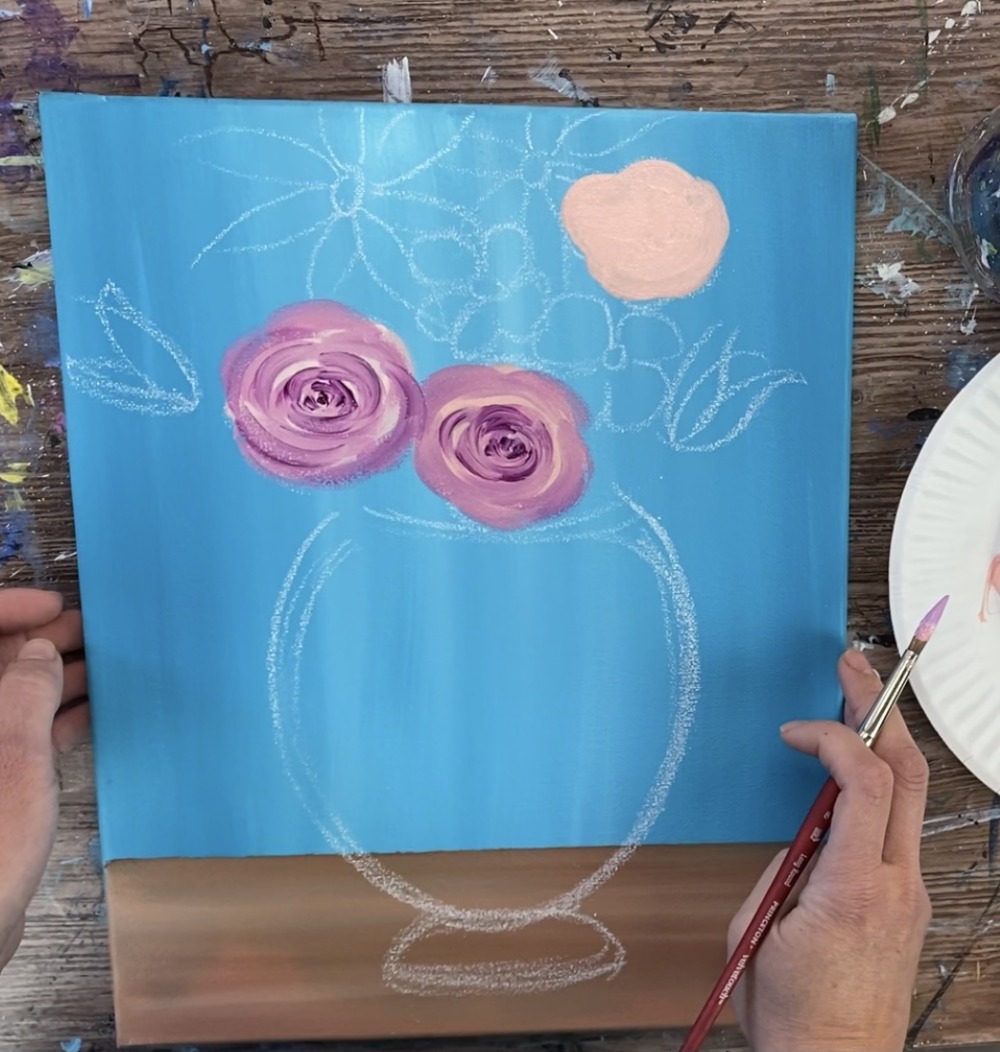
Use your #8 round brush. Paint one of the roses a base coat with the color light pink.

Then add some white into the light pink and paint the next rose so it is slightly lighter. Paint the third rose as well with the light pink. This is just the base color, in the next step you will paint a darker color for the petals.
Next load your palette with deep violet. Mix that color in with the light pink so the purple is lighter (about 1 part light pink, 2 parts deep violet).
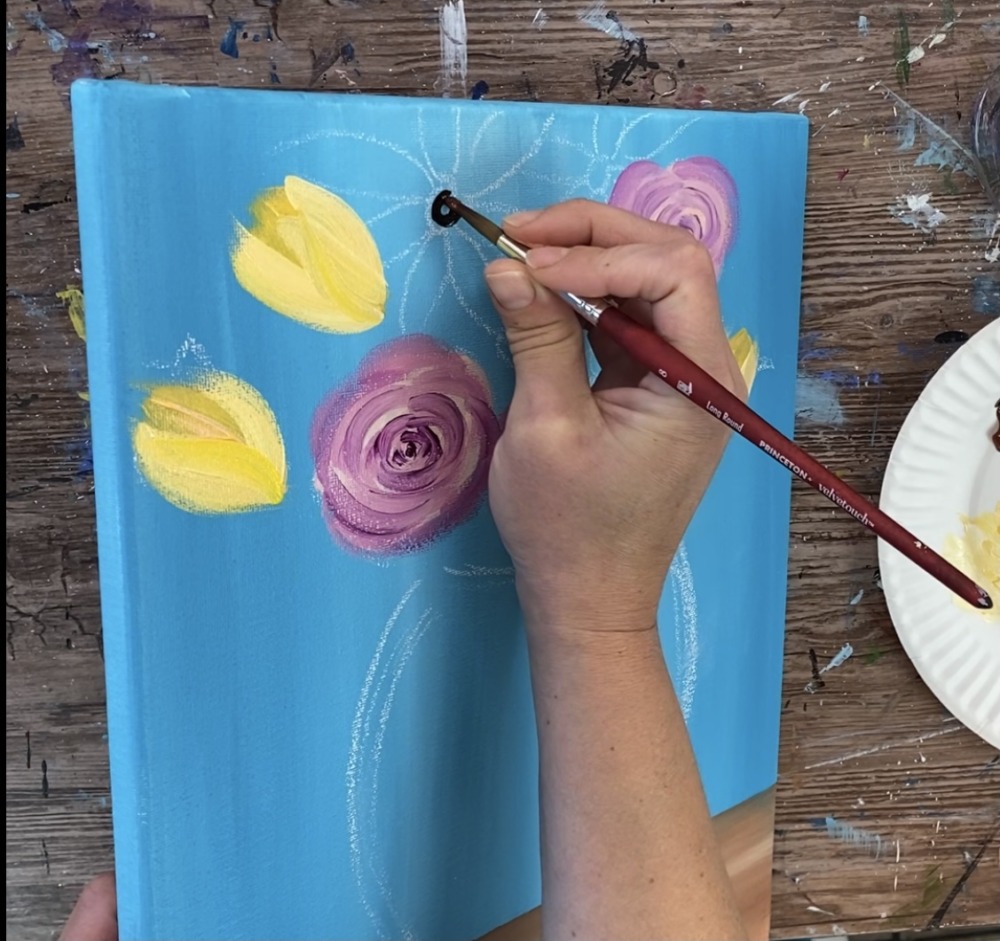
Use your #8 round brush. Start in the center of the rose and make small curved “c strokes”. Stagger the strokes as you work your way to the outer part of the rose.
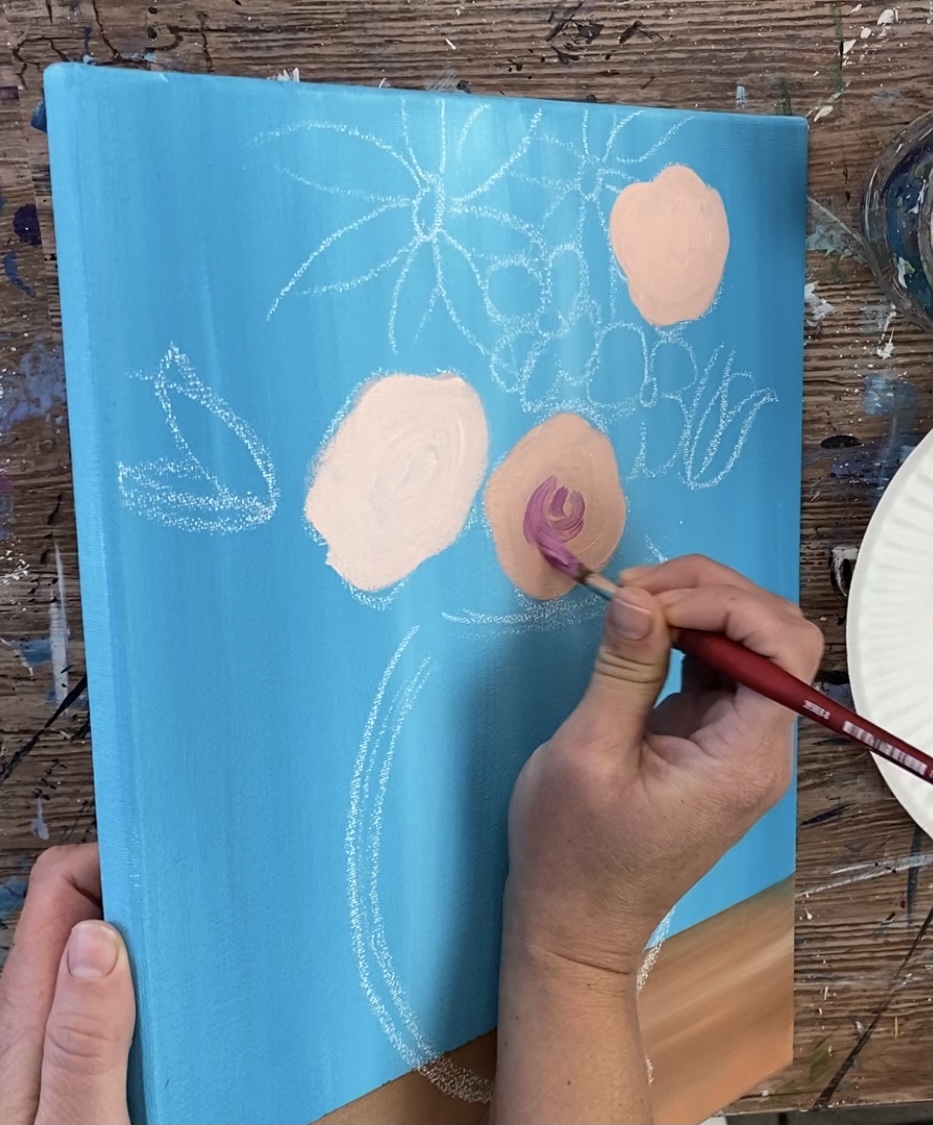
You will form the rose by painting more “c strokes” that get larger and larger. This should be done in one stroke. Try not to keep going over your strokes or the pinks will blend all the way.
Then add some more small “c strokes” with the deep violet in the center so that the center is slightly darker.
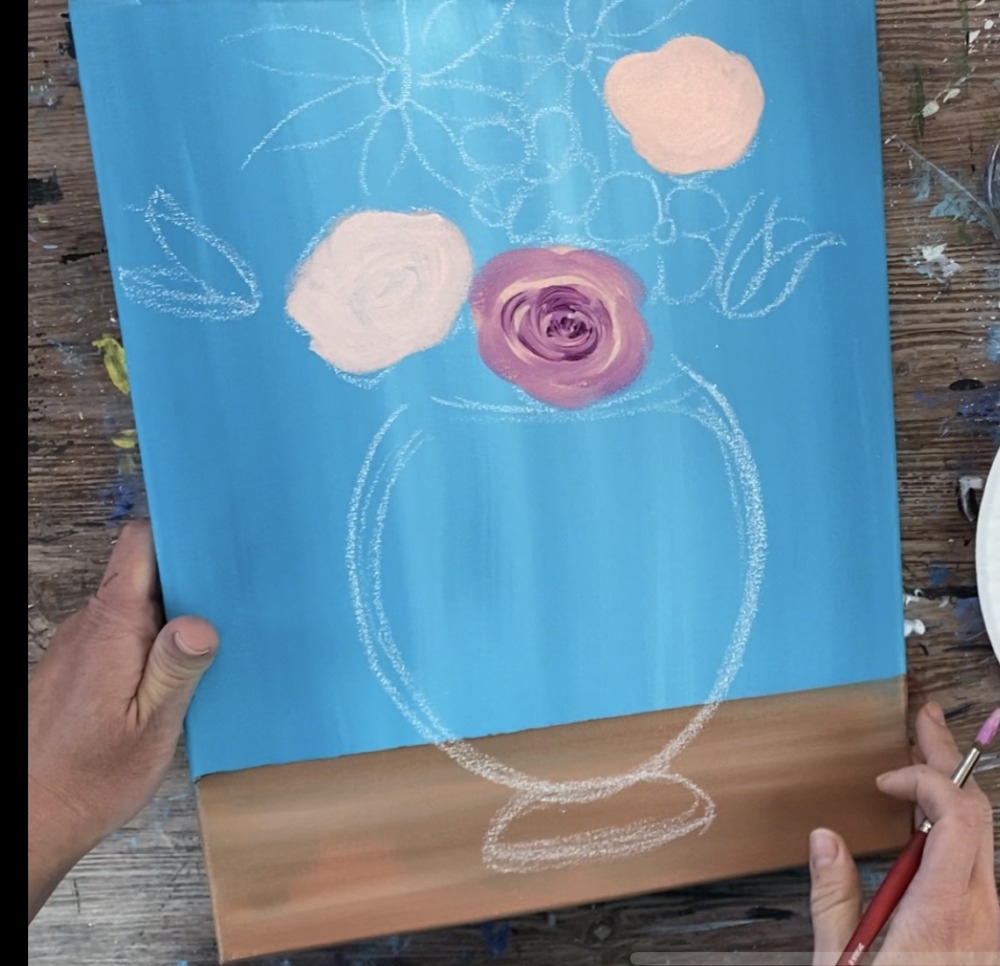
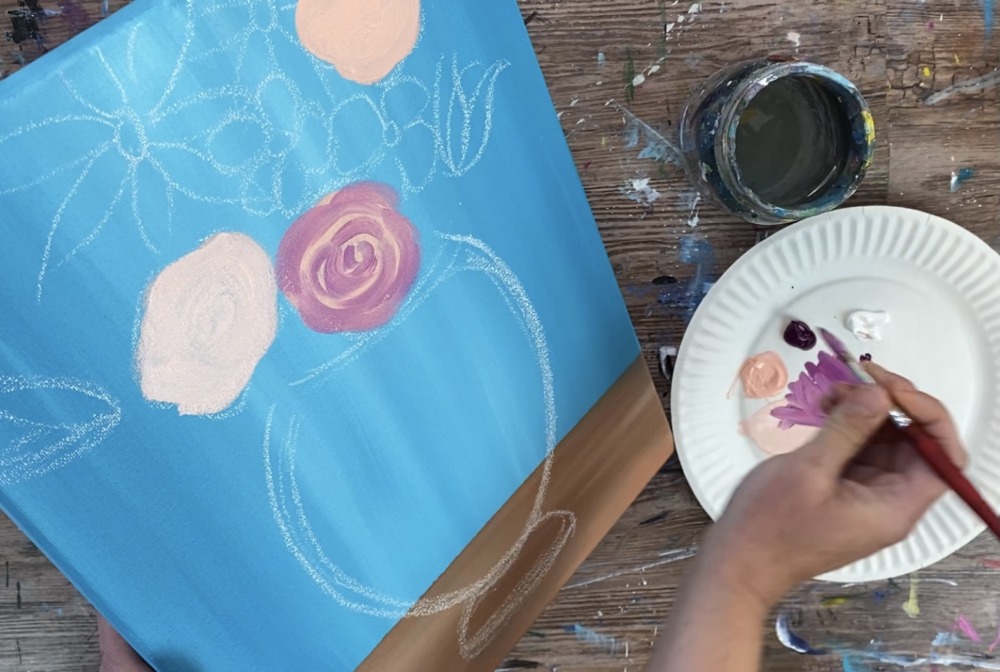
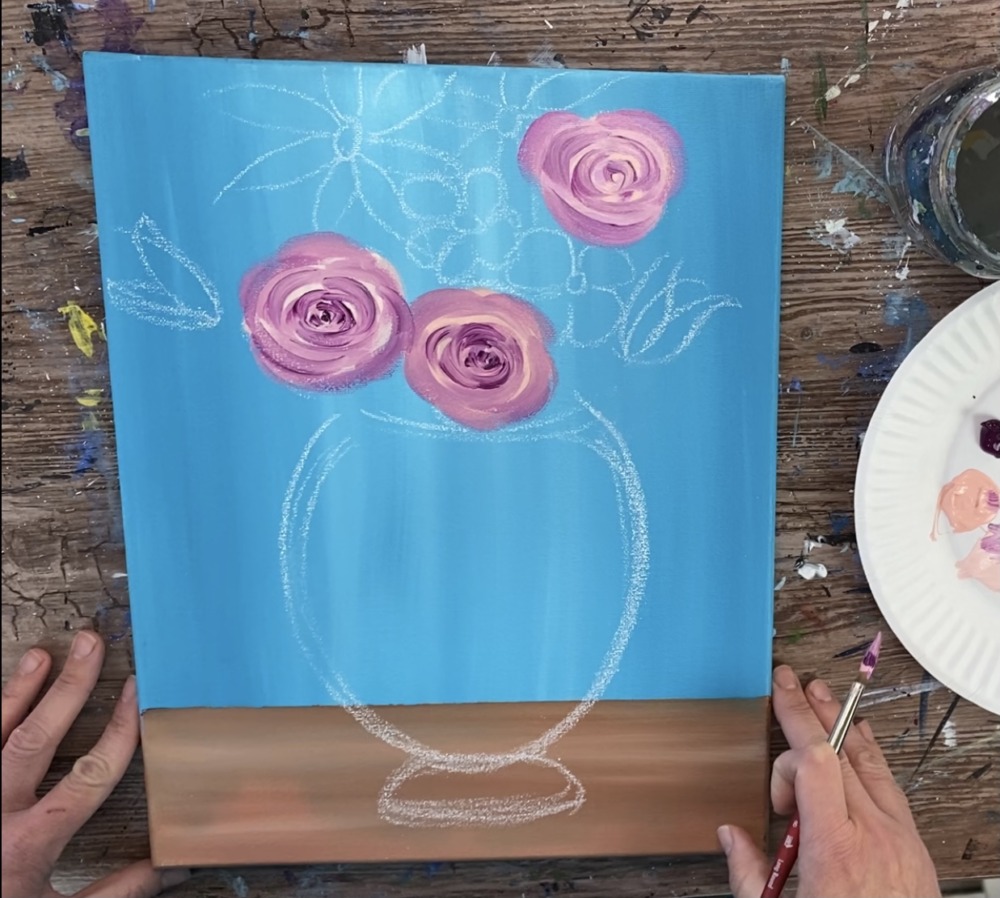
Paint the other roses using the same technique. You can vary the color of the deep violet and pink to make each of the roses look slightly different.

Your roses may overlap each other and that is fine. Repeat the technique on all three of the roses.
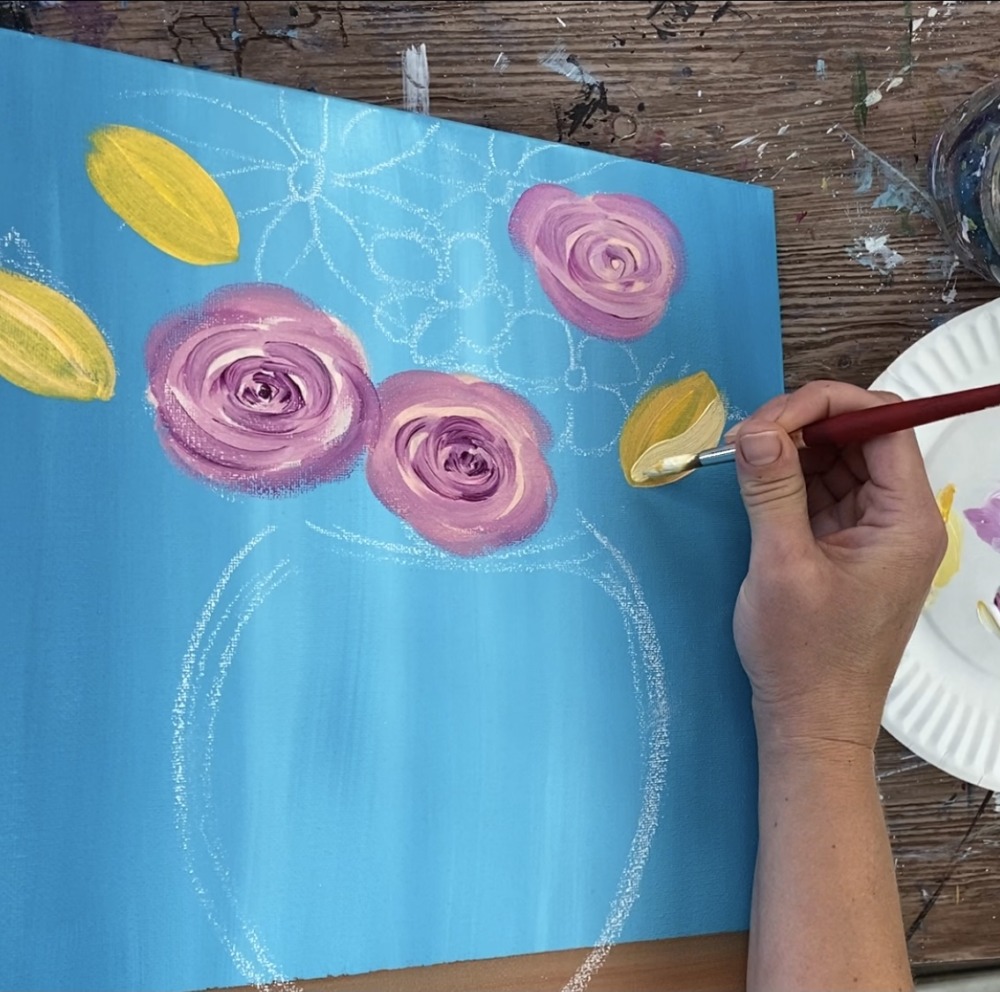
4. Paint Tulips
For the tulips, I used the same technique I did in my Tulips In Boots tutorial. Load your palette with cadmium yellow medium hue. Add a little bit of light pink into the yellow to make it more of a peach color.
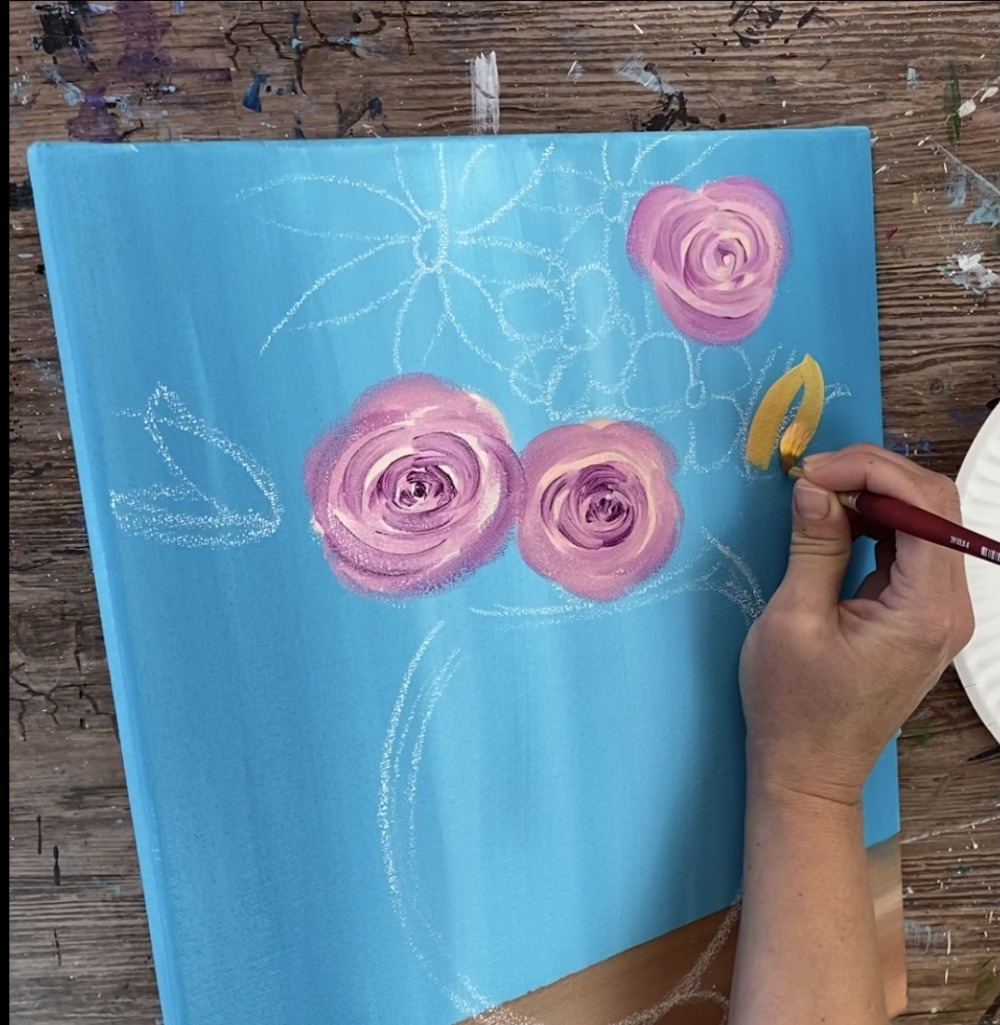
Paint the center oval piece of the tulips first. I used my #8 round brush for this step.
I added a third tulip in there that I did not draw. This may happen with you too as you paint your flowers in! You may decide to add or omit a flower in your vase.
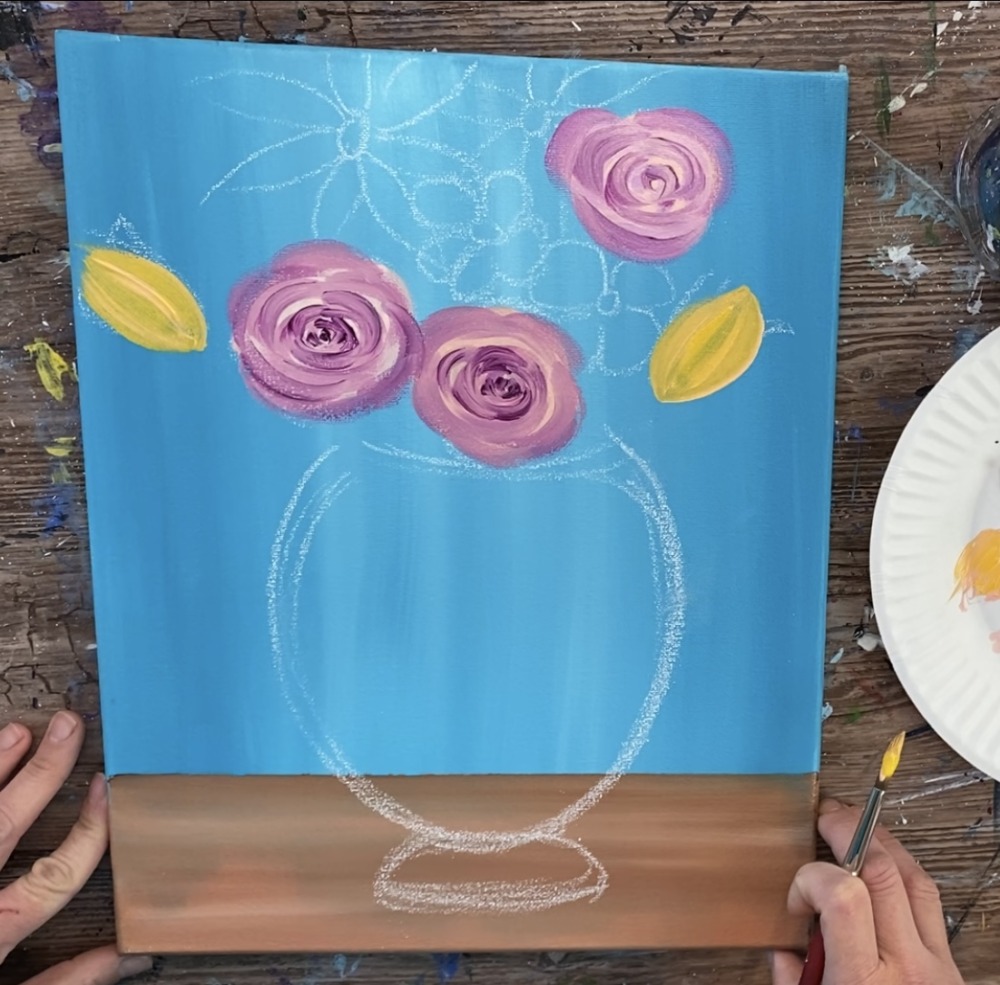
Then mix some titanium white into yellow to make a lighter yellow. Paint a tulip petal starting on the bottom and stroking upwards. This forms one of the outer petals.
Need a different technique for tulips? You can see my “Easter Bunny Silhouette” painting which utilizes a small flat brush for painting tulips.
Paint the left petal using the same technique stroking from the bottom up. You can also try painting from the top up if that is more effective for you. Try to keep that middle dark yellow area still showing.
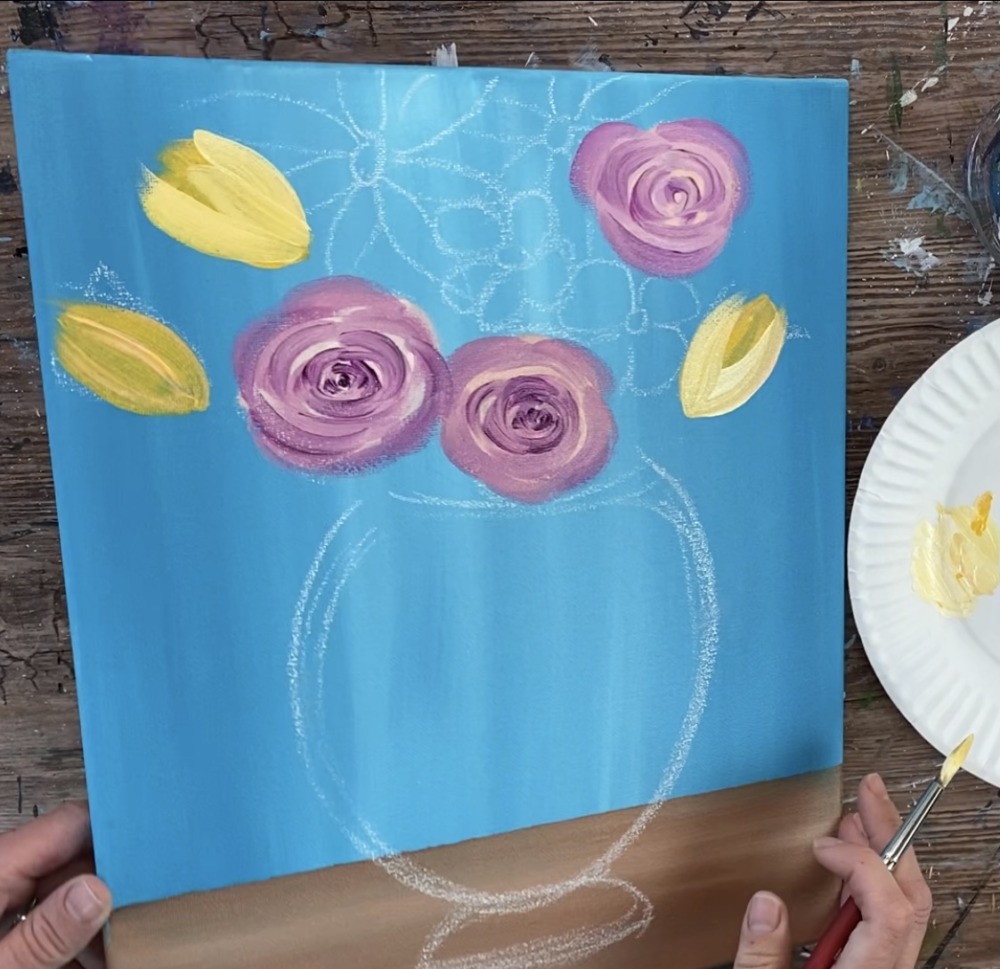
Paint the lighter petals on each of the tulips. You can go back over some of your tulip petals with a darker yellow (yellow without white mixed into it) if you want them to stand out more.
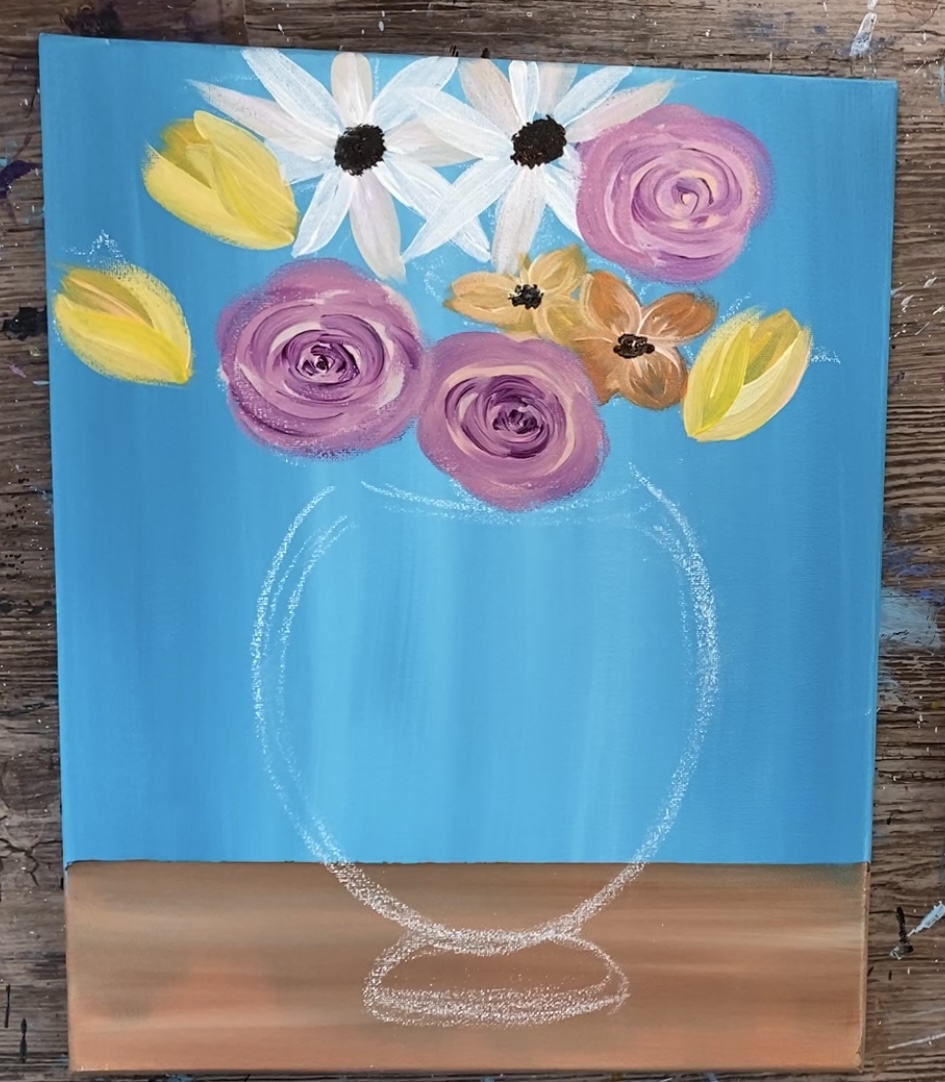
5. Paint Daisies
Use the #8 round brush. Start in the center of the daisies and paint a circle with 1 part black and 2 parts burnt Sienna. This makes a very dark brown.
Paint both of the circles of the flowers.
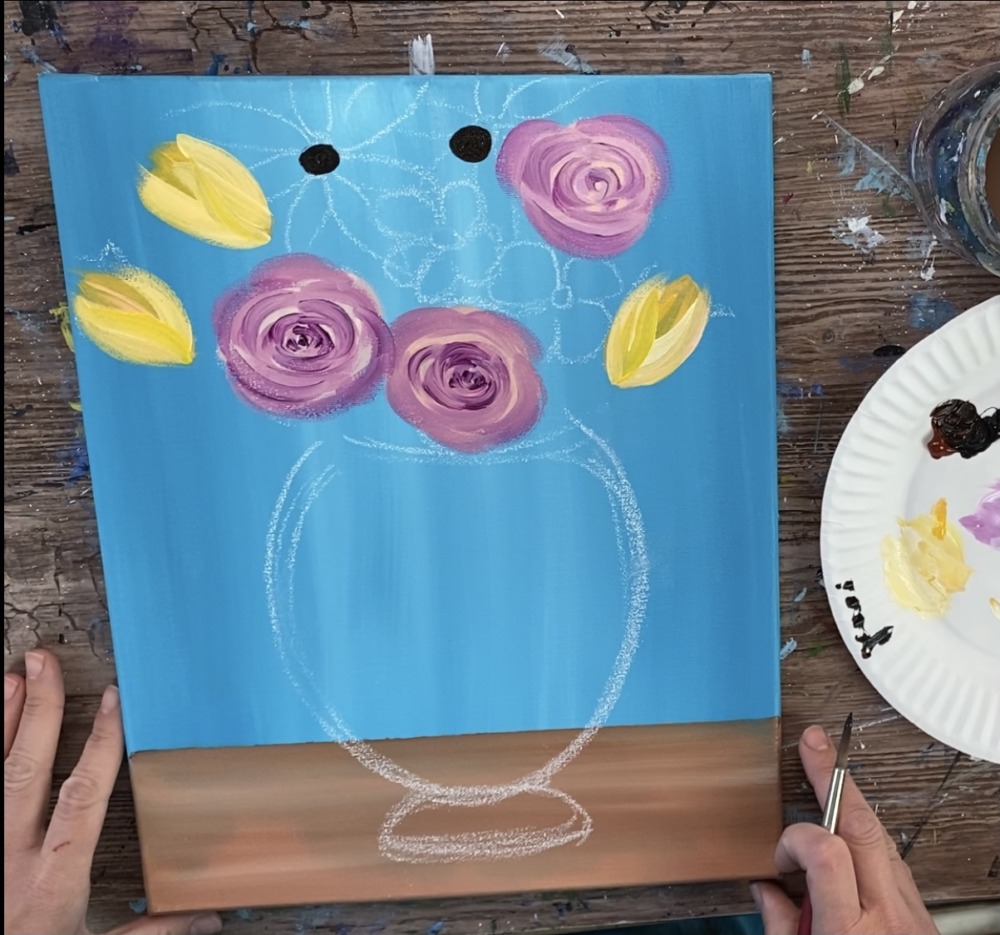
Then mix a little bit of brown into white to make an off white/ cream color (about 1 part brown to 4 parts white). Paint the petals (every other petal). These darker whites will be the back petals.
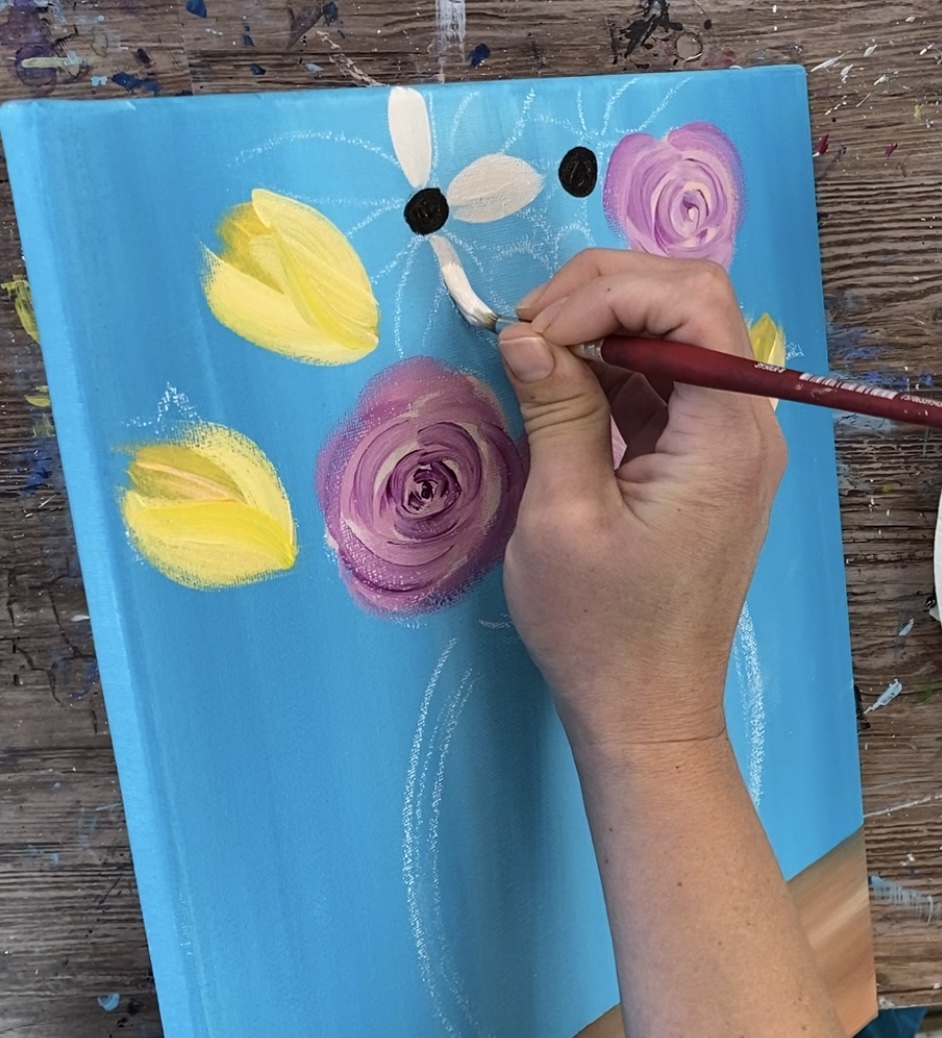
You will need to decide if your daisies are overlapping the roses & tulips or visa versa. Either paint the petals over the other flowers or stop at the flower to make it look like it is going behind.
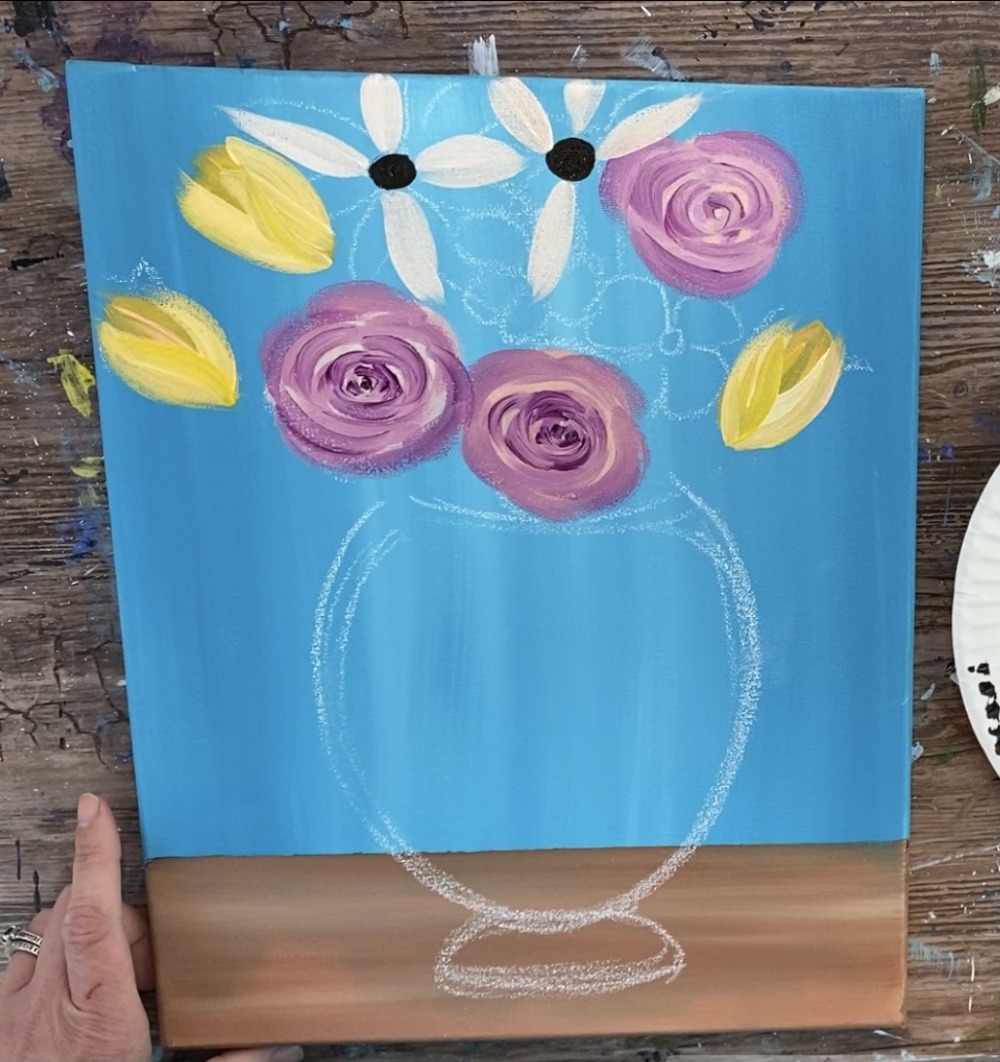
Next paint the other petals of the daisies using just titanium white not mixed with the brown. These brighter white petals can overlap the darker white petals at the base.
6. Paint Orange Flowers
These flowers are tucked away in that space so they are very loose and abstract. I used cadmium orange hue mixed with a little white and yellow to lighten the orange up. Use the #8 round brush to paint the petals. One of the flowers is slightly darker (more orange) than the other so it will stand out.
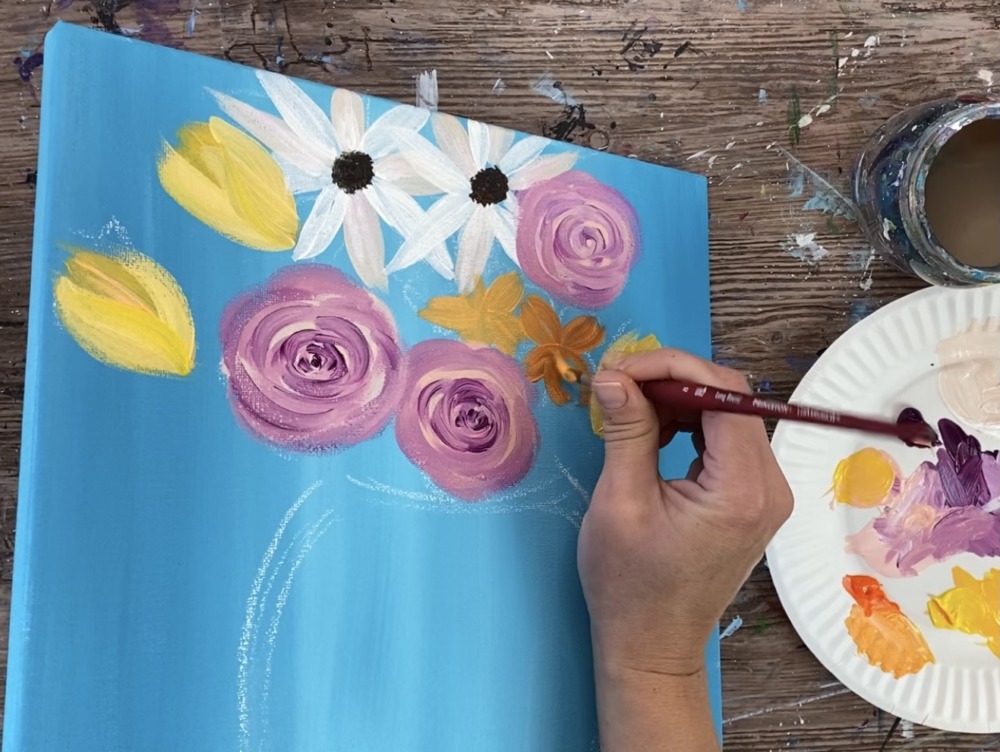
Then add some brown/black little dots in the centers of those flowers.
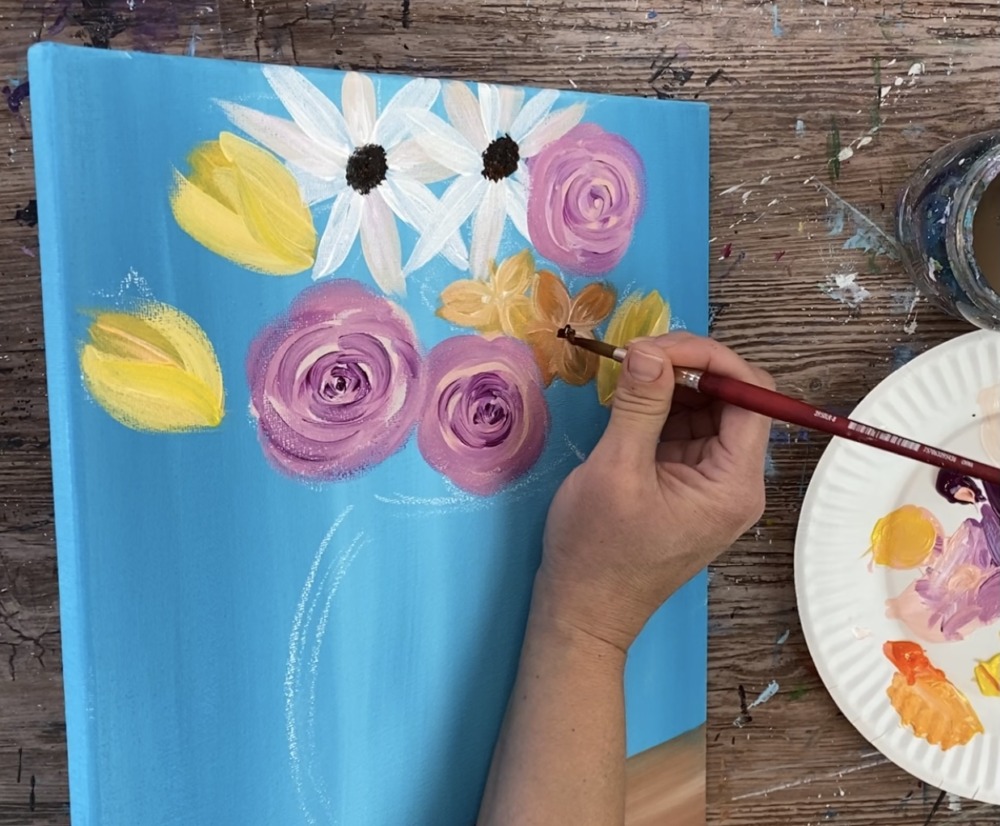
You can add a little bit of white to the edges and centers of the petals to make them stand out a bit more.
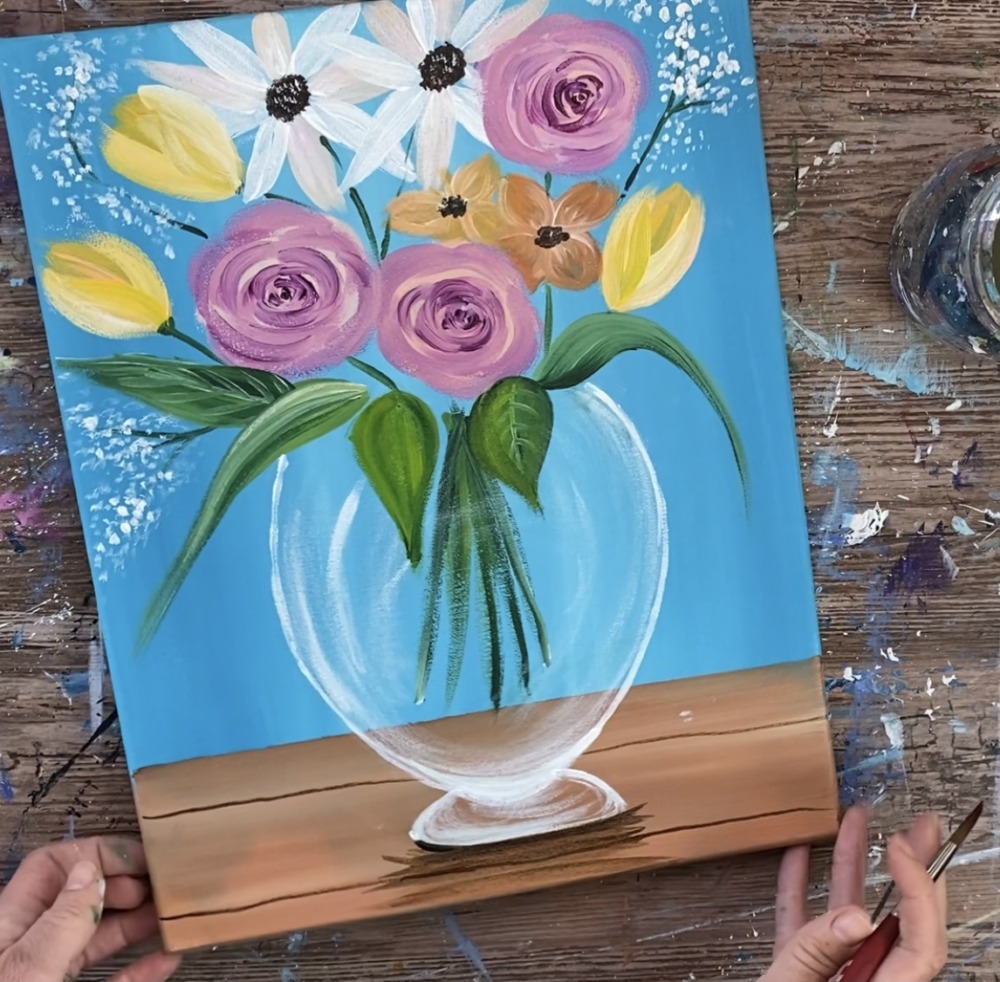
7. Paint Baby’s Breath Stems & Leaves Of Other Flowers
For the branches of the baby’s breath, I used hooker’s green hue permanent. Water it down slightly to get the flow. The lines should be very thin and loose. I used the very tip of my #8 round brush to paint those stems. You can use that brush or another very thin liner brush for this step.
Paint the stems as if they were tree branches sticking out from the flowers.
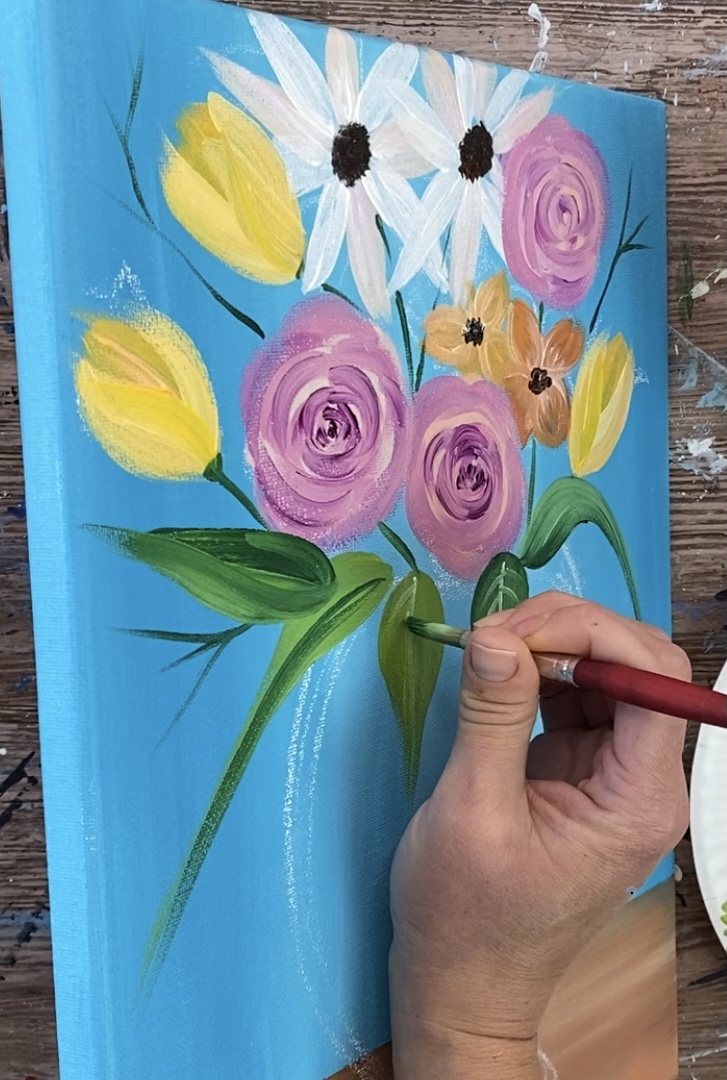
Next use your #8 round brush to paint the flower leaves. These leaves are situated at the top of the vase and may overlap parts of it.
For the tulip leaves, I did them with a lighter green. Mix about 1 part hooker’s green with 1 part titanium white.
Press firm & use the full bristles with your round brush and stroke down.
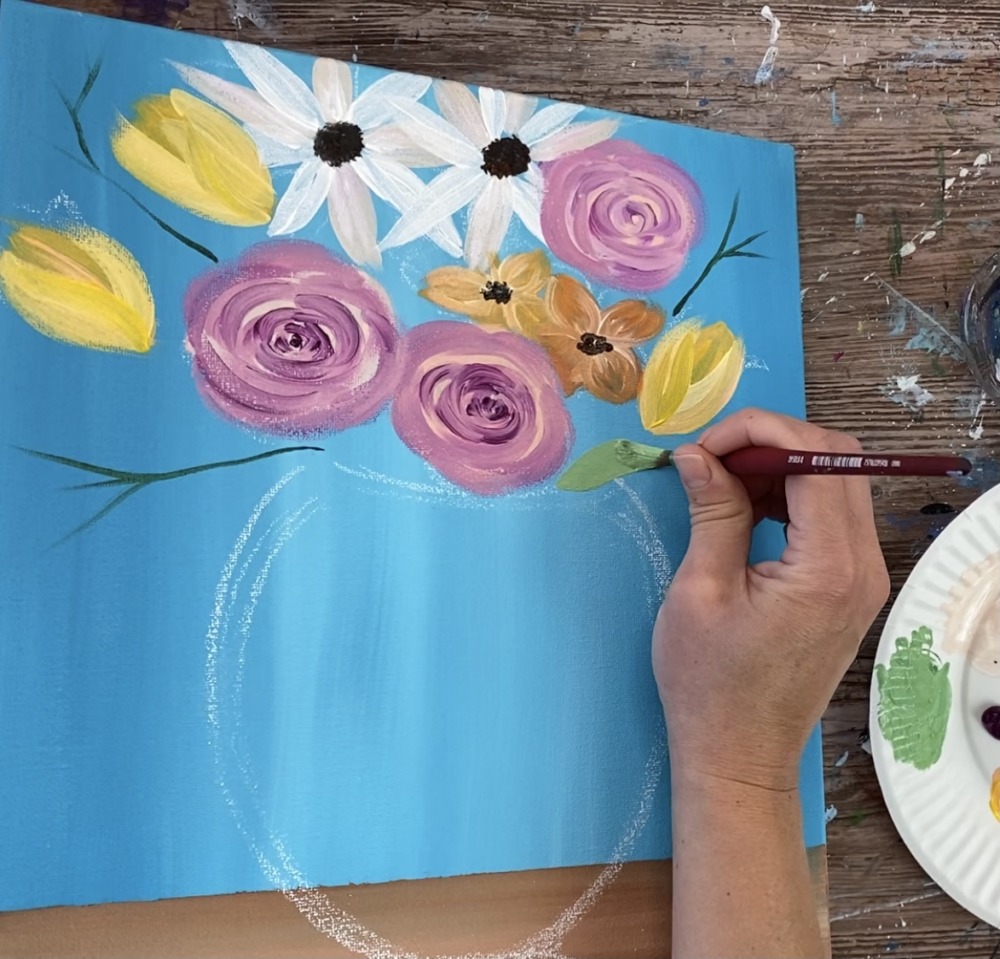
Release the pressure as you stroke down so your leaf goes to a point. Use the tip of the round brush and not the full amount of bristles to get the leaf to go to a narrow point.
Make a few of these long and narrow leaves so that they overlap the vase and go outwards.
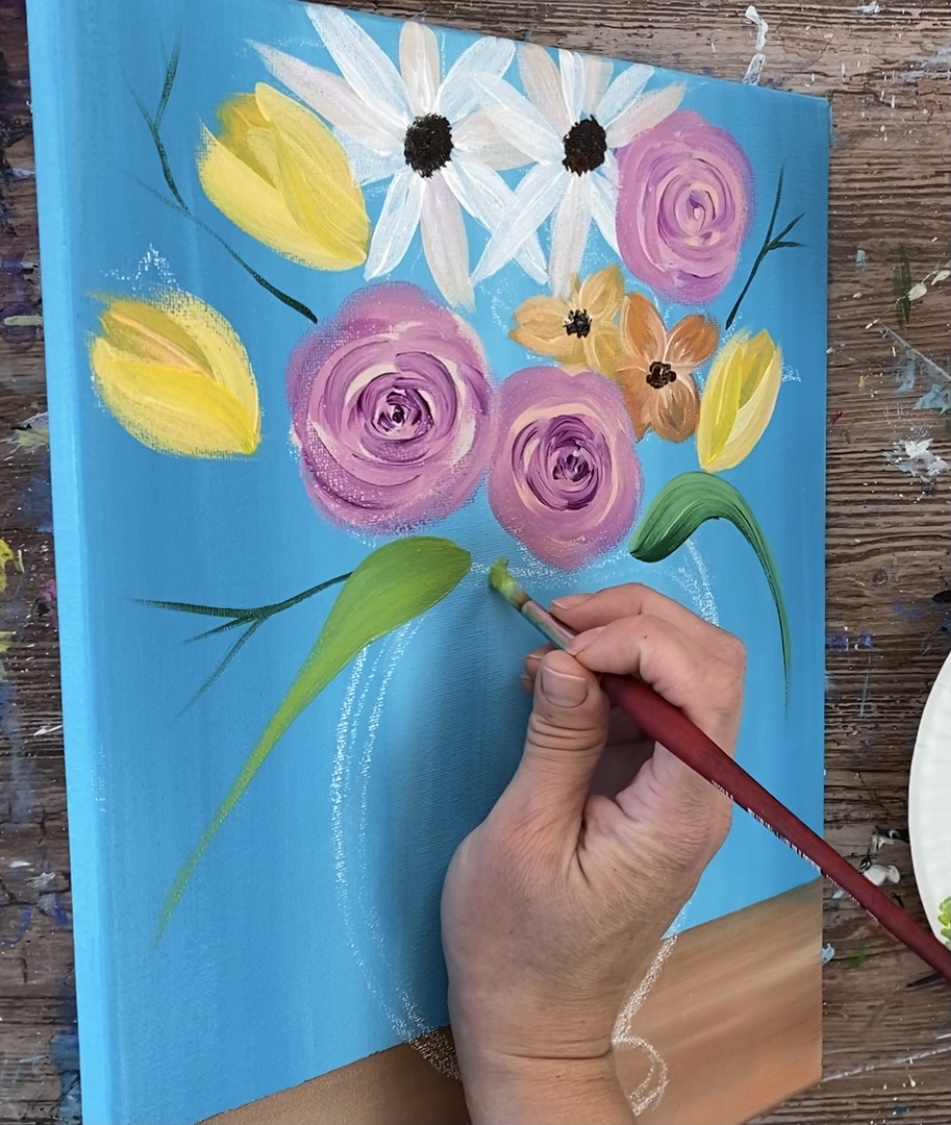
Then I painted some rose shaped leaves. These ones are more wider but still go to a point. Tip: vary the colors of your greens by adding more yellow or white in them. This helps your leaves stand out from each other especially if they my have to overlap each other.
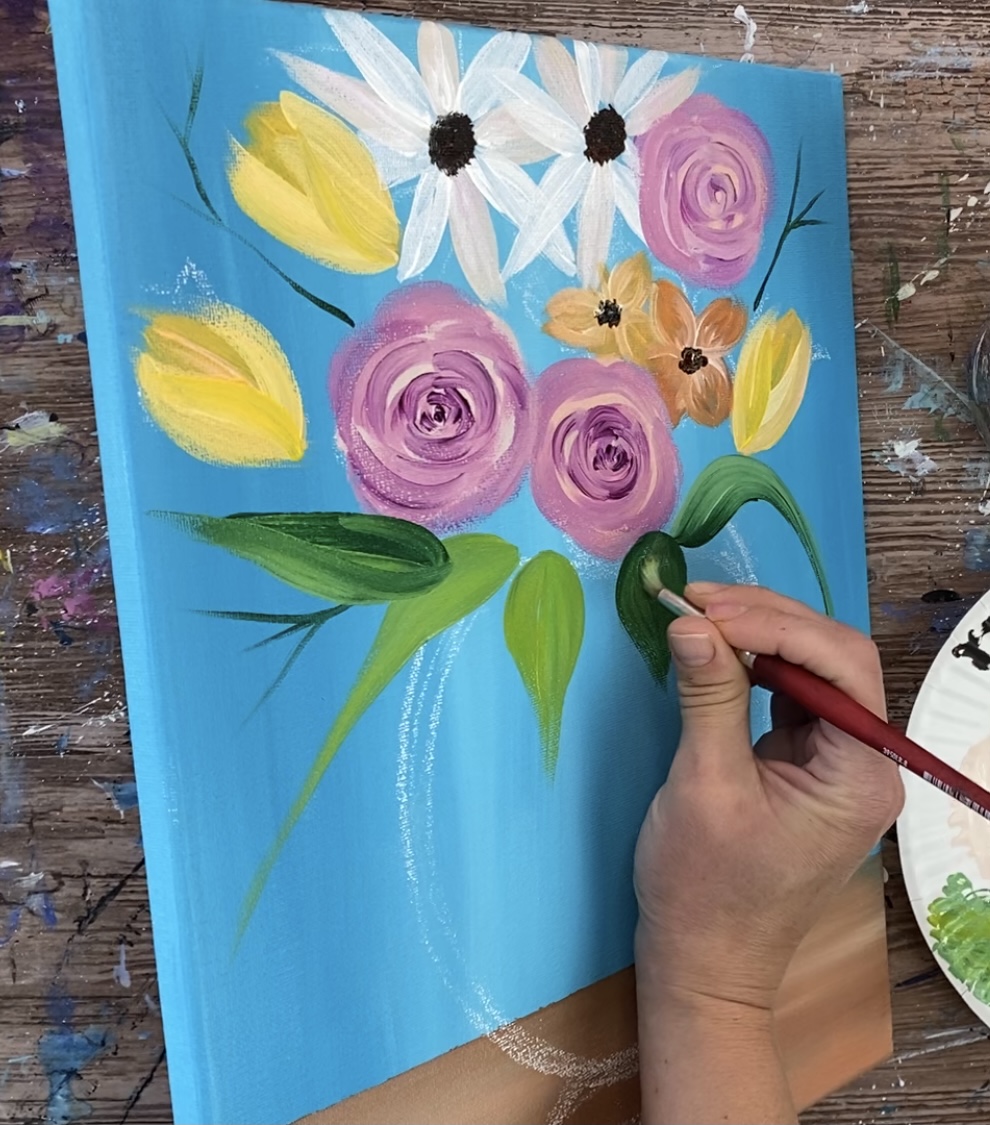
Do the center lines and veins on the leaves as well. Use the tip of your round brush for this or a smaller liner brush if necessary. If your leaf is dark, use a lighter green for the veins (mix more white into the green).
You can highlight and shadow the leaves by stroking a lighter color on the top and a darker green on the bottom.
Also paint some of the stems of the flowers. Not all the stems will be showing but a few green lines going from the flowers to the vase will make it look like they aren’t all floating.
8. Paint Baby’s Breath
Now that your stems of your “baby’s breath” are dry, use your #8 round brush to paint little tiny white dots on the edges of the branches.
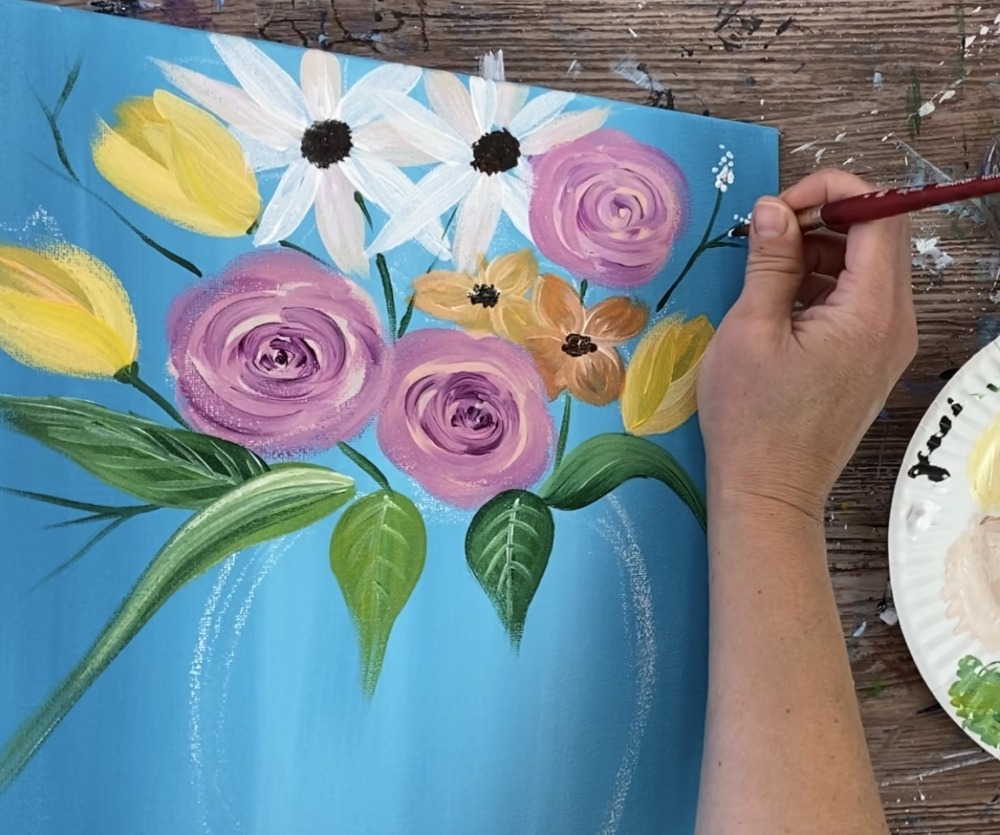
Do this in clusters & vary the dots so some of them are slightly larger and some of them are smaller.

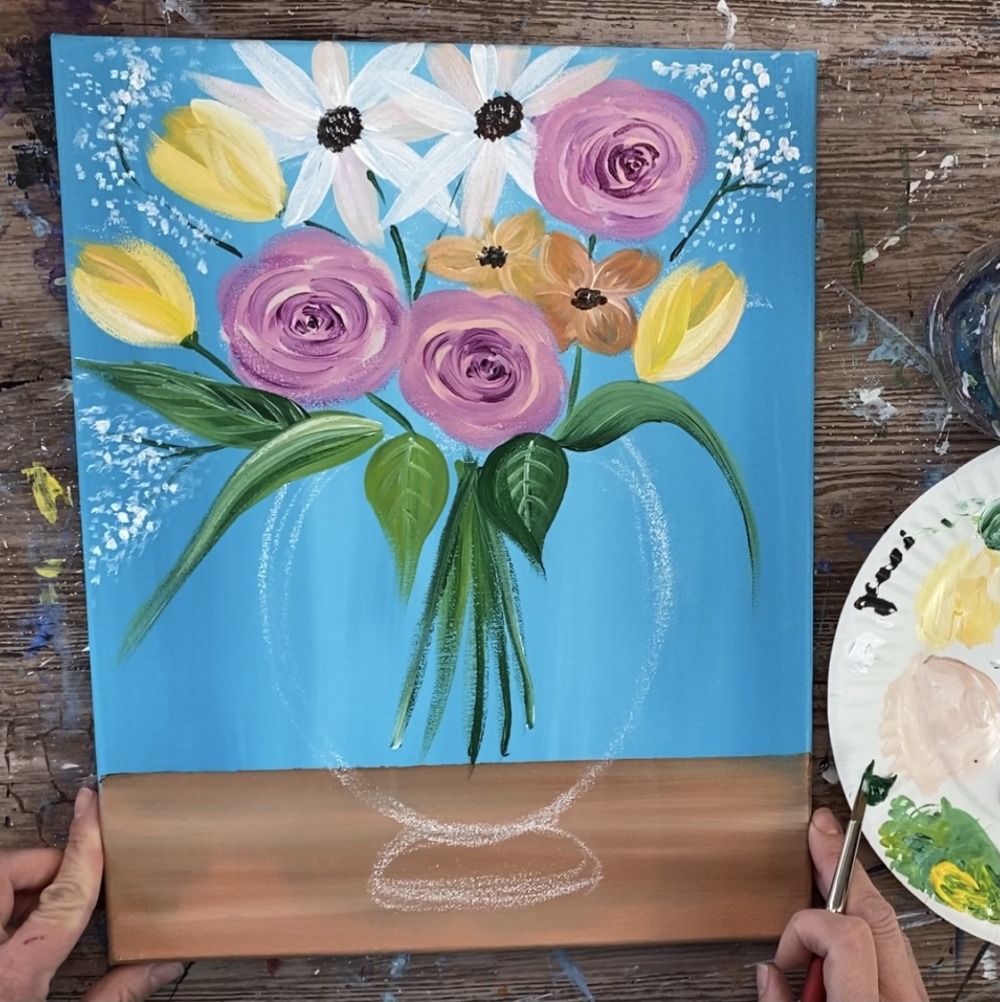
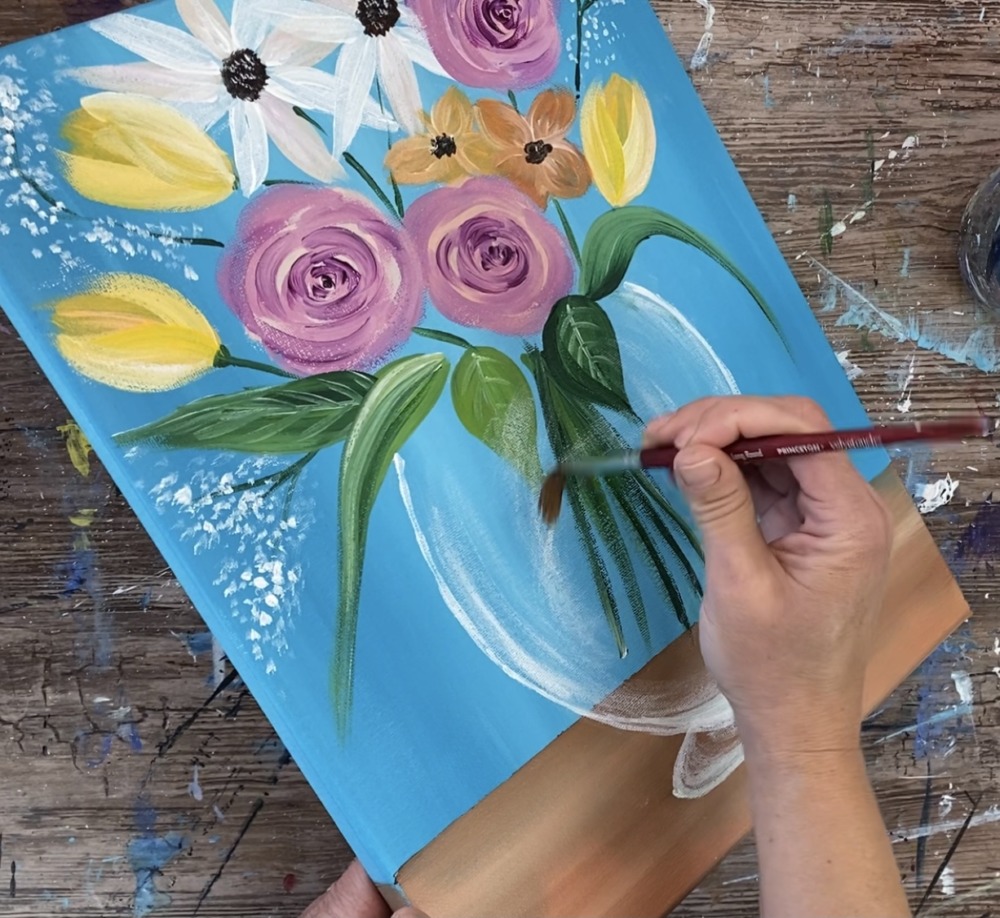
9. Paint Stems
Next use a combination of the hooker’s green hue permanent, titanium white and yellow to paint the stems. Start at the top of the vase and stroke down allowing your paint to run dry on the bottom of each of the stems.
The stems should be gathered together in the middle at the top and flair outwards on the bottom.
Vary the colors of each of the stems so they stand out from one another.
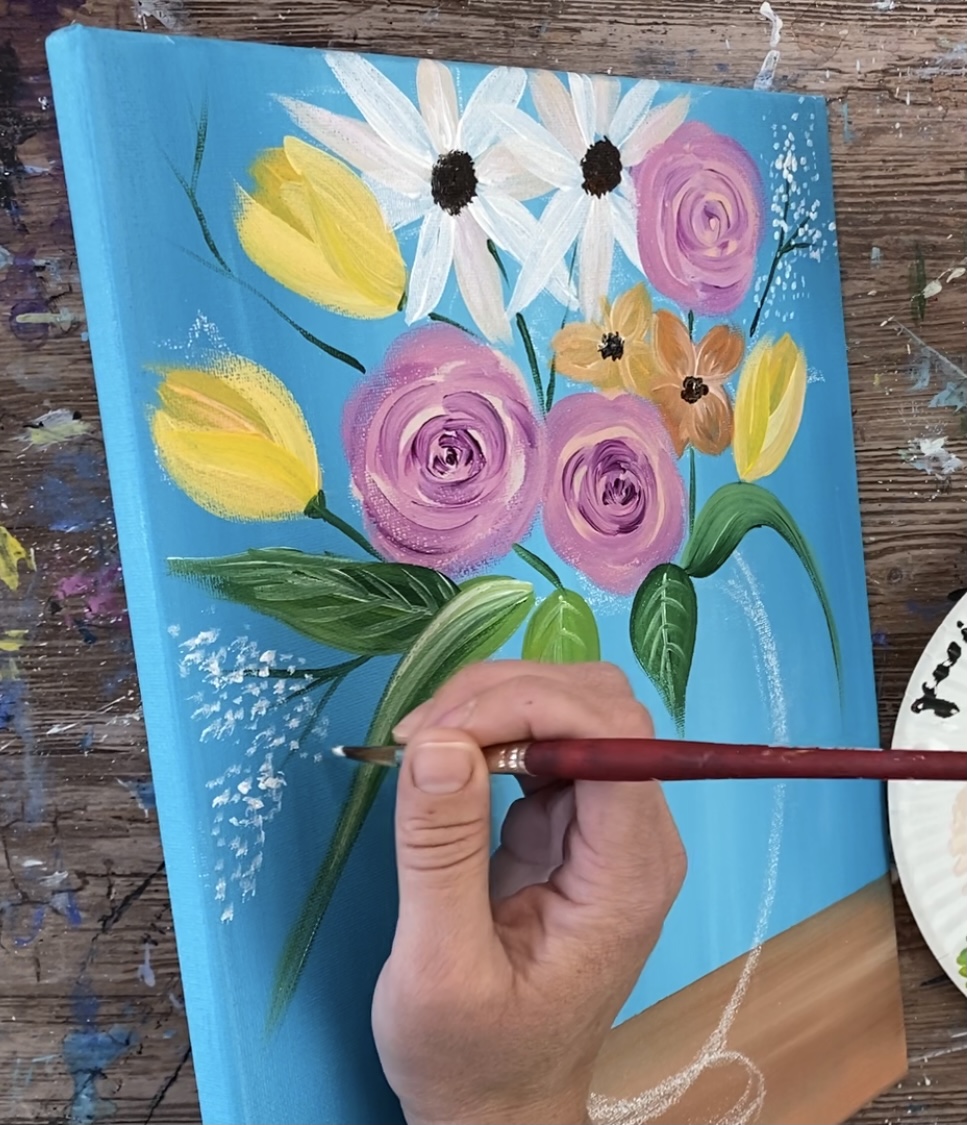
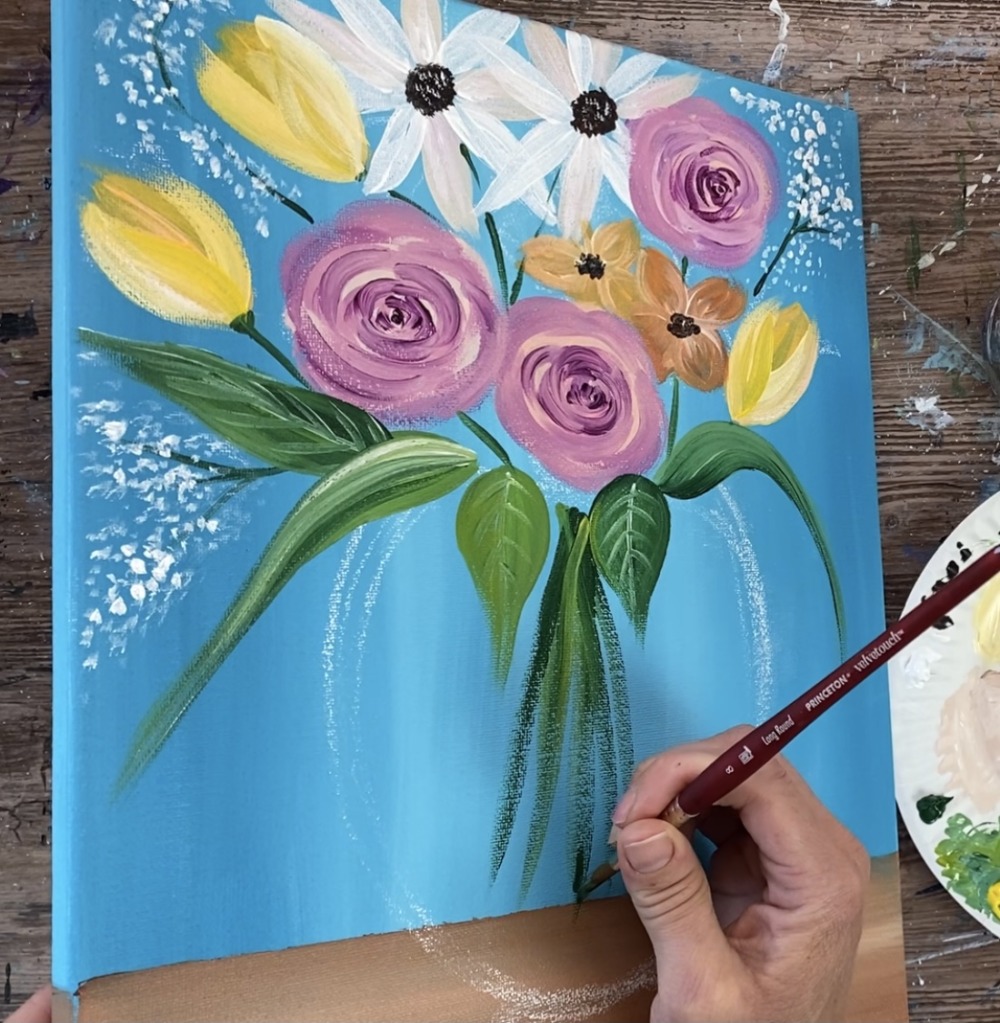
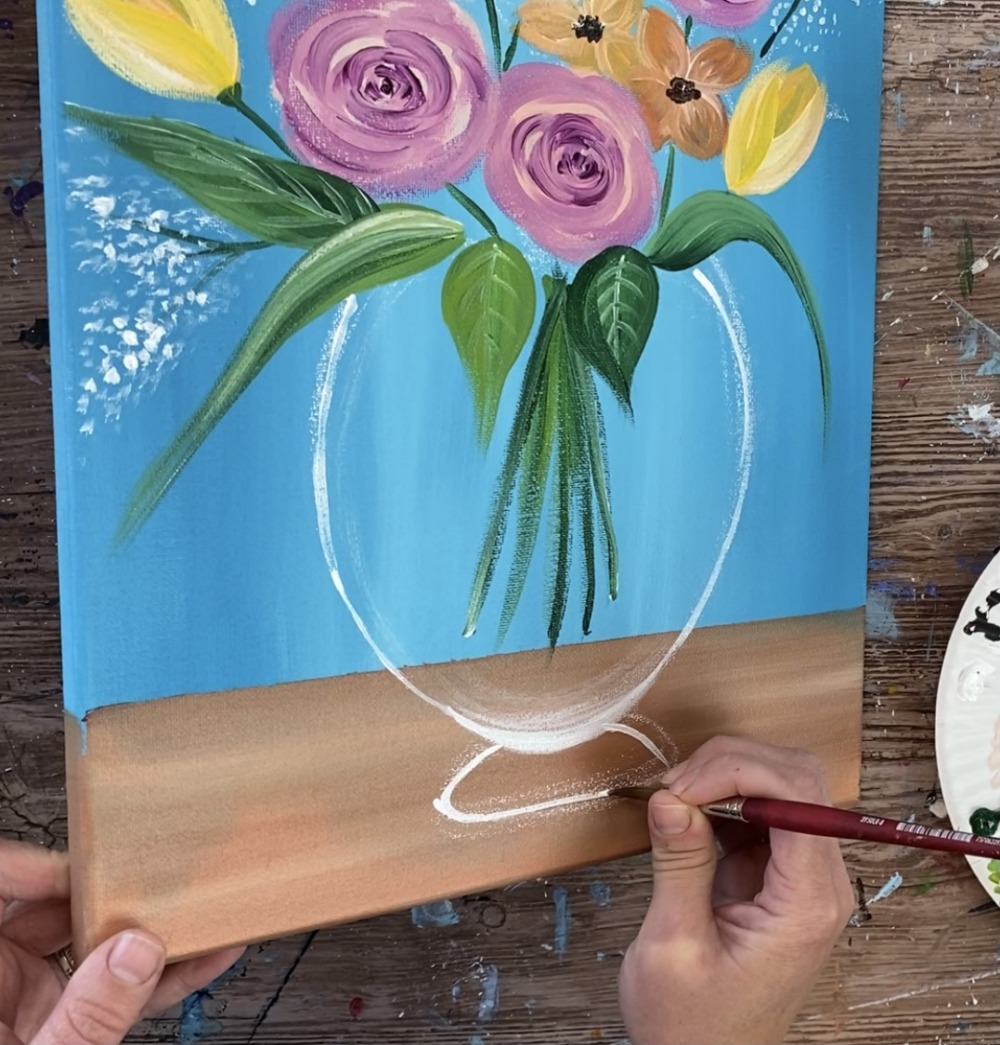
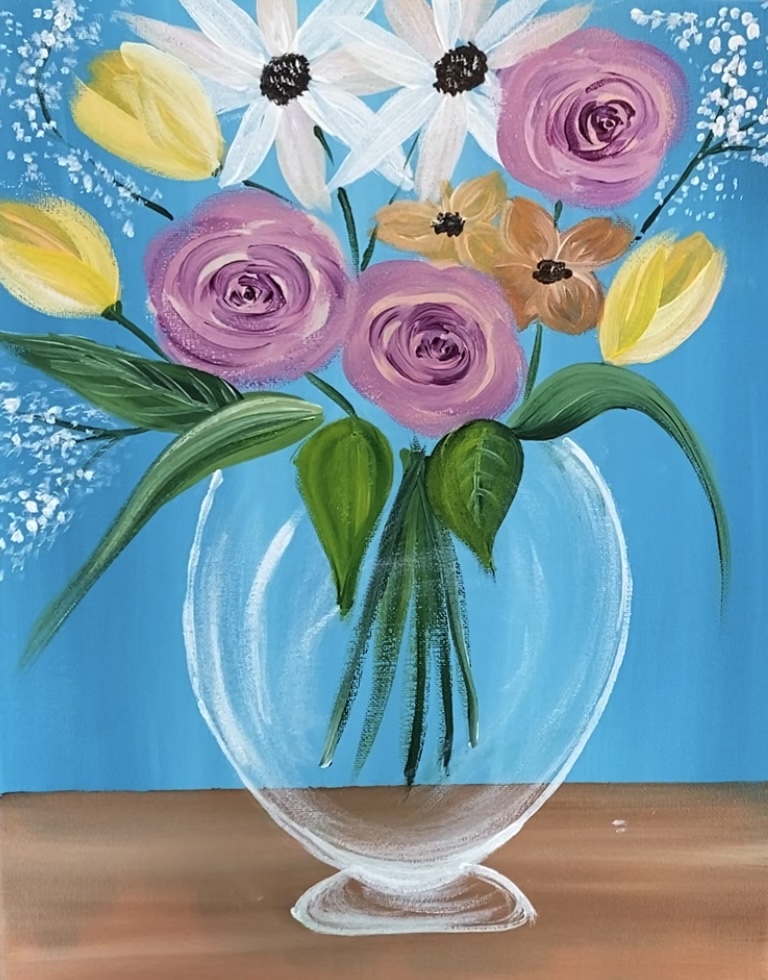
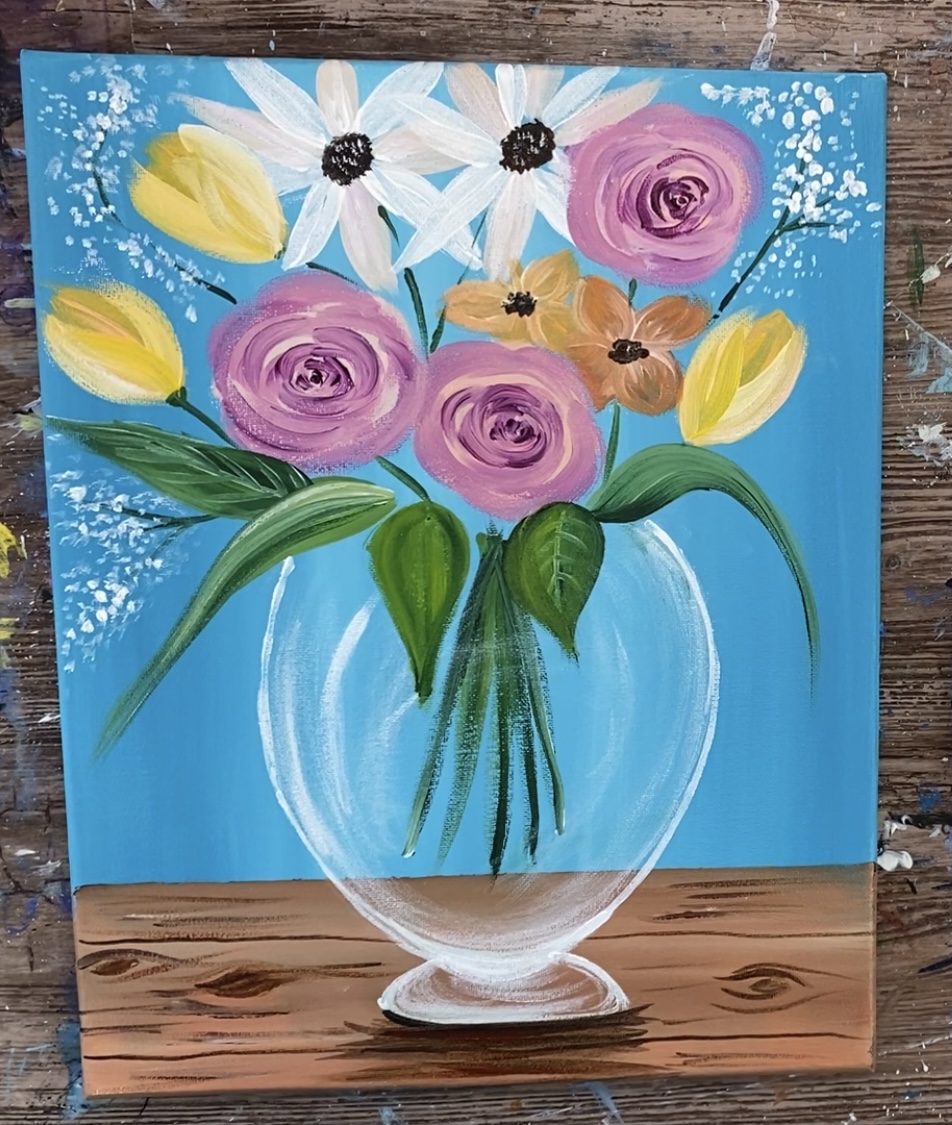
10. Paint Glass
Use your #8 round brush (or a smaller round brush) and titanium white. Paint the outline edge of the glass where you drew the shape with chalk.
Your chalk will erase as you paint but also you can wait for your initial paint line to dry and then erase the rest of the chalk with a wet paint brush.
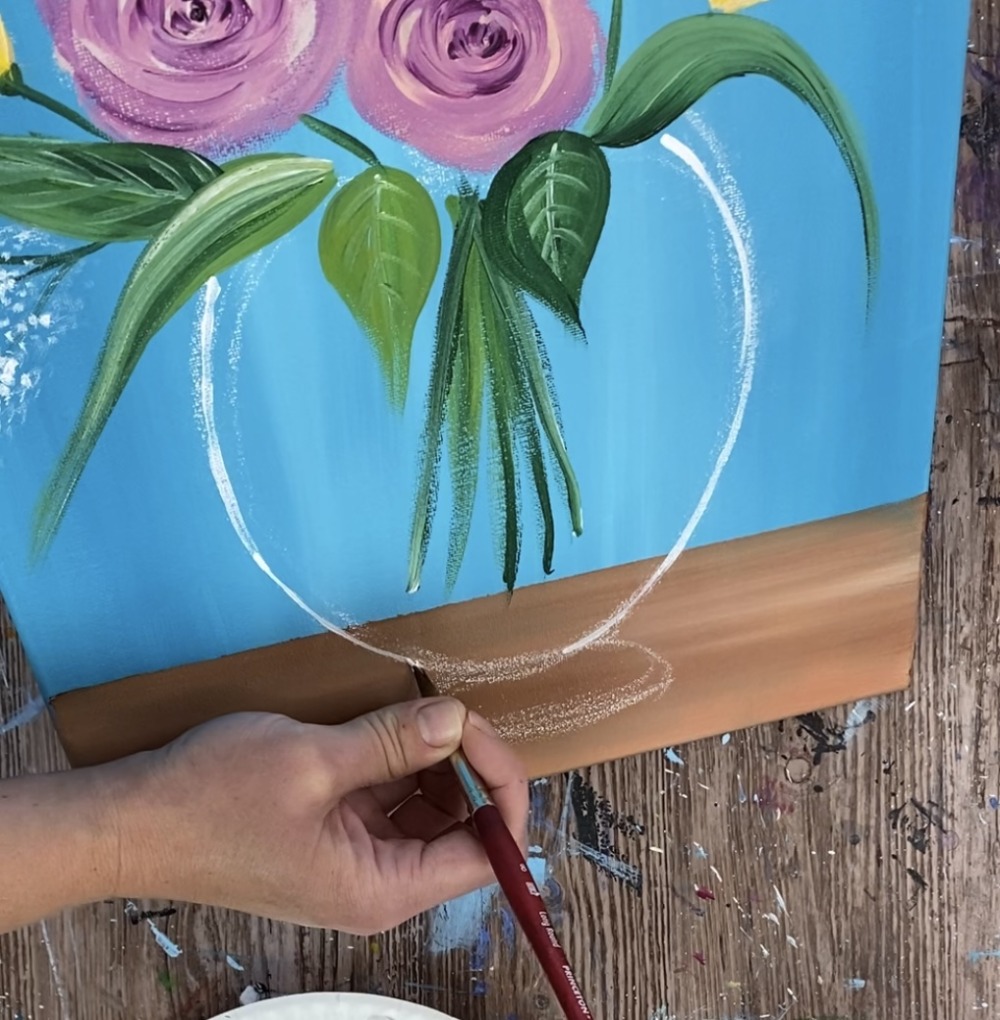
Paint the bottom of the glass a slightly more thicker line and let it fade out/ dry brush upwards.
To get the “glass glare” on the edges, load your brush in titanium white and wipe off some of it. “Dry brush” the white on the left and right edges of the glass. Make sure the direction of your stoke goes in the direction of the glass.
You can add some dry brush to the middle area over the stems. Just make sure all the green from the stems is dry or your run the risk of green paint running into your white dry brush.
When you dry brush the middle, go in a curved/ circular direction.
11. Paint Shadow & Wood Texture
Water down some burnt Sienna mixed with a little mars black. Paint left and right stokes just under the vase. This should be a very thin, translucent area to represent the shadow of the vase.
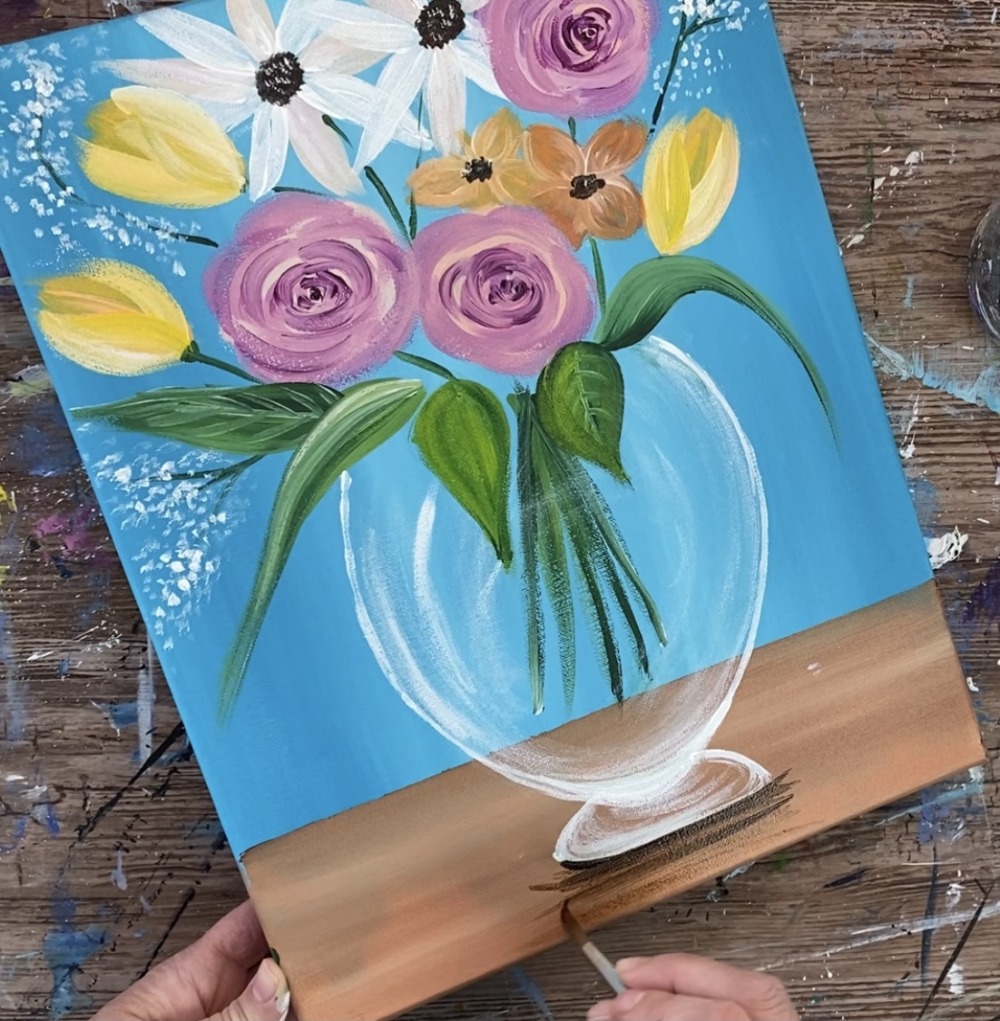
Then paint the wood texture on the surface of the table. Start by dividing the area into three panels. Use that same black/brown watered down paint. Use the very tip of your round brush to paint the two thin lines.
Then paint wood texture in between the lines/ panels. Use the same brown & black paint. Paint small horizontal lines. Paint “wood knots” by painting cat eyed shapes and curved lines that contour around them.
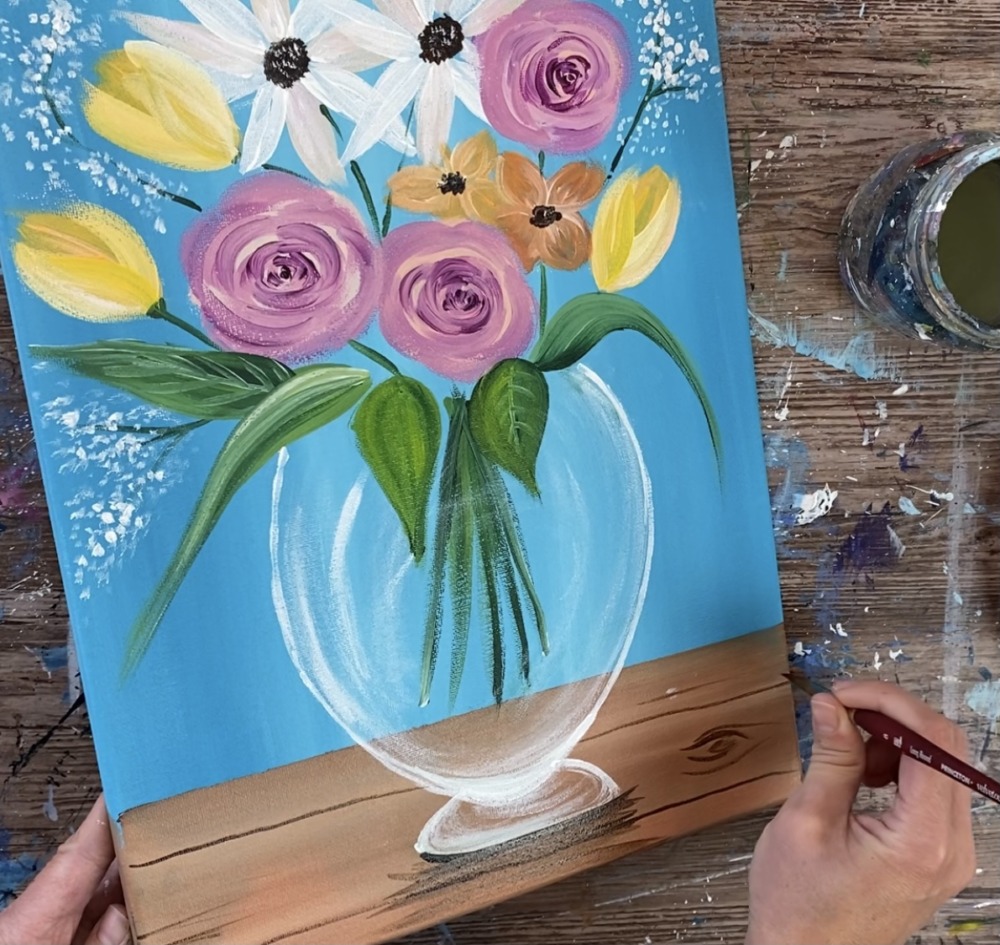
Do this wood texture all throughout the table. You can add some white in there as well to give the wood color a varied look.
12. Finishing Touches
I decided to paint another rose in the area on the bottom. This one was done with a yellow base and I used orange to form the petals. The same technique was done with this rose as the other three roses.
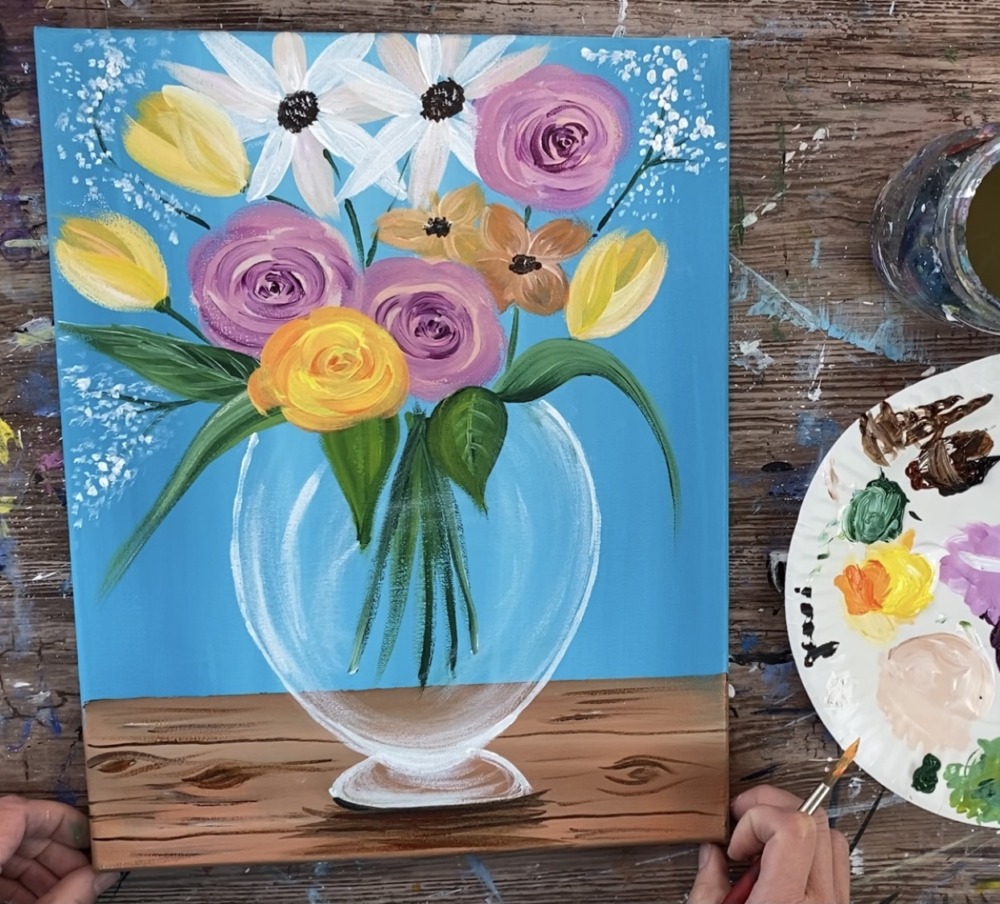
Optional: I added a rose on the table with a stem and a leaf. I also painted another leaf hanging out of the vase. This was done by painting a thin center line and then painting small oval leaves attached to that center line on each side.
Share your art here!


Can you please paints in apple barrel paint because I don’t have liqutitex basic paint that would be wonderful thank you!
Thank you I appreciate it
Thank you so much!
You are the best teacher in the world Treacy!
You’re welcome!!!
Hey! Id love to show this tutorial in my Grade 6 class. I was just wondering what the focus could be for this lesson? Thanks!
Hi Tracie,
I learned to paint during the pandemic and I have no background in painting and I learned own my own during the quarantine. And you’re such a wonderful teacher and I want to thank you! Can you please paint ranunculus flower. Thank you!