
Would you like to save this?
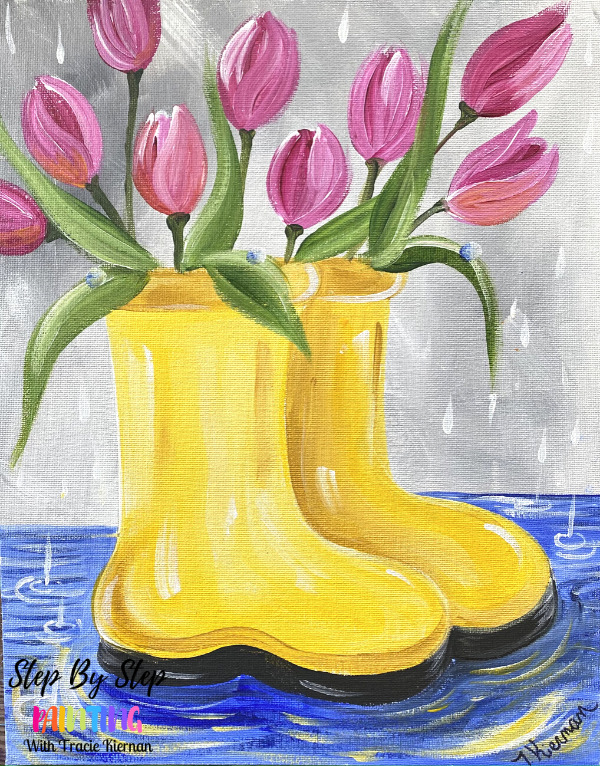
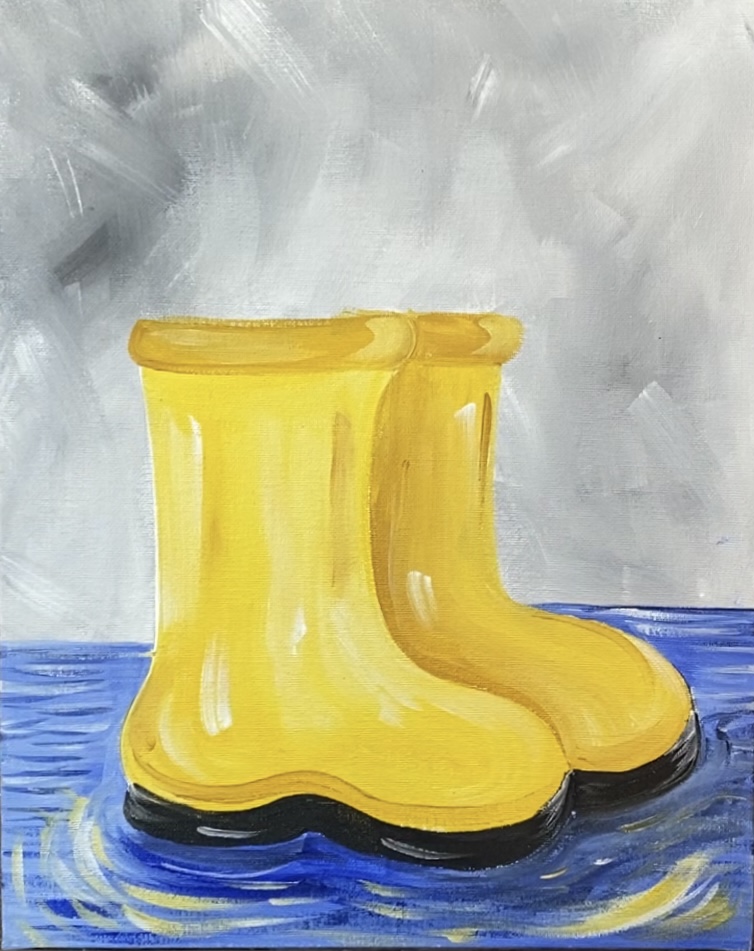
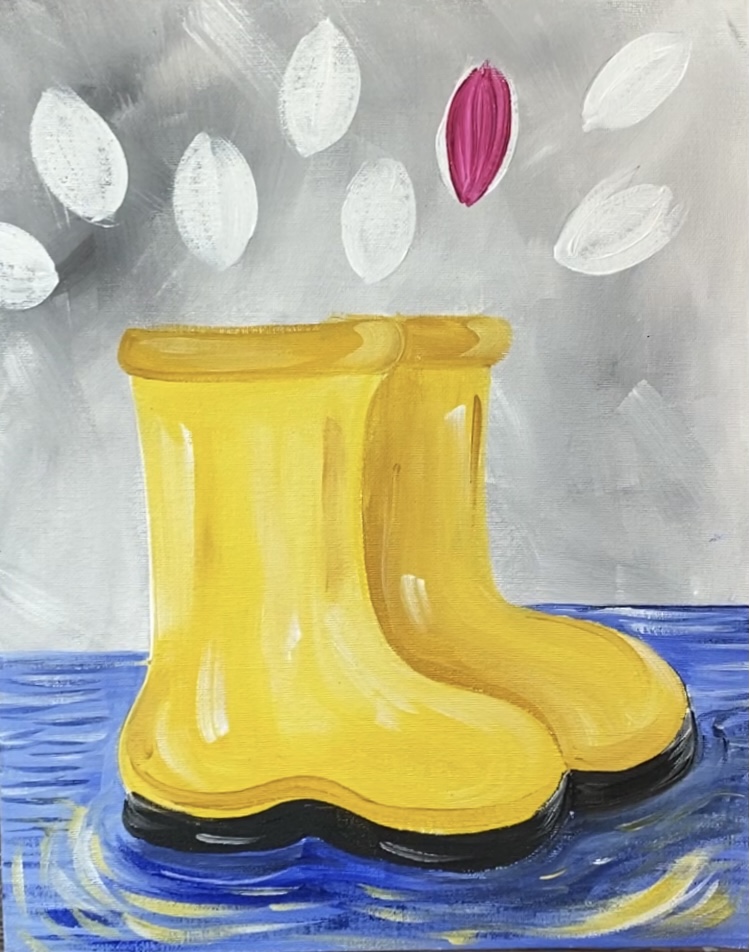
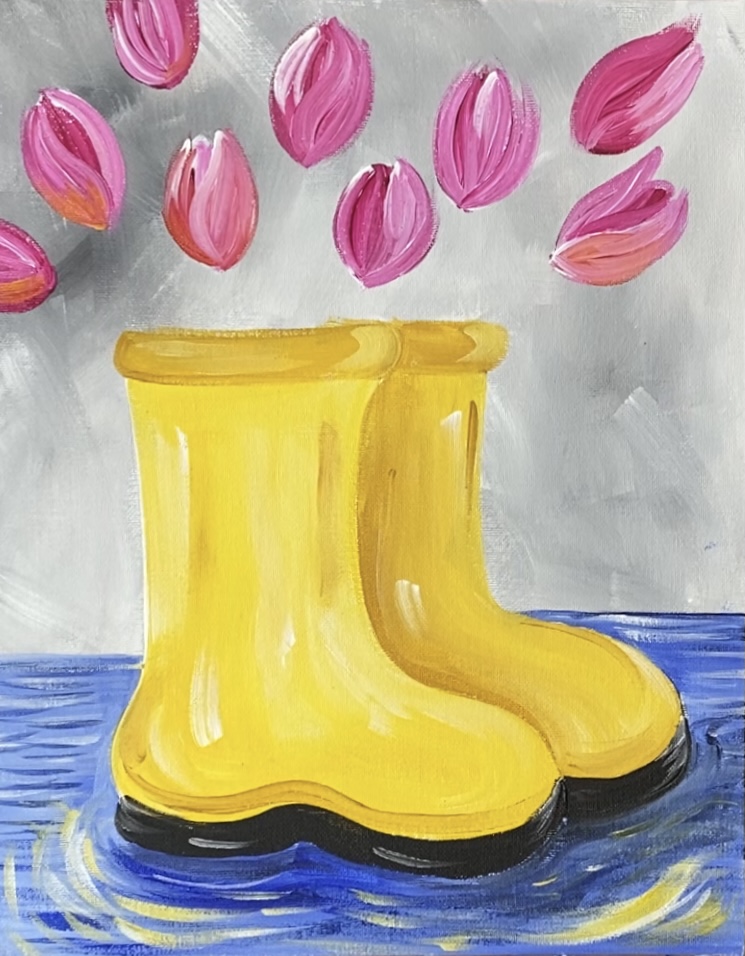
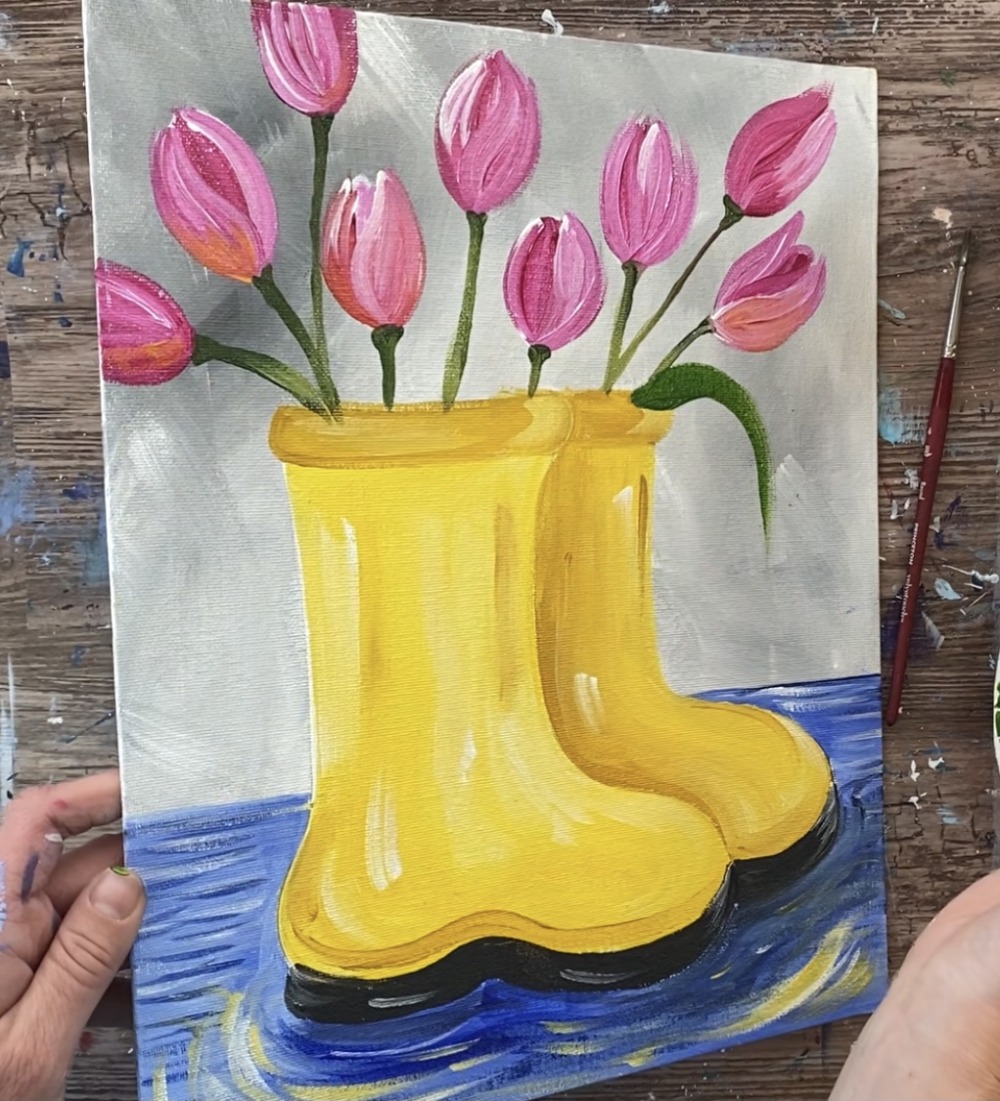
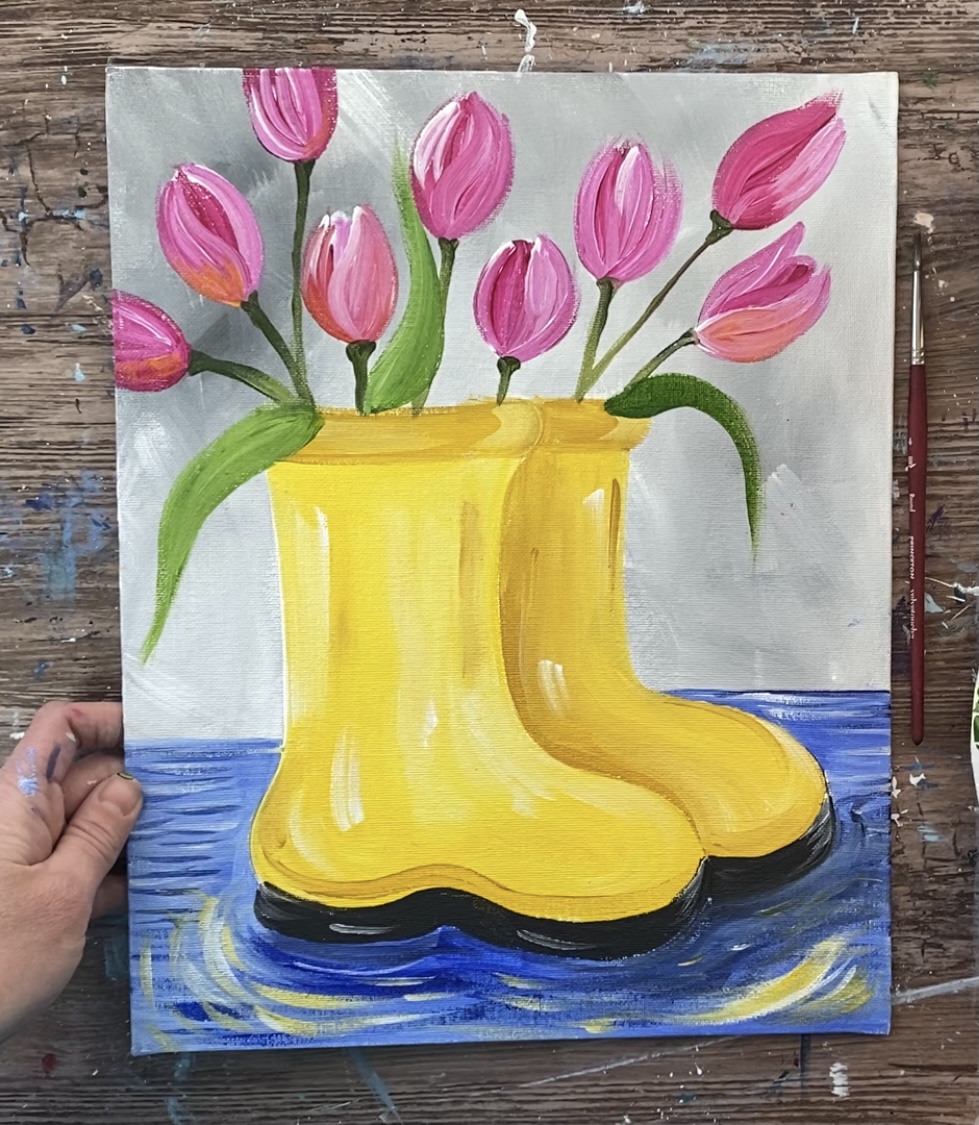
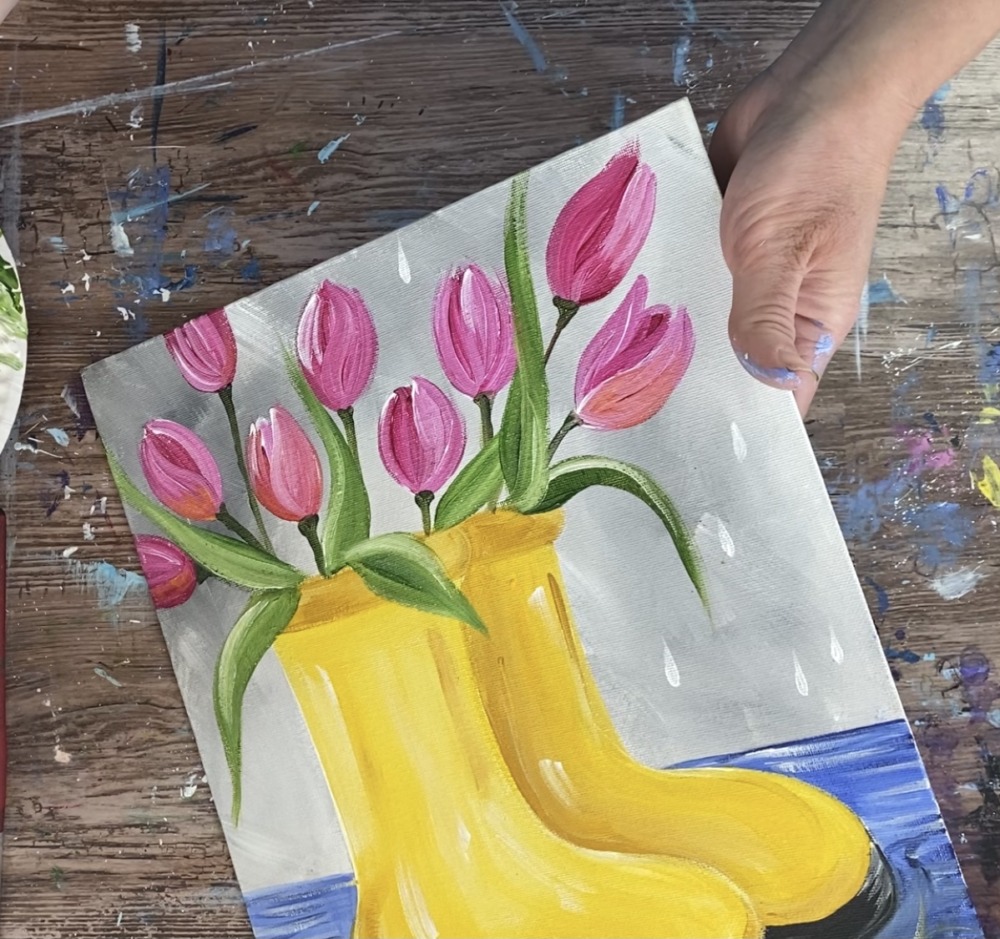
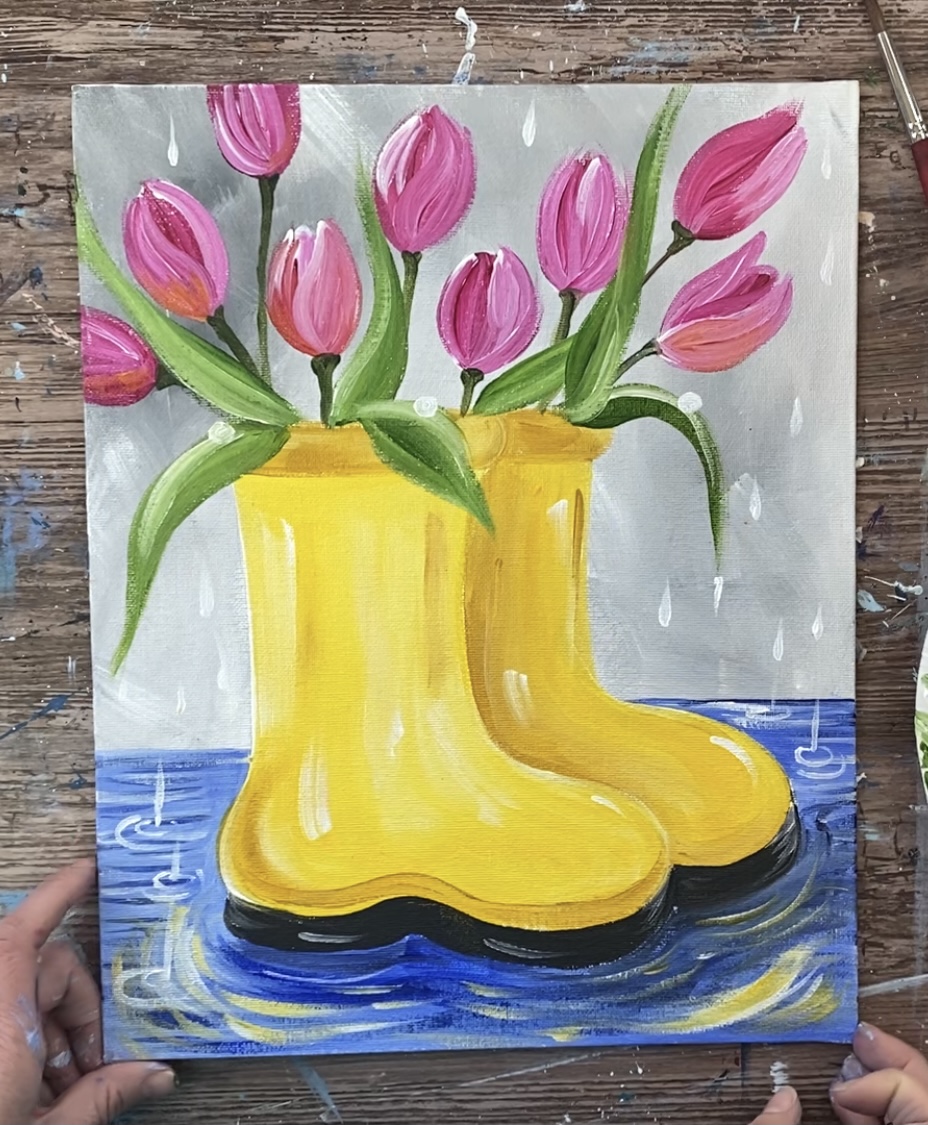
This tulip painting tutorial will demonstrate how to paint a set of yellow rain boots with a bouquet of bright pink tulips with rain drops in the background.
This is a beginner acrylic painting tutorial and it includes a free traceable of the boots that you can download, print and transfer to your canvas.
You can customize this painting by changing the color of the boots and/ or the flowers.
Looking for another technique for painting tulips?
Pamela Groppe has some GREAT tulip painting tutorials over on her blog you can check out!
Materials
Tulips In Rain Boots Painting

Beginner friendly acrylic painting tutorial. Learn how to paint a set of yellow boots with a bouquet of pink tulips.
Materials
- 11 x 14 Canvas
- Acrylic Paint
- Brushes
- T-Square Ruler or Straight Edge
- Optional Traceable
- Chalk or pencil if you are drawing boots
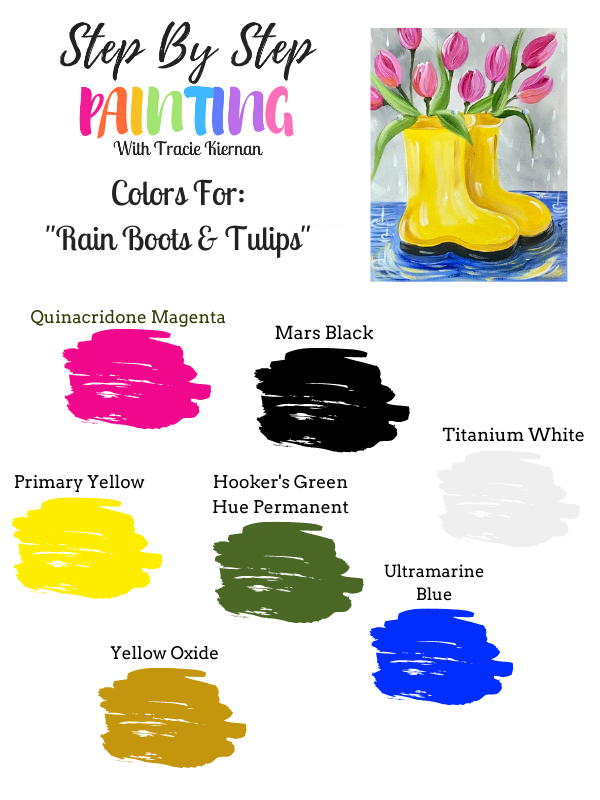
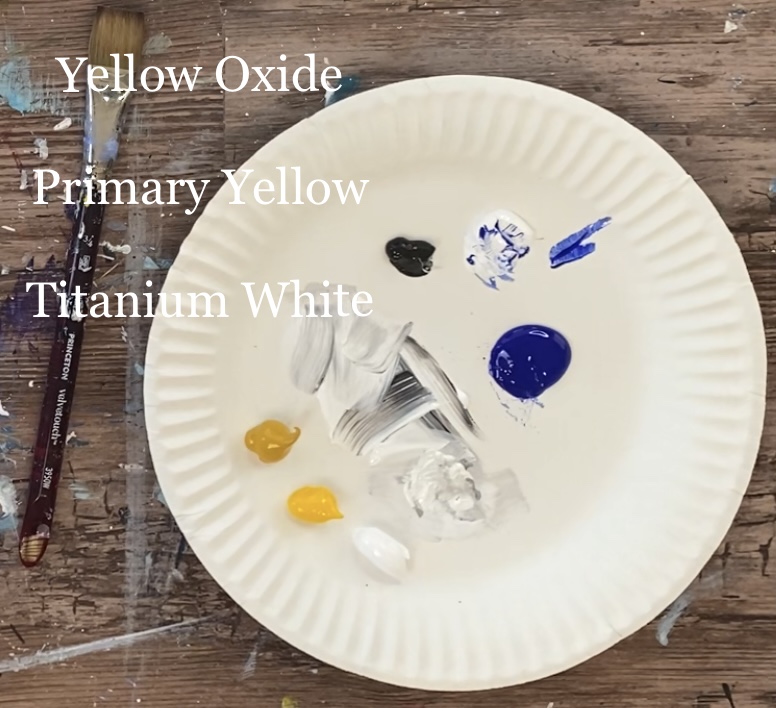
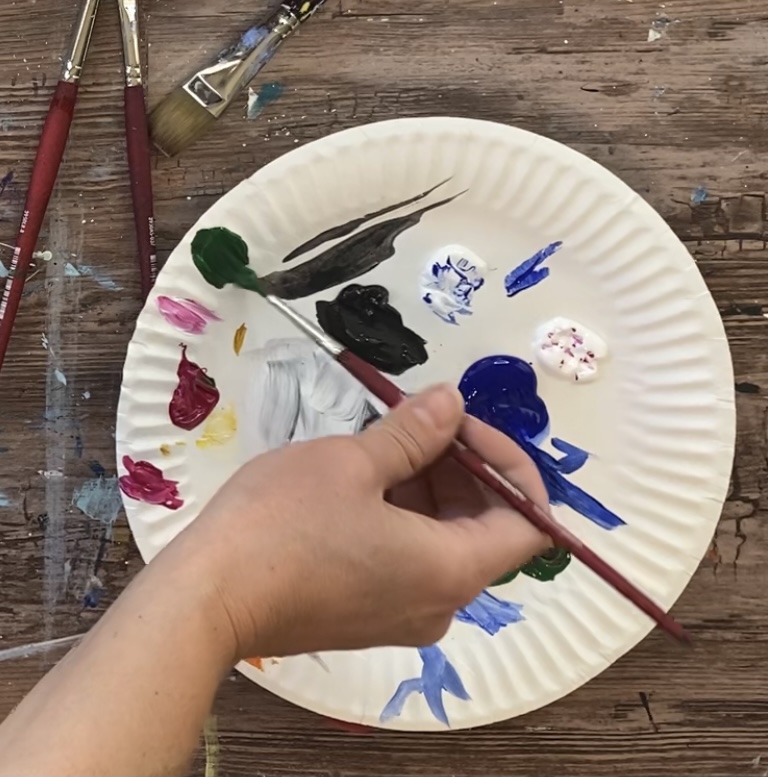
Colors
- Primary Yellow
- Yellow Oxide
- Hooker's Green Hue Permanent
- Ultramarine Blue
- Titanium White
- Mars Black
- Quinacridone Magenta
Brush Sizes
- 3/4" Flat Wash
- #8 Round Brush
- #4 Round Brush
- 10 Flat Brush (1/4" Flat or 4 Bright)
Instructions
- See instructions of www.stepbysteppainting.net for full tutorial.
Color Palette
Traceable

Directions At A Glance For Tulip Painting
Full Video For Tulip Painting
Step By Step Directions
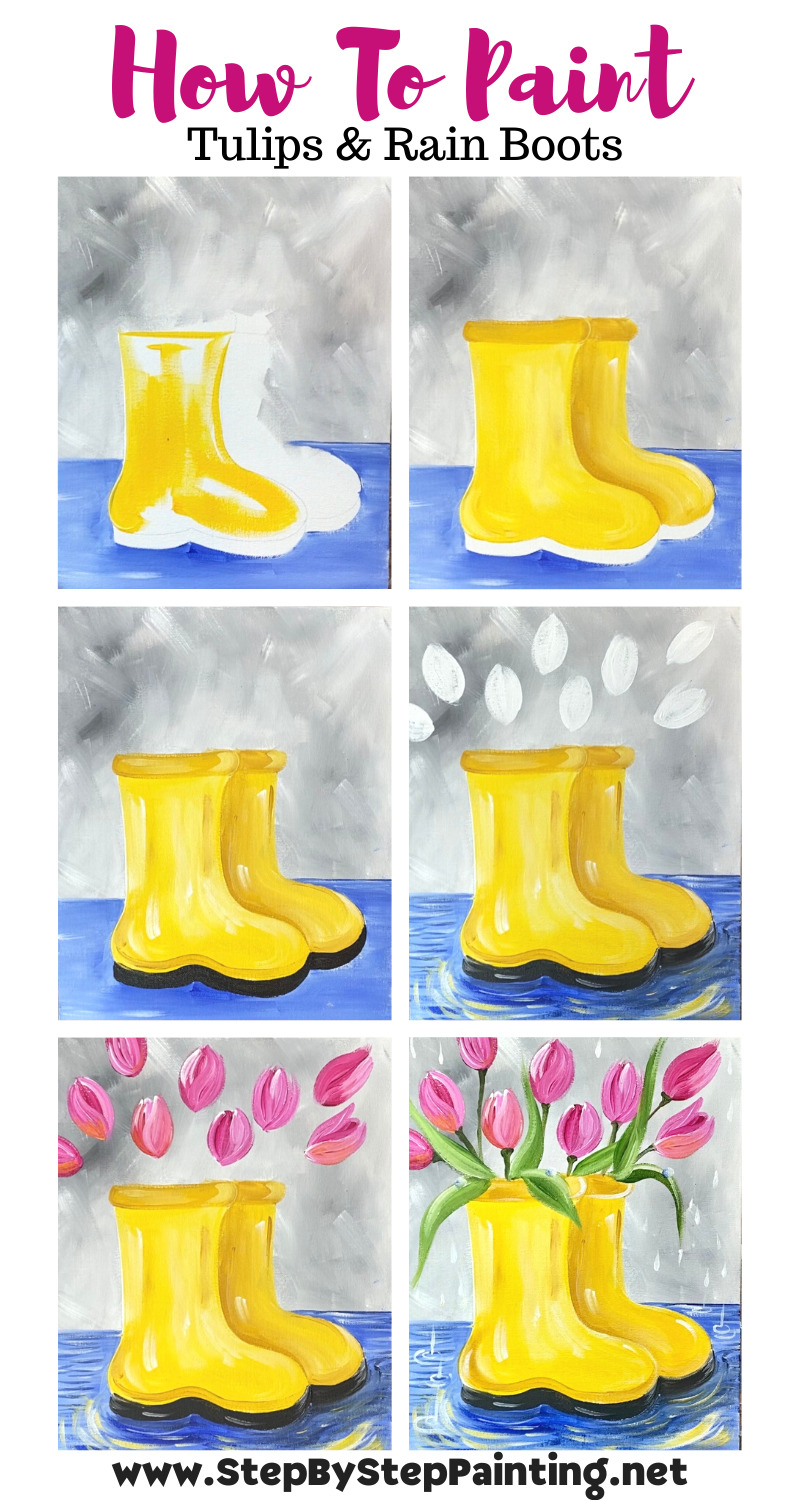
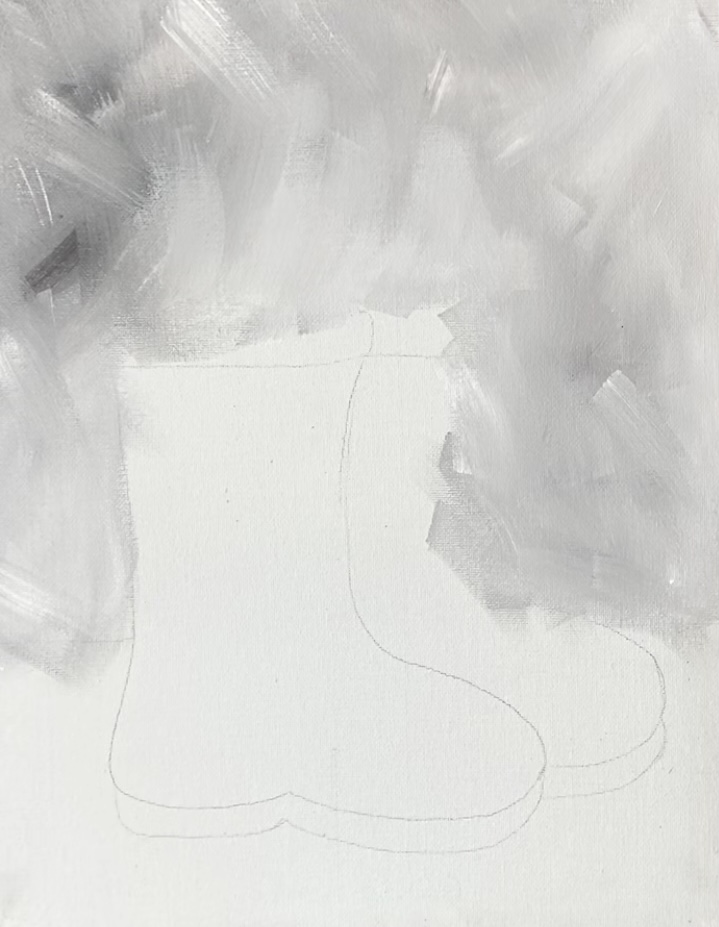
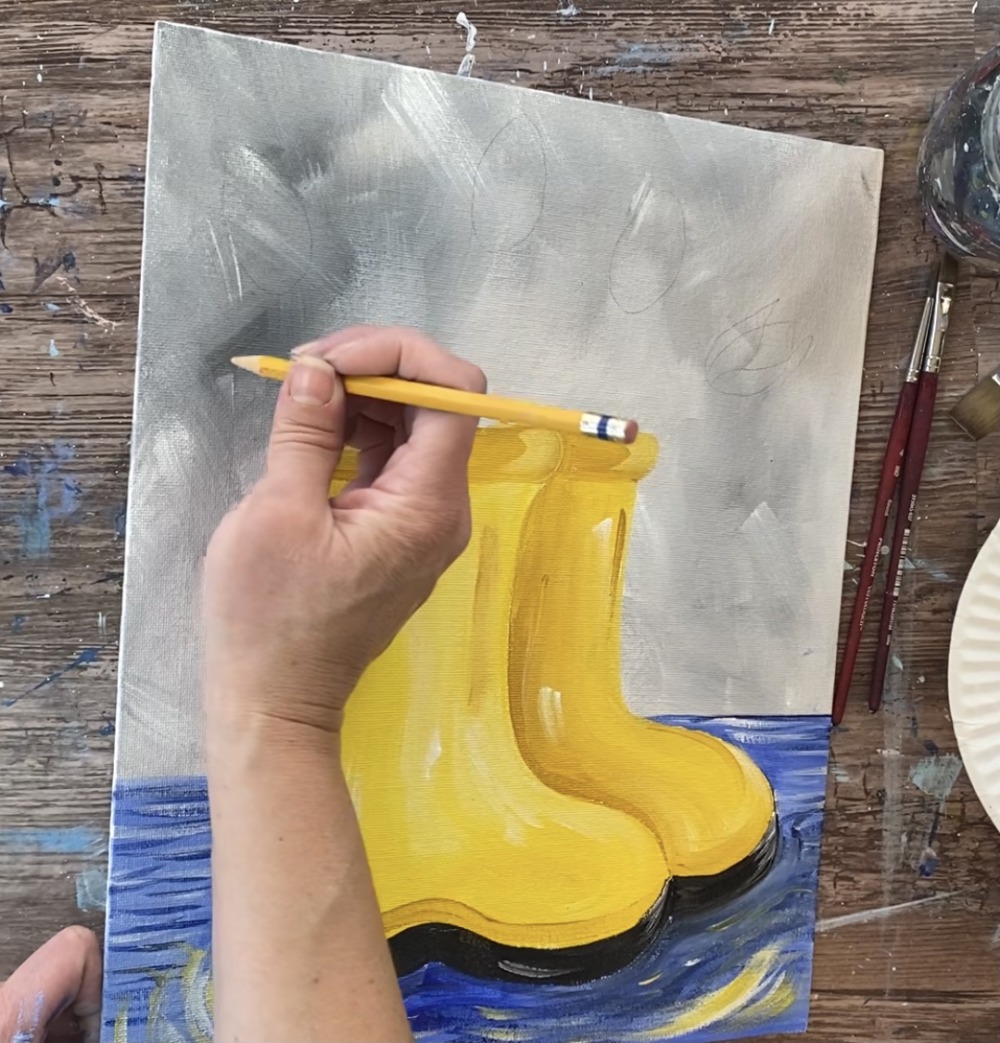
1. Transfer/ draw boots onto the canvas
If you would like to download the template, scroll up in this blog post for the free PDF download. I did this on an 11 x 14 canvas and used transfer paper to transfer the design. You will need to tape the boot template together.
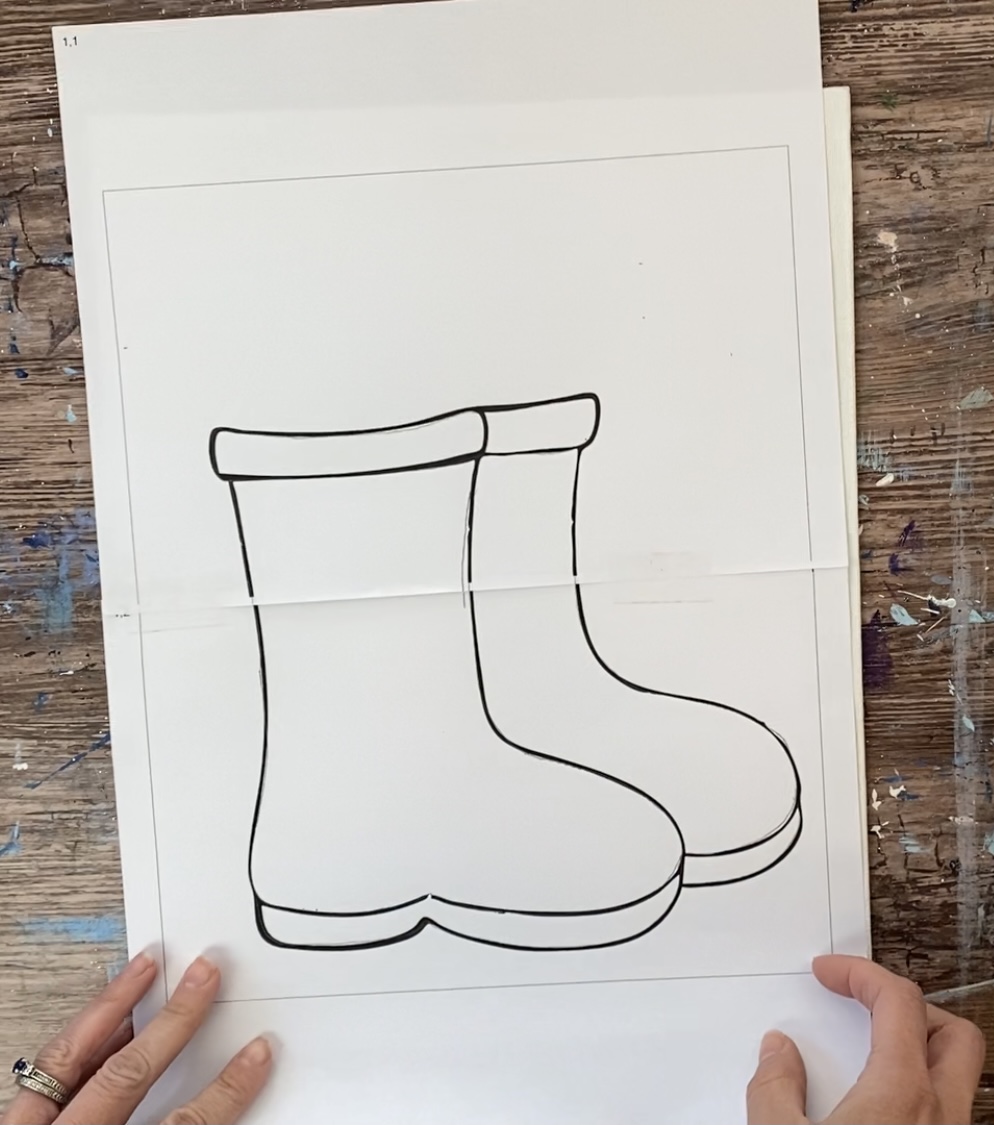
You’ll want about two inches of space underneath the boots and a lot of space above them for the tulip painting.
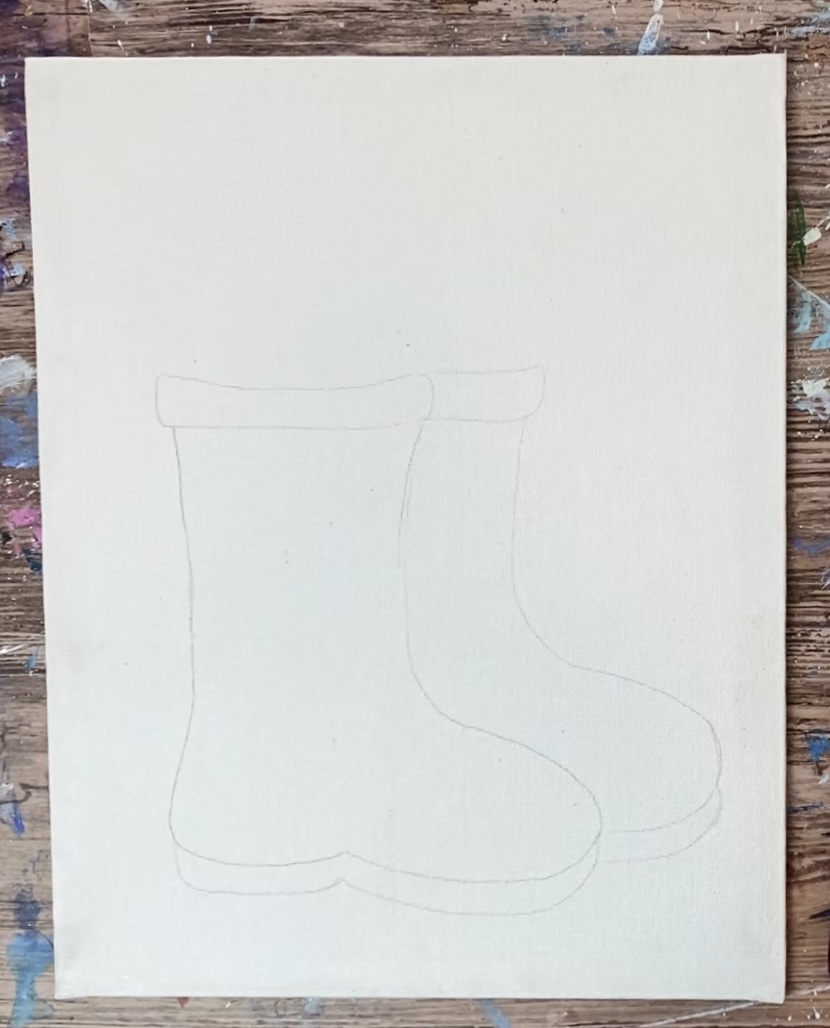
Alternatively you can lightly free draw the boots on the canvas.
Then you will need to draw a horizon line behind the boots. Estimate about 4.5″ from the bottom of the canvas (doesn’t have to be exact). Then use a t-square or straight edge to draw a horizontal line.

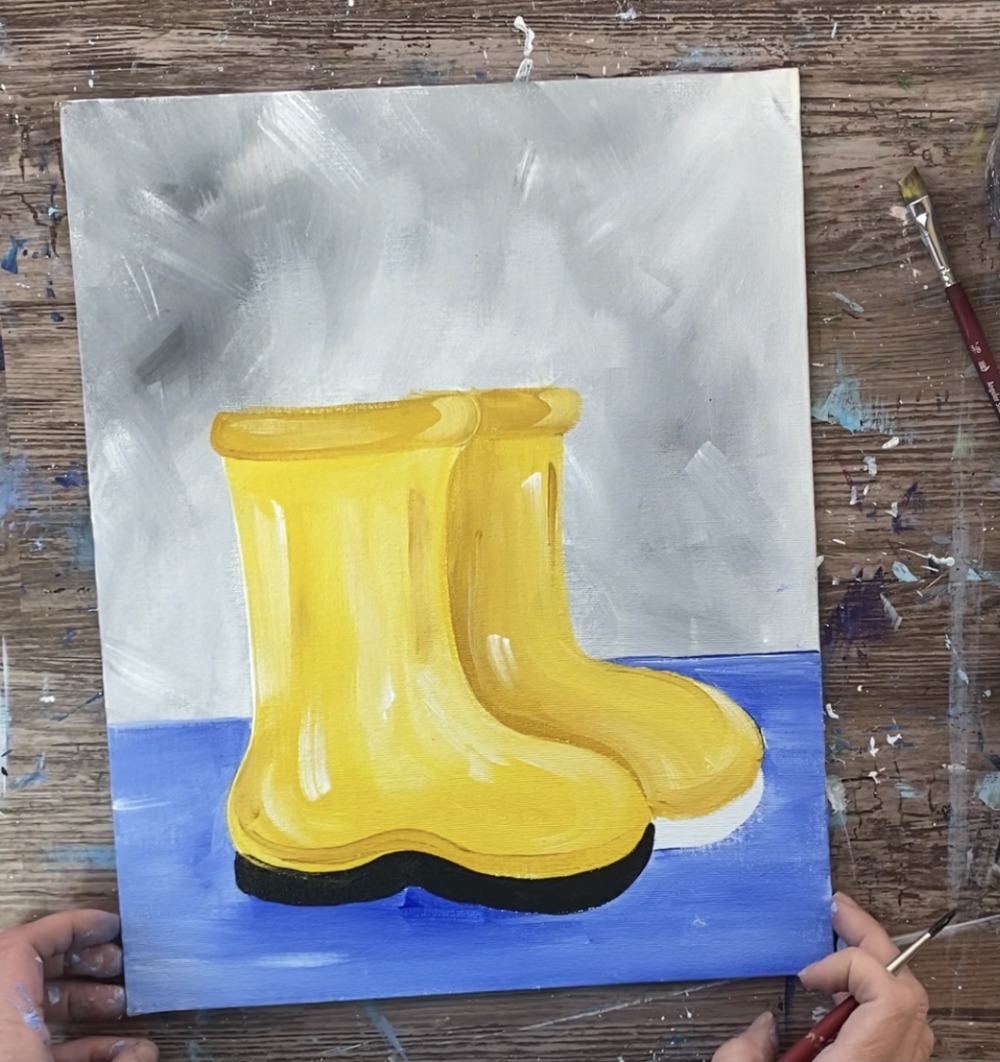
2. Paint the gray background
Above that horizontal line is a gray background and below is blue. Start out by loading your palette with titanium white and mars black. Use your 3/4″ flat wash brush to double load in white and blue. Use only a small amount of black.
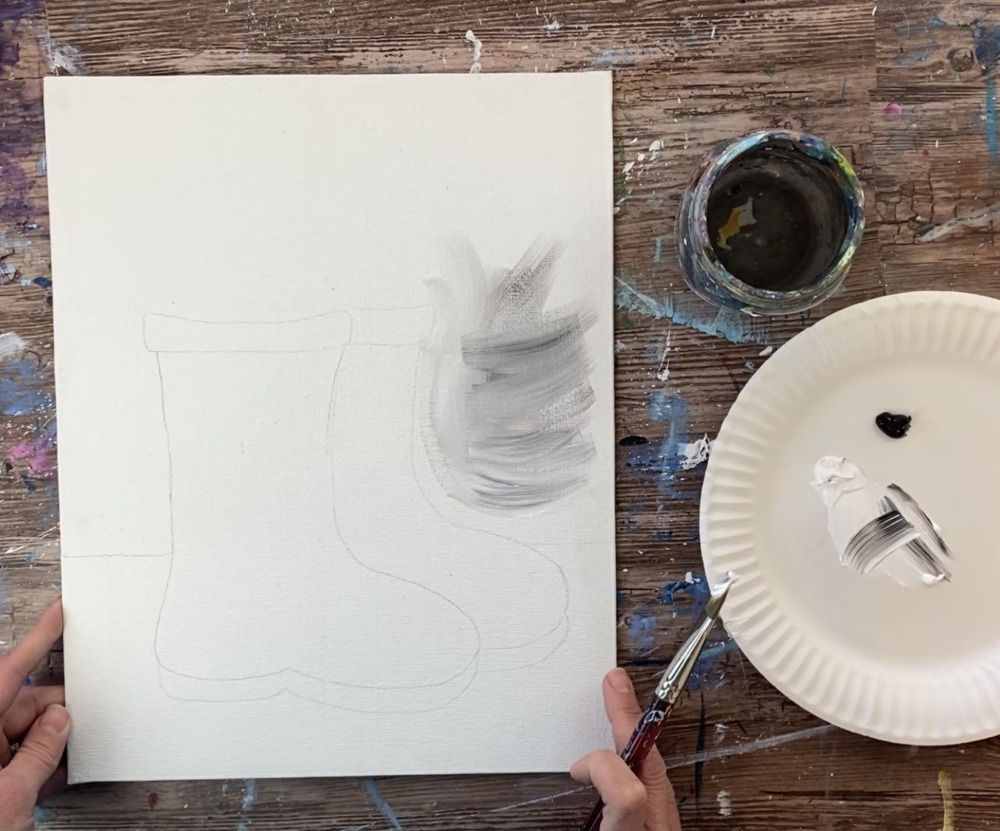
Paint expressive angular strokes all around the boots. Try to use much more white than black so as to not make the background too dark. That white and black will blend together to make different shades of gray.
Go around the boots as much as possible. Your gray does not need to blend all the way to one color, it can look darker in some areas and lighter in others. Remember to not add too much black into the white.
Tip: if you want to paint over the the boots, you can! you will just need to paint the boots white again so the yellow will show up bright and give good coverage over the under layer of paint.
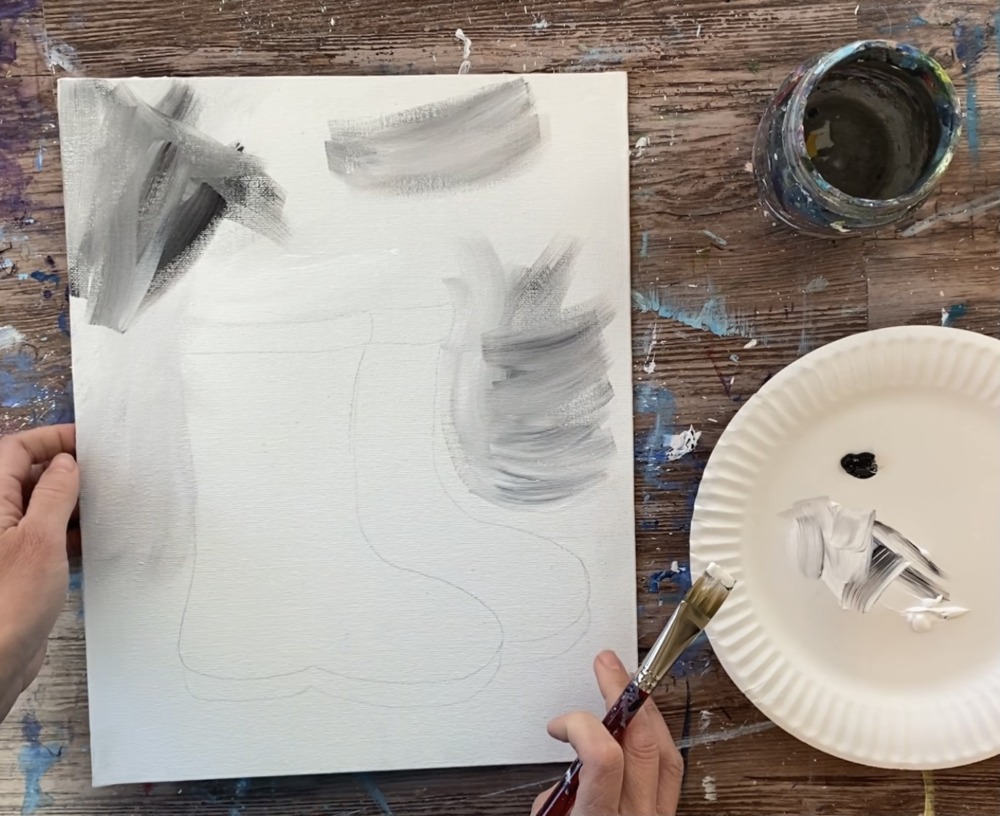
3. Paint blue ground
Load your palette in ultramarine blue and titanium white. Use your 3/4″ flat wash to paint horizontal strokes in the ground area and around the boots. Double load the brush in both the blue and white (about equal amounts).
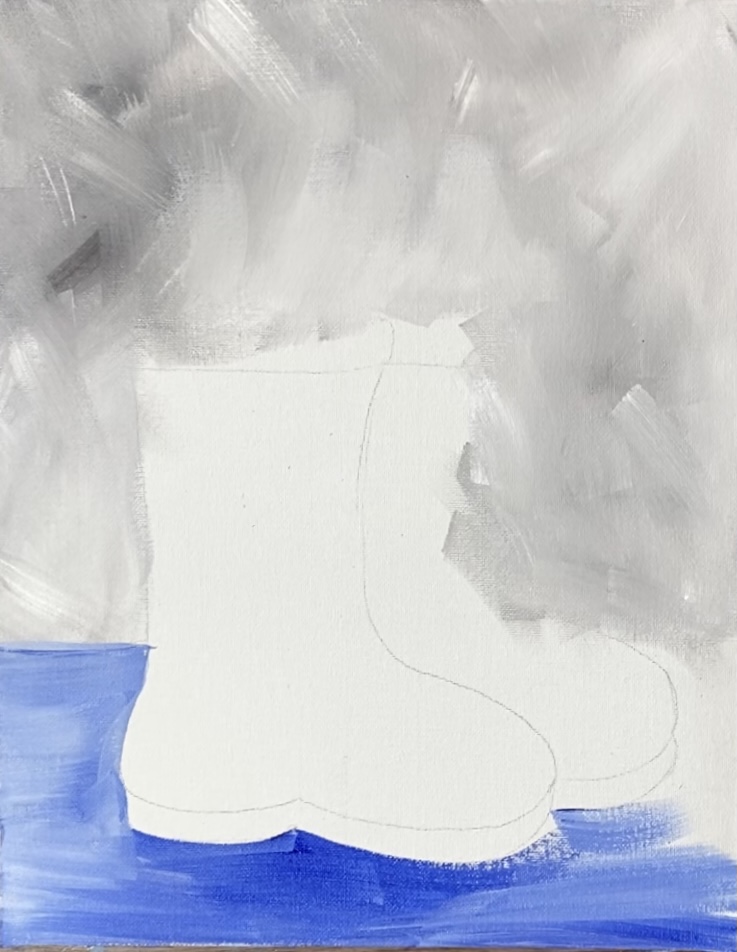
Vary the amount of white and blue in some areas so it’s not all the same tint throughout.

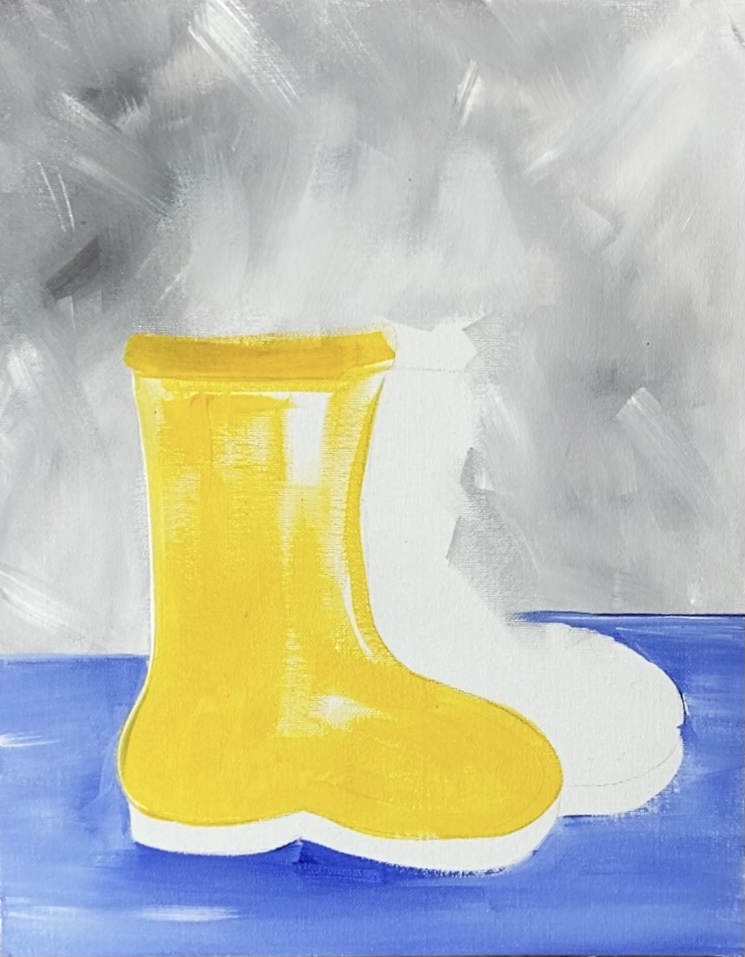
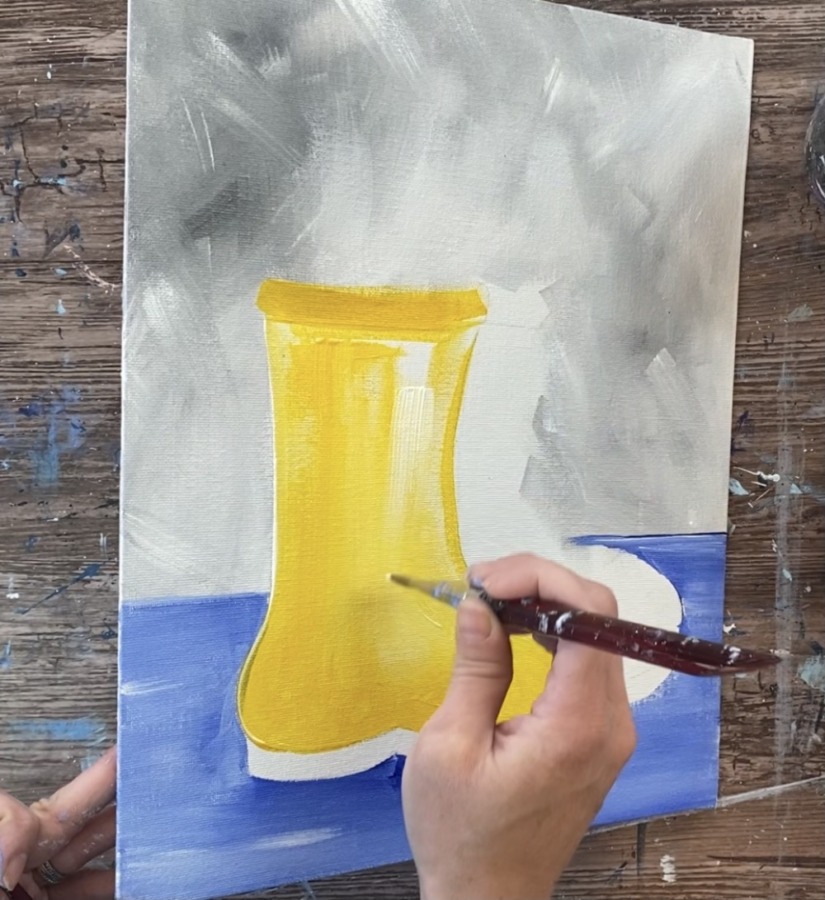
4. Paint Yellow Boots
For the boots, I used my 3/4″ flat wash brush for the larger main area but I also used a 3/8″ angle brush to help cut in on the smaller areas and the edges.
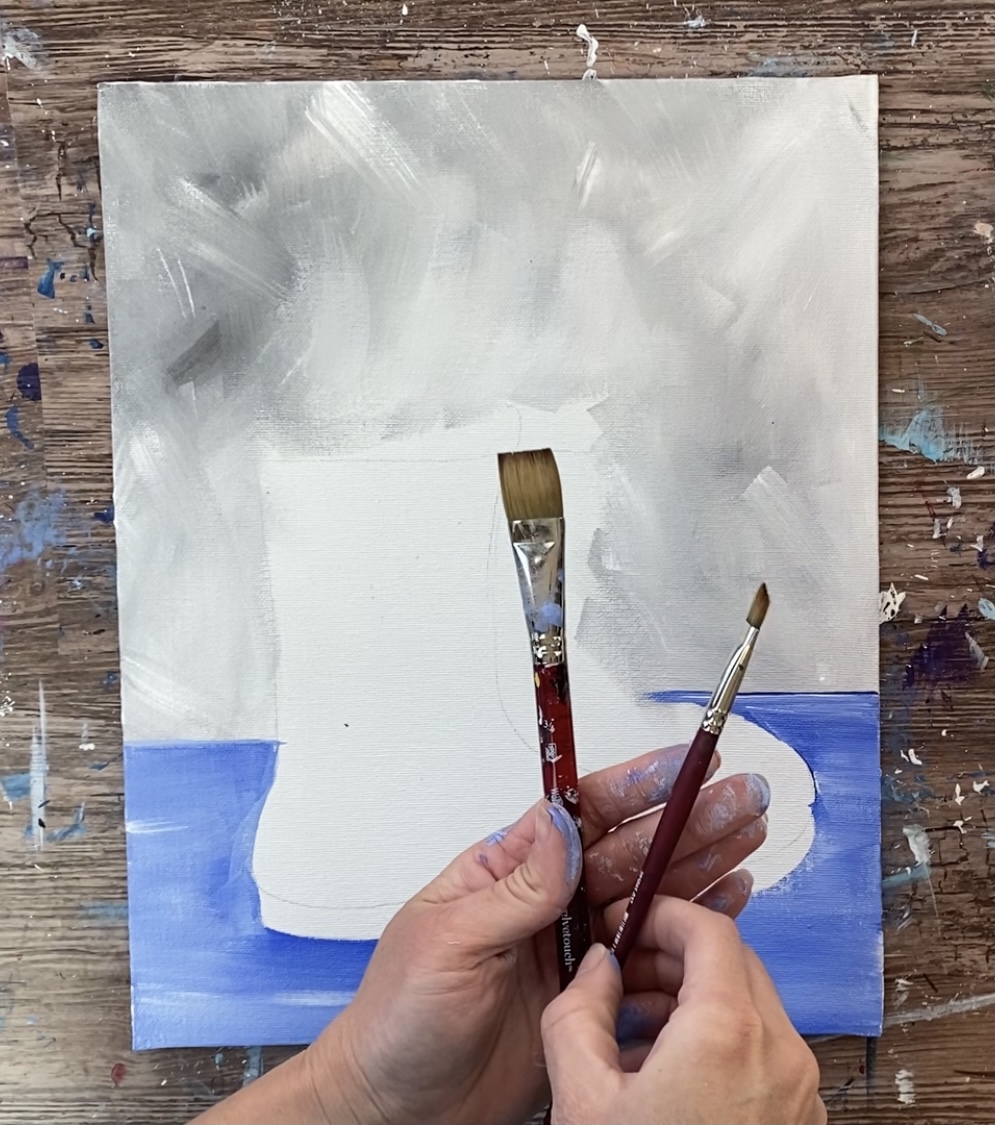
Load your palette with yellow oxide, primary yellow and titanium white.
Start by using your 3/4″ flat wash brush dipped in primary yellow and paint the boot shape in using up and down full width strokes.
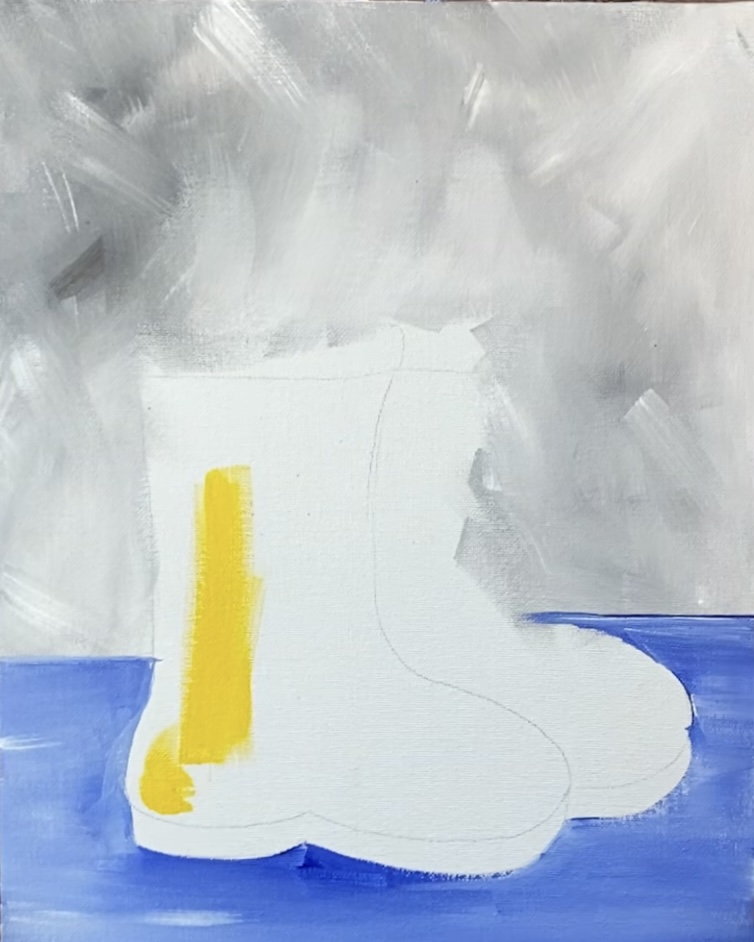
Fill the entire booth shape in. On the edges, use contouring stokes (going in the direction of the shape). Use the 3/8″ angle brush for the edges and the rounded parts.
For the top part of the boot, use yellow oxide double loaded in primary yellow so that it is darker.
Load your brush in titanium white and primary yellow so that the yellow kind of varies in some areas all around the boot. This will make some of the yellow lighter but don’t make it light everywhere. Just do a few vertical streaks of this white/yellow combo.
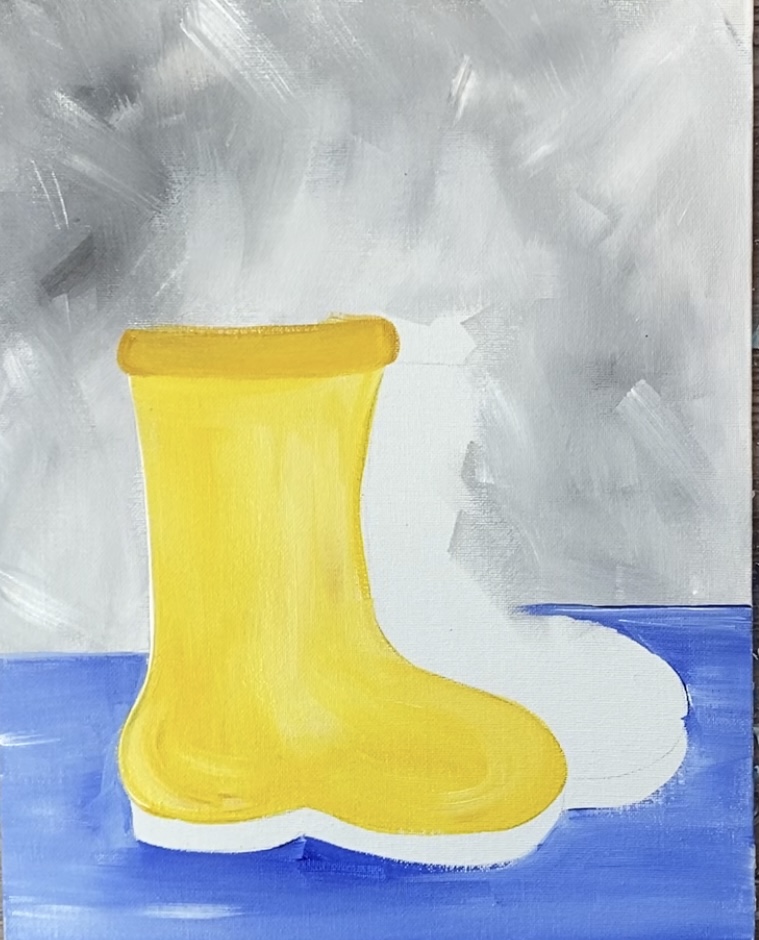
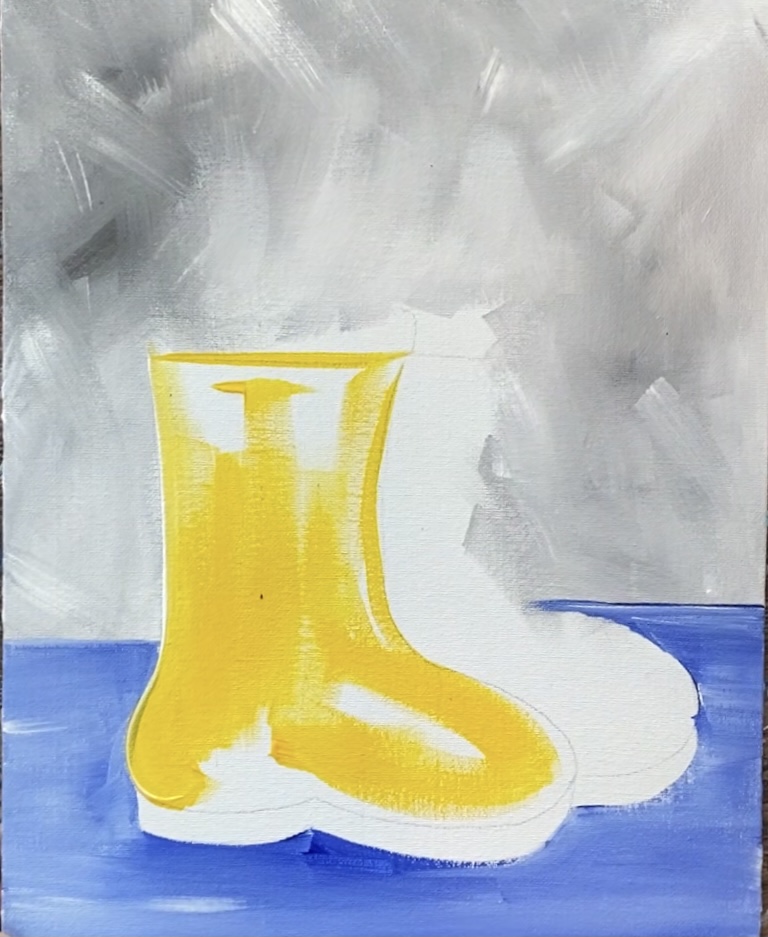
When you paint the second boot in, start with yellow oxide. You want the far left edge of this right boot to be darker so that it will stand out from the boot next to it. I used my 3/8″ angle brush to start filling this boot in. Go in contouring strokes (curved on the curved part of the boot and vertical on the vertical part).
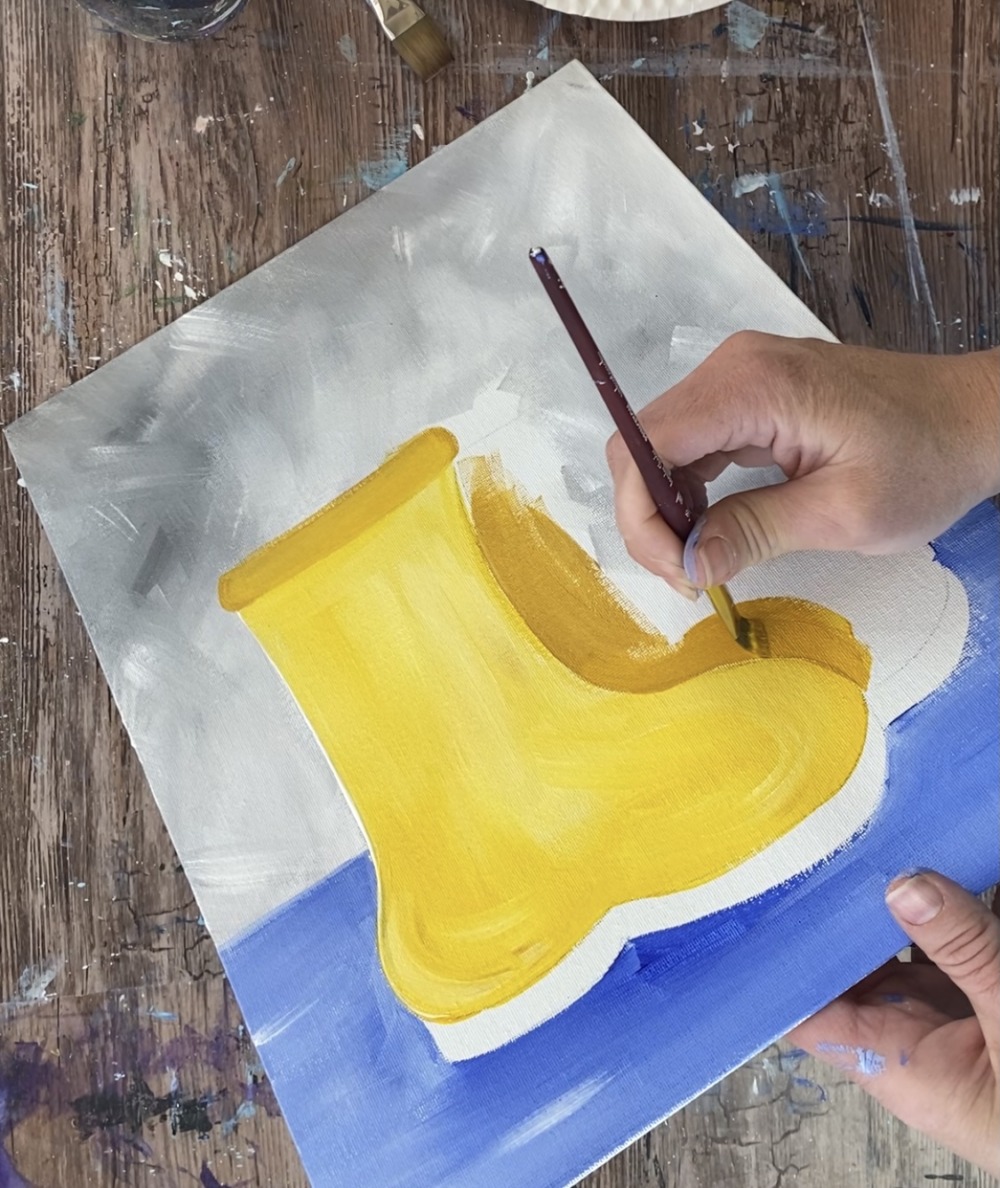
Then blend that yellow oxide in with primary yellow for the rest of the boot. Make sure your strokes go in the direction of the curve of the boot.
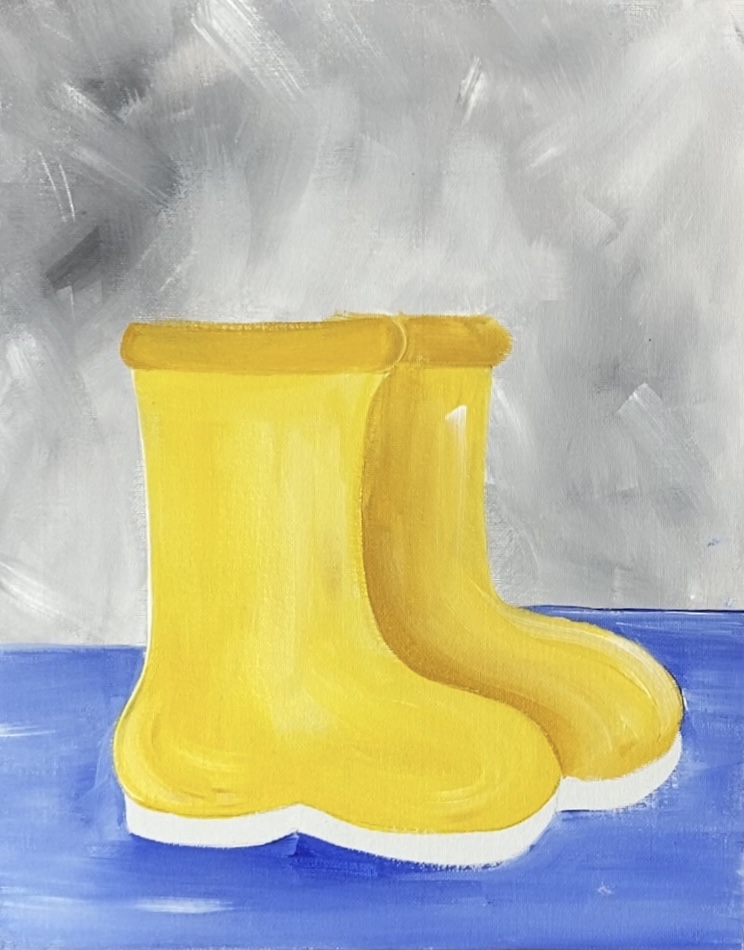
The top part is yellow oxide. There are also a few white streaks added into the right boot.
To make the boots appear shiny, add a few vertical white streaks in there. These should not be completely opaque streaks, just a few very light streaks with the 3/4″ flat wash brush. You can also add a few yellow oxide vertical streaks in there.
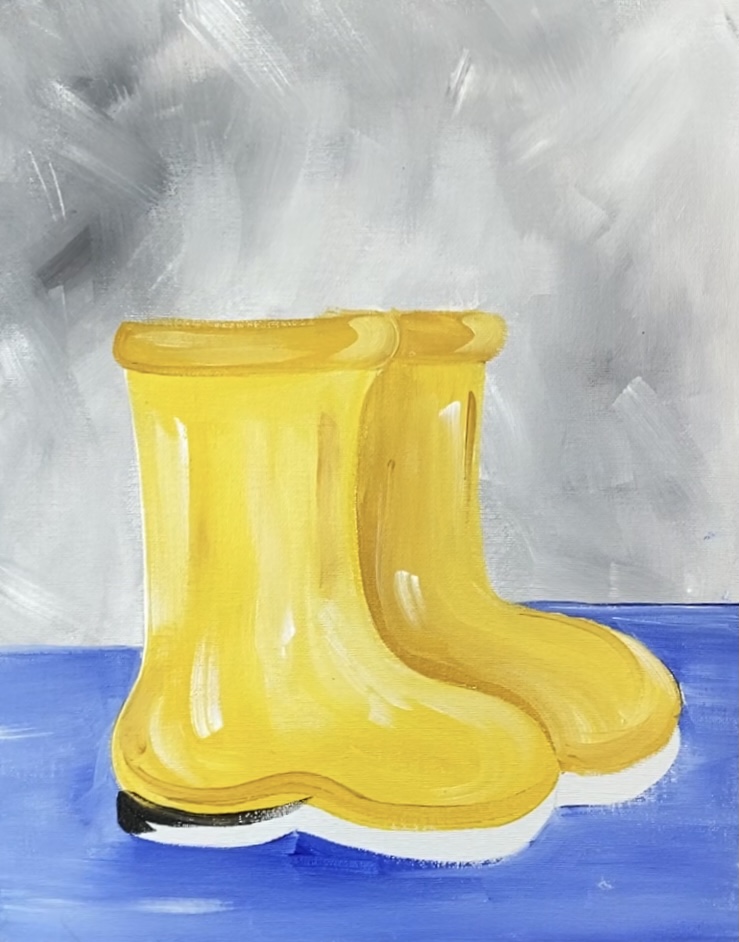
Add yellow oxide to the very bottom curved part of the boots that is above where the black will be. I did that with the 3/8″ angle brush.
Next used a #8 round brush to paint the bottom soles of the boots with mars black. Slightly water the black down so it flows easily to form the curved shape.
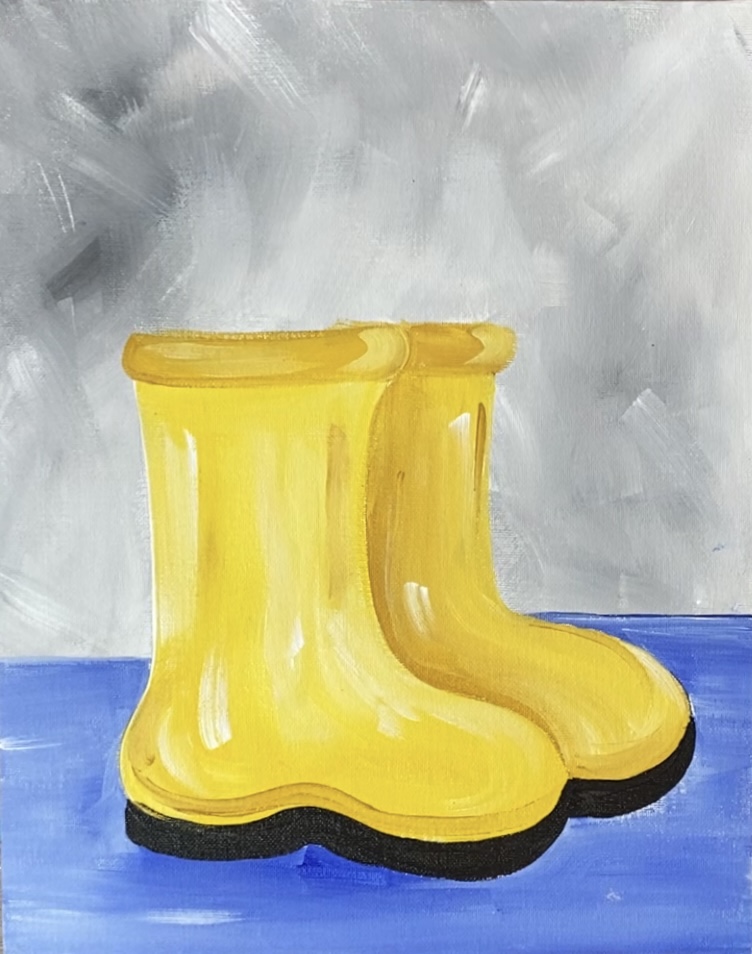
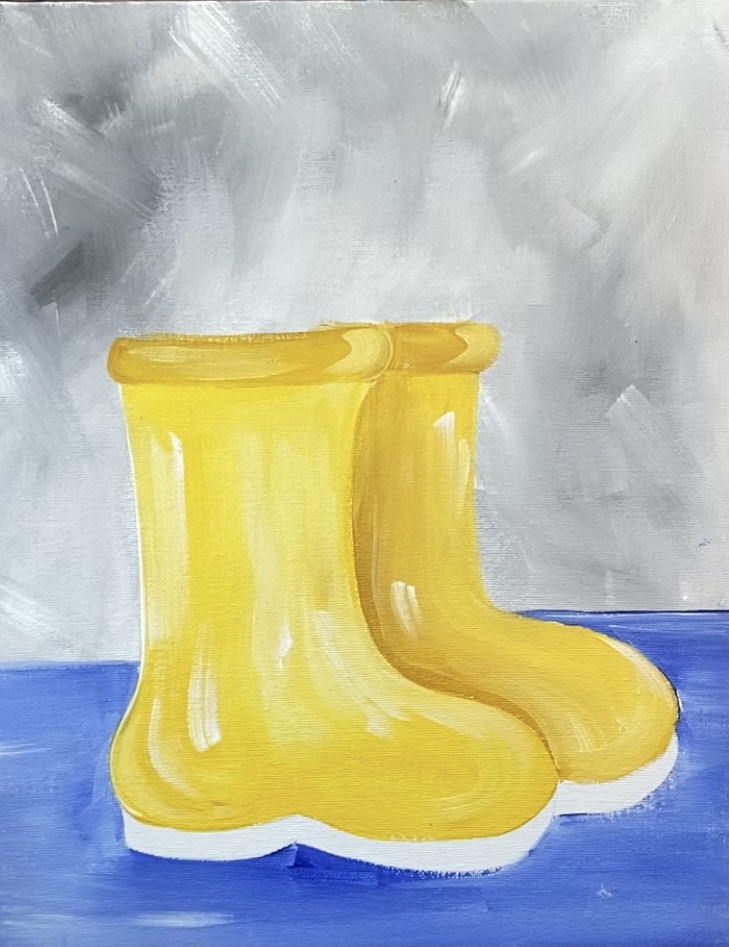
5. Paint water under boots
Use the #4 round brush for this step. Water down some mars black on your palette to a water color consistency. Add it to the area just under the black sole. It should show up very translucent. Paint curved, contouring strokes with that black just under the sole but not too far down.
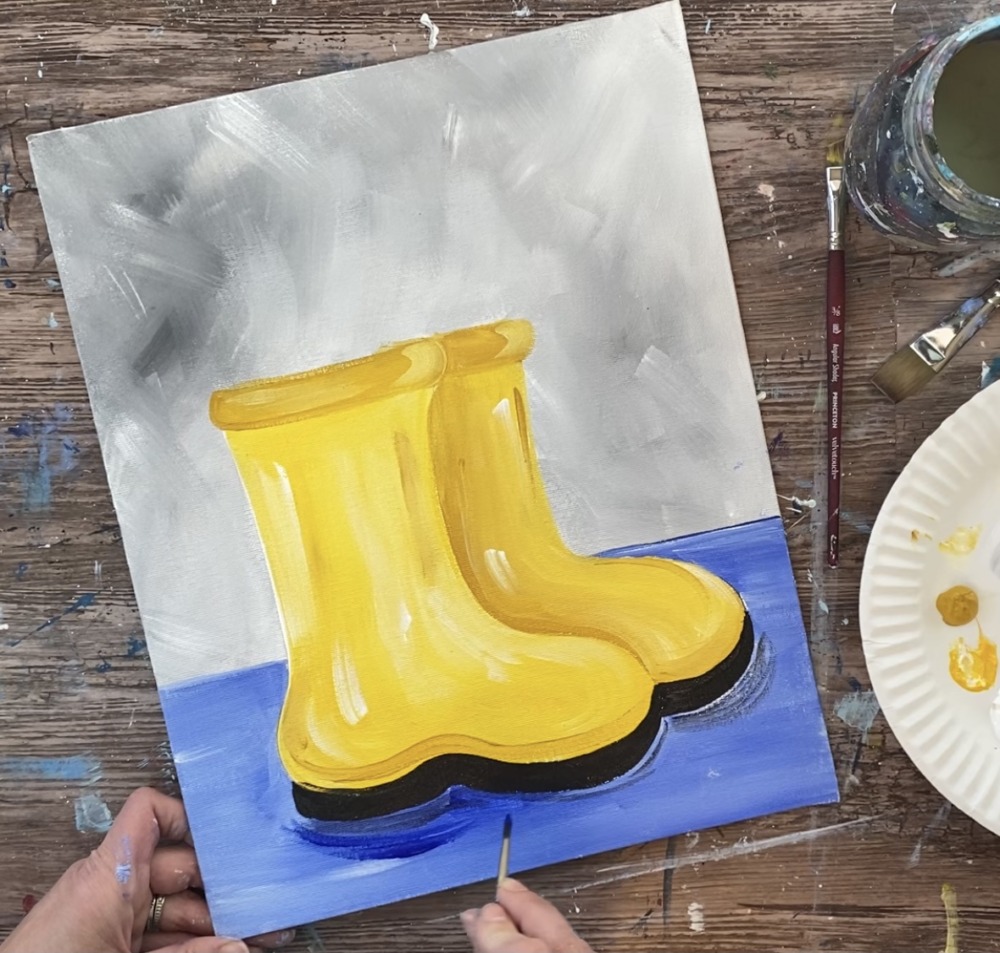
Then wipe off the brush and water down some ultramarine blue. Paint the contouring strokes under the black.
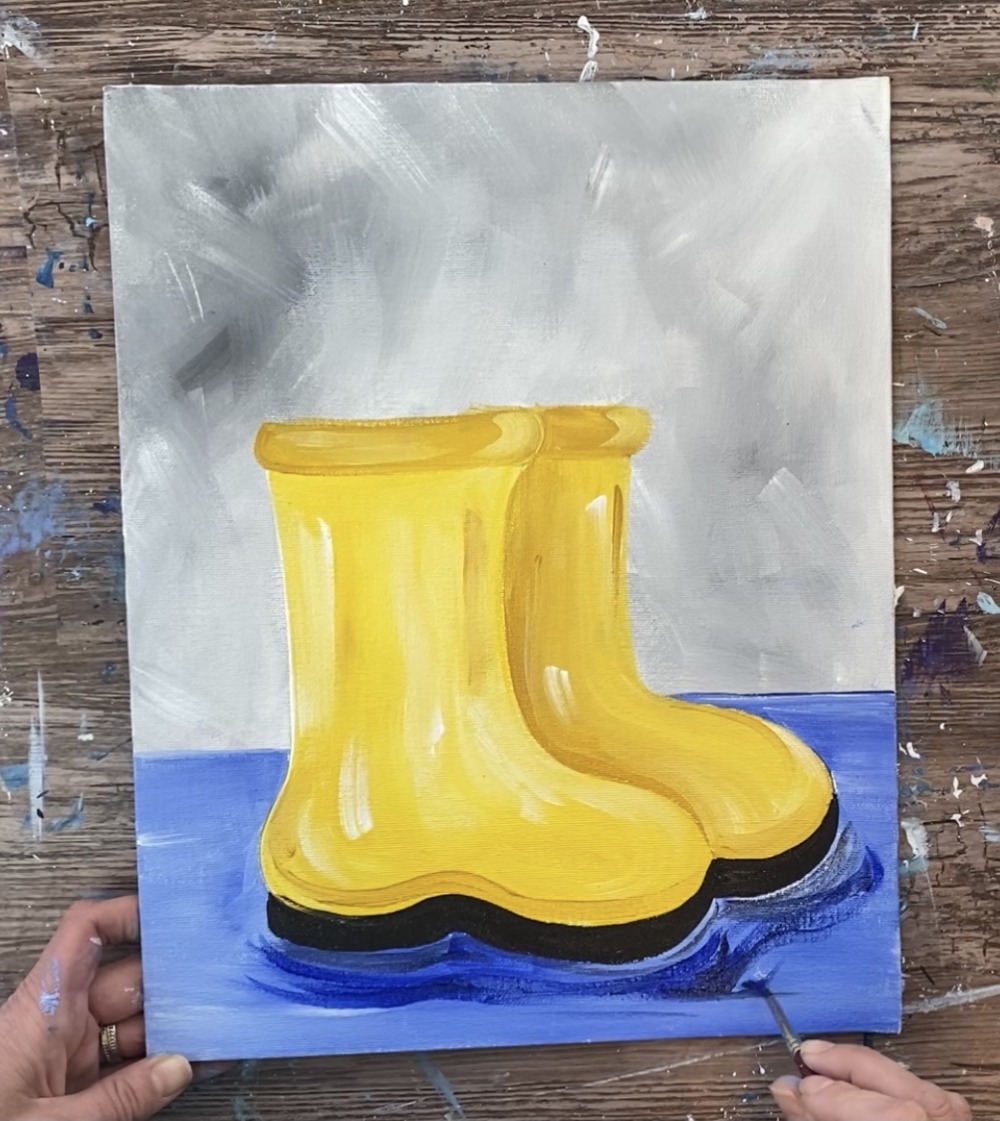
Continue to paint the area under the boots but don’t cover all the first layer of blue. You are painting water/ ripple texture. This should all be very thin and translucent.
Then paint horizontal strokes with that watered down ultramarine blue all throughout the bottom blue area behind the boots.
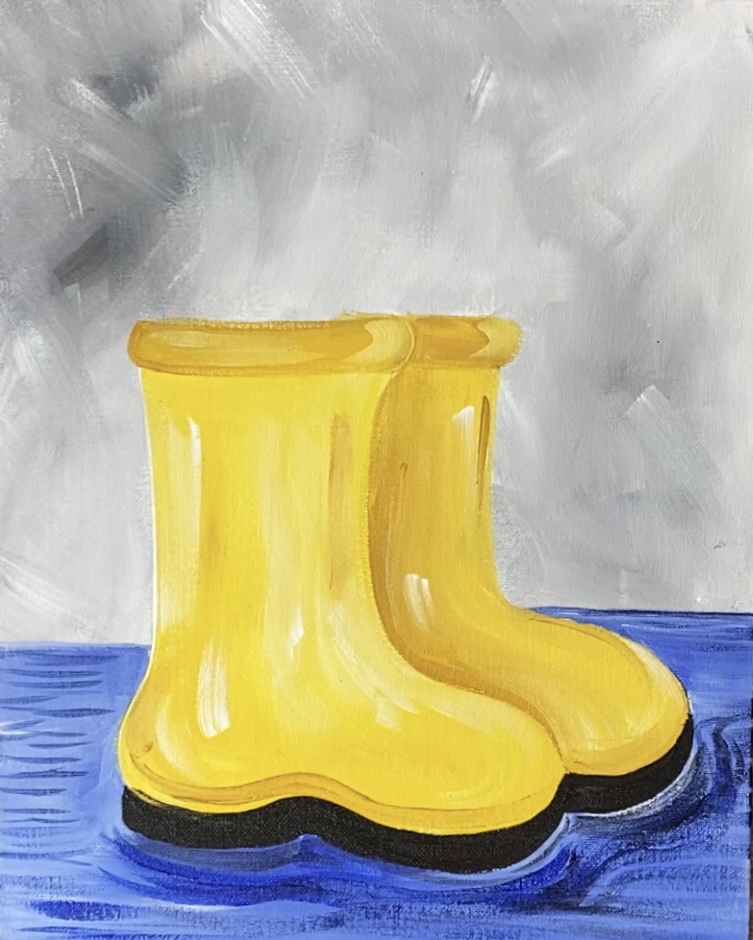
Then rinse and dry that brush. Mix primary yellow in with some titanium white to make a light yellow. Paint a few light yellow ripple strokes under the boots.
Tip: if the blue seems to be mixing with the yellow, wait for that area to dry and then go back and add the yellow ripple lines.
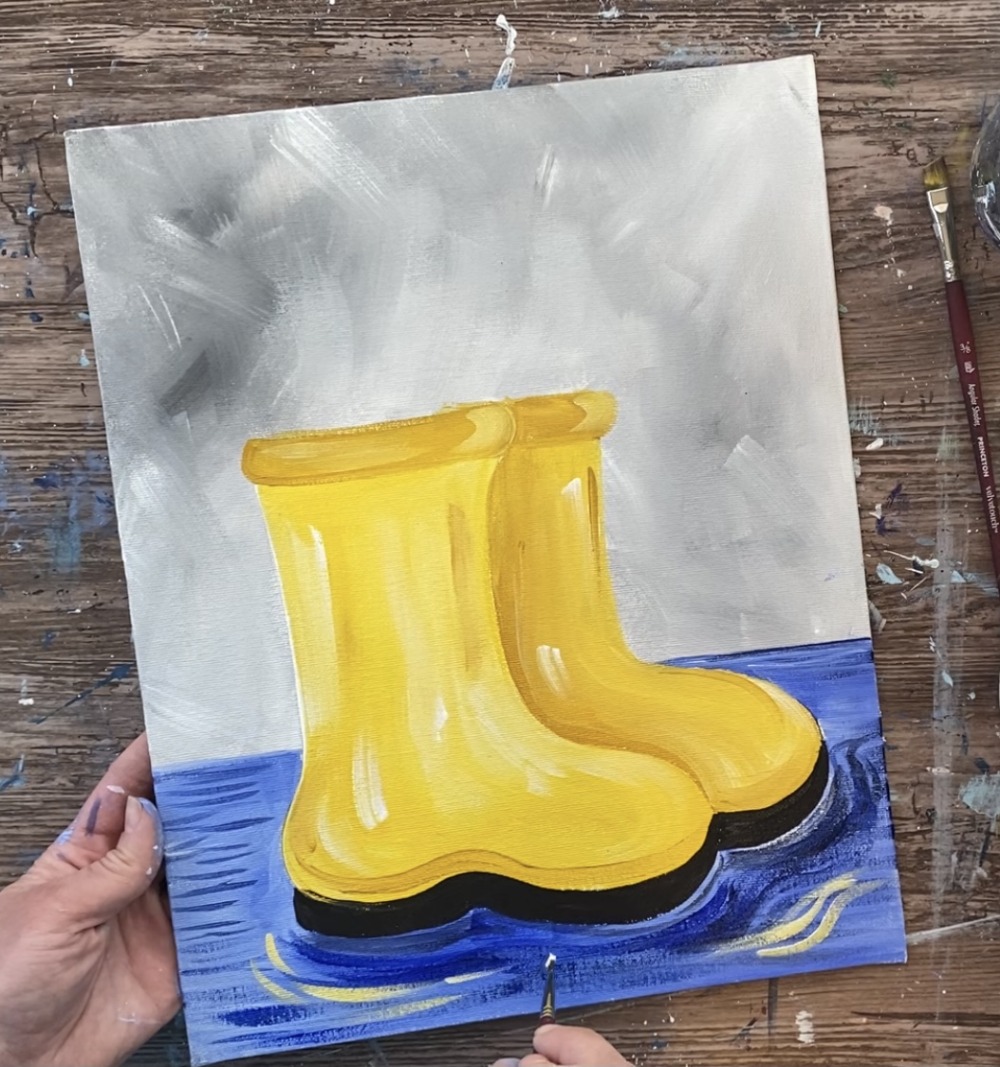
Those yellow reflection strokes sort of contour in curved directions around the bottom of the soles.
Then paint a few watered down white horizontal strokes in the background water area behind the boots. Add some white to the yellow ripple area as well.
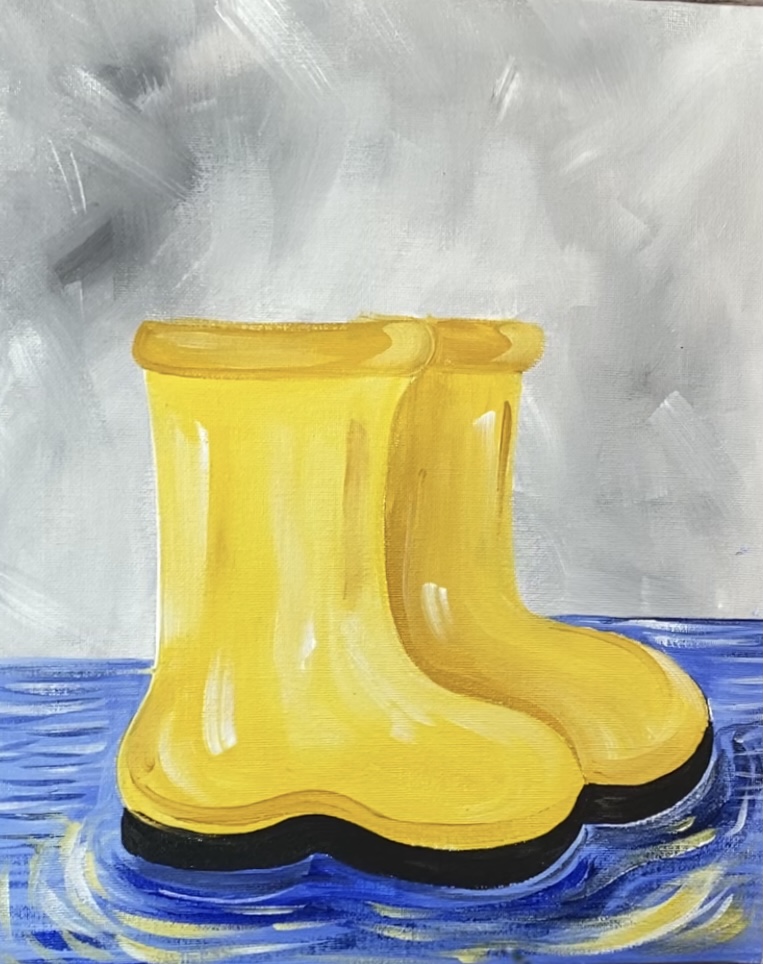
Then (optional) add some white highlight to the black sole curved areas. Just a few subtle strokes on the front and back of the soles.
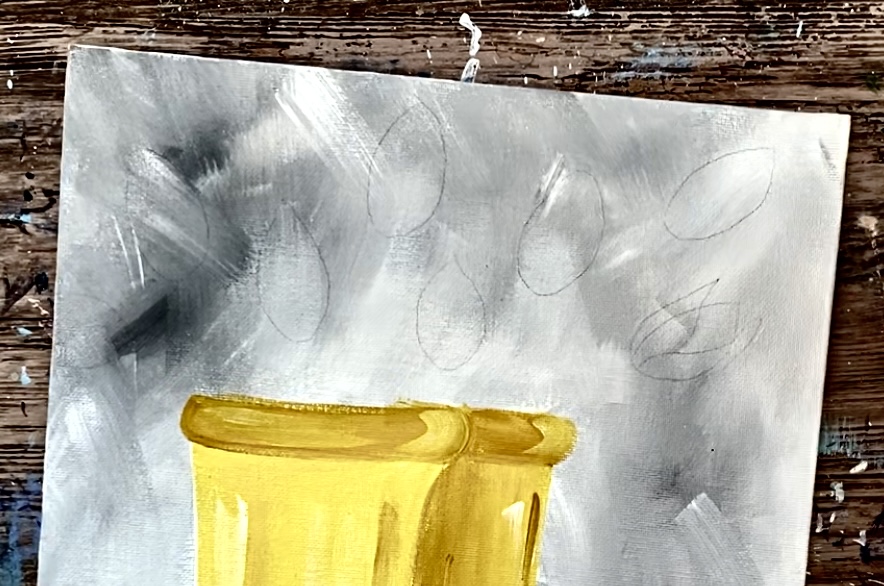
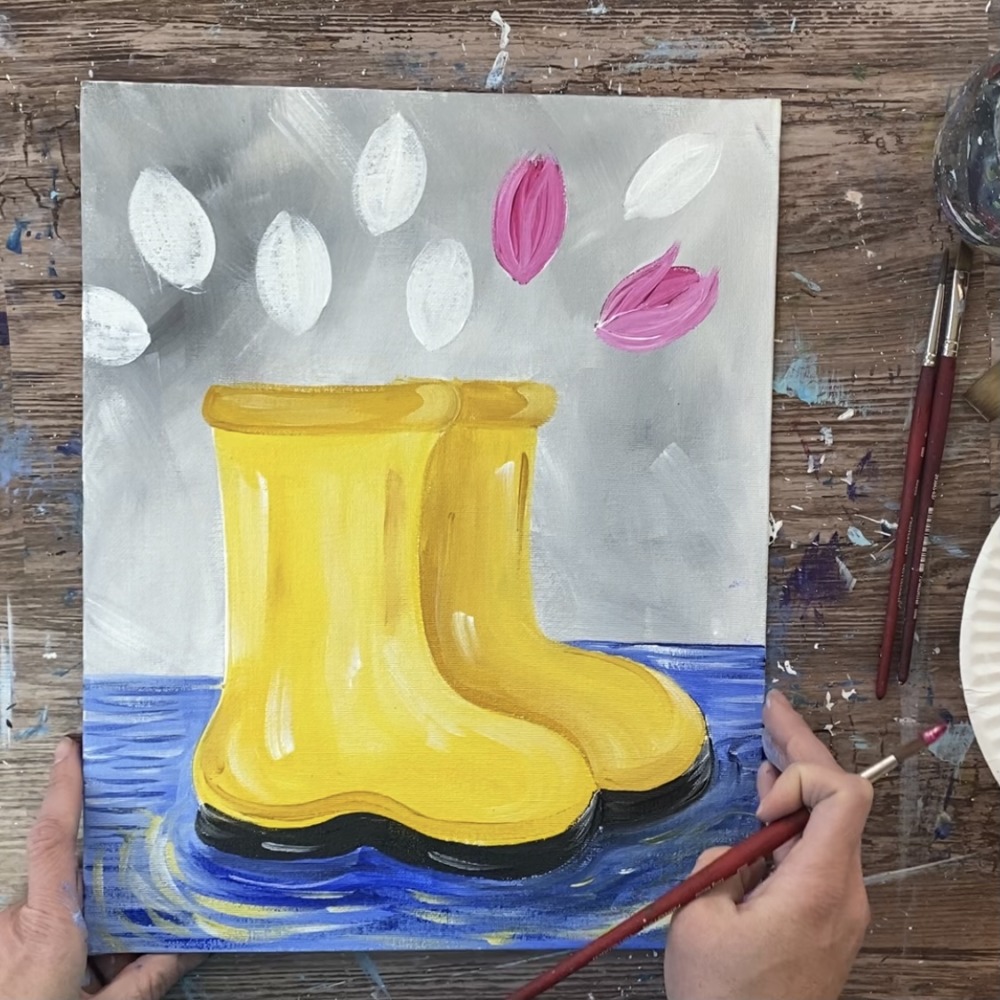
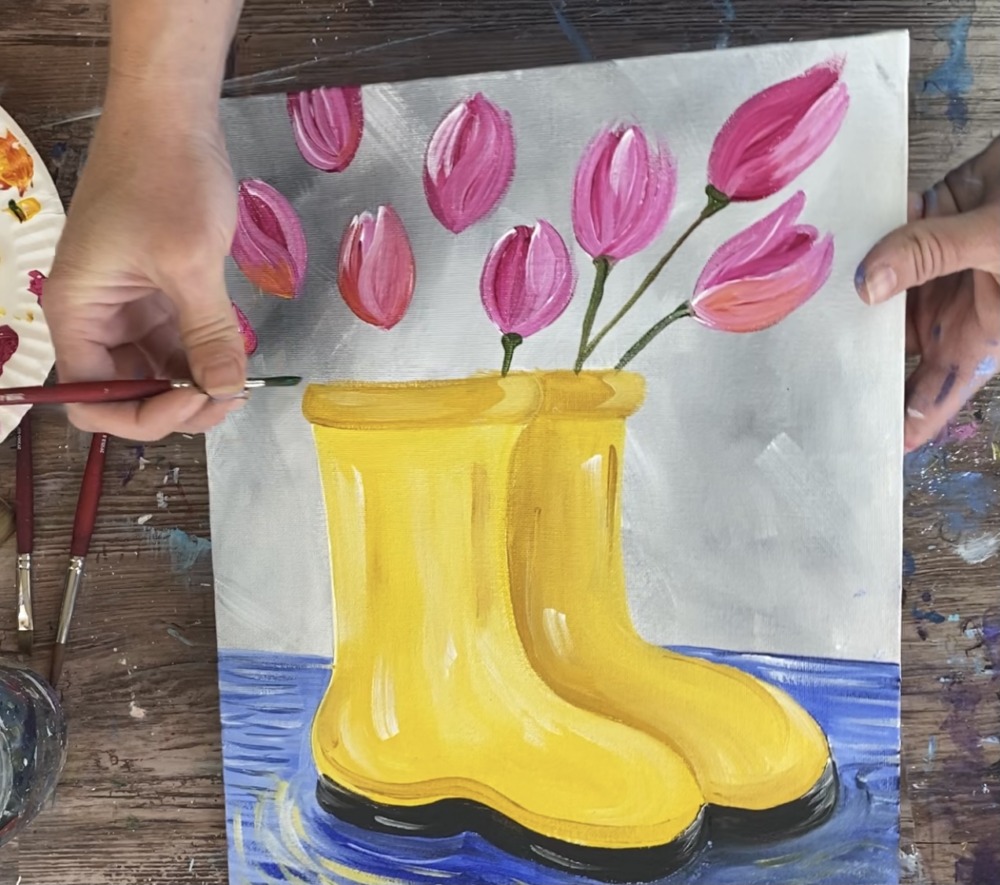
6. Draw tulip shapes
Draw with a pencil (or chalk) lightly. Draw various tulip bulb shapes above the boots. They are oval like/ tear drop shapes. Some of the tulips that I drew had the petals sticking out on the sides but most of them were just a basic oval/ tear drop shape.
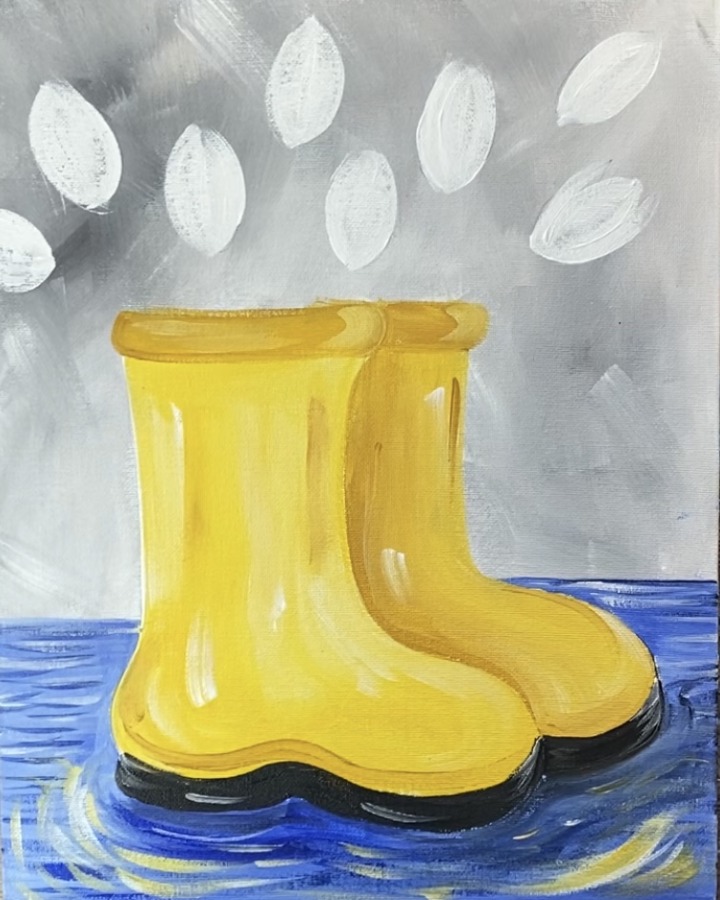
7. Paint tulips white
Next use a #8 round brush to paint the tulips white. You do not have to fill them in completely solid, just a single light coat. This first layer of white will help the color of the tulips show up nice and bright.
8. Paint tulips quinacridone magenta & titanium white
These tulips are not realistic, more expressive. The trick with this technique is letting white blend with the quinacridone magenta to create the petals but not to blend all the way.
Next load your palette with quinacridone magenta. Paint an oval shape in the middle.
Then load your brush with titanium white and mix the white with the magenta to make it a lighter color. paint an outer petal on the left and another outer petal on the right.
Repeat this technique for the other tulips.
Alternatively, you can drag the white/magenta combo from the top to the bottom having that quinacridone magenta blend with the white. Do not blend it all the way.
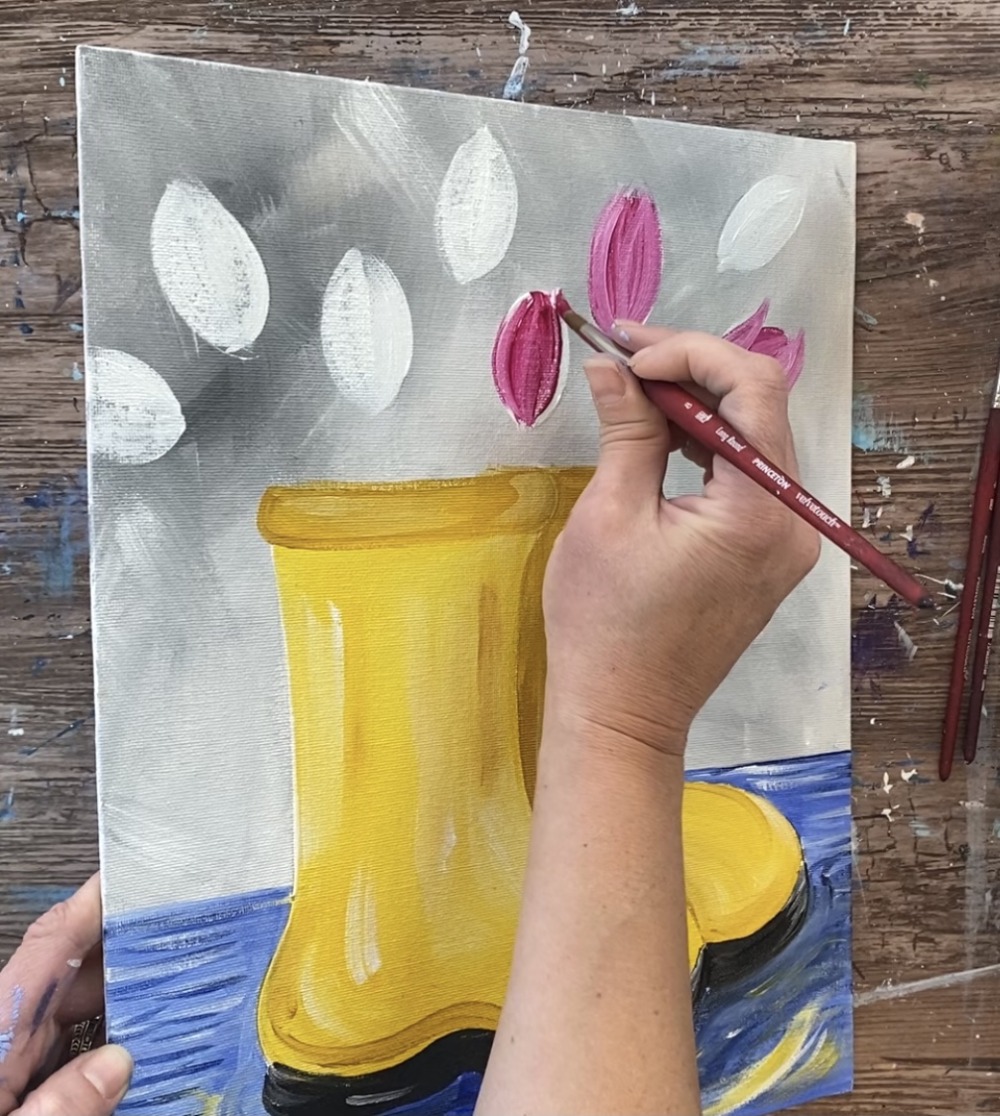
Each tulip will look different because the amount of magenta/ white will vary depending on how much you load on the brush.

You can add a little yellow to the magenta to make more of a warm tone for some of the tulip petals.
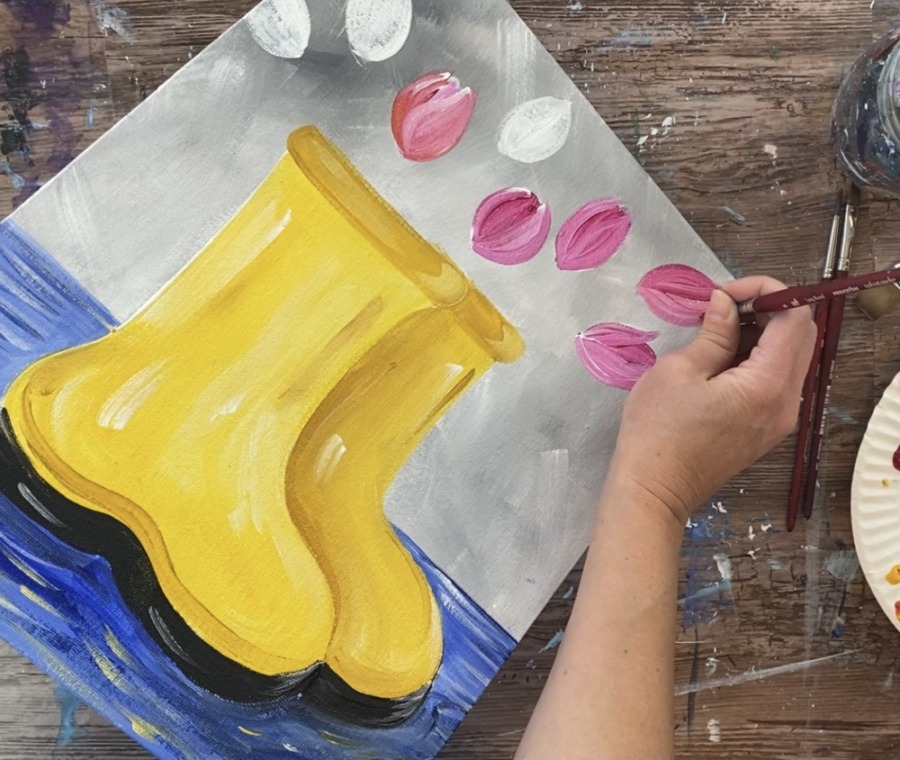
Go back over some of your petals with some white to make some lighter areas especially at the tops of the petals. Try not to over blend.
9. Paint stems
Use a #4 round brush and the colors hookers green hue permanent mixed with a tiny bit of quinacridone magenta (this darkens the green and makes it more of a natural green color). Slightly water this green down so it will flow easily.
Paint the stems so they kind of “web out” at the base of the tulip flower but then go to a very thin line for the stem.
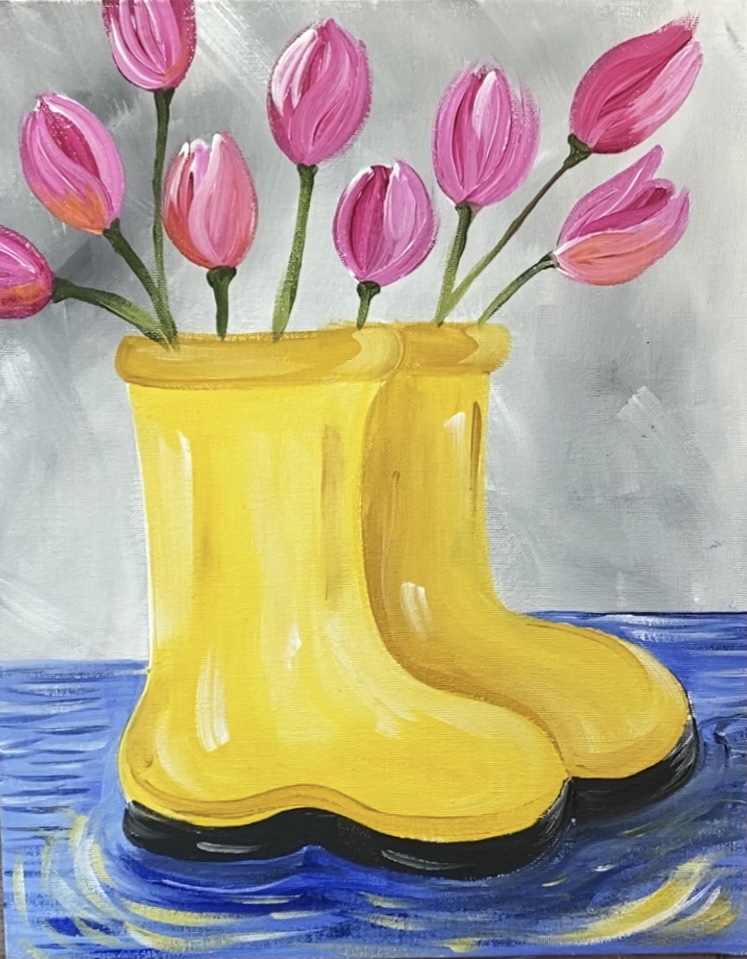
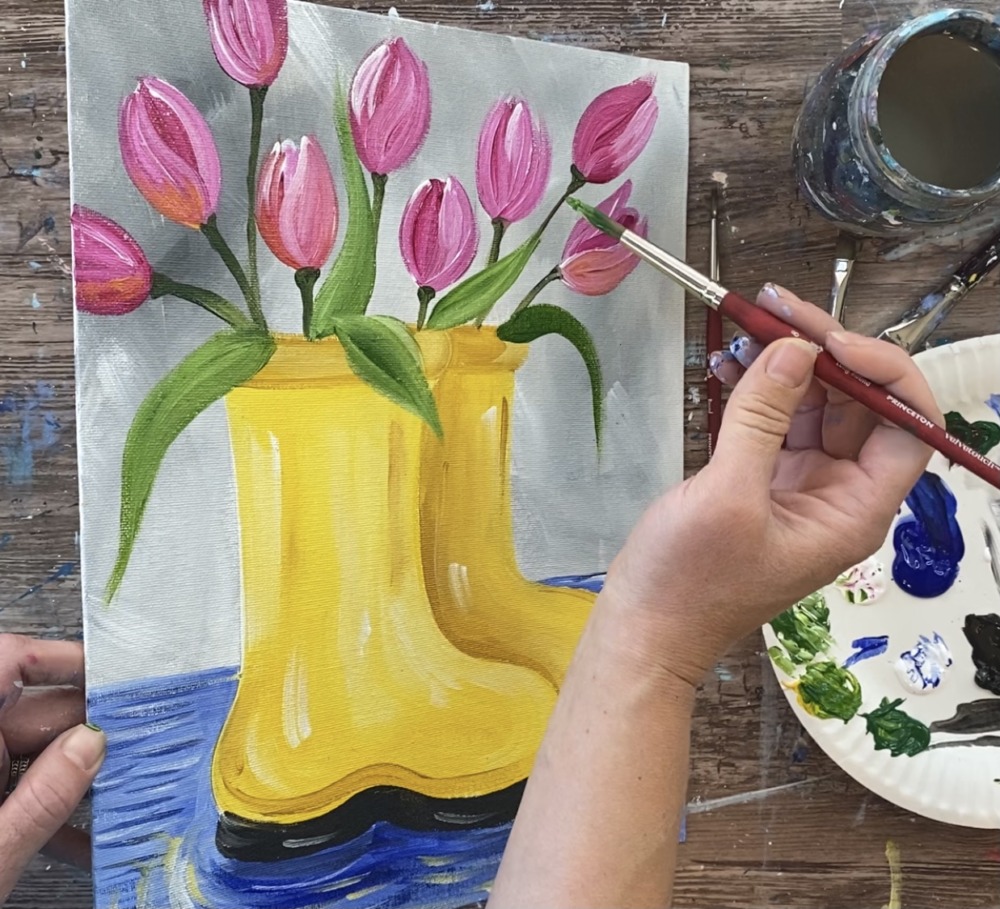
10. Practice Leaves
For the leaves, I used the #8 round brush. I suggest practicing the leaves on the back of your canvas first so you can get the feel for them. The trick with these leaves is to vary the pressure of the brush.
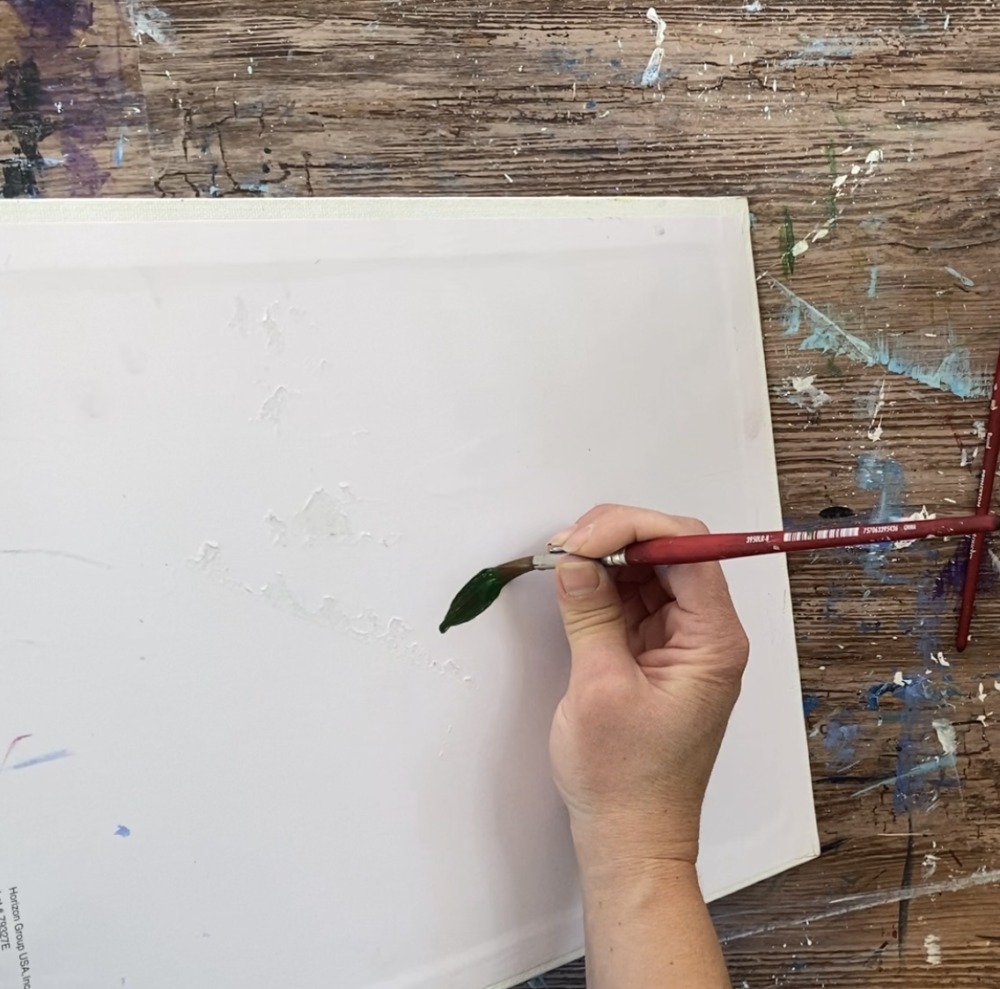
Press hard at first to make a thick stroke but then release the pressure and kind of twist the brush so it goes thin and to a point.

Next try to make a leaf that is longer but curves downwards.
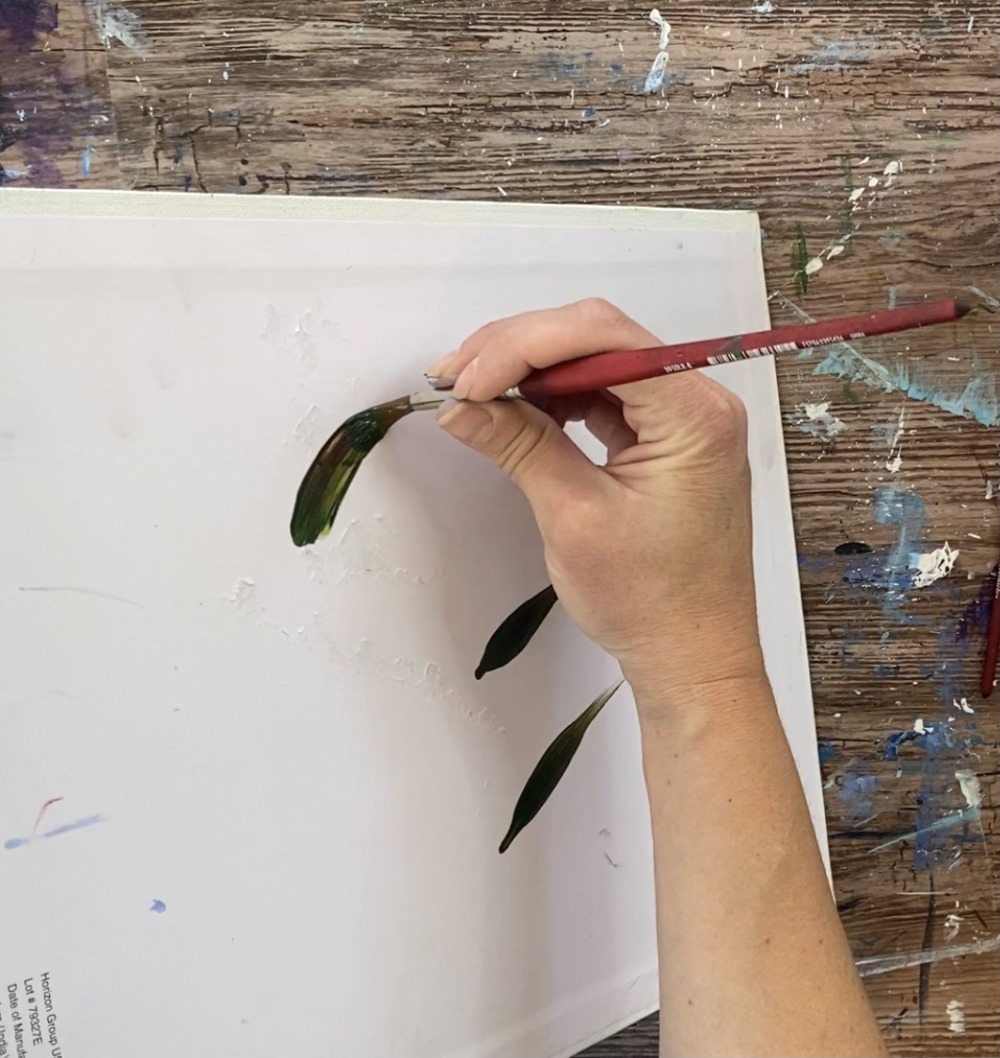
11. Paint Leaves
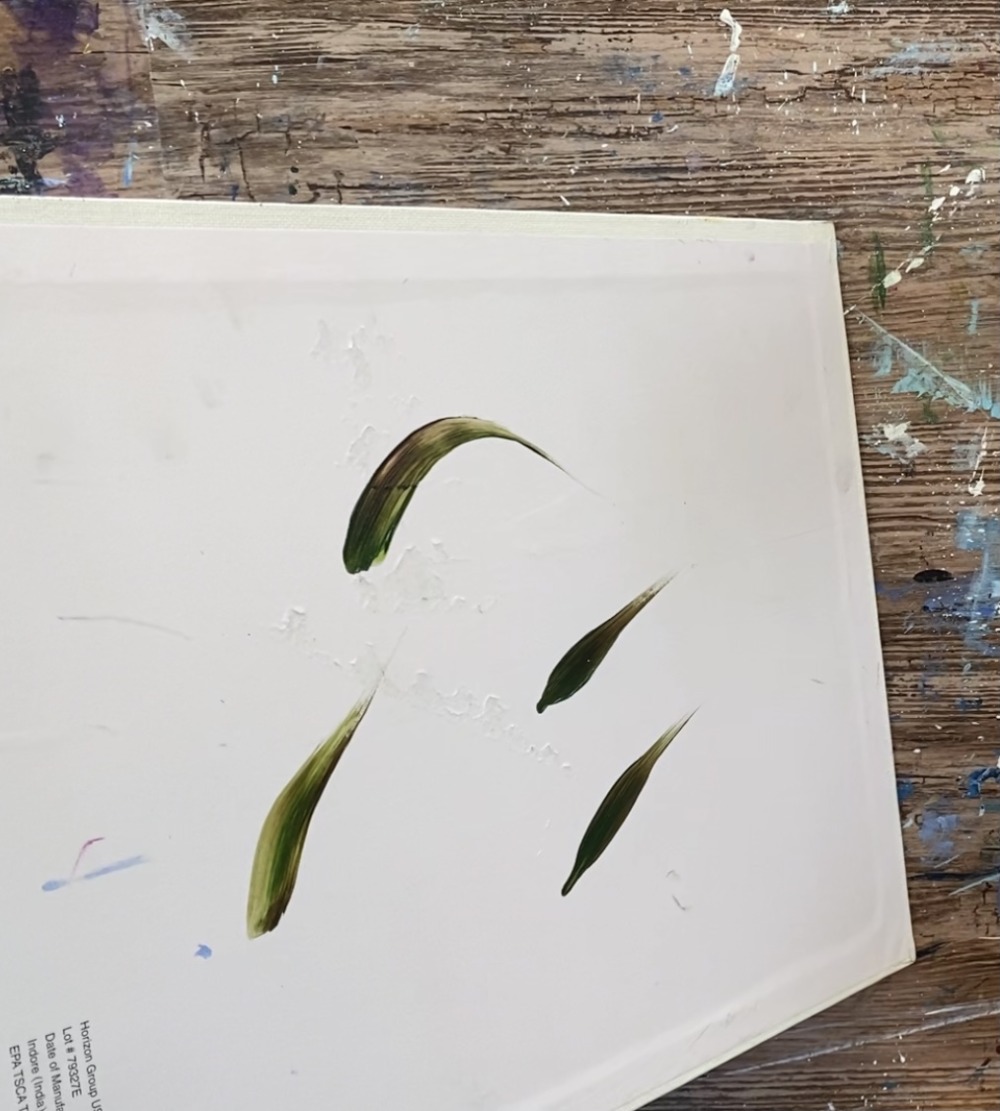
Use the #8 round brush and the hooker’s green/ tiny bit of quinacridone magenta mix to paint a variety of leaves. Start at the top part of the boot and paint a leaf dipping downwards to a point.
Paint a variety of leaves. To vary the color of green, add some white into it. This will make some leaves stand out from one another if you need to overlap them.
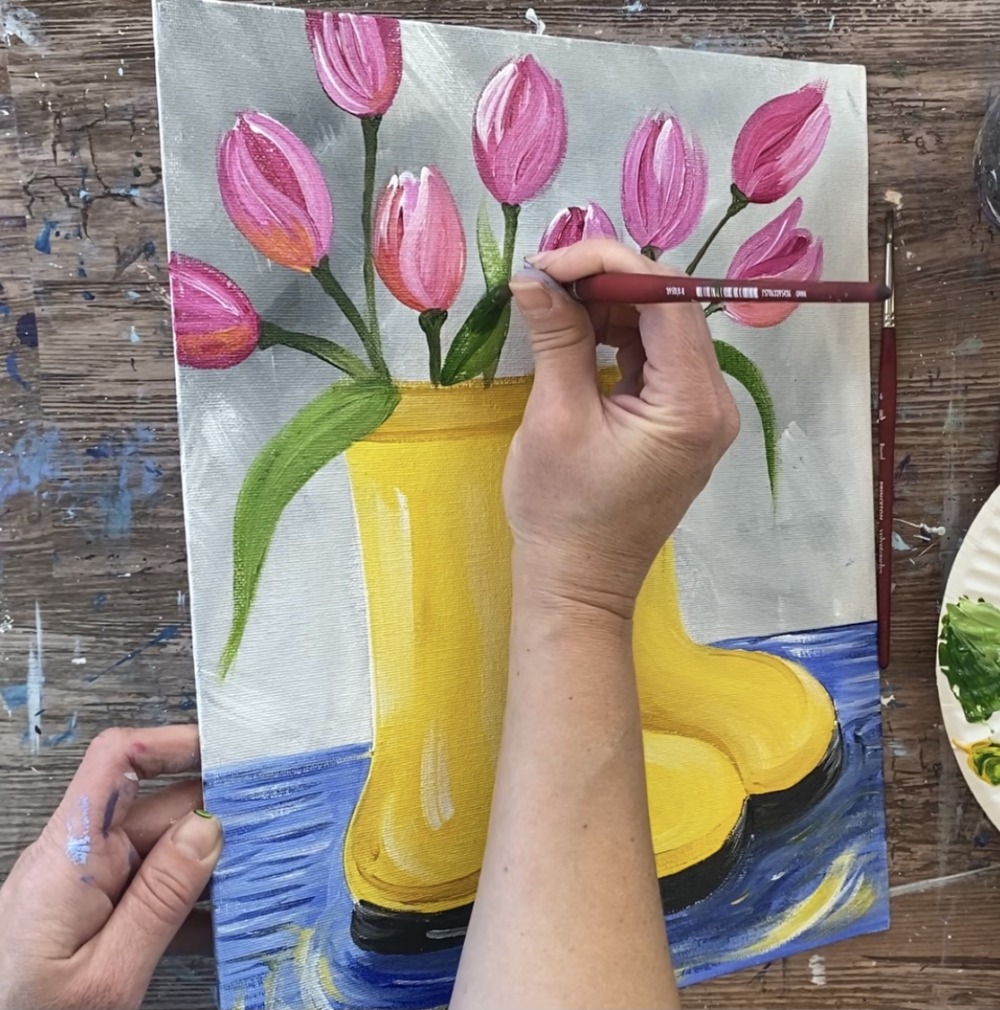
The variation in the green color is made just by dipping different amounts of green/ white/ dark green onto the brush before you make the leaf stroke.
You can also go back in and add some lighter green strokes onto some of the leaves.
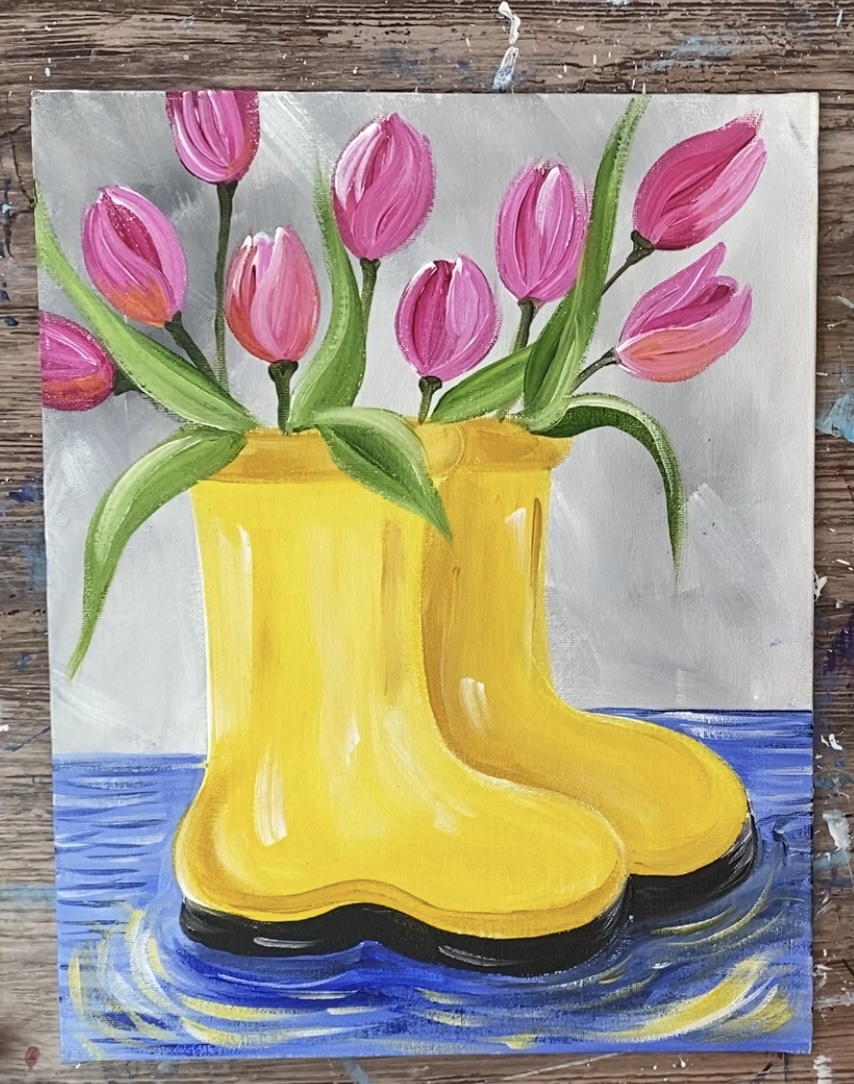
12. Paint raindrops in background & ripples on ground
For the raindrops I used a #4 round brush and titanium white. Paint small vertical rain drop shapes over the gray background area.
You can also paint small circle drops of water on some of the leaves. Then paint some vertical lines on the blue water and ripple lines around them.
Add some ultramarine blue on the bottom parts of the circle drops on the leaves.
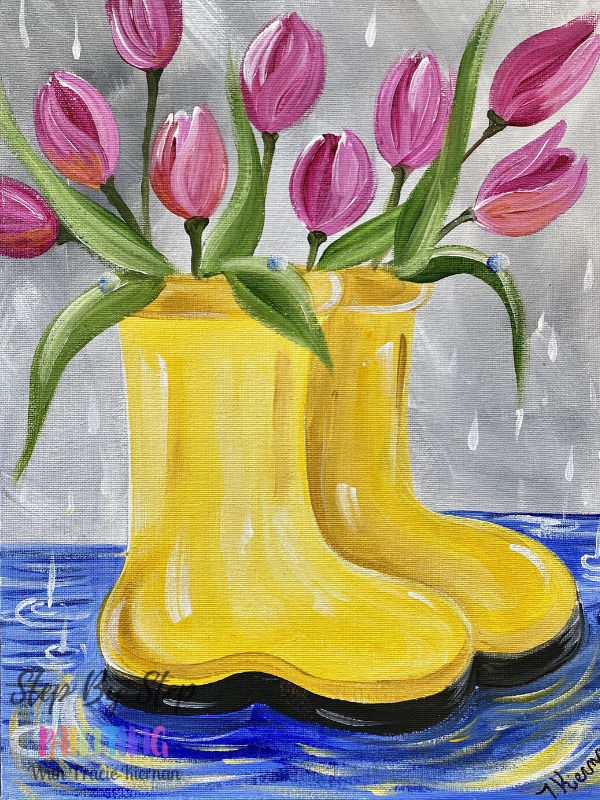
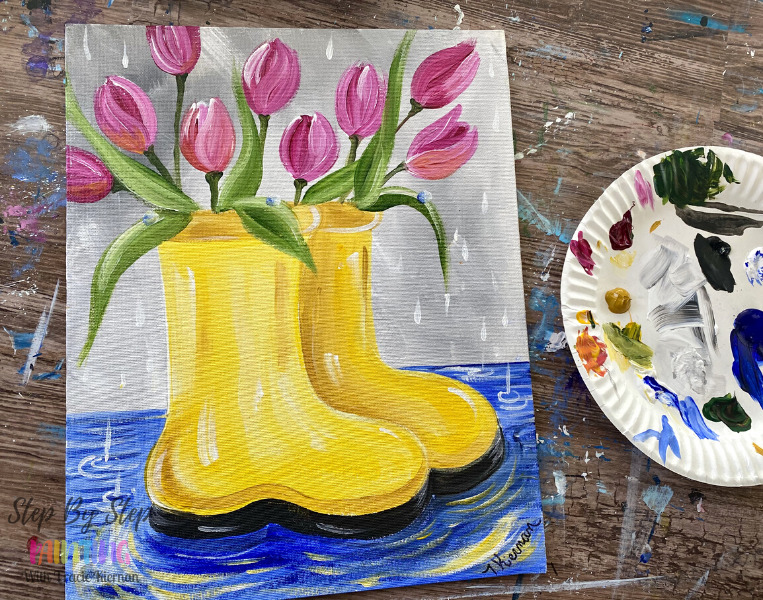
That’s it! Sign your name and show it off!
Share your art here


LOVE LOVE LOVE your website.
Plan on making everything new you put out but NEED a frog in the worse way to paint as a gift to my aunt.
Similar to the pig with daisies….maybe with flowers involved ?
FROG PLEASE !!!!
Thank you if you can do it much appreciate.
Thanks so much Brenda! I’ll consider that frog as a future tutorial!
Hi Tracie! I love your tutorials, thank you so much! I was wondering if there was a way to get the video files so I could watch and paint even when I don’t have internet?
Thanks Rebecca! Unfortunately that’s not a feature I have right now but I am looking into that option! I know quite a few are interested in downloading the videos.
Thanks for the shout out, Tracie! These boots and tulips look great together.
You’re welcome!! And thank you!!
I am new to painting in Acrylics but love the Wellies and the tulips painting. I tried it and it turned out perfect you can even tell the flowers are Tulips. You are a good instructor. Look forward to trying more. Thank you.
That’s great to hear Eileen! So glad you liked doing these tulips!