
Would you like to save this?
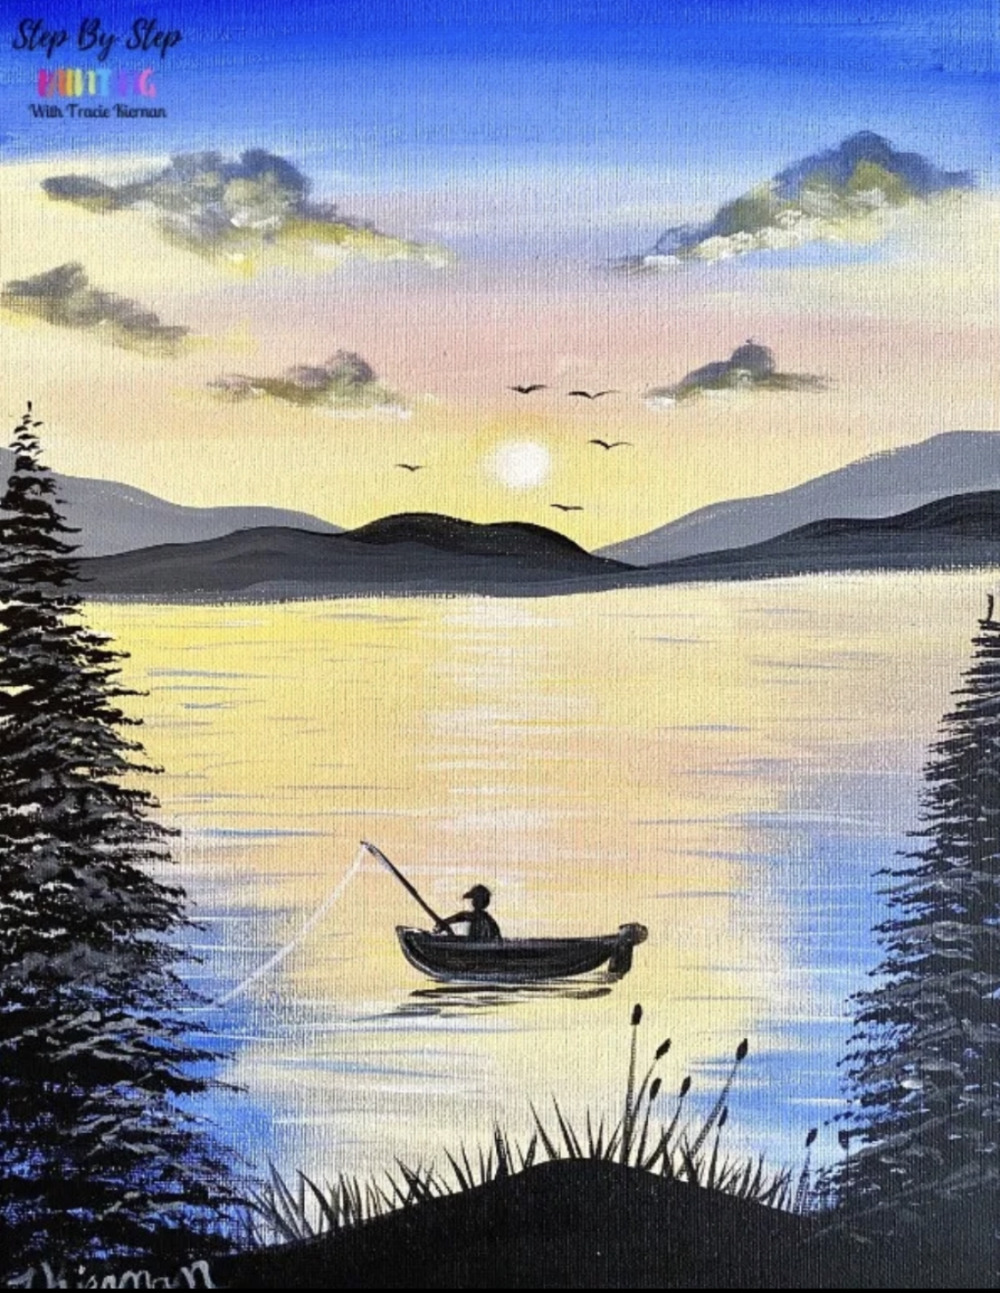
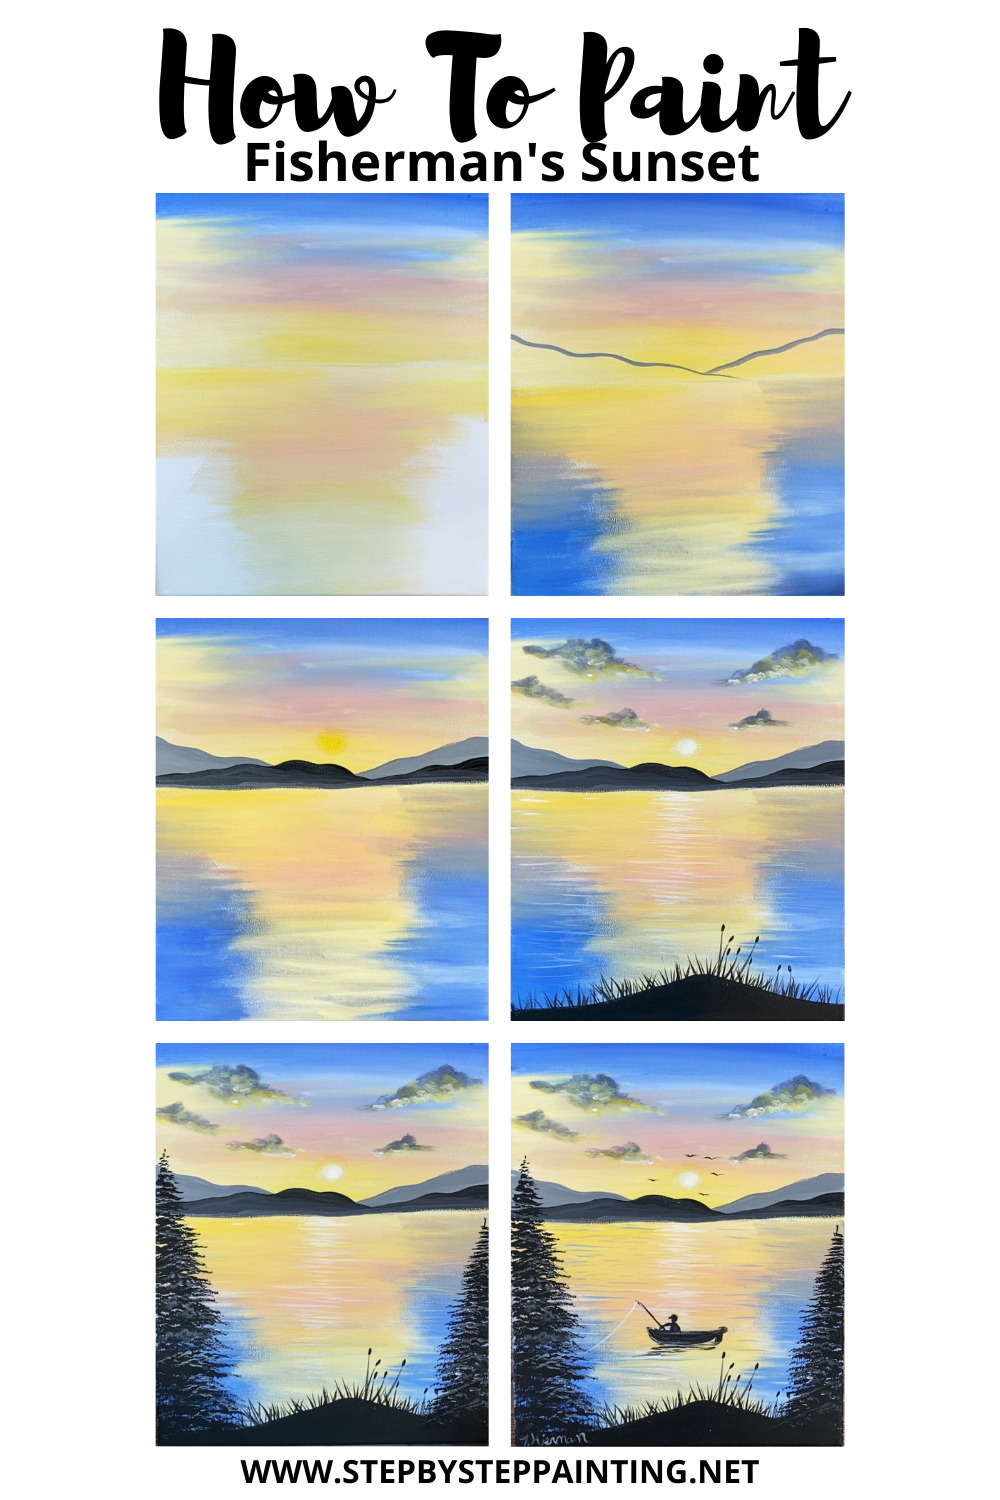
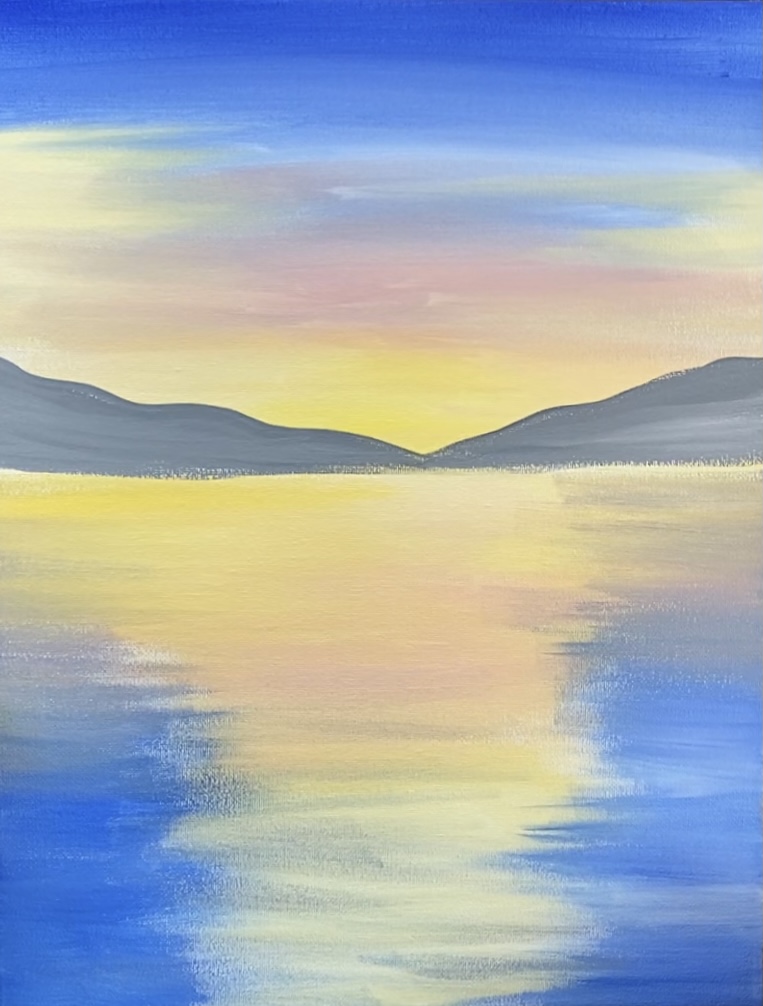
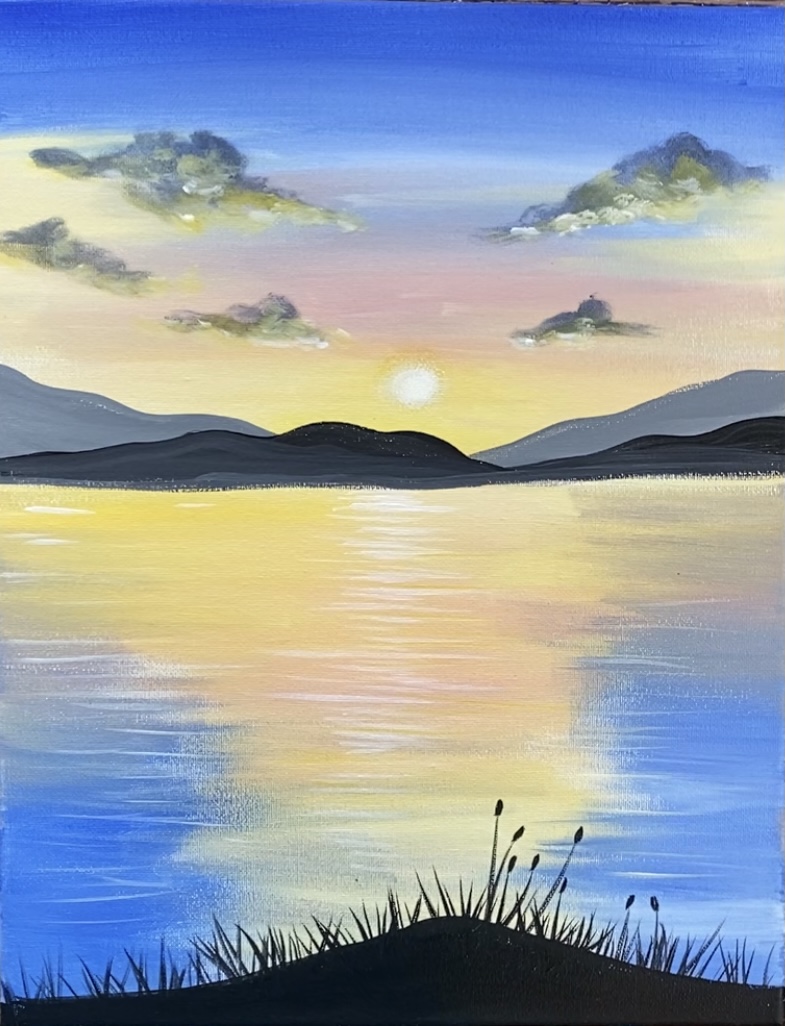
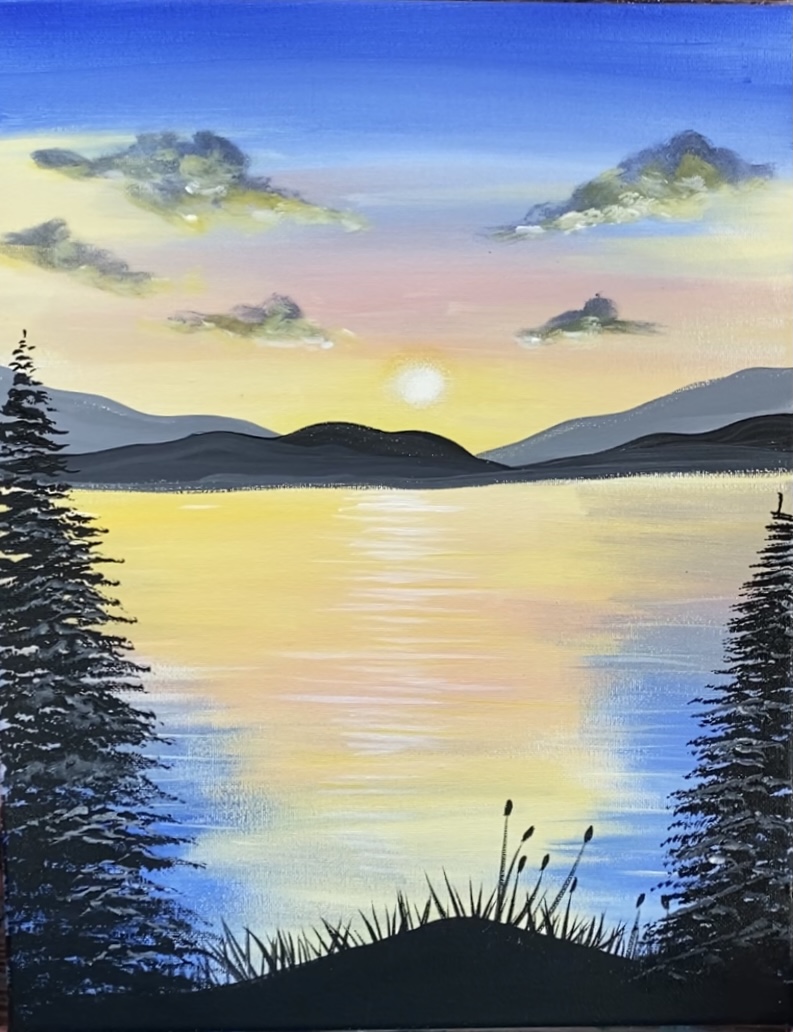
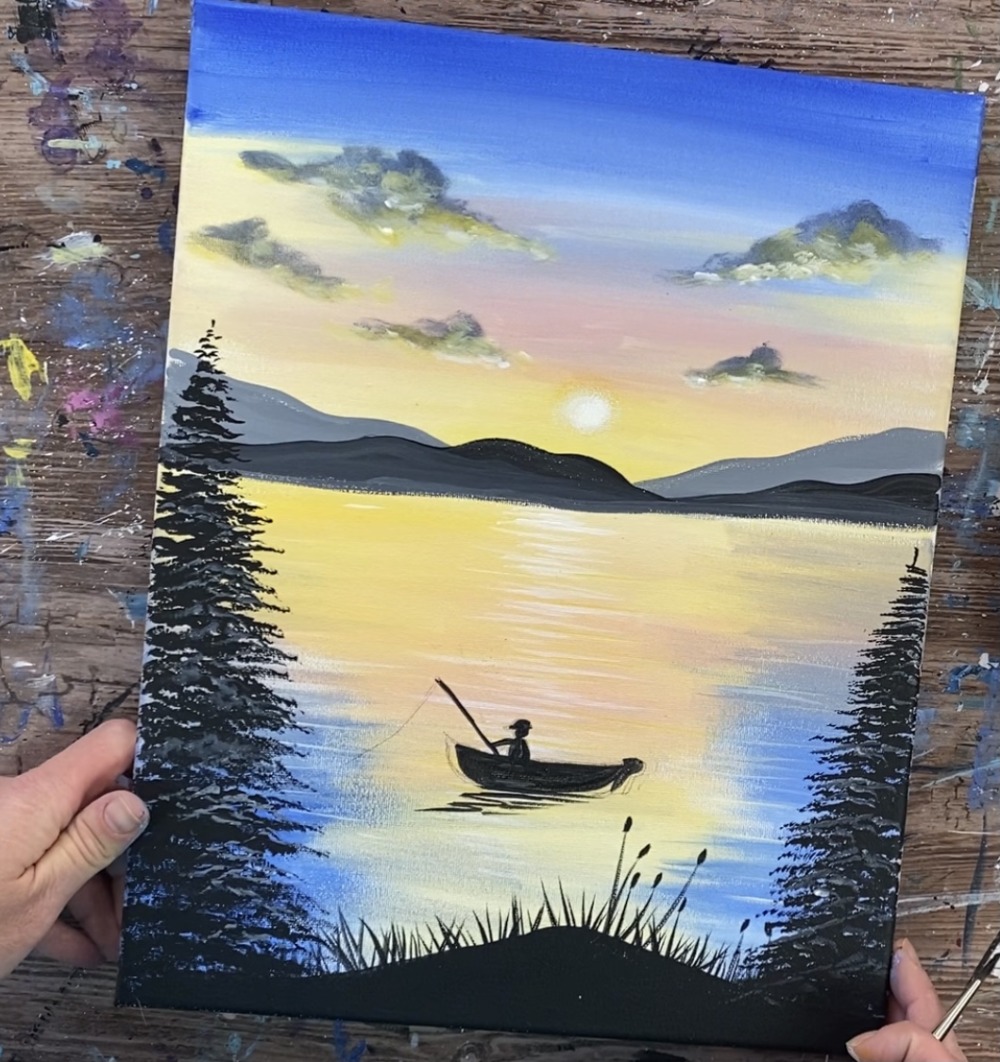
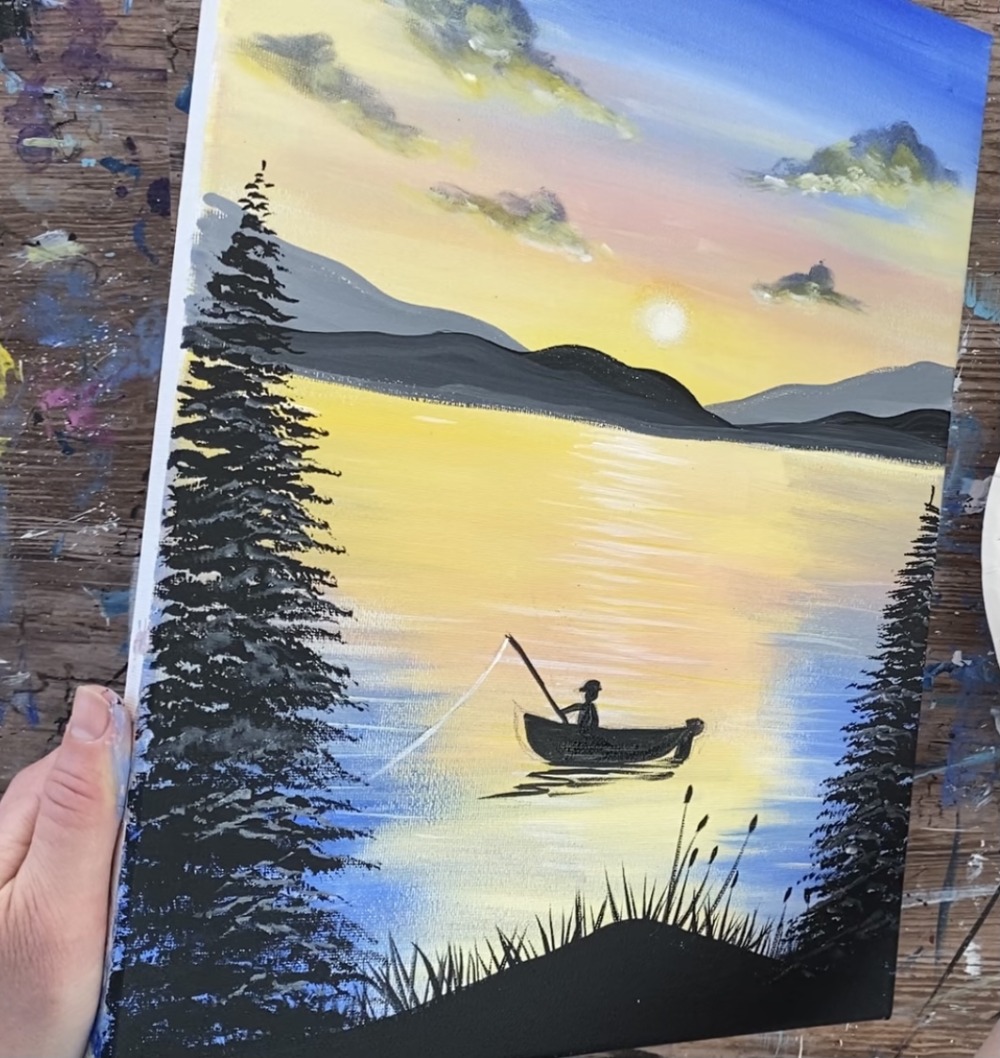
Learn how to create an easy fishing painting with sunset scene on a lake. This tutorial will demonstrate how to paint the pastel and blue sunset reflecting on a large lake. There is also a silhouette of pine trees and cattails in the foreground.
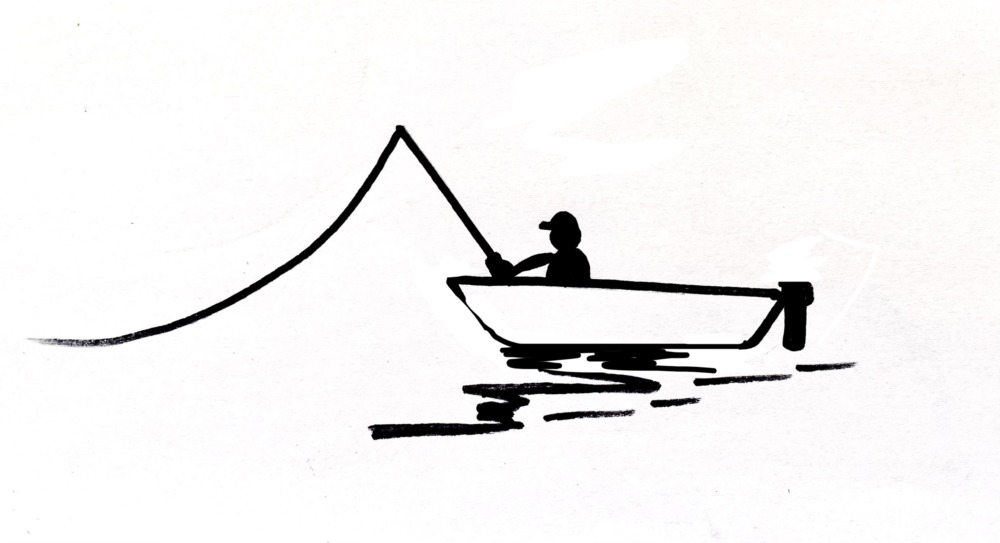
The tutorial comes with a free traceable for the fisherman that you can use to create the silhouette!
Enjoy and happy painting!
Looking for more sunset paintings?
I have many sunset painting tutorials that demonstrate different technique for creating different colored sunsets! Check out all of the sunset acrylic painting tutorials here!
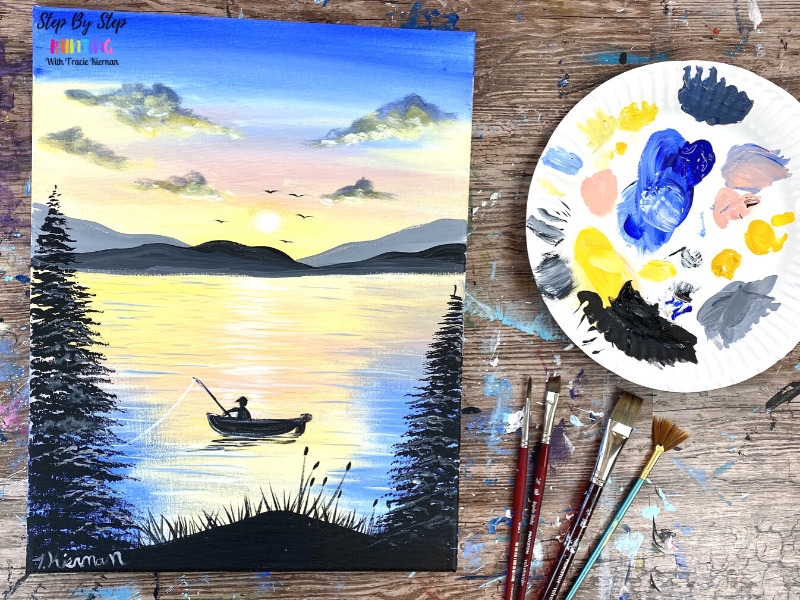
Materials
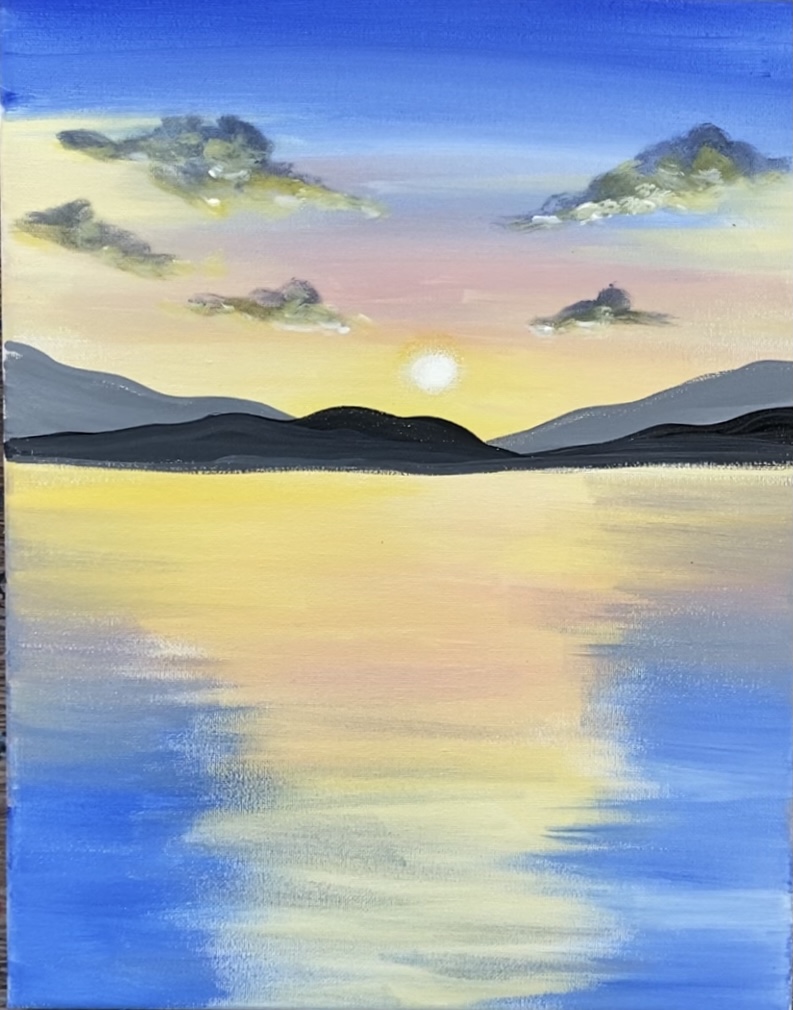
Fisherman's Sunset Acrylic Painting Tutorial
Paint a pastel blue and yellow sunset with a silhouette of a fisherman in a boat.
Materials
- 11 x 14 Canvas
- Acrylic Paint
- Brushes
- Pencil
- Optional Traceable Template
- Optional Graphite Paper
- T-Square Ruler
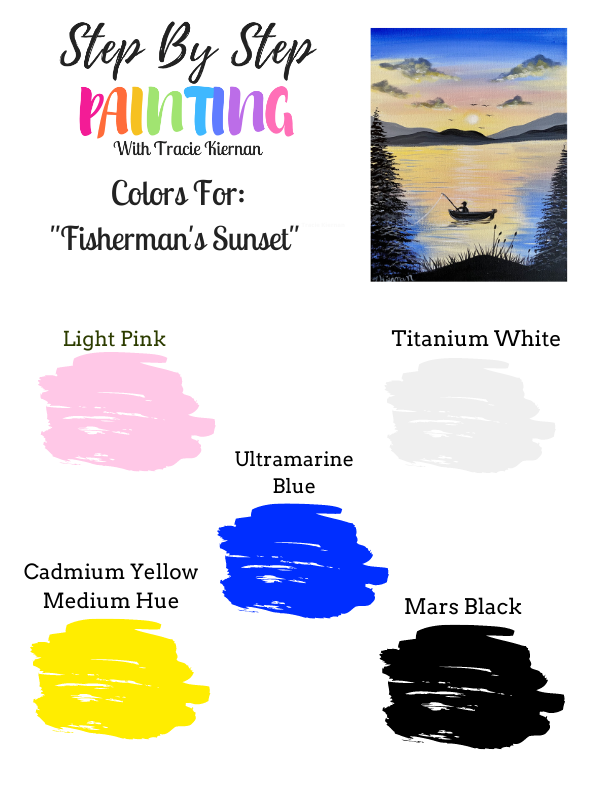
Colors
- Titanium White
- Mars Black
- Light Pink
- Ultramarine Blue
- Cadmium Yellow Medium
Brushes
Instructions
- See full tutorial on www.stepbysteppainting.net for directions!
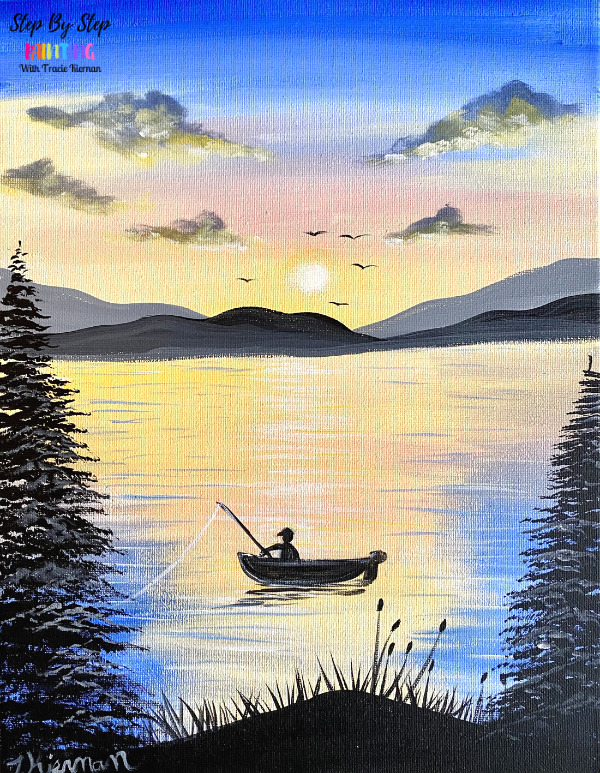
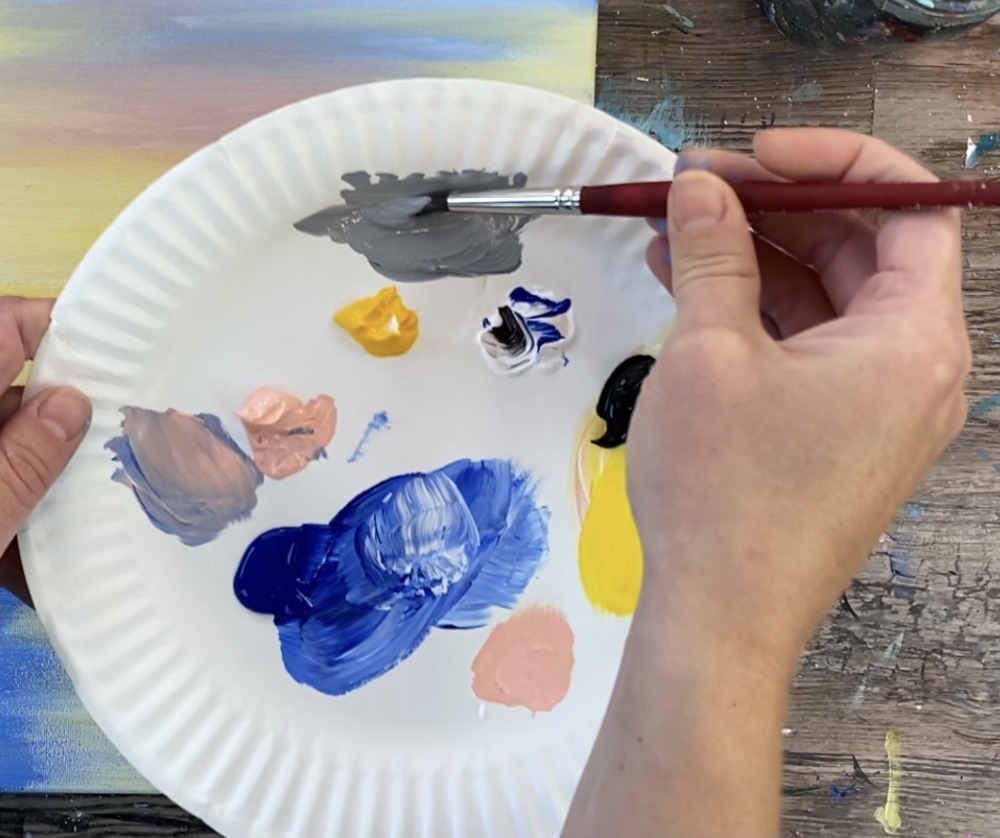
Color Palette
Directions At A Glance
Traceable
Video For Fishing Painting
Step By Step Directions
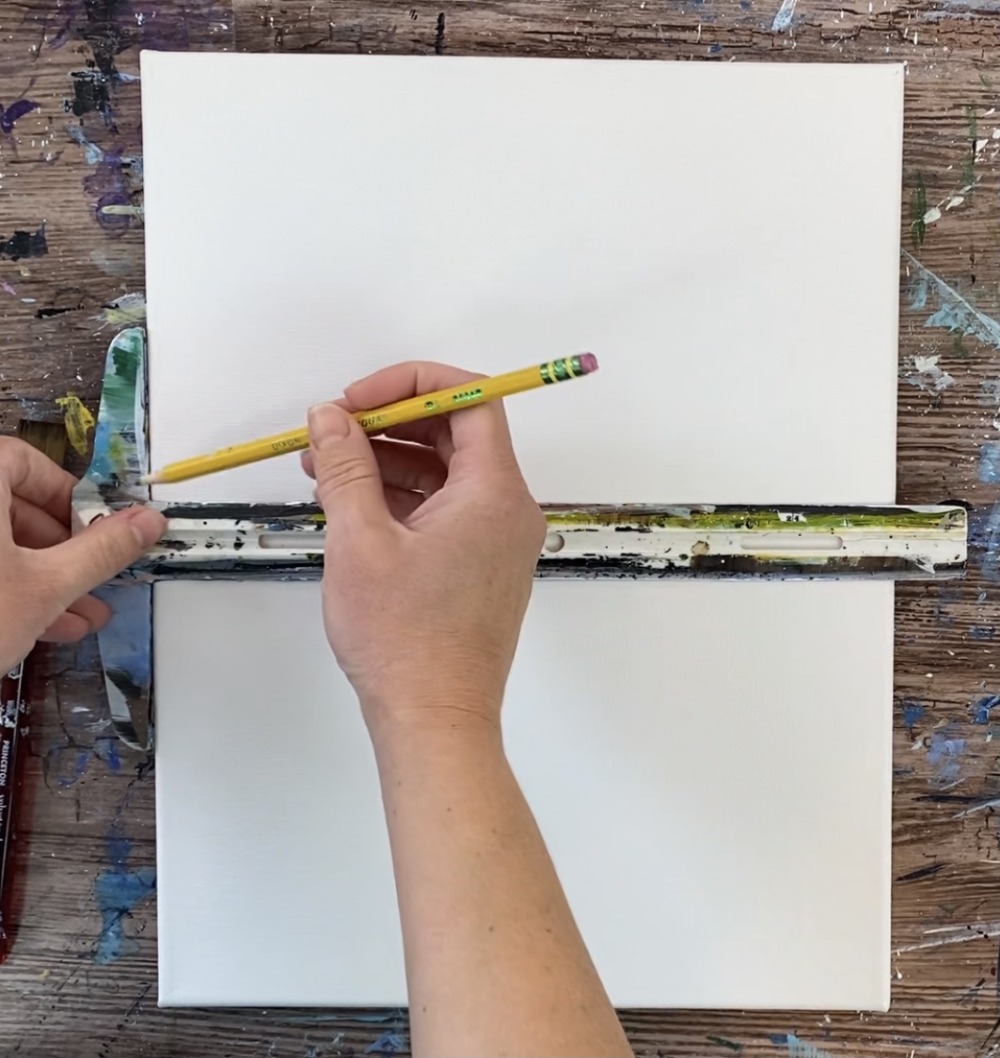
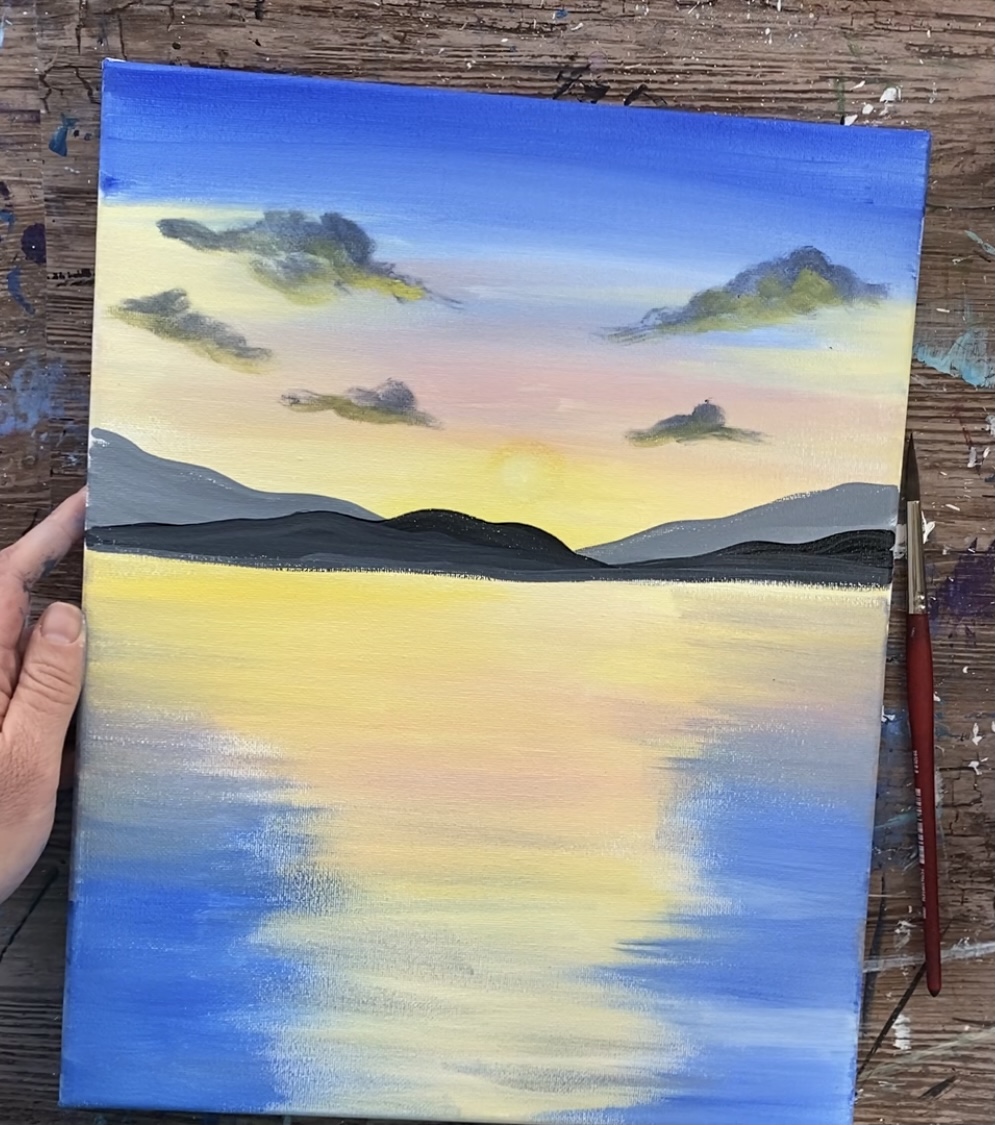
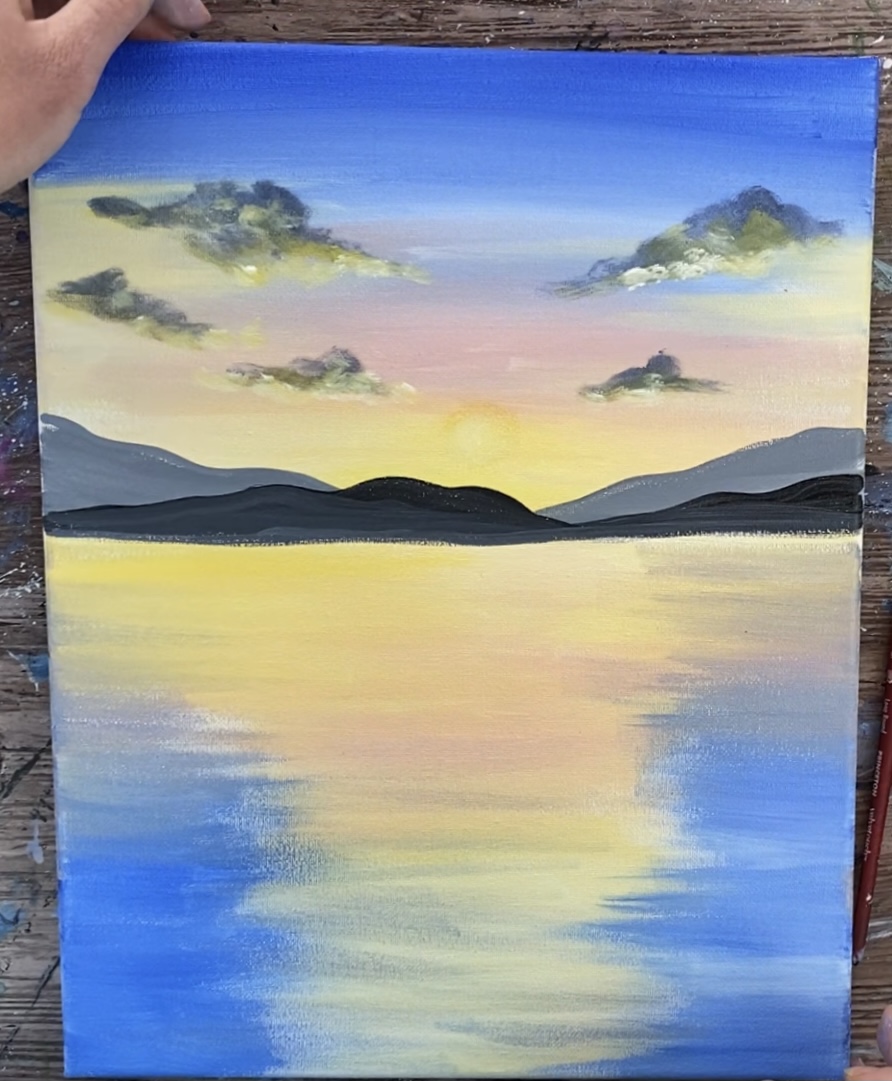
1. Draw the horizon line
Position your canvas vertically and estimate where the center is. Place a t-square or straight edge and draw a horizontal line across the canvas with a pencil.
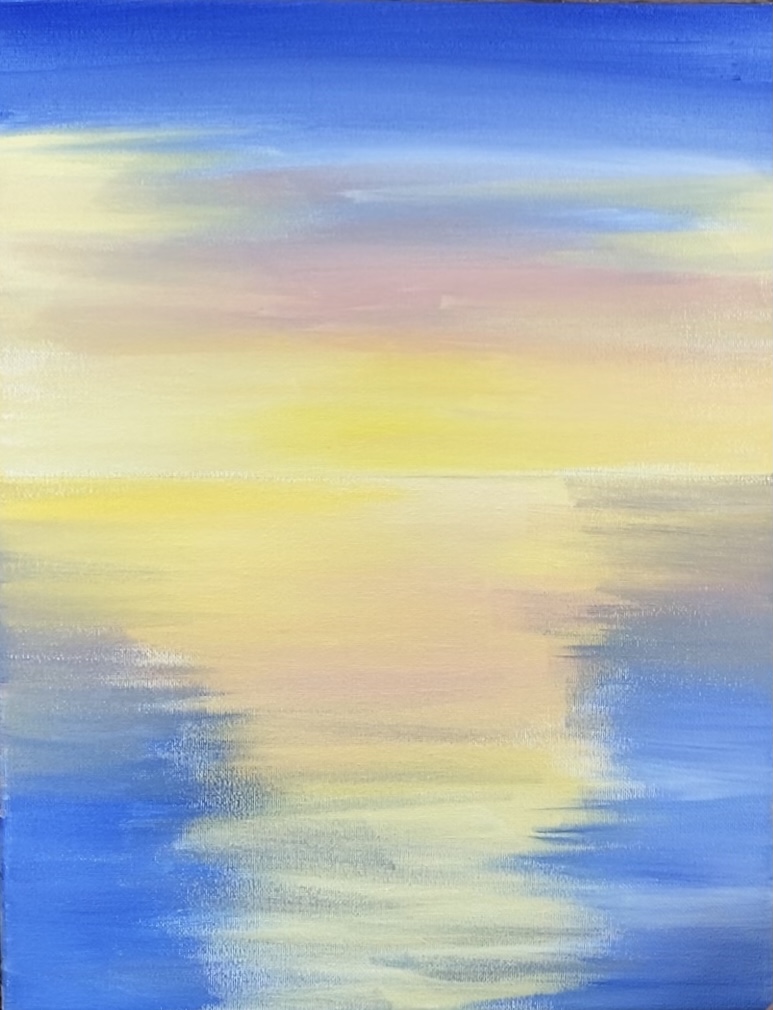
2. Paint the sky
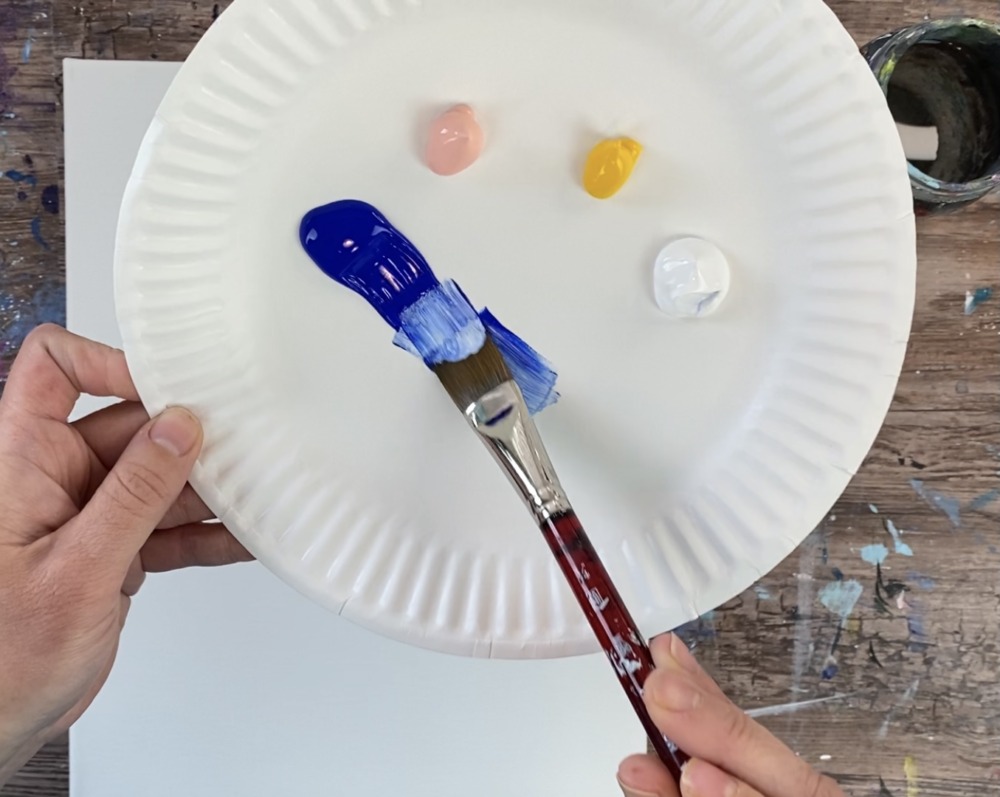
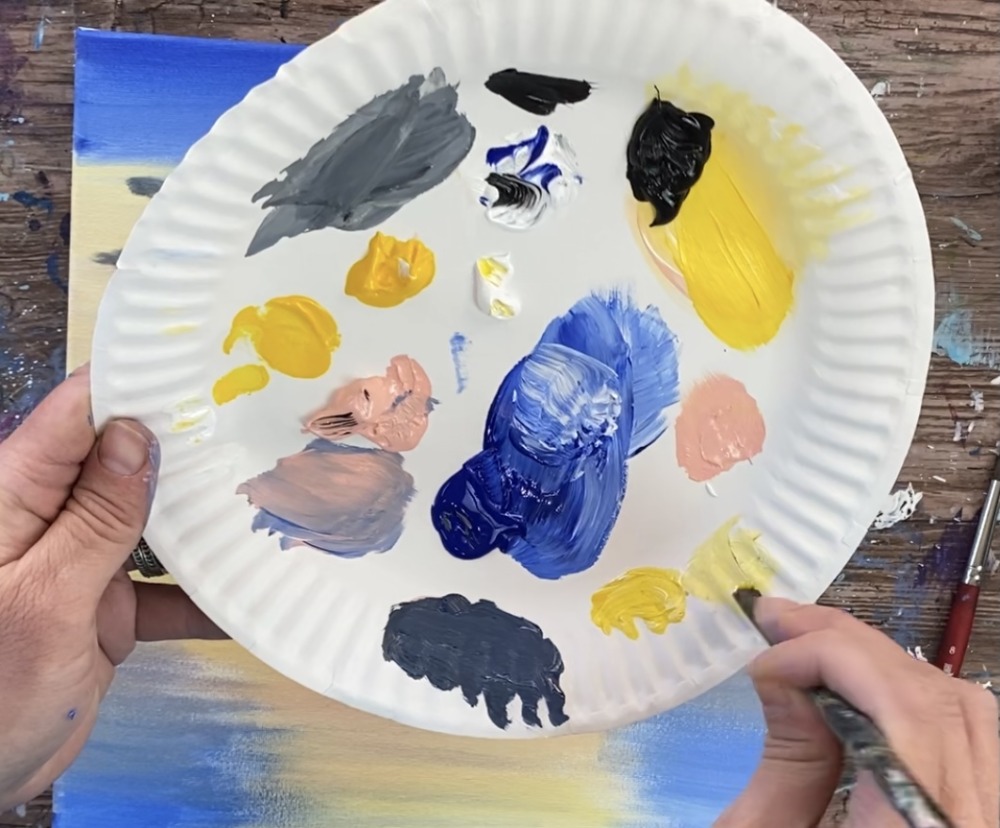
Load your palette with ultramarine blue (blue), light pink (pink), cadmium yellow medium hue (yellow) and titanium white (white).
Use your 3/4″ flat wash brush to mix about 2 parts blue and 1 part white to make a lighter blue.
Start at the top of the canvas and paint left and right horizontal strokes.
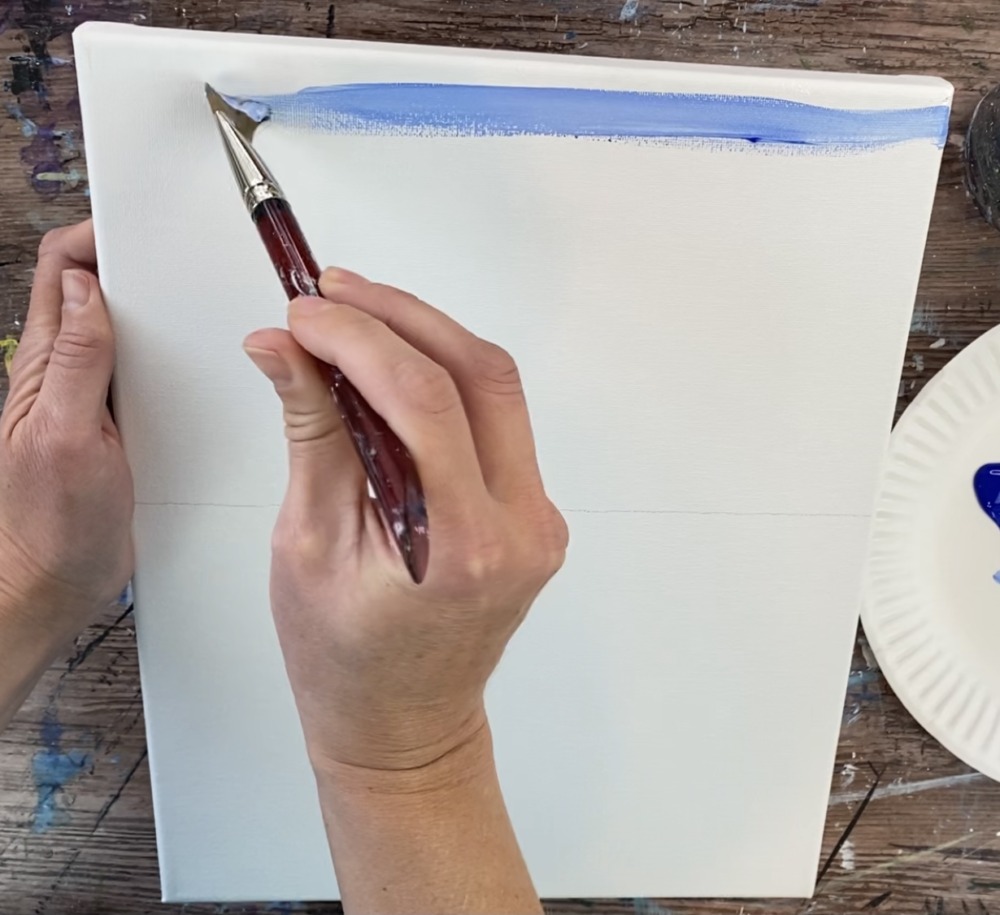
Paint about a 3″ area with the blue. The top part of the sky should be slightly darker with it gradually getting lighter. Add more white to your brush to lighten it up.
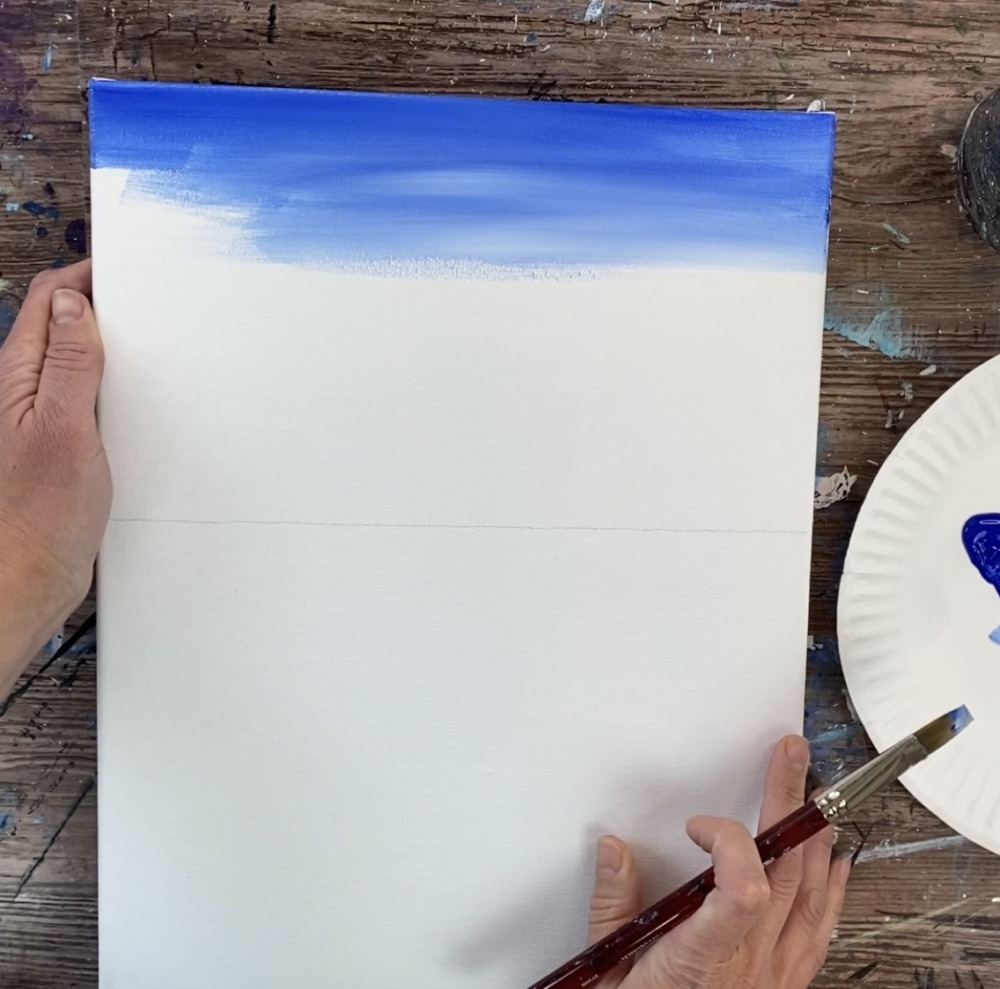
In the middle area, leave the left and right part blank and only paint horizontal strokes in the middle. This is because there will be some yellow in this area of the sky. Add more white lower in the sky so it gets lighter and lighter.
Then wipe off your brush but do not rinse. Load the brush in pink. Paint left and strokes with the pink blending it with the light blue and going almost all the way down the horizon.
Note: the blank part of the canvas on left and right is reserved for yellows that will be in the sky.
Then completely rinse brush. Load it into yellow and white. Start at the bottom above the horizon line and paint left and right strokes blending up into the pink area.
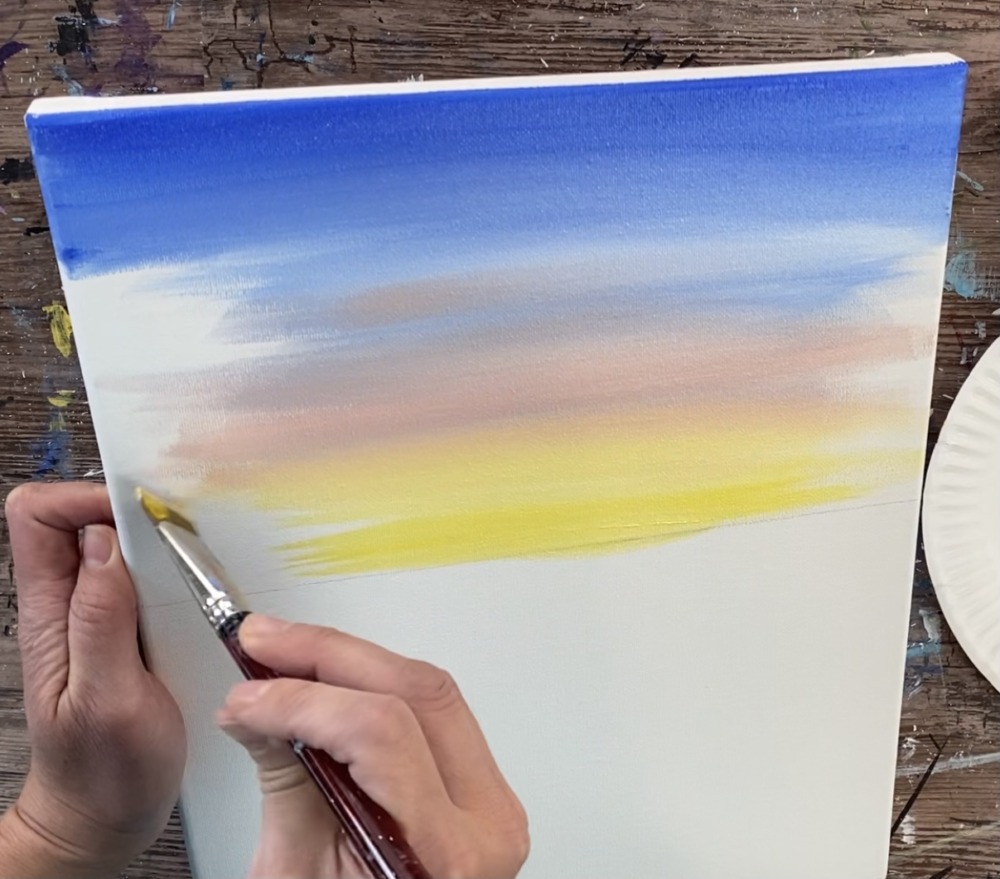
Gently add the white and yellow in the rest of the sky up into the blue (on the left and right sides). Be careful not to blend the yellow with the blue or you will have green in the sky. Gently allow the yellow to slightly go over the light blue area without blending it.

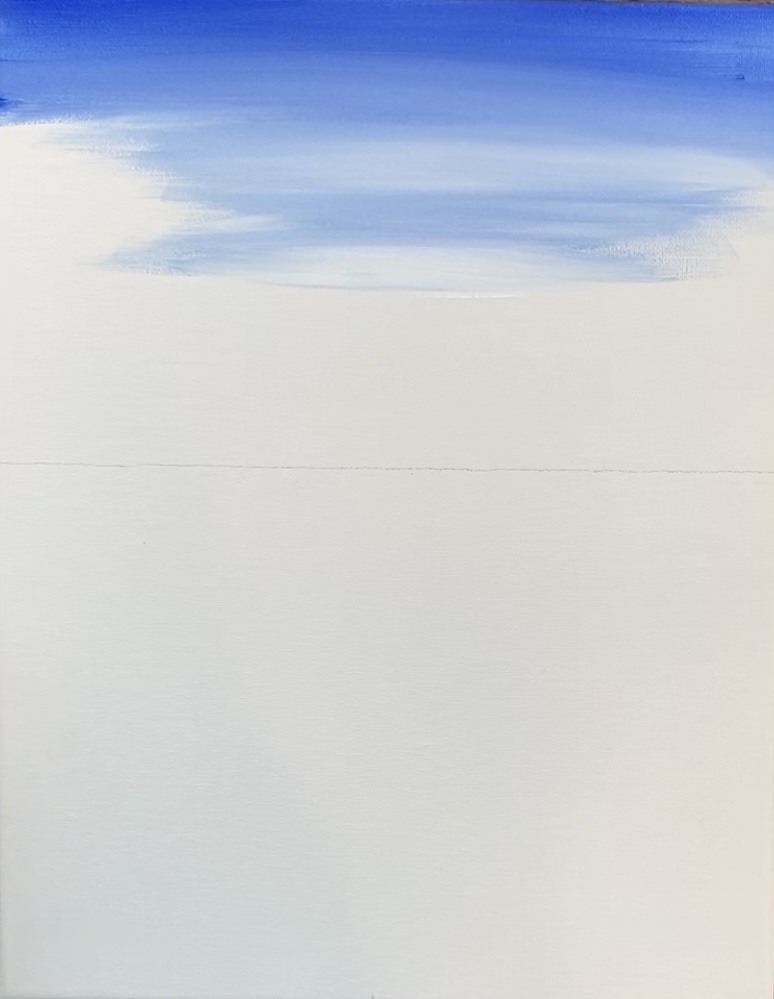
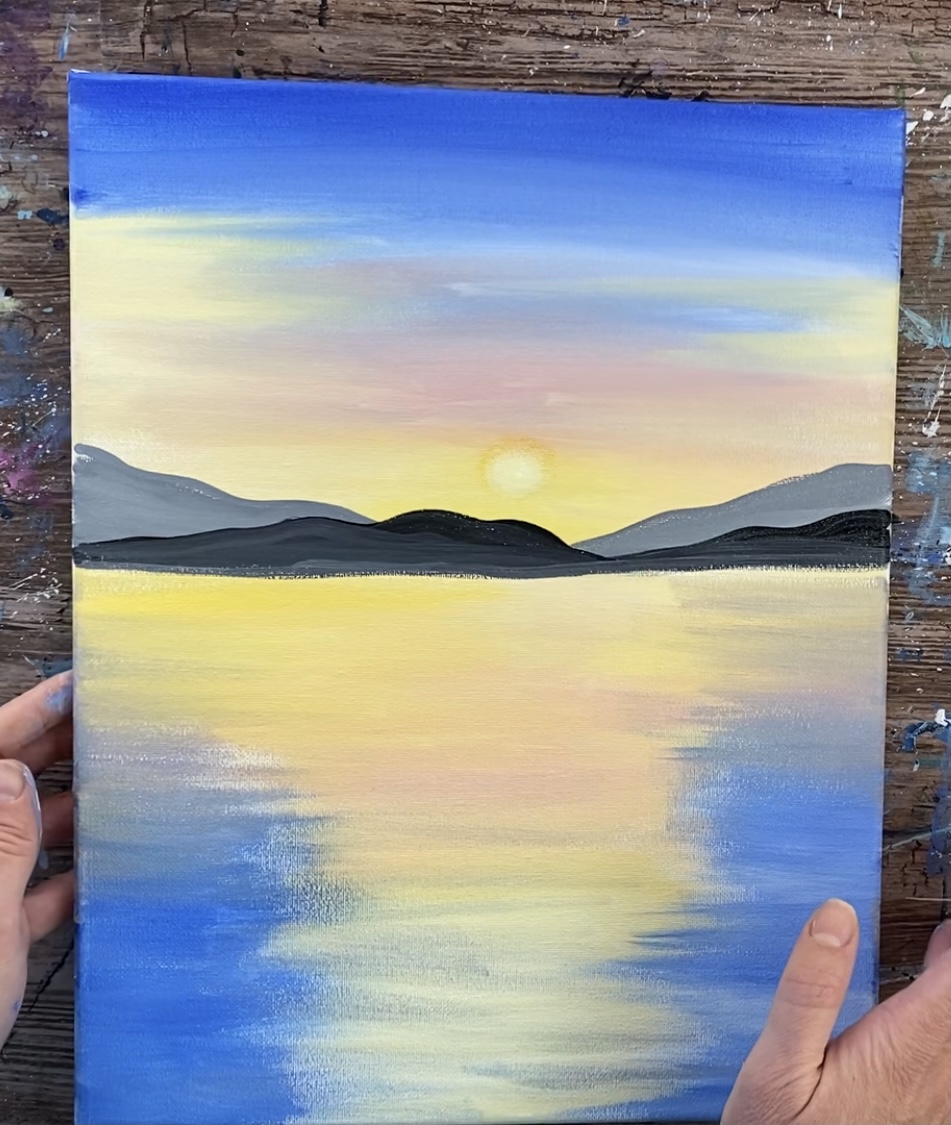
3. Paint the water
The water has the same colors as the sky and is the same technique. Use your 3/4″ flat wash and start just below the horizon line. Paint left and right strokes with yellow and white. Add bits of pink in there as well.
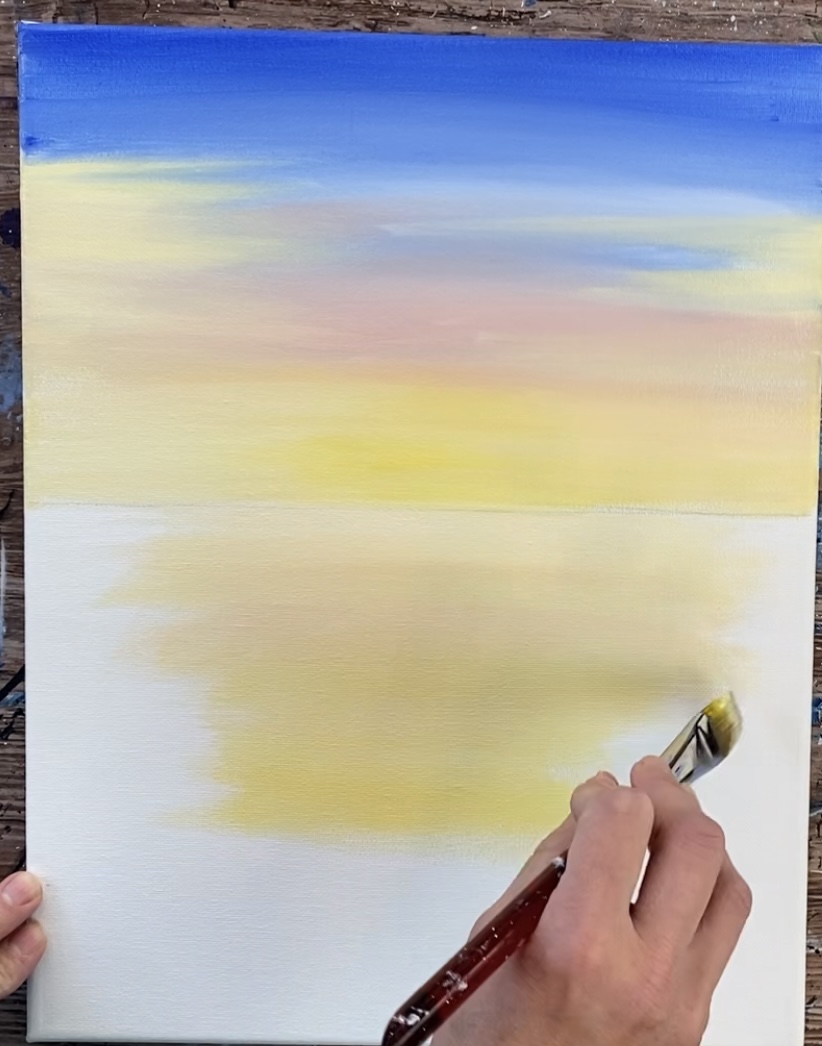
Paint just down the middle of the canvas, leaving about an inch of space blank on the left and right.
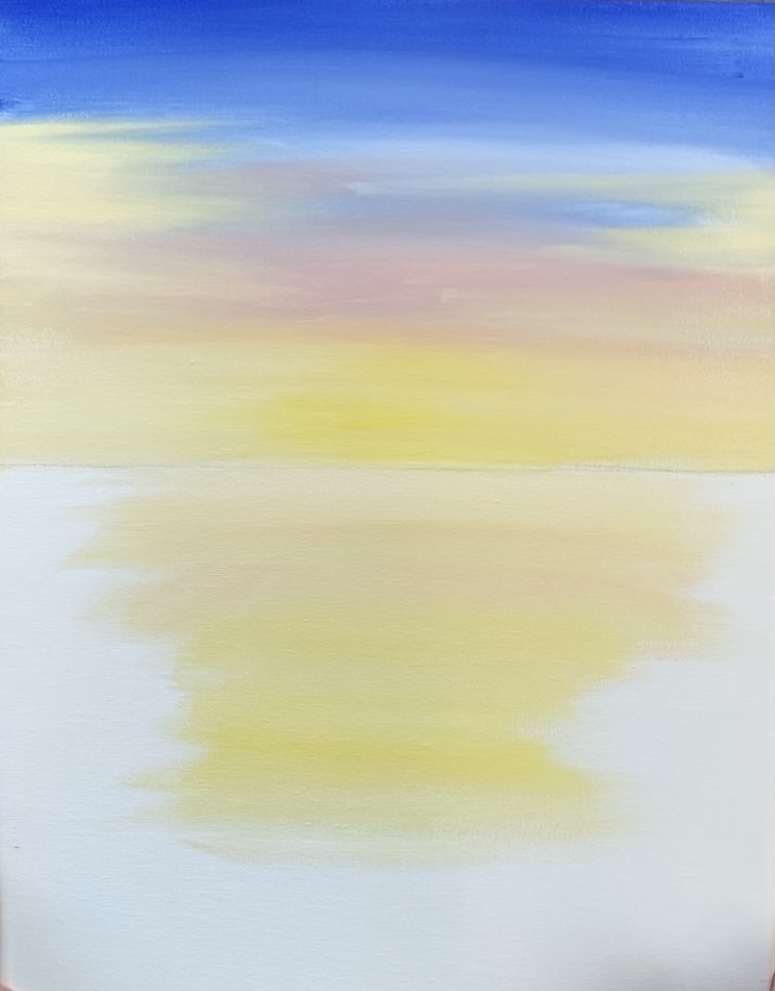
Don’t worry about water texture, just paint it the same way you did the sky. Also, the middle area should be the brightest in the water because that is where the sun will be reflecting on.
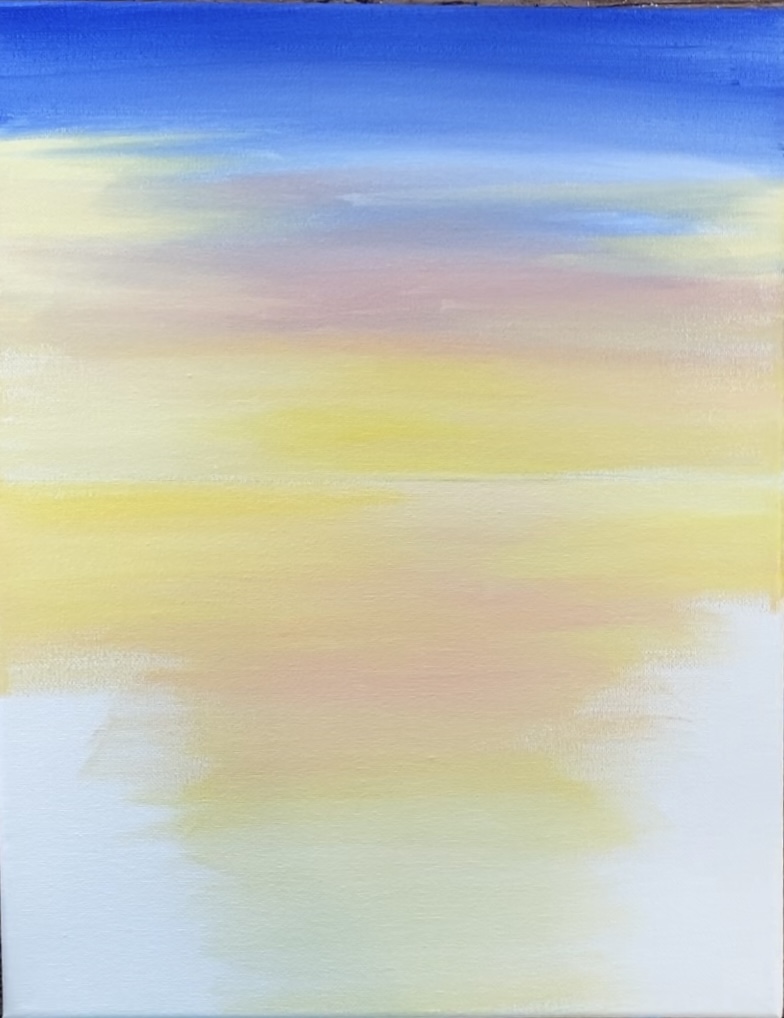
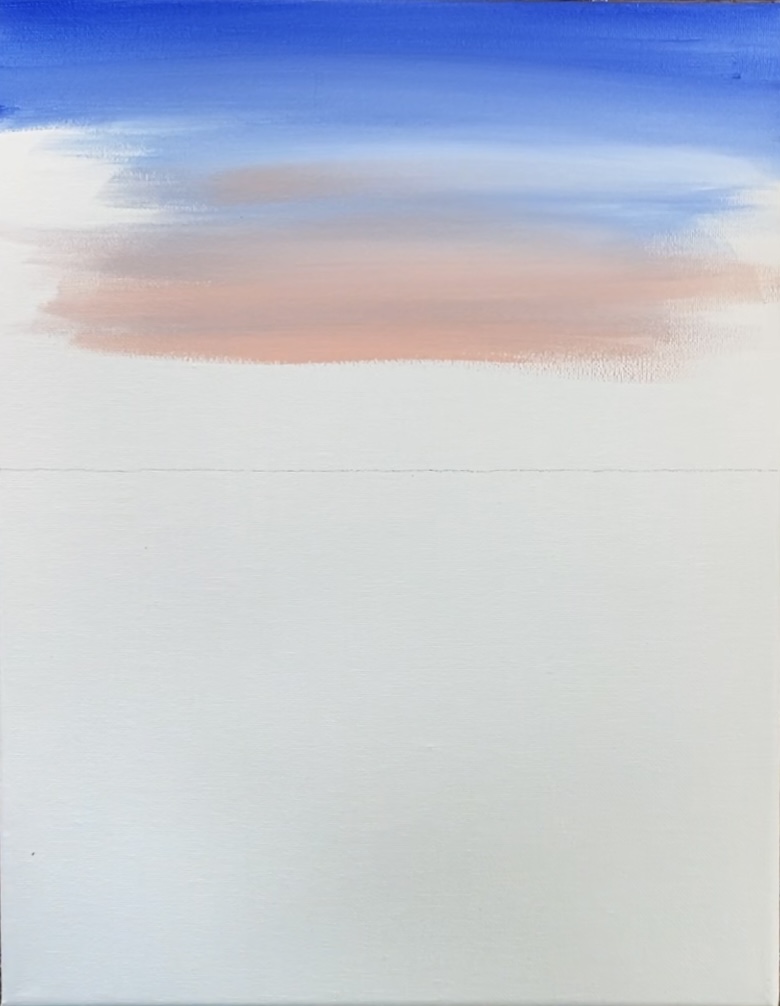
Then completely rinse brush. Load it into blue and white (mixed together so it’s not as dark). Paint the blue in the water starting on the bottom left and right. Gently paint over the middle yellow area but don’t blend the blue with the yellow.
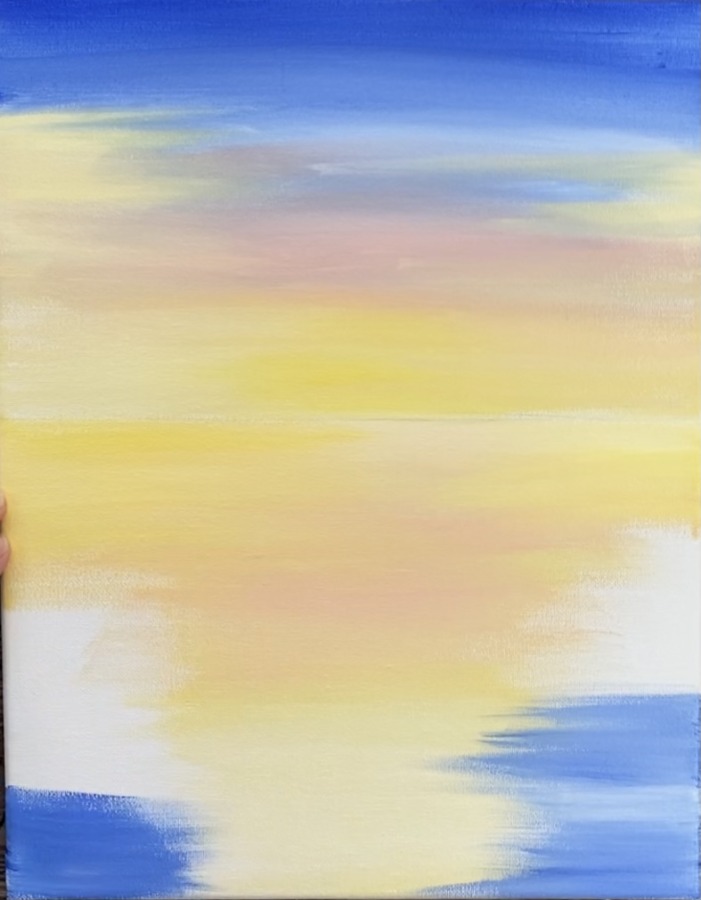
Fill the rest of the water area with the blue and white. You can also add some pink in there as well. Add a small amount of blue over the middle yellow area (thin strokes using the tip of your brush).
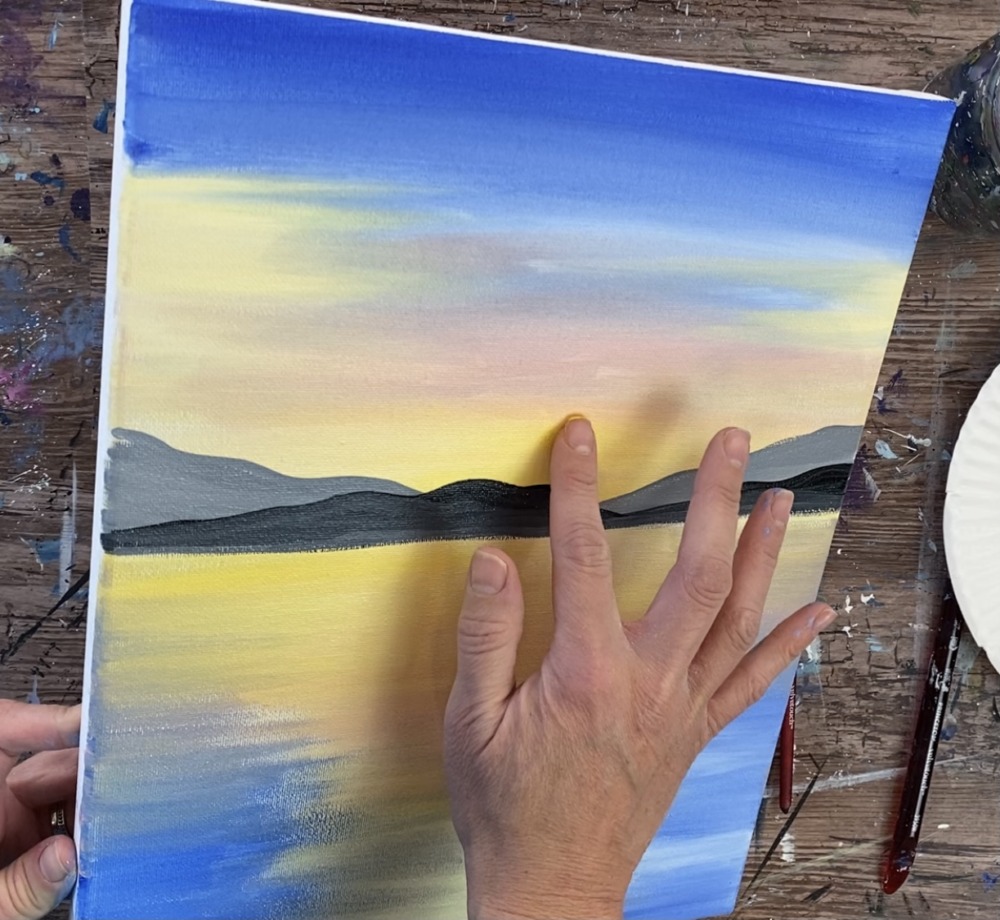
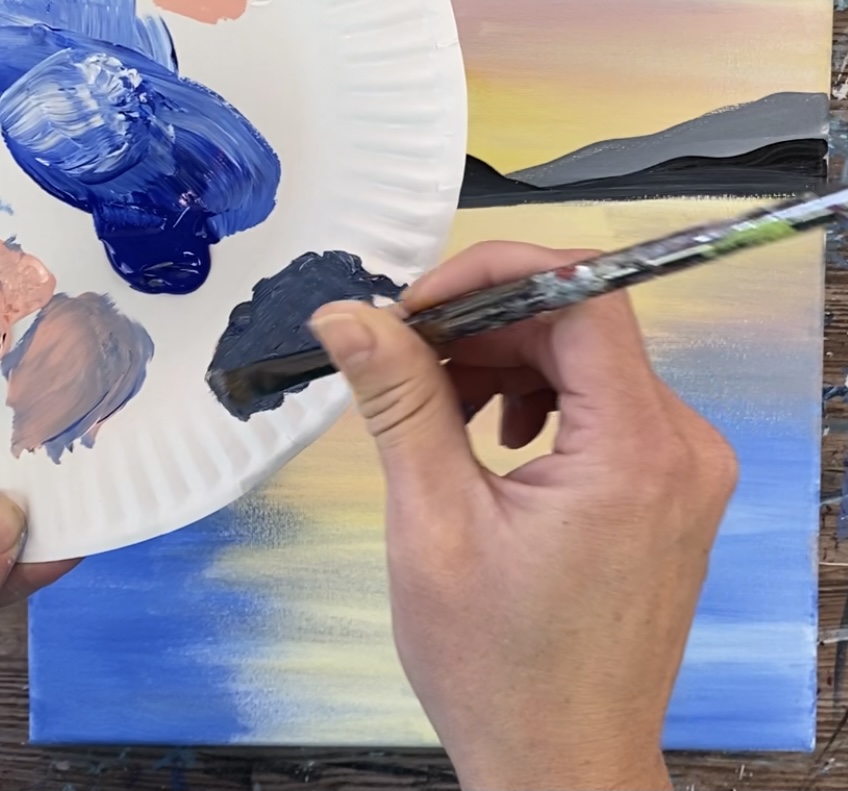
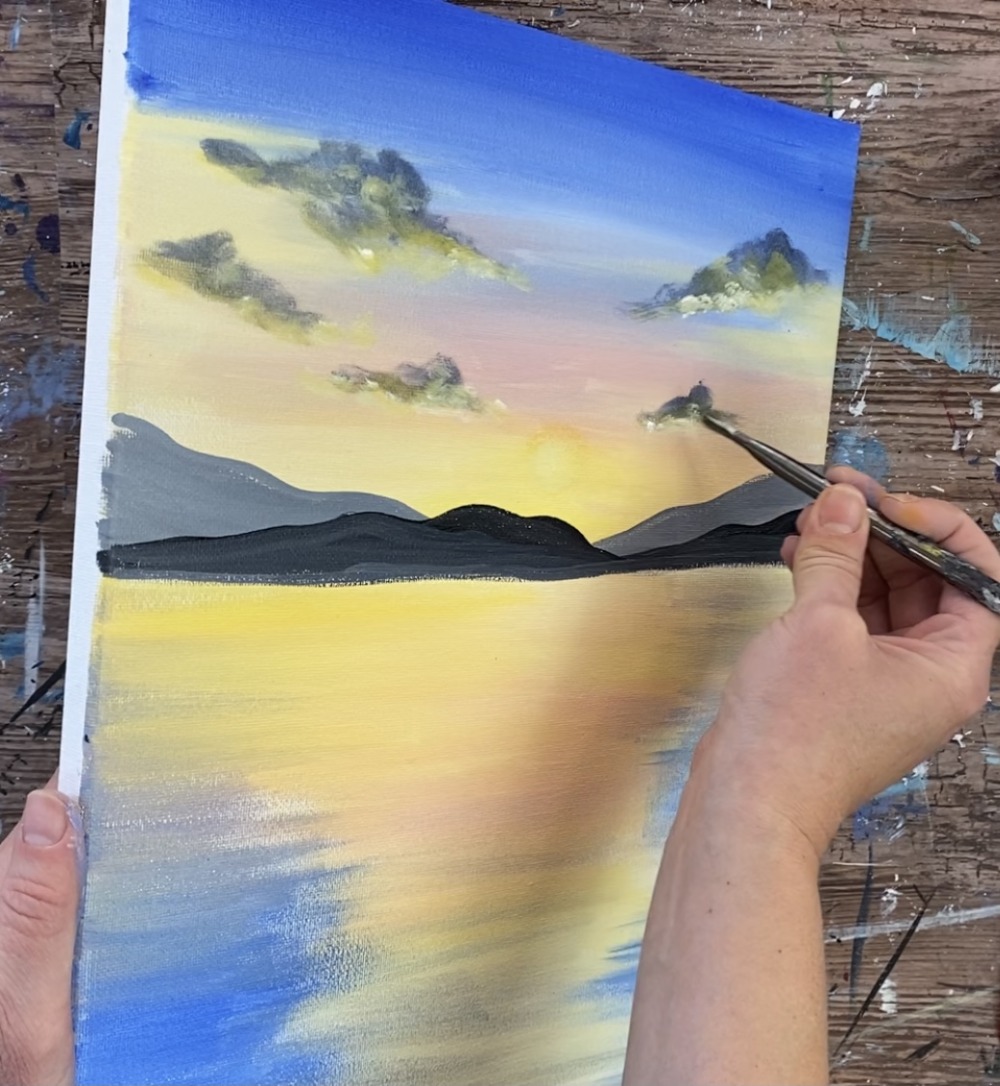
4. Paint the mountains
Use a #8 round brush to mix on your palette a medium gray (about 2 parts white and 1 part black). Add a little bit of water into the gray.
Use the tip of your brush to draw out the mountain line. Paint two wavy lines that meet and dip down in the middle.
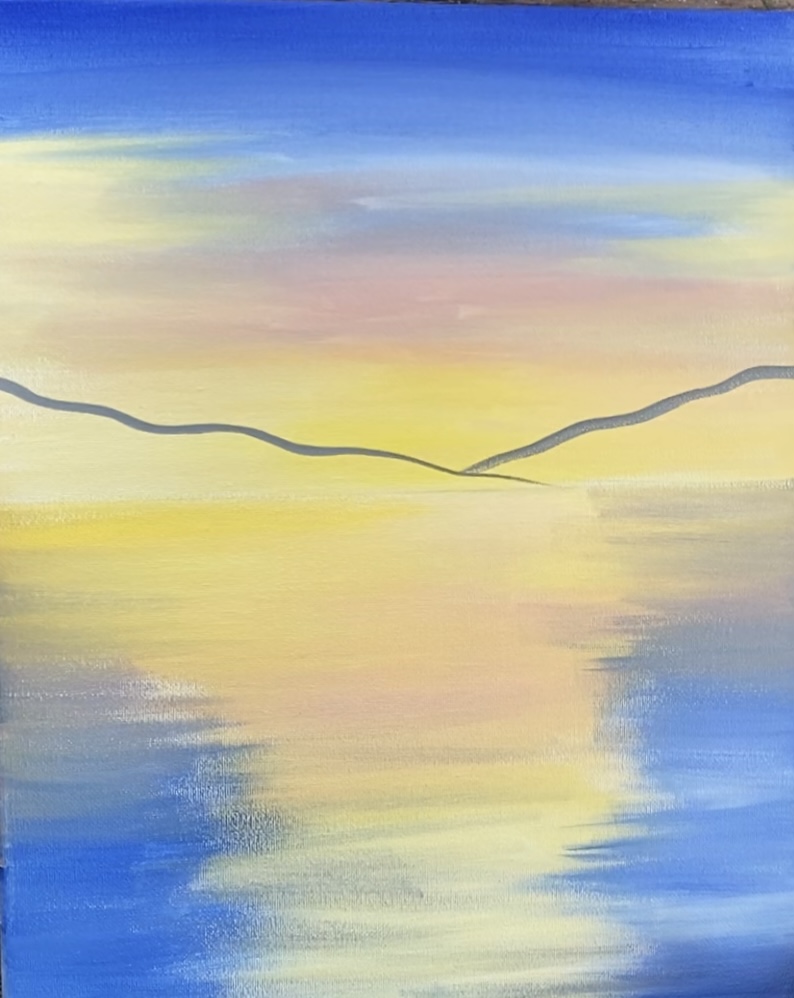
Then fill it in solid with that medium gray color. This should go all the way to the horizon line but not be painted below that line.
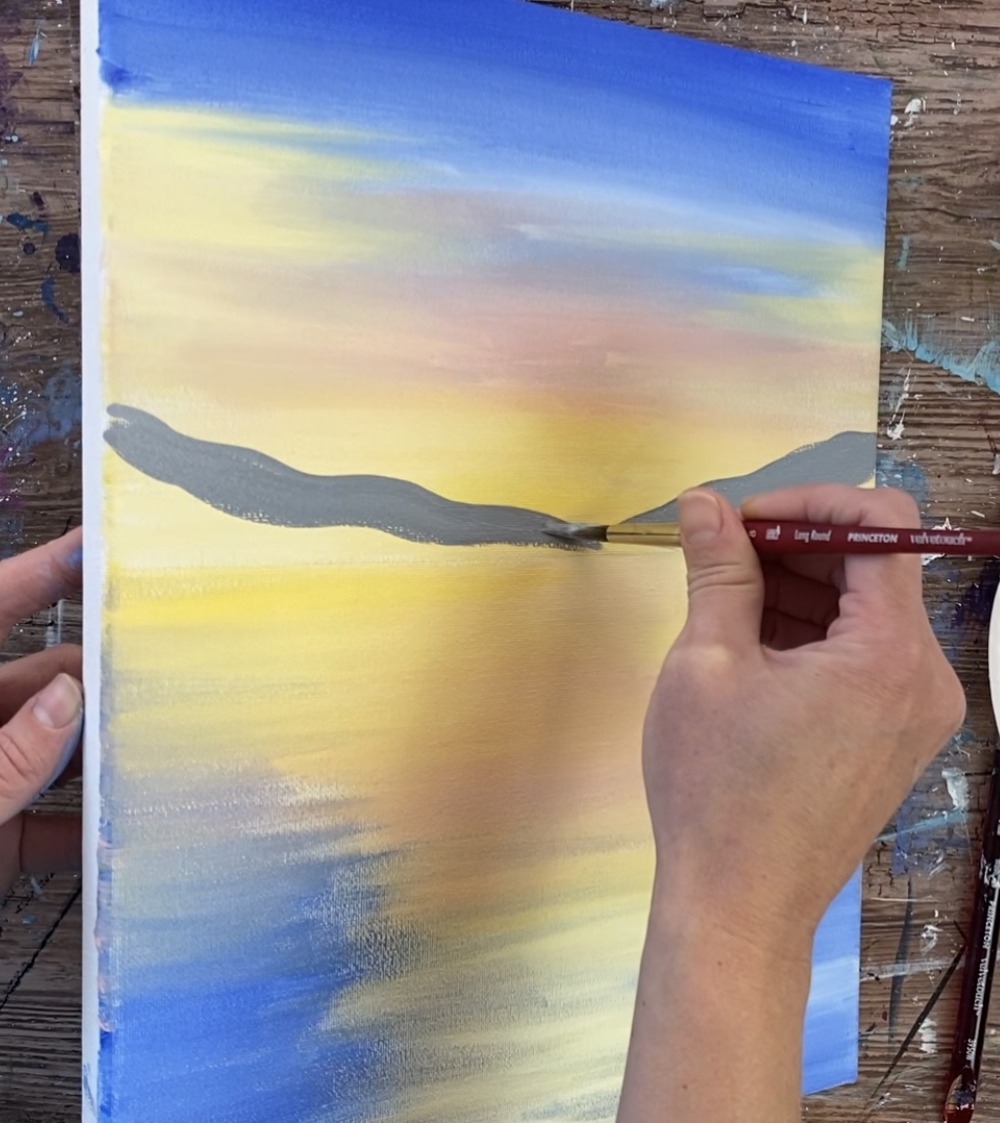
Next load your brush in some mars black (wipe off excess paint if needed but you do not need to rinse your brush). Paint another mountain range below the gray mountains.
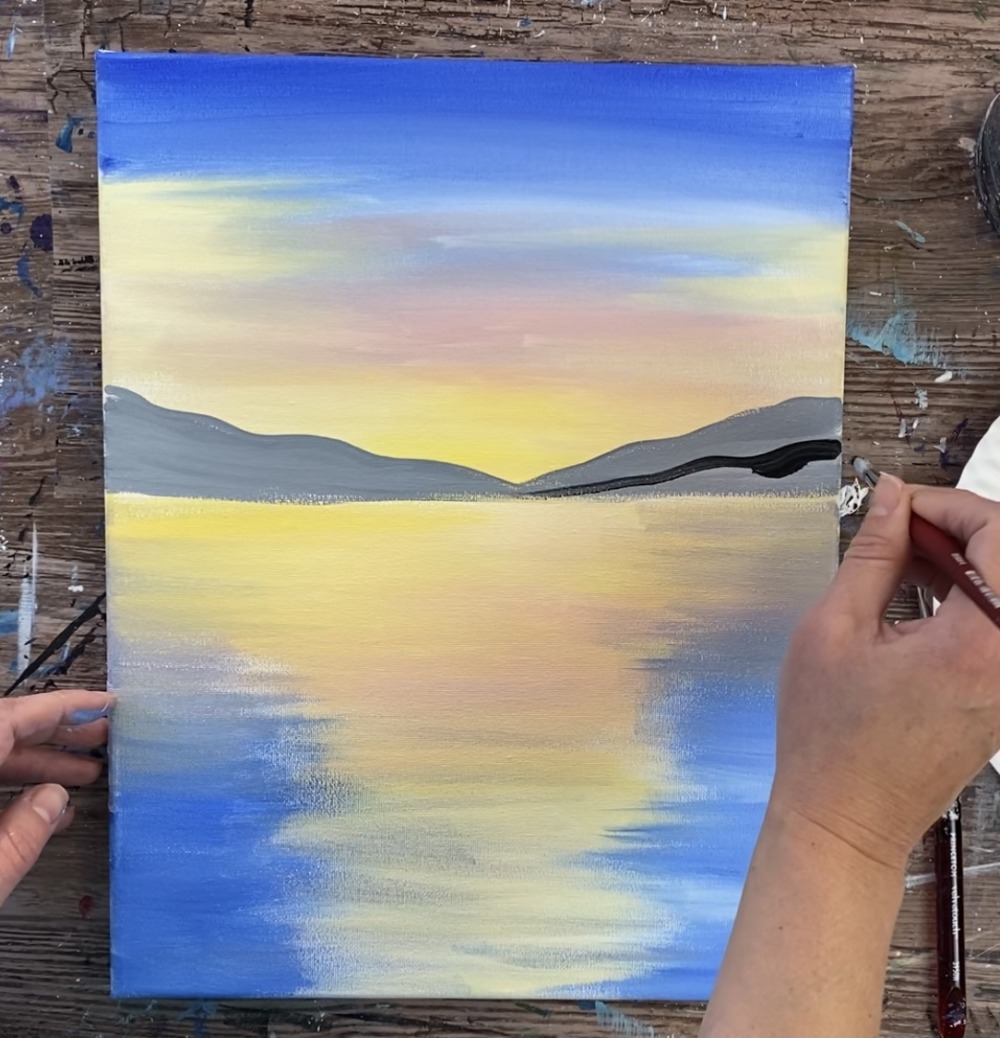
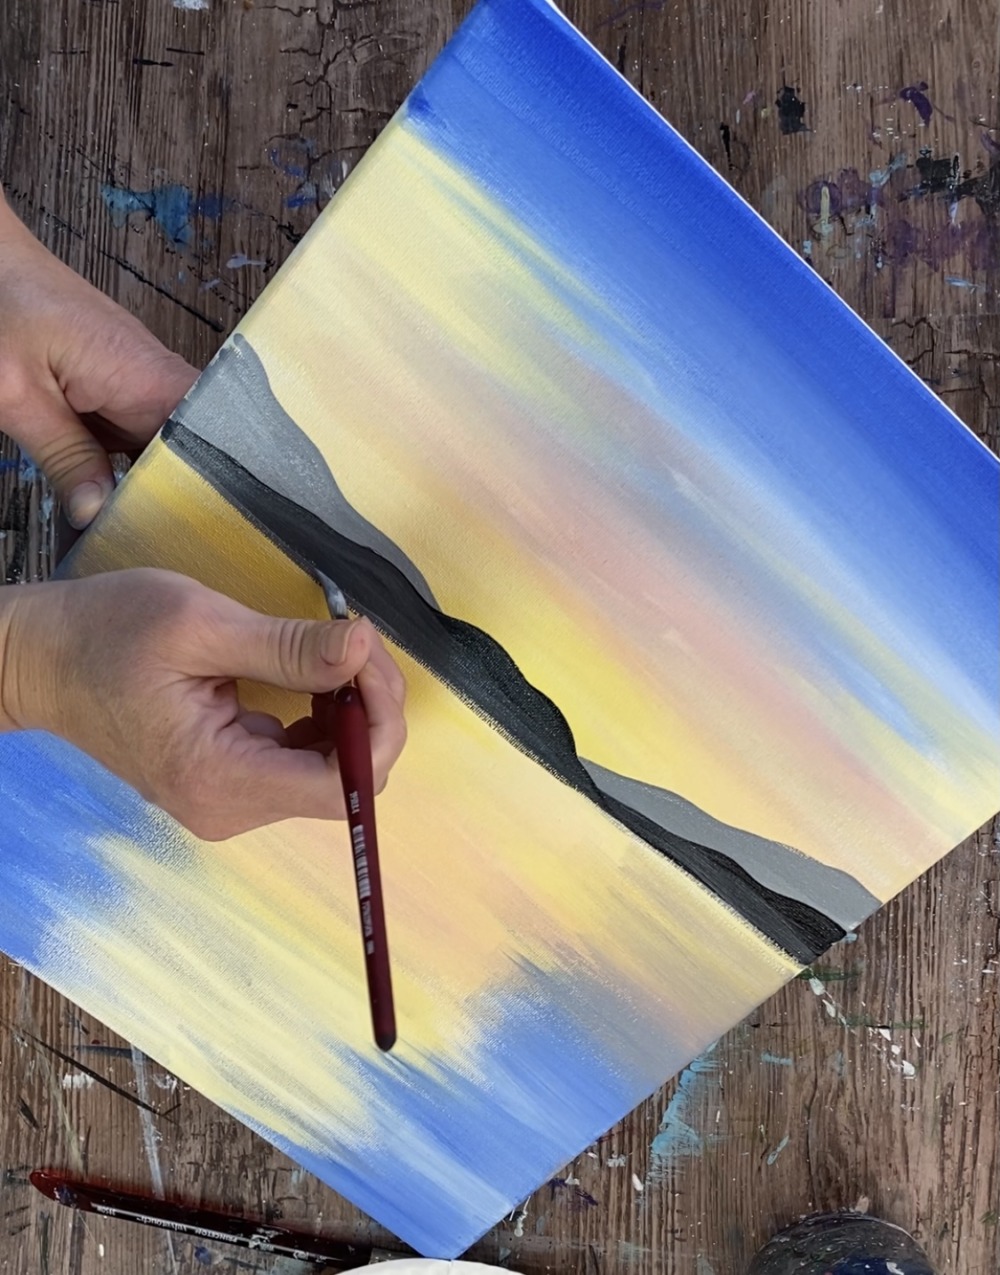
The black will make the mountain look like it is closer and the lighter gray makes the mountain in the back look like it’s further!
5. Paint the sun
Use your index finger and apply a small amount of yellow paint to it. Press and form a small circle using your finger.
You will form a glowing yellow circle. You can use your finger to kind of blend that yellow outwards a bit.
Tip: you only need a small amount of paint on your finger. It may help to wipe some of it off to ensure you only have a small amount. Alternatively, you can use a paint brush or a small round sponge for this step.
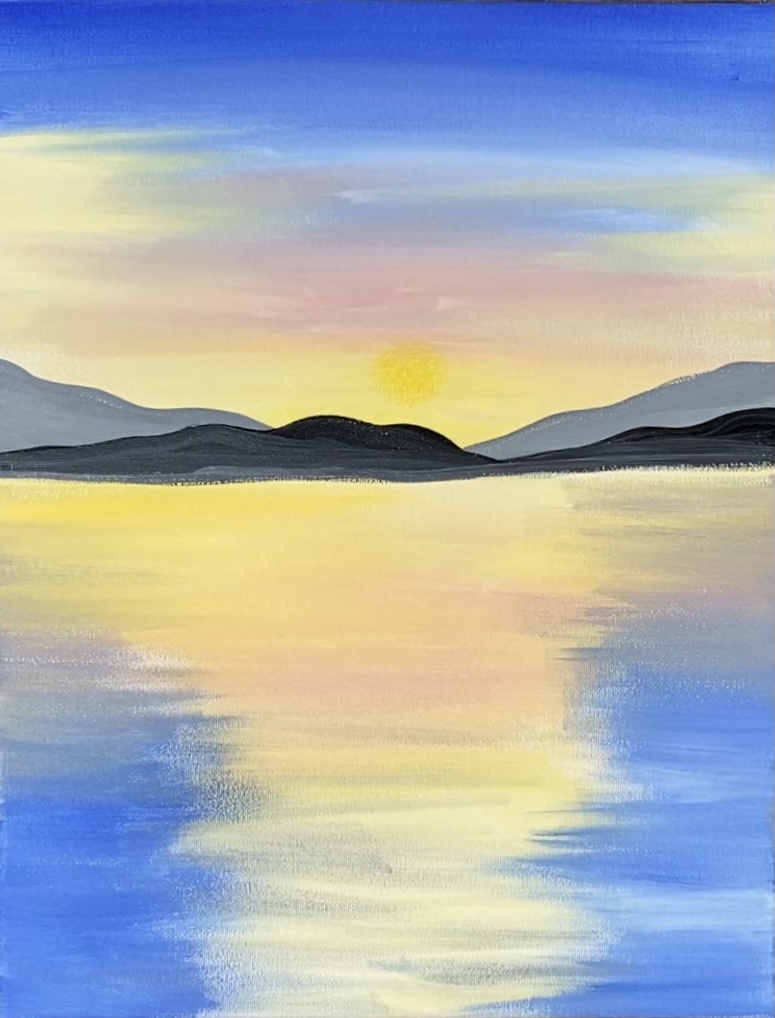
Then add a small amount of white to your finger. Press and form a smaller white circle inside of that yellow circle and blend it outwards.
It will create a glowing yellow circle. You can add another layer of bright white if you want to make the sun even brighter.
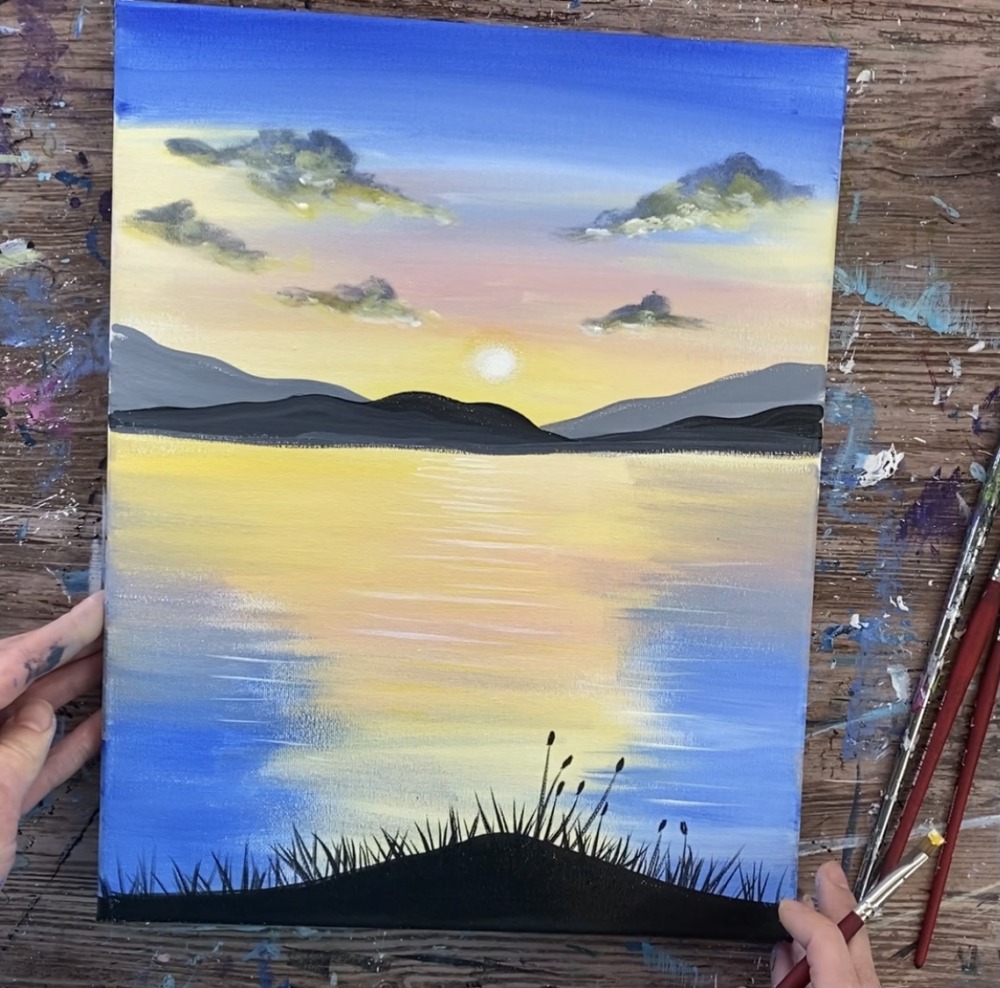
6. Paint the clouds
This is the cloud technique that works for me! If you have your own way of doing clouds, you can do that! I like to use a small bright brush to do this. With these sunset clouds, you will be starting with a dark gray layer and gradually add lighter and brighter colors to the bottom of the clouds where the sun would be reflecting on them.
Mix on your palette a dark grey/ blue color. Do this by mixing 1 part black, 2 parts light pink and 2 parts blue (doesn’t have to be exact).
Load just a small amount of paint on the tip of your bright brush. Wipe off some of it so that when you will do your stroke, it will be dry and see through.
Paint in small circular strokes forming the shape of the cloud.
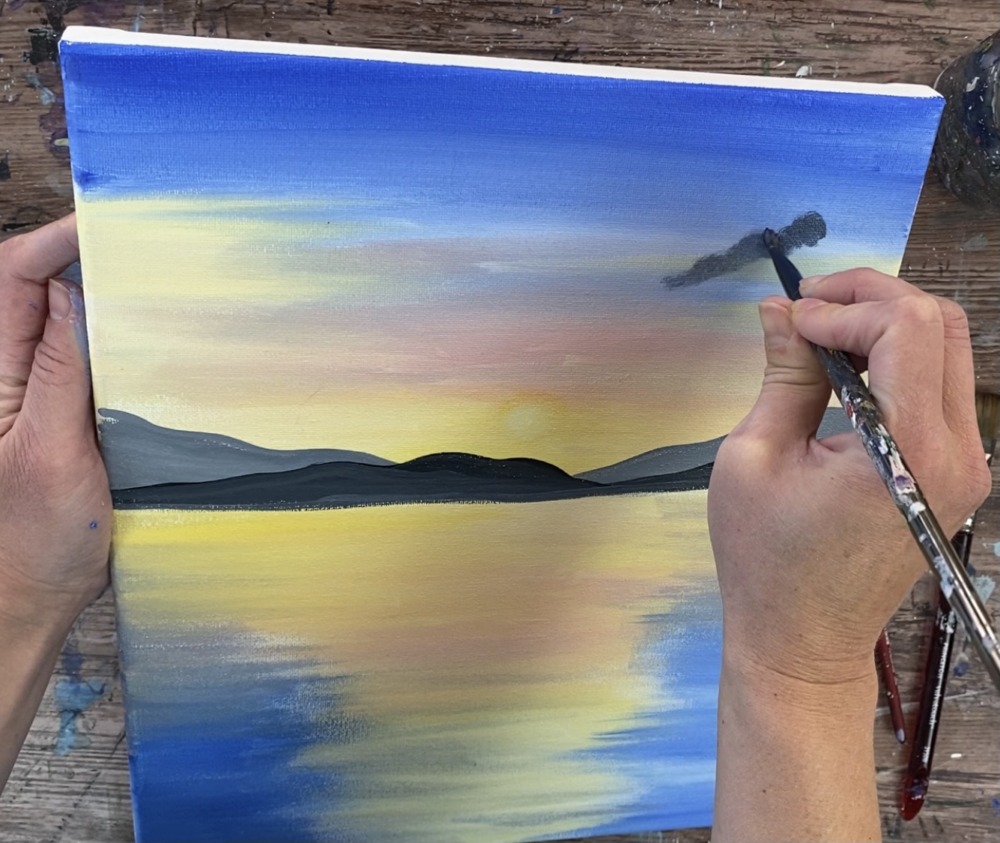
The clouds should look dark gray but some of the sky should be still showing through because of the “dry brush” technique. Paint several different shaped clouds.
The clouds higher in the sky are larger and the clouds lower in the sky are smaller.
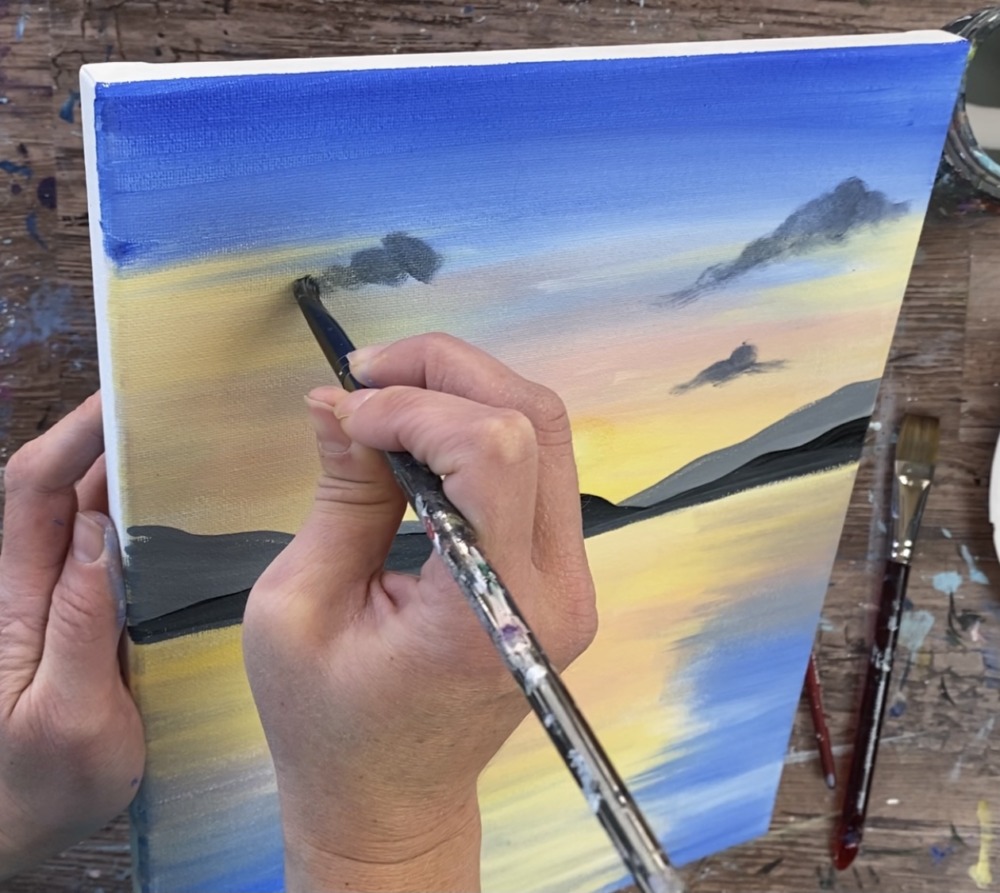
Then wipe off the brush but do not rinse. Load the brush in a little bit of yellow and wipe off a little paint off the brush (like you did with the gray layer of paint).
Paint in small, circular strokes with just the tip of the brush. Add the yellow to the bottom area of the clouds but do not cover all the gray. The yellow is where the sun would be reflecting on the bottom of the clouds.
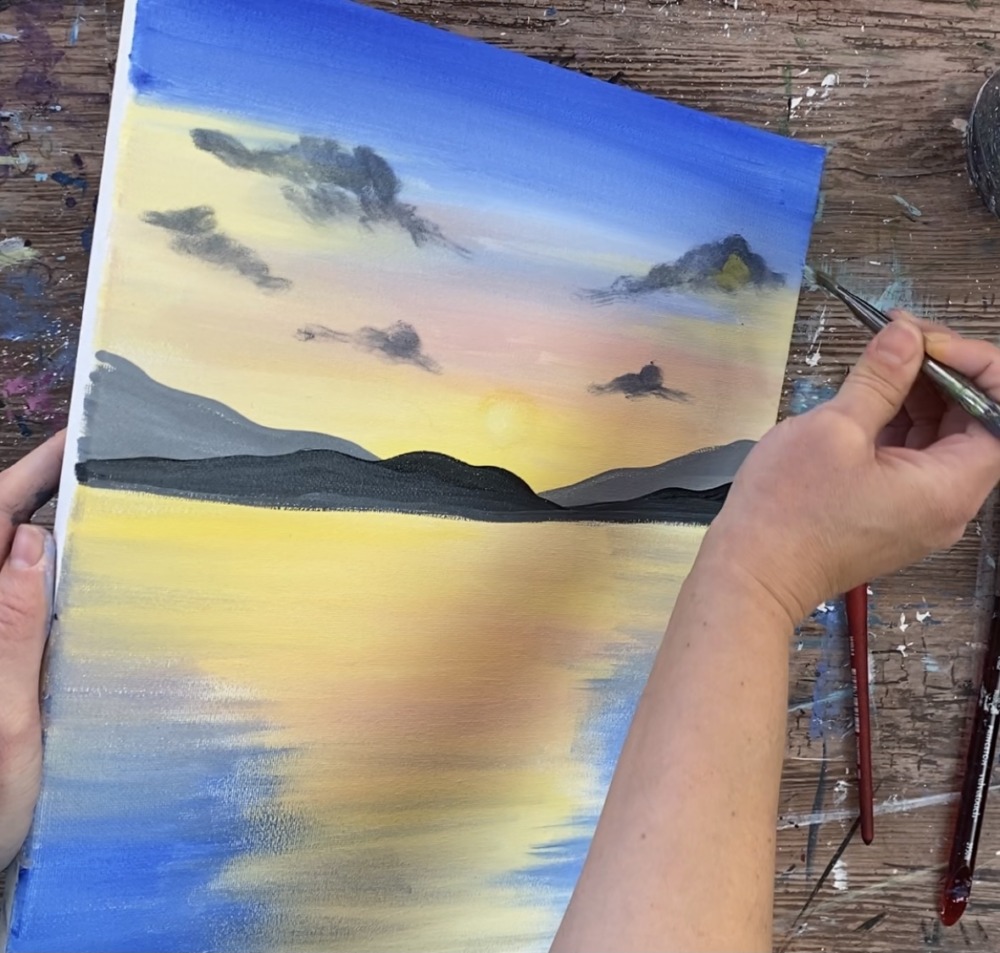

Notice the picture below how the yellow is only on the bottom area of the clouds and a little in the middle area but the tops of the clouds are still dark gray. The clouds are not completely opaque and you can still see a little sky showing through.
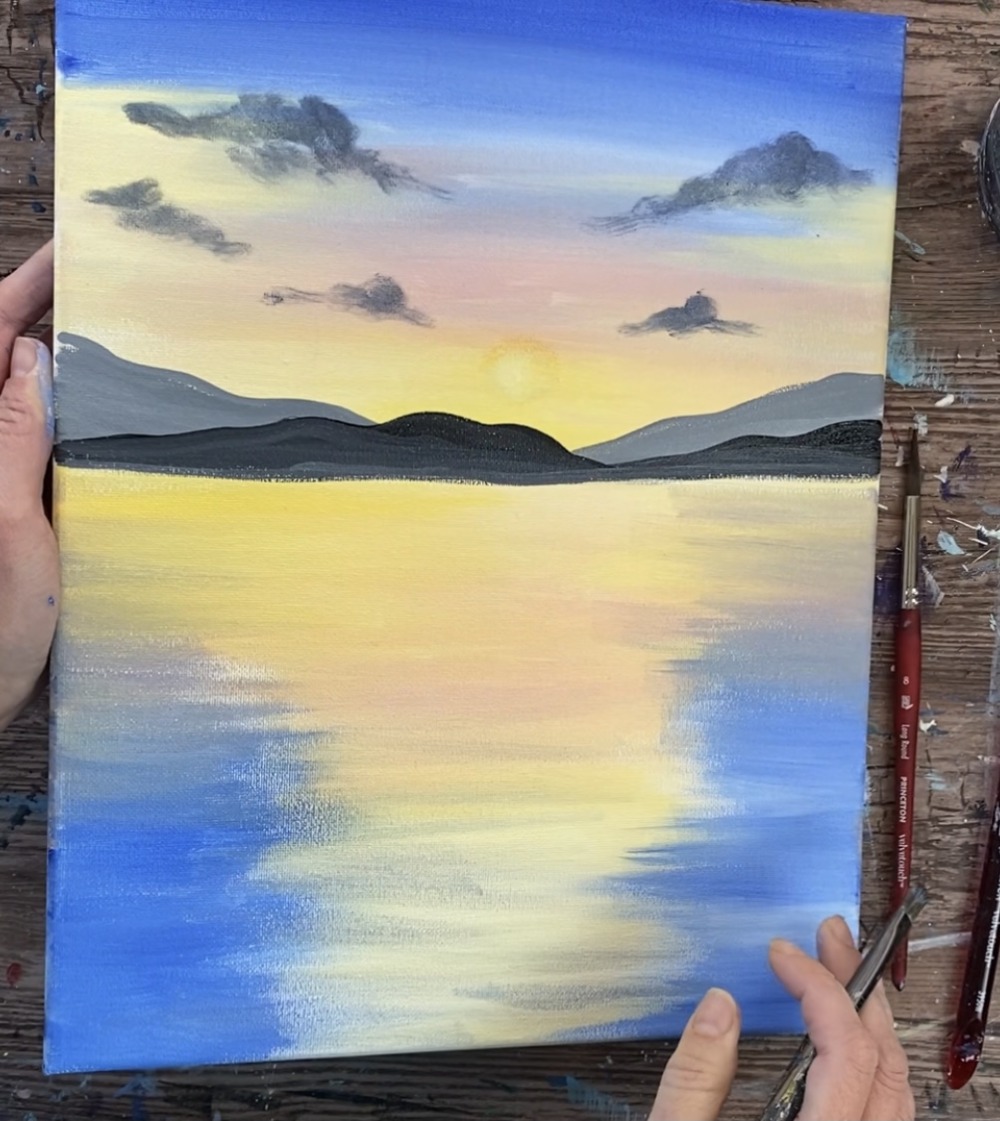
Then do a third and brighter layer on the bottom of the clouds with titanium white mixed with white. Add this just to the bottom of the clouds (still dry brush style). This is where the brightest part of the cloud would be.
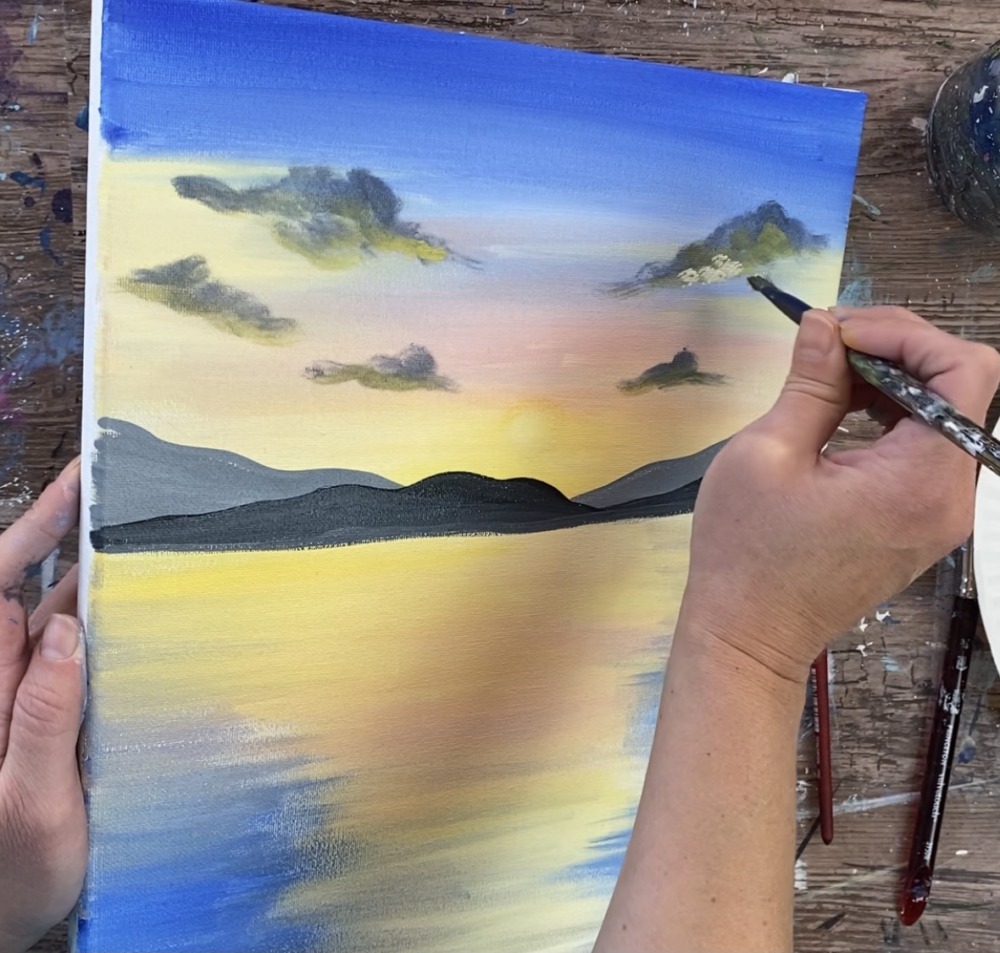
Add that bright white to the very bottom of the clouds. They will look bright and reflecting the sunset just on the bottoms.
You can also add bits of titanium white to make bits of the clouds even brighter.
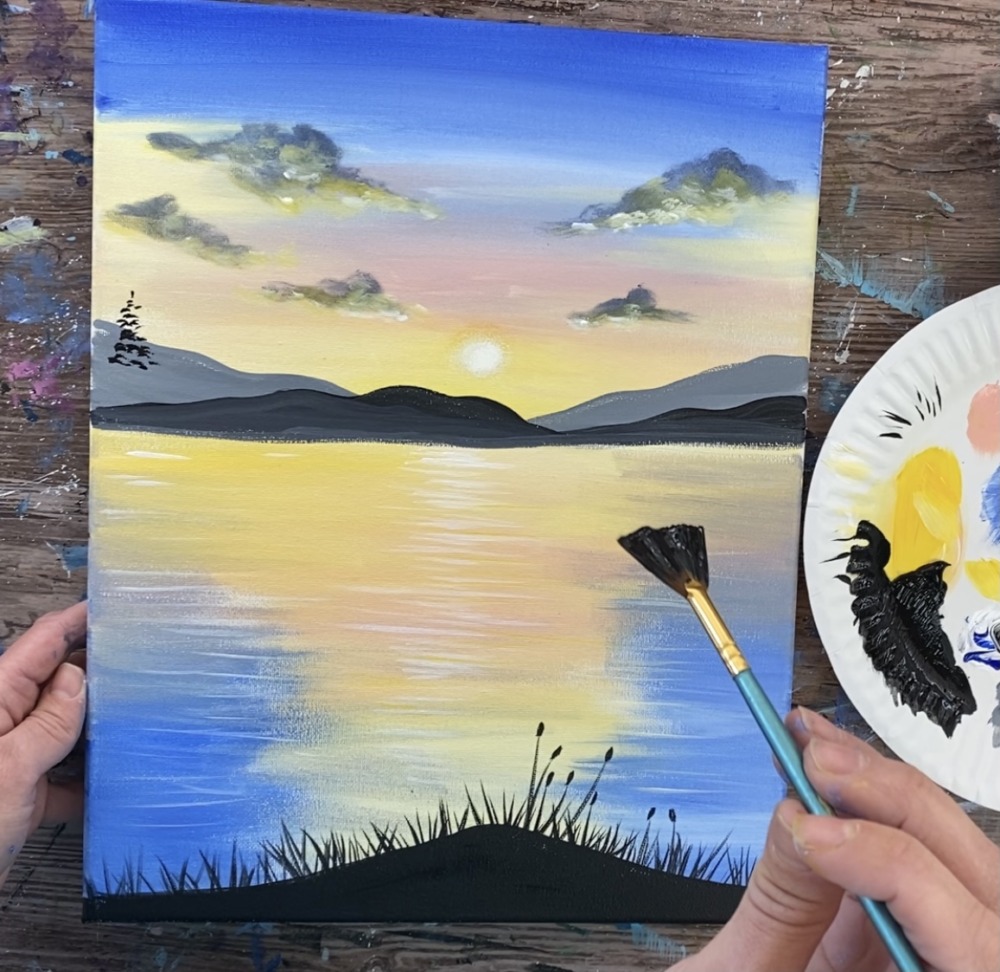
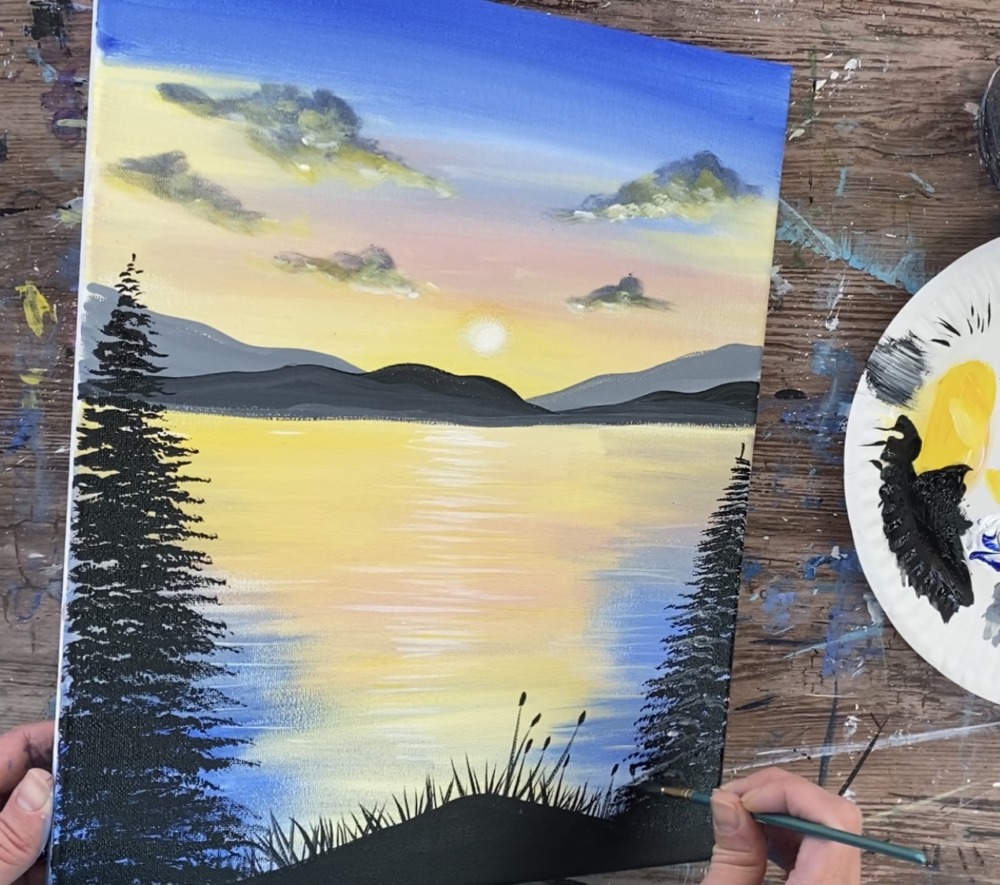
7. Paint the bottom land silhouette
Use a #8 round brush and the color mars black (slightly watered down). Paint a pointed hilly area on the bottom of the canvas and fill it in solid black.
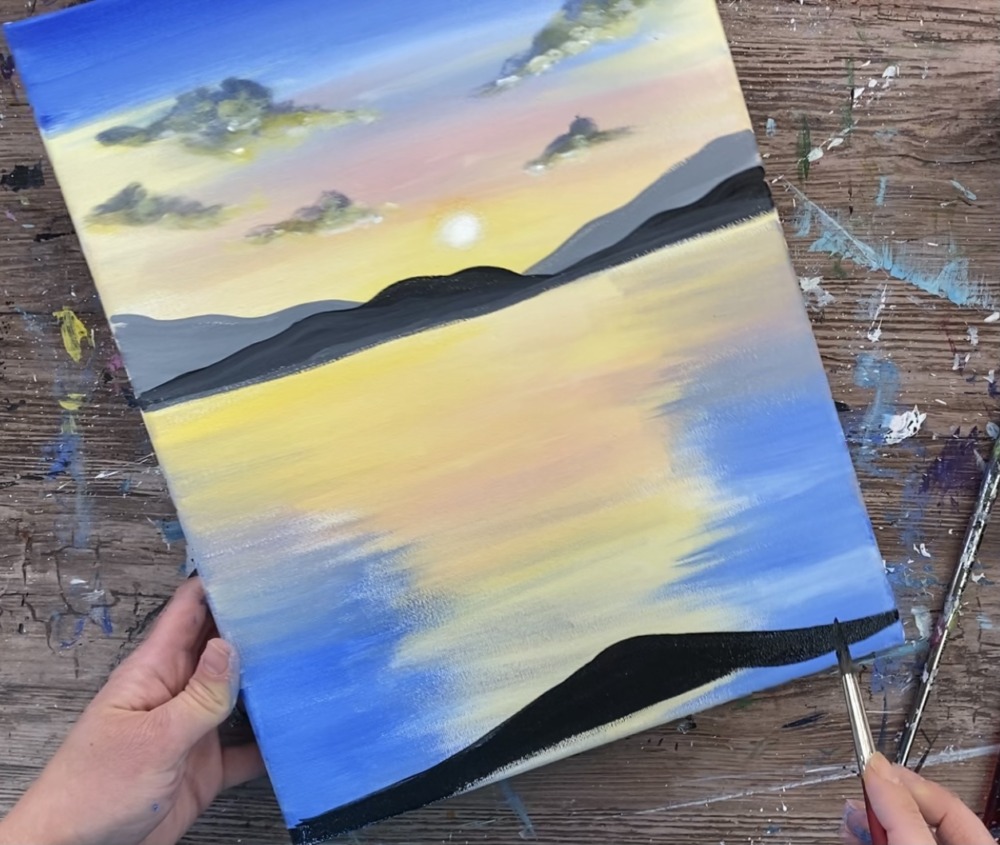
Next use either the #8 round or a #4 round brush to paint the grass. Paint very thin pointed lines with the black. Flick the brush at different angles to create the grass silhouette texture on the black hilly area. Make sure to use the very tip of the brush to get the thin lines.
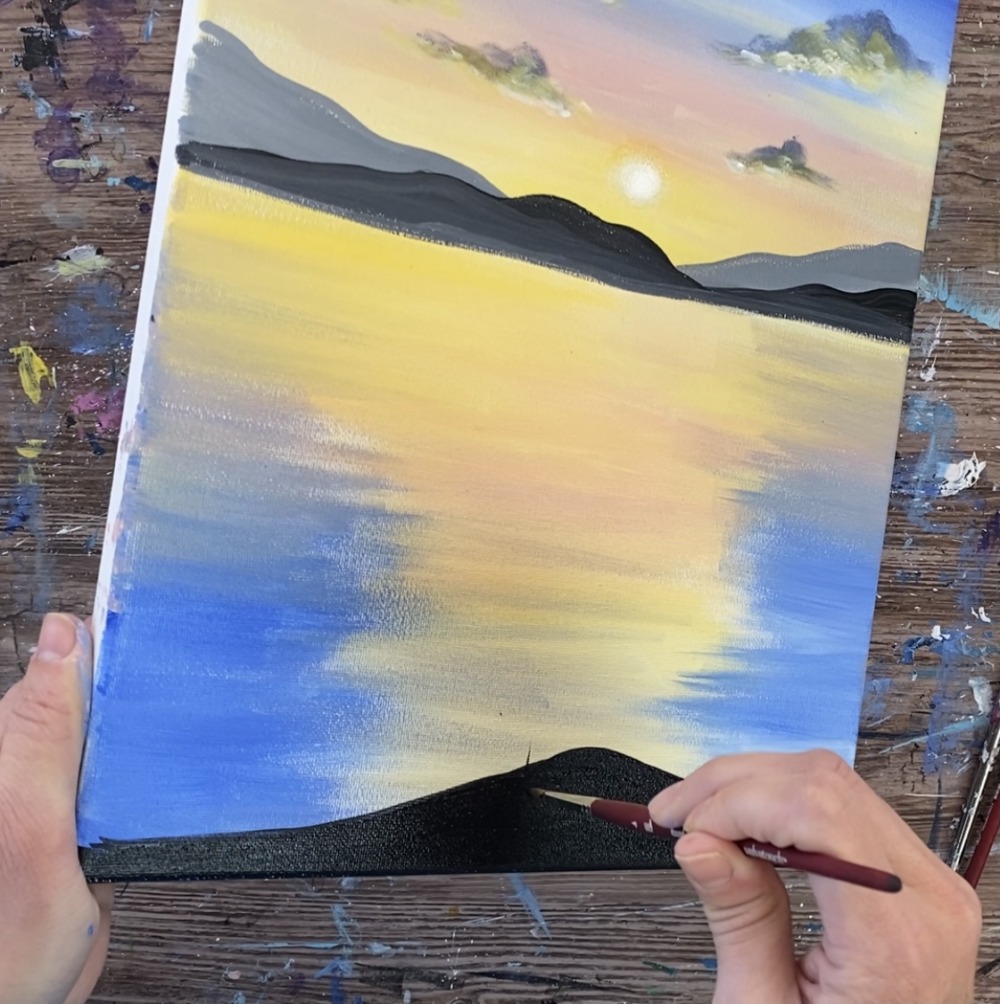
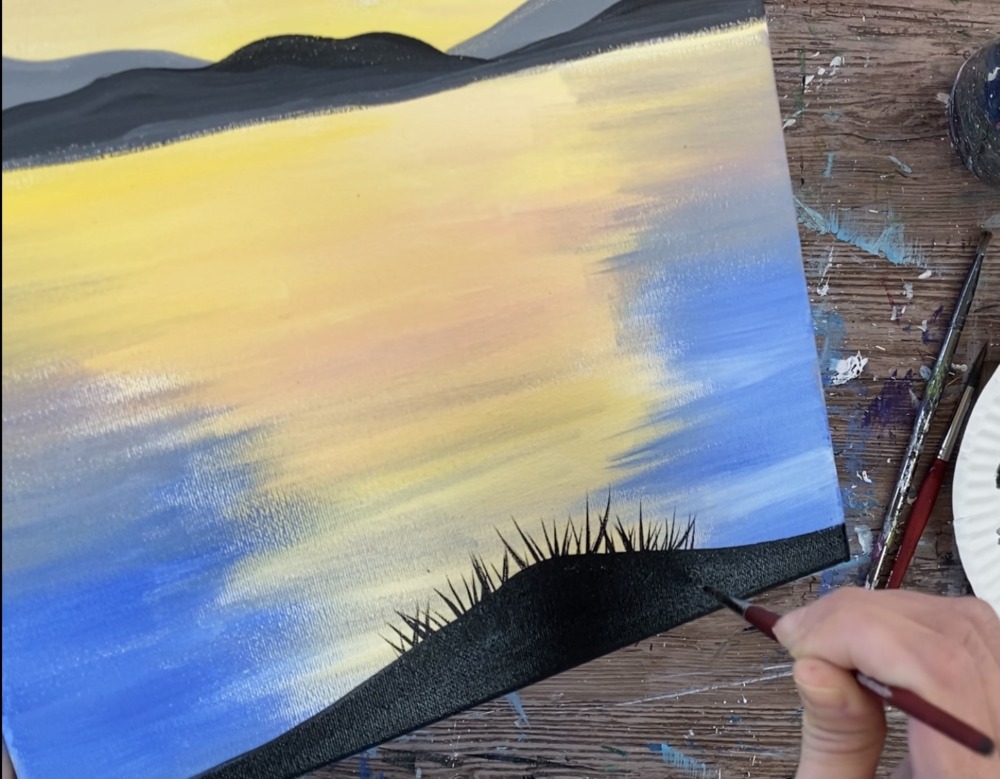
Make some longer grass lines and add small oval shapes on the tips of the grass to create the cattail silhouette shapes.
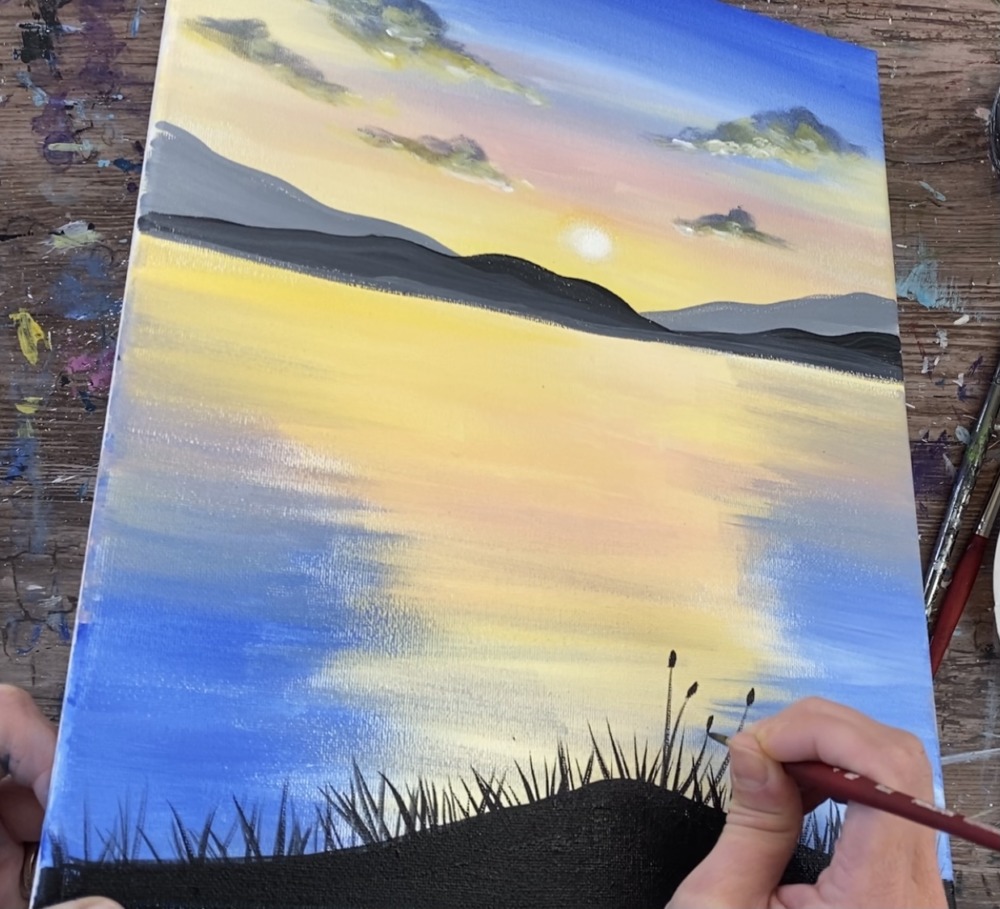
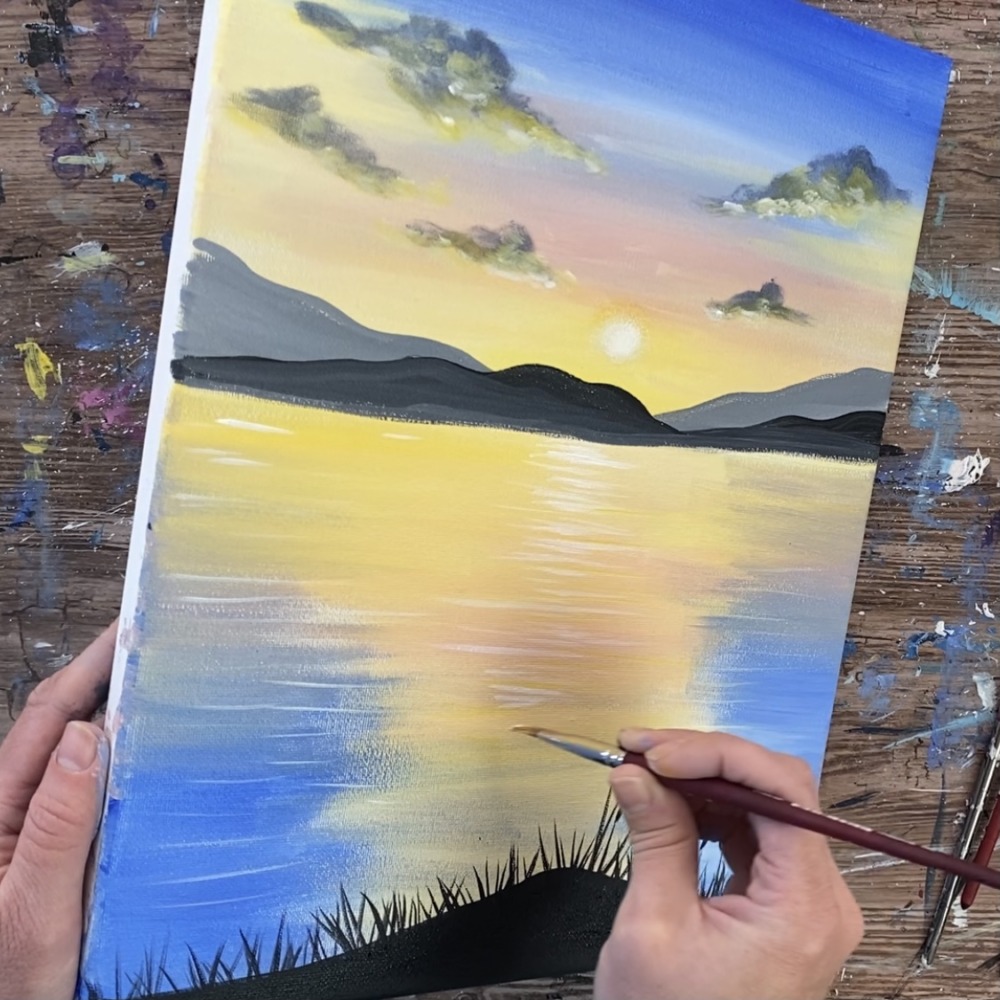
8. Paint the water lines/ reflection
Use your 3/8″ angle brush (or a round brush) and titanium white to paint thin white horizontal lines in the water. Concentrate the lines especially under the sun. Try to get your lines to be smaller in the distance and longer closer to the bottom.
Paint these thin lines all over but make sure there are a lot of the white lines in a vertical area directly under the sun.
9. Paint the fan brush trees
Painting fan brush trees is an acquired skill that takes some practice! If this is your first time, I recommend practicing on a separate area (like a sketch book) until your feel comfortable adding them to your painting. You can also see my tutorial about fan brush trees here!
Paint the fan brush silhouette trees with a #4 fan brush (or any size). The brush I use is about 1.25″ wide but you can use any similar size. I don’t recommend the super large fan brushes because they are harder to control.
Start at the top and make a small vertical mark for the top of the tree. Then hold the brush at an angle and gently tap the corner of the brush to form the smaller branches at the top of the tree.
Go in a zig-zag direction and have your branches start to get wider as you work your way down. Remember to only use the tip of the bristles of the fan brush.
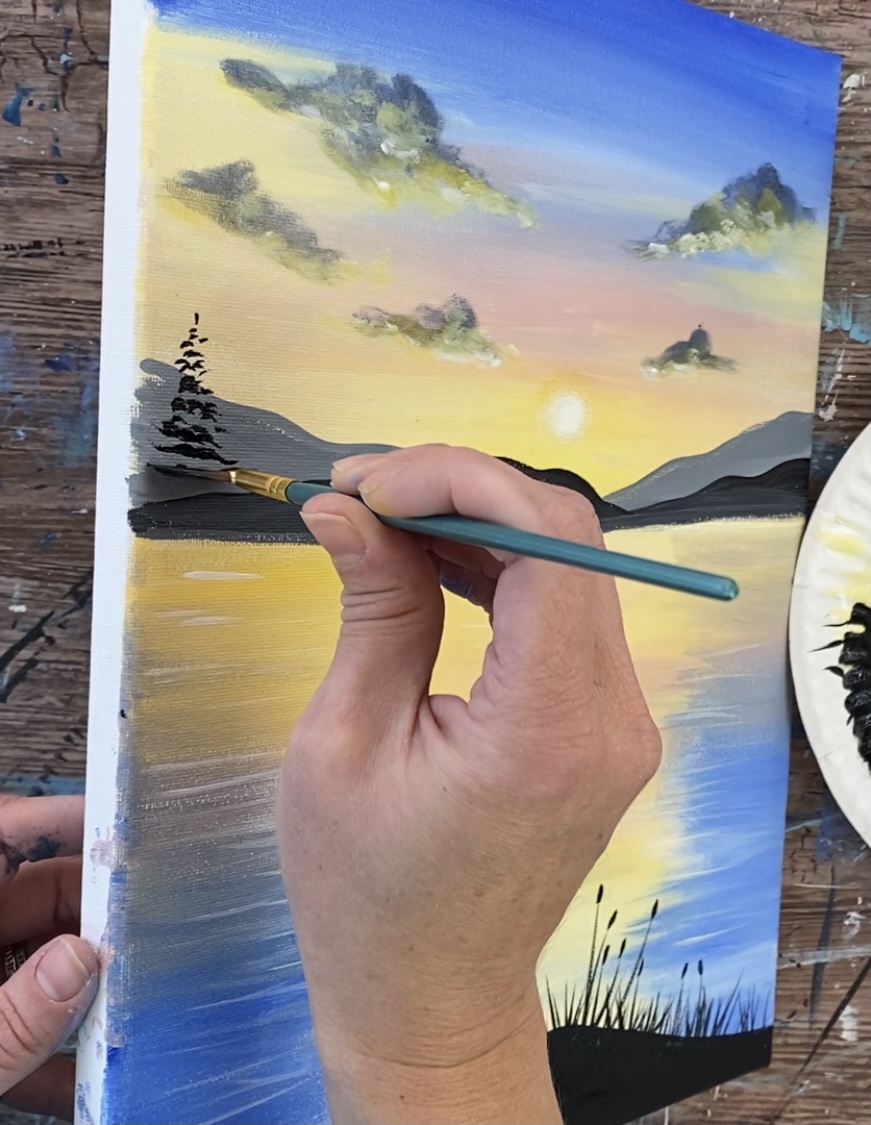
Keep working your way down to the land silhouette.
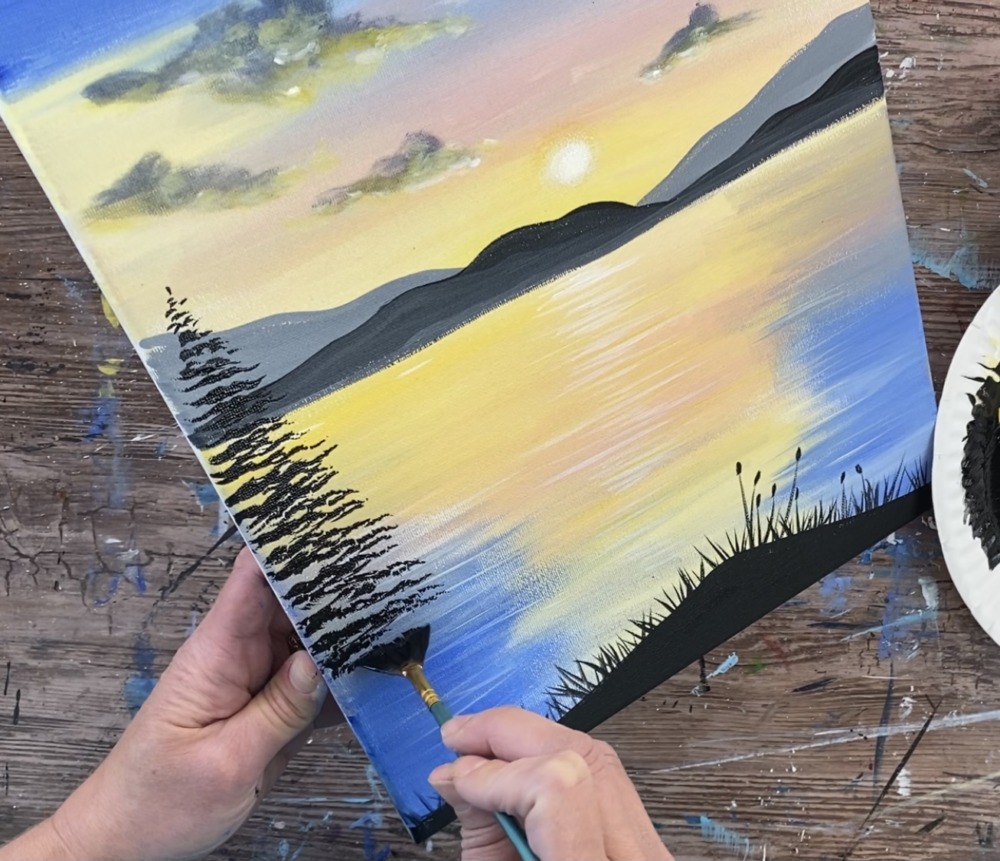
It’s okay if your tree looks bare at first. You can go back over it with a second or third coat to make it look more bushier.
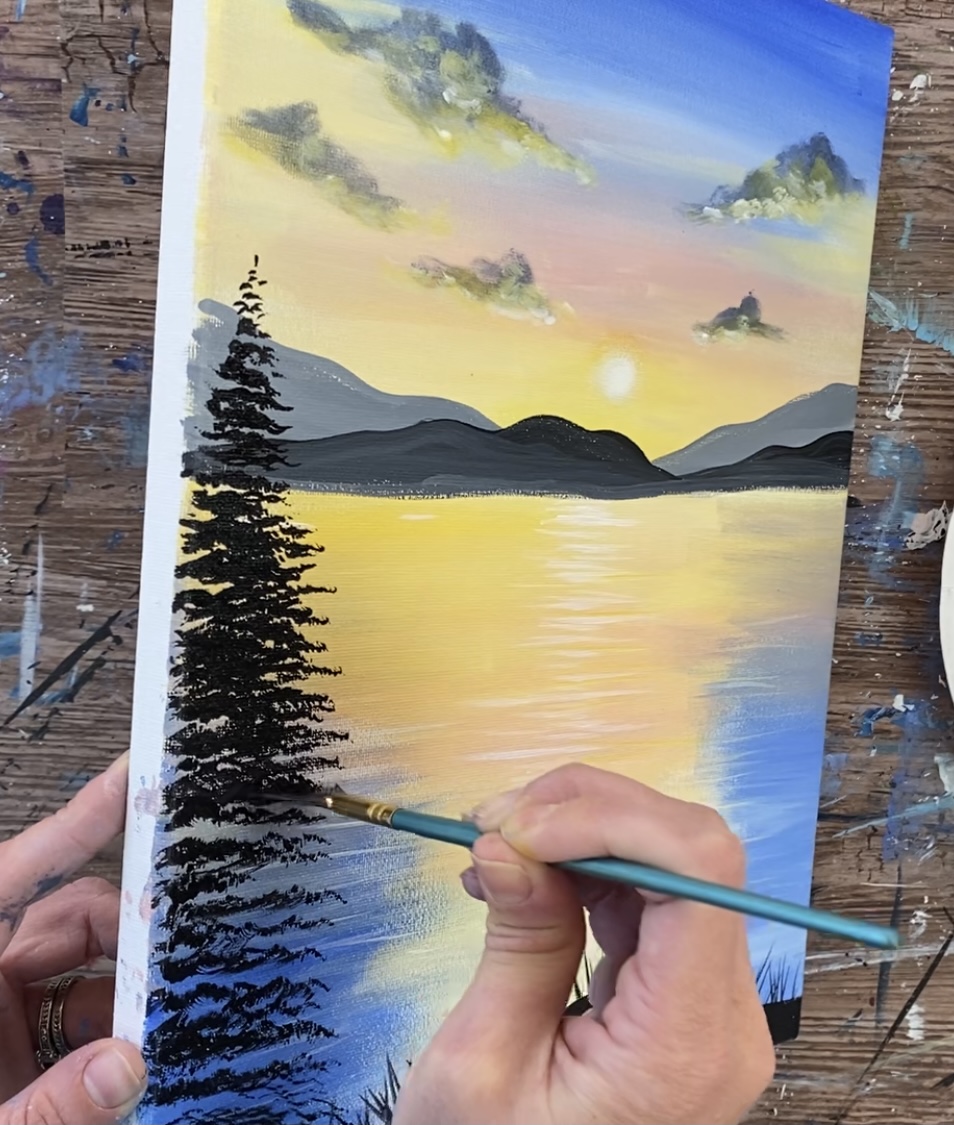
Paint a second smaller tree on the lower right.

Then (optional) add a coat of dark gray branches using the same technique. The dark gray layer gives the trees some depth.
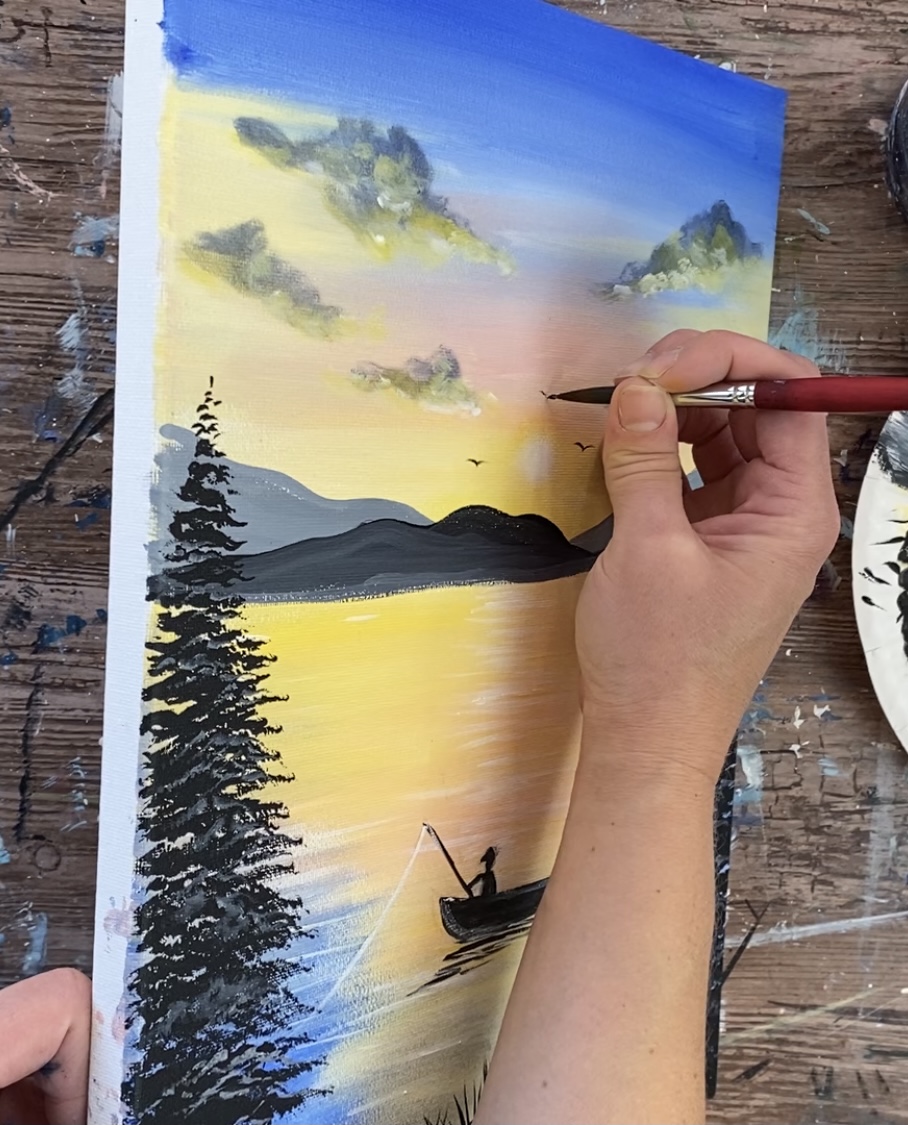
10. Draw the fisherman in the boat
You can use my template or lightly sketch the fisherman and boat. It is a really simple drawing!
I started out by drawing the boat shape.
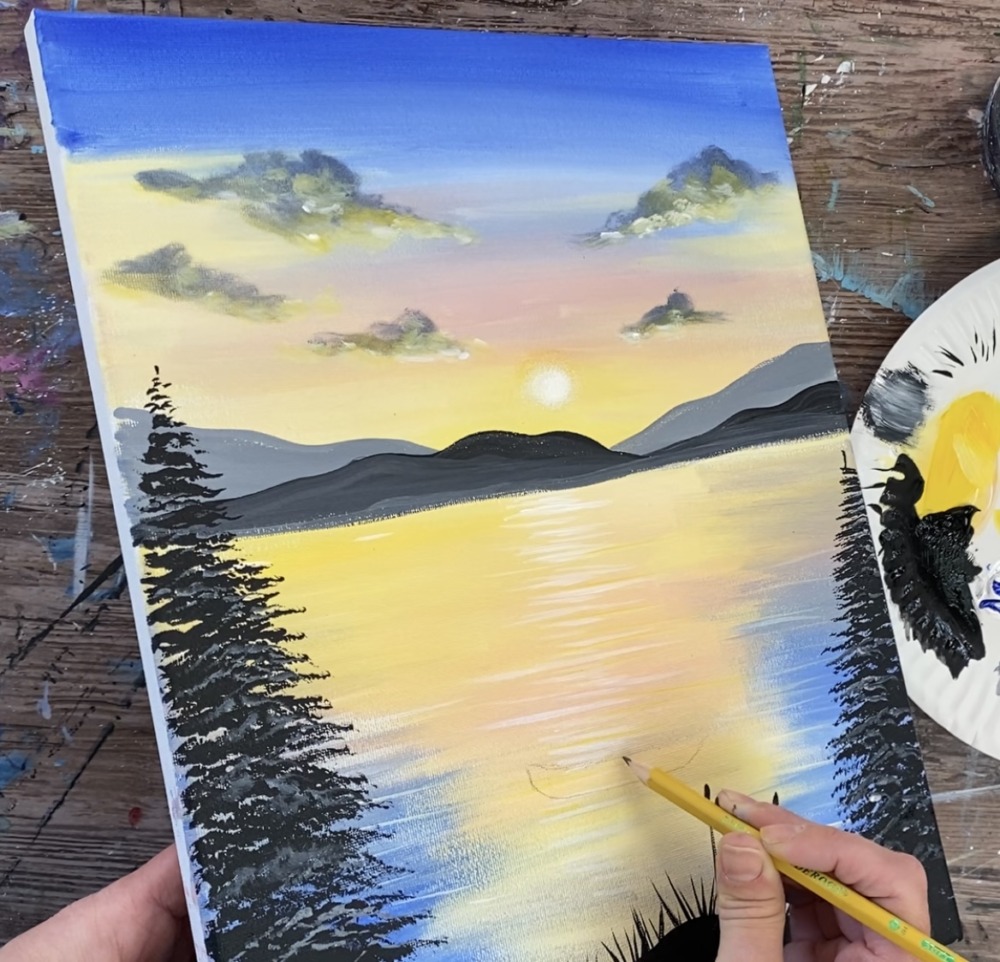
Then I drew the outline of his body, a narrow half circle and then a small circle on top of that for his head.
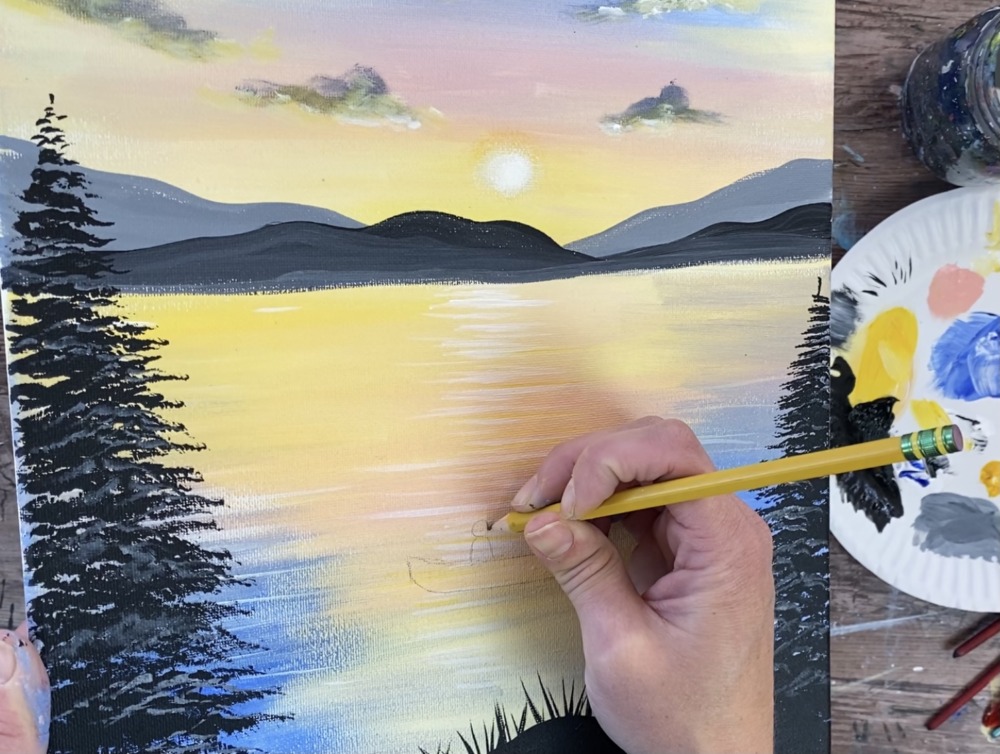
Then I lightly sketched his hat and arm. The fishing pole sticks out of the boat at an angle.
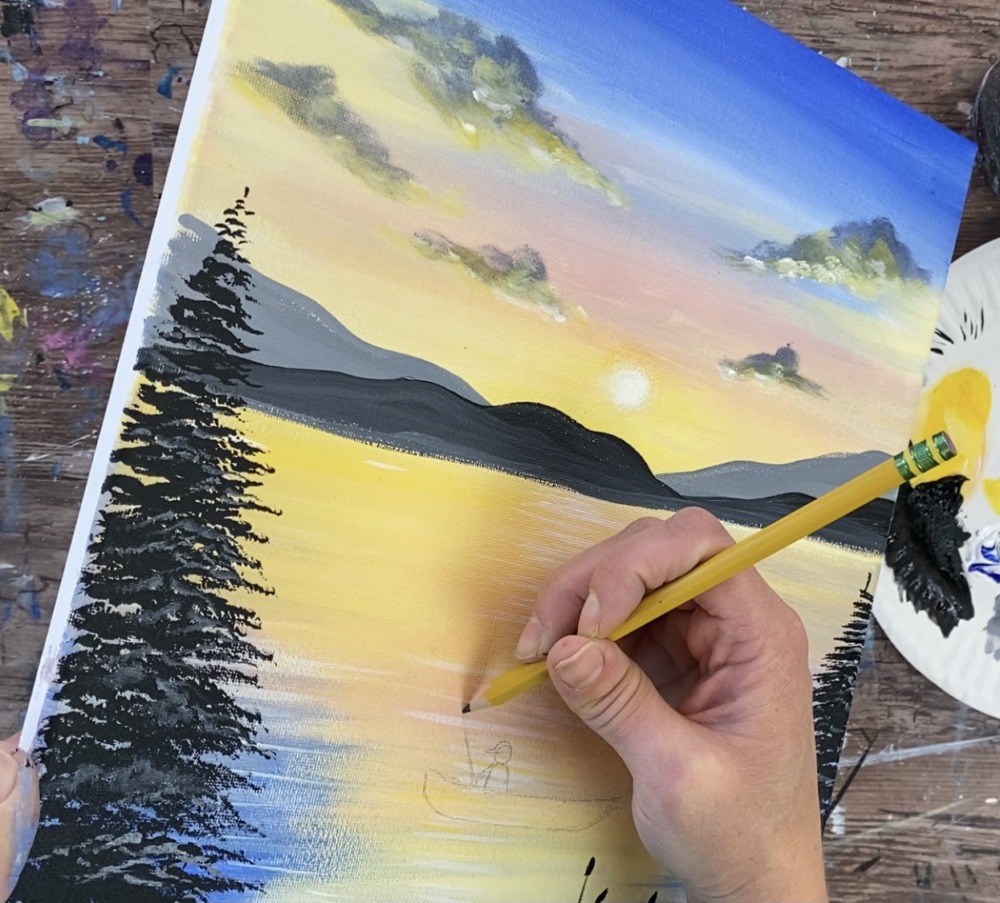
Then I drew the fishing pole line.
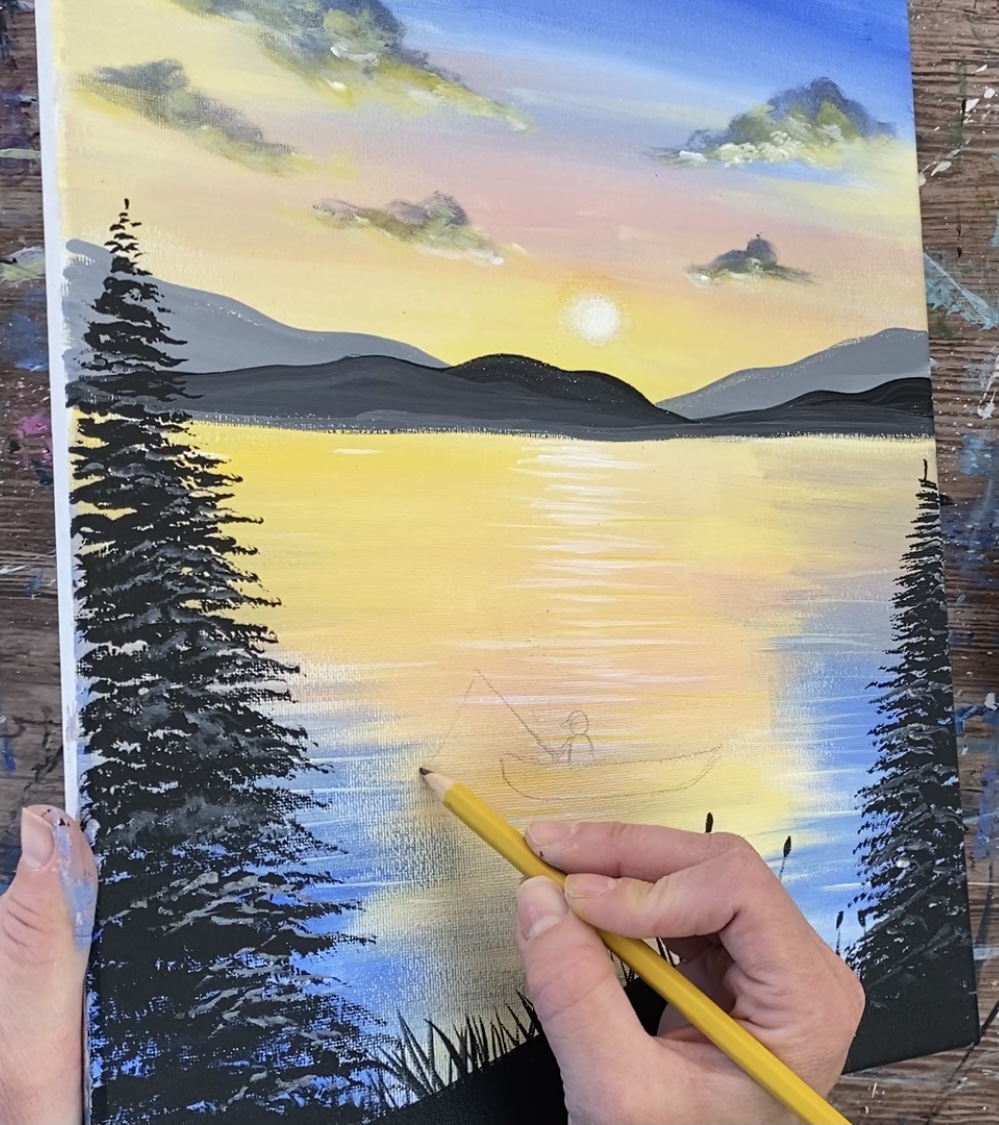
And I also lightly sketched the motor of the boat.
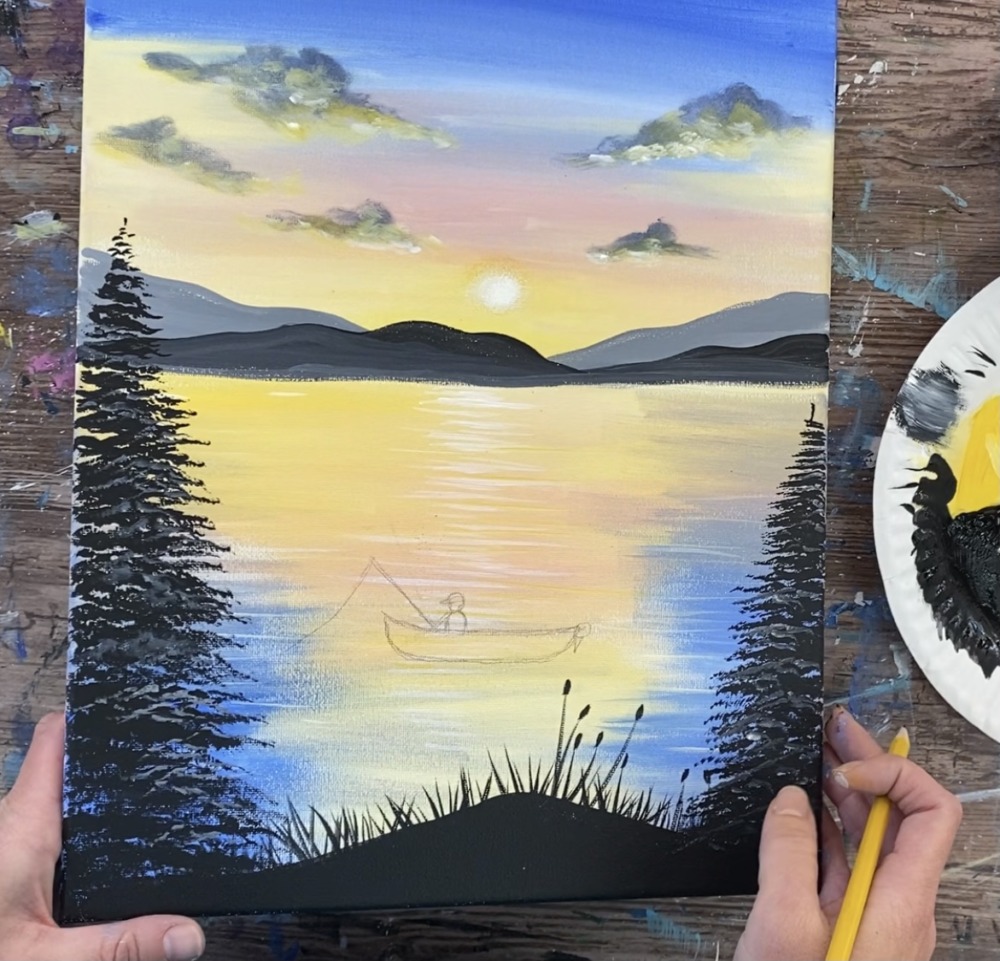
Remember that your drawing can be adjusted when you paint in the silhouette. Pencil will erase on the painting.
11. Paint the fisherman silhouette in
Use any small round brush to paint the silhouette in with mars black. It may help to slightly water your black down so it flows easily.
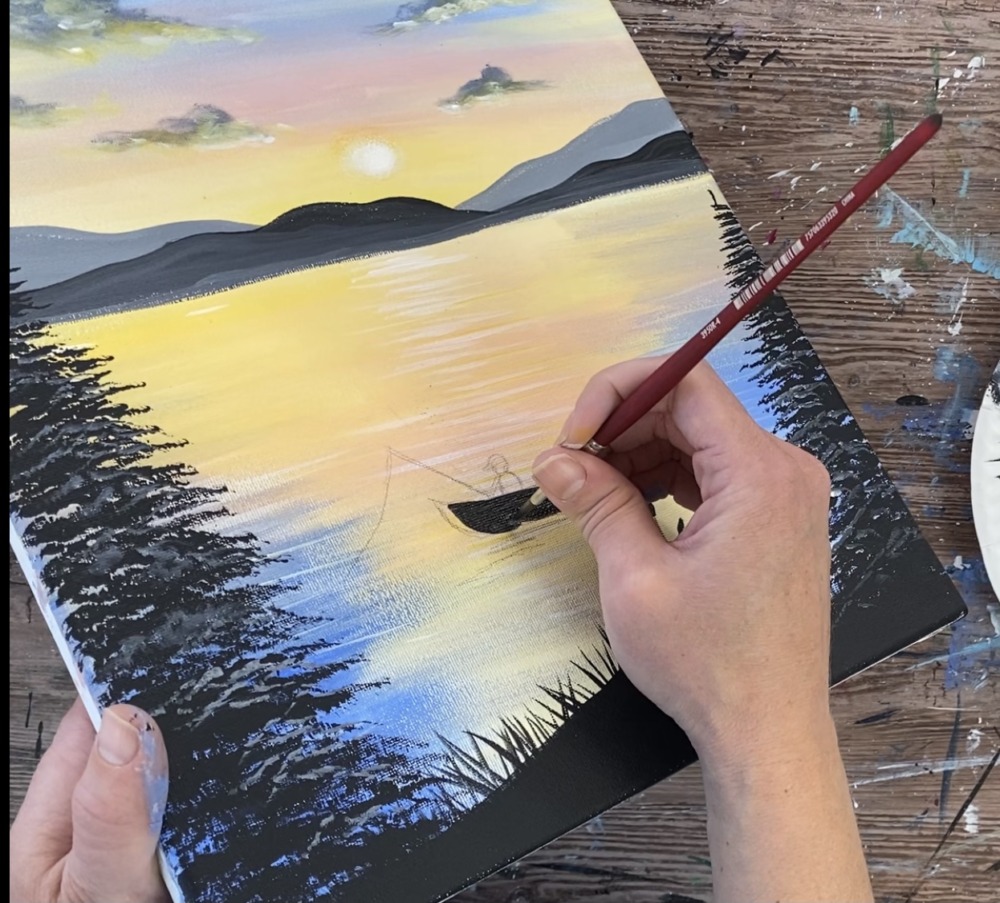
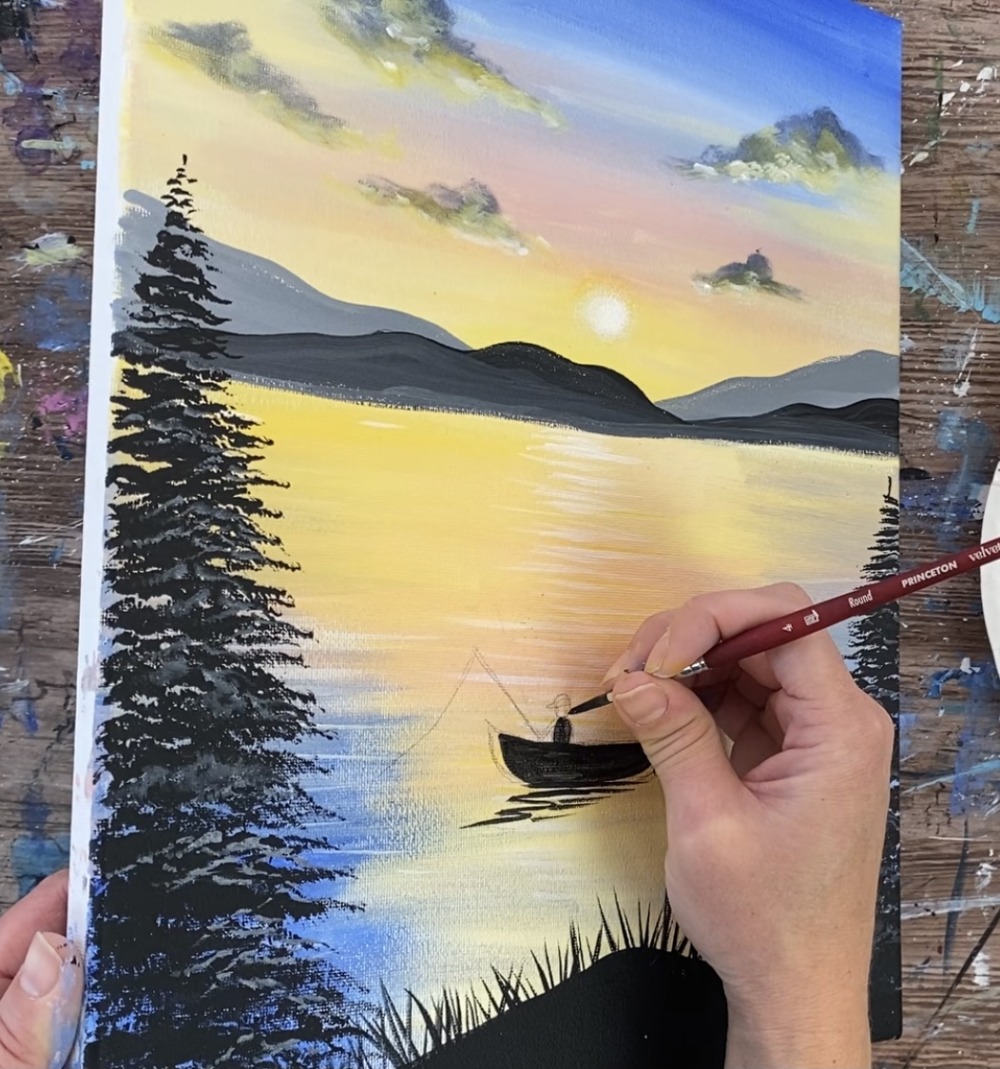
I did white instead of black for the fishing pole line.
I also painted some black water reflection lines under the boat.

Then, optional, you can add a little bit of white to some of the areas of the silhouette. I did some white on the top part of the boat.
When this silhouette dries, you can erase any remaining pencil lines.
12. Paint the birds
Use the very tip of the brush to paint the birds in the sky. Alternatively you can use a paint pen for this step.
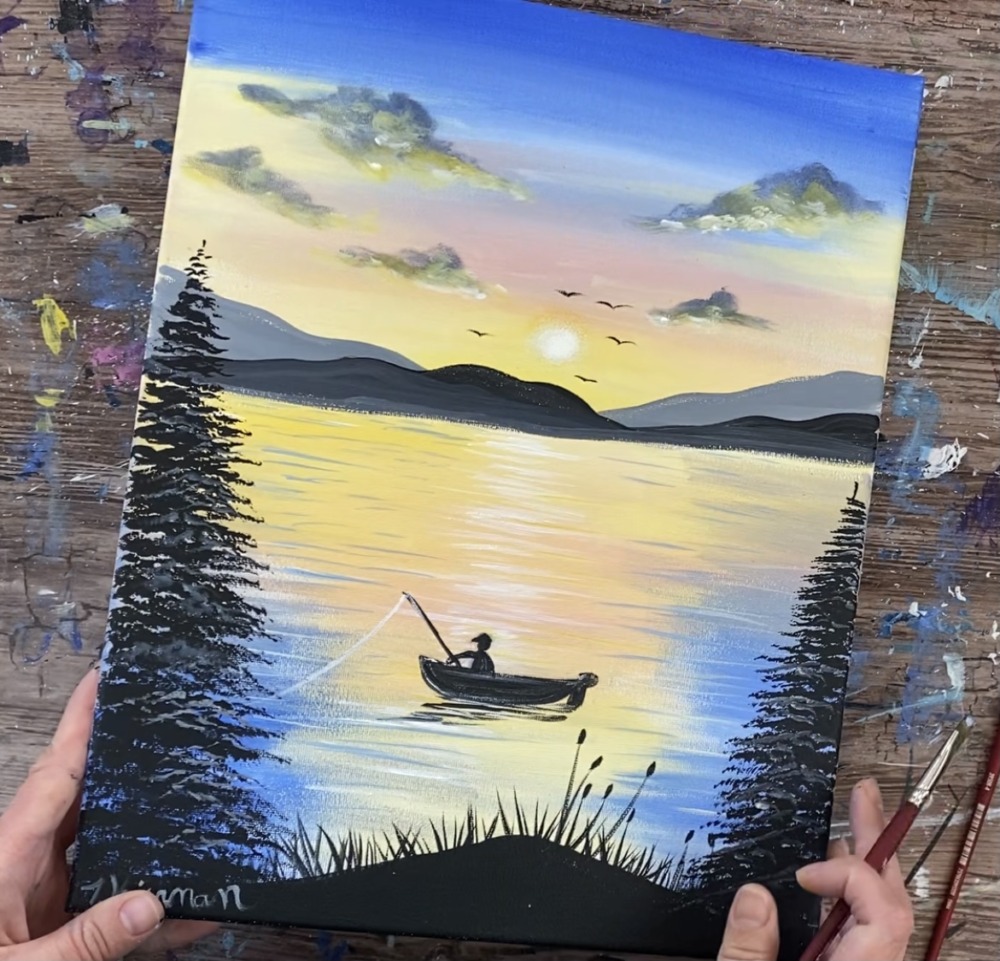
That’s it! Sign your name and show it off!
Share Your Art Here!


Thank you so much for posting these free tutorials! I just started painting for fun and they really help. My painting turned out really good besides the blending of the sky and ocean, I bought the recommended brush but it left big streaks. Any suggestions?
Date: sun 2 jan 2022
Hi I’m 11 year old girl and I love drawing and painting and my mum use to paint before I was born and my mum and you helped me realise that you have great days and bad days and not everyone is good at painting
Charli
Tracie—I just finished the Fisherman at Sunset. Thursday, I did your Mountains in Spring, with the big birch tree in the foreground. I am loving your pictures! One question—do you have a specific tutorial on fan brush trees? My trees look more like maybe I sneezed black paint! 🙂