

Would you like to save this?
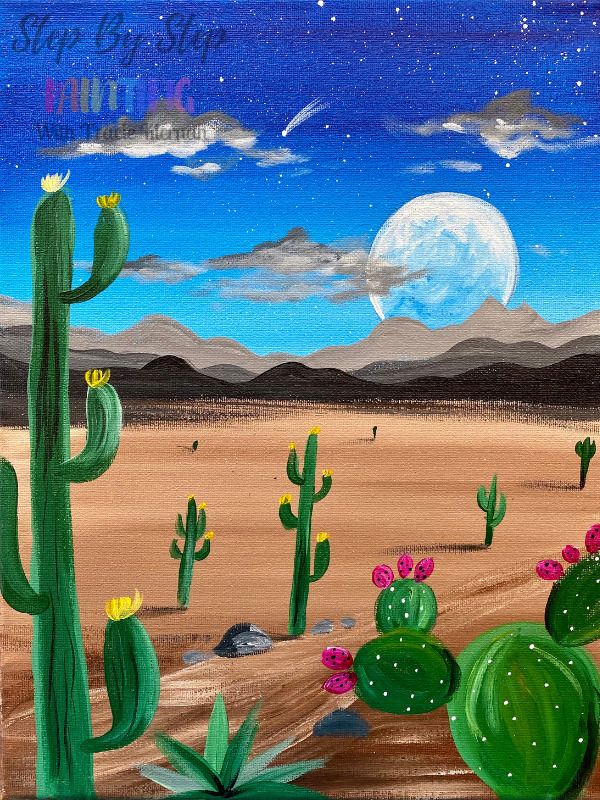
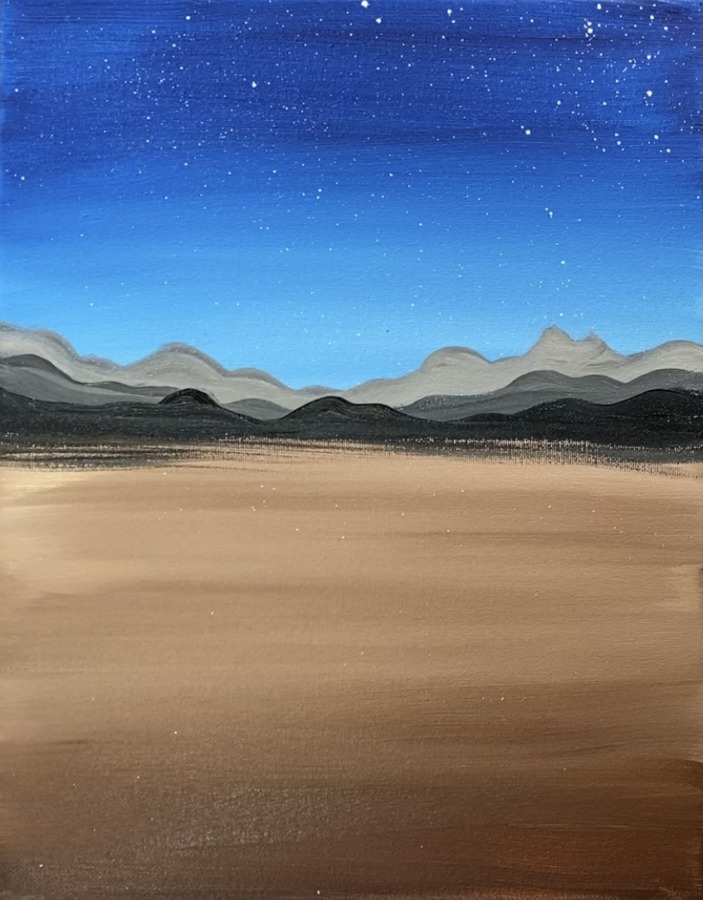
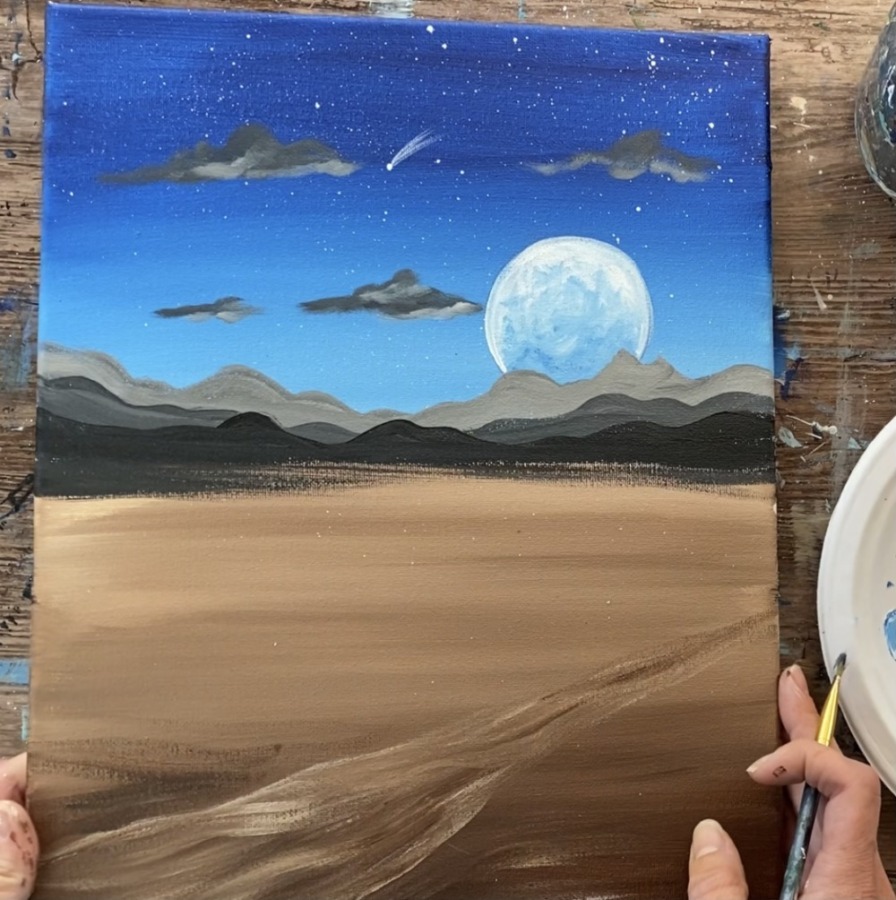
This beginner acrylic tutorial will guide you through simple steps for painting a desert scene. The scene has mountains in the distance, saguaro cacti and a dry desert wash.
The painting is done on an 11 x 14 canvas, however, you can do this on any size, preferably a rectangular size canvas.
I love painting a desert, especially one with a night sky! That beautiful full moon lights up the landscape creating just enough light to see the cacti and color on the ground.
Enjoy and happy painting!
Materials
Desert Landscape Painting
Learn how to paint a desert landscape painting at night with this beginner acrylic painting tutorial.
Materials
- Acrylic Paint
- Paint Brushes
- 11 x 14 Canvas (or any size)
- Pencil or Chalk
- 2.5" Circle To Trace
- T-Square Ruler
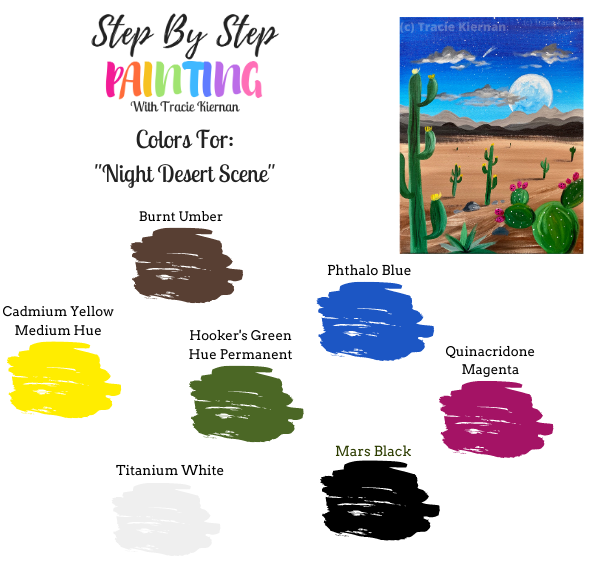
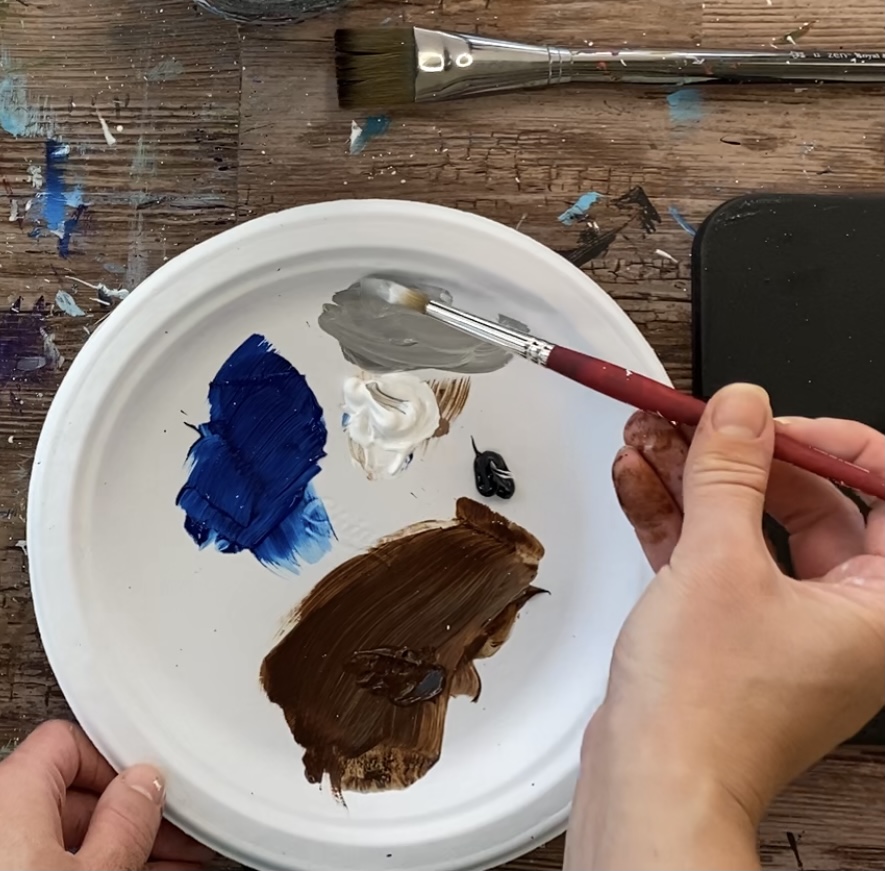
Colors
- Titanium White
- Mars Black
- Cadmium Yellow Medium
- Hooker's Green Hue Permanent
- Phthalo Blue
- Quinacridone Magenta
- Burnt Umber
Brushes
- 1" Flat Wash Brush
- #8 Round Brush
- #4 Round Brush
- 1/4" Flat/ Bright Brush
Instructions
- See tutorial on www.stepbysteppainting.net for full instructions!
Color Palette
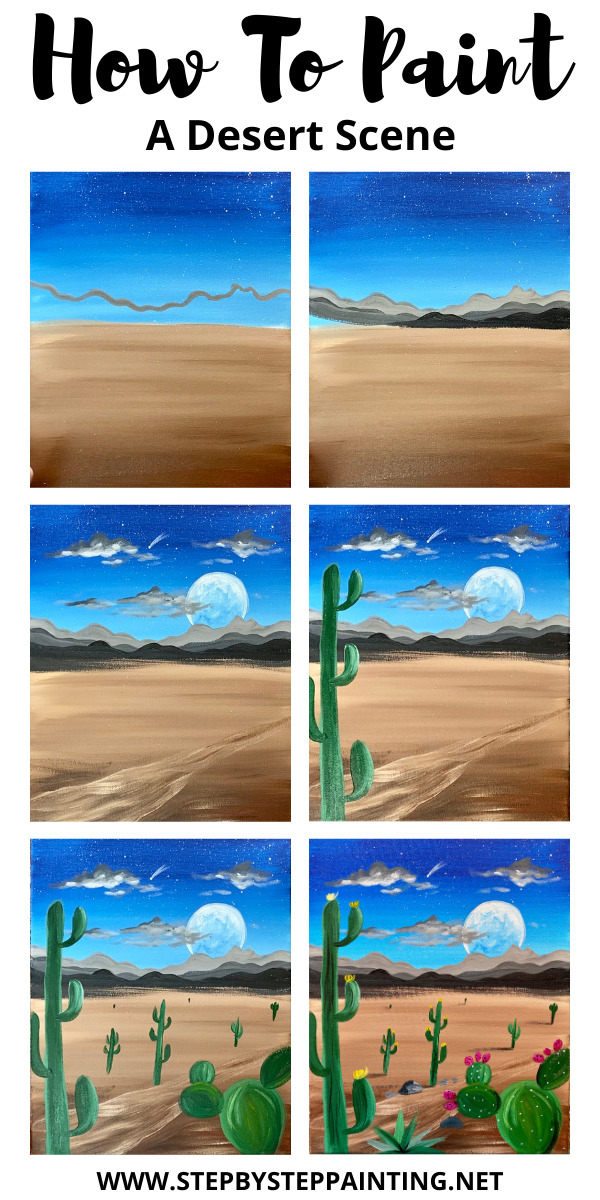
Directions At A Glance
Video
Step By Step Directions
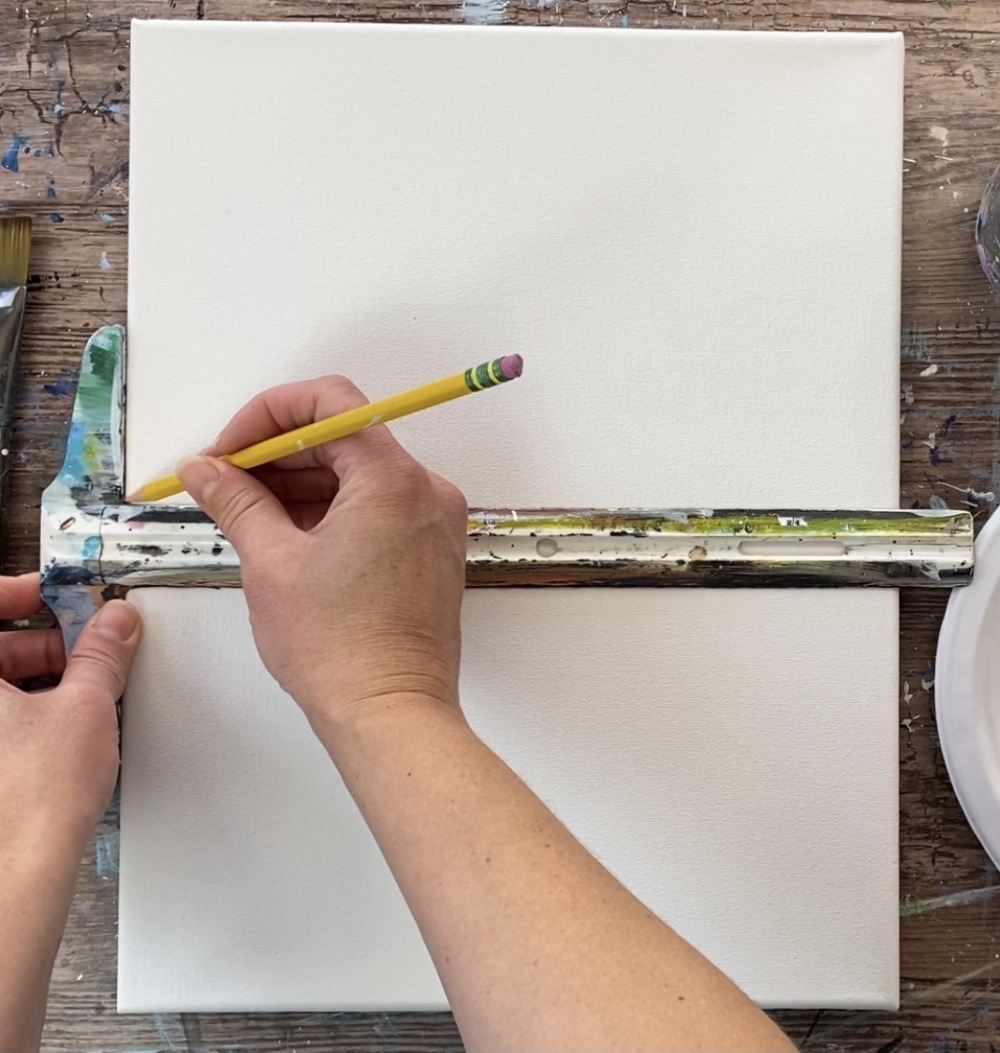
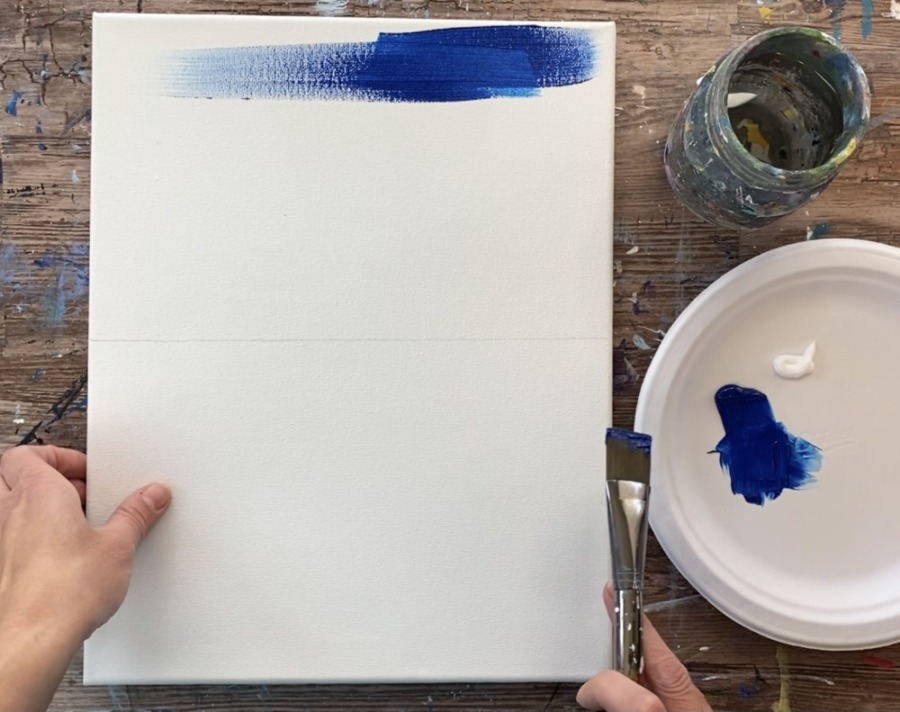
1. Draw Horizon Line
Position your canvas so that it is vertical. Then draw a horizontal line across the canvas (lightly) with a pencil. I recommend using a T-Square ruler to line up your line. Alternatively you can place a piece of painters tape in this area.
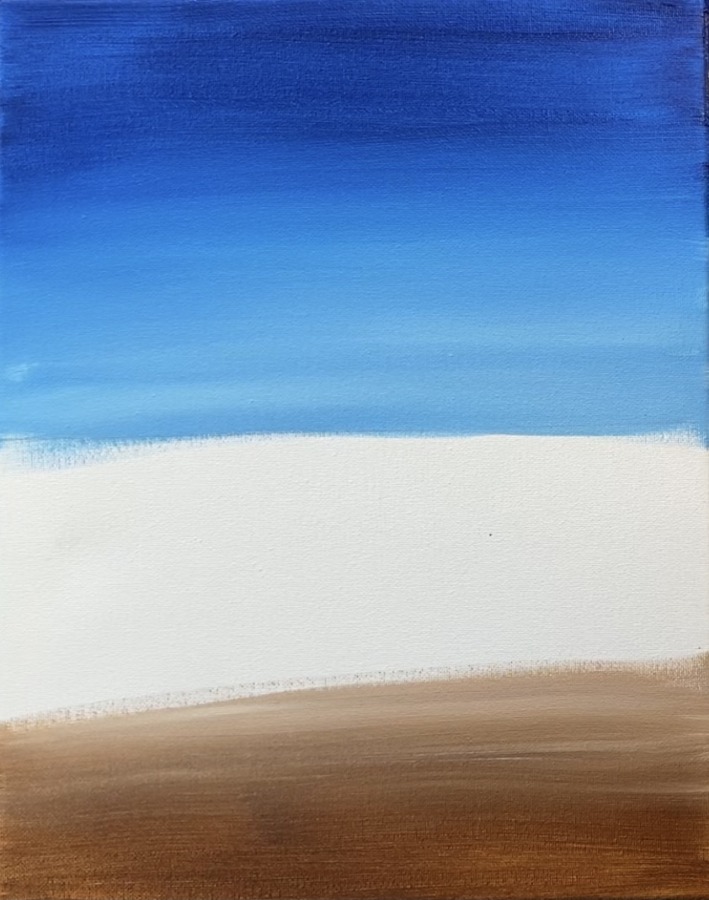
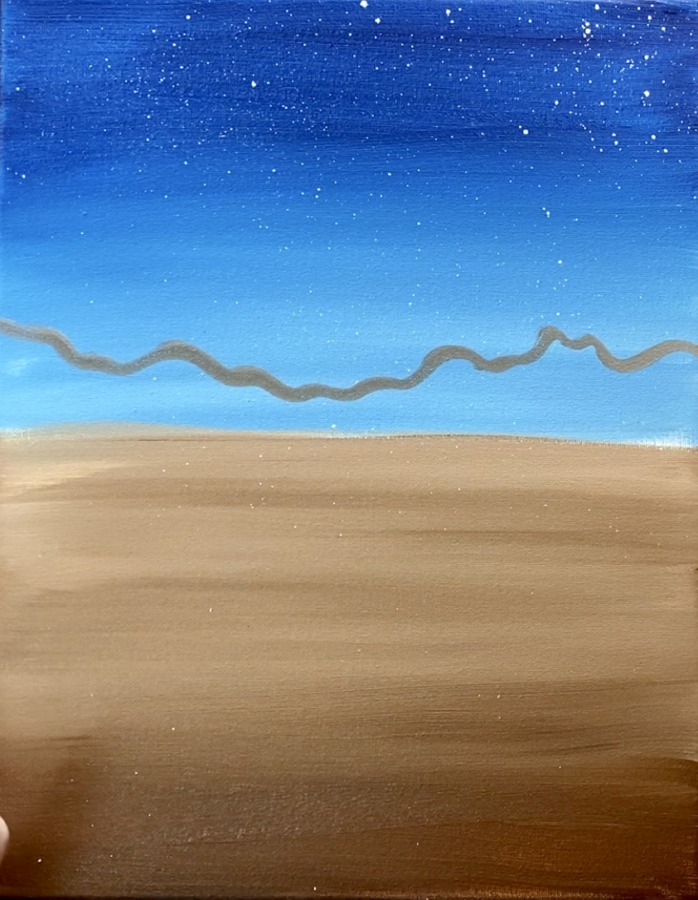
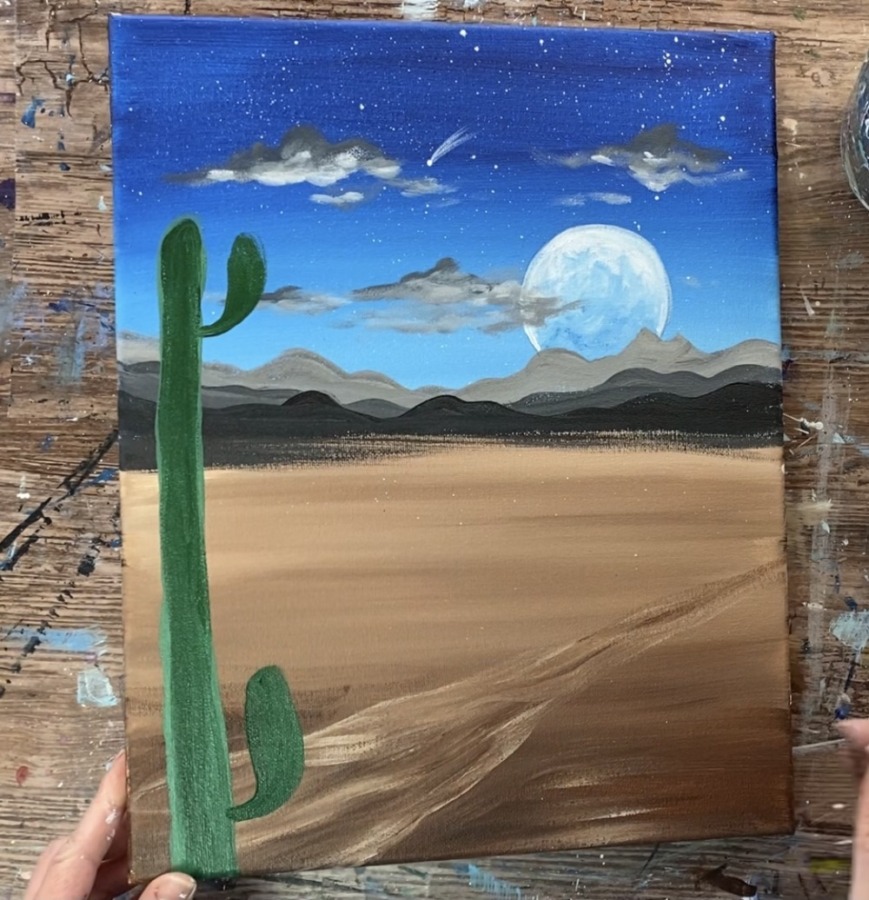
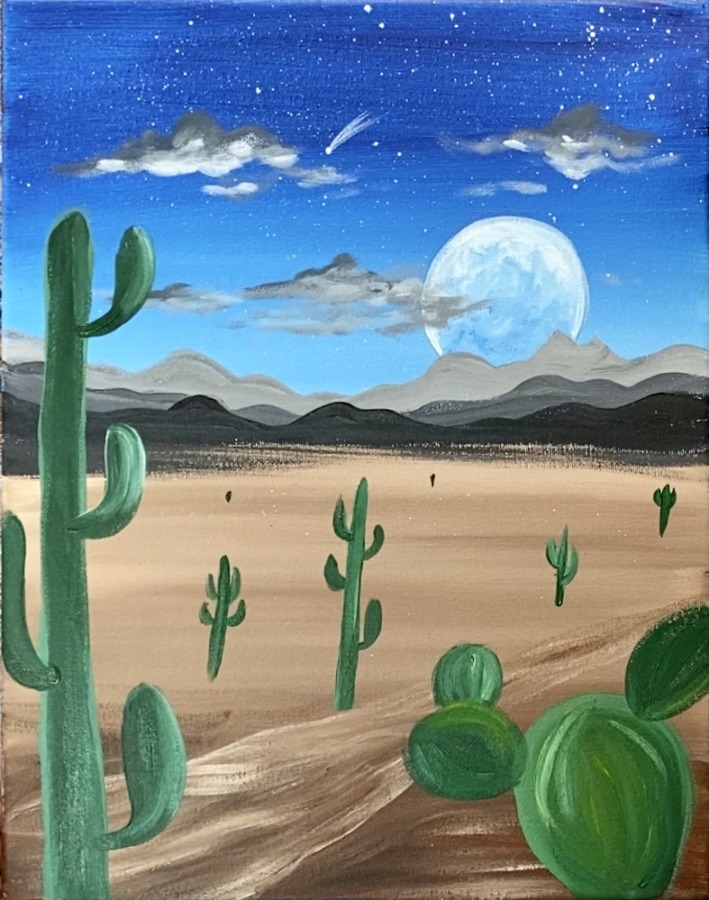
2. Paint The Sky
Load your palette with the colors “phthalo blue” and “titanium white”. Use a 1″ Flat Wash Brush dipped in water and tapped dry. Load it into the phthlao blue.
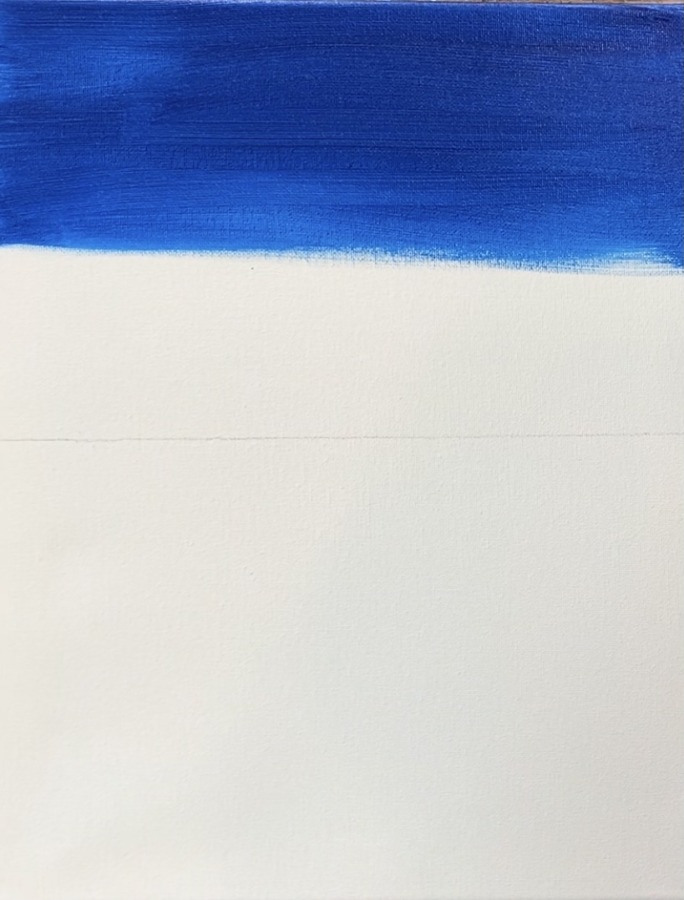
Start at the top of the canvas and paint left and right strokes going across the canvas.
Continue to paint the phthalo blue and fill up half of the sky area.
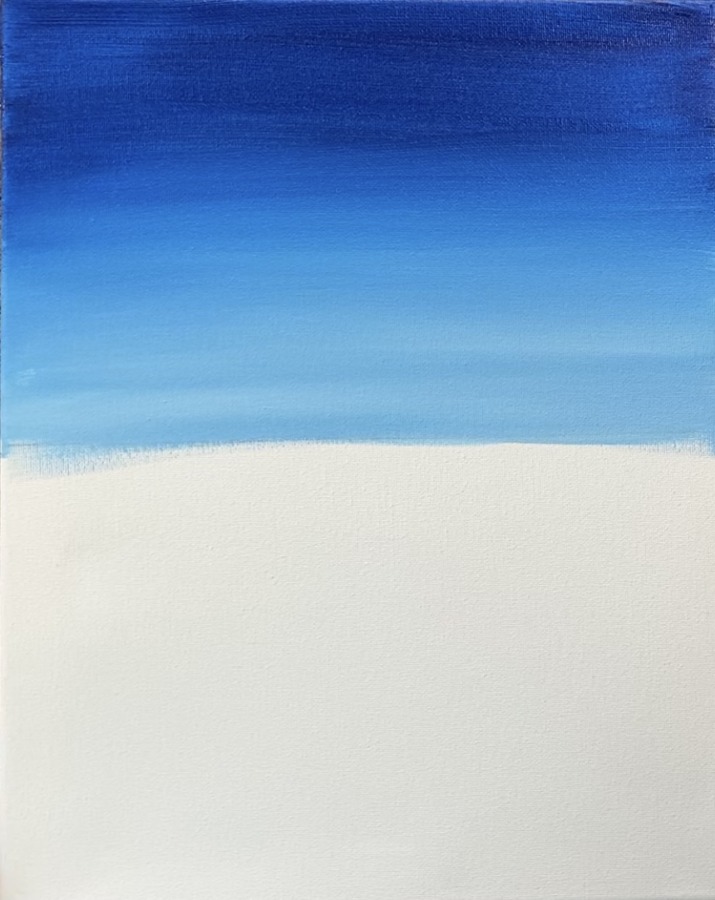
Then load your brush into the white without rinsing it. Blend the white into the dark blue. Then continue painting left and right strokes down to the horizon line.
Your blue should be darkest at the top and gradually blend to a lighter blue as you approach the horizon line. Go all the way to the horizon line and stop.
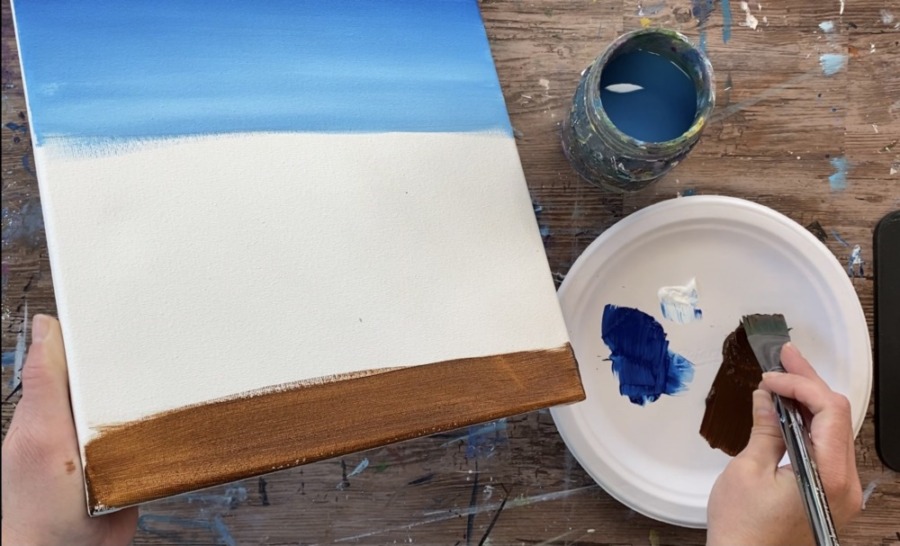
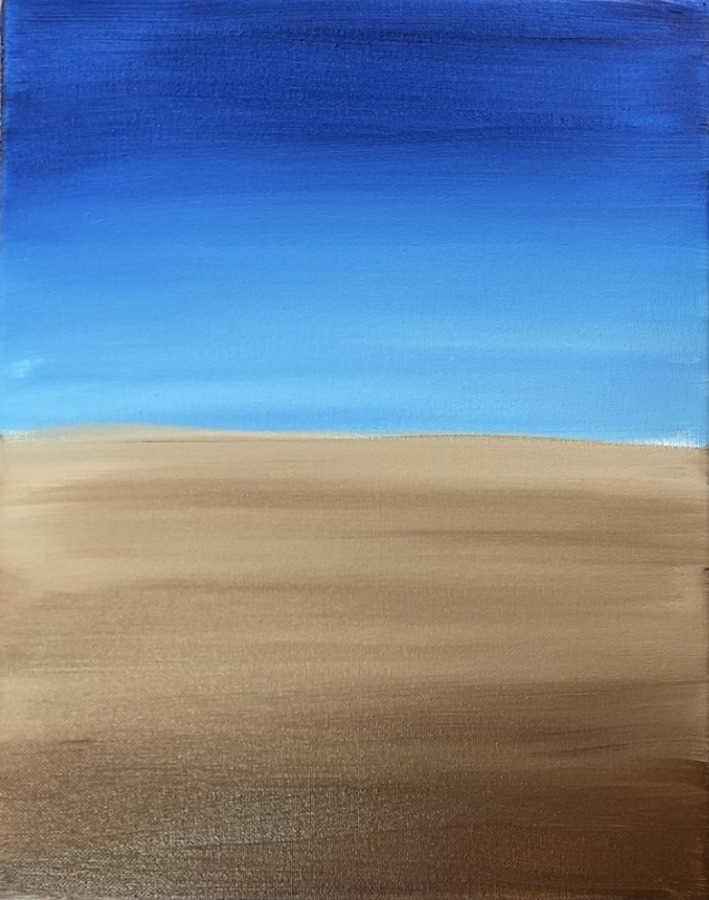
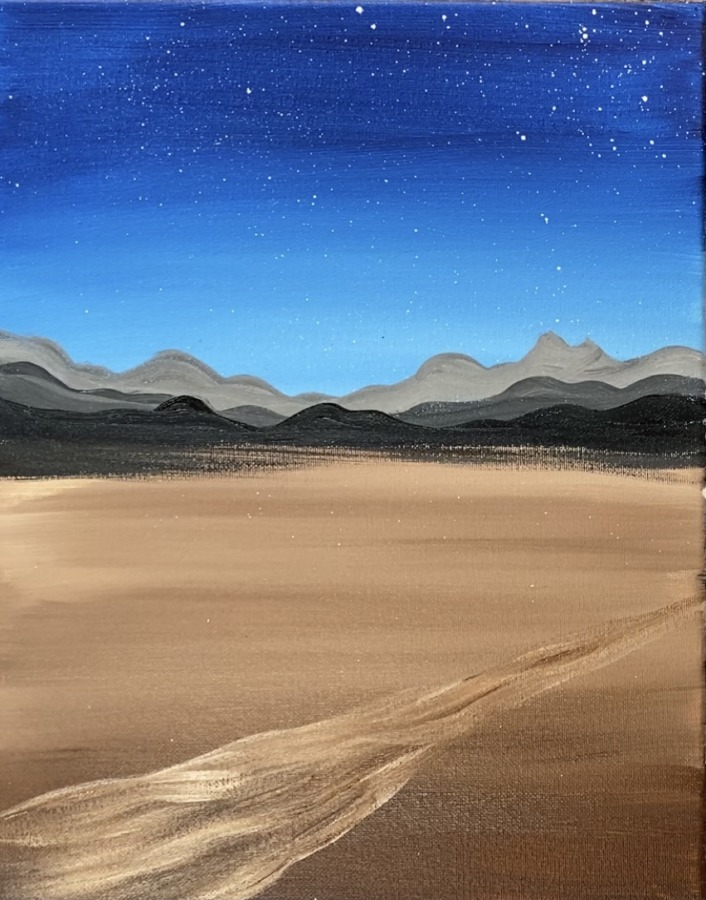
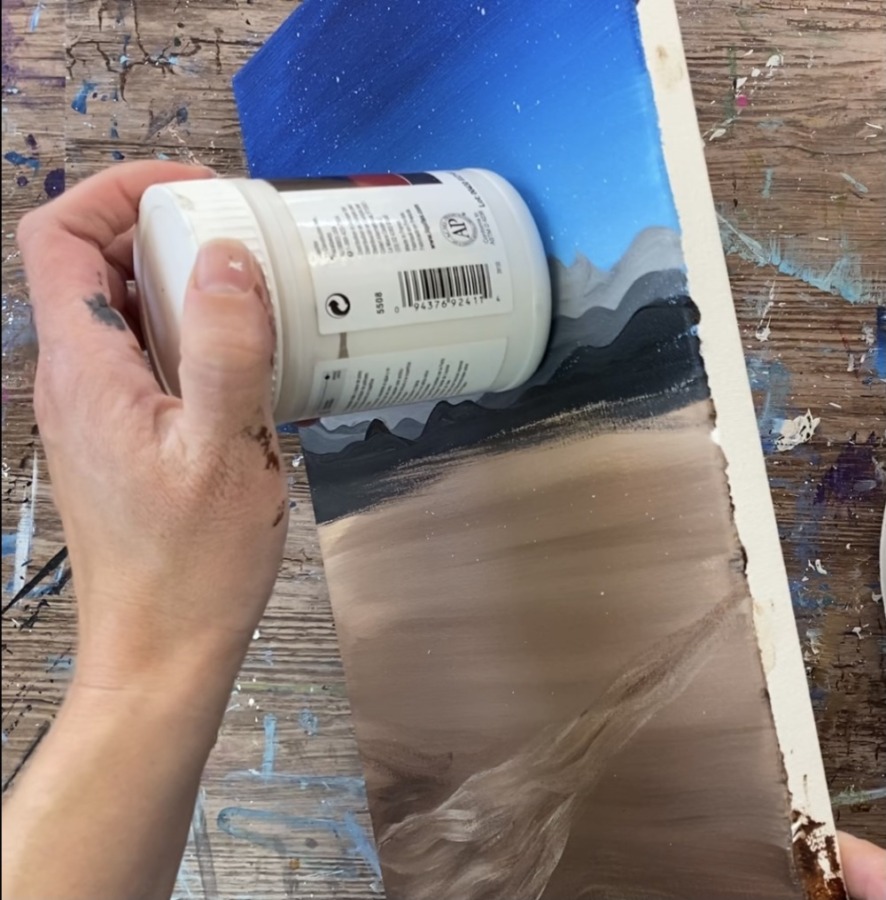
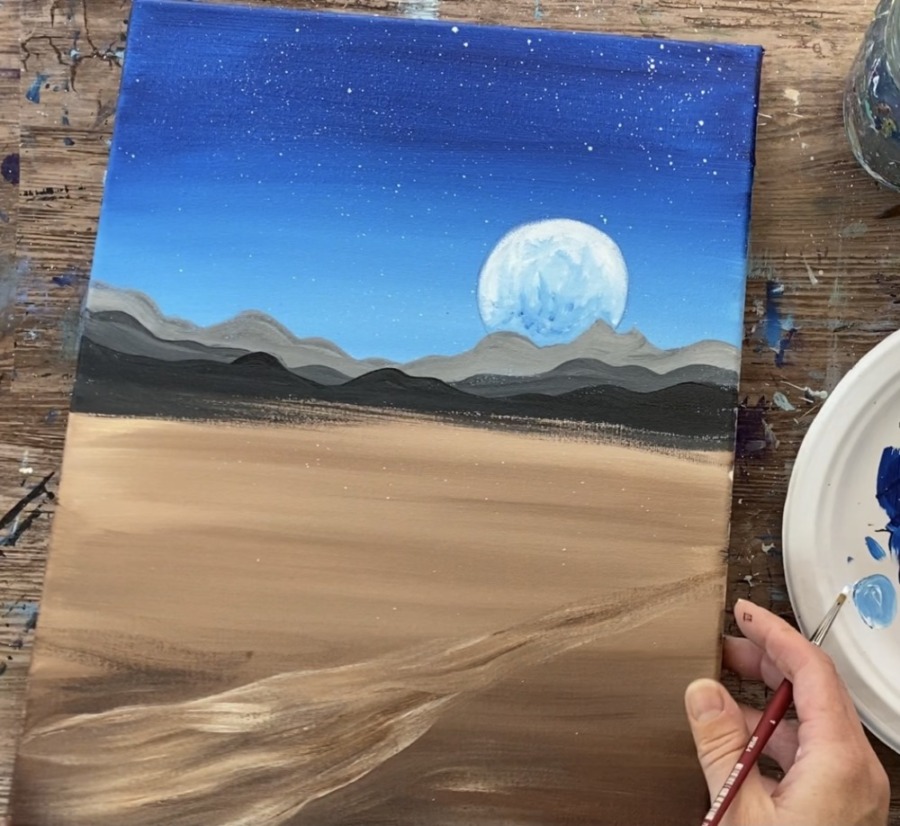
3. Paint The Ground
The ground is painted in the same technique as the sky only with a brown and then blended to a lighter brown up to the horizon line.
Load you palette with burnt umber. Rinse and dry your 1″ flat brush. Start at the bottom and paint left and right strokes to about the halfway point under the horizon line.
Then gradually blend white into the brown so the brown gets lighter.
The ground does not have to be a gradient. You can have darker streaks all throughout the land. It does give the landscape a sense of “depth” when you have your lighter brown closest to the horizon line and the darker brown on the bottom.
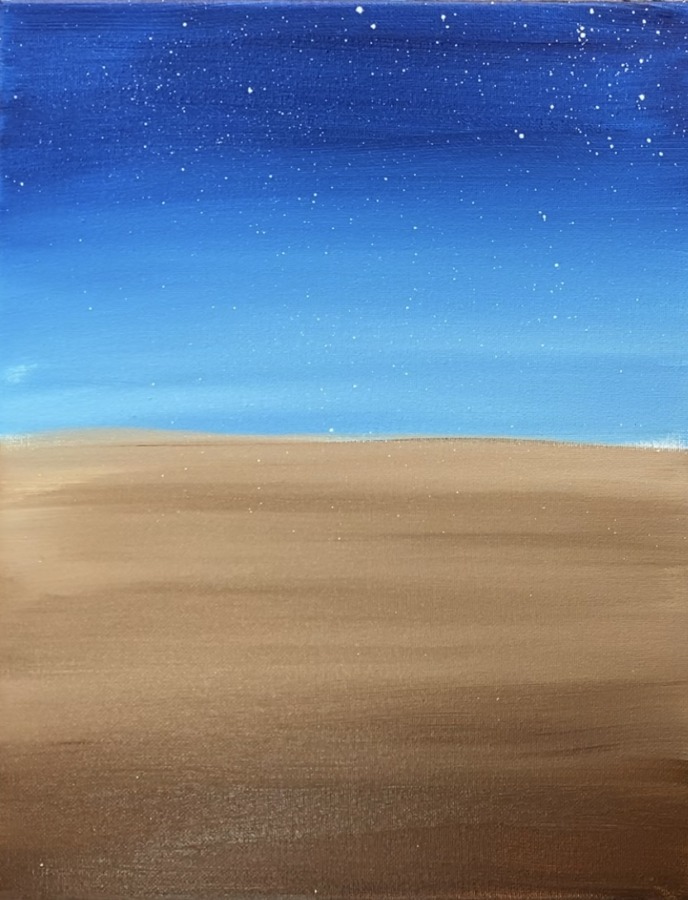
4. Paint Stars
Use a toothbrush (or your flat brush) for splatter star technique. Basically load the toothbrush in some slightly watered down titanium white paint. Test out an area away from the canvas first to make sure the splatters are not too thick or not too watery.
Flick the brush with your finger to make the splatter stars in the blue sky area (try not to get dots on the ground). Alternatively you can cover the brown by laying a sheet of paper over it so it will block the start splatters.
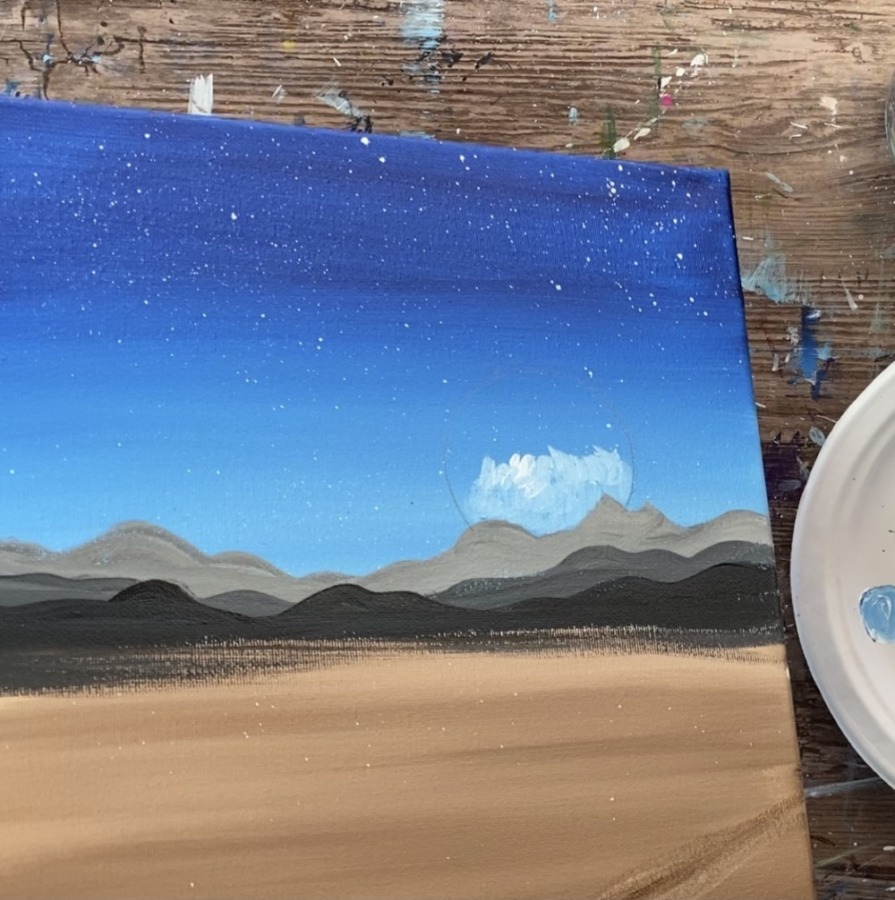
5. Paint The Mountains
These mountains are going to be done in layers with the furthest mountain range being the lightest layer and the closest (bottom) mountain range being the darkest layer. You will be making three shades of gray on your palette: light, medium and dark.
Use a #8 round brush for this step.
For the lightest gray layer, mix 4 parts white, 1 part black and 1 part brown. Add a bit of water to this to help with the flow.
Loosely paint the furthest mountain range line above the horizon line.
Then fill in the mountain. You can paint all the way to the bottom or leave a gap. The other two layers will be painted overlapping this far mountain range.
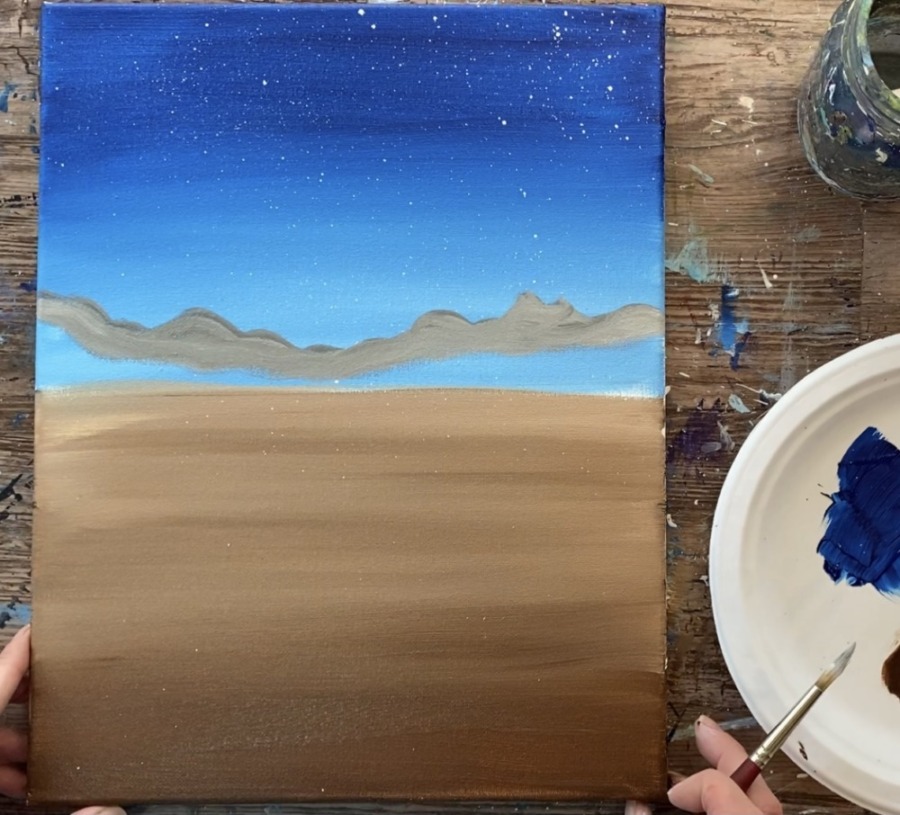
Next mix a medium gray on your palette. Paint the next layer of mountain range below the lighter one.

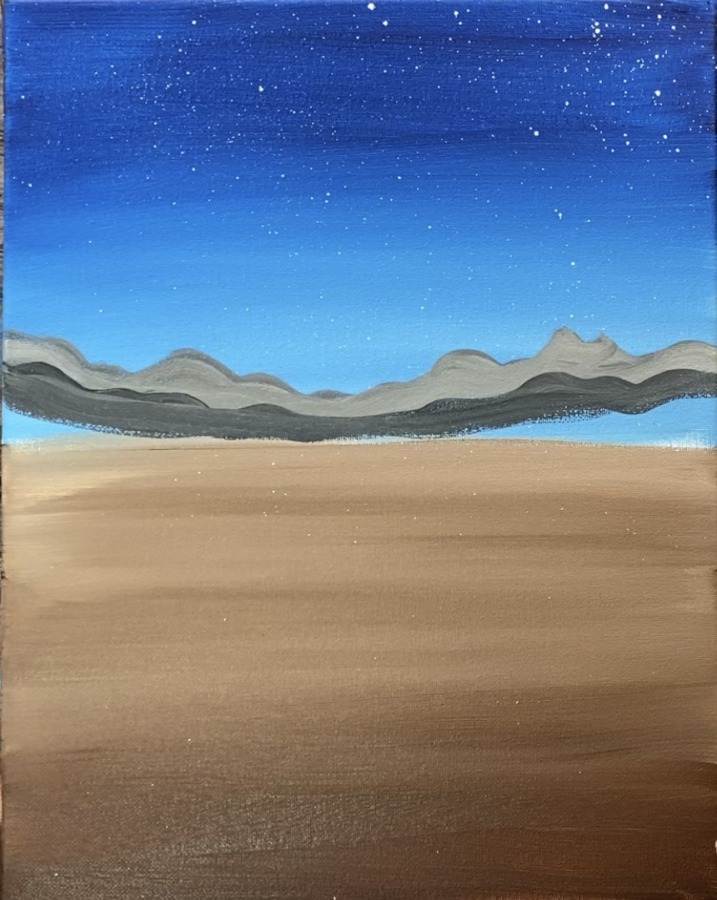
For the third & bottom mountain range layer, use just mars black.
Then, lightly “dry brush” mars black below the black mountain range to create a shadowy area at the base of that land area.
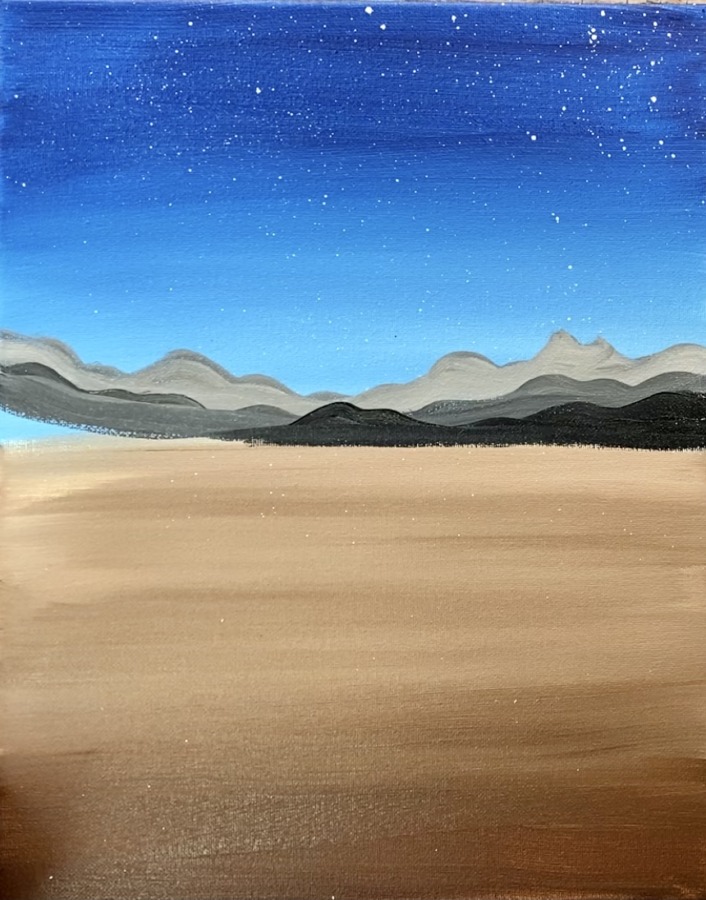
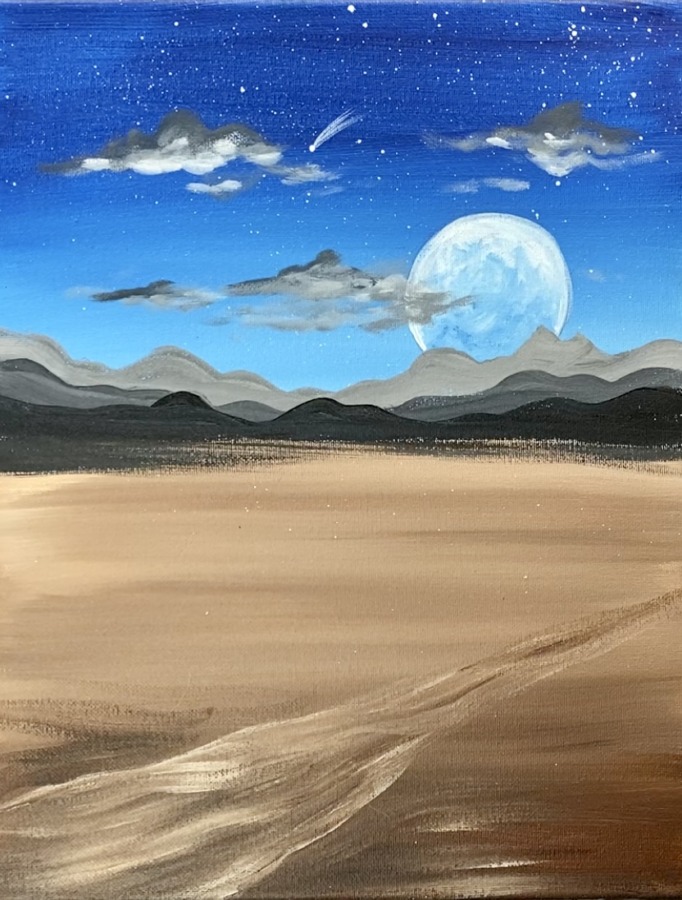
6. Paint The Dry Wash
Use your #8 round brush and light brown (white mixed with brown) to paint a diagonal dried river area. Start in the lower left area and paint a diagonal line to the upper right area of the land.
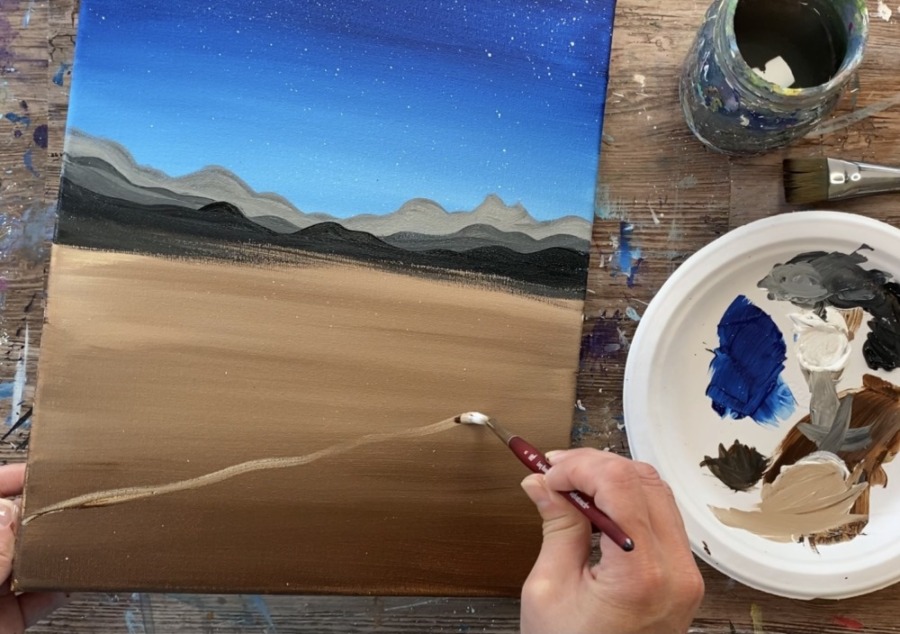
Create this dry river area that is wide on the bottom and gets narrow in the distance. Use the “dry brush” technique to fill in diagonal lines in this area. Loosely and lightly paint it in with the light brown color but leave a lot of that first layer of the ground showing through.
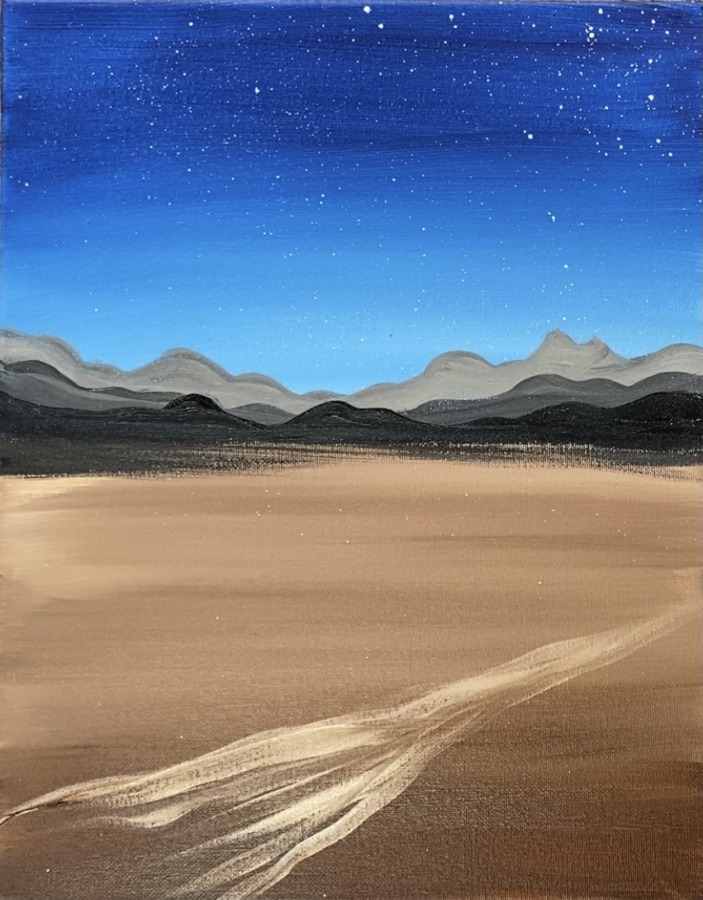
Paint some darker brown into the dried river area.
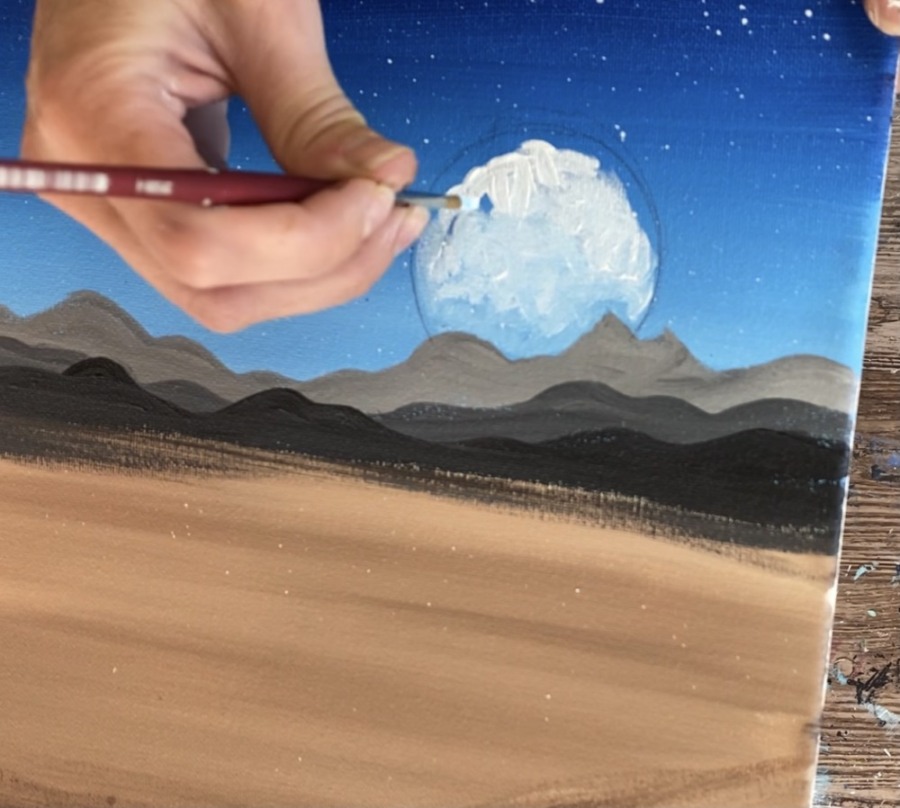
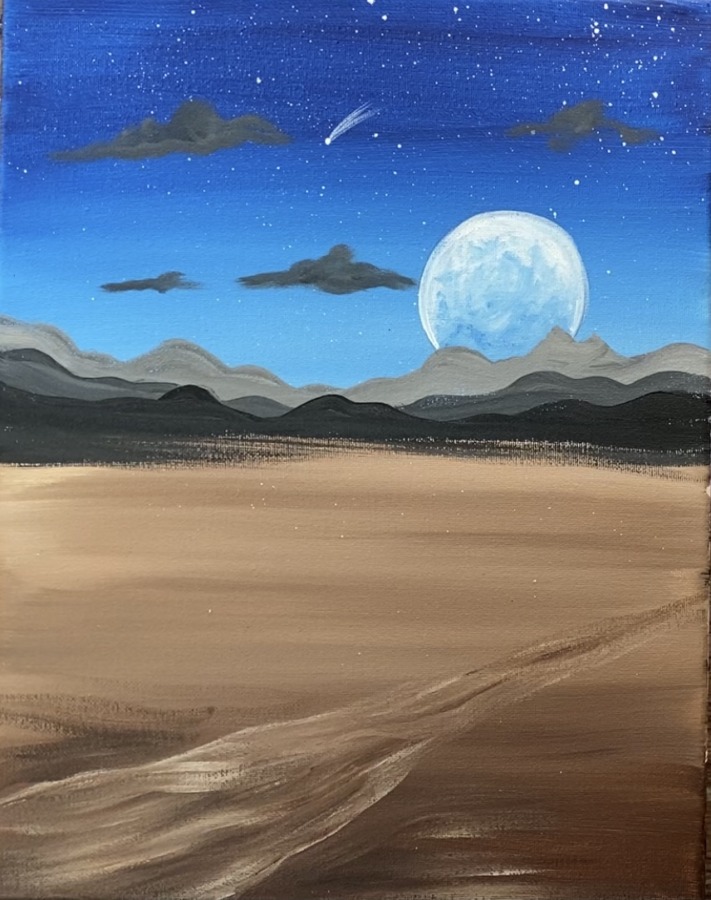
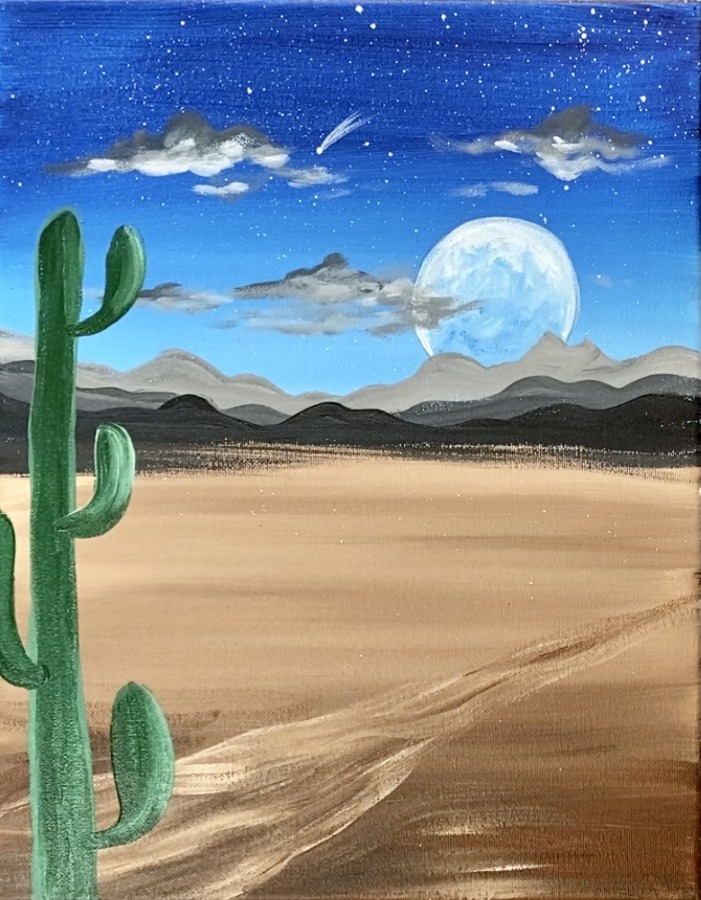
7. Paint The Moon
For the moon, I traced a 2.5″ circle (I used a circular container to trace). You can find a similar size circle to trace, a compass, etc.

Use a pencil to trace the circle of this moon so that it is behind the mountain range.
Use a #4 round brush to paint the mountain range in. Start with a light blue color (mix about 1 part phthalo blue with 2 parts titanium white). Paint short textured strokes on the bottom of the moon (just above the mountain range).

Gradually add in small amounts of titanium white into that light blue as you paint your way up the circle. Keep painting textured strokes. This moon is slightly darker on the bottom and lighter at the top.
Continue to add more textured white strokes as you work your way up the circle.
Then go back into the moon and add some darker textured strokes (more phthalo blue).
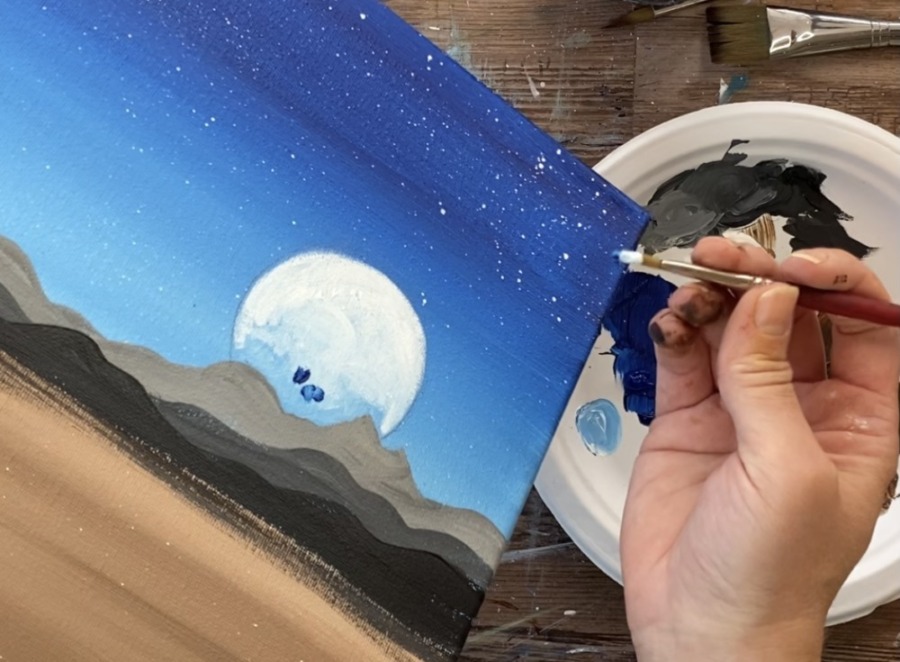
Blend those darker blue areas into the moon to create more of that “moon texture”. Tip: add more white into the blue if it gets too dark. Phthalo blue is a strong color.
Outline the outer edge of the moon with just titanium white to brighten it up.
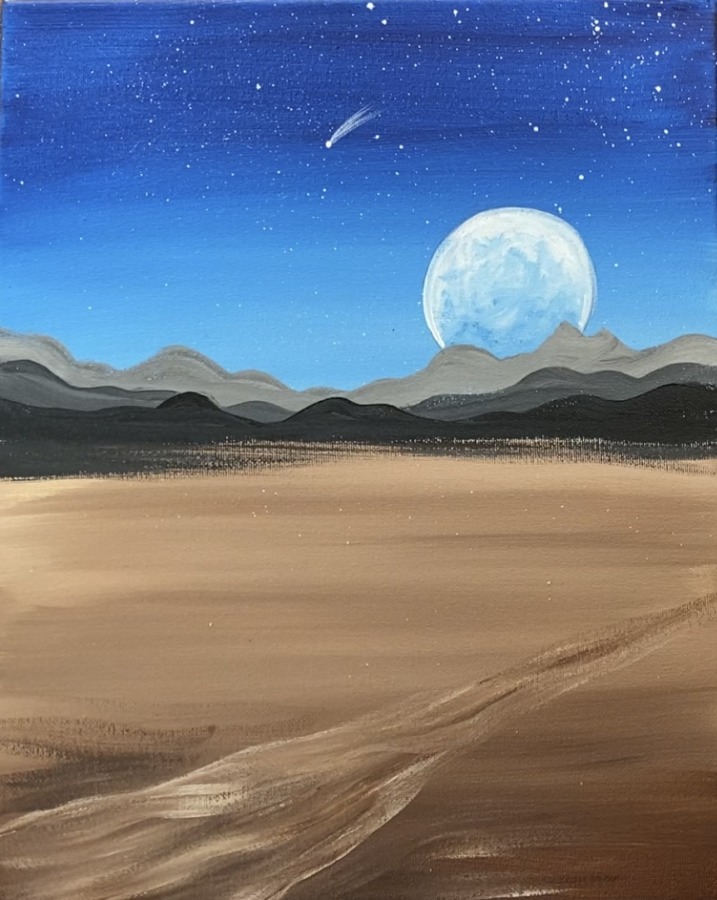
To paint that shooting star, paint a small dot with titanium white and your round brush. Then dry off your brush and paint the tail by stroking your paint from the dot outwards so it fades out.
8. Paint Clouds
Use a small 1/4″ bright/ flat brush to paint the clouds. Mix a medium gray color on your palette (almost the same shade as the middle mountain range).
Wipe a little paint off your brush so there is only a small amount on the brush. Use the tip of your brush to paint small circular strokes forming the shape of the clouds.
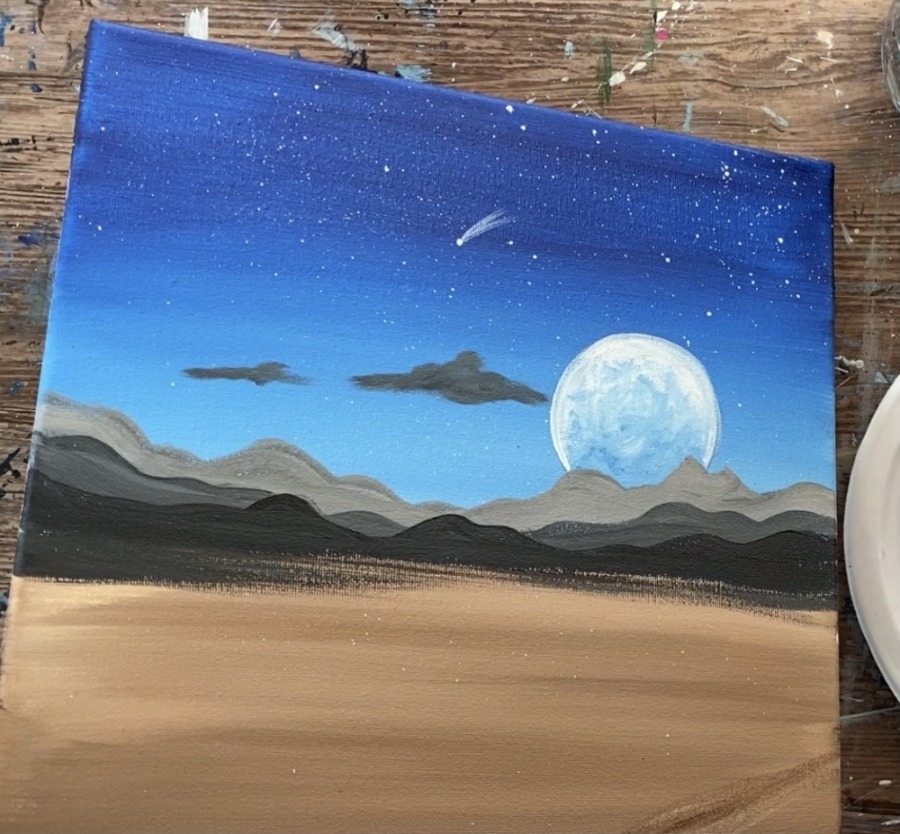
These are flat, horizontal clouds. The ones up higher in the sky are slightly larger and the ones towards the mountains are slightly smaller.
Then highlight the bottom of the clouds. Mix a medium gray on your palette by adding white to that first darker gray. Load your brush with that lighter gray and wipe it off with a towel so there is only a small amount paint on the brush.
Paint small circular strokes on the bottom of the cloud blending with that darker gray. Note: the highlight is on the bottom of the cloud because that is where the moon would be reflecting the light.
Tip: here is a cloud tutorial that explains a little further about the technique I use to create clouds.

Next add a small amount of a lighter color of gray to the bottom of the clouds. Again, only have a small amount of paint on the tip of your brush. Paint in circular strokes blending with the other grays. You can also overlap some clouds over the moon.
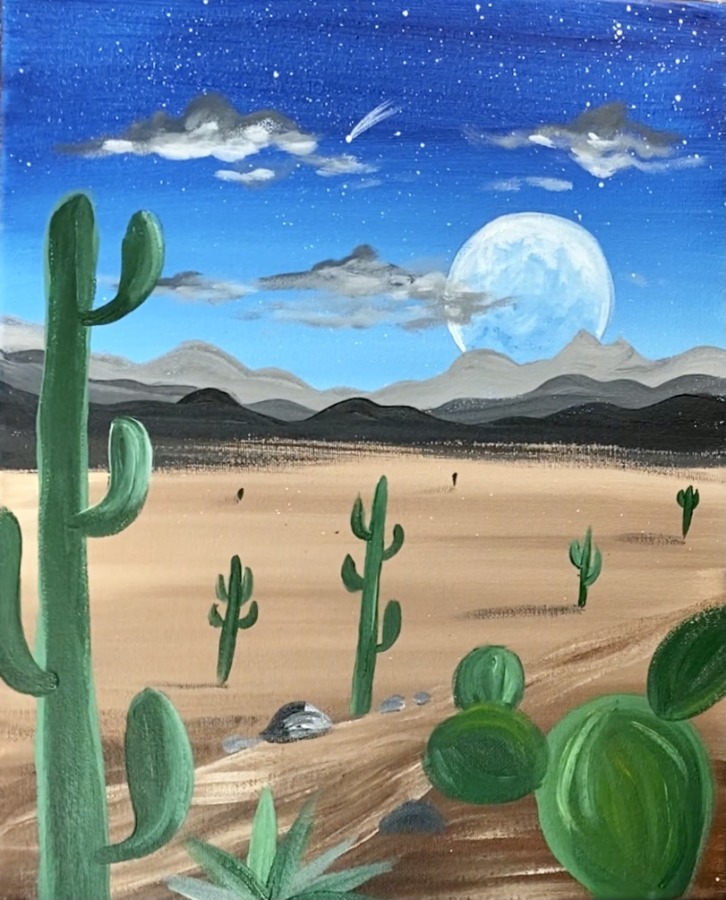
9. Paint Large Saguaro Cactus
Load your palette with hookers green hue permanent and titanium white. Mix about 1 part white with 2 parts green to make a lighter green.
Use your #8 or #4 round brush to paint the outline of the large saguaro cactus on the bottom left.
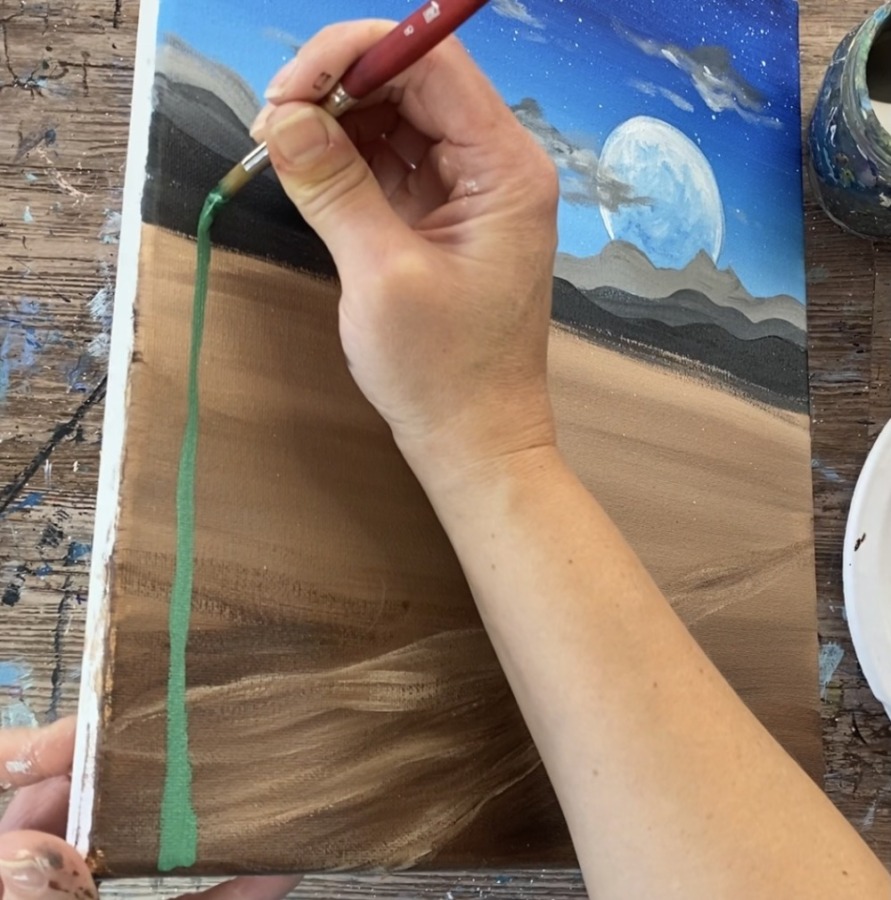
Draw out the shape of the cactus with your brush then fill it in solid. This is a tall, narrow rectangular shape with a curved top. The top is also slightly more narrow than the bottom.
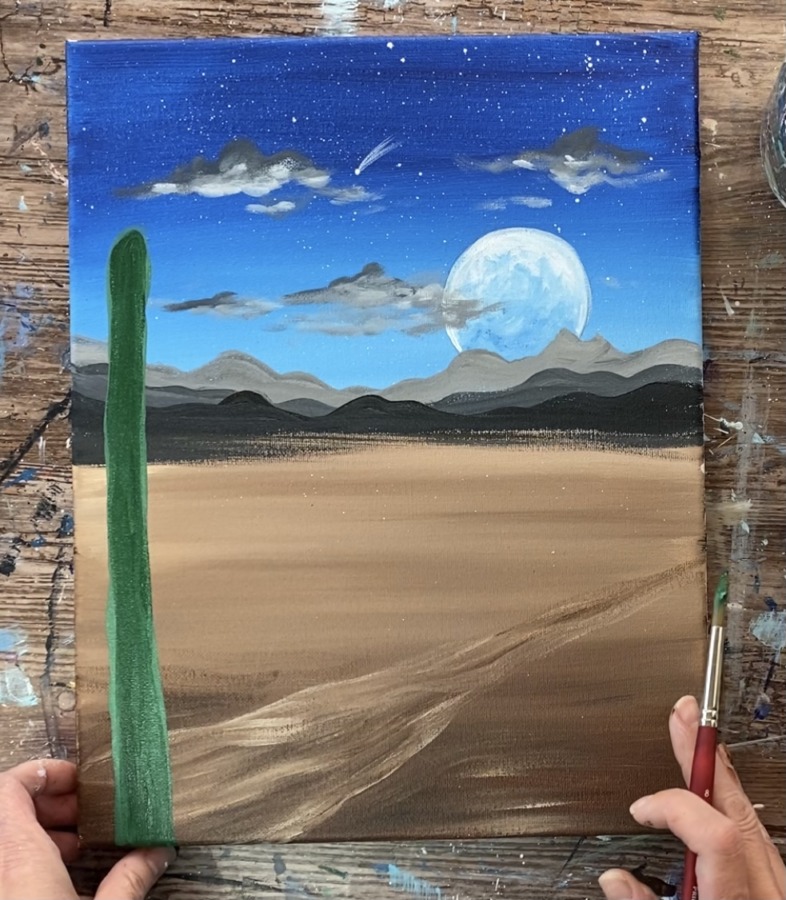
Then paint the arms of the saguaro. Make the base of the arm more narrow and the top wider with a rounded/ curved top.
Paint as many arms as you want. Add some lighter green (add more white to your brush or to the green of your palette) and paint the right side of the arms and blend with the green. This gives the cactus some highlight and depth.
10. Paint Large Prickly Pear Cactus
Add some cadmium yellow medium to the green on your palette. Paint the prickly pear cactus shape by painting a teardrop shape. Then paint smaller oval/ teardrop shapes attached to the larger one.
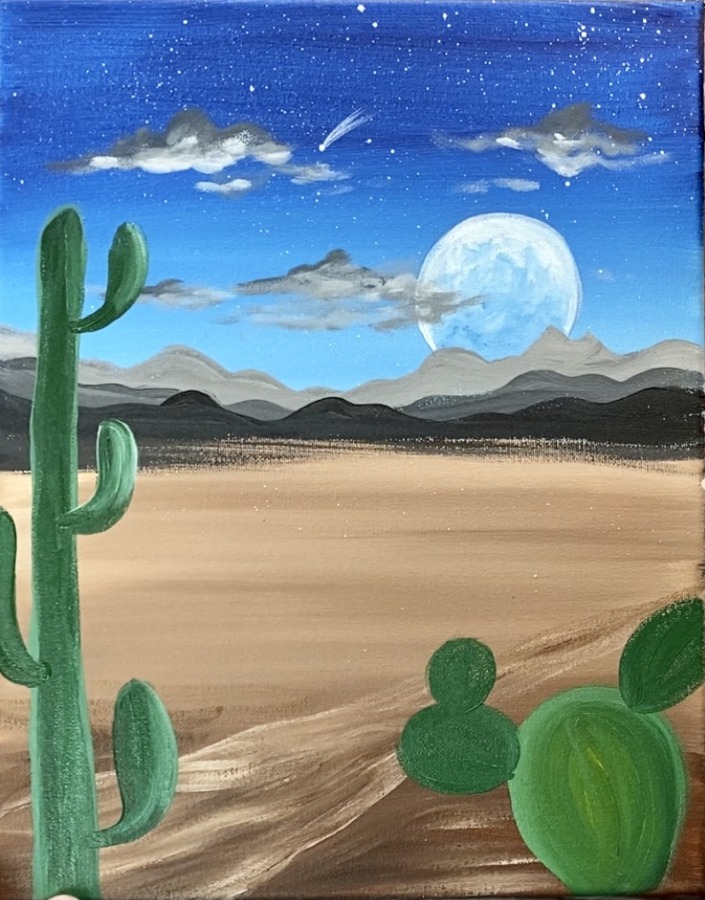
Tip: vary the green by adding different amounts of white/ green/ yellow to your brush.
11. Paint smaller saguaros in the background
Use a smaller brush for the smaller cacti in the background. I used my #4 round brush. Paint vertical lines with a rounded tops as well as the arms of the cacti.
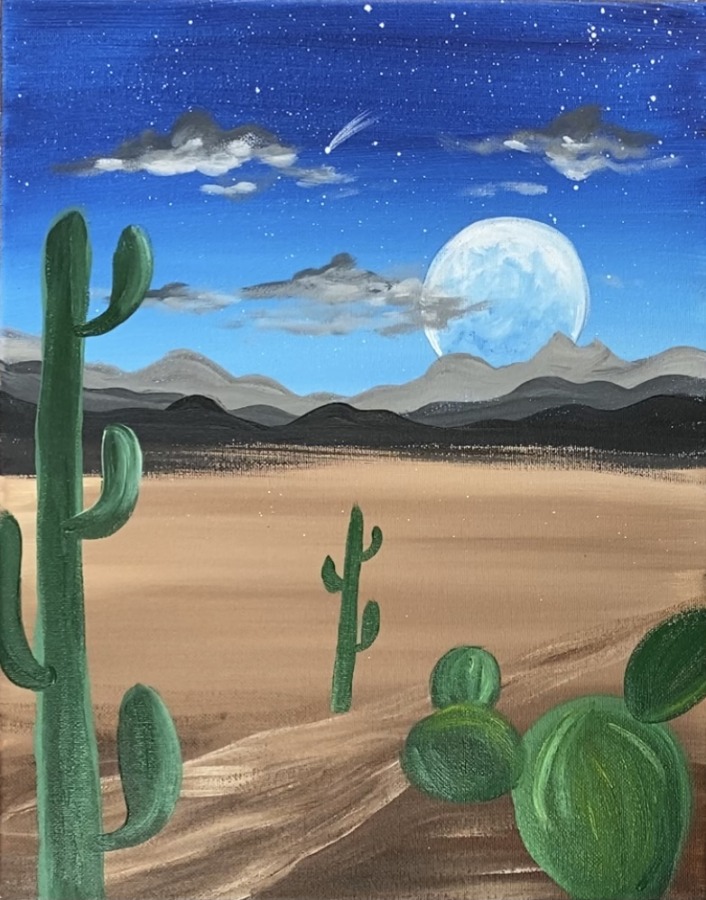
Paint as many saguaro cacti as you want! Remember to make them smaller the further away they are. Some of the ones way in the distance are just a small vertical paint mark and you do not see the arm.
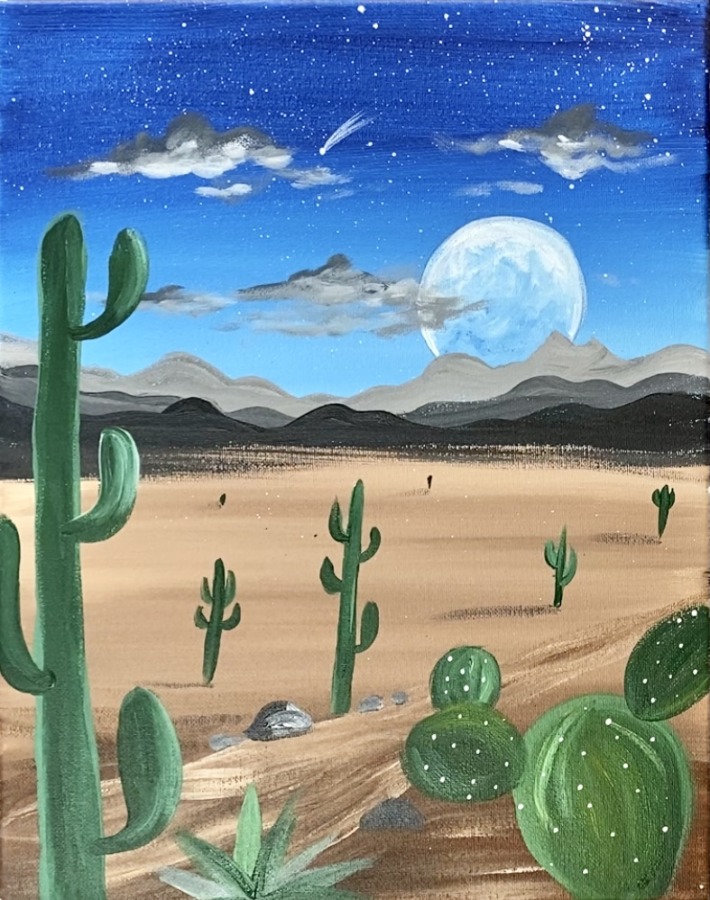
12. Paint Shadows & Rocks
Dry brush horizontal shadows next to each of the cacti. Use a #4 round brush and mars black and wipe off the paint so only a small amount of paint is on the brush.
To paint the rocks, mix a dark gray on your palette. Then paint the rock shape. Add a little white to the rock on the right side. Paint several rocks along the dried river bed with different shades of gray.
To paint the agave on the bottom, use different tints of green (hookers green mixed with white) to paint pointed leaf shapes fanning out to create the agave plant.
13. Paint Details On Prickly Pear Cactus & Saguaros
Use titanium white and a #4 round brush to paint small dots on the prickly pear.
Then load your palette with some quinacridone magenta. Paint little teardrop shaped prickly pear fruit on the cactus. Add some pink (quinacridone magenta mixed with white) highlight on one side of each of the fruits.

Then paint yellow blossoms on some of the saguaros. Mix cadmium yellow medium with a little white. Use the 4 round brush to stroke up and make small little blossoms on the tops of each of the arms.
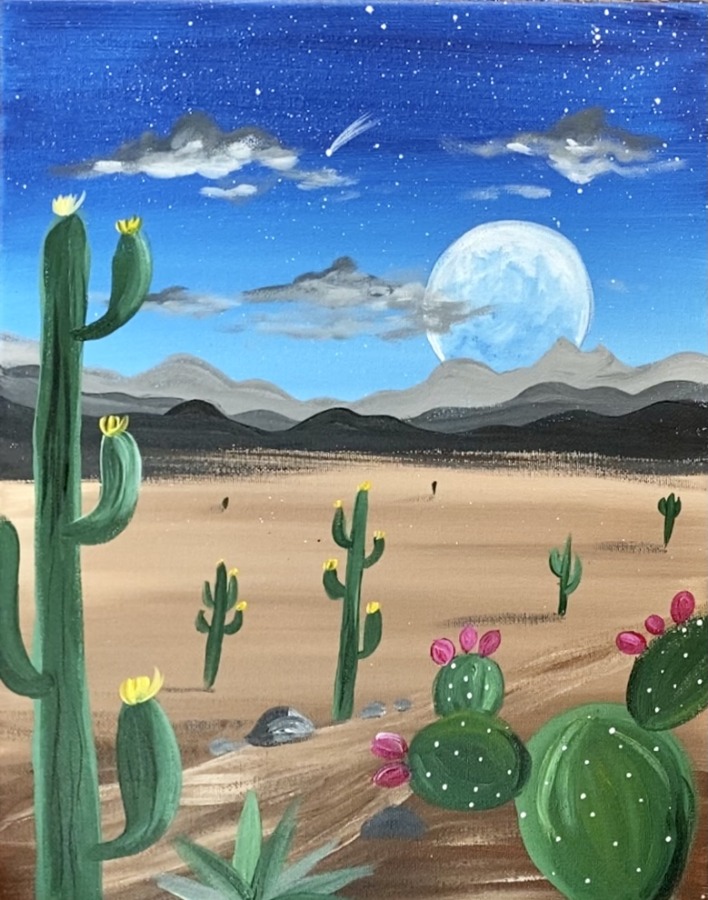
Then paint little black dots on the prickly cactus fruits.
Share Your Art Here


