


Would you like to save this?
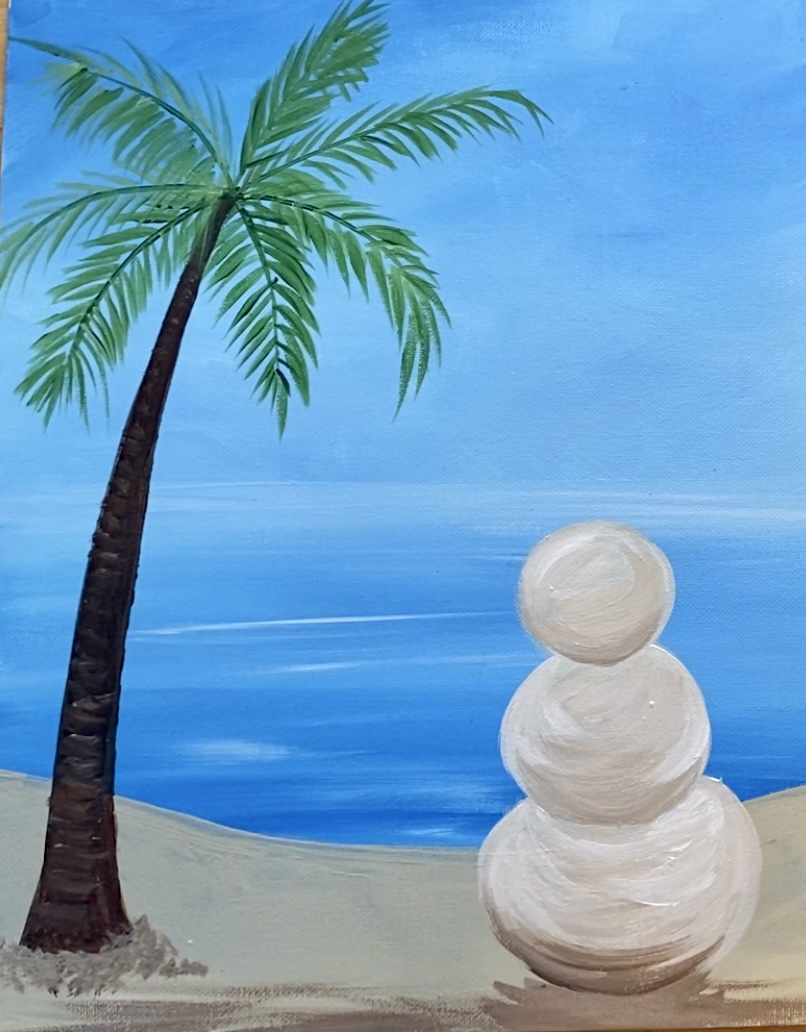
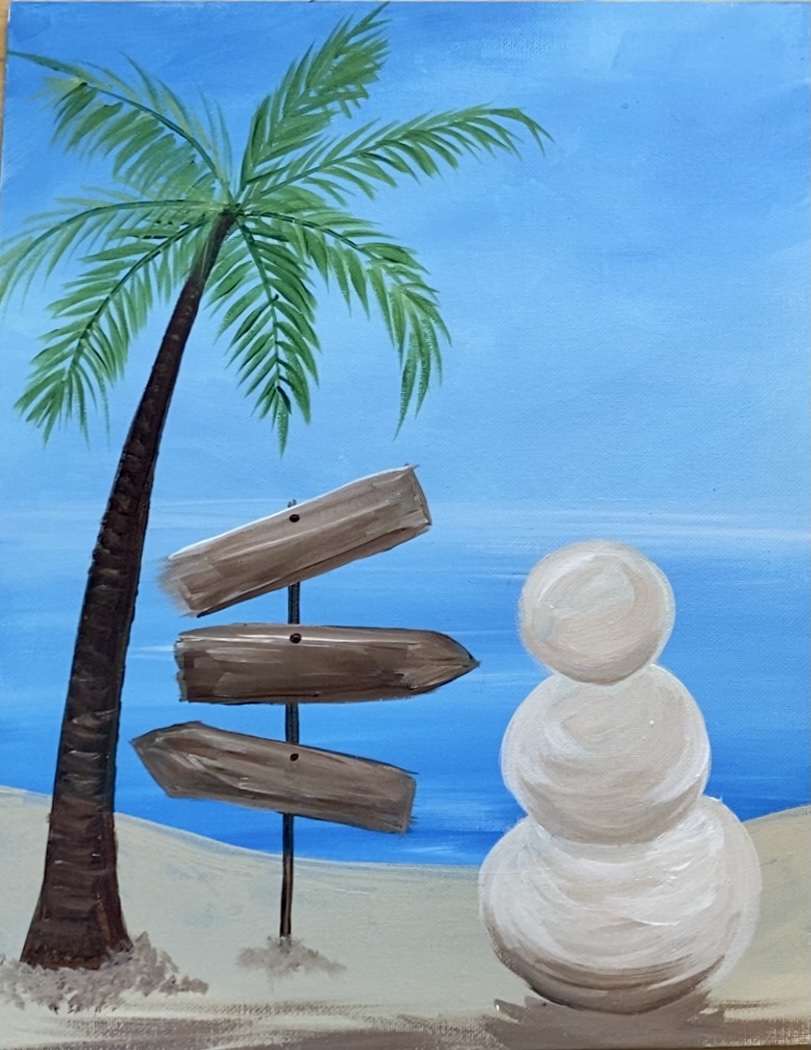
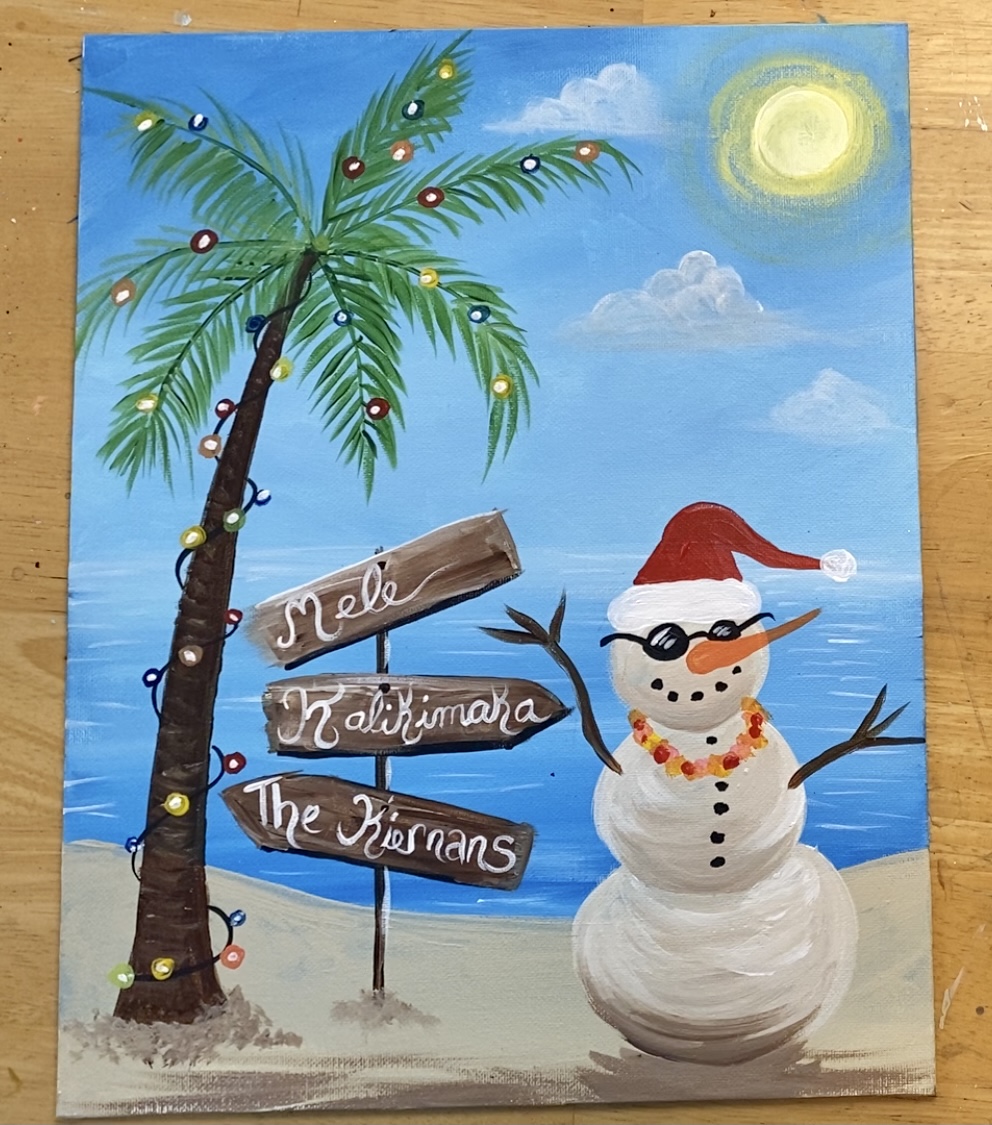
This painting is based off of one of my favorite Christmas songs and the Hawaiian saying for “Merry Christmas!”
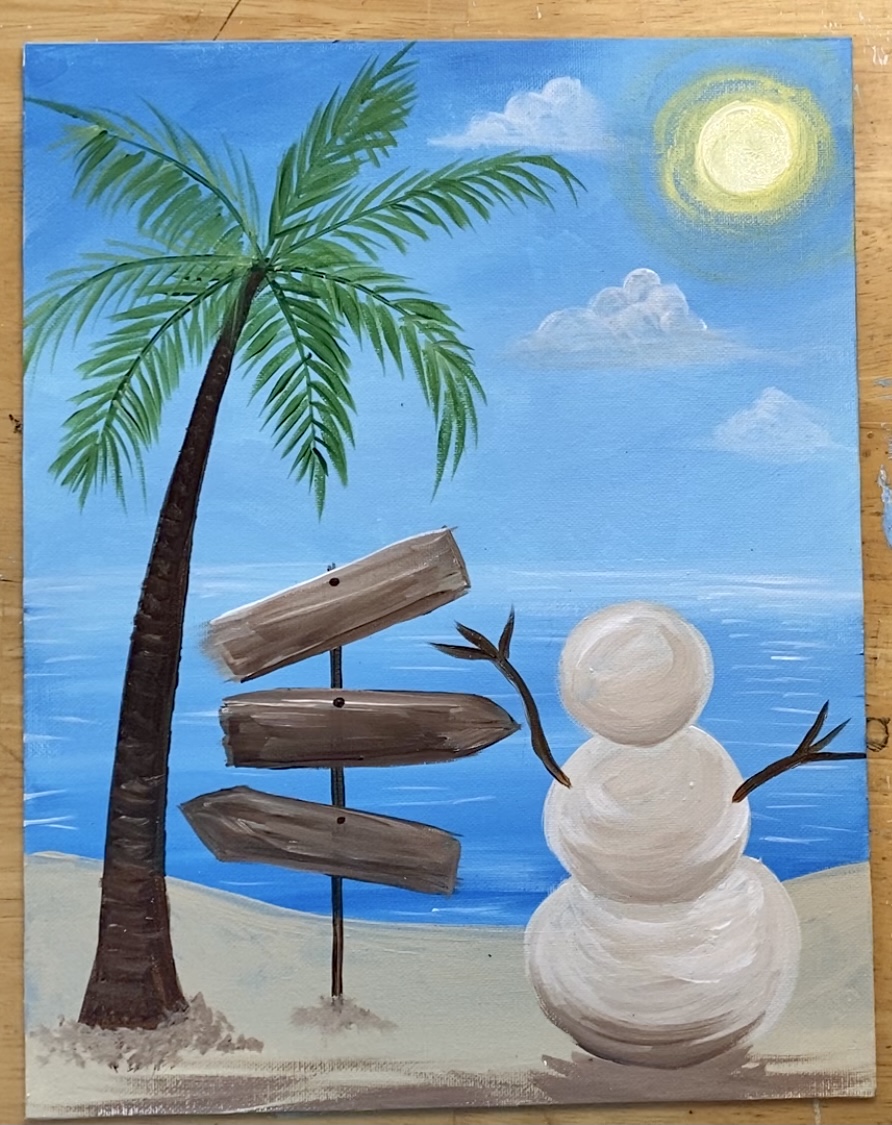
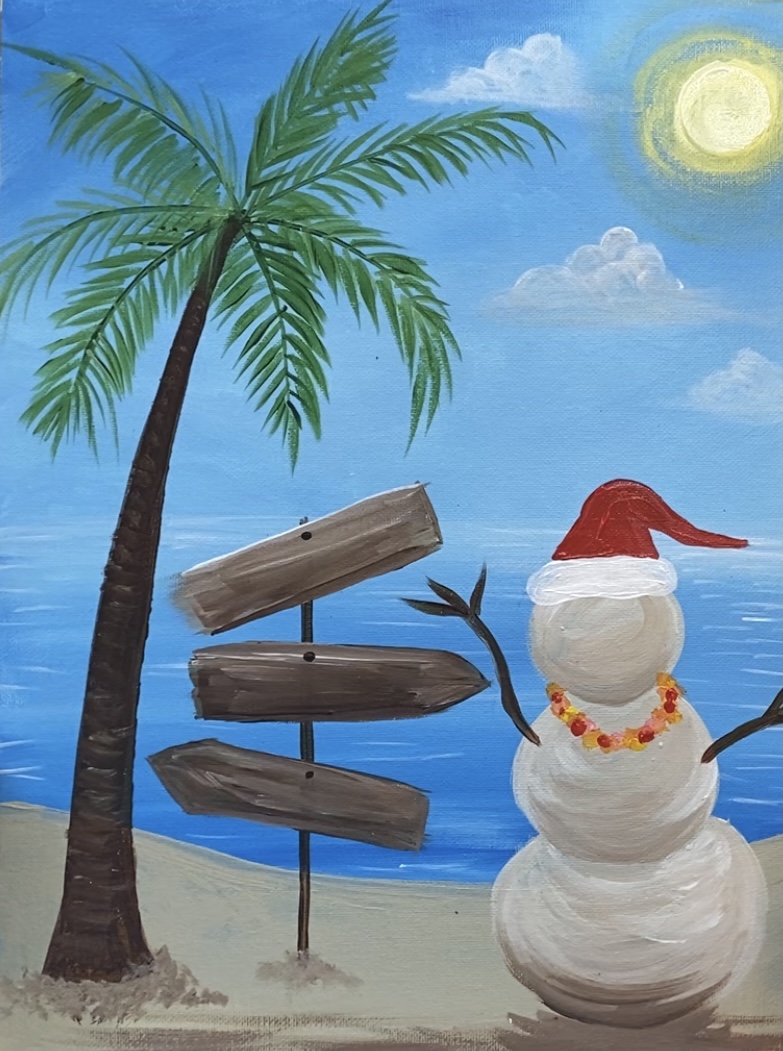
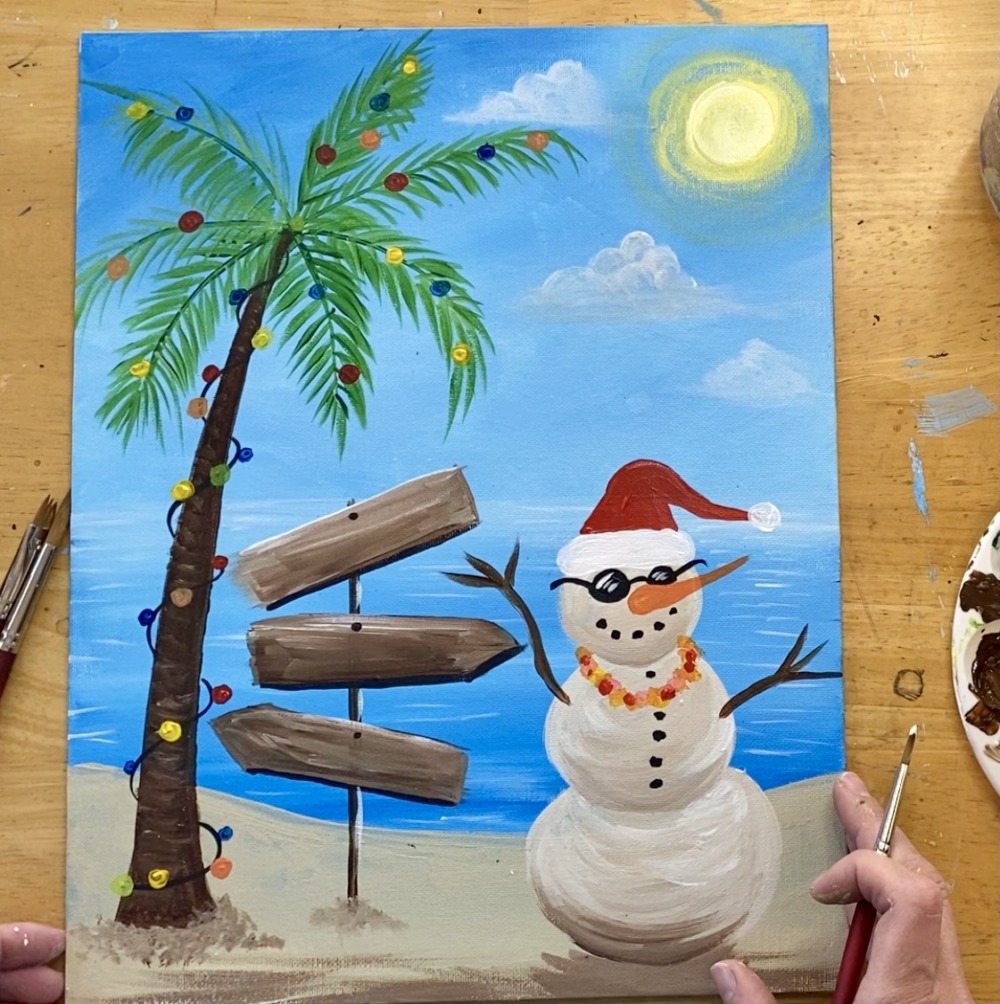
I thought I was done with painting enough snow people for 2020 but I guess not! I felt like escaping to a tropical island to do this adorable sandy rendition.
You will learn how to paint a beach scene with a Christmas Light Palm Tree and a Snowman Made out of sand!
I did this on an 11 x 14 canvas with acrylics.
Enjoy and happy painting!
This post contains affiliate links. To see our affiliate link disclosure click here.
Materials
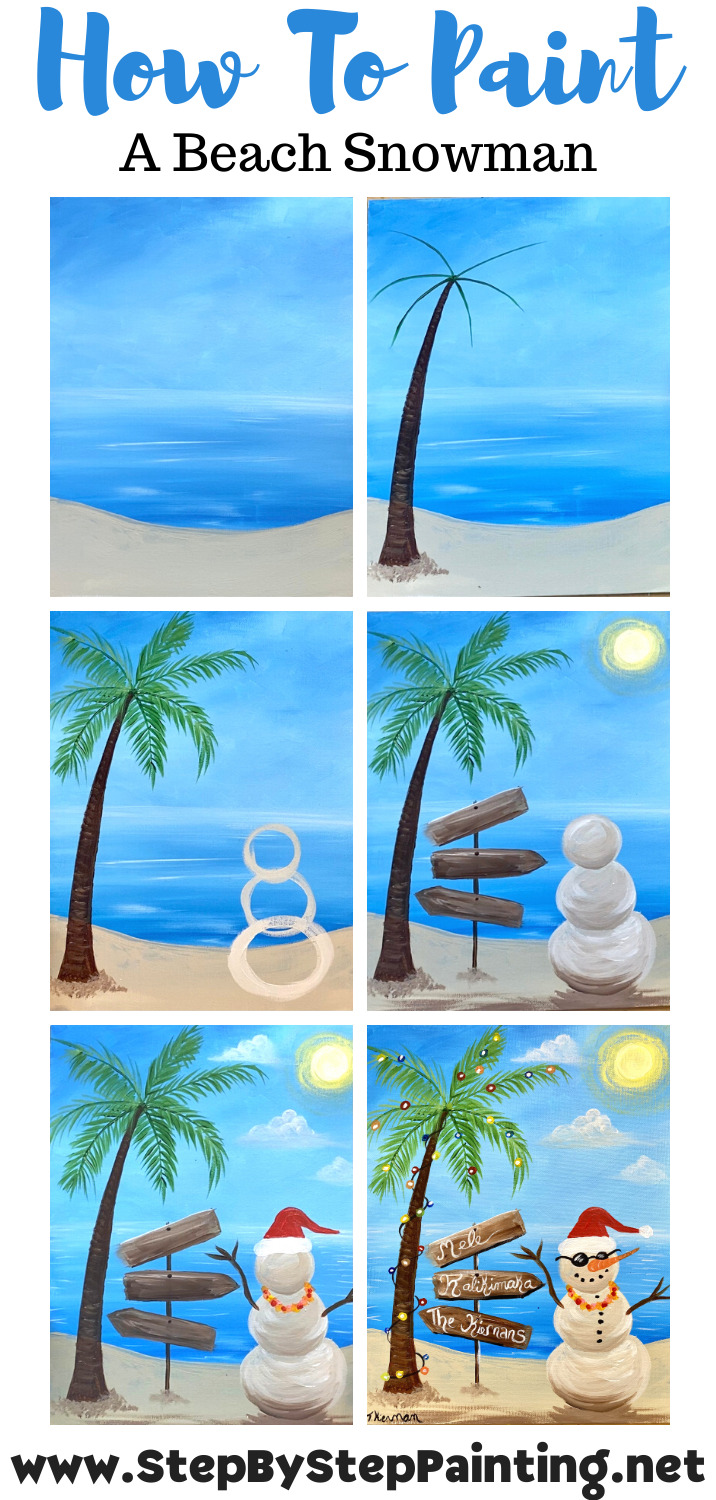
Beach Snowman Painting Tutorial
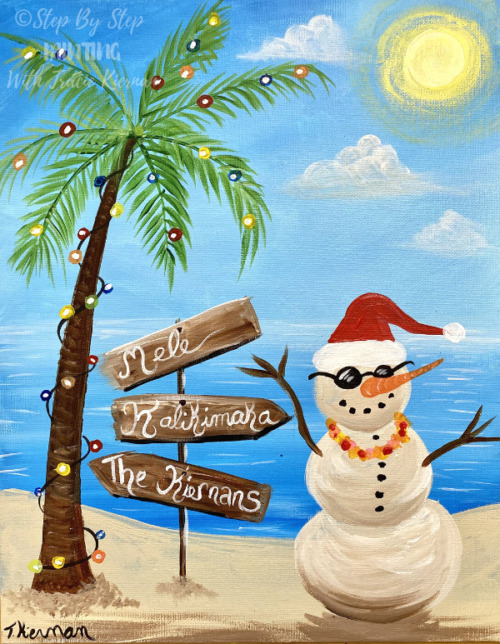
Learn to paint a beach scene with a sand snowman and a palm tree with Christmas lights! Customize the sign with your family
Materials
- Acrylic Paint
- Brushes
- 11 x 14 Canvas
- T-Square Ruler or Straight Edge
Colors
- Titanium White
- Mars Black
- Cadmium Red Medium Hue
- Primary Yellow
- Unbleached Titanium
- Burnt Umber
- Primary Blue
- Hookers Green Hue Permanent
Brushes
Color Palette

Directions At A Glance
Video
Step By Step Directions
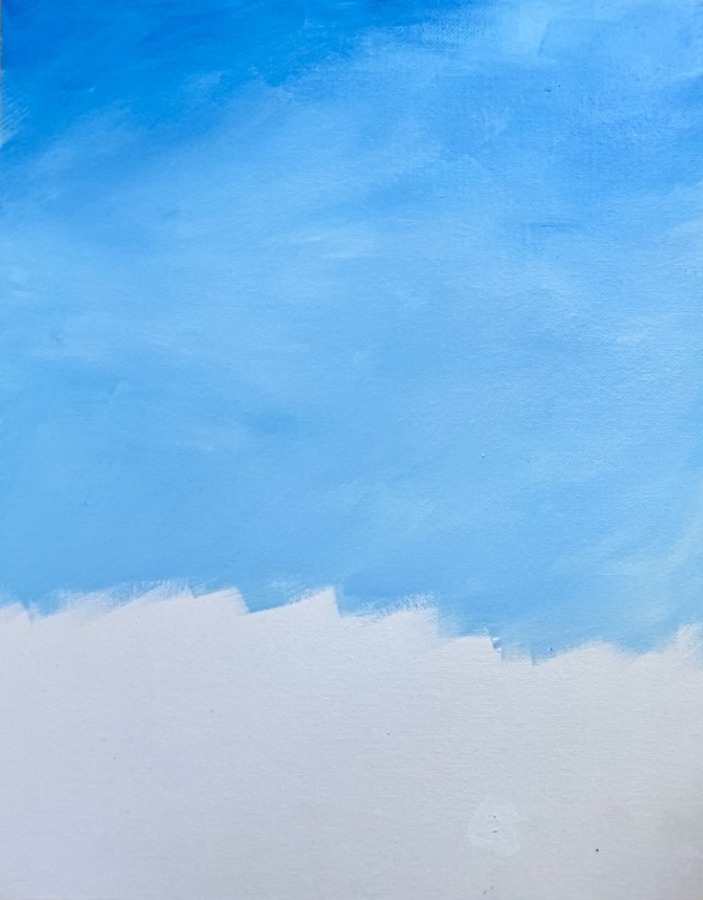
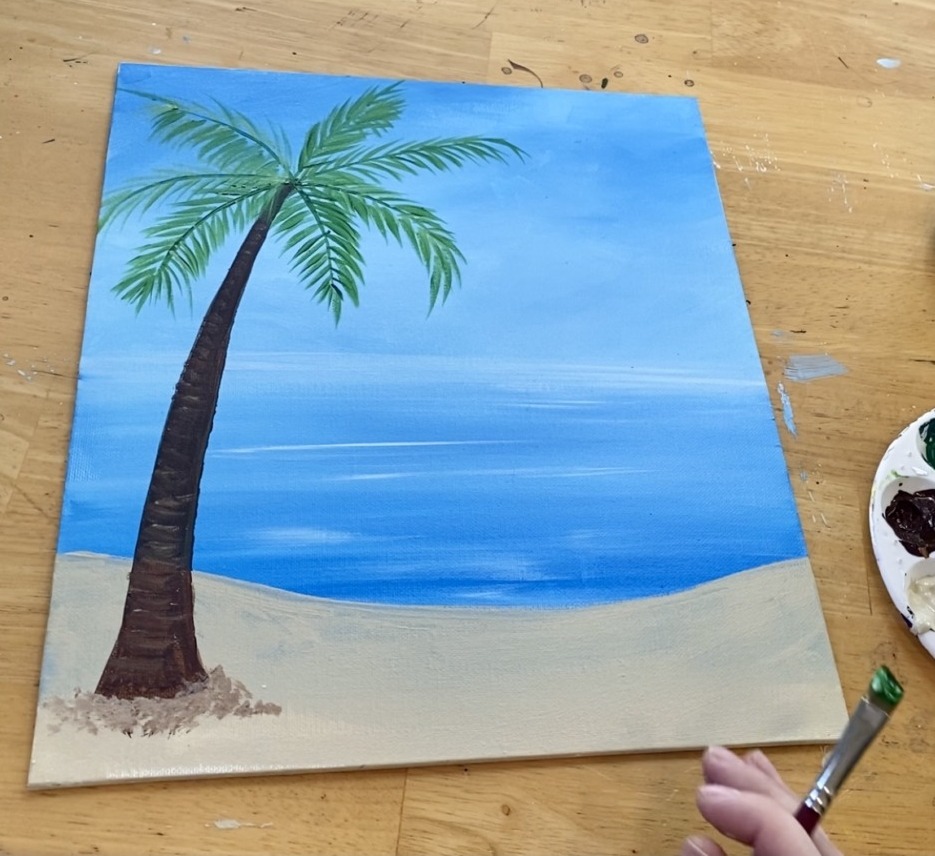
1. Paint the sky
Use your 3/4″ flat wash brush for this step! On your palette, load primary blue and titanium white.
Mix white with the primary blue so it becomes a lighter blue.
Start at the top with your brush and paint short, angular strokes with the full width of the brush.
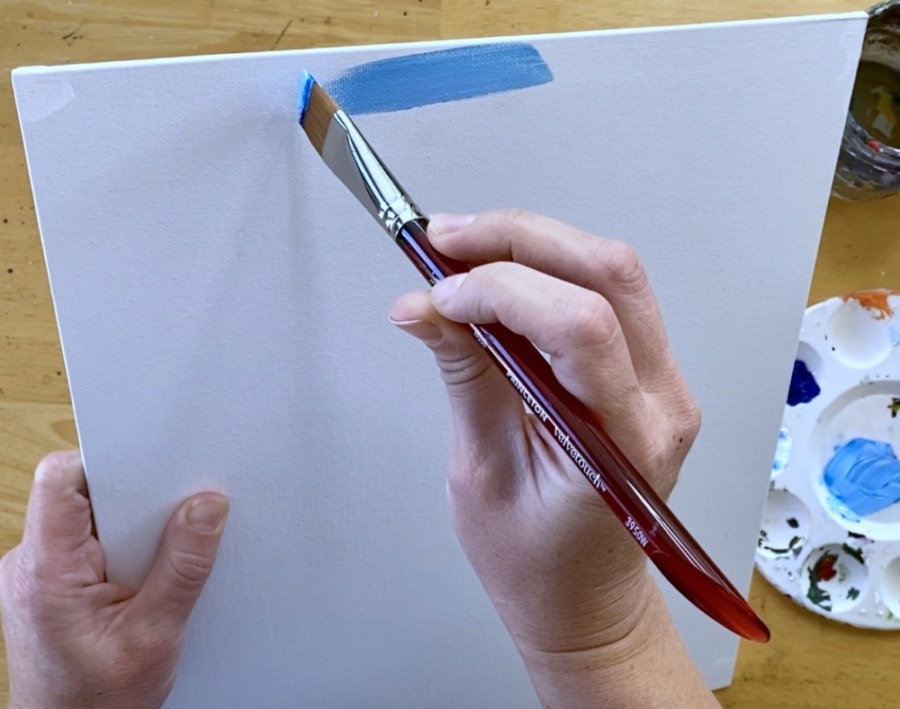
These are “X style” strokes! You are basically, “flip flopping” your brush to create the sky texture. Keep painting with that light blue color. Add a tiny bit of water to the brush to help the paint flow better.
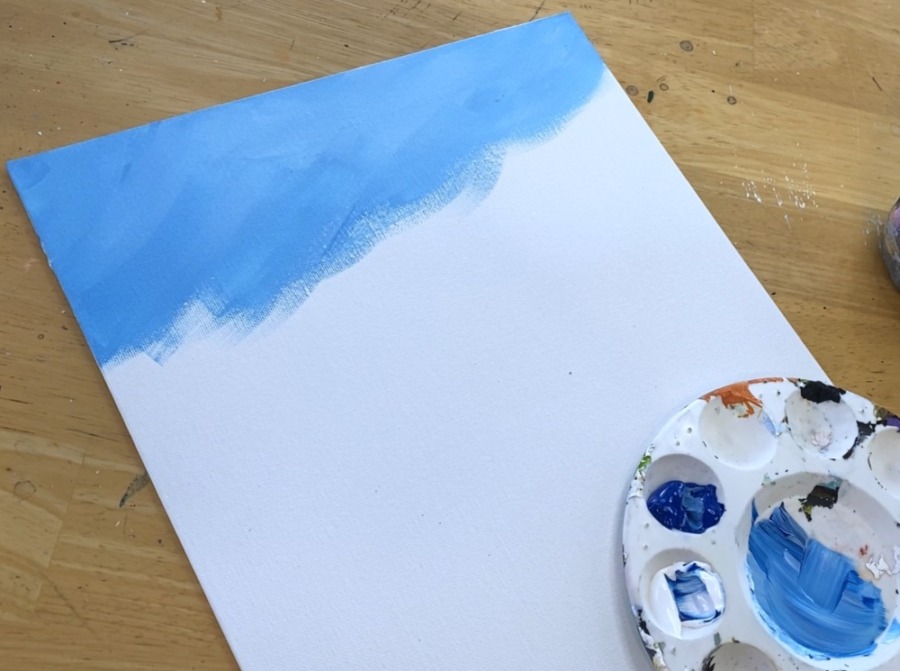
As you work your way down, gradually add more white into the blue until it gets lighter and lighter towards the horizon line.
Note: the “horizon line” (or line where the sky and water meet) is going to be at approximately the half way point on the canvas.
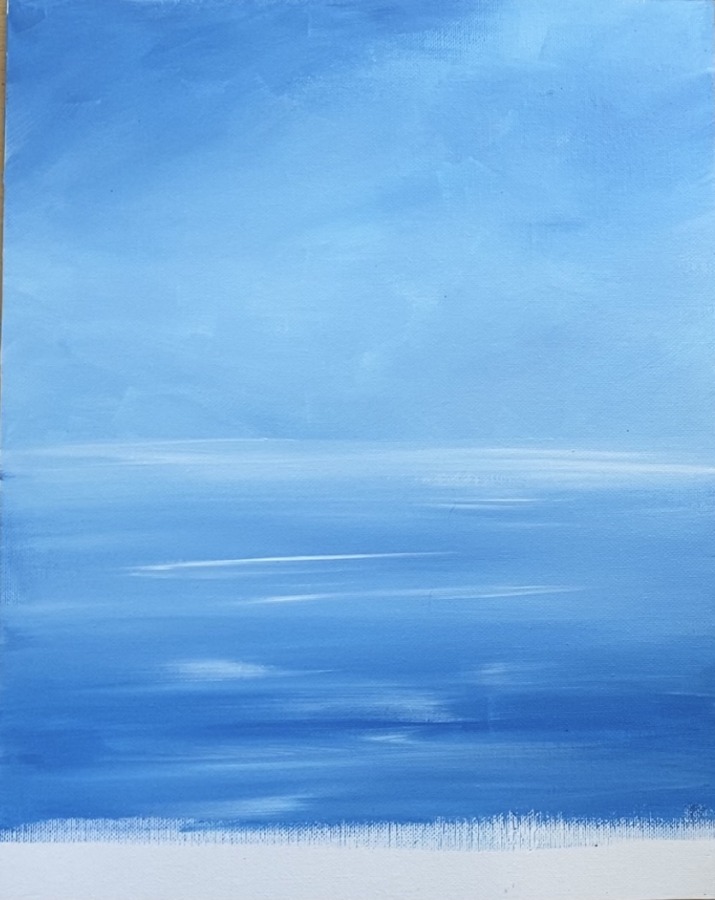
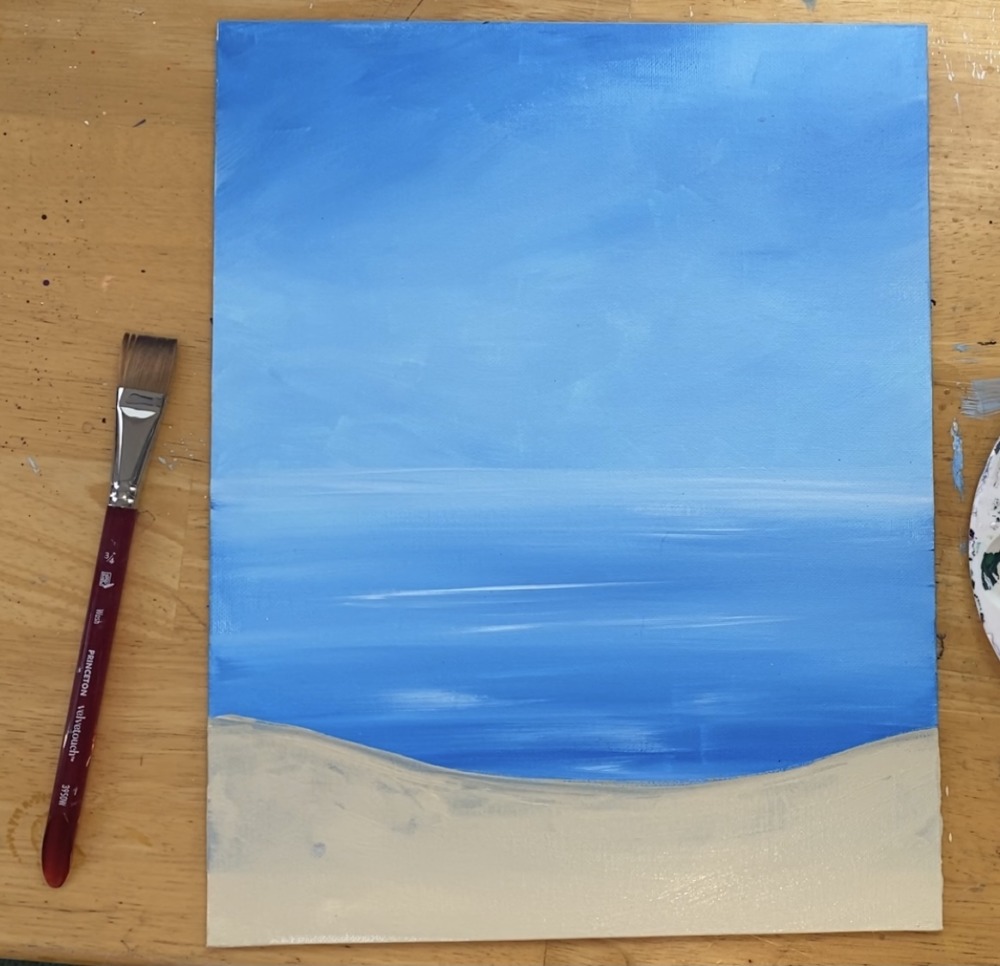
2. Paint the water
Then find the half way point on your canvas. It’s okay if you painted too far (I painted way too far).
Use a t-square ruler or straight edge. Paint horizontal strokes starting with a light blue (a lot of white mixed with the primary blue).
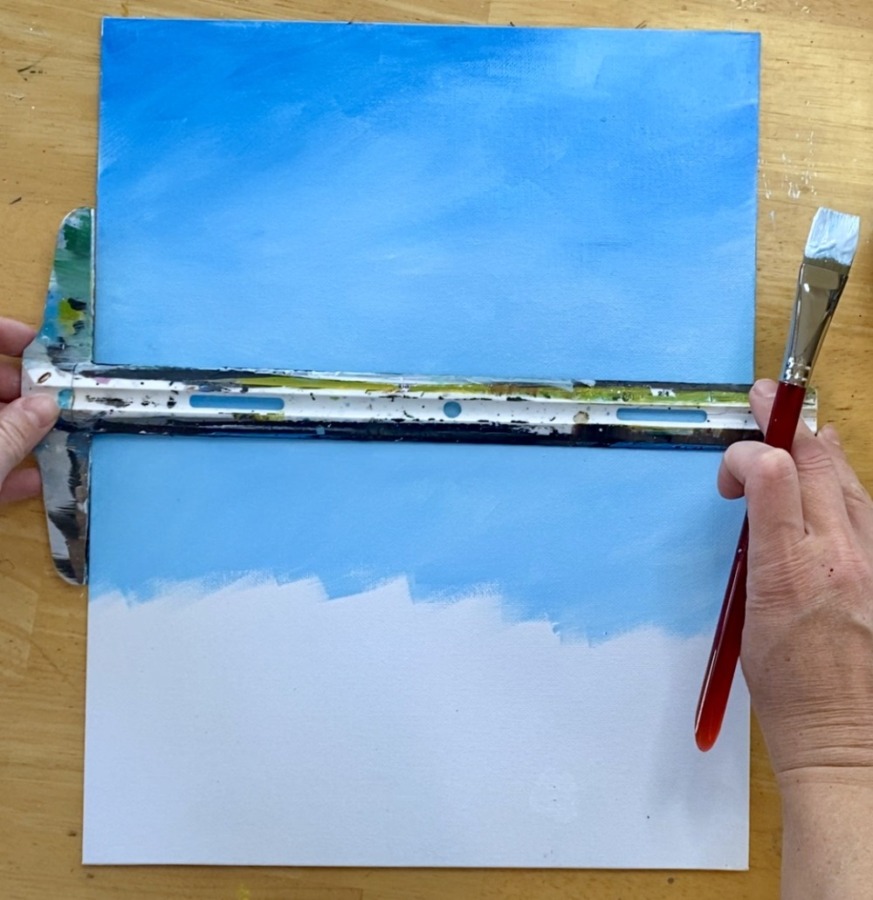
This time, try to have your blue start out lighter and then get darker as you go to the bottom of the canvas. The difference in strokes helps to determine where the water is and where the sky is in this painting.
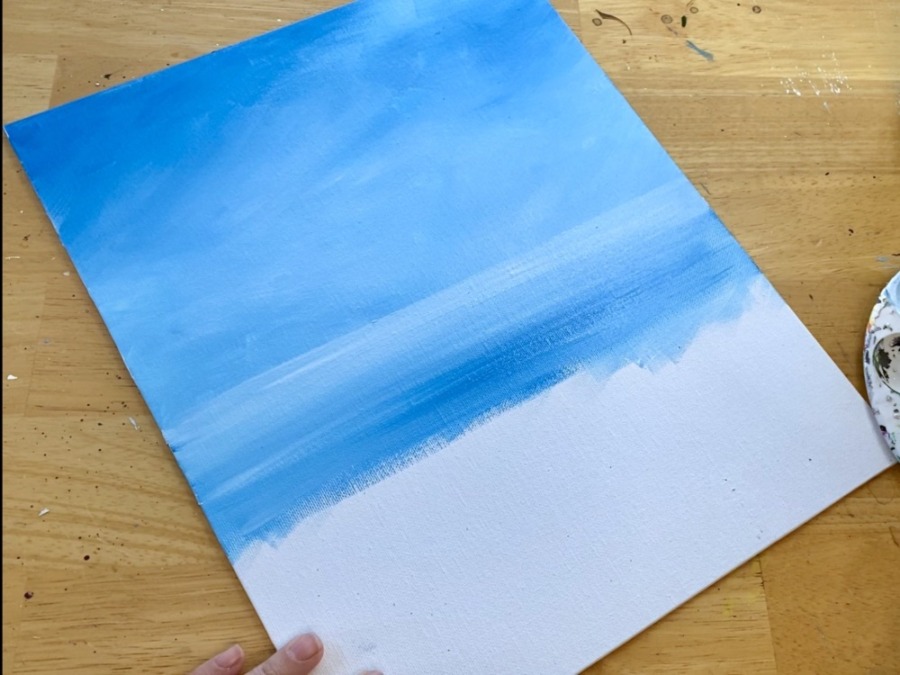
Keep painting left and right strokes working your way down the canvas. You can blend a few strokes of white in there to make it look like “water texture” but try to keep it simple!
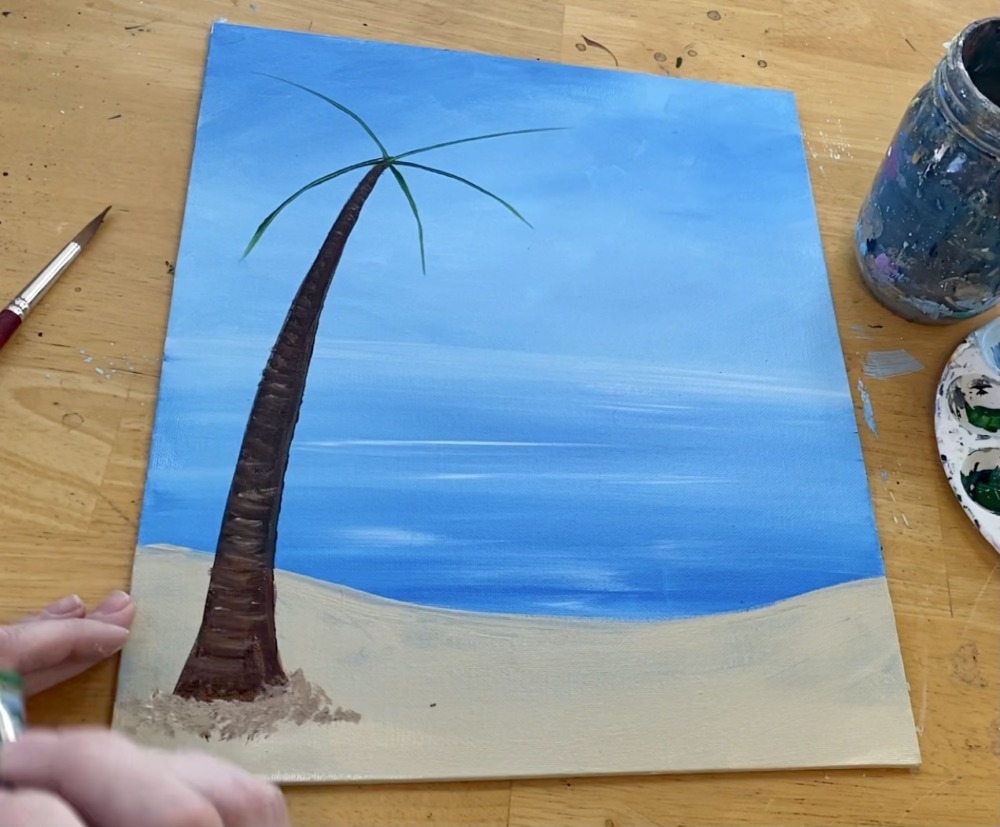
3. Paint the sand
Next load your palette with unbleached titanium. Use a cleaned 3/4″ flat wash brush to paint a sandy area.
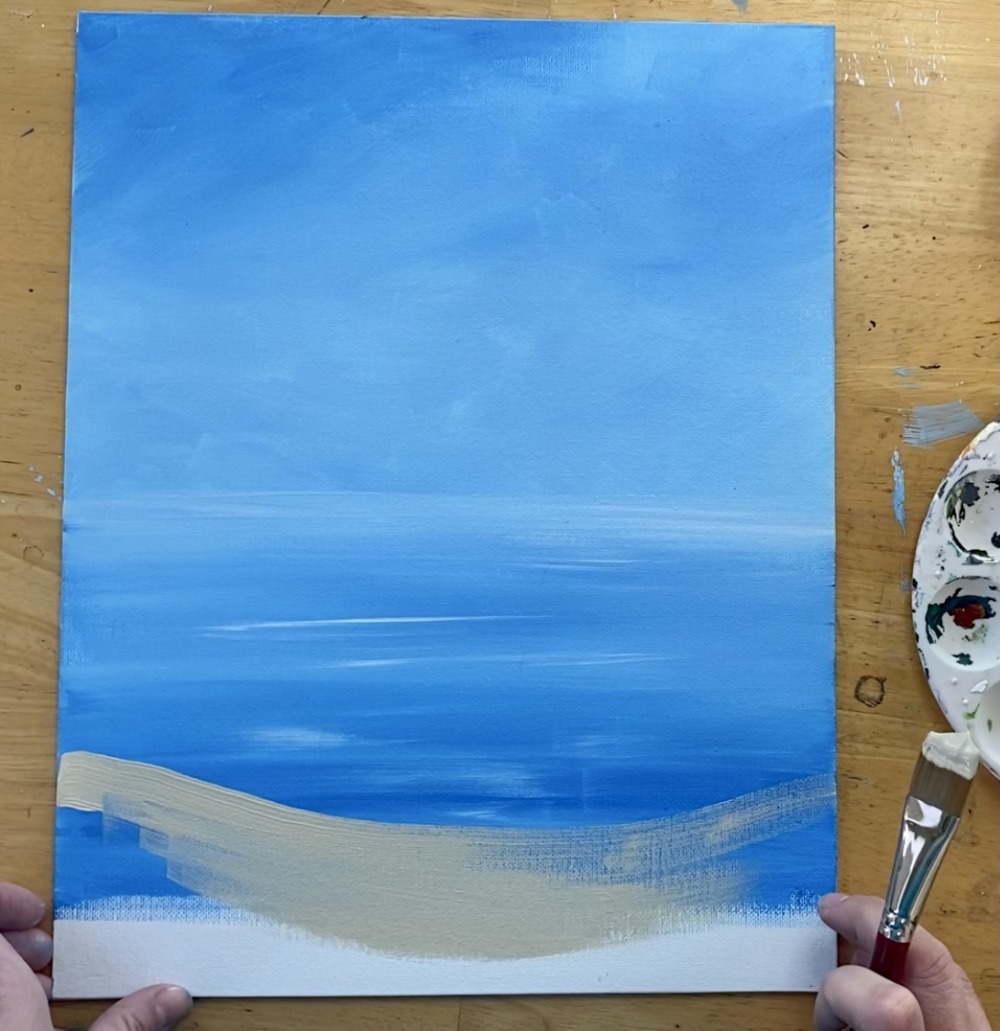
I painted mine with as an inverted curved area.
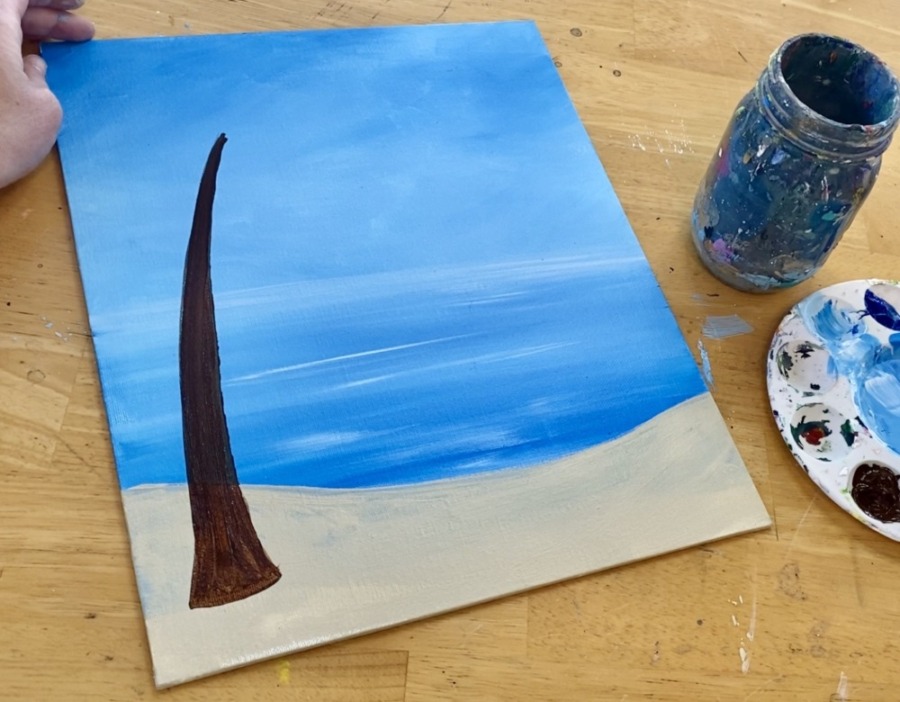
4. Paint the palm tree
Use a #8 round brush and the color “burnt umber”. Paint the trunk of the tree by using the brush to outline the shape.
If you don’t feel comfortable with this palm tree, you can try using chalk first to get your initial shape in place.

It’s a large trunk and the bottom is wider. The top curves and almost goes to a point. Fill it in solid with burnt umber.
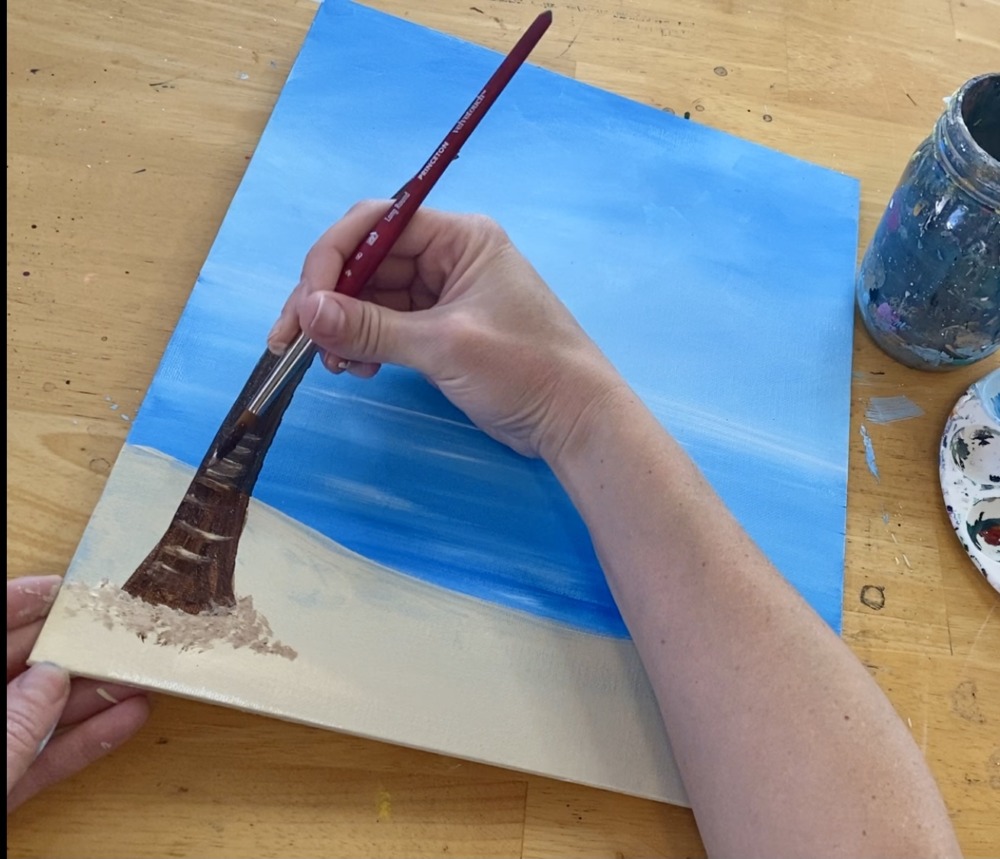
Then mix unbleached titanium white burnt umber. Paint little textured dots around the base of the palm tree to make it look like sand around it.
Then paint small curved strokes with the unbleached titanium/ burnt umber combination all up the palm tree (to give the trunk some texture).
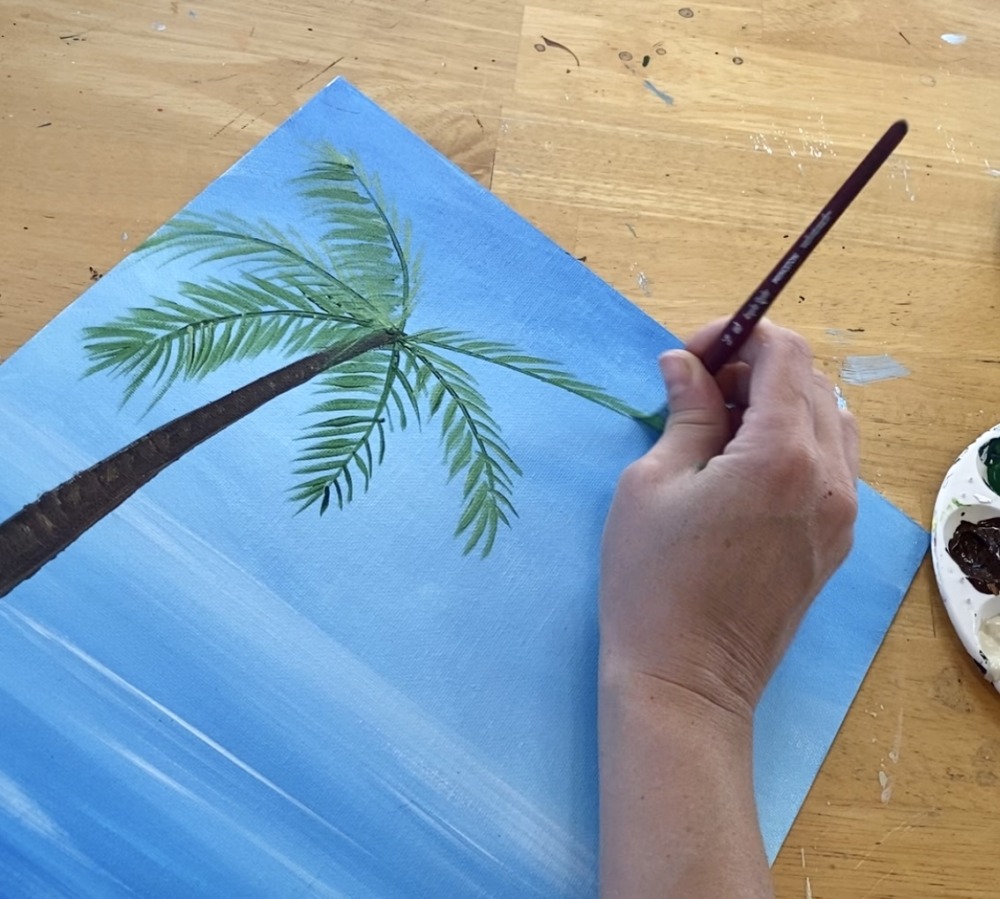
Use a 3/8″ angle brush to paint the palm tree fronds. Start by painting the center line with hookers green hue permanent.

Then paint the palm leaves angling out from the center lines. Use the angle brush to create those strokes.
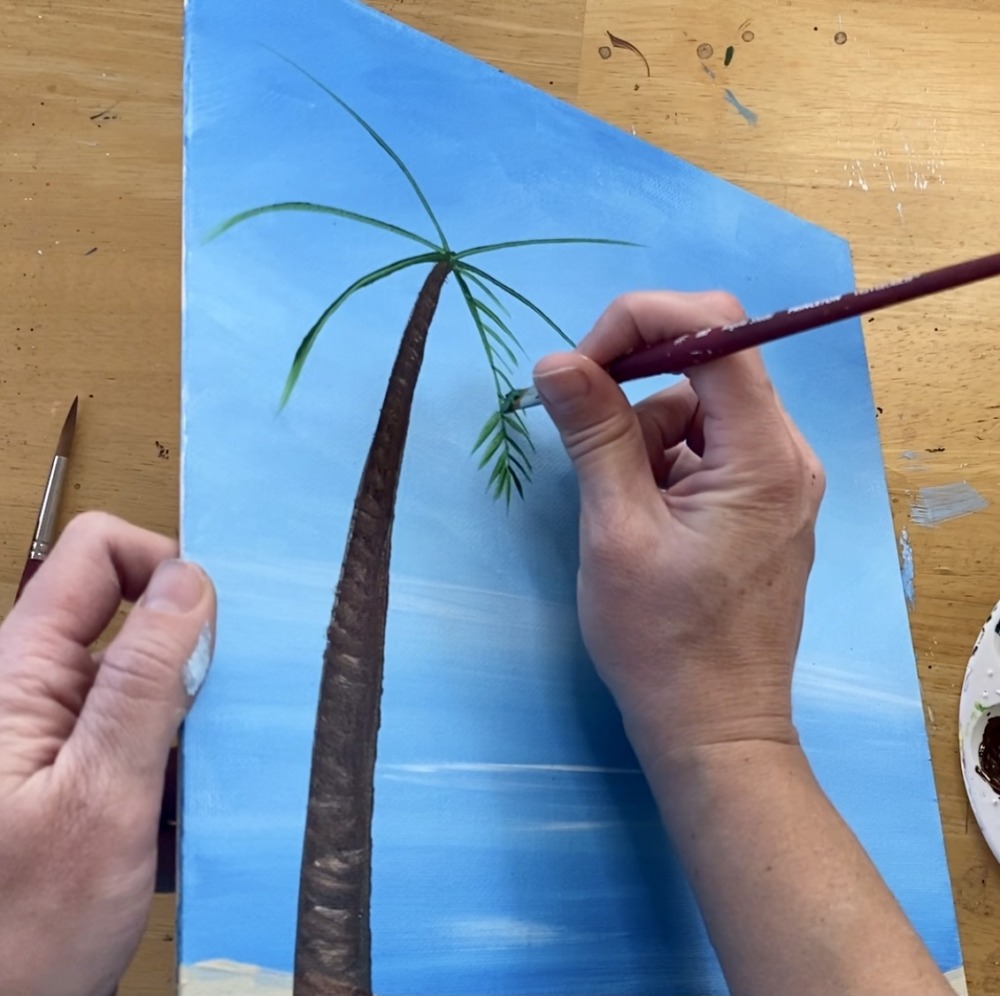
For “color variation” add a little titanium white into the green. This will create some lighter areas. You can also have some of the palm leaves overlap each other.
5. Paint the snowman
Use the color unbleached titanium mixed with some titanium white (to make it lighter) and your #8 round brush. Paint a large, medium and small circle that slightly overlap each other.
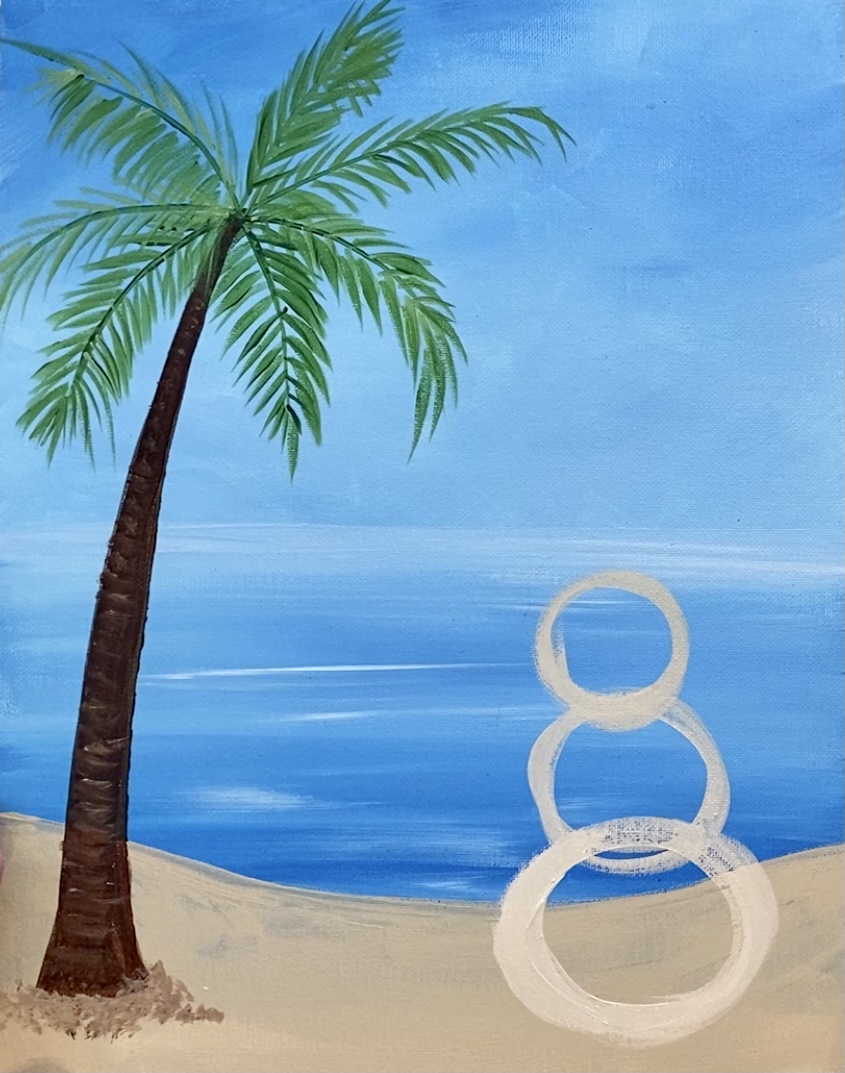
Then paint the circles in solid with that unbleached titanium (sand color) and titanium white combination.
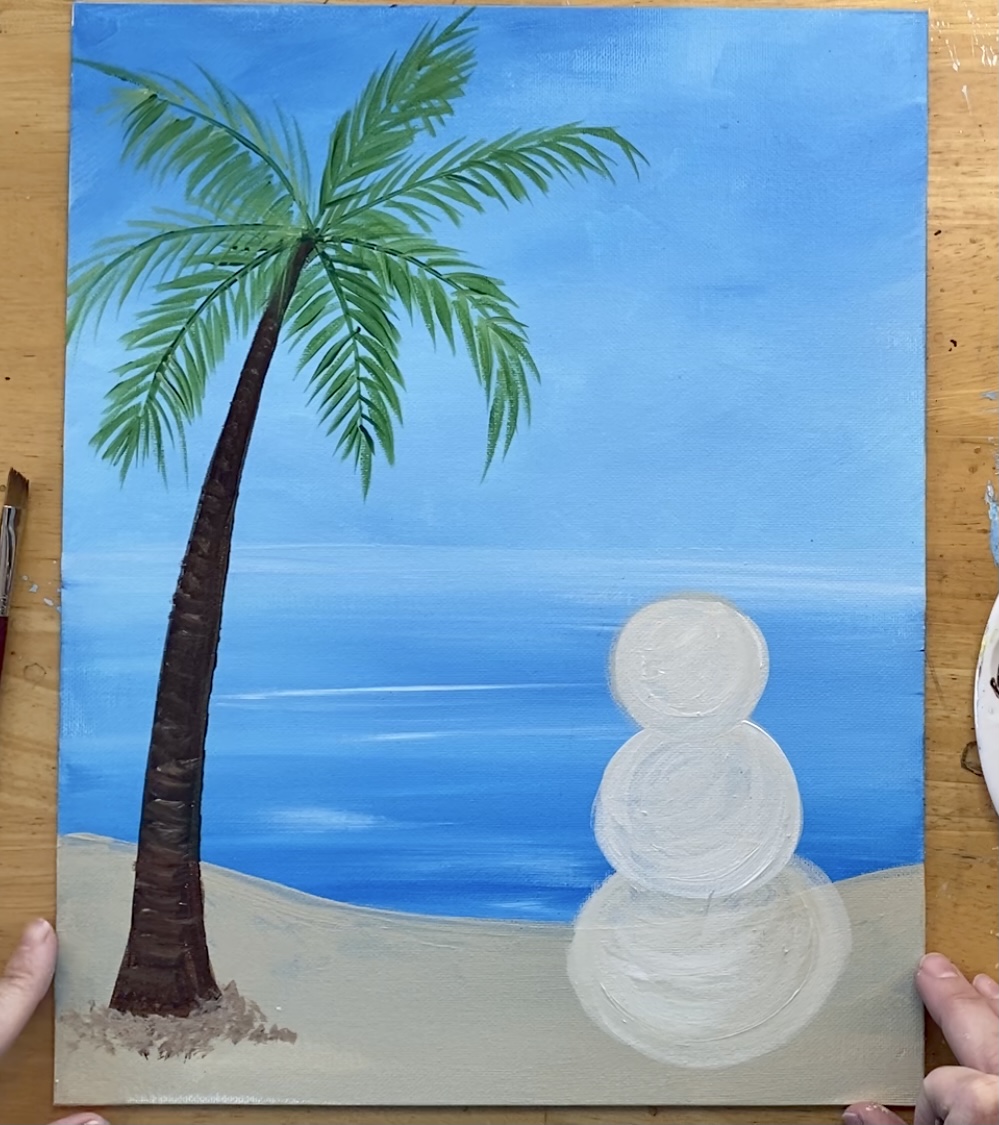
To do the shading on the snowman, mix a little burnt umber into the unbleached titanium to darken it a bit. Start on the bottom of the circle and blend it up.
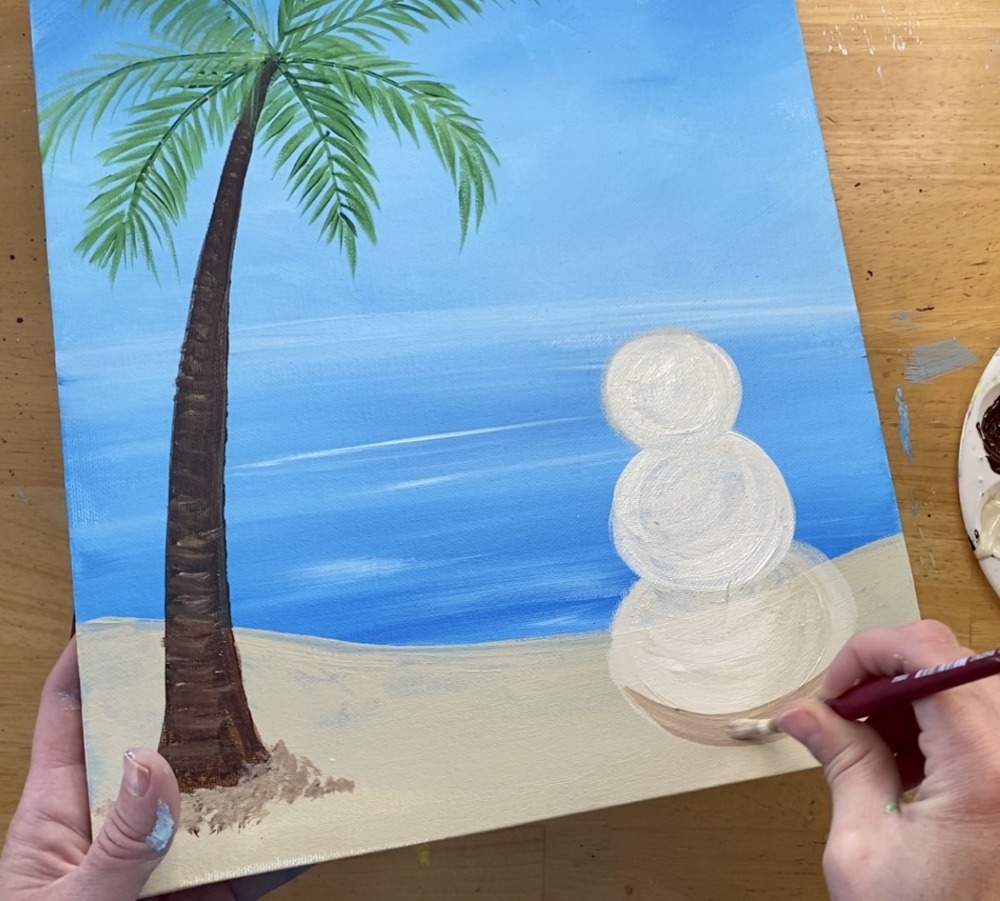
Add more unbleached titanium and white into it as you blend up so it gets lighter towards the top of the circle.
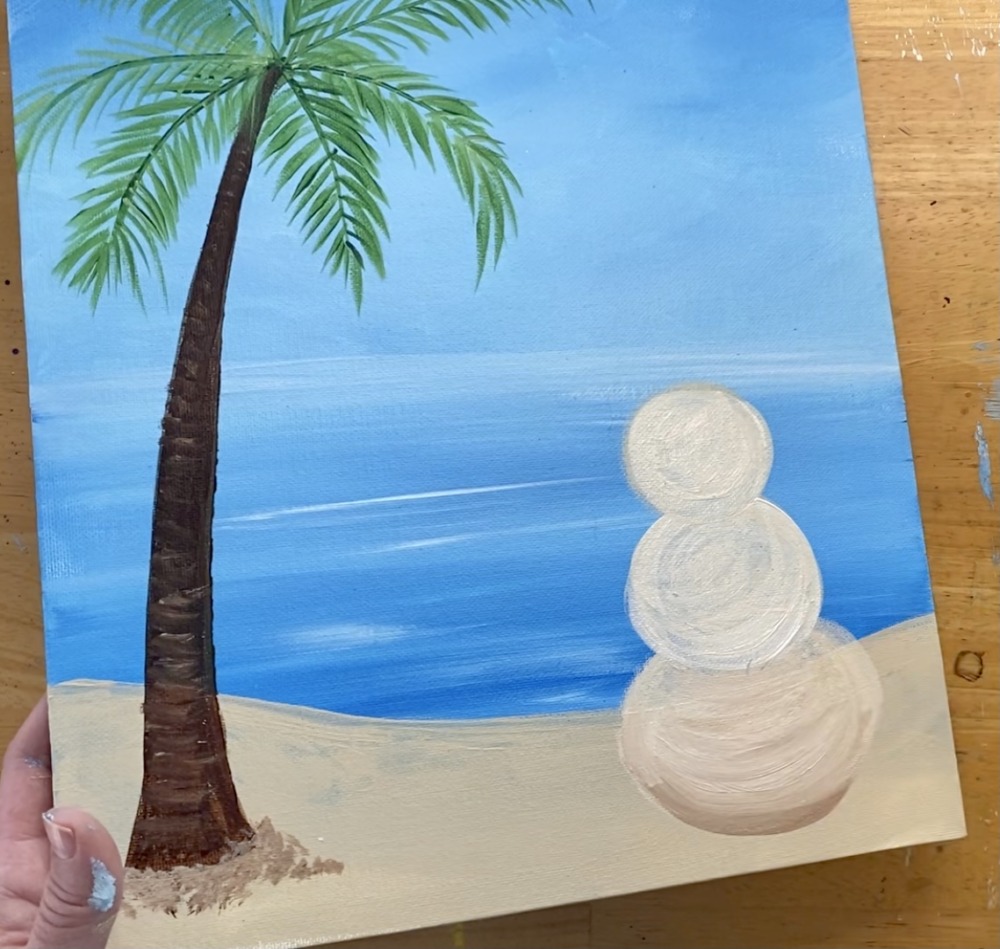
Repeat the shadowing for each of the circles. Then paint some shadowing underneath the snowman by using burnt umber mixed with unbleached titanium.
Add the brown on the bottom of the canvas and under the snowman.
6. Paint the sign post
Use a 3/8″ angle brush (or a small round brush) and the color burnt umber to paint a vertical post.
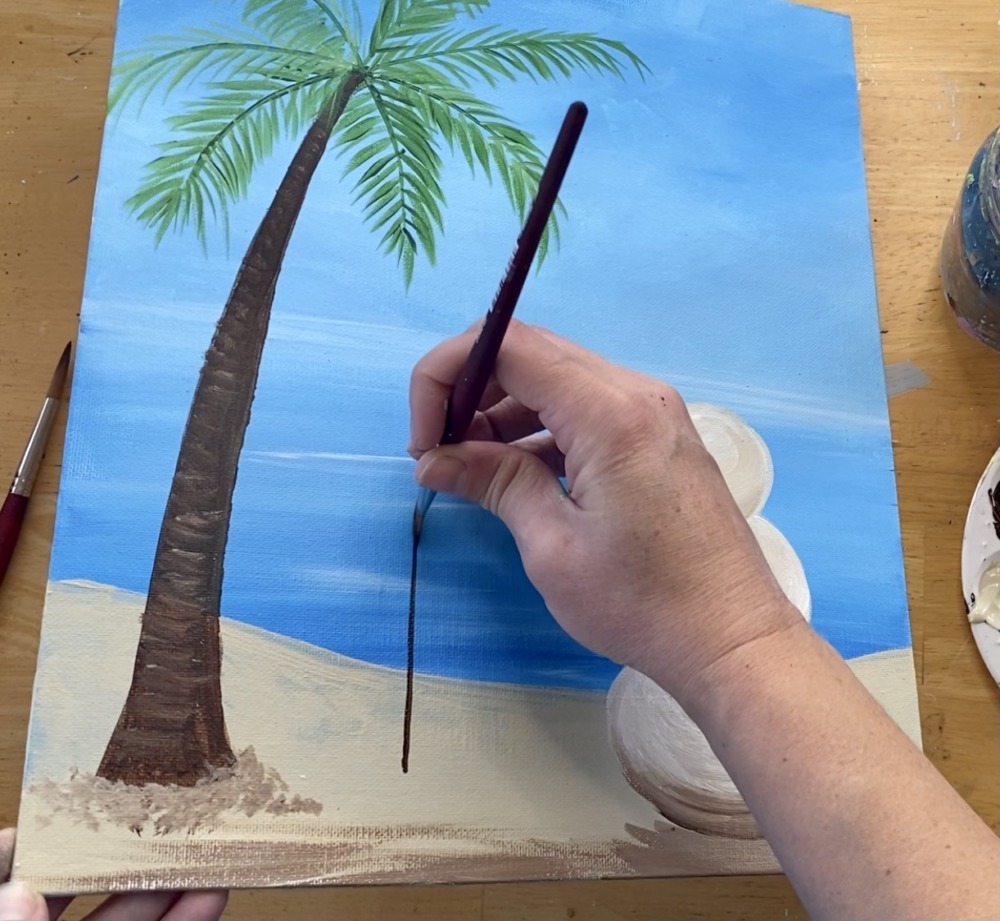
Then load your brush in burnt umber and titanium white. Use the 3/8″ angle brush to paint a sign that is going diagonally attached to the post.
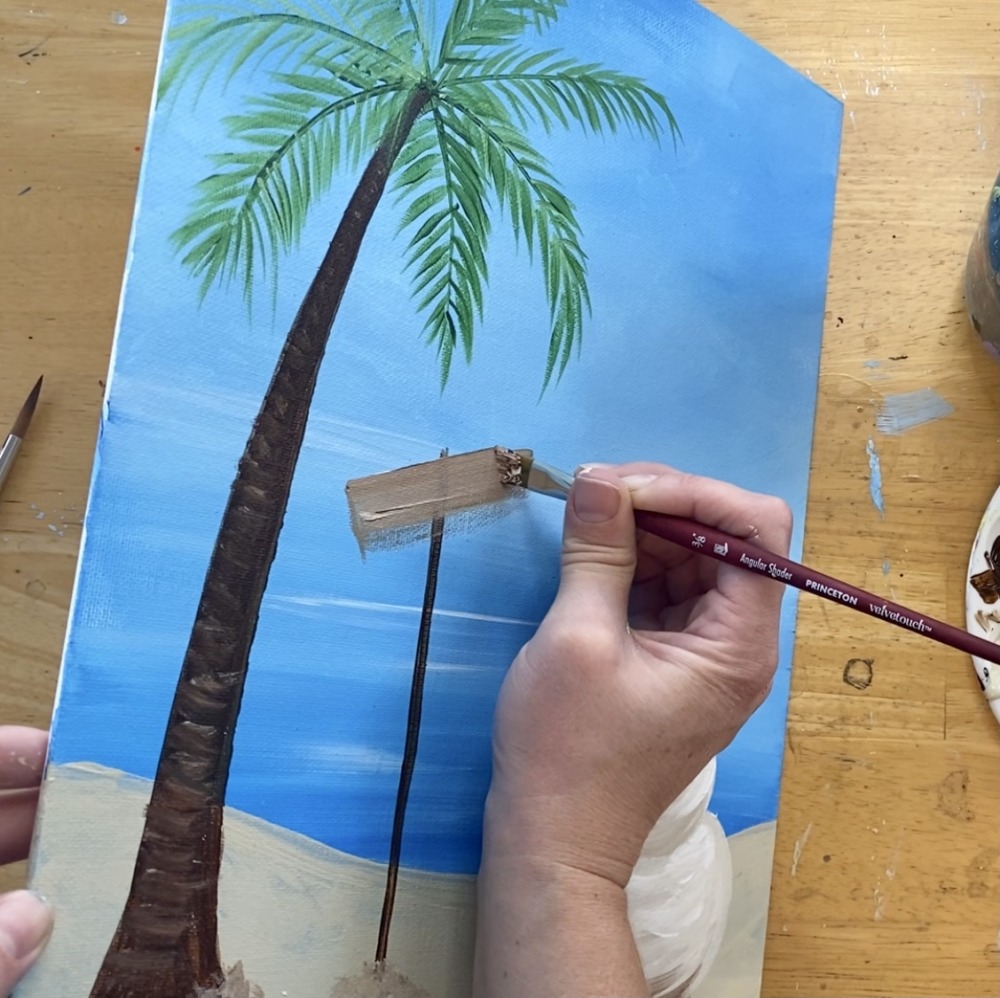
Paint three signs. The one in the middle is more horizontal and the one on the bottom is slanted. You can paint them in different directions if you want! To get the “wood grain” look, simply paint streaks of white onto the brown so it mixes together slightly.
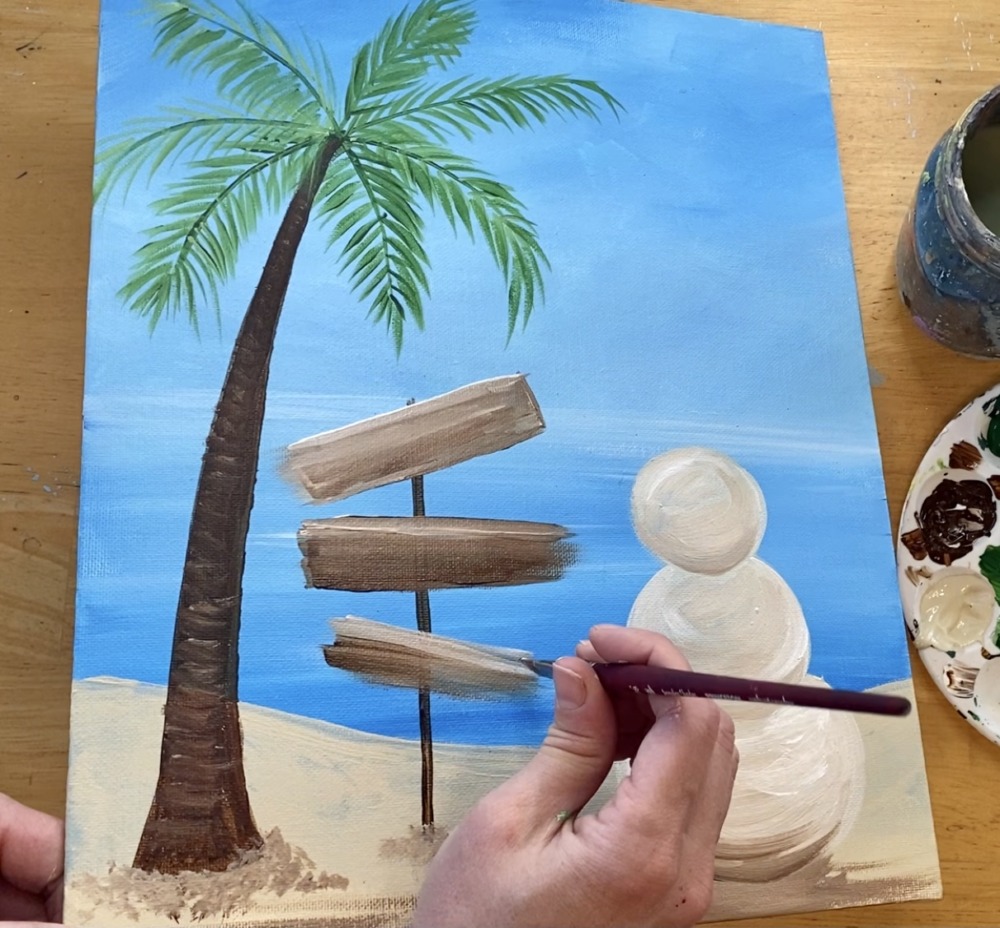
Define the shape of the signs. You can paint them so they have an arrow or a straight edge. Then paint a black dot for the nails.
7. Paint the sun, clouds and water reflections
Paint the sun using a #8 round brush and the color primary yellow mixed with some titanium white. Paint a circle.
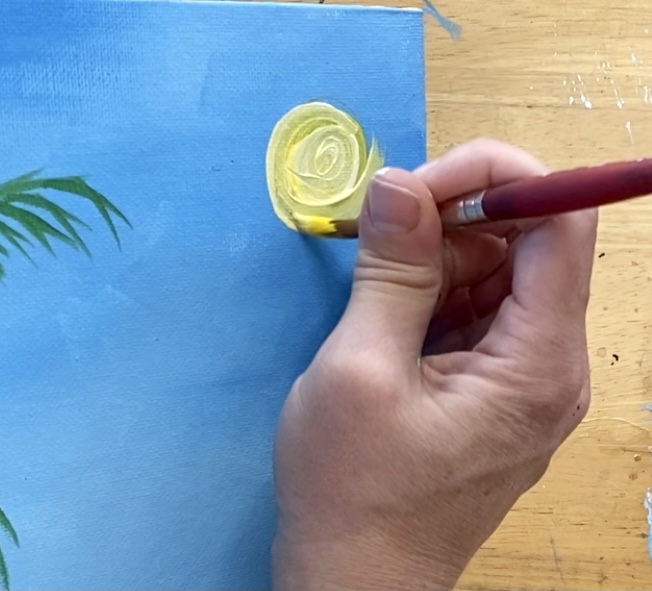
Optional: then use your finger to smear the edges of the circle so it fades out into the sky.
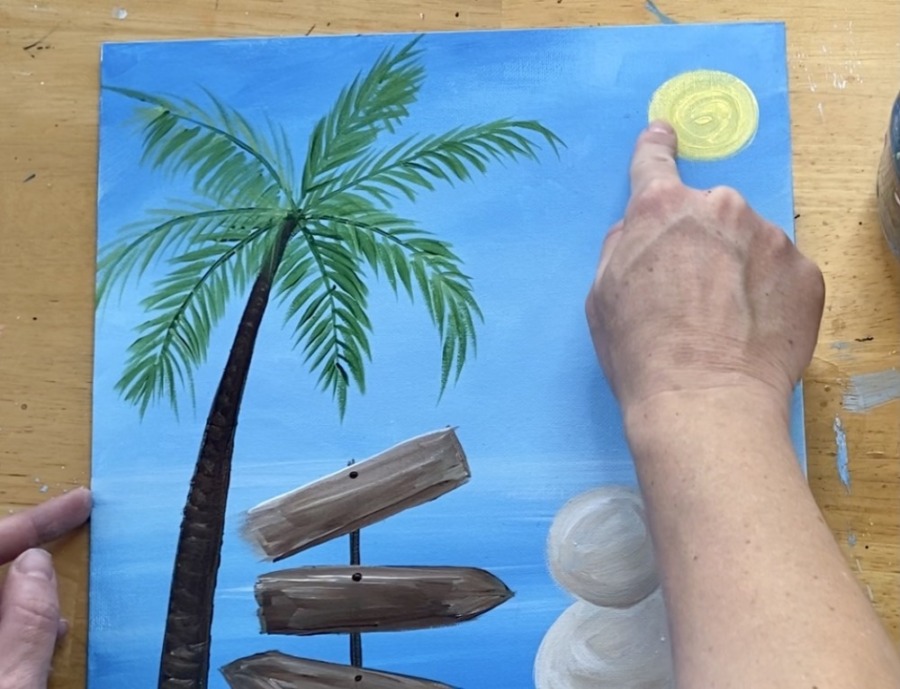
That effect was done by smearing the edges! You can also make “rings” around the sun using any brush and the “dry brush technique”.
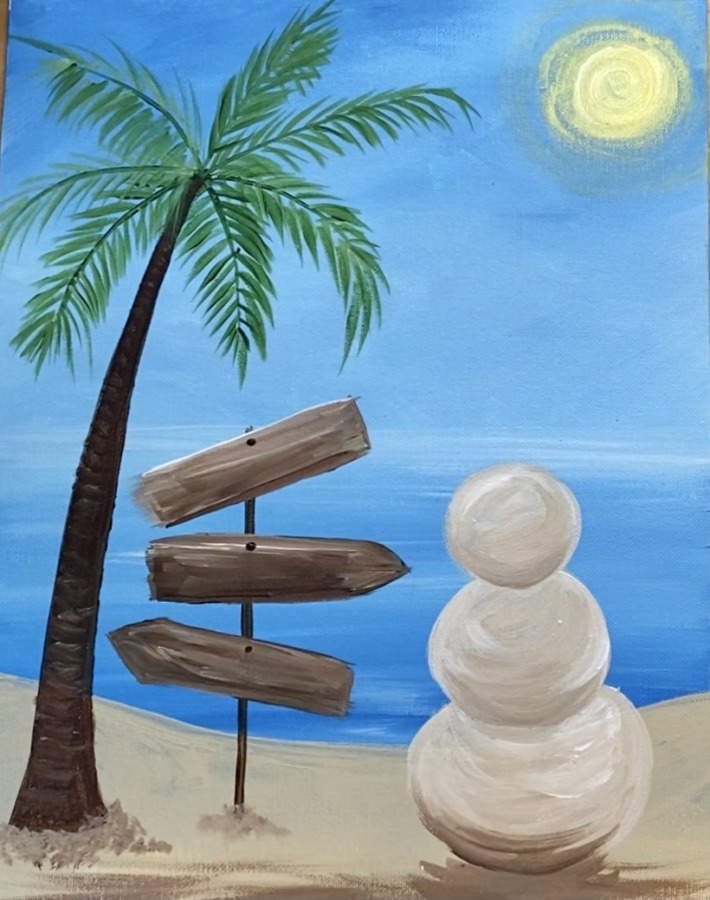
Next paint the clouds. I used the 3/8″ angle brush but you can use whatever brush you feel most comfortable painting clouds with. I did the same kind of simple cloud technique that I used in my Golden Hour Sunset Painting Tutorial.

Basically load your brush in some titanium white but wipe the white off so only a small amount is on the tip of the bristles. Form the shape of the cloud at the top. Then dry brush the rest of the cloud in.

Then paint the white reflection lines in the water using the 3/8″ angle brush. Do as many lines as you want in the water but put some extra lines under the area where the sun is.
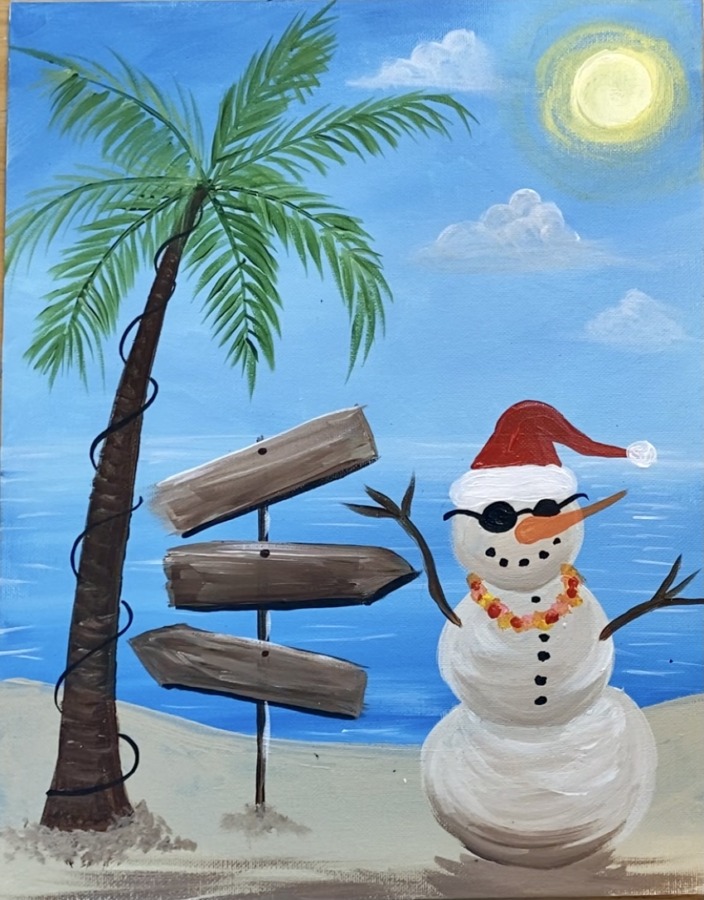
8. Paint details on the snowman
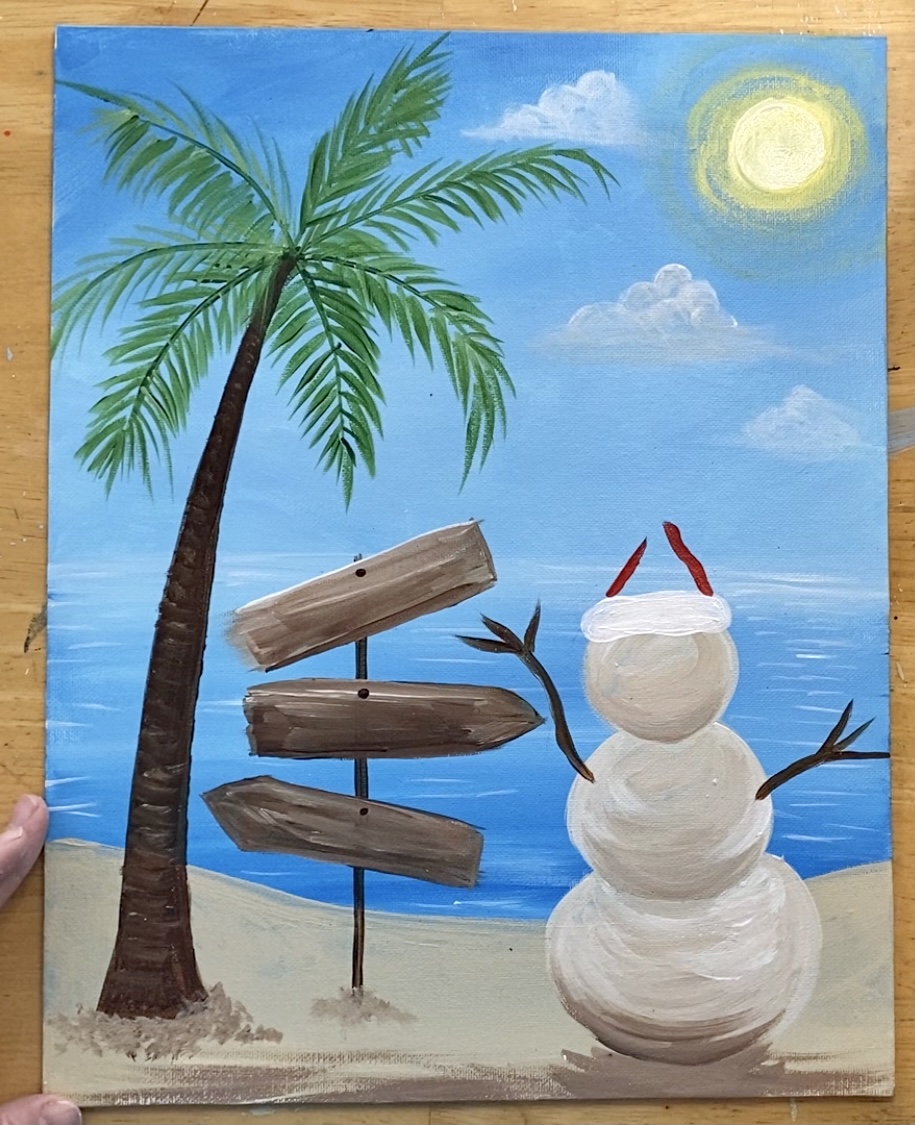
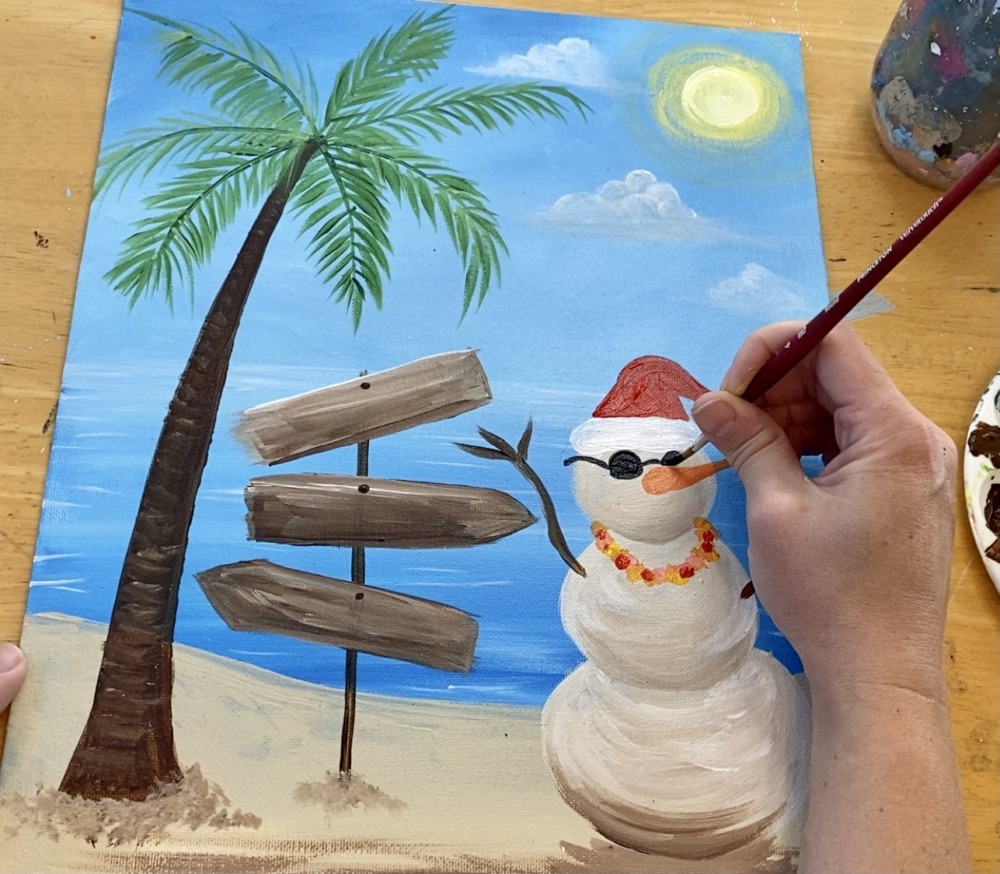
Use a #4 round brush and burnt umber to paint stick arms on the snowman.
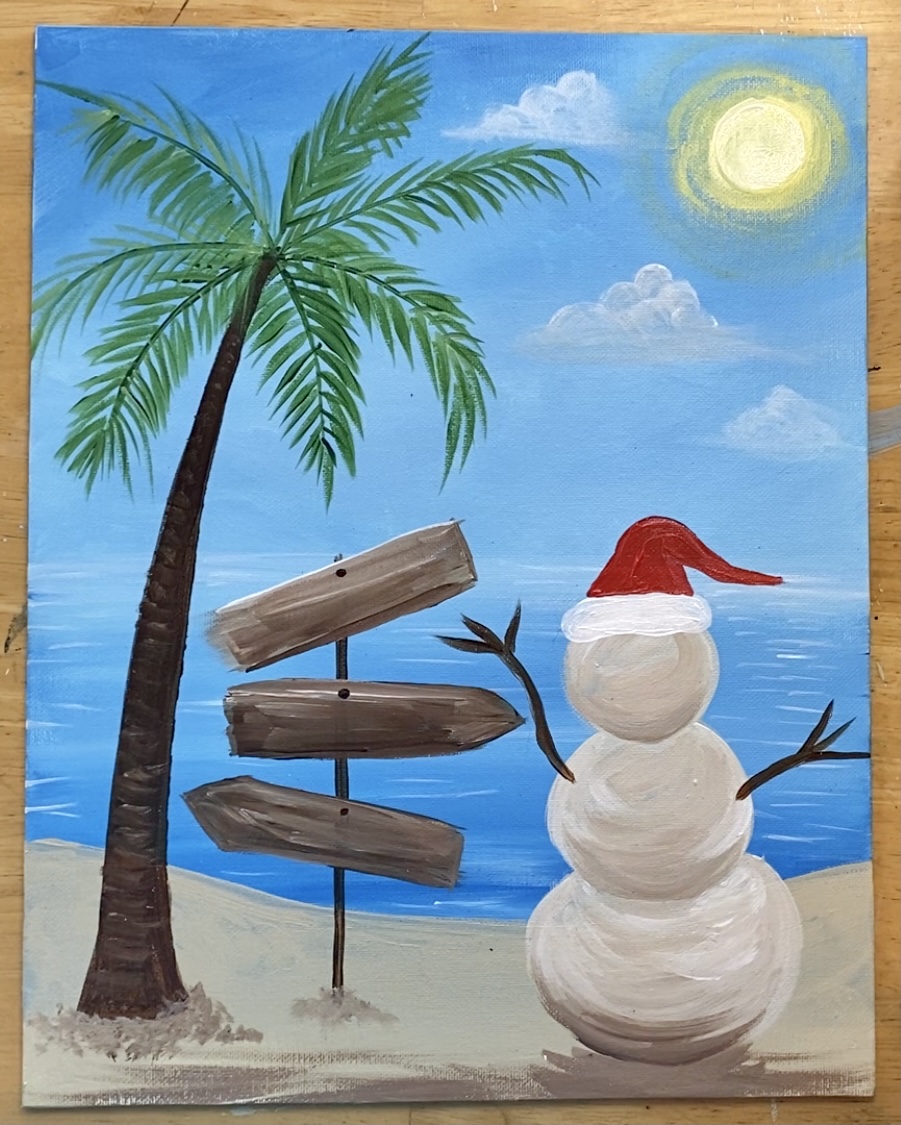
Then do his Santa hat. Use titanium white for the bottom part and cadmium red medium for the red part that folds over.
For the flower lay, I mixed on my palette a mixture of pink and orange colors. To make the pink (light red) mix cadmium red medium with some white. To make the orange, mix primary yellow with a little bit of cadmium red medium and a tiny bit of white.
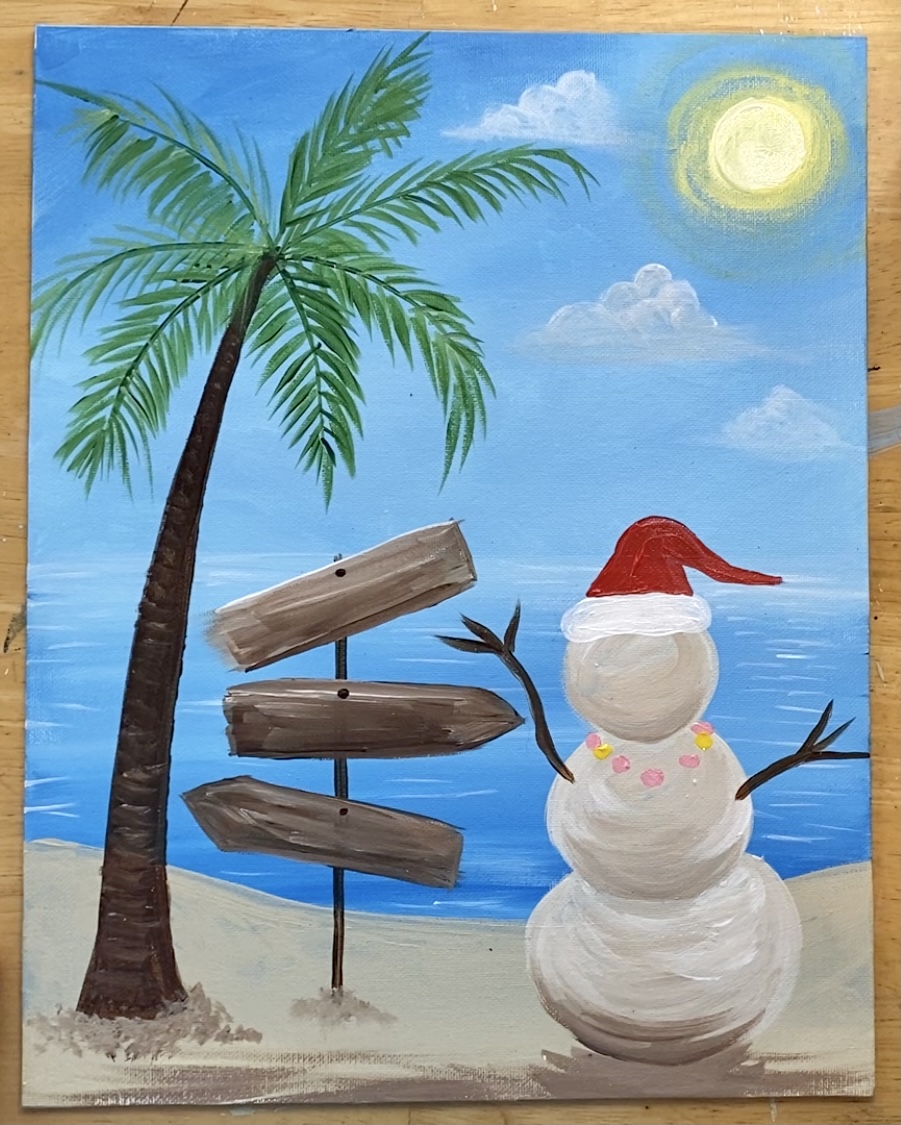
Then I did some solid yellow and solid red flowers. This lei was done with a #4 round brush and tiny textured dot strokes.
For the carrot nose, I used orange (yellow mixed with a little red). The sunglasses were painted with mars black. For both of those items, I used a #4 round brush.
9. Paint lights on the palm tree
Use a #4 round brush and mars black to paint the strand around the trunk of the tree.
Then clean the round brush. Paint colored circles on the black strand.
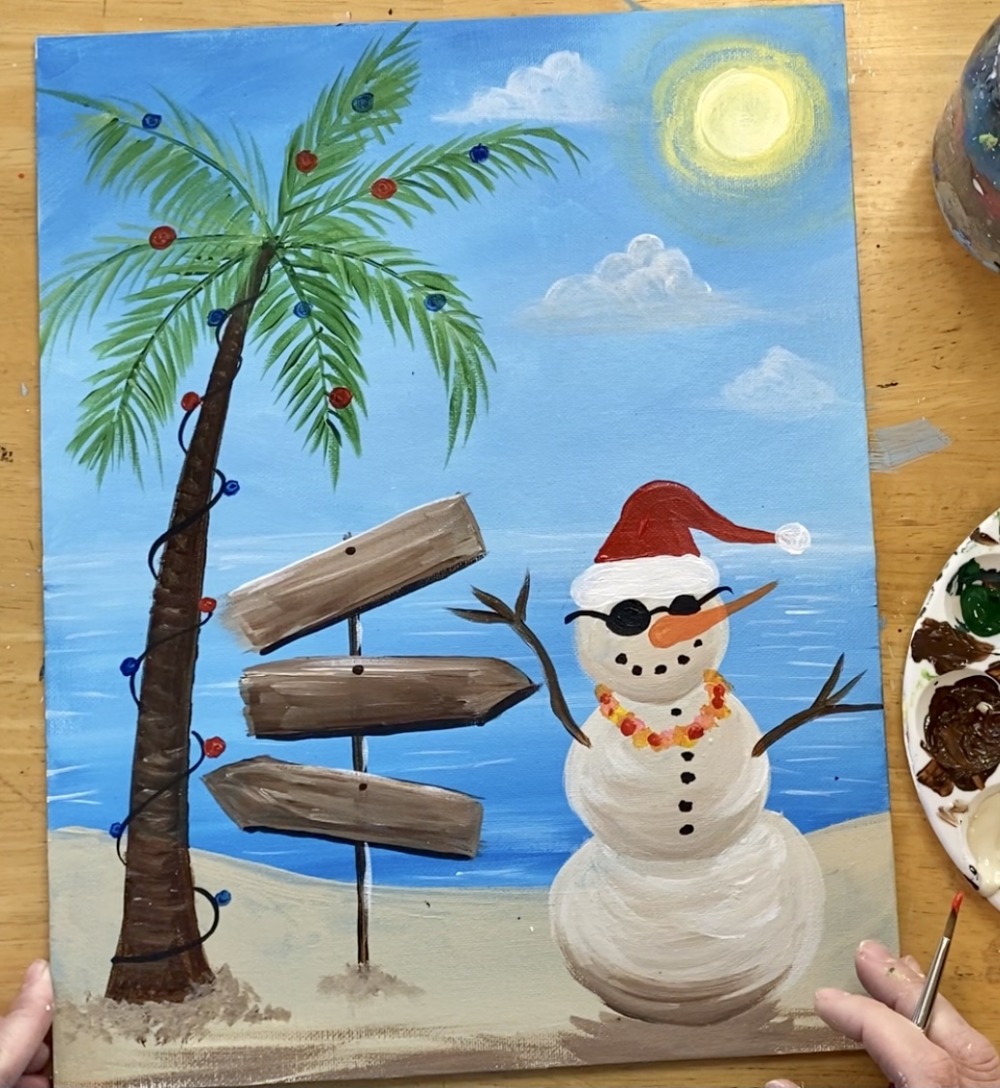
I did circles with primary blue, primary yellow, cadmium red, hookers green and orange. For the lights on the palm fronds, I did not paint the string.
10. Paint words on the sign & white in the lights
Use titanium white and a #0 round brush to paint the word. You can also do this with a white paint pen.
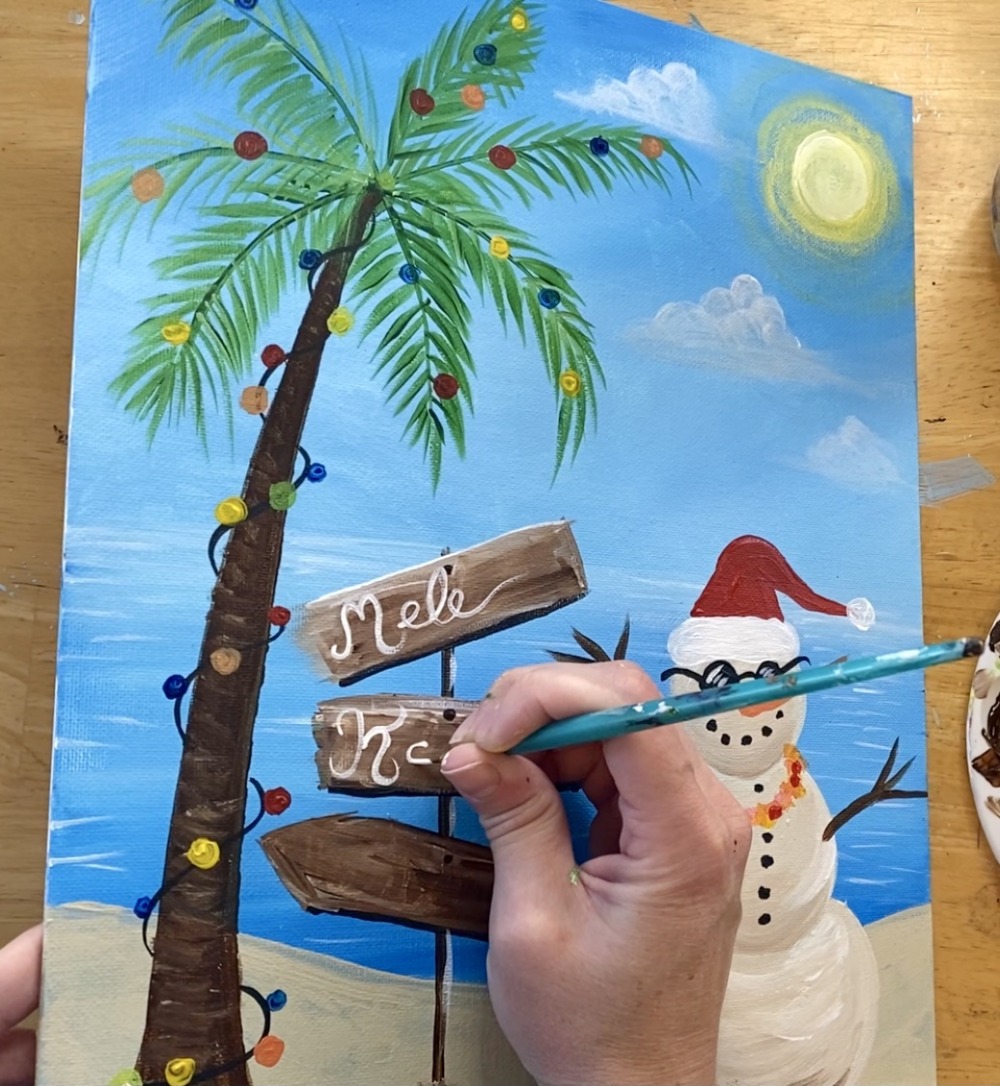
Then (after the lights are dry) paint a small white dot in the middle of each of the circles. This helps the lights look like they are glowing.
Finished!
Sign your name and show it off!
Share your art here!


Great picture with very clear instructions! First time doing something like this and will definitely do some more!
Thanks Kellie! So glad you enjoyed this one!