
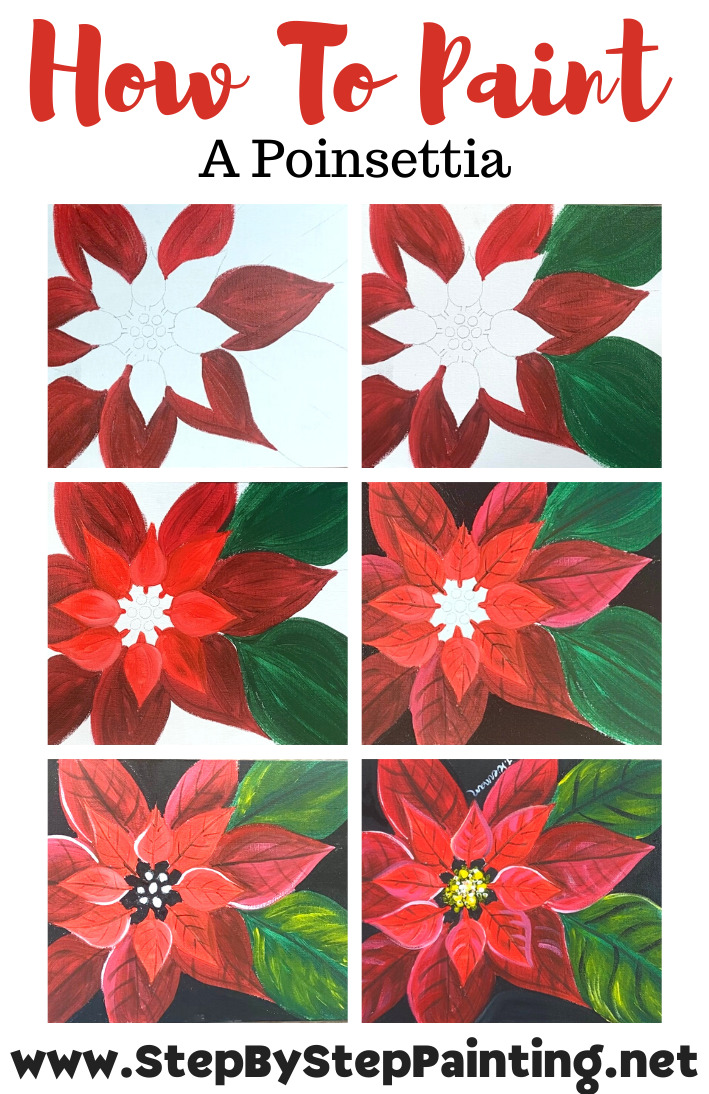
Would you like to save this?
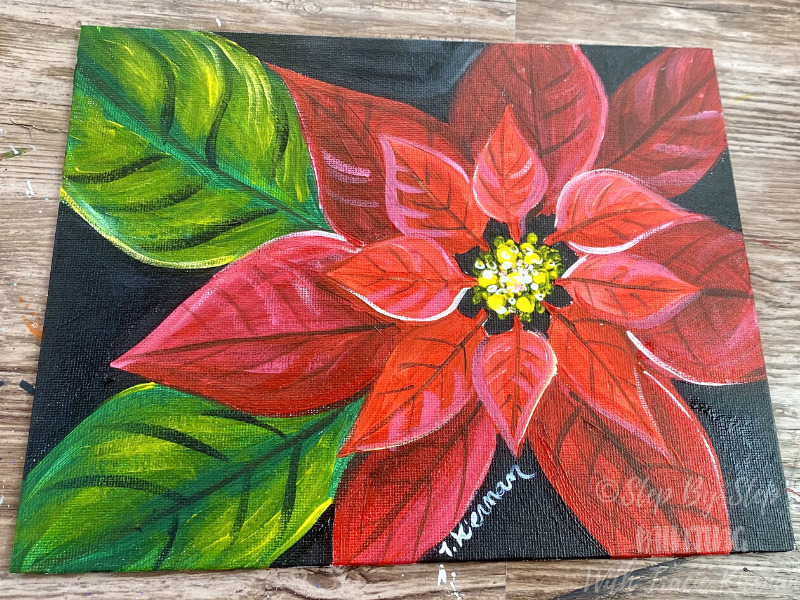
Learn how to paint a poinsettia with acrylics on canvas! I will be demonstrating this on an 8 x 10 canvas (although this design lends itself to work on any size).
Please note that this is an intermediate level painting so there is a little bit of a challenge if you are new to acrylics! The concepts are similar to my sunflower painting. If you did that one and found it easy to do, you will be applying a lot of the same concepts for the poinsettia.
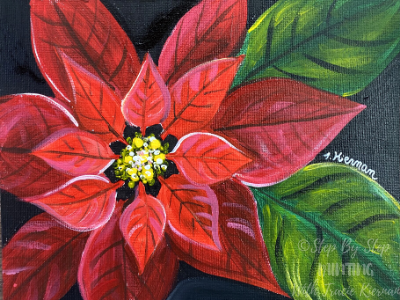
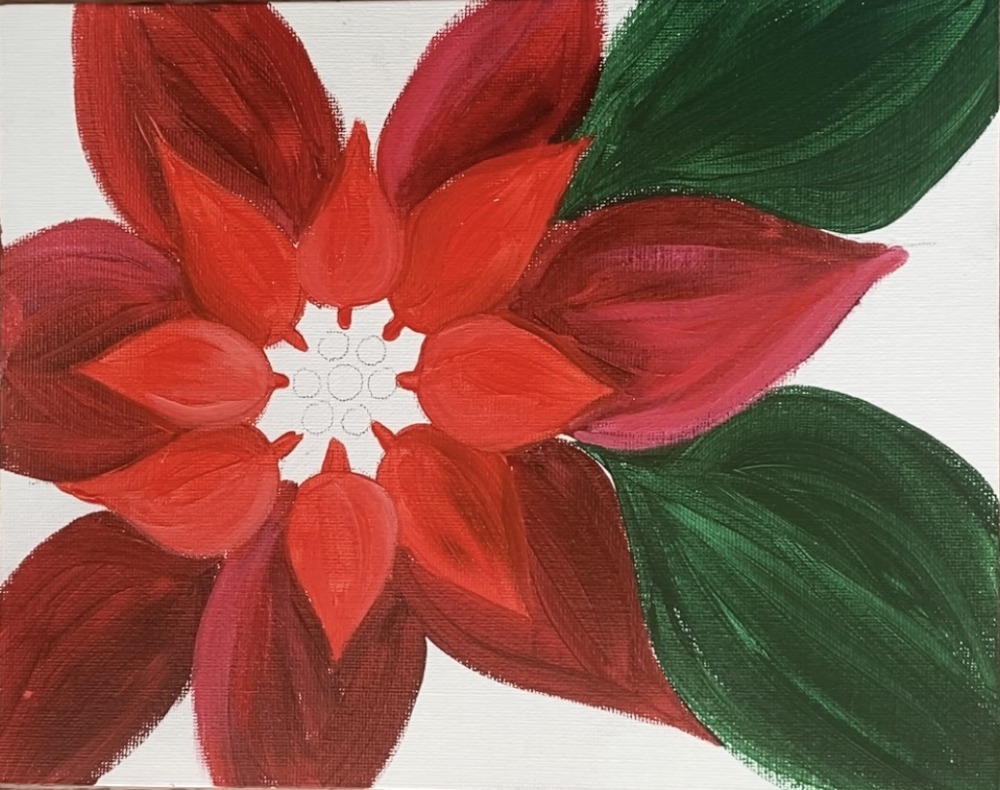
Poinsettias are beautiful Christmas flowers with deep red hues! I used two different red color paints for this: cadmium red medium (which is a really bright warm red) and naphthol crimson (which is a cool darker shade of red). The two reds help you get petals that are brighter in the front and darker in the back.
The background of this painting was painted solid black. You can change the background to any color if you don’t want to do black. I almost did it a dark prussian blue but chose to stay with the black because I love the way the black and red look together.
Enjoy and happy painting!
Materials
How To Paint A Poinsettia
Learn how to paint a poinsettia with acrylics on an 8 x 10 canvas.
Materials
- 8 x 10 Canvas
- Acrylic Paints
- Brushes
- Drawing Pencil
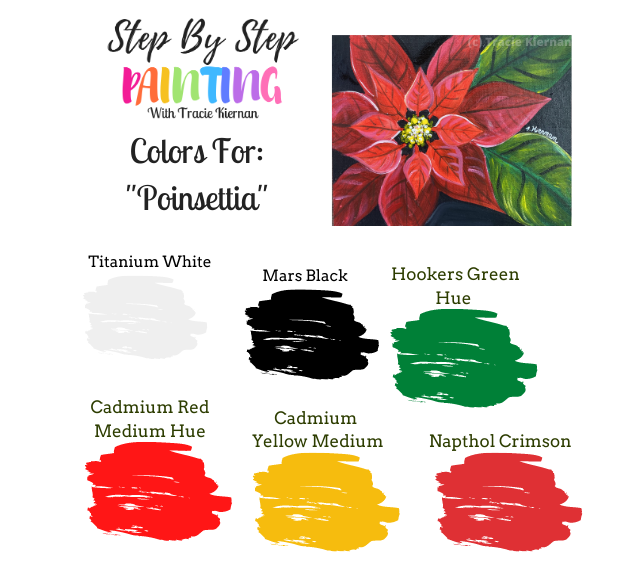
Colors
- Cadmium Red Medium Hue
- Naphthol Crimson
- Cadmium Yellow Medium
- Hooker's Green Hue Permanent
- Titanium White
- Mars Black
Brushes
Instructions
See tutorial for full instructions.
Notes
For color substitution:
- Find a bright warm red and a cool dark red. The two different shades of red will help the petals in the front stand out from the petals in the back.
- You can use any shade of yellow and any shade of dark green.
- You can use any shade of black and any shade of white.
- If you do not want a black background, choose a color that will stand out from the red and green.
Color Palette
Traceable
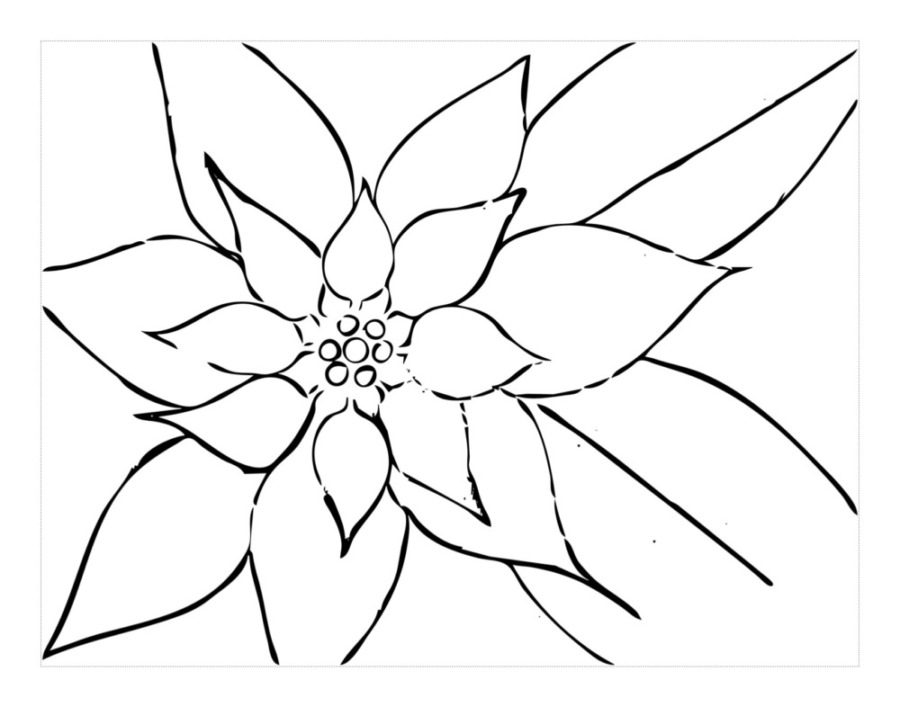
Drawing a poinsettia is fairly easy! If you are not up to drawing, you can use my traceable below which is optimized to fit an 8 x 10 canvas.
Directions At A Glance
Video
Step By Step Directions
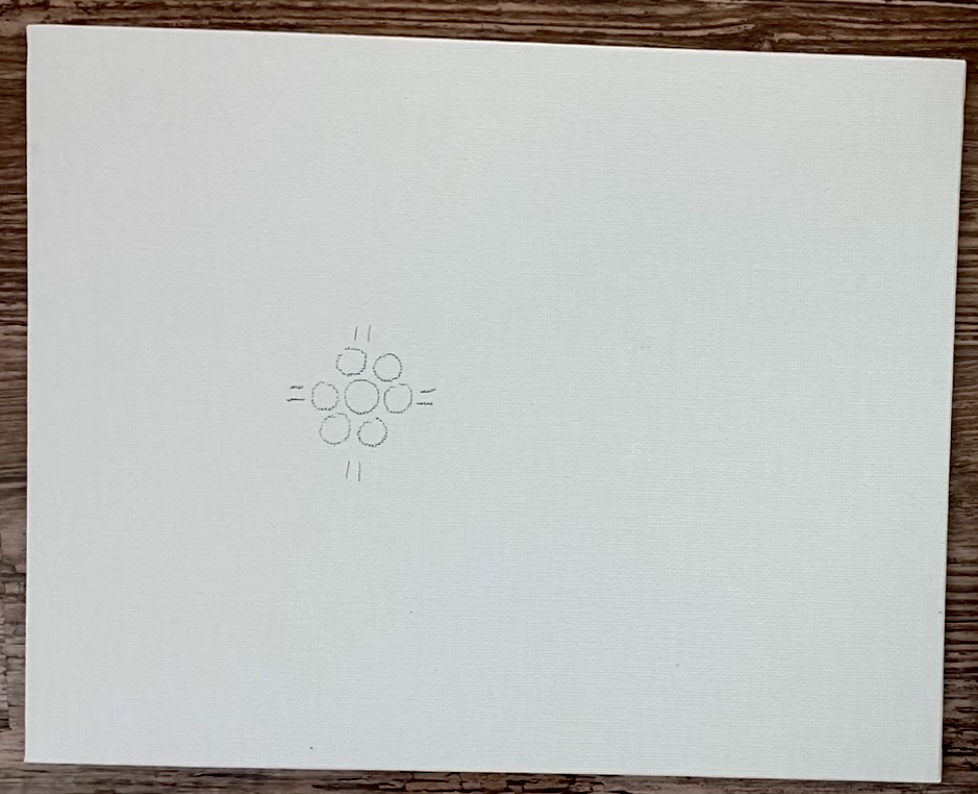
1. Draw the poinsettia
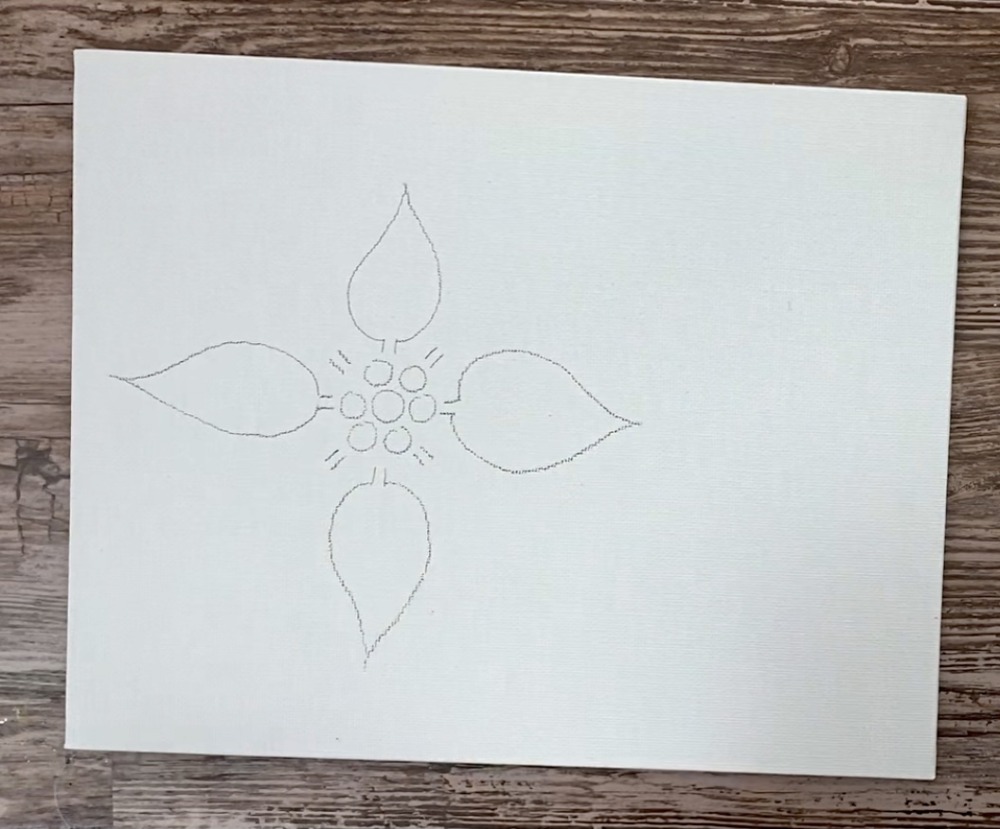
Start by drawing 5 small circles in the center (offset to the left) of the canvas. Then draw four bases for four of the petals.
Then draw four small petals attached to each of those bases. The petals are basic teardrop shapes that go to a point.
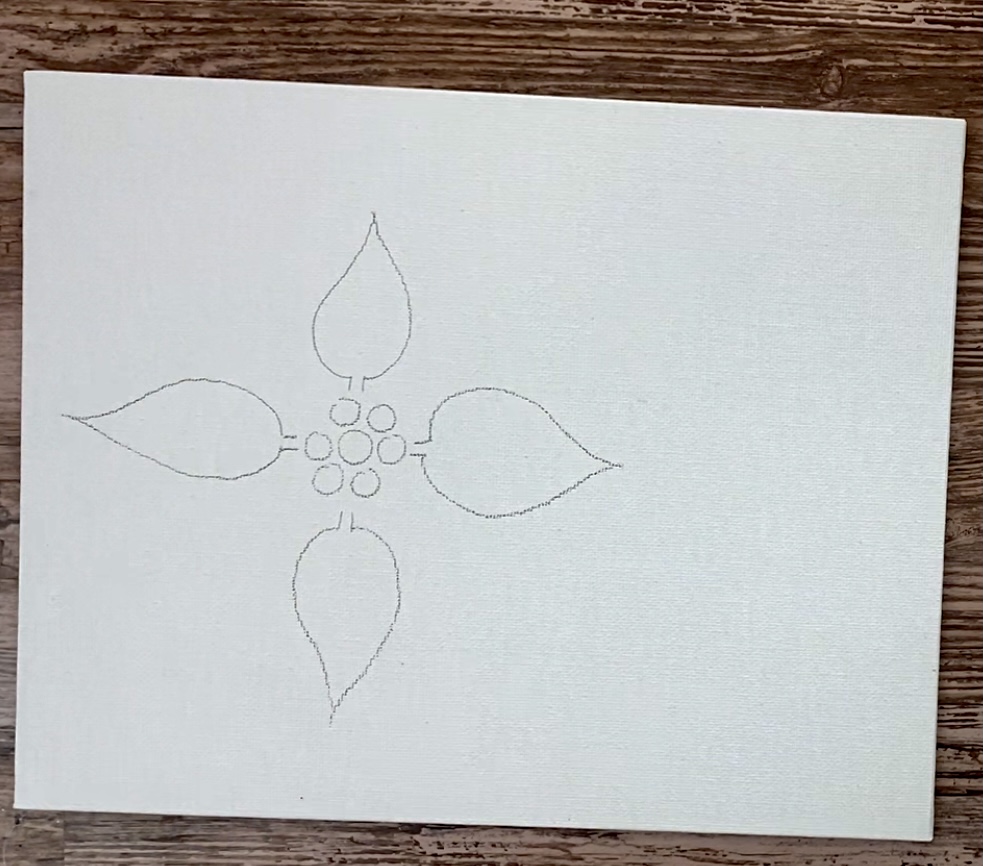
Then draw four more bases going diagonally between each of the four petals.
Draw four more petals that are in between the first four petals you drew. You can have the petals all be identical or change the size slightly and have some curve or bend differently.
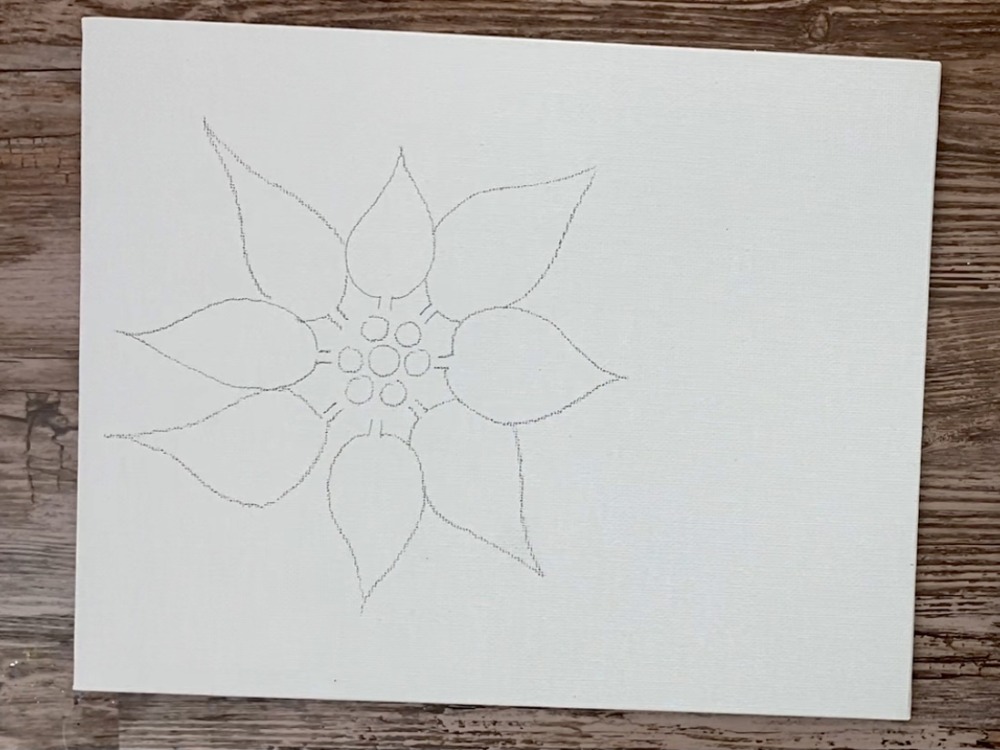
Then draw the larger petals. These ones are in between and behind the smaller petals and go to a point or go off the edge of the canvas.
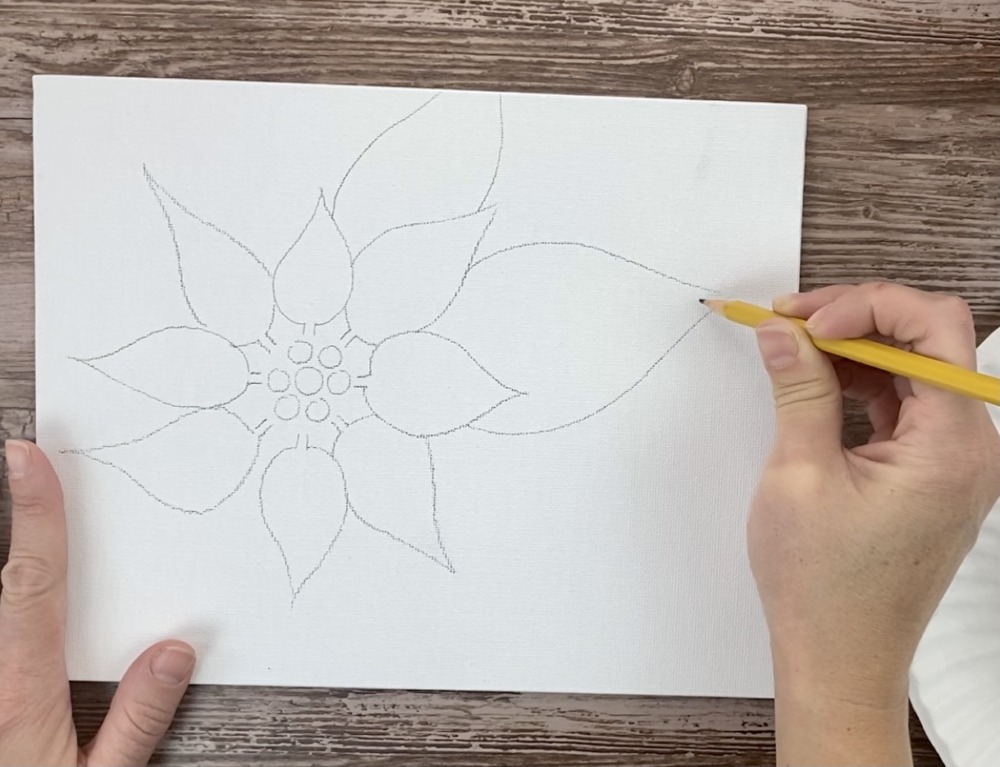
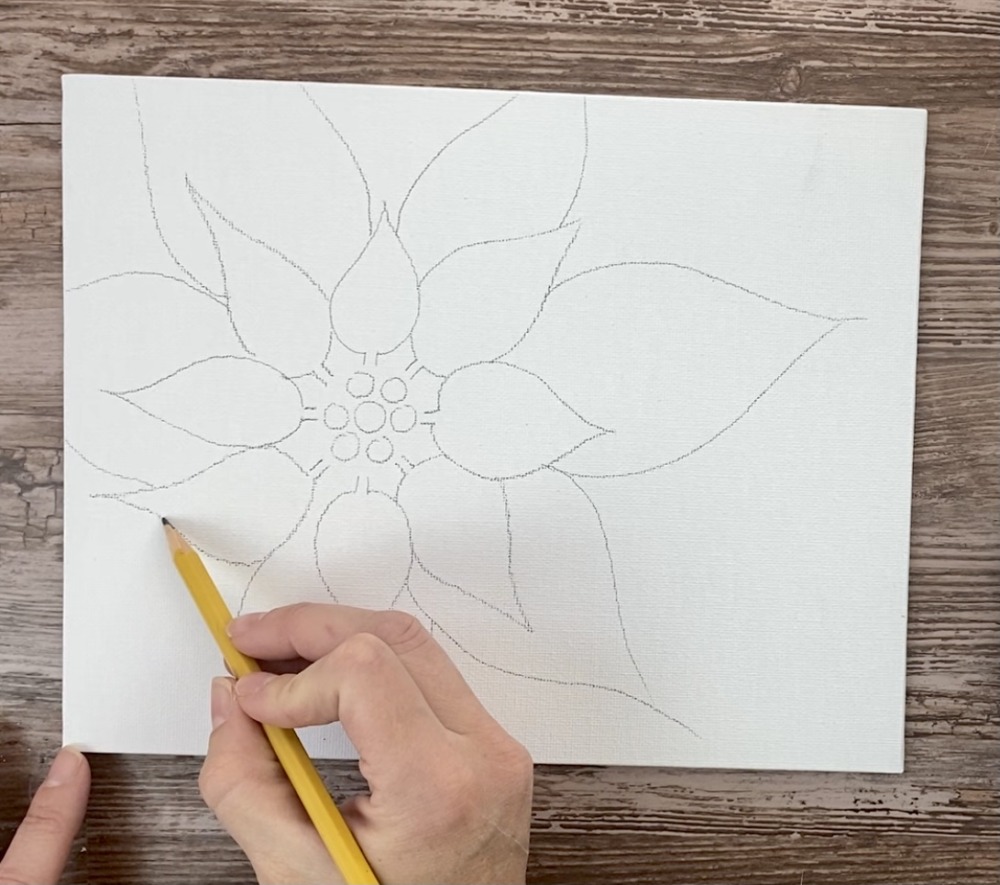
Then define where you want your leaves to go. I did my two big leaves behind the big petals. Then I drew a diagonal line on both of the leaves to distinguish them from the petals.

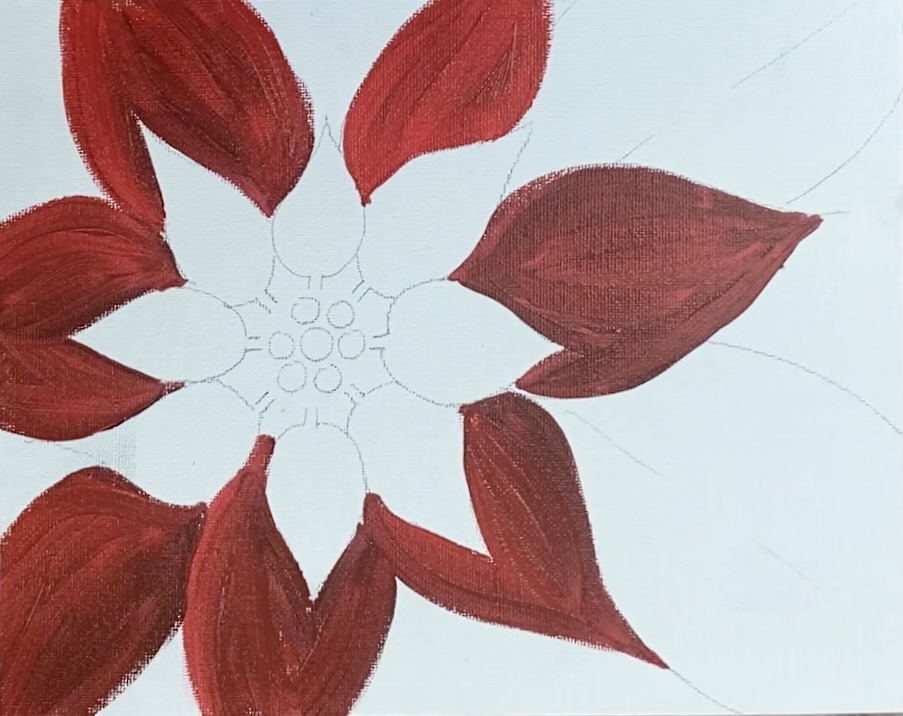
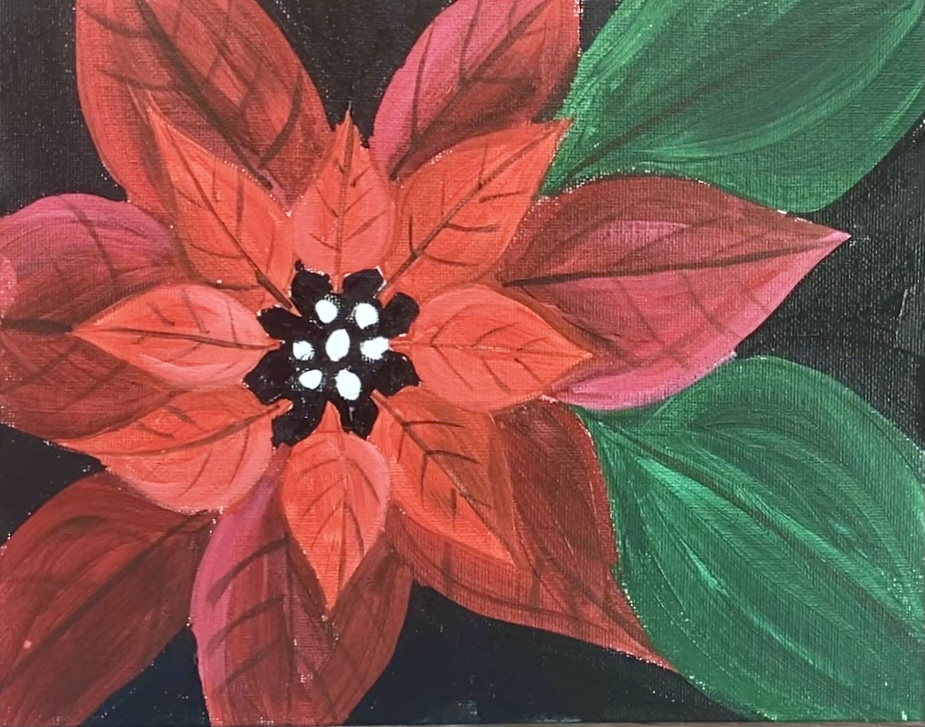
2. Paint the back petals dark red
Load your palette with naphthol crimson and hookers green hue permanent. Use a #4 round brush.
Mix a small amount of the green into the red so that it becomes a dark red.
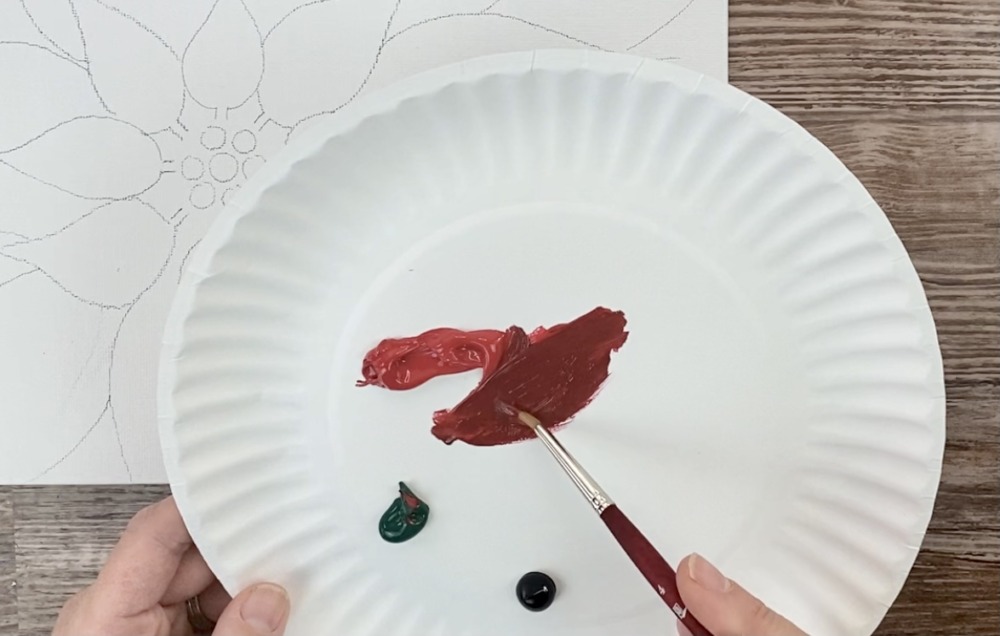
Paint all your back petals that dark red color.
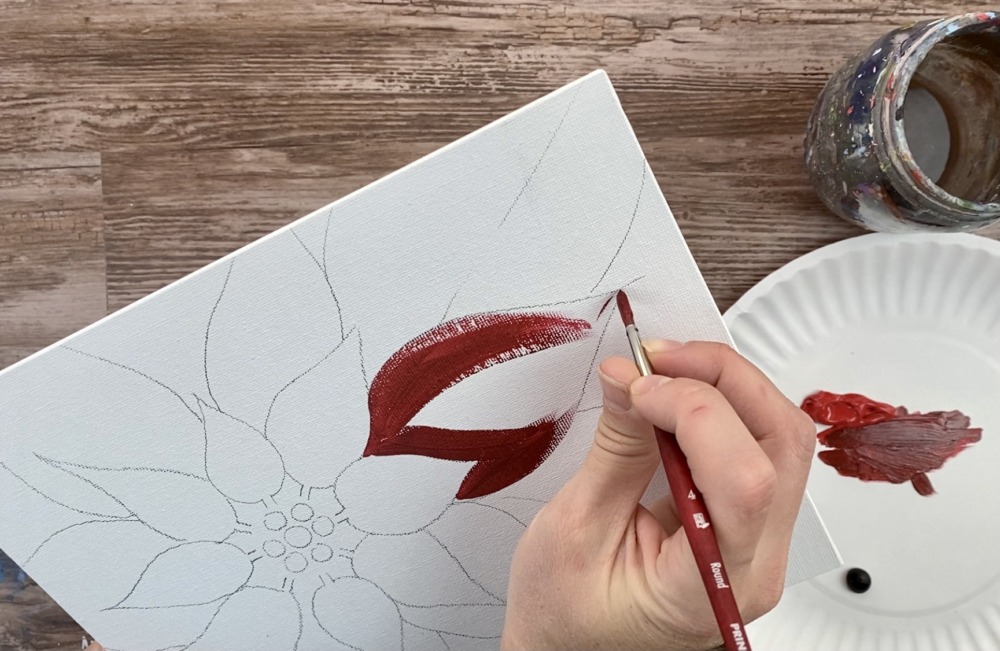
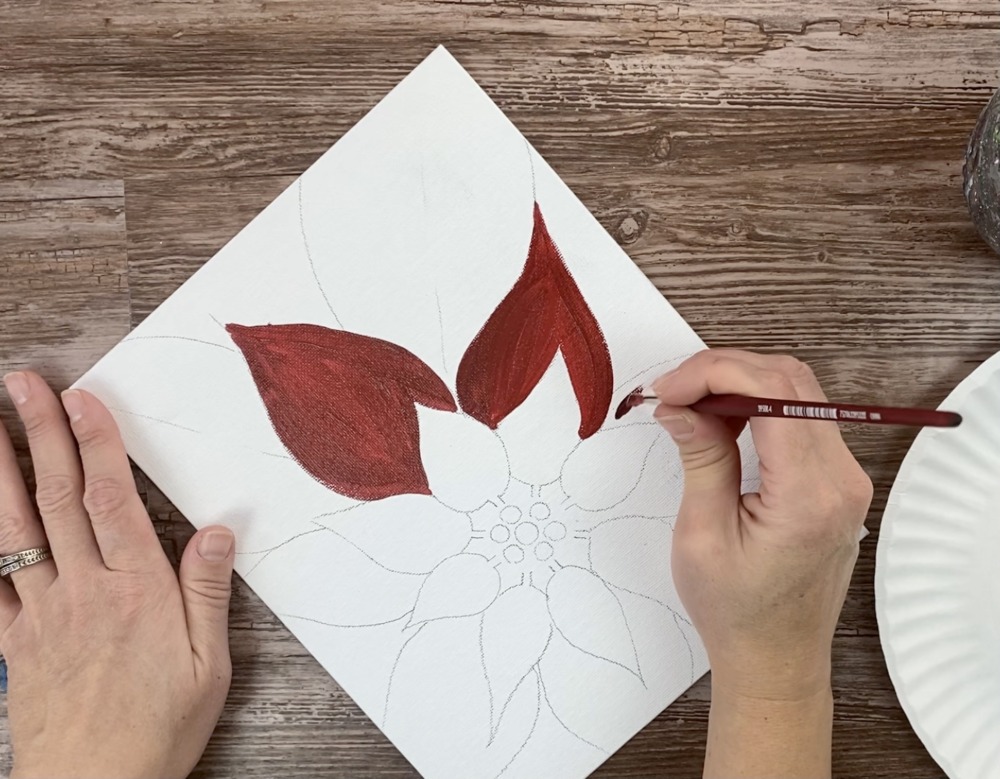
If you want variations in the red like shown below, add more pure Naphtol crimson to your brush as you are painting. You can also have some of the edges of the petals that are touching each other be slightly darker to show depth.
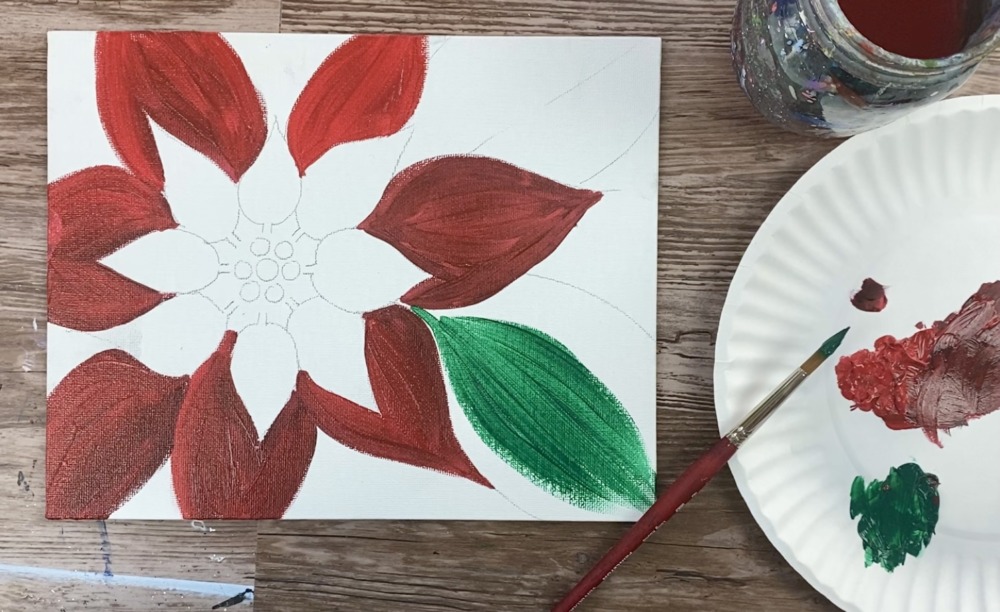
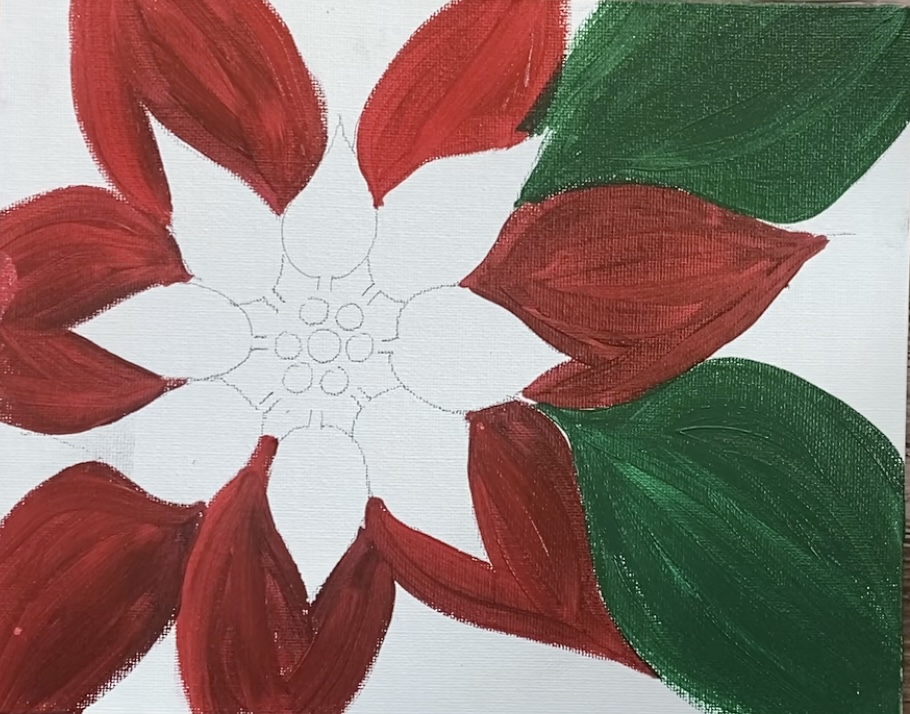
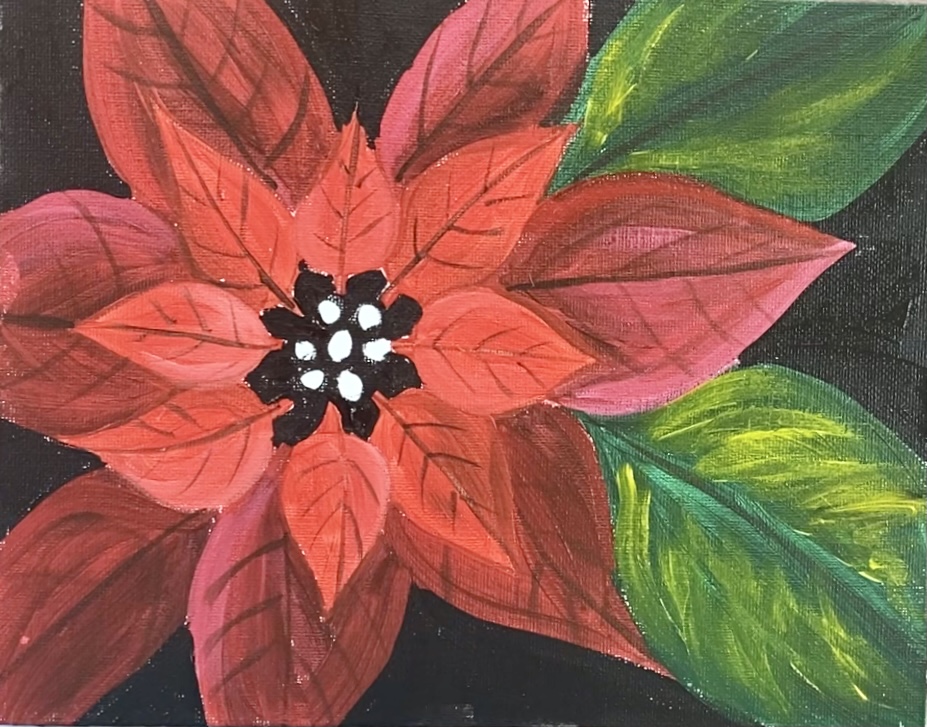
3. Paint the base of the leaves
Paint the leaves with a solid coat of hookers green hue. Use a larger brush, the #8 round. Have your strokes go outwards and curve with the direction of the leaf.
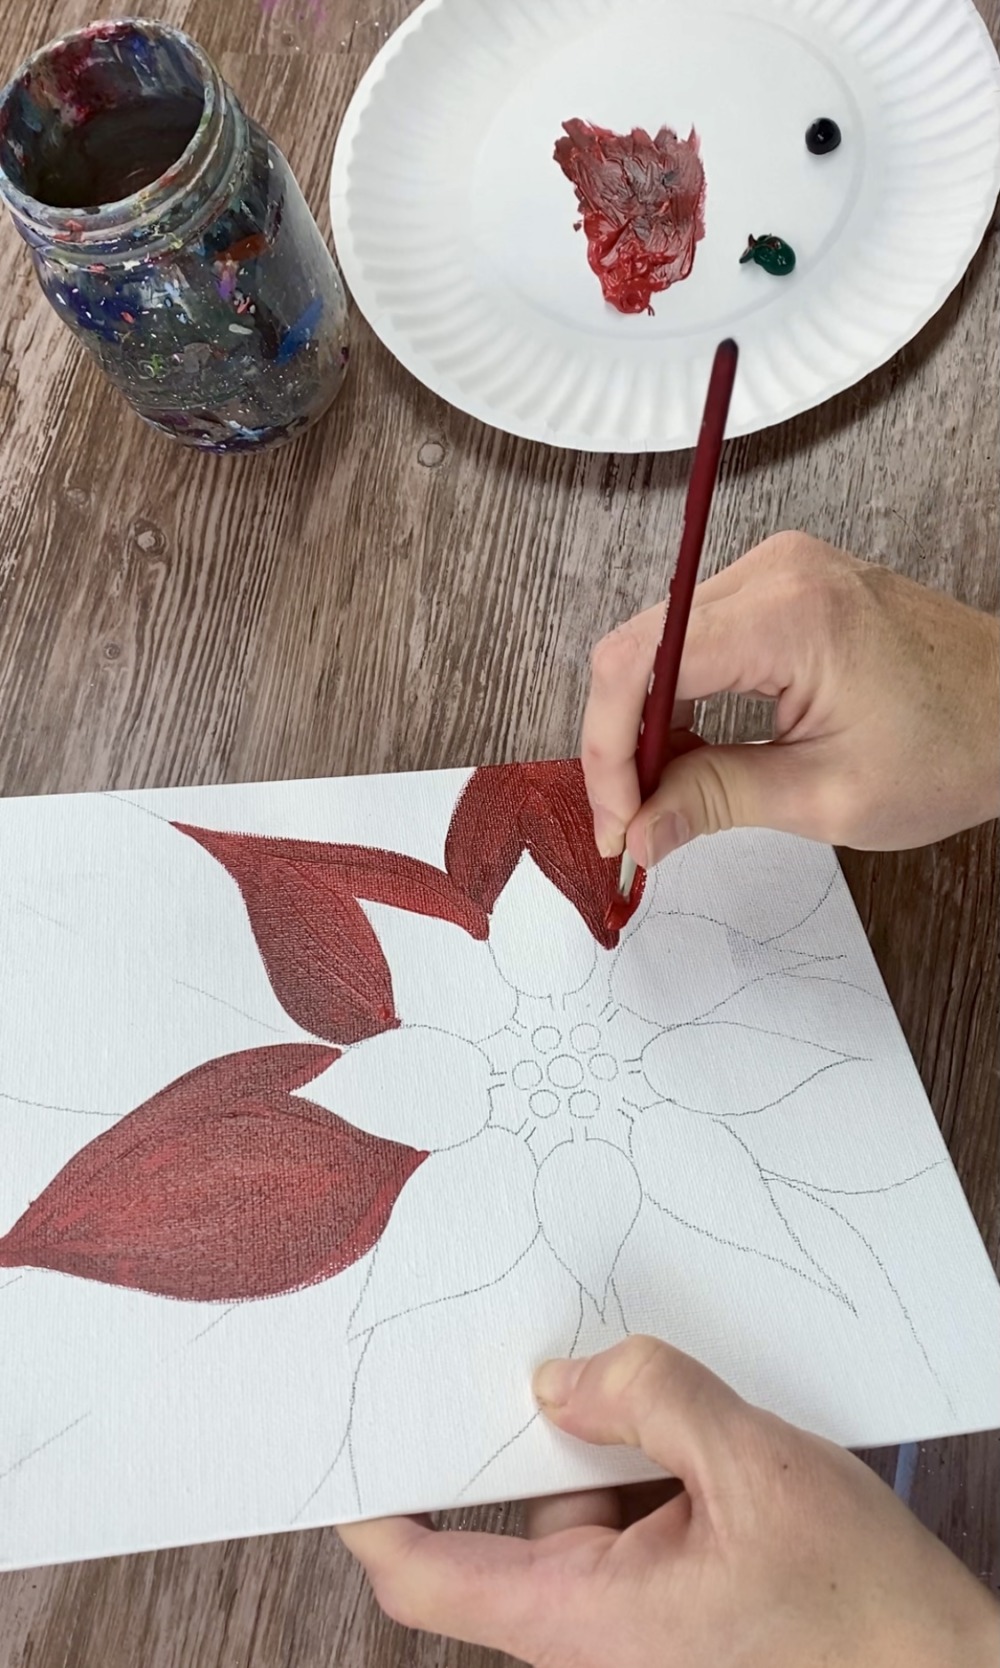
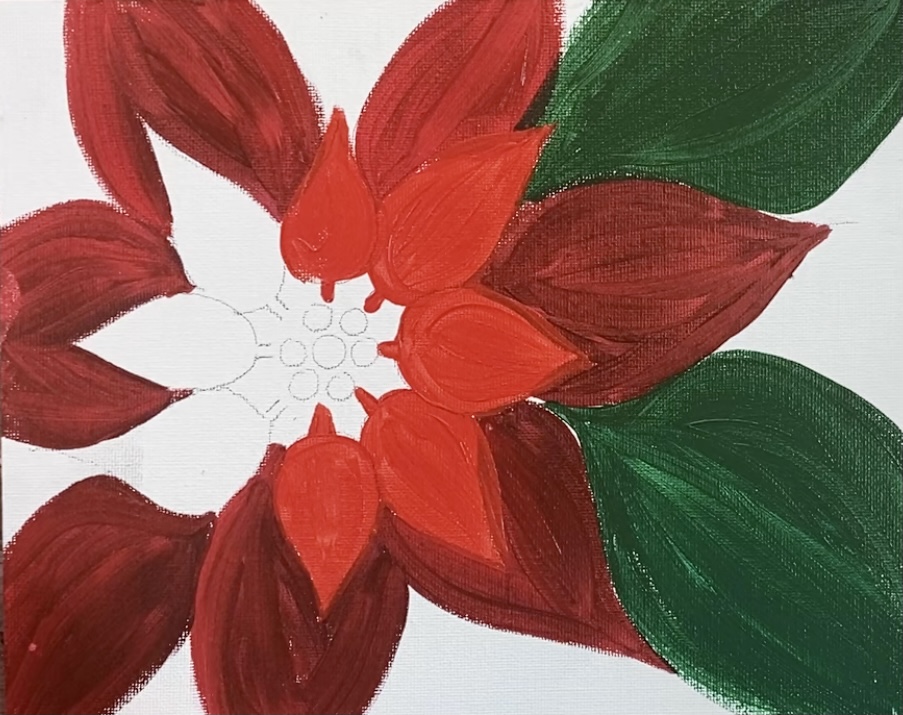
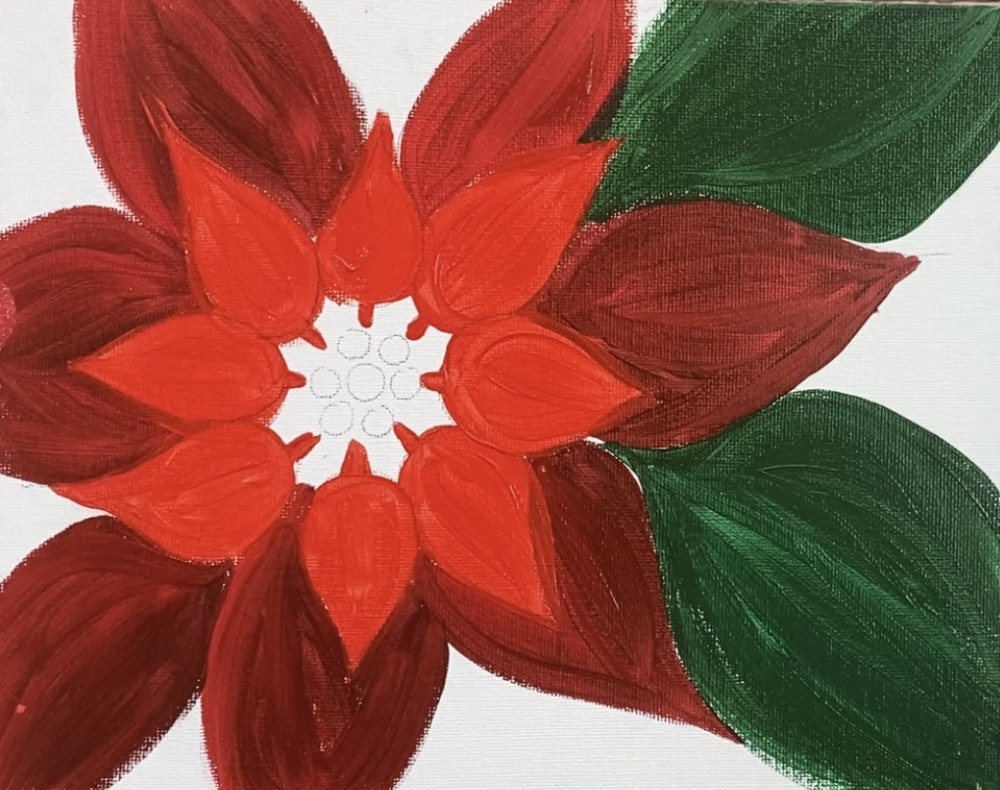
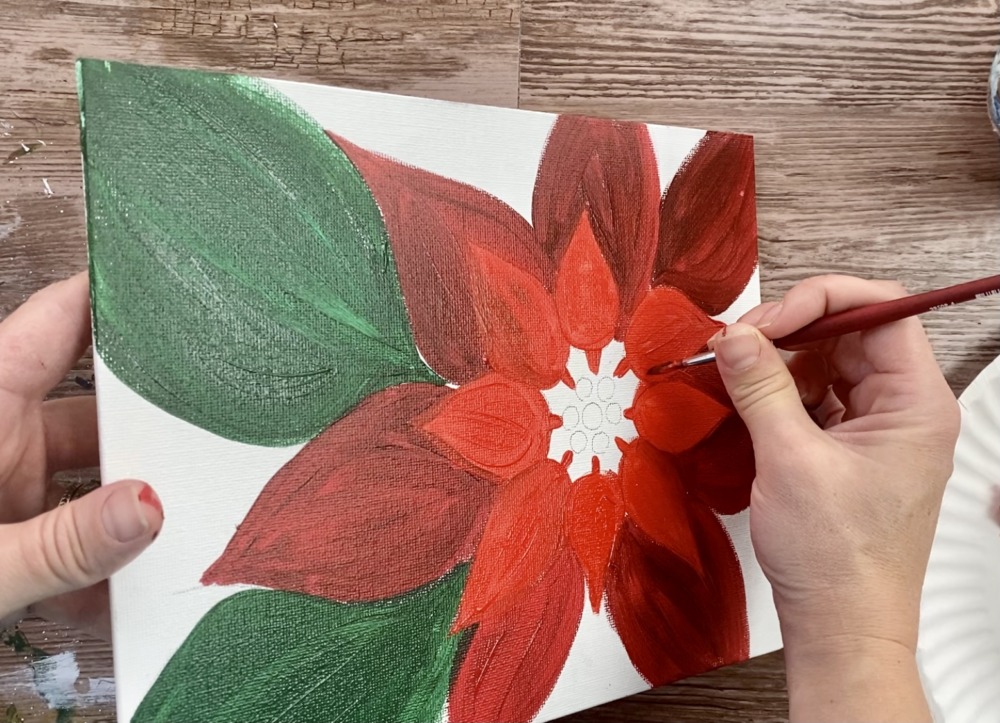
4. Paint the front petals bright red
Use your #4 round brush and cadmium red medium hue to paint all the front petals and the base.
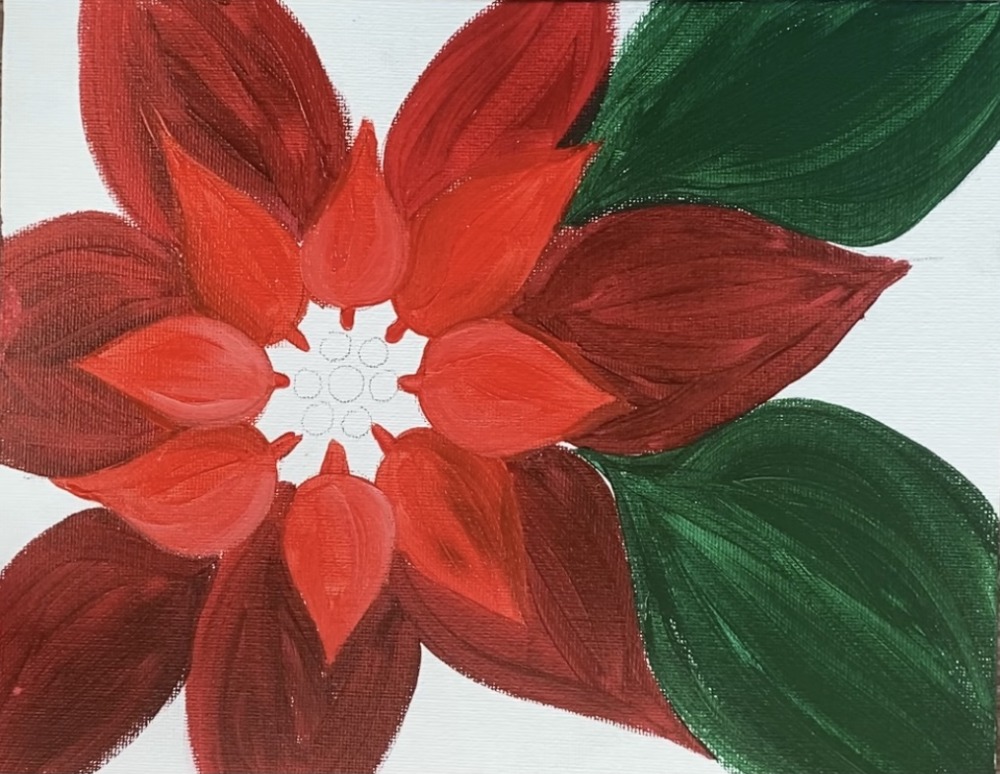
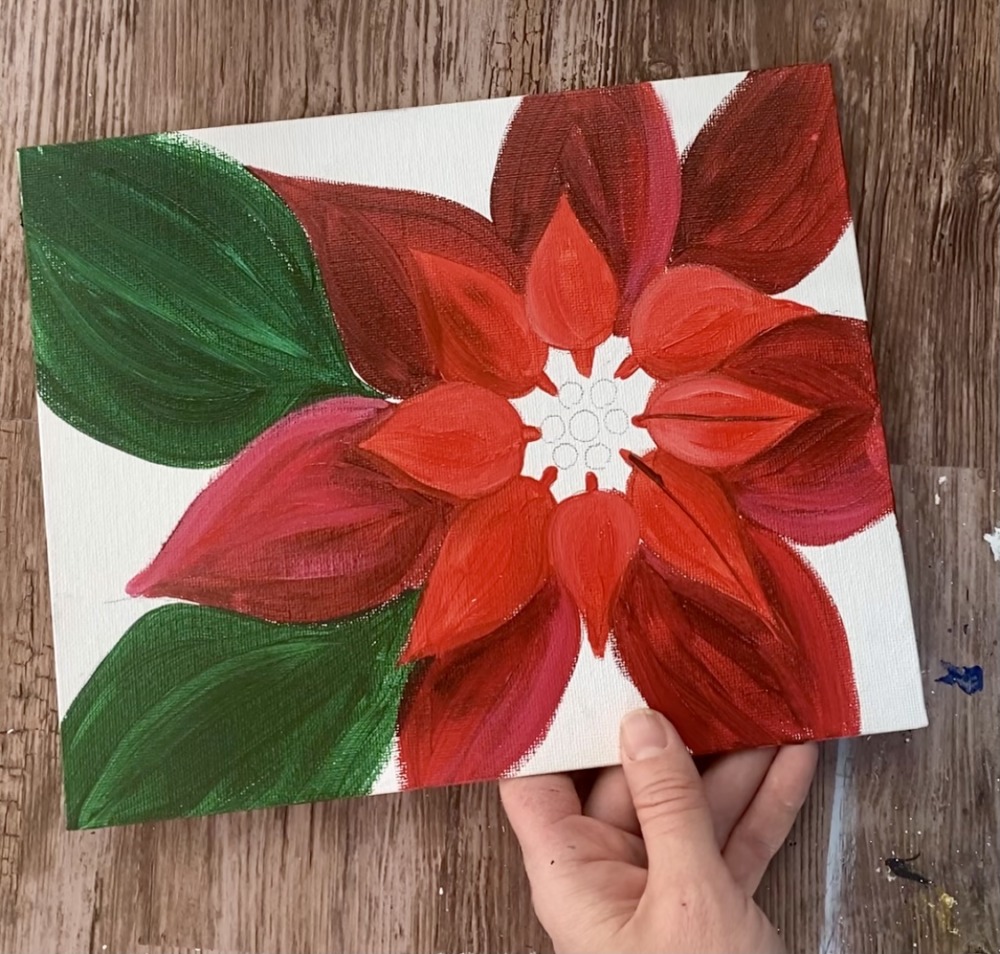
5. Add some values to the front and back petals
In order to make the petals stand out and give some dimension, you will need to blend in some darks and lights.
Mix a little hookers green into your cadmium red to make it slightly darker. Then brush on the darker red on the edges of the petals that look like they are below some of the petals.
Likewise, mix a little white into some cadmium red medium for a slightly lighter tint. Paint the lighter red on the edges of the petals that are in the front and overlapping other smaller petals.
Then add some “lights” in the back petals. Mix a little white into Naphtol crimson (it will make an almost pink color). Paint on some of the edges of the petals then blend the lighter color back in (by using just naphthol crimson) to blend.
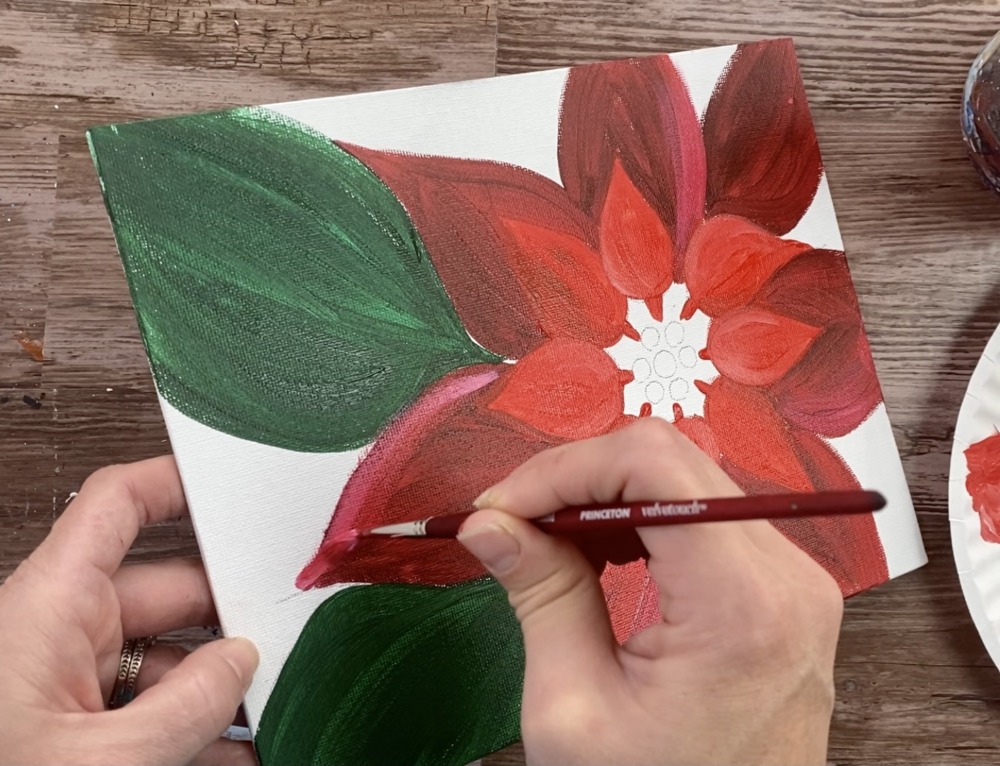
You can add a little more green into naphthol crimson to make a slightly darker shade of red. Use that color on the back petals where a shadow would be (where the petals are overlapping).
6. Paint the veins on the petals & leaves
I used a 3/8″ angle brush to paint the veins on the petals and leaves. Mix a dark color on your palette (naphthol crimson and green). You can also use black (but it may be too dark).

Paint a line in the center of all the petals and the two leaves. Start at the base and paint that line all the way to the tip.
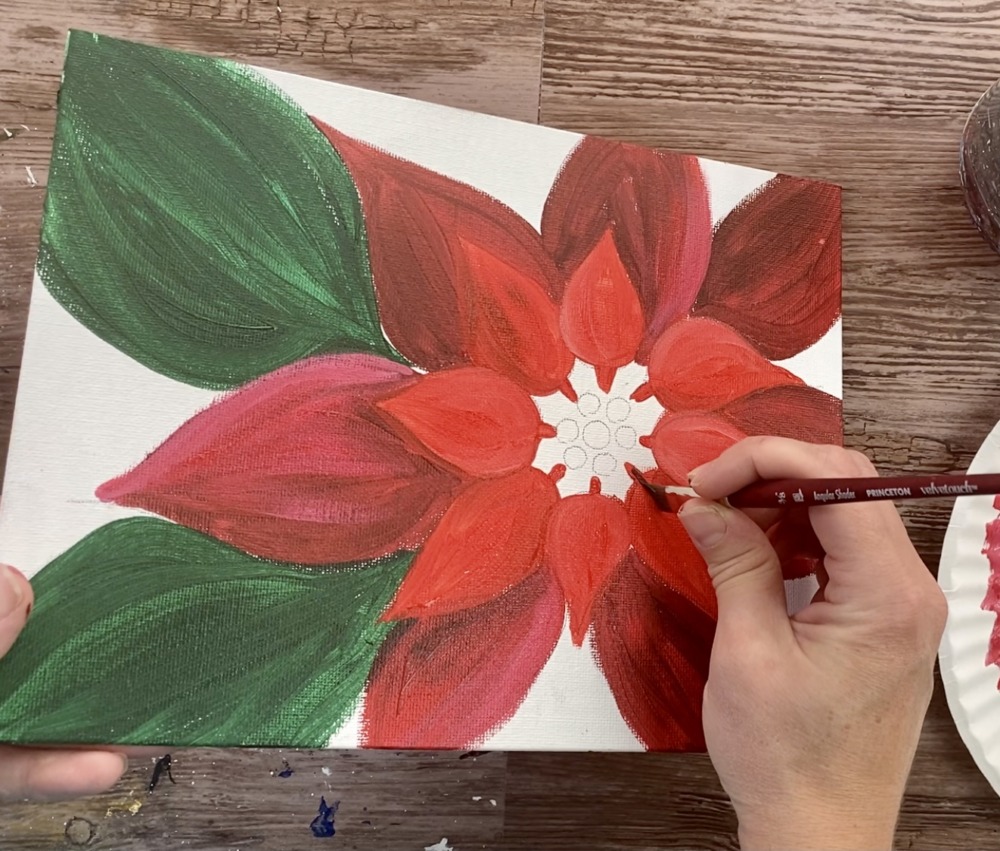
Then use your angle brush (or smaller round brush if you prefer) to paint vein lines. Start at the center line and paint diagonally outwards.
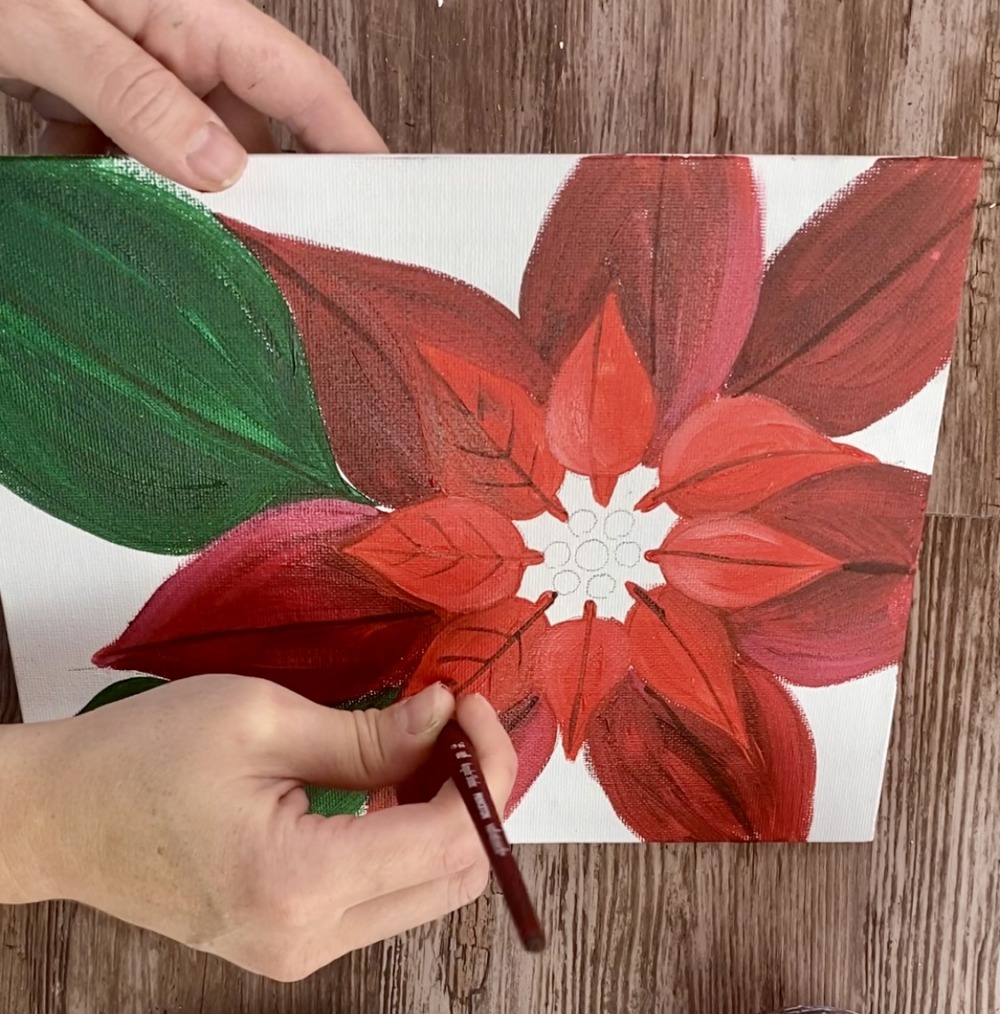
Do this to all the petals. I did not do my vein lines for the leaves yet.

7. Paint the background black
Use any brush to paint the background black. Add a tiny bit of water into the black to help it flow a bit. Be careful going around all the leaves and petals.
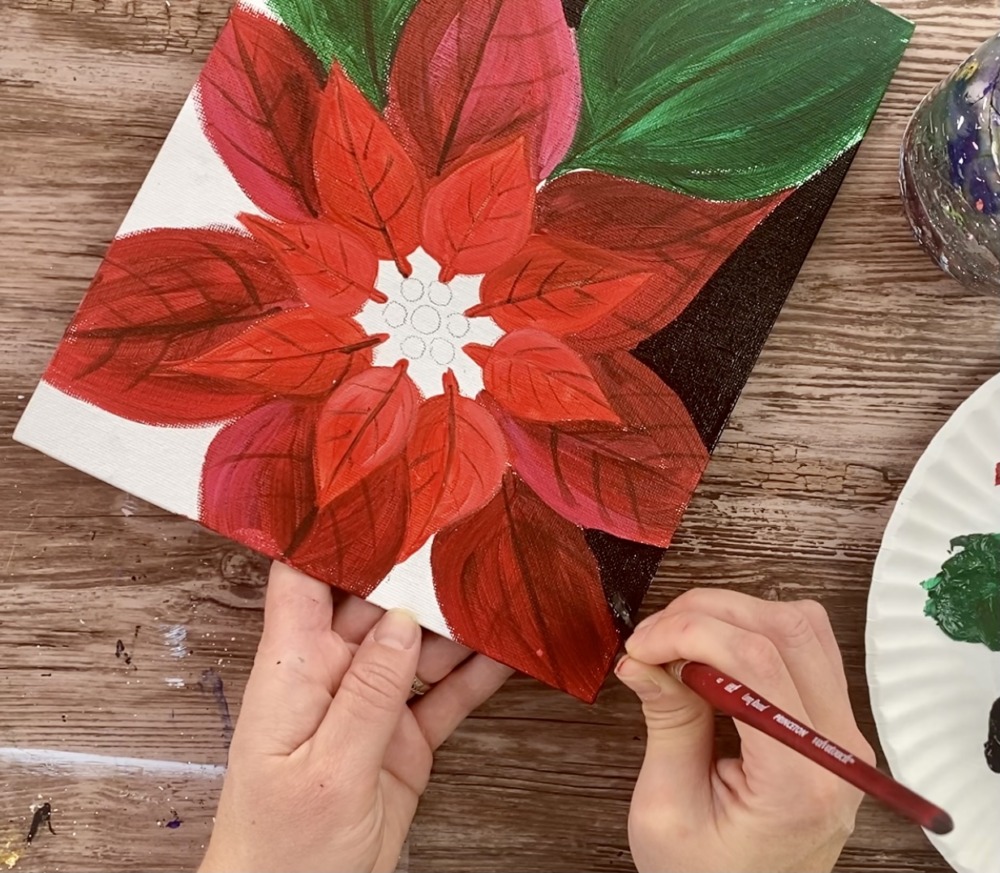
Carefully paint the center part as well. If you don’t want to go around the circles, you can paint it all black then paint the white circles again after the black dries.
Touch up your red petals and green leaves if needed.
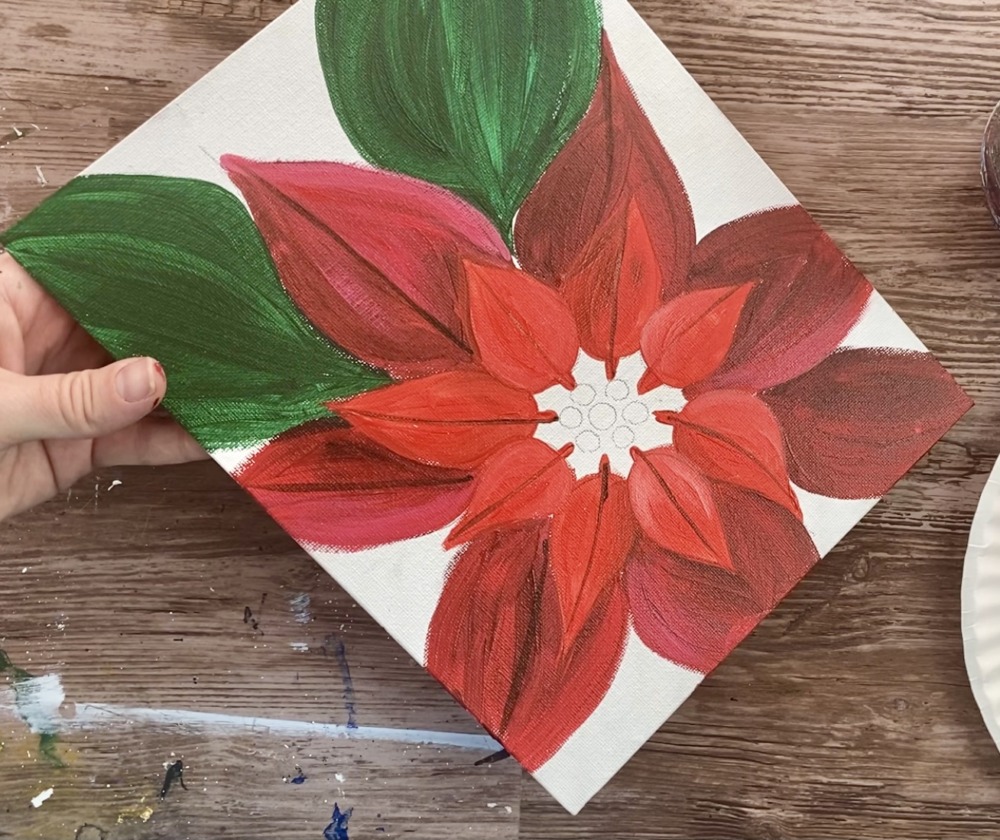
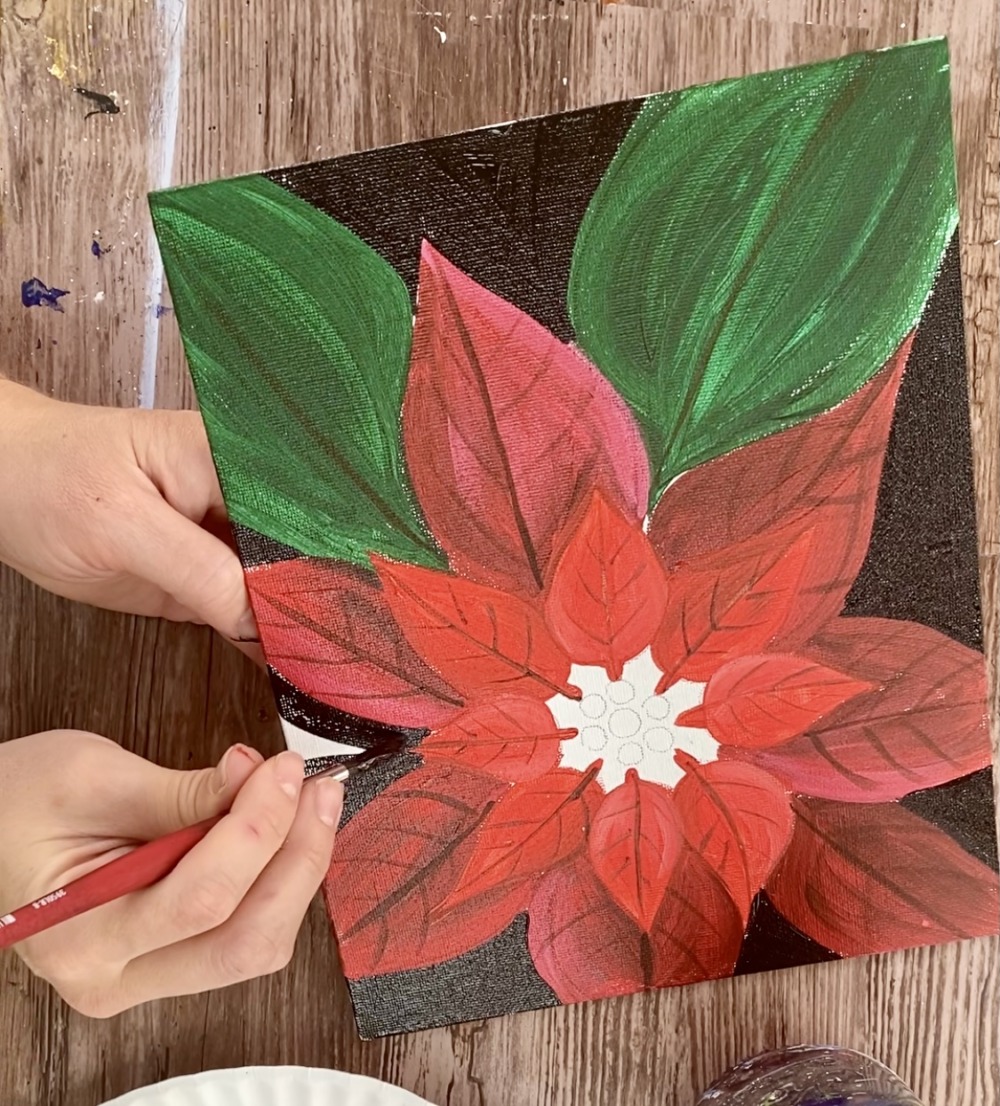
8. Add some yellow onto the leaves
Load cadmium yellow medium onto your palette. Since this yellow is a translucent color, it will show through over that green. Use a #8 round brush to paint diagonal strokes on the leaf to give the leaf some brighter tones.
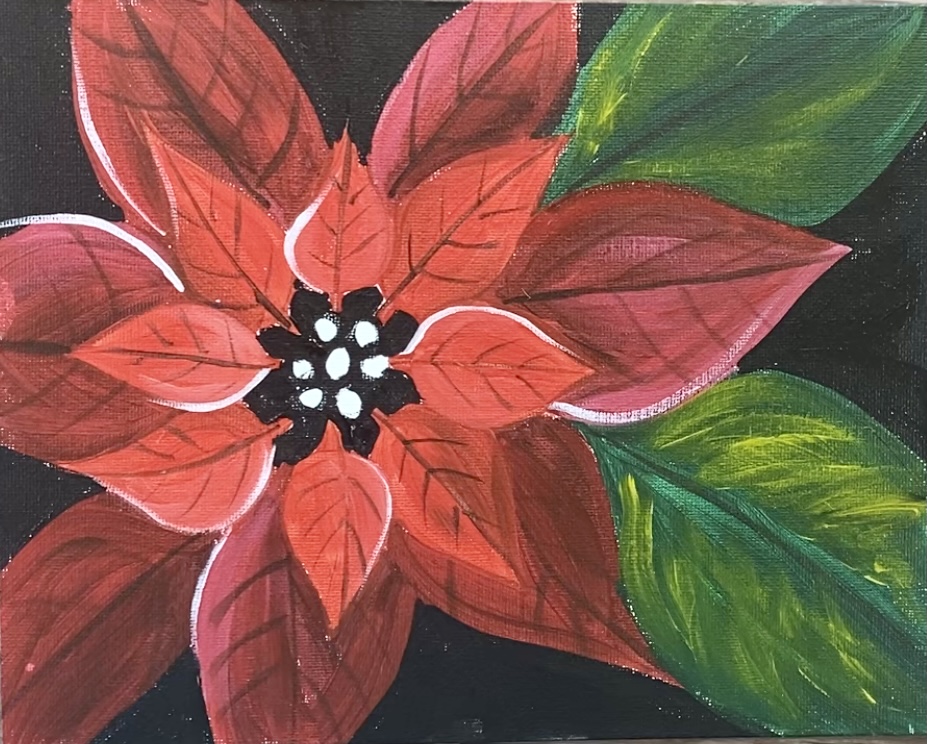
9. Loosely outline some petals with white (optional)
This is optional but it helps the petals stand out and pop a bit more. Use a small brush, preferably a #0 round brush. Loosely outline the sides of some of your petals white titanium white.
Note: if you don’t like the bright white, you can tone it down a bit by mixing in some red so it is light red or light pink.
10. Add some “loose” strokes of light red in between the veins of some petals
Mix naphthol crimson with titanium white on your palette. It will make a pink color. Use your #4 round brush to paint strokes of this lighter color in between some of the vein lines on all the petals (front and back petals).
Paint curved strokes on one side of the petals in between the vein lines.

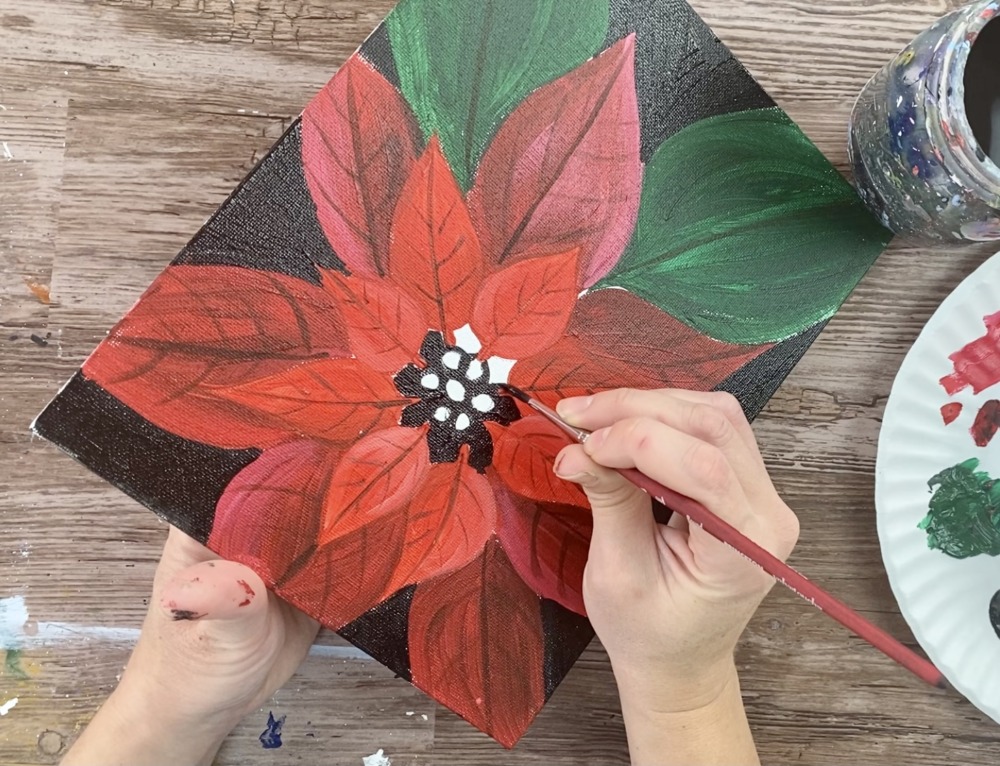
11. Paint the circles in the center with yellow
Use your #4 round brush and cadmium yellow medium to paint circles in the center. The ones that overlap the black will look darker and the ones that overlap the white will look brighter.

12. Add more light red in between veins, add white in center dots, add dark vein lines on leaves, add some highlights on the leaves
I did some more touchups using that pink color in between more of the veins on the leaves and on the side overlapping some of the white outline which helped to tone that white down a bit.
I also added the dark vein lines to the leaves with mars black.
Then in the center where the dots are, I painted some more white circles.
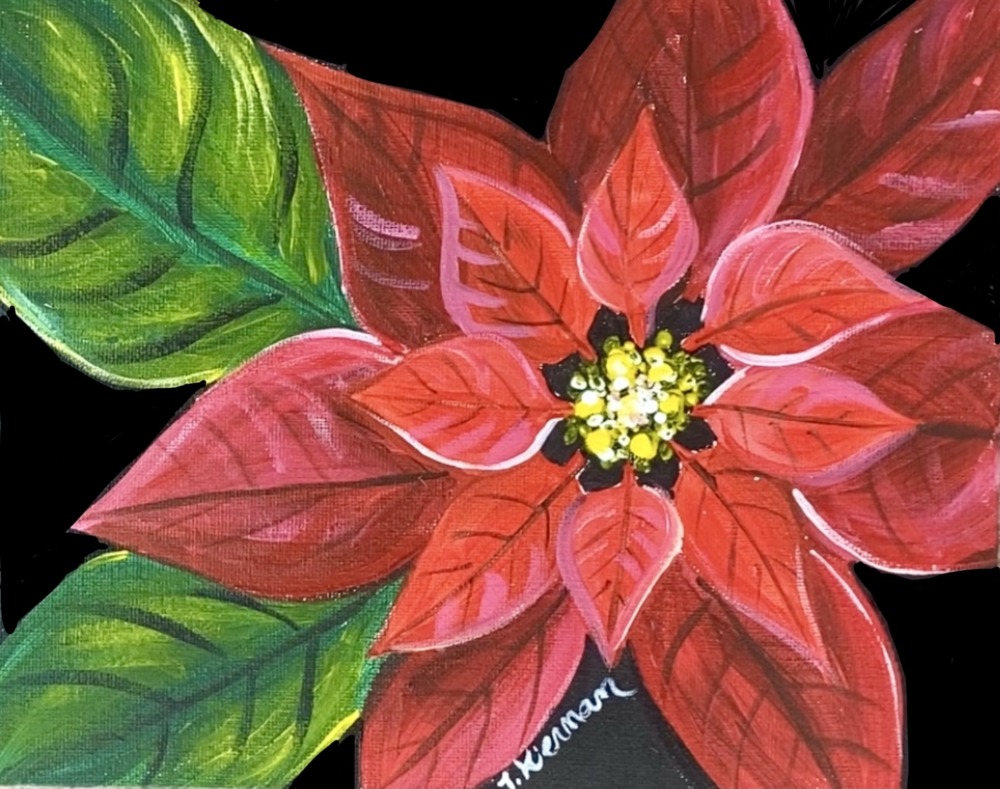
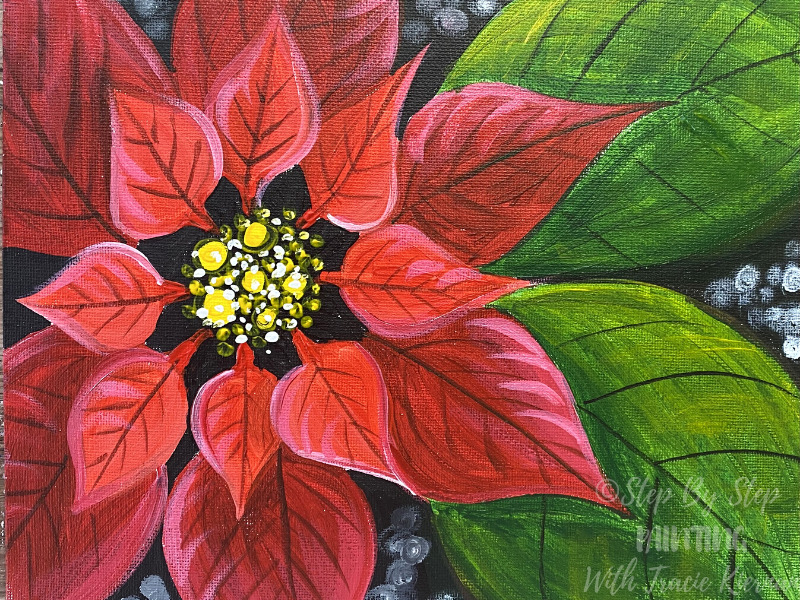
On the version below, I painted small bokeh in the background. That was done using a 0 round brush and titanium white. To make the effect, load your brush in the white but wipe the paint off with a paper towel. “Dry brush” different size circles that overlap each other. Add some that are brighter and some that are dimmer.
Finished!
Share Your Art Here!


I just discovered your site. I’m a beginning artist (which proves you’re never too old to start…) and the tutorials and printables are terrific. Thank you so much for offering all of this. 🙂
You’re welcome! So glad you found my site, enjoy painting!!
My paintings are much better thanks to you