
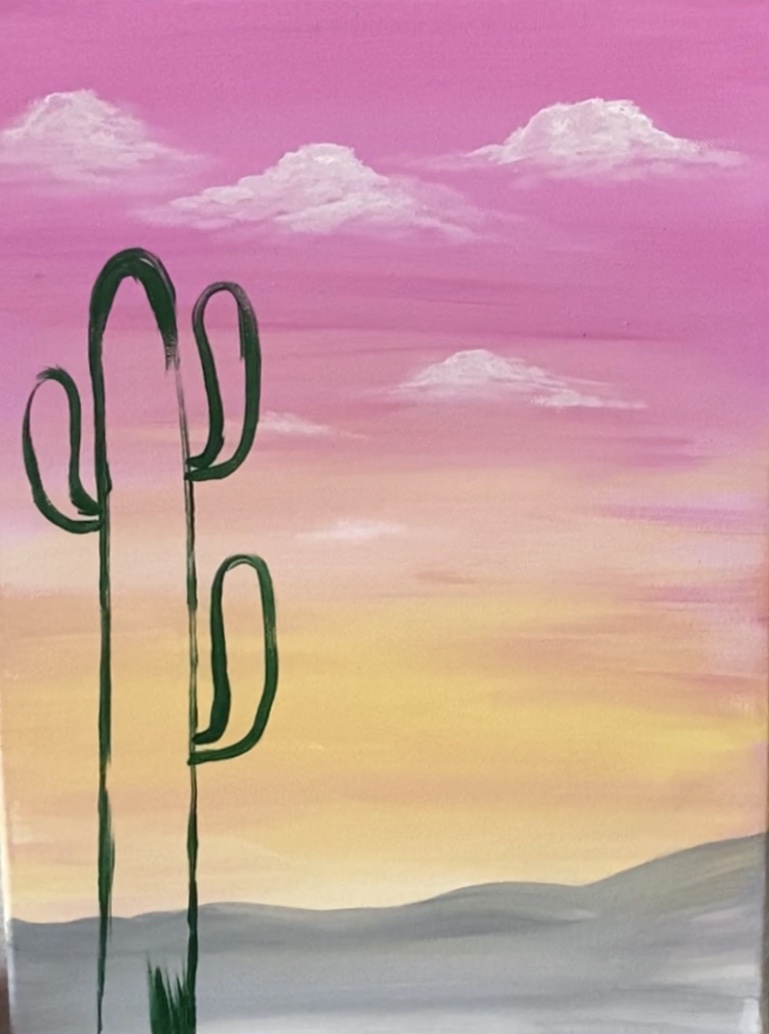
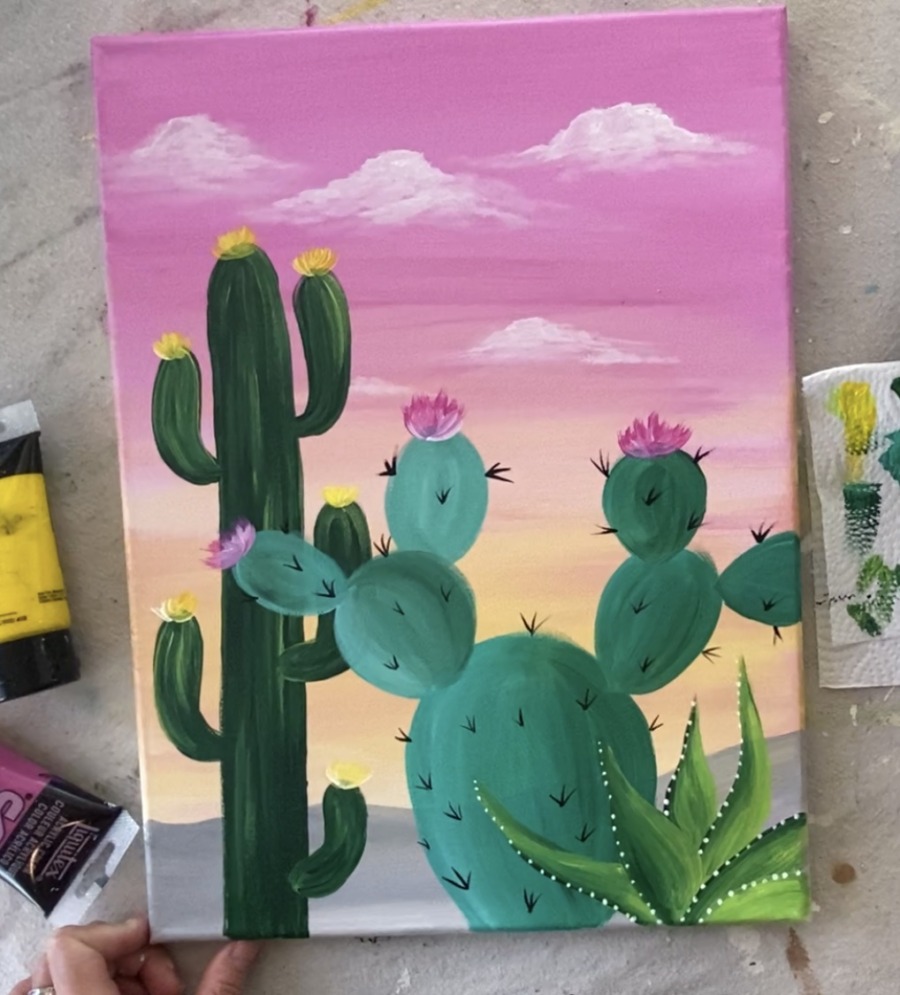
Easy Desert Acrylic Painting
Learn to paint a simple sunset background with three different cacti in the landscape. This is a very easy beginner friendly painting! 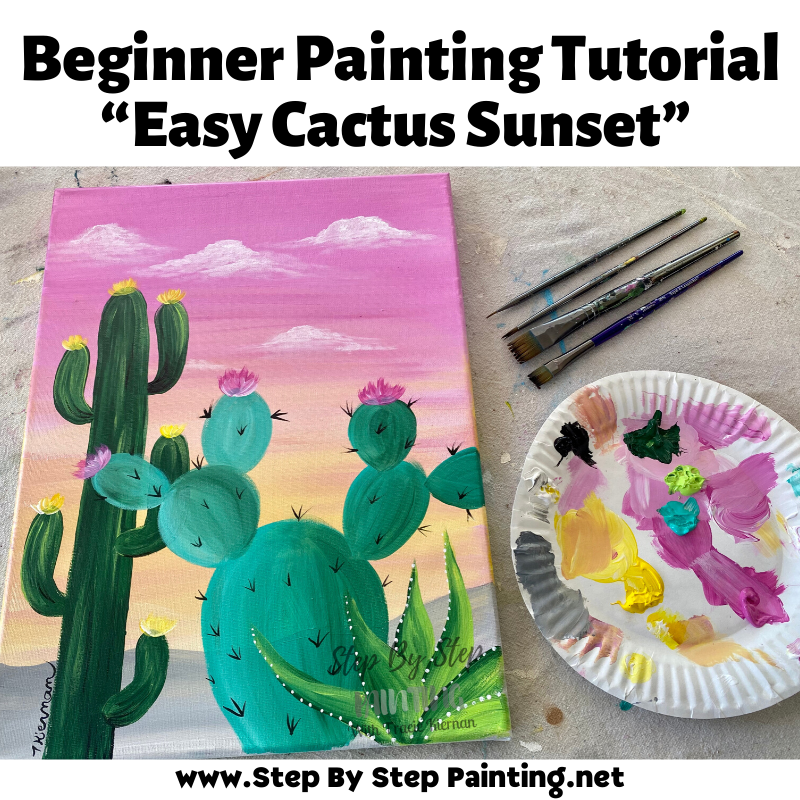
Would you like to save this?
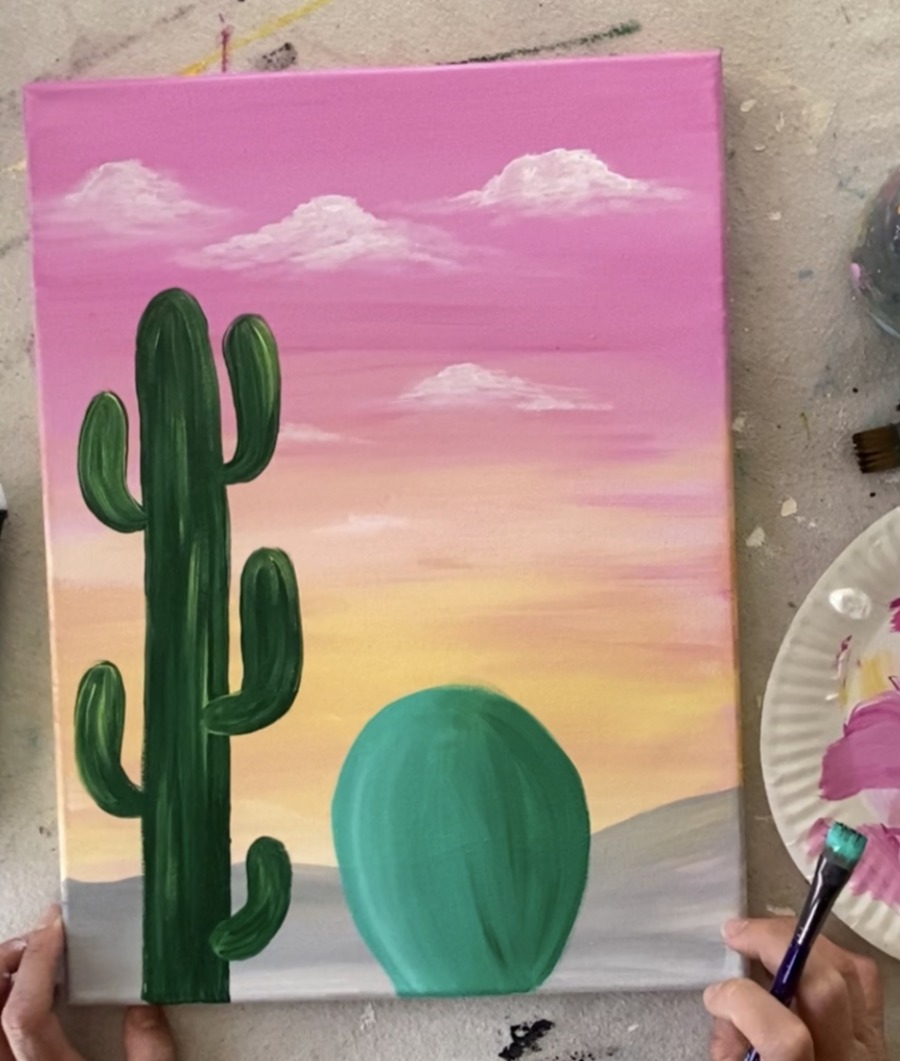
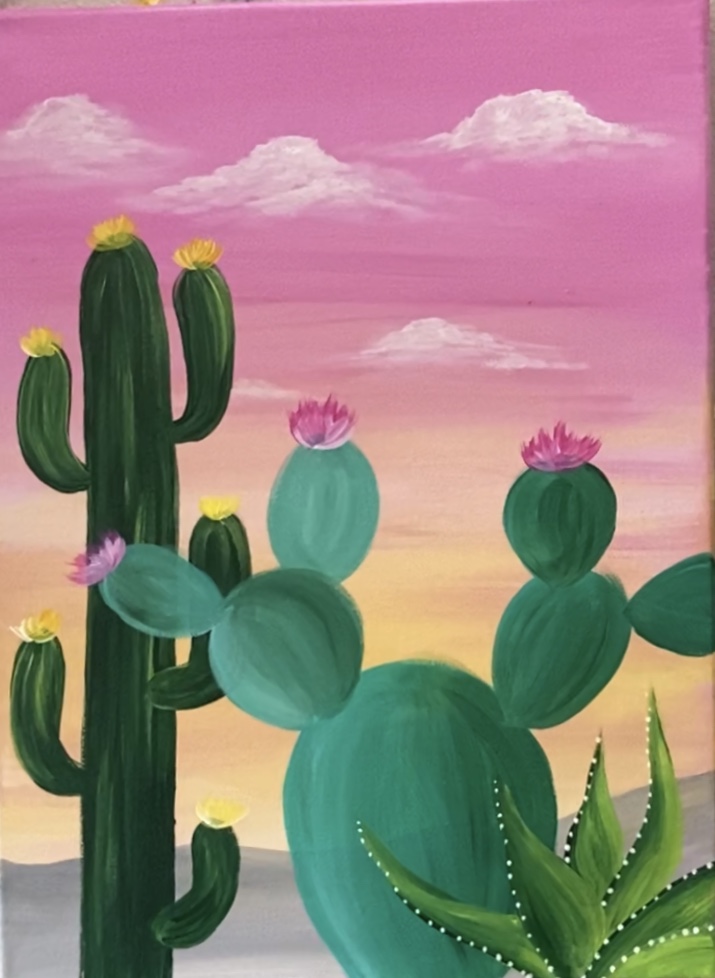
I did this on a 12” x 16” canvas with student grade acrylic paints.
I just love the pastel pinks and oranges in the sky! I used three colors for the sky: medium magenta, primary yellow and titanium white.
The contrast of the cool green against the warm color sky makes this painting “pop”. There are three different greens in the color palette of the cacti: deep green permanent, brilliant yellow green and bright aqua green.
Desert scenes, especially cacti & succulents, are one of my favorite subjects to paint! You can see more of my desert paintings in the gallery below.
Materials
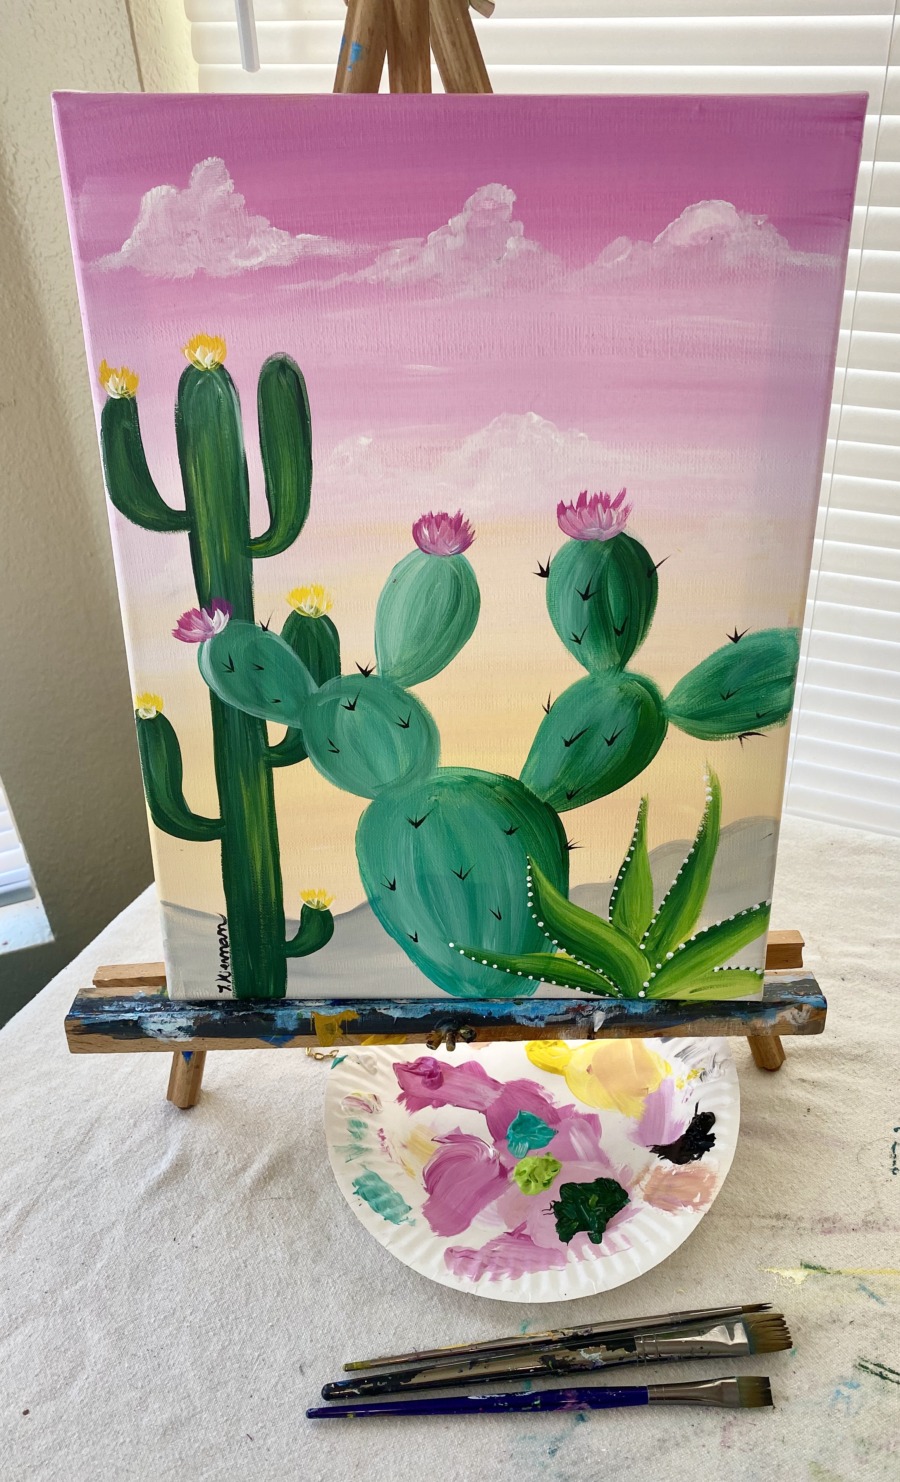
Easy Cactus Painting “Desert Golden Hour”
Learn how to pant an easy, beginner pastel sunset with three different types of cacti/ succulents in the foreground.
Materials
Colors
- Titanium White
- Mars Black
- Medium Magenta
- Primary Yellow
- Bright Aqua Green
- Green Deep Permanent
- Brilliant Yellow Green
Brushes
Color Palette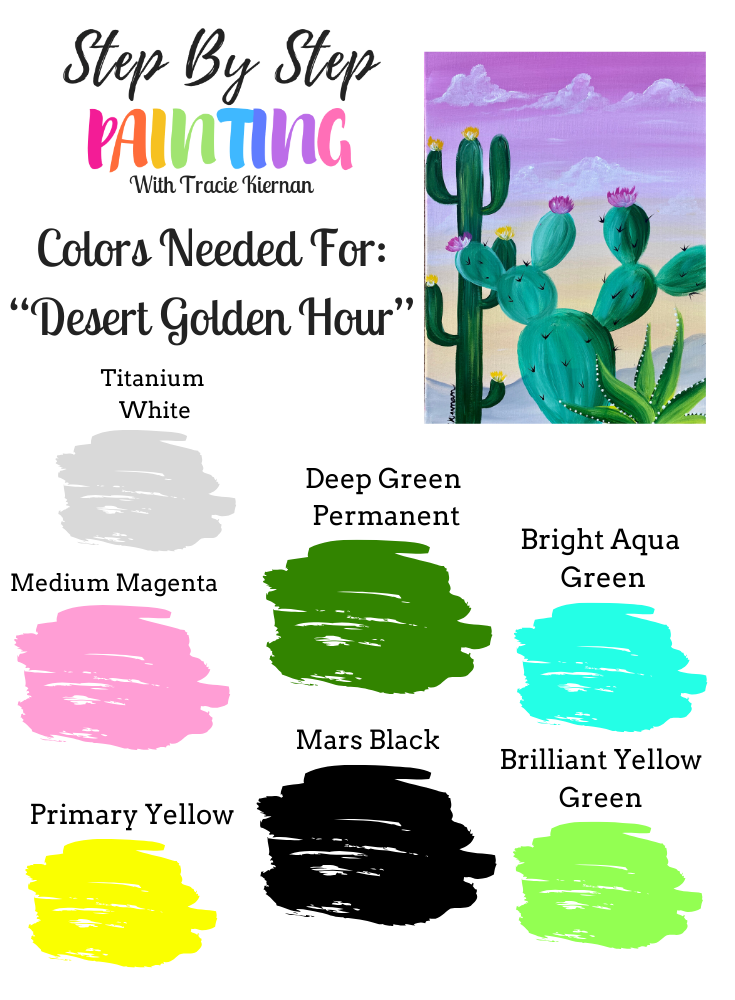

Craft Paint Suggestions
I advocate for using whatever acrylic paints you have on hand! If you would like to use craft paints, such as Apple Barrel Plaid or Craftsmart here are the colors I would suggest:
- White
- Black
- Medium Pink/ Fuchsia
- Dart Green or Grass Green
- Light Turquoise or Light Aqua
- Bright Yellow
- Lime Green
Directions At A Glance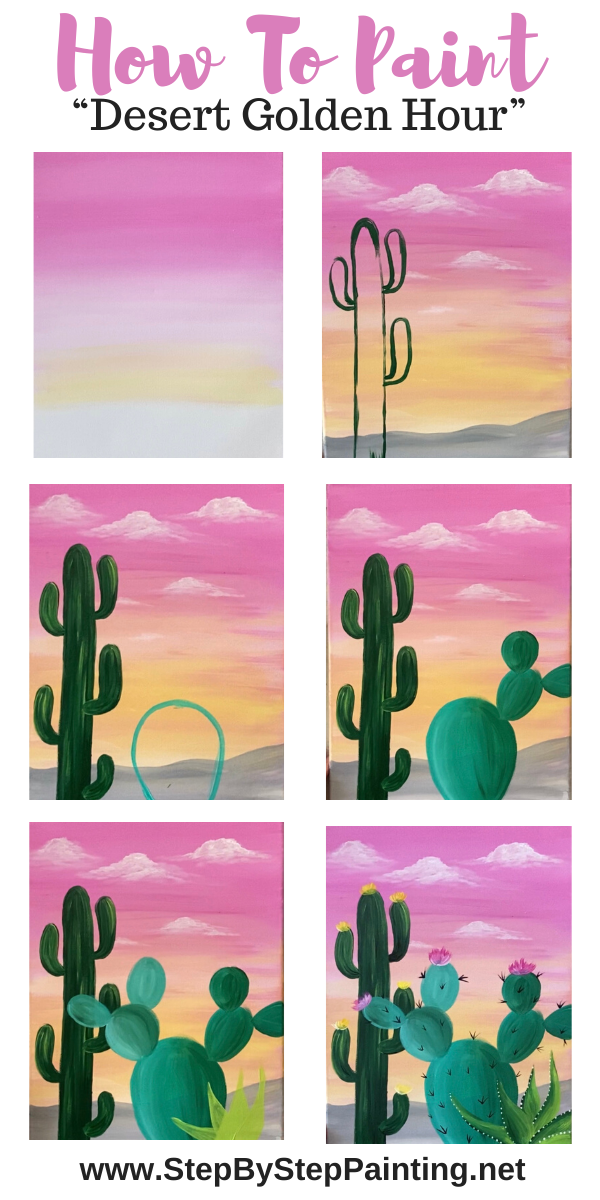

Video
Step By Step Directions
1. Paint the sunset gradient
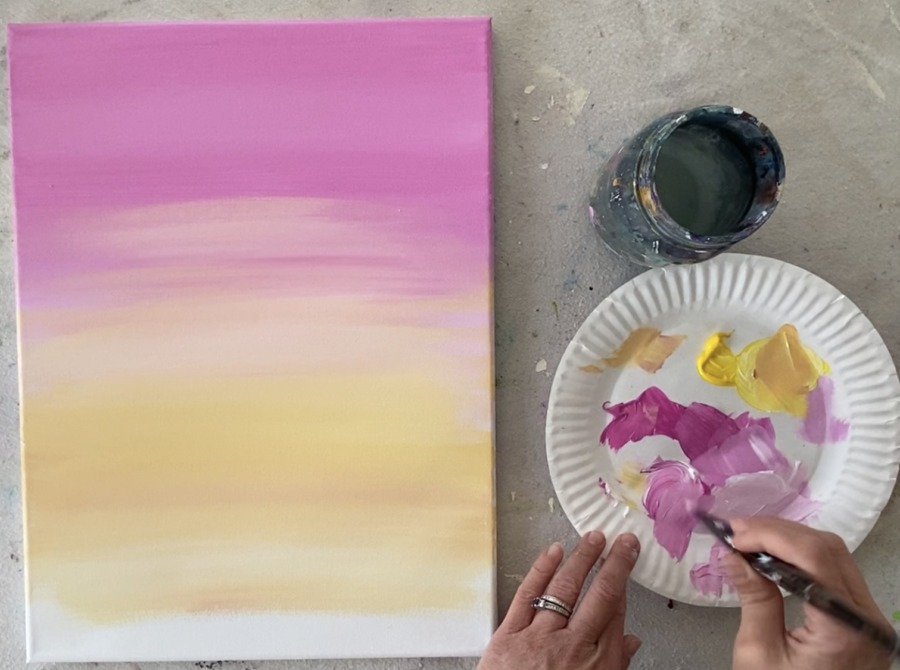
For this background, I used a 3/4” flat wash brush and the colors: titanium white, medium magenta and primary yellow.
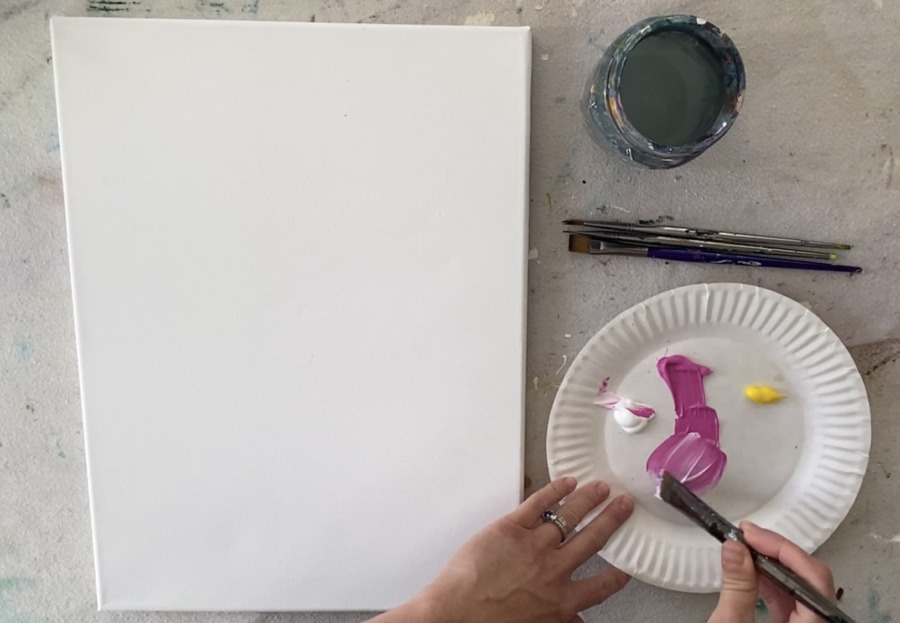
First mix about 2 parts magenta and one part white to soften the magenta up a bit.
Position your canvas in the vertical/ portrait mode. Start at the top of your canvas and paint left and right full width horizontal strokes. Go about a third of the way down your canvas.
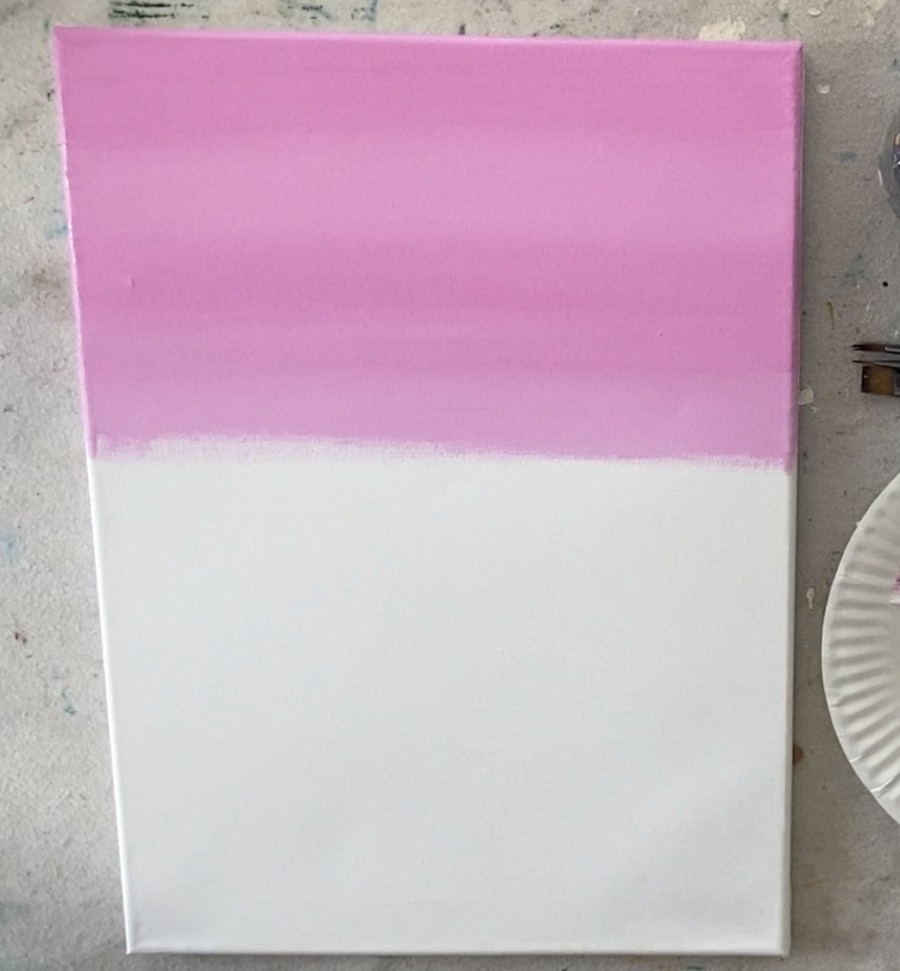
Then add a glop of white to your brush without rinsing off the pink.
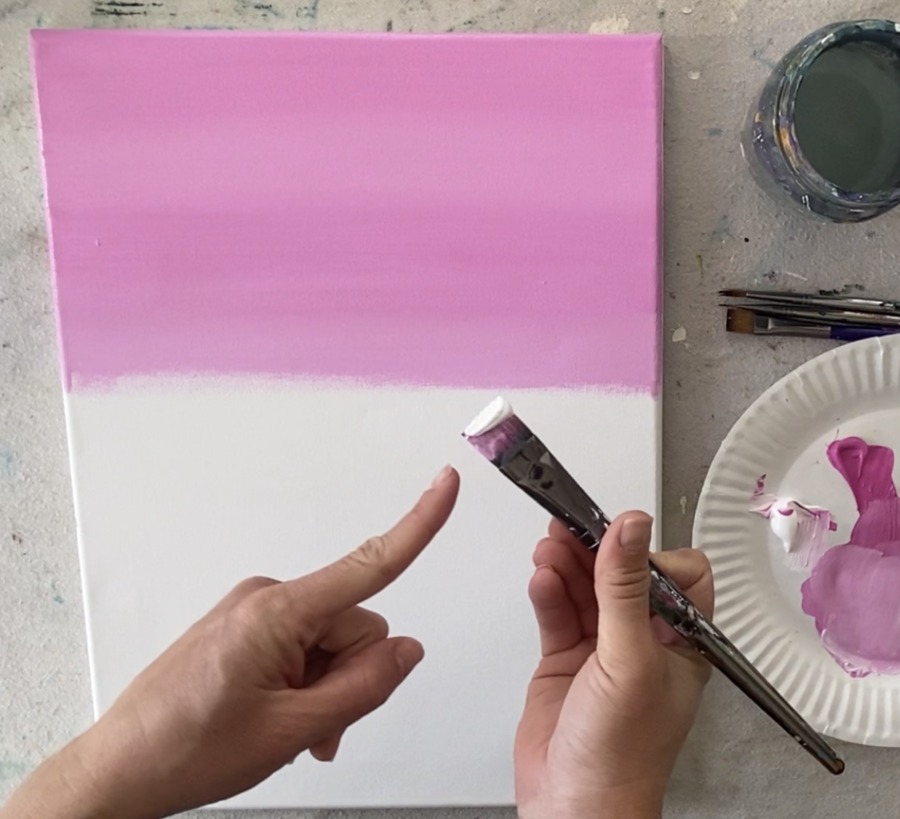
Blend the white into the pink so that it looks like the sky is getting much lighter as it approaches the bottom of your canvas. Go a little over half way down the canvas with this very light pink.
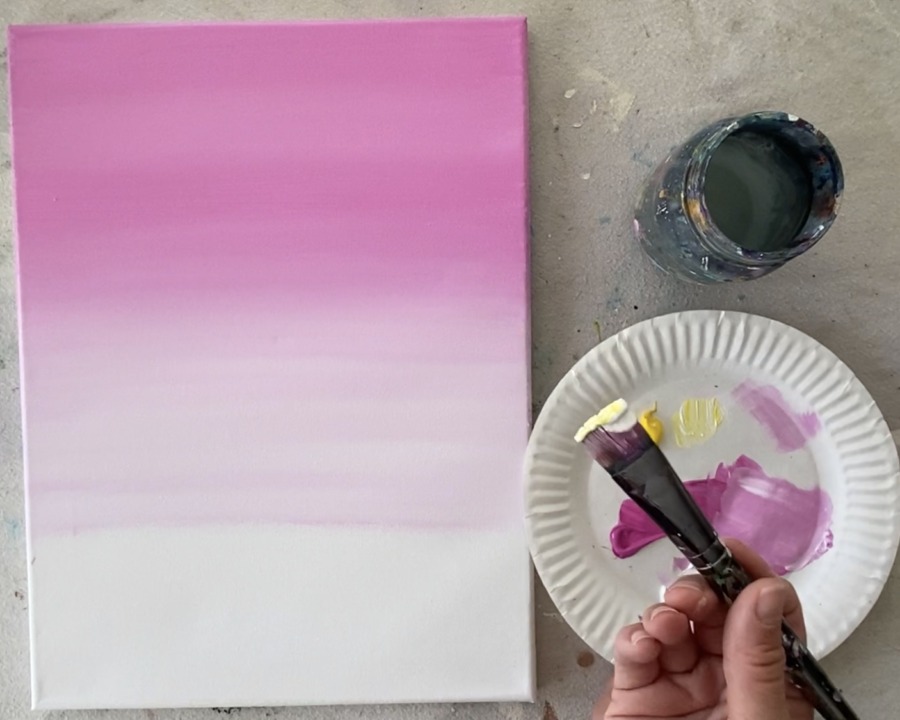
Then wipe off the excess paint off your brush. Load it in yellow and primary white (about equal amounts).
Blend the yellow into the light pink so that it turns kind of light orange. To get the colors to blend well, add more titanium white into the mix.
Add more white as you approach the bottom of your canvas but leave a gap on the bottom for the mountains.
Then blend back up into the sky. Your sky does not have to be a perfect gradient and will look different from mine because of the amount of yellows, pinks and whites applied to your canvas.
Just keep in mind that this sky is a very pastel palette so the more titanium white you use the better! Keep blended but don’t over-blend or everything will turn to the same color.
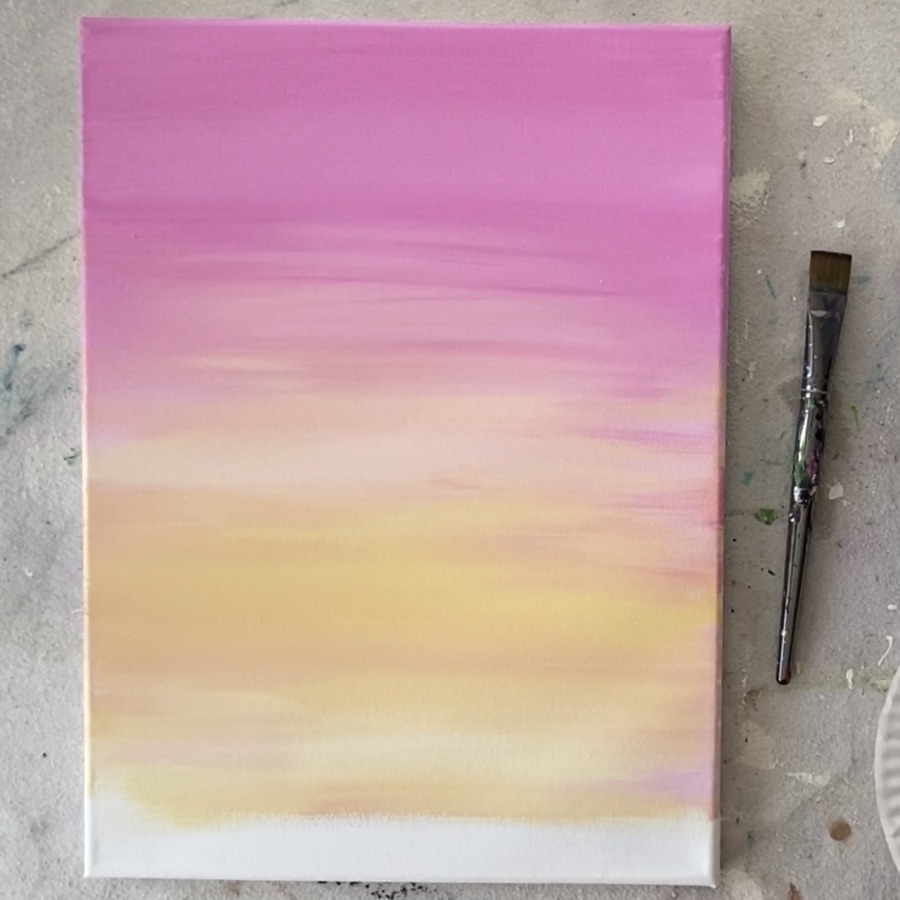
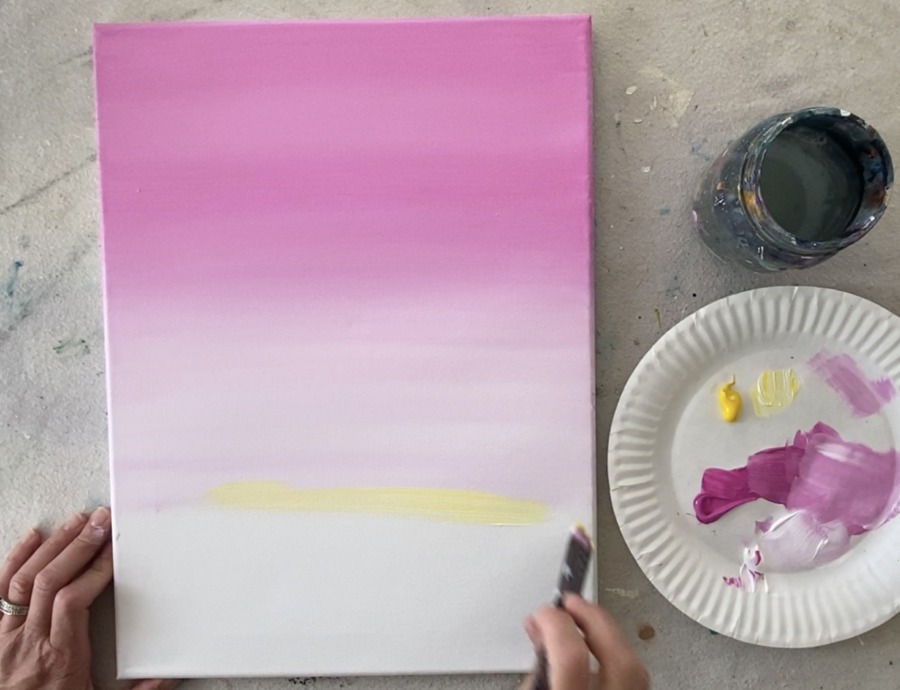
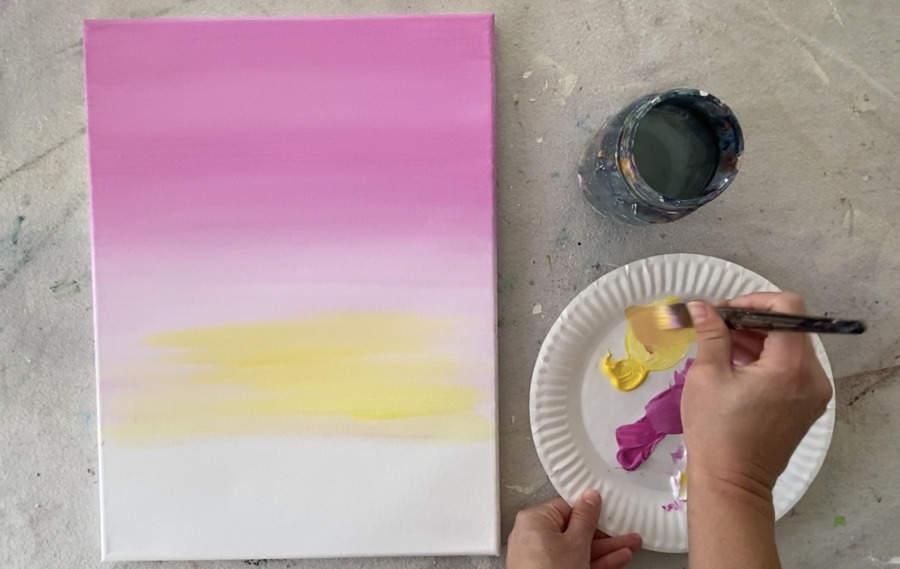
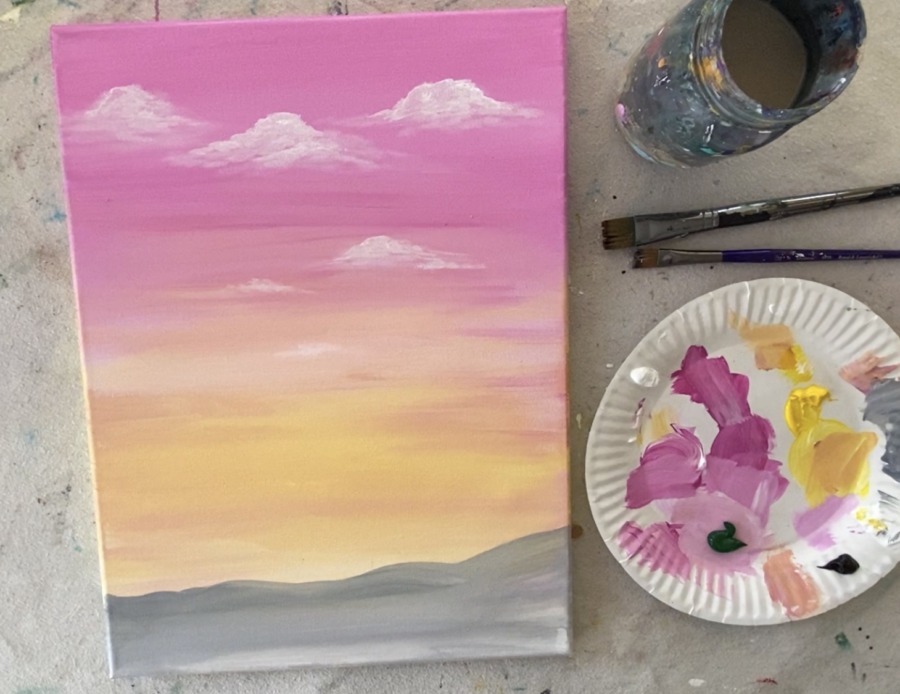
2. Paint the mountain
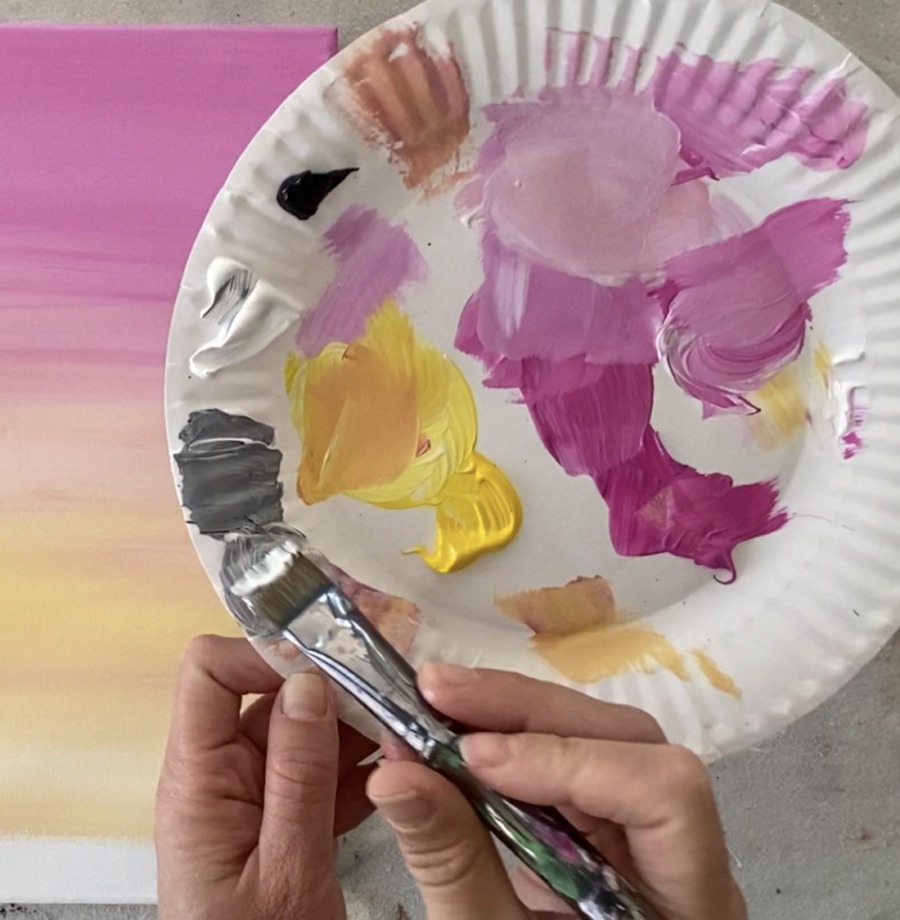
Next paint the mountain! Completely rinse and dry the 3/4” wash brush.
Then on your palette mix white with a little bit of black so that you create a very light gray. I’d say about 1 part black to 4 parts white should work!
Then use the tip of your 3/4” flat wash brush to paint an uneven mountain line. Mine started out lower on the left and got slightly higher on the right.
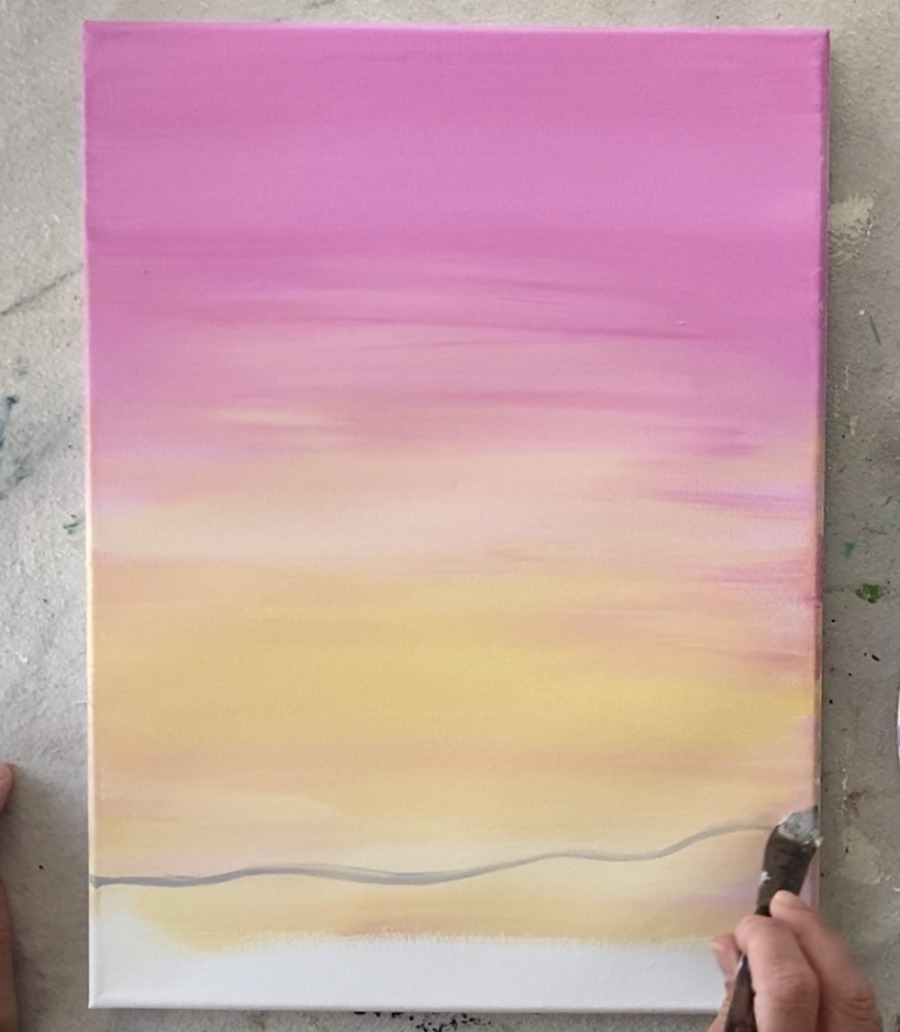
Fill in the mountain with this gray.
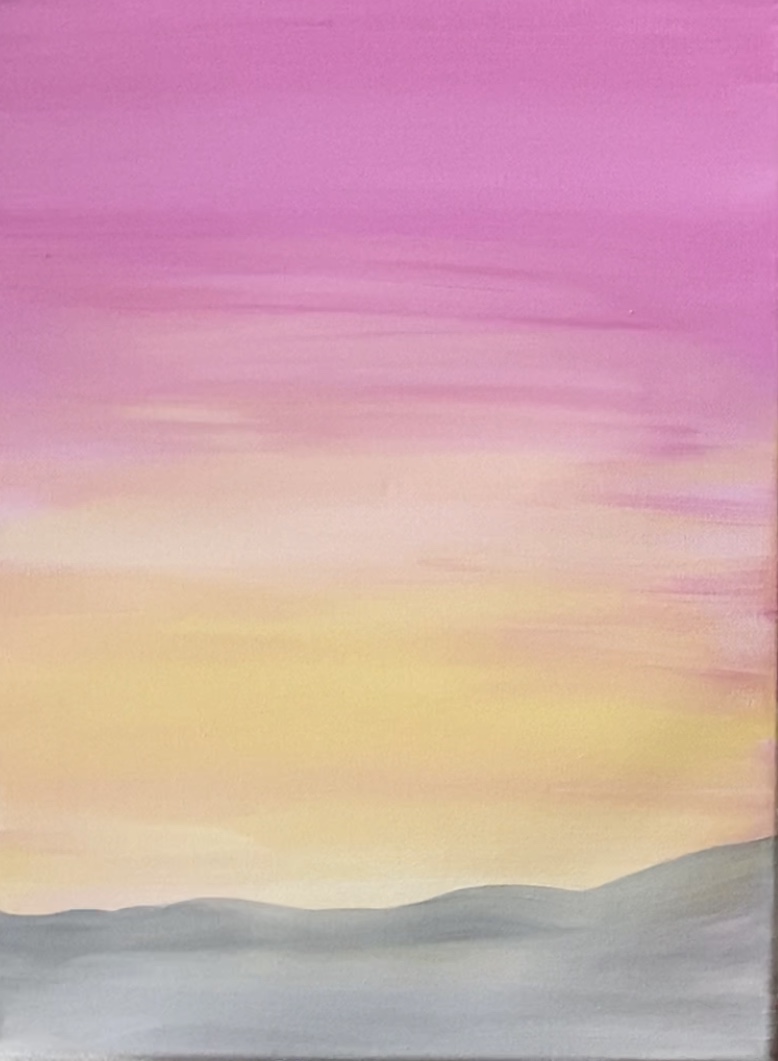
Optional: to make it look like this mountain is way in the distance and part of the sunset, blend more white on the bottom of the mountain so the top is slightly darker than the base of it. I did this technique in my Jacaranda Tree Painting.
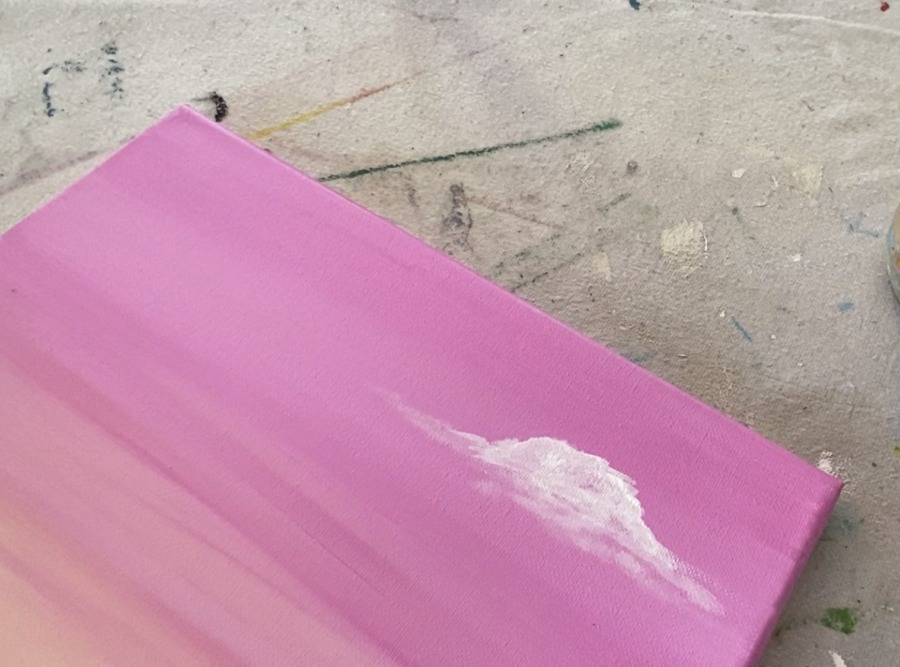
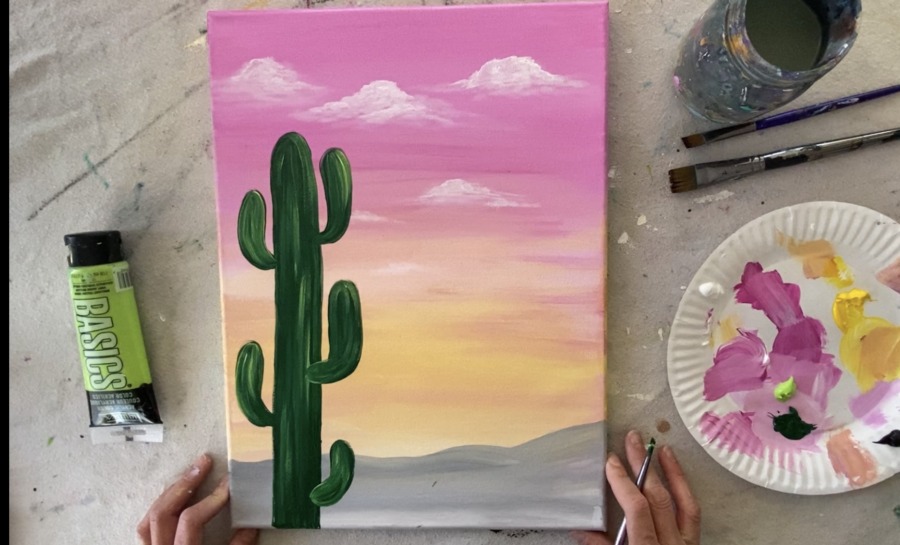
3. Paint clouds
To do the clouds, I used just the color titanium white and I used a 12 bright brush. Load just a bit of white on the very tip of the 12 bright.

Then sort of stamp the brush to form the top of the cloud. These clouds are not large and puffy, they are flat and sort of stretched out.
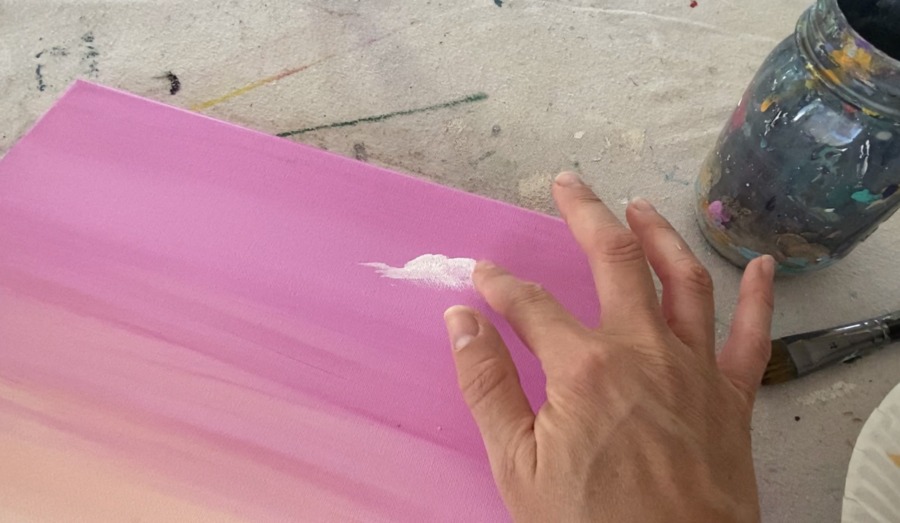
Then you can take your finger and sort of blend downwards so the base of your cloud fades away and gets much lighter.
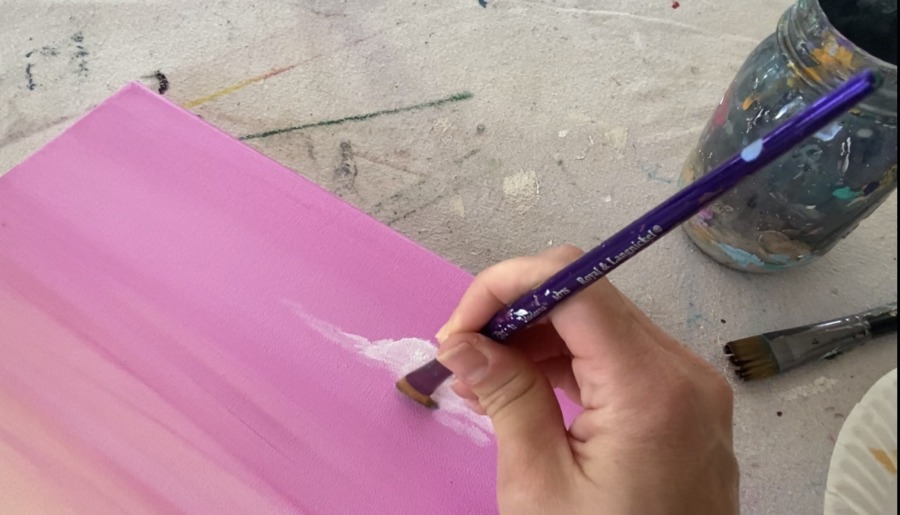
You can also do this with the brush by wiping off the paint of your brush and using the dry brush to blend your clouds.
For these clouds, less paint is more! Be sure to wipe off excess white with a paper towel before you start painting the clouds. I am tapping the tip of my brush to create this effect (not painting in circles).
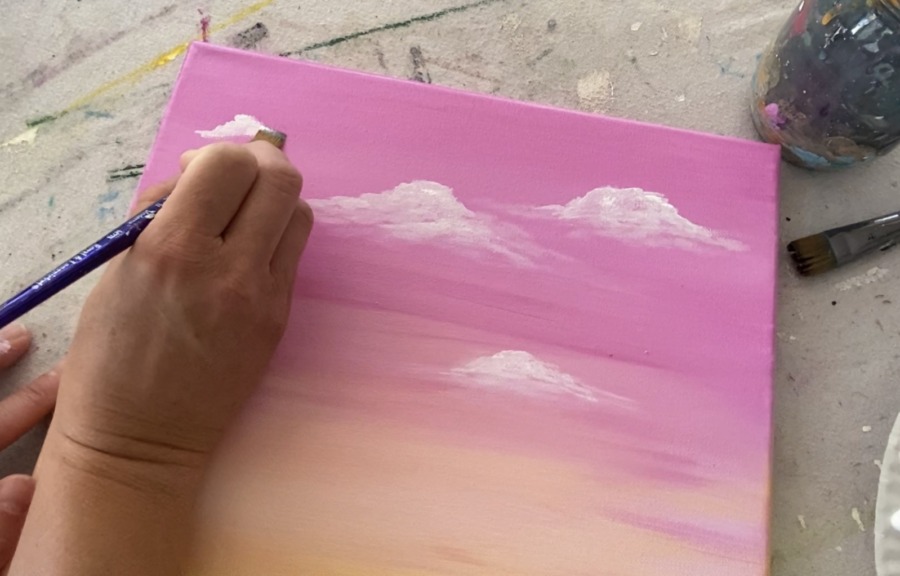
Create several clouds in the sky.
There are a few smaller, more stretched out clouds below the larger ones.
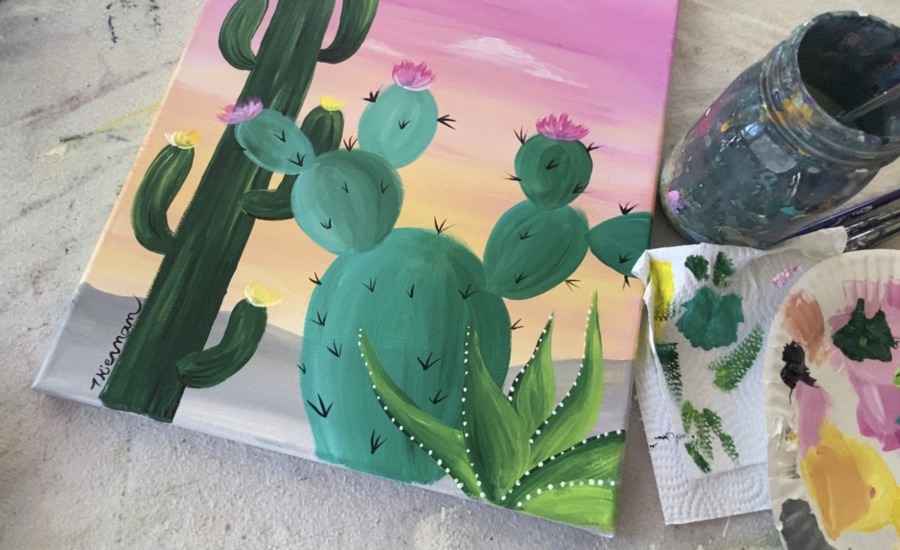
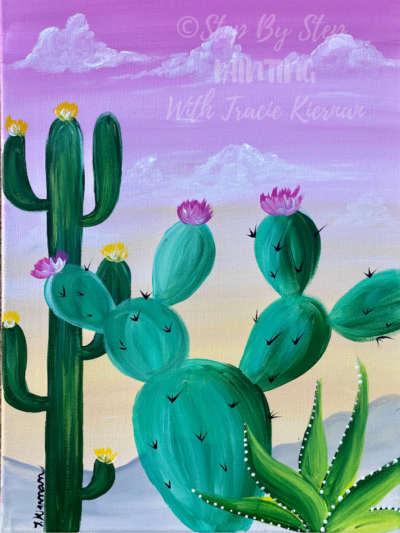
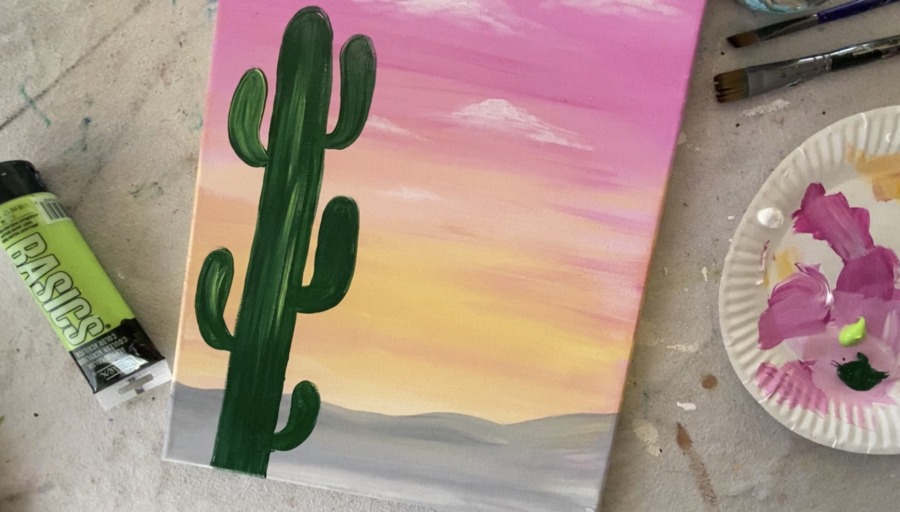
4. Paint the saguaro
Ensure everything is dry before continuing! To do the saquaro, I actually sketched the shape out with a #4 round brush and the deep green permanent color.
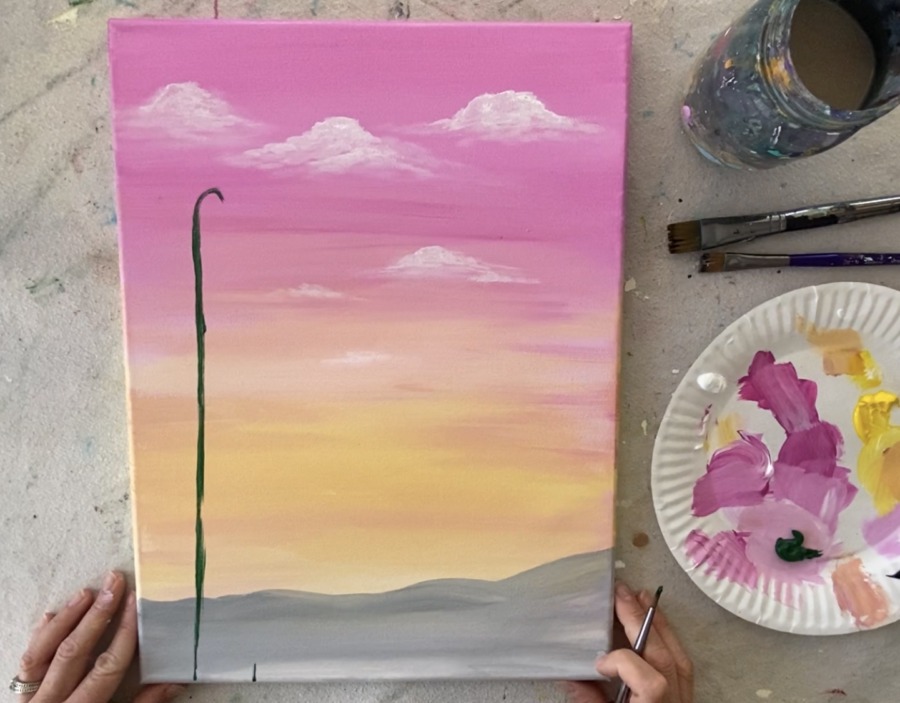
If you are not feeling as confident in painting the outline, you can use chalk first to draw the outline of the saguaro.
This saguaro is very tall and goes up well into the darker pink area of the sky. There are several arms. When you paint the arms, have them be kind of narrow at the base and a little thicker on the tips.
Then fill the saguaro in with deep green permanent. You may use the 12 bright brush or the 4 round brush for this. 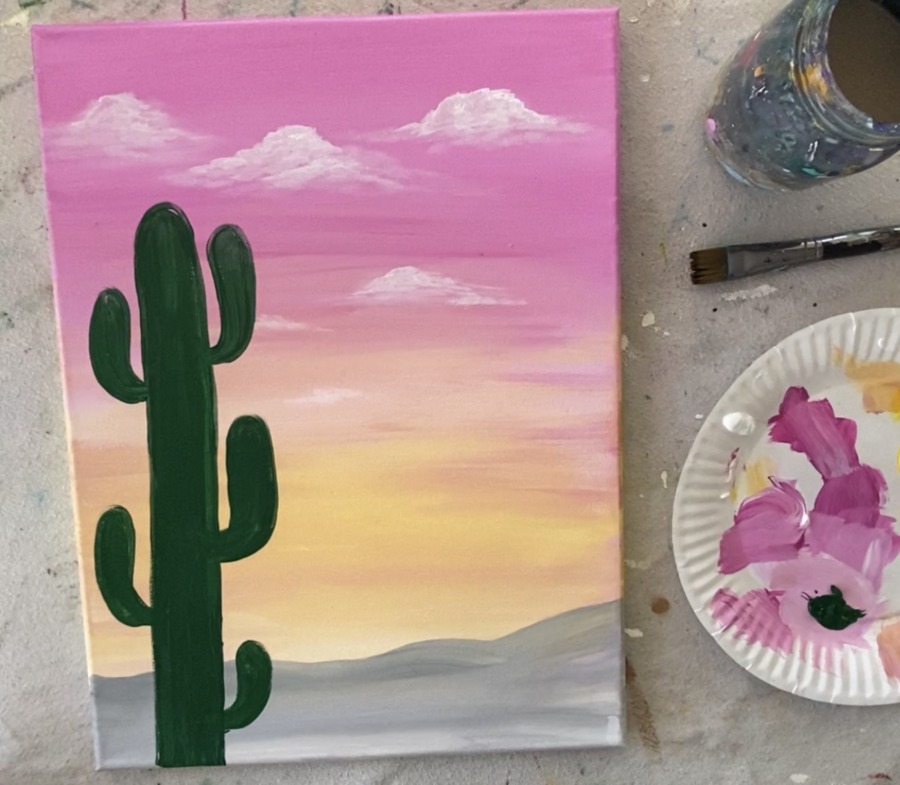
Then to add some highlight and color interest into the cactus, I blended in some “brilliant yellow green” before that deep green permanent dried.
To do this, load your 4 round brush in the brilliant yellow green. Then paint vertical lines and curved lines of “cactus texture” throughout the cactus. Your lighter green will blend with the darker green to create color variations.
You can make some of the arms look like they are overlapping the middle part of the cactus by simply adding rounded strokes of that lighter green so that it stands out.
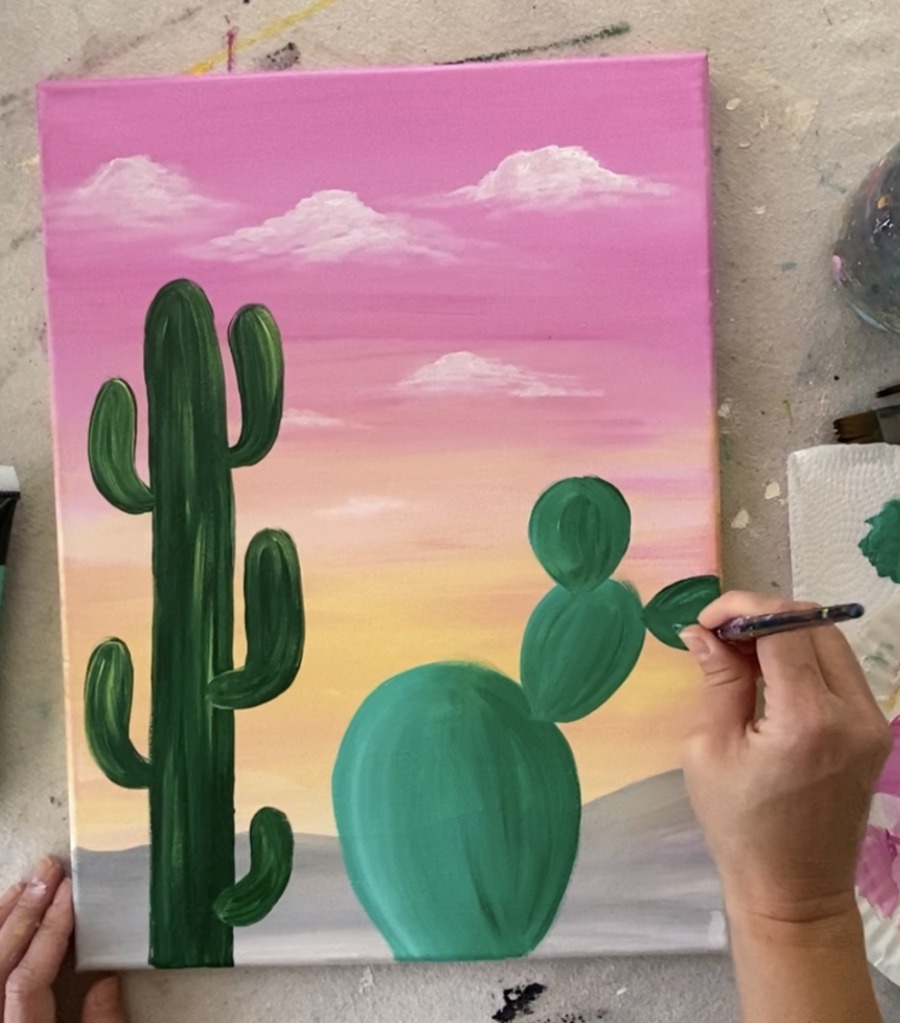
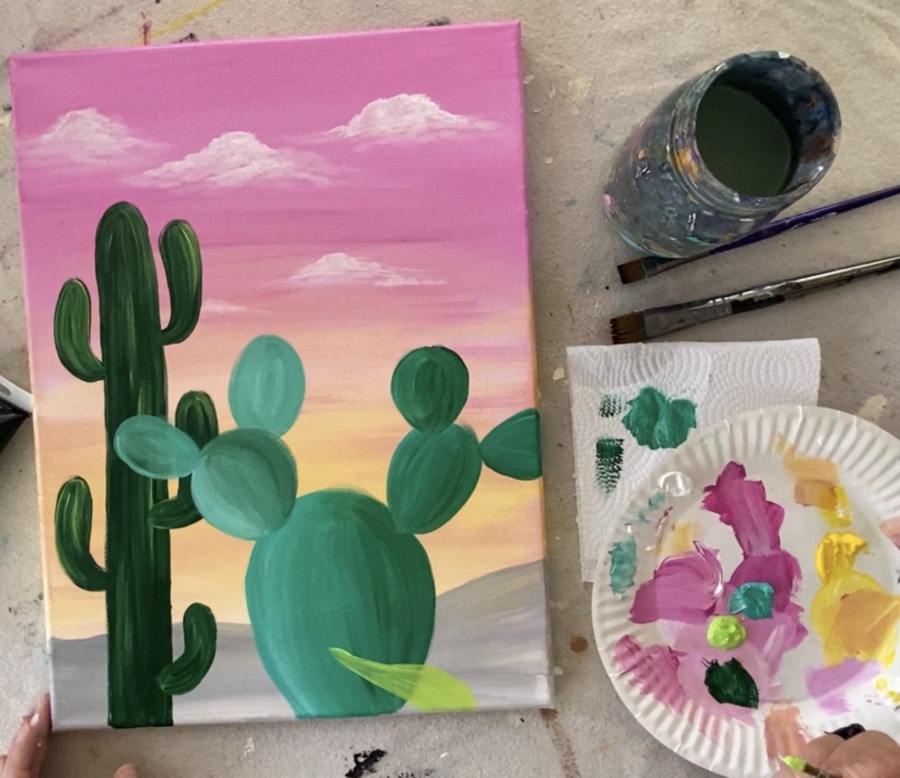
5. Paint the prickly pear
The prickly pear has different shades of green to make it stand out against the saguaro. I used bright aqua green, titanium white and some deep green permanent.
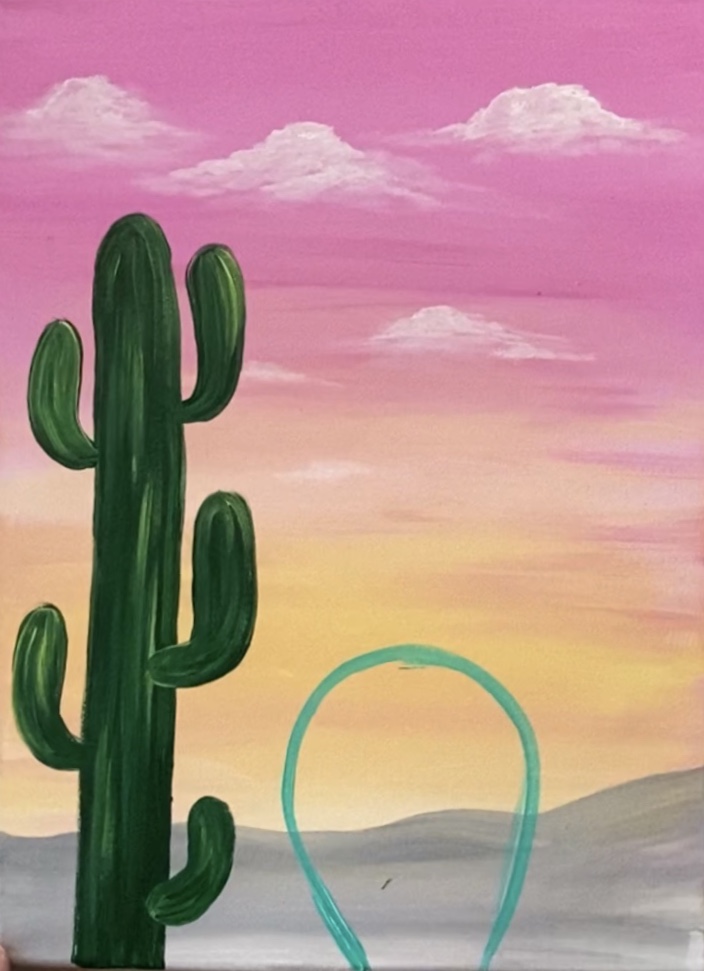
First draw out the base of the prickly pear with just bright aqua green. Fill that in solid with the bright aqua green. I recommend using your 12 bright for this but if you feel more comfortable drawing it with the round, you can use that one.
Then use the 12 bright to fill it in solid with the aqua. 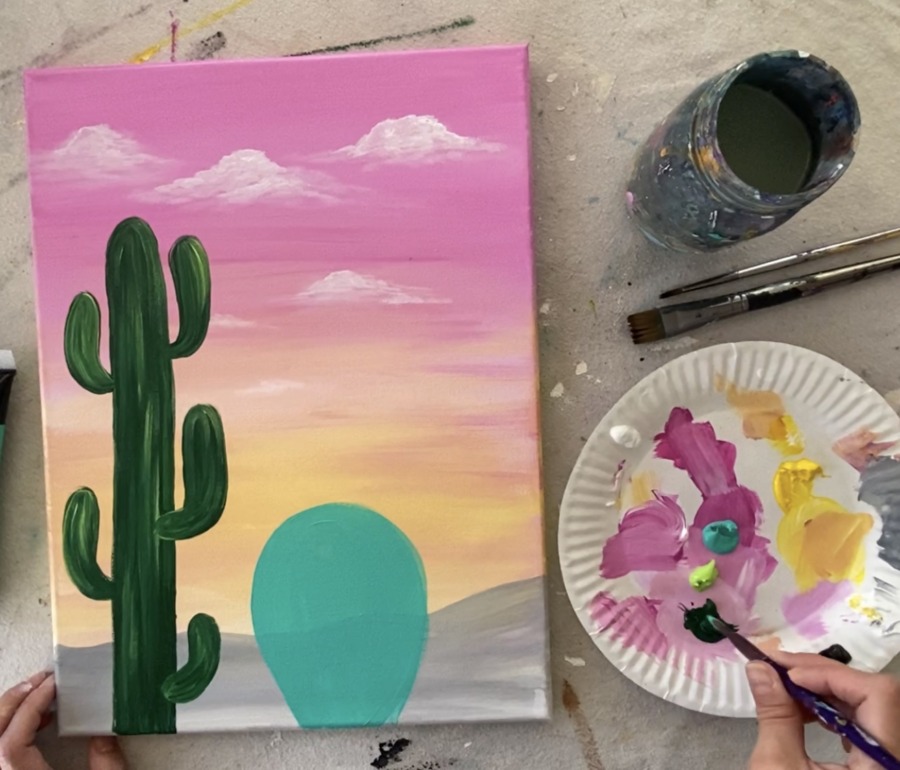
To give that aqua a more green tone, I loaded my 12 bright in the deep green permanent (without rinsing it).
Then I painted the right side of this prickly pear shape and blended it in so the left side is slightly lighter than the right. 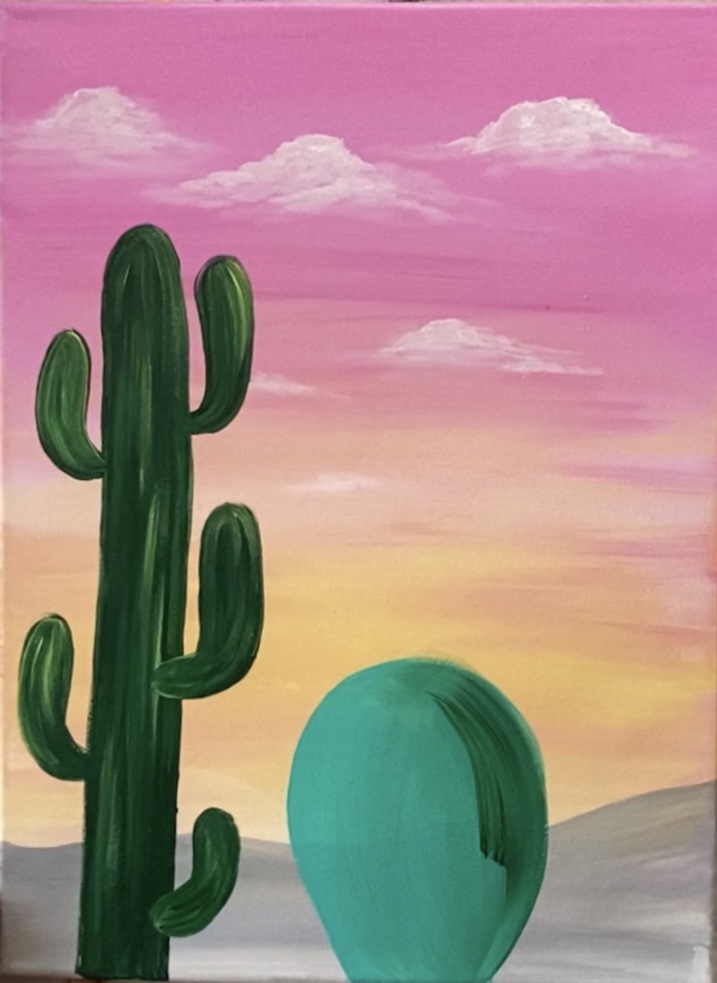
To make the left side even lighter, blend in a little titanium white so that it blends with the bright aqua green. Make your stroke go in a curved direction to contour the shape of the cactus.
These colors will blend on the canvas.
Then add on more prickly shapes using the same technique of first painting the shape aqua and then darkening the right with deep green permanent.
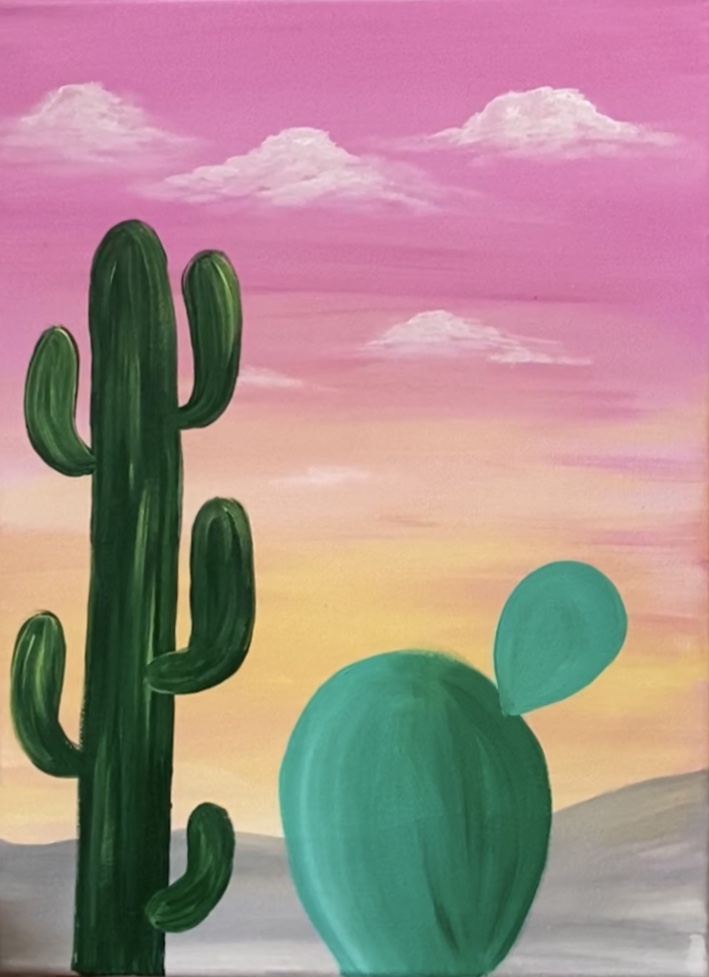
The base of each prickly arm is narrow and kind of pointed then. It kind of looks like a teardrop shape.
Also, you don’t need to rinse your brush for each prickly pear arm. If you get excess paint, simply wipe with a paper towel. However, the variations of the aqua and deep green kind of make each prickly pear arm unique.
Don’t be afraid to overlap that saguaro! You may need a bit more titanium white in your aqua and deep green combo to make sure that the dark cactus isn’t still showing through.

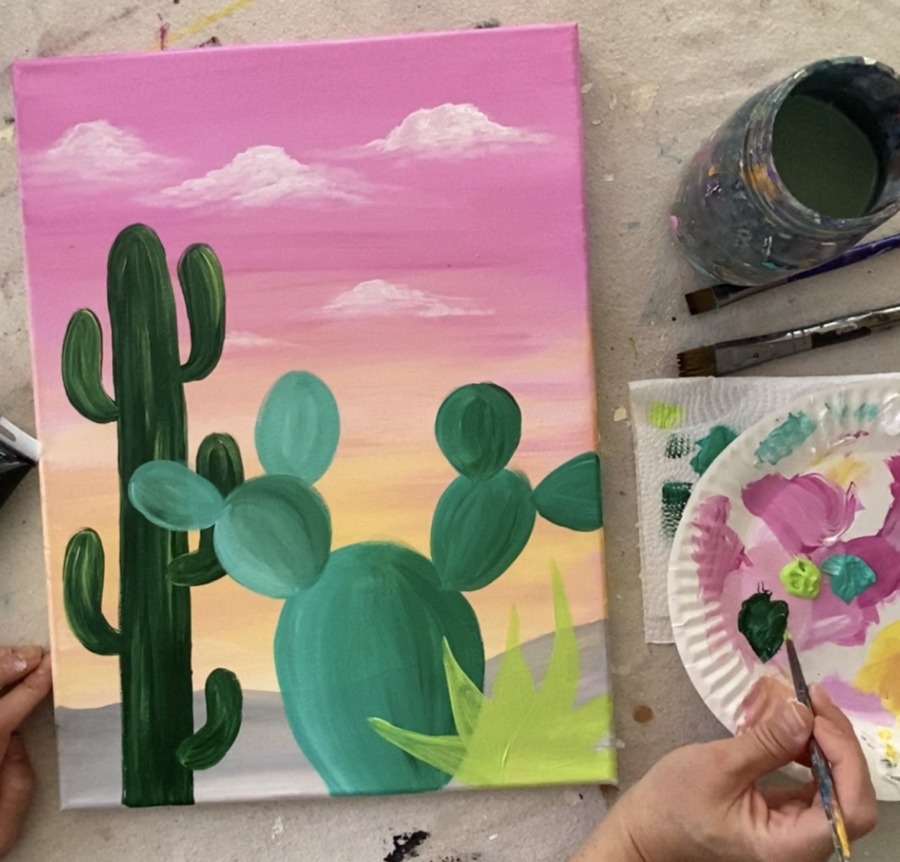
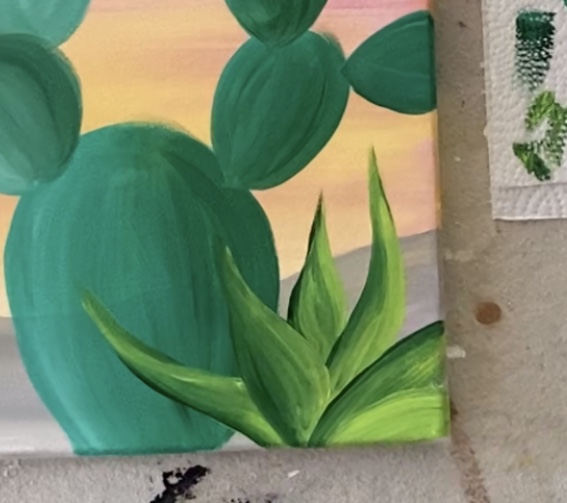
6. Paint the agave
For the agave, I used a different green combination to make it stand out against the prickly pear cactus. I used brilliant yellow green and deep green permanent for this.
Use your 4 round brush and brilliant yellow green to sketch out each of the agave pieces. This shape overlaps the prickly pear.
The shape will look flat at first but in the next step, you will be blending a darker green to make each strand stand out.
Then blend deep green permanent into the agave pieces. Each “strand” has deep green permanent on the left side and blends to the lighter green on the right. 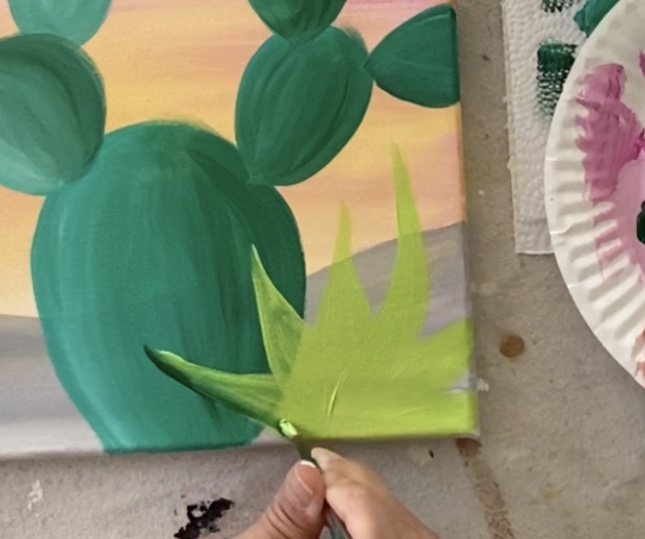
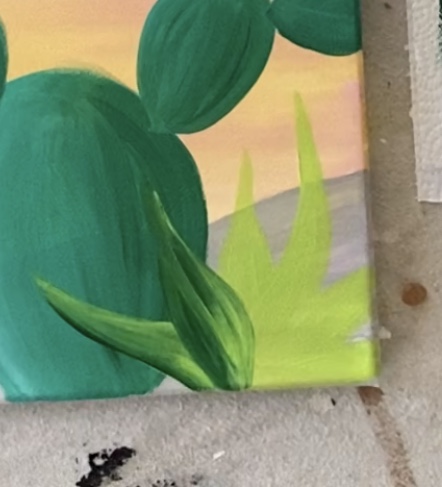
Paint a dark line on the left and then blend it in with the lighter green. If you need to, load more lighter green onto your brush to help it blend.

Pay attention to which piece is overlapping.
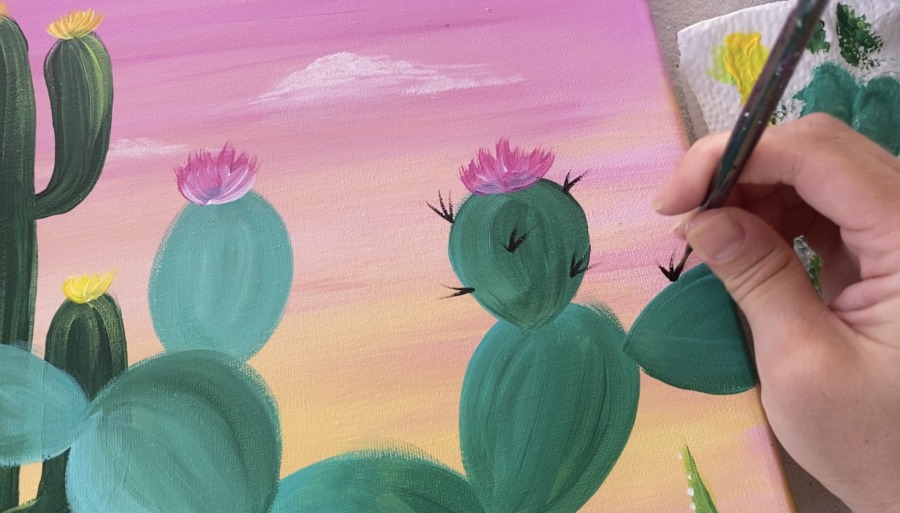
7. Paint blossoms
I did yellow/white blossoms on the saguaro and pink/white blossoms on the prickly pear.
Add yellow and white to the tip of your round brush and paint simple blossoms by stroking upwards. 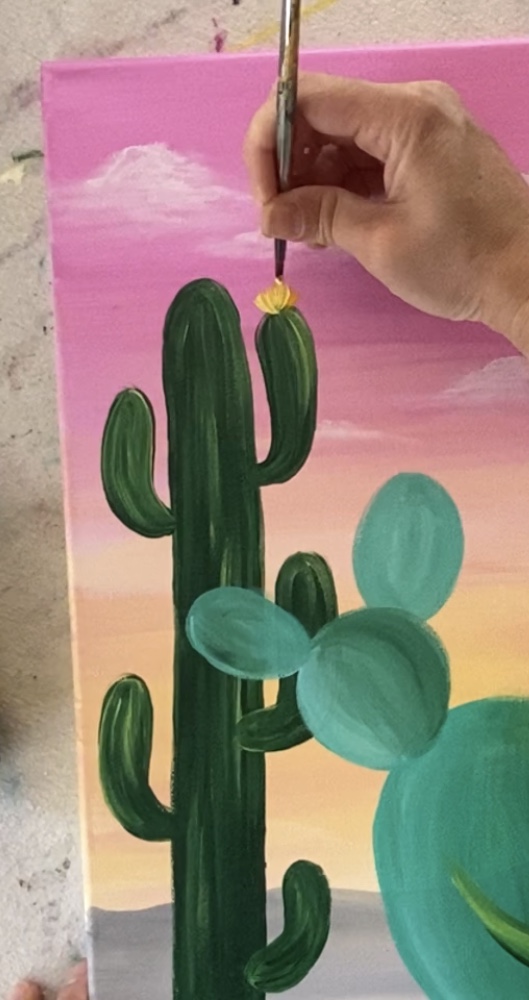
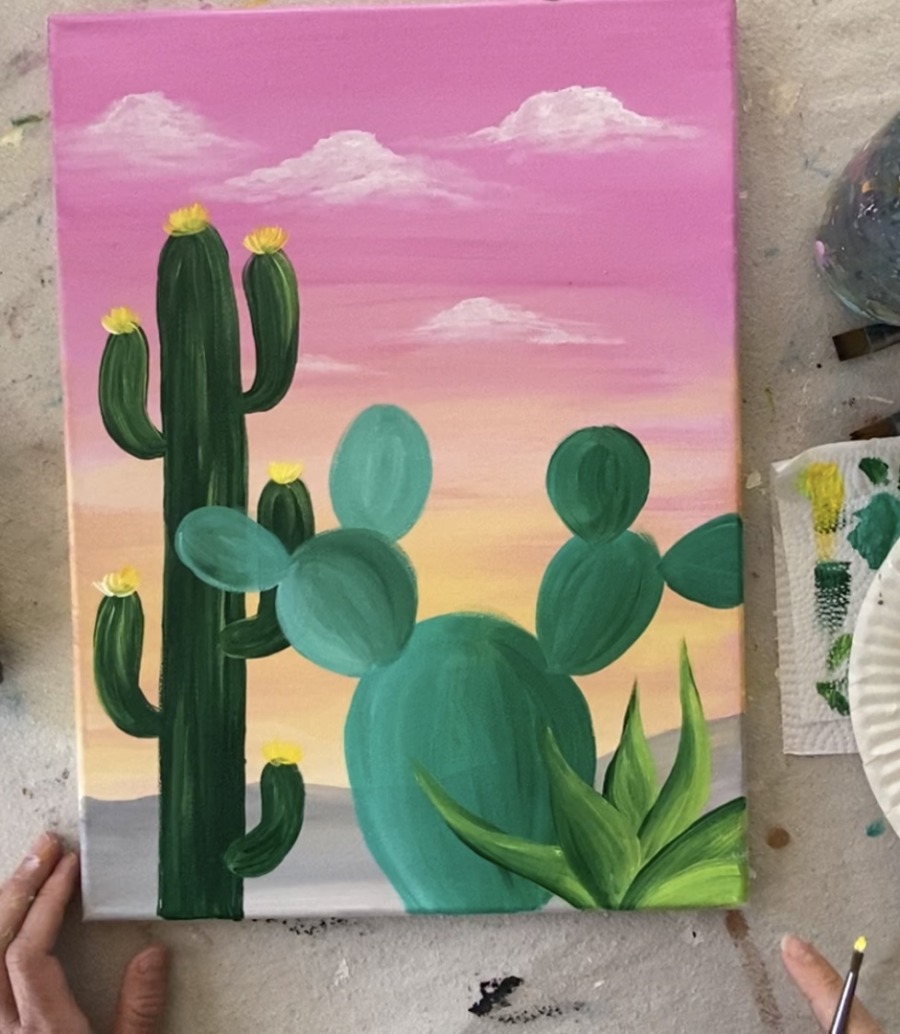
For the prickly pear, load the tip of the round brush in the pink and white. These blossoms were slightly larger.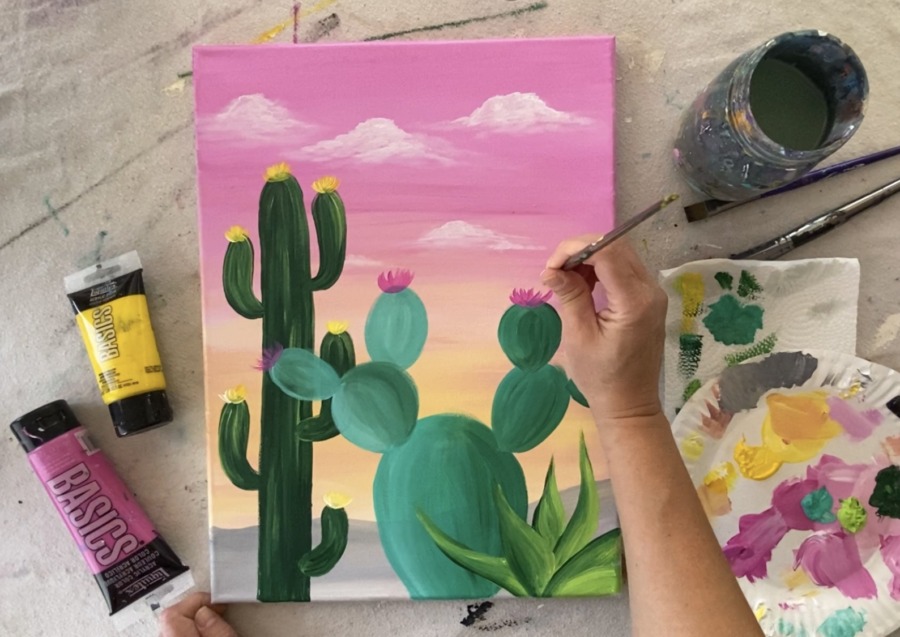
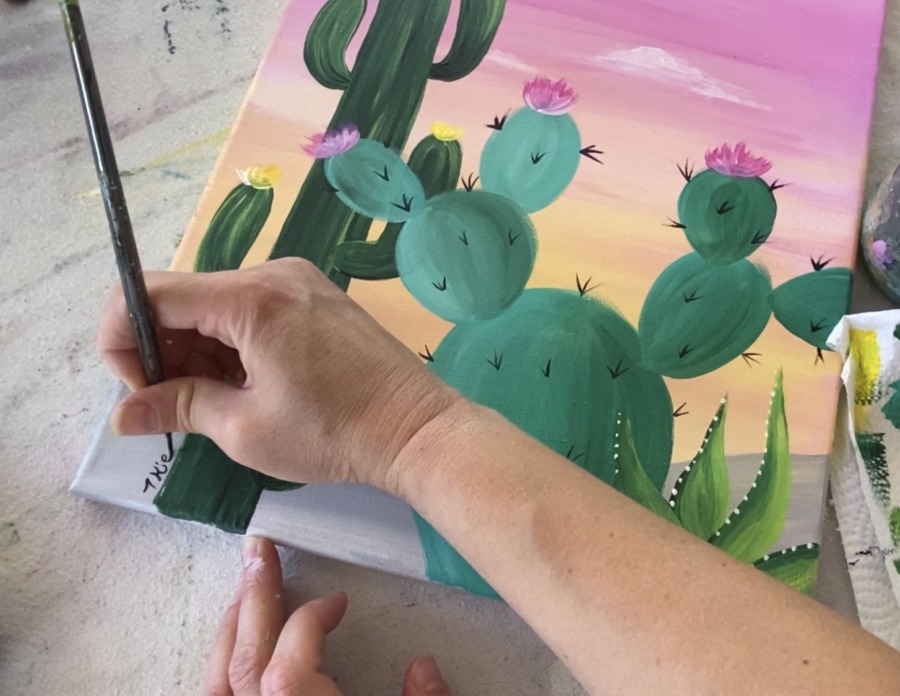
8. Paint dots on agave
The dots on this agave certainly add some nice visual interest! I used my #0 round brush for this step. Simply load the tip of it in titanium white and paint dots on the left side of each of the agave pieces. 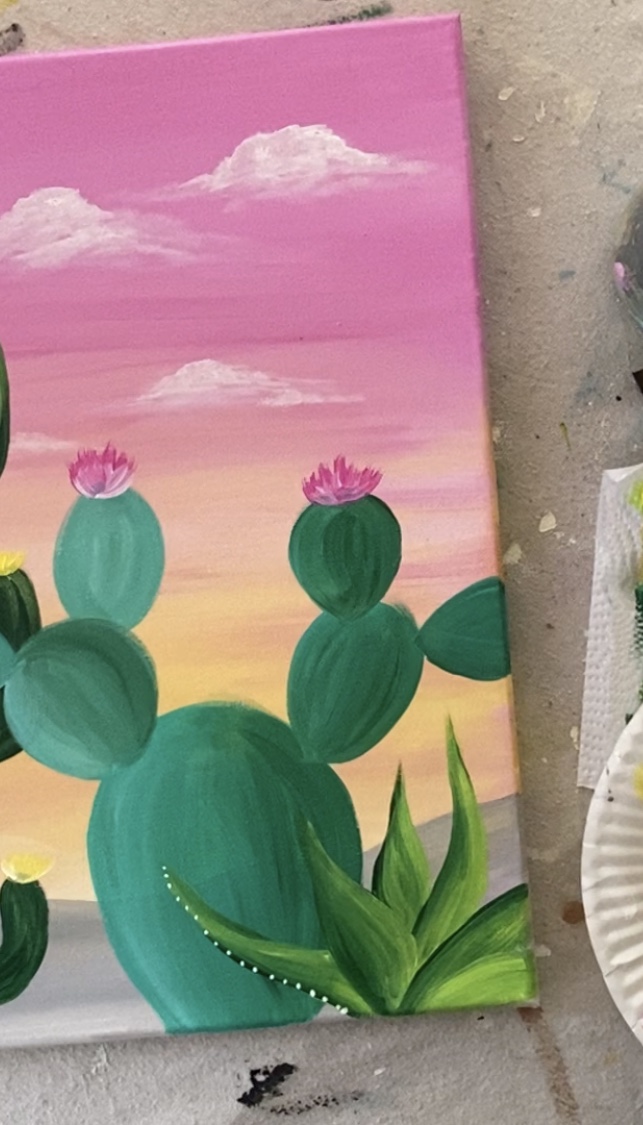
9. Paint spikes on prickly pear
For the spikes, I used that #0 round brush and mars black. You may want to water down your black slightly to make sure these lines flow smoothly.
Paint clusters of spikes in groups of twos and threes.
10. Paint a little texture on the saguaro
As a final step, I used that #0 round and mars black to paint some subtle black lines on the cactus. This adds some extra texture and visual interest. 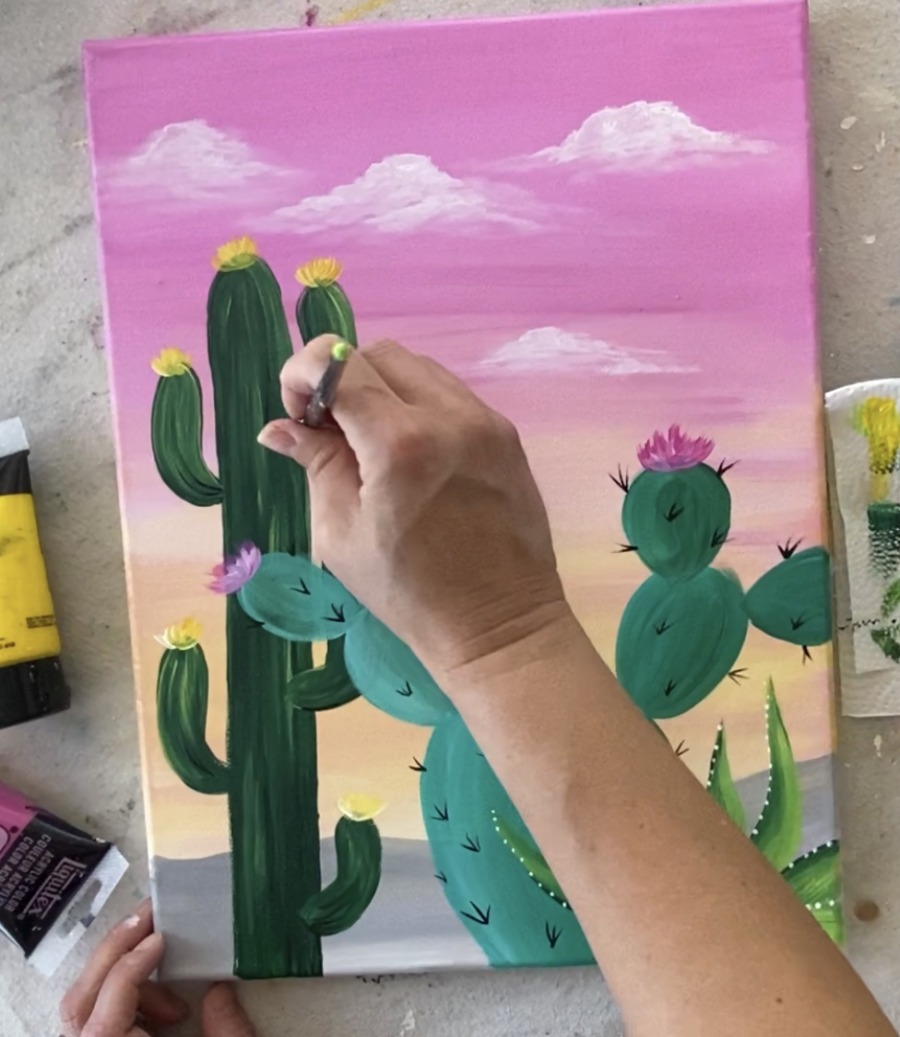
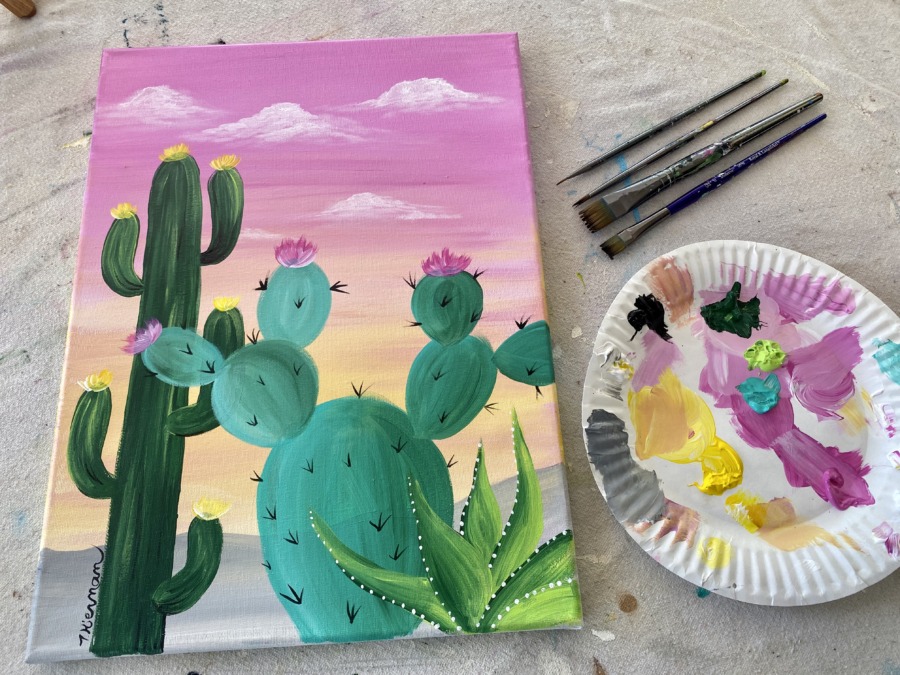
Finished
Sign your name!!
Share your art!


I just did a fun quarantine paint night with my family with this portrait and it was a blast!! Thank you so much for sharing! 🙂
You’re welcome! Glad you enjoyed your paint night ?
This was so amazing to do with my mom, grama, aunts and cousins! You’re step by step instructions in the video were great for me to watch before hand! Everyone loved this and the paintings all turned out so cute!!!
soo fun