

Would you like to save this?
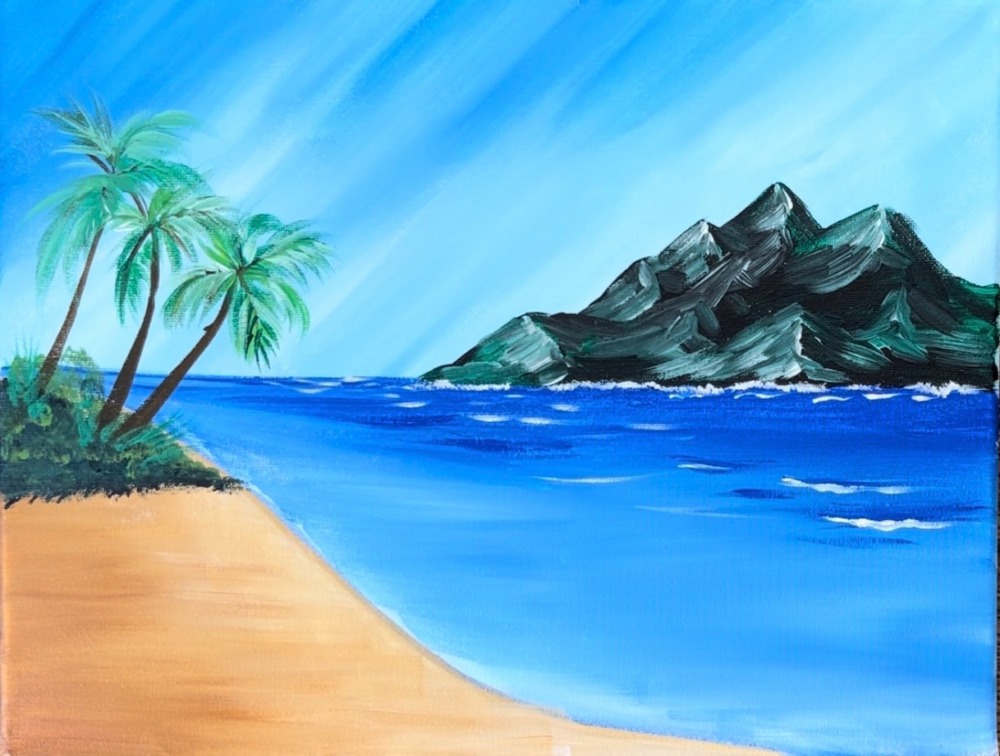
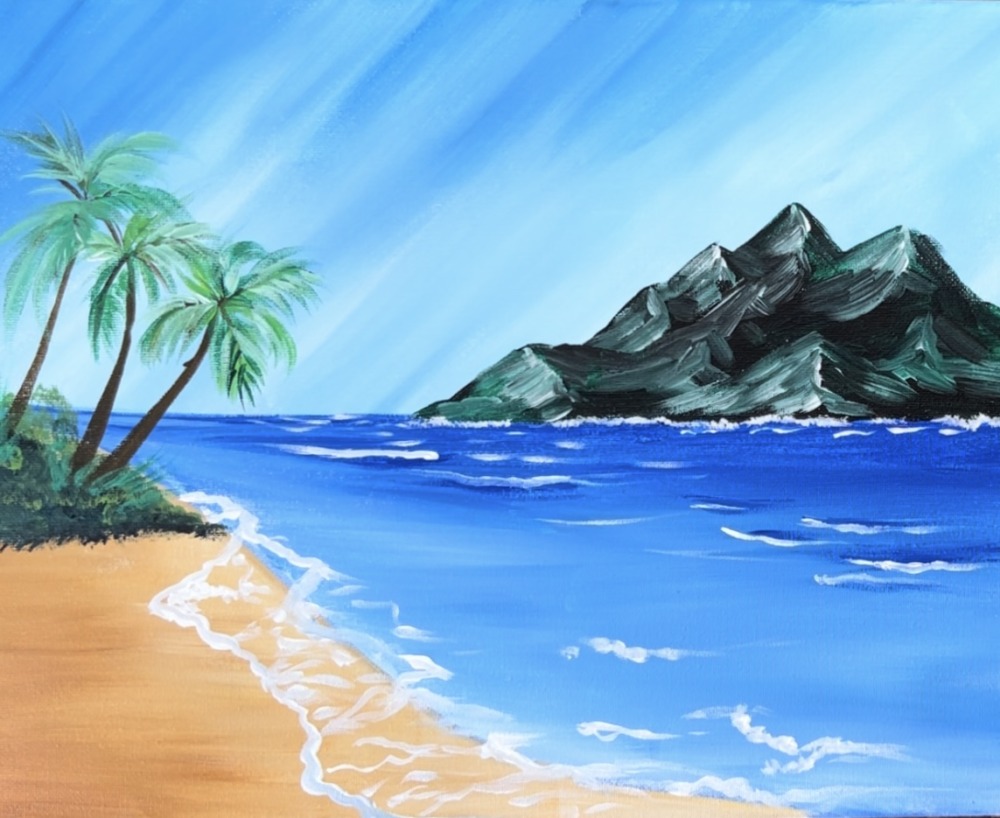
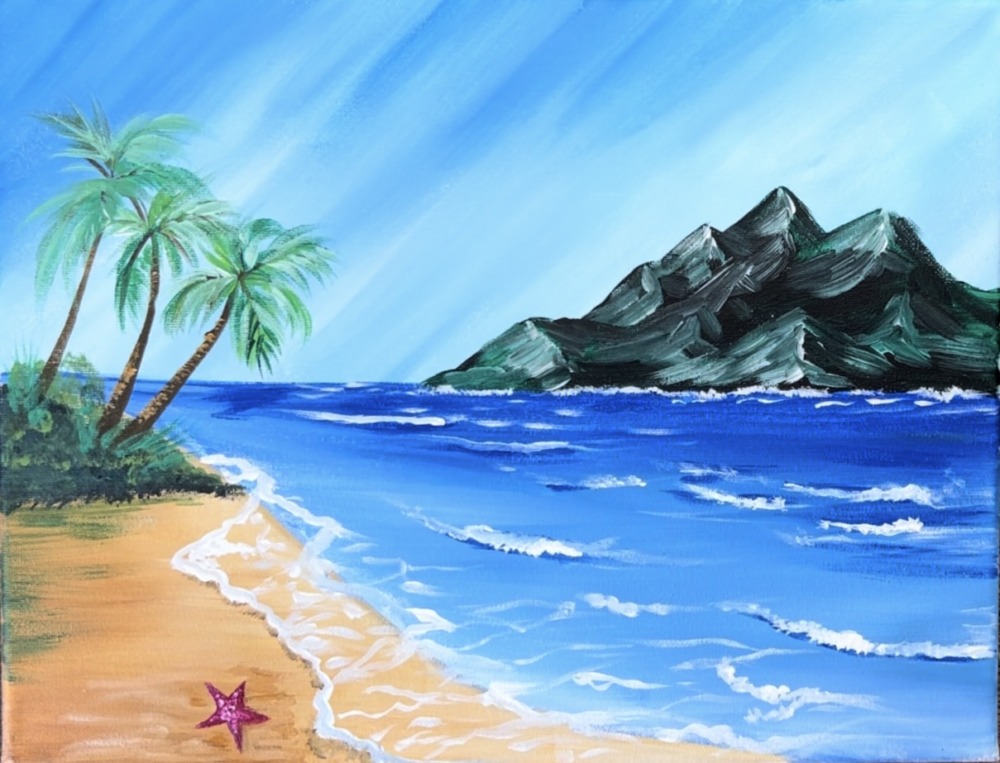
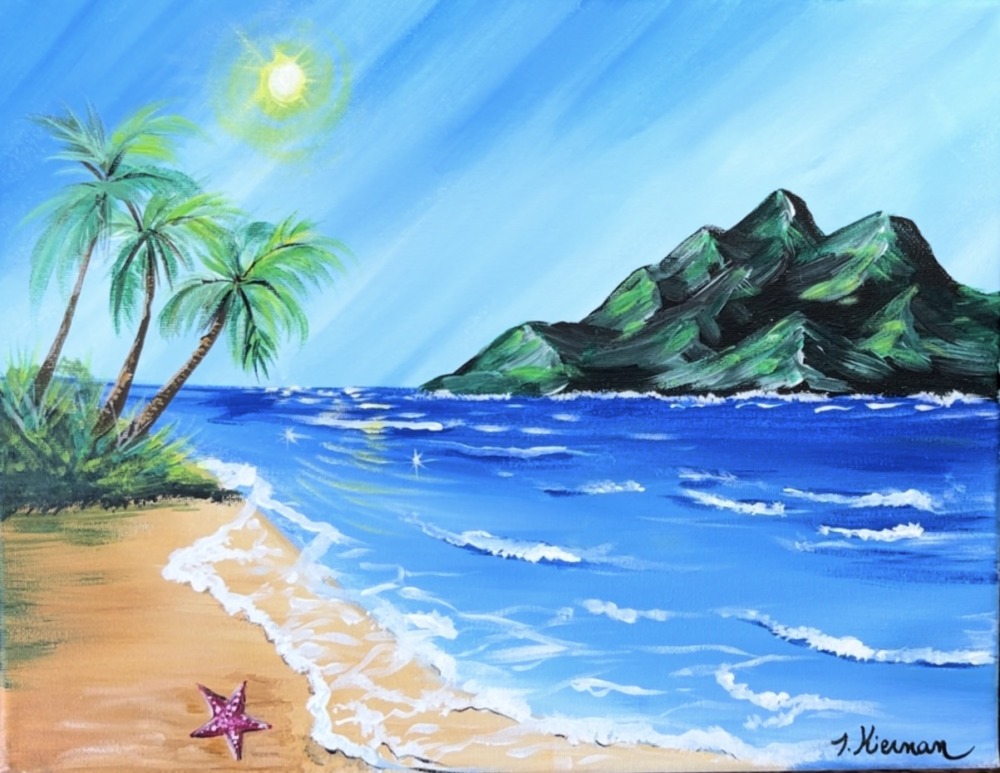
Paint a tropical beach island with as starfish and swaying palm trees. This tutorial is demonstrated on an 11″ x 14″ canvas with acrylics.
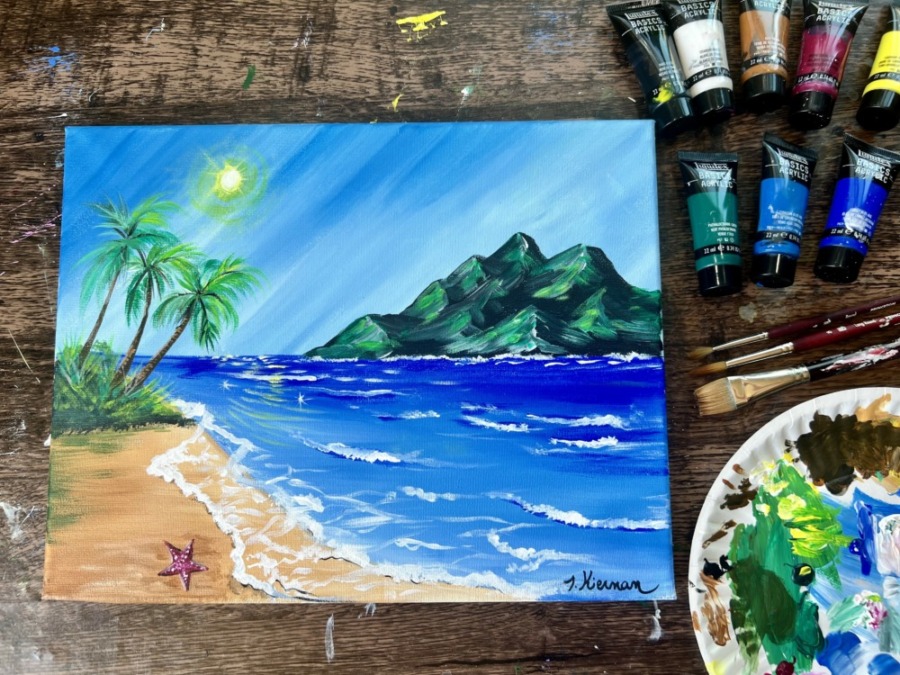
We will be doing a loose painting style technique to do the soft waves to make it look like they are gently washing over the sandy shore.
Enjoy and happy painting!
Materials List
How To Paint A "Tropical Island Beach"
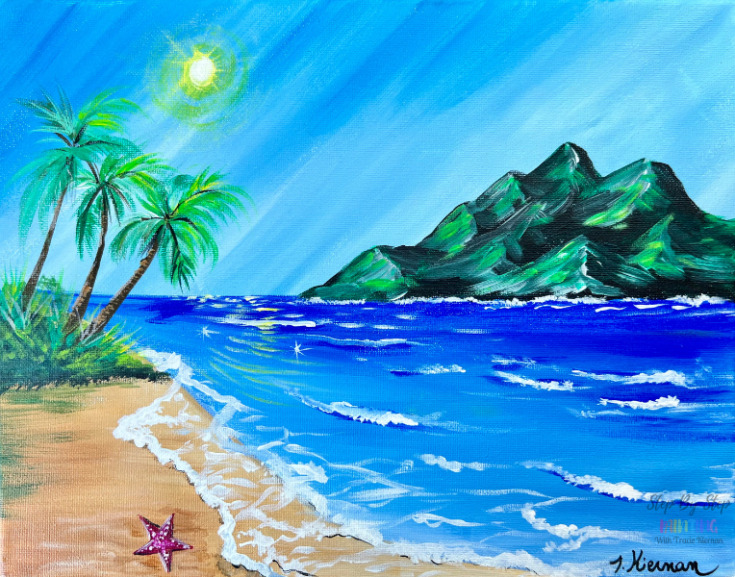
Learn how to p aint a tropical island beach with palm trees, soft waves and a starfish.
Materials
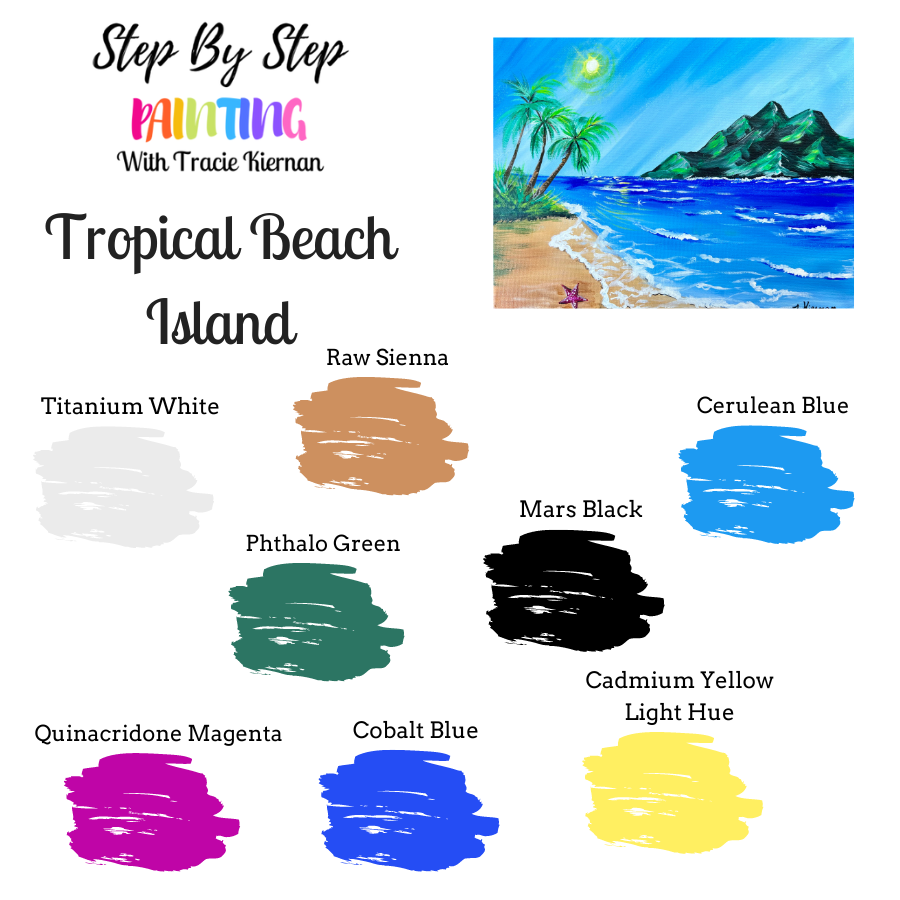
Colors
- Titanium White
- Mars Black
- Raw Sienna
- Cadmium Yellow Light Hue
- Quinacridone Magneta
- Cerulean Blue
- Cobalt Blue
- Phthalo Green
Brushes
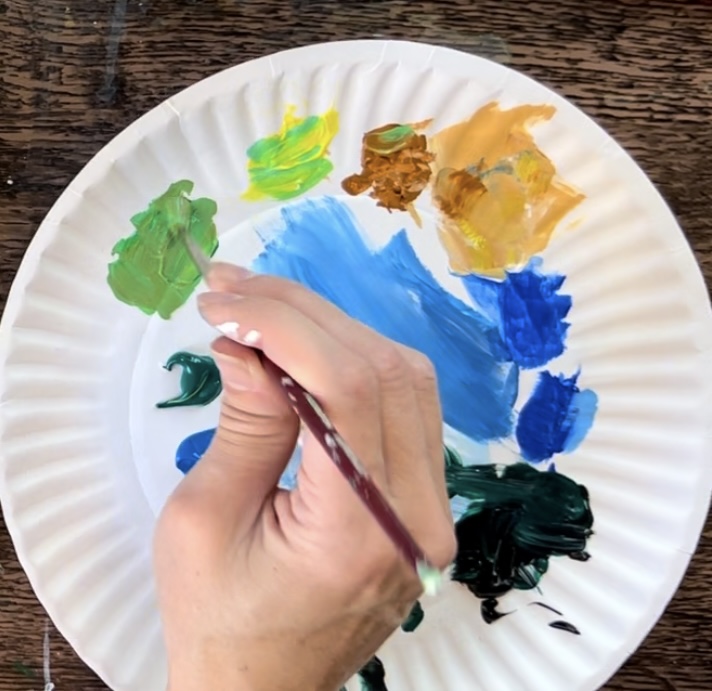
Color Palette
Directions At A Glance

Video
Step By Step Instructions
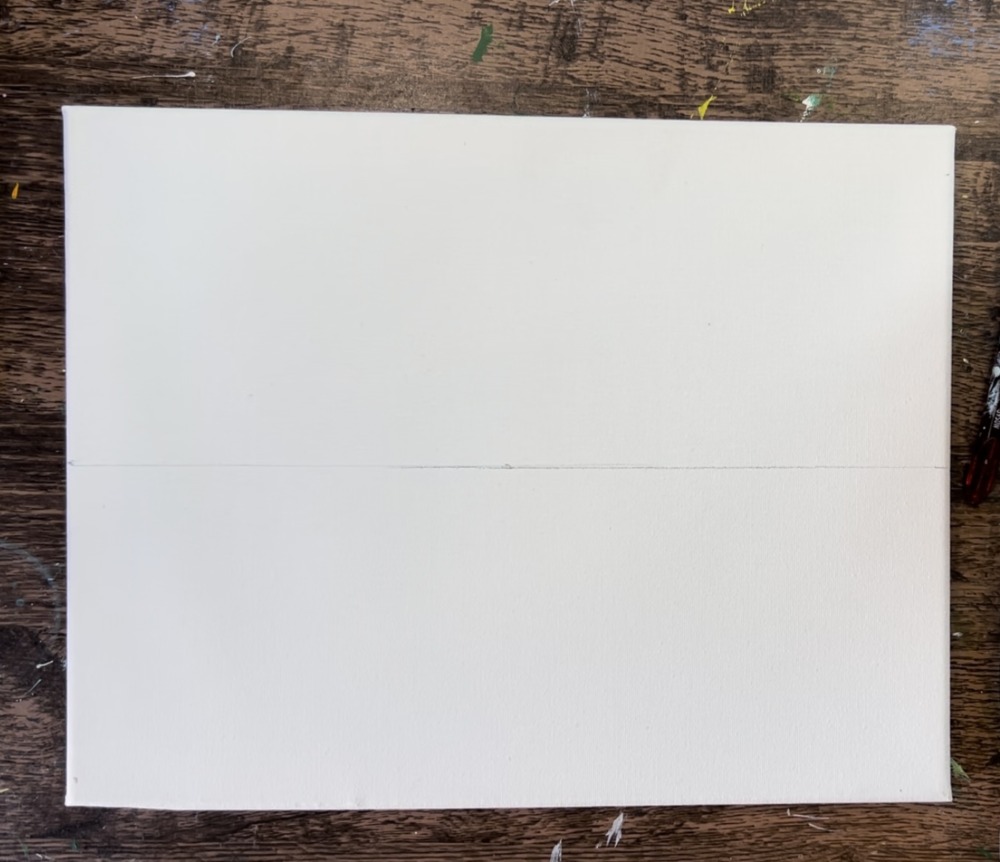
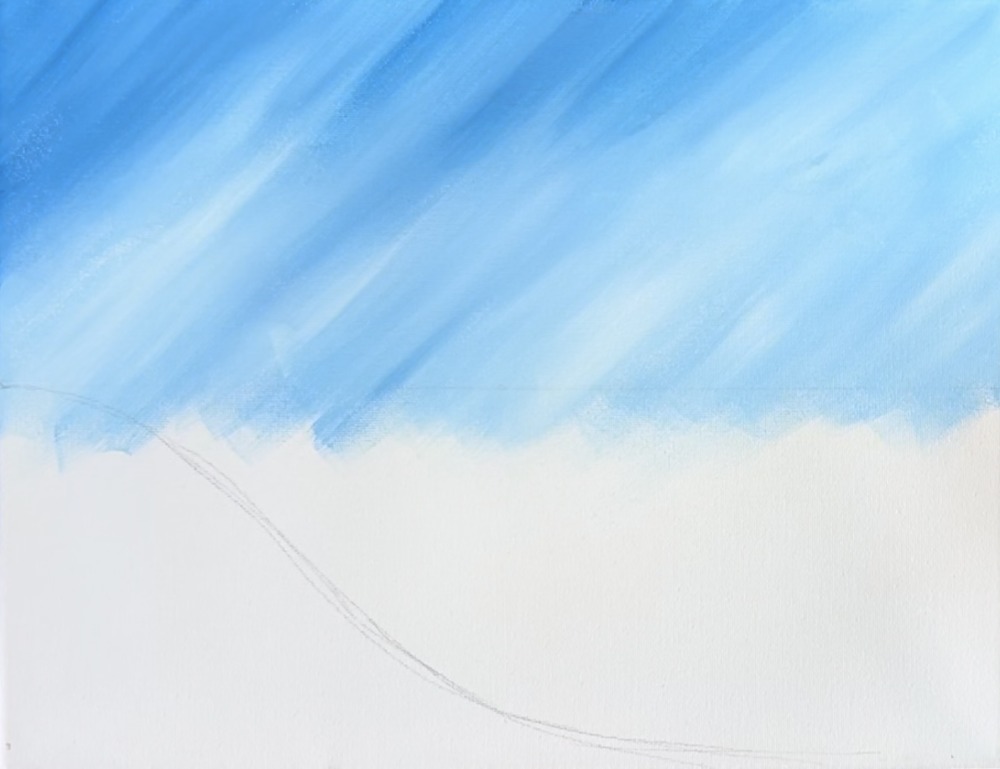
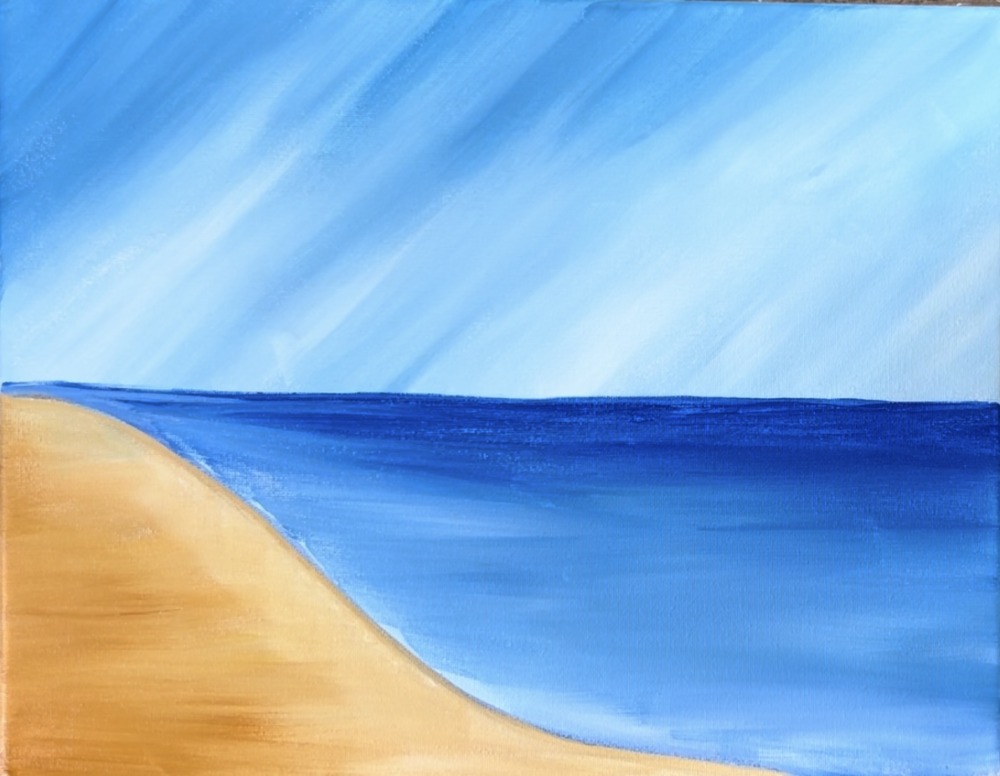
1. Paint Sky
Position your canvas horizontally. Locate the center of the canvas. Use a ruler or straight edge to draw a horizontal line across the center of the canvas. This will be the horizon line in the painting.

Load your paint palette with the two colors: cerulean blue and titanium white. These will be the colors used in the sky.

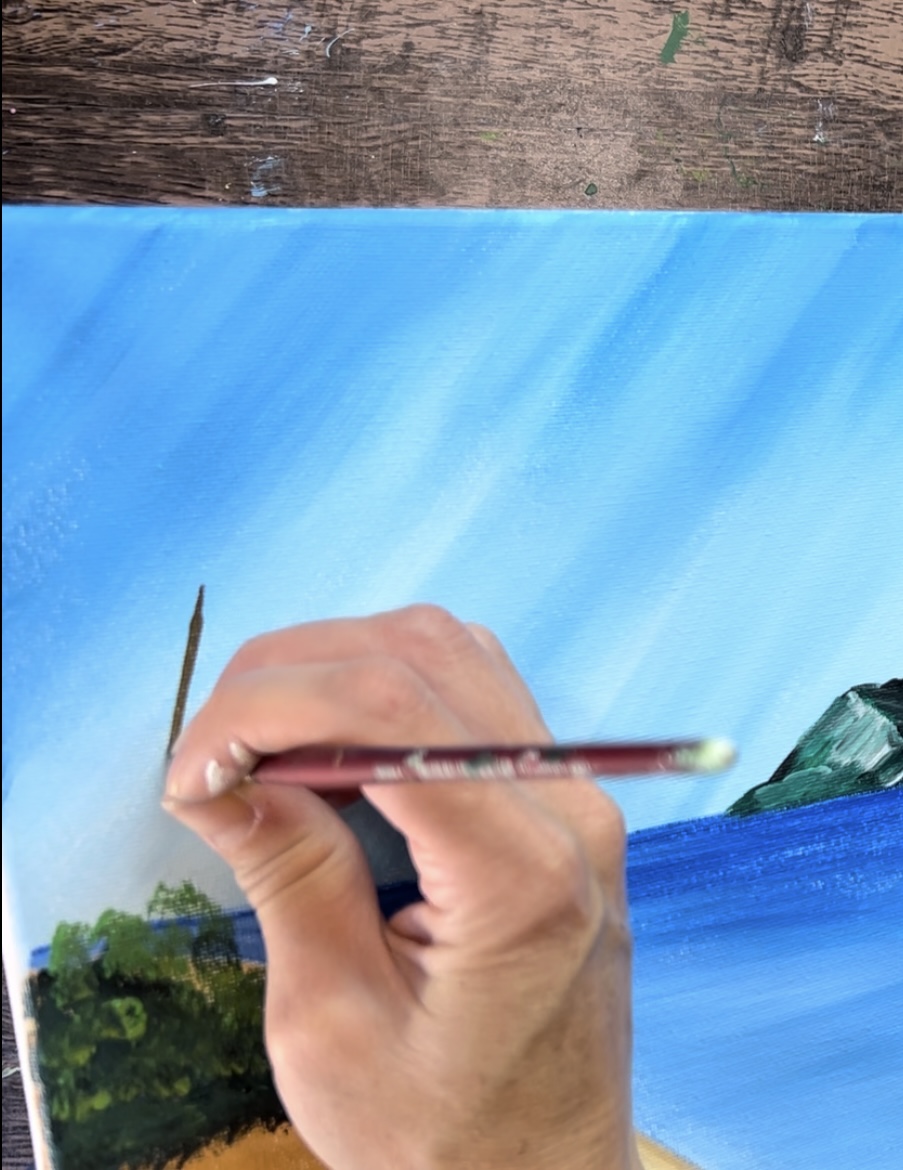
Load your 3/4″ flat wash brush into water. Then load the brush in equal amounts of blue and white. You can either gently mix the two colors on the paint palette or have the colors mix together on the canvas. Start at the top of the sky. Paint diagonal paint strokes with the blue and white.

Note: if you don’t want diagonal paint strokes in the sky, you can paint them horizontally or paint them more “sporadically” at different angles. Each would create a different style in the sky.
Fill the entire area above the “horizon line” with this blue. I made the blue slightly darker at the top and slightly lighter on the bottom.

You do not need to wait for this to dry before going onto the next step.
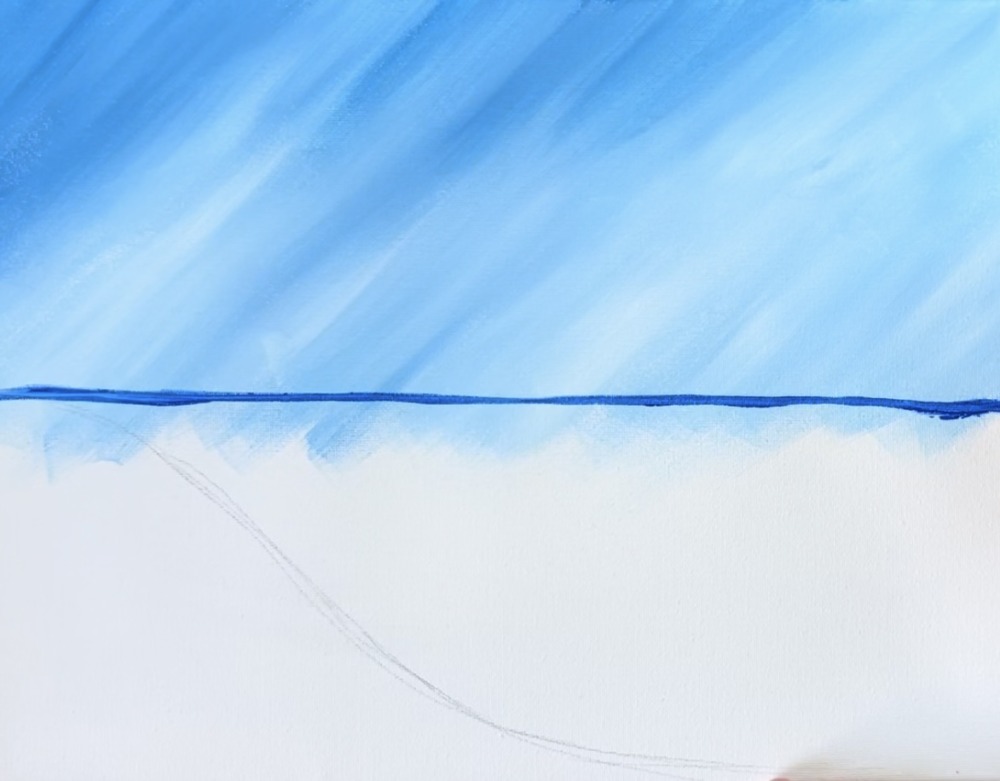
2. Paint Ocean
Use a pencil to draw the shore line. Start on the left just at the horizon line. Draw a curved line that dips down and then hugs the bottom right edge of the canvas. This line will divide the sandy area from the ocean area.

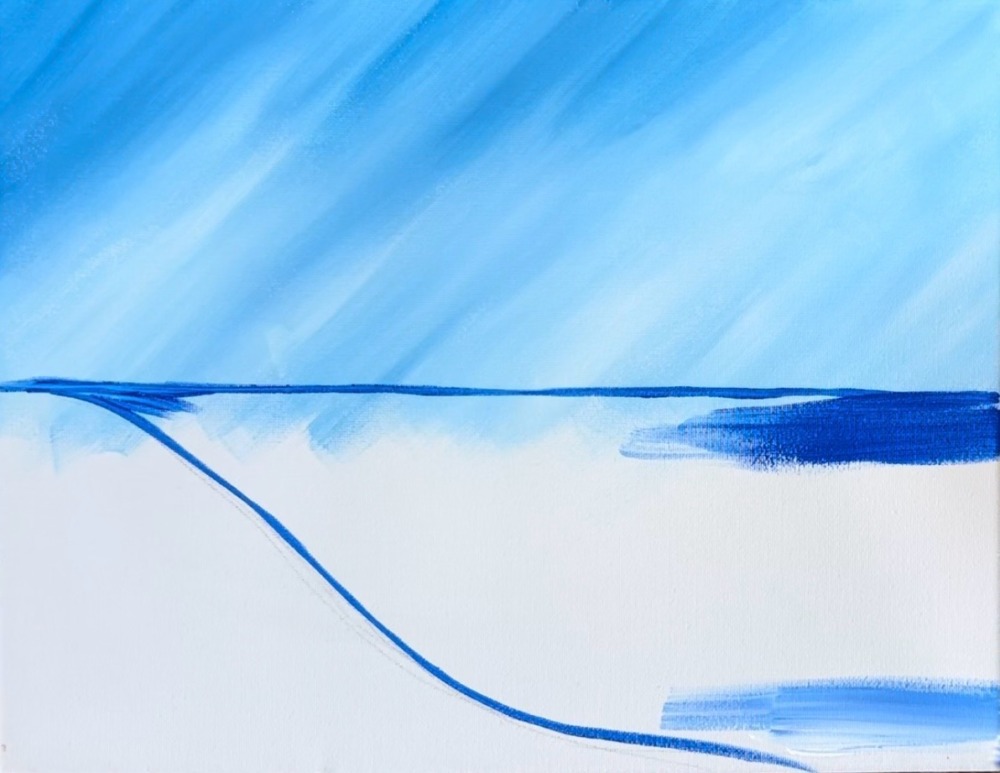
Then load your palette with the color “cobalt blue”, “titanium white” and more “cerulean blue”. Use a clean 3/4″ flat wash brush and load that into the cobalt blue. Paint the horizontal line at the “horizon line”.
Then paint outline the shore line as well. Start filling in the ocean area. The blue at the top of the ocean area (just under the horizon line) will be darker and mostly the “cobalt blue”. The blue on the bottom along the shoreline, is lighter and mixed with “titanium white”. The blue in the middle of the ocean area is “medium” and is “cerulean blue” mixed with white and the cobalt blue.
Use the 3/4 wash brush to fill your ocean area. Do this with all left and right paint strokes.

Blend your cobalt blue into cerulean blue in the middle of the ocean area. Then add “titanium white” on the bottom and close to the shore line. If needed, paint your ocean along the shoreline in a curved direction first and then go back with left and right paint strokes so the ocean water is all going the same direction.

3. Paint Sand
Load your paint palette with the colors you will be using for the sand: “raw sienna”, “titanium white” and “cadmium yellow light hue”. Mix equal parts of each of those three colors. It will make a golden brown sand color.

Start on the left side of the sand area. Paint left and right paint strokes with the 3/4 flat brush.
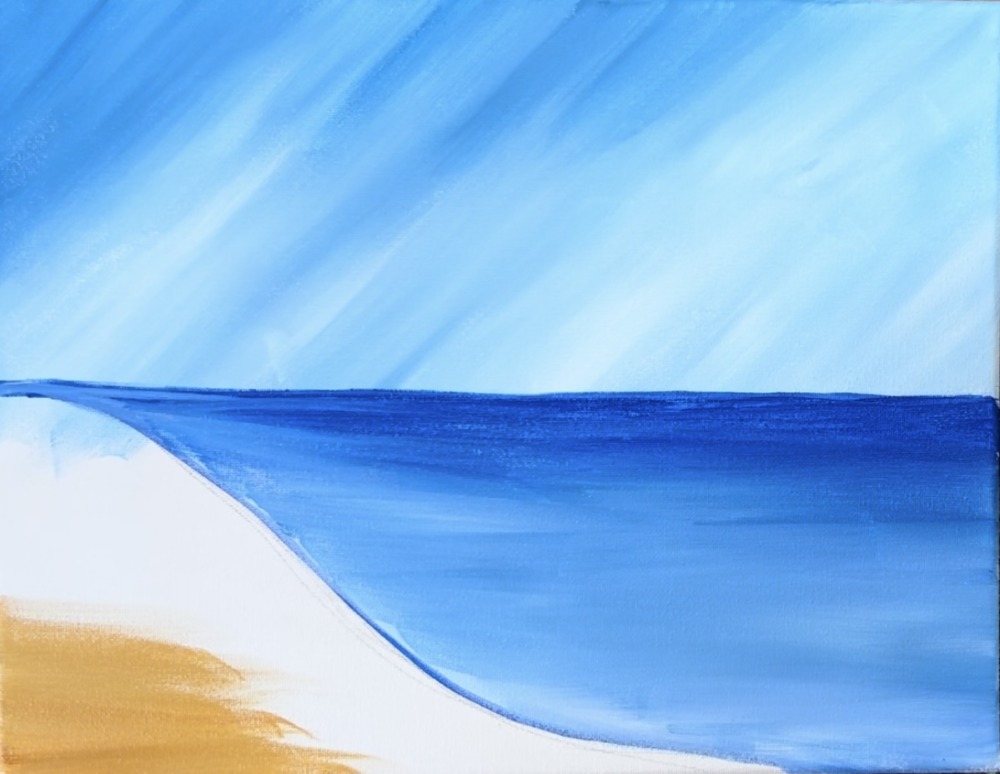
Do this in the entire area of the sand. Then add a little more titanium white to your brush and blend that just on the right side (where it meets the ocean water). Blend the sand so it is slightly darker on the left and lighter on the right side.
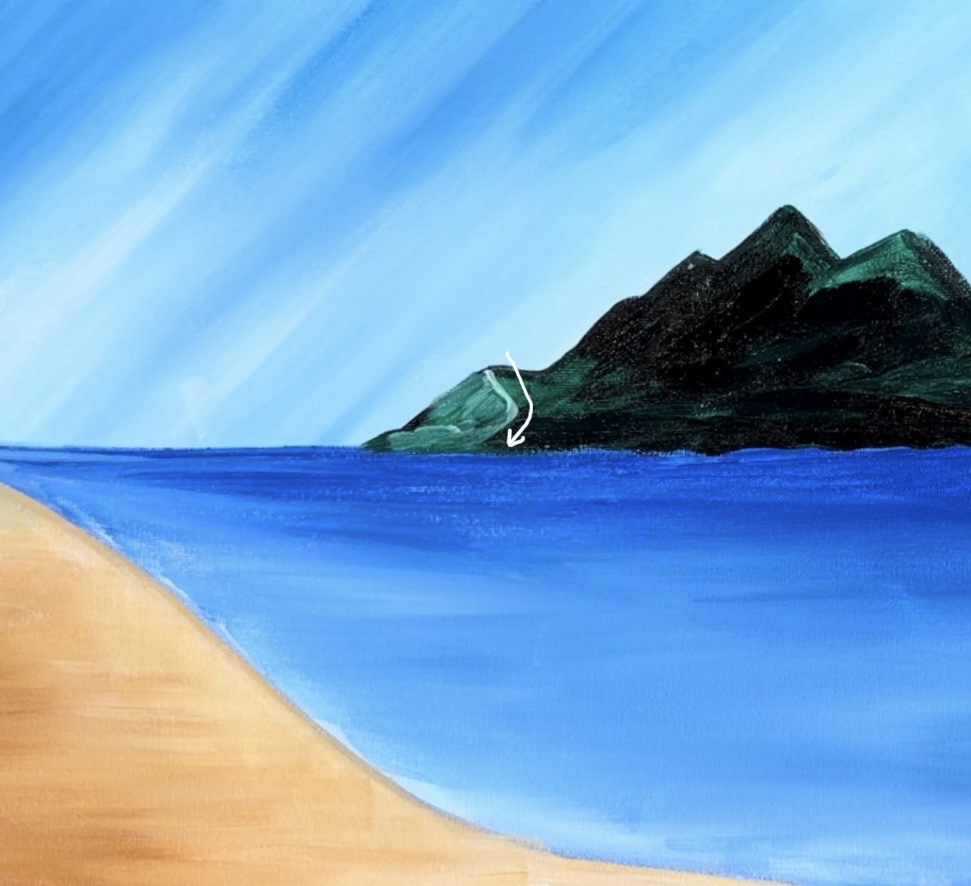
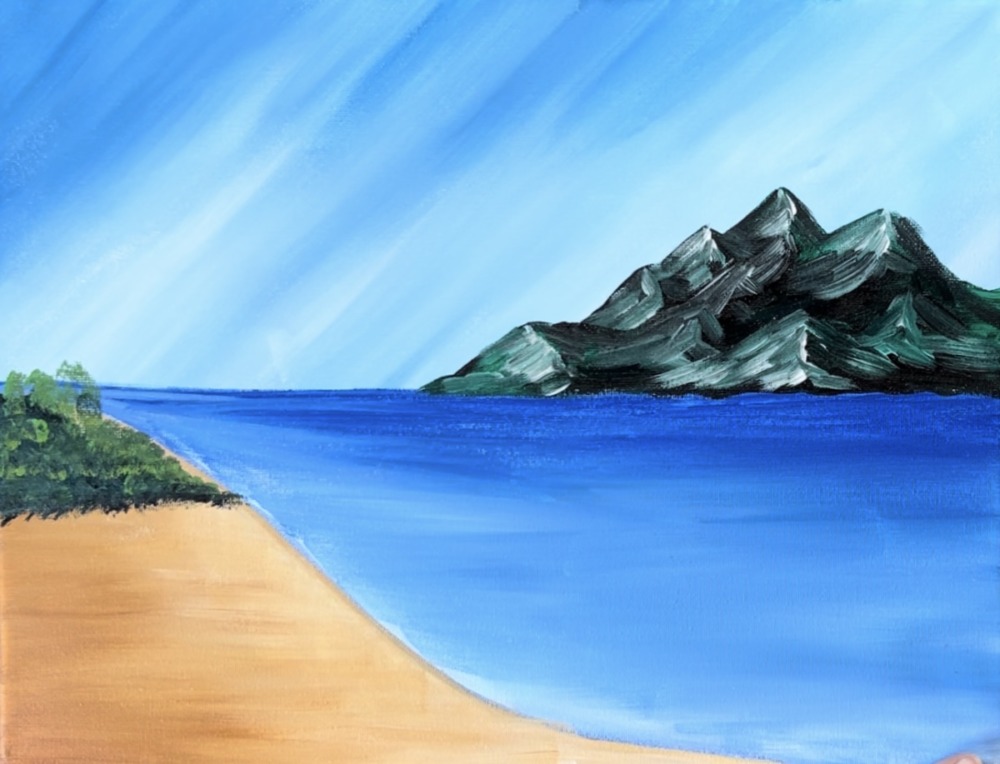
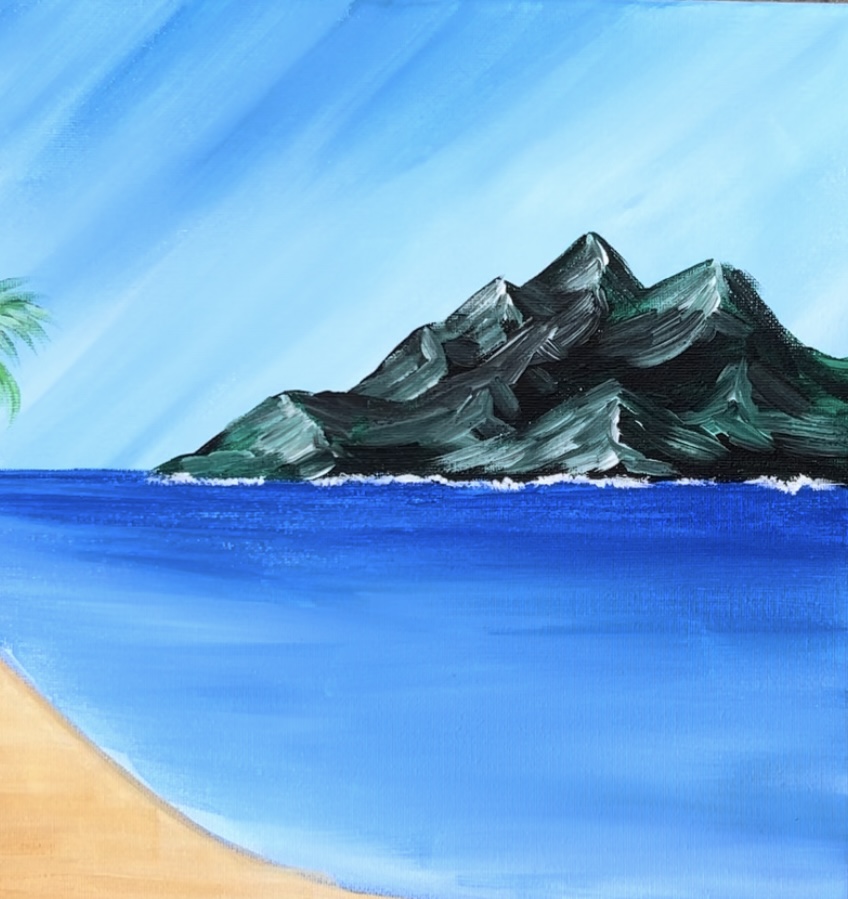
4. Paint Mountain Island
Tip: if you want to simplify this painting, you don’t have to do as much detail and highlighting in the mountain! You can leave it more flat or just add a little bit of texture to it.
On your paint palette, mix equal parts “mars black” with “phthalo green”. Use a #4 round brush to outline the shape of the mountain island. The height of this mountain’s highest peak goes to almost the top middle of the sky. The width of this mountain peak is a little more than half as wide as the width of the canvas. I did four peaks of different heights.

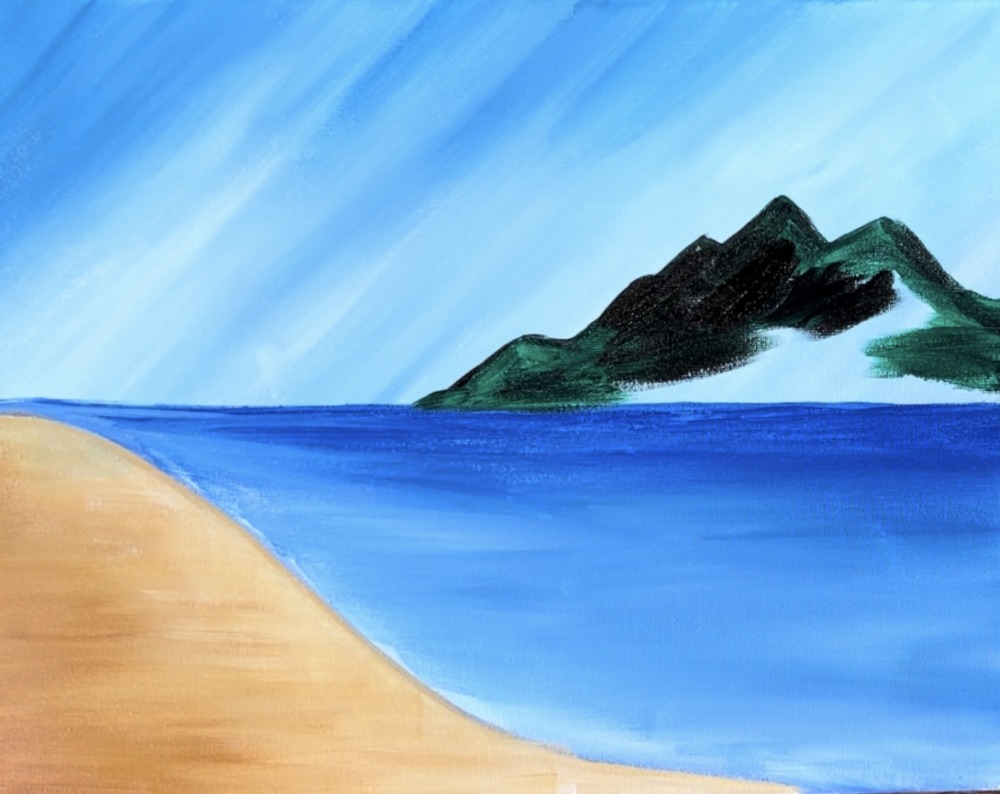
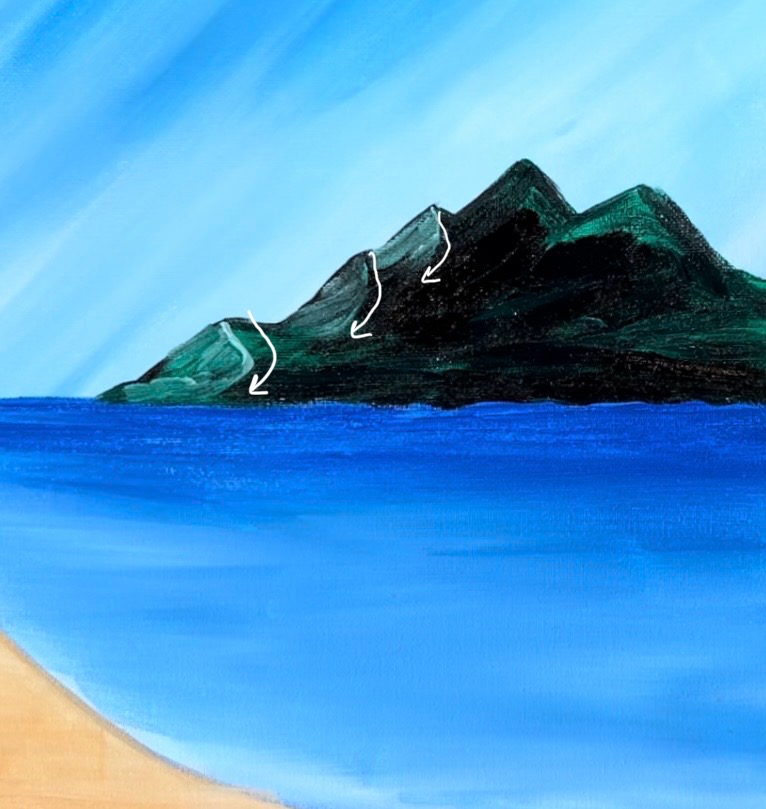
Fill the mountain in solid with the green and the black. Use your #4 round brush and vary the amounts of black and green you are loading onto your brush. Paint diagonal directions and let the colors gently blend together but not all the way.
This will create your initial base color of the mountain and give some “color variation”. Overall, it should look dark. We will highlight it in the next step.
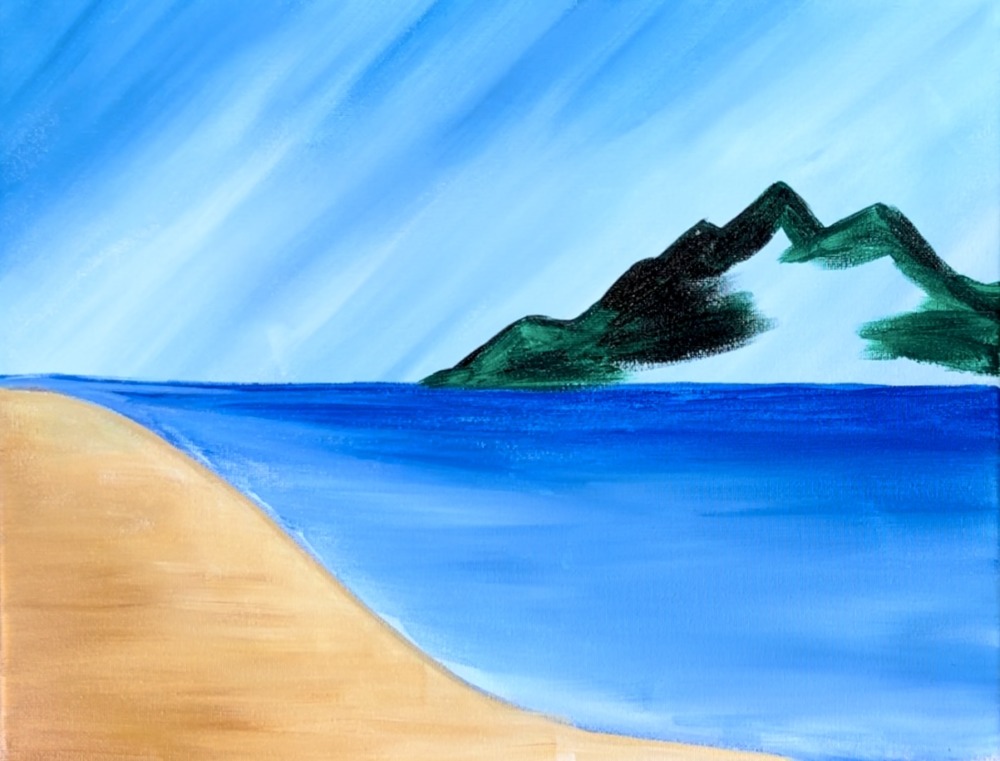
Highlight this before the base layer dries. Do not rinse your brush that has the black/ green on it. If it seems like there is too much paint on the brush, wipe a little off. Then load your brush into “titanium white”. Alternatively you can triple load your brush in white and a small amount of green and black. The point is, we don’t want solid white for the highlights, we want a medium to light green color.
Start by highlighting the mountain peak on the far left. Use your brush to paint a diagonal line that starts at the peak of the mountain and goes diagonally down to the right and then goes diagonally to the left.
Then use the #4 round brush to paint the mountain. Do so with paint strokes going at an angle downwards to the left. Paint short paint strokes that blend a little with the dark layer. Leaf the right side of the mountain peak dark. This will be the shadowy part of the mountain.
Do this technique to each of the mountain peaks.
To add some of the highlights on the peaks in the lower middle of the painting, paint diagonal lines and then paint lighter green paint strokes going diagonal to the left.

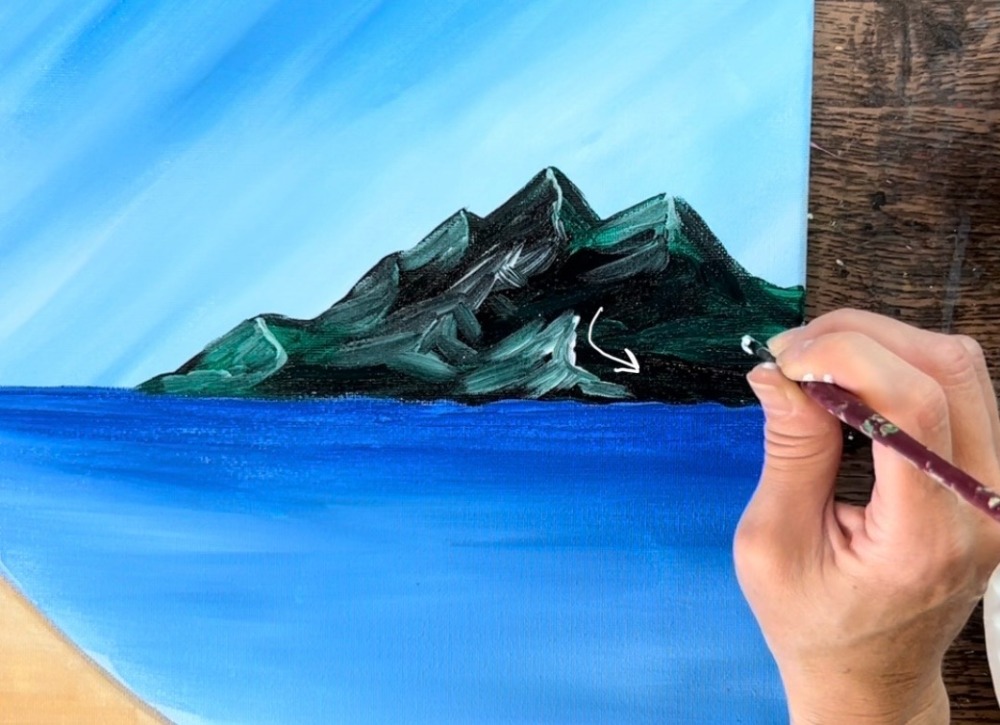
Add a little more white to your brush and paint a lighter layer of mountain (same diagonal paint strokes) just along the edge of where the highlight and shadow meet. This brightens up the mountain a little bit.

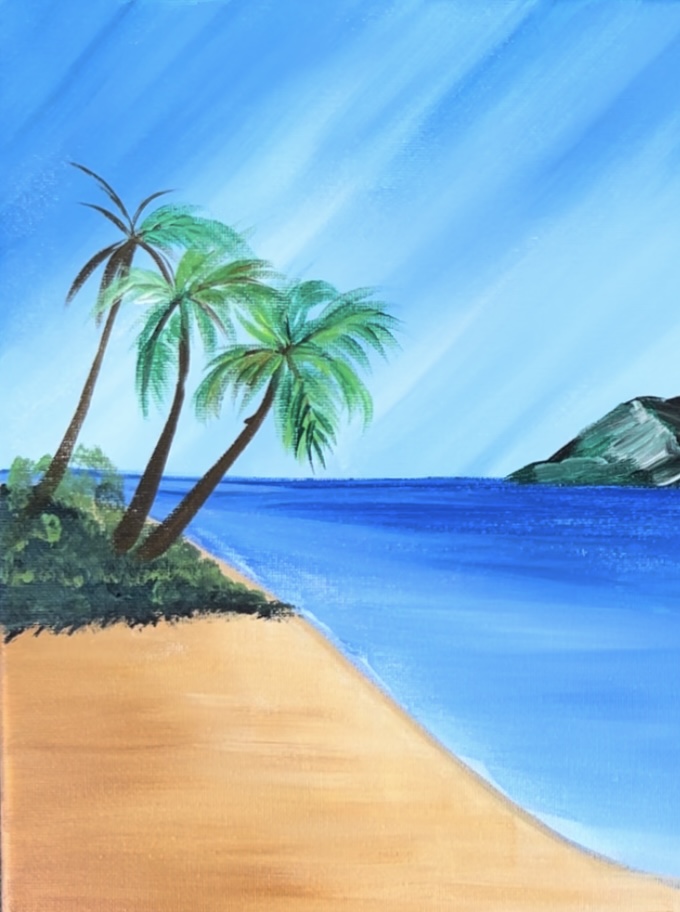
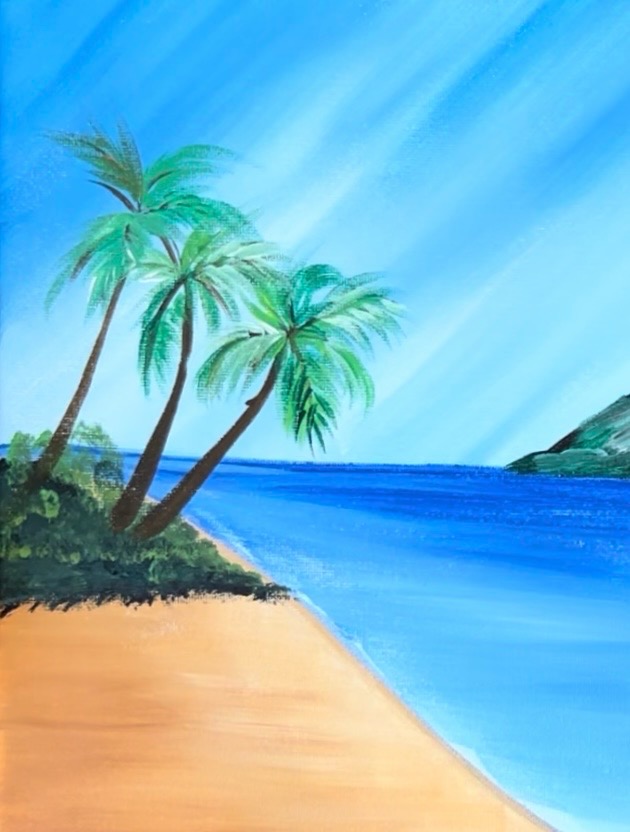
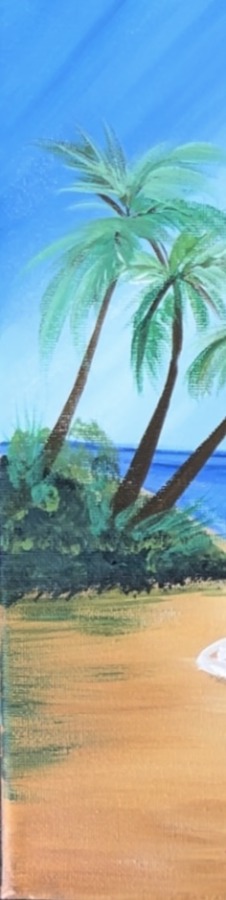
5. Paint Palm Trees
Start by painting the bottom area where the palm trees will be growing. Use a #4 round brush to paint a bushy area using the same dark green base color of the mountain. “Stipple” your brush (paint dots) to create a triangular area in the distance on the upper left side of the painting.

Rinse the brush. On your palette, mix a lighter yellow-green color by mixing “phthalo green” with “cadmium yellow light hue” and a small amount of “raw Sienna”.
“Stipple” this lighter green layer in your green bush area but don’t cover all of the dark layer.
Mix your palm tree trunk color on your palette. Mix about equal parts “mars black” with “raw Sienna”. Water it down slightly. Then paint the palm tree trunk. Start at the top of the trunk with very light pressure on the brush for a thin line. Stroke your paint stroke downwards and apply a little more pressure on the bottom of the trunk so the palm tree trunk is wider on the bottom and thinner at the top.
I did three palm tree trunks each swaying to the right.
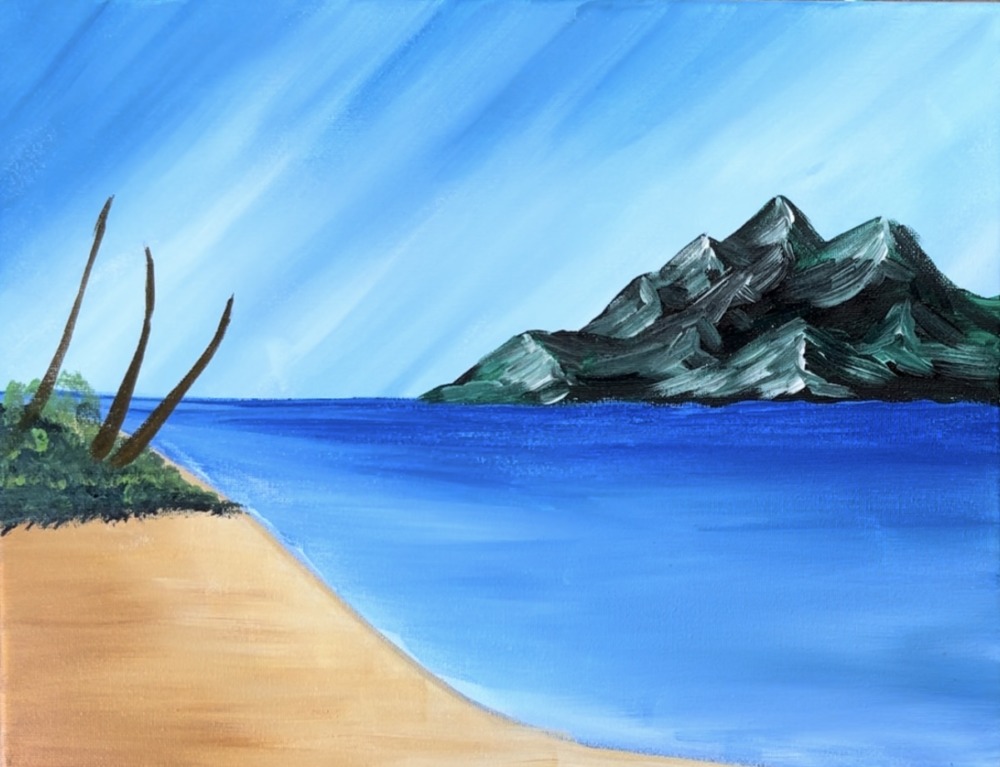
Then paint the centers of the palm fronds. Use the #4 round brush and the same color to paint the center lines of each of the palm fronds.
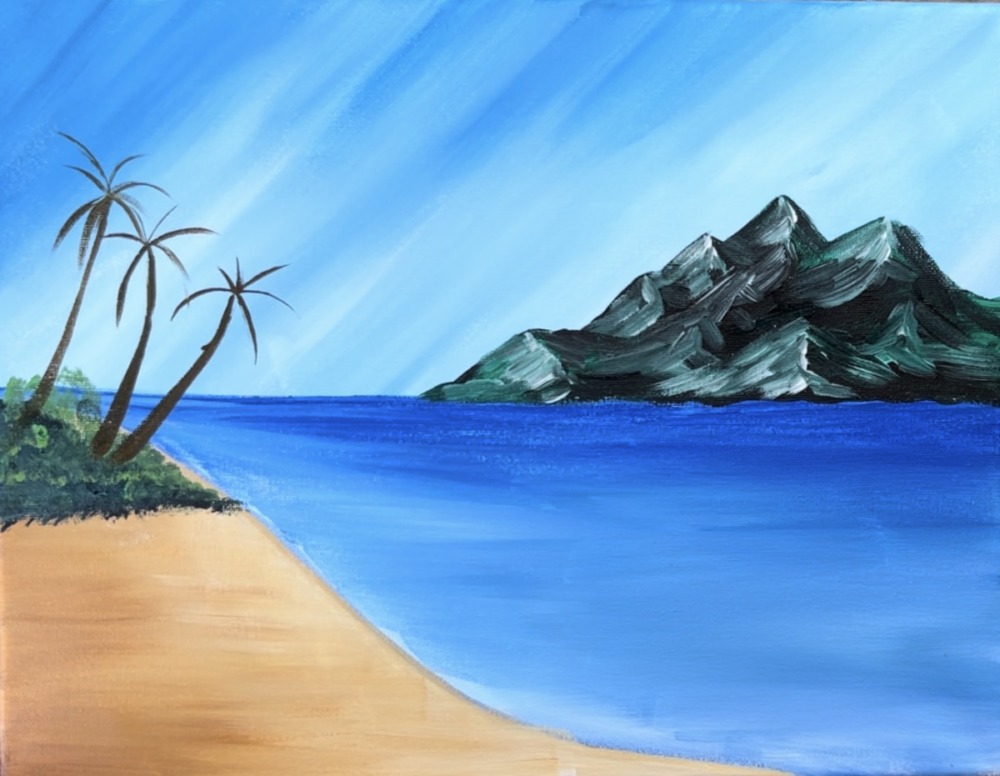
Paint the palm tree leaves. I switched to a “#8 round” brush for this step. On your palette mix titanium white with phthalo green and cadmium yellow light hue.

Paint the palm frond leaves. Start from the center dark line and stroke each of the leaves downwards. Vary your green by loading your brush in different amounts of your darker greens and then different amounts of your mixed lighter greens. This will give your palm tree fronds color variation.

Fill each of the palm fronds with the leaves. Curve each of the leaves downwards.
Add some “grass” paint strokes on the bottom of the palm tree trunks. These will overlap the trunks of the trees in different directions and gives that area a little more texture.

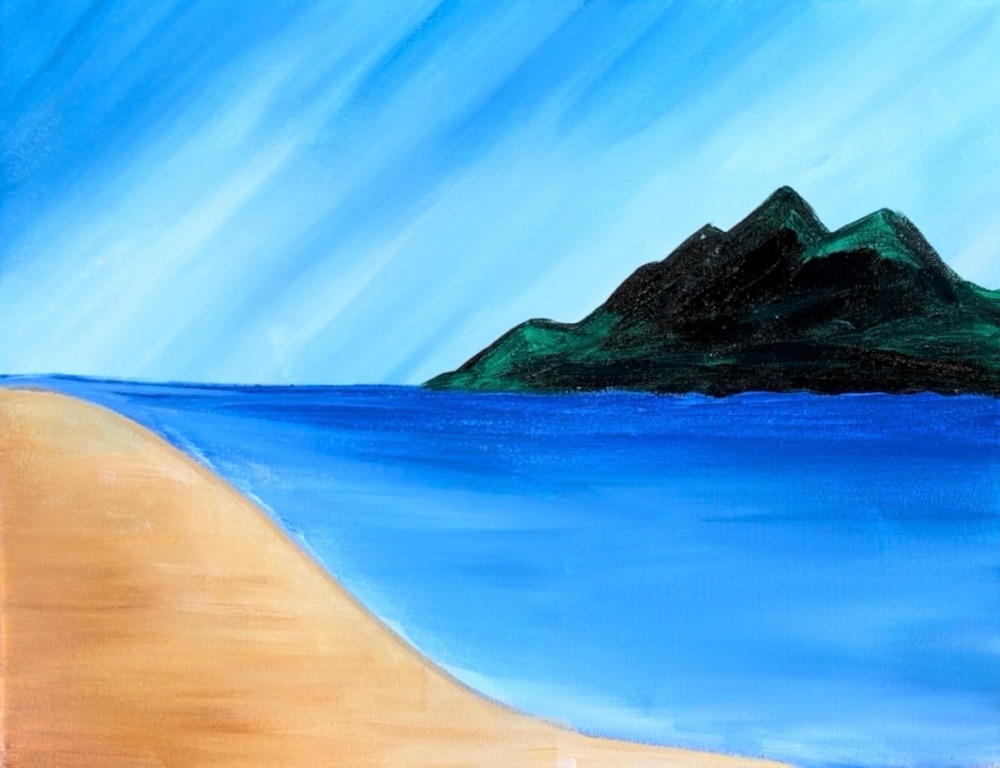
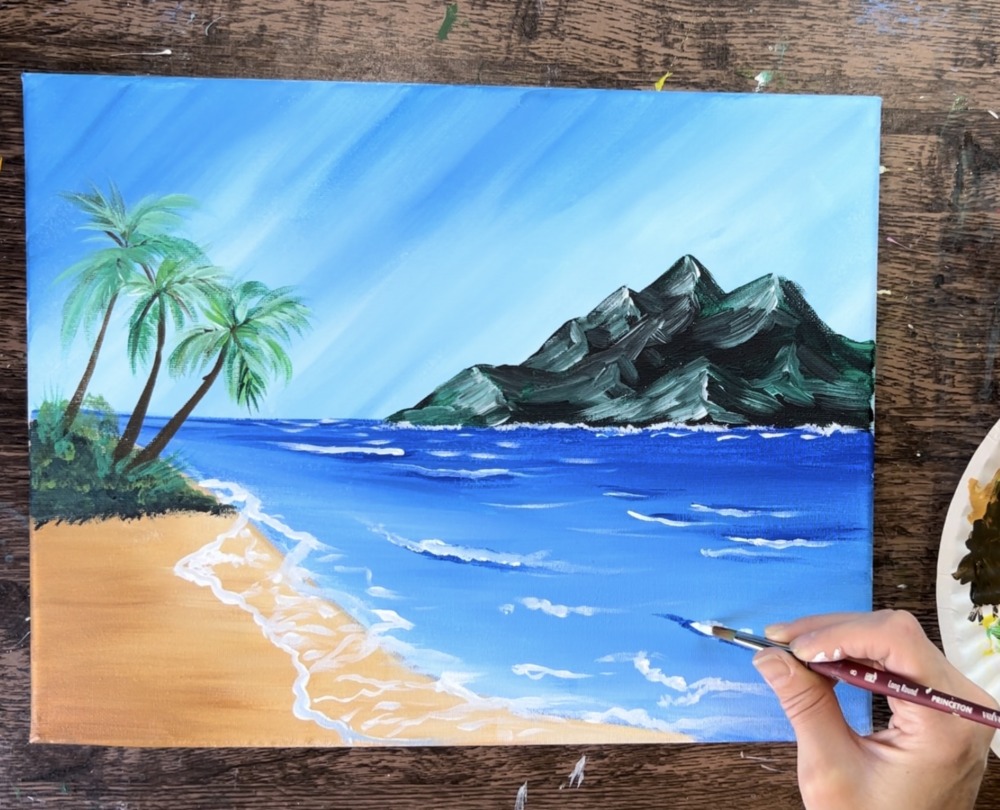
6. Paint Waves
Use a #4 round brush and titanium white. Paint the waves that are along the base of the mountain island. “Stipple” your round brush with just the white and paint a layer of “wave splash lines”. This line doesn’t stay consistent and there are areas where there are no white wave lines.
Next, paint the white water/ wave lines in the ocean. I switched to the #8 round brush for this to use the finer point of the brush for thinner lines. The lines that are further away in the distance are closer together and not as long. The lines that are in the middle of the painting are further apart and longer.
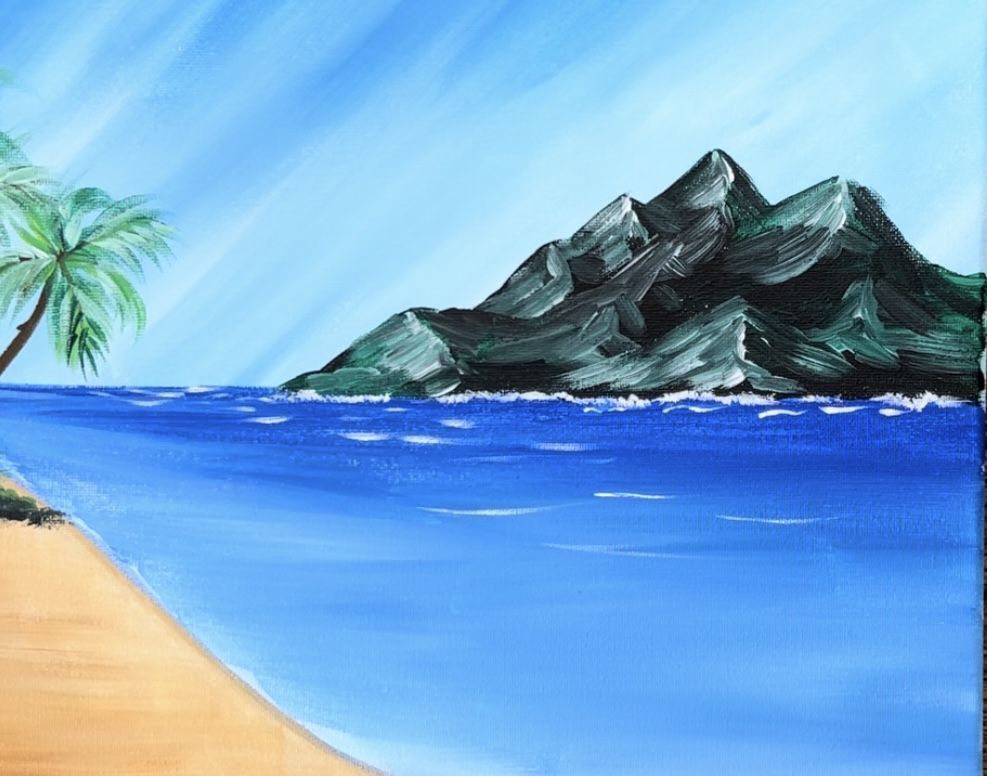
Then load cobalt blue onto your palette. Paint horizontal areas with the dark blue color to create different color variations in the ocean water. The blue also helps to add shadow to your white wave lines. Paint some of the white wave lines on the bottom or top of some of your blue lines.
Then start painting the shallow water flowing over the sand area on the beach. Use either of the round brushes for this step. Use titanium white with a very small amount of cobalt blue on it. Define your shore line by painting a “wiggly line” that overlaps the sand area. Paint a second line that goes over the area where the ocean meets the sand.
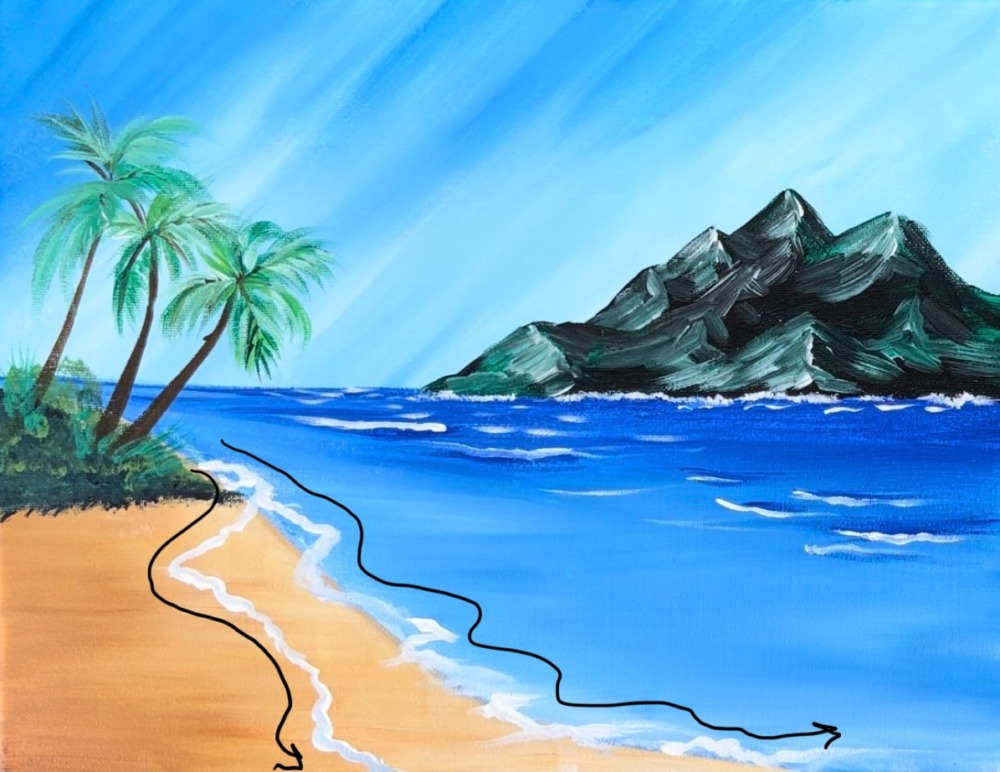
Then, between those two main lines, add smaller lines that intertwine and connect. Do this with titanium white and any of the round brushes. Try not to dover all of the sand and first blue layer of water. Most of that should still be showing through.

Add more wave lines in the ocean area closer to the shore. You can stipple your brush for those waves to make them a little larger/ textured.
Use “cobalt blue” to add some shadow under some of the closer wave lines along the shore.

Then, mix “raw Sienna” with “cobalt blue” to make a shadowy colors. Use the #8 round brush to stipple a little bit of “shadow” just to the left of the white water lines on the far left that goes over the sand. Note: this color should not be too dark. Lighten it up if needed with some titanium white.


Add some “shadow” under the green palm tree bushy area. Use and of the brushes and “phthalo green” mixed with “raw Sienna”. Add a very thin, light layer with this green just under the bush area. It should be a little translucent and show the sandy color through the green.
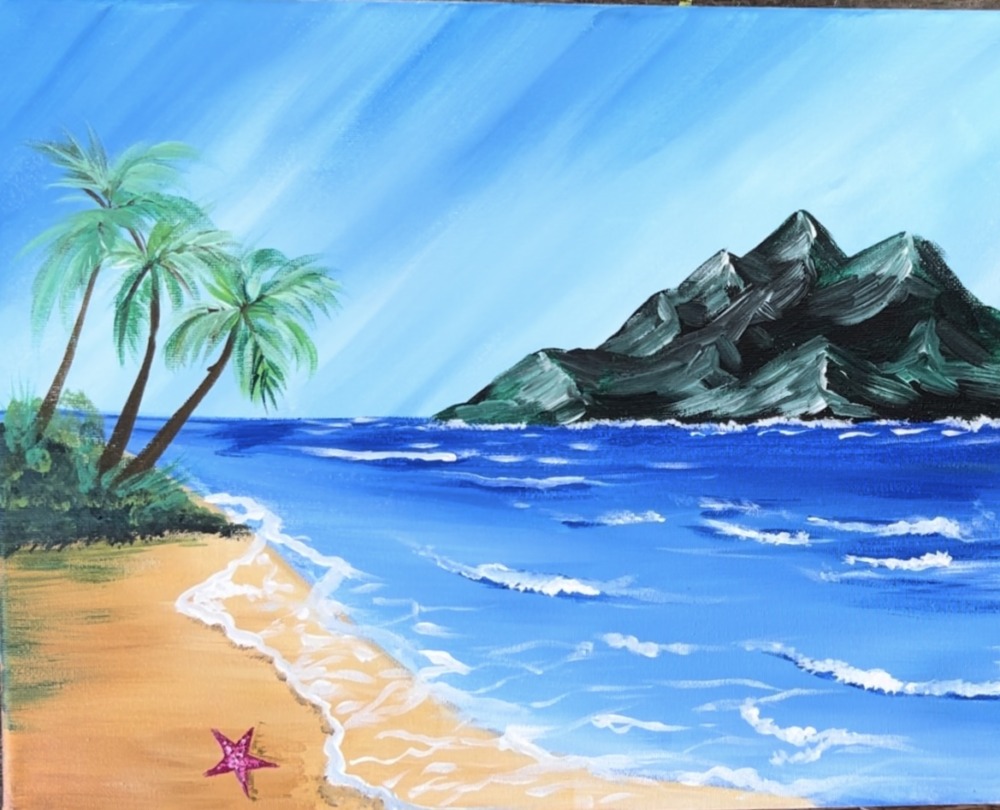
7. Paint Starfish & Sun
Use the #8 round brush (for the fine tip) to paint the starfish. Load your paint palette with “quinacridone magenta” and paint a start.

Use “titanium white” to paint little white dots on the star.
Optional: paint some darker sand color under and to the left of the starfish. Use the same “sand color” you used to paint the first layer of sand but add a small amount of black into it to darken it. Paint left and right paint strokes next to the starfish.
If needed, re-outline the shape of the starfish.
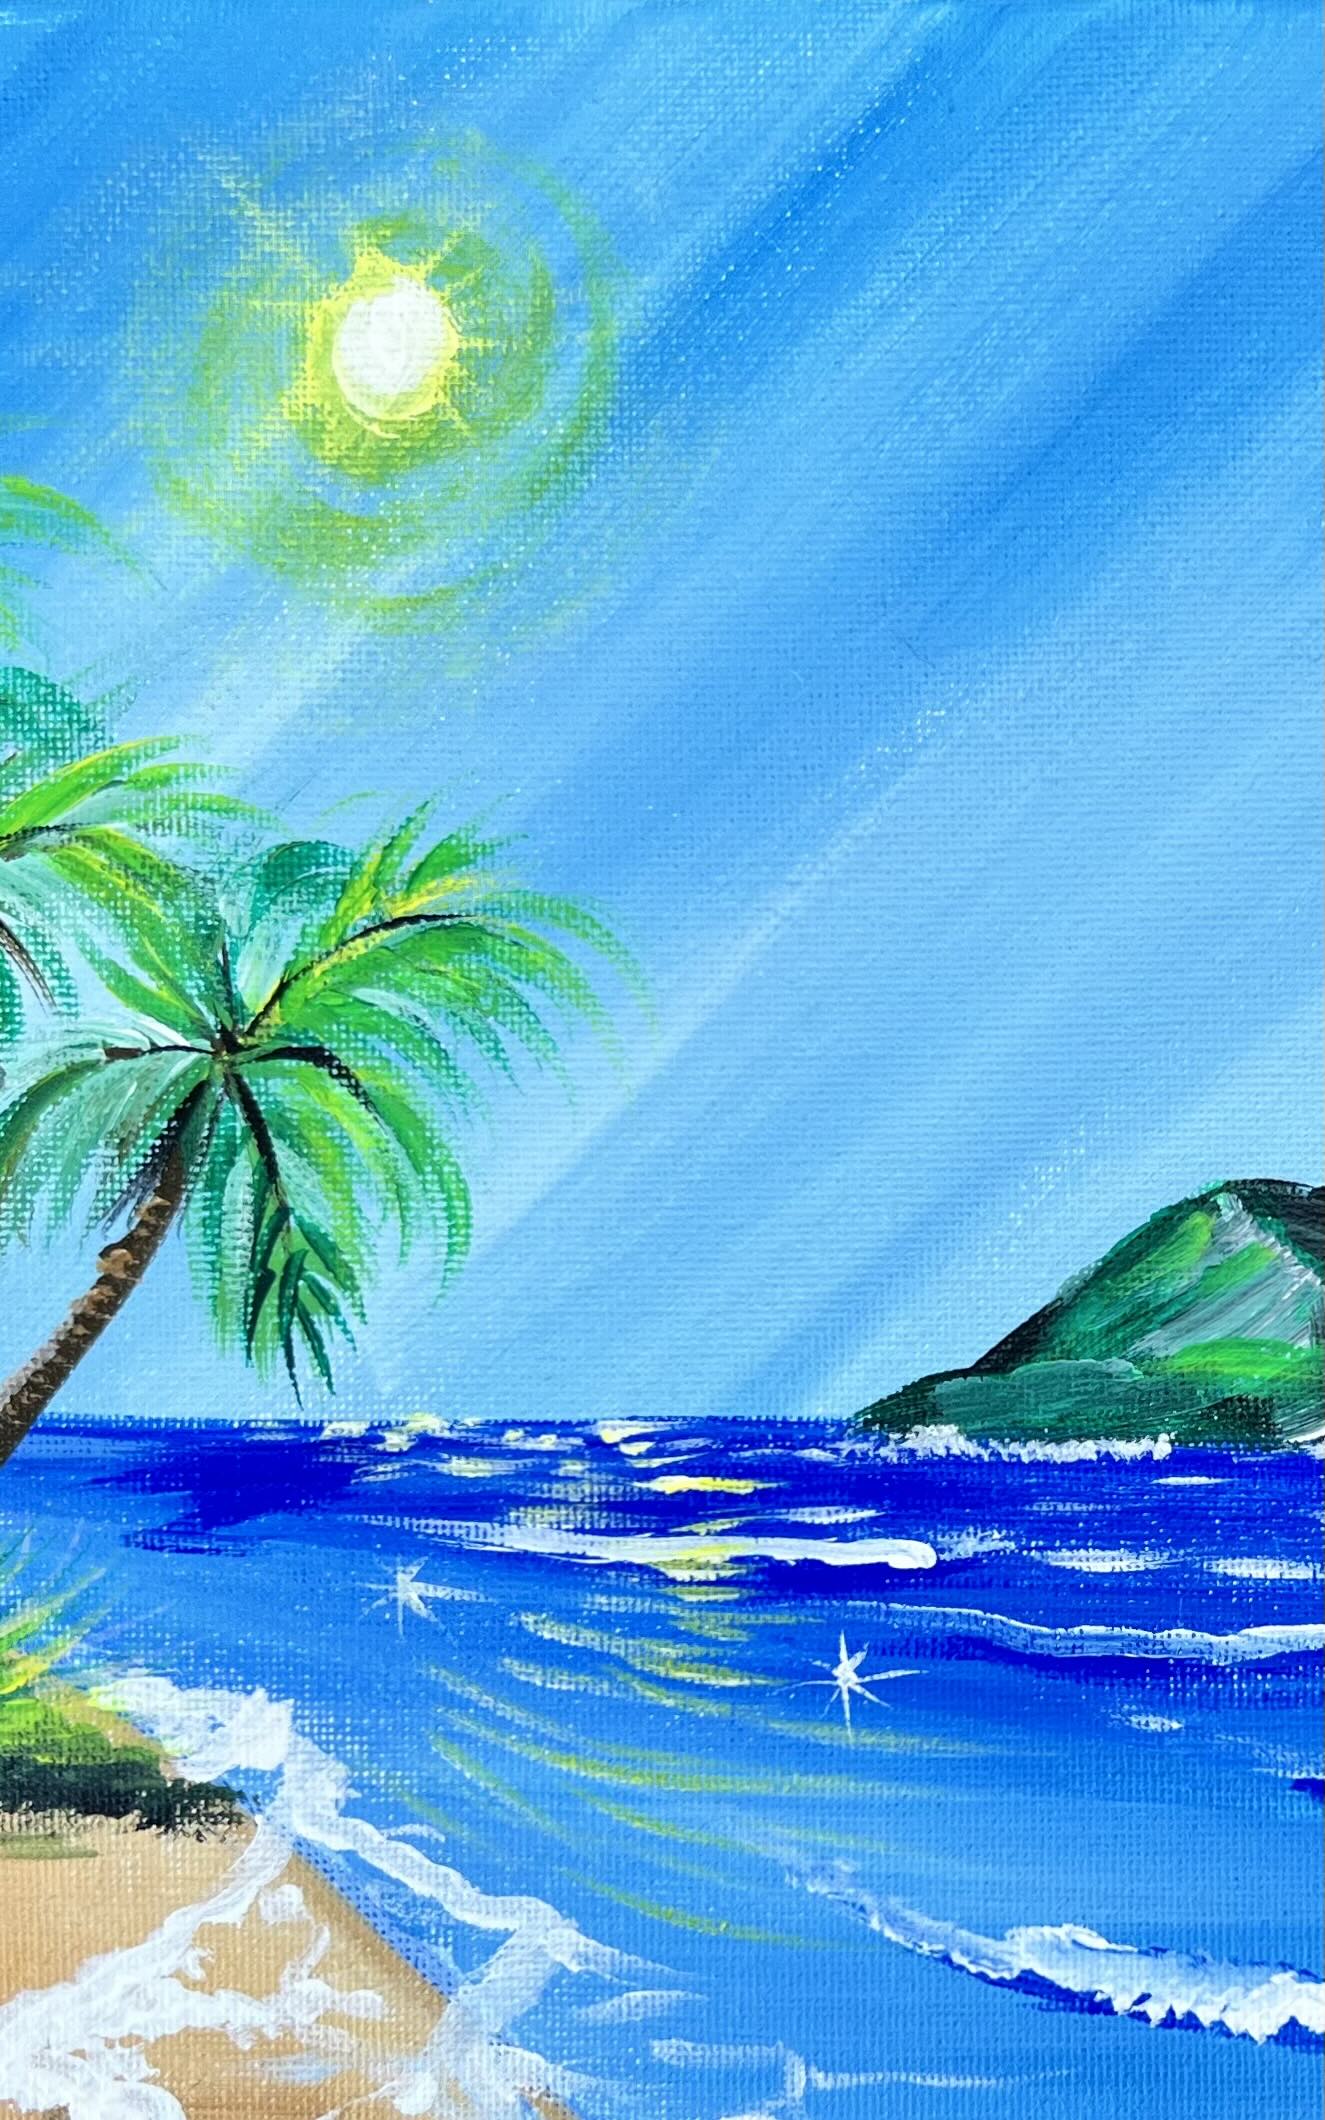
Next, paint the sun. Use “cadmium yellow light hue”. Use the #4 round brush to paint a small circle that is kind of transluscent. Wipe off some of the paint off the brush to ensure it will be a very thin layer. Paint a few round paint strokes around the circle to make the sun glowing. This first layer should be thin and translucent.

Then mix titanium white with the “cadmium yellow light hue” color to make a bright, opaque yellow. Paint a small circle with this bright yellow color. This will make the sun look very bright!
To paint sun rays, use a dry #4 round brush. Drag the paint from that circle outwards and allow each ray to go to a point. Each ray can be a different length.
Then go back and re-paint the sun circle with titanium white and the yellow.
8. Paint sun reflections
In the ocean water area, below the sun, paint little horizontal water reflection lines with the yellow. Paint a few “sparkle stars” as well in the water.
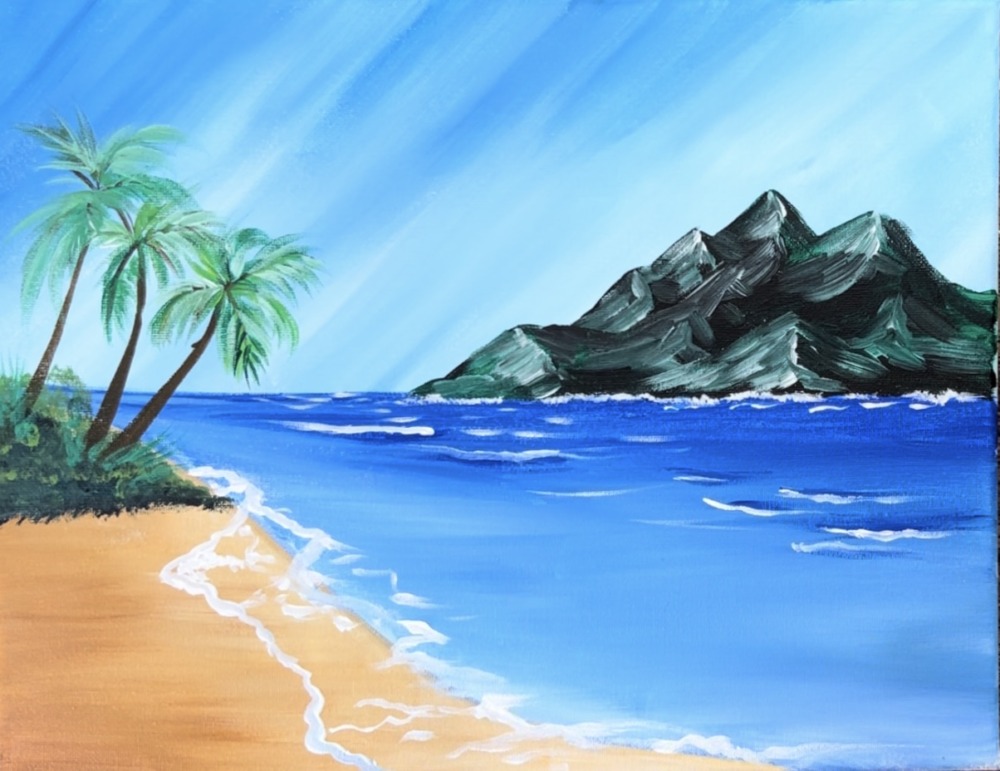
Some other touch ups I did: add lighter green-yellow color to the tops of the palm tree leaves, add more yellow-green color to the left side of the peaks of the mountain and added texture on the left side of the palm tree trunks (light brown horizontal lines).
Finished!
