
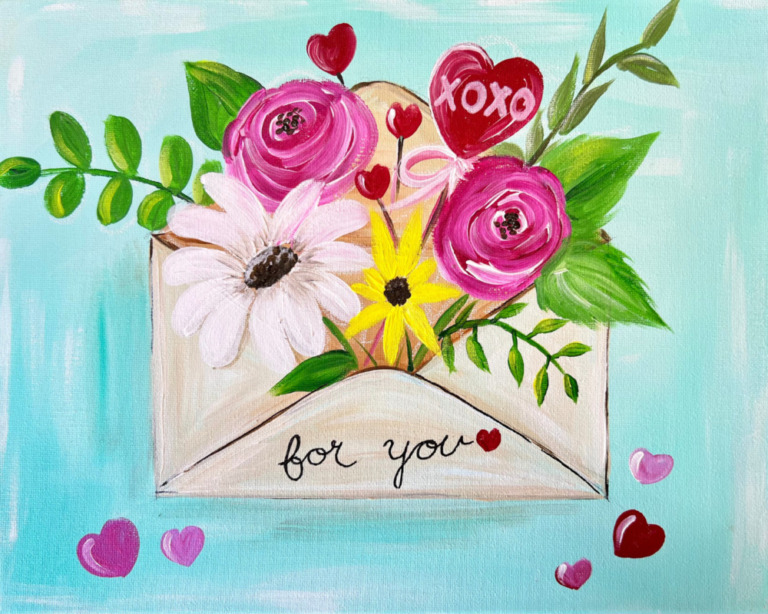
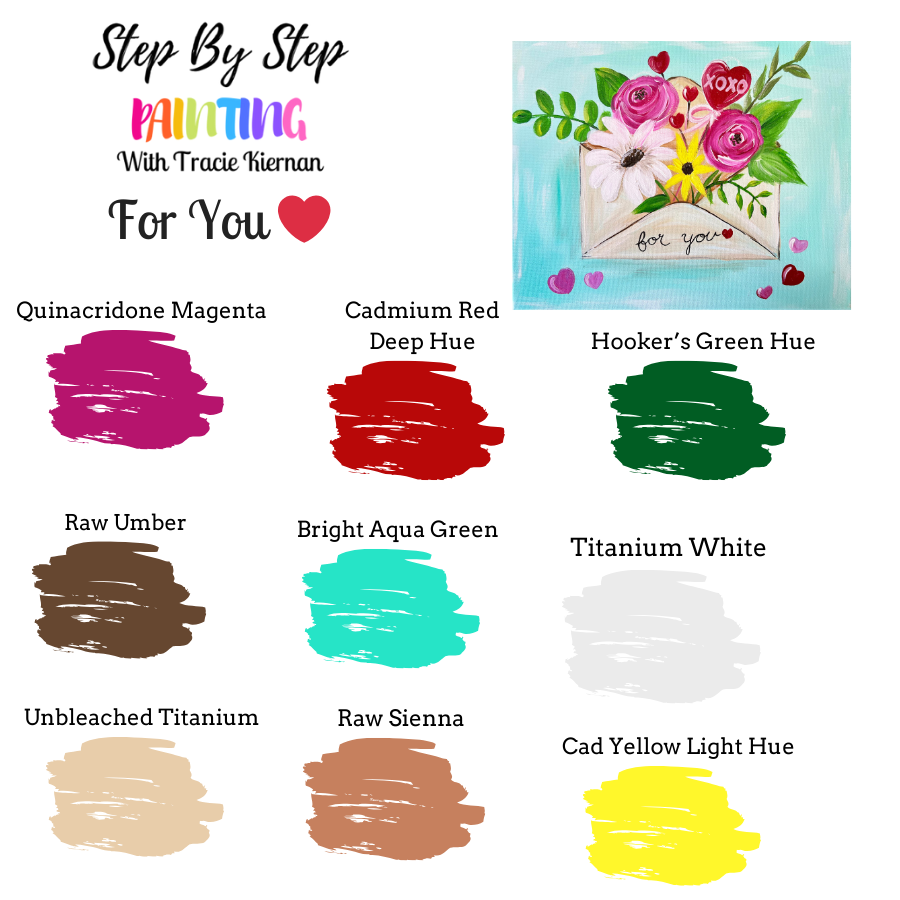
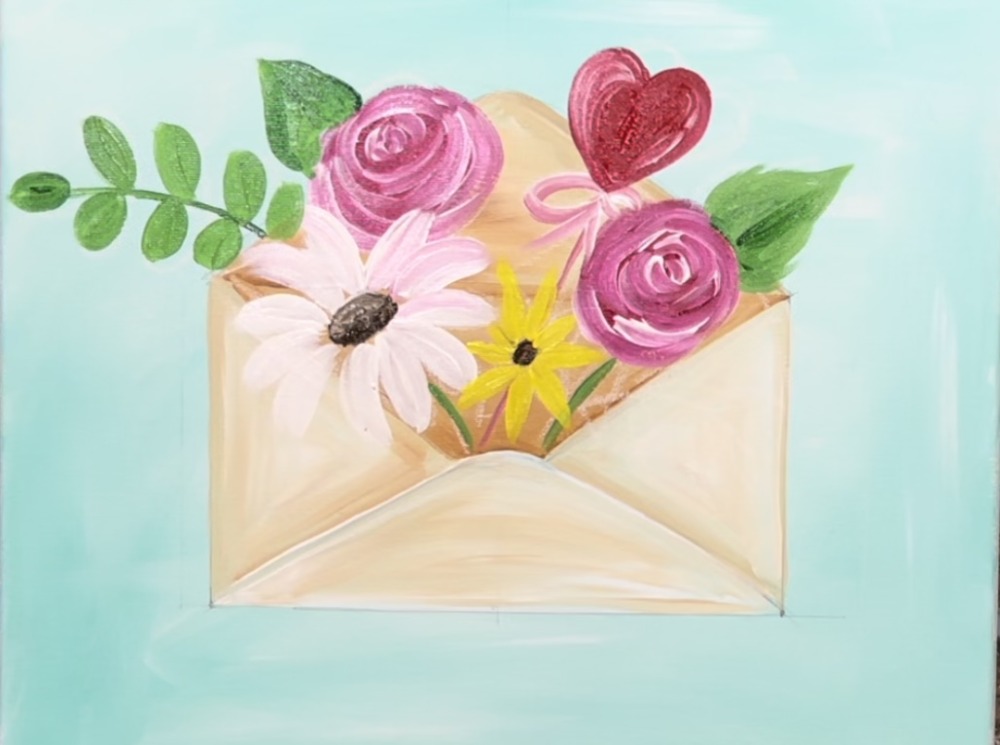
In this tutorial we will be painting an array of colorful flowers bursting from a Valentine’s Day envelope. This can also be a great Mother’s Day painting or even a year round painting!

Would you like to save this?
This tutorial is demonstrated on an 11 x 14 canvas, however, you can do this on any size and also paint this on paper or any object!
There are 8 colors in this painting! You are welcome to simplify the color palette or even add more colors to the floral arroundement!
Enjoy and happy painting!
Materials
How To Paint Valentine's Day Flowers In Envelope
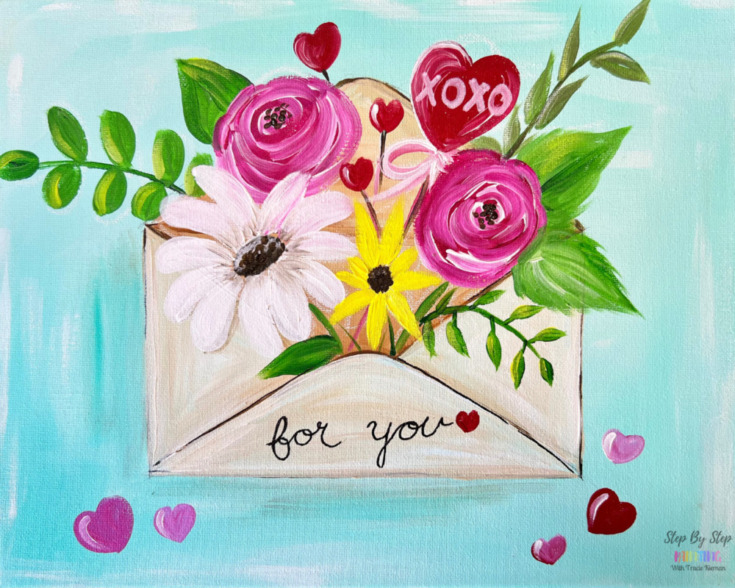
Learn to paint a pretty envelope with Valentine's day flowers inside.
Materials
- 11 x 14 Canvas (or any size canvas)
- Acrylic Paint
- Brushes
- Ruler (preferably a t-square)
- White Chalk
- White Paint Pen (optional)
- Black Paint Pen or Black Sharpie (optional)
Colors
- Titanium White
- Raw Umber
- Hooker's Green Hue
- Bright Aqua Green
- Quinacridone Magenta
- Cadmium Yellow Light Hue
- Unbleached Titanium
- Raw Sienna
Brush Sizes
- 3/4 Wash
- #12 Bright (1/2" flat)
- #4 Round
Color Palette
To simplify this palette, you can omit one of the browns and either the red or magenta.
Directions At A Glance

Video
Step By Step Instructions
1. Paint Background
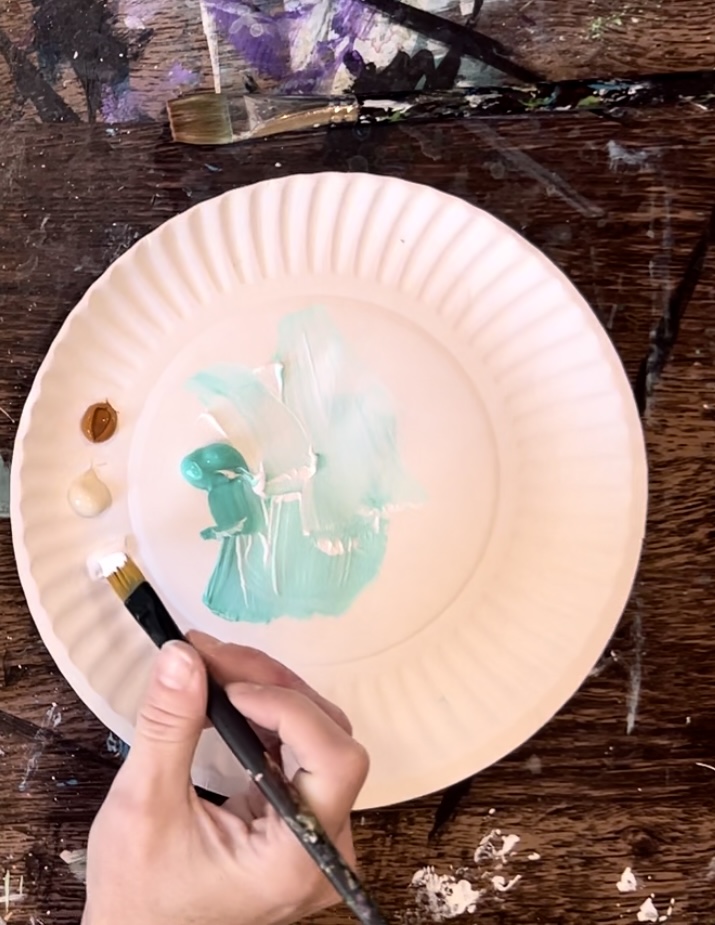
Load your paint palette with the colors: bright aqua green and titanium white.

Use a “3/4″ flat wash brush” to “double load” into both the titanium white and the bright aqua green.
Paint the entire canvas with both of the colors blending gently together. The white mixing with the aqua will make a pretty “robin’s egg blue”. You can make your paint strokes go all different directions. I did long, angled strokes with the white and aqua blending gently together but not all the way.

After you fill your entire canvas, wait for this to dry.

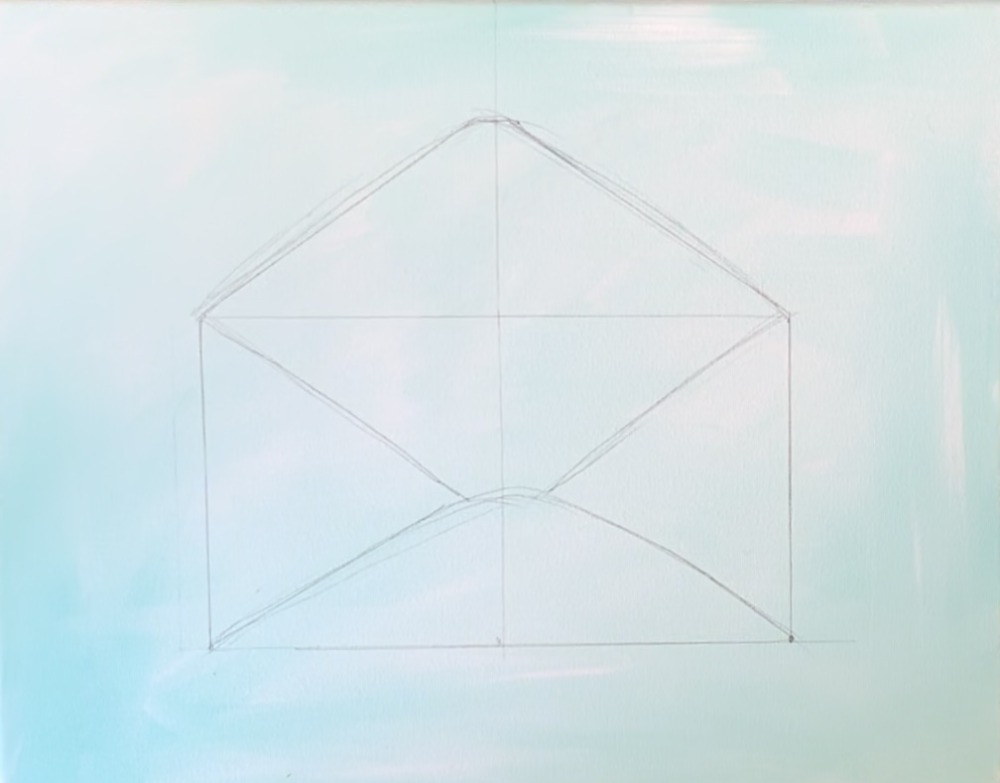
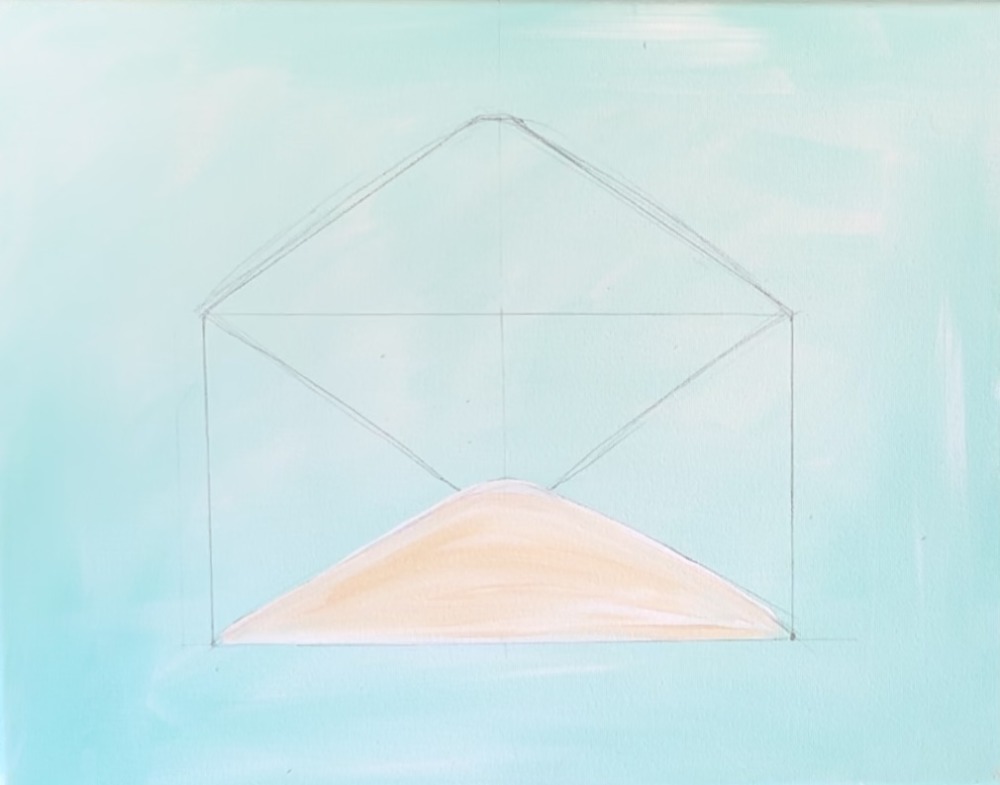
2. Draw Envelope
Use a ruler (preferably a t-square ruler) to draw the envelope. You can look at the diagram below to help you with the measurements.

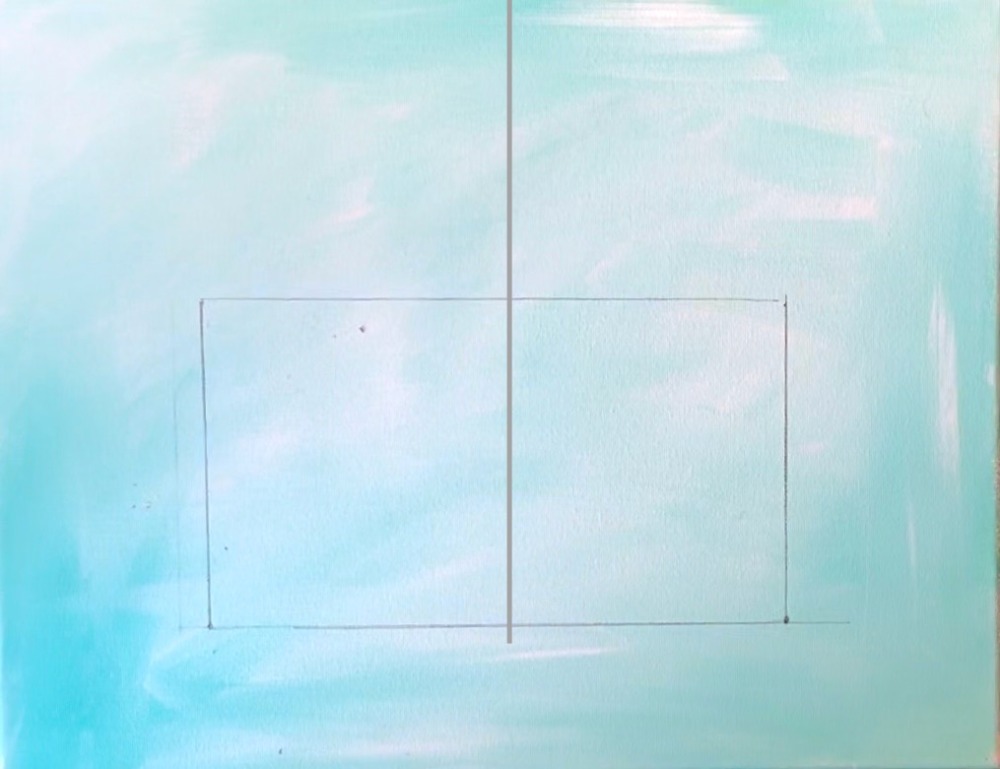
First, draw a rectangle that is approximately 8″ wide and 4.5″ high. Position this rectangle at about 2″ from the bottom edge of the canvas.

When using the t-square ruler, it helps to line it up with the edge of the canvas. This helps your lines be parallel to the edges of the canvas.
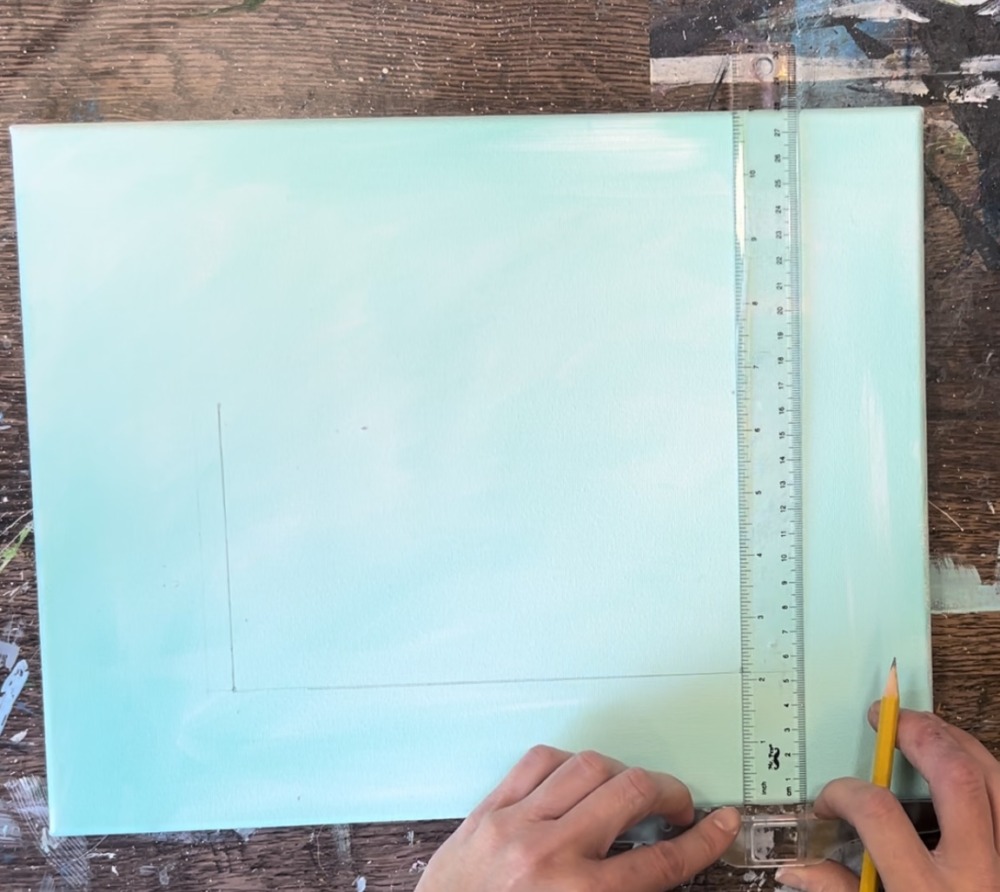
Then, draw a line right down the middle of your rectangle and up to the top edge of the canvas. This will help you to draw the triangular opening and folds of the envelope.
Then sketch the top triangular opening. The “peak” of this triangle meets at that center vertical line. I made my triangle peak about 3″ high from the top horizontal line of the rectangle. Also, try to curve the top peak of the triangle.
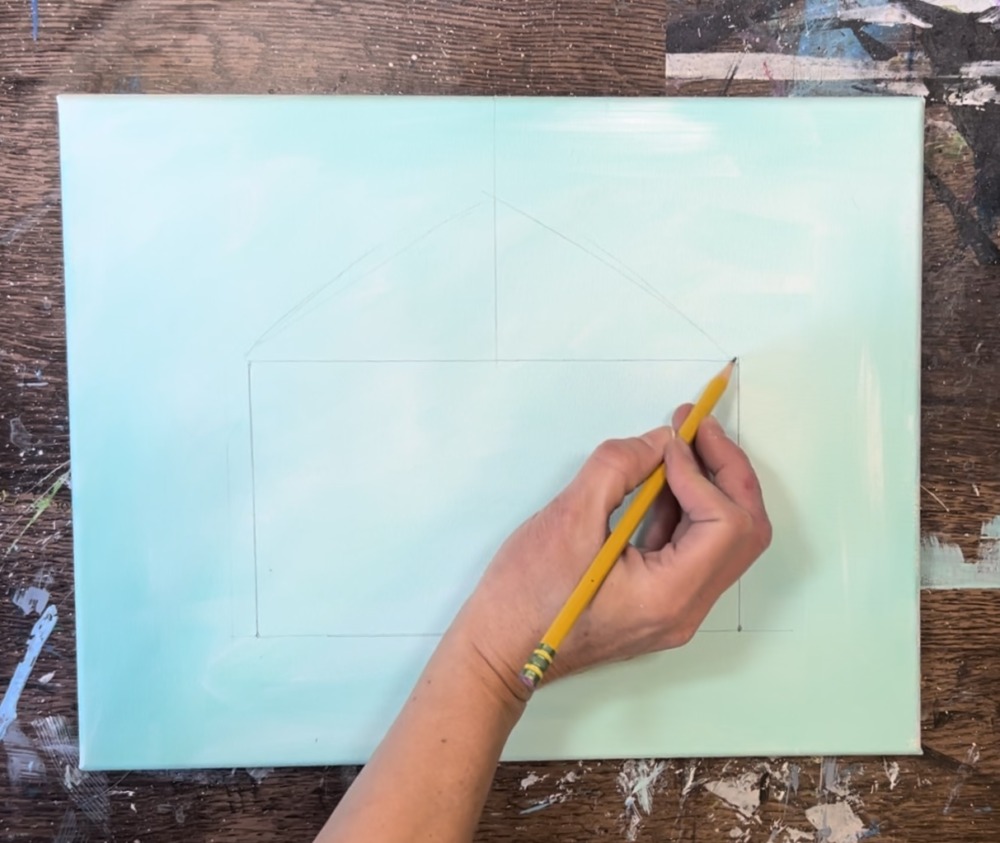
Then sketch the bottom triangular folded part of the envelope and curve the “pointed” part. Use the center vertical line to help this by “symmetrical”. Draw two diagonal lines going to the upper left and upper right corners of the rectangle.
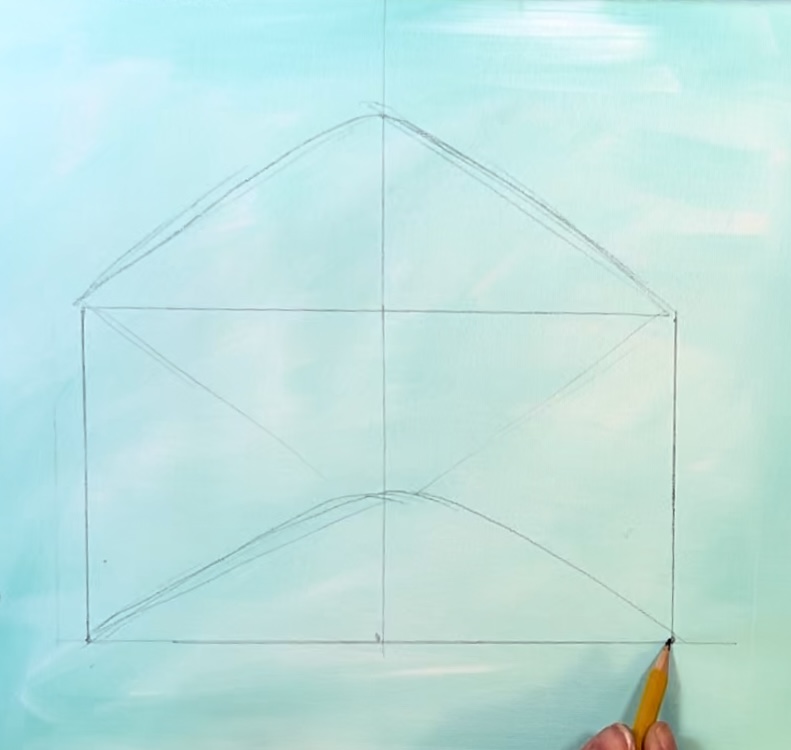
After sketching these lines, I went back with my ruler to help make them straighter.
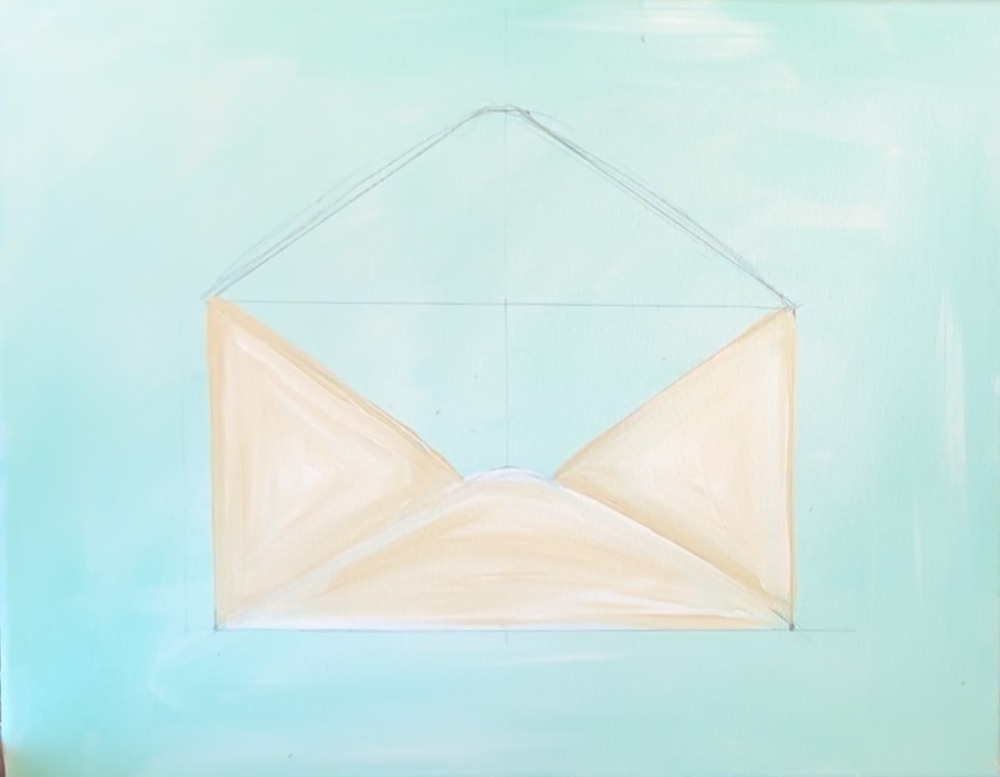
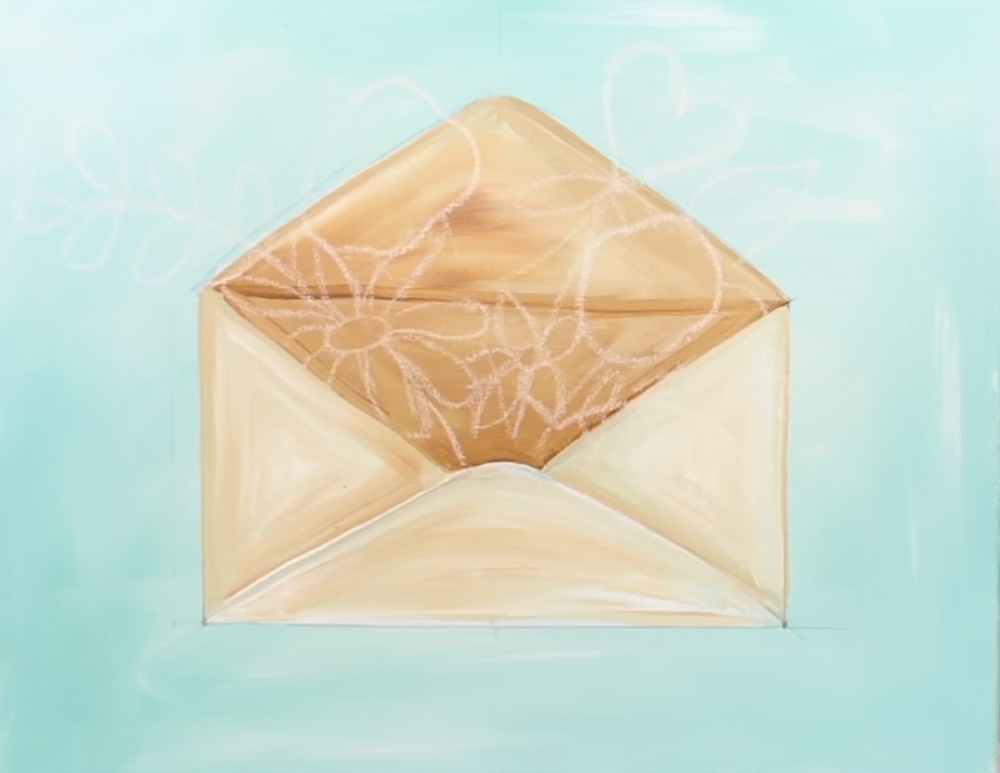
3. Paint Envelope
Load your paint palette with: “titanium white”, “raw sienna” and “unbleached titanium”. Use a “12 bright brush”. Start by loading the brush into “titanium white”.
Start on the bottom “fold” of the envelope and outline the inner part of the triangle with titanium white.
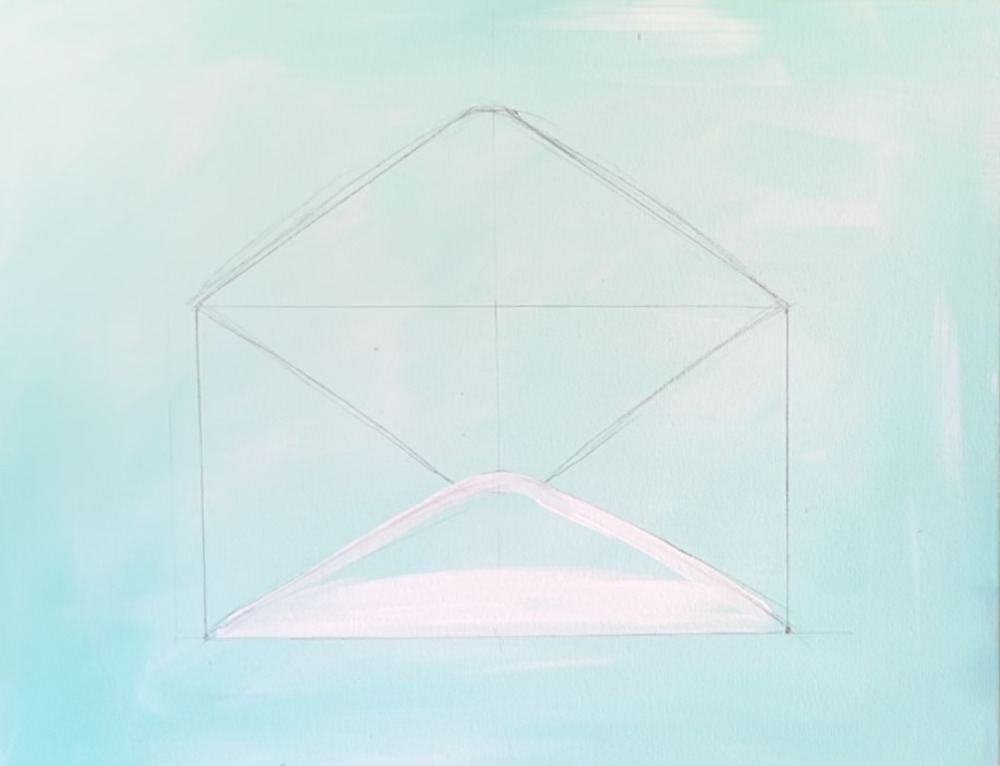
Then, without rinsing the brush, load it into a small amount of the “unbleached titanium” (beige) color. Fill the rest of the shape with paint strokes that go in the direction of the triangle. Gently blend the beige and white together and leave the outer edge lighter.
Next, use the “beige color” and the “12 bright brush” to paint the triangular area on the right. This time, outline it with the beige first so that it is darker on the edges and add the white towards the middle. With the darker edge, it will make it look like this part of the envelope is behind the bottom fold.

Repeat this step for the triangular area on the left.
Then paint the inside of the envelope. This time, load your brush (without rinsing it) into the “raw sienna”. You’ll want this inside part of the envelope to look darker than the rest of the envelope.
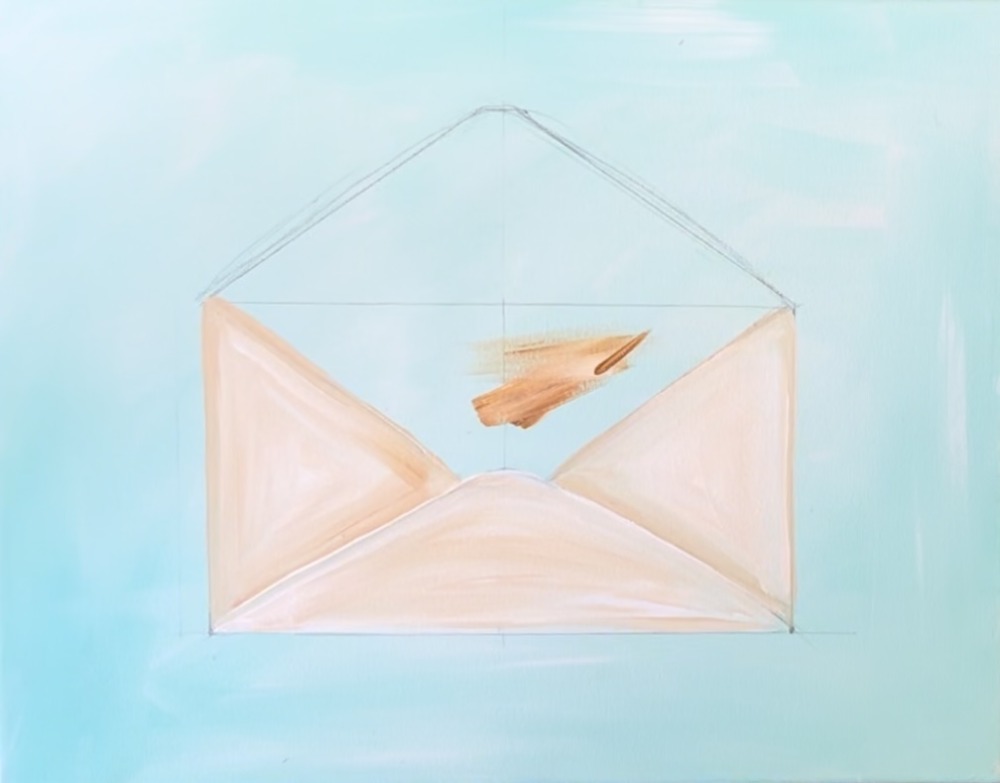
Gently mix the “raw sienna” with the white and fill it with expressive paint strokes. Because this area is darker, it will appear to be the opening part of the envelope.
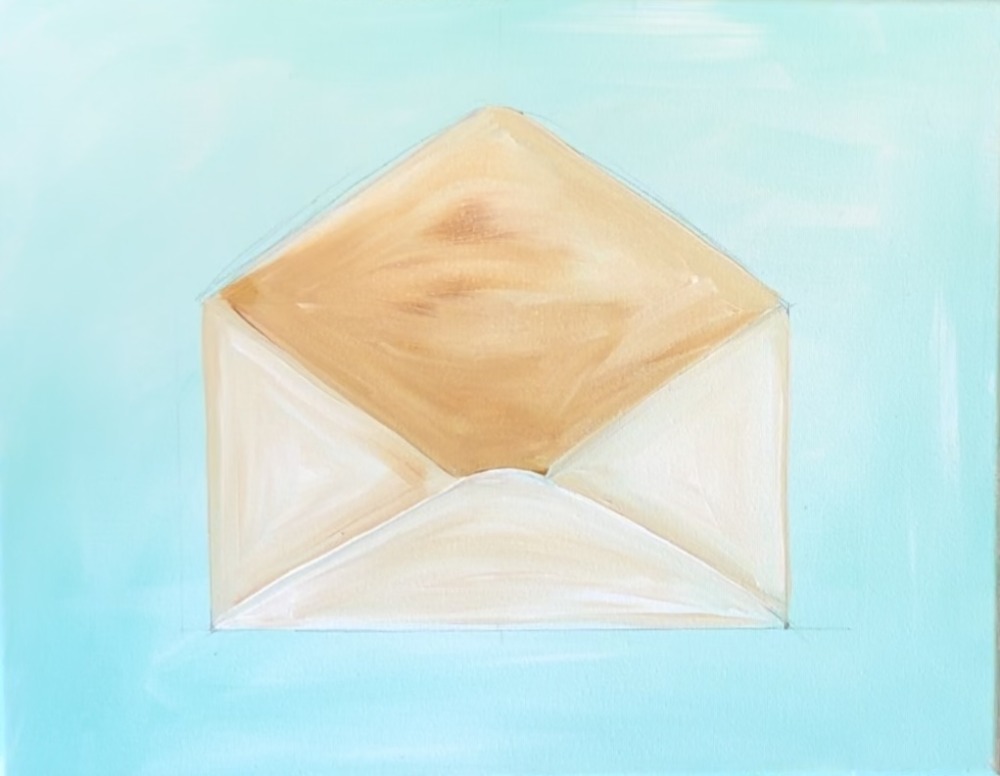
Then paint the horizontal “fold” of the envelope using the “12 bright brush” and “raw sienna”.

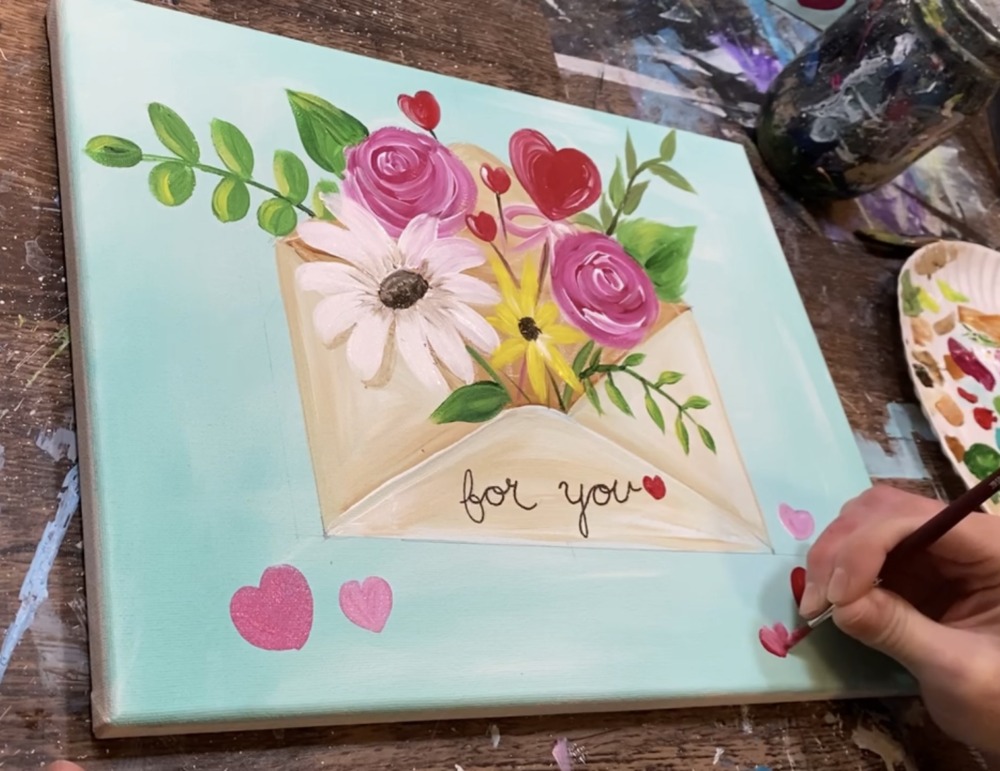
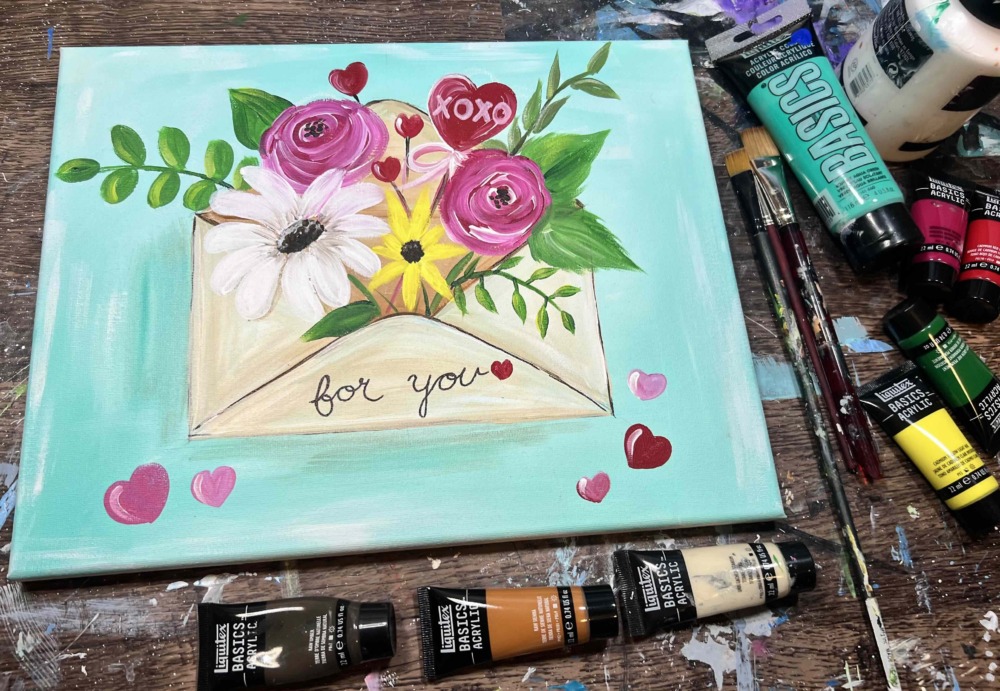
4. Draw Floral Composition
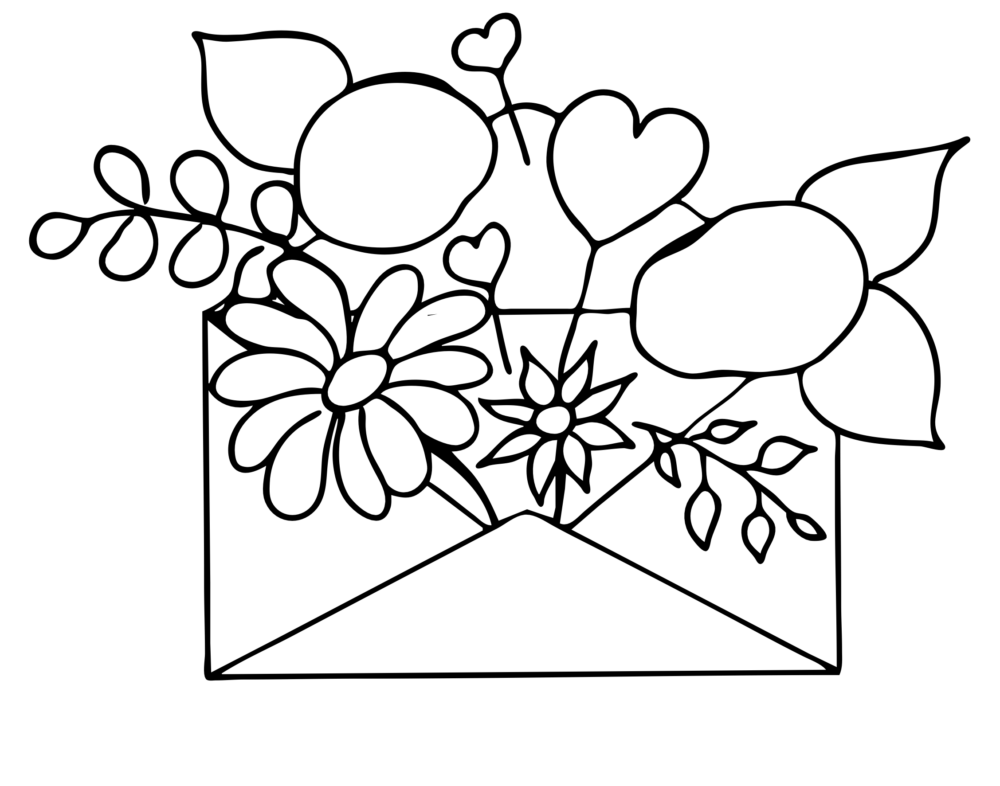
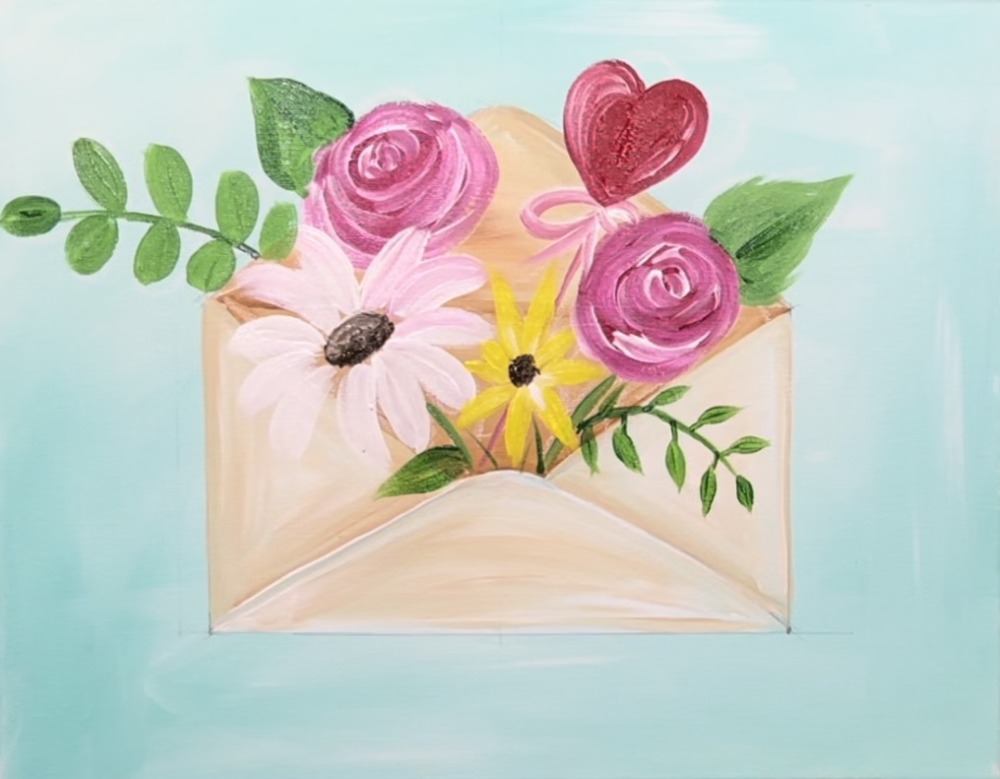
Use a piece of chalk to draw the floral composition. For the roses, draw simple “blob circle shapes” to help with the placement of the roses. Draw the leaves and hearts as well as the daisy and small flower in the lower middle. You can use the image above to help with the composition of the drawing.
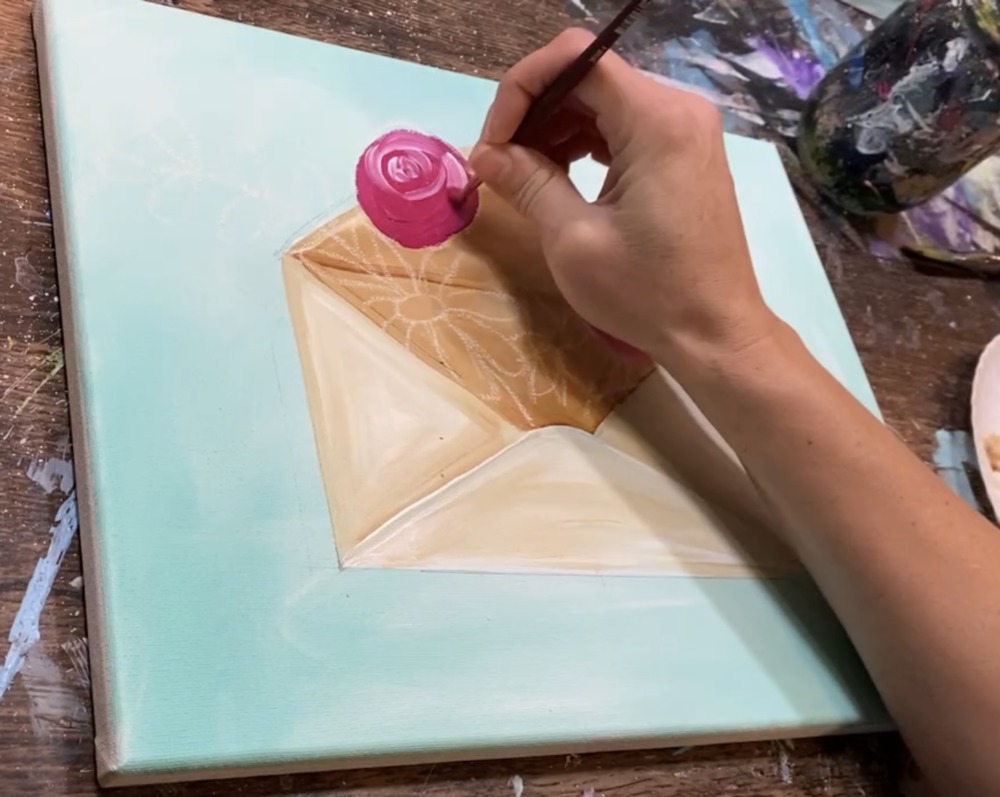
5. Paint Flowers
If this is your first time painting these types of roses, I recommend practicing on the back of your canvas or on paper. I have an in-depth rose tutorial that you can find here!
Load your paint palette with “quinacridone magenta” and “titanium white”. Use a “4 round brush” to paint your rose shape/ blob circle.
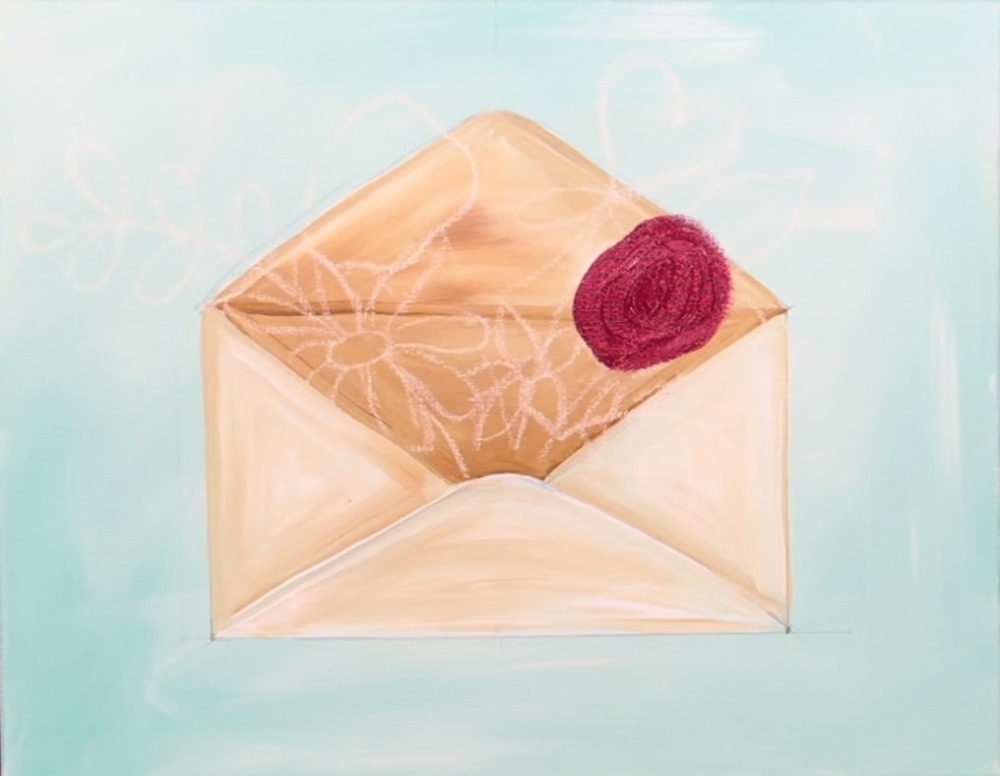
Before this dries, load your #4 round brush with a small amount of white without rinsing the brush. Start in the center of the flower and paint two curved “c strokes”.

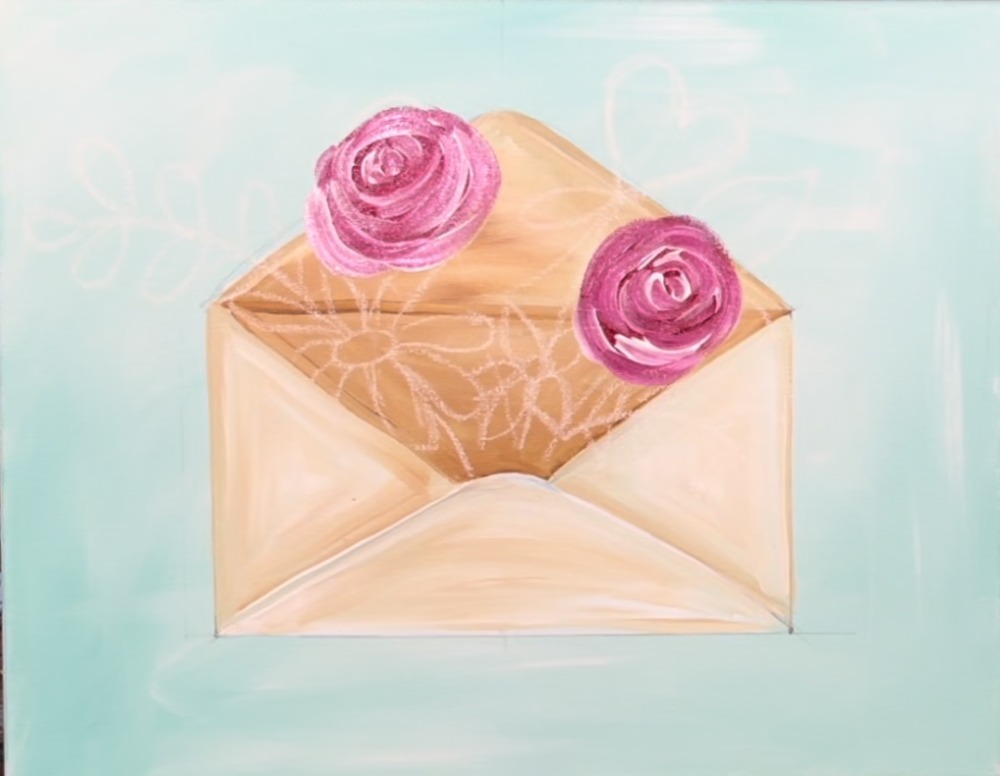
Then continue to paint “curved c-strokes” that stagger each other and work your way to the outer edge of the rose shape. The white will blend with the magenta color to create a decorative rose petal effect.

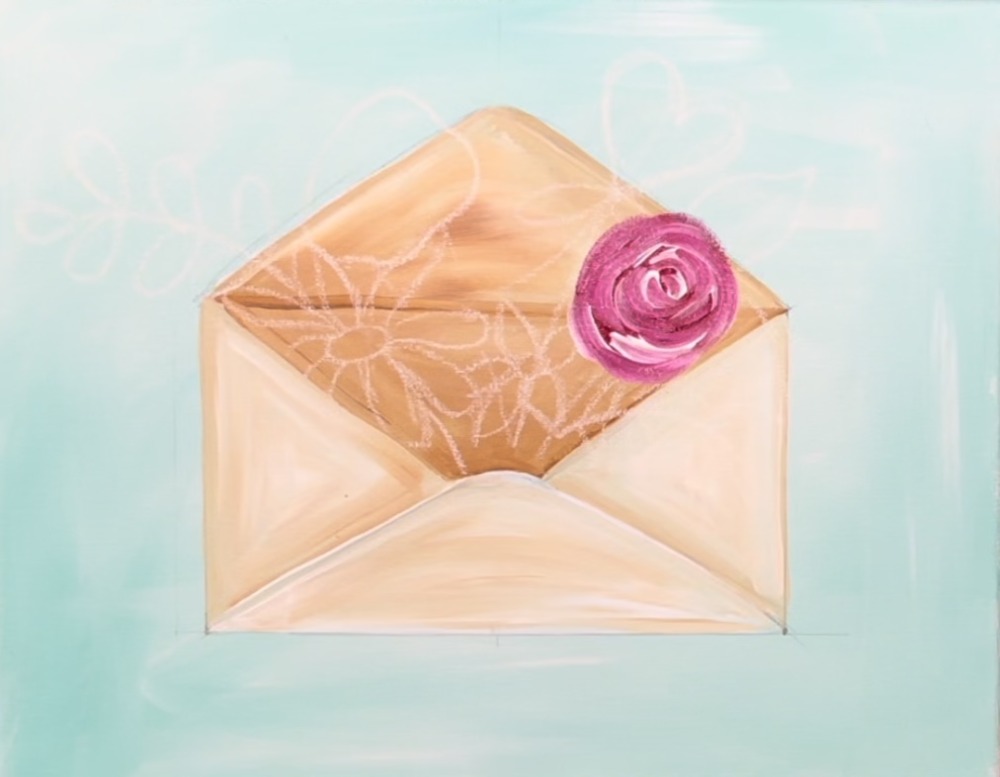
Repeat this technique for the rose on the left.
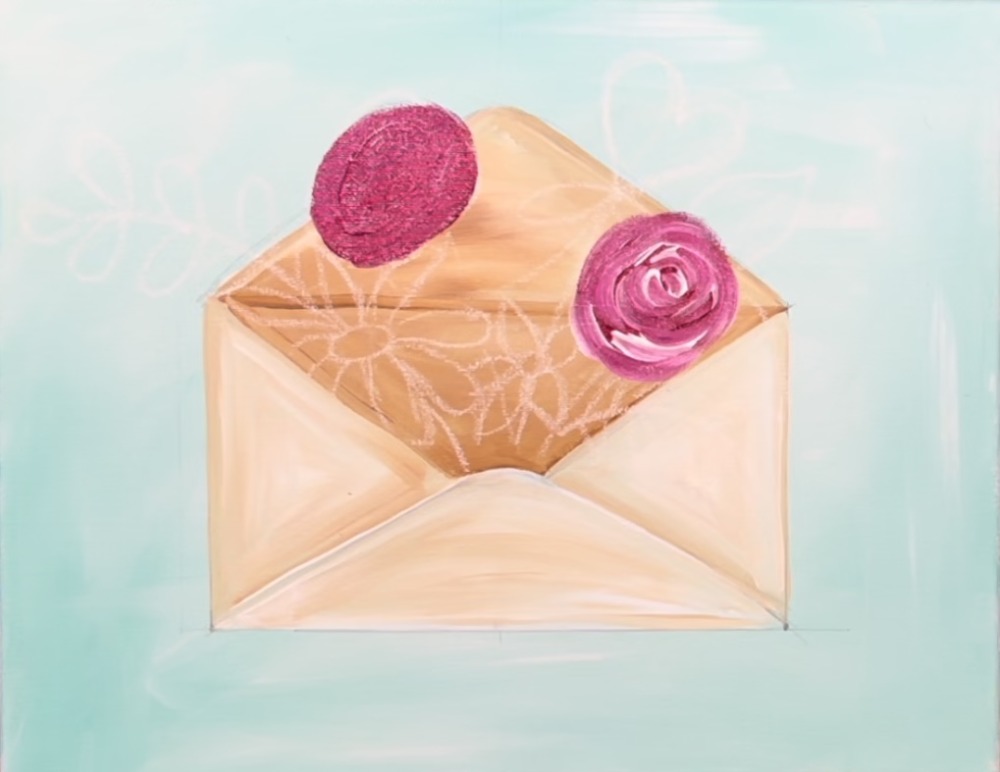
This time, instead of starting in the center, I started on the upper left center area. This will make the rose look like it is slightly on its side. Make your “c-strokes” larger on the bottom and thinner at the top.
Next, paint the daisy. Use the color “raw umber” to paint the center oval of the daisy.
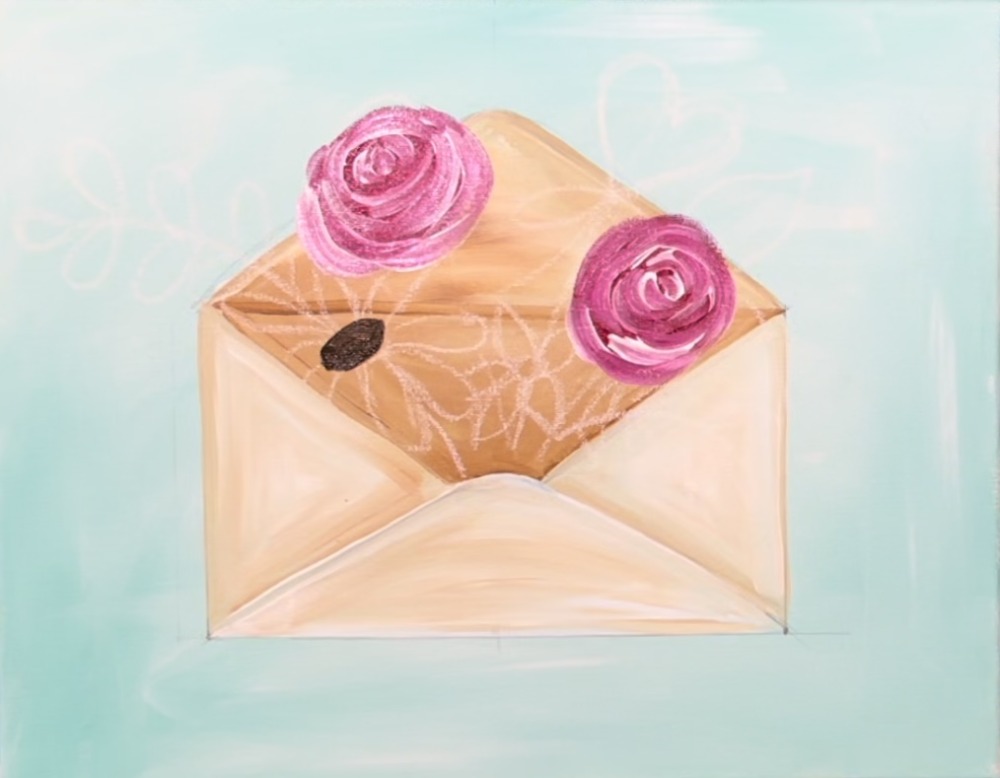
Then rinse the #4 round brush. Load it into just “titanium white” and paint each of the petals. Start at the “base” of the petal and paint your paint stroke so that it starts out slightly thinner and then point the petal with a rounded end that is slightly thicker.
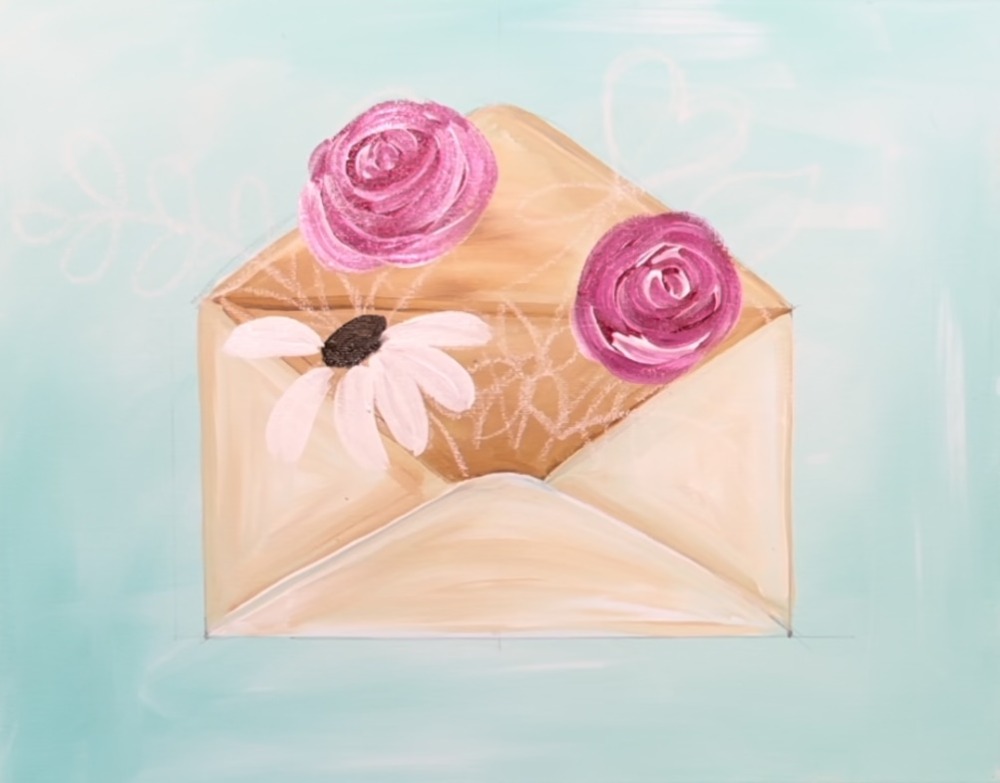
Because this daisy is on its side, the petals will be slightly shorter on the top above the center oval and slightly longer below the center oval. Each of the petals are slightly curved.

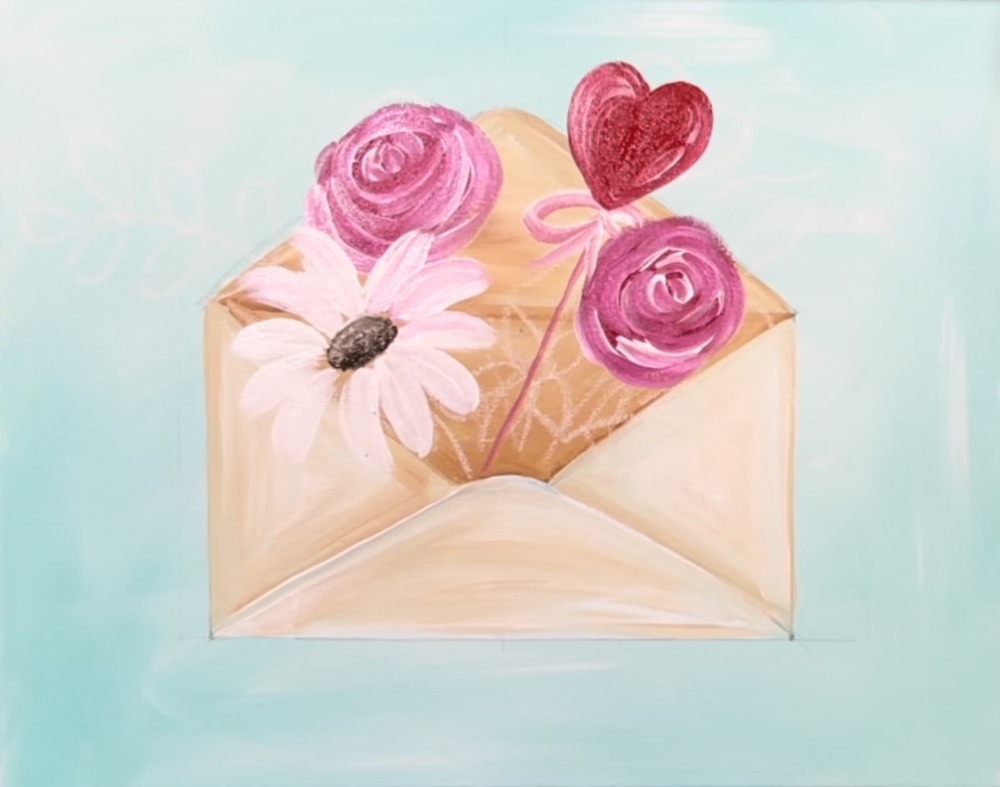
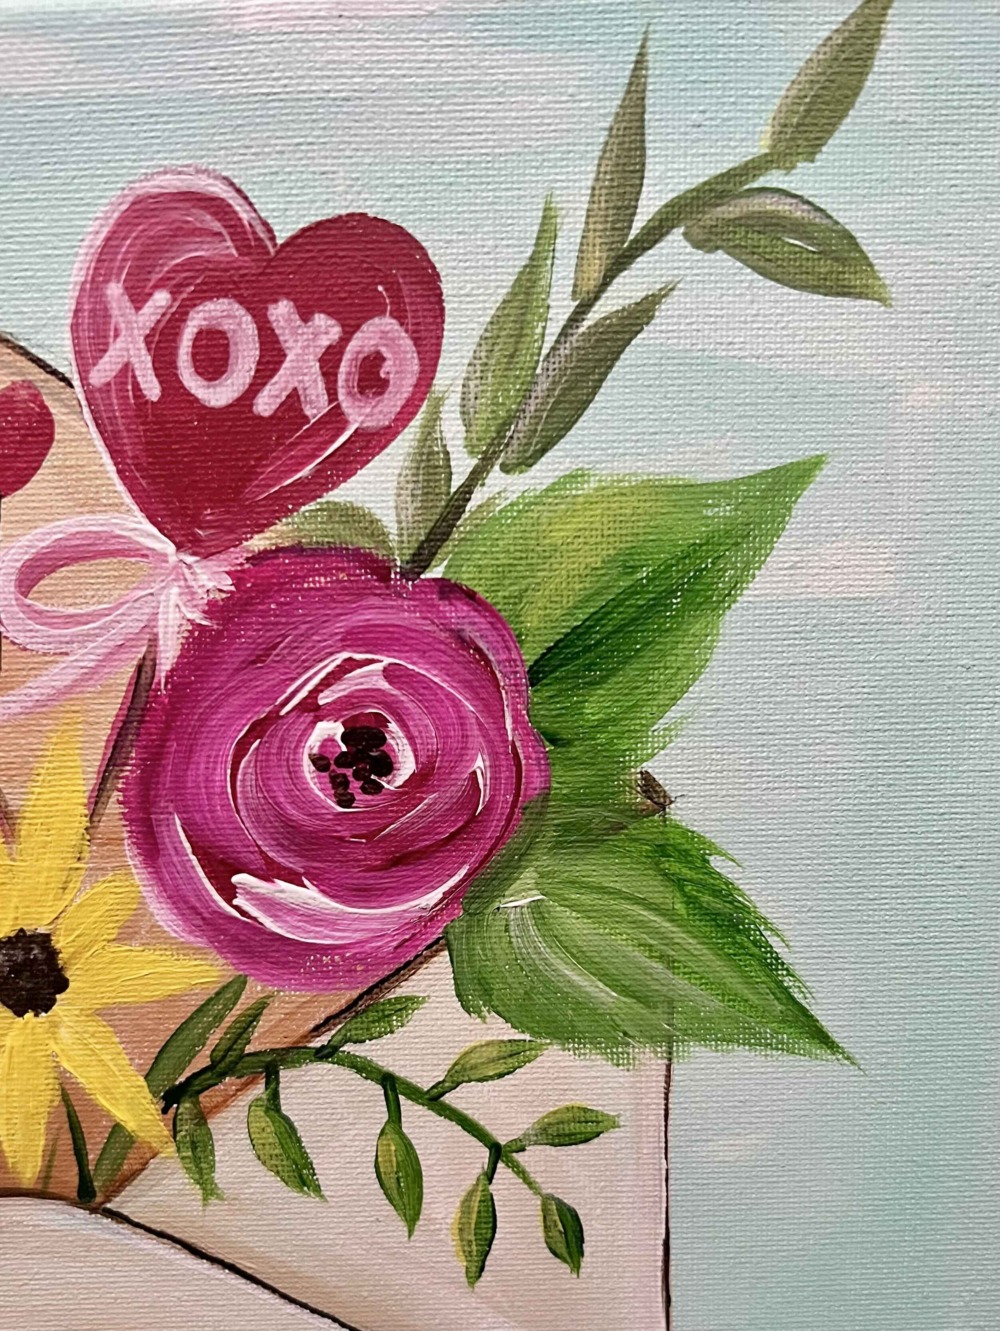
Paint the heart using the color “cadmium red deep hue”.

Use titanium white to paint a “highlight curve” on the left side of the heart and another set of highlight curves on the right side of the heart. You can do this before the red dries so that the white slightly blends with the red.

Without rinsing the brush, use “titanium white” to paint the stick and bow attached to this heart. The red and white will blend together to make a light red. You can also change the color of any of the things in this envelope!
Then start painting the greenery. Load your paint palette with “hooker’s green hue”. Mix a little titanium white into this green to create a lighter green. Paint the “rose petal” to the right of the rose Las a large teardrop shape with a little bit of “edging” on the sides. Paint a branchlike set of rounded leaves on the left. Start by painting a thin, curved line. Then add rounded leaves on each side of the middle stem.
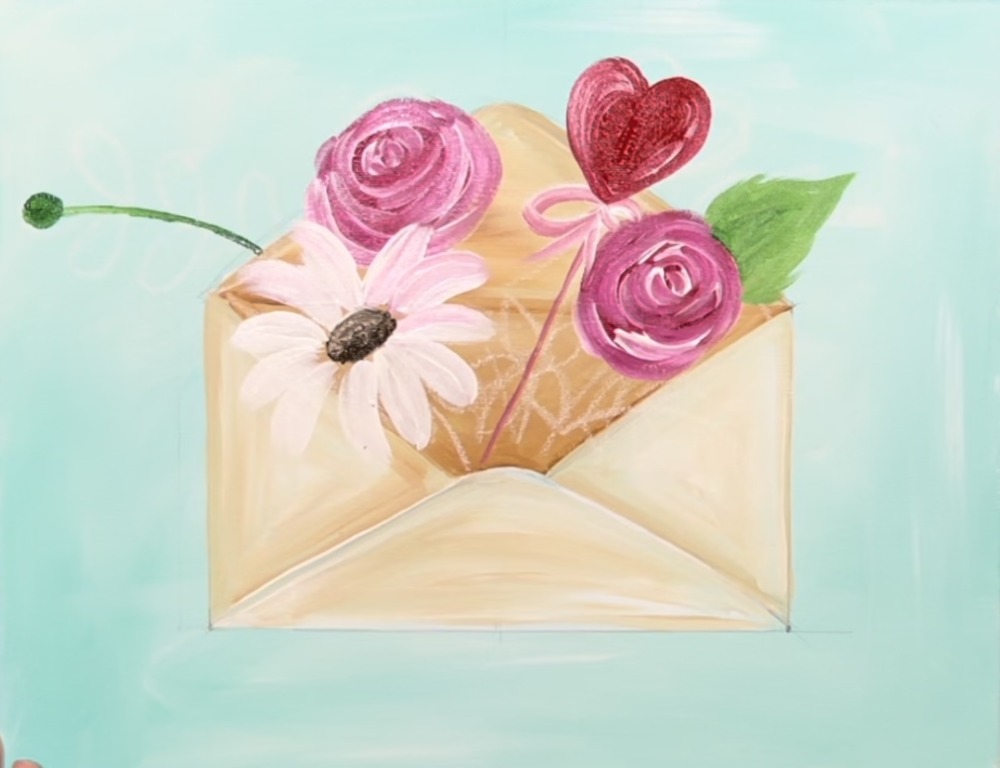
Paint another rose leaf on the other rose and paint a few stem lines that go from the flower to inside of the envelope.

Then paint the yellow flower using “cadmium yellow light hue” for the petals and “raw umber” for the center of the flower. Use the #4 round brush and paint petals that are rounded on the base and pointed on the ends. This flower is behind the daisy and the rose on the right.
Paint more leaf details including another branchlike set of leaves peaking out of the envelope on the right.
Then paint more small heart details using the cadmium red deep hue.

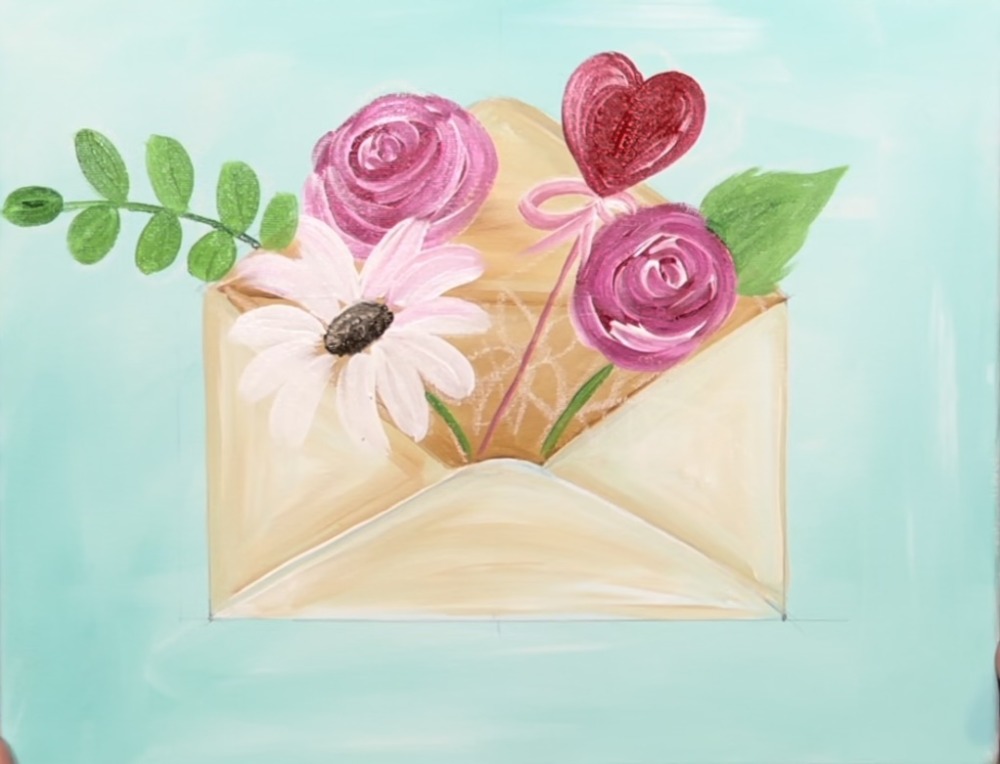
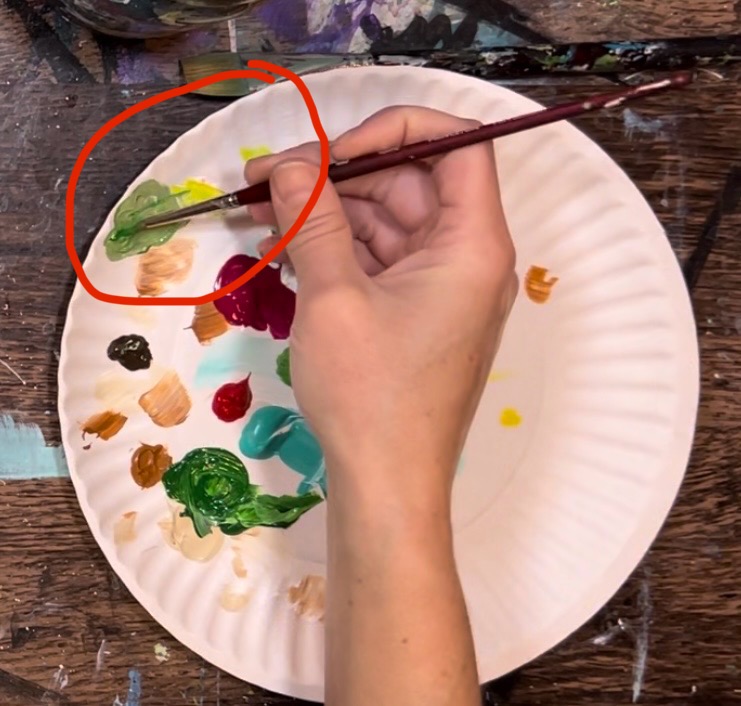
Another detail you can do is add some “yellow green” to the leaves. Mix a “yellow green” on your palette by mixing one part yellow and one part green and then add a little bit of white into it. Then use the round brush to paint one side of some of the leaves with a thin layer of this yellow green. This will add more color interest to your green leaves so they don’t appear so “flat”.

To paint that “eucalyptus” style of branch in the upper right. Mix a “brown green” on your palette by mixing a little “raw umber” into your “hooker’s green hue” and add a little “titanium white” into it. Then paint a branch and small, pointed leaves attached to the branch.
Below is a closeup of the leaves on the right (after some of the other details are added in the next steps).
6. Write Words On Envelope
Use a black sharpie, paint pen or a small brush and black paint to do the lettering on the envelope. I wrote “for you” but you can change this to anything else!
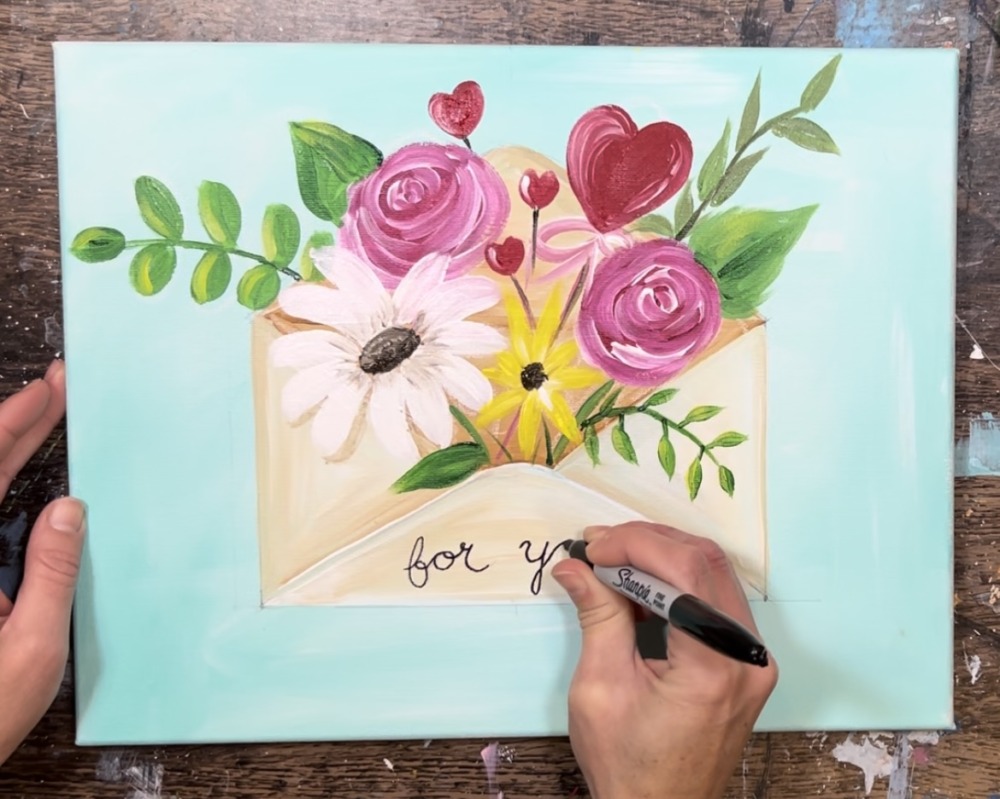
Then paint a little red heart to the right of it.
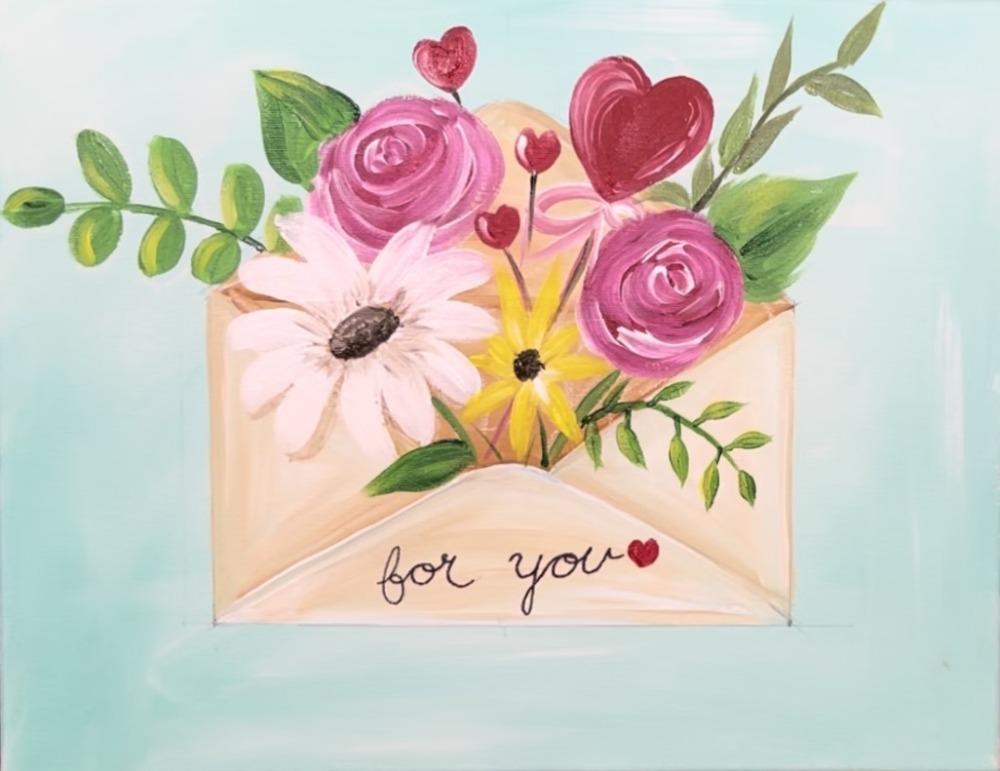
7. Paint heart accents and final touch ups
Some other details include: painting little hearts outside of the envelope using red and pinks on your palette and your #4 round brush.

If you want to add a little bit of “shadow” under the envelope, you can water down raw umber to a water color consistency and paint a very light layer under and to the right of the envelope. (This is a very optional step, it looks fine without the shadow!)

You can also loosely outline the envelope drawing to help it to stand out a bit better. You can use the paint pen or sharpie to do this. You can also use raw umber paint to lightly do outlining. You do not, however, need to outline all of the lines of the envelope.

Another detail includes using the white paint pen to write “XOXO” on the heart. If you do not have a white paint pen, you can use a paint brush and titanium white paint.
As a final step, I painted little “raw umber” dots in the center of each of the roses.