
Would you like to save this?
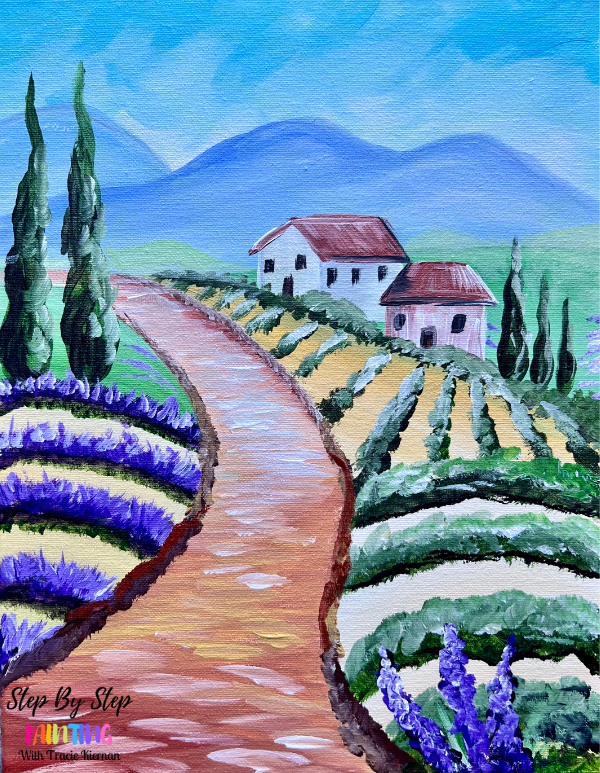
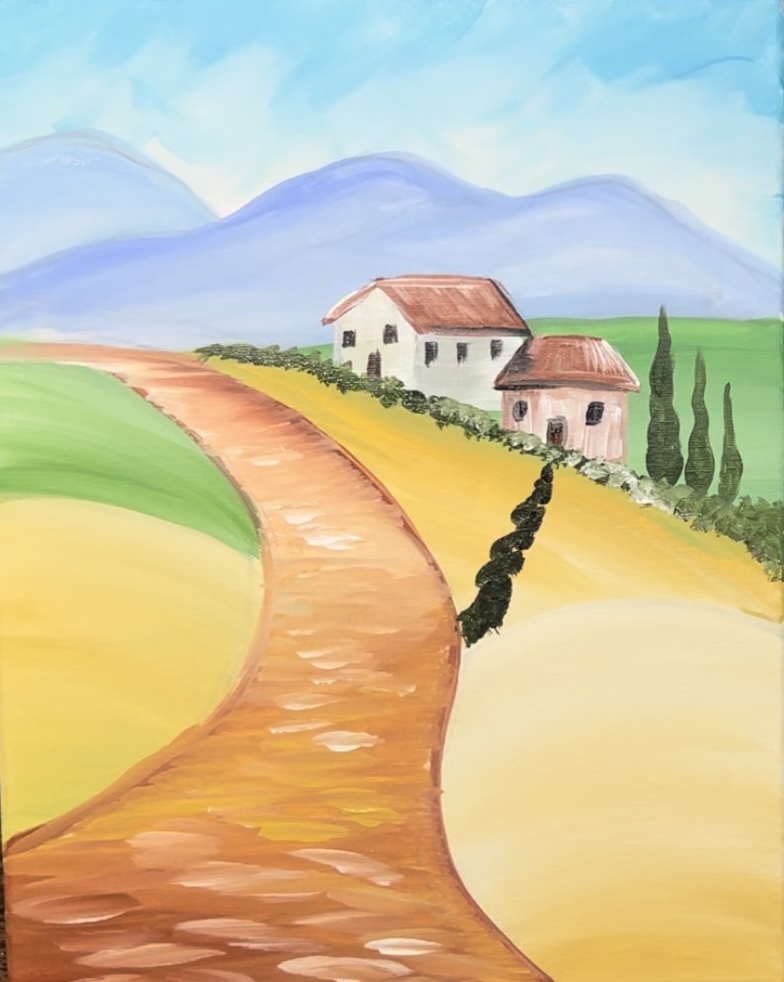
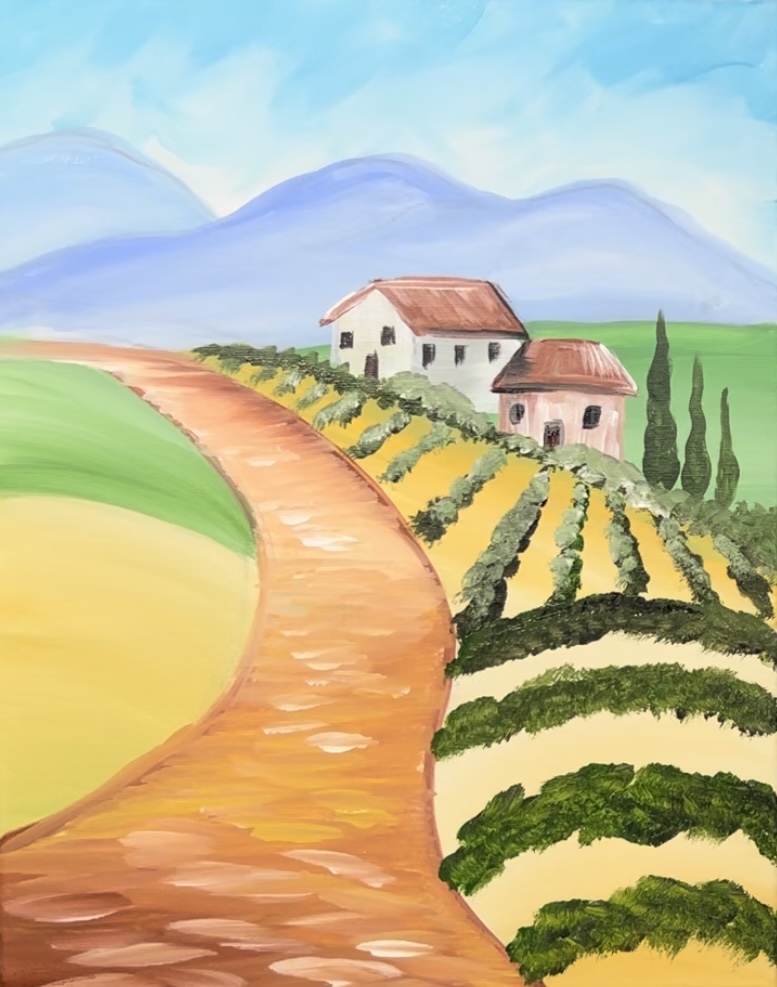
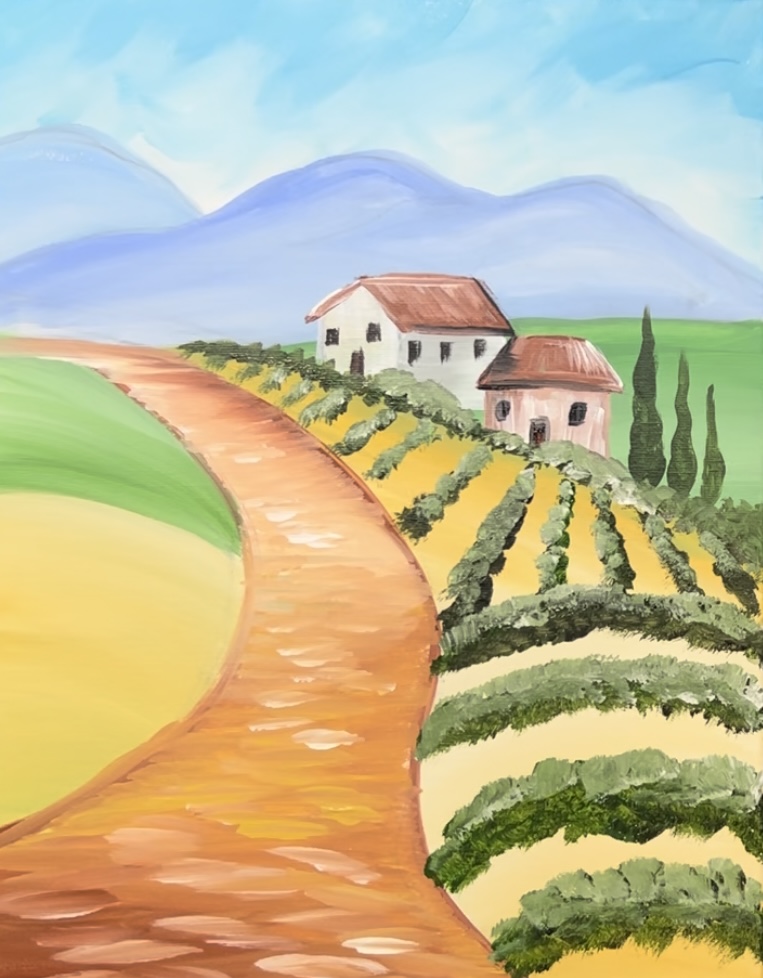
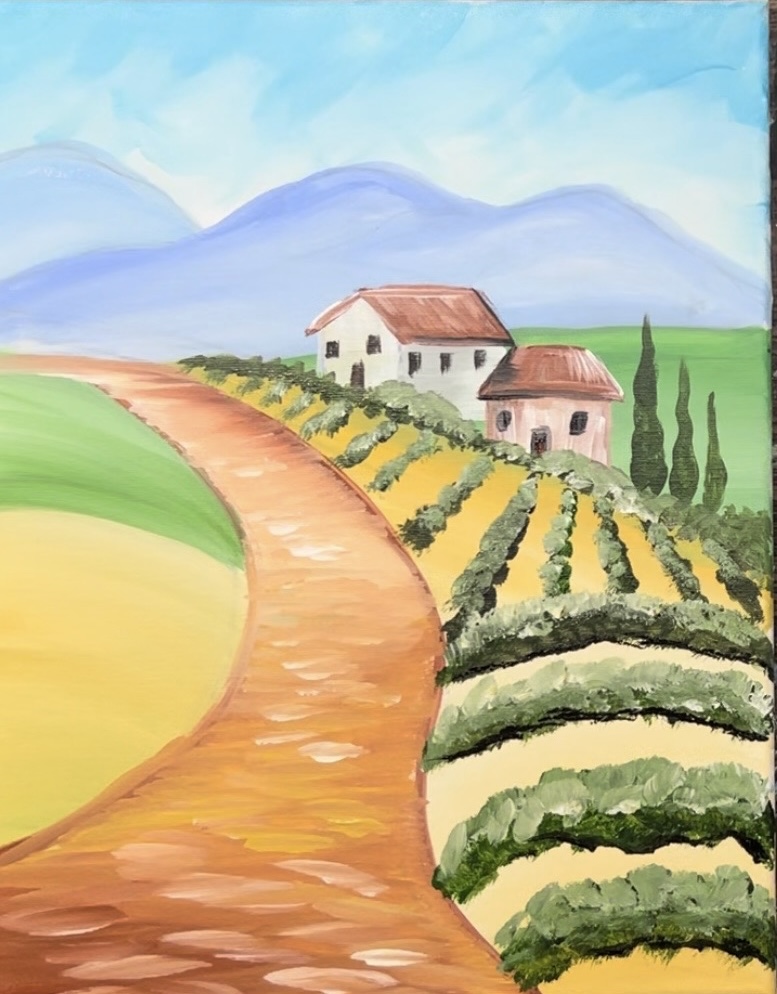
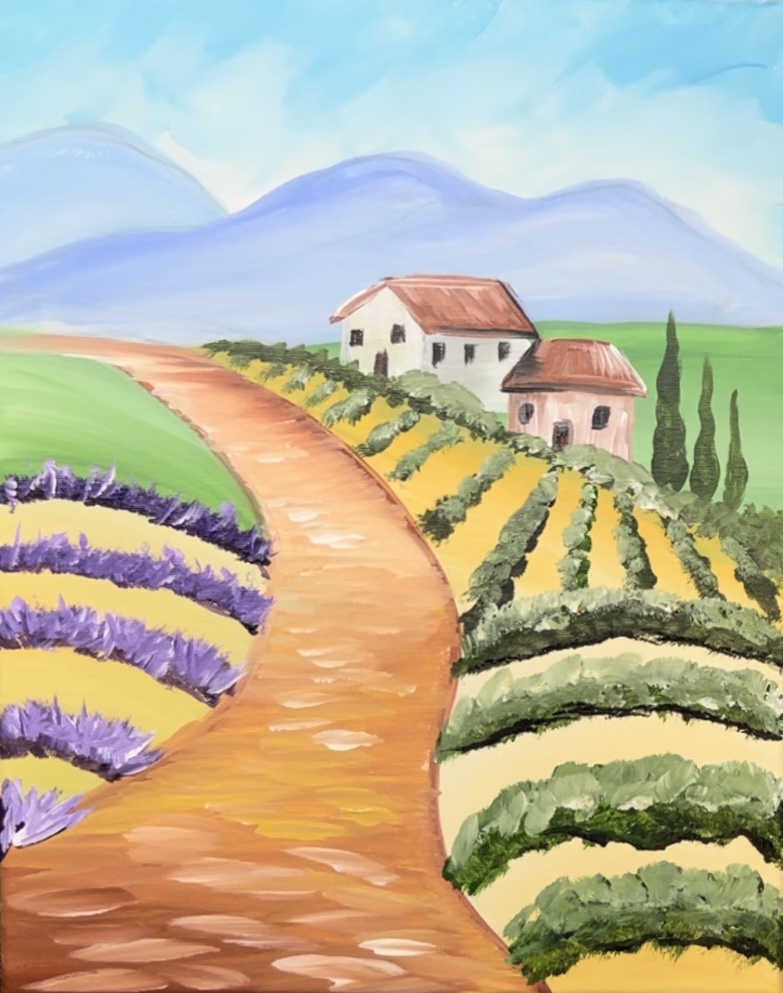
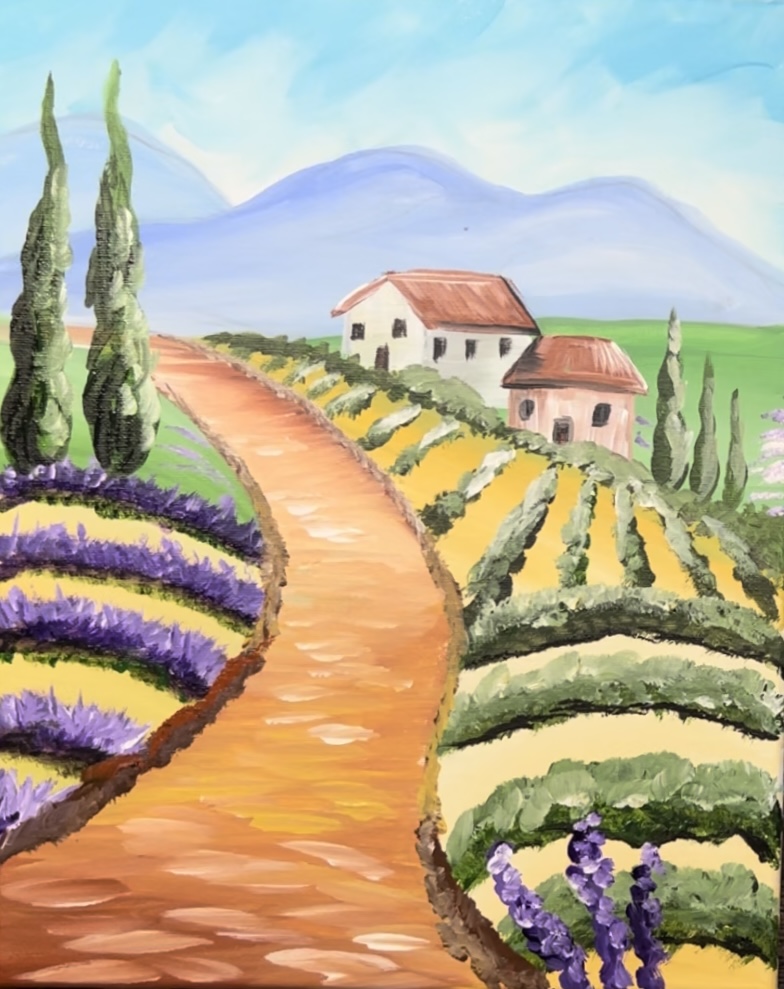
This tutorial will show you how to paint a “Tuscan Landscape” with rows of grape vines and lavender. This is a “loose style” painting with mostly expressive paint strokes of color that blend right onto the canvas. We will be focusing on the parts of the landscape and how to create “perspective”.
Enjoy and happy painting!
Materials
Tuscan Landscape Painting Tutorial
Materials
- 11 x 14 Canvas
- Acrylic Paint
- Pencil
- Brushes
- Ruler
Colors
- Titanium White
- Mars Black
- Naples Yellow
- Hooker's Green Hue
- Light Blue Permanent
- Dioxazine Purple
- Red Oxide
Brushes
- 3/4" Flat
- 12 Bright
- 4 Round
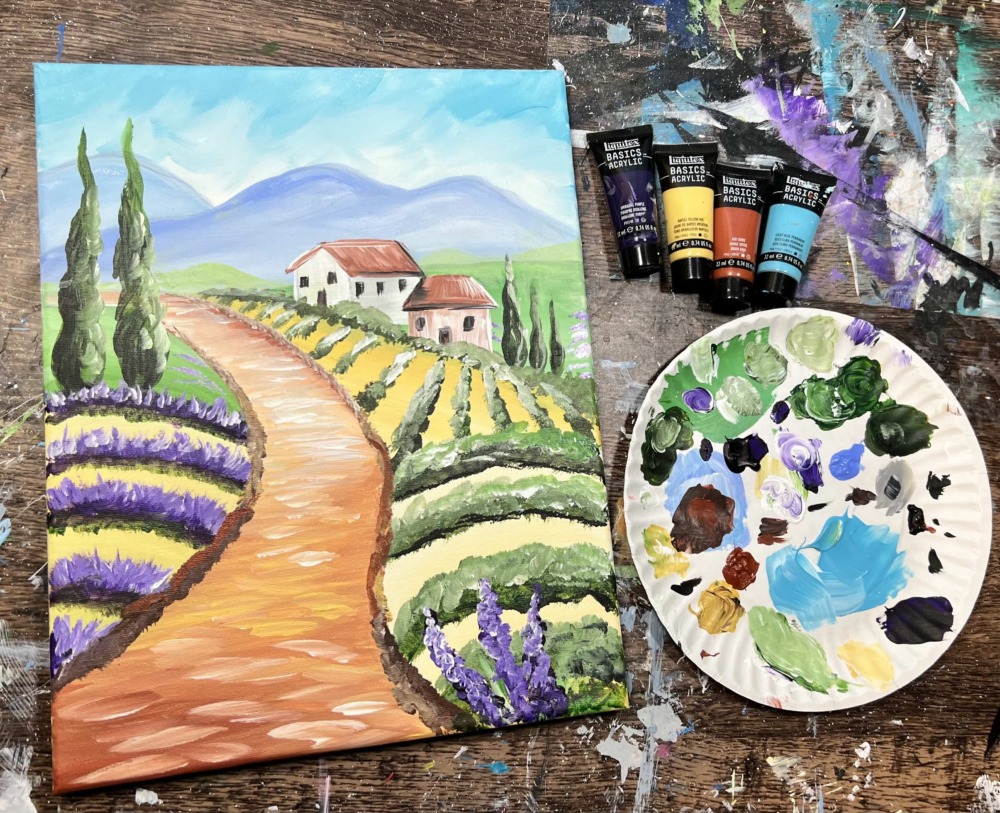
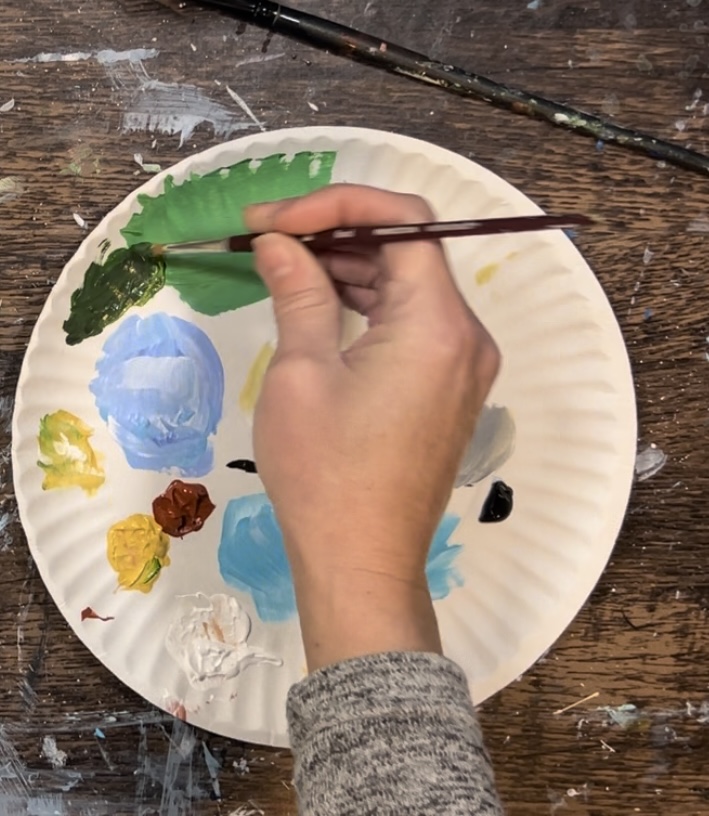
Color Palette
I used Liquitex BASICS acrylics for this painting. If you are using a different brand, you can use the color chart below to help you match colors.

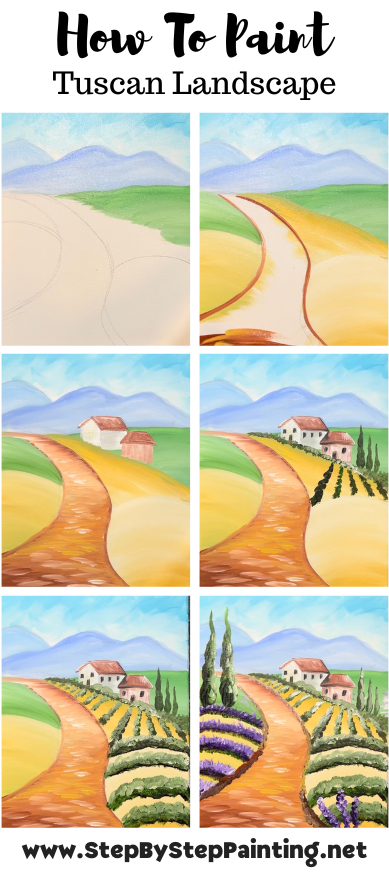
Directions At A Glance
Video
Step By Step Instructions
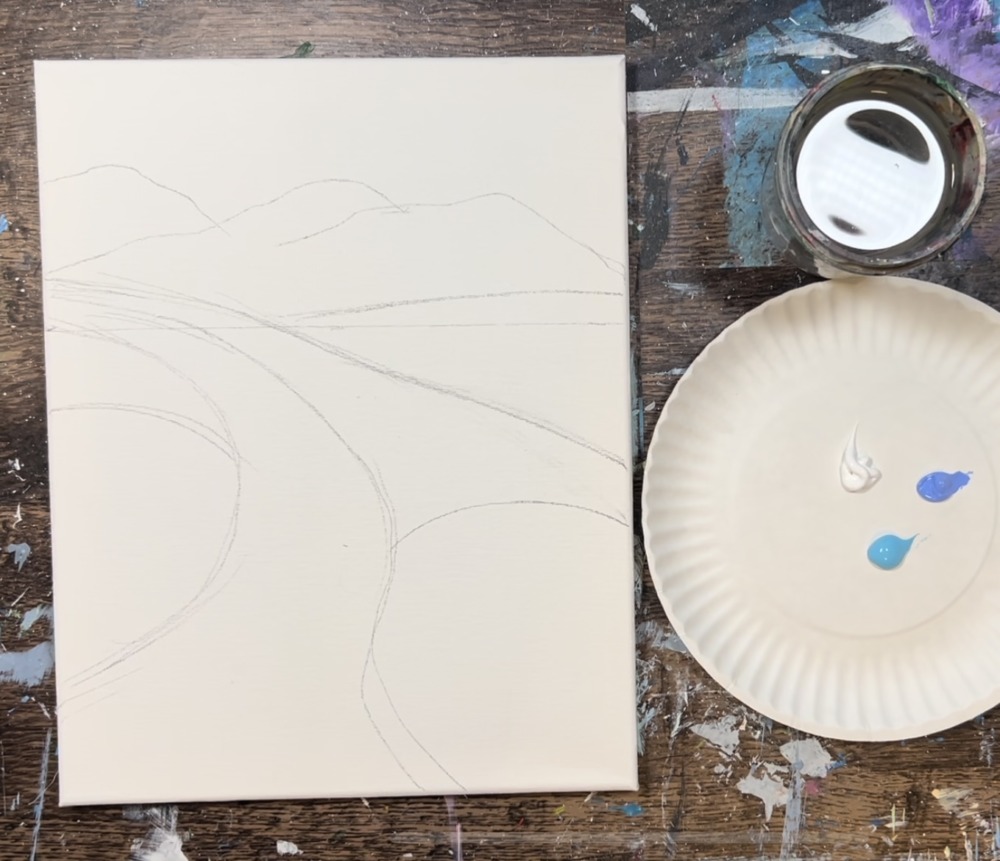
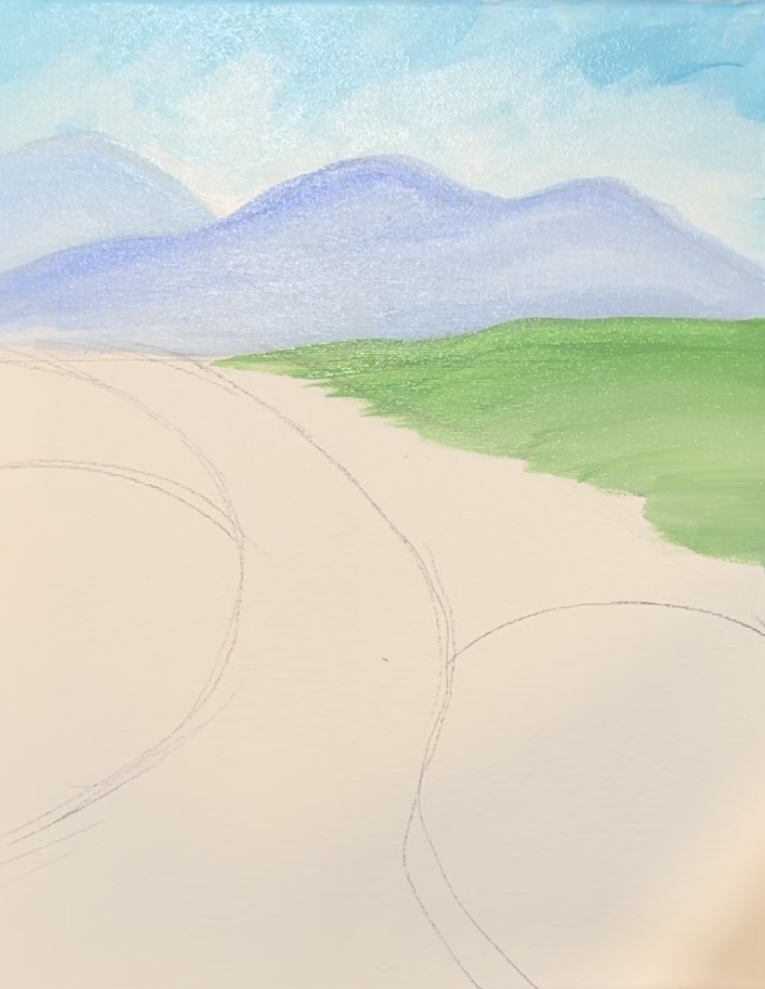
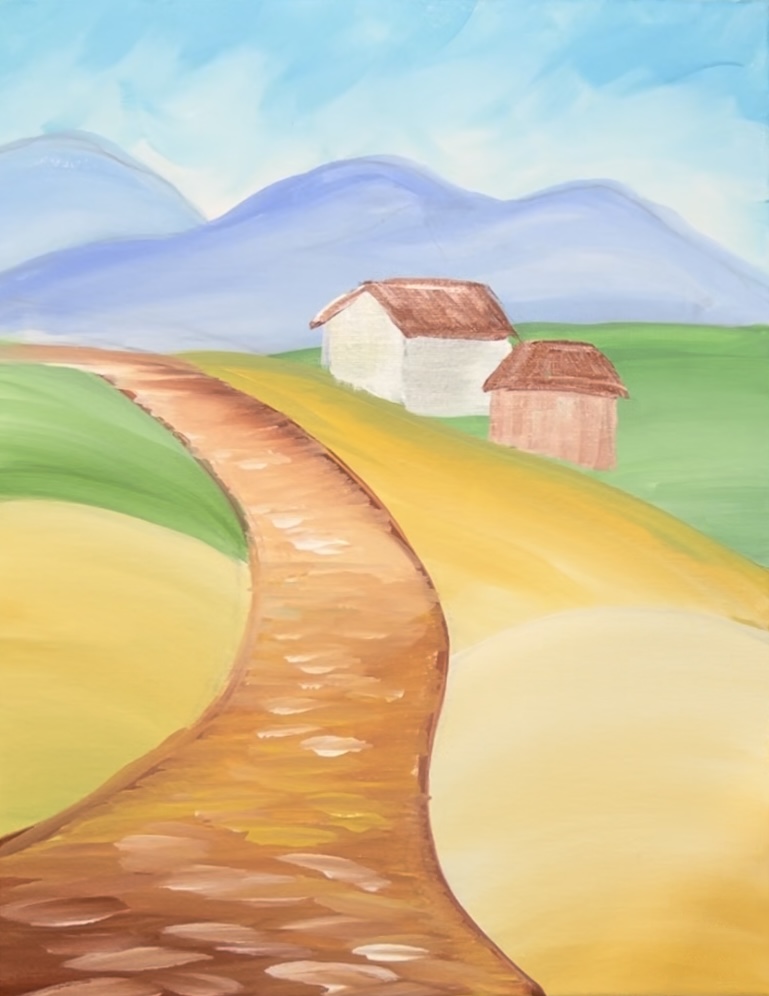
1. Draw Landscape
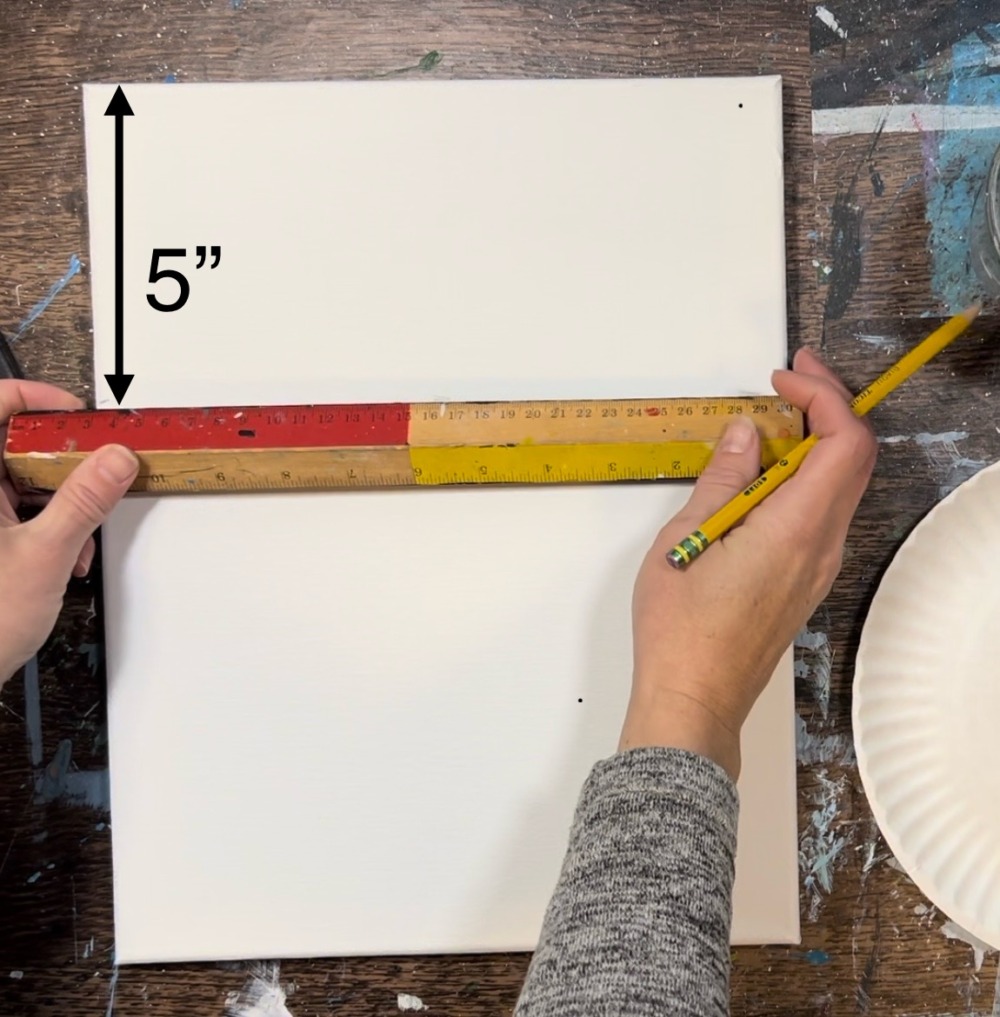
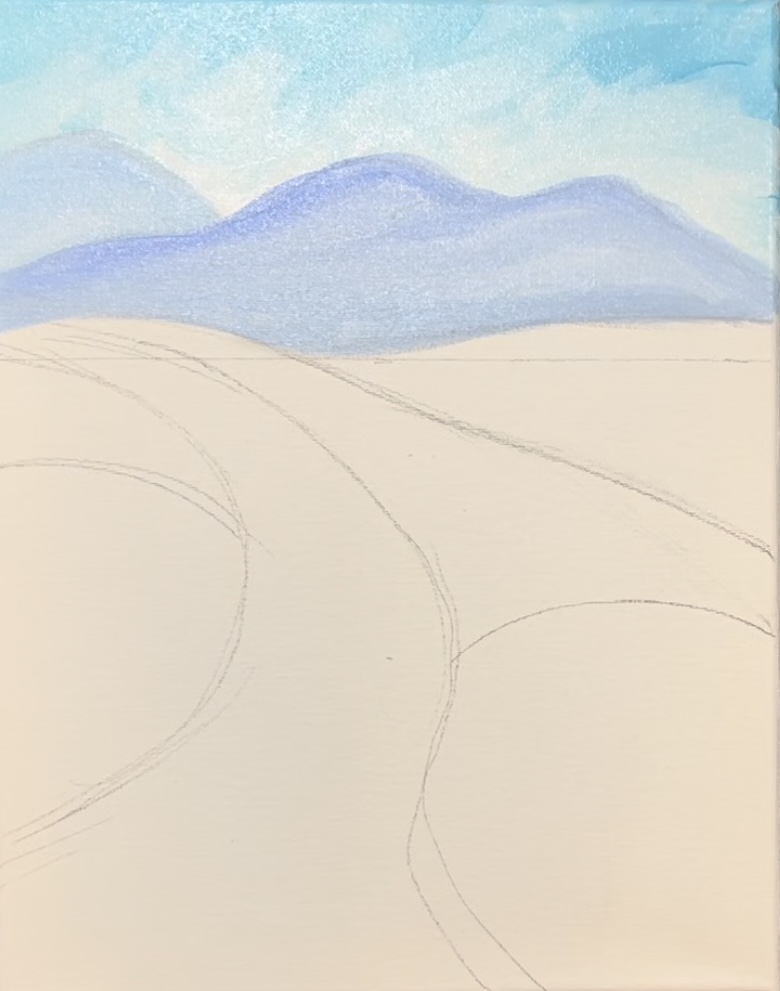
Below is a digital sketch of the landscape drawing. The “horizon line” is about 5″ from the top edge of the canvas. This drawing does not have to be exact and you are welcome to change it up.

Position your canvas so that it is vertical. We will be dividing the canvas up into different sections of the landscape. First, mark where the “horizon line” is. This is the line that divides the land and sky (mountains go above this line).
Draw this horizontal line at 5″ from the top edge of the canvas.
Then draw three large mountains above this horizon line.
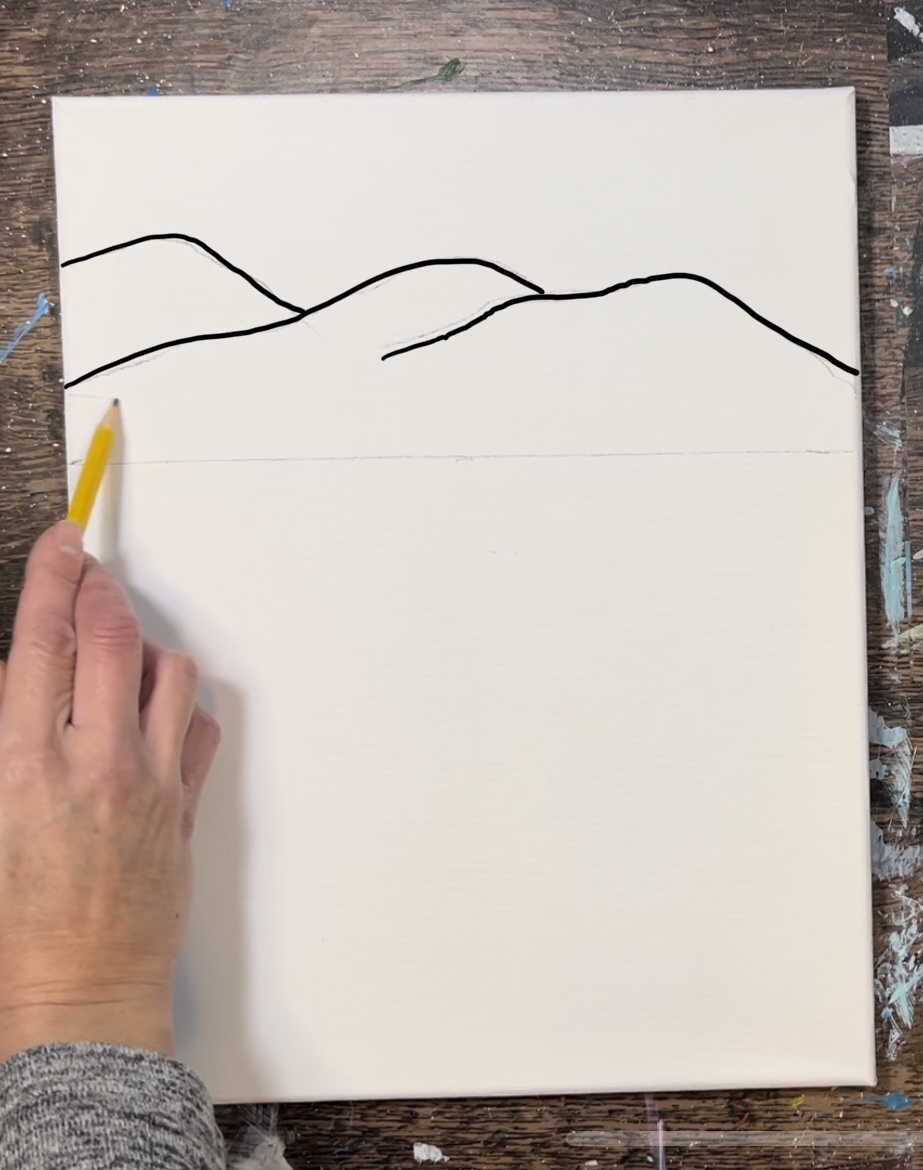
Draw a low hill that goes slightly above the horizon line on the right. Then start sketching the road. This road is narrow in the distance and twists/ turns to a very wide road on the bottom edge of the canvas.
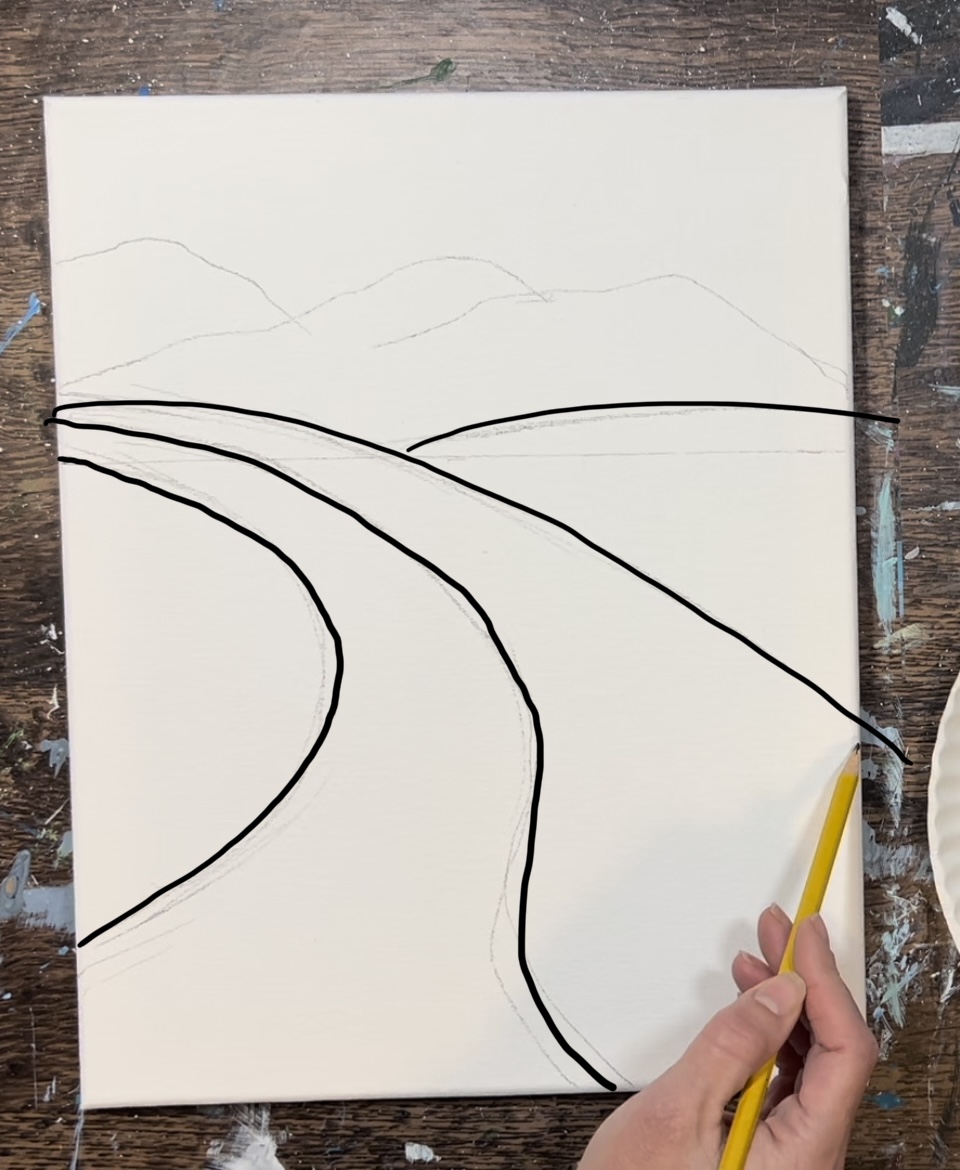
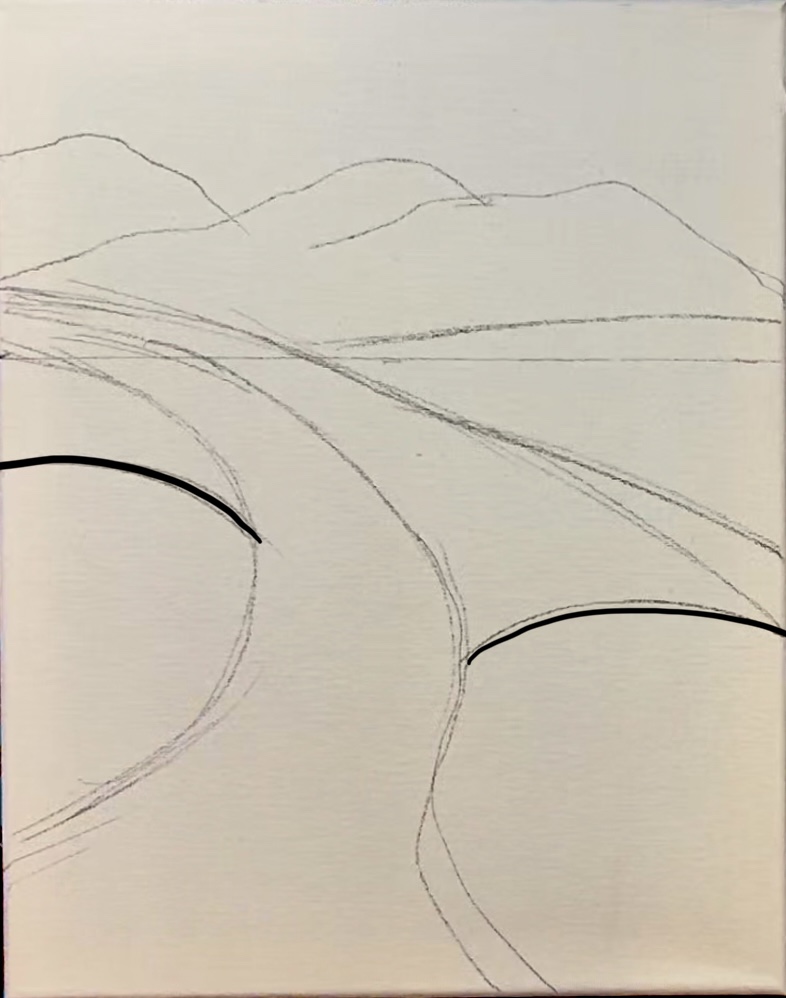
After you draw the road, draw a second hill (a long, diagonal and slightly curved line) on the right of the road that goes down and off the right edge of the canvas.
Then draw two more curved hill lines on the left and right of the road.
2. Paint Sky
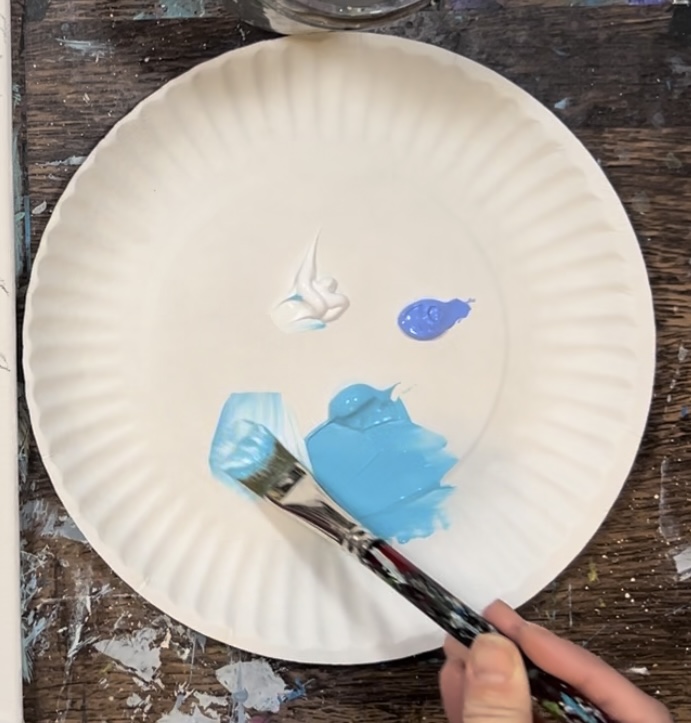
Load your palette with the three colors: titanium white, light blue permanent and light blue violet.
Use your 3/4″ flat wash brush to mix light blue and white together.
Start at the top edge of the canvas to paint the sky. Paint diagonal strokes that gently blend together.
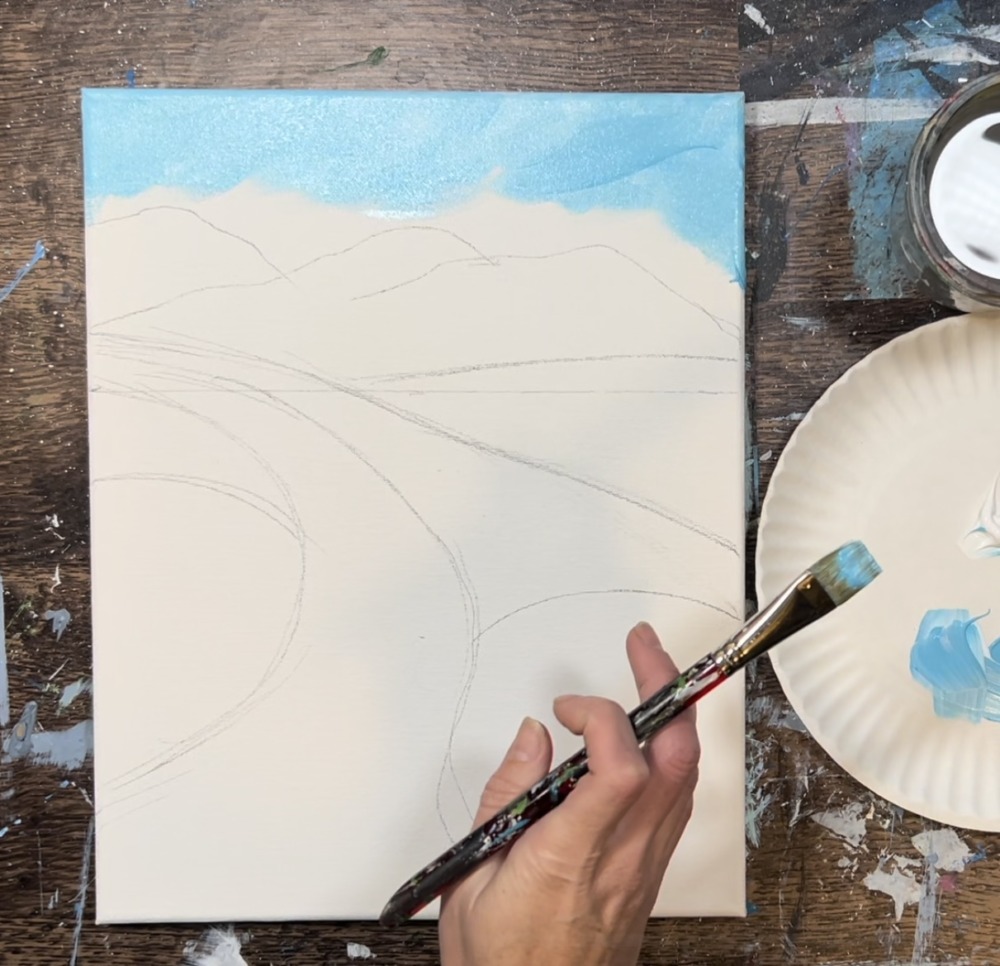
Load more titanium white onto your brush without rinsing it. Gently blend the white into the sky on the bottom (just above the mountain lines). Allow your sky to be slightly lighter on the bottom and slightly darker on the top edge of the canvas.
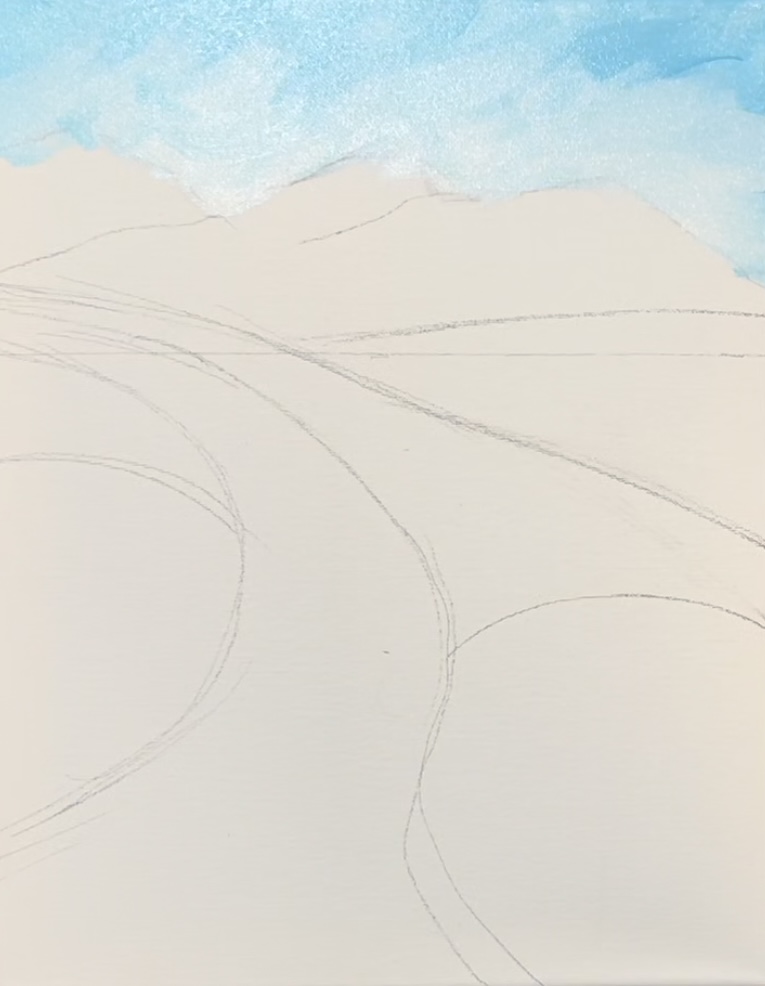
3. Paint Mountains
Mix a light blue/violet color on your palette by mixing equal amounts of “light blue violet”, “light blue permanent” and “titanium white”.
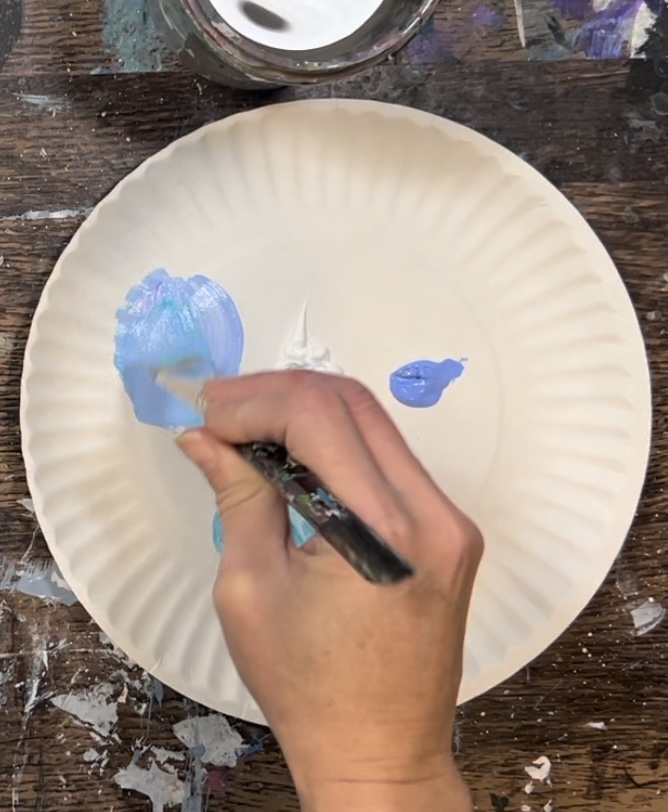
Use the 3/4″ flat wash brush to paint the mountain on the far left. Then add a little more “light blue violet” to your brush and paint the front mountain range. A “trick” with these mountains is to blend more titanium white on the bottom/ base on the mountain so that it is lighter on the bottom of the mountain range and darker on the top edges.
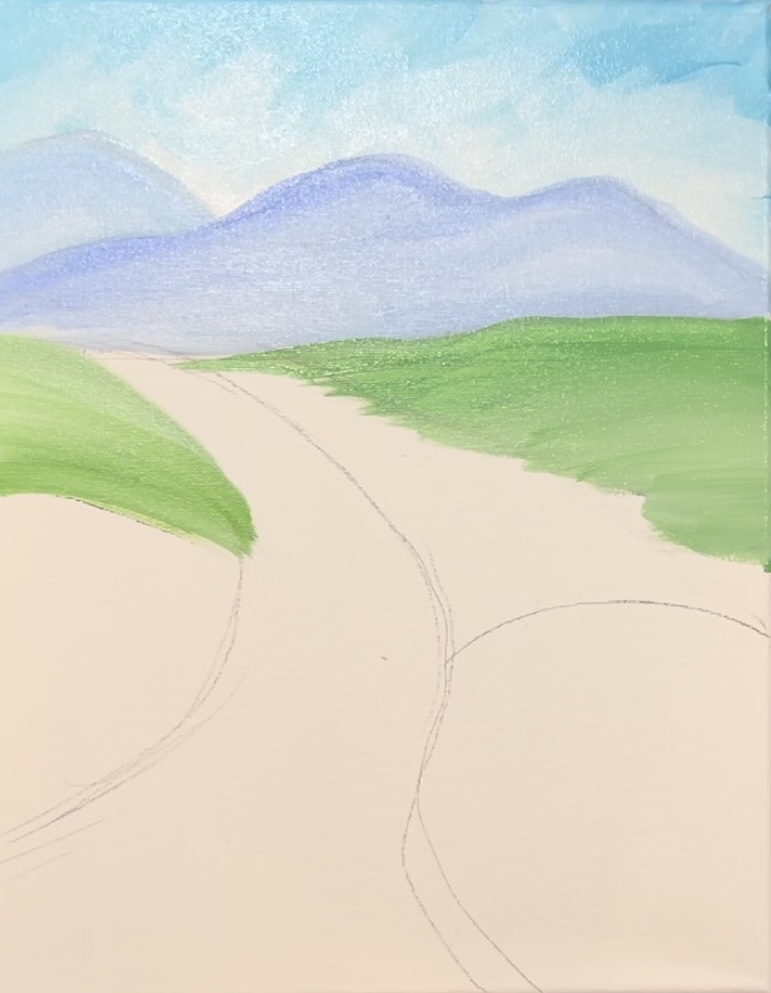
4. Paint Green Hill Areas
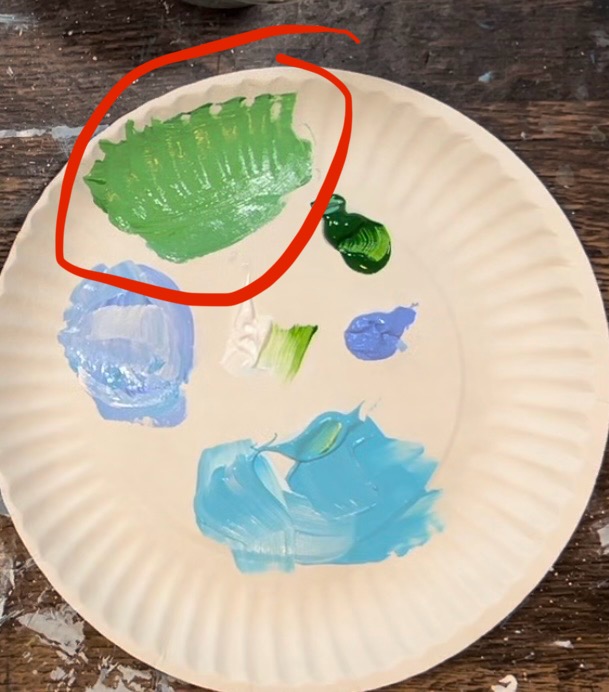
Mix a light “spring green” color on your palette by mixing 1 part “hooker’s green hue”, 1 part “titanium white” and 1 part “light blue permanent”. Add more white to this color after mixing it until you get a light green.
Use the 3/4″ flat wash brush to paint the hill area far in the background with this “light green”. Do this with loose, left and right paint strokes.
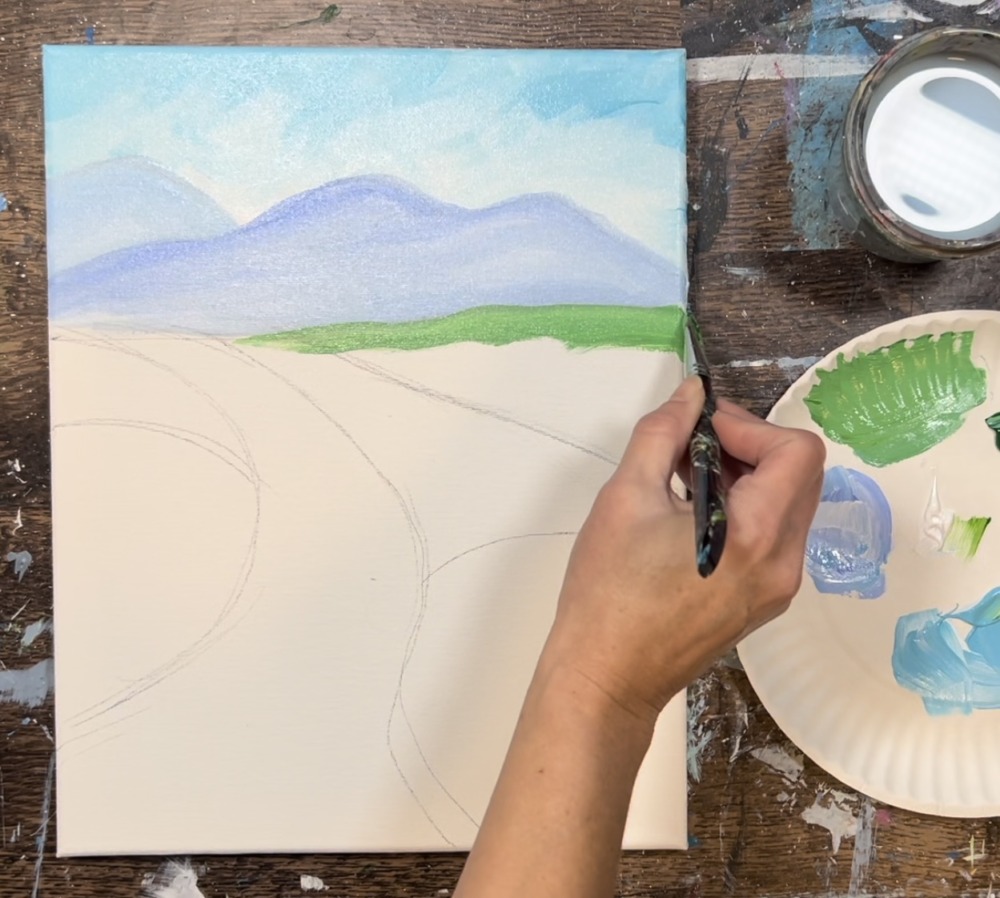
As you work your way down, add a more white to the brush to lighten it up on the bottom. It is okay if you go over your drawing lines.
Paint the hill area on the top left using the same light green color. This time, make the hill lighter on the top and darker on the bottom. Use the 3/4″ flat wash brush and paint curved strokes going in the direction of the hill.
5. Paint Yellow Hill Areas
Load the color “Naples yellow” onto your paint palette. Use the 3/4″ wash brush to paint the hilly area on the right that is just under the green area. Start with just pure Naples yellow at first and then blend titanium white towards the bottom of the hill area so that it becomes lighter on the bottom.
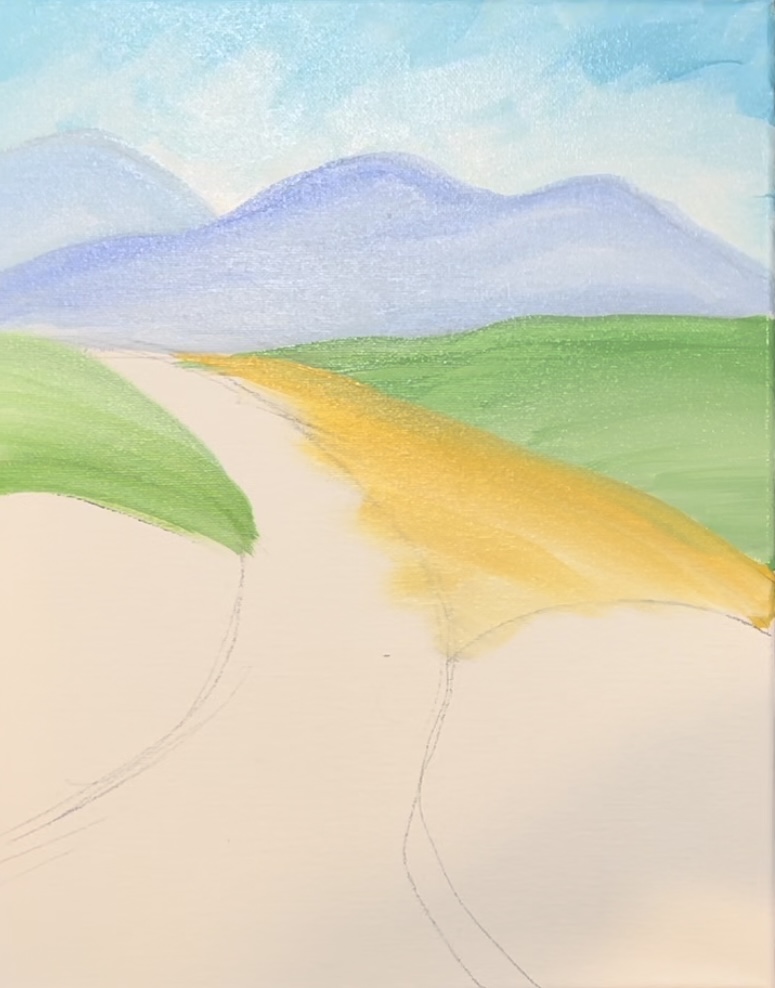
Next, paint the bottom hill area using the same two colors. This time blend titanium white with the Naples yellow first and then blend it into just Naples yellow on the bottom so that it is darker on the bottom.
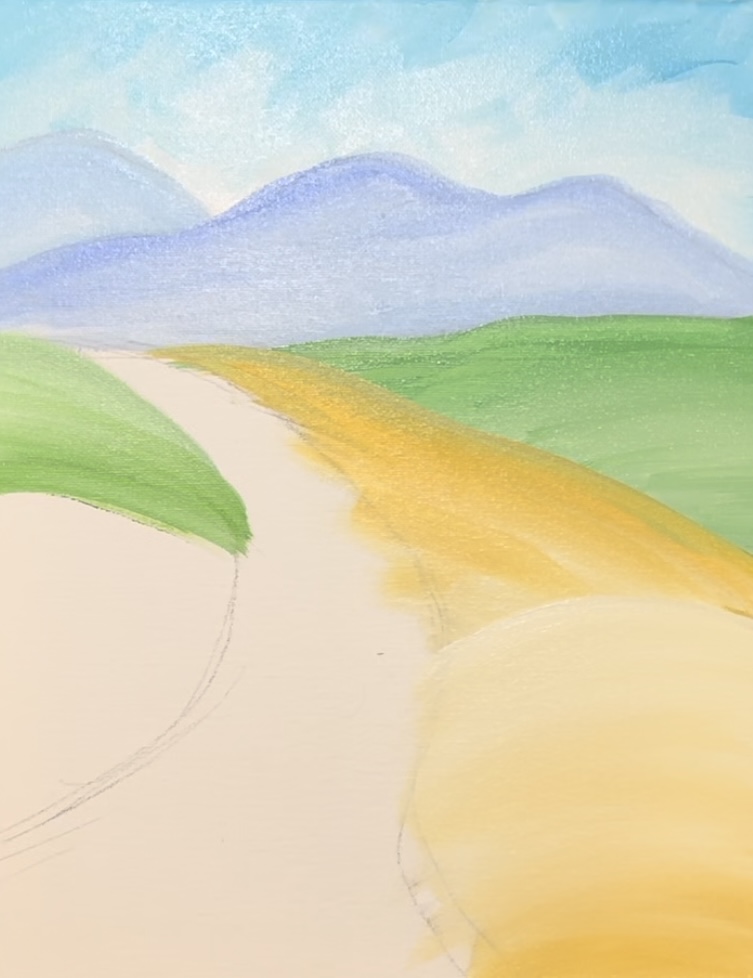
Then paint the hilly area on the left of the road using the same colors. This time, add a small amount of “hooker’s green hue” into this color to change it a bit. Paint curved strokes in this area and allow it to be darker on the bottom and lighter on the top.

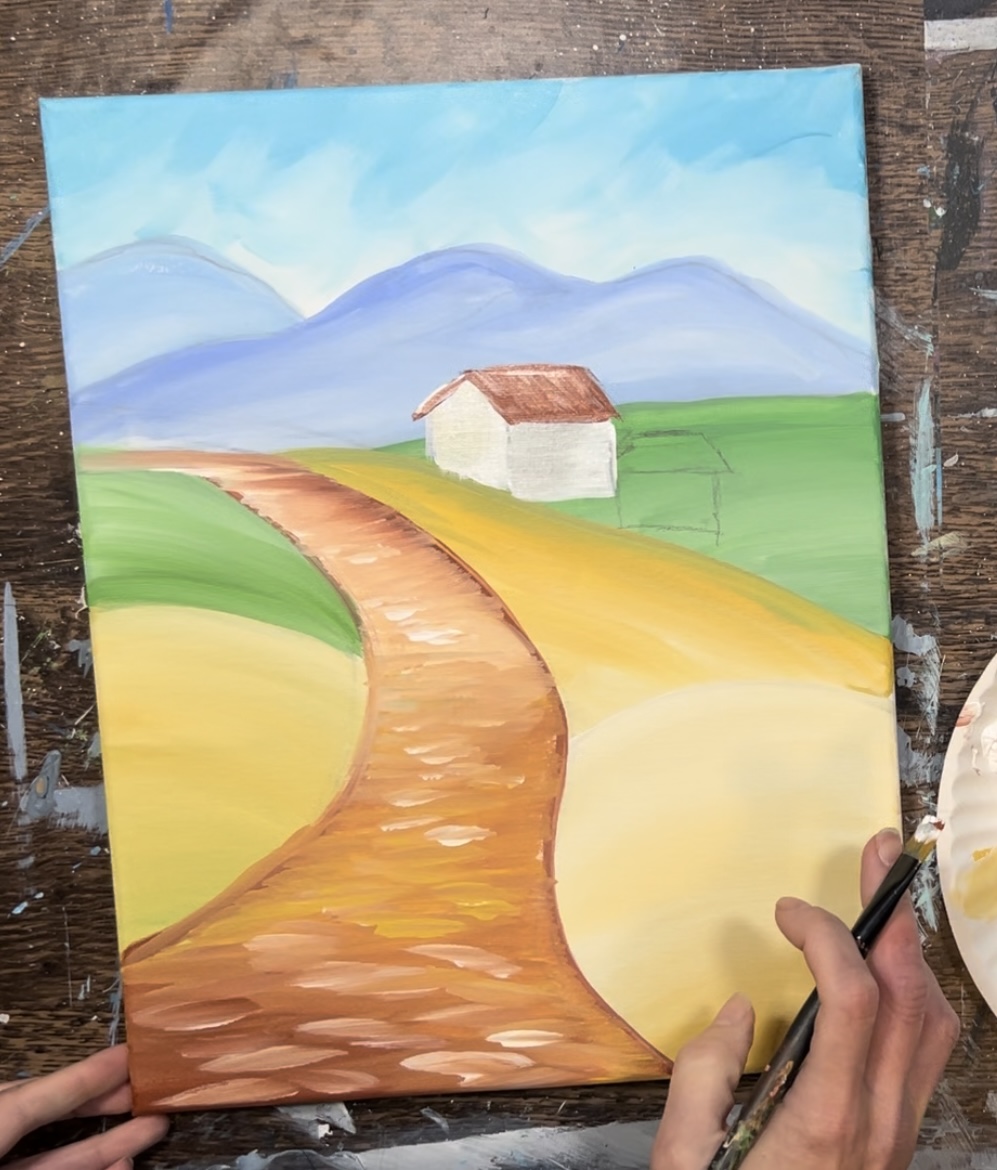
6. Paint Road
Load your paint palette with “red oxide”. Use the 3/4″ flat wash brush (or the #12 bright brush) to paint the outline of the road. Then start filling the road in. Start at the bottom of the road and paint left and right strokes using just the “red oxide”. Only go up a little with this red oxide because you will be adding lighter colors to this road as it goes in the distance.
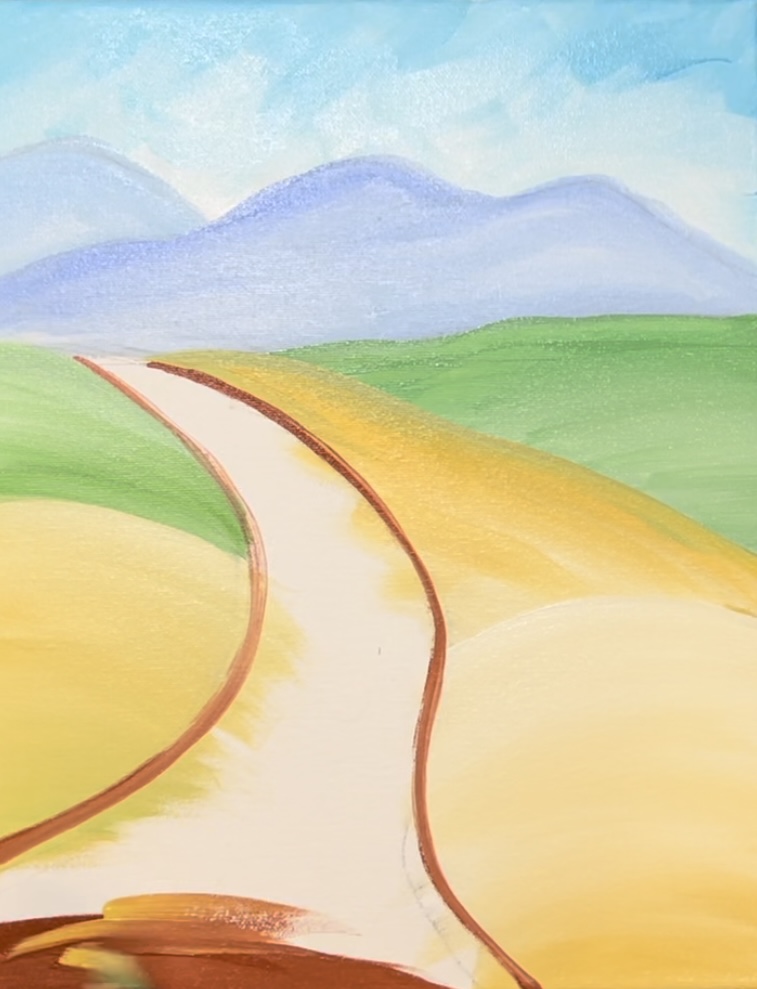
Without rinsing the brush, add “Naples yellow” to the brush. Continue to paint left and right paint strokes and blend this yellow with the red oxide so that the road color starts to get lighter.
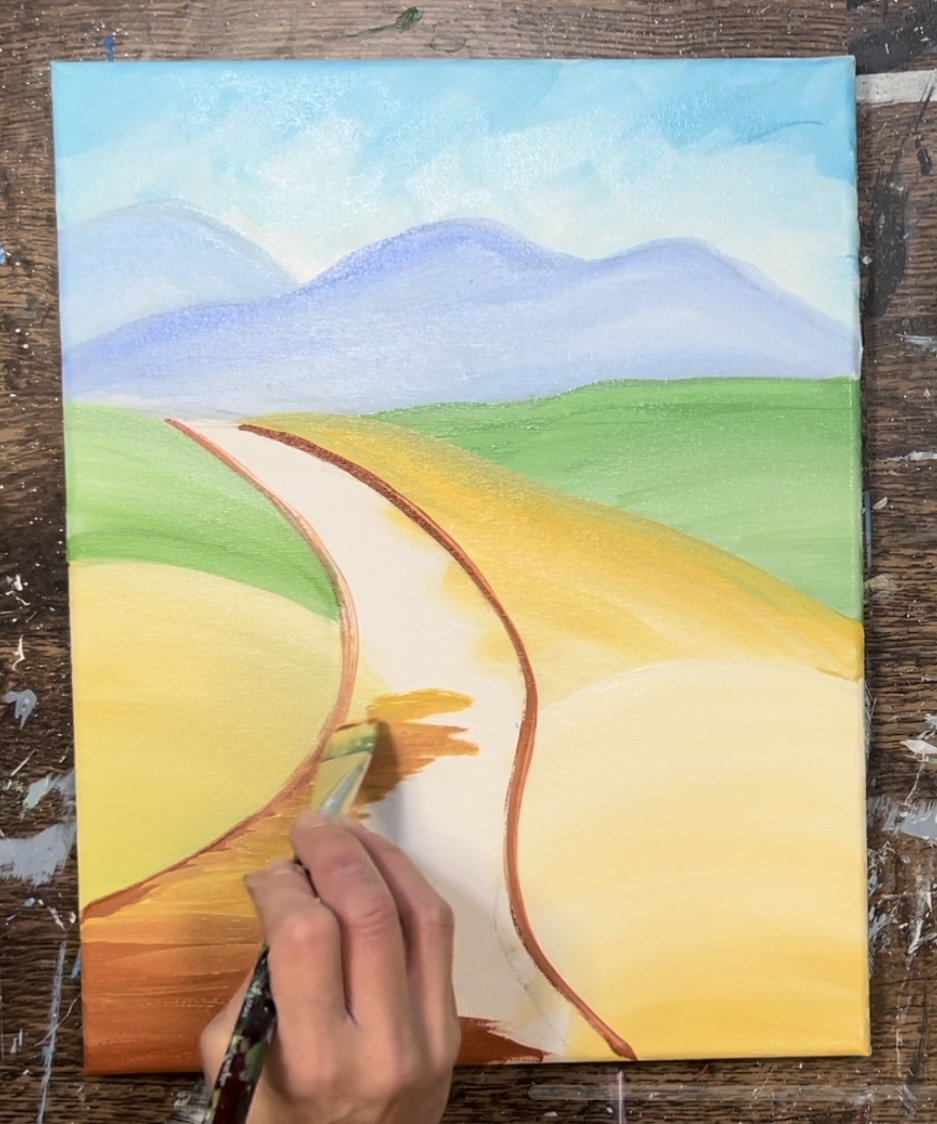
Then, without rinsing the brush, load it into “titanium white”. Blend titanium white paint strokes further up the road to allow the road to be much lighter in the distance. (Note: you may need to wipe the brush off or rinse if it seems to be getting “overloaded” with paint and the colors aren’t mixing).
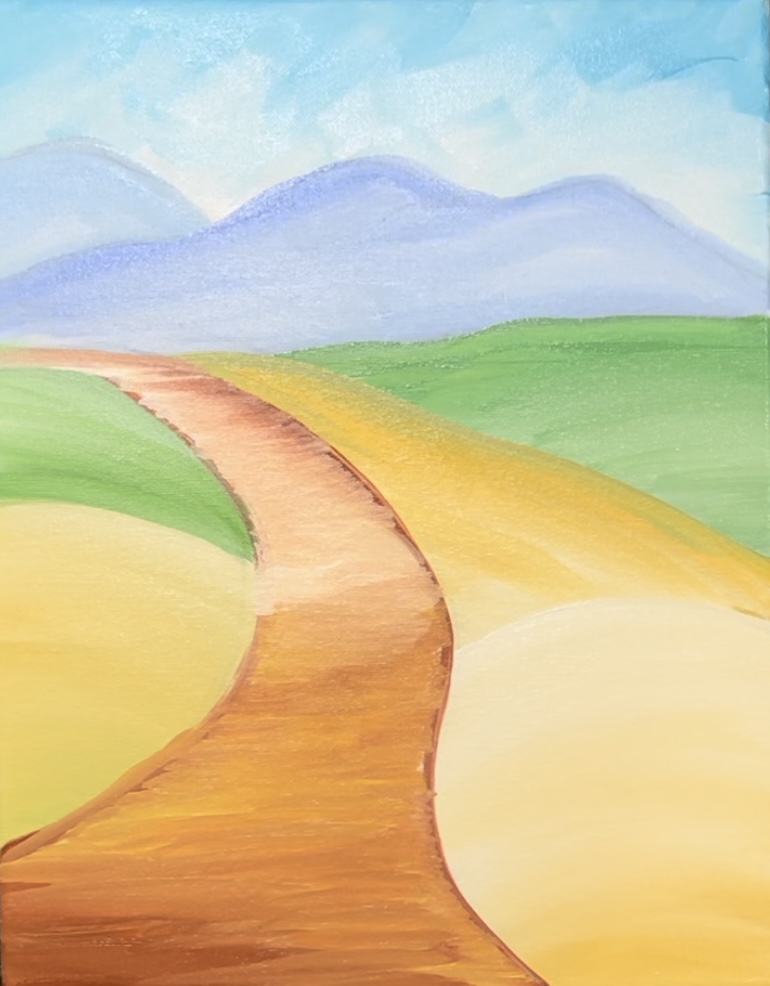
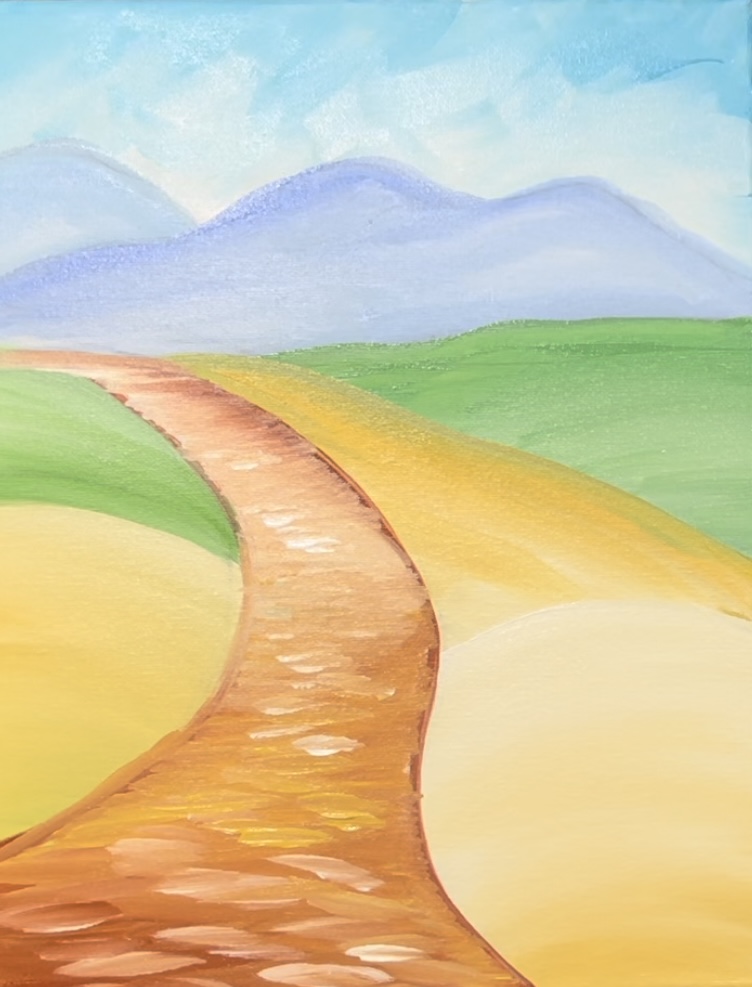
Then paint “textured” left and right paint strokes on the road. Use a combination of the titanium white and the Naples yellow to paint these horizontal “dashed marks” on the road. They should be larger strokes on the bottom and smaller strokes in the distance.
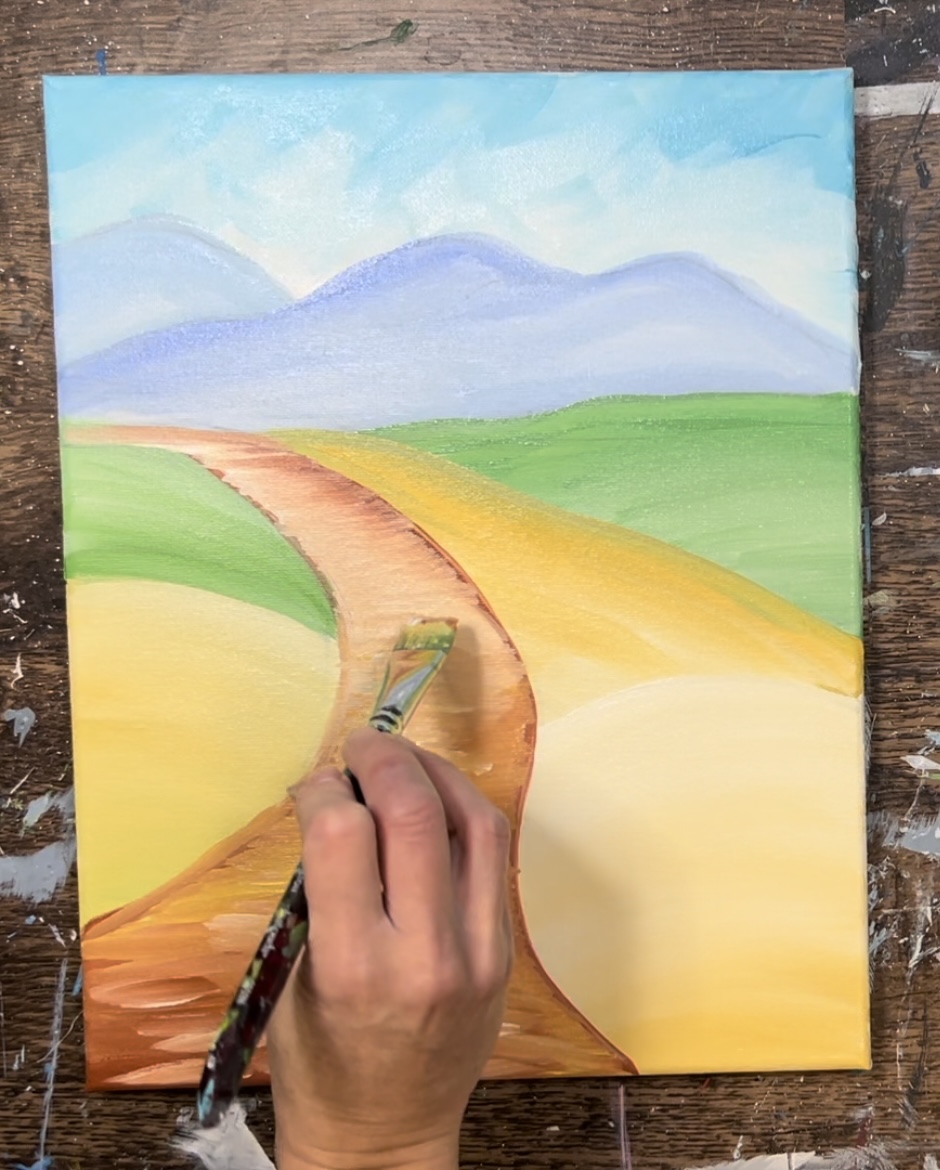
Add more white paint strokes in the distance.
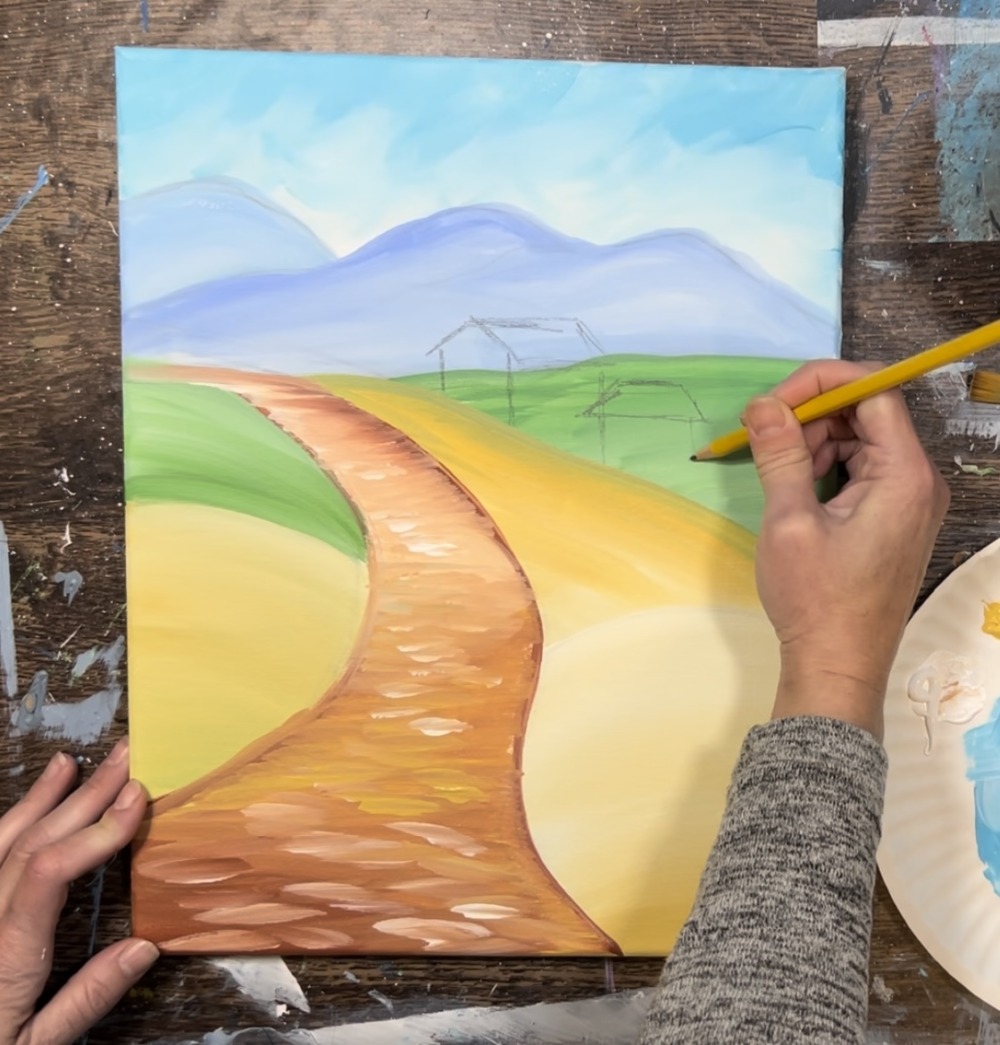
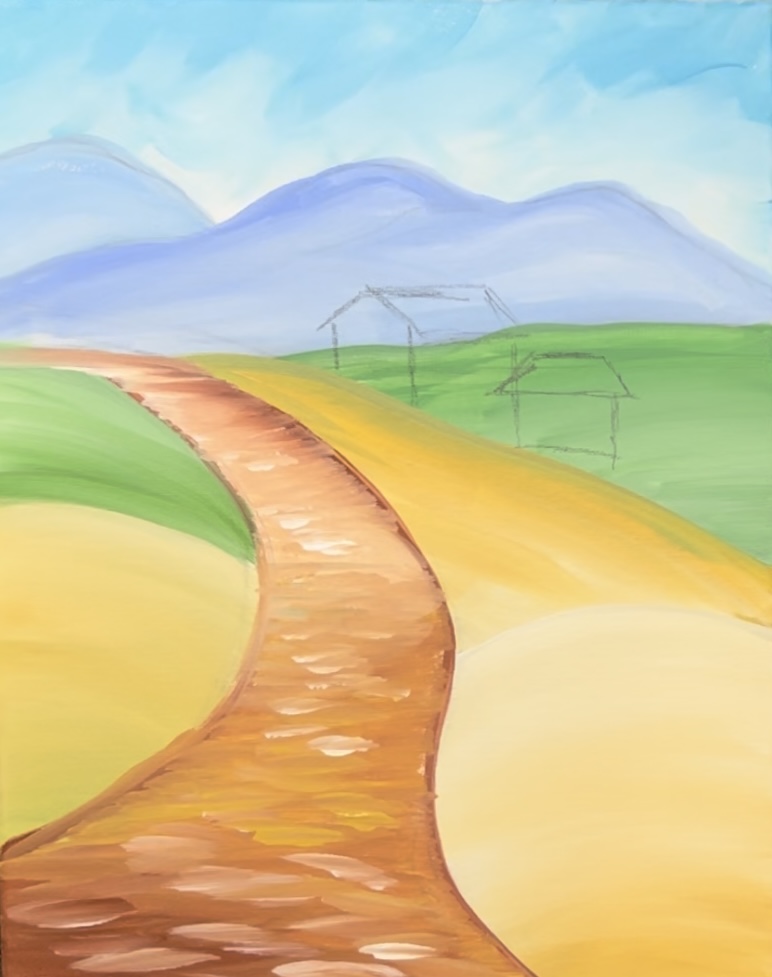
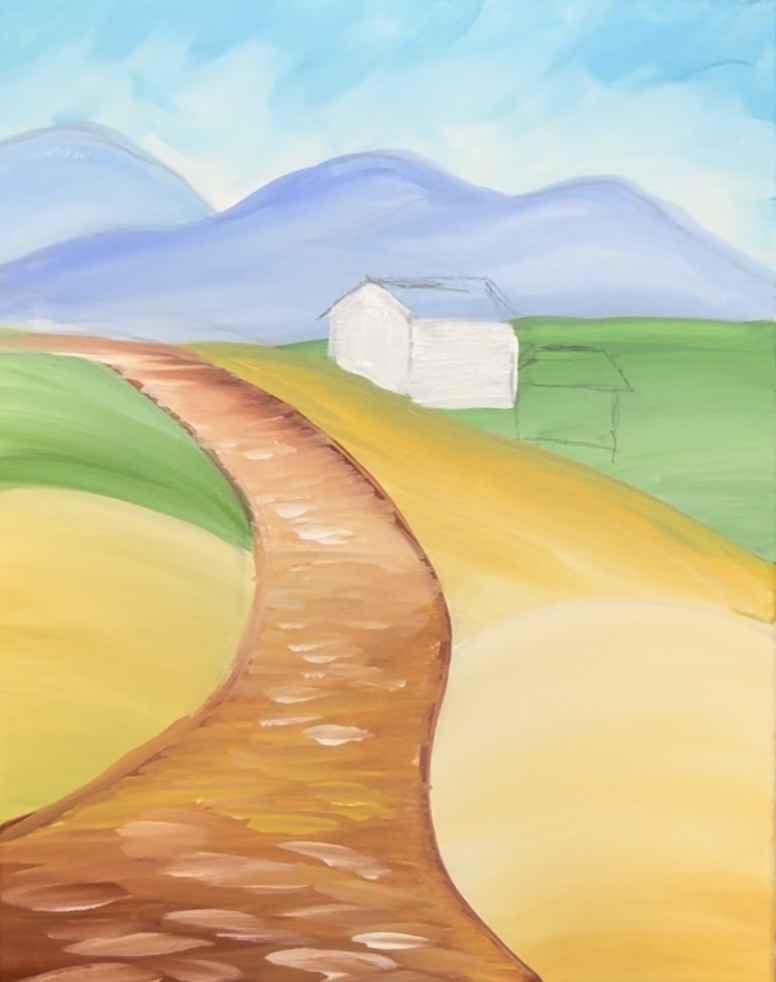
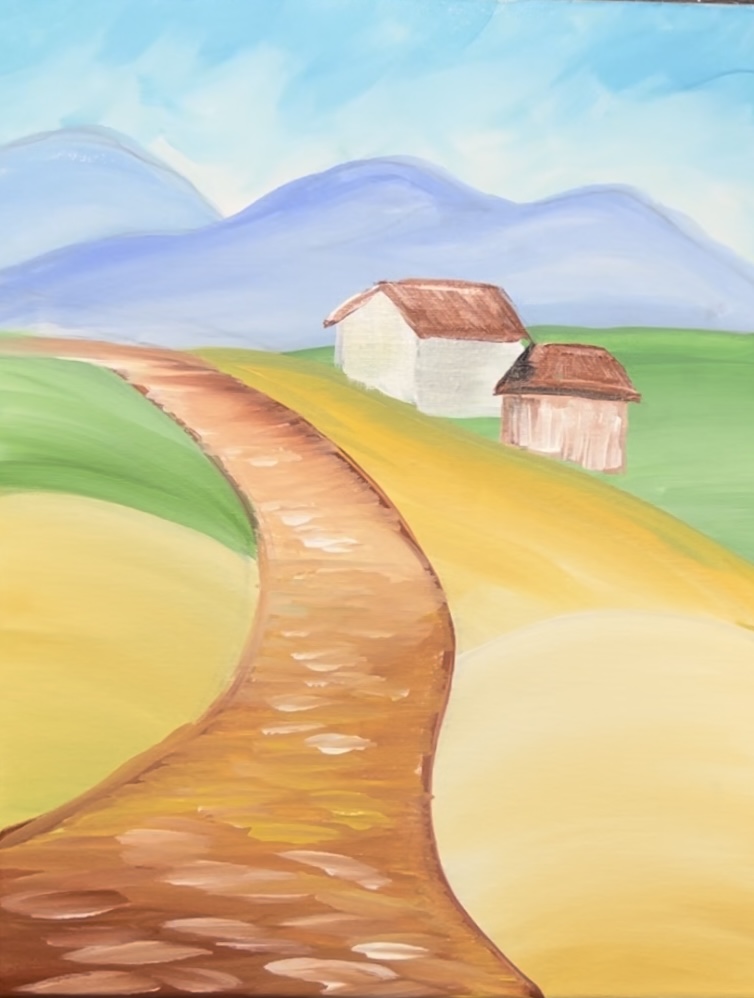
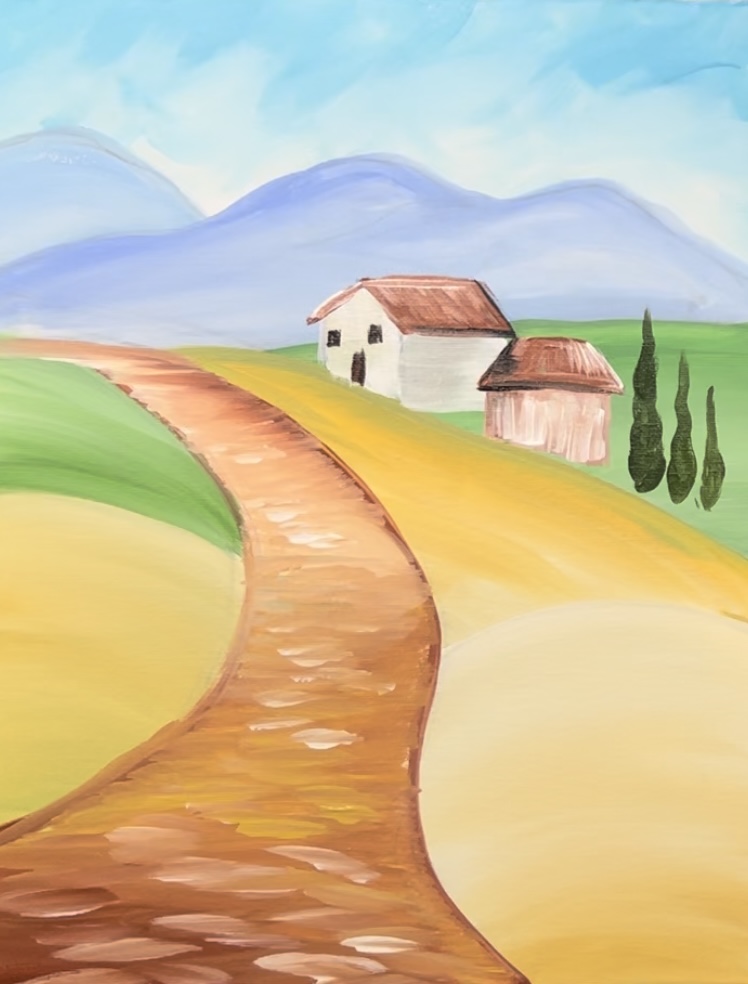
7. Draw & Paint Buildings & Small Cypress Trees
Use a pencil to lightly sketch the two buildings. Draw a 3/4 view of a house on the left and a frontal view of a house on the right. The house on the right has a trapezoid roof and this slightly overlaps the house on the left. Also note the location and size of these homes. They are nestled just above the yellow hill area. We won’t really see the base of these two buildings because they will be covered by green plants on the bottom.
After you are done drawing the two buildings, load your palette with fresh titanium white. You can use either a #12 bright brush or a #4 round brush for this step. Start by painting the front part of the house on the left. Do this with vertical paint strokes. Then paint the side of the house on the right with horizontal paint strokes.
Add a tiny bit of mars black to the side of the house on the right to make this look a little more “shadowy”. Then rinse the brush and add a tiny bit of Naples yellow on the left so the front part of the house is an “off-white” color.
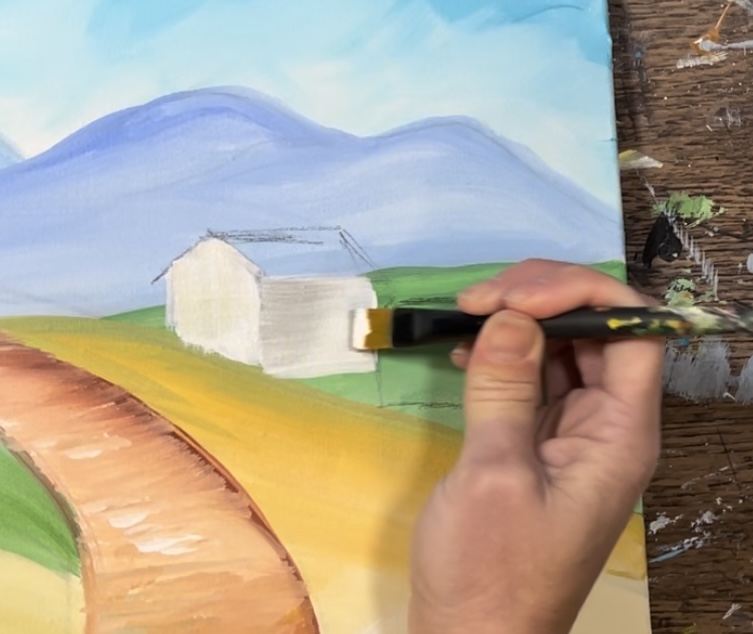
Next, paint the roof. Load your palette with “red oxide” and use the tip of the brush to paint the roof. Start by outlining the two angles on the front and then paint the horizontal line on the top of the roof on the right.
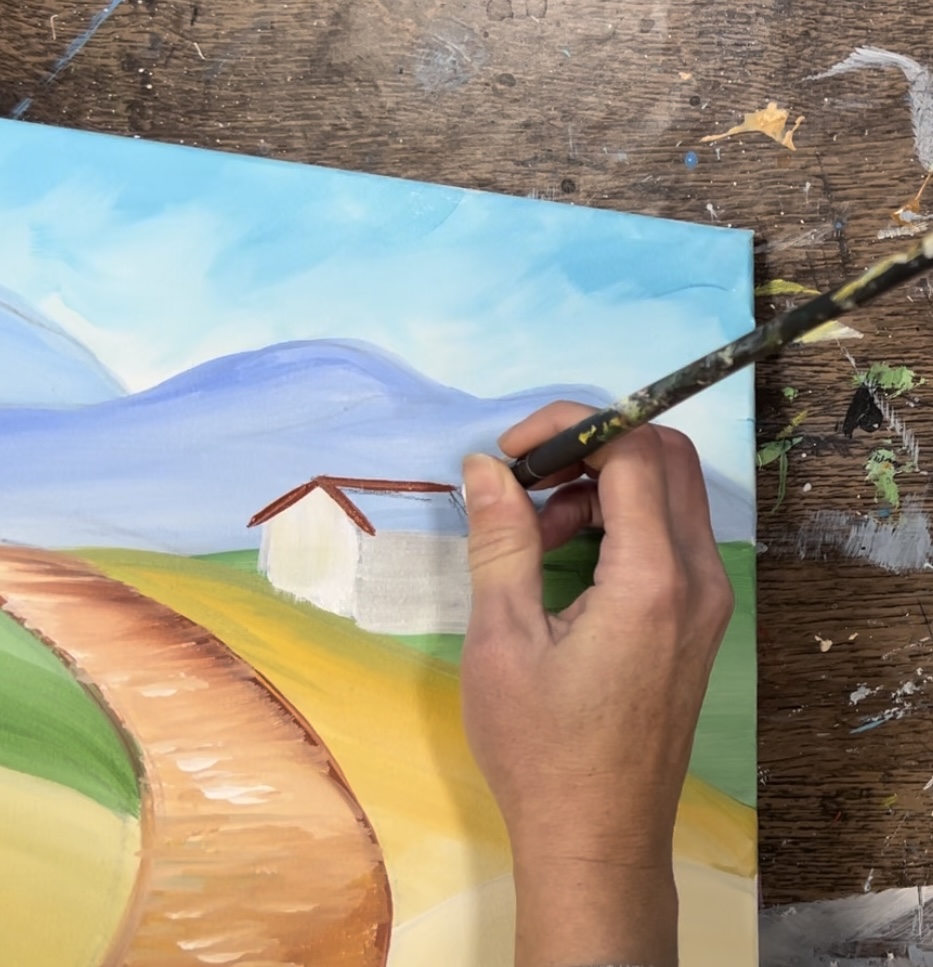
Fill the roof in solid using diagonal strokes. Then, before the red dried, blend a little bit of titanium white into the roof on the top.
Paint the second building on the right. For the front part of the house, mix a small amount of red oxide into titanium white and paint this with vertical paint strokes. Then paint the roof the same way you painted the roof on the left building.
Blend a little bit of “mars black” on the left part of the roof so that it is dark and shadowy.
Then paint the three cypress trees on the left of those buildings. On your palette, mix a dark green. Mix about equal parts “hooker’s green hue” with “Naples yellow” and add a small amount of “mars black” into it.
Paint three cypress tree columns with the largest one on the left and have them get progressively smaller to the right. You don’t need to paint the trunks of these trees because this area will be covered by greenery in a later step.
Next, use a #4 round brush and mars black to paint windows and doors on the buildings. You can mix a little “red oxide” into the black if you want the black to not be so dark. You also can paint these windows and doors very loosely.
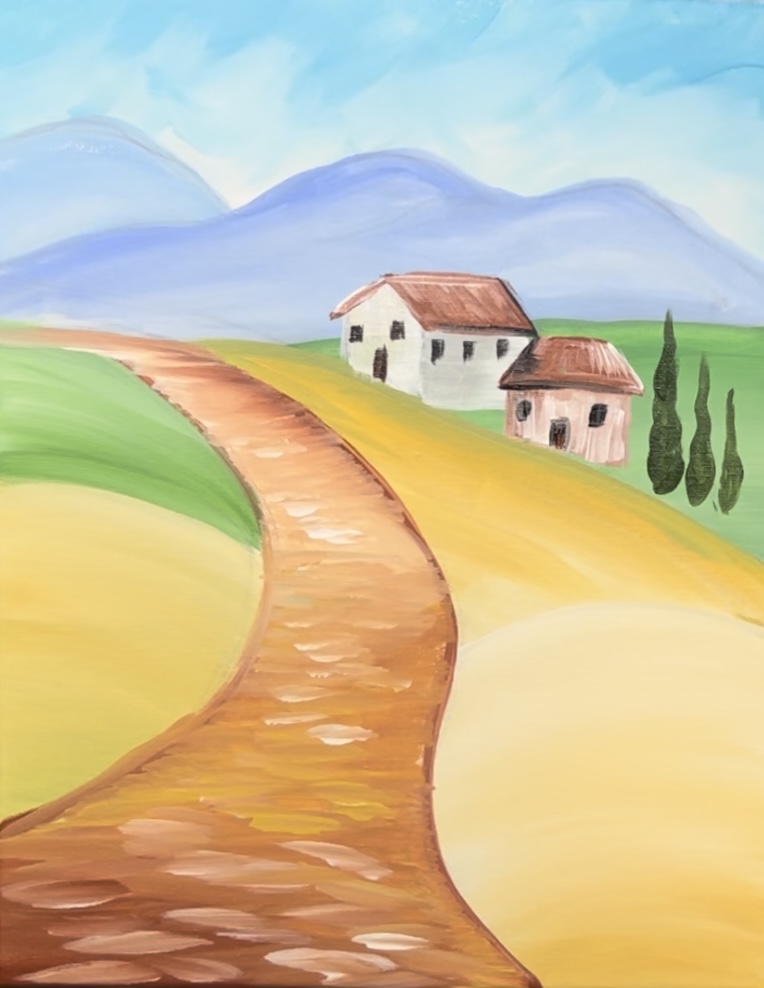
8. Paint “Greenery” along top of yellow hill
Use the #4 round brush to paint “green shrubbery” along the top of the yellow hill and allow it to overlap the base of both of the buildings as well as the base of the cypress trees. Use the same color that you used for the cypress trees. Paint “stipple” paint strokes that are slightly rounded.
Then go back and add a small amount of “titanium white” to this green so that it is lighter towards the top. Allow this greenery to be a little “taller” on the far right and “narrower” in the distance. This will create some depth/perspective.
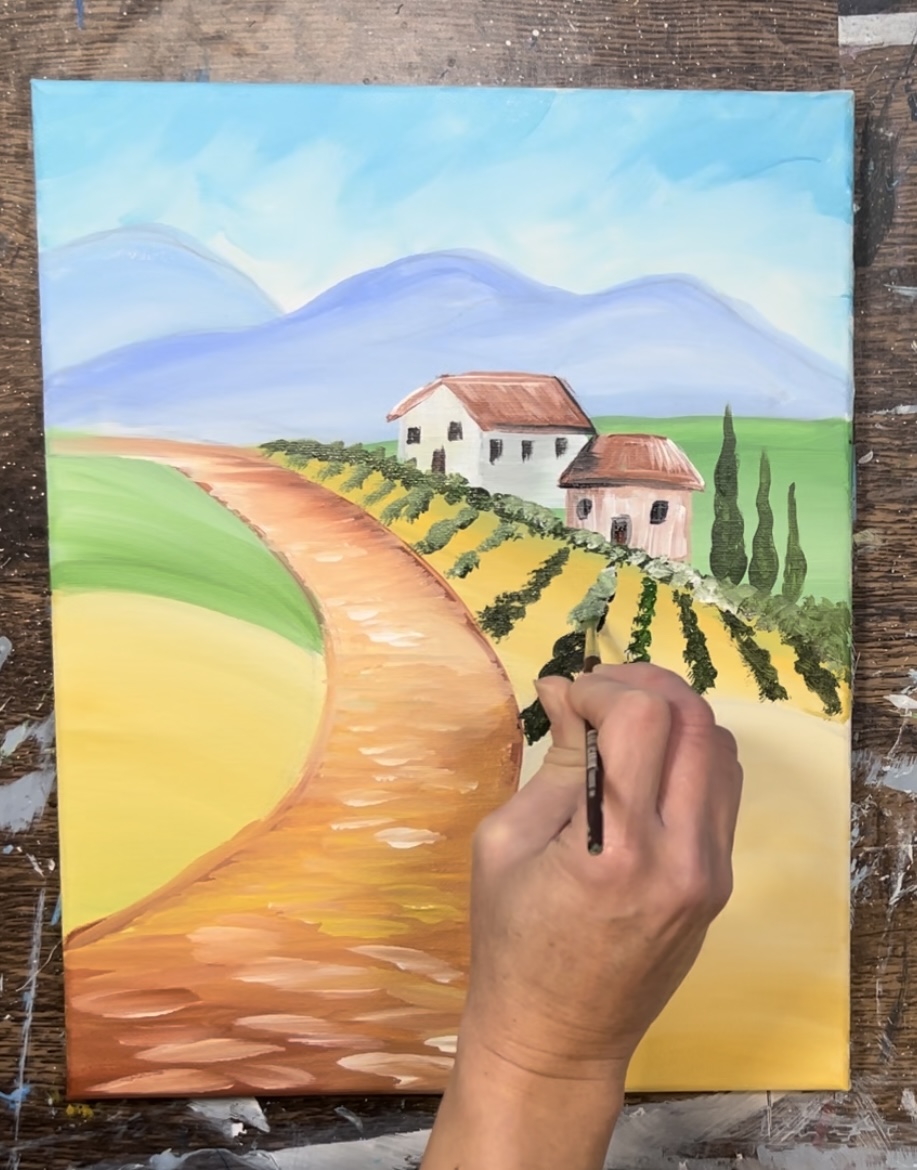
9. Paint first set of grape vine rows
Start with a very dark green for these grape vine rows (the same dark green as the cypress trees but a tad bit more black). Start in the center of the yellow hill area. Use the #4 round brush to paint small rounded/ stippled paint strokes. Paint a diagonal row that is thinner/ pointed far away and wider as it gets to the bottom of the hill area.
When you paint each of these “rows”, you’ll want to change the angle so that it starts swaying more to the right as you go to the right. Make the spacing further apart as you paint the row closer to the bottom and the spacing should look closer together further away.
Then paint the rows to the left of that center row. This time, add a little more white to the brush so they appear to be lighter. Also, these are smaller and closer together rows because they are much further away.
Add a layer of light green/ white paint on the top of the green rows to lighten them up but leave a lot of the dark green still showing through.

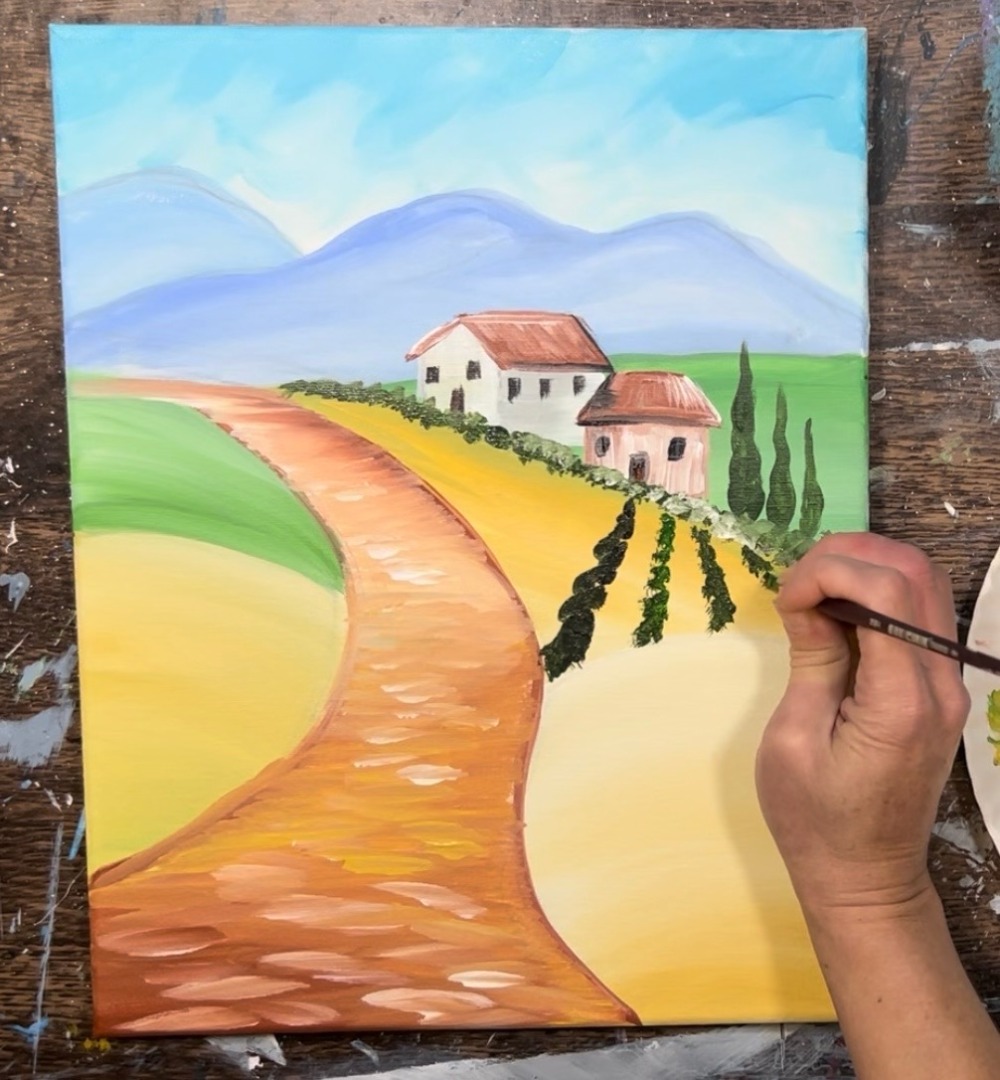
10. Paint second set of grapevine rows
Switch to a #12 bright brush for the second set of rows on the lower hill. The technique is the same but these rows are closer so paint the little “dabbed strokes” larger. Start with the dark green and paint a row on the very top of the hill (make sure you are going in a curved direction).
Then paint another row going in a curved direction. Again, do this with bigger paint strokes.
As you paint each “row”, allow it to be larger and a little further spaced apart.
Add a little bit of light green to the top edges of each of the rows so that the top is lighter and the bottom is darker.
Rinse the #12 bright brush. Then load the edge of the brush into just “mars black”. “Stamp” the brush on the bottom of each of the rows to give it a dark/ shadowy base on the bottom.
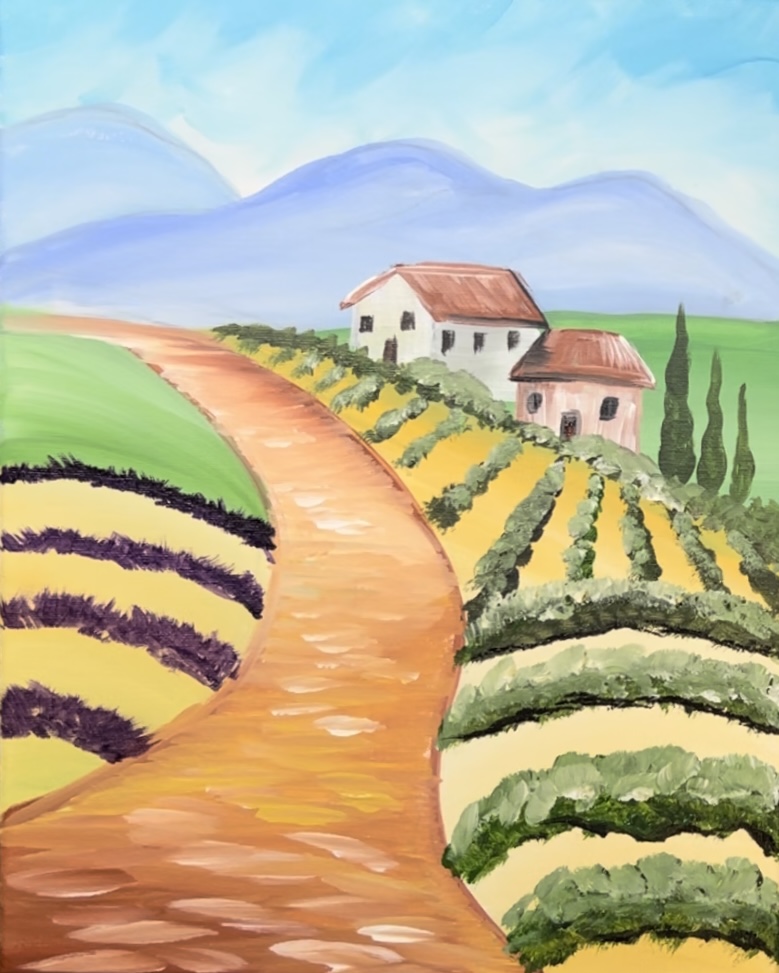
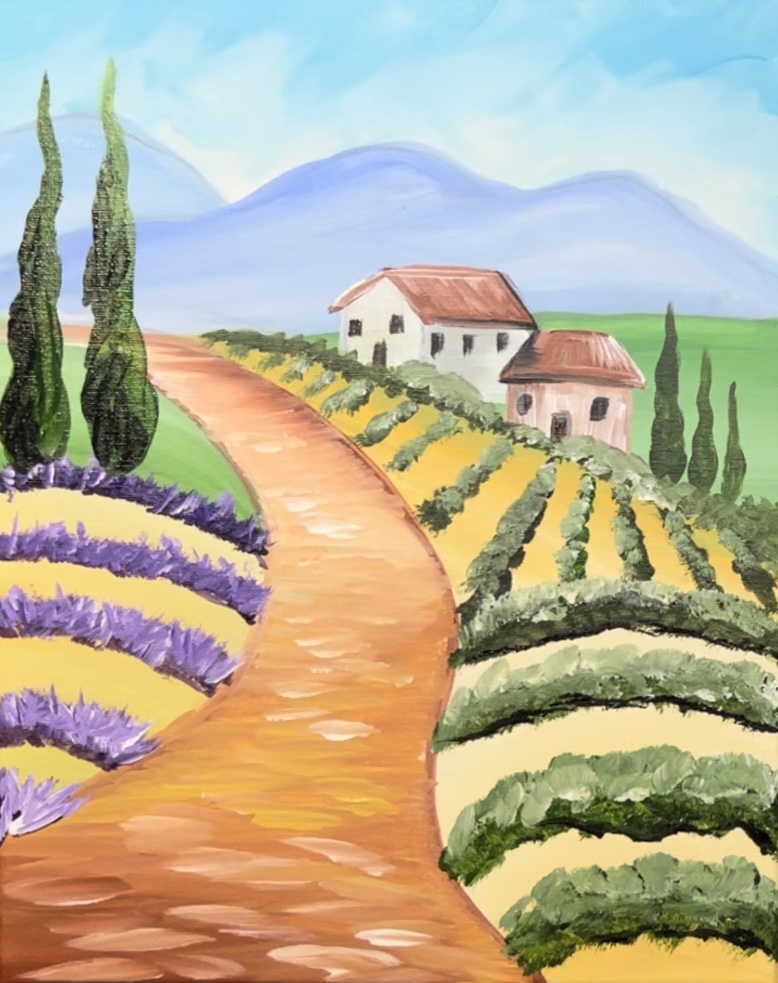
11. Paint lavender rows
Load your paint palette with “dioxazine purple”. Mix a tiny bit of black into this purple. It will make a very dark purple. Then use the #12 bright brush to paint your “lavender rows”. Instead of “stippling”, try dragging your brush up just a little bit to create some texture.
Rinse the brush. Then mix titanium white with the dioxazine purple. Paint a second layer with this purple using the same brush and technique. Again, try to drag the brush up as you paint the rows.
Add a third layer with more titanium white to lighten the rows. Make sure the bottom of the rows remain dark/ don’t cover all of the initial dark layer.
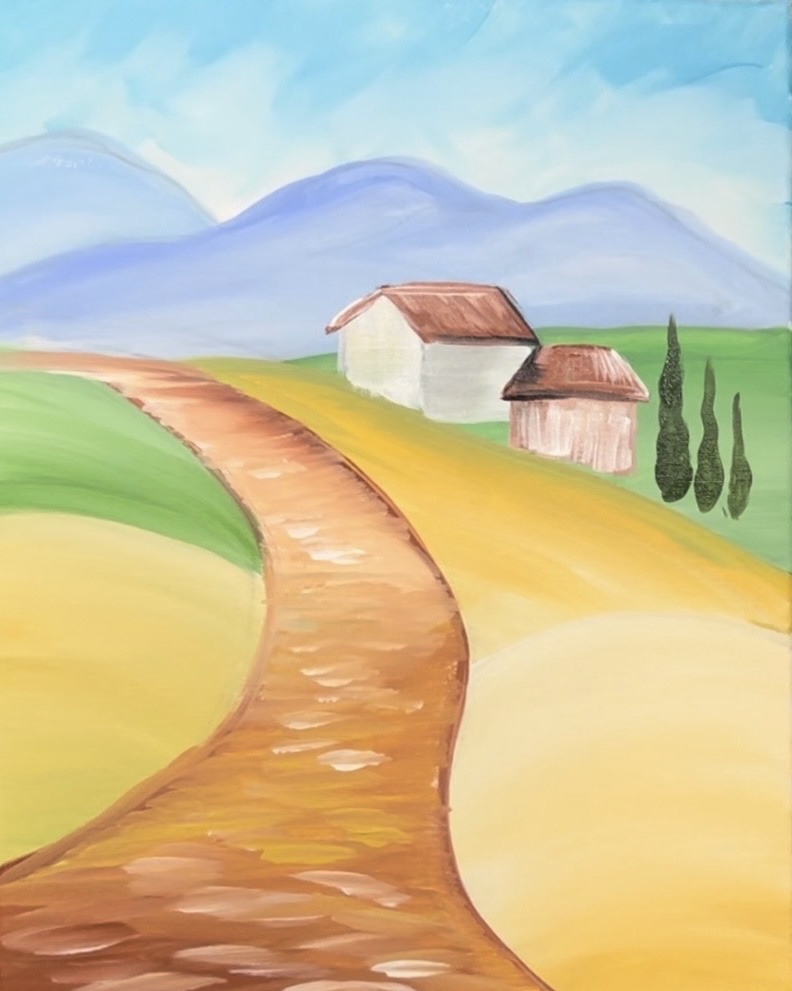
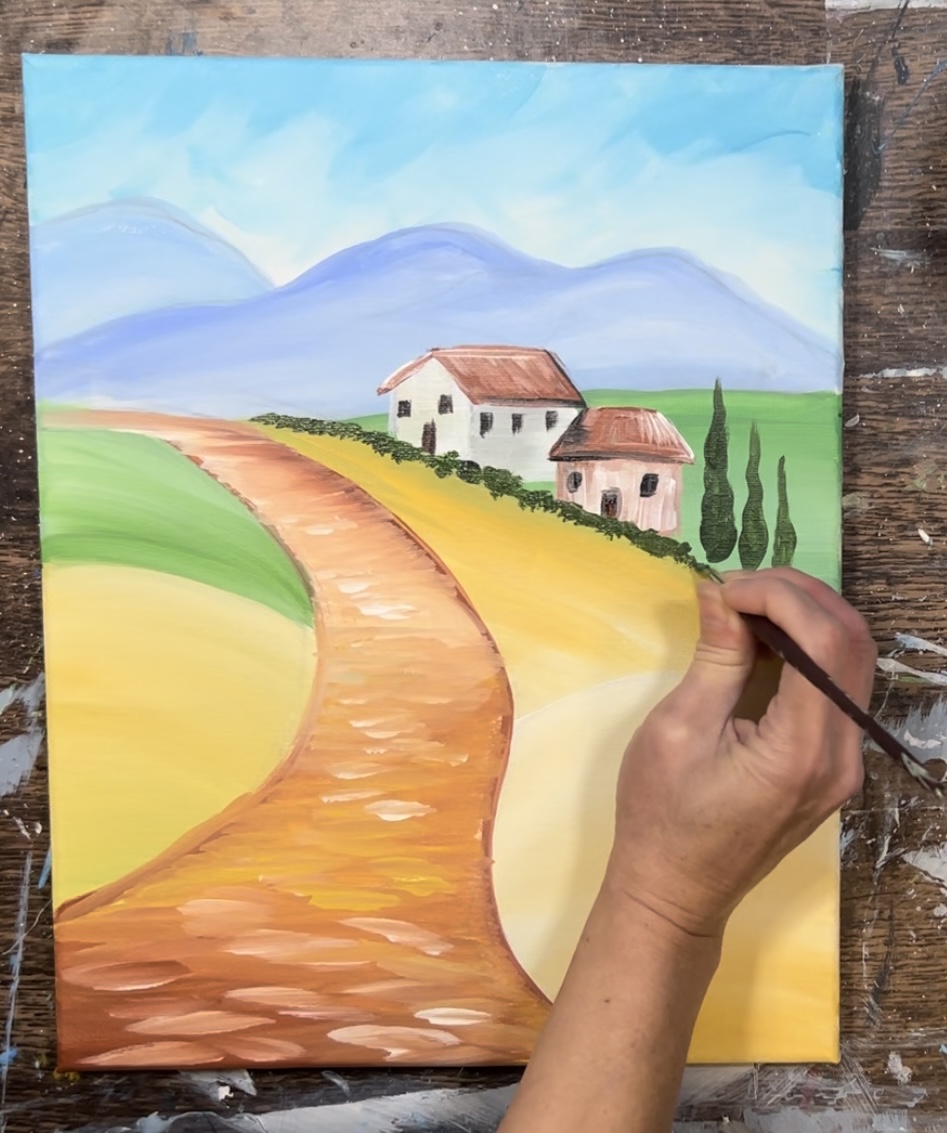
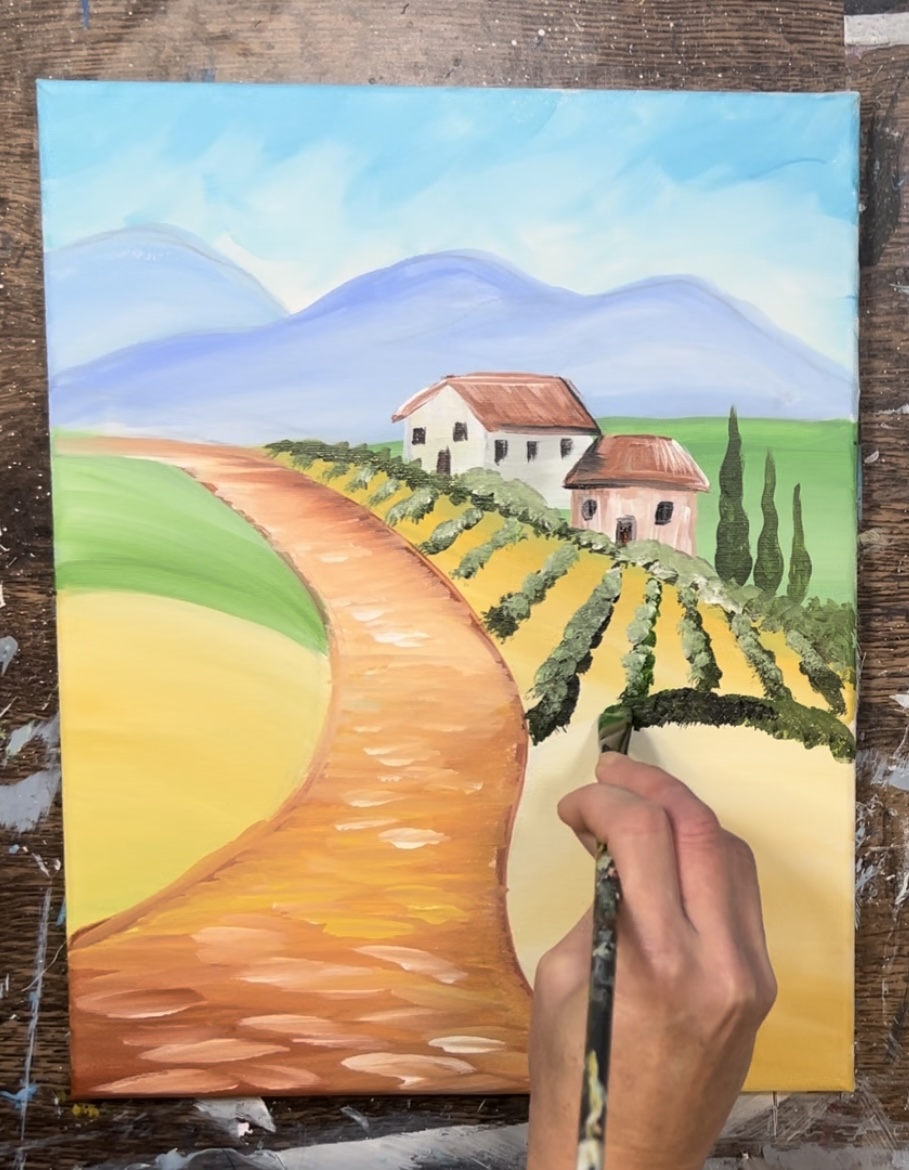
12. Paint Large Cypress Trees
Use either the #12 bright brush or the #4 round brush to paint the two cypress trees on the left. Do this with the same dark green color you used for the other cypress trees. Start on the bottom of the tree and paint vertical/ curved paint strokes forming the shape of the tree. Allow the top to be slightly “wavy” and go to a point.
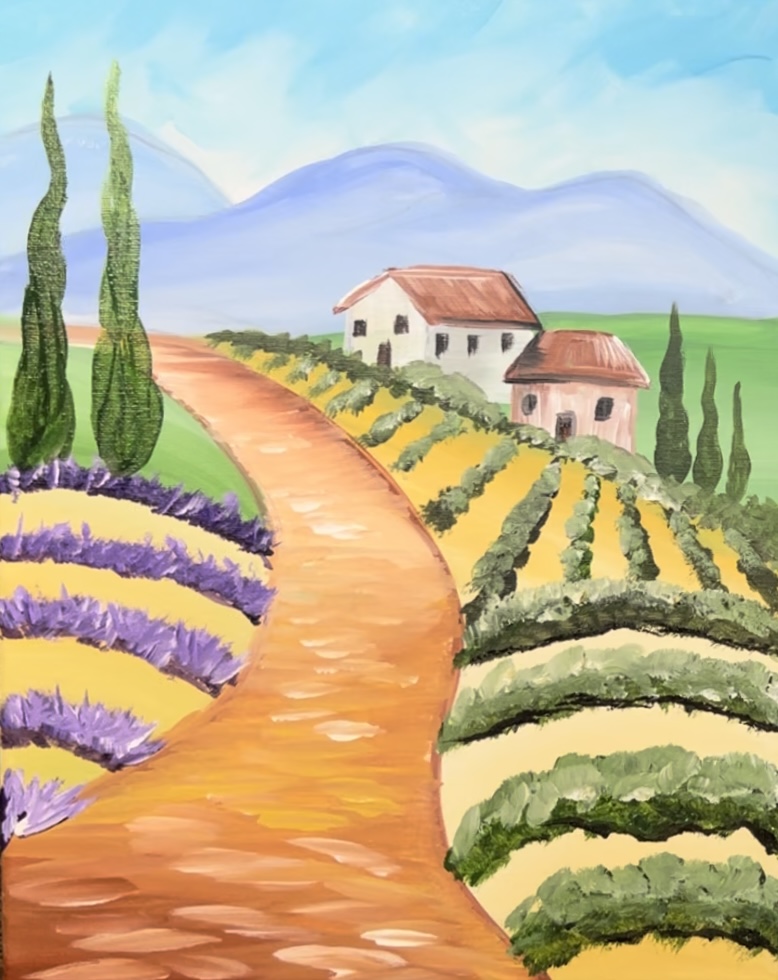
Add a little bit of “mars black” on the left of the cypress trees and blend it in slightly with the green. This will give your trees some shadow.
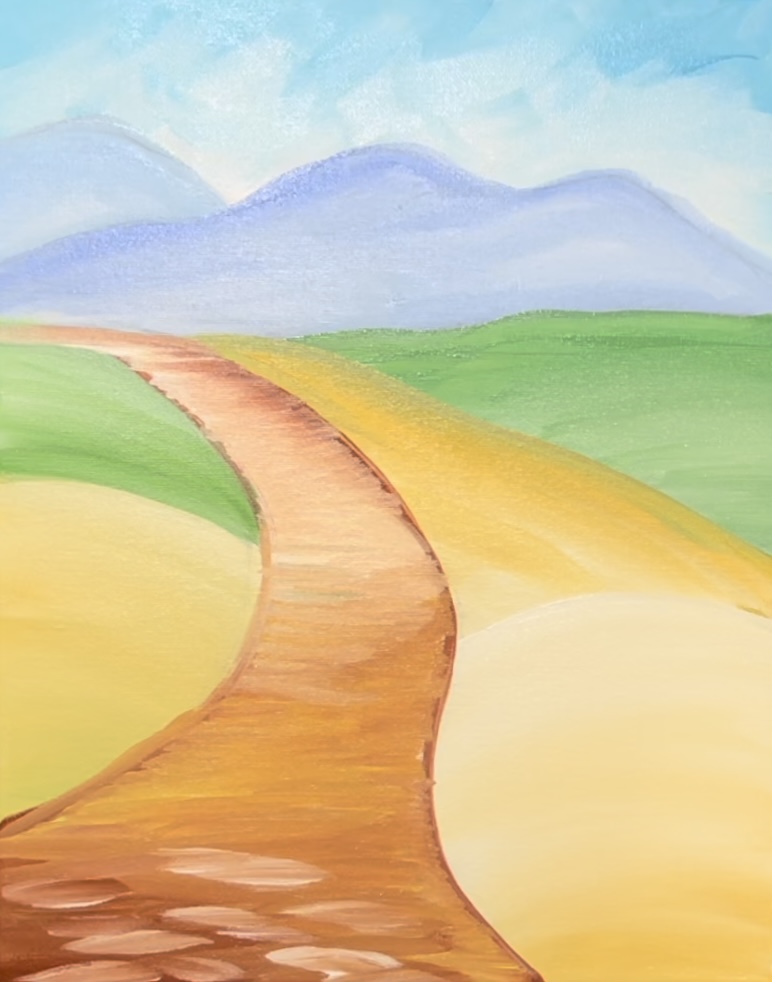
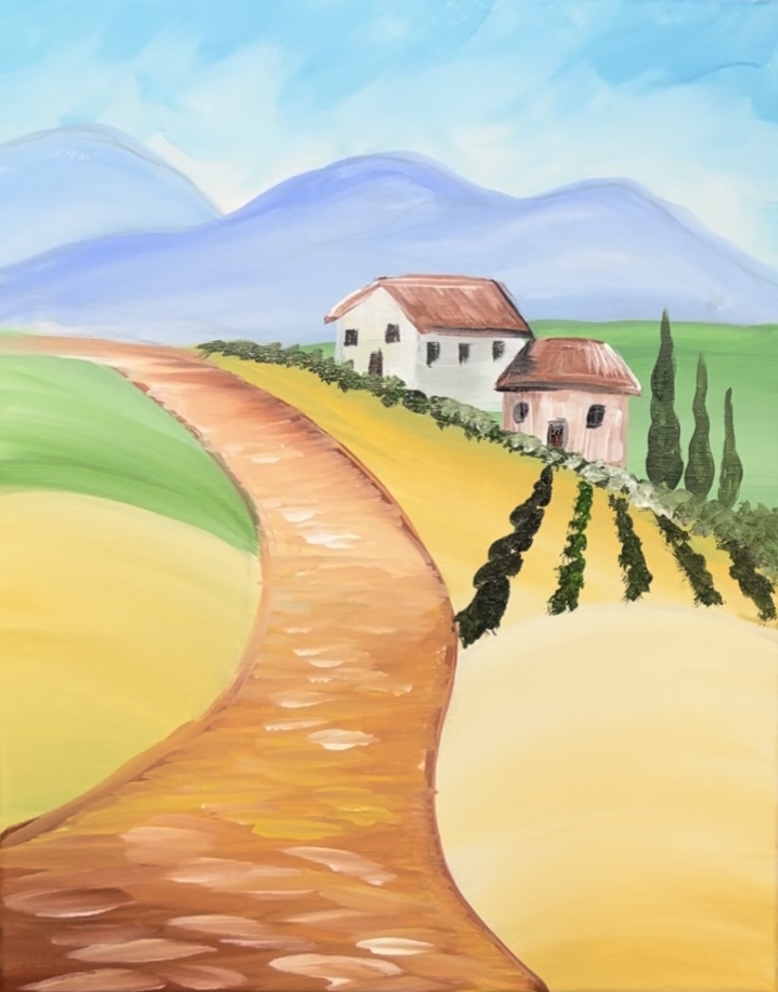
13. Paint edging of road
Use the #12 bright brush and a combination of the “red oxide”, “Naples yellow” and “titanium white” to paint the edging of the road. Start on the bottom and “dab” the brush with the red oxide along the edge of the road. These little “dab strokes” start out larger on the bottom but get smaller as the road goes in the distance. Add lighter color (Naples yellow) as you work your way up the road. Then add titanium white to the brush for the sides of the road in the distance.
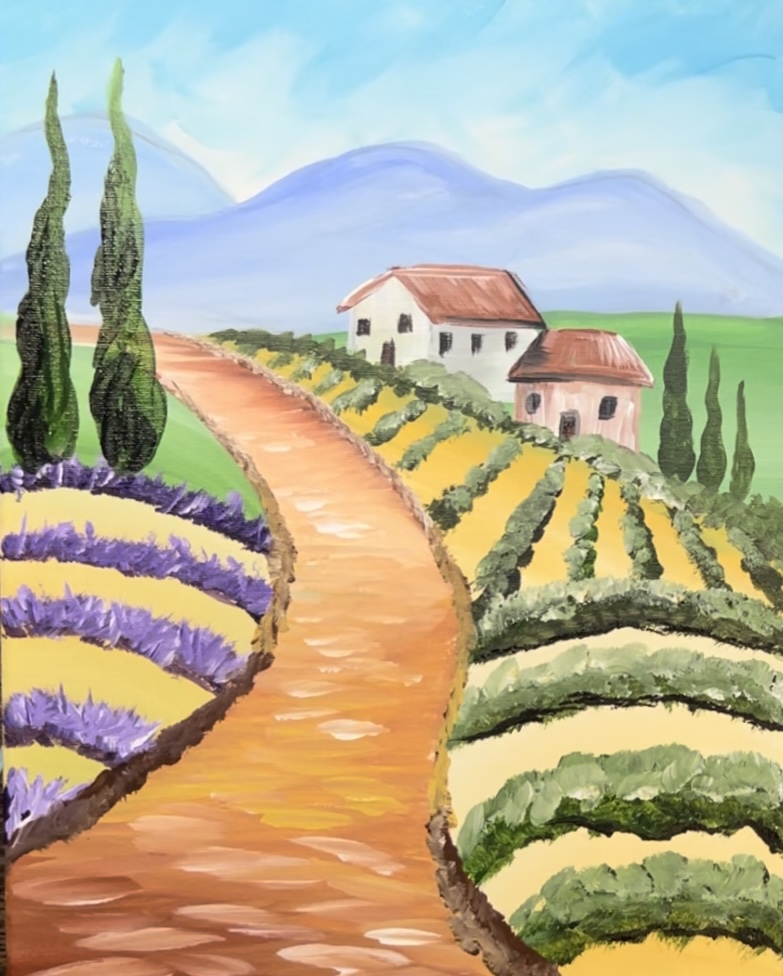
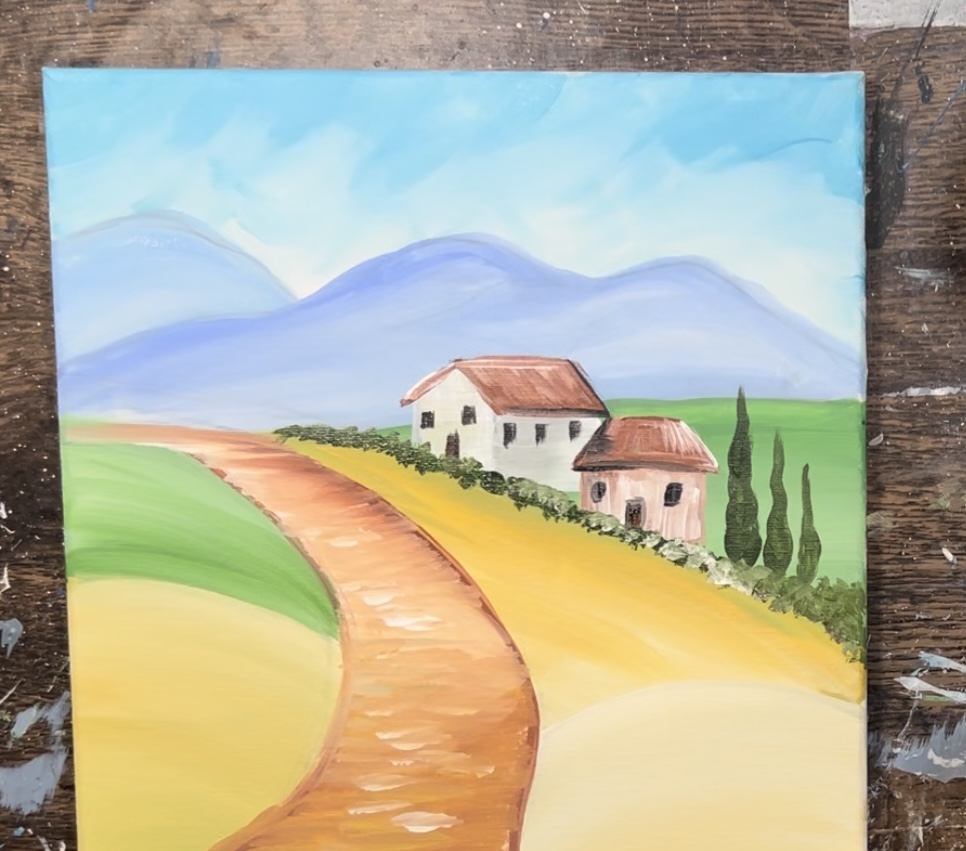
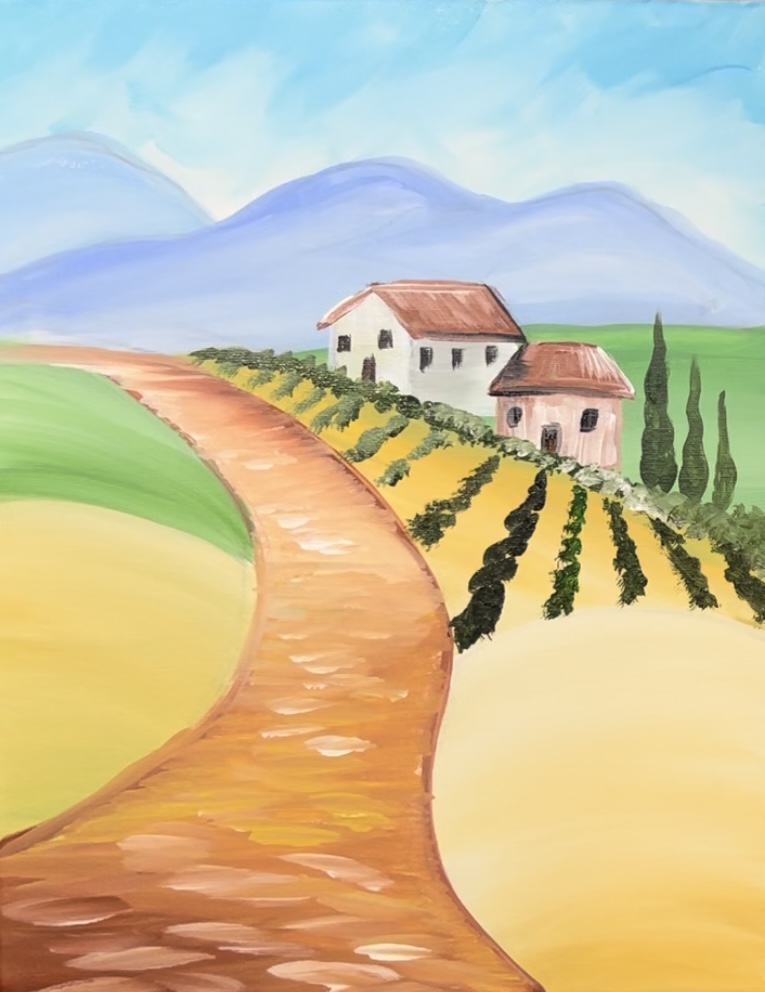
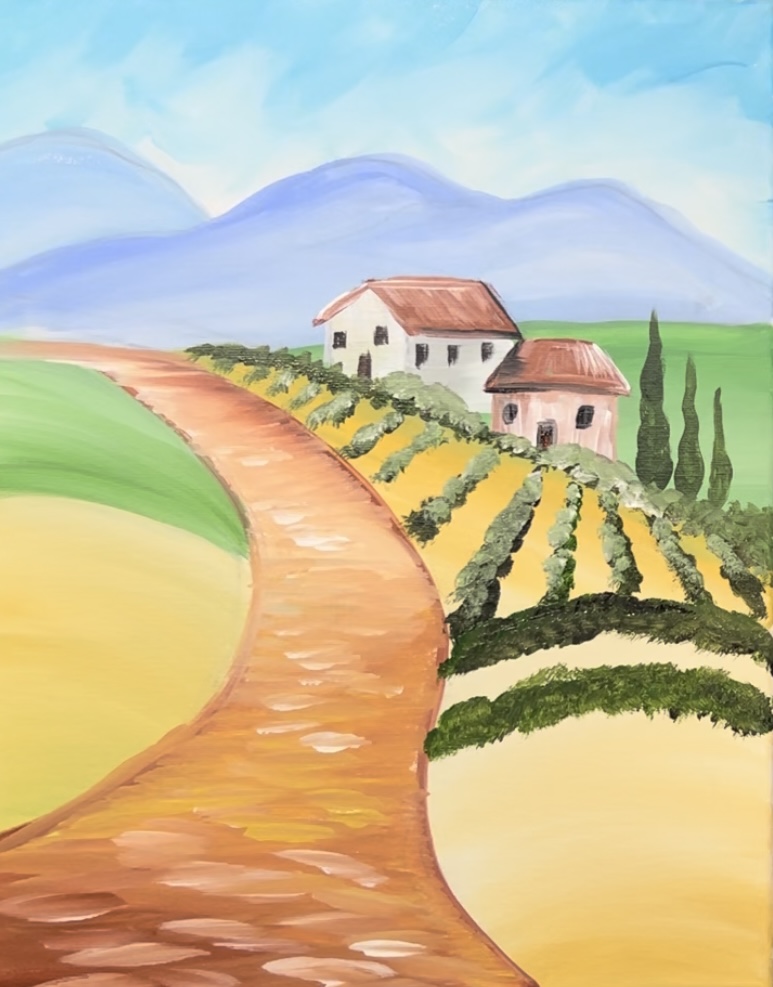
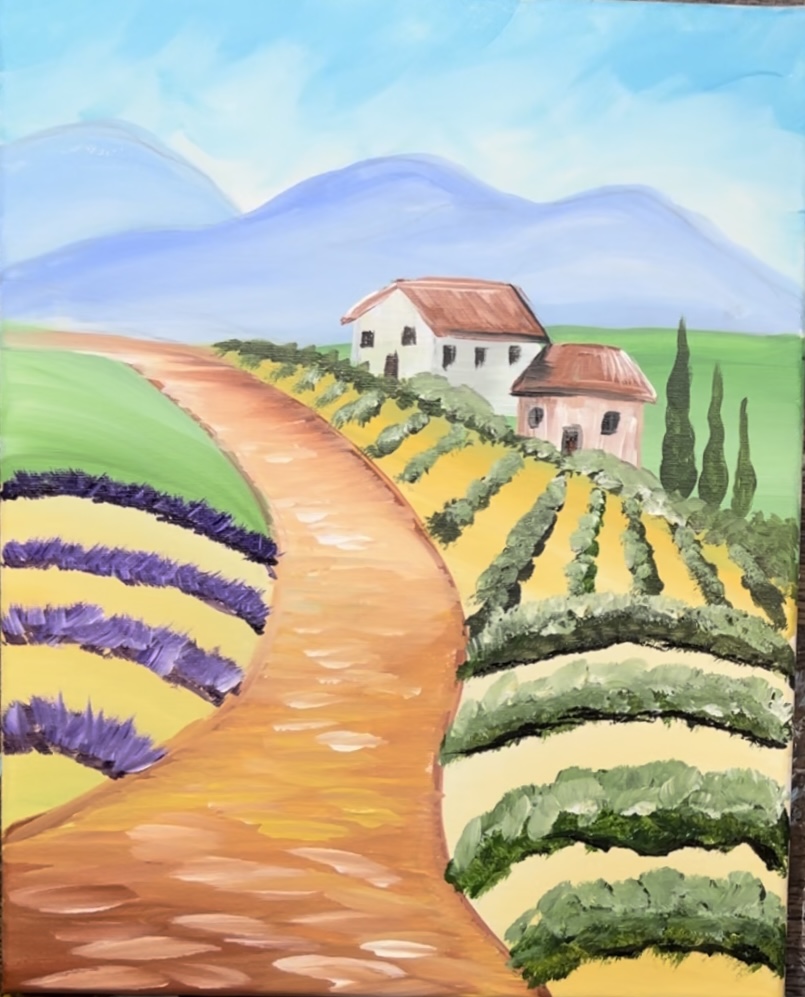
13. Final Touchups
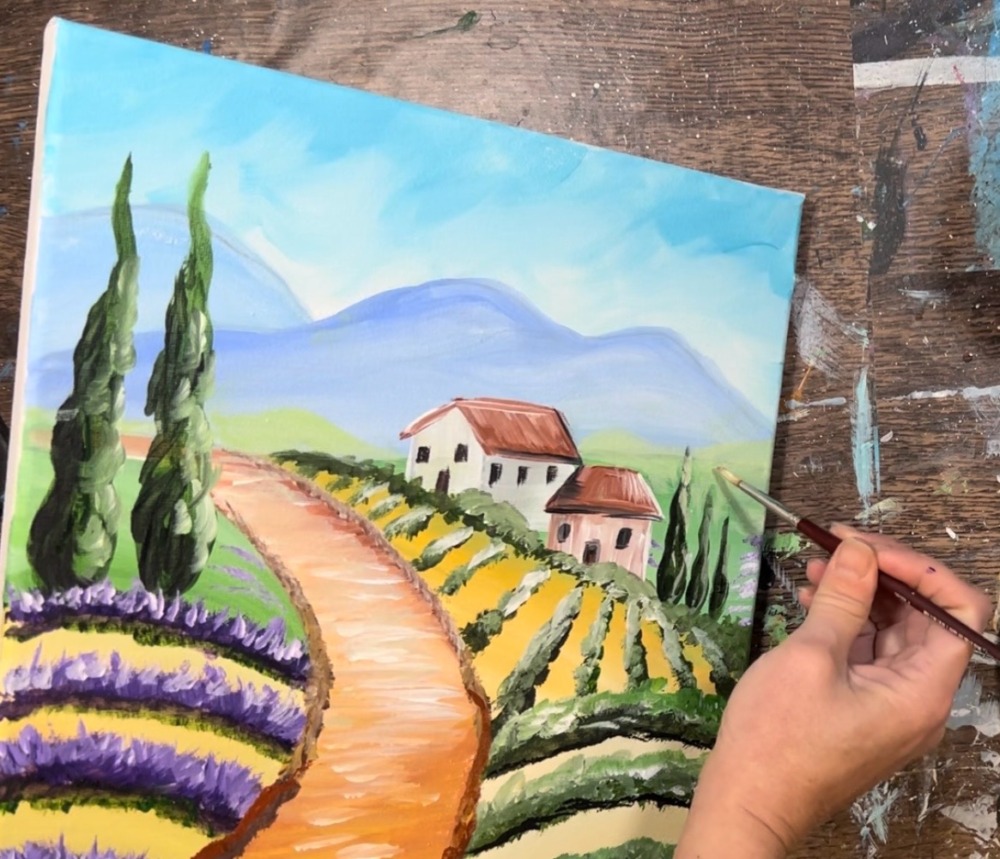
Some final touch ups in this painting include: painting some larger “lavender” flowers in the lower right corner area of the painting. Use a #4 round brush To do this. Start with the dioxazine purple and paint columns of dotted flowers. Then add a layer of titanium white over it to lighten it up.
I also added some very light purple “dots/rows” way in the distance behind some of the cypress trees. Also, on the base of the purple lavender fields, I added a darker green layer.
Another final touch up includes painting a lighter colored green hill way in the distance where the land is flat. I used a #4 round brush and very light green (white and a little hooker’s green) to loosely paint the hill way in the distance.
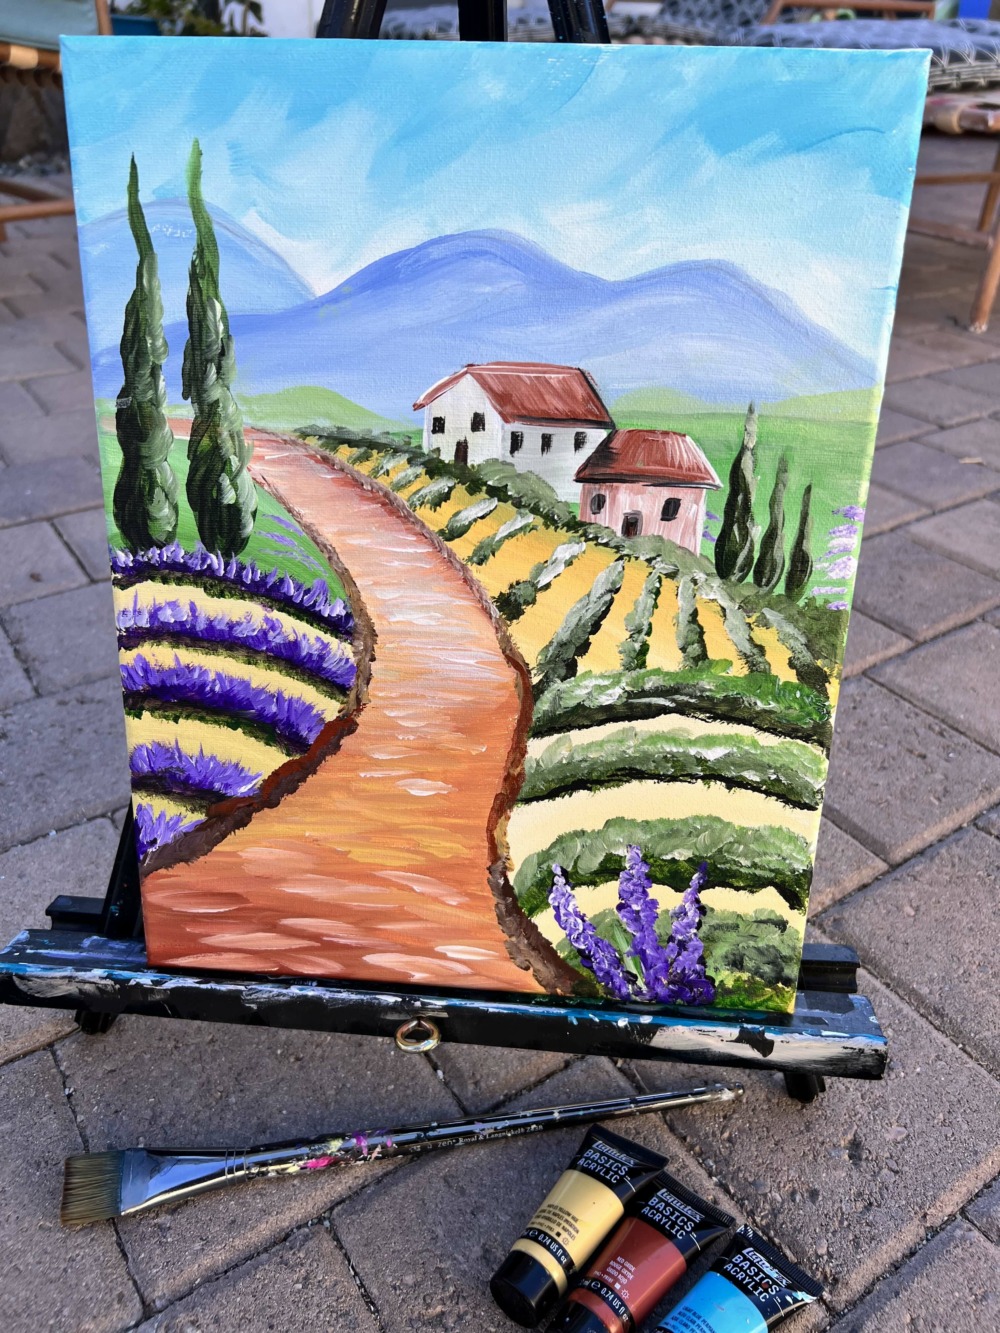
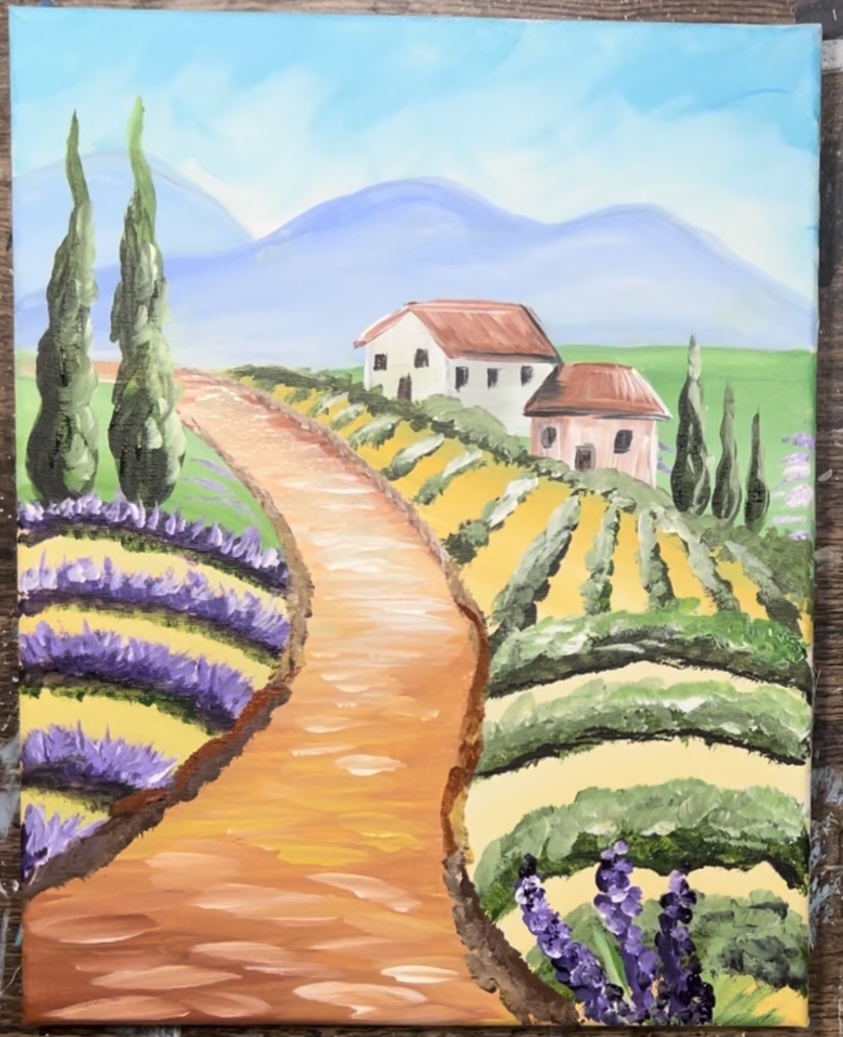
Finished