

Would you like to save this?
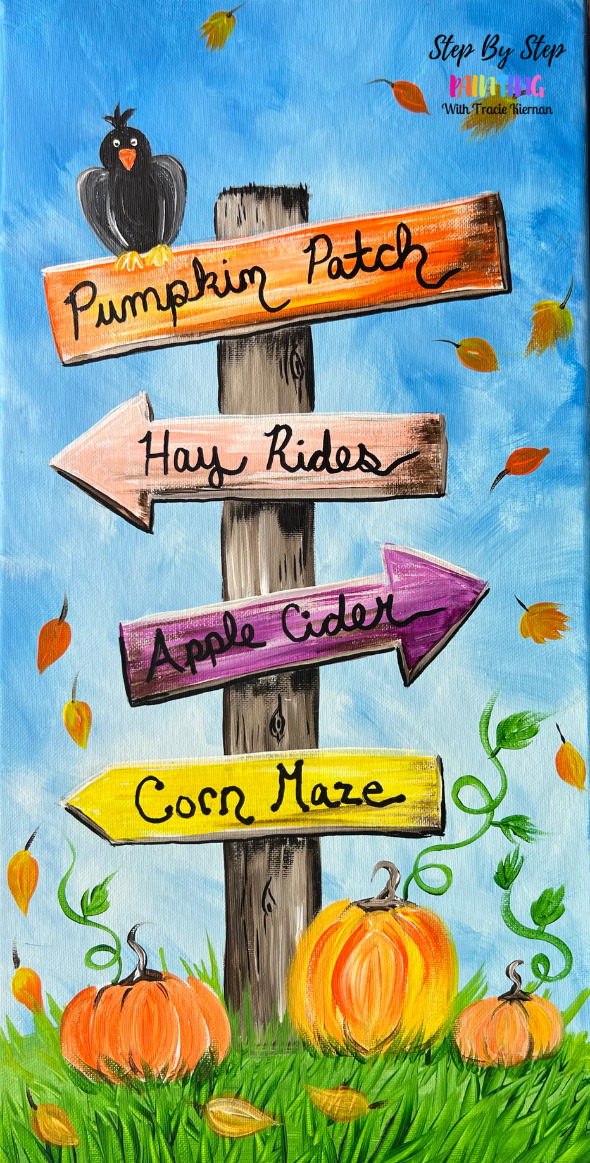
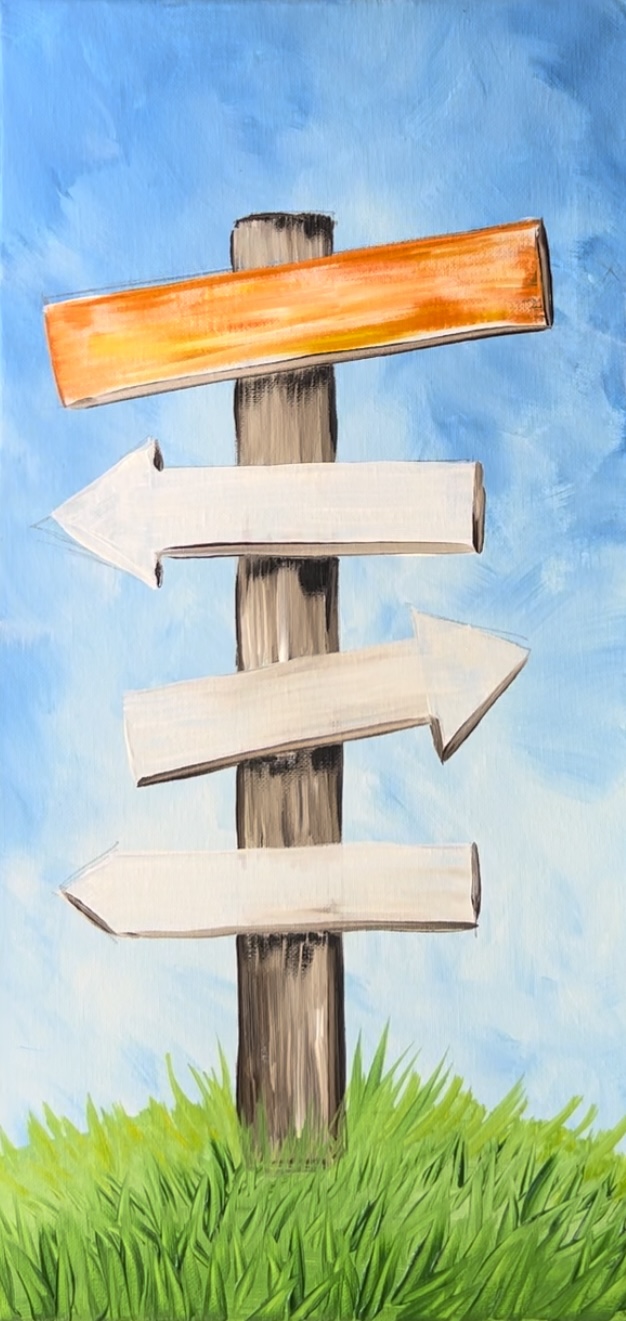
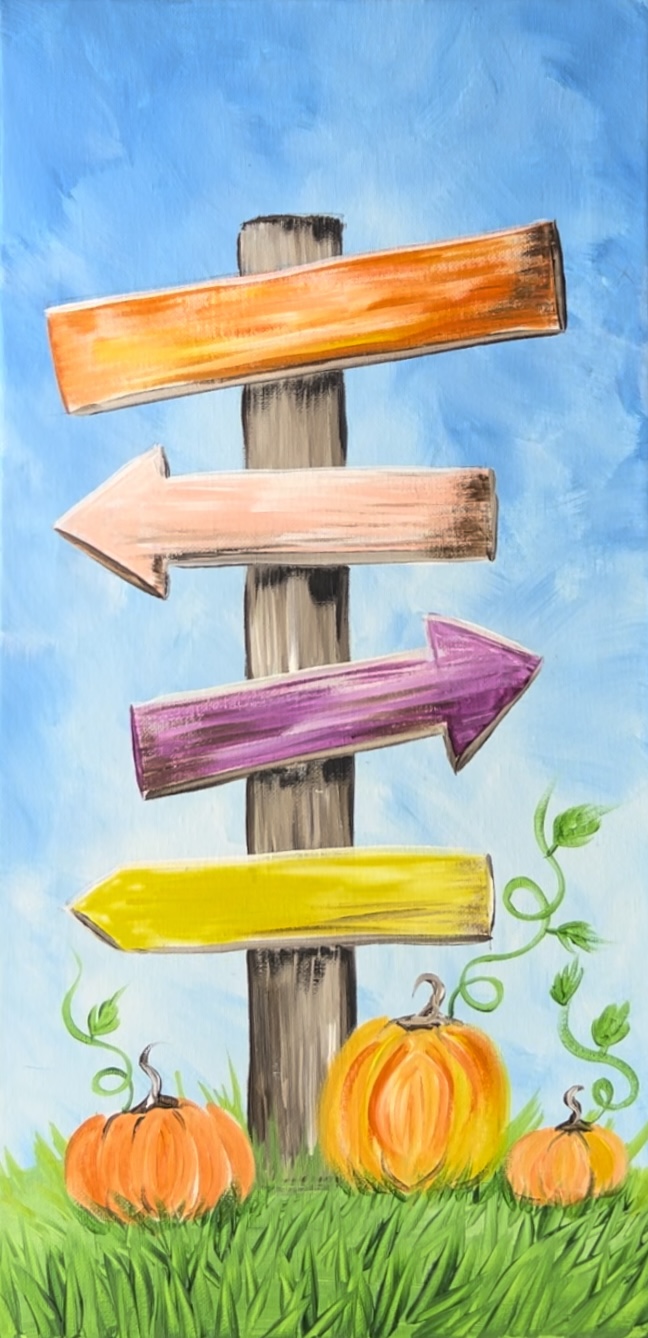
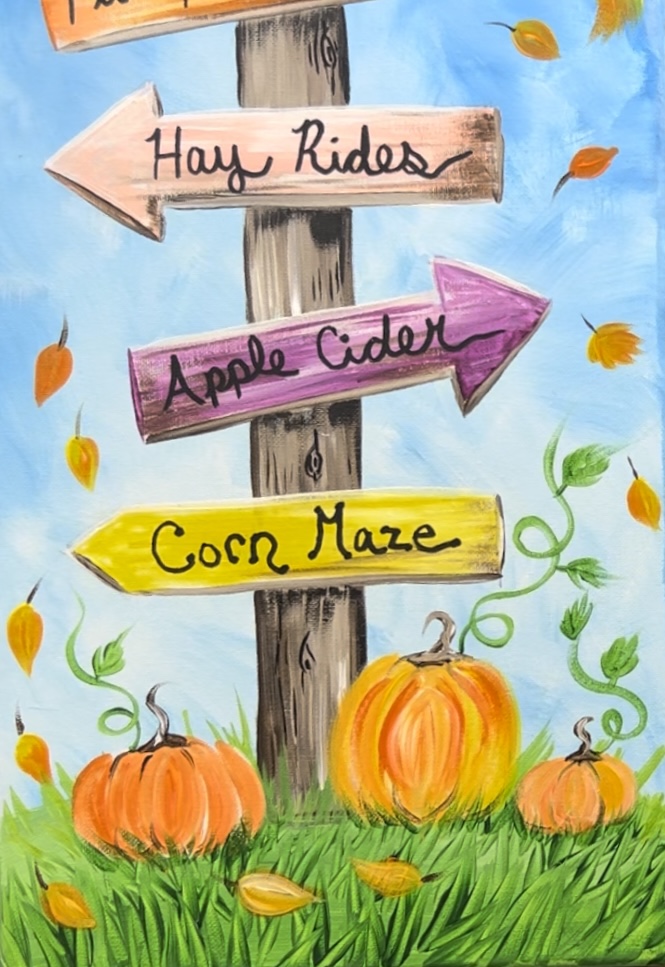
Learn how to paint a pumpkin patch sign. You can customize the words, colors and lettering on this.
This painting is demonstrated on a 10 x 20 long canvas, however, you can do this on any size!
Enjoy and happy painting!
Materials
How To Paint "Pumpkin Patch Signs"
Learn how to paint "pumpkin patch signs". This acrylic painting tutorial is demonstarted on a 10 x 20 canvas.
Materials
- 10 x 20 Canvas
- Acrylic Paint
- Brushes
- Pencil
- Ruler
- Optional Traceable
- Optional Graphite Paper
- Black Paint Pen or Sharpie (for lettering)
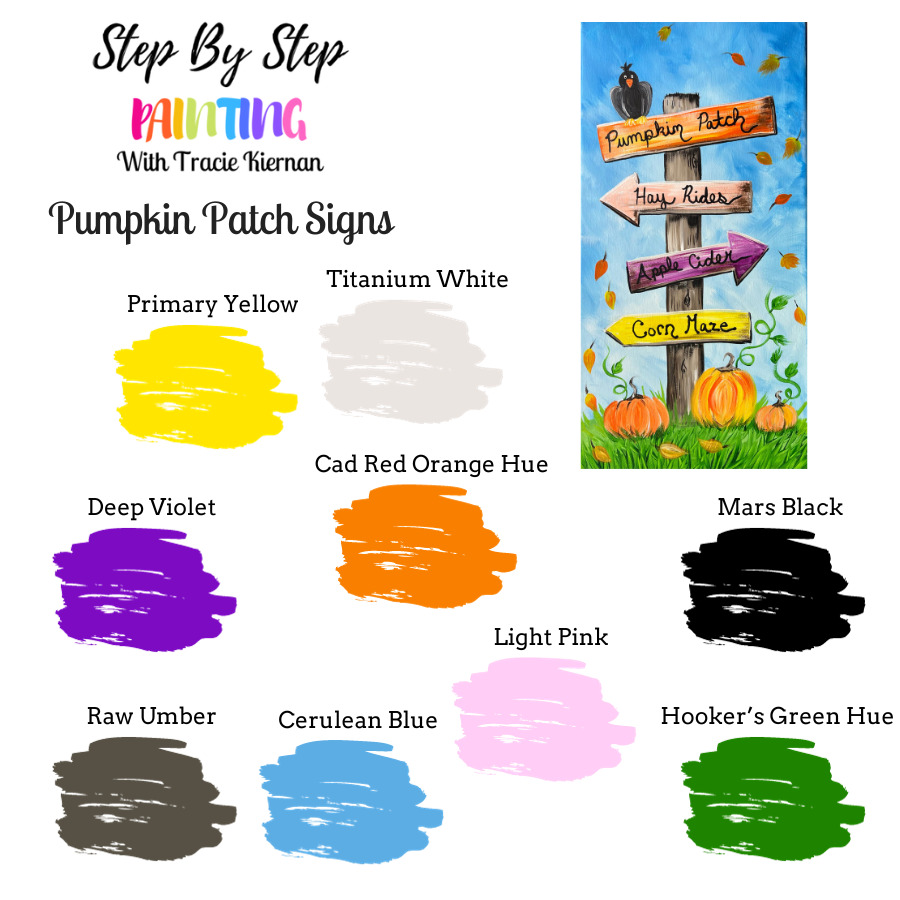
Colors
- Titanium White
- Mars Black
- Raw Umber
- Cerulean Blue
- Hooker's Green Hue
- Cadmium Orange Hue
- Light Pink
- Deep Violet
- Primary Yellow
Brushes
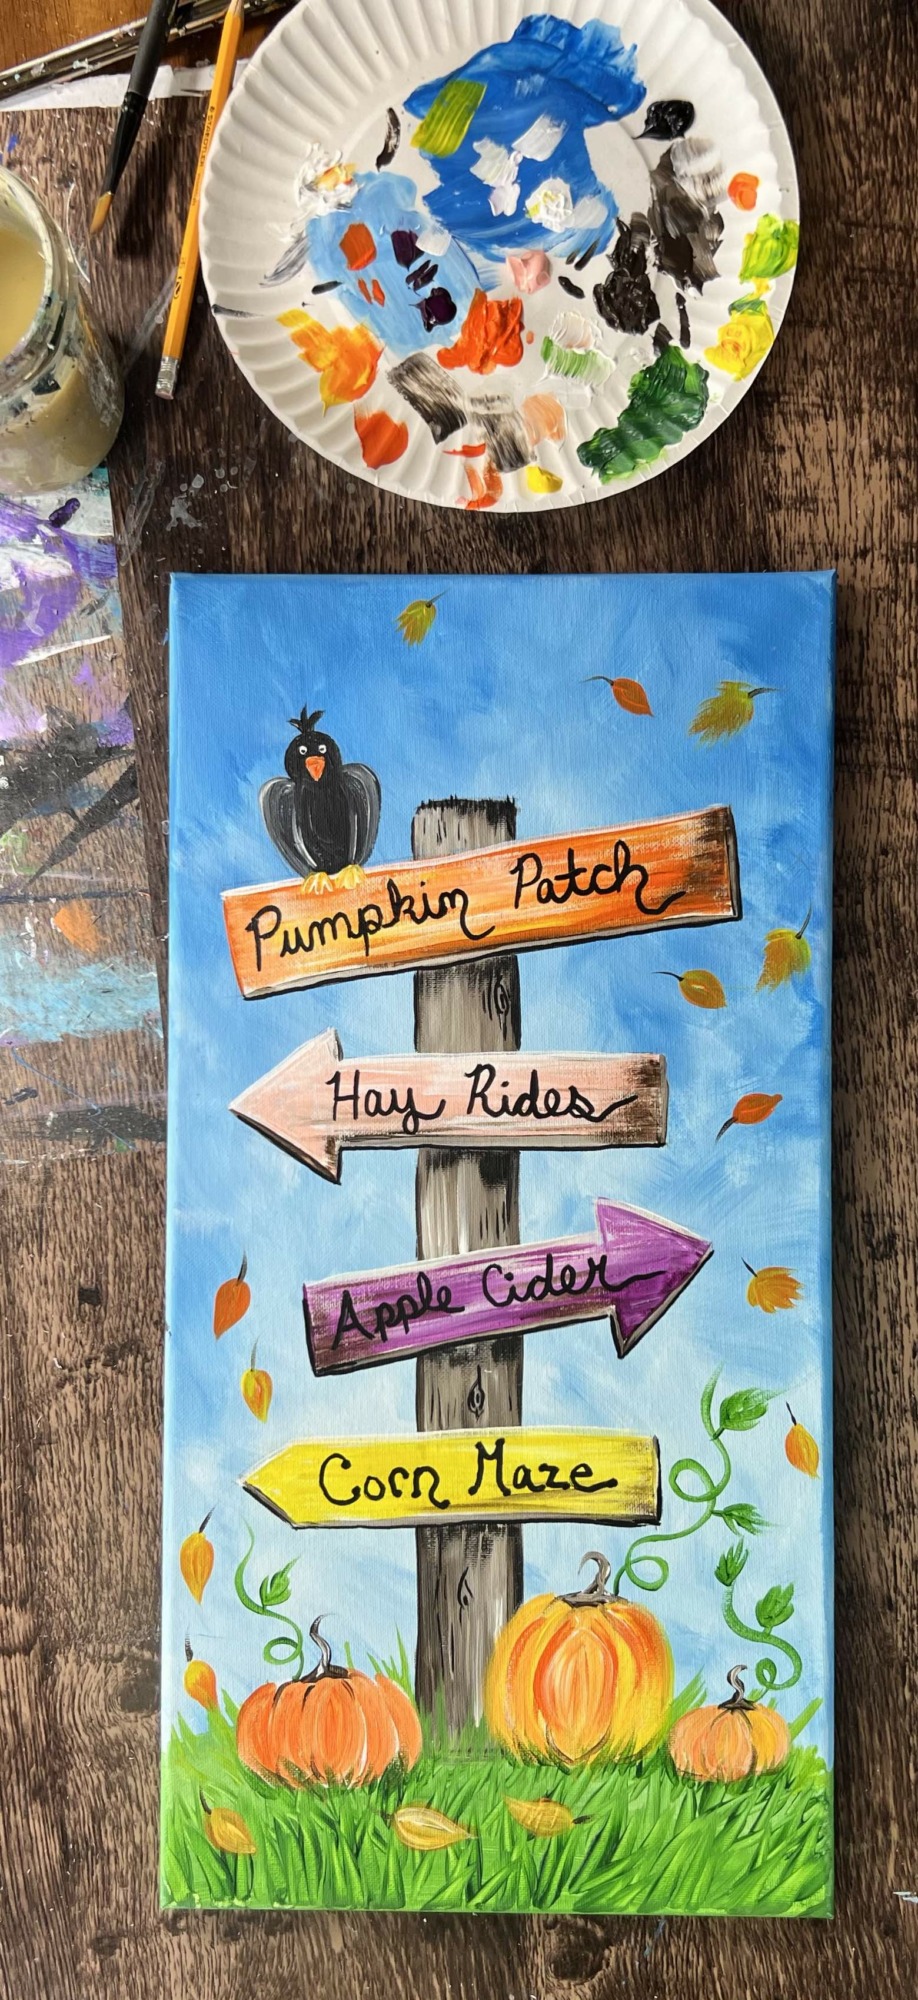
Color Palette
I use Liquitex BASICS acrylics. If you are using a different brand, I would recommend looking at the color chart below to help you sub the colors.
Craft Paint Conversion
If you are using craft paints such as these Apple Barrel Paints, I would recommend subbing to:
- Jet Black
- Snow White
- Brown Oxide
- Parakeet
- Harvest Orange
- Regency Blue
- Cameo Pink
- Grape Jam
- Yellow
Optional Template:
I do not use the template in the tutorial, however, if you prefer using the tracers, you are welcome to print this out and transfer it to the canvas.

Directions At A Glance:
Video:
Step By Step Directions:
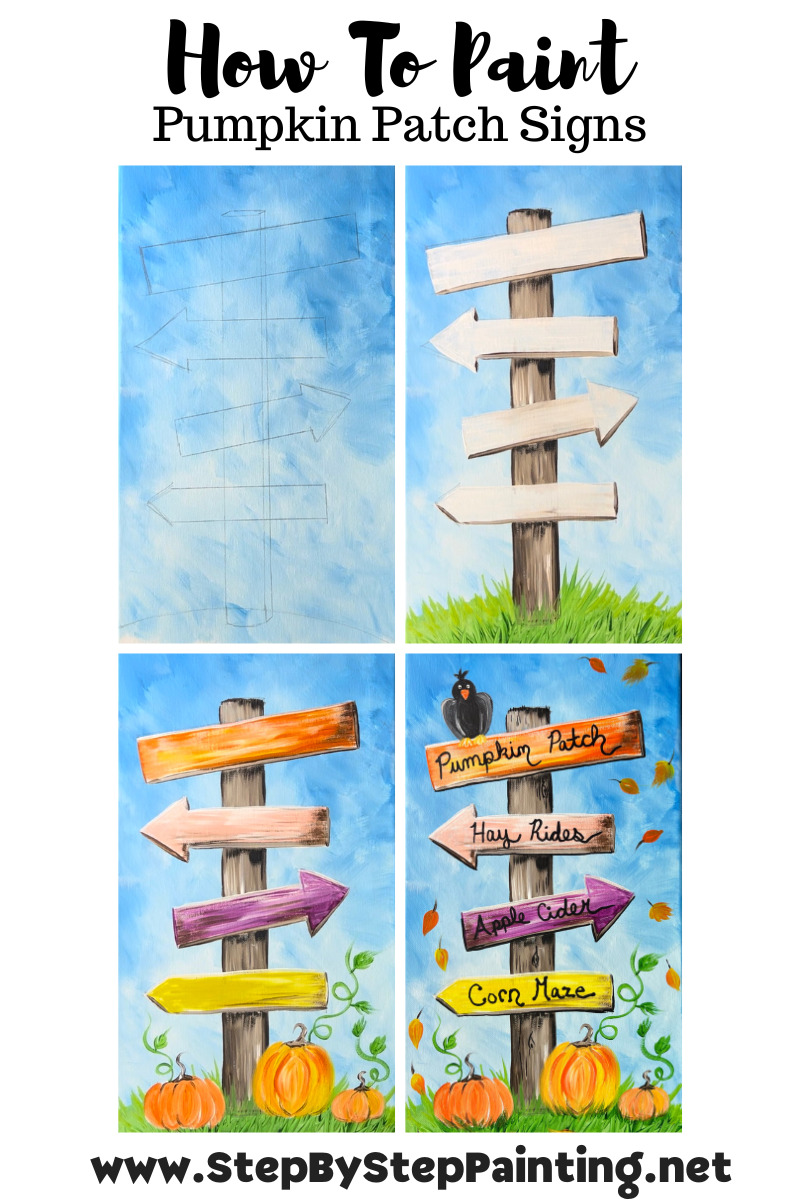
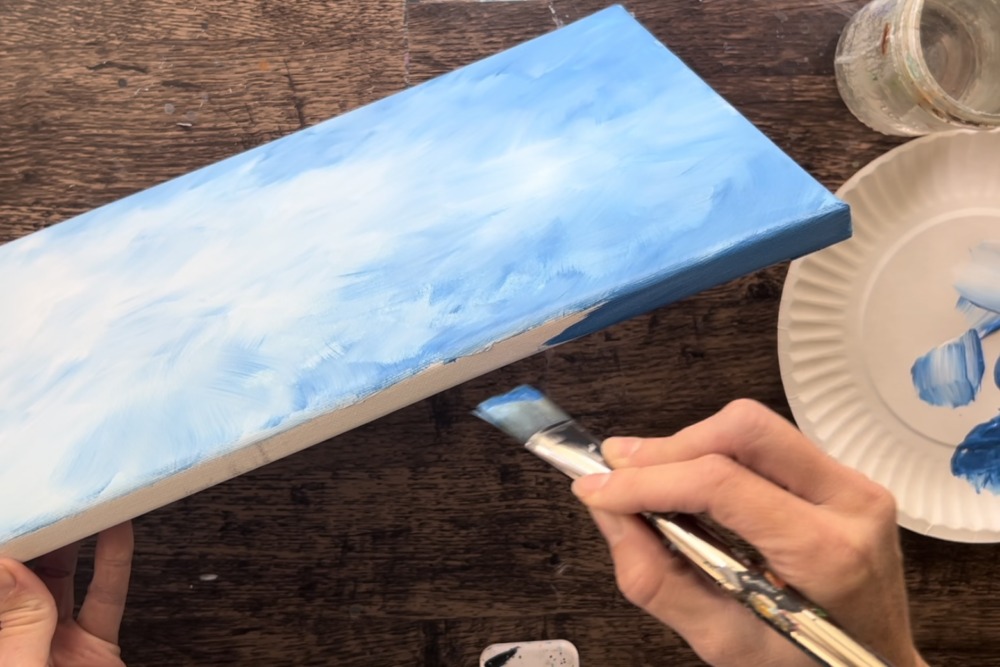
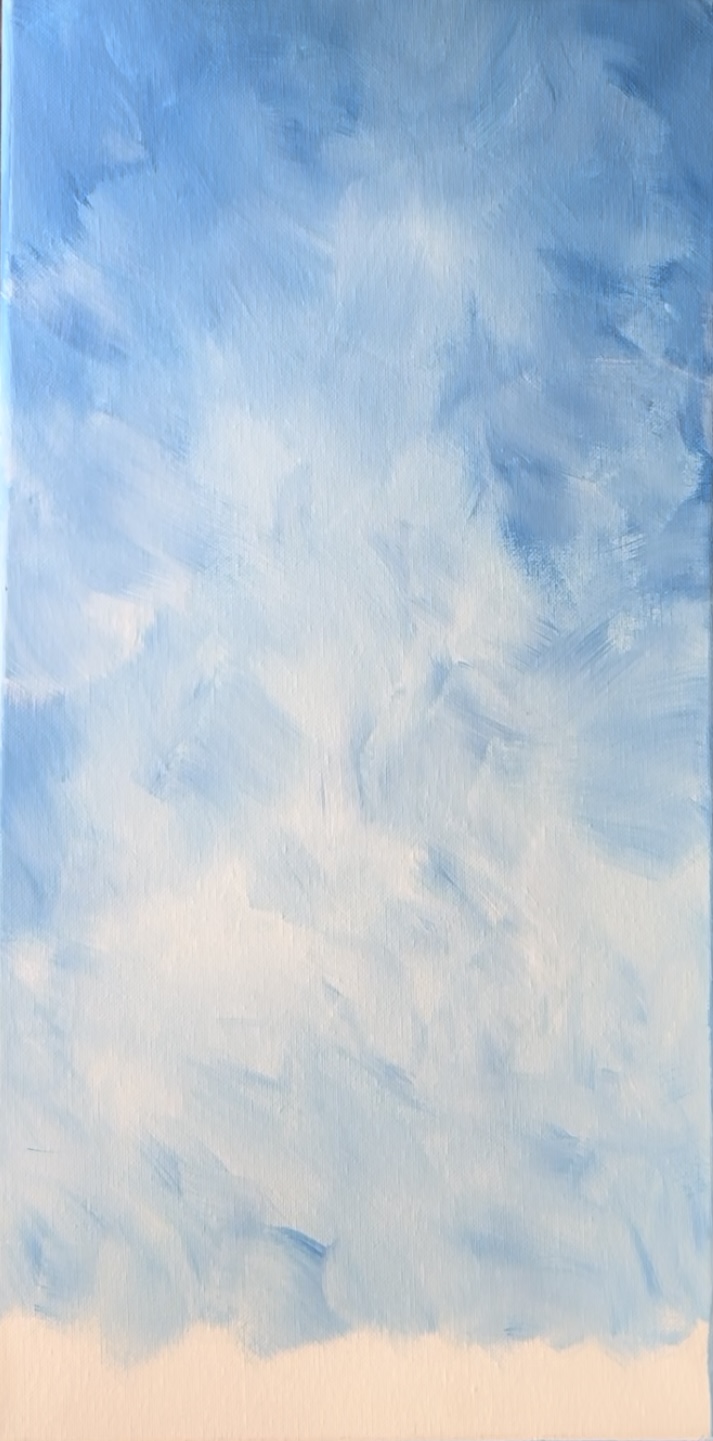
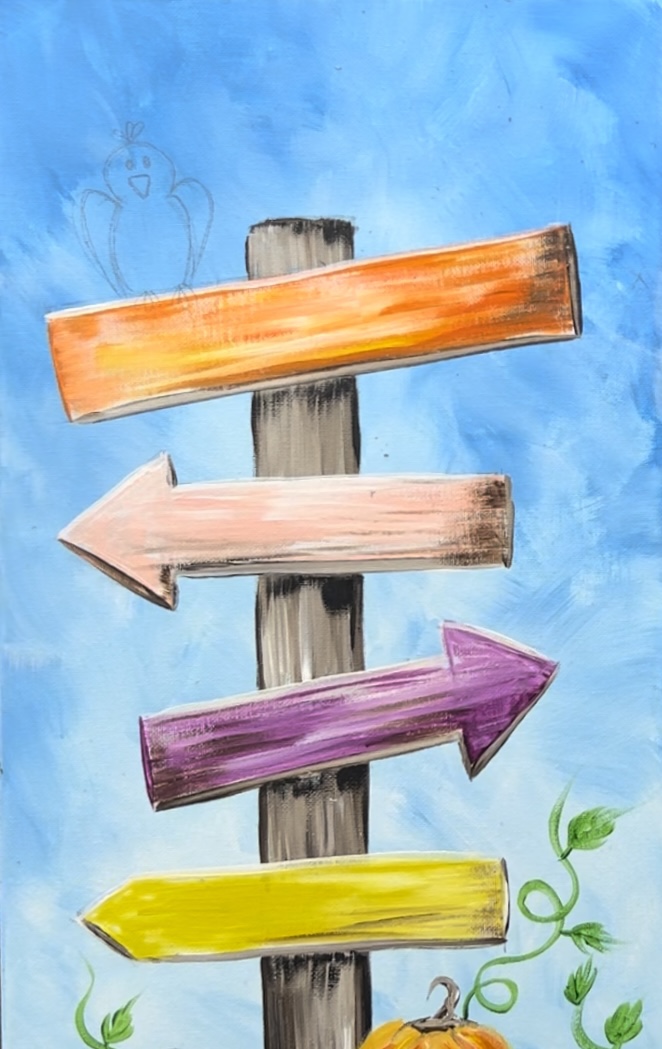
1. Paint the background
Load your palette with titanium white and cerulean blue. Use a 1″ flat brush. Load it into the water and wipe the brush but leave the bristles still a little wet (but not dripping).
Double load your brush in equal parts blue and white. Start at the top of the canvas. Paint angle, expressive strokes blending the colors together on the canvas.
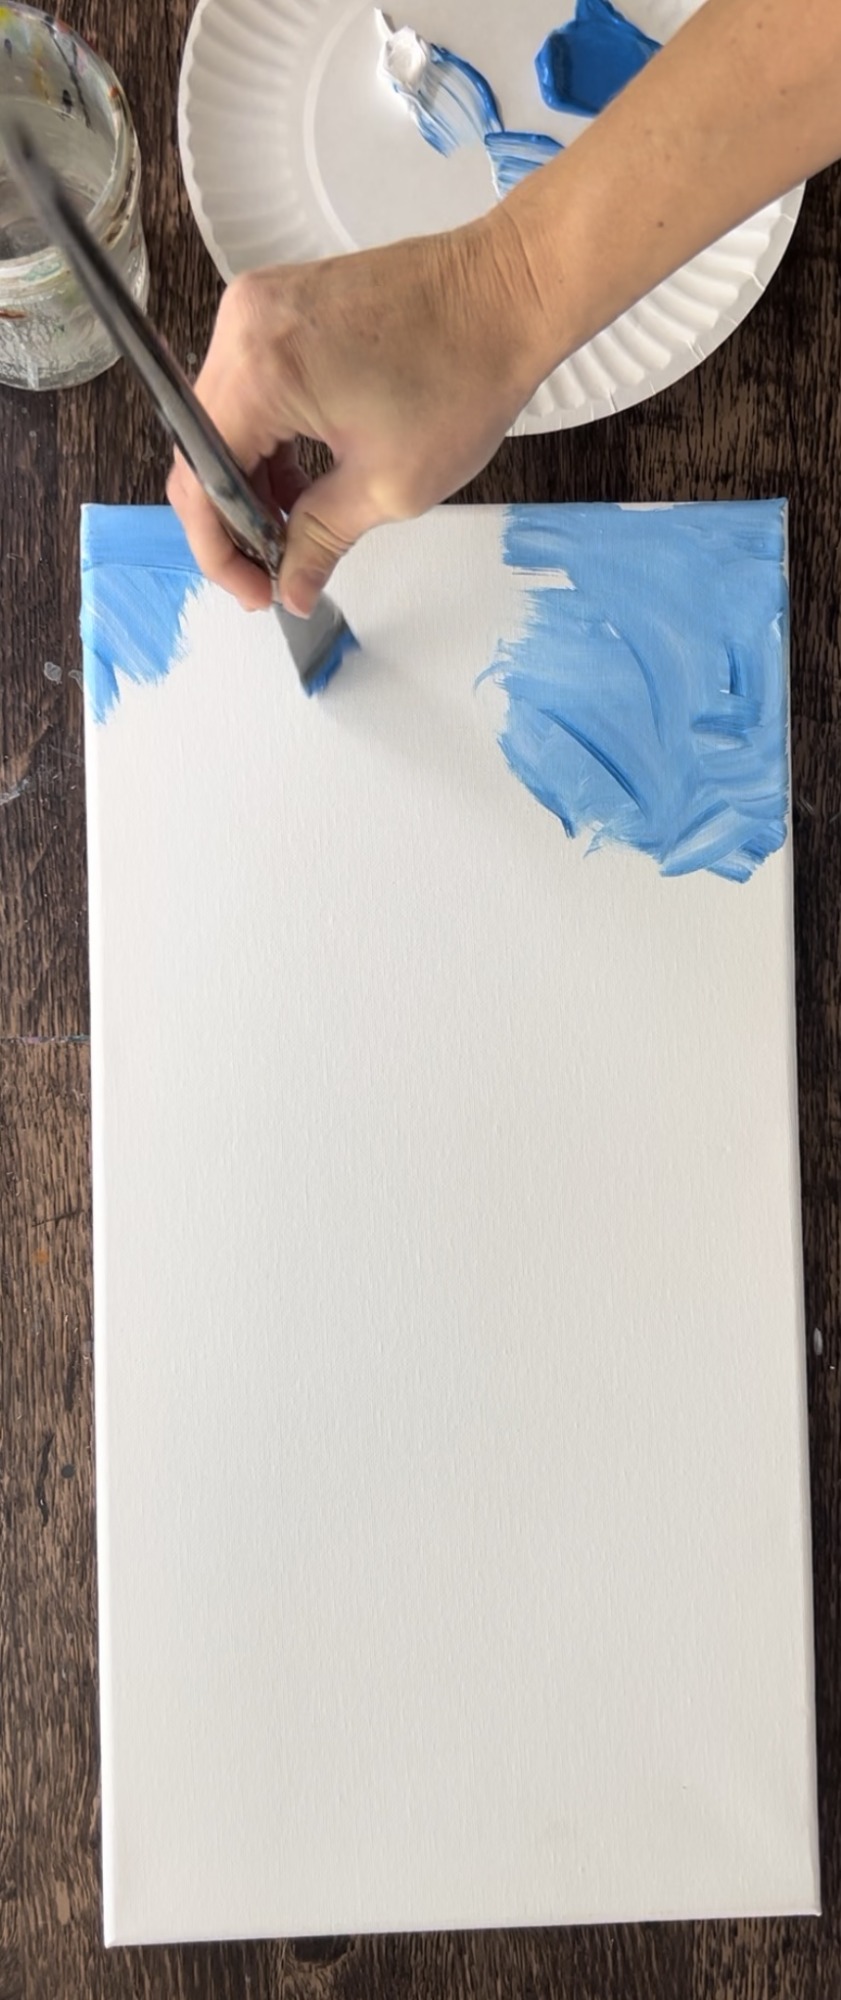
As you work your way down, allow the blue to get lighter by adding more titanium white to your brush and less blue. Also, blend a little extra white in the center area of the canvas and leave the top and the edges slightly darker.
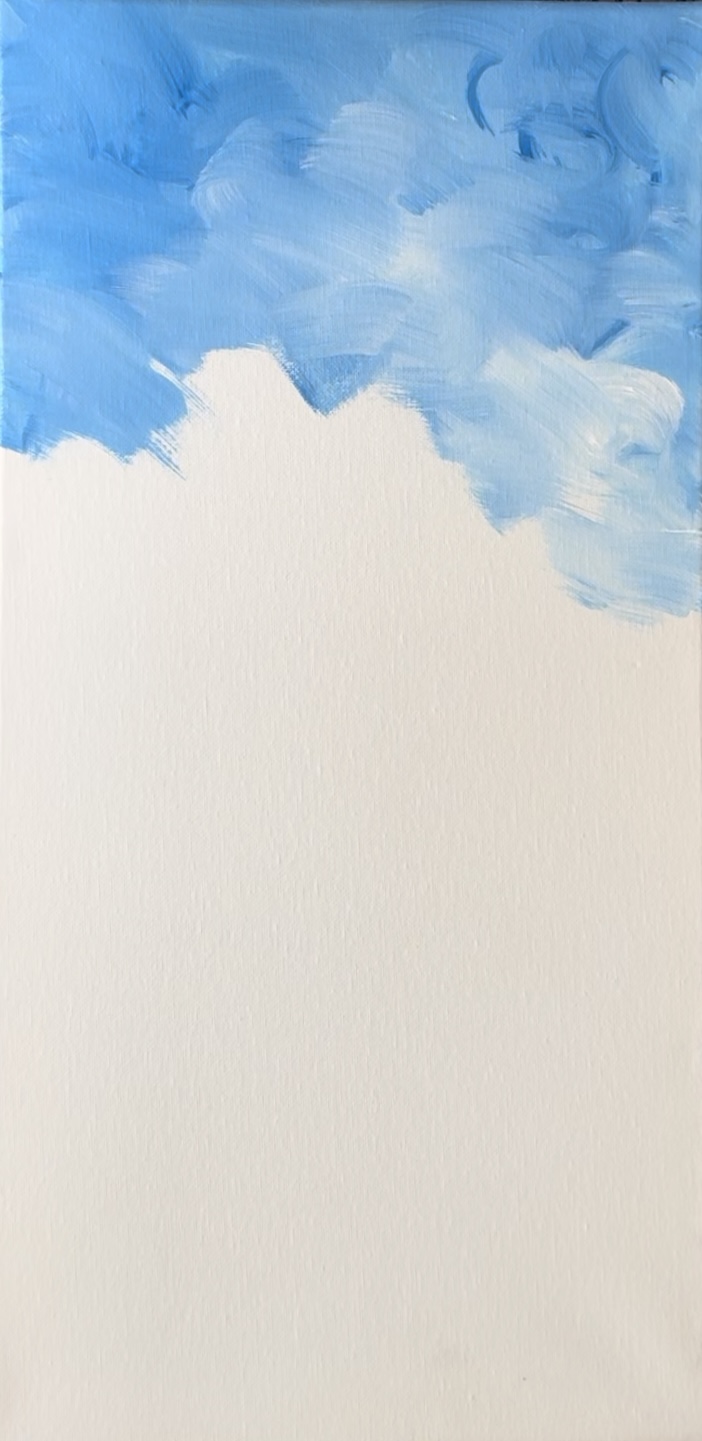
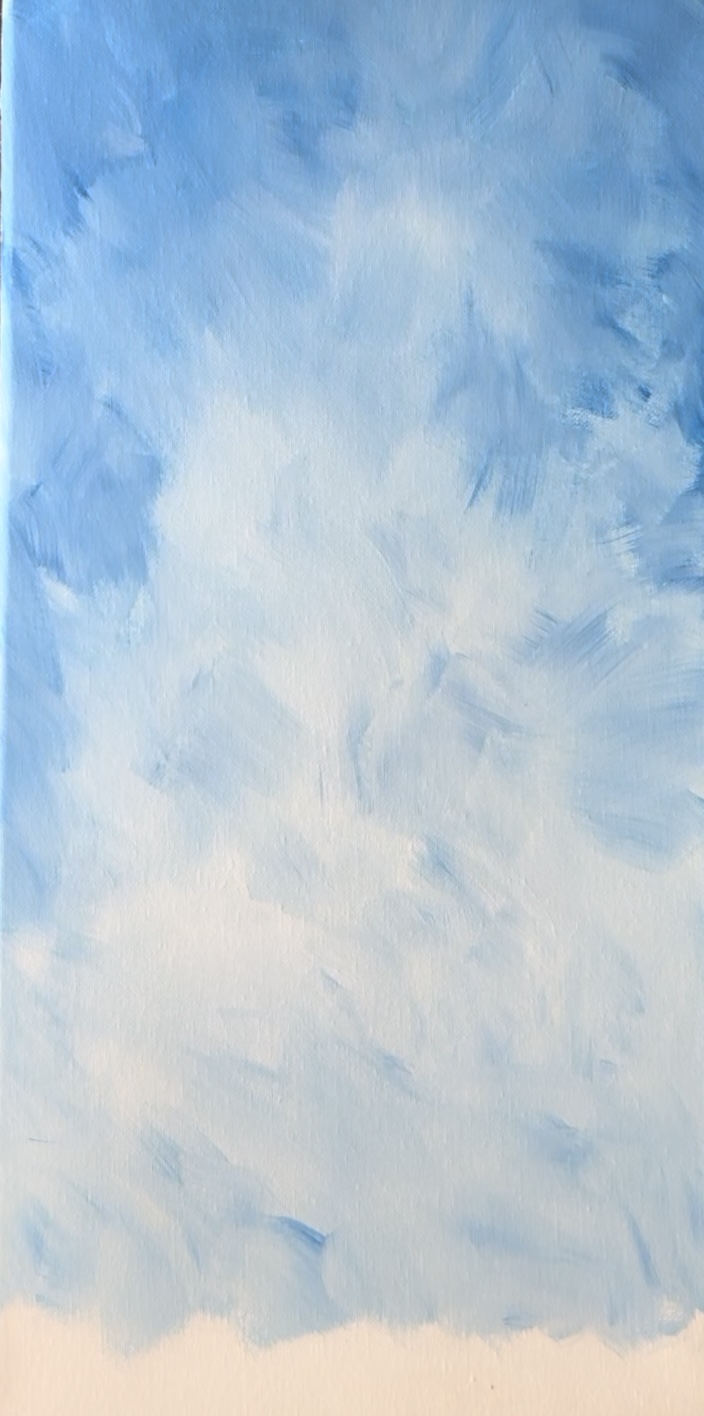
If you want smoother strokes, go over them lightly several times before they dry.
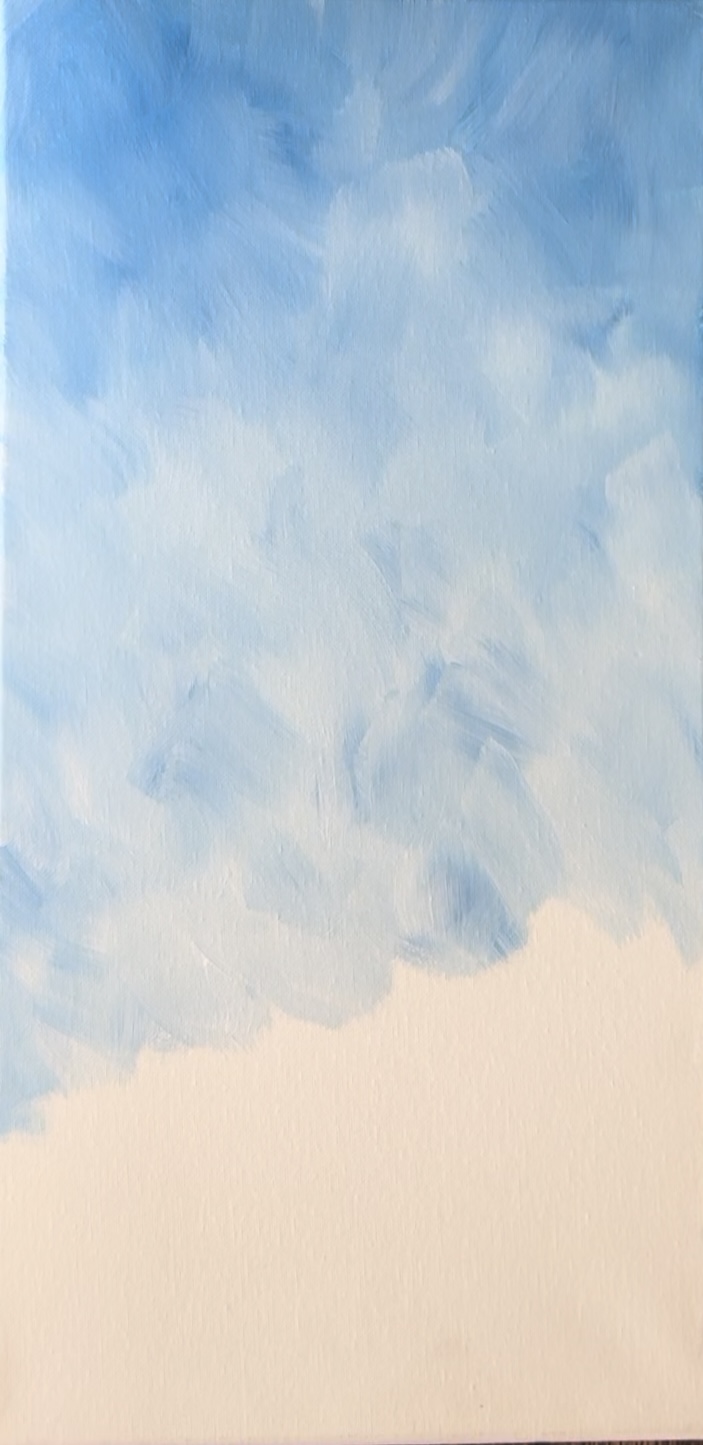
Fill your entire canvas with this style of background and leave about a 1 to 2 inch gap on the bottom of the canvas.
Optional: if you are working on a stretched canvas, paint the sides with the same color as the sky.
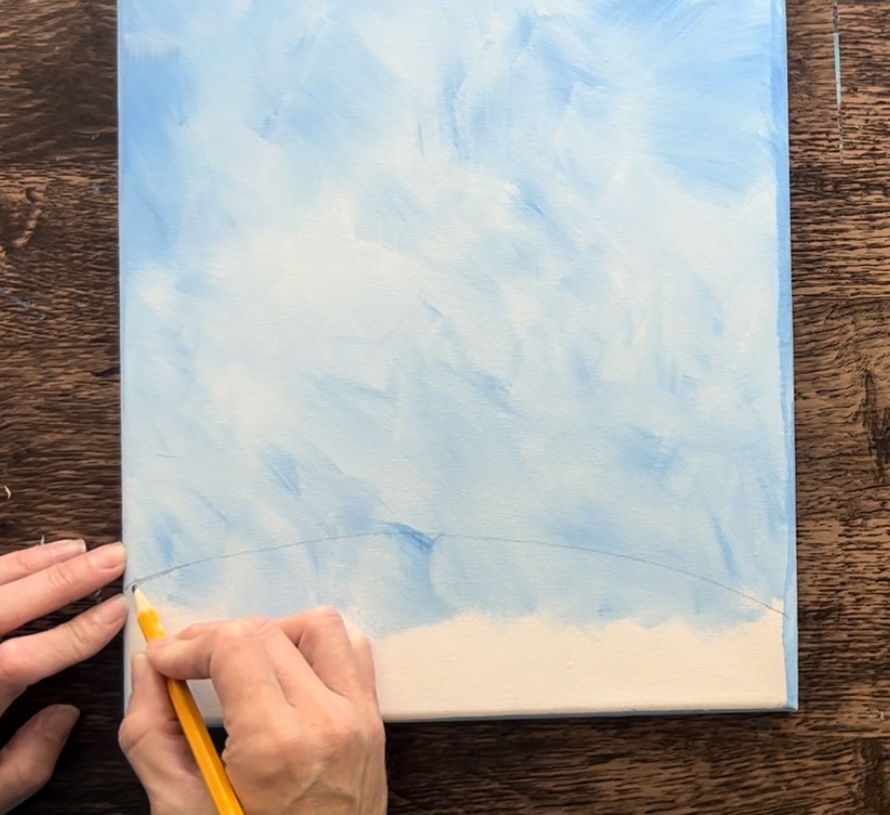
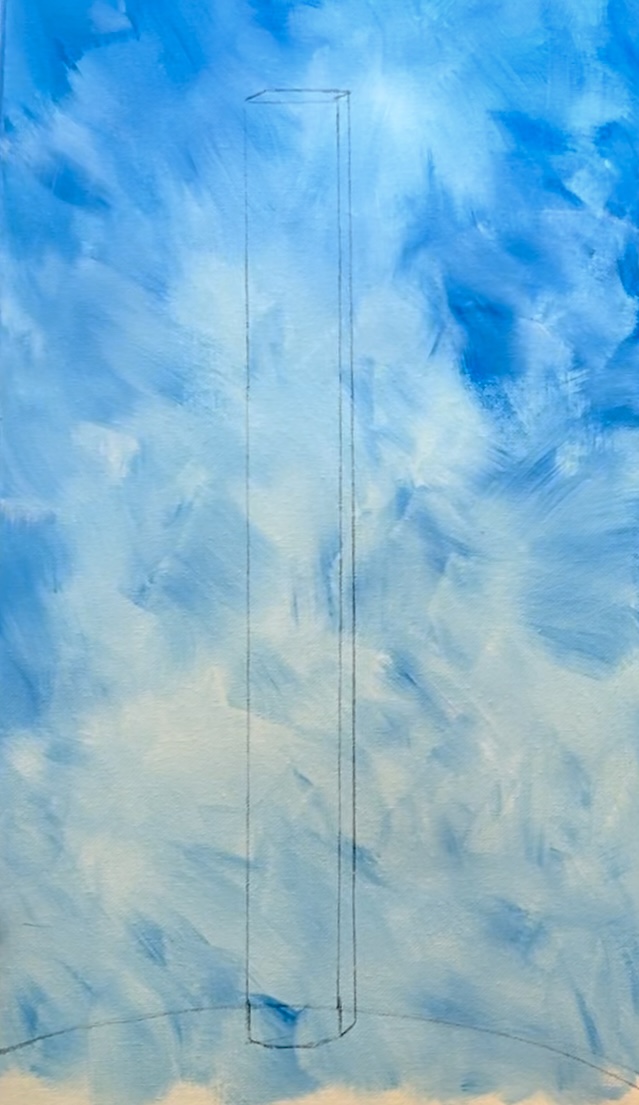
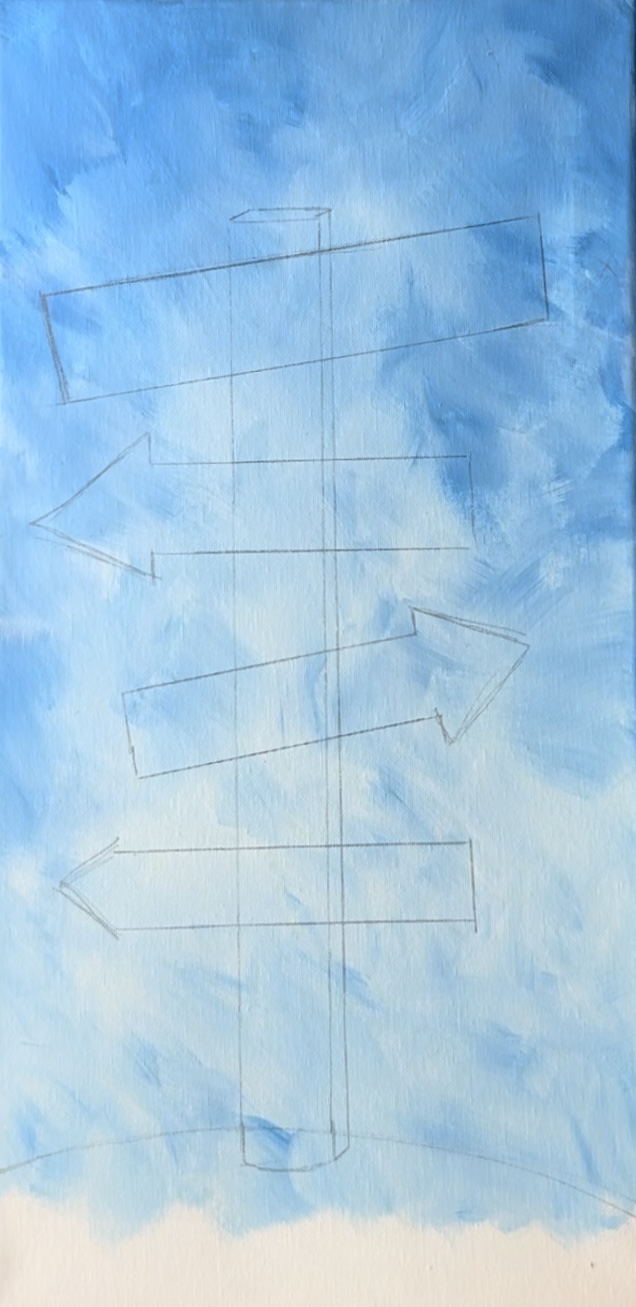
2. Draw the hill
Use a pencil to draw the hill. Start at about 2.5″ on the lower left of the canvas and draw a curved hill line that goes across the bottom of the canvas.
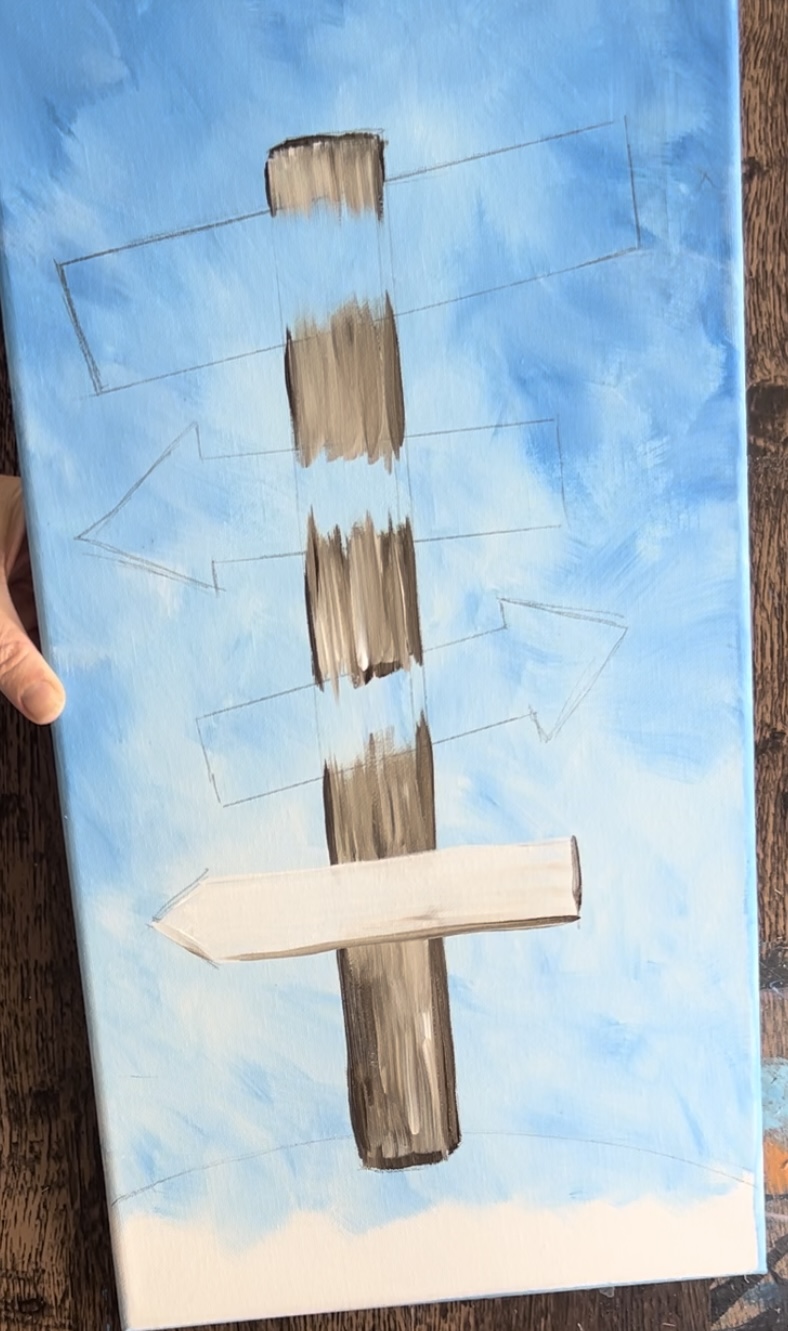
3. Draw Post
Next, use a ruler to draw a very tall rectangular post. You may use my measurements or change the size of it. My post is about 1.5″ wide and 14″ high.
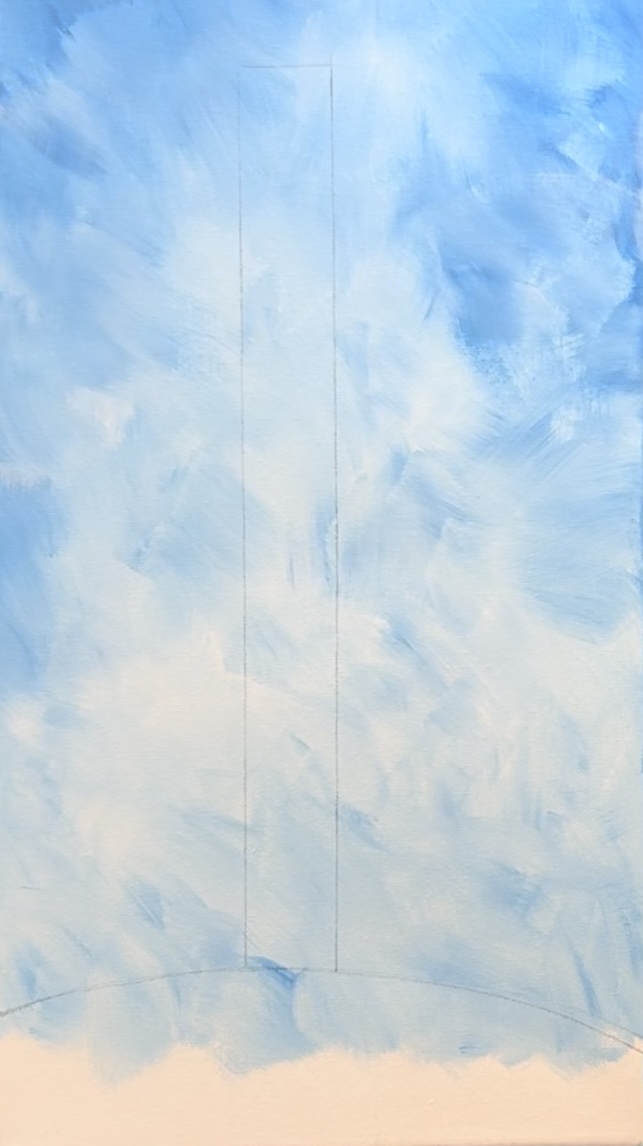
Optional: you can make this post look a little more “three dimensional” by drawing a second vertical line just slightly to the right of it and small, angled lines at the top.
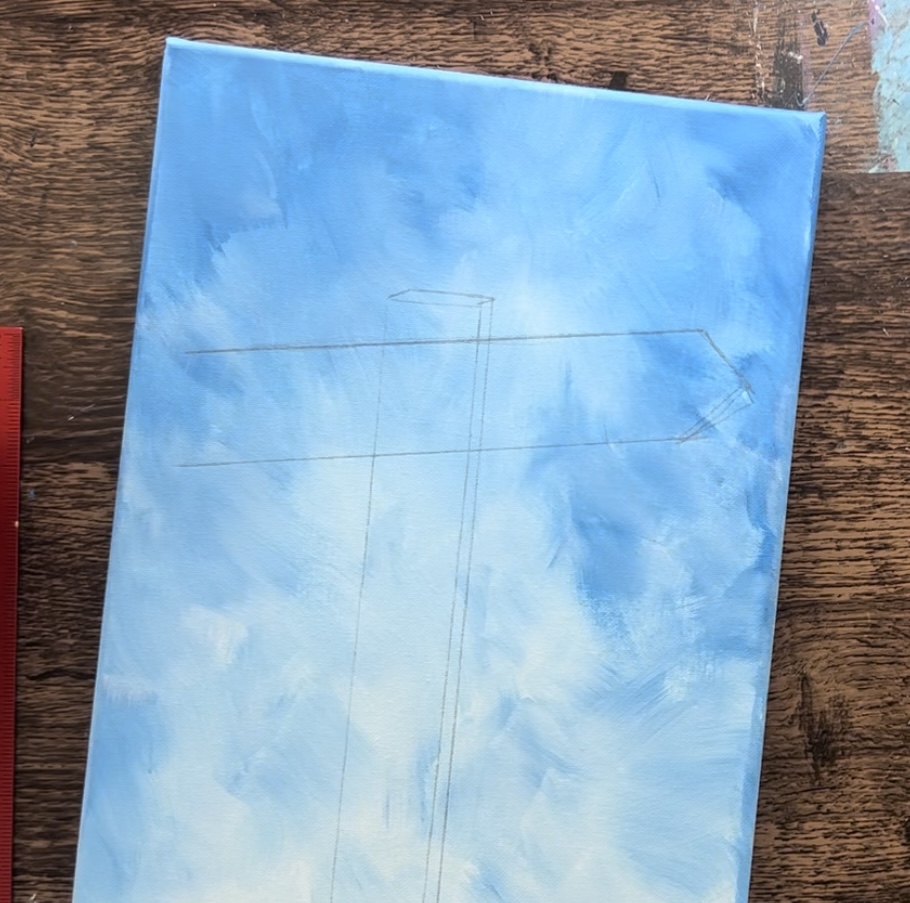
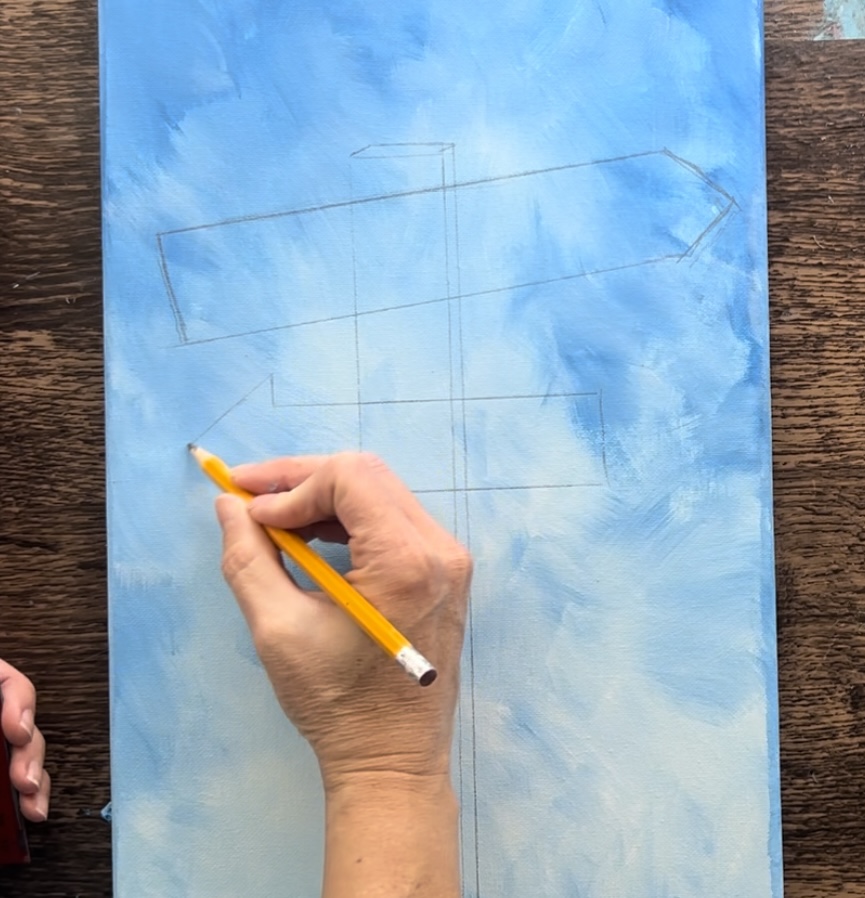
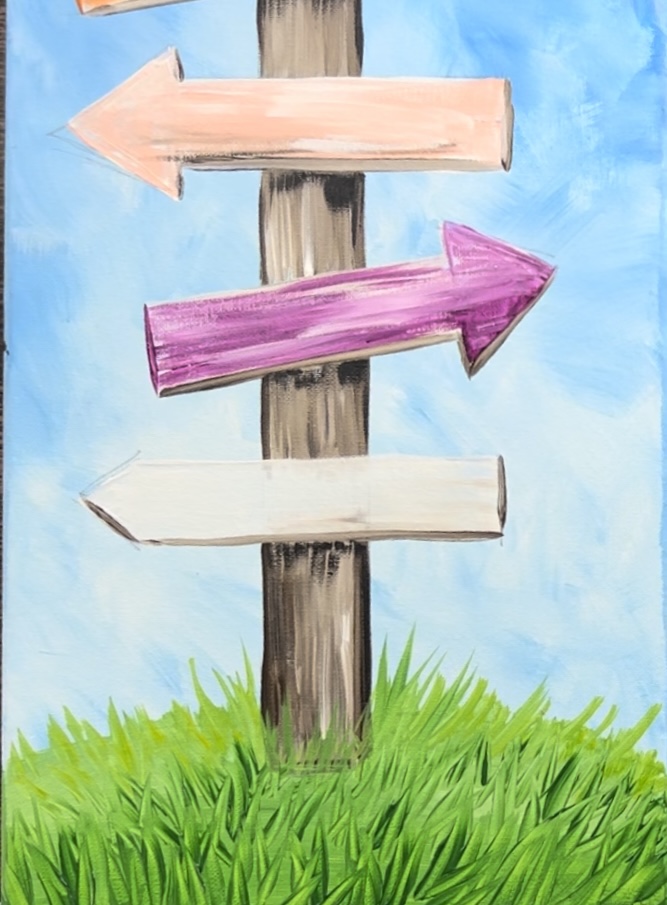
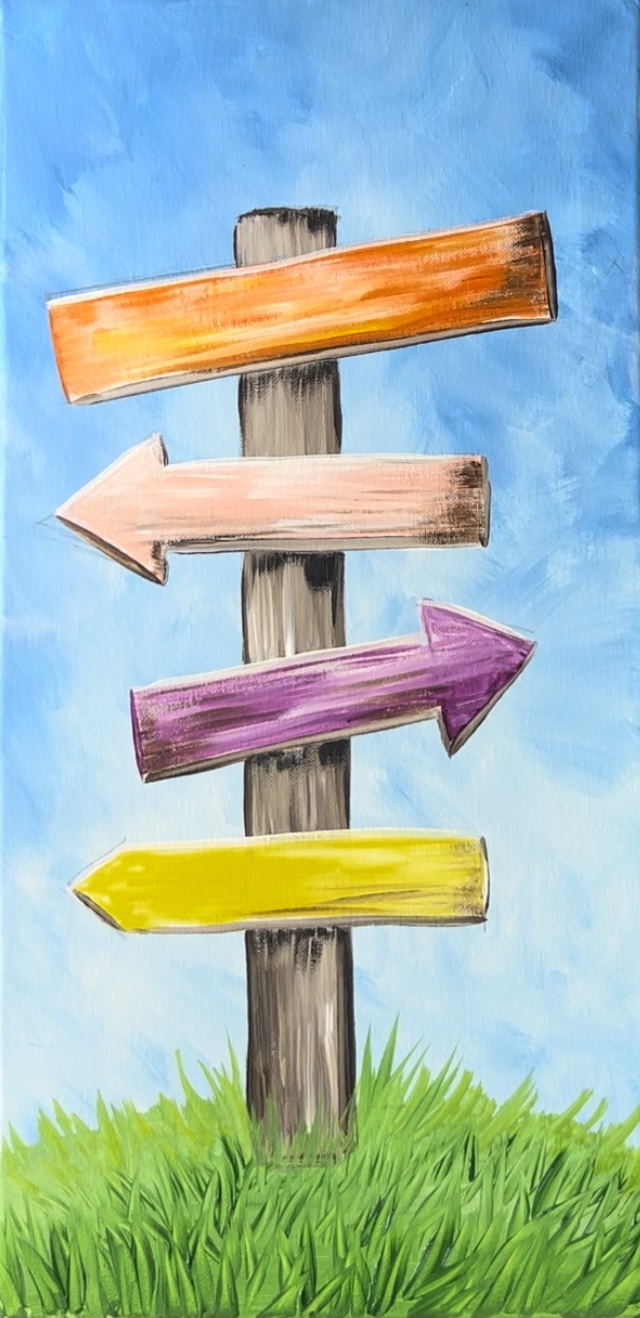
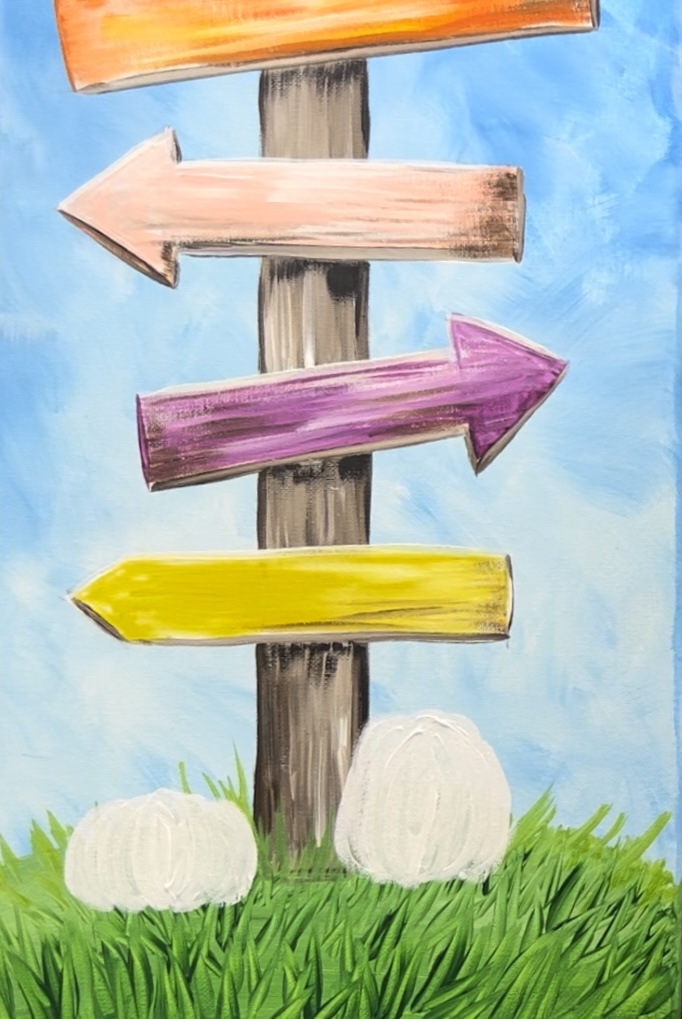
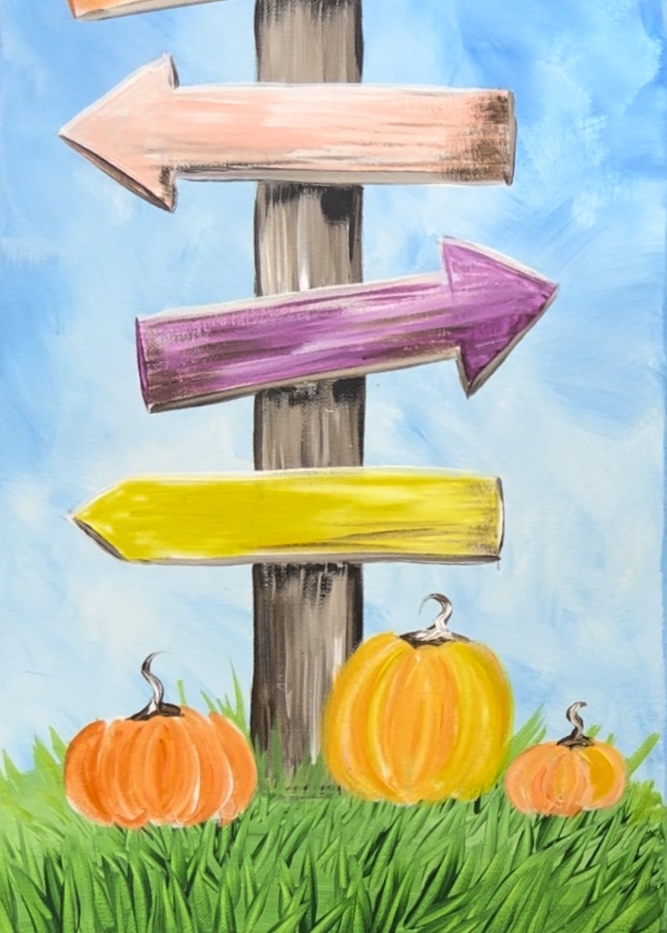
4. Draw Signs
Then draw the signs using the ruler. It is actually really easy to do this! Just use your ruler to draw angled rectangles and/or arrows. They don’t all have to be the same size and they don’t all have to be going at the same angle.
Each of these signs vary in size and you can make them different sizes or use my measurements.
The top “pumpkin patch” sign is about 1.5″ high and about 7.5″ wide. Again, you can make this wider if you want.

At first I made this sign more like a “pointed arrow” but it ended up being more of a rectangle.
Then, draw the next sign. This one is an arrow shape and I drew it about 1.5″ below the top sign. The width is about 6.5″ and the height is about 1.5″.
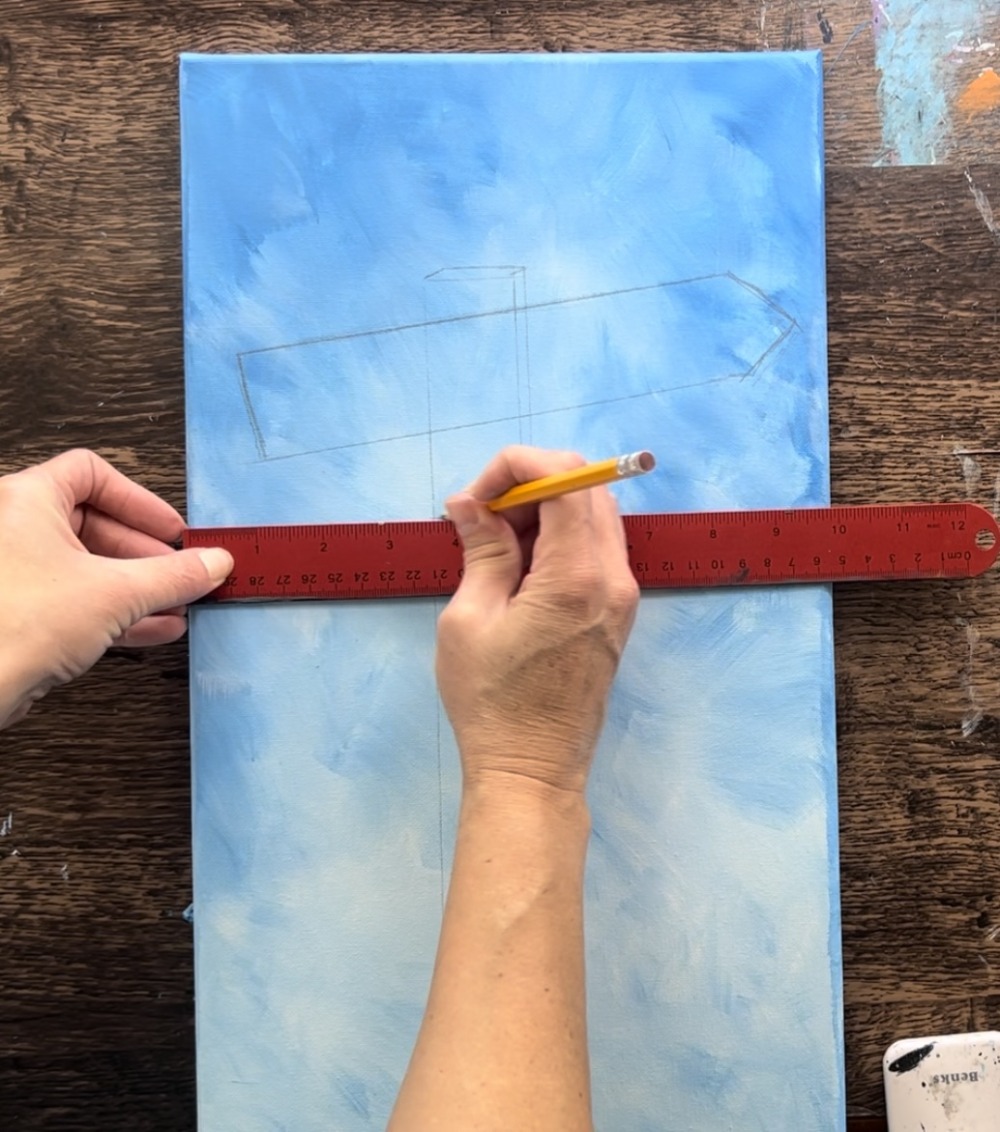
Draw the third sign about 1.5″ below. This arrow is about 6.5″ wide and 1.5″ high. It is also going the opposite direction and more of an upward angle.
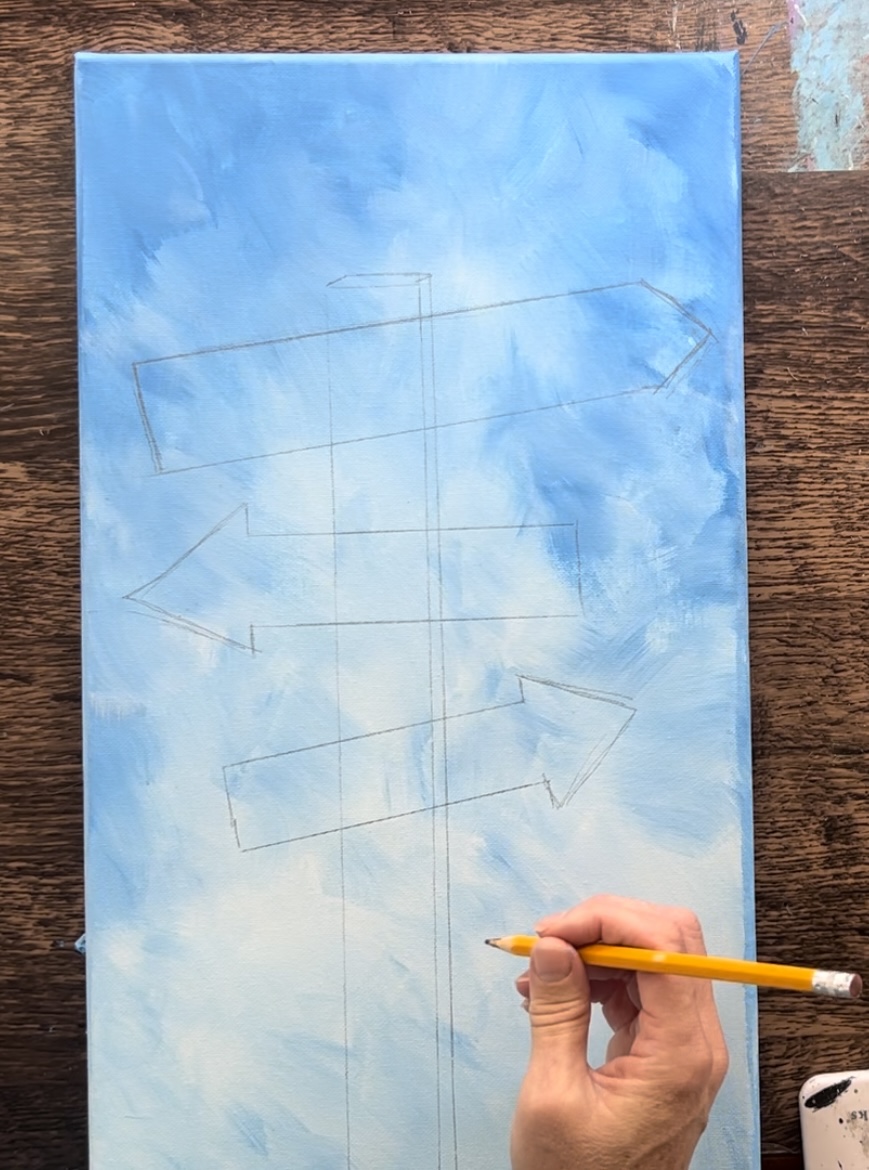
The bottom arrow is about 6.5″ wide and 1.5″ high. It is also facing the opposite direction and going at more of a horizontal position.
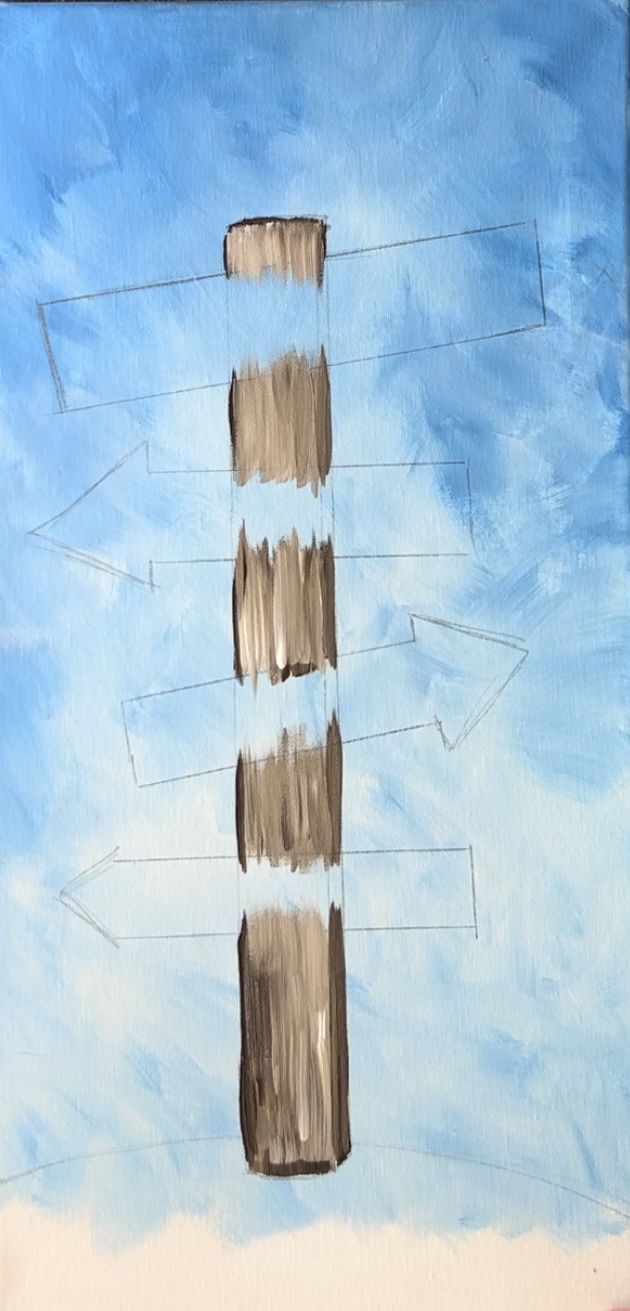
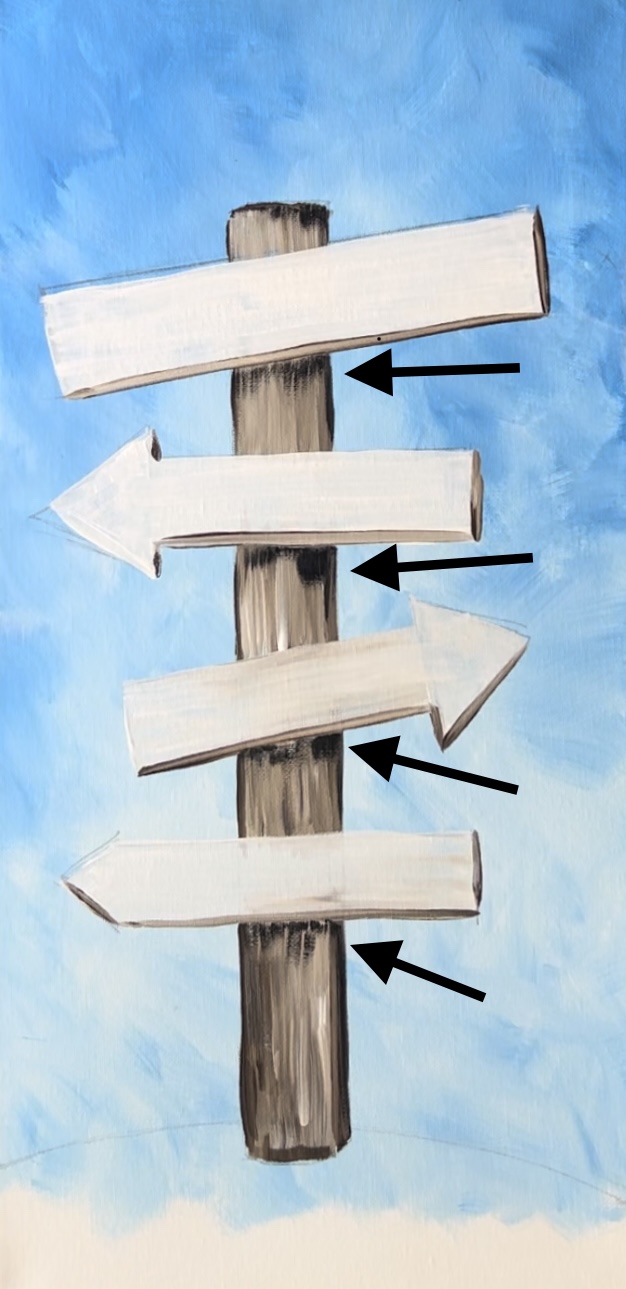
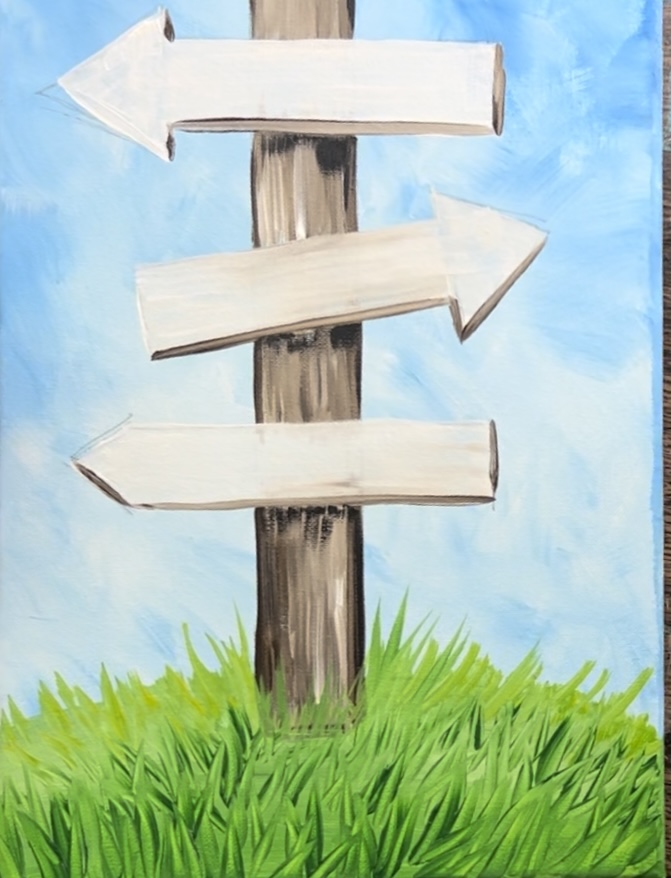
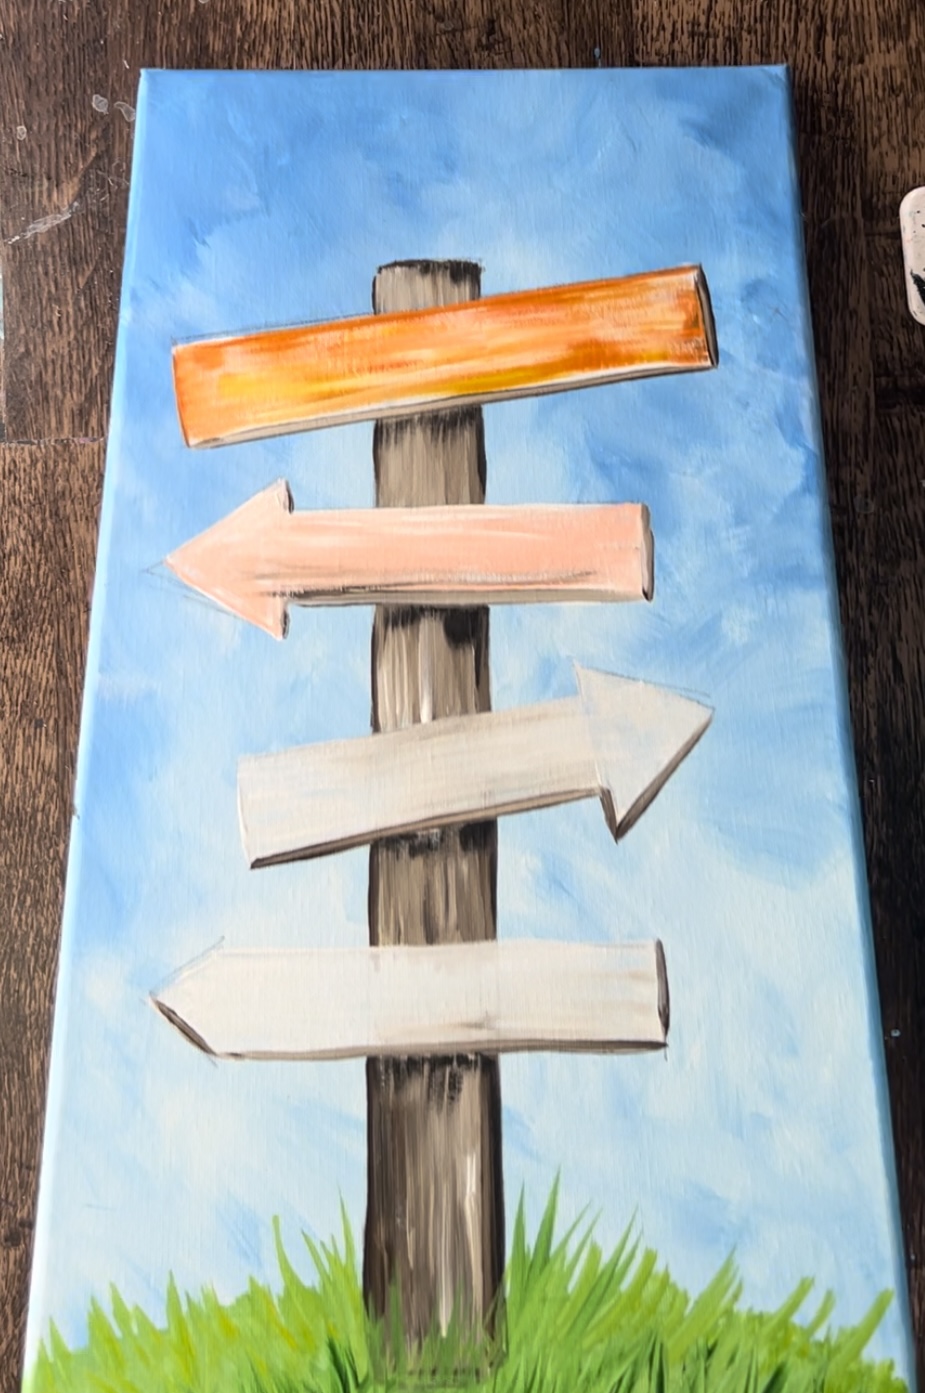
5. Paint post
Load your palette with the colors: raw umber and titanium white. Use a #12 bright brush to paint the vertical post behind the signs. Start by loading the brush in just the brown and using the tip of the brush to paint/ outline the far left edge.
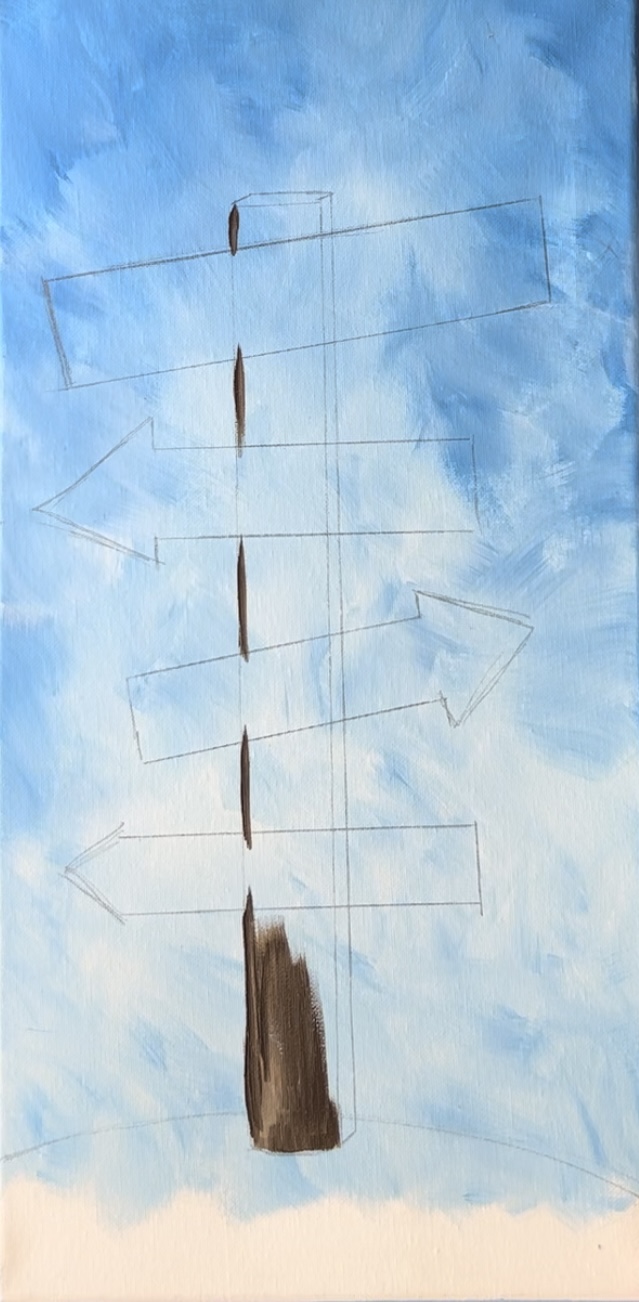
Double load the 12 bright brush in both brown and white. Paint up and down strokes and let the two colors blend together to create “streaks” of brown and white to create a “faux wood” effect.
6. Paint Signs
Load your palette in some fresh titanium white. Use the 12 bright brush. Paint left and right strokes to fill in each of the signs white. It is okay if some of the brown gets mixed in with some of the white. In fact, I added tiny bits of brown into this white to create a very light wood color. Also, use the tip of the brush and the brown to outline the bottom and right edges of the signs to make them look a little “three dimensional”.
Paint each of the signs using this technique.
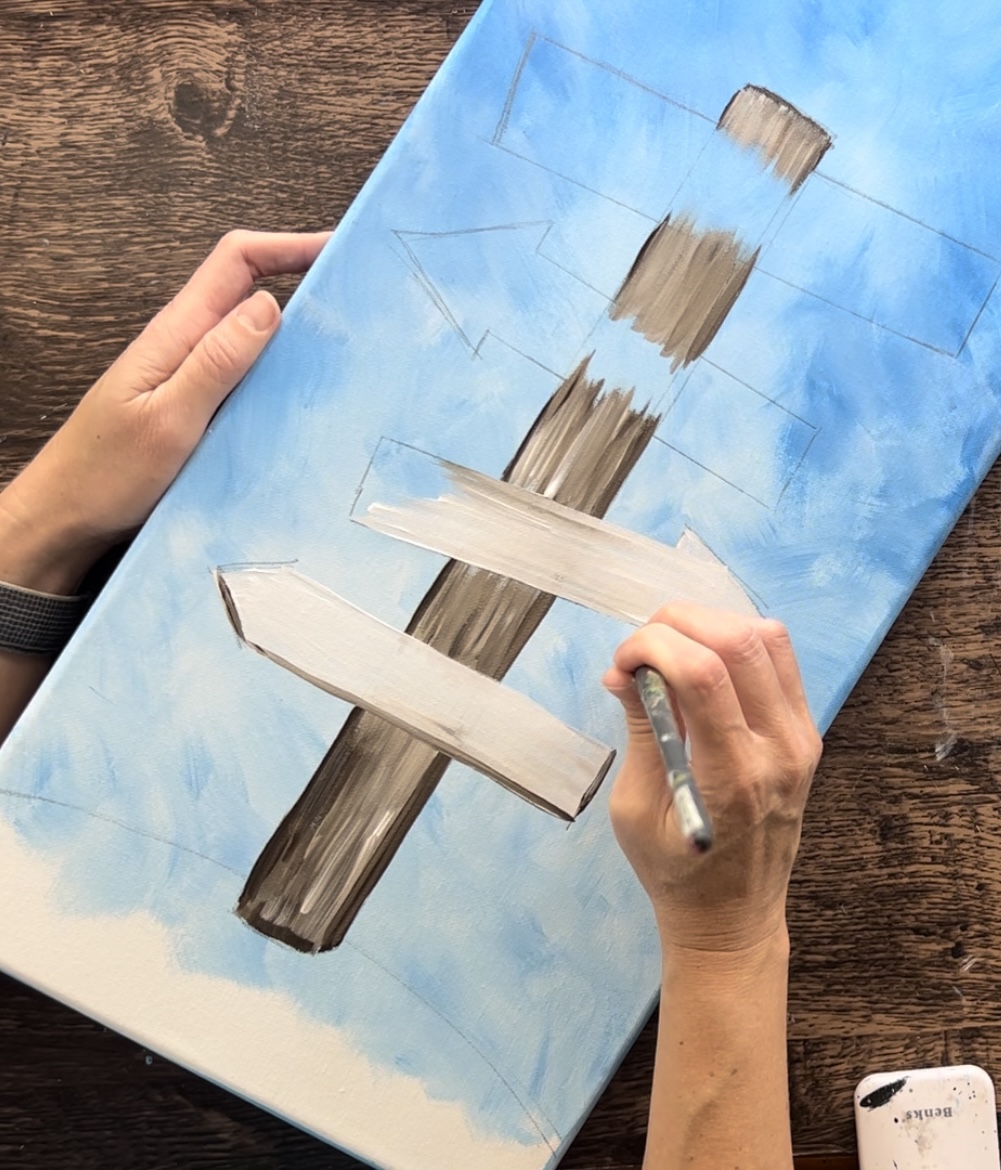
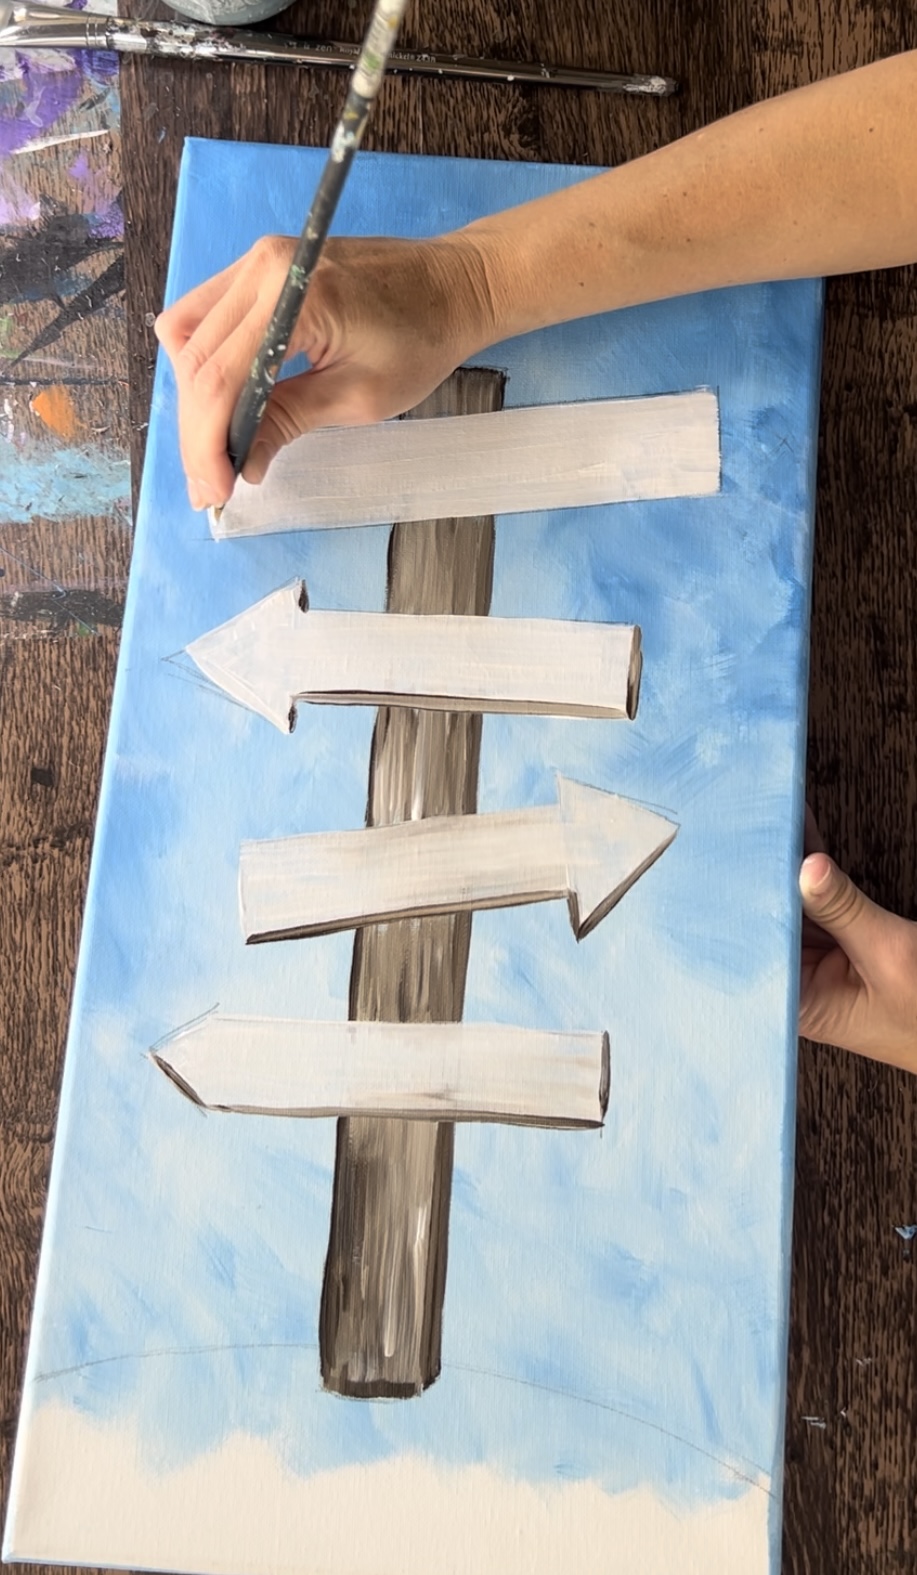

Next, paint some “shadow” using the dry brush style and mars black. Do this below each of the signs. To do this, load your 12 bright brush in “mars black”. Wipe the brush off with a soft cloth or paper towel. Then paint dry brush strokes just under each of the signs.
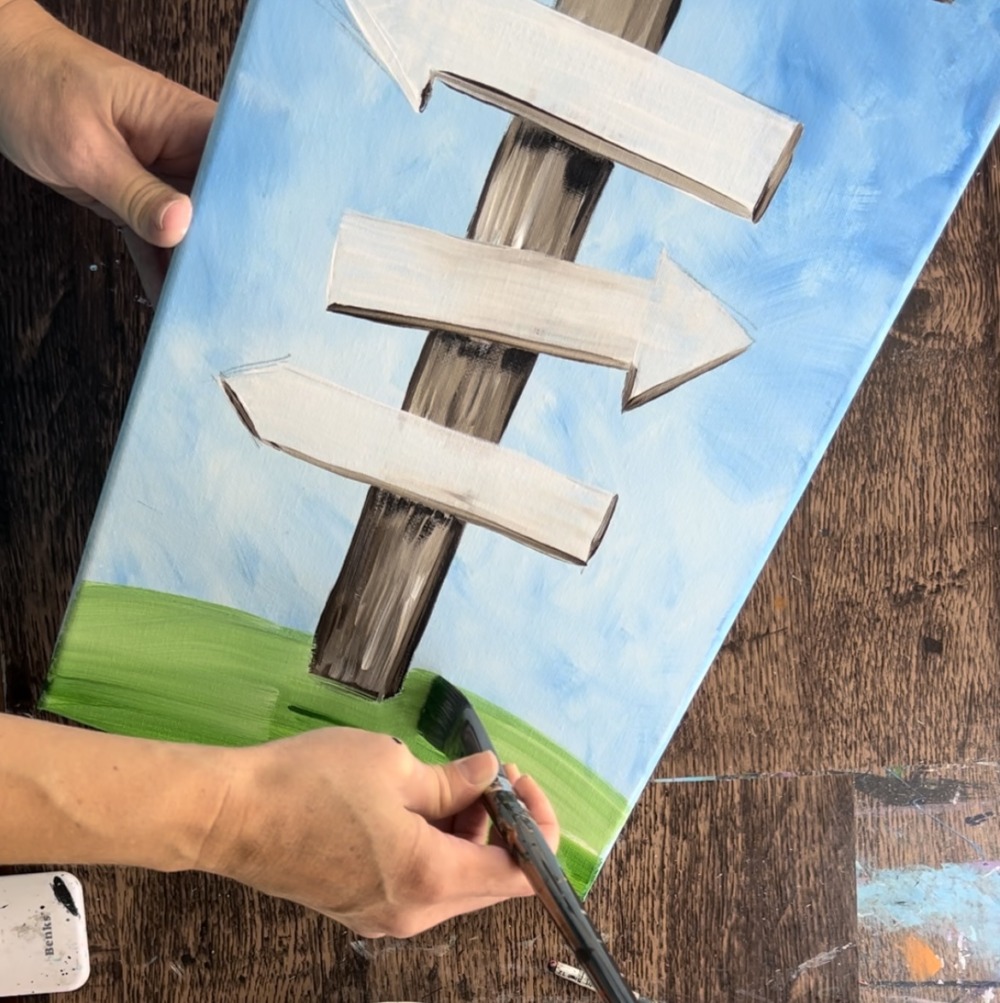
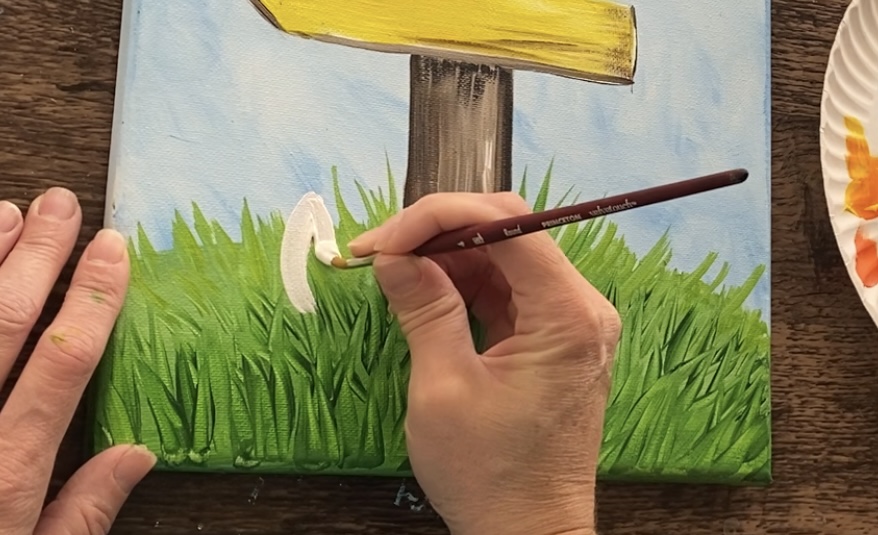
7. Paint Hill & Grass
Load your palette with “hooker’s green hue” and “titanium white”. Use a 1″ flat brush to paint the hill. Start on the bottom with just the green. Then gradually blend white into the green as you work your way to the top of the hill. You are creating a blended look where the hill is a little lighter at the top and darker at the bottom. Paint in curved strokes.
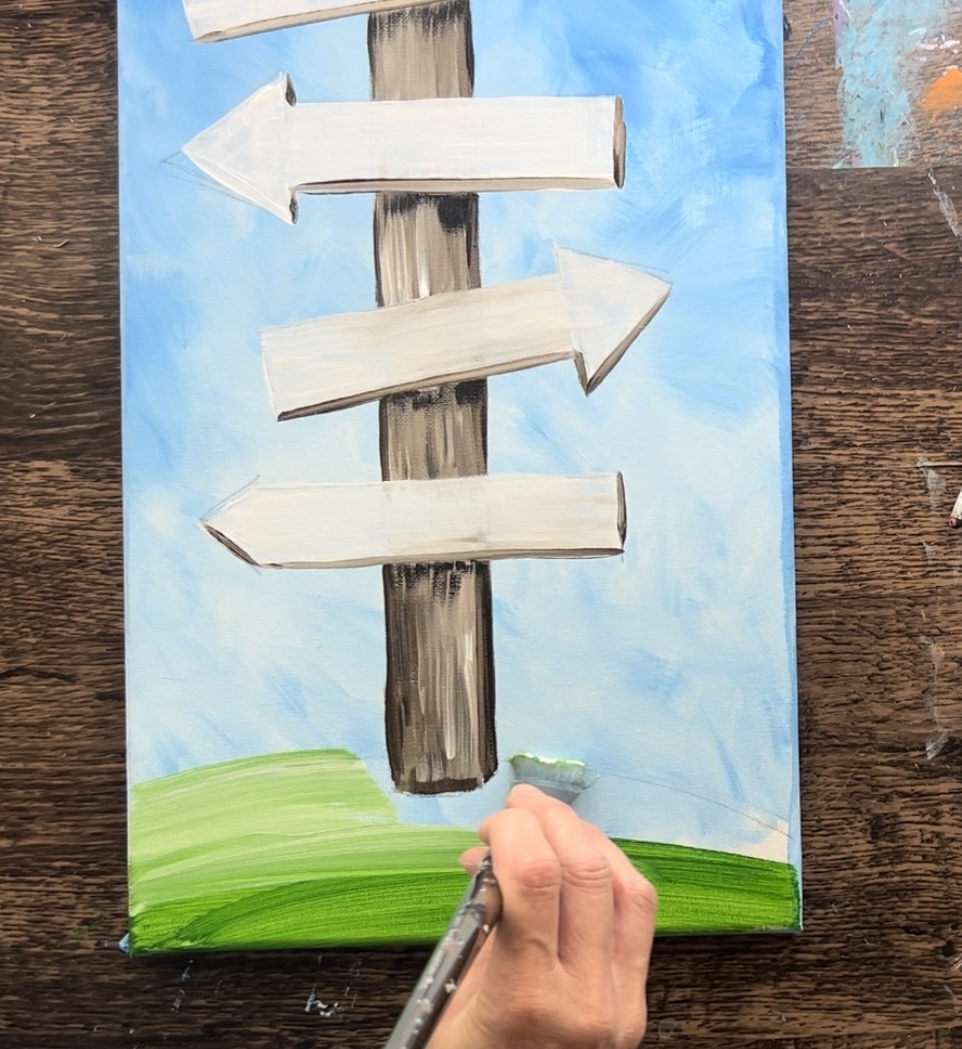
You don’t need to wait for this to dry all the way before doing this next step. In this next step, you will be painting “grass texture” strokes.
Use a “12 bright brush” for this. Load primary yellow onto your palette. Mix yellow and green together (about equal amounts).
Then use the tip of your flat brush to paint grass strokes that go in opposite directions on each side of the post. Start in the back just below the top edge of the hill and paint each stroke going from the bottom then upwards. The grass will go above the “hill line” and overlap part of the sky.
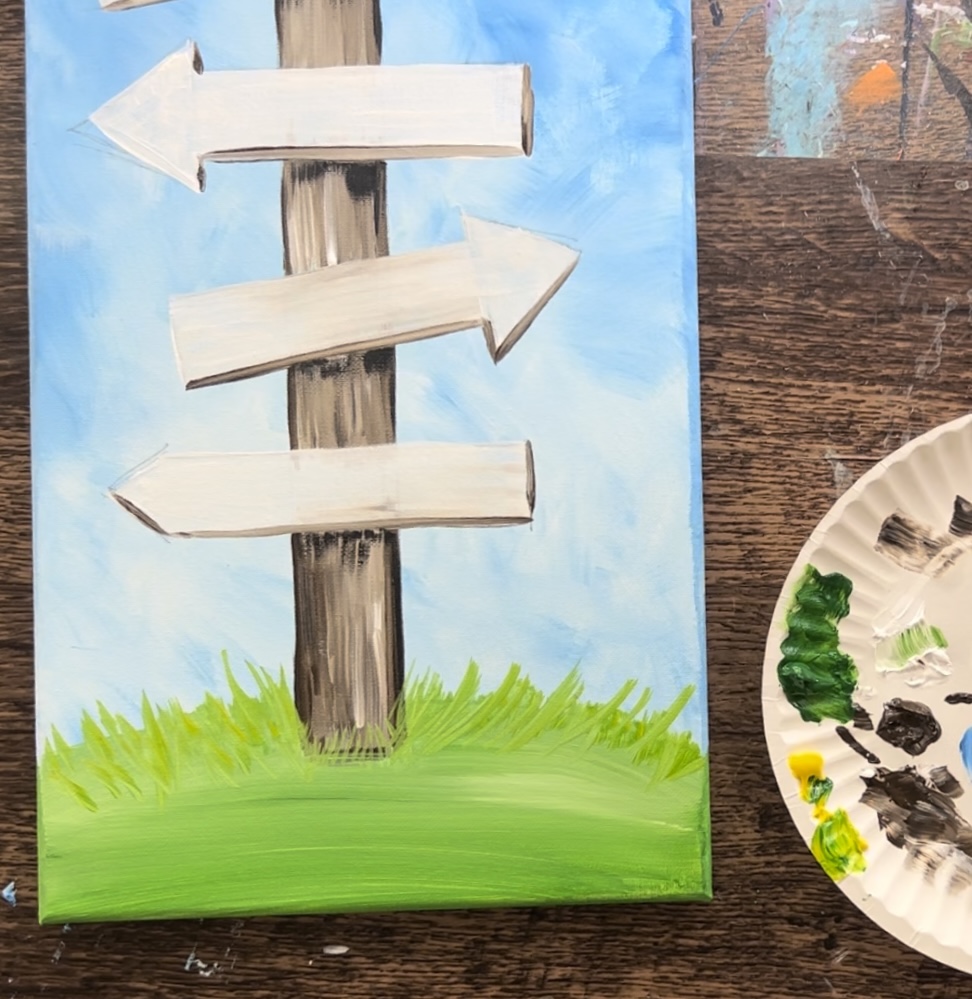
Then do another layer of this grass in a row below your first layer. Add a little more green to your brush this time so that the grass will be slightly darker. Paint the same type of “grass strokes”. It’s okay if it looks messy! Try to make your grass blades go in opposite directions on each side of the post.
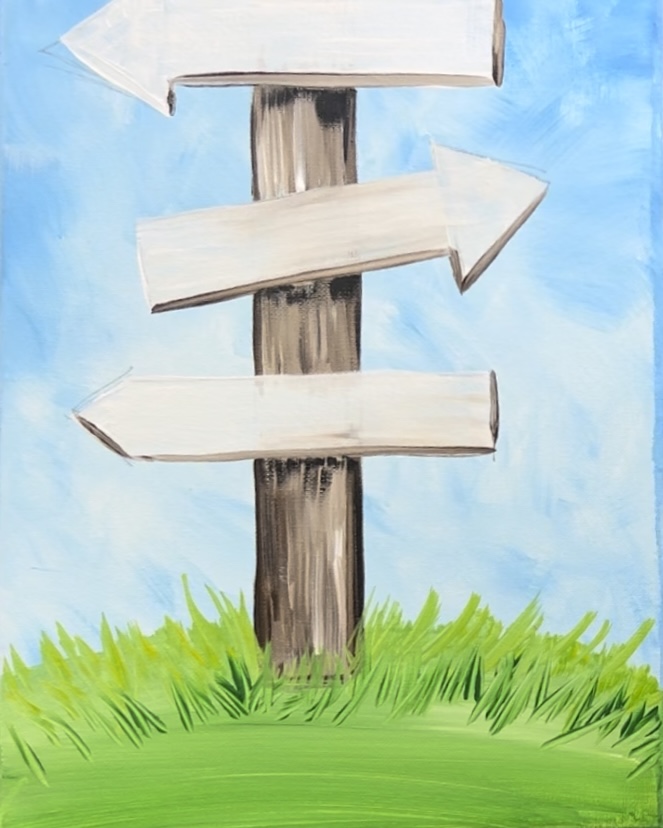
Keep adding rows/layers of this grass until you fill up the entire hill area.
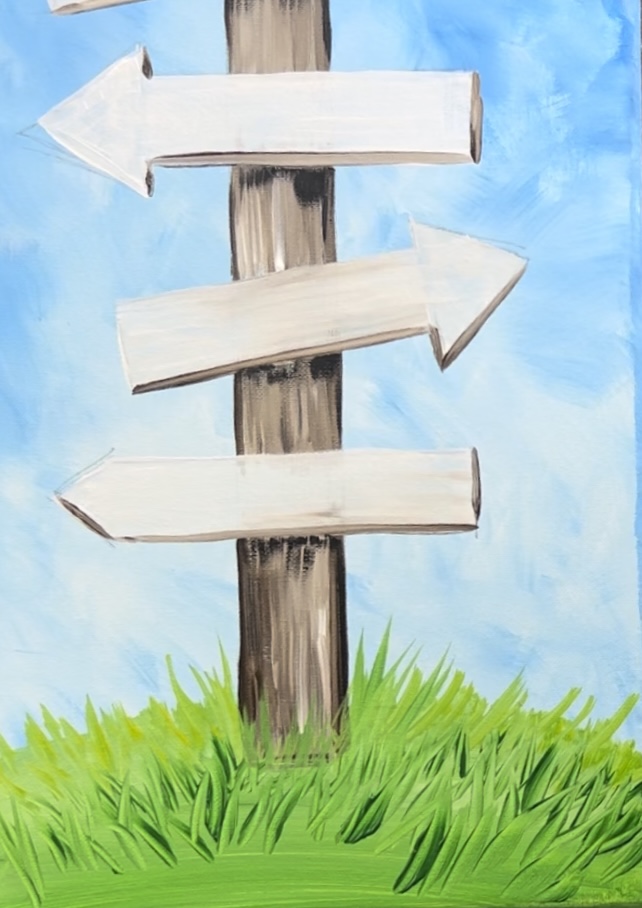
You can overlap the base of the post with some grass blades.
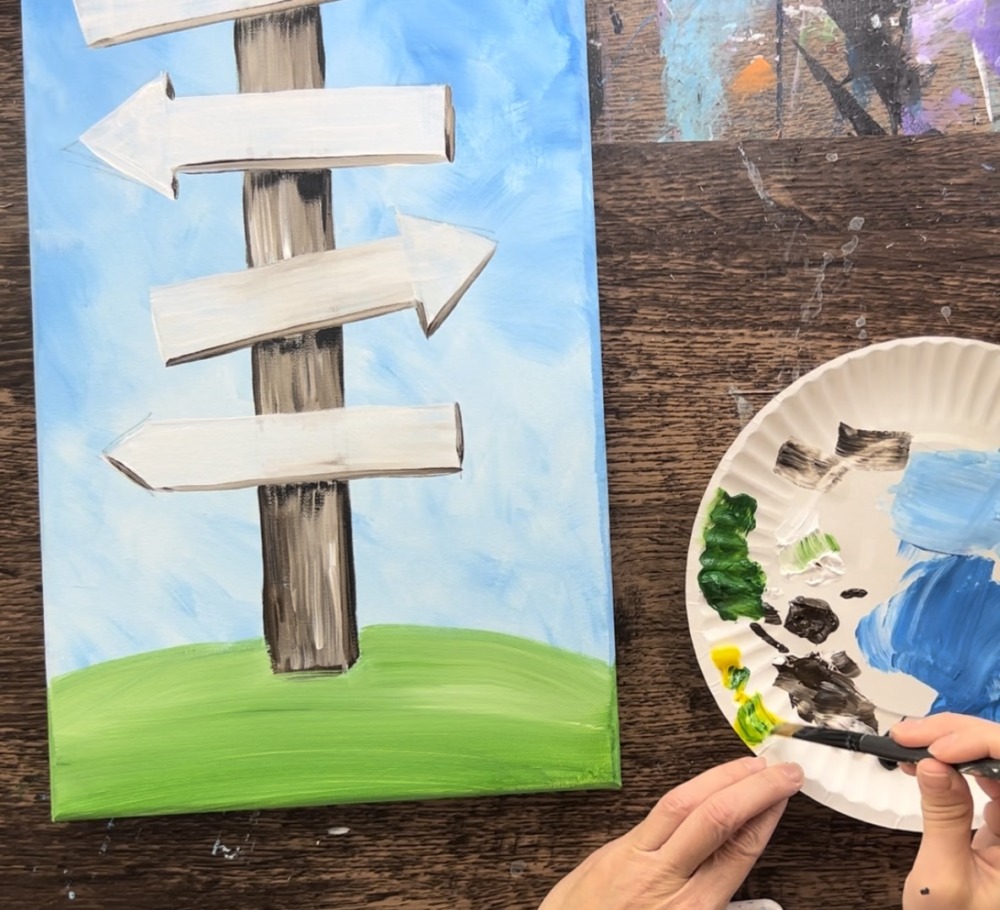
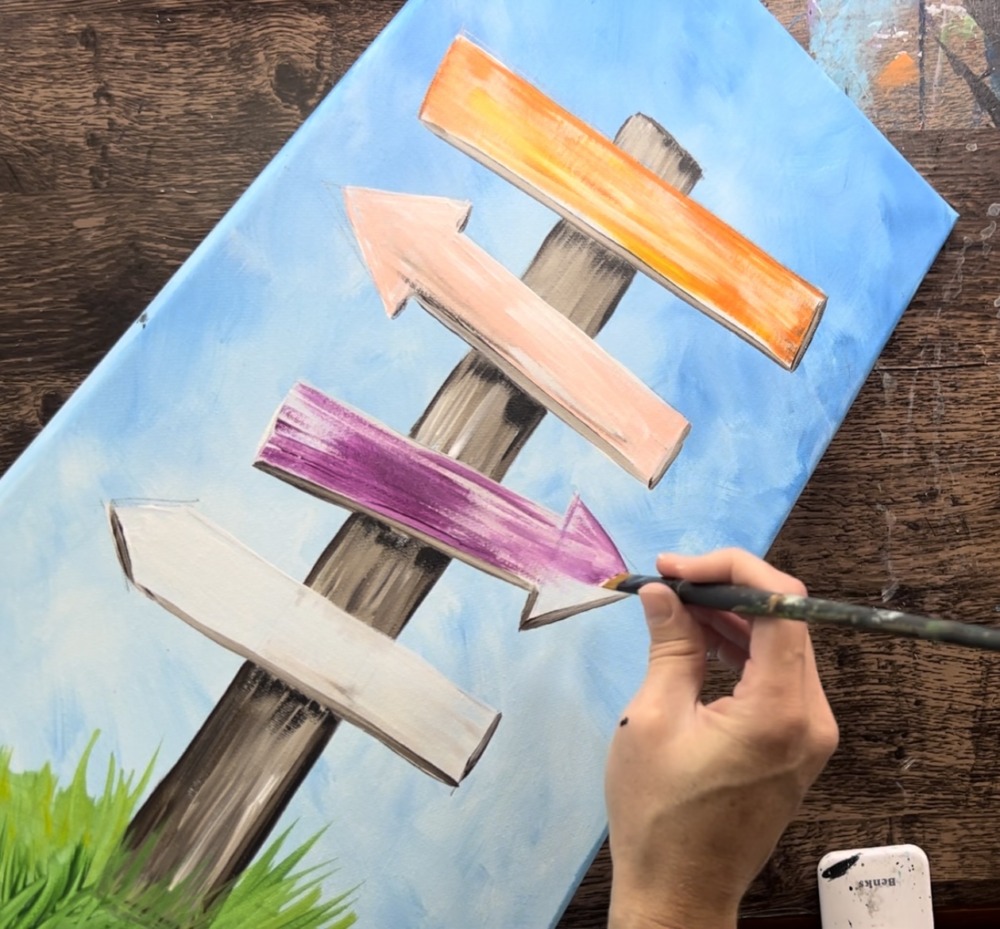
8. Paint color on signs
Load your paint palette with the colors you will be painting the signs. I did: “cadmium orange and primary yellow” for the top sign, “light pink” for the next sign, “deep violet for the third sign” and “primary yellow” for the bottom sign.
Use the 12 bright brush and a cloth for this step. You will be “dry brushing” the color onto each of the signs. When you paint this, only load a small amount of paint on the brush and wipe off some of the paint. Paint left and right strokes using the full width of the brush. Leave a lot of the white still showing through.
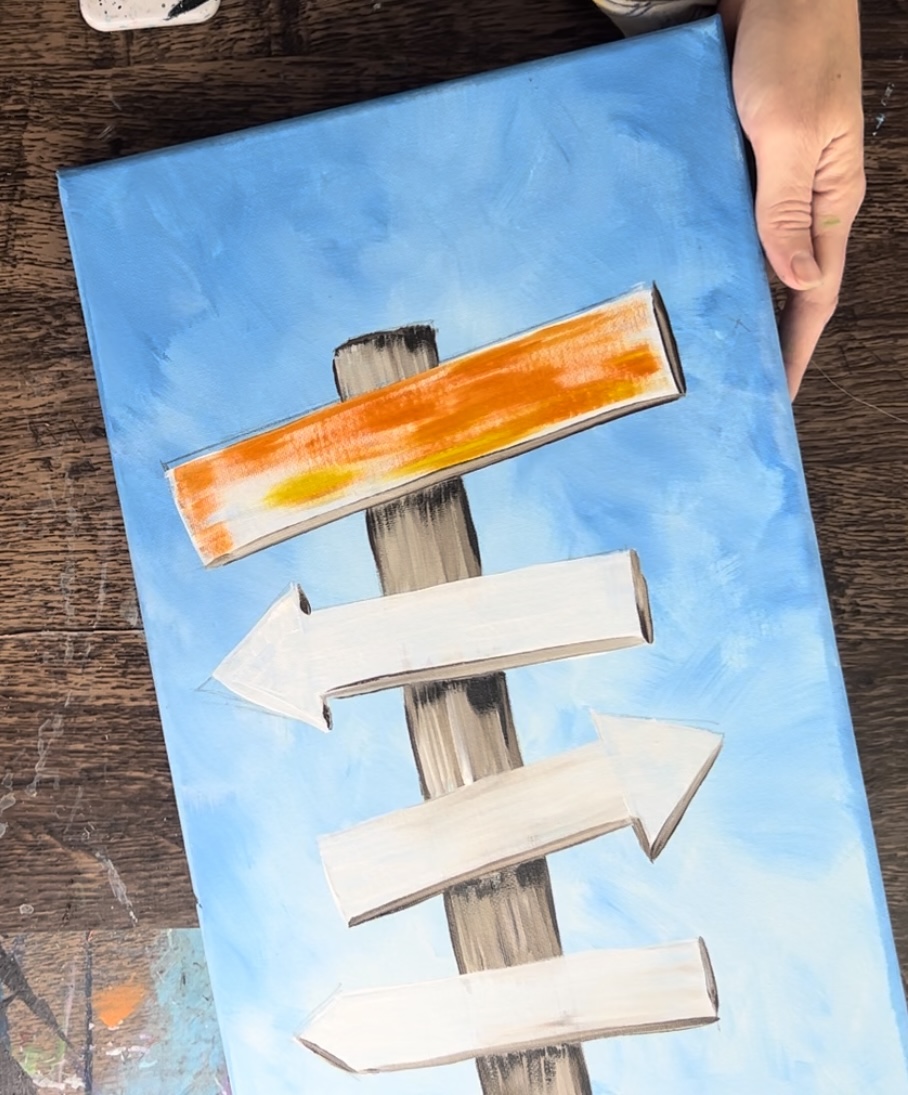
For this top sign, I used orange and a little yellow to lighten the orange.
Then next sign was done with “light pink”. Again, do this “dry brush style” and leave a lot of white still showing through.
Another technique you can try is blending very small amounts of raw umber (brown) paint into the color. This will help with the “faux rustic wood” effect we are going for.
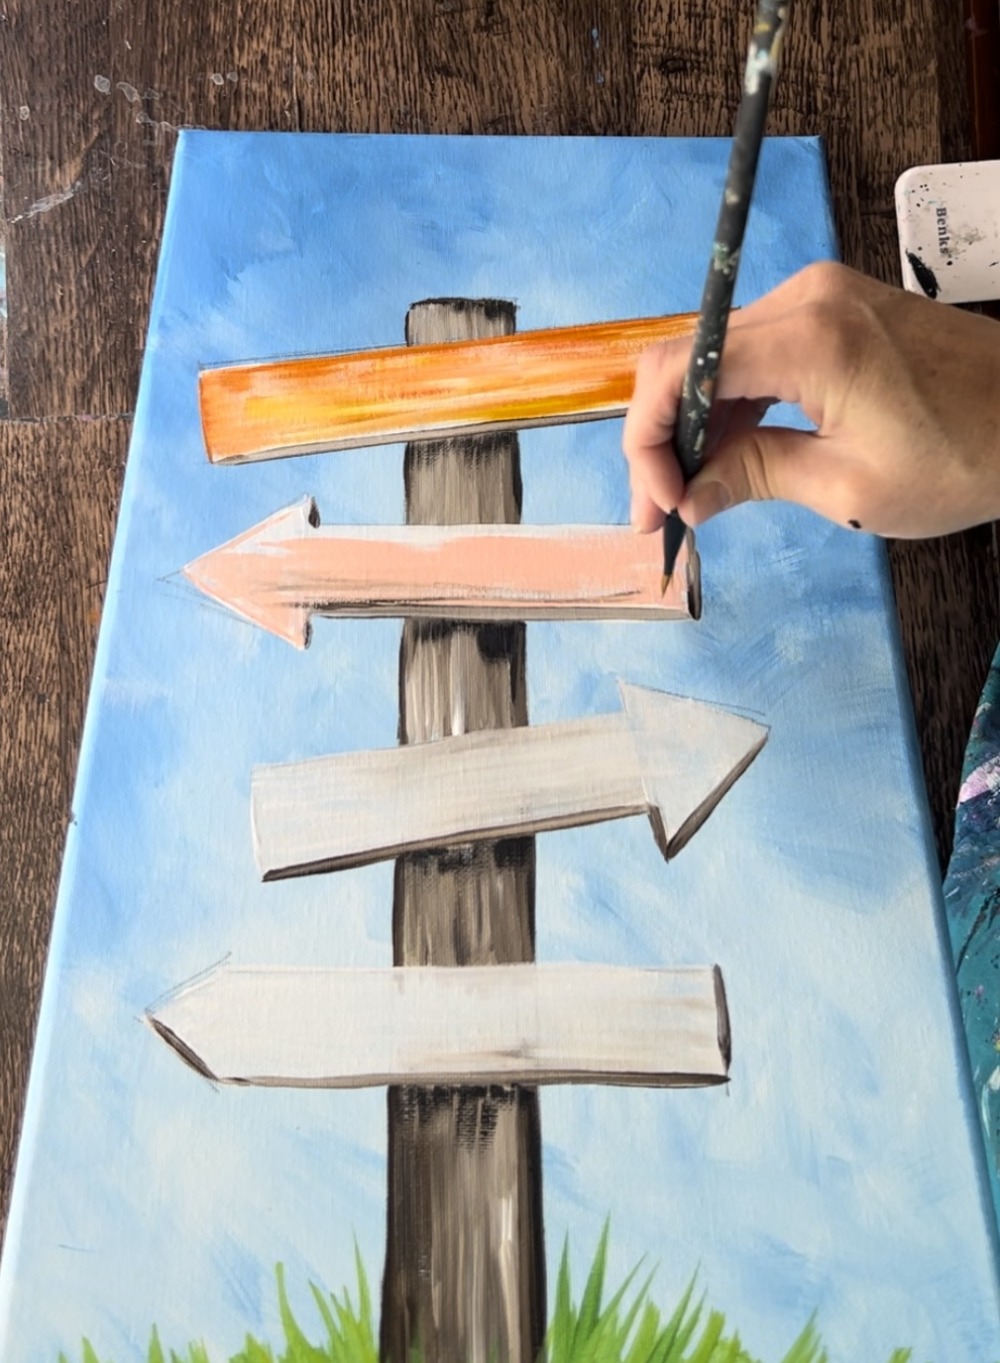
The next arrow sign was done with deep violet.
Finally, the bottom sign was painted “primary yellow”.
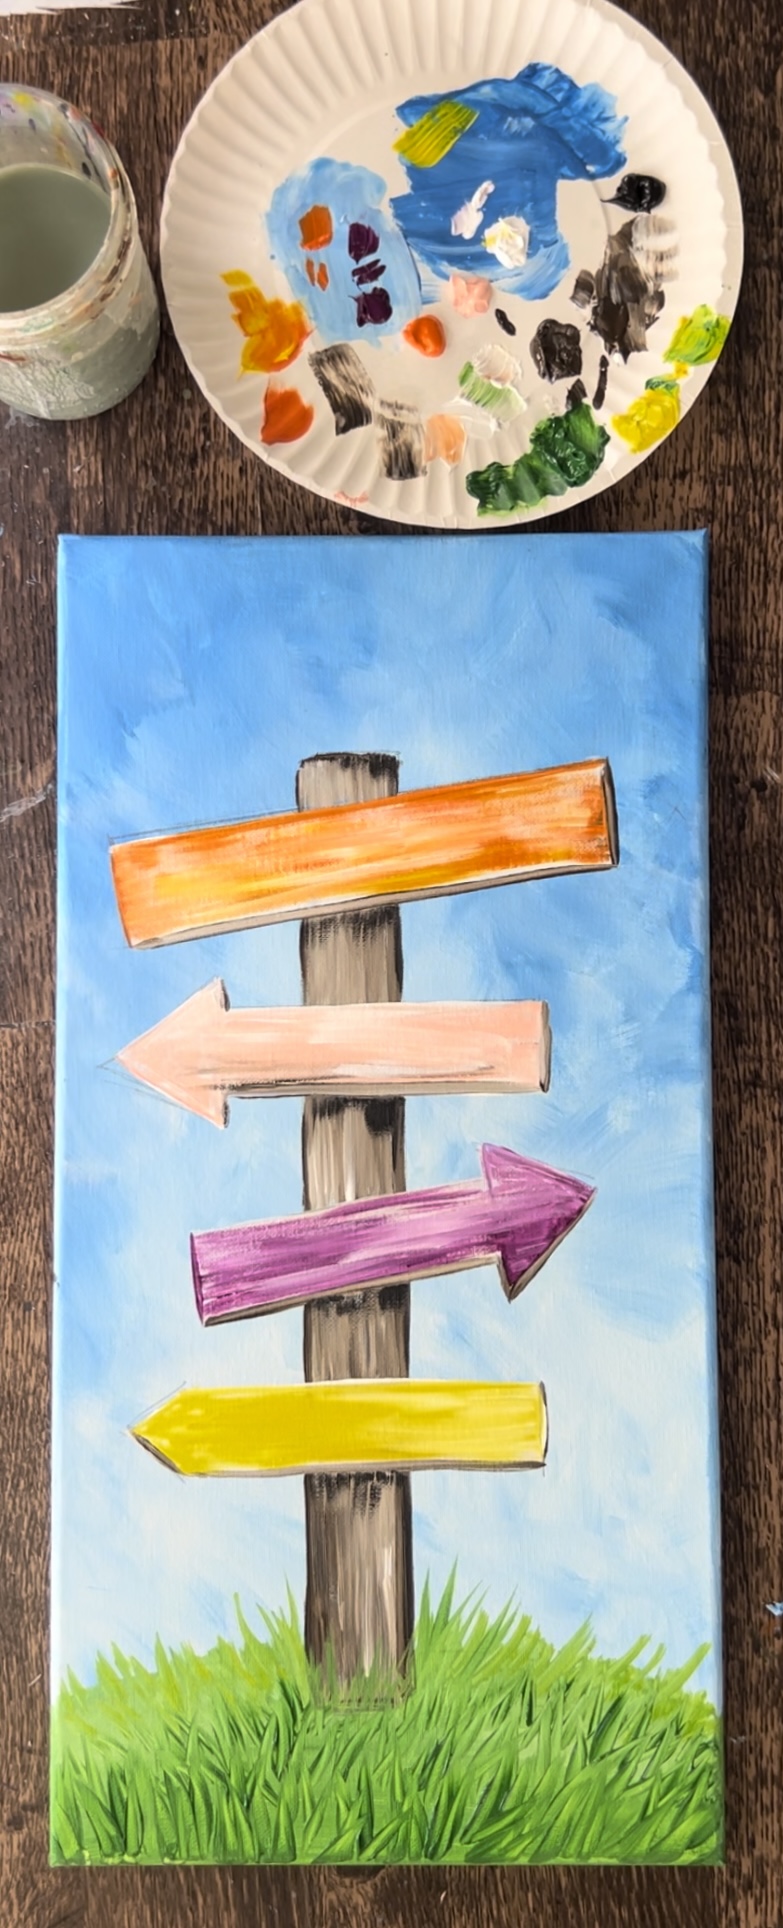
This next step is optional. Add a little bit of brown to some of the edges of the sign. Use the 12 bright brush and “dry brush” some of the brown on the edges to give them more of a rustic effect.
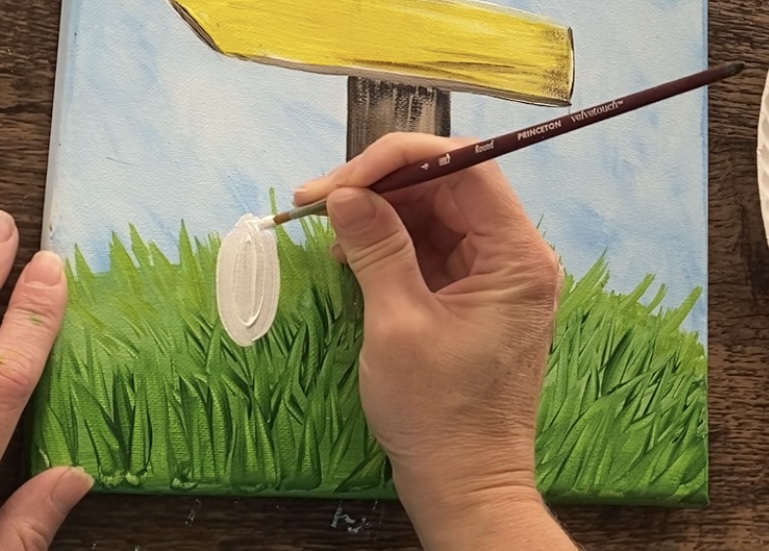
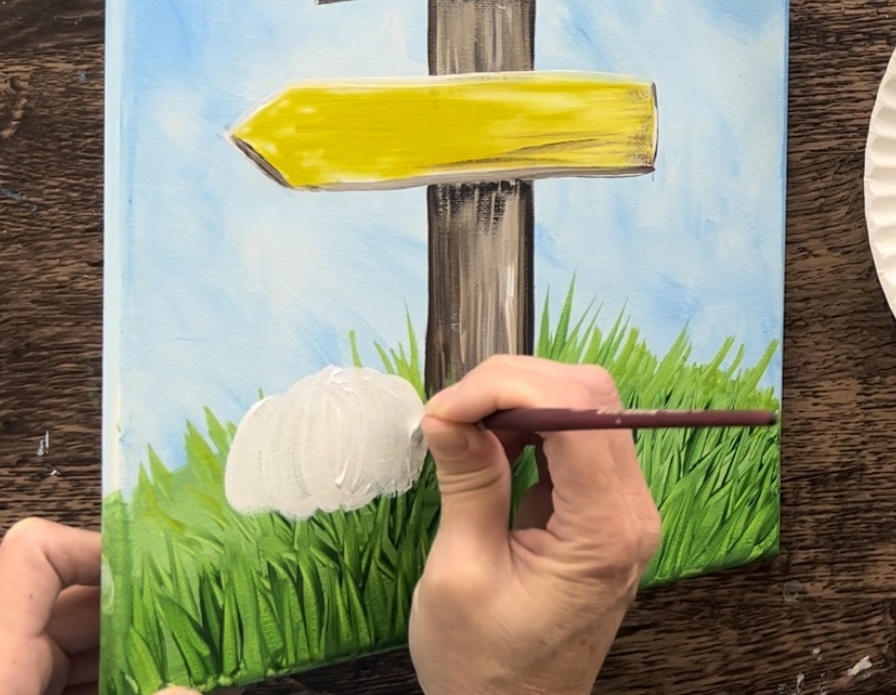
9. Paint pumpkins
Use a #4 round brush and titanium white to paint the pumpkins.
Start by painting these pumpkins white and then add your orange layer over it when the white dries.
To paint the pumpkins, start by painting an oval in the center of the pumpkin.
Then on each side of the oval, paint a curved stroke that starts at the top and then stroke down.
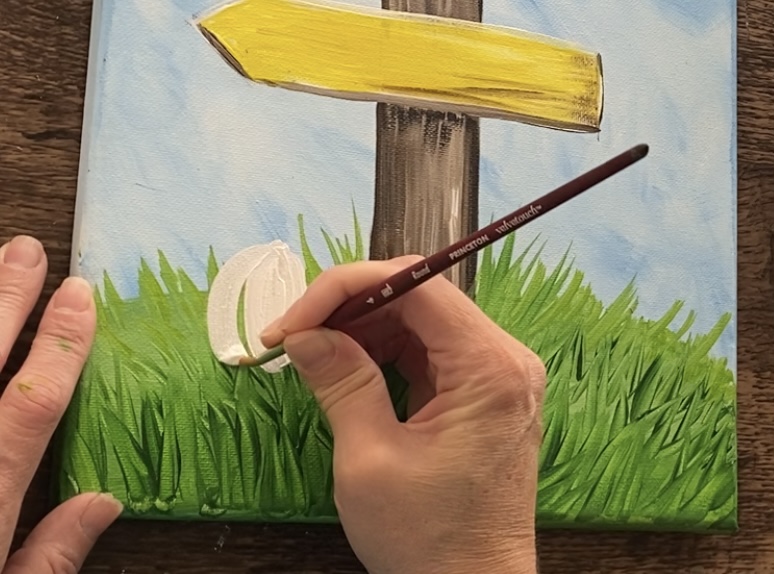
Do this on each side of the oval. You are forming a pumpkin shape with “bumps” on the top and bottom.
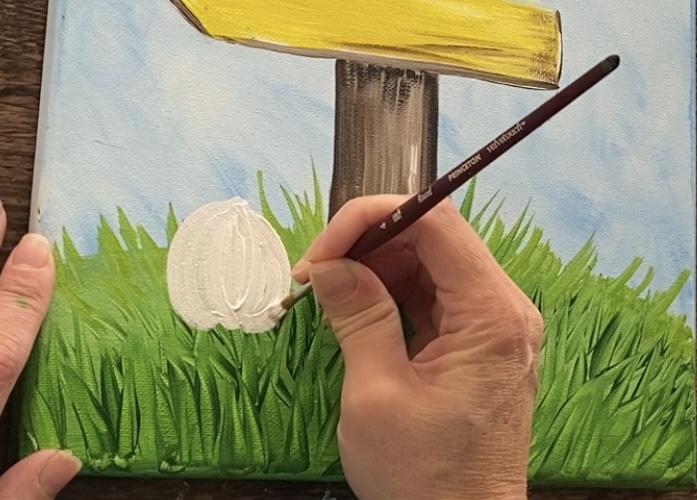
Then paint two more curve strokes on each side.
Paint a second pumpkin using the same technique. I did this one sightly taller.
Let your pumpkins dry a little bit. Then paint them orange. When you paint them orange, use the exact same technique/ stroke style you used to paint them when. Use the #4 round brush and start with the center oval.
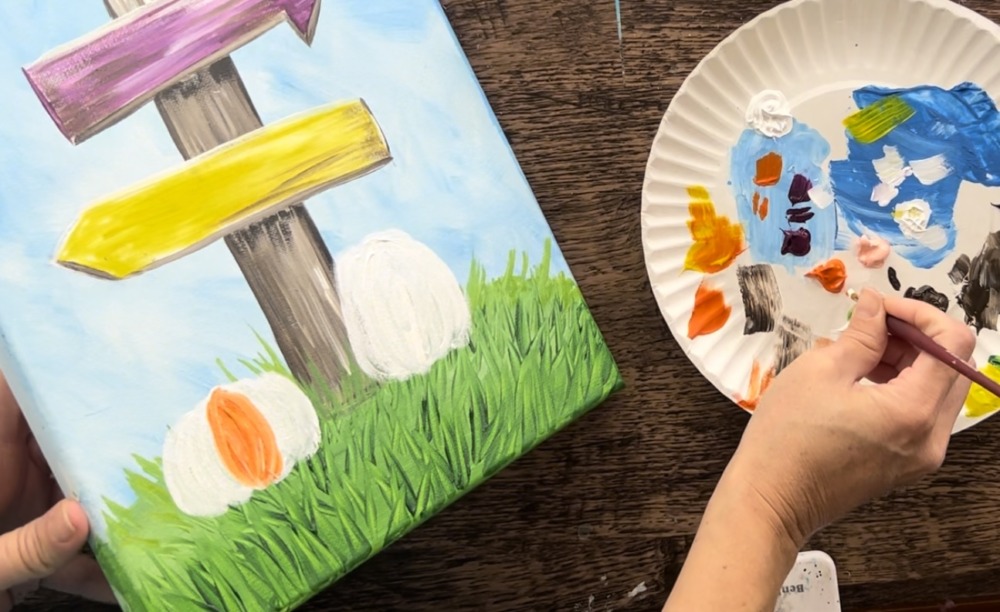
It’s okay if you leave some of the white showing through the pumpkin.
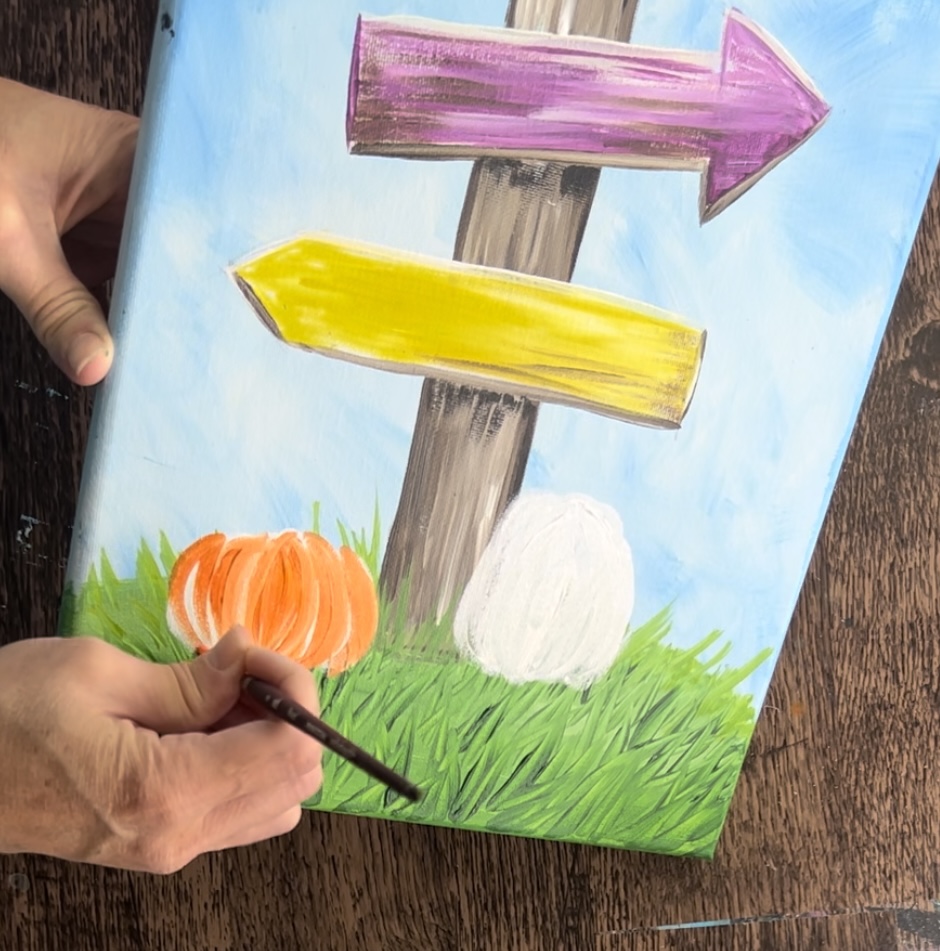
Repeat this for the other pumpkin. I added some “primary yellow” into the orange to lighten the color and make it look different than the other pumpkin.
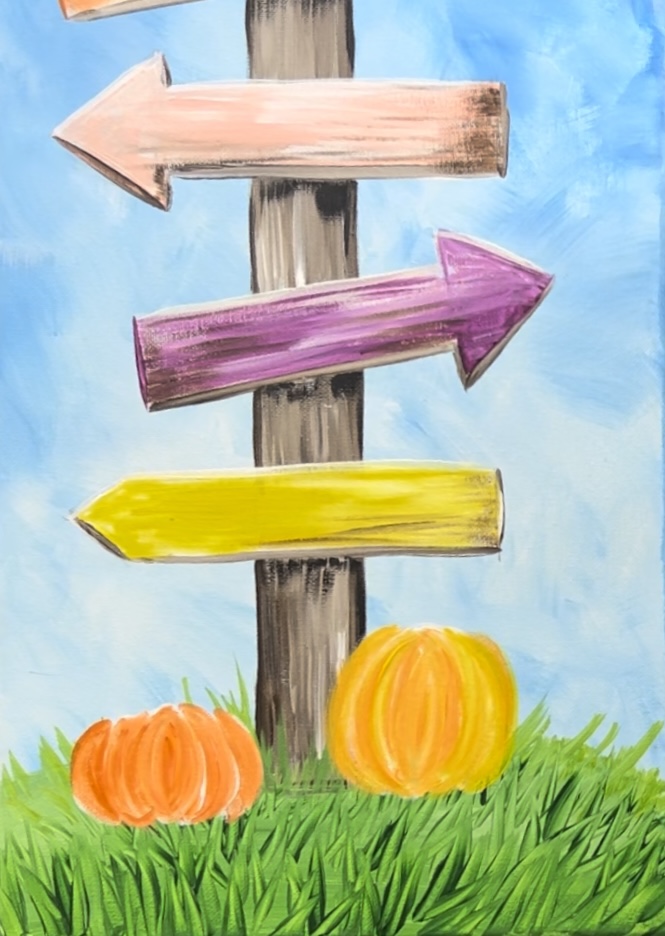
I also did another smaller pumpkin to the far right. Feel free to paint as many pumpkins as you want!
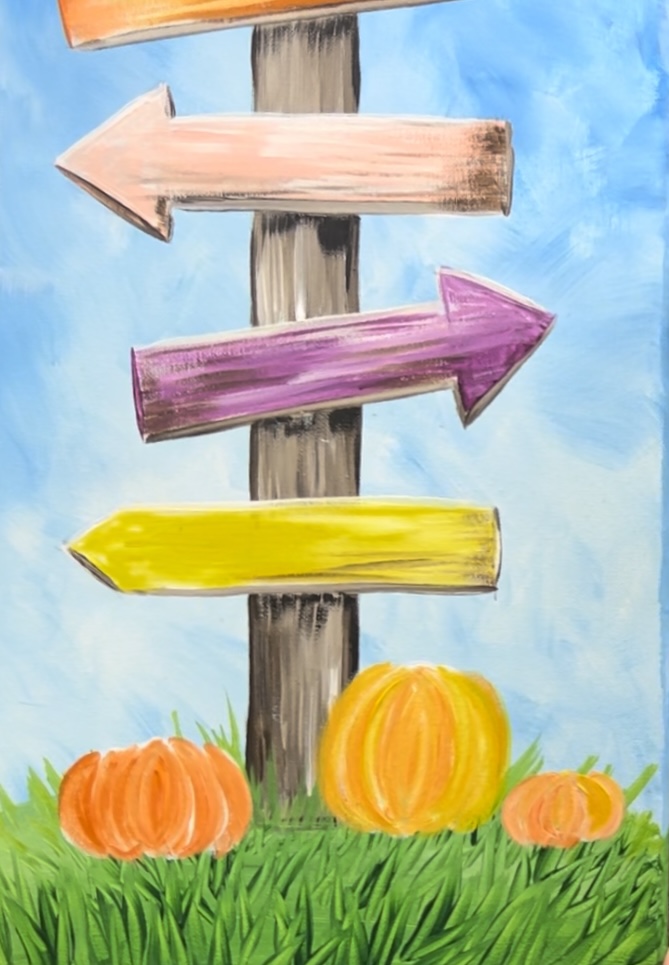
Next, use the #4 round brush and “raw umber” to paint the stems. Paint a “scalloped base” on the top of the pumpkin and have it quickly form into a very thin stem that curls and goes to a point. You can also change the style of this pumpkin stem.

Optional: add a little bit of titanium white into the brown to give it some highlight.
Also optional: use brown to slightly outline the lines in between the “pumpkin bumps” on the top and bottom of the pumpkin. I didn’t outline all of the pumpkin, only some of it.
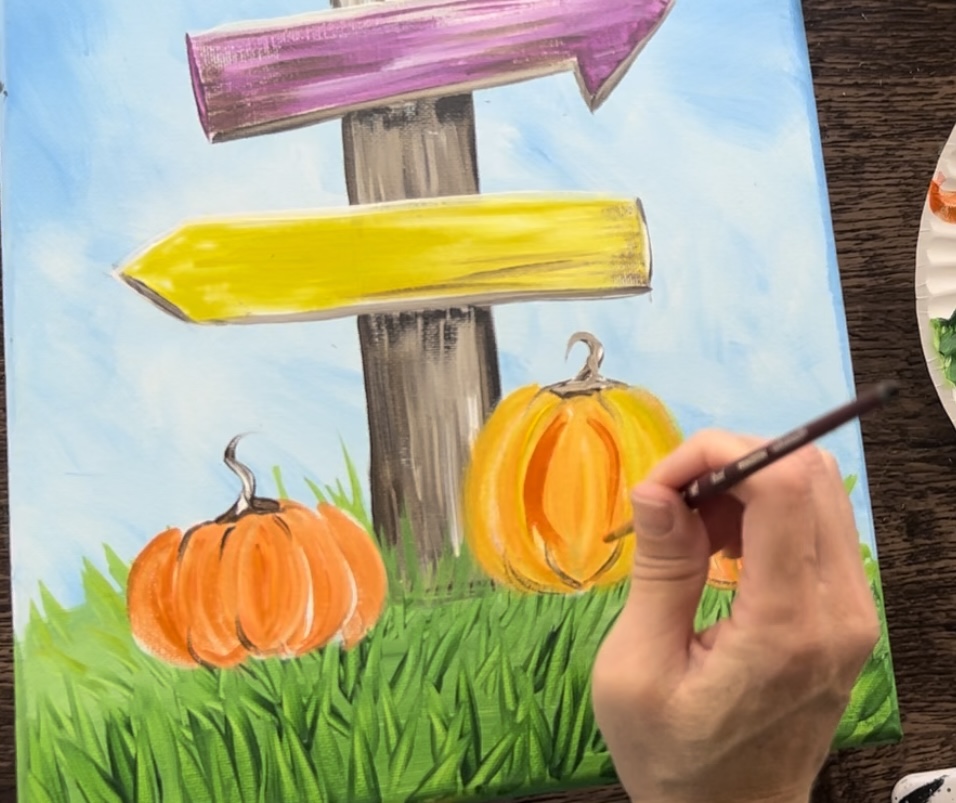
Next, use hooker’s green hue and the #4 round brush to paint the pumpkin vines. Paint a curly line that goes upwards behind each of the stems.
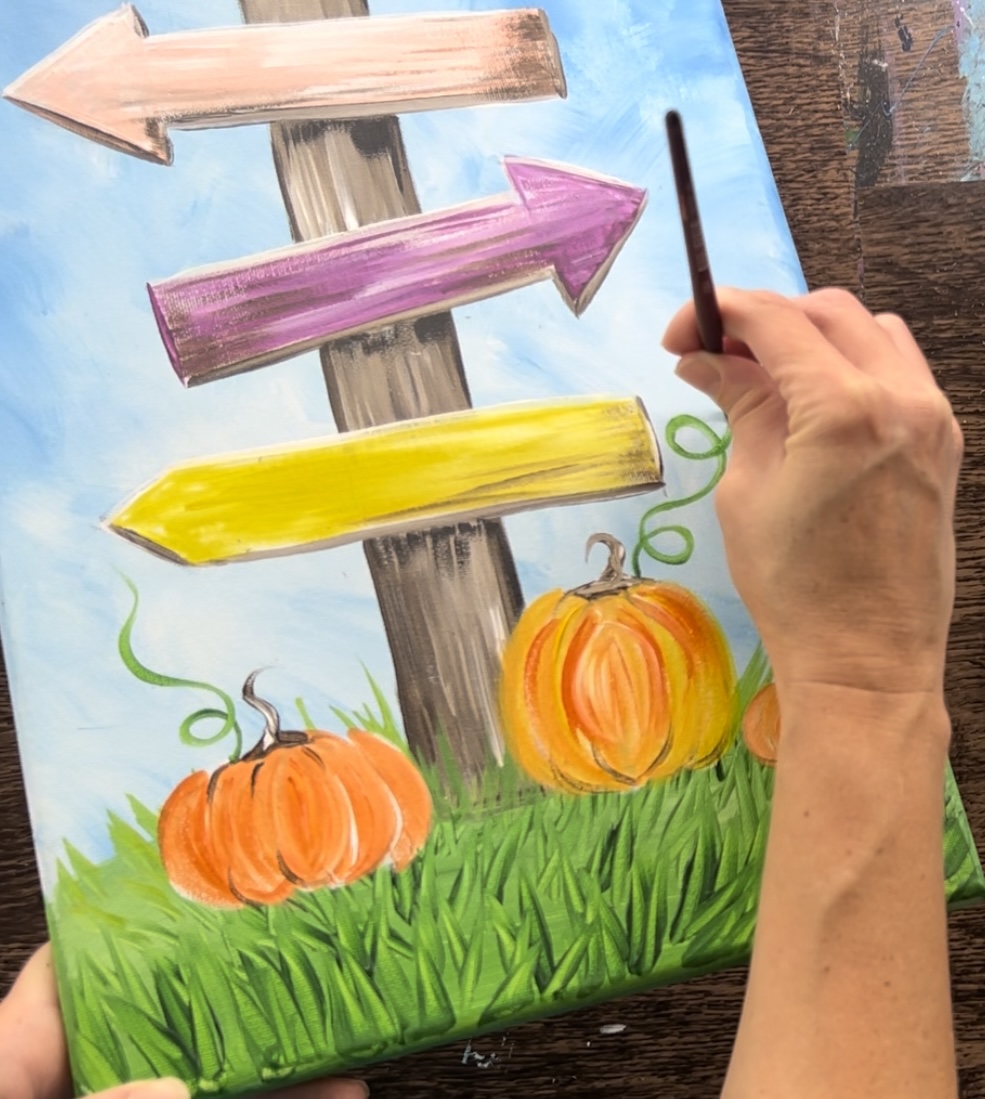
Then paint simple pumpkin leaves with the same green on the vines.
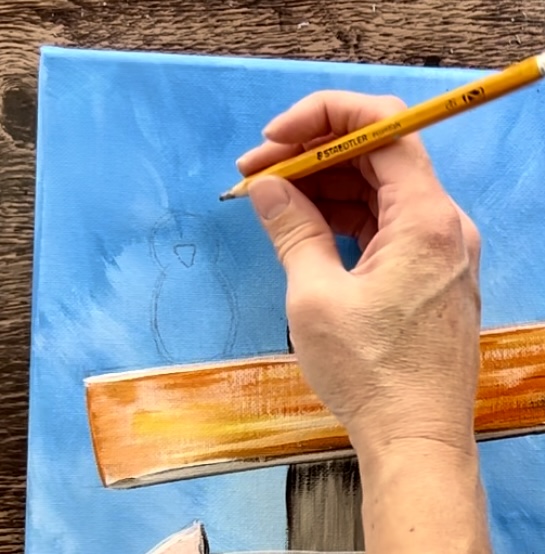
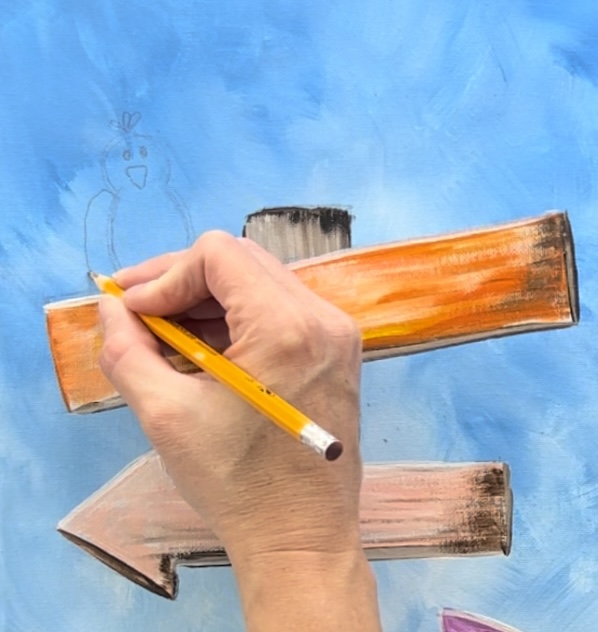
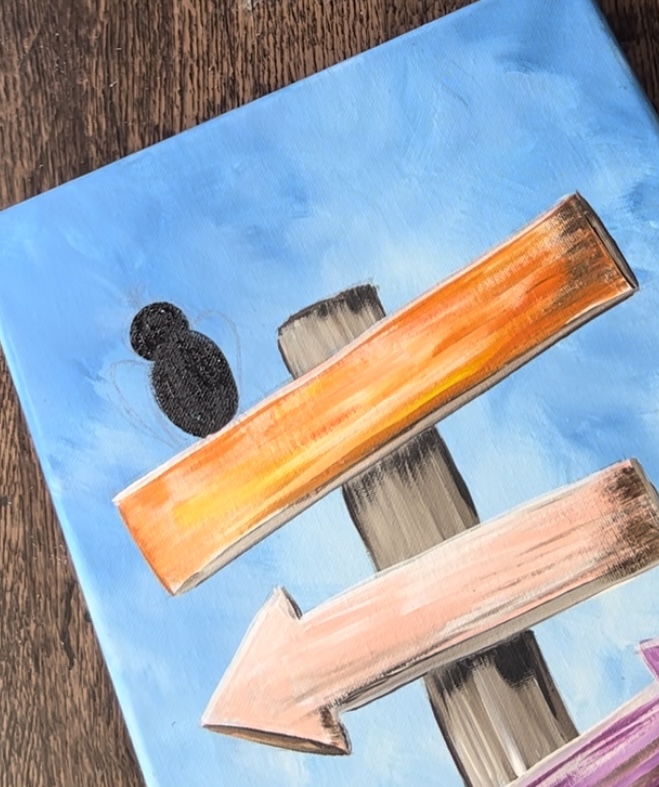
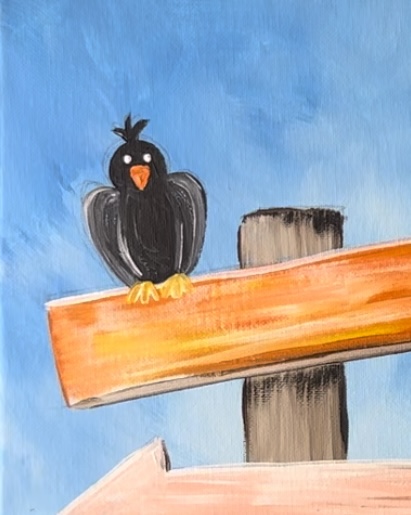
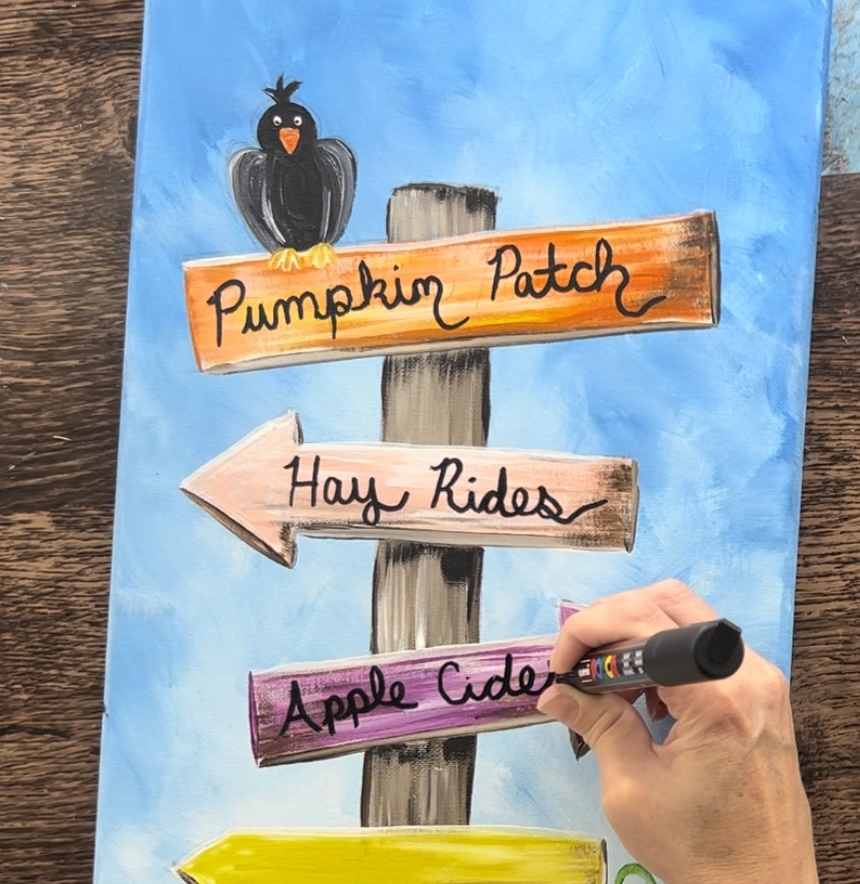
10. Draw & Paint Bird
Use a pencil to sketch out the bird. Draw an “egg shape” on the top edge of the top sign.
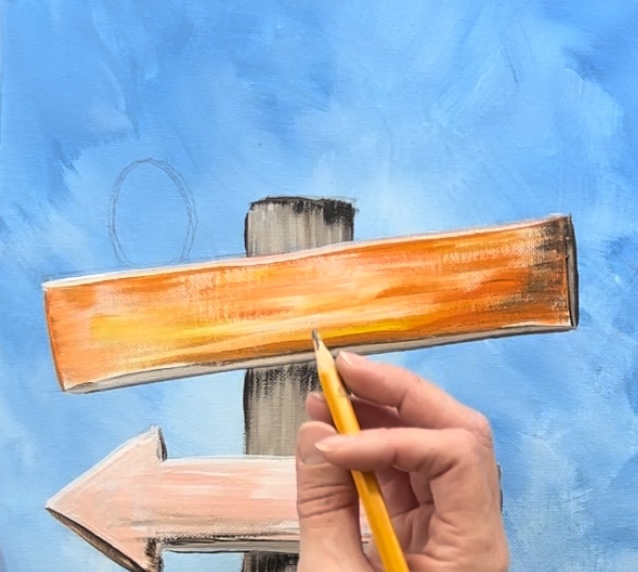
Then draw a circle above that for the head. Erase the lines inside of the bird. Draw a triangle for the beak and two eyes.
Draw three feathers on top of the head. Draw two curved lines on each side of the body for the wings.
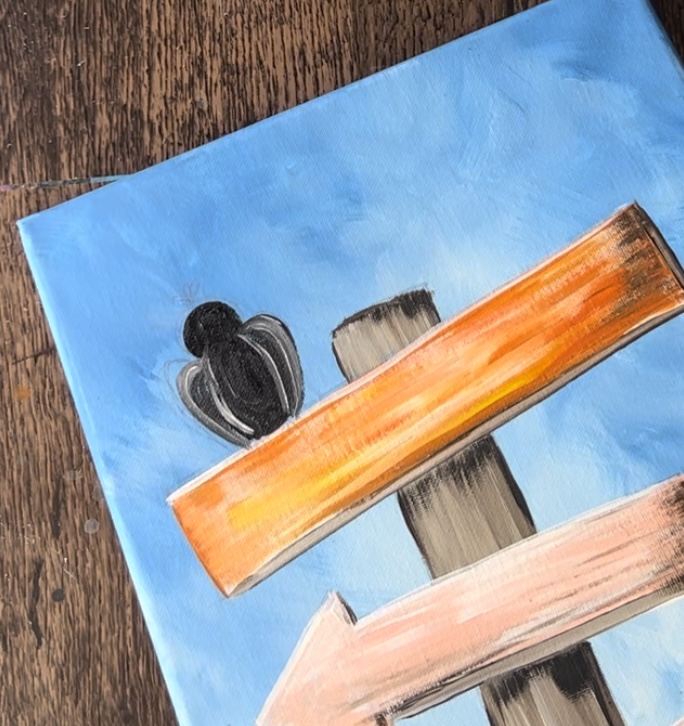
Next, paint the bird. Use a #4 round brush and “mars black”.
As you paint the wings, add a little titanium white into the black so that it becomes a dark gray color. This is to help the wings stand out against the body and head.
Paint the top feathers using just the tip of the round brush to paint small paint strokes.
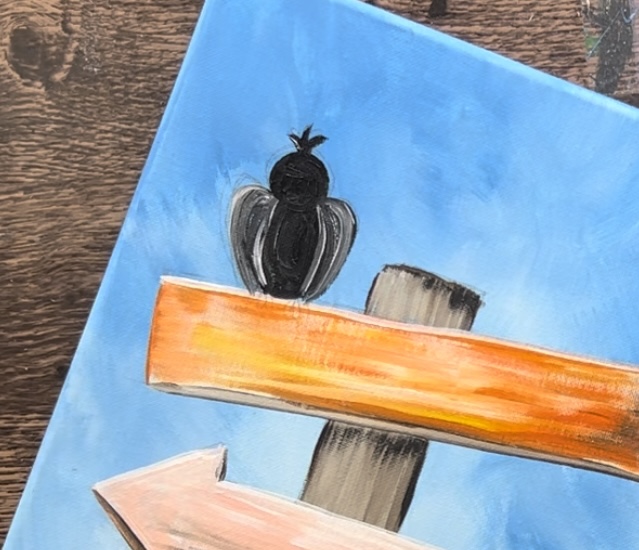
Paint the feet of the bird. For contrast, I mixed titanium white in with yellow and orange so that it would be lighter than the sign and stand out. You may need to make the feet darker or lighter depending on the color of your sign.
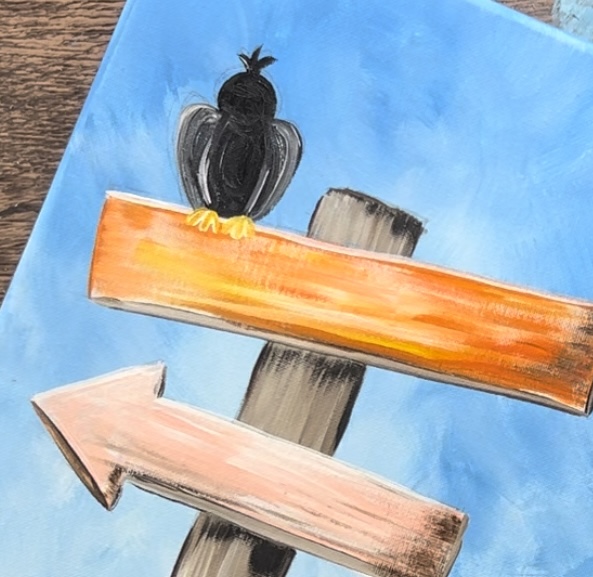
Wait for the bird to dry. Then use titanium white to paint two dots for the eyes and then a white triangle for the beak. Wait for the triangle to dry. Then paint it orange.
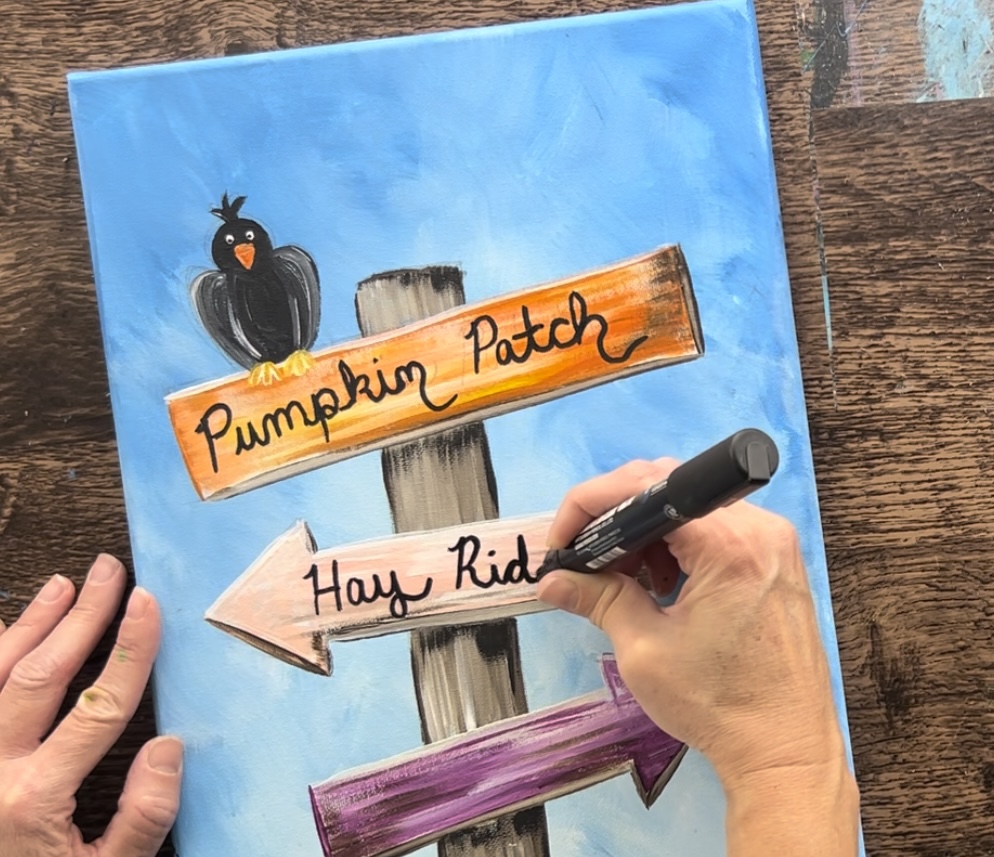
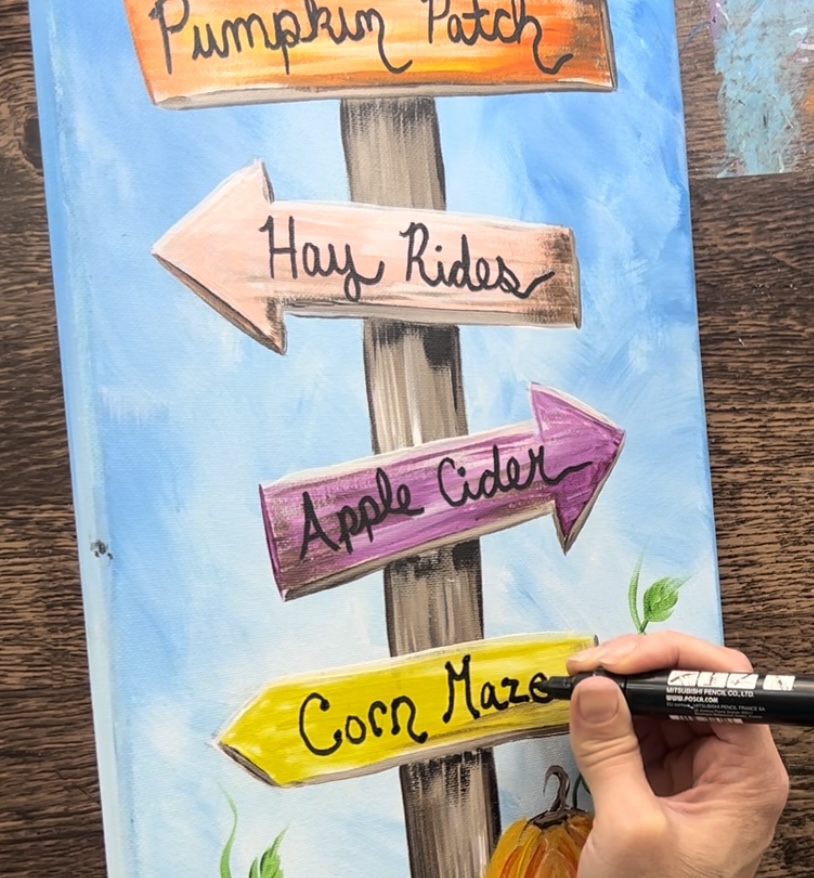
11. Write Words
I recommend writing the words out in pencil first so you can get the sizing and placement. Then re-outline your lettering with a black paint pen or sharpie. You can also paint these with a thin paint brush and black paint.
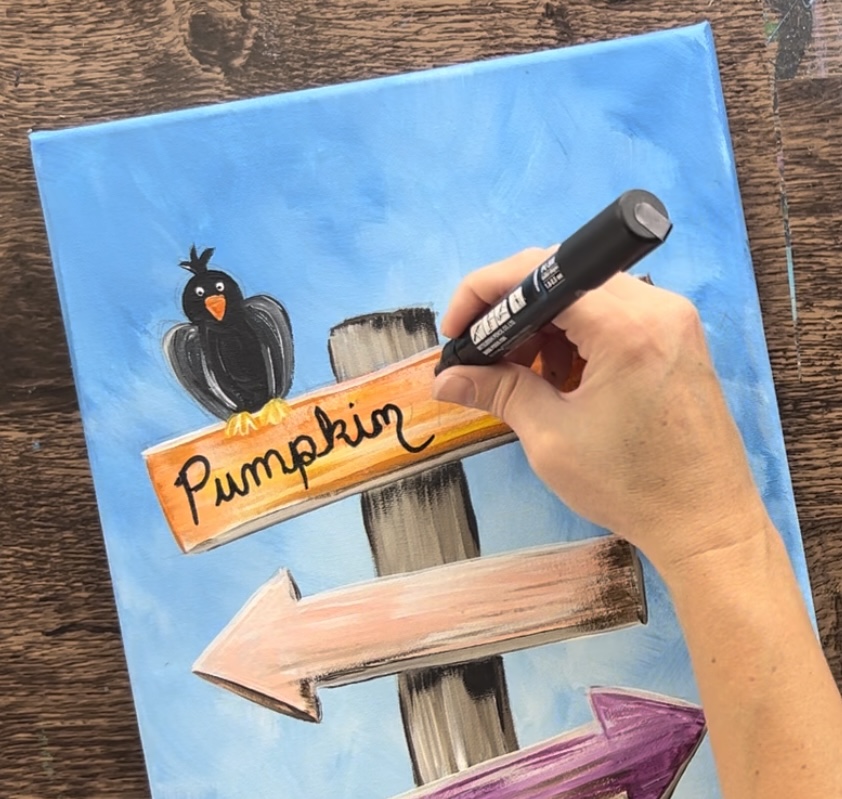
I wrote “Pumpkin Patch”, “Hay Rides”, “Apple Cider” and “Corn Maze” on each of the signs. You are welcome to change the words and style of lettering for this!
12. Paint Leaves
As a last touch for this painting, I painted leaves falling in the background. Use a #4 round brush and orange and yellow paint. Paint basic leaf shapes all throughout the background and some on the grass on the bottom.
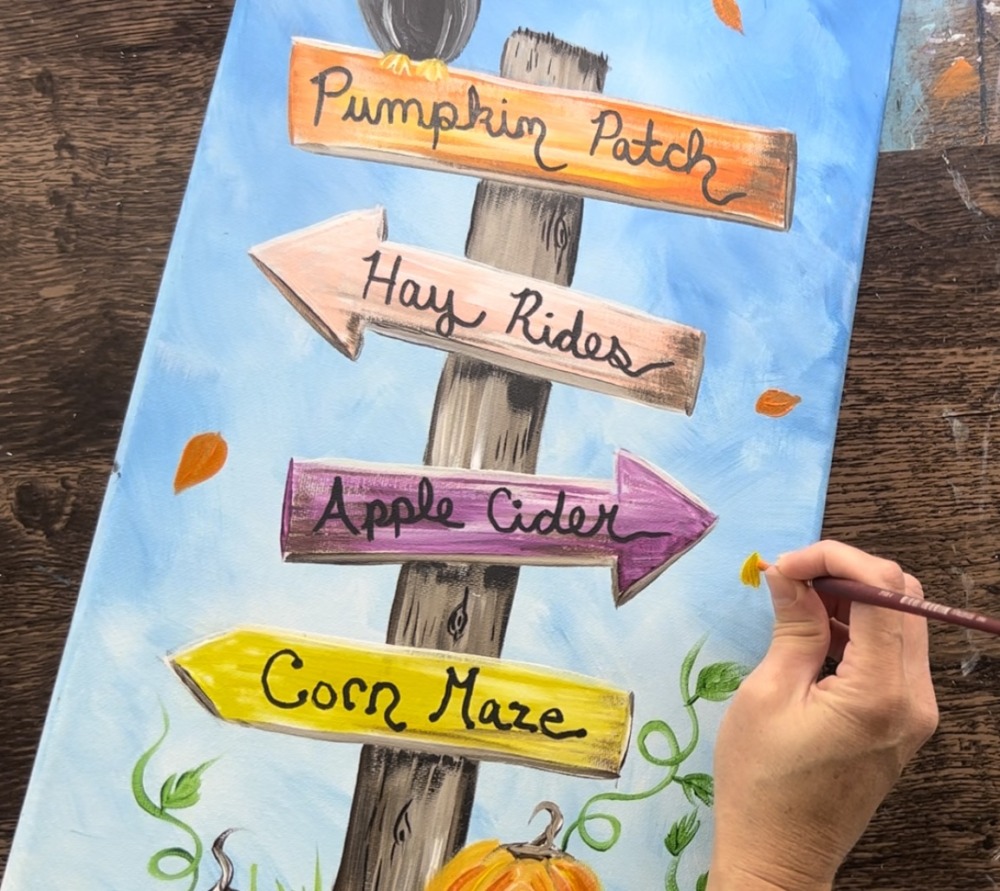
Then paint the stems. Use the #4 round brush and brown paint to paint small curved lines on the base of each of the leaves.
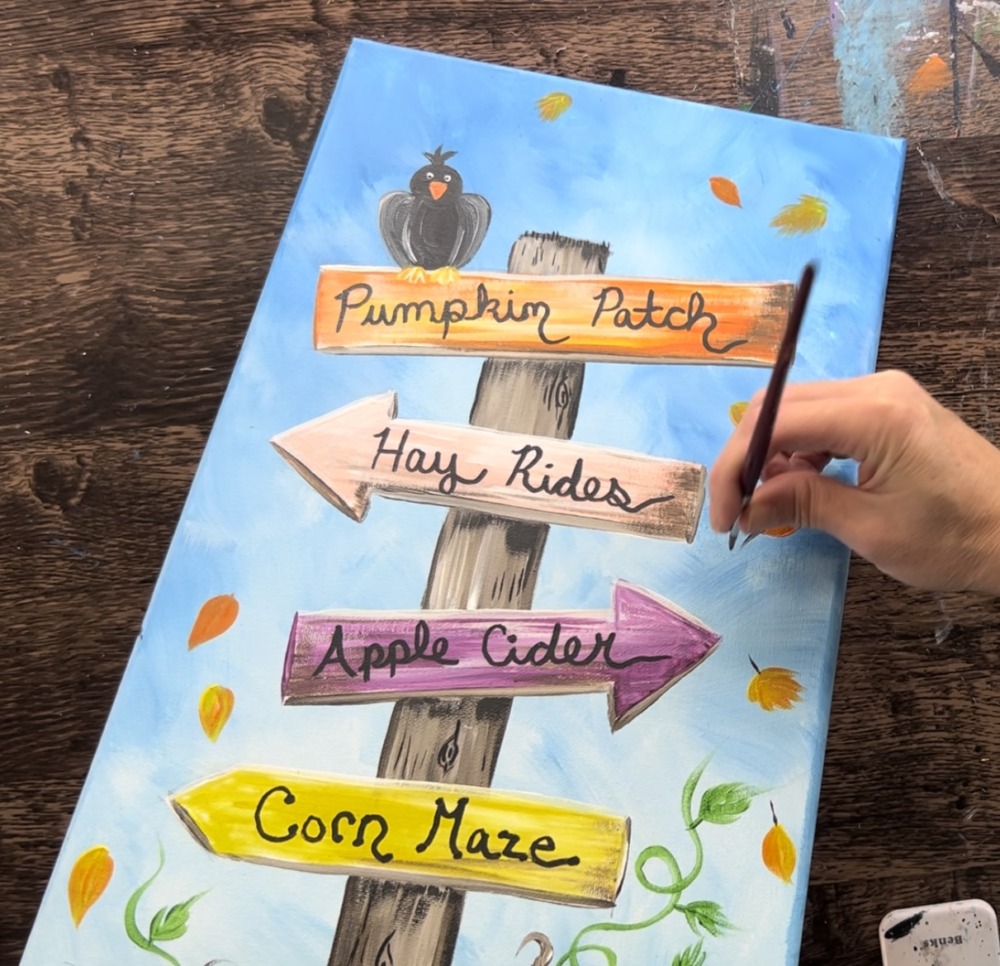
Finished!