
Would you like to save this?
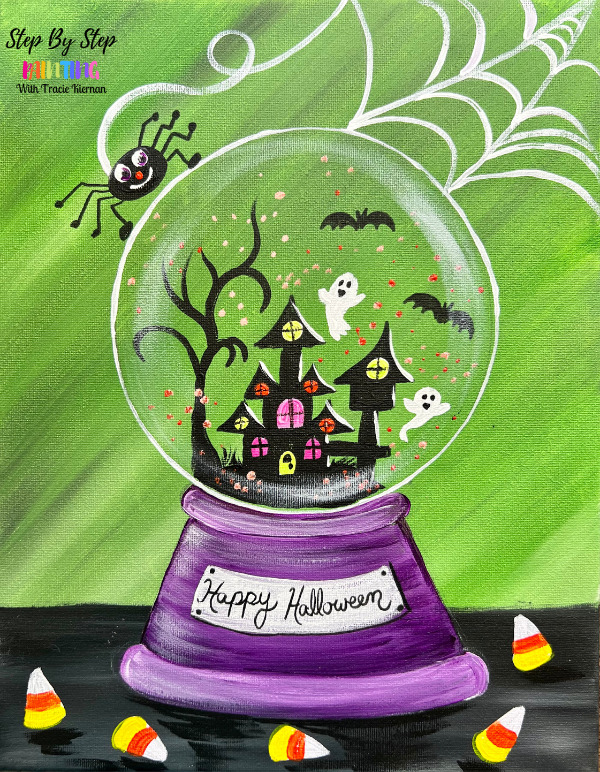
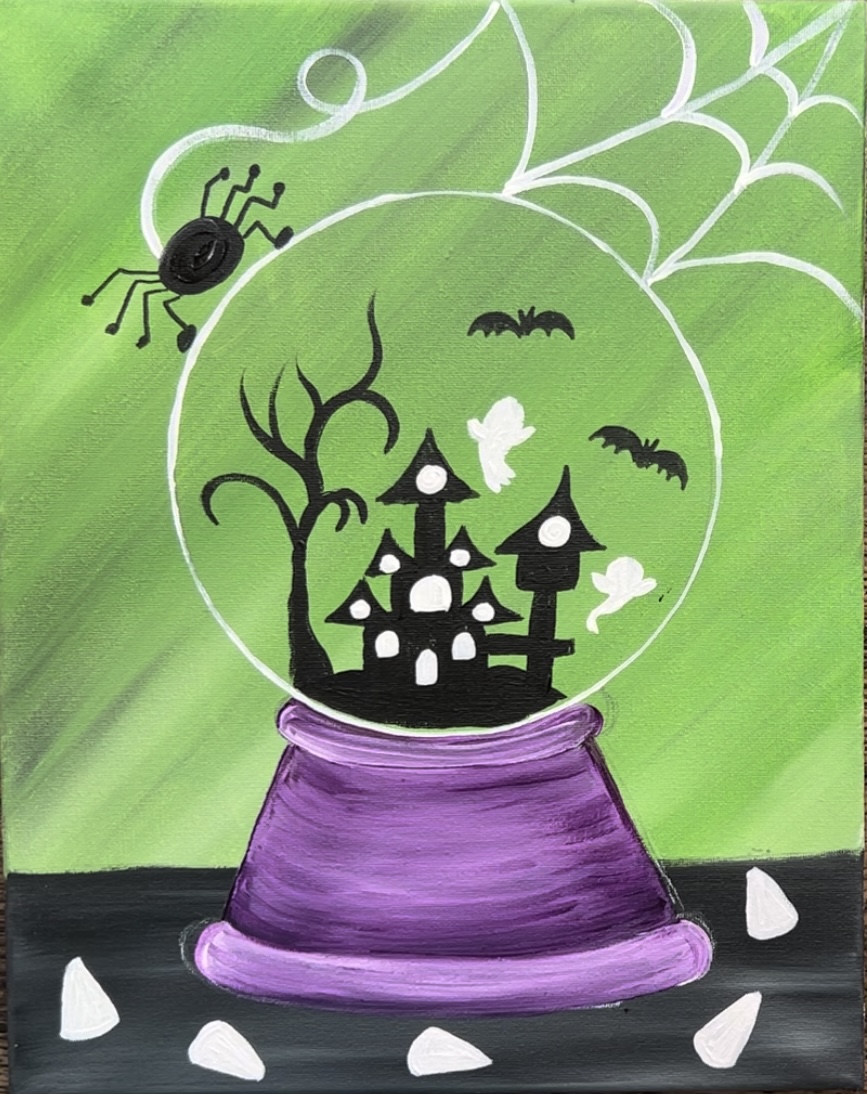
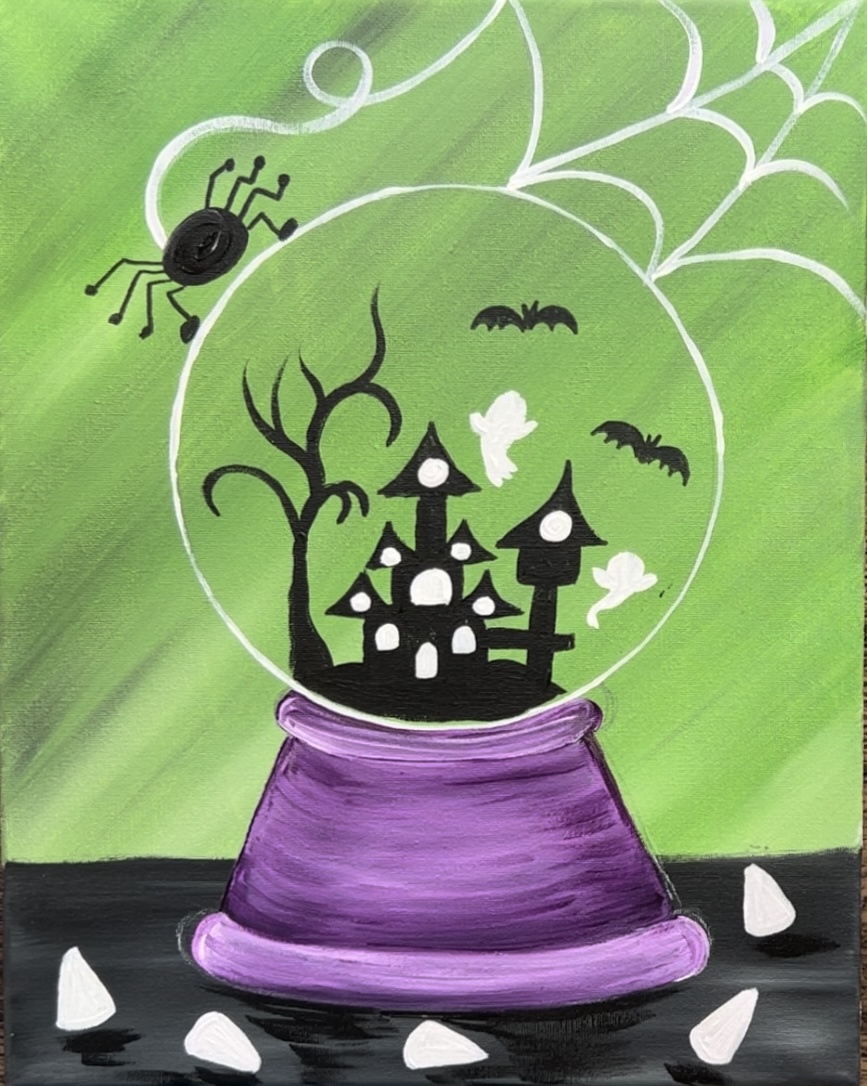
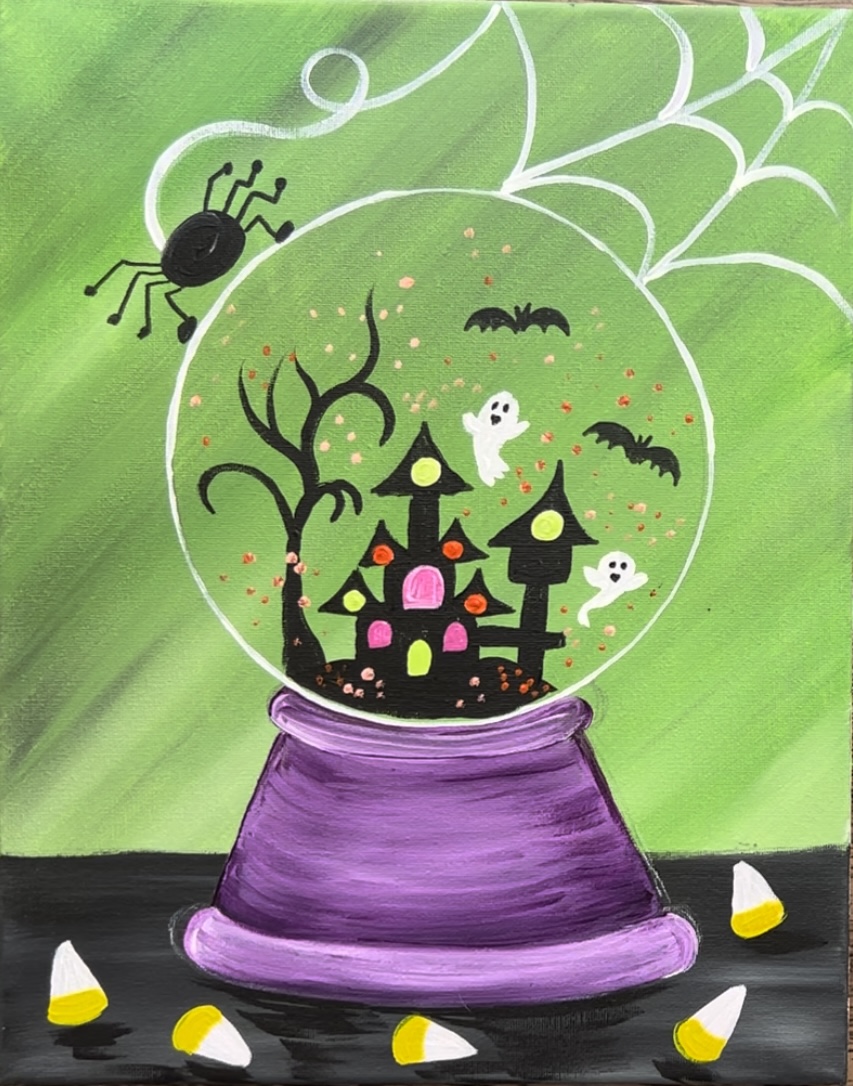
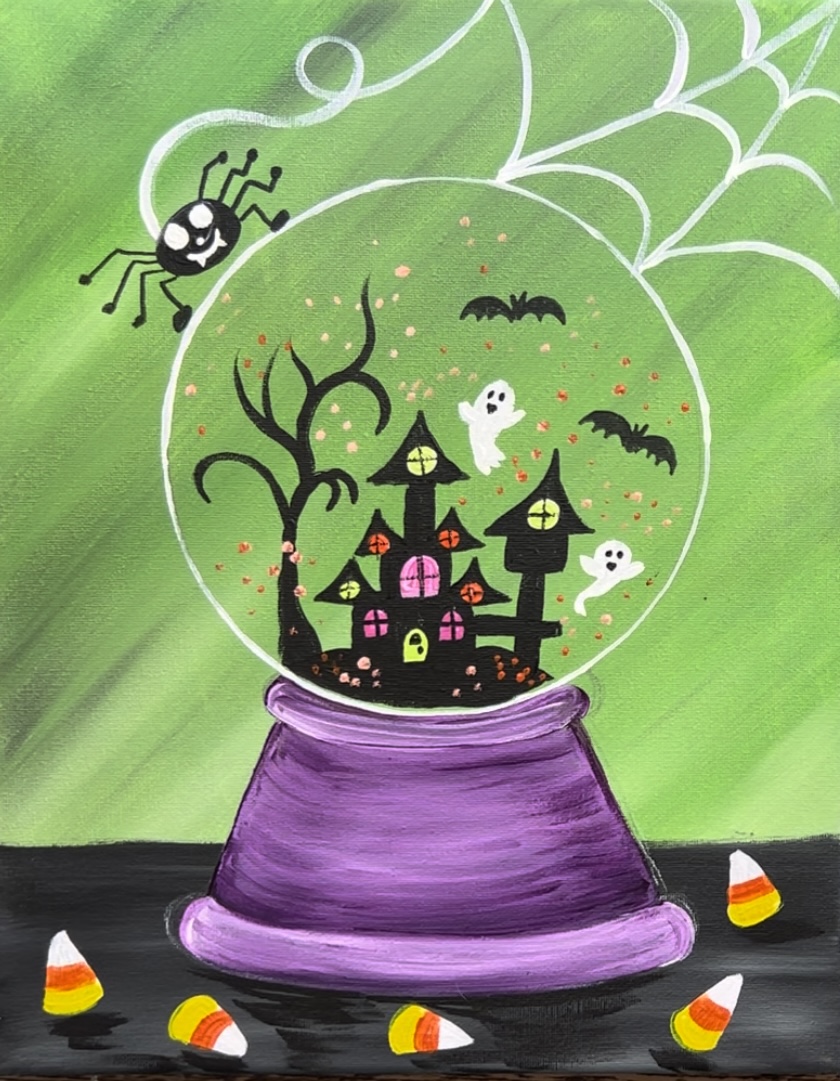
Paint a halloween globe with acrylics on canvas! This is a super easy acrylic painting tutorial! It’s a great one to add to your halloween painting collection or something you can paint with your kids.
I’ve done a couple other globe style paintings such as this Family Snowman Globe and this Cabin Globe. This particular one is a fun Halloween theme and you are welcome to customize it! Add different candies on the table, change the word, add a pumpkin or graveyard inside, etc.
Enjoy and happy painting!
Materials
Halloween Globe Painting Tutorial
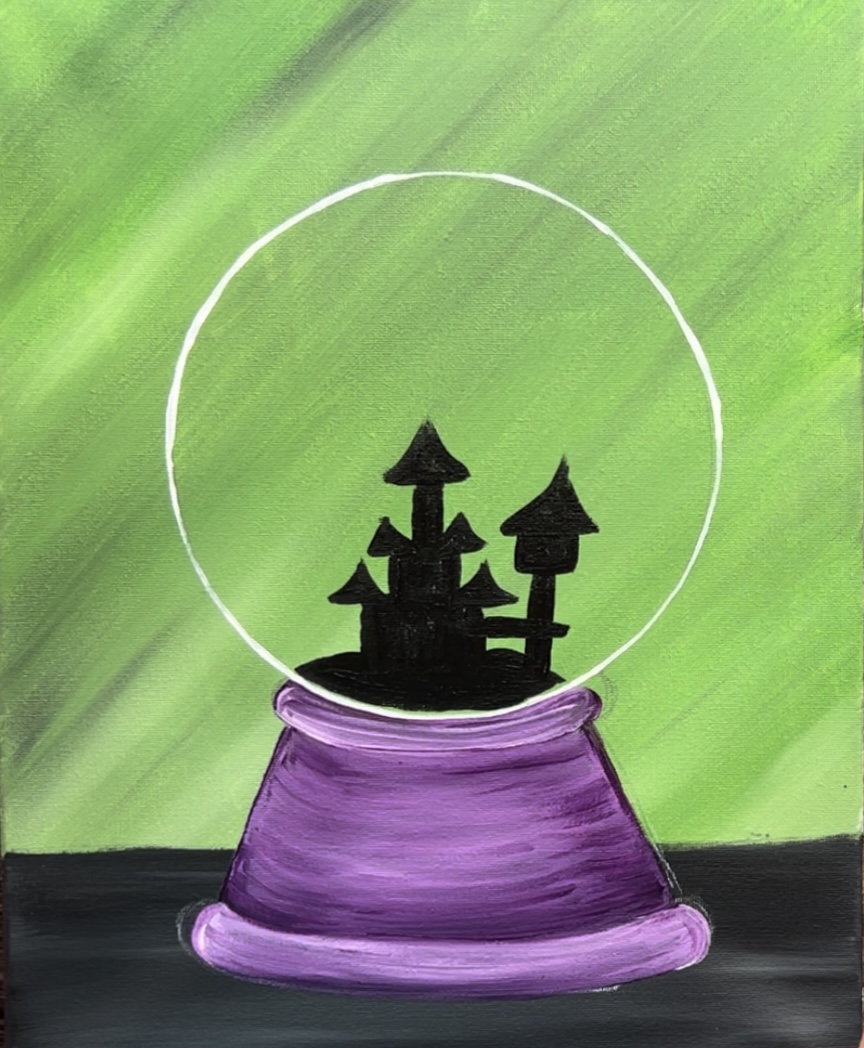
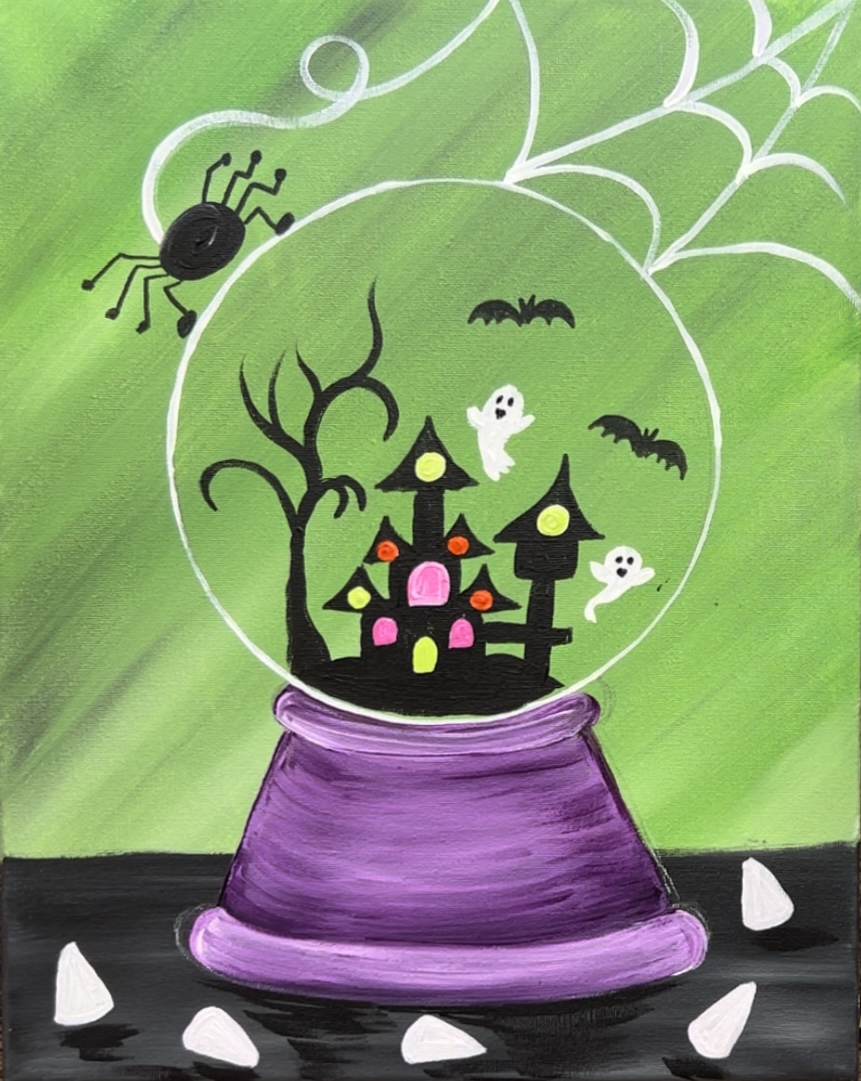
Paint a Halloween theme snowglobe with acrylics on an 11 x 14 canvas.
Materials
- 11 x 14 Canvas (this design can work on any size)
- Acrylic Paint
- Brushes
- Ruler
- 6.75" circle (or similar size) to trace
- Black Paint Pen or Sharpie
Colors
- Titanium White
- Mars Black
- Cadmium Red Light Hue
- Primary Yellow
- Hooker's Green Hue
- Brilliant Yellow Green
- Medium Magenta
- Prism Violet (or any purple color)
Brushes
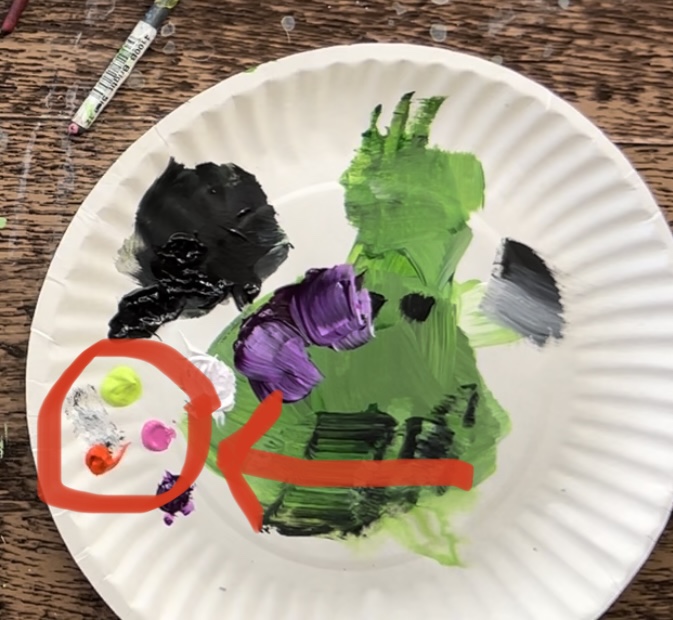
Color Palette
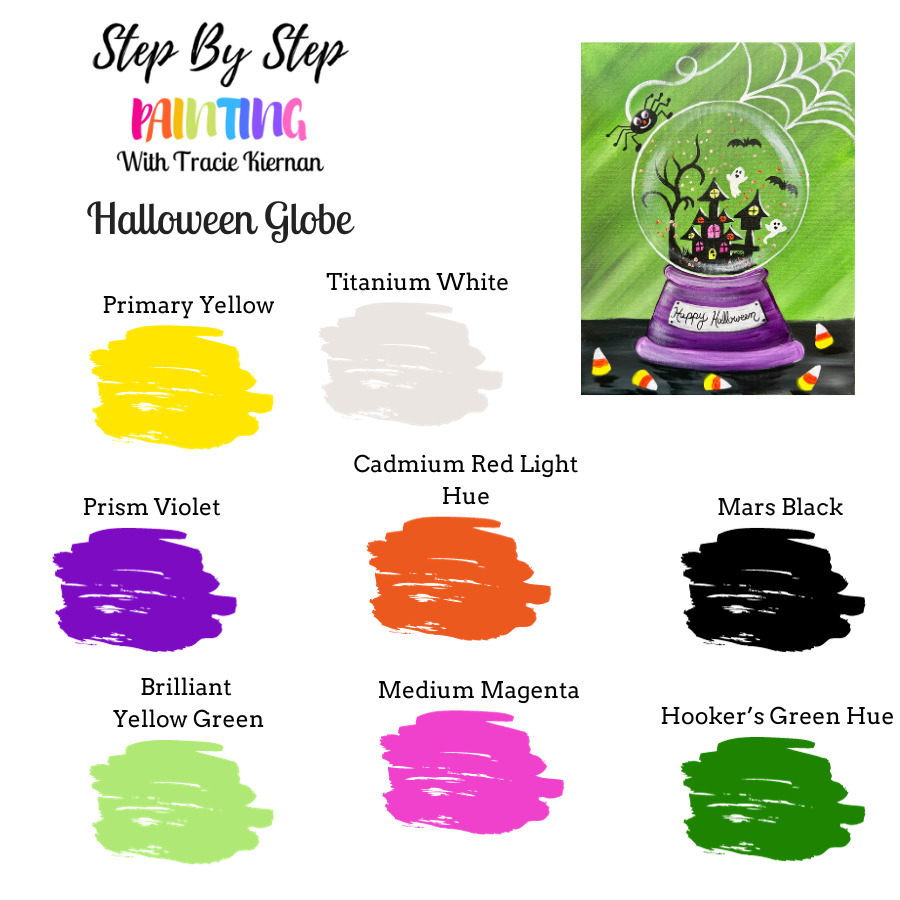
If you don’t have “cadmium red light hue”, you can sub it for any orange color. This also goes for “prism violet” which was used in the base of the snow globe. You can use any purple color or change the color to something else.
Craft Paint Conversion
If you are using craft paints such as Apple Barrel Craft Paints, I would recommend subbing to:
- Jet Black
- Snow White
- Harvest Orange
- Grape Jam
- Candy Pink
- Caterpillar
- Parakeet
- Yellow
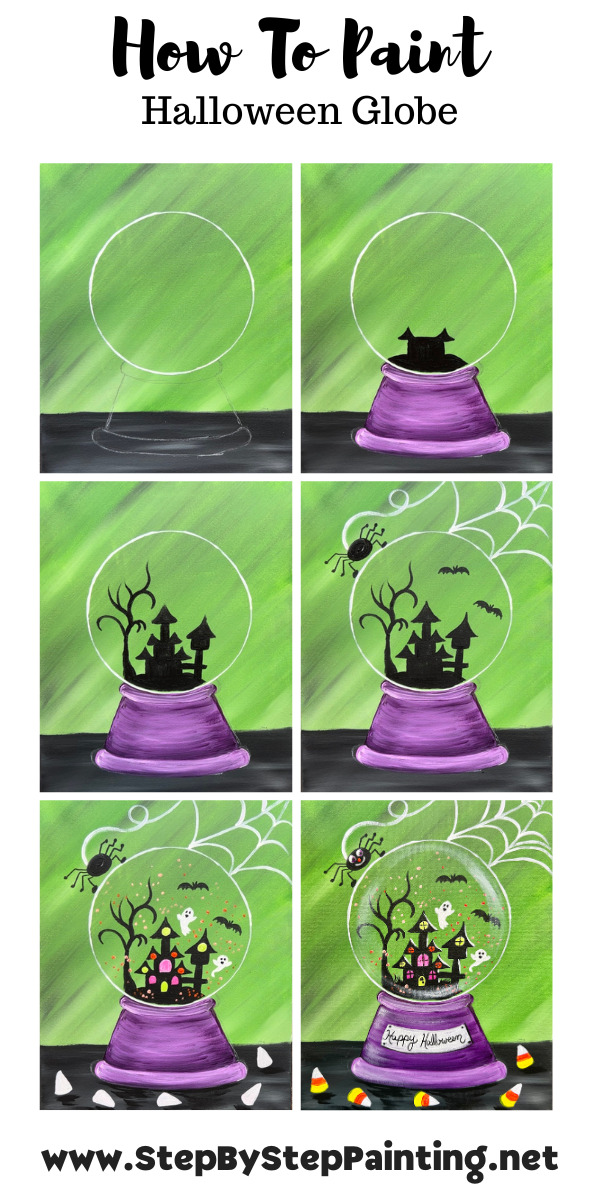
Directions At A Glance
Video
Step By Step Directions
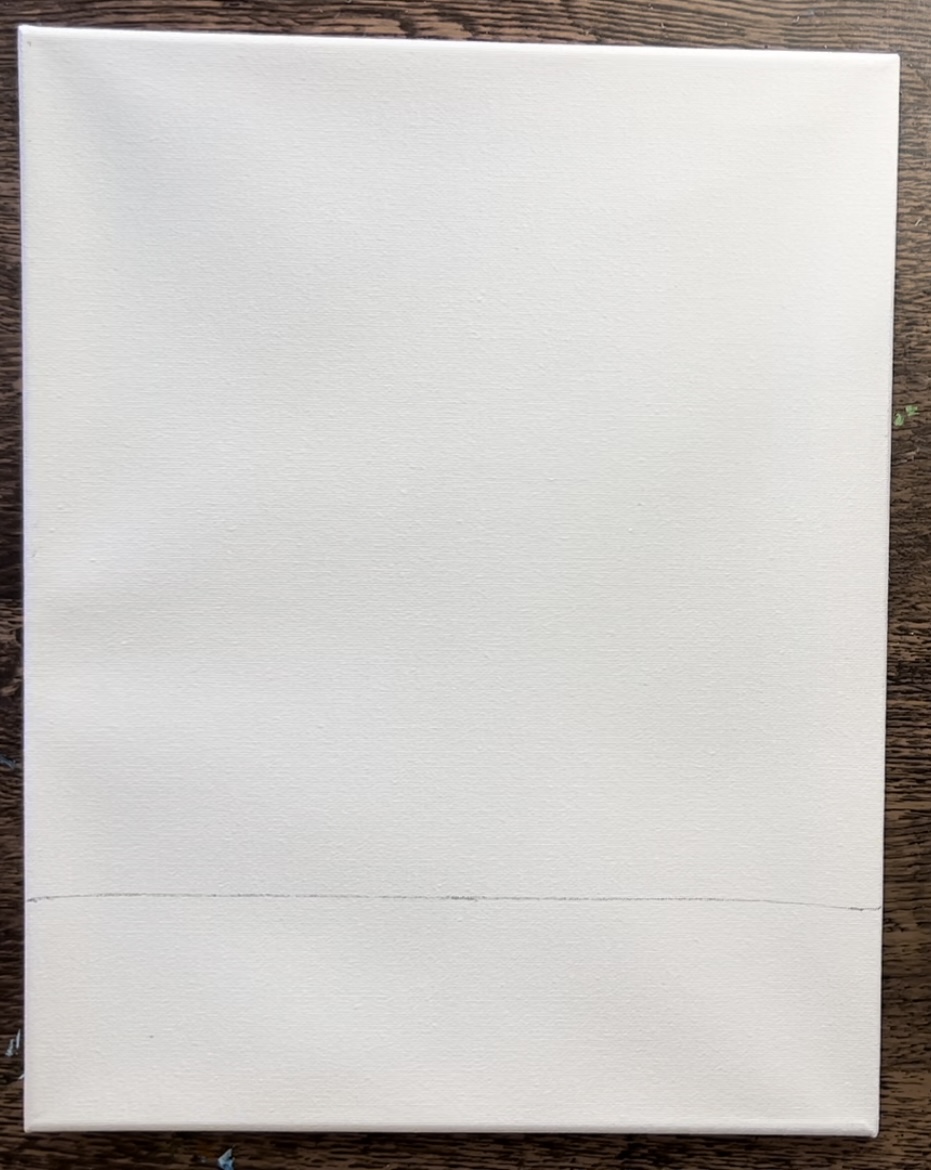
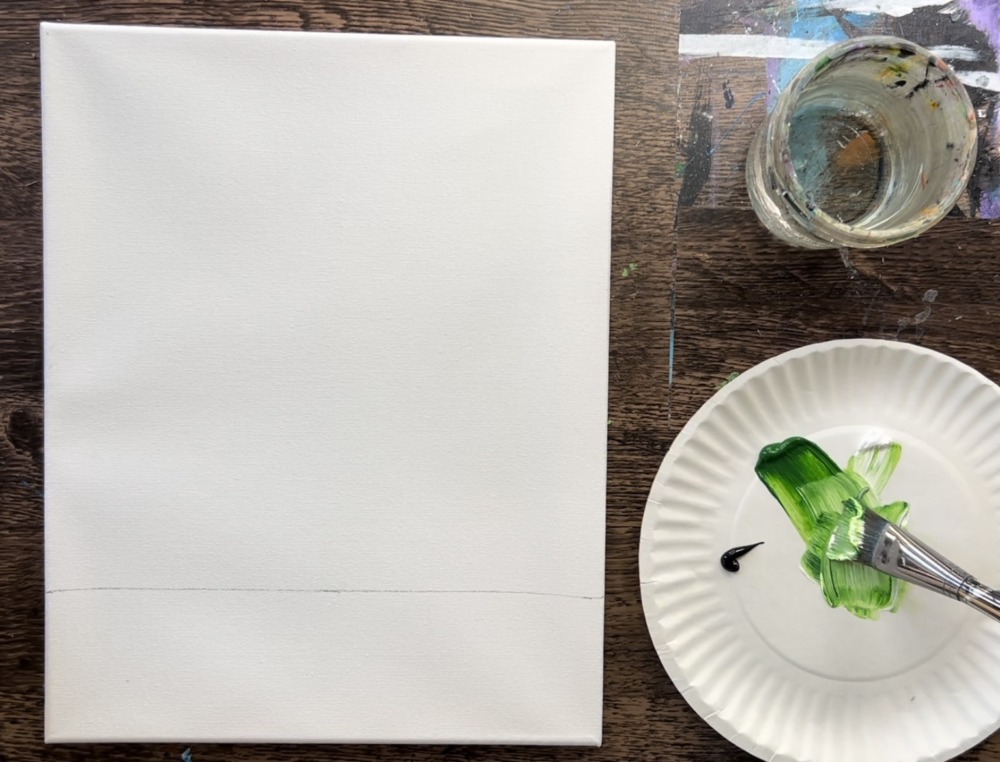
1. Draw Table Line
Measure 3″ from the bottom of the canvas and draw a horizontal line.
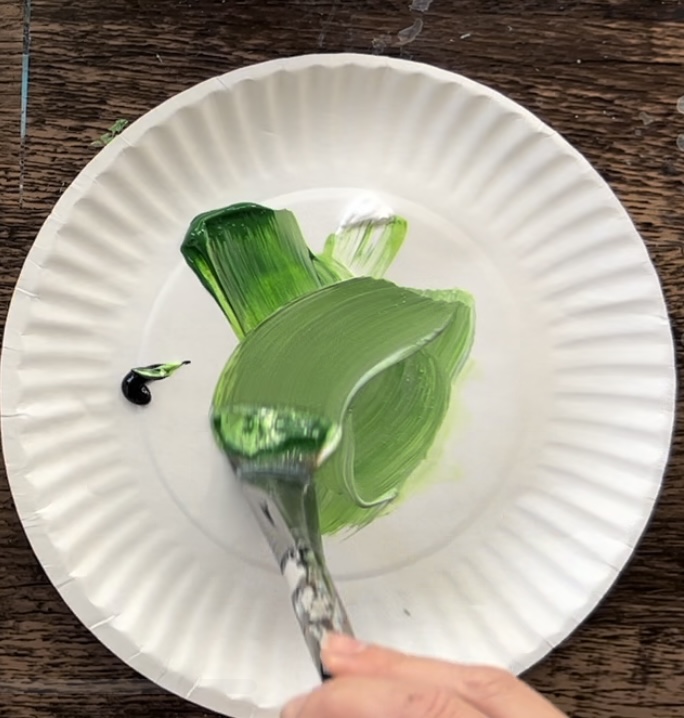
2. Paint Green Background
Load your palette with hooker’s green hue, titanium white and mars black. Use a 1″ flat brush to mix equal amounts of white and green together. This will create a lighter green. You do not need to mix the color all the way.
Next, add a tiny bit of black into that color to shade it a slight gray- green. Again, you don’t need to mix the color on the palette all the way.
Paint the background (everything above the line). Paint in diagonal strokes. Allow the color to be blended and not mixed all the way. You can add bits of white and black into it to vary the colors.
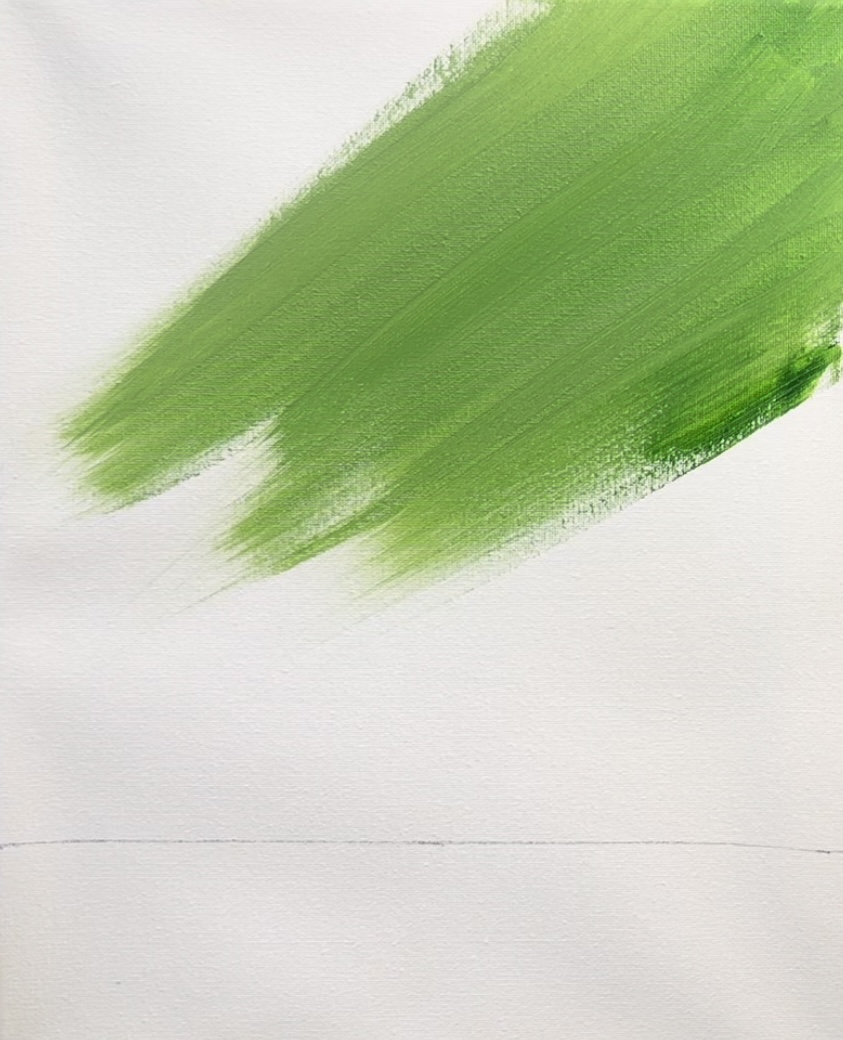
Continue painting all the background with diagonal strokes.
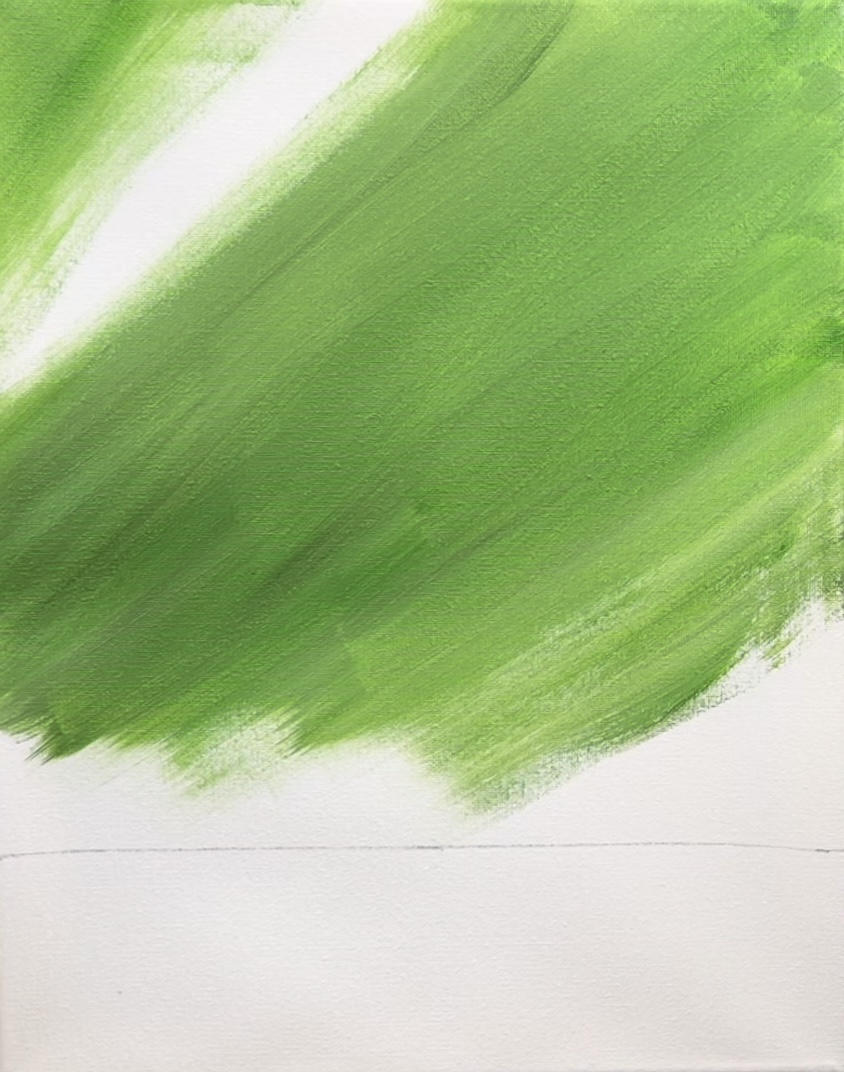
Fill the background and leave it “unblended”. This means that some areas may be darker and some lighter. This gives the background more “interest”.

3. Paint Table Area
Without rinsing the 1″ flat brush brush, load it into just mars black. Paint the entire table area with left and right strokes.
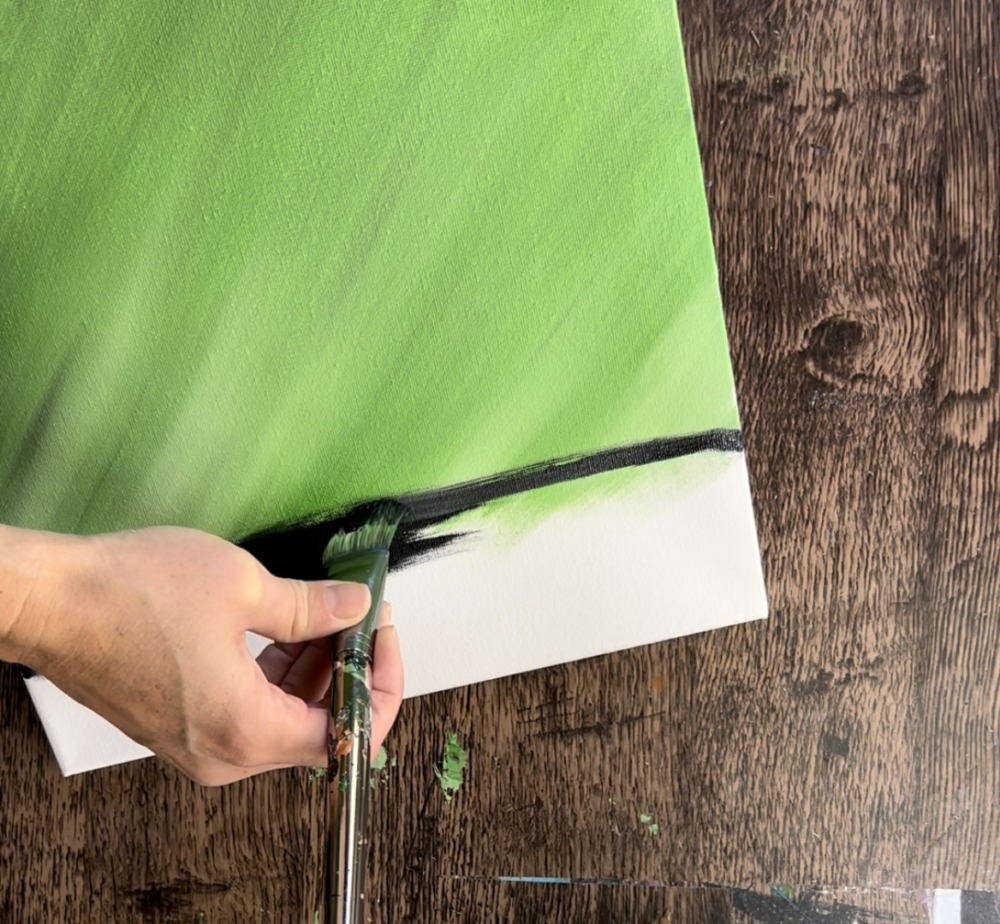
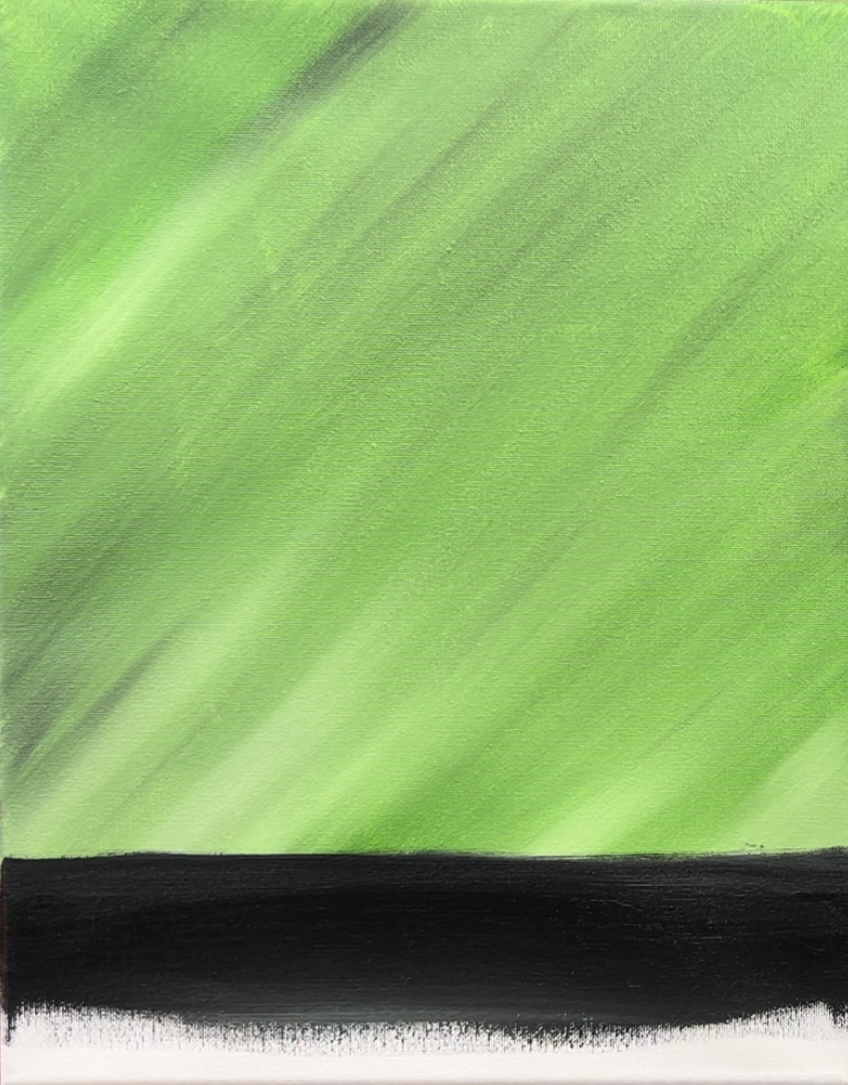
As you approach the bottom edge of the canvas, add a little titanium white to your brush. Then blend white into the black so that it becomes a medium gray. You don’t need to blend this all the way. Let the bottom of the table area be slightly lighter and let the top edge be much darker.

Let this dry before going onto the next step.
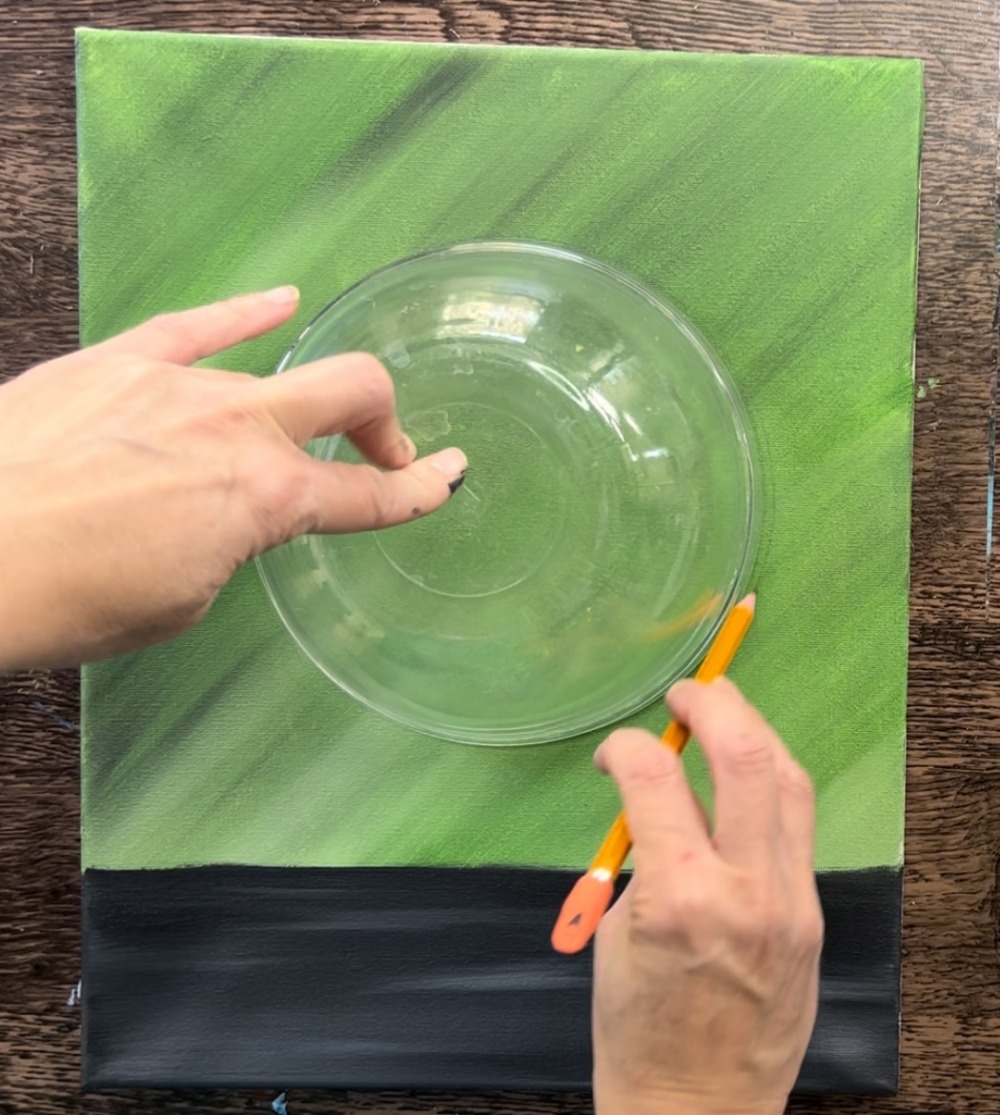
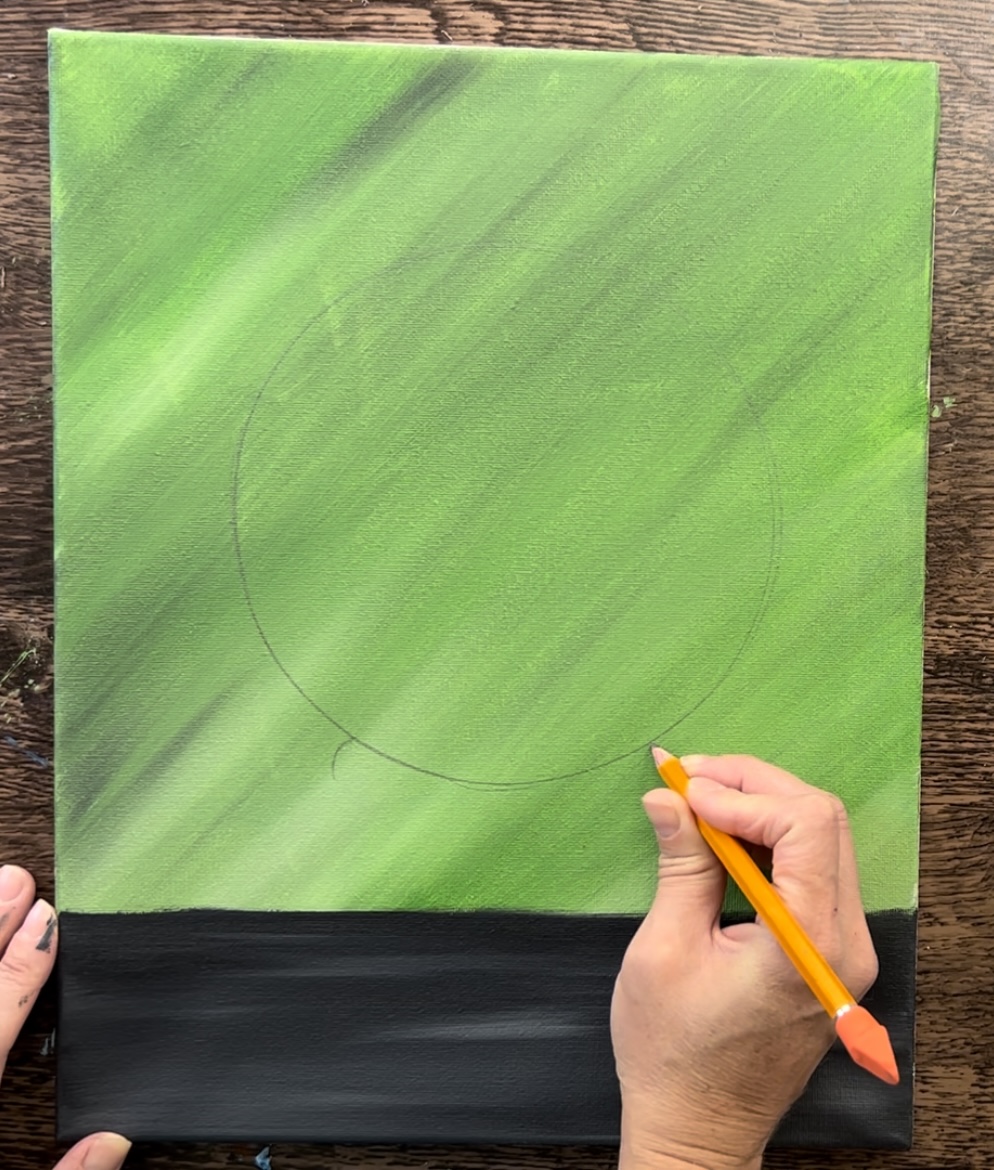
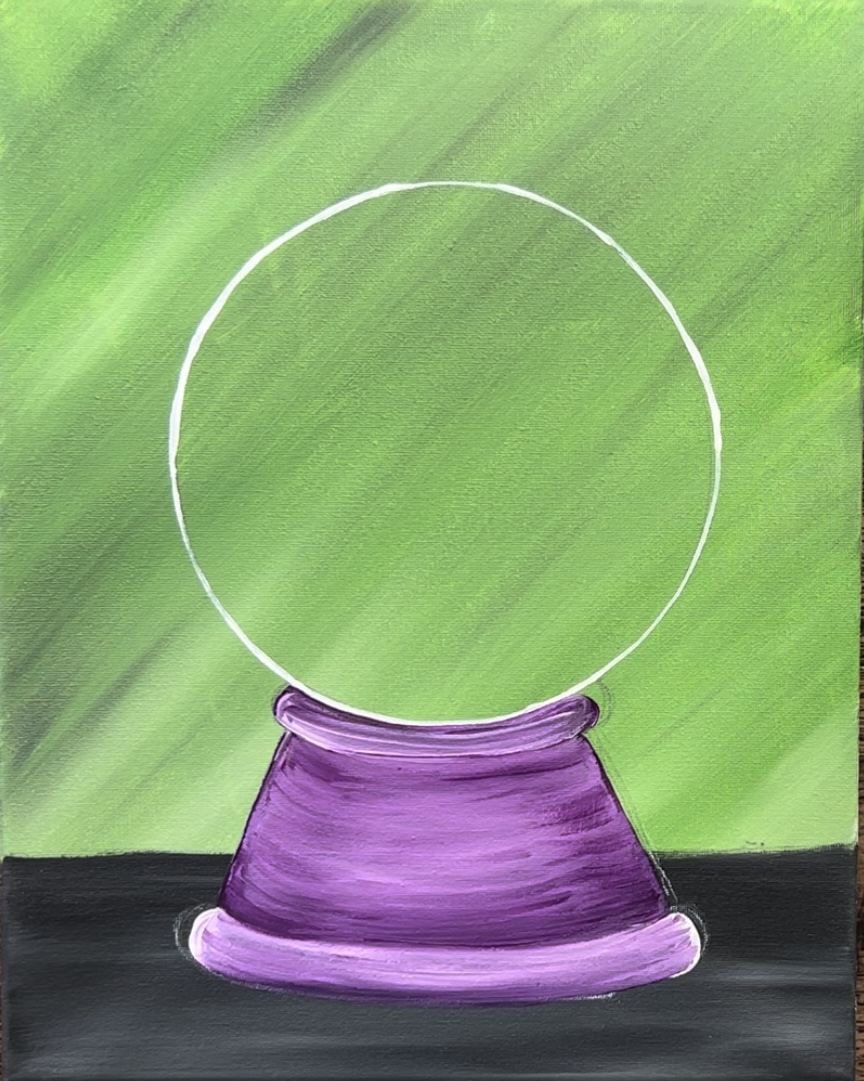
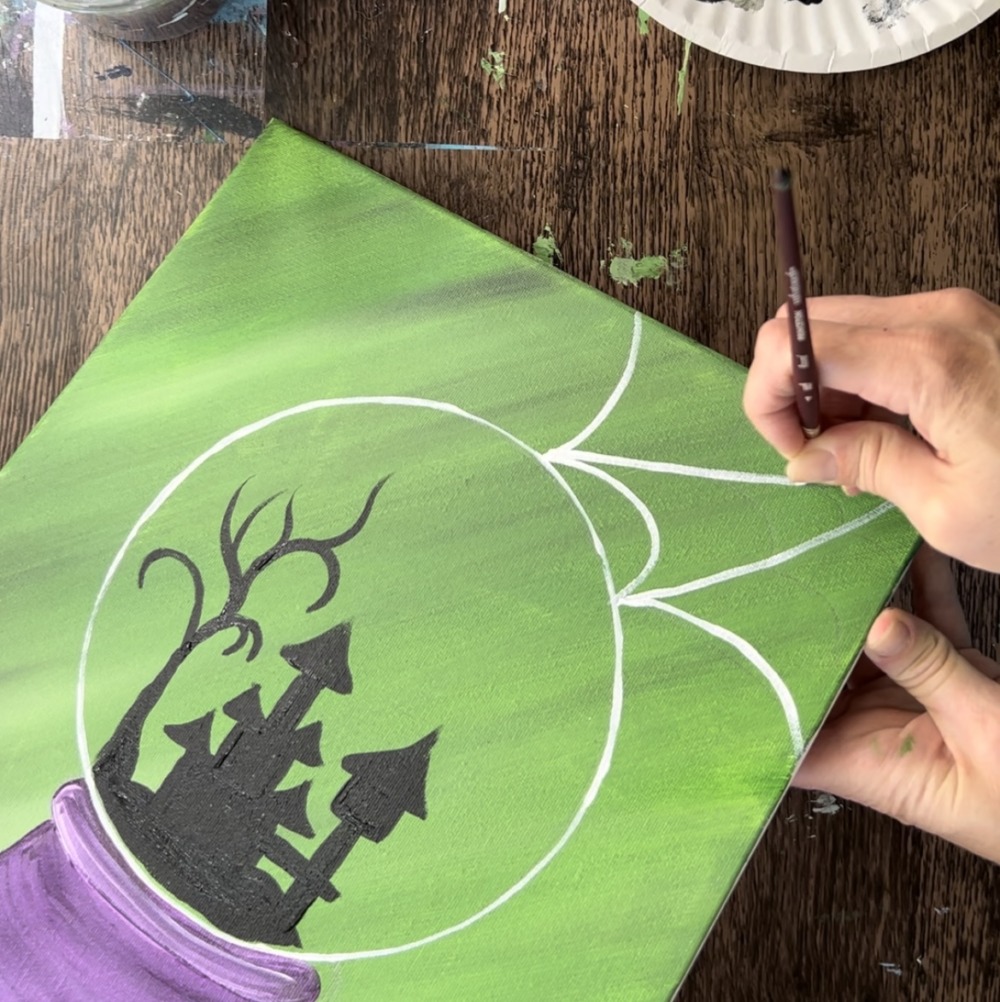
4. Draw Globe
Use a compass or an object such as a bowl to trace this circle. The bowl that I traced is 6.75″ in diameter. Position it so that it is center on the canvas and about two inches above the table line.
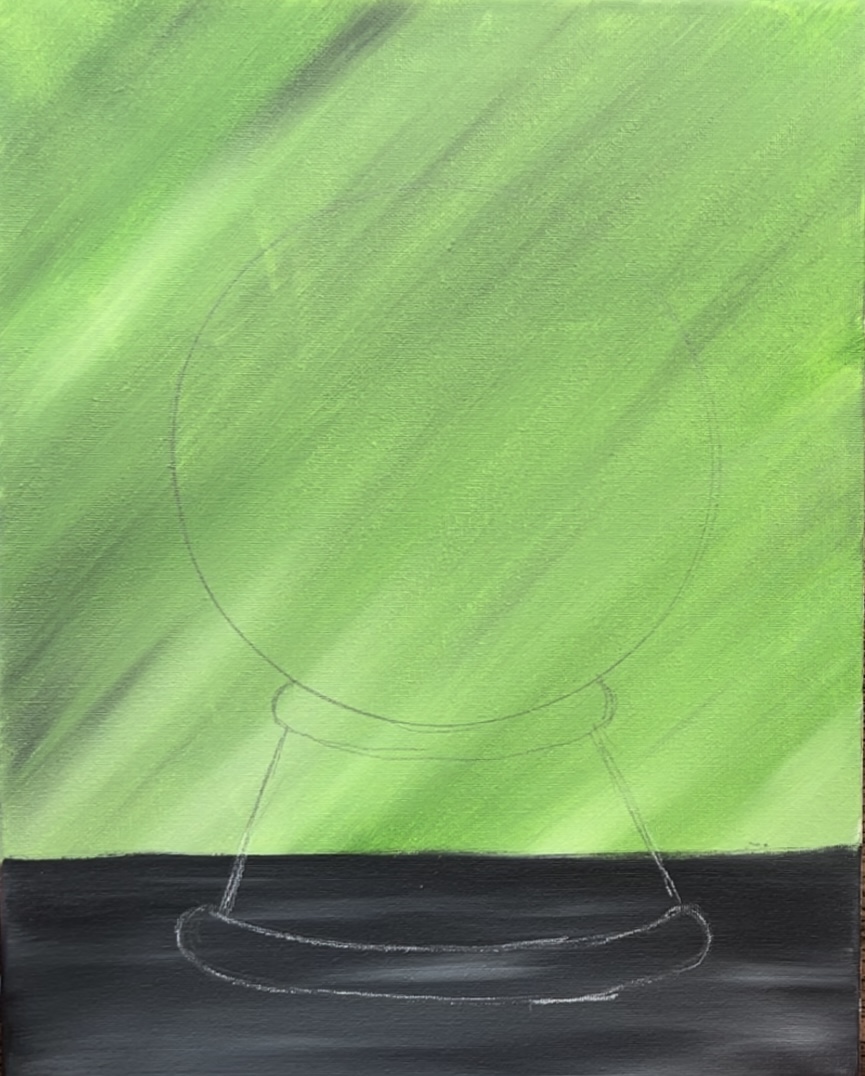
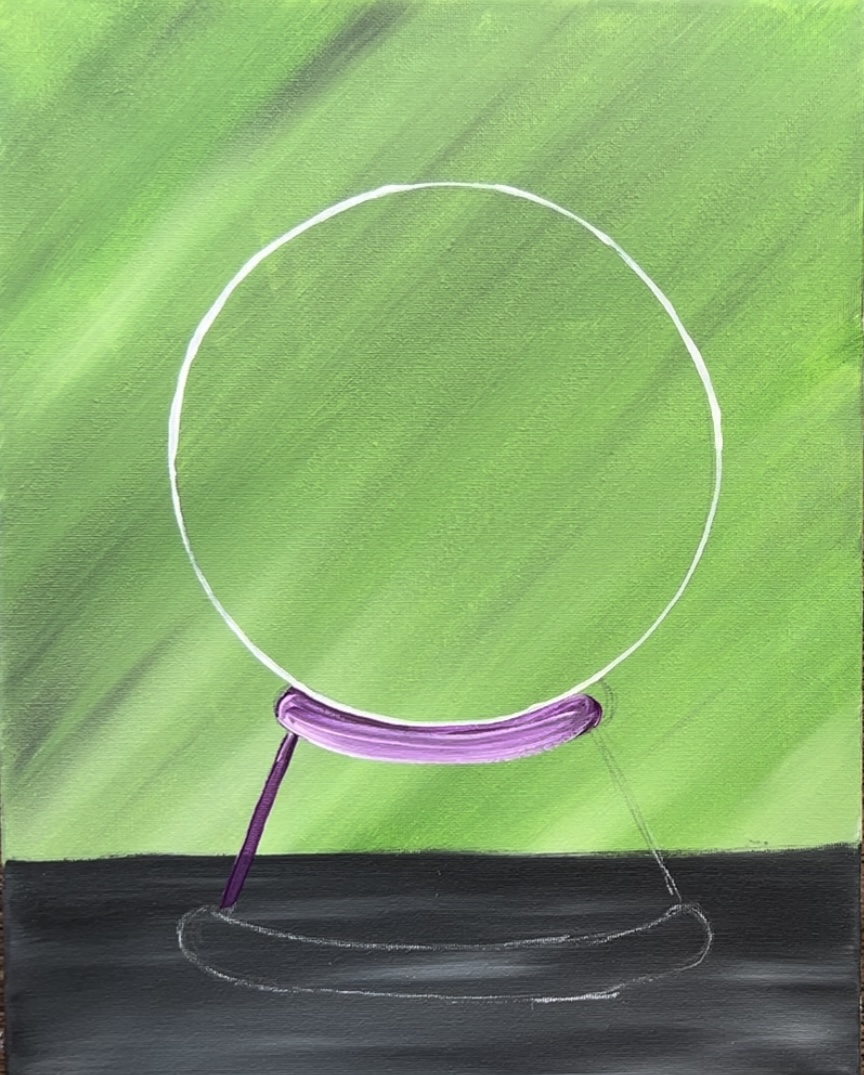
Then draw the base of the snow globe. Start by draw two small curves on the bottom of the circle on each side. These are about 4″ apart.
Form a curved and narrow shape that fits underneath the circle. Then draw two diagonal lines going down into the table area.
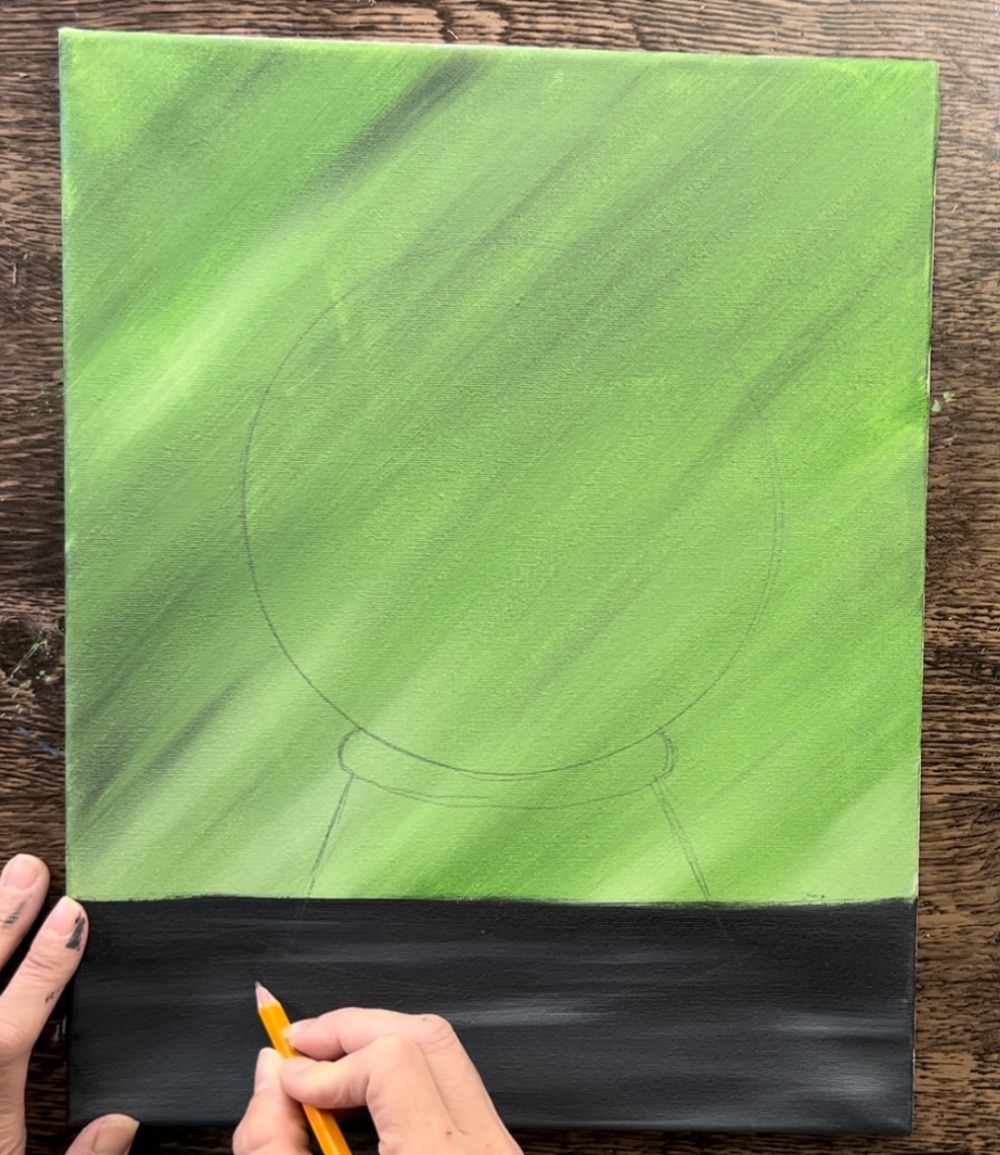
Draw another curved base area. The with of my base at the bottom, widest area is about 6.5″ or just slightly less wide as the circle.
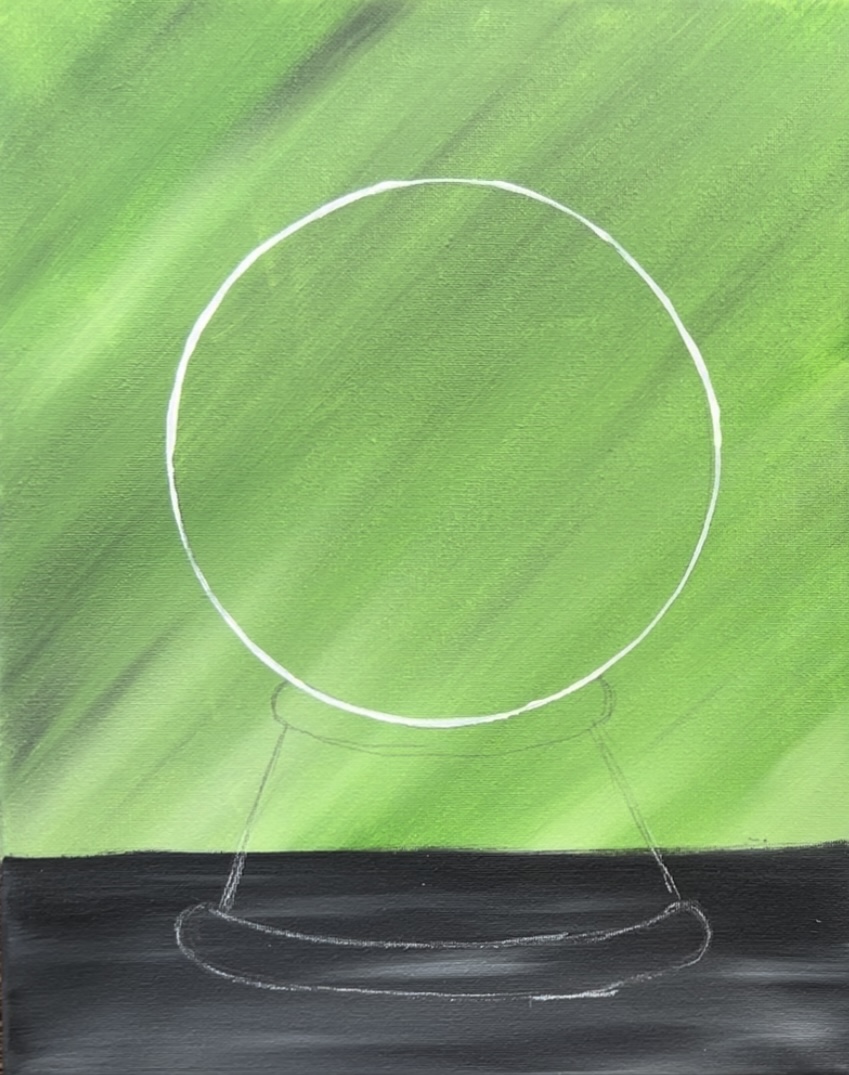
5. Paint Circle
Load your paint palette with some fresh titanium white. Use a #4 round brush to paint over the circle you just drew. Try to make this line as consistent as possible, however, it does not need to be perfect.
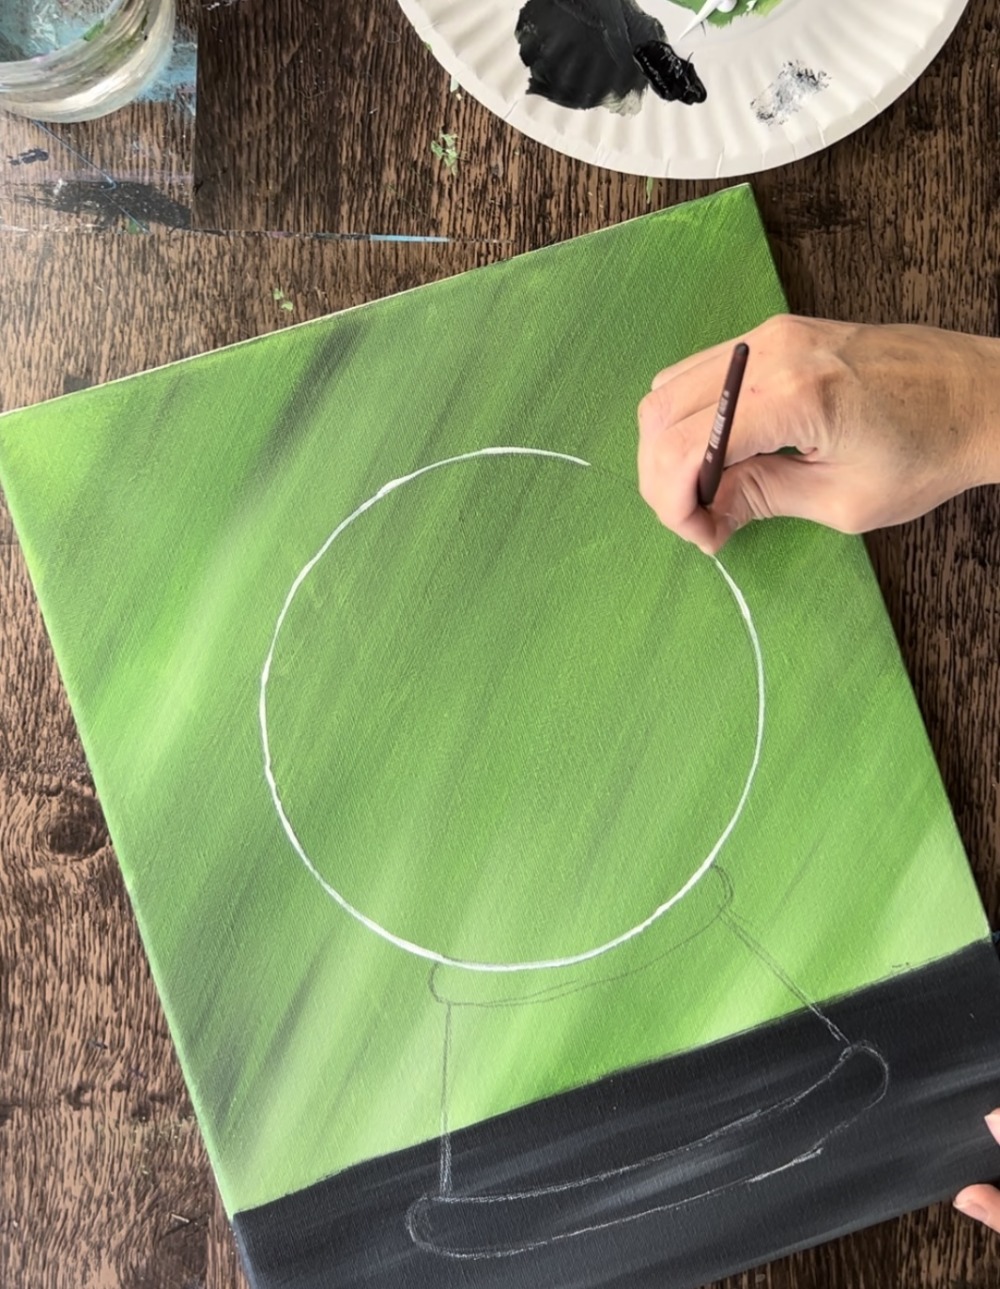
Do not rinse the round brush for the next step.
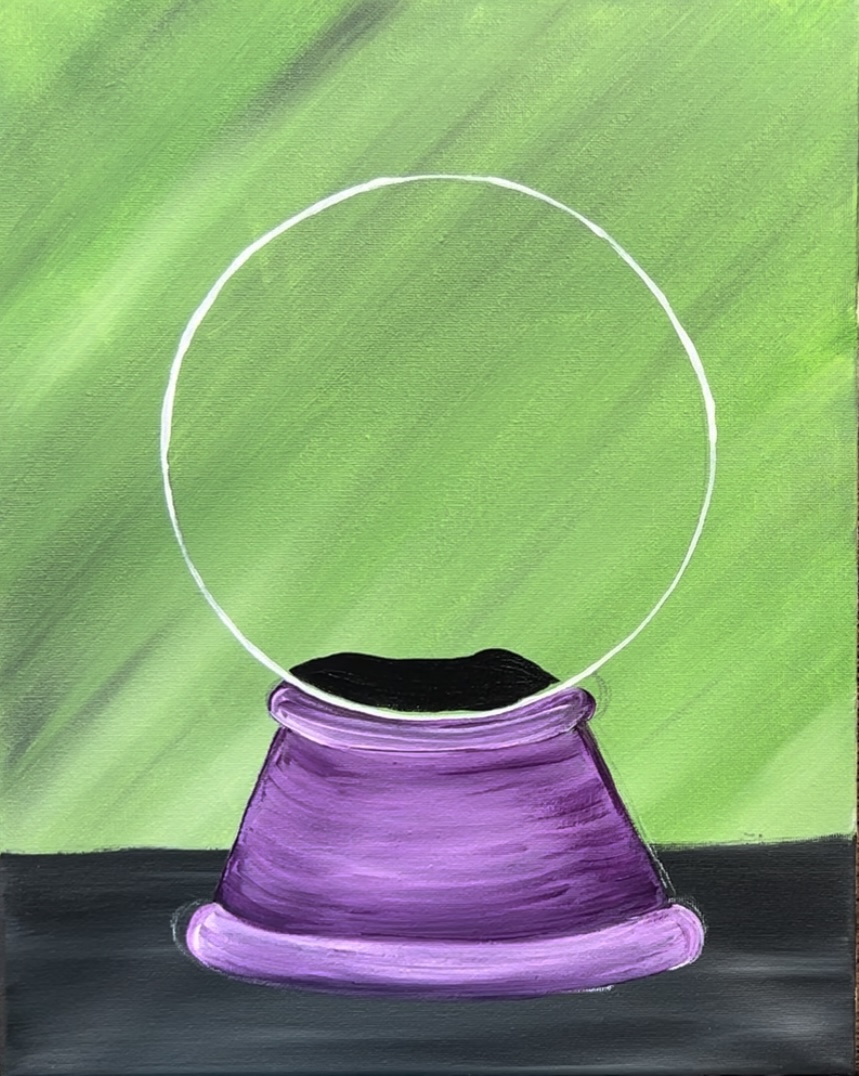
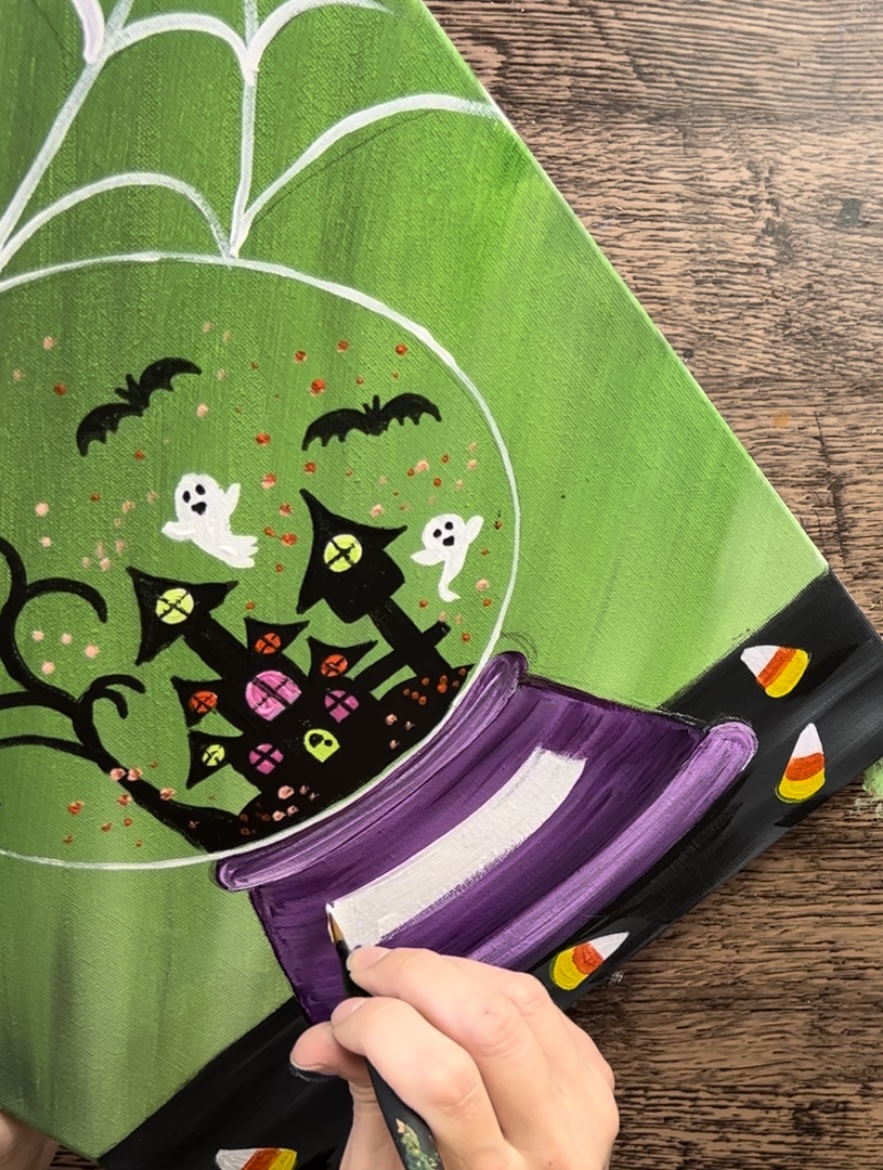
6. Paint Globe Base
Load your palette with “prism violet” or whichever color you are painting your vase. Load your round brush (which still has titanium white on it) into the purple. Then paint the curved area just under the circle. Allow the purple and white to gently blend together..
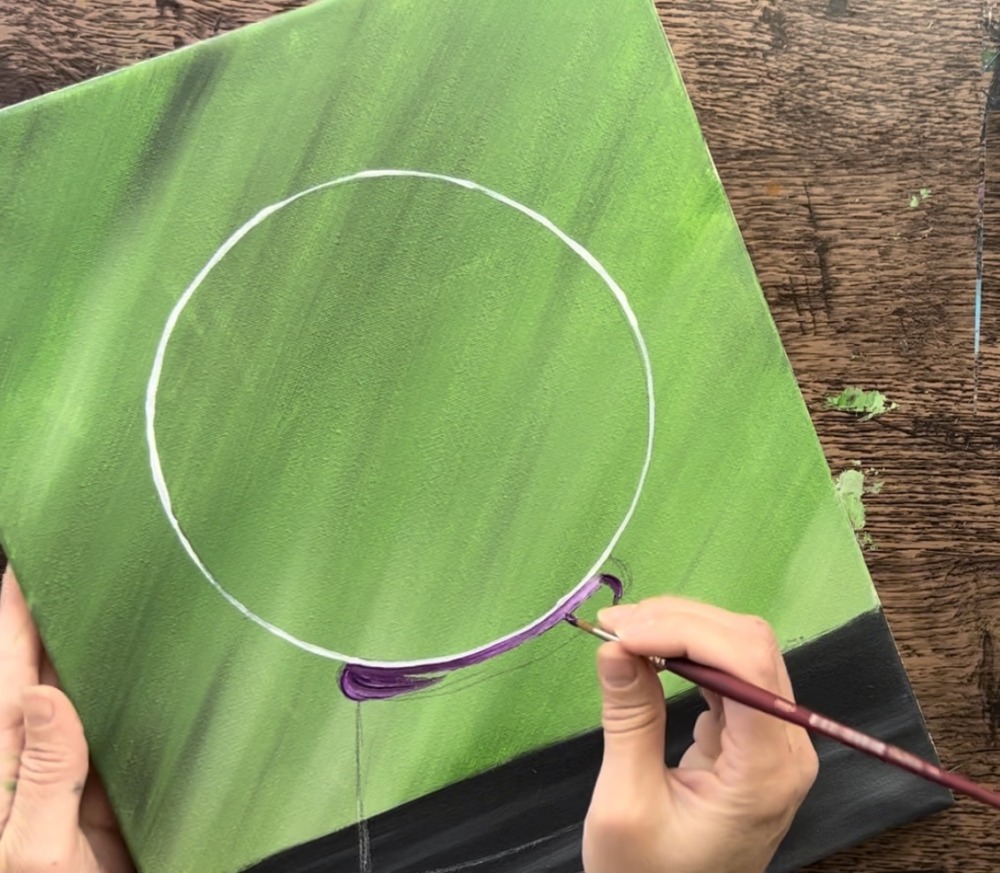
This will create a light purple color. You don’t need to have the colors blend all the way. Then load the brush in just the purple and outline the left and right diagonal lines.
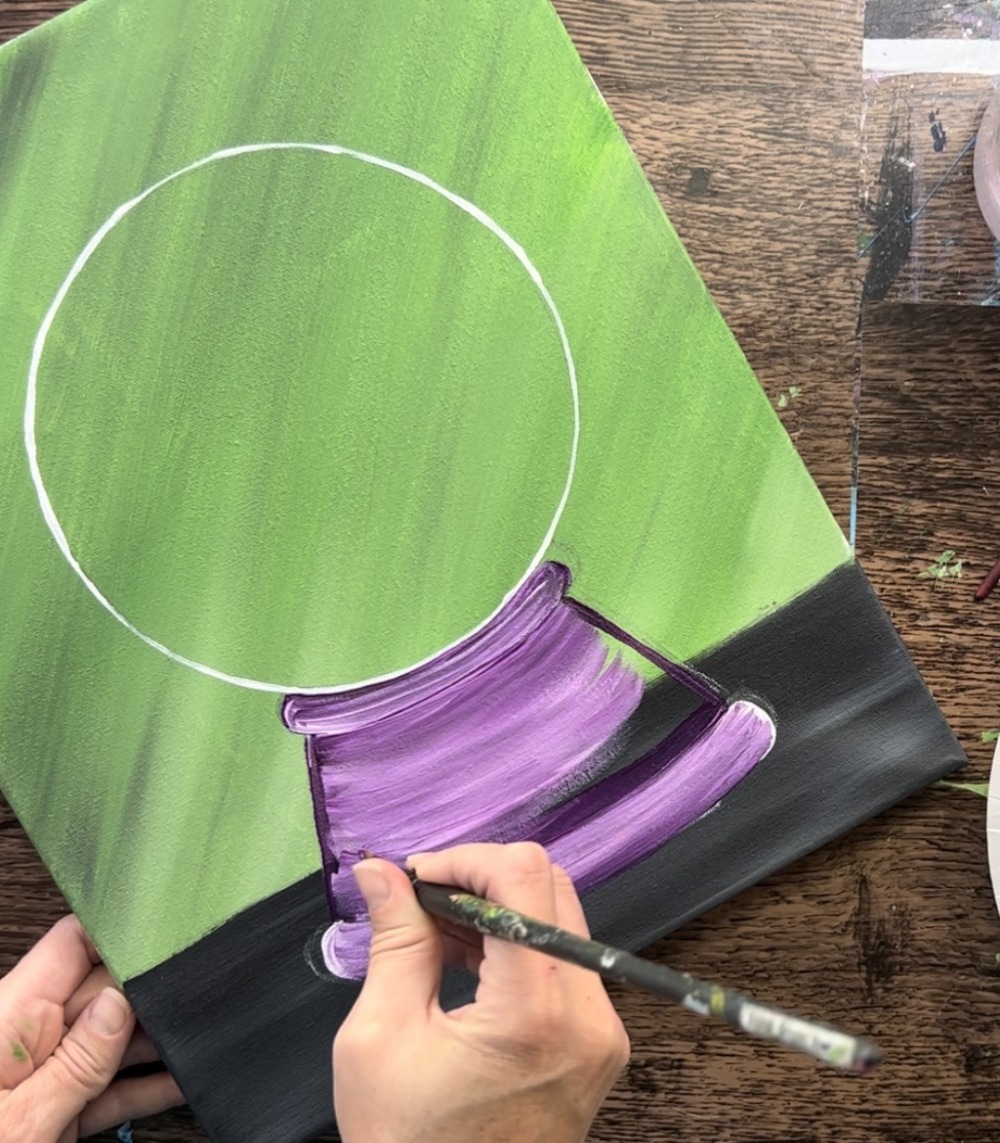
Then paint the bottom curved base area. Again, double load the brush in white and purple and allow the two colors to blend together to make a light purple. Make sure your paint strokes are going in a curved direction going left and right.
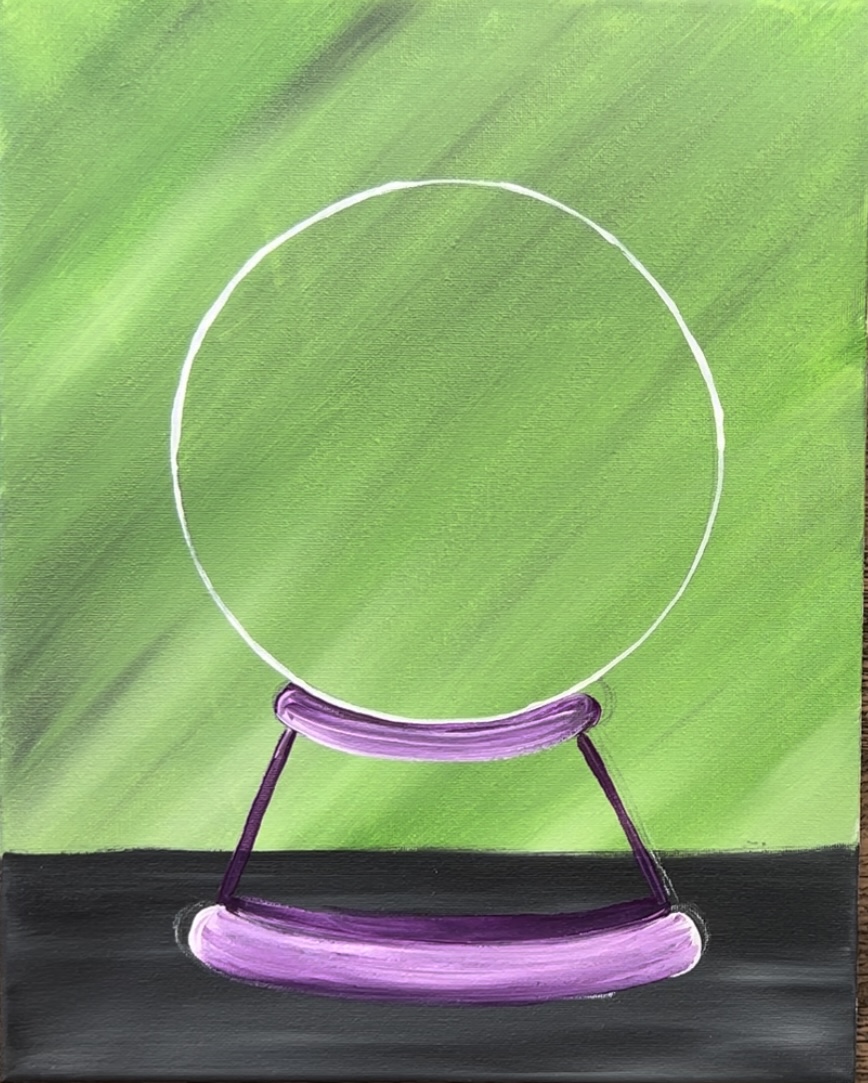
Switch to a #12 bright brush (1/2″ flat brush). Double load it into purple and white. Use the full width of the brush to paint curved strokes and fill the entire snow globe base with this color.
Allow some areas to be darker and some lighter. You can achieve this by not blending the purple and white all the way and also adding more purple or more white to the brush.
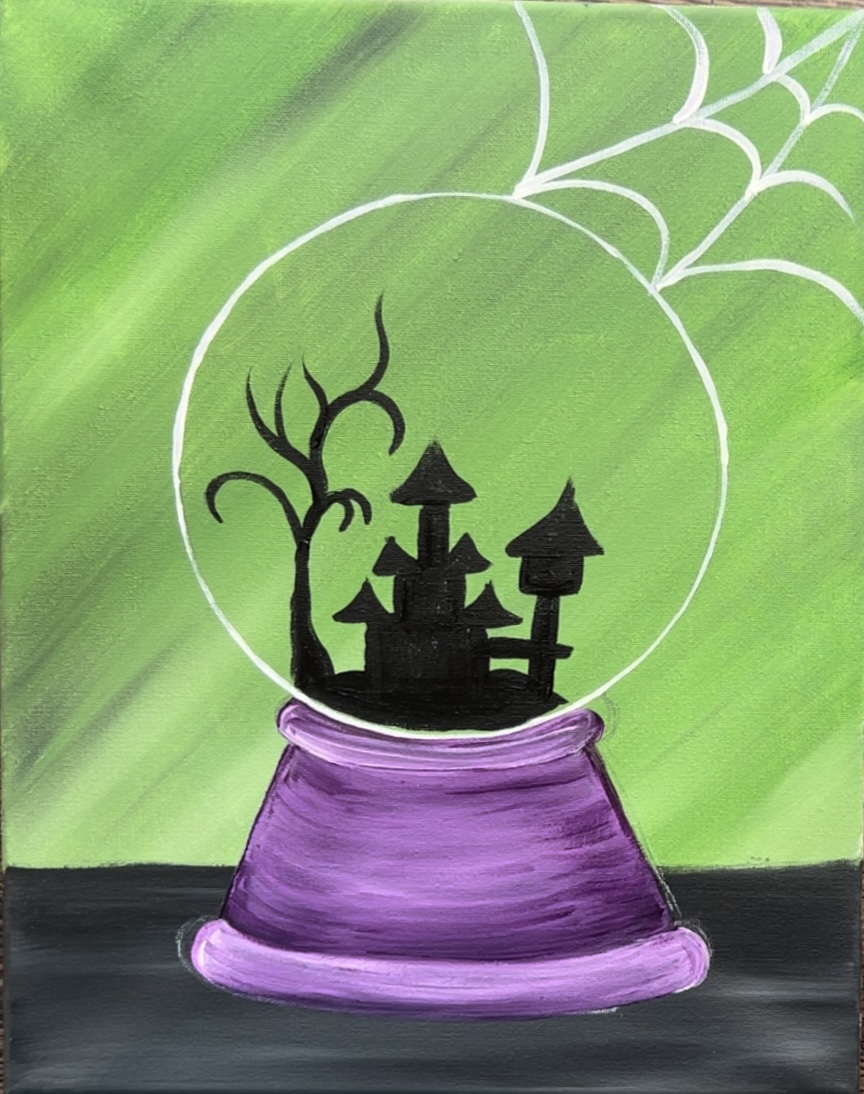
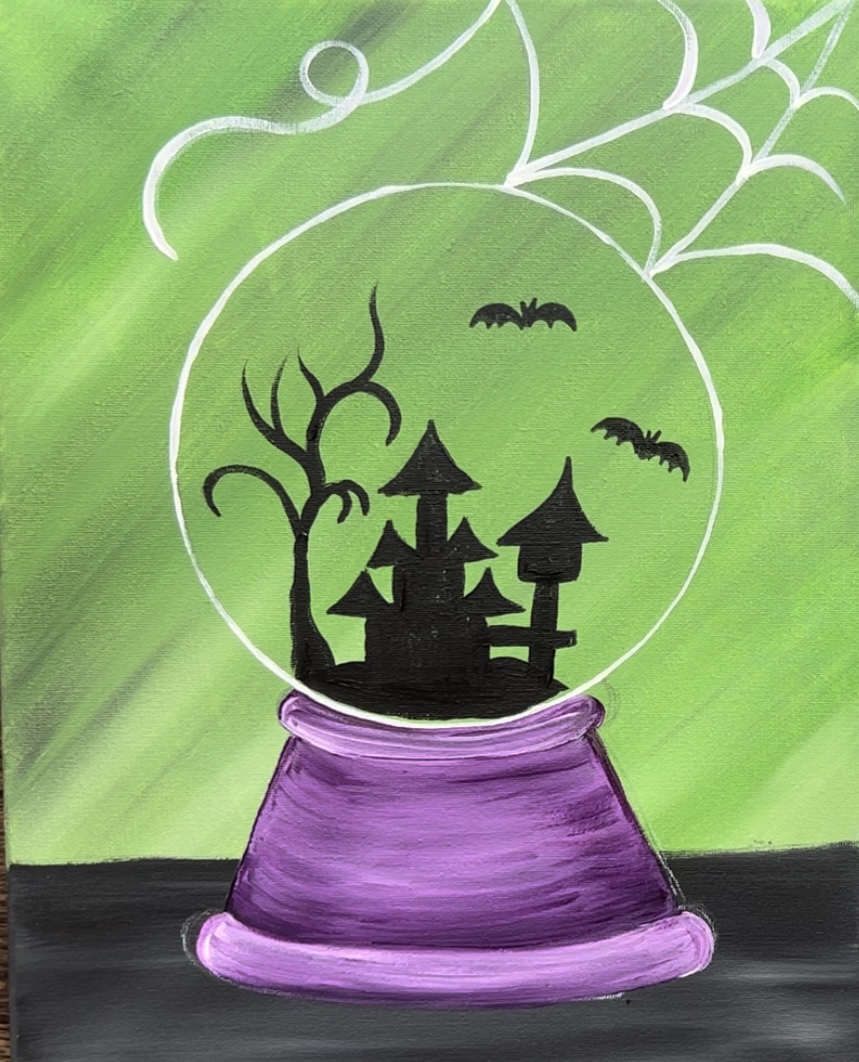
7. Paint Inside Of Globe (ground, house and tree)
Use a #4 round brush and mars black to paint the inside of the globe. Start by painting the ground. Paint a wavy area and fill it solid black. Do not allow any of the black to cover the white circle line of the globe.
Next, start painting the house. Paint a rectangle shape that has two triangular roof shapes on each side. Note: you can change the style of this house. You can also do something else in the globe such as a graveyard, pumpkin, etc.
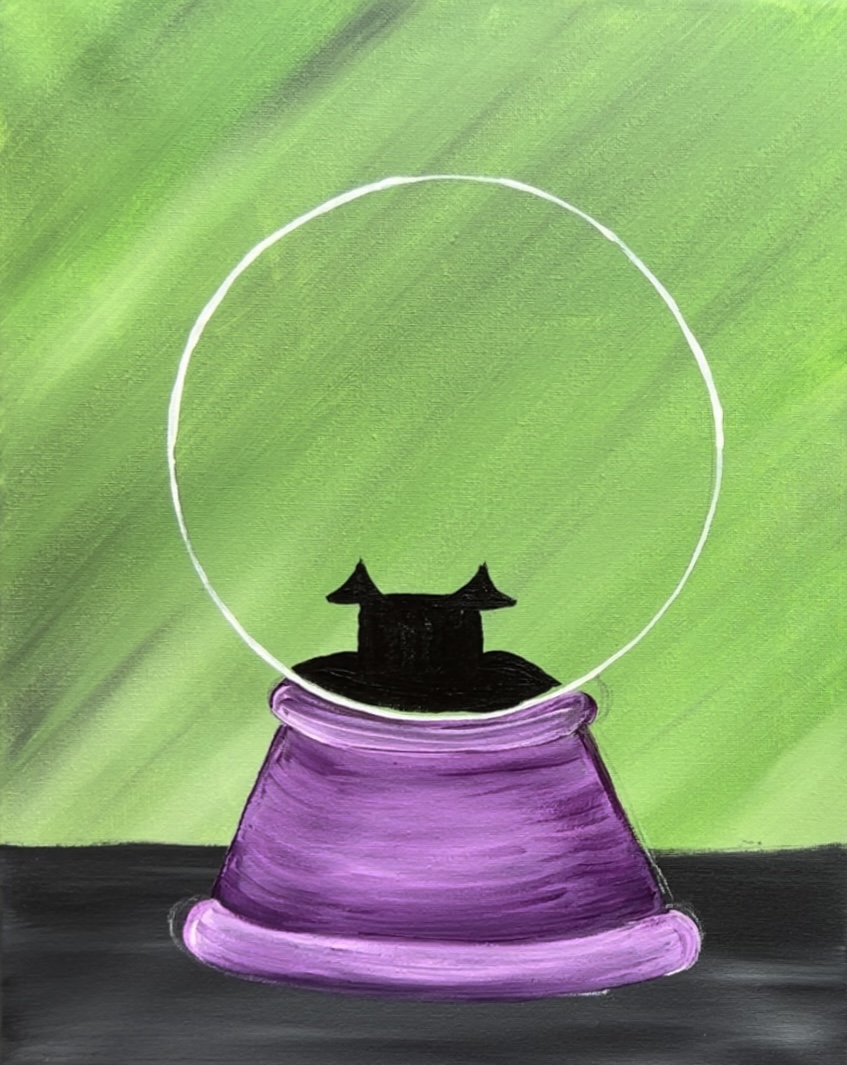
Continue to pain the haunted house by adding more levels, triangles and towers.
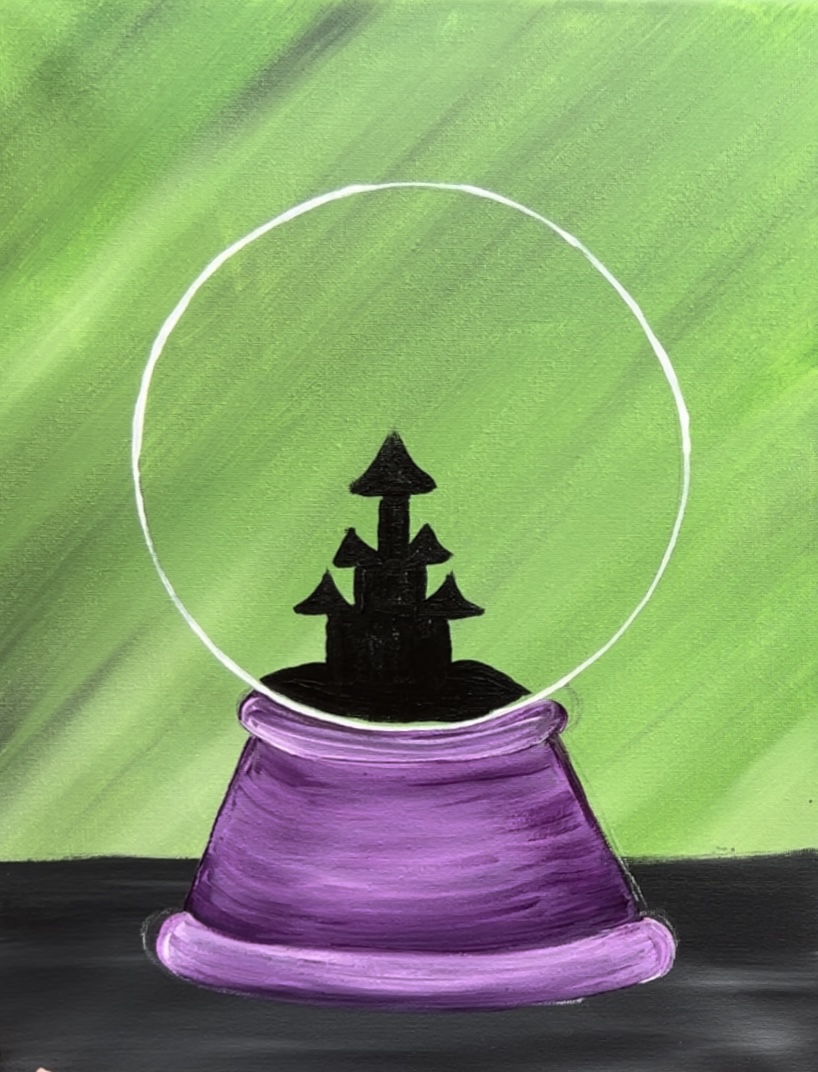
I did a tower on the right that is connected with a bridge.
Then paint a tree on the left. This tree was done with black and also the #4 round brush. Paint curvy branches.
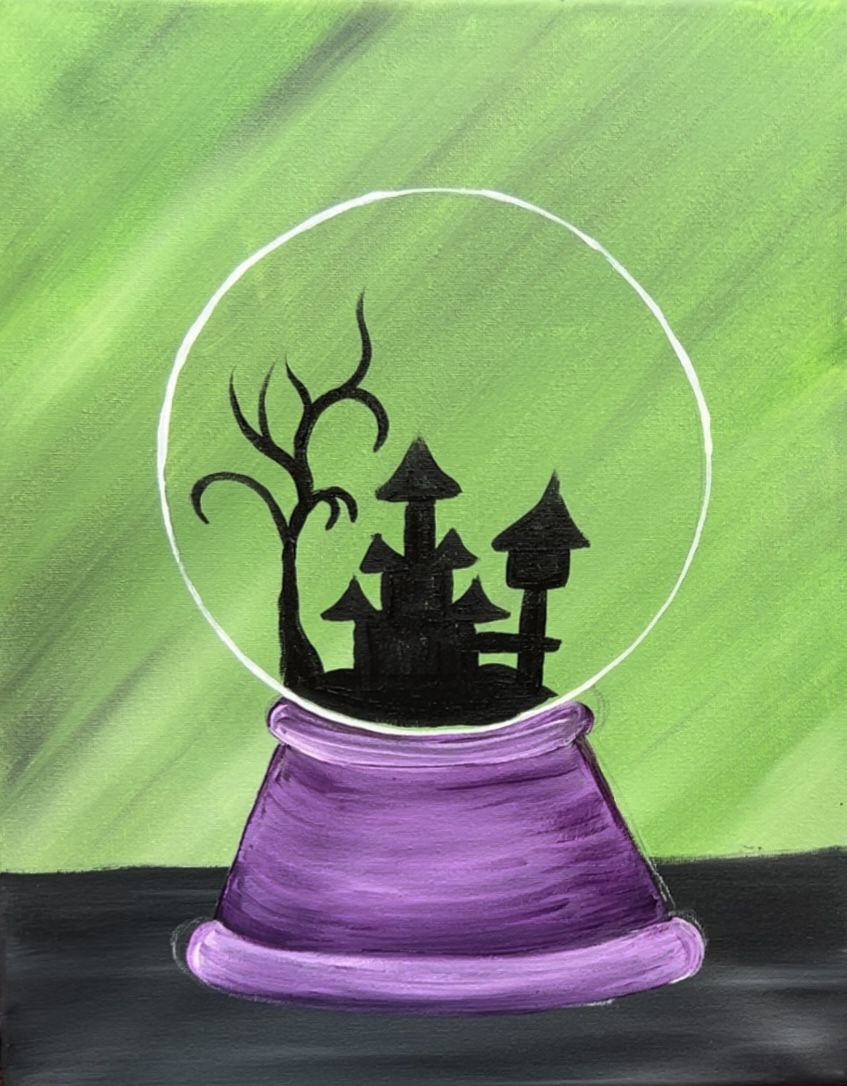
This first silhouette layer needs to dry before you can detail it any further.
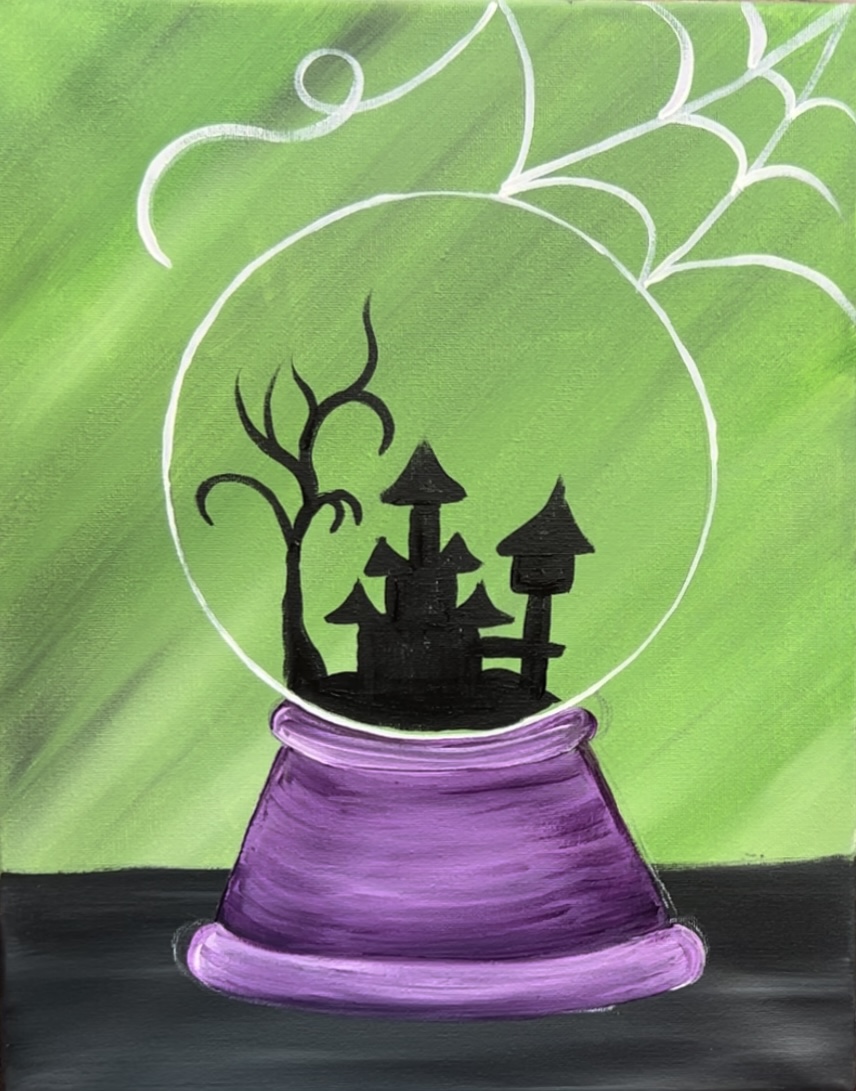
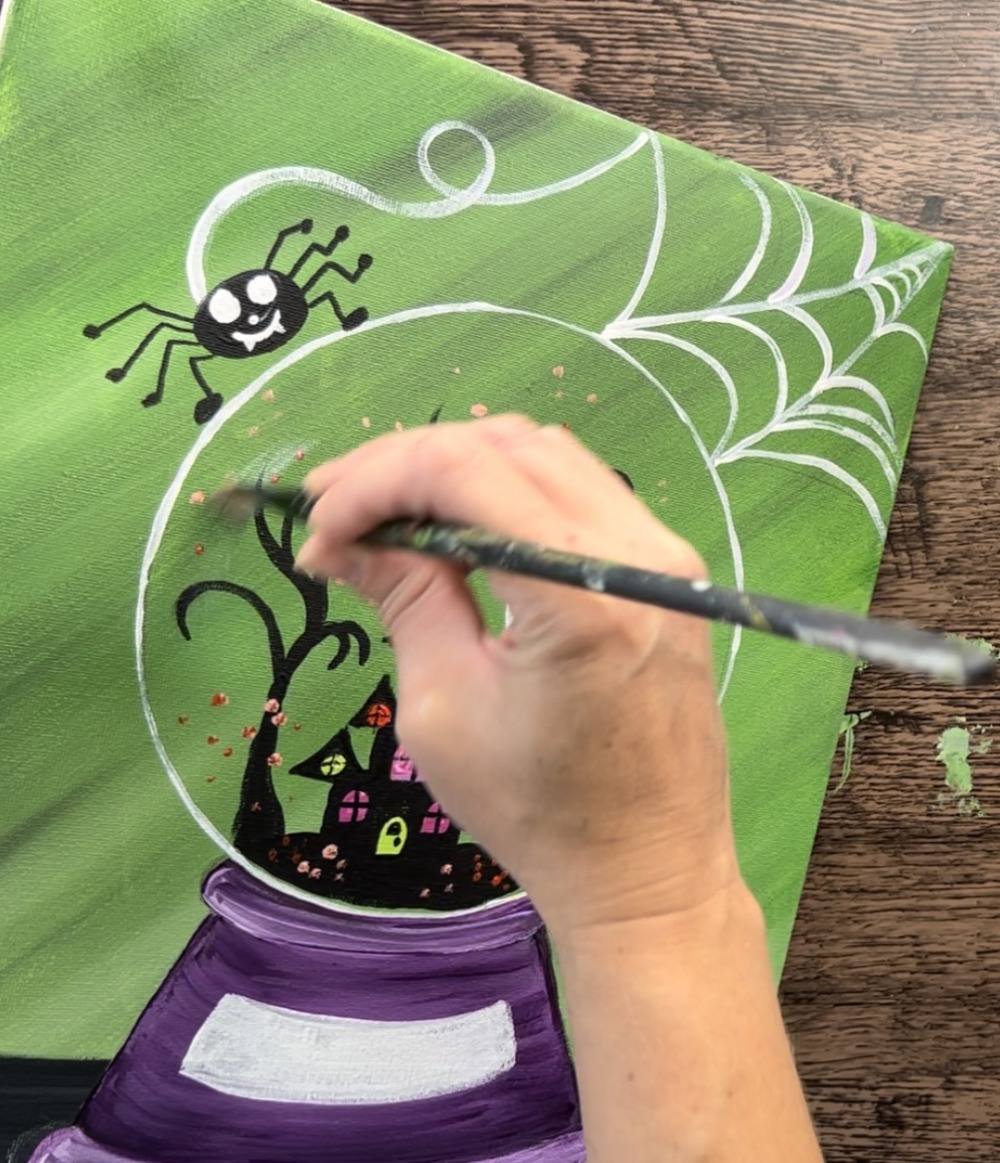
8. Draw/ Paint Spiderweb
Draw the spiderweb with a pencil before painting it. This is hard to see in the picture but you can look ahead at the painted version to see how to draw it.
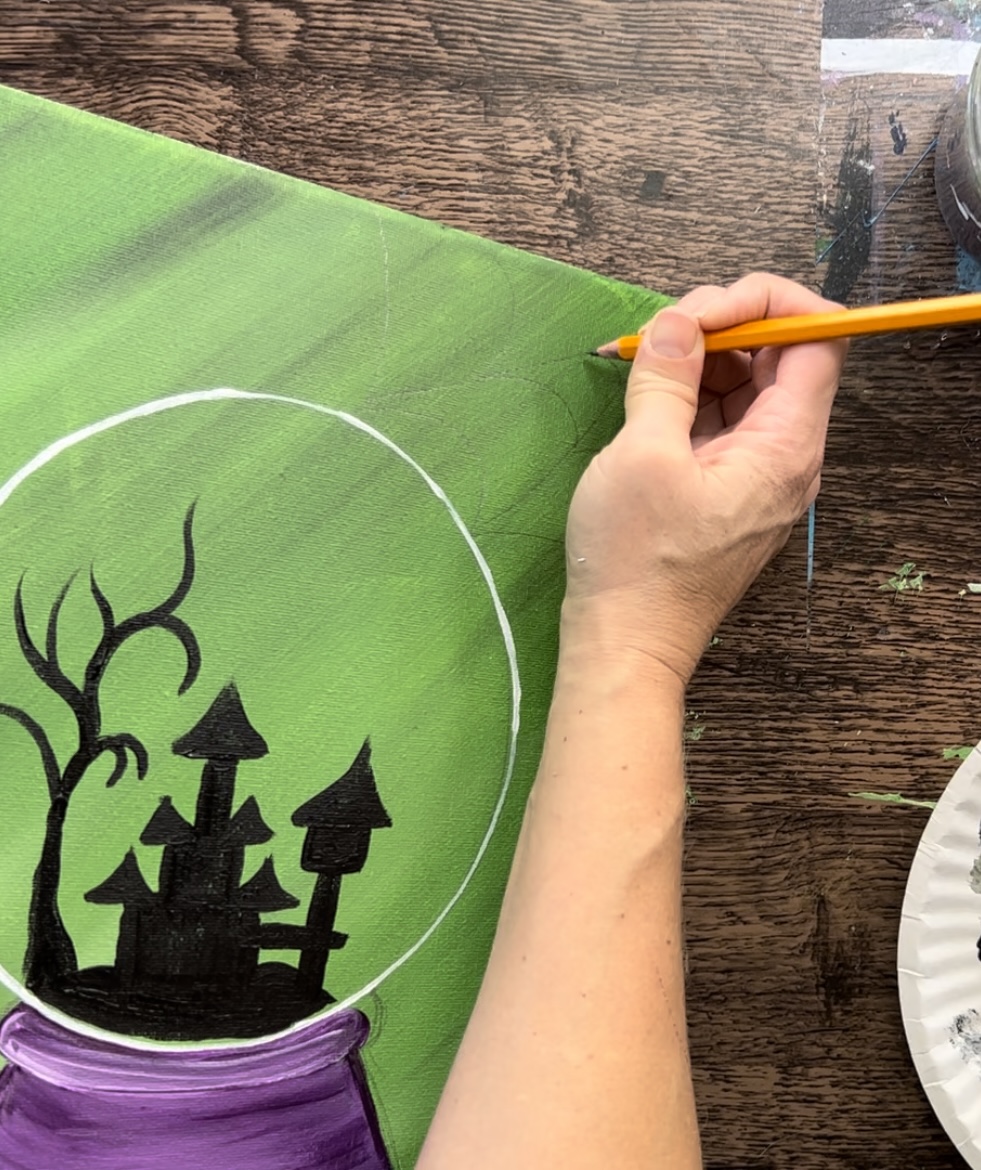
Draw and paint three curved webbed lines that attach to the circle and go off the edges of the canvas.
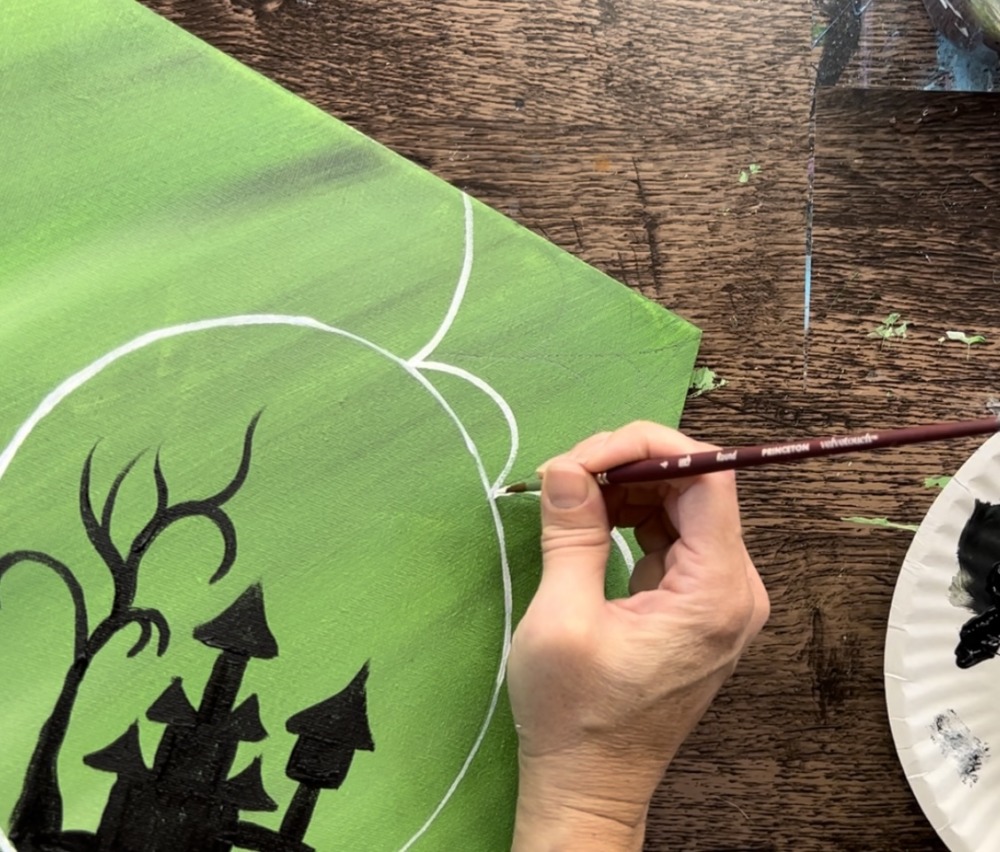
Then draw/paint two diagonal lines that attach to the points of the webbed lines and connect at the upper right corner of the canvas.
Next, paint more webbed lines in between each diagonal line.
Paint a curled line that will attach to the spider in a later step.
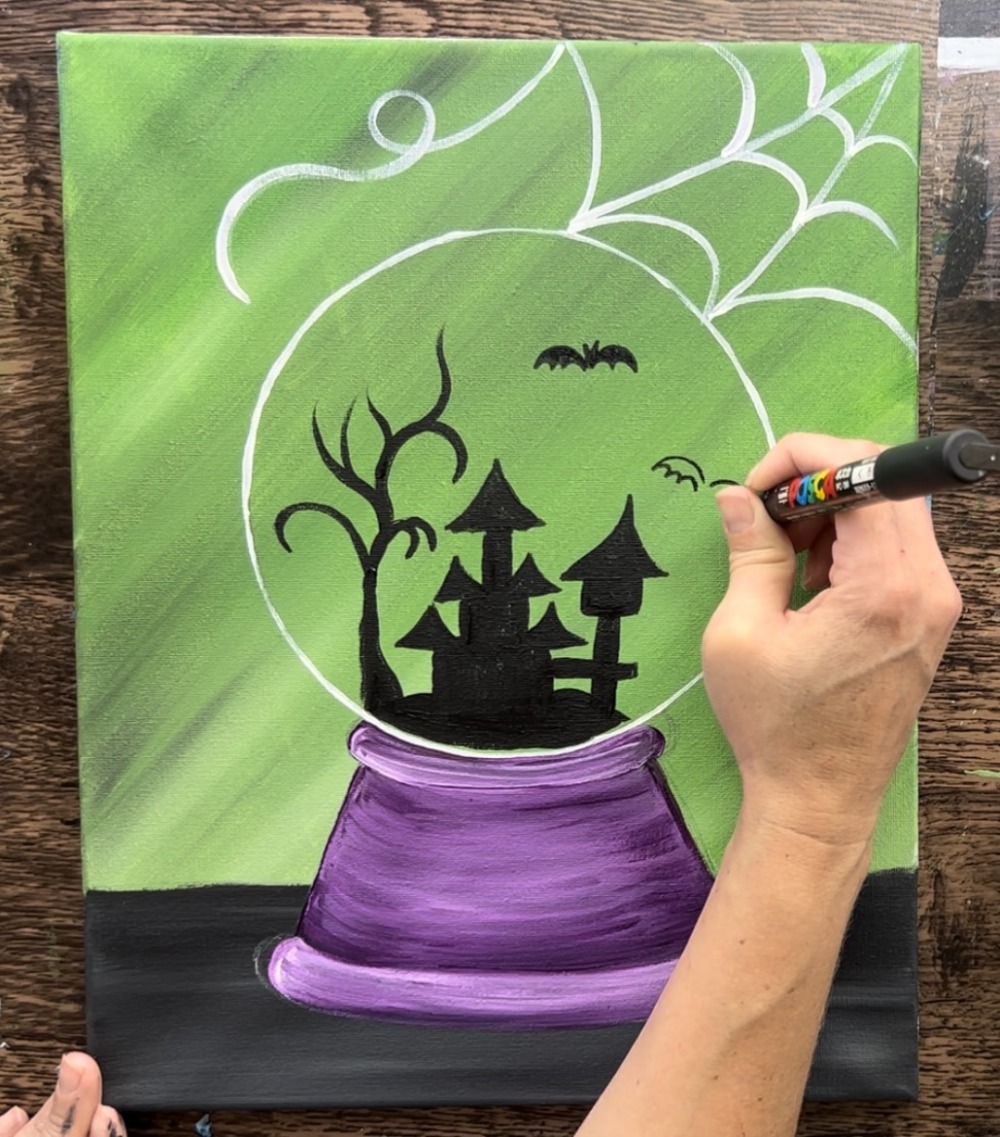
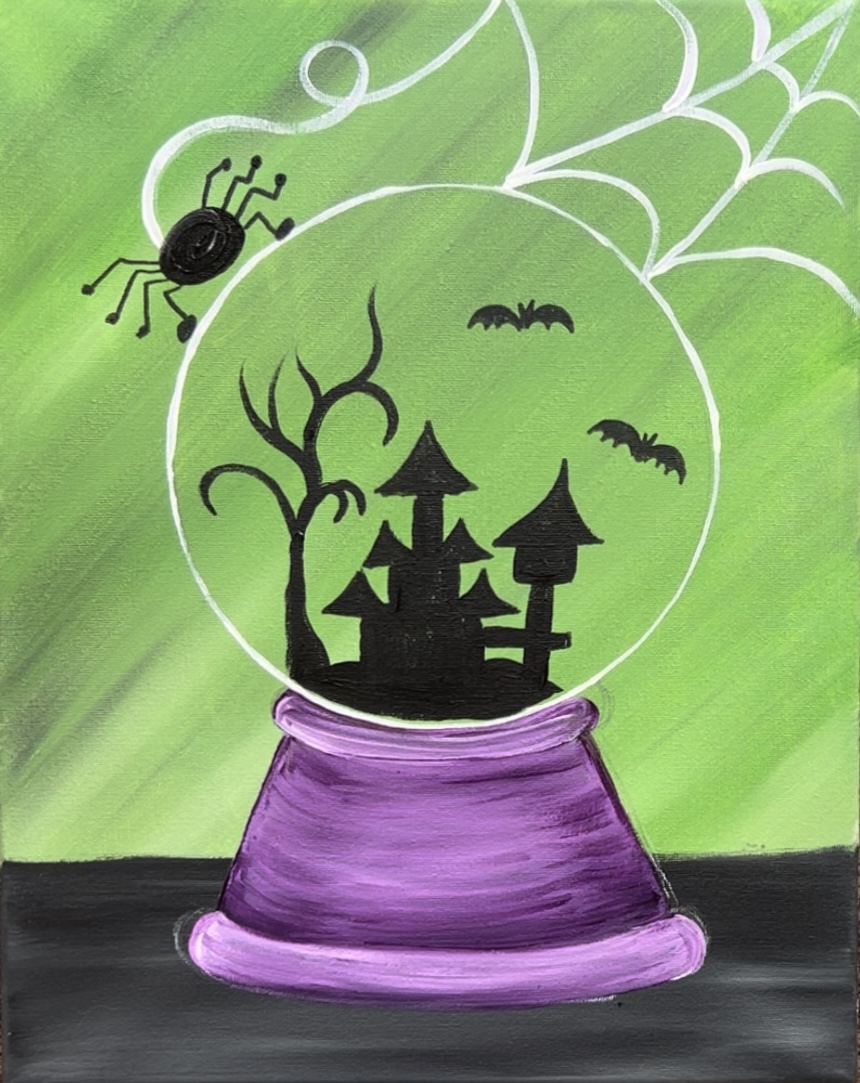
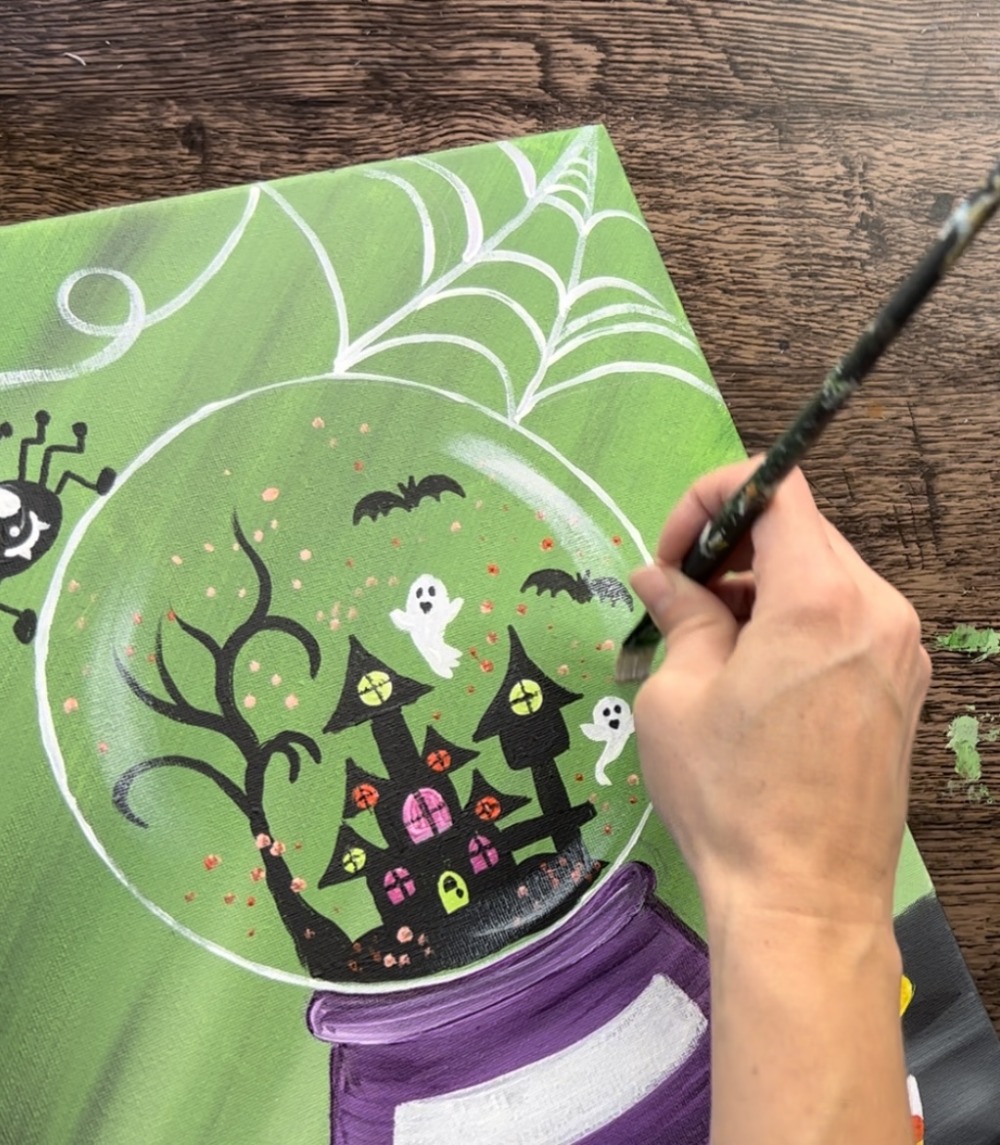
9. Draw/ Paint Bats & Spider
Use a black POSCA paint pen (or a sharpie) to draw and paint in bats.
Use a #4 round brush and mars black to paint the spider’s body. I used a paint pen to draw the legs.
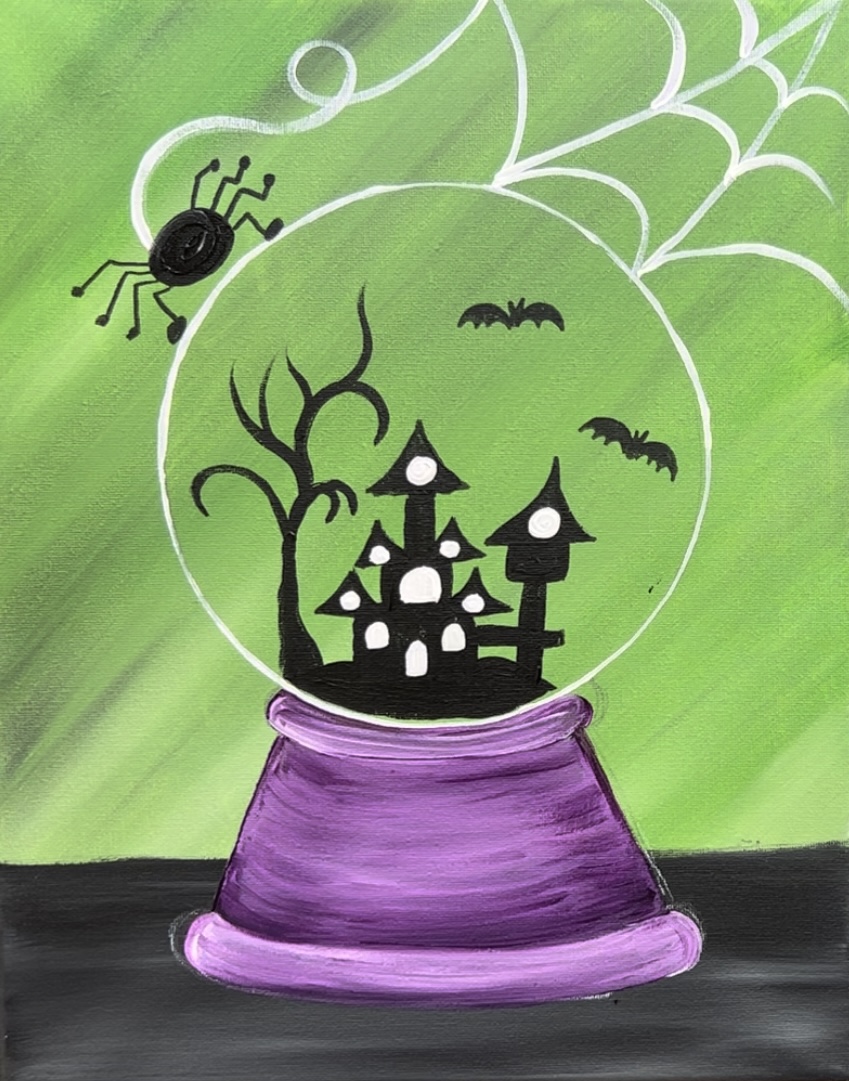
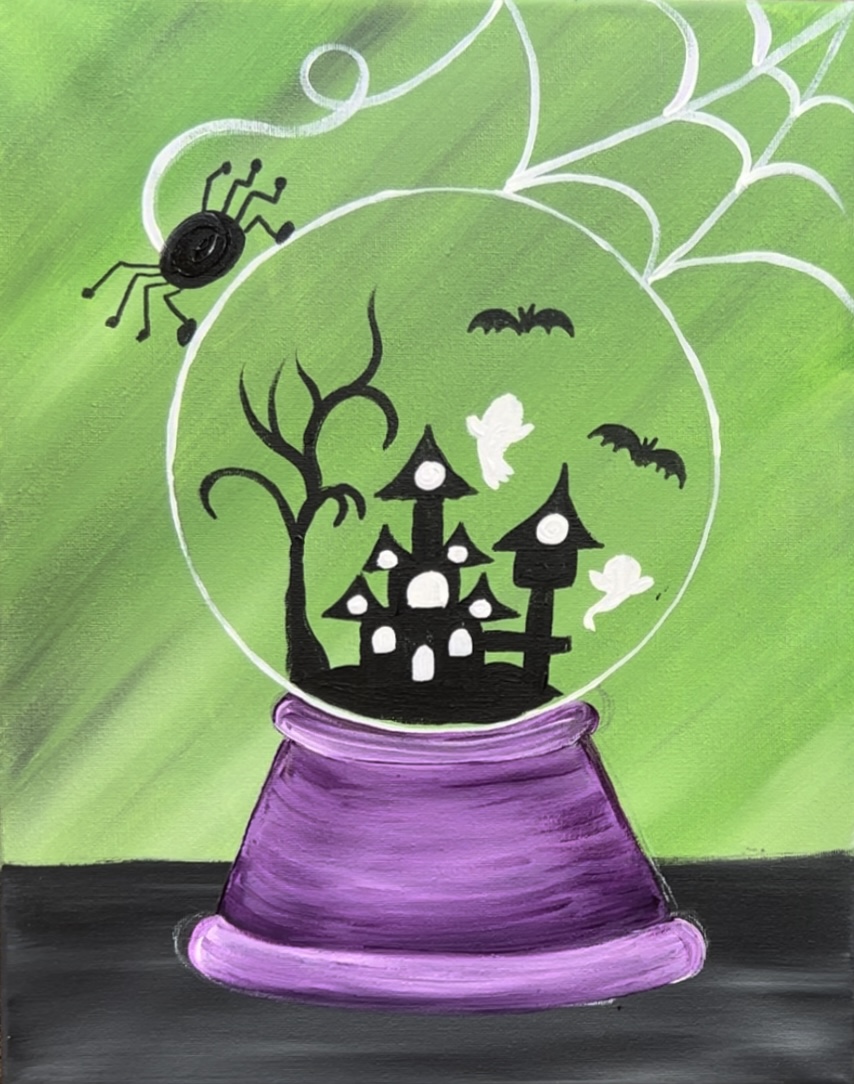
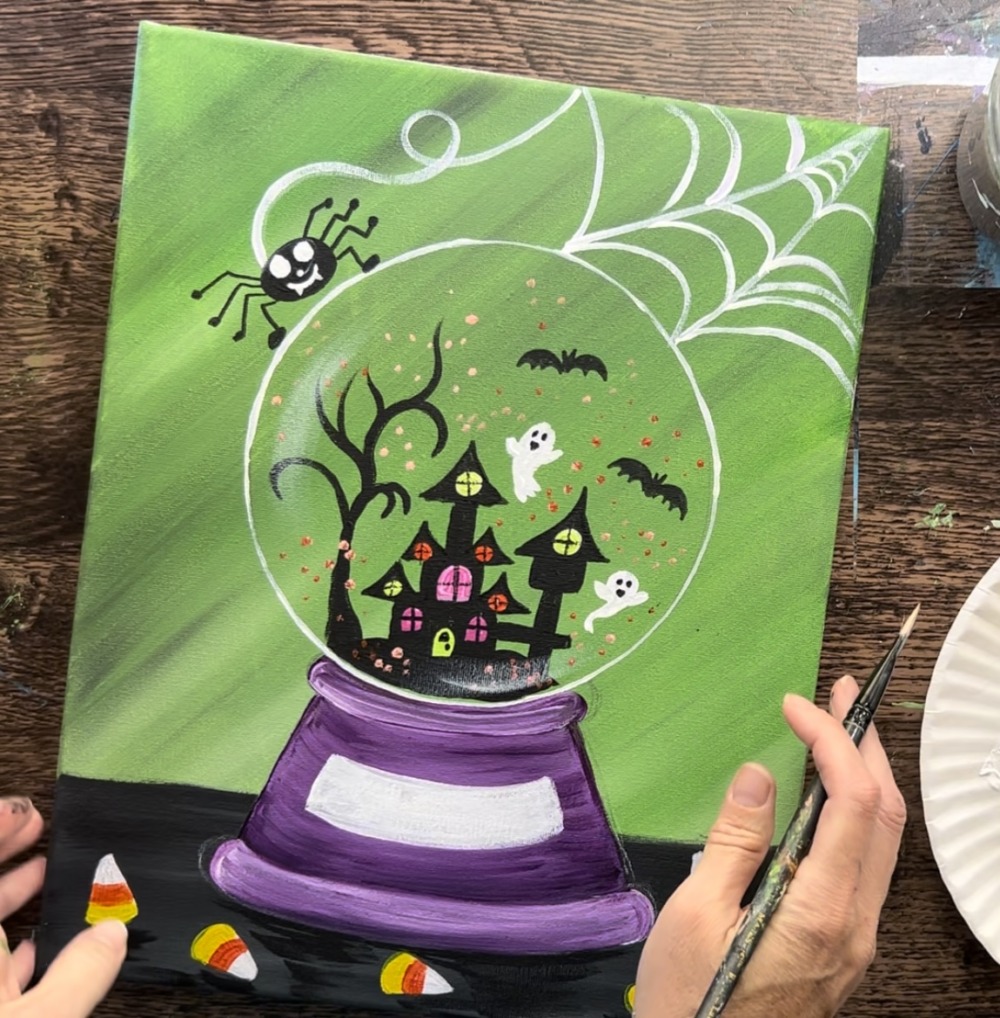
10. Paint Windows, Ghosts and Candy Corn
Use a 3/0 round brush and titanium white to paint windows and door on the haunted house. You will need to wait for this to dry before adding the colored layer on top.
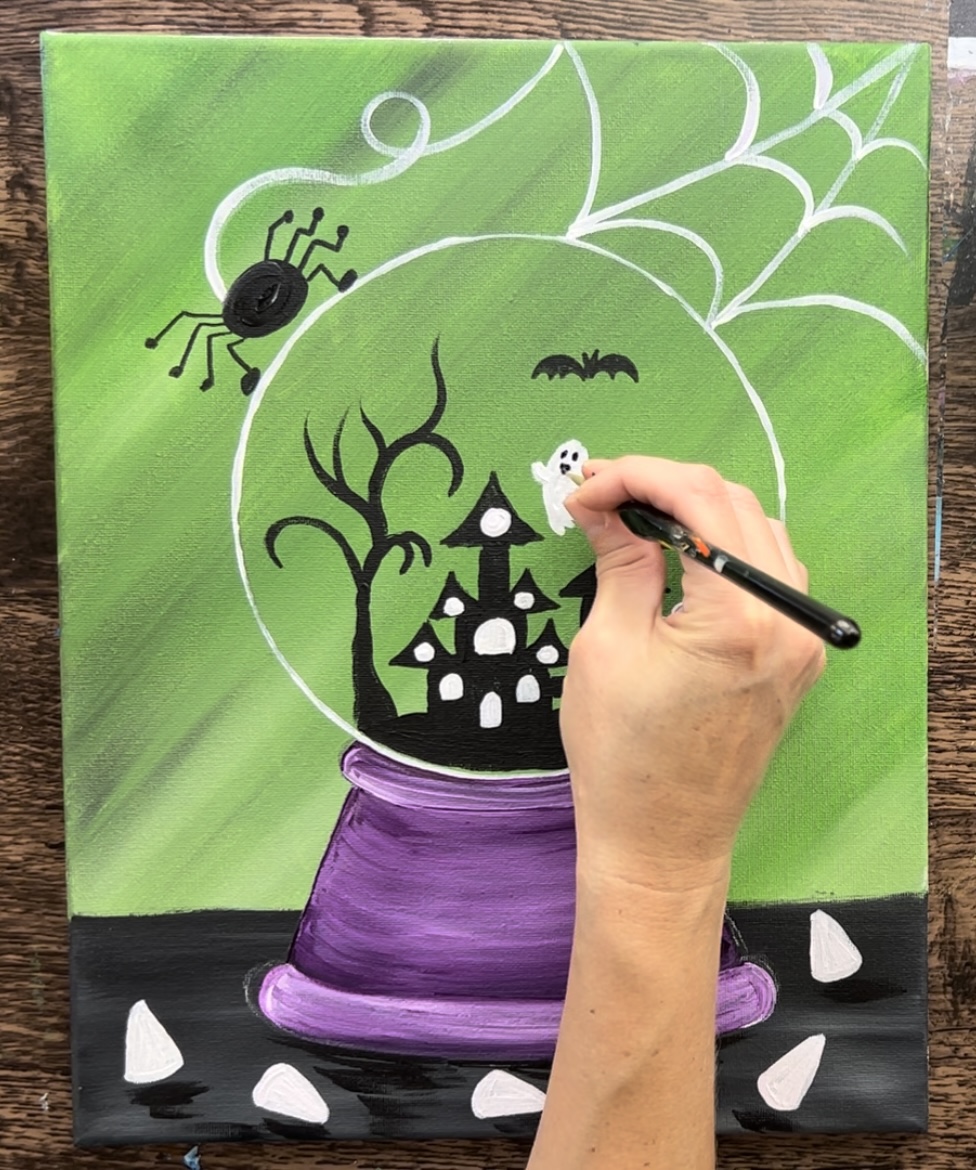
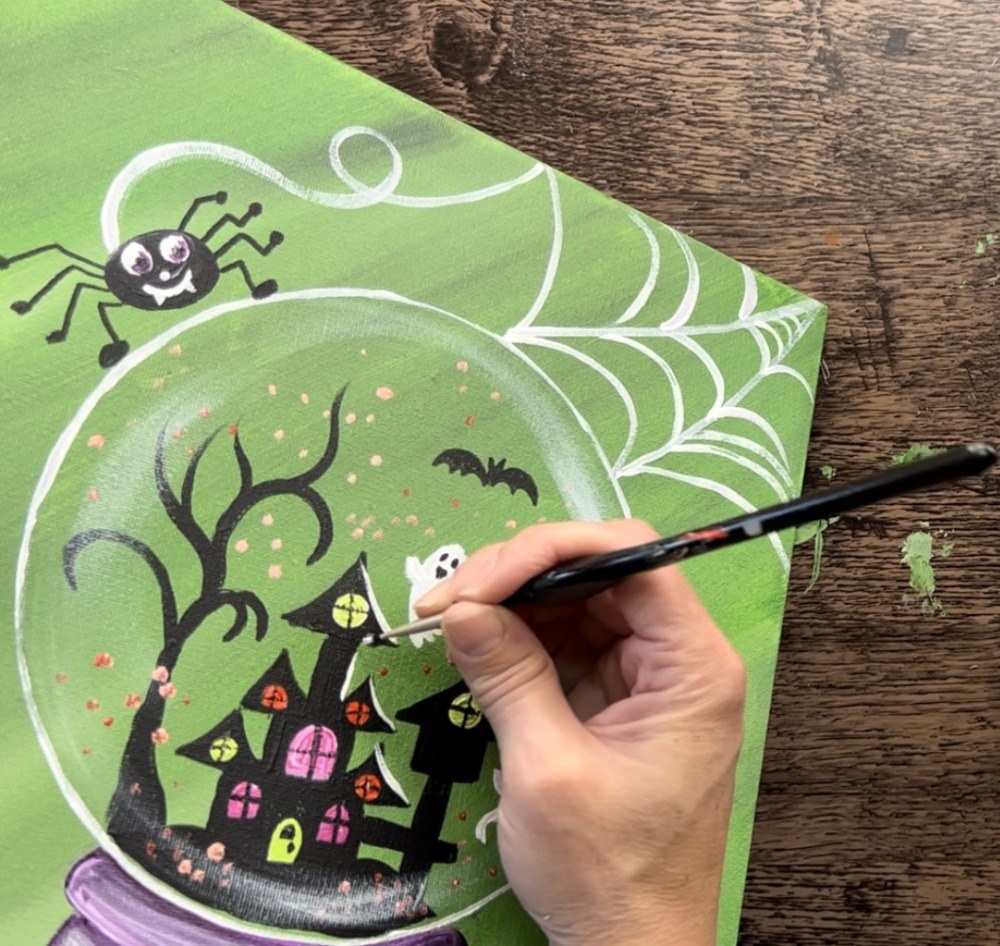
Use the same tiny round brush to paint the ghosts.
Paint the shape of all of the candy corn. You can do other candy shapes if you want.
Next, add shadow underneath the objects on the table. Do this with a 12 bright brush (or one of the round brushes). Load just mars black onto the brush and paint loose left and right strokes under each of the objects.

Use the 3/0 round brush and mars black to paint faces on the ghosts.
11. Add Color To Windows & Candy Corn
Load your palette with bright colors. I used: brilliant yellow green, medium magenta and cadmium red light hue (orange). You only need a small amount of these colors! You are also welcome to change the colors.
Use a 3/0 round brush to paint the windows with these bright colors.

Then use either the 3/0 round brush or the 4 round brush to paint little colored confetti dots around the snow globe. Use a combination of the orange and orange mixed with white.
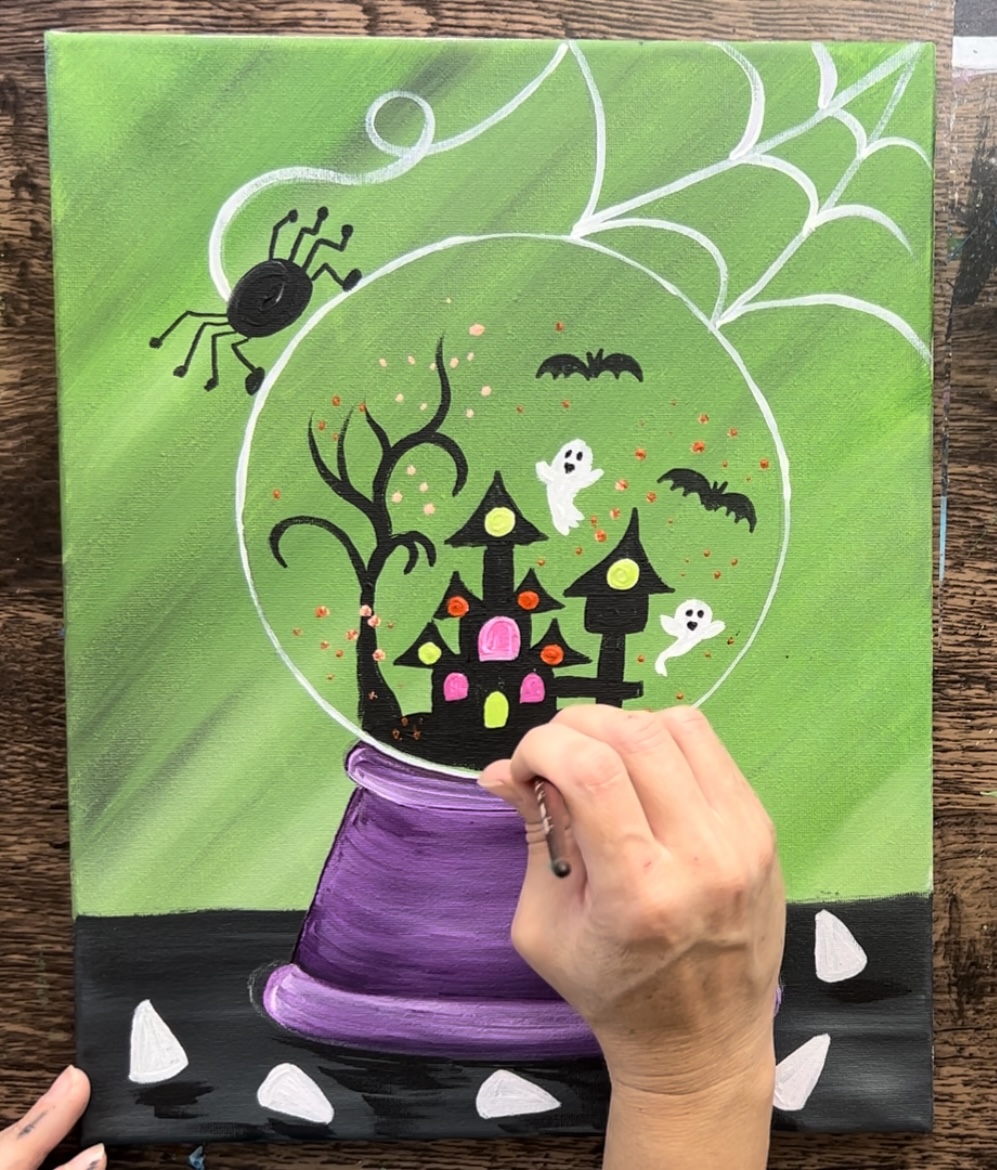
Some of the confetti dots can overlap things in the snow globe and some can be nestled on the ground area.
Next use any of the round brushes to paint the candy corn. Load your palette with a small amount of primary yellow and paint the bottoms of all of the candy corns.
Then use the cadmium red light (orange) to paint the centers.
12. Draw Details On Windows & Spider
When the windows are dry, use a paint pen to detail them all with window pane lines.
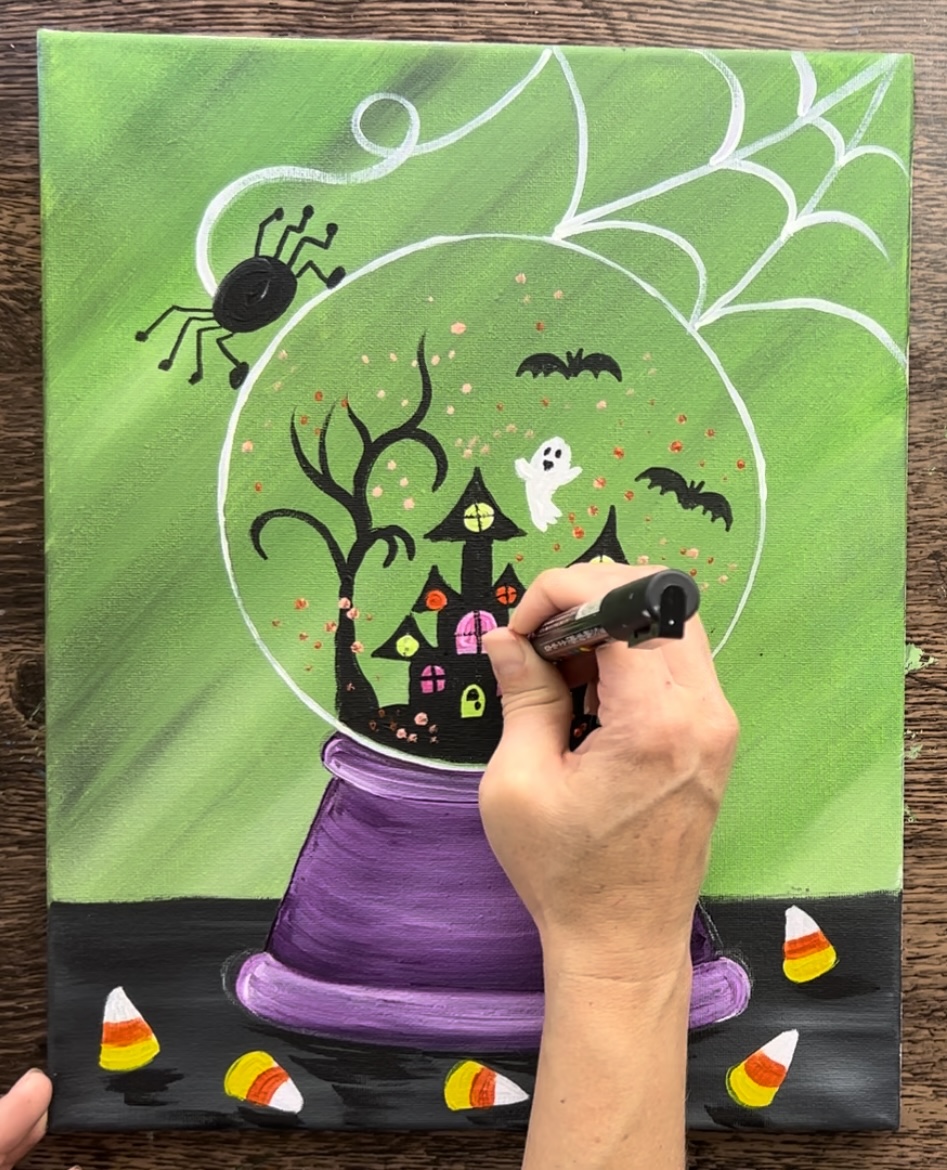
Then use a 3/0 round brush and titanium white to paint the eyes, nose and mouth on the spider.
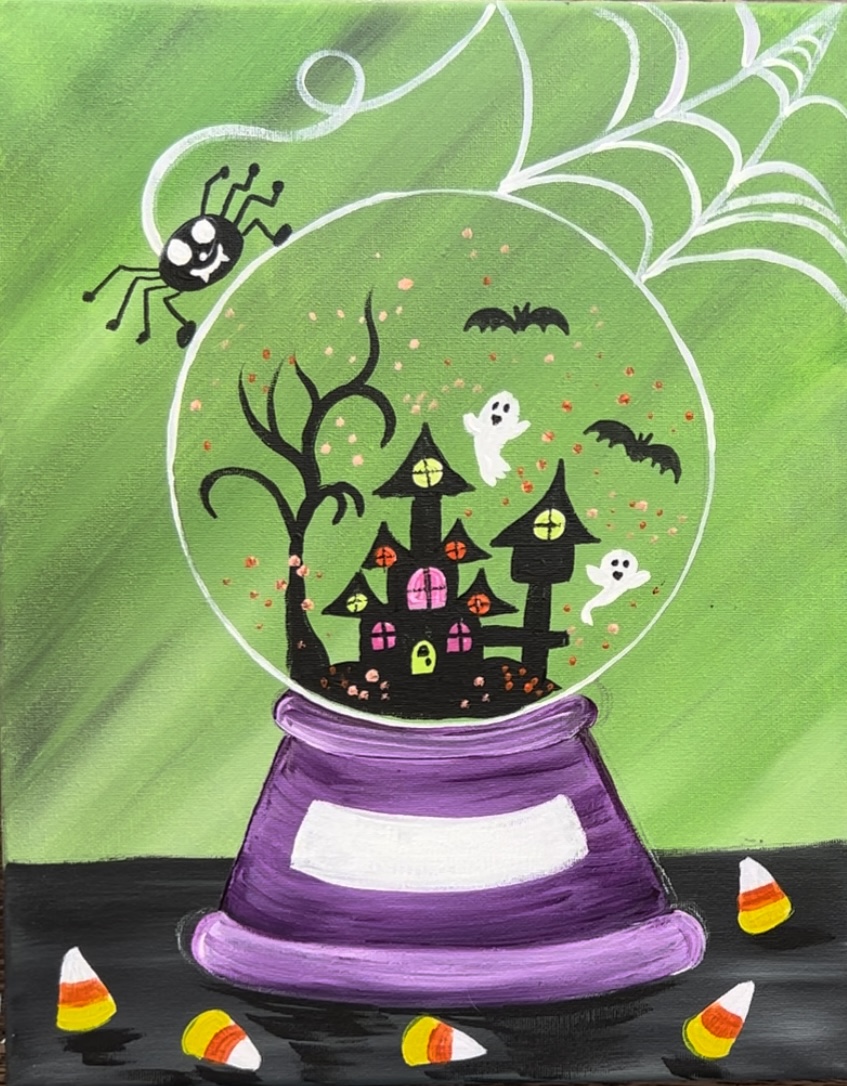
13. Paint Nameplate
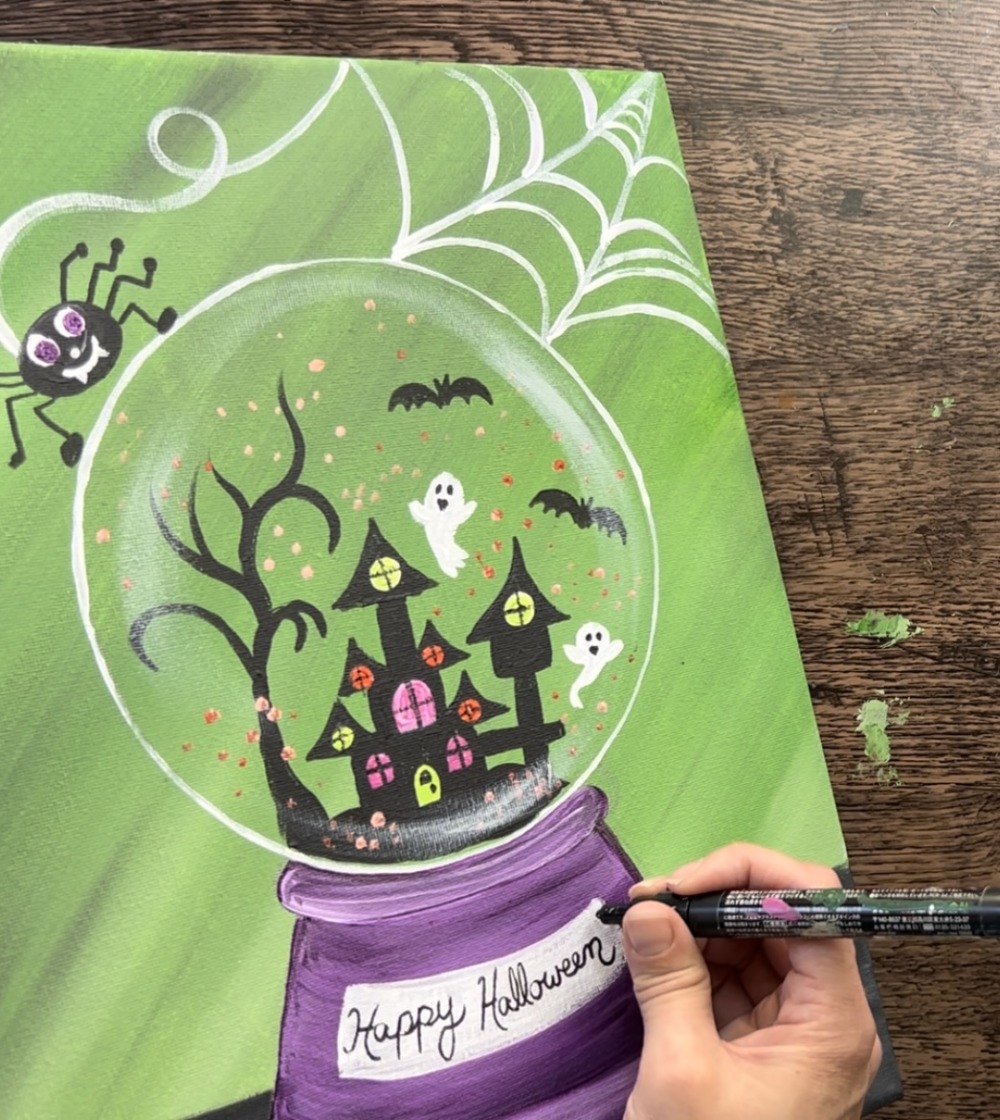
Use a 12 bright brush to paint a white curved rectangle. This is where we will write “Happy Halloween” or other word/ name.
Let this dry before doing the lettering.
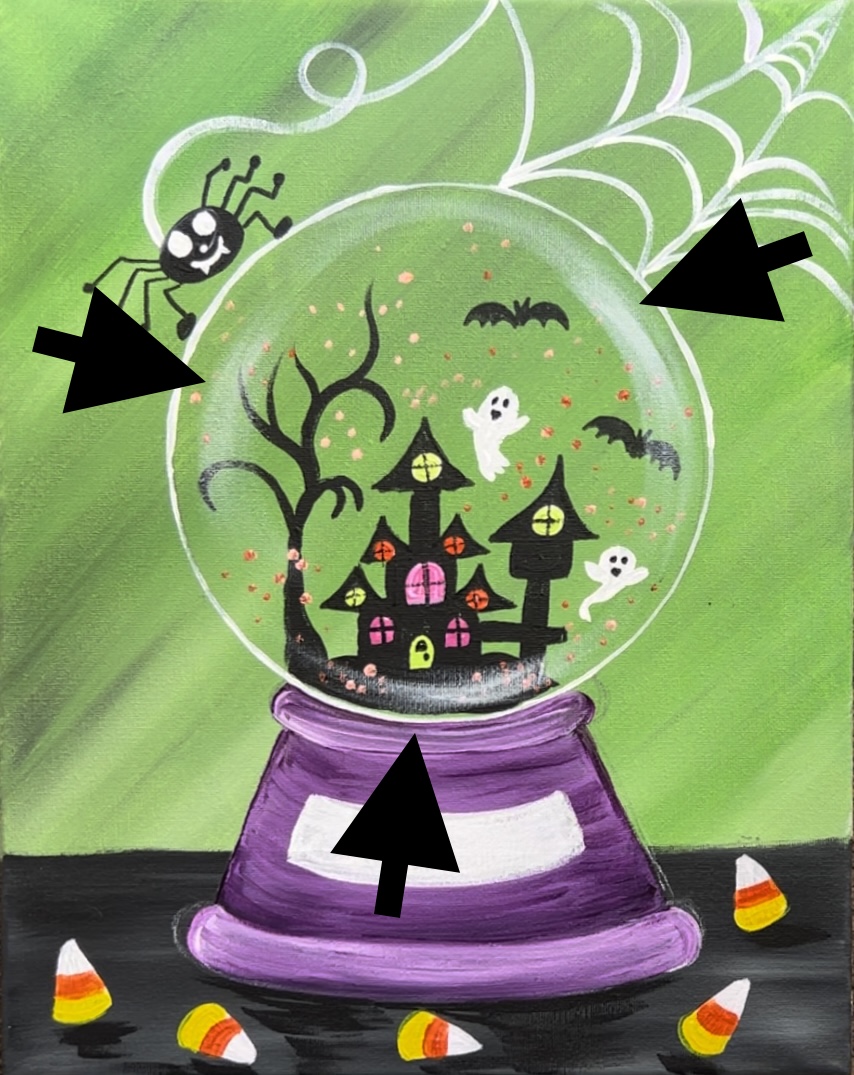
14. Paint Dry Brush Glare
Dry brush the globe next! This technique will create the illusion that the globe is made of glass and that everything behind it is inside of the glass.
Load your 12 bright brush with titanium white. Wipe the brush with a soft cloth. Then paint a curved mark on the left side of the globe. Start out very slow. You want to make sure the paint is very “dry” and translucent. You should still see most of the background through that paint stroke.
Paint more curved strokes along the inner edge of the circle. It is okay if you are painting over objects that are on the inside of the globe.
I did three main dry brush/ glare marks. Two towards the top and one on the bottom.
15. Write Wording
Use a POSCA paint pen or sharpie to write the wording.
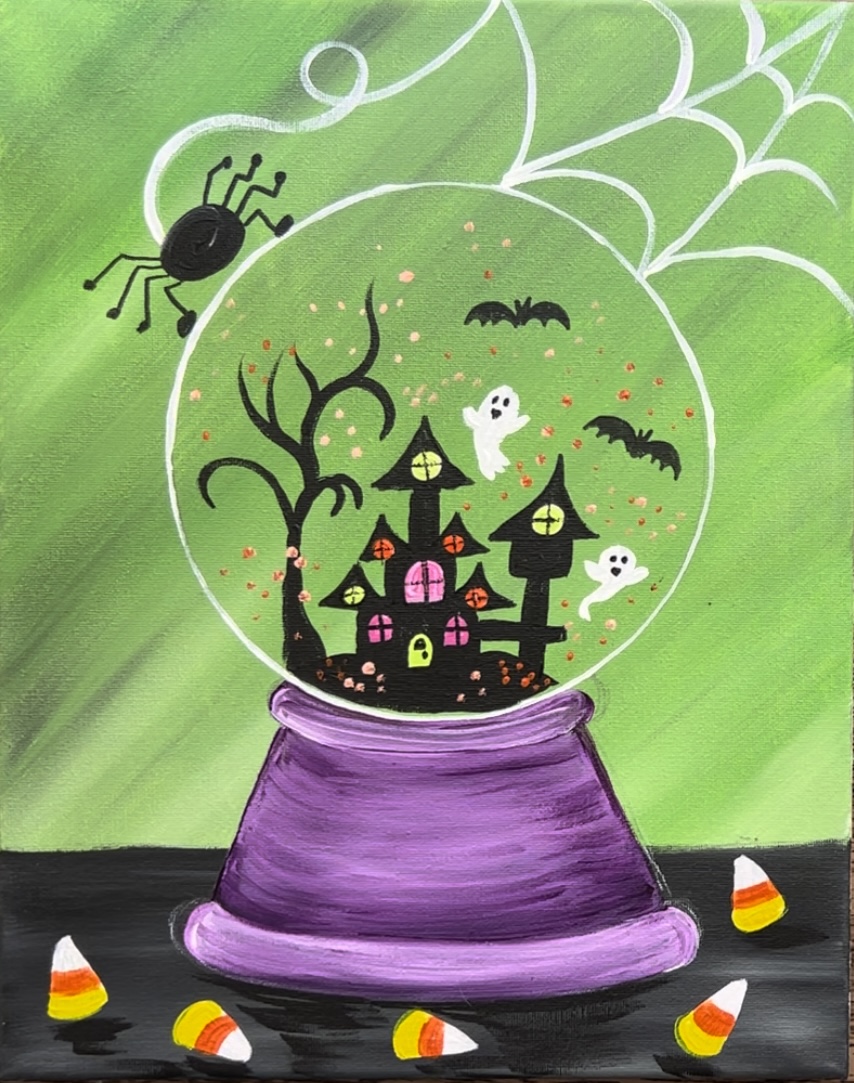
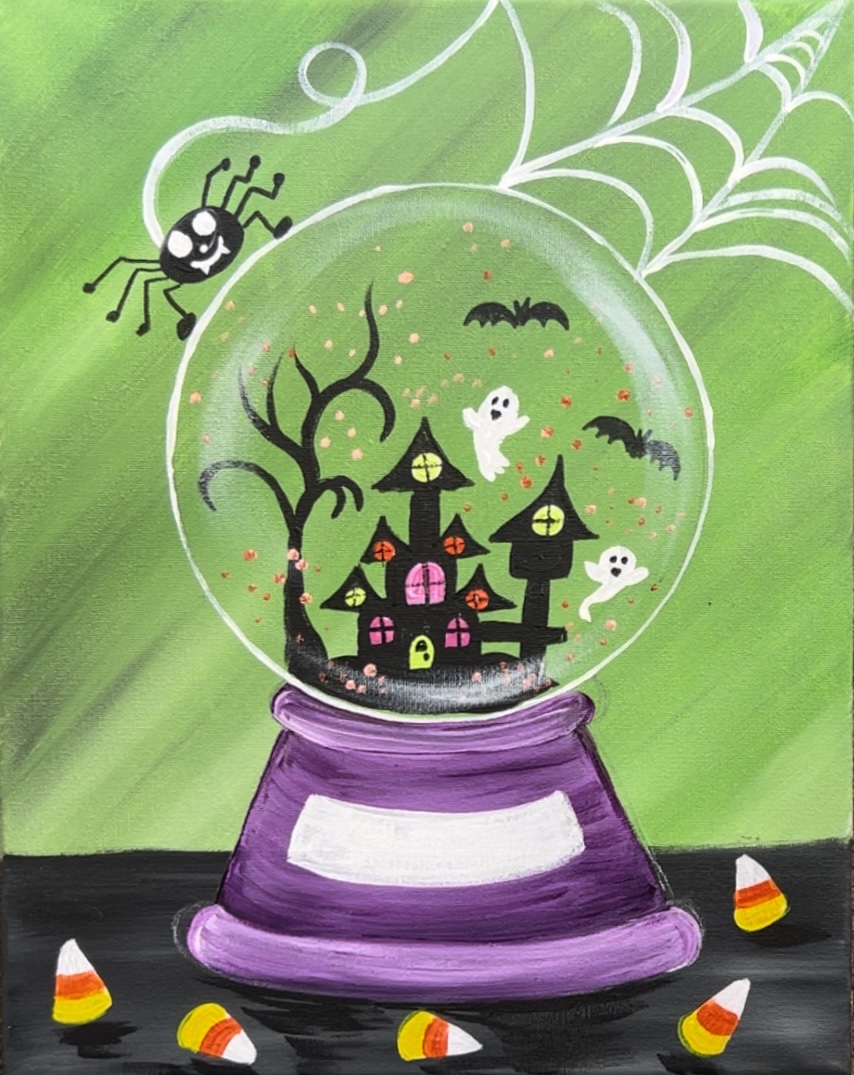
16. Final Details
Some other fine details I did… I painted a purple oval and a black circle inside the spider’s eye.

I also used the 3/0 round brush and titanium white to add highlights to the right side of all of the haunted house. This was done just on the right side of the triangles and right side of any of the walls.
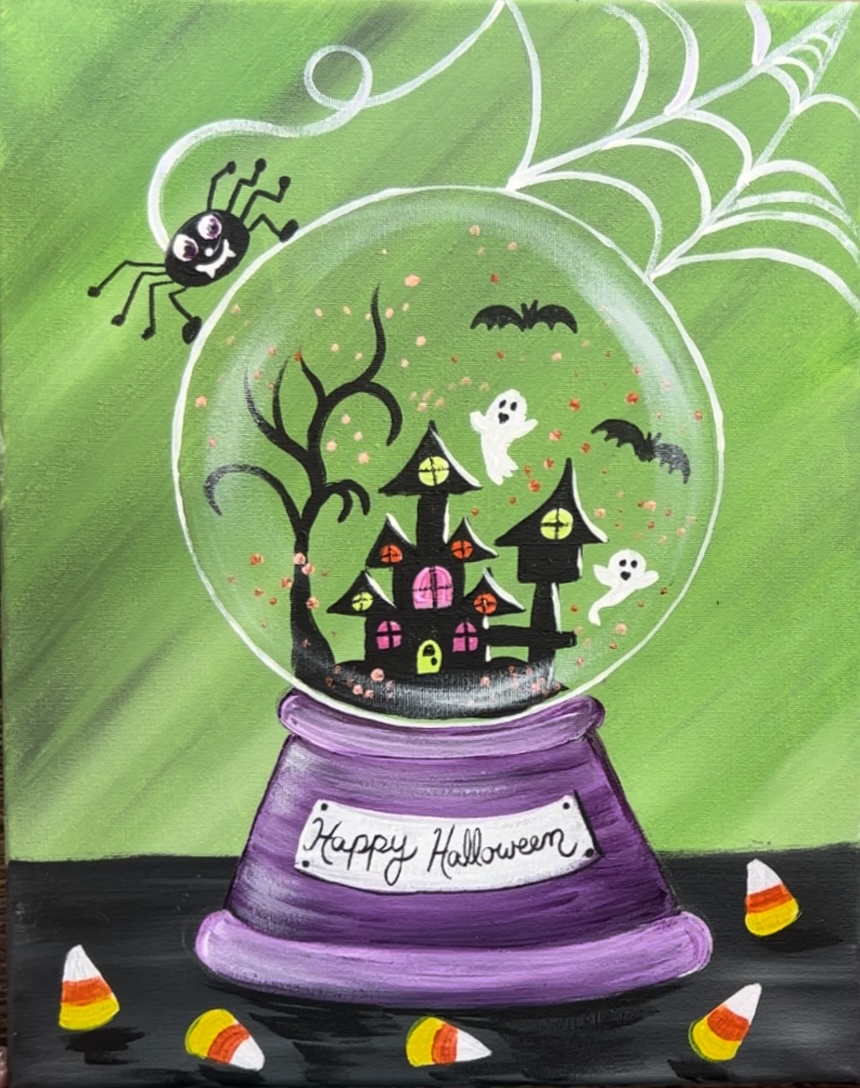
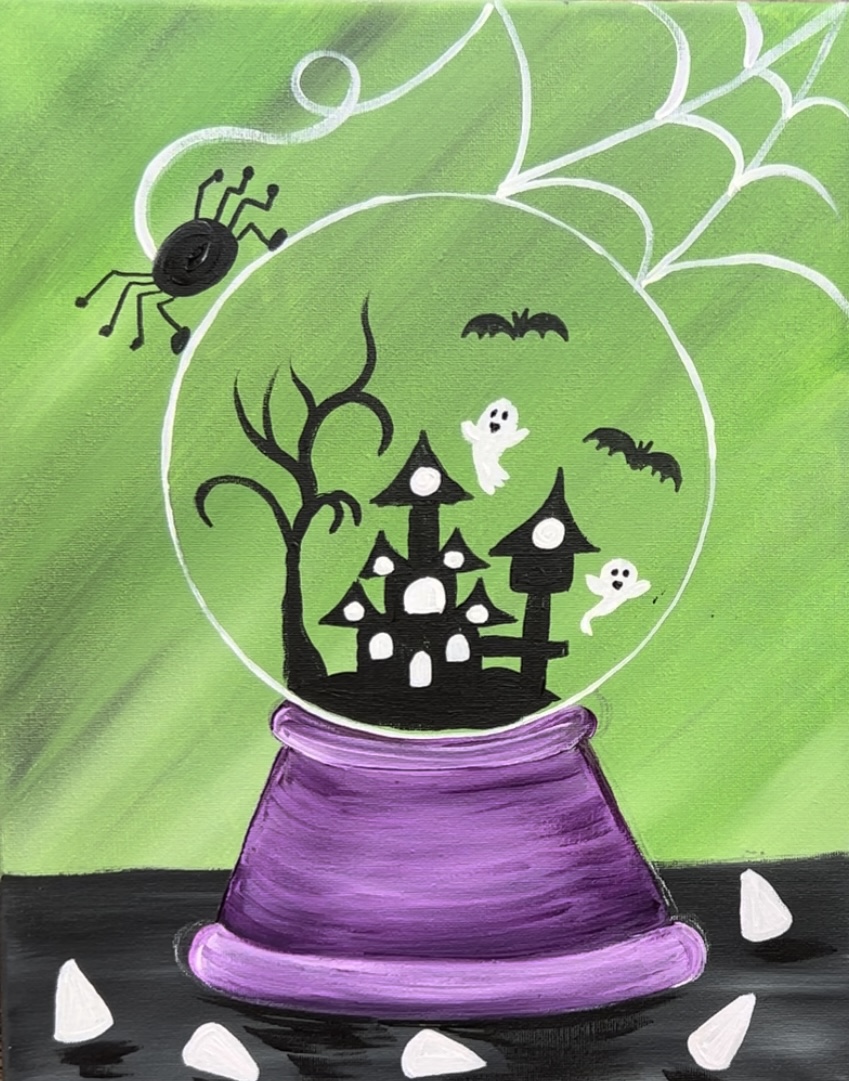
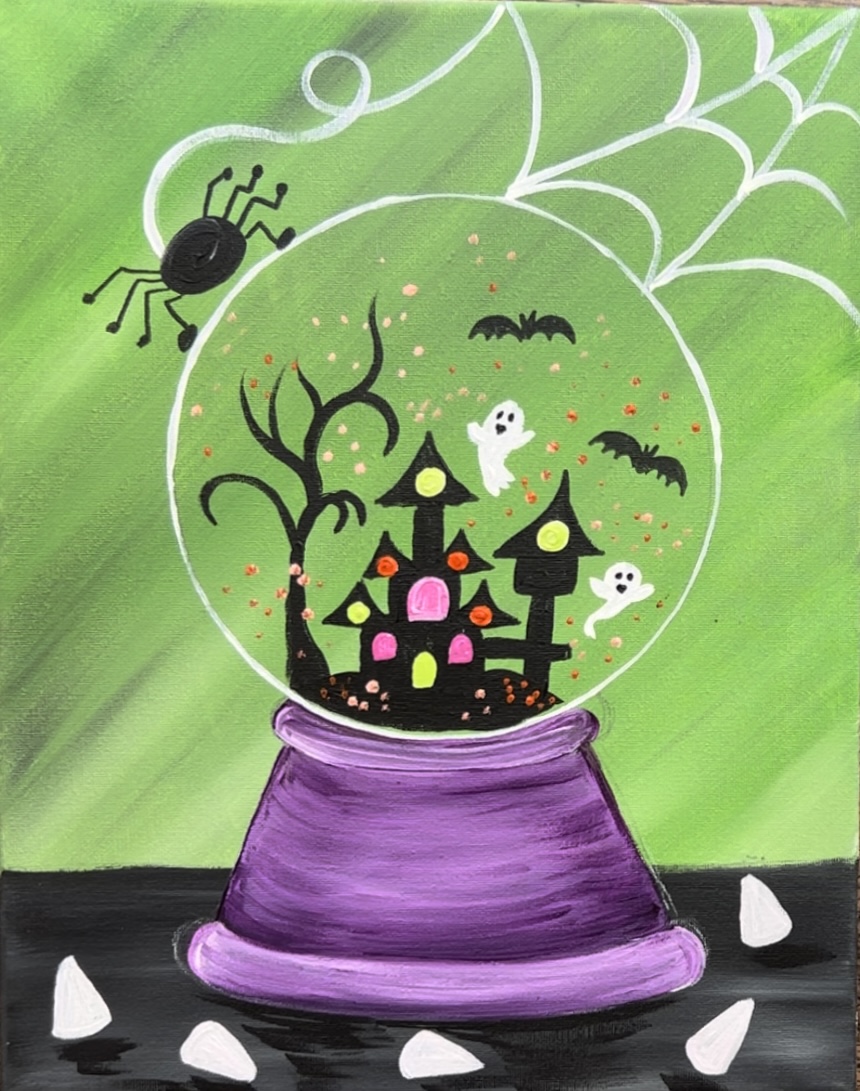
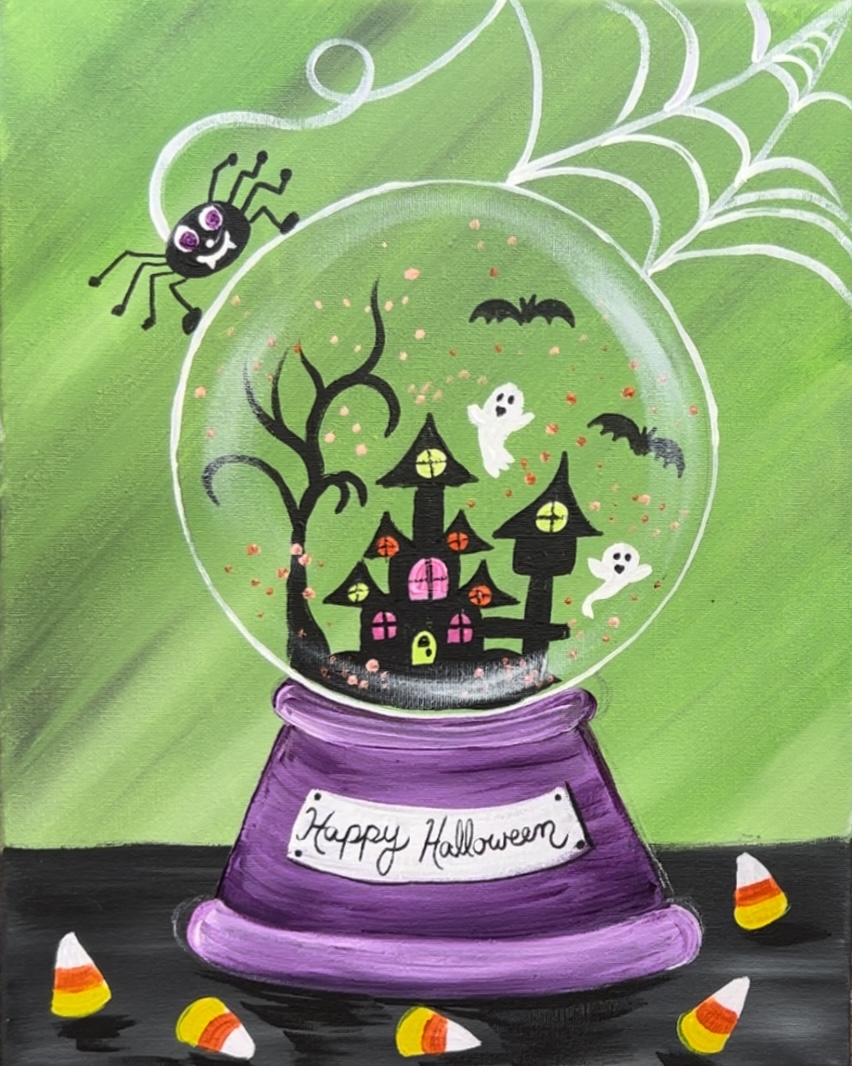
Finished !
