
Would you like to save this?
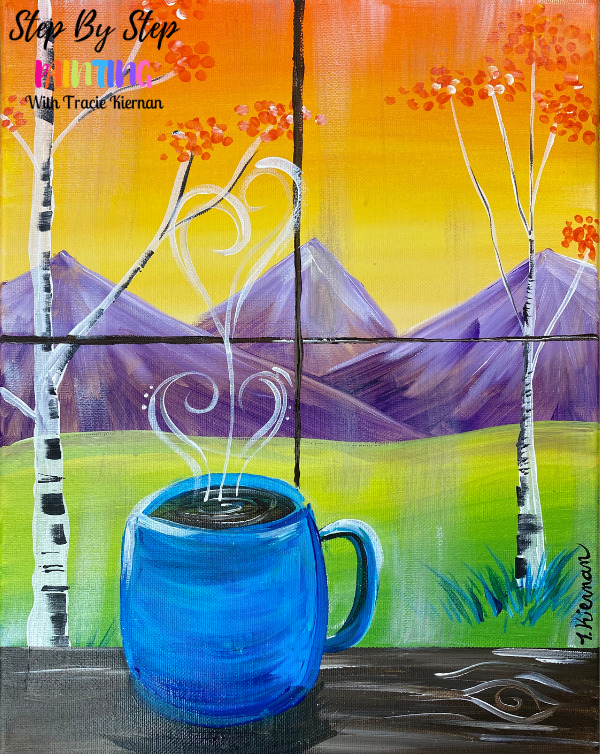
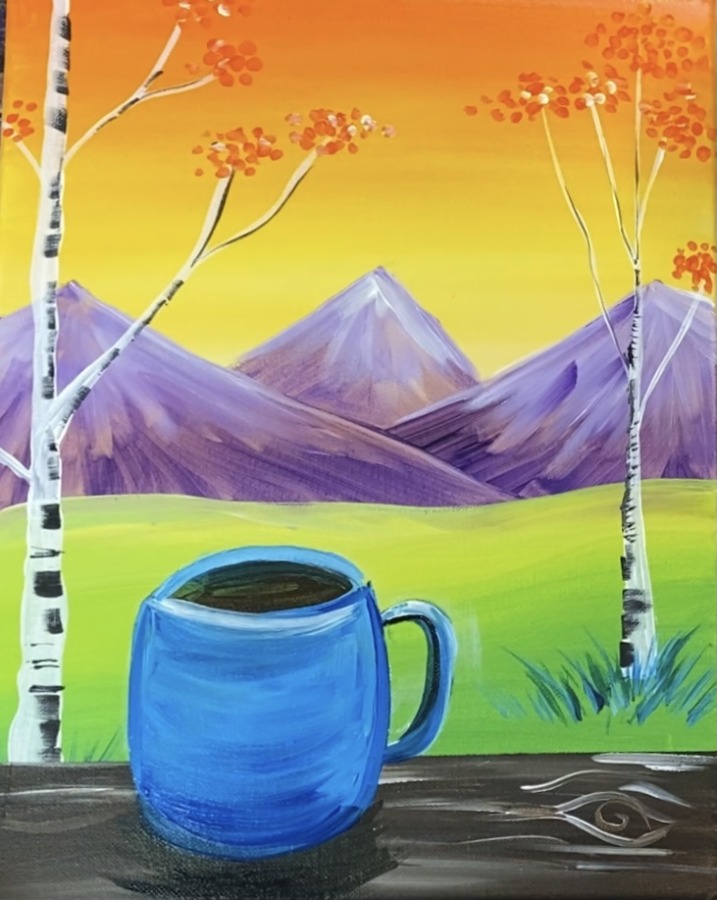
Learn how to paint a fall landscape with purple mountains and aspen trees. Paint a coffee cup on a ledge in front of a window!
You can customize the color of the cup with a different color and/ or add pretty designs on it.
This tutorial reminds me of the winter hot cocoa window version.
Enjoy and happy painting!

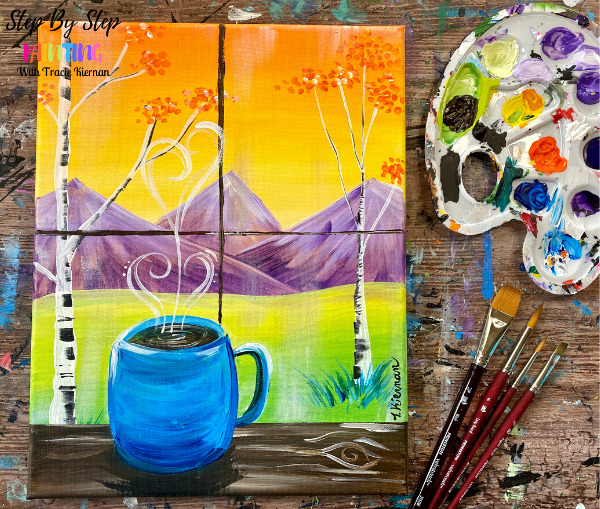
Materials:
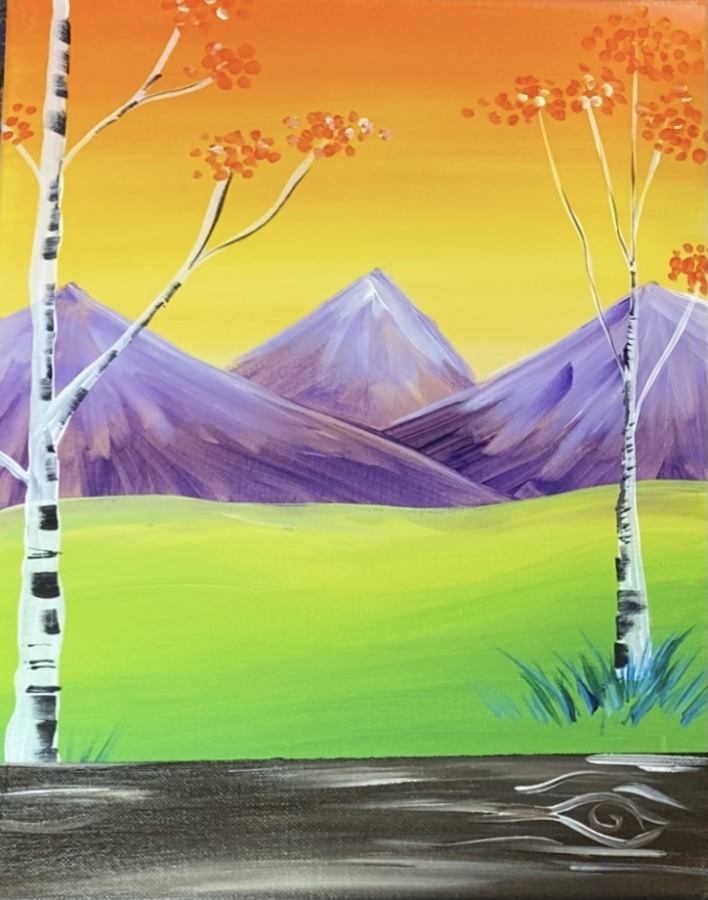
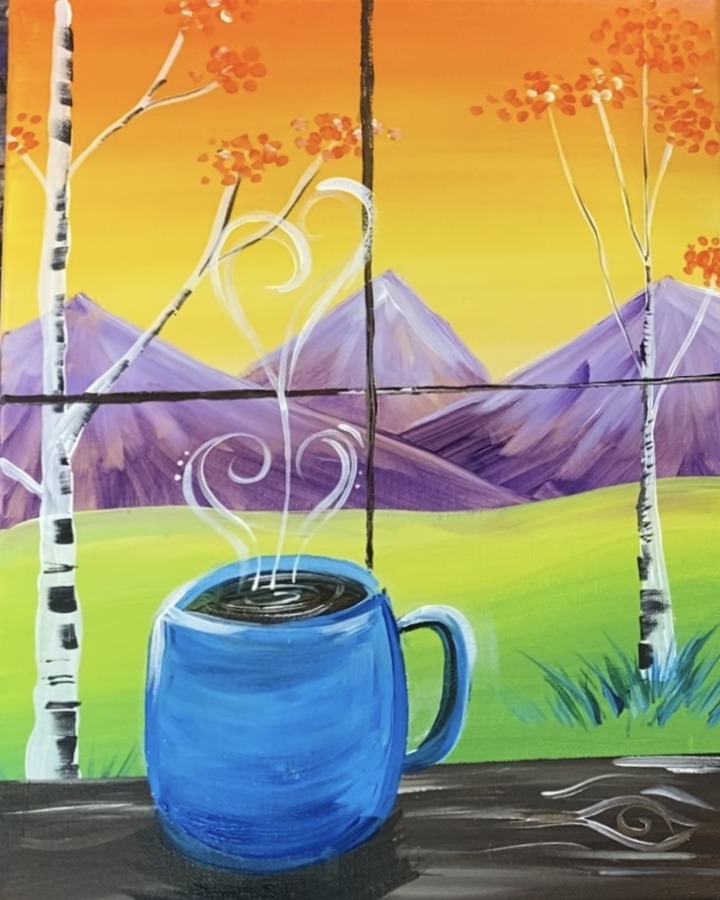
"Coffee At Sunset" Acrylic Painting Tutorial
Learn how to paint a cup of coffee next to a window overlooking a fall landscape at sunset!
Materials
- 11 x 14 Canvas
- Acrylic Paint
- Paint Brushes
- Painter's Tape or Masking Tape (optional)
- Chalk (optional)
- T-Square Ruler (optional)
Colors
- Cadmium Orange Hue
- Primary Yellow
- Titanium White
- Mars Black
- Primary Blue
- Raw Umber
- Brilliant Purple
- Prism Violet
Brushes
- 3/4" Flat Wash
- #8 Round Brush
- #4 Round Brush
- 3/8" Angle Brush
Instructions
- See tutorial on www.stepbysteppainting.net for full tutorial instructions!
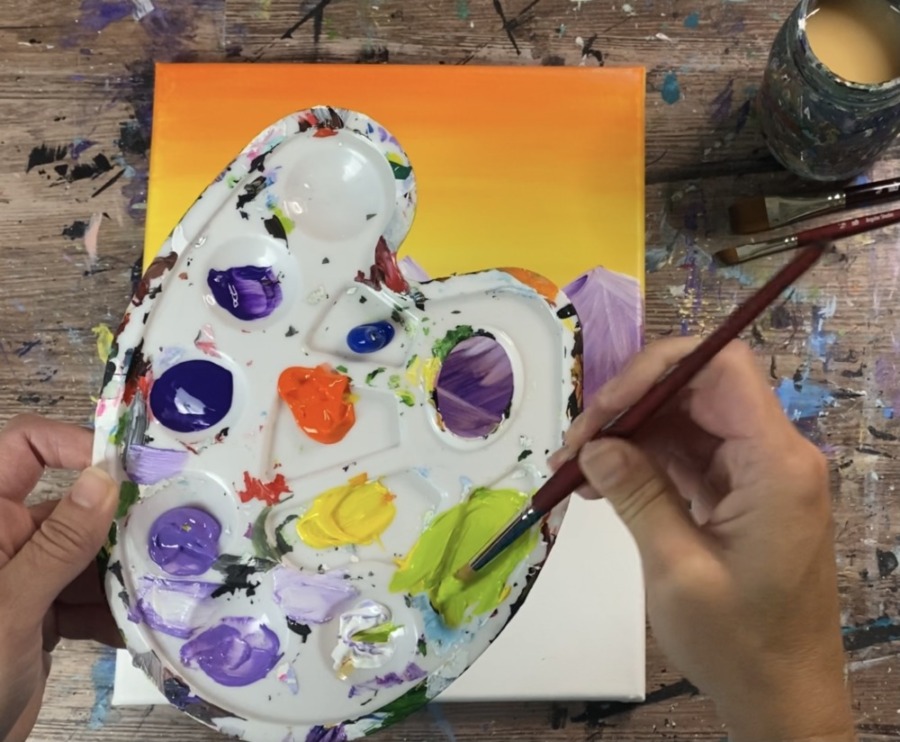
Color Palette:

Using Craft Paints?
If you are using craft paints such as the Apple Barrel Paints, you can try substituting with these colors:
- Bright Blue
- Purple Iris
- Black
- Melted Chocolate
- Bright Yellow
- Jack-O-Lantern
- White
Directions At A Glance:

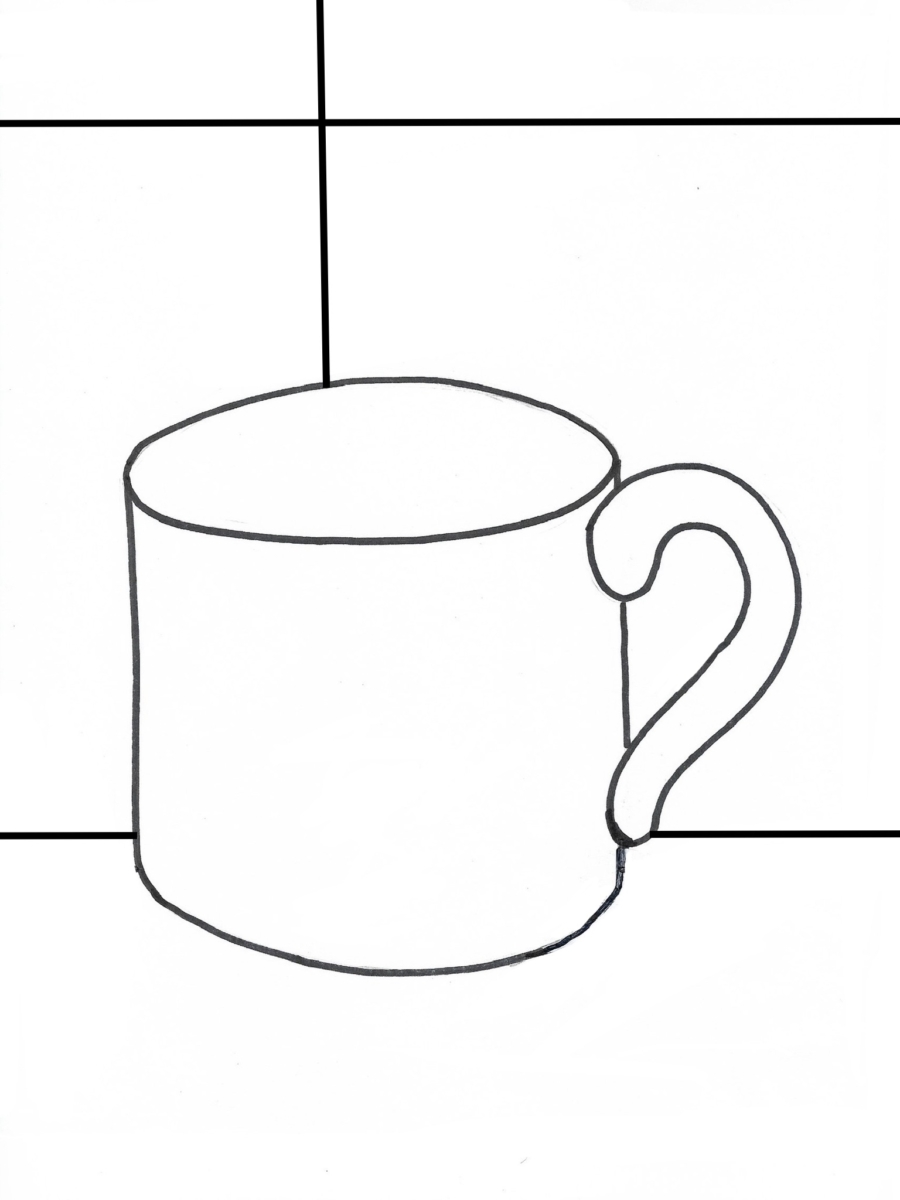
Traceable:
Video:
Step By Step Directions:
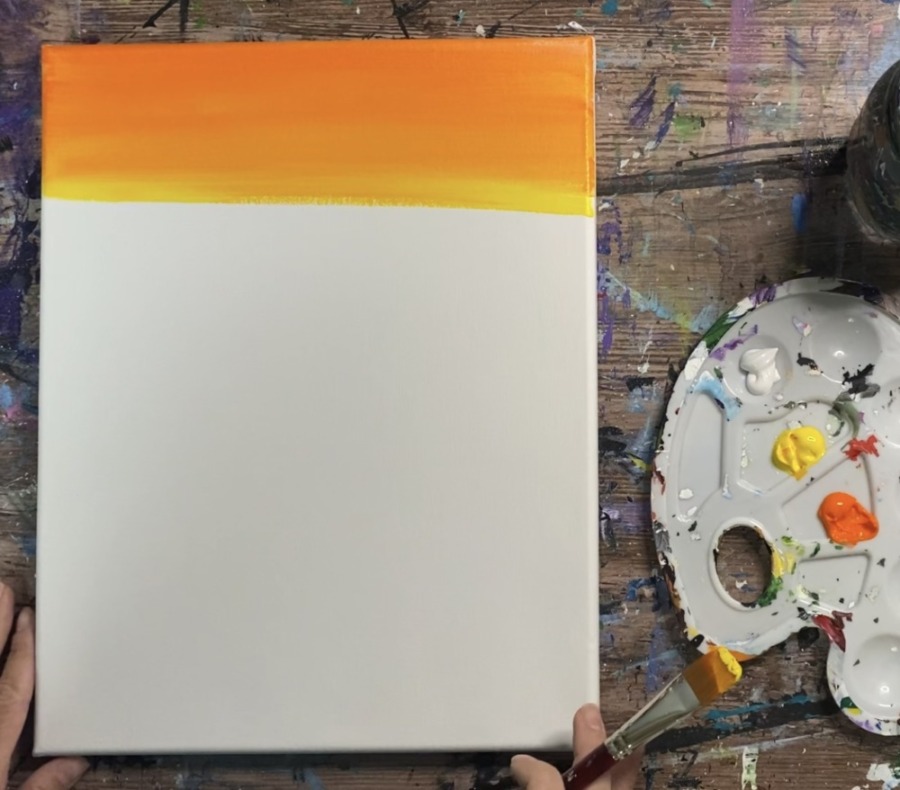
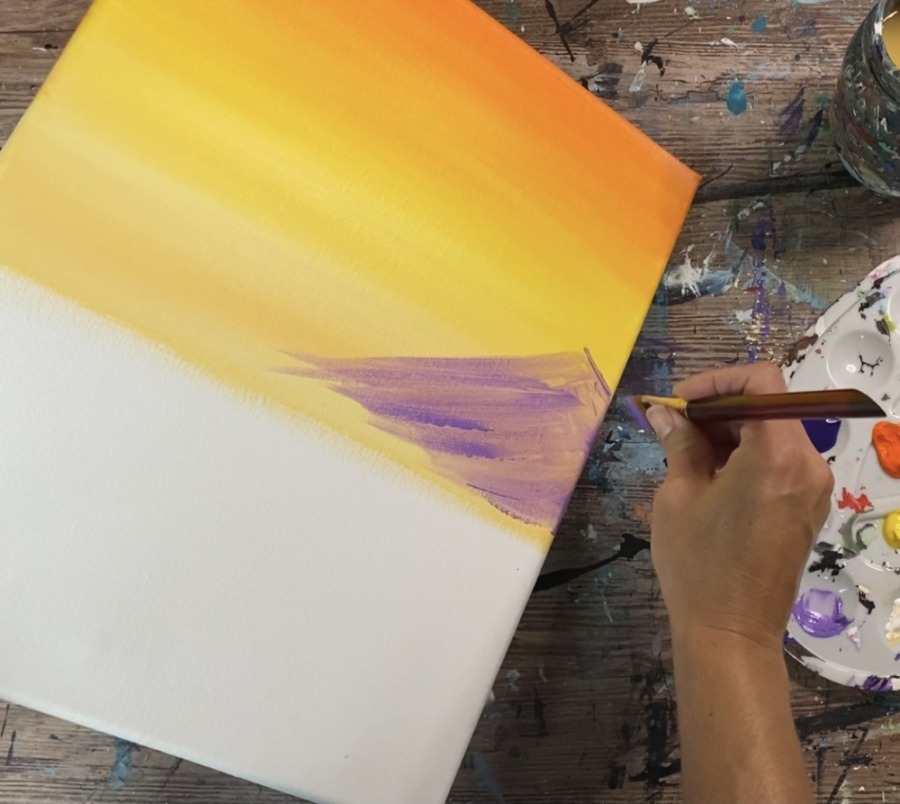
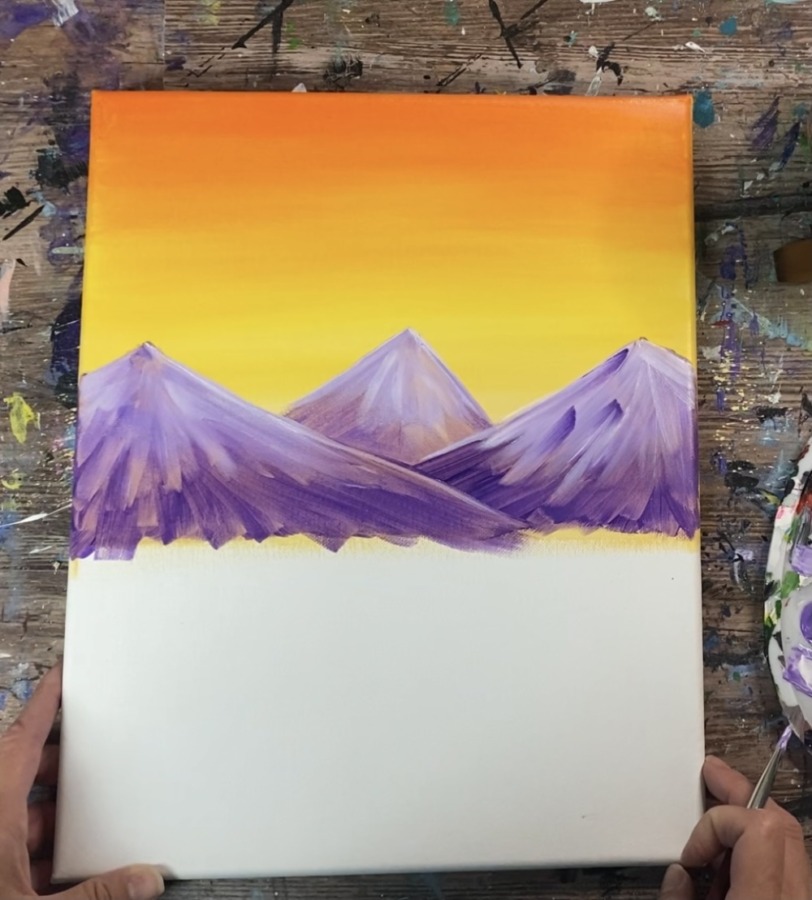
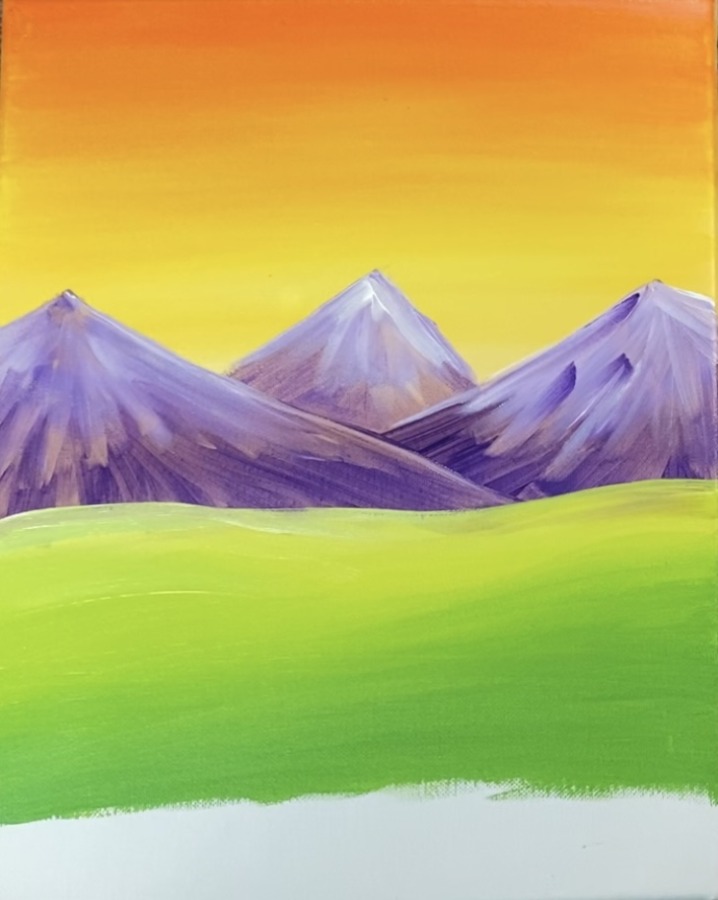
1. Paint the sunset sky
Position your canvas in vertical mode. You will be painting a blended sunset on the top half of your canvas (a little more than halfway down). This sunset starts with orange and then blends to yellow and then blends to a white mixed with yellow on the bottom.
Load your 3/4″ flat wash brush in water and tap it dry. Then load your brush in cadmium orange hue paint. Paint left and right strokes on the top of the canvas. Go down about 3-4 inches.
Then wipe off your brush and load it into primary yellow. Blend the yellow up into the orange. Continue to paint left and right strokes.
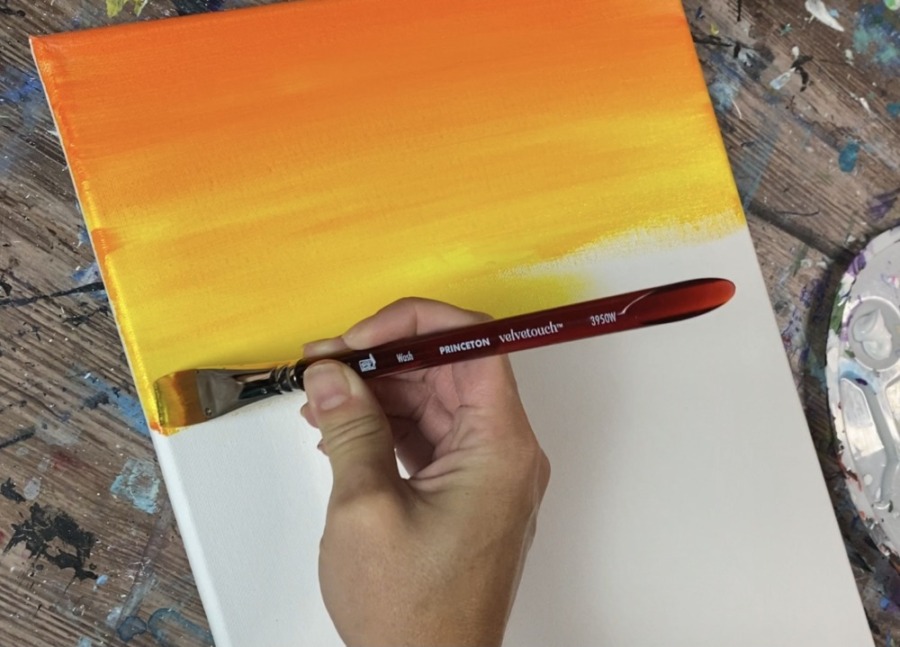
Then wipe your brush off and load it into titanium white. Blend the white up into the yellow so that it turns into a light yellow. Go a little more than halfway down your canvas and stop. Your sky should be lightest on the bottom.

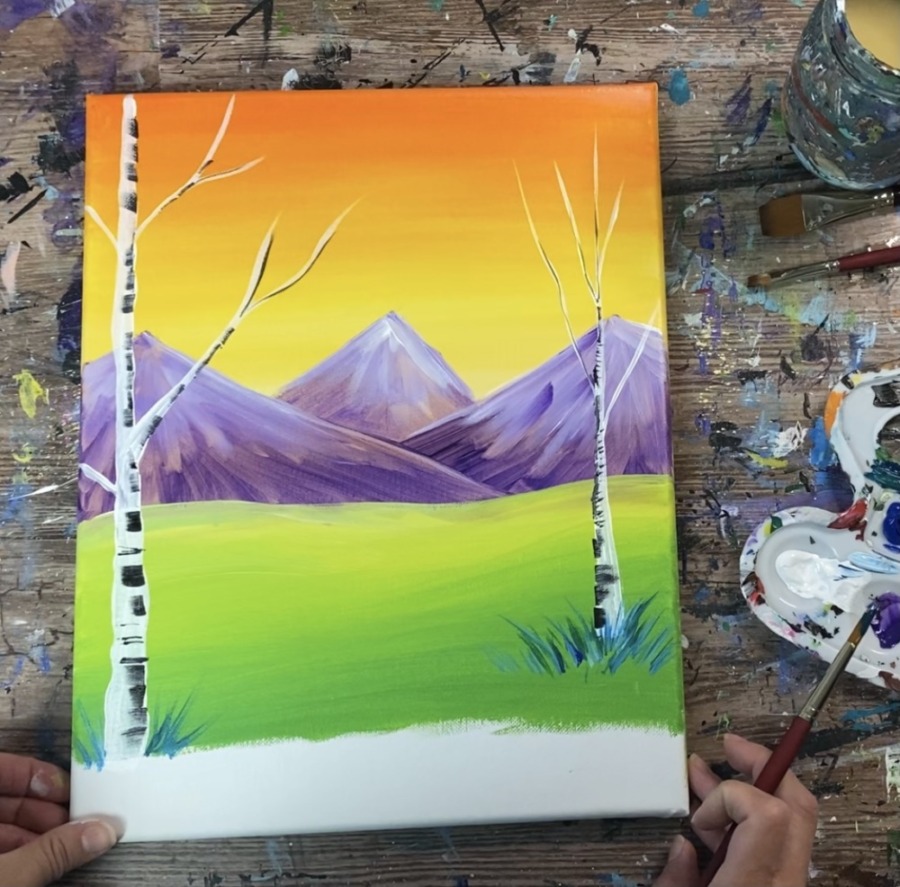
2. Paint The Mountains
Allow your sky to mostly dry before doing the mountains.
Load your palette with brilliant purple (light purple). Use your 3/4″ flat wash brush to paint 3 triangular mountain shapes. These go above the “horizon line” (the bottom part of your sky.
Paint three similar size mountain points. Drag your brush downwards at an angle to form the shape of each mountain.
Tip: the “brilliant purple” color is a translucent color and may not give 100% coverage and that is okay.
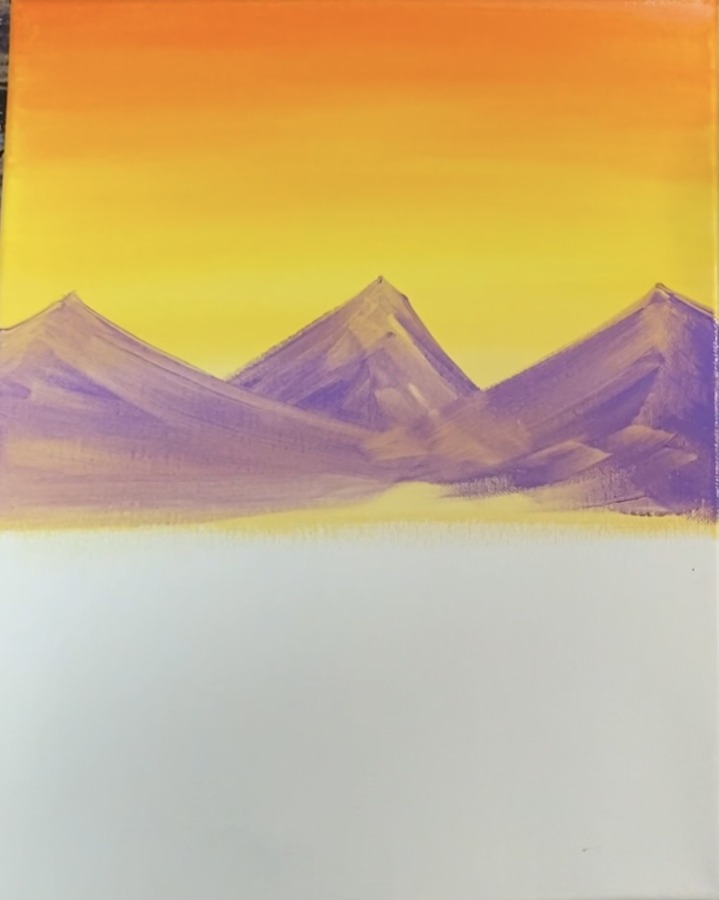
Next load your palette with prism violet (darker purple). Paint the bottom of the mountain and stroke upwards at an angle. Leave the top open without dark purple paint.
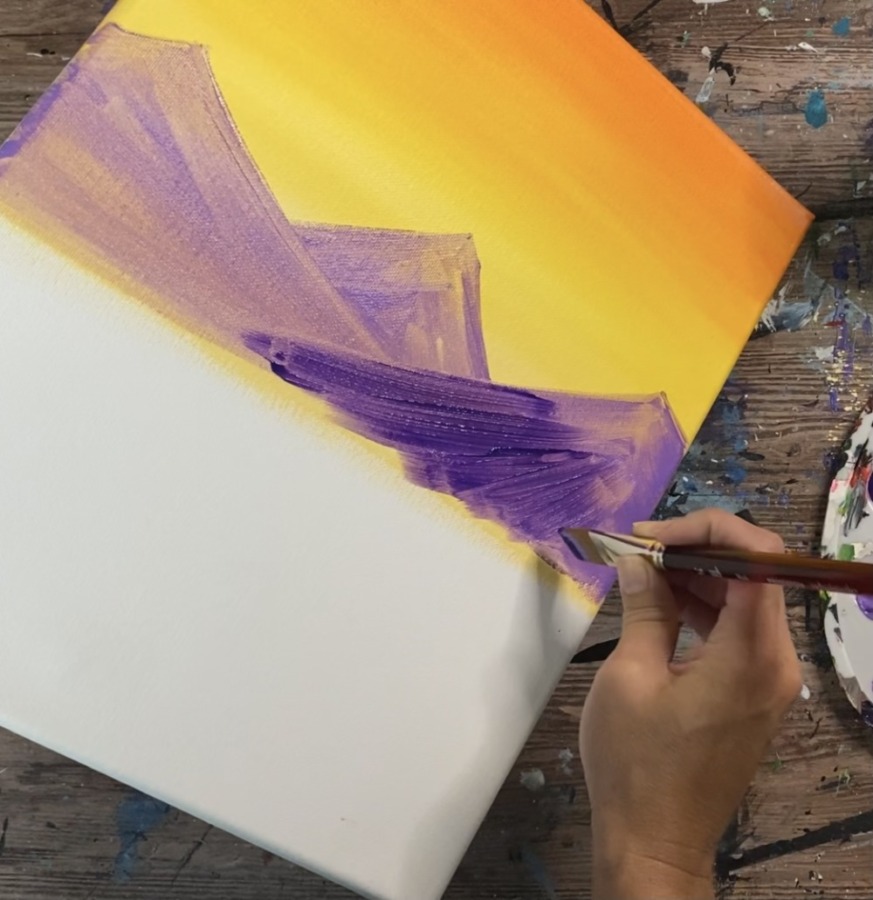
Define which mountain is in the front, middle and back by overlapping your strokes.
Tip: You may benefit from switching to a smaller flat brush if the 3/4″ is too large for the mountains. I switched to a 3/8″ angle brush to do this step.
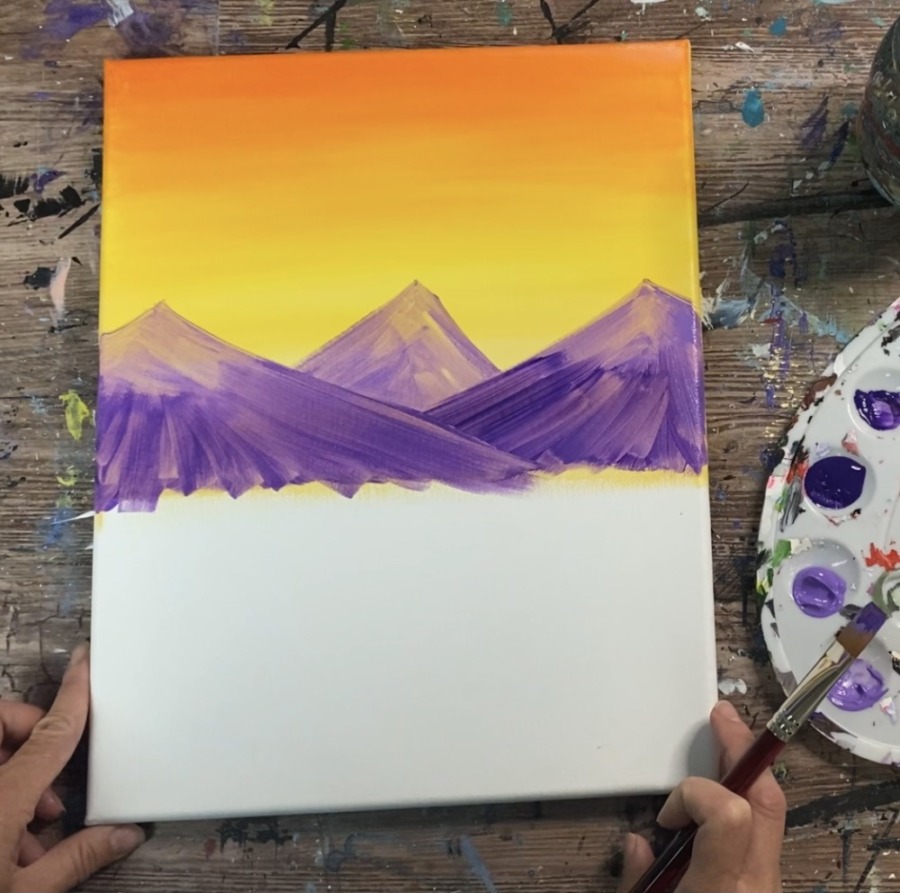
Then wipe off your brush and load it into titanium white. Paint the top point of each mountain and drag your strokes downwards at an angle. The white will gently blend with the purples. The idea is to get the top point of your mountains lighter and the bottom base of the mountains to be darker.
Tip: the bottom base of your mountain will slightly be overlapped by green paint so you don’t have to worry about that area being “smooth” or “flat”.
3. Paint The Ground
Mix a light spring green color on your palette by mixing about 5 parts yellow, 1 part primary blue, 2 parts white and a tiny bit of the light purple. (These proportions do not have to be exact).
Use your #8 round brush to paint the land at the base of the mountain. Paint a long, wavy land area that slightly overlaps the mountain base.
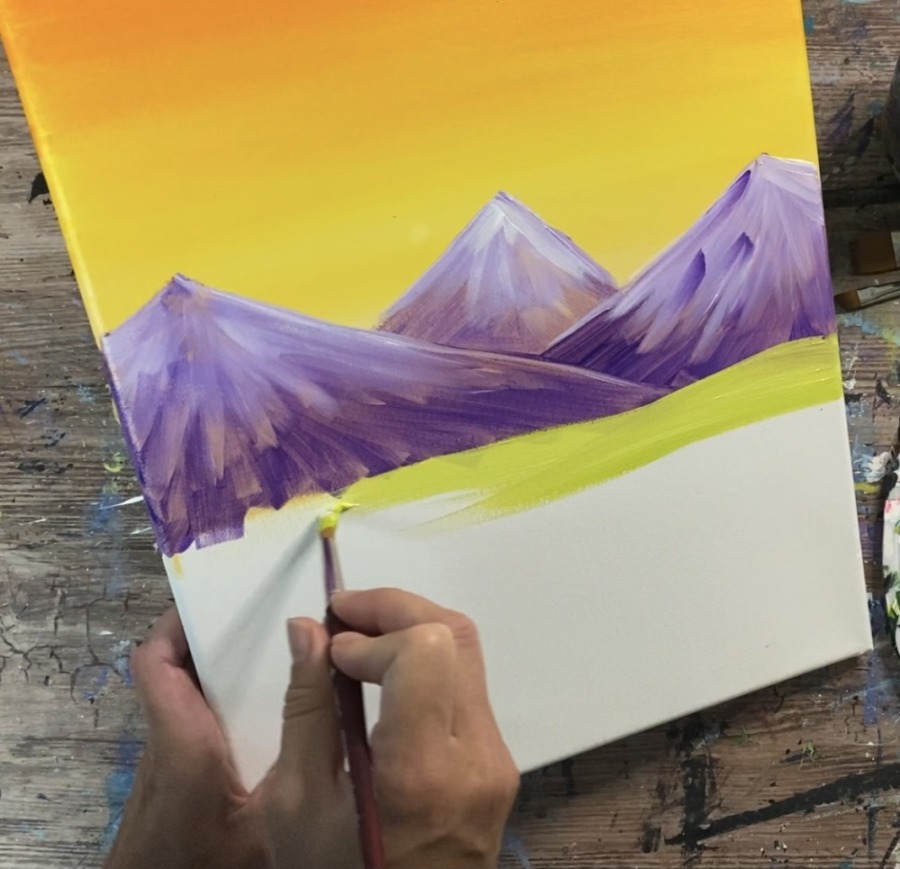
Then gradually add more “primary blue” to your spring green color so that the green turns to a slightly darker green. Continue to paint long wavy lines down the canvas. This green should get darker and darker as you work your way down.
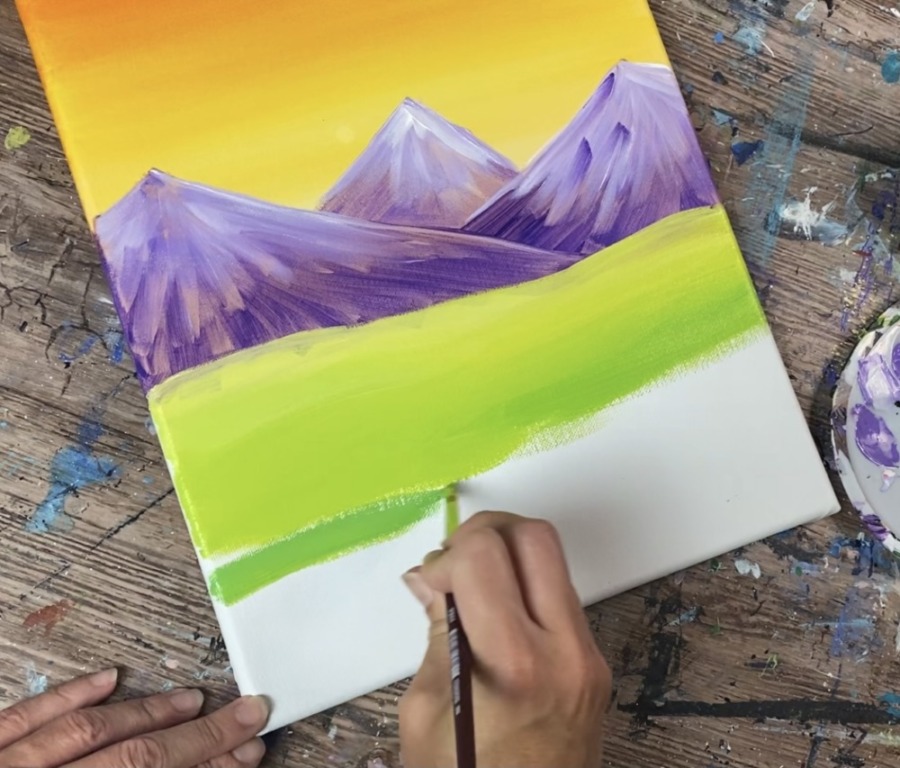
Leave about an inch to two inch gap on the bottom of the canvas (this is where the ledge will be).
Tip: if you have trouble blending the light green to the dark green, you can simplify this by painting the land a solid light green color instead of a blended green.
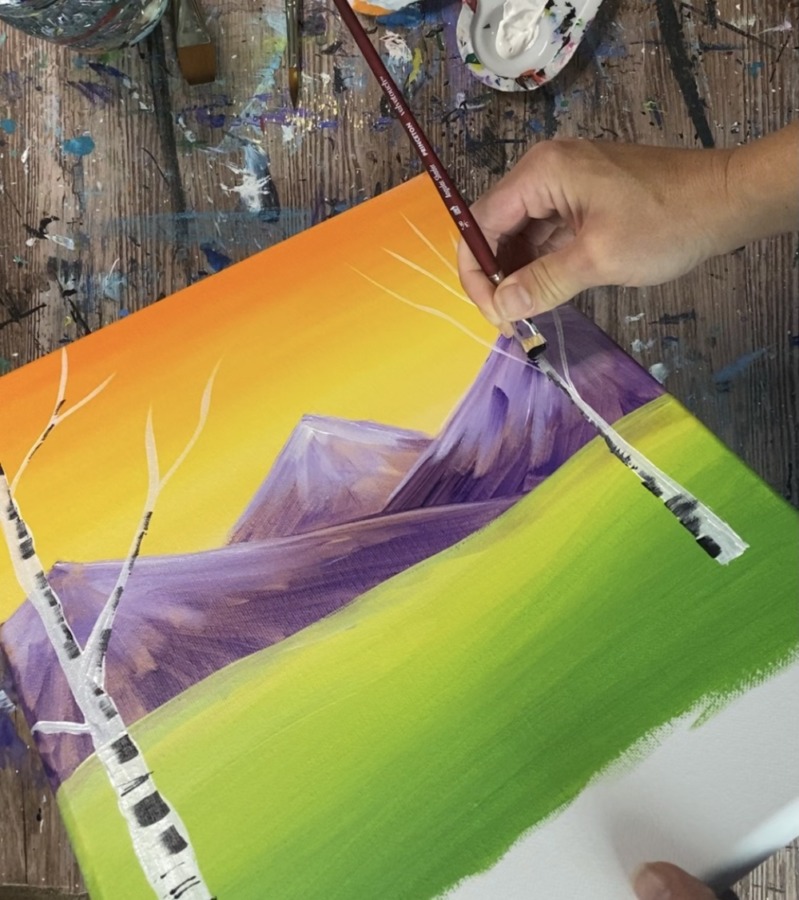
4. Paint The Trees
Wait for the green on your land to dry before doing this step. Load your palette with titanium white. Use the 3/8″ angle brush to paint the tree.
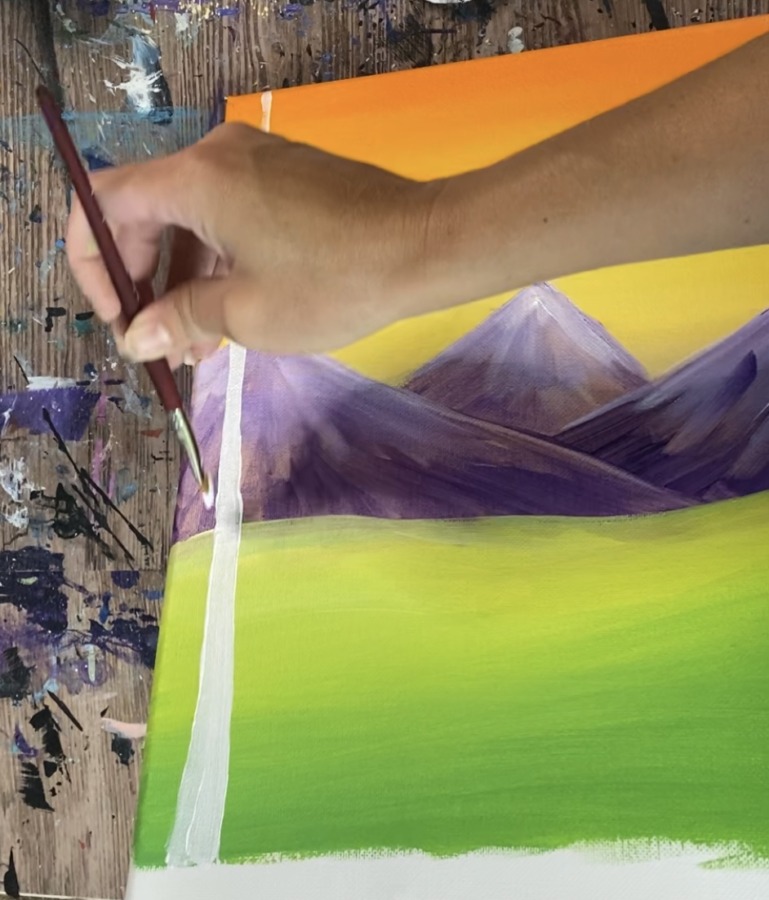
Paint a tree trunk so that it is slightly thicker on the bottom and gets thinner at the top.
Then use the tip of your brush to paint thin branch lines.
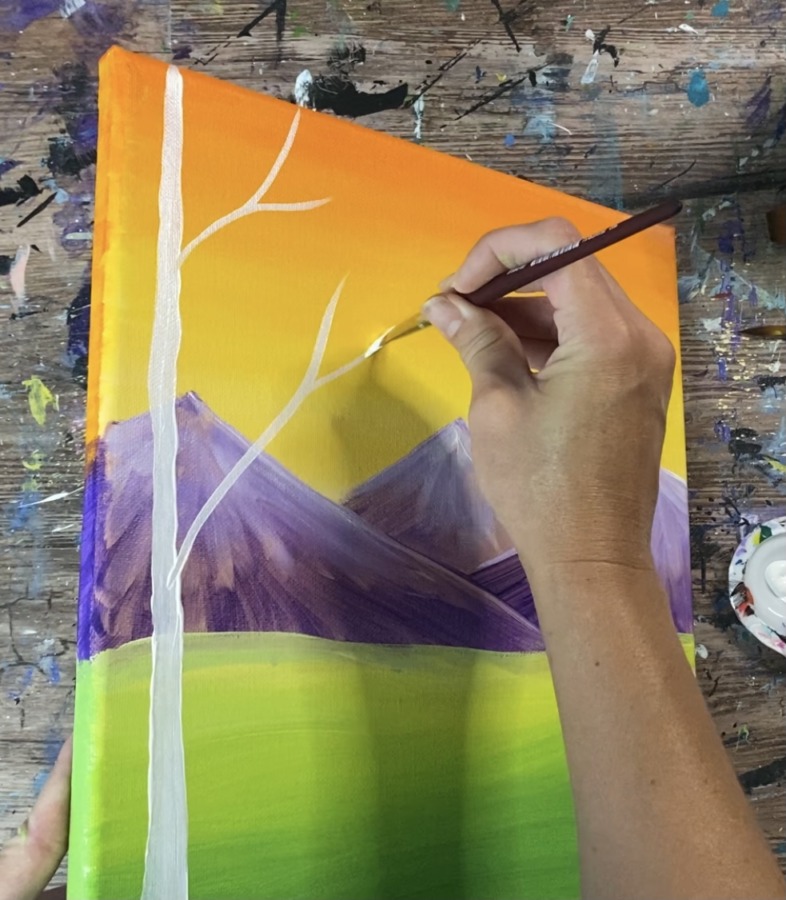
Paint another smaller tree that starts in the middle right side of the landscape. This tree does not go all the way to the top of the canvas and stops in the middle of the sky.

Then load your palette with “mars black”. Load a small amount of black on the tip of your angle brush. Paint the marks of the aspen/birch trees. Gently drag your strokes horizontally from right to left. Paint various marks up the tree.
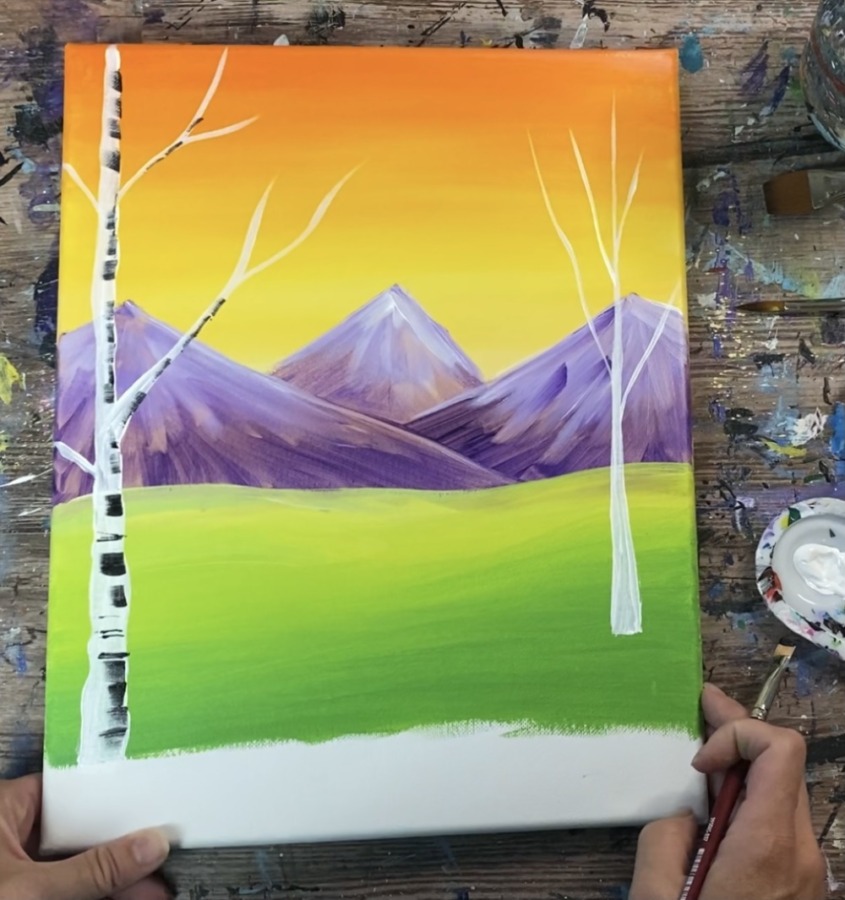
Do the same thing for the tree on the right. Tip: use the very tip of your brush to create smaller marks in smaller areas of the tree branches.
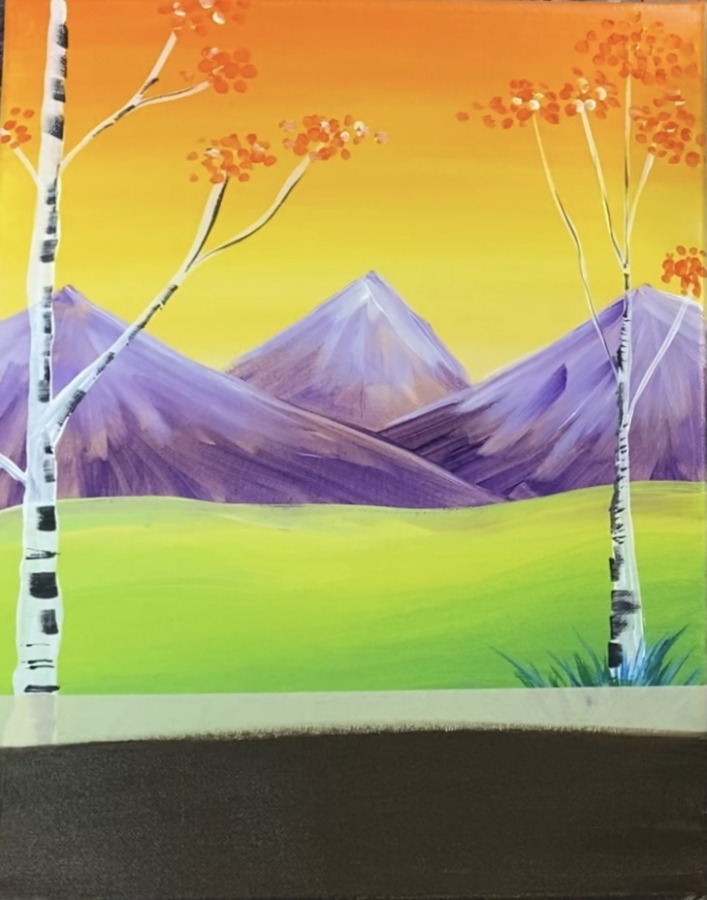
5. Paint The Grass
Use the color primary blue mixed with a small amount of yellow to create a blue-green color (about 5 parts blue to 1 part yellow). Use the tip of your brush to paint grass blades on the base of each of the trees. Add a little white to give it “color variation”.
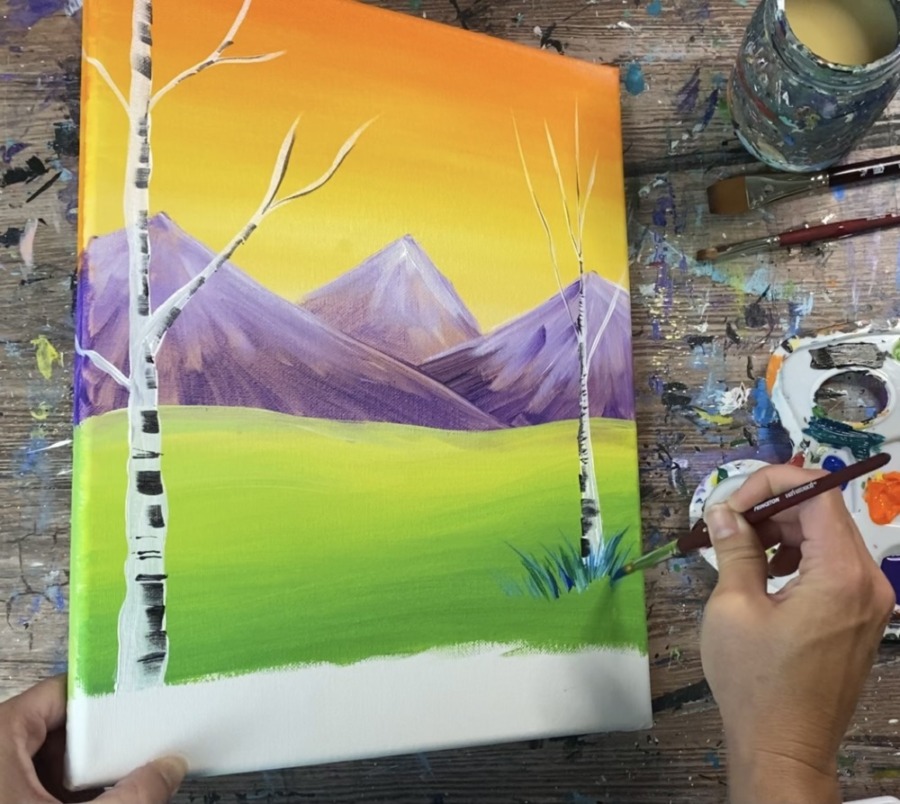
Just use the tip of your brush to paint loose angle lines to represent the grass blades. Only paint the grass at the base of each tree. You do not need to paint grass all throughout the landscape.
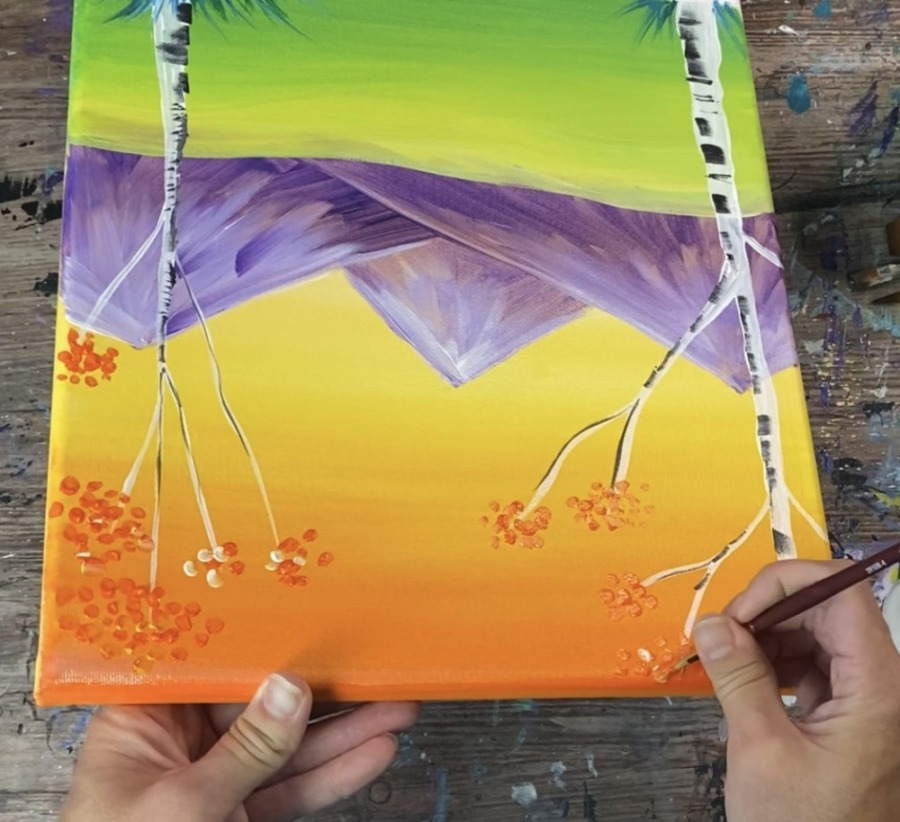
6. Paint The Leaves
Use your round brush and the color cadmium orange hue to paint small circle dots on the tips of the branches. “Stipple” your brush to create the dotted leaf effect.
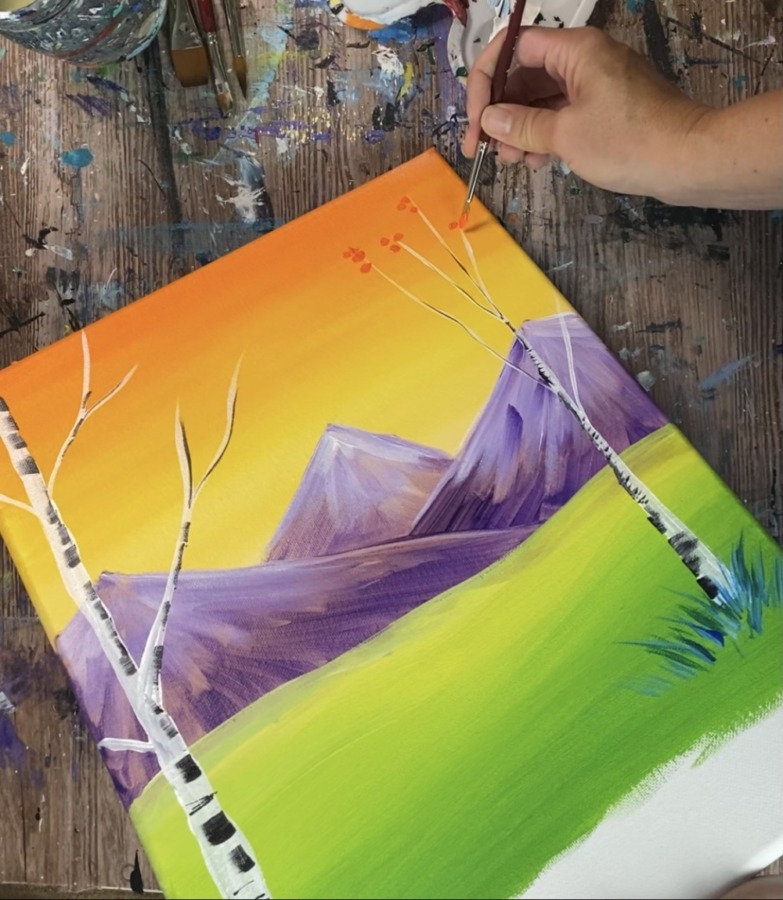
Tip: add a little white into the orange so that some of the leaves have a little more contrast against the orange sky.

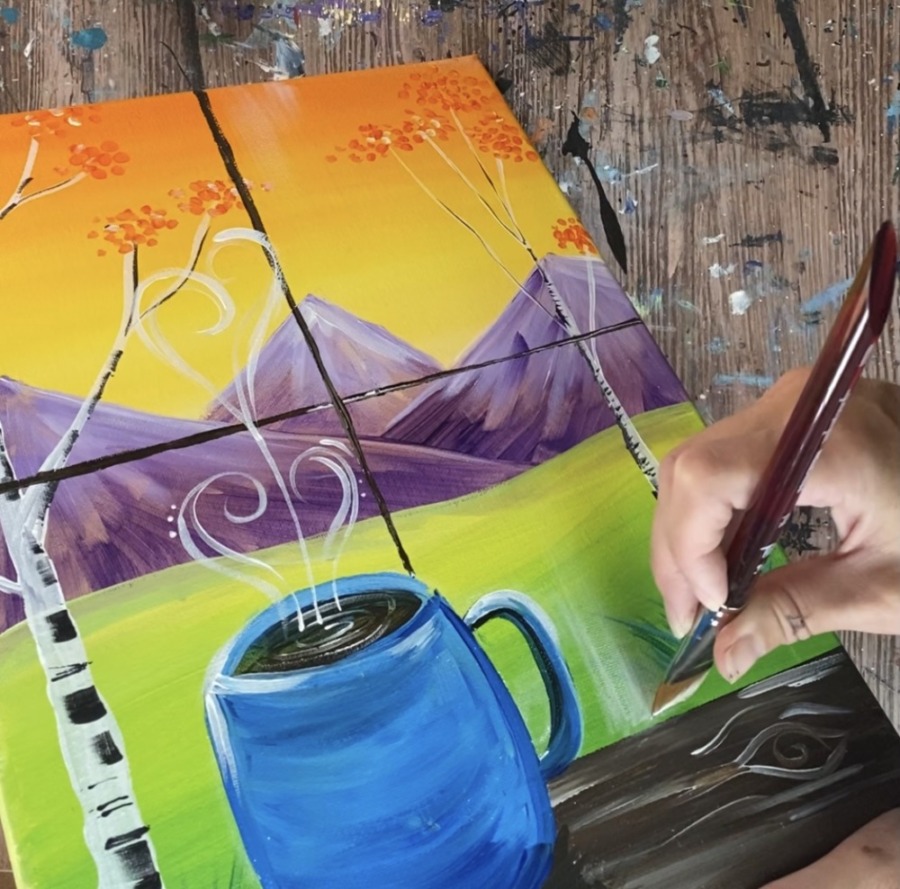
7. Paint The Table/ Ledge
Use a t-square ruler and masking tape to define your table/ledge area. Position your tape so there is about 2 inches space to paint the ledge.
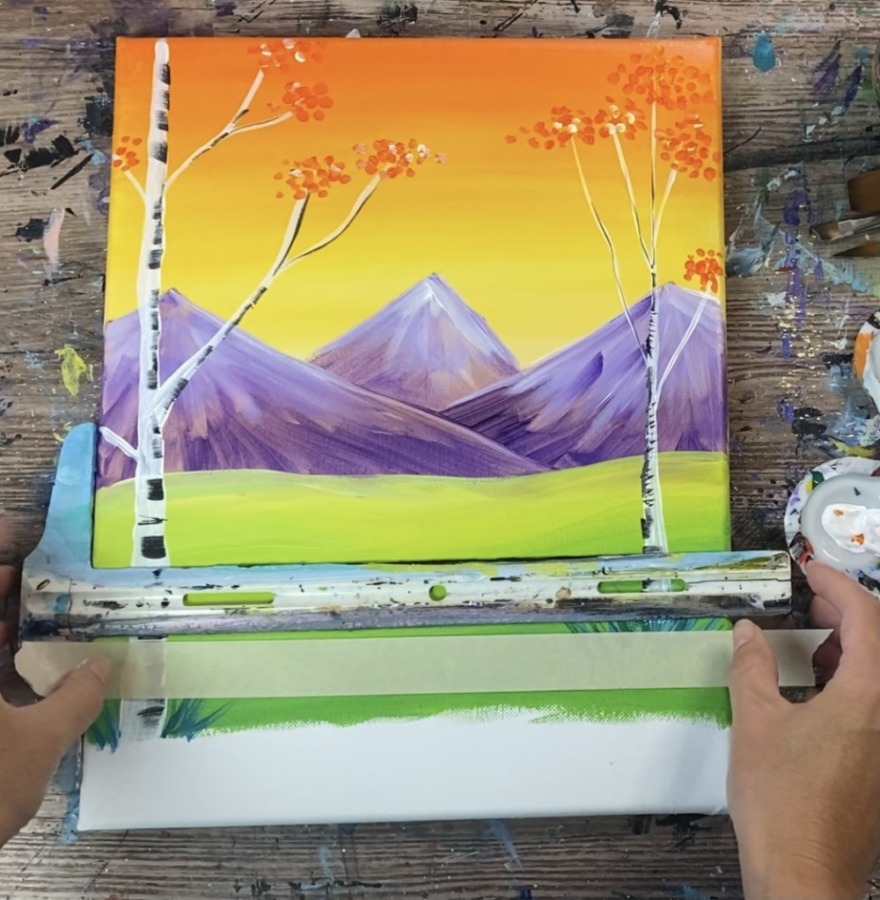
Use your 3/4″ flat wash brush to paint that area a solid raw umber (dark brown).
Use your 3/4″ flat wash brush to gently blend some white with the brown to create a woodgrain “two toned” look in the wood. Let the white gently blend with the brown but not all the way.
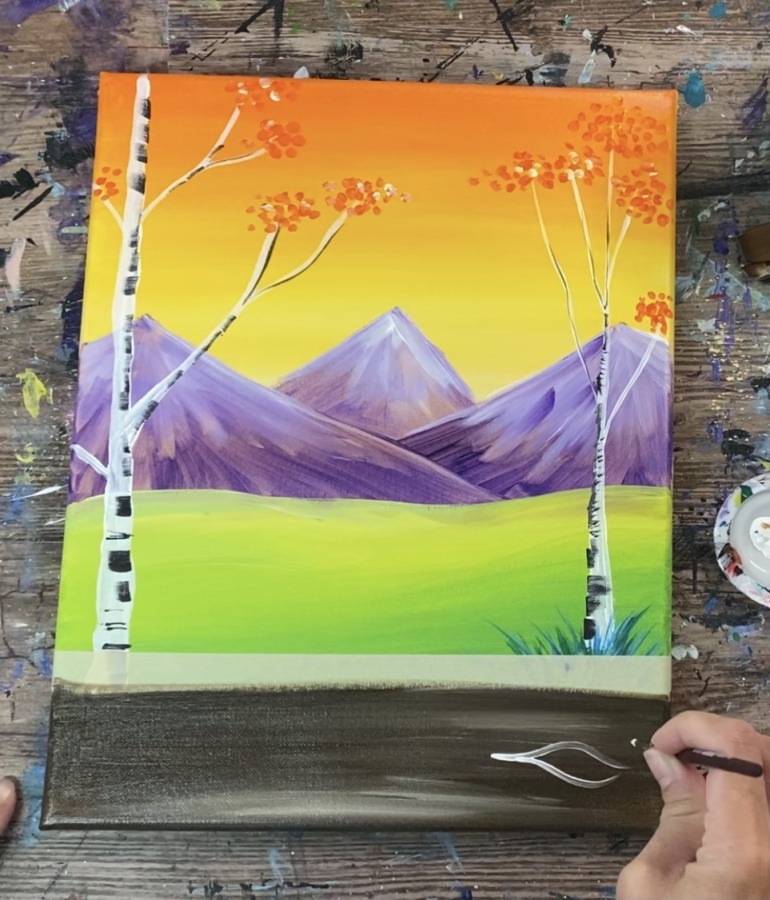
Then use your #4 round brush to gently paint wood grain texture. Load your brush in the titanium white and let it blend with the brown that is still wet on the canvas. Paint a “cat eye” shape for a wood knot.
Then loosely paint more horizontal wood grain lines with the white and use your #4 round brush. If the white is too bright, you can mix some brown into it to create a light brown.
8. Draw The Coffee Cup
If you don’t want to draw the cup, you can use this traceable for it!

Let your brown ledge dry before doing this step. Use a piece of chalk to draw the coffee cup. Start at the bottom and draw a curved line for the base of the cup. Then draw two curved lines going upwards. Then draw an oval shape for the opening of the cup.
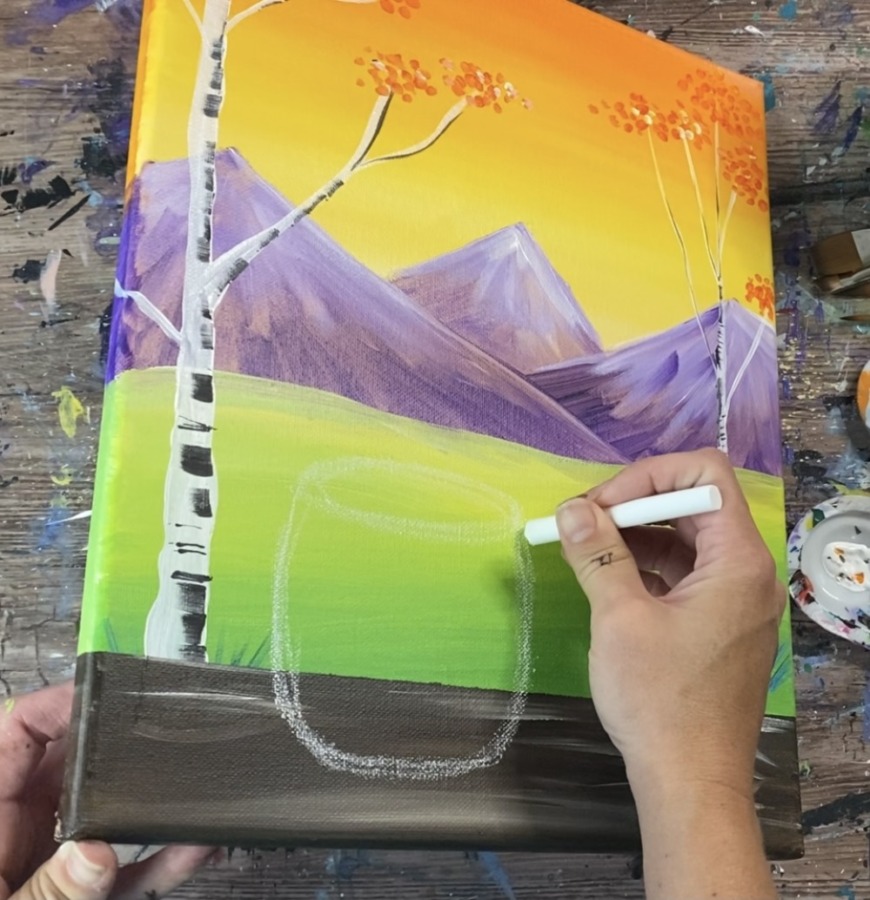
Draw the handle of the coffee cup.

9. Paint The Coffee Cup
Use the #3/8 angle brush to paint the cup (or a round brush if you prefer). Double load the brush in both titanium white and primary blue. Paint the cup using “contouring strokes”. This means the direction of the strokes are going in the direction of the shape of the cup.
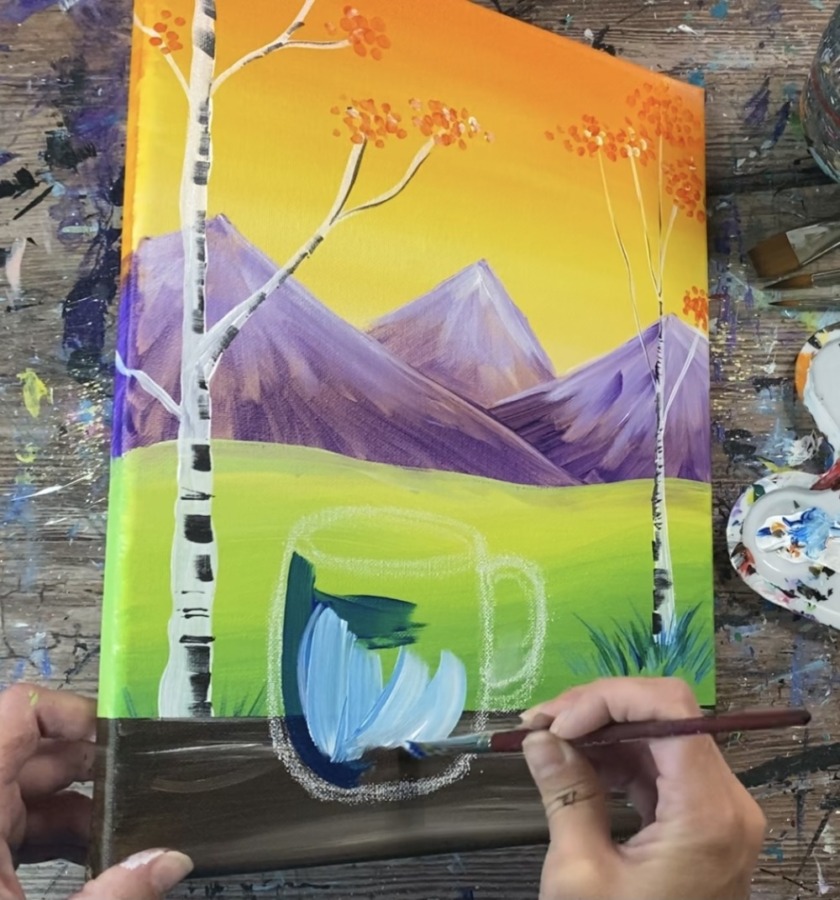
Paint the cup with this blue-white combination. The white allows the blue to have coverage and cover the colors in the background. You might need to apply a second coat if any of the background is still showing through the cup.
Use your round brush to paint the handle of the cup.
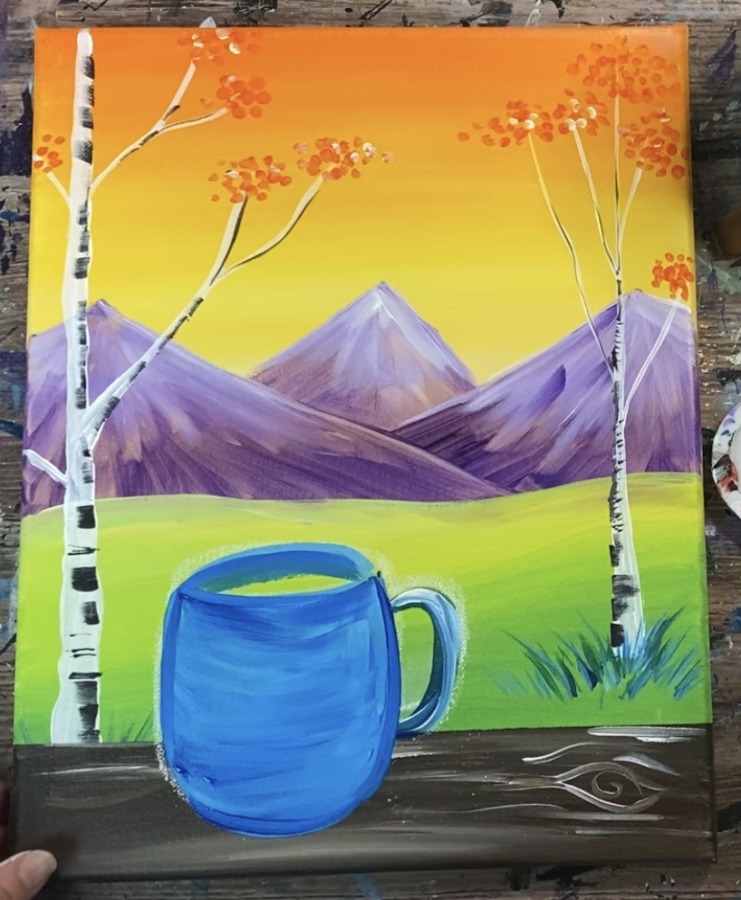
Paint the opening of the cup with the dark brown.
Add some shadow on the handle by painting primary blue on the left side. Paint some titanium white along the rim of the cup.
Paint curved stokes on the bottom of the cup with more of the primary blue to make it appear darker on the bottom.
Then paint a shadowy area under the cup with a layer of raw umber paint. Use your round brush to paint curved strokes for the shadow under the cup.
10. Paint Window Pane
Use your t-square ruler to paint a horizontal line in the middle of the canvas. Line up your ruler so that your line will be horizontal. Use your #4 round brush and raw umber to paint the horizontal line.
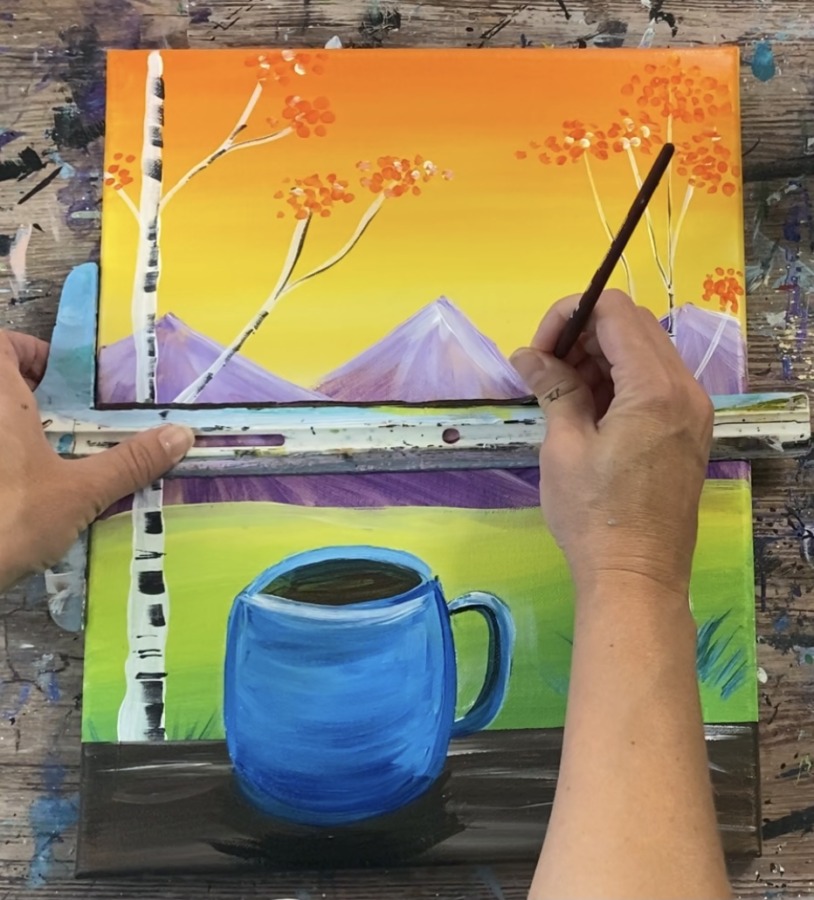
Then paint the vertical line using your t-square ruler lined up vertically.
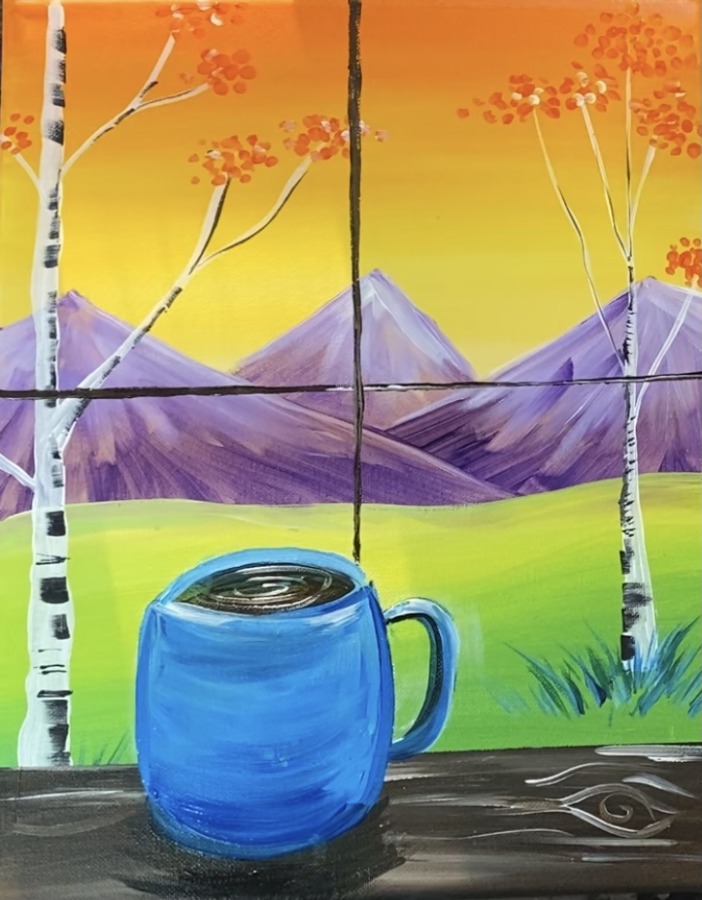
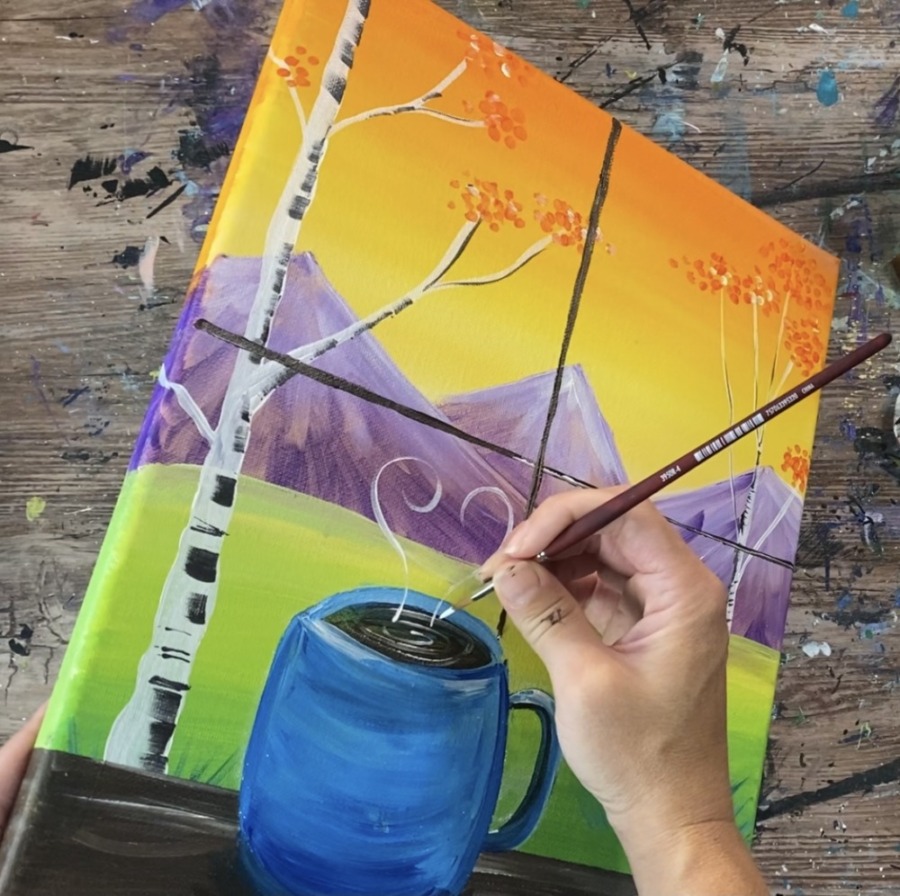
11. Paint Coffee Steam
Use your #4 round brush to paint white swirled lines on the brown coffee. You can also mix white with brown to make a light brown and make the swirled lines with that color.
Then use your #4 round brush and titanium white to paint the steam of the coffee cup. Paint swirled lines extending from the opening of the cup.
12. Paint Window Glare
To paint the window glare, you will use your 3/4″ flat wash brush and do a “dry brush technique”. To do this technique, load a small amount of white paint on the tip of your brush. Then wipe off most of the paint off your brush. Then use the full width of the brush and stroke upwards.
This creates a translucent window glass glare over your landscape. Do this in various areas around your window.
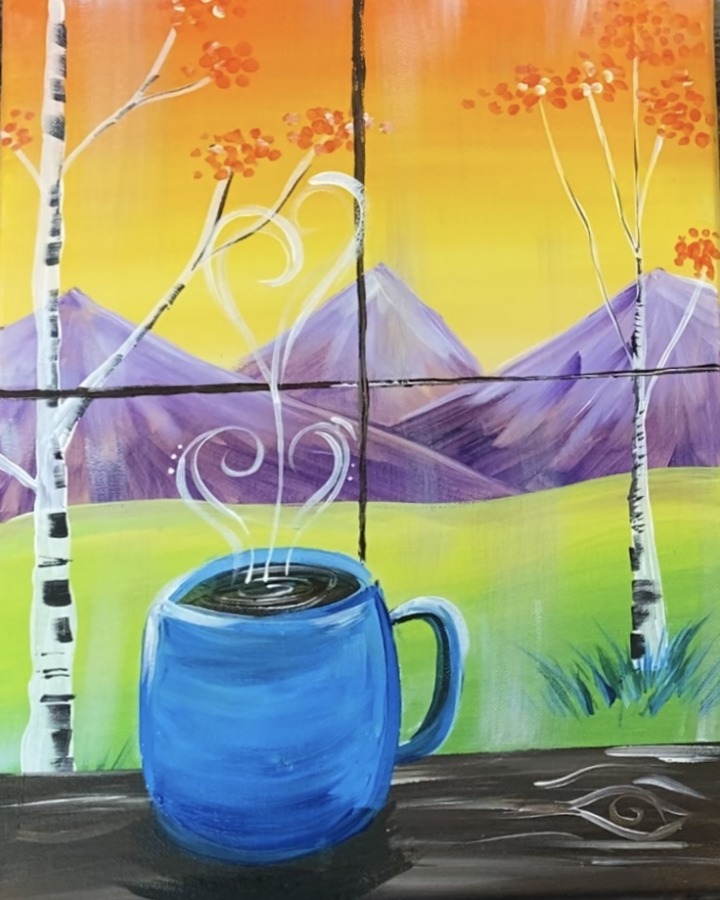
Finished!
Share Your Art Here:


I did not find a place to send you a message regarding the fall red wagon tutorial. Is there a traceable for this wagon?