

Would you like to save this?
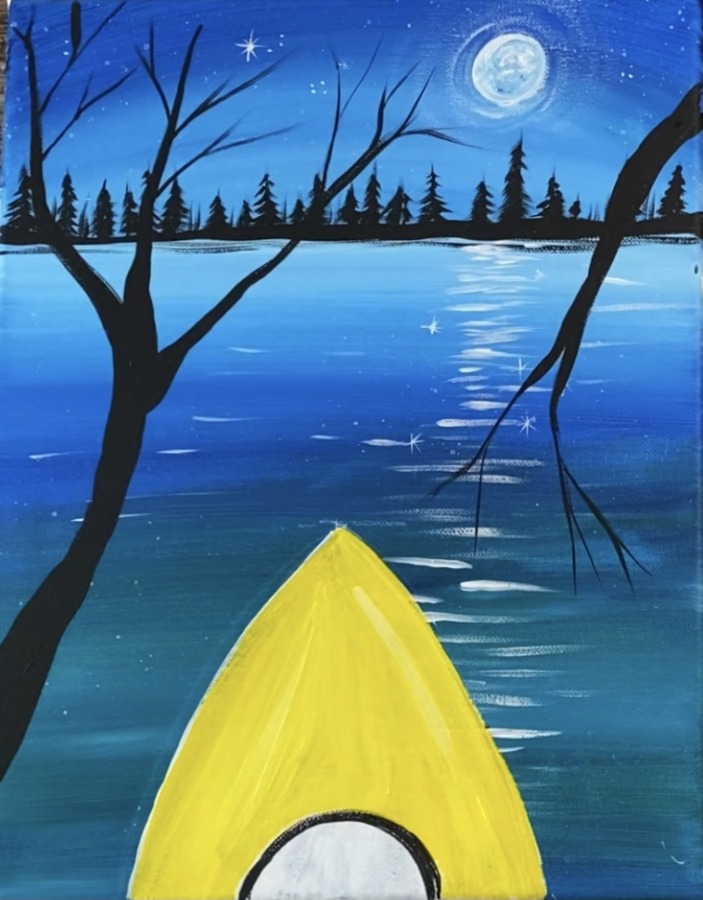
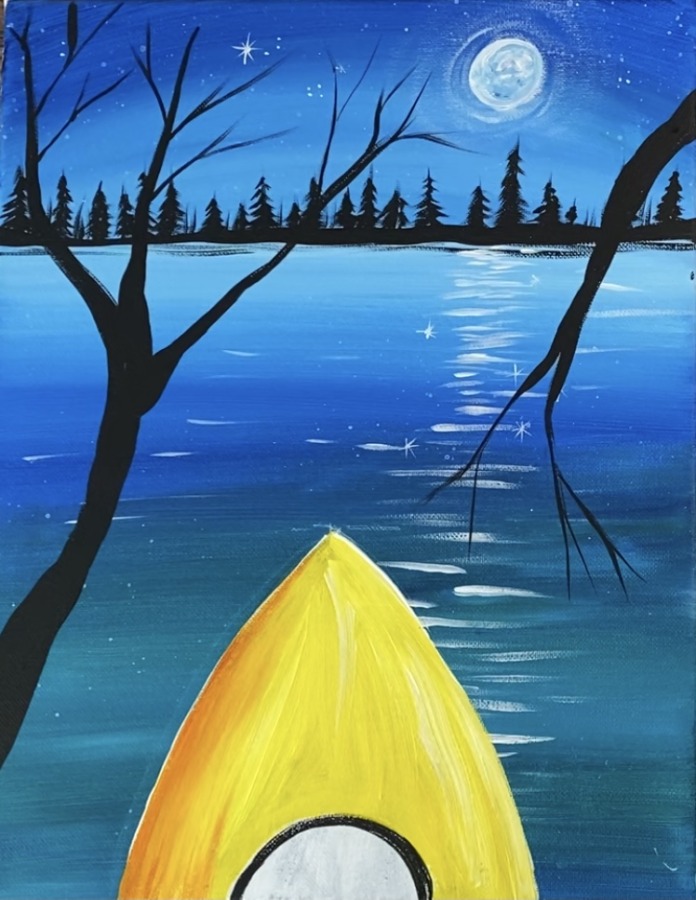
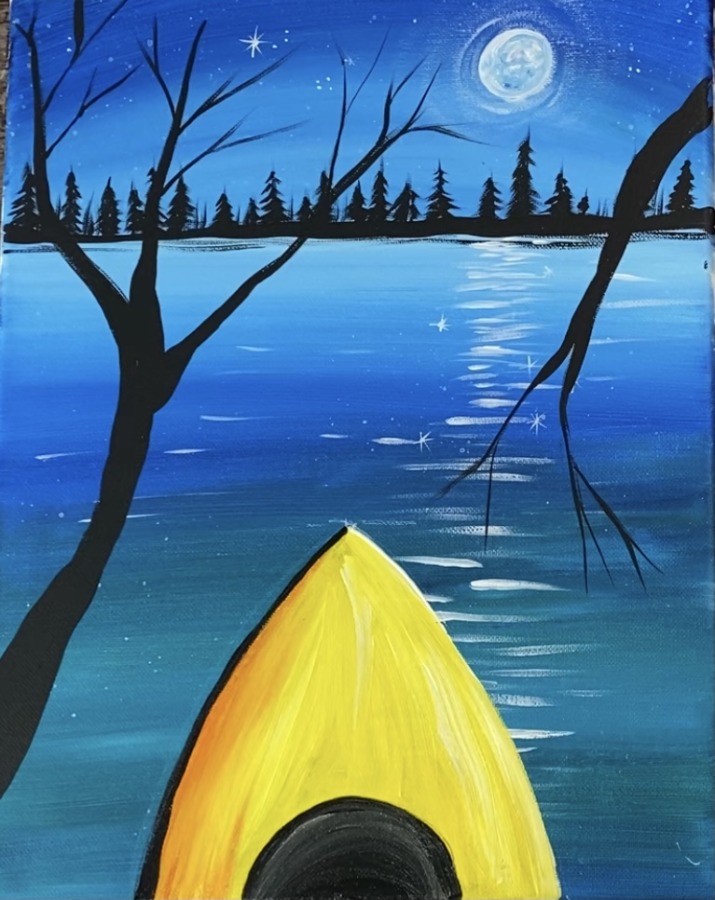
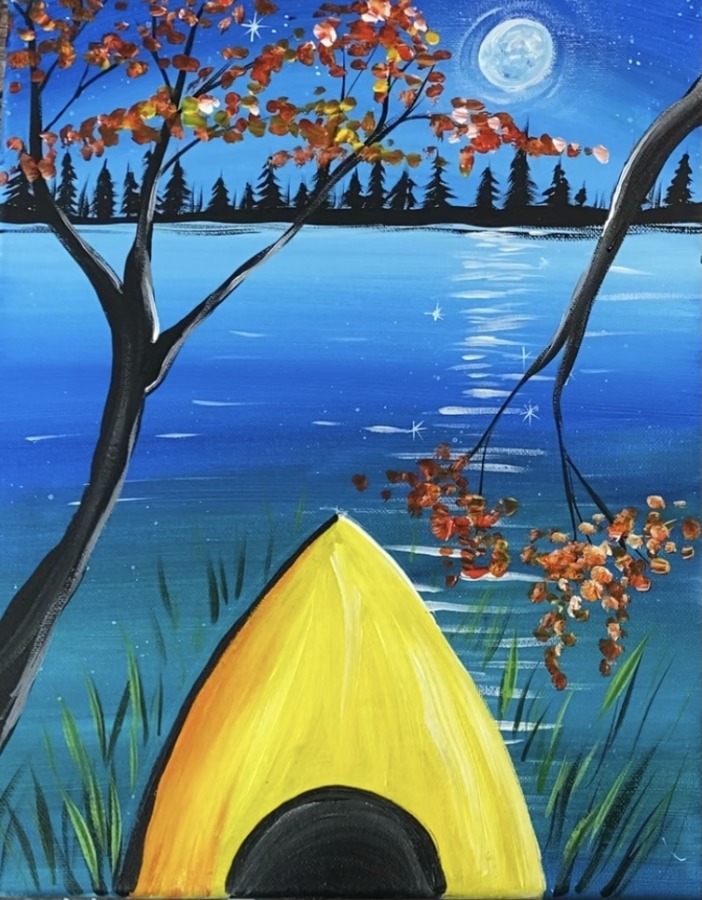
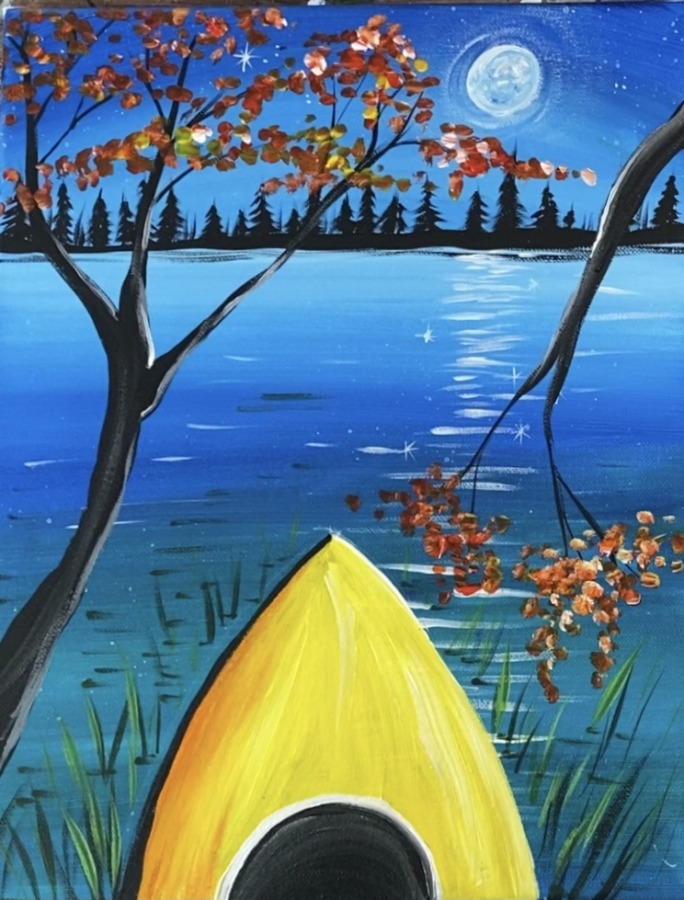
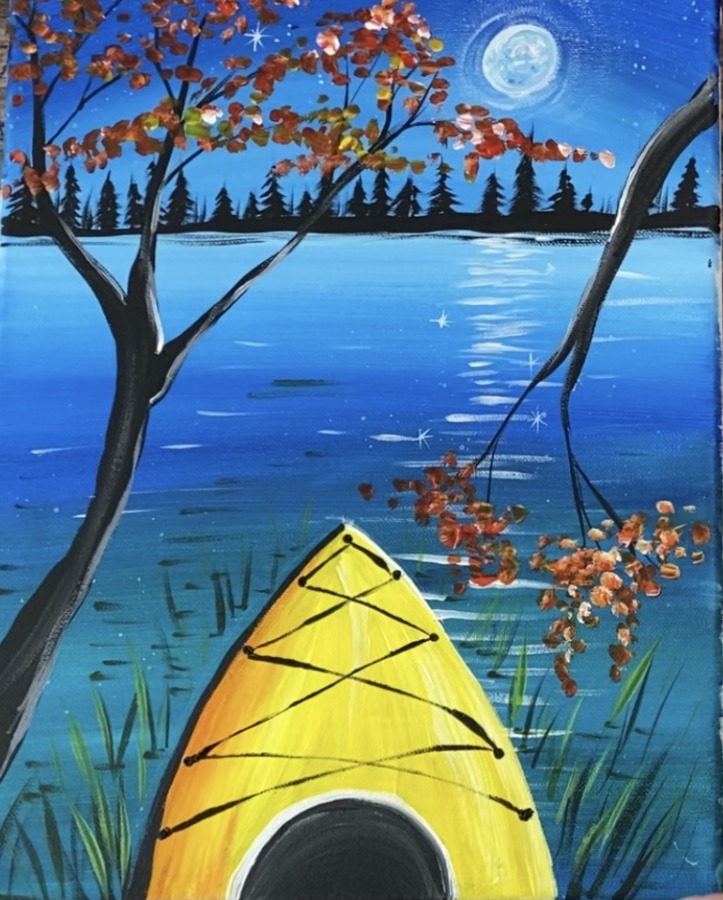
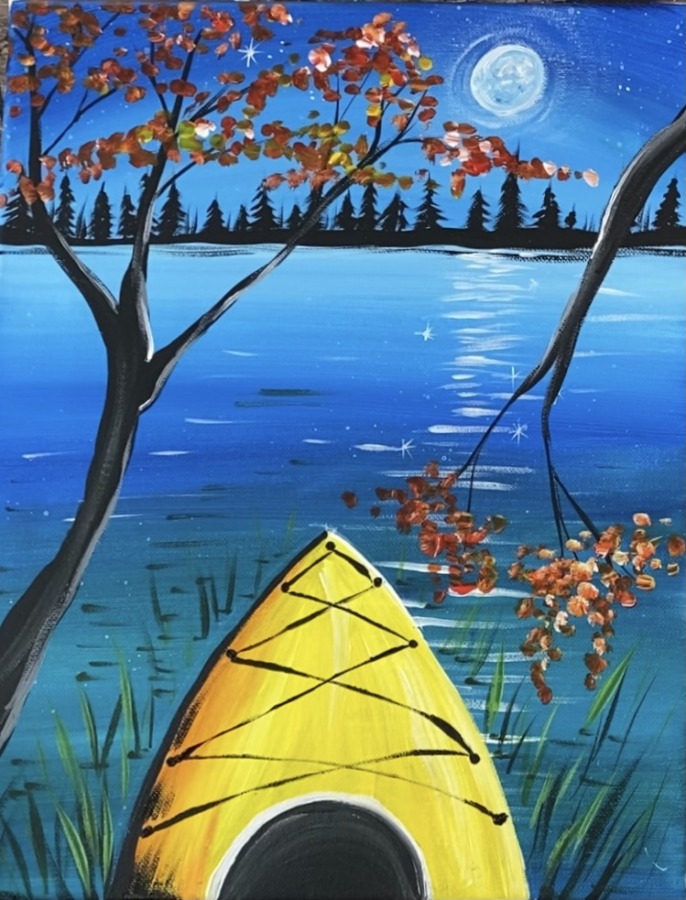
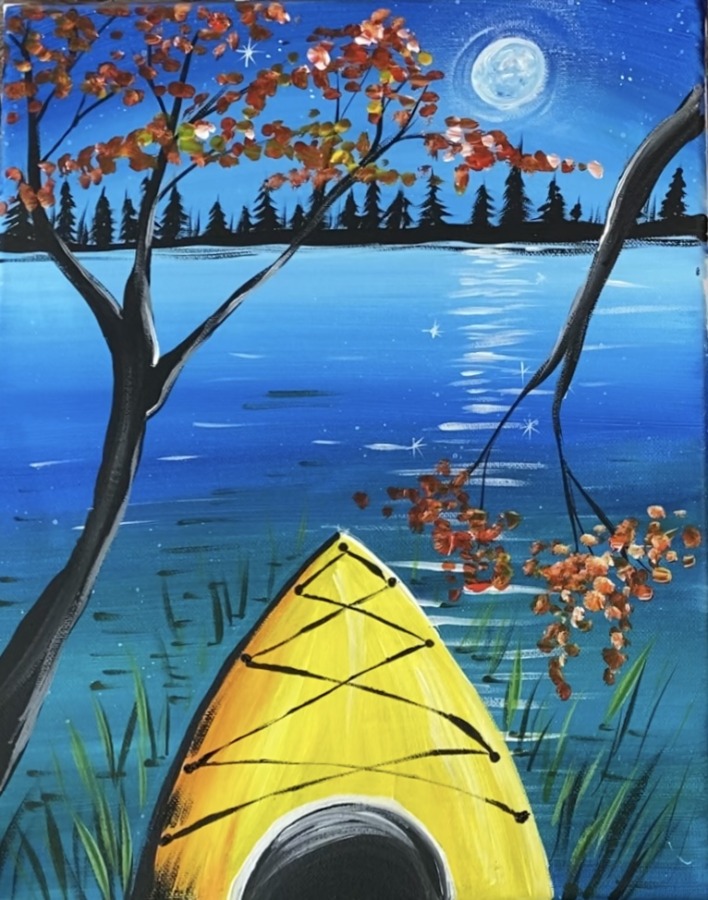
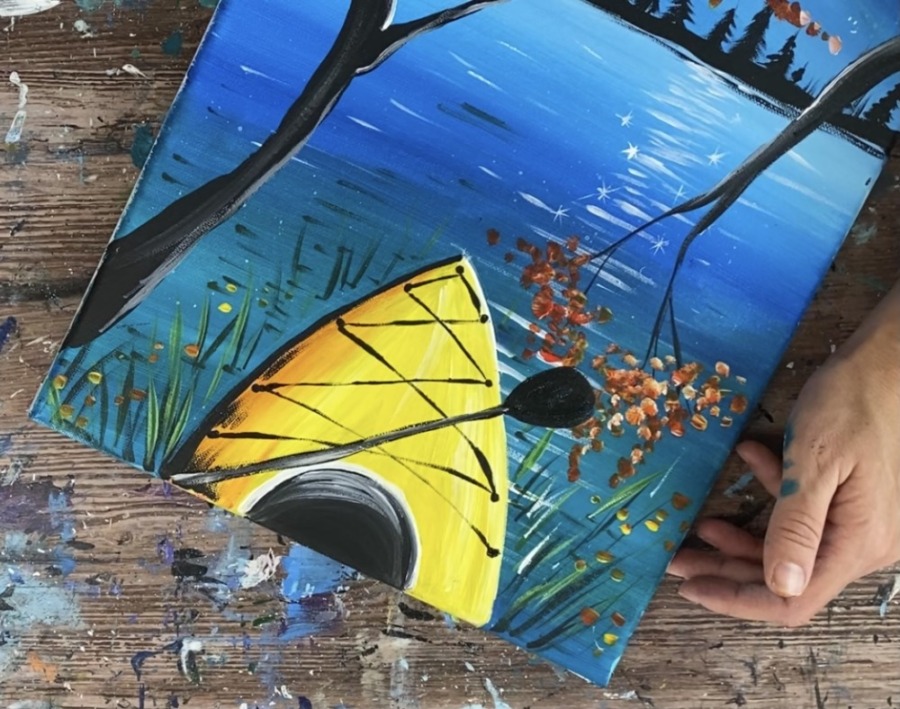
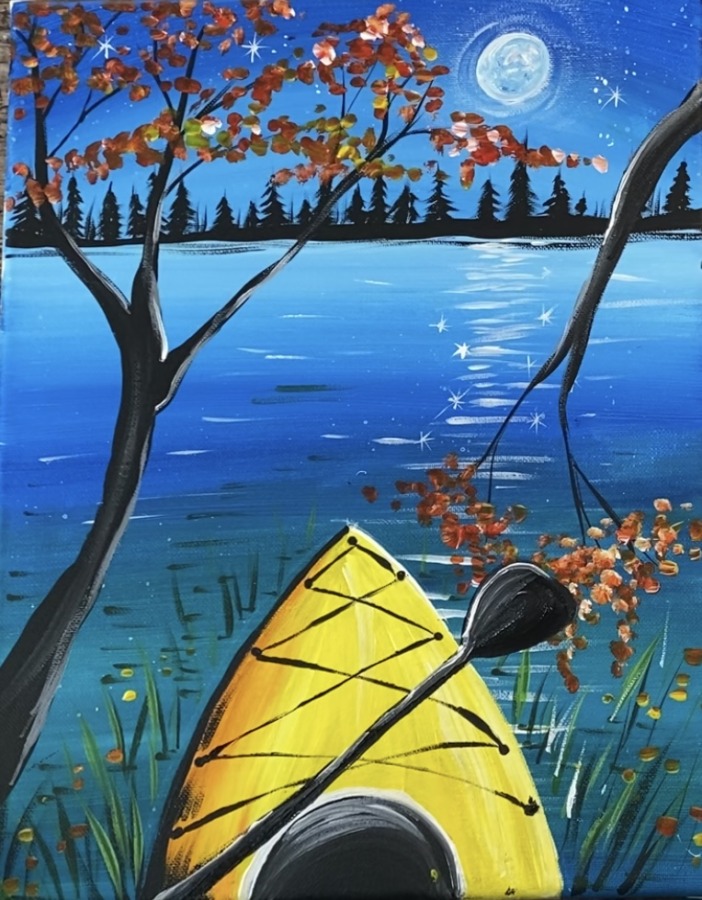
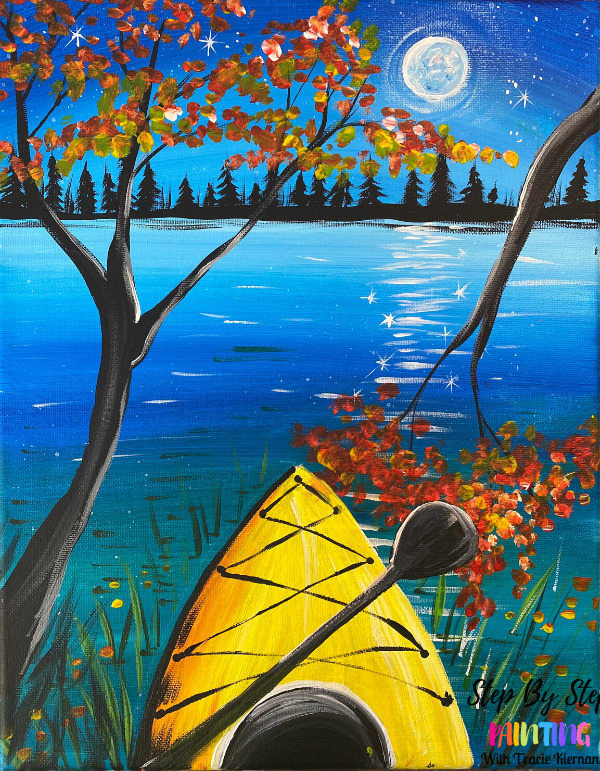
Learn how to paint a sparkling night landscape lake scene with a yellow kayak, glowing full moon and fall foliage!
This painting has a unique perspective! It is a first person point of view riding in the kayak!
The following tutorial is for beginners and will guide you through each step!
Enjoy and happy painting!
Materials
Moonlight Kayak Acrylic Painting Tutorial
Learn how to paint a yellow kayak at night on a moonlit lake with fall foliage.
Materials
- Acrylic Paint
- 11 x 14 Canvas
- Brushes
- White Chalk Pen (optional)
- Ruler or Straight Edge
Brushes
- 3/4" Flat Wash
- #12 Bright Brush
- #8 Round Brush
- #4 Round Brush
- 10/0 Liner Brush
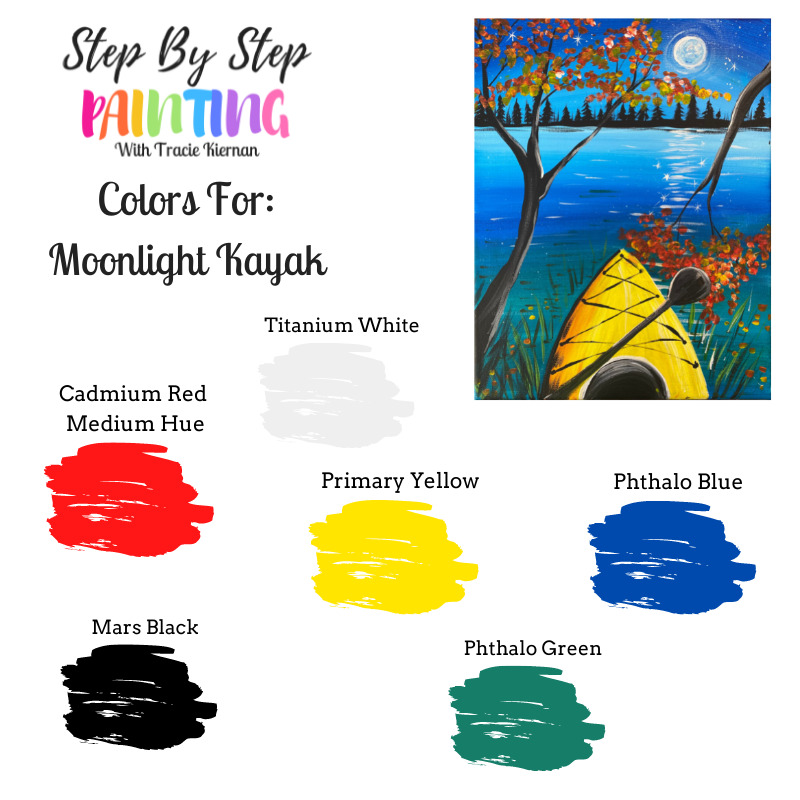
Colors
- Cadmium Red Medium Hue
- Primary Yellow
- Phthalo Green
- Phthalo Blue
- Mars Black
- Titanium White
Instructions
- See tutorial on www.stepbysteppainting.net for full detailed instructions!
Color Palette
Using Craft Paints?
Try substituting with these Apple Barrel Craft Paint Color Suggestions:
- Black
- Flag Red
- White
- Bright Yellow
- Bright Blue
- Holly Branch mixed with Bimini Blue (to make the green-blue color)
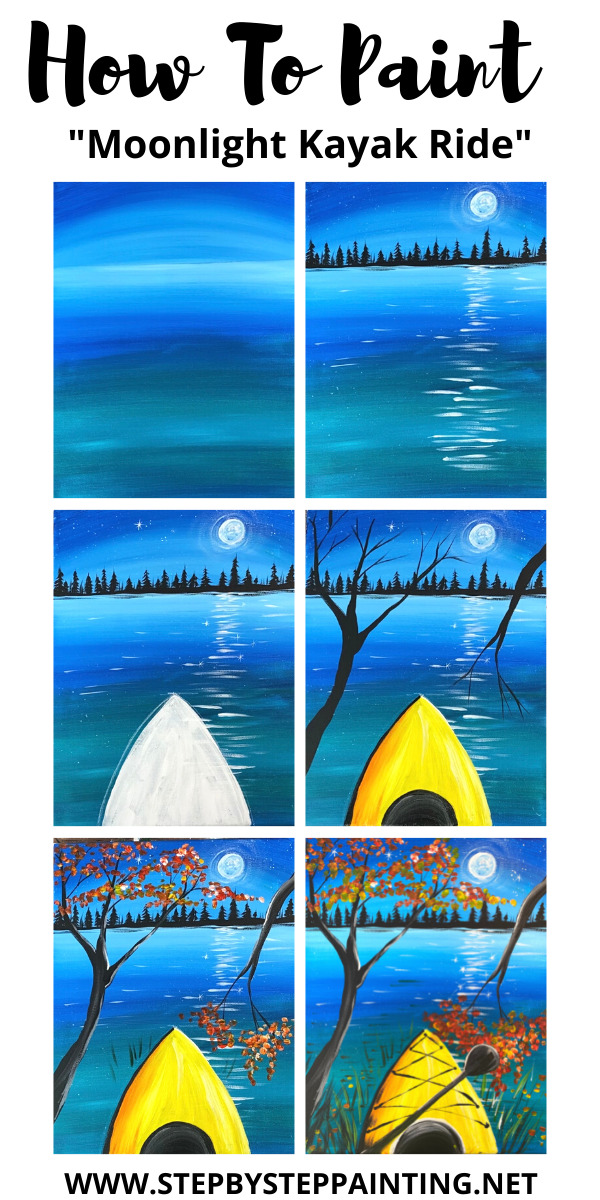
Directions At A Glance:
Video
Step By Step Directions:
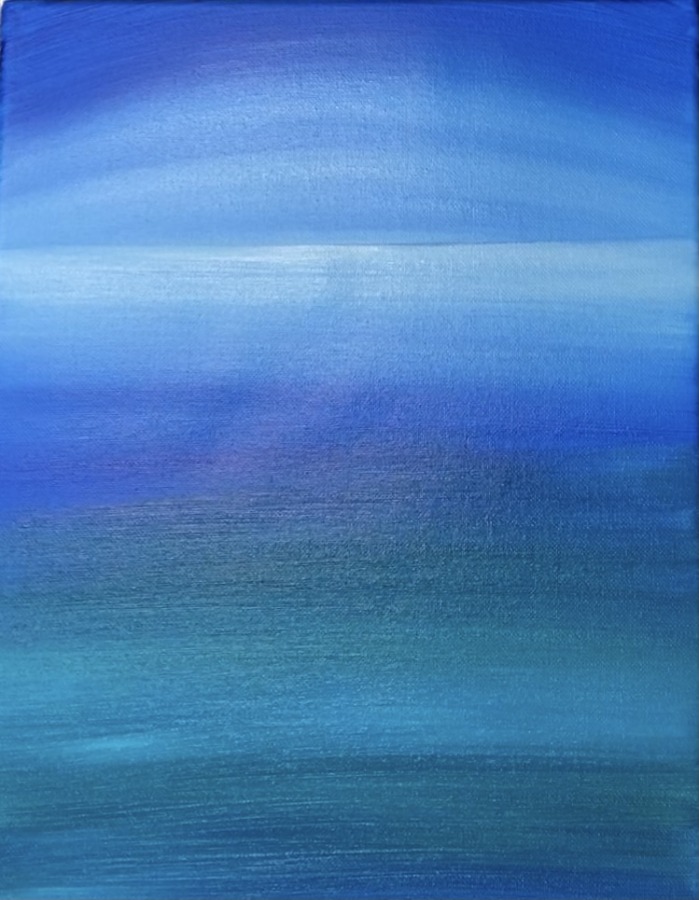
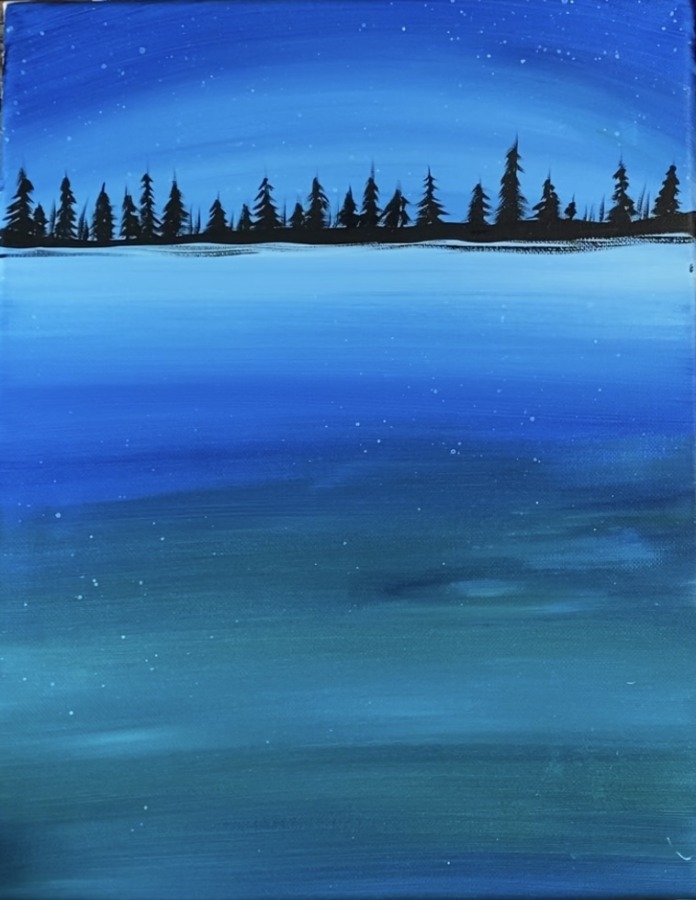
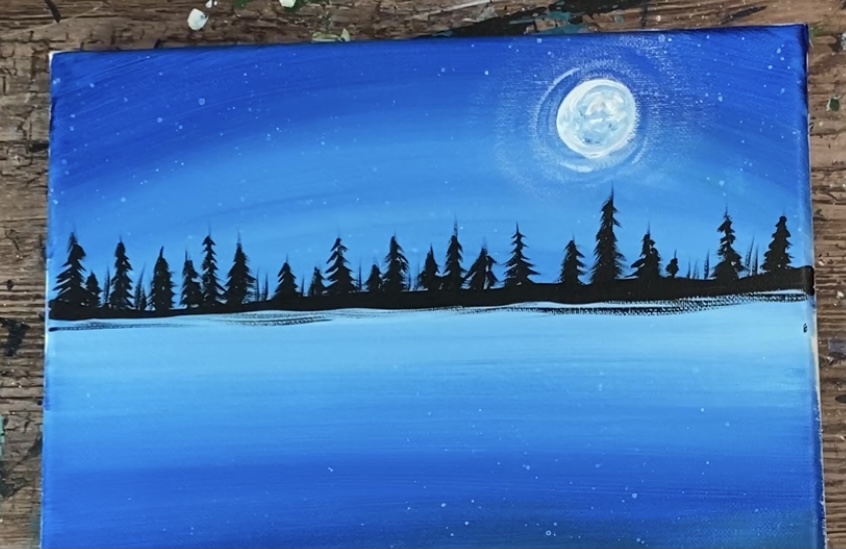
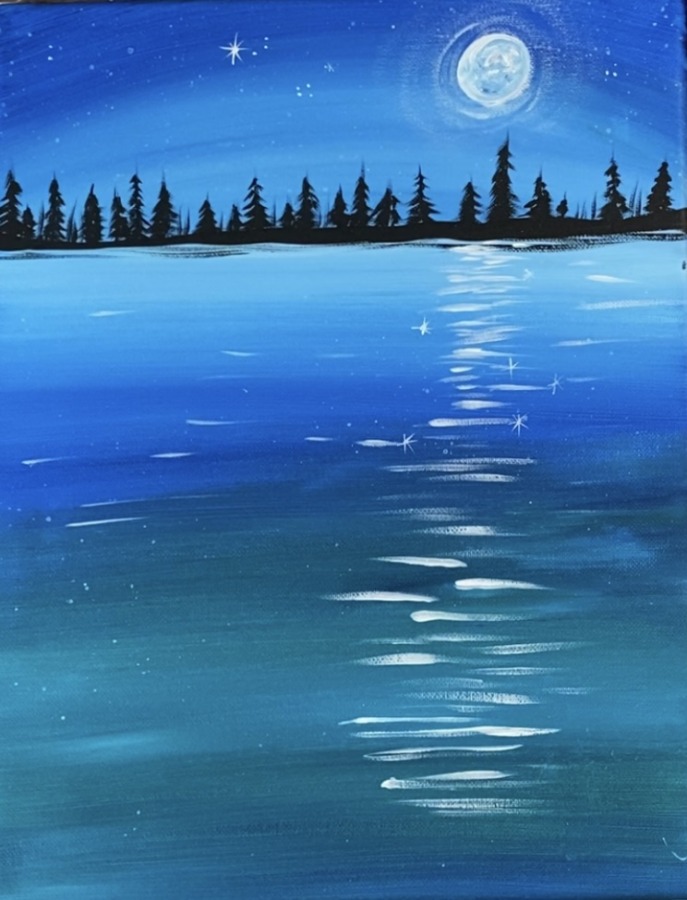
1. Paint The Sky & Water
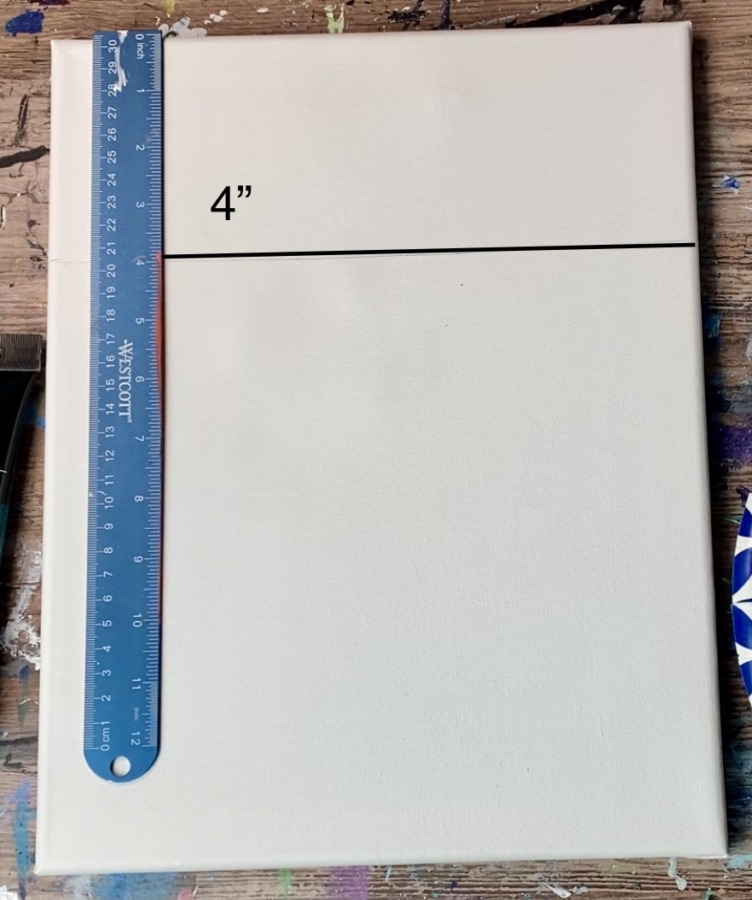
Position your canvas so that it is vertical. Then measure 4″ from the top and draw a horizontal line with a straight edge. Note: if you are using a larger canvas, estimate a little further down.
Next paint the sky. Load your palette with phthalo blue and titanium white. Use a 3/4″ flat wash brush. Start at the top and paint in an arc direction. Use the full width of the brush and make sure your strokes go all the way across the canvas.
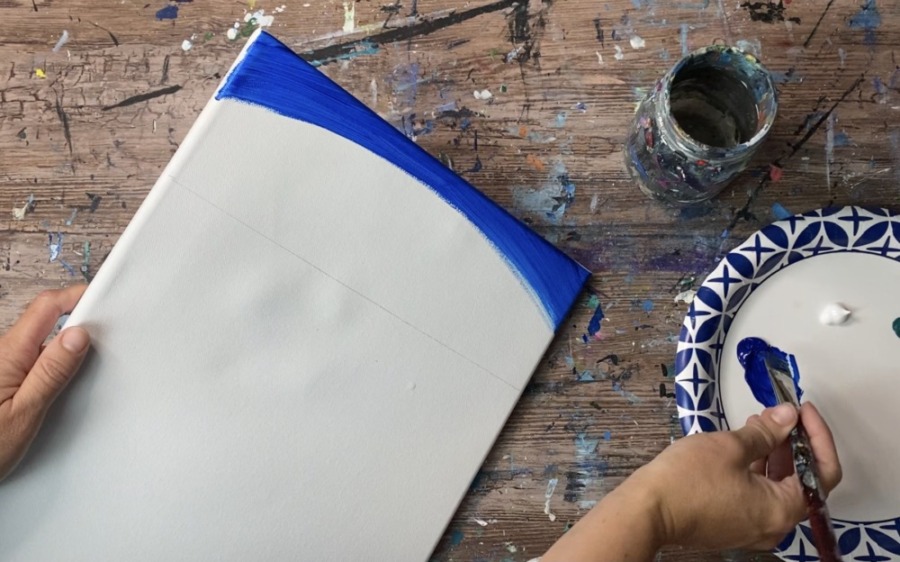
Next, load your brush (without rinsing the brush) in some titanium white. Blend the white into the blue so that it becomes lighter. Go all the way to the horizon line.
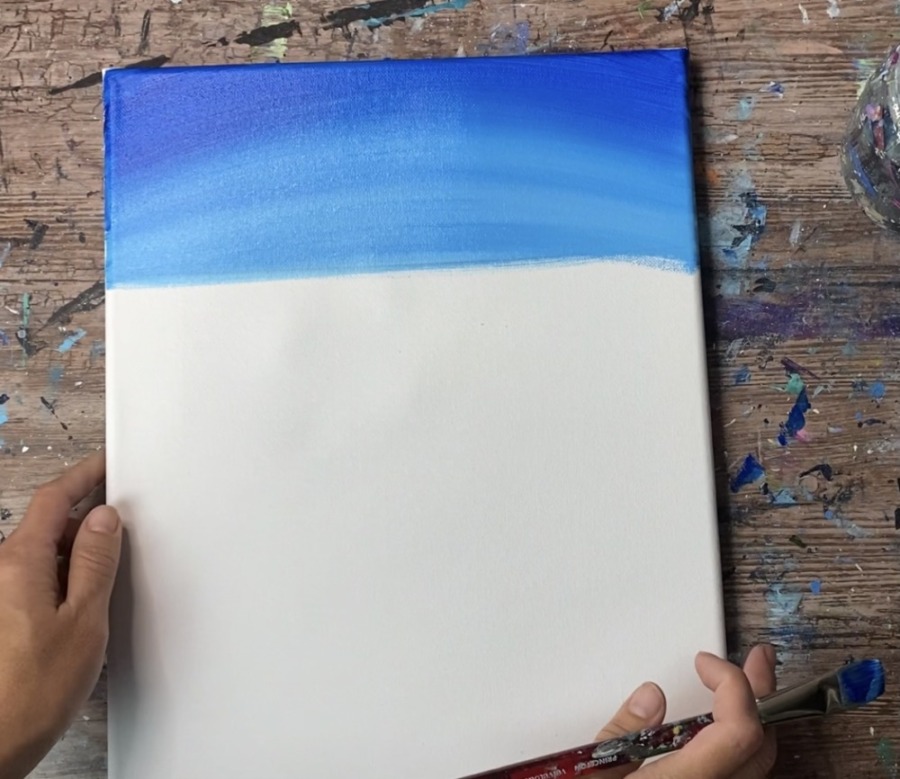
Next add a little more white to your brush and paint left and right strokes under the horizon line. This should be a very light blue.
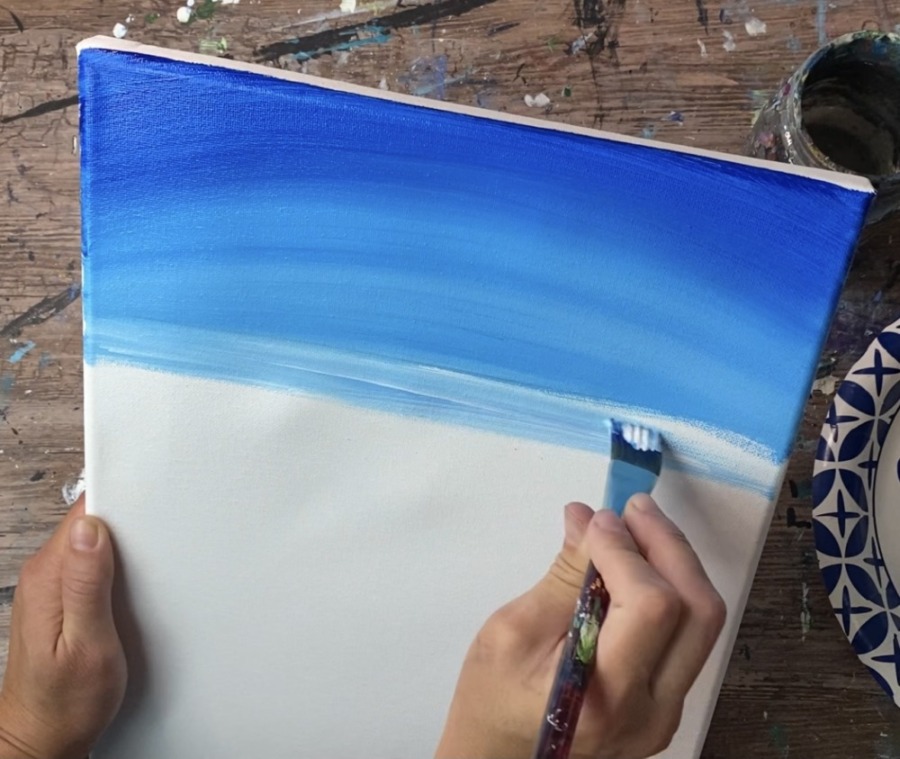
Paint the water using left and right strokes. Use the full width of the brush and make sure your paint goes all the way across (not stop in the middle). Gradually add more phthalo blue to the brush so the water gets darker.
Tip: it may be helpful to rinse or dry your brush off if the colors don’t seem to be blending right.
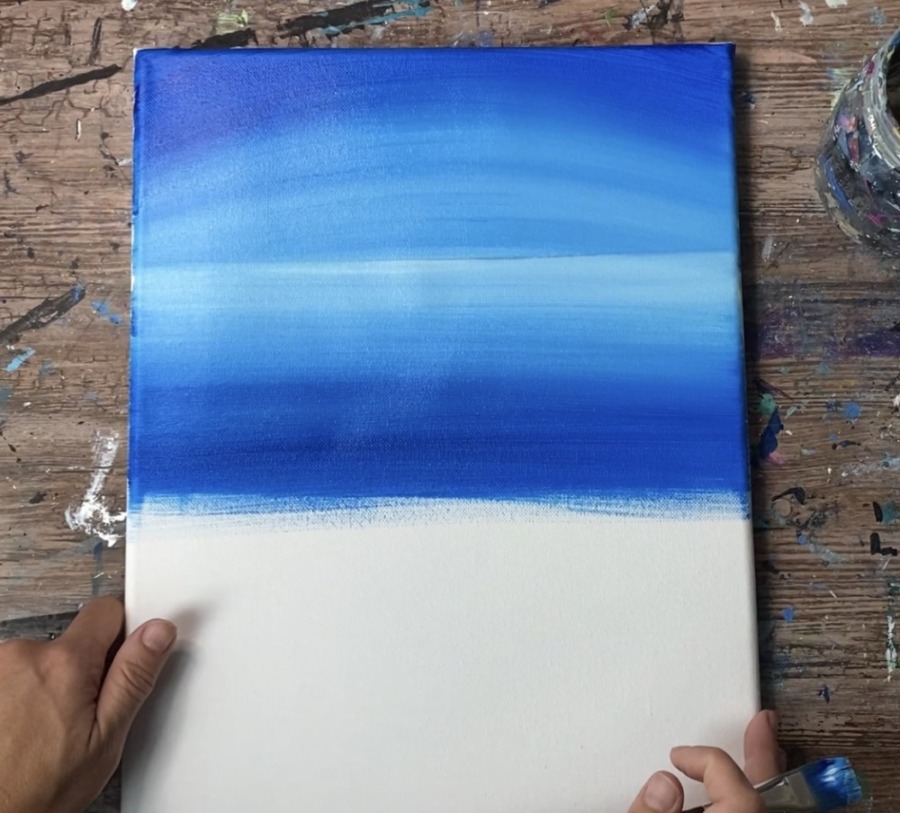
Then load your palette with phthalo green. Mix the green with the phthalo blue. It should make a dark teal color. Blend that down the canvas, blending it with the phthalo blue.
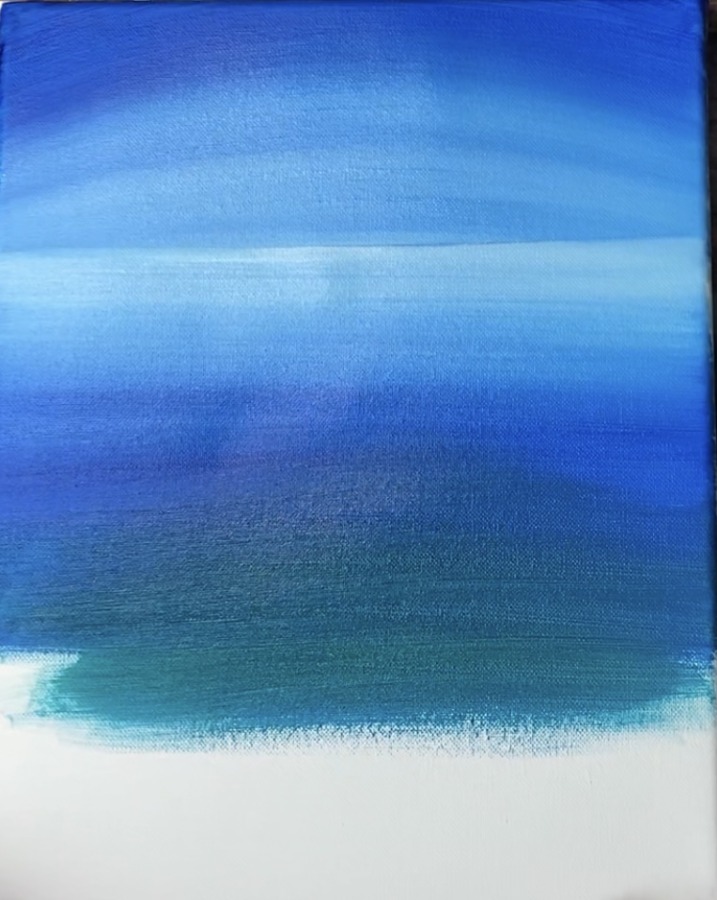
Keep adding the phthalo blue/ phthalo green combination down to the bottom of the canvas. You can add a little white into it to lighten the color up if needed.
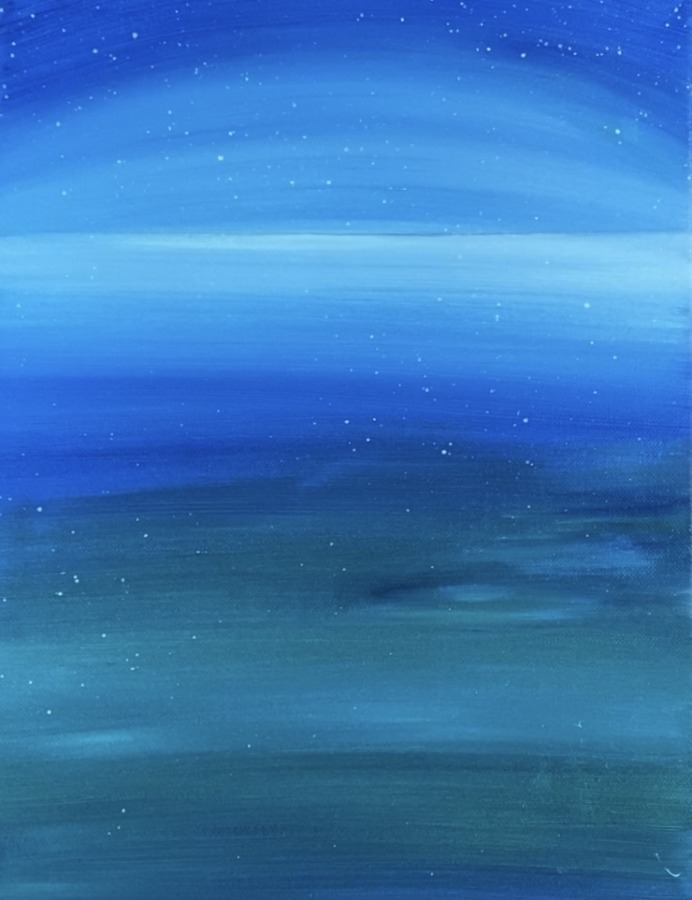
Next splatter stars on the sky and a little on the water. You can use a toothbrush dipped in slightly watered down white paint to do this effect. You can also flick a regular paint brush to do this.
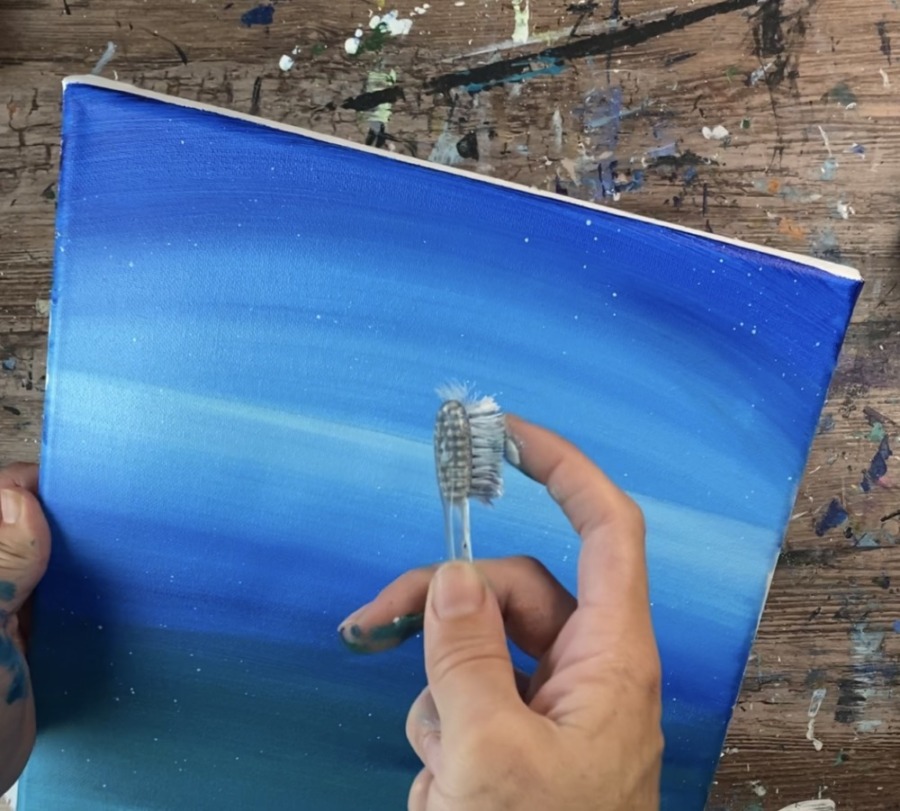
Tip: make sure you test out an area first before splattering your stars.
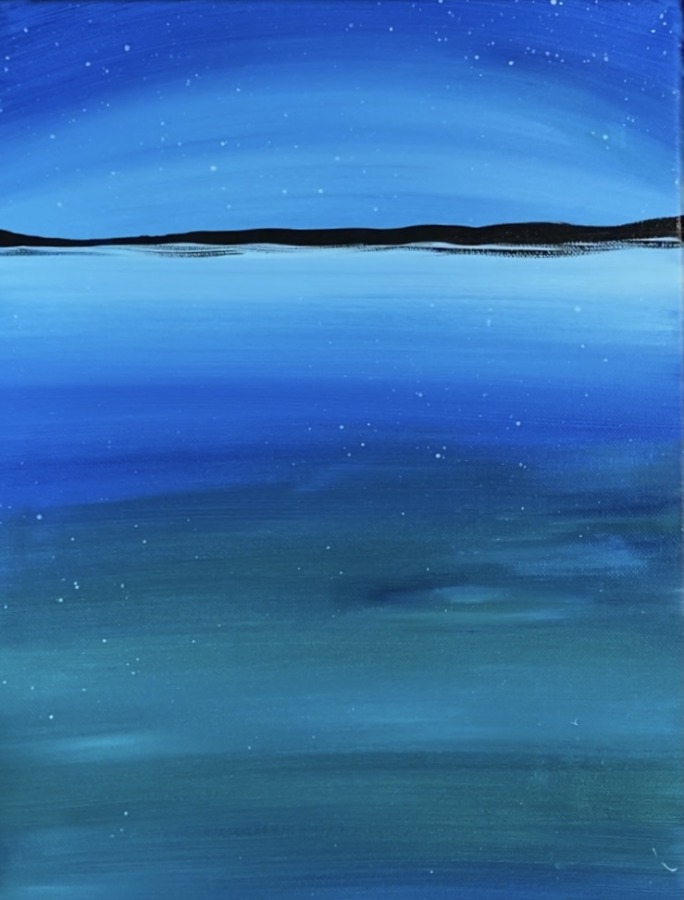
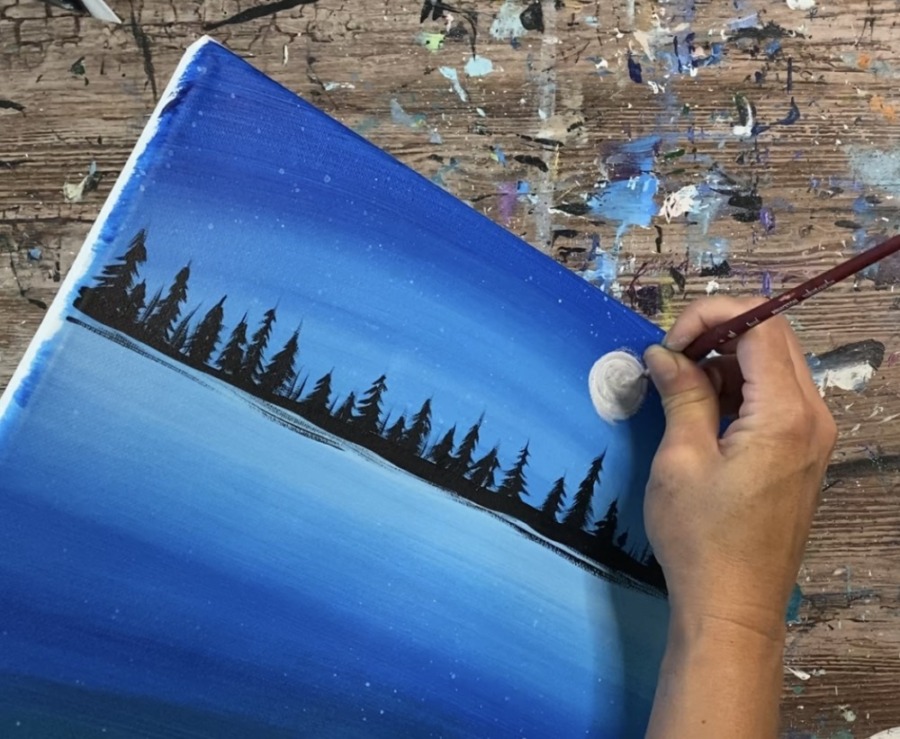
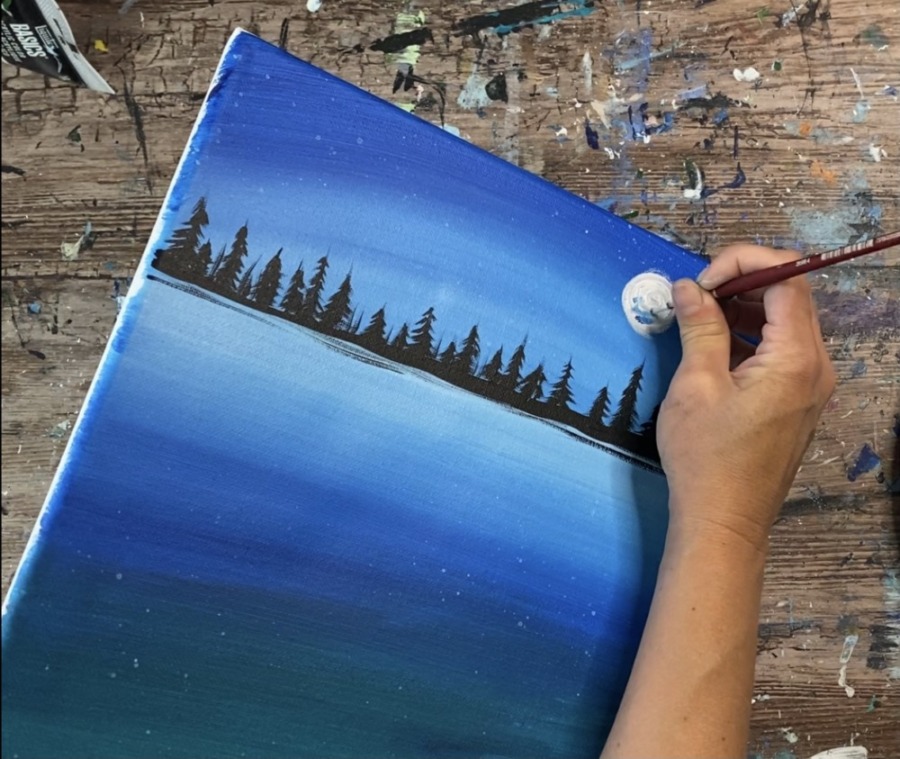
2. Paint Distant Land & Silhouette Trees
Use a #8 round brush and mars black. Slightly water down the black so that the paint will flow. Paint a low hilly land area above the horizon line. Then loosely paint reflection under the land.
Next, paint the trees. Use the tip of your round brush and mars black. Paint the center vertical line first. Then drag the branches downwards forming the conical tree shape.

Make a variety of trees across your horizon line. Some trees are taller, some shorter.
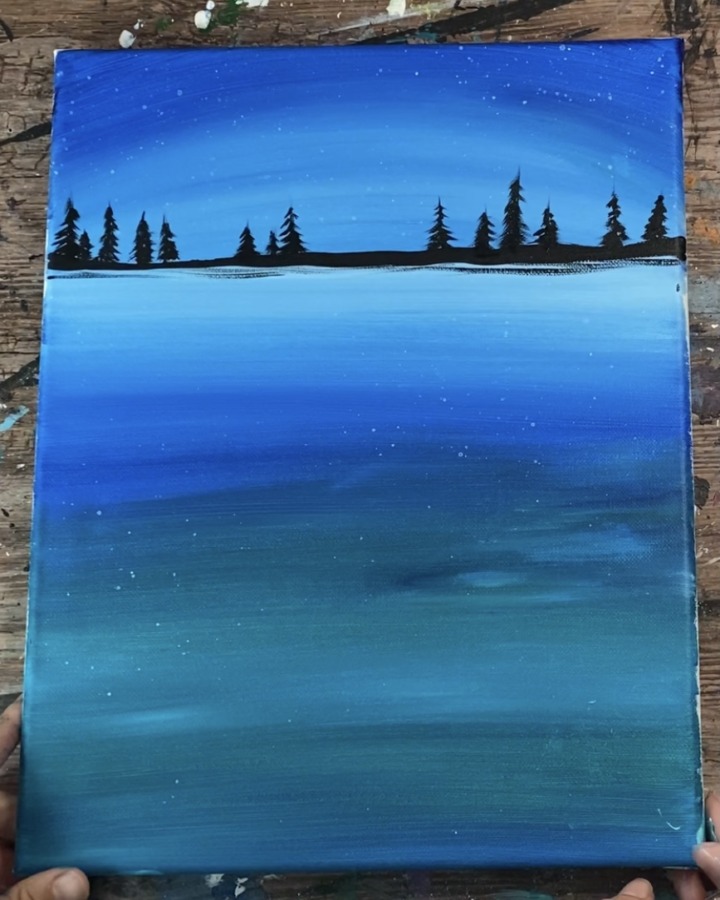
You can paint thin vertical lines in between some of the trees for more trees that are way in the distance.
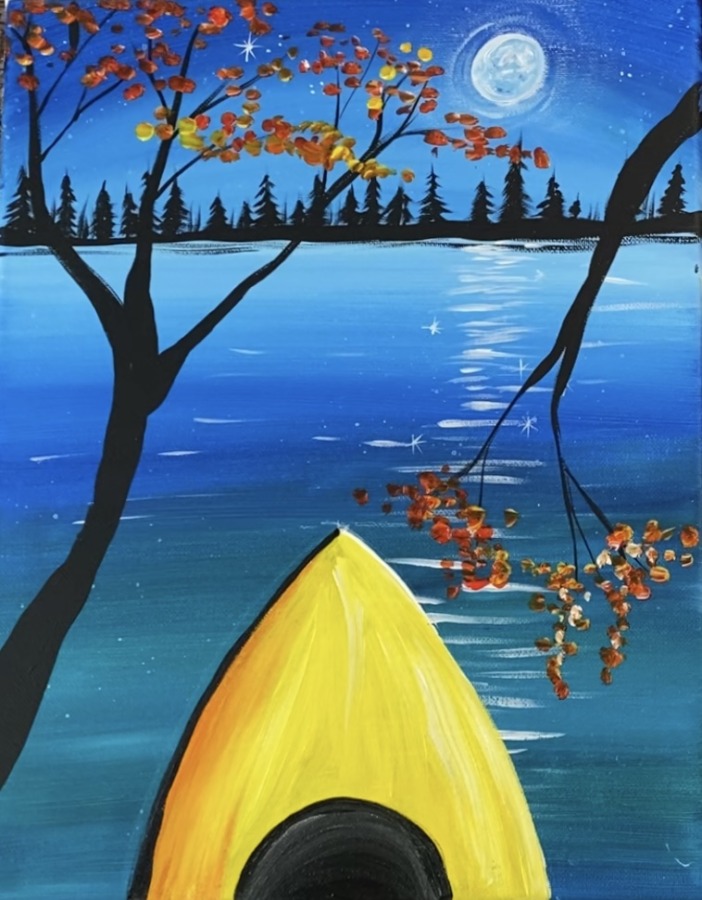
3. Paint Moon
Paint a small white circle for the moon. Paint this in the upper right area of the sky.
Then mix a small amount of phthalo blue and do small little dotted texture on the moon. Blend that in with the white.
Then load your brush in just the white but wipe some of it off. “Dry brush” the white paint around the moon to create “moon beams” around the moon that radiate out into the sky and fade away.
4. Paint Water Reflection
Use your #8 round brush and titanium white to paint white water reflection lines under the moon. Paint them in a vertical area just under the moon. The vertical area can gradually get wider as you go down to the bottom of the canvas.
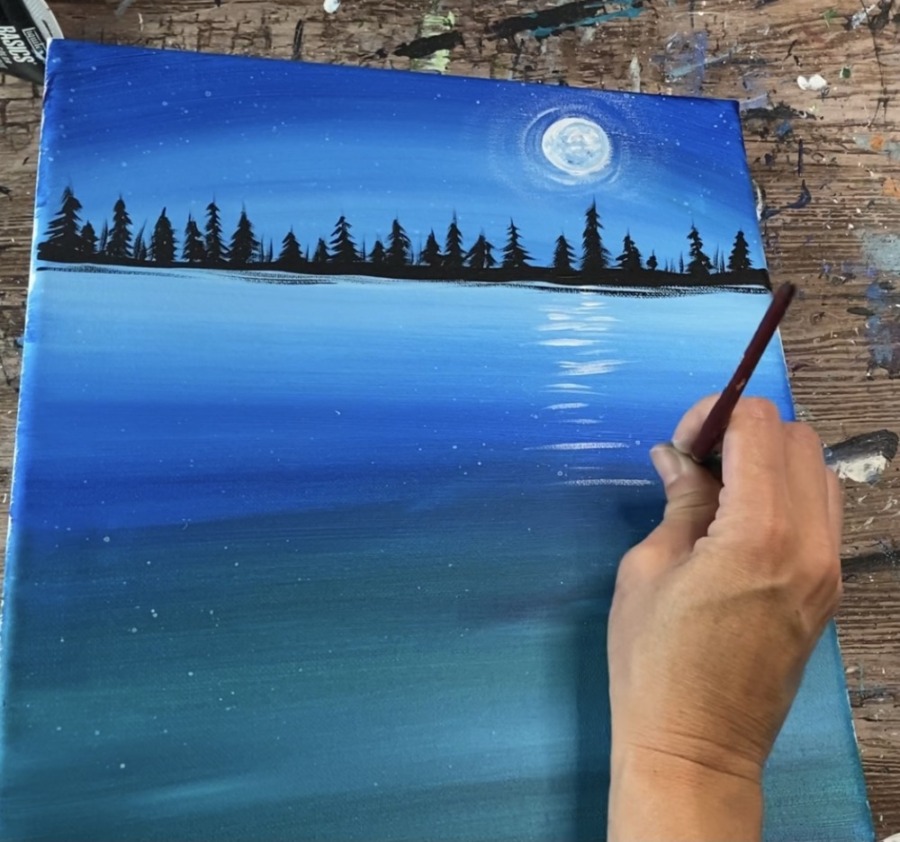
Then paint a few white lines here and there throughout the water.
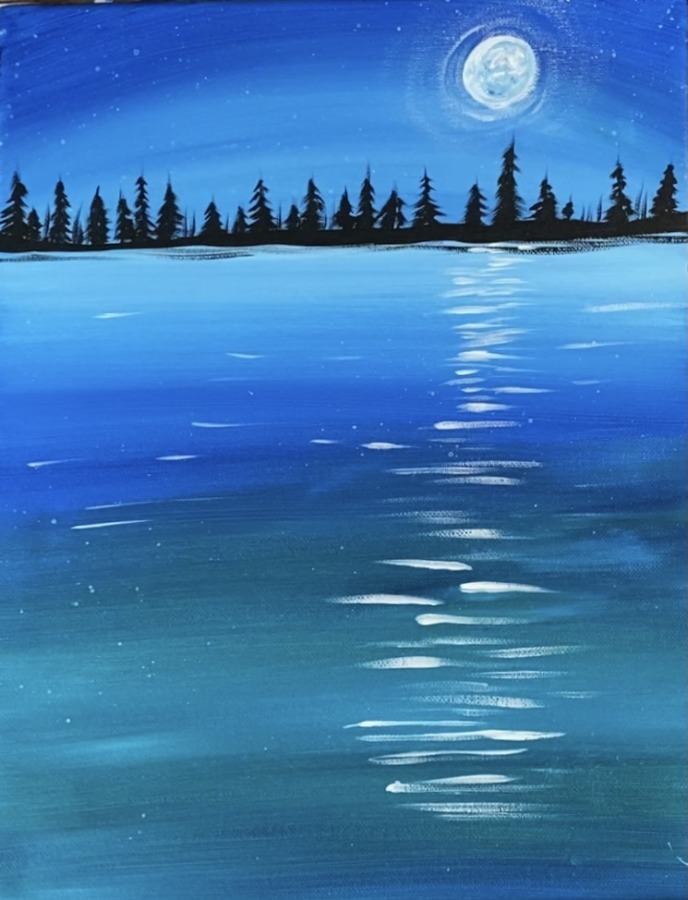
Use a 10/0 liner brush to paint some “sparkles” in the water next to some of the white reflection lines. Paint a plus with two diagonals (like an asterisk).
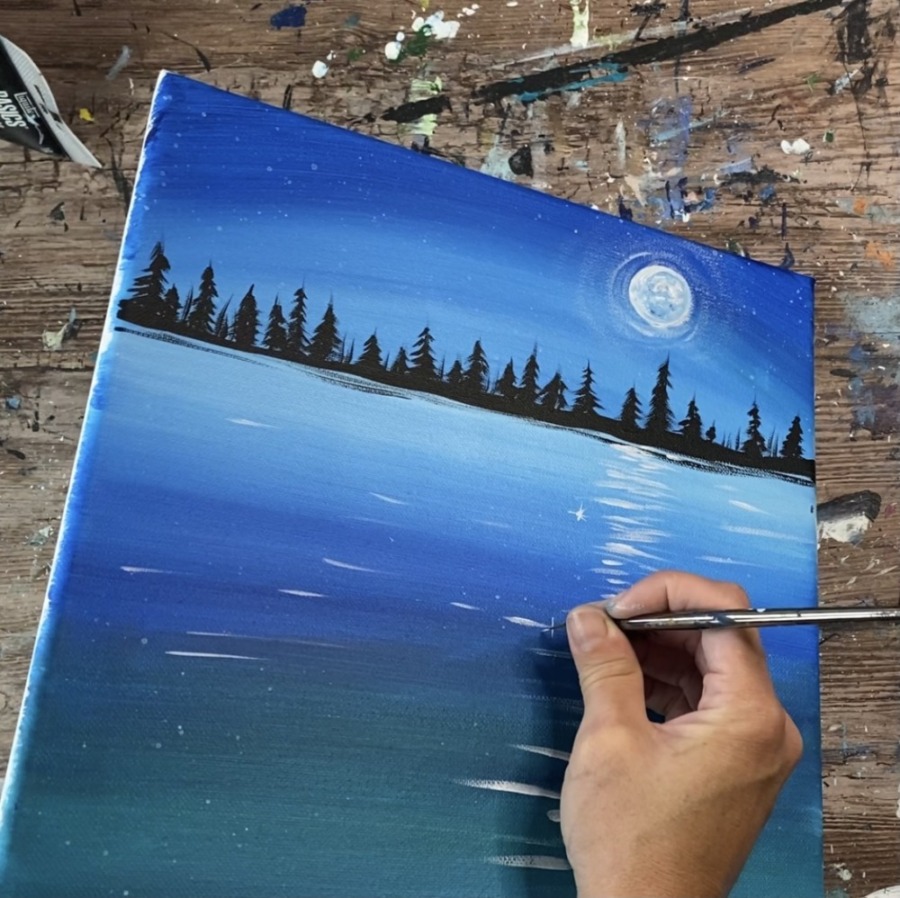
Do as many sparkles as you want in the water. Then paint a few stars in the sky using the liner brush.
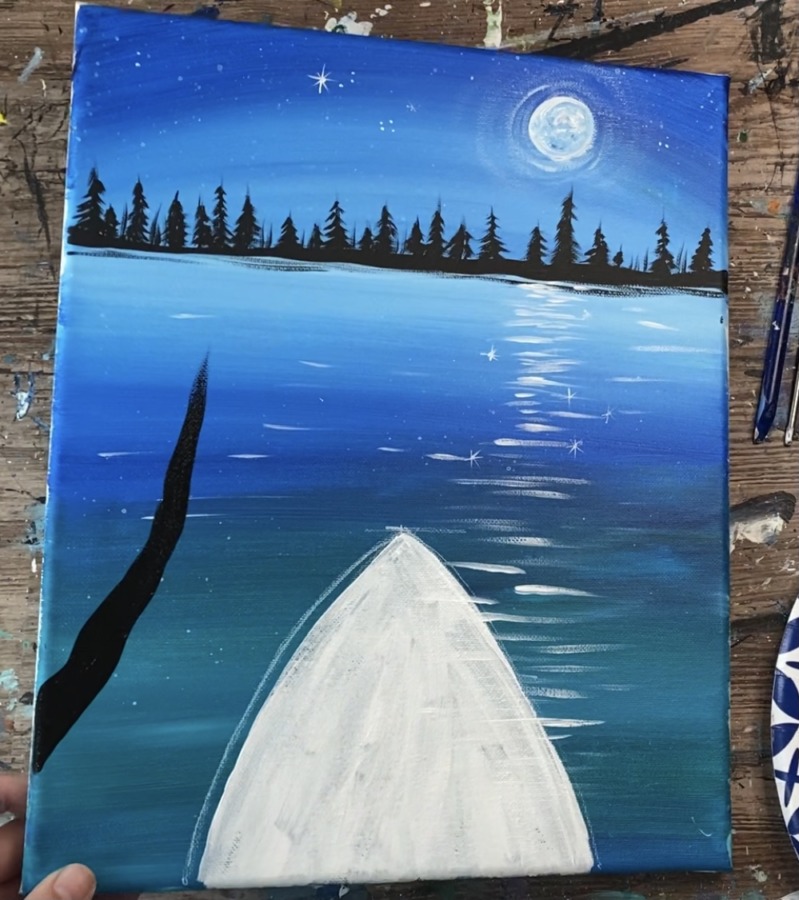
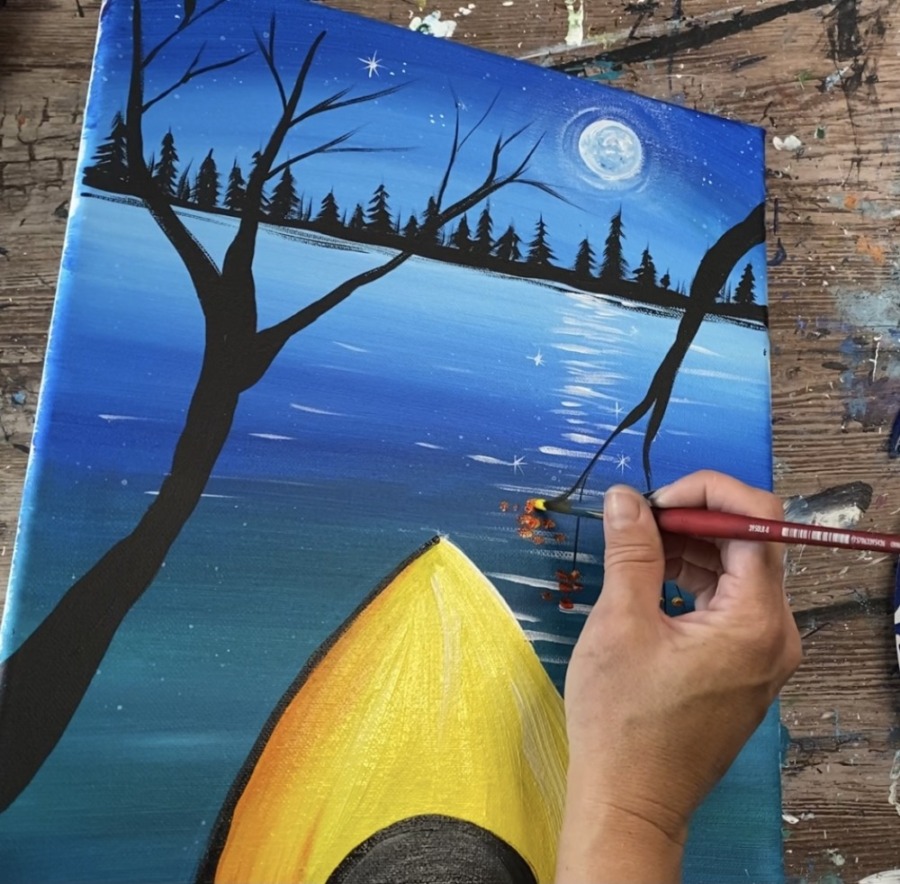
5. Draw & Paint Kayak Shape White
Draw the kayak shape with a piece of chalk or white chalk pencil. Mine was approximately 5.5″ high and 6″ wide, however, it does not have to be exact. It helps if you make a mark for the top point first and two marks for the left and right sides to establish the width of the drawing.

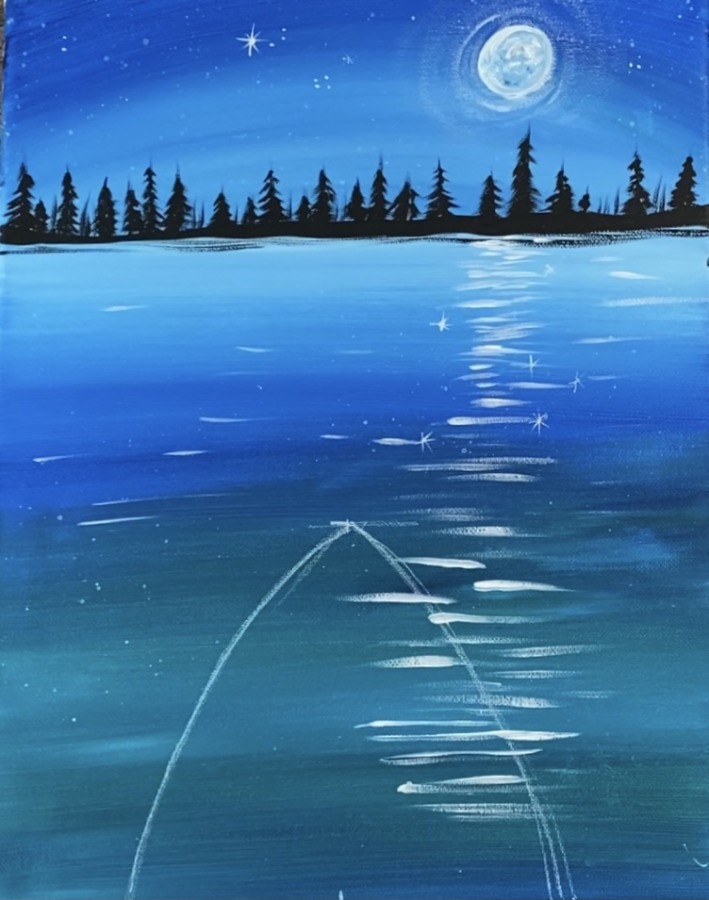
Then paint the shape of the kayak in with titanium white.
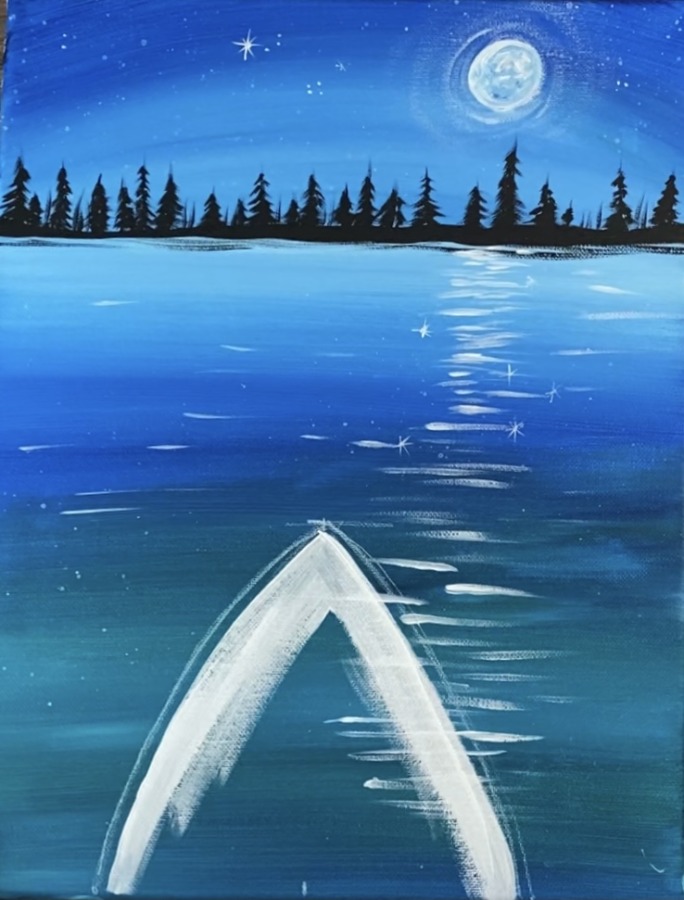
Use a #12 bright brush and titanium white. You do not have to make it completely solid (it’s okay if a little of the water color is still showing through).
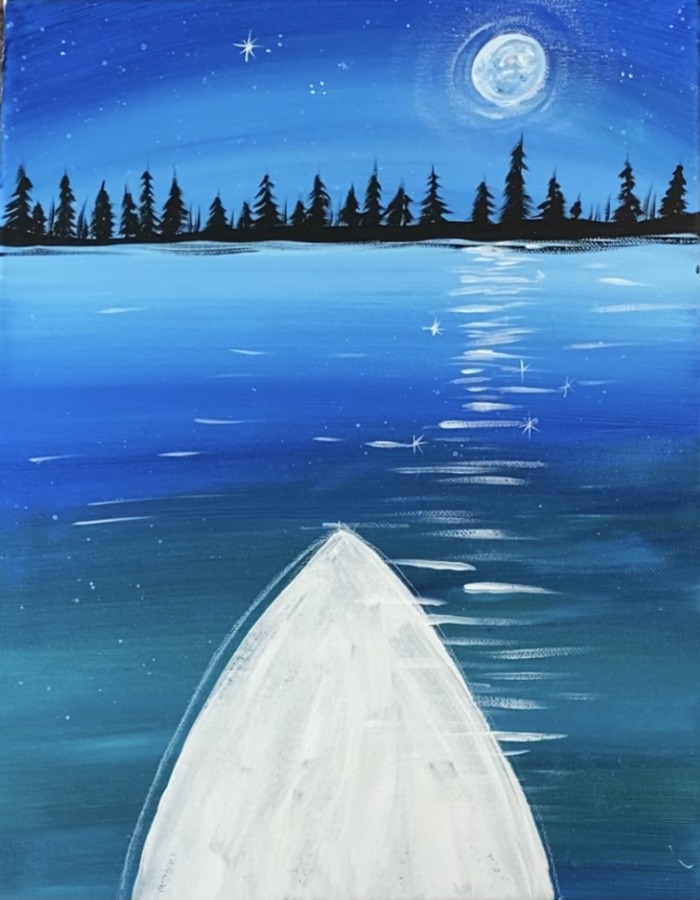
This has to dry before painting it yellow!
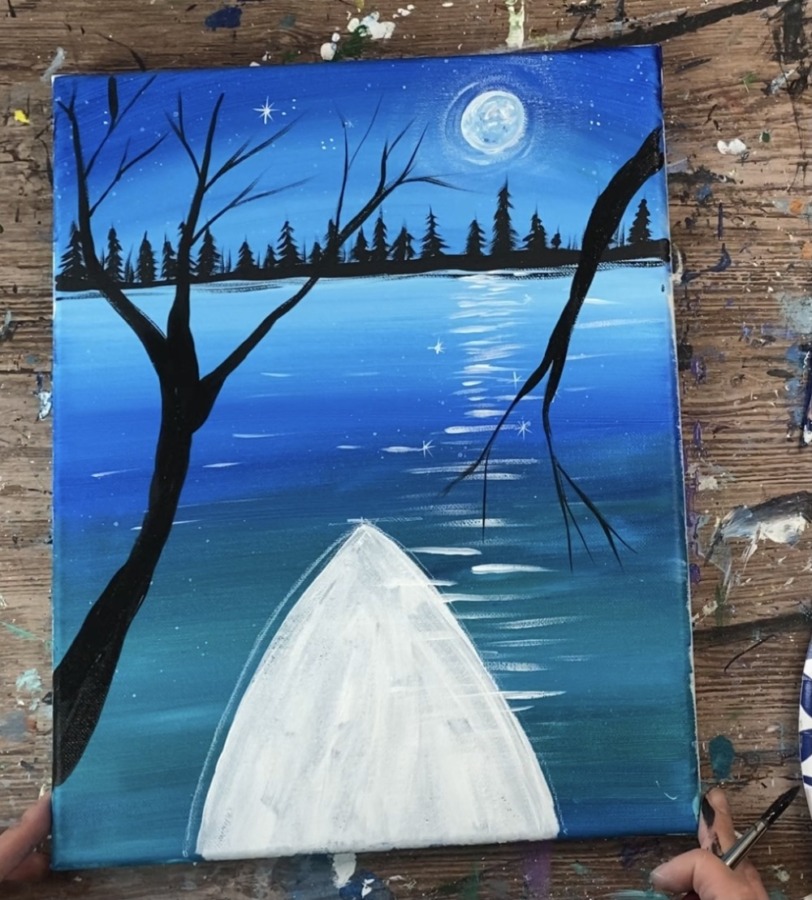
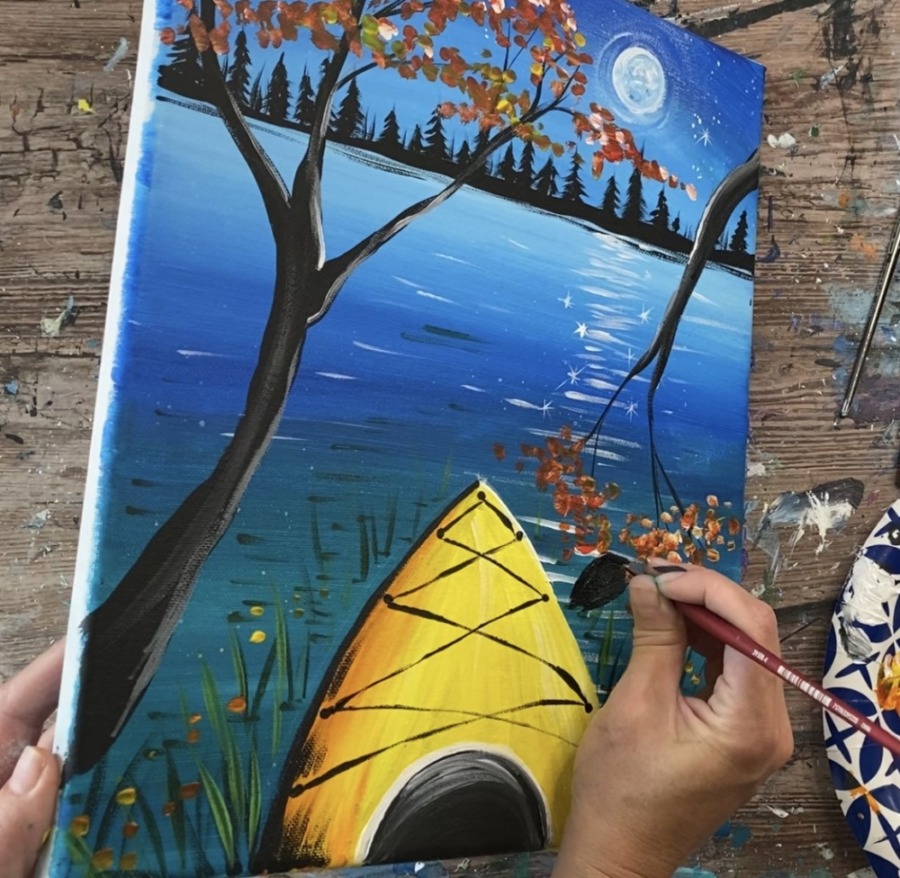
6. Paint Tree Branches
Use a #8 round brush and mars black to paint the large tree branch on the left. Slightly water down the mars black so that it will flow. Paint a semi thick branch shape and then go diagonal. Make the branch go thinner by releasing pressure on the brush.
Then paint three more branches. Start your brush with a little pressure and then release the pressure of the brush to allow the branch to go thinner.

Then paint smaller branches. Use the tip of the brush to create these thin lines. Create as many small branches as you want.
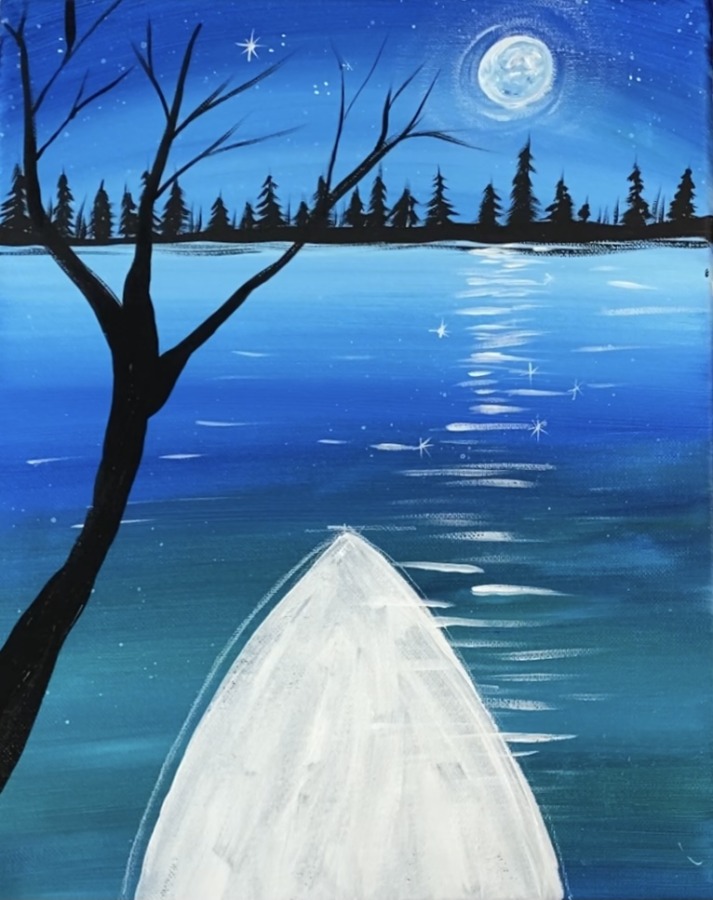
Then paint another branch on the right side of the painting. This one is going diagonal down and is smaller than the one on the left. Try not to allow the branch to cover any part of the kayak.
7. Paint Kayak
If your white coat of paint on the kayak is dry, paint a second coat on the kayak shape with the color primary yellow. You can use any brush for this, I used a #8 round brush.
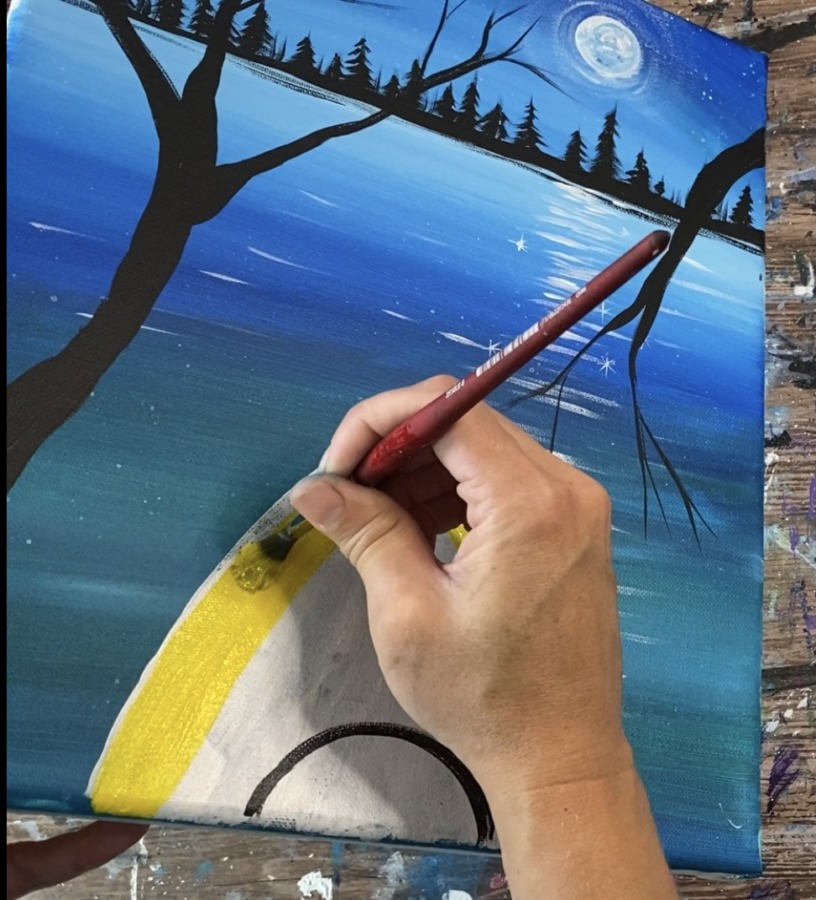
Paint a black half circle opening on the bottom of the kayak with black and do not paint that part yellow.
Then blend in some orange on the left part of the kayak for shading (make orange by mixing 3 parts yellow to 1 part red). Rinse brush off and then blend white on the right side of the kayak for highlighting. Make your strokes “contour” and go in the direction of the shape of the kayak.
Then paint the opening half circle shape on the bottom solid mars black.
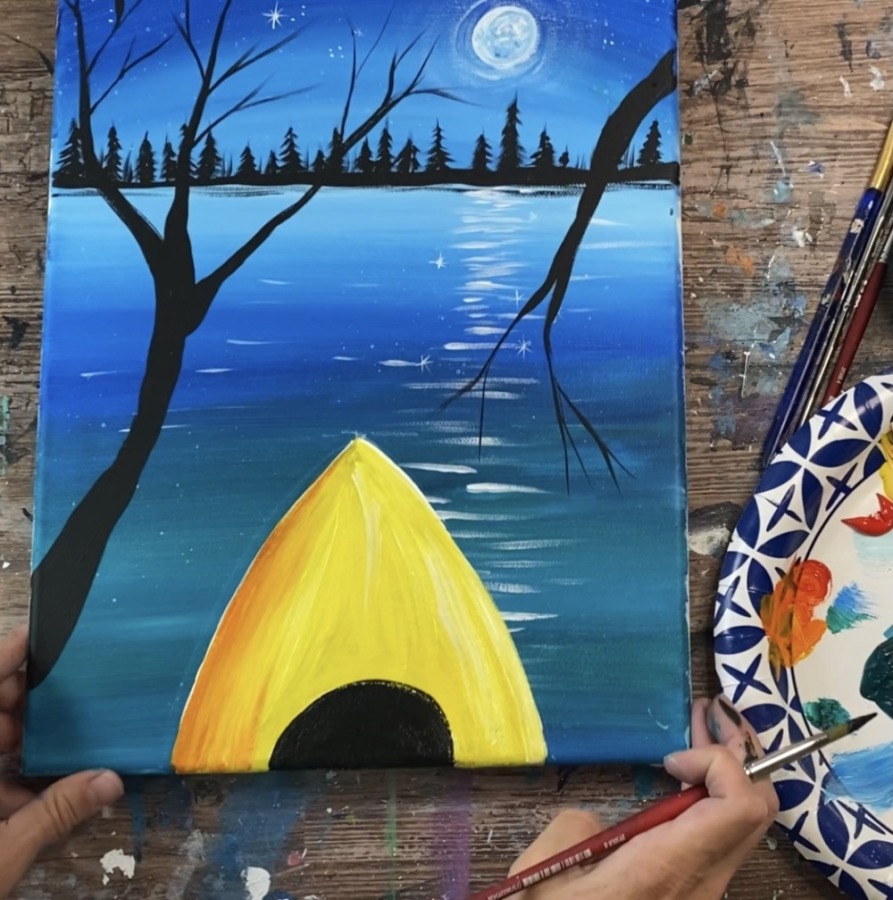
Outline the left part of the kayak with black.
8. Paint Foliage On Trees
Use any of your round brushes to “stipple” dots of leaves on the edges of the tree branches. Use a combination of red, orange and yellow with a little white. Vary the colors by dipping the tip of your brush in different amounts of those colors.
Paint clusters of those leaf dots over all of the tree branches.
9. Add Highlight On Branches & Paint Water Grass
Mix a very light gray on your palette by mixing about 3 parts white to 1 part black. Then use any of your round brushes to loosely paint a highlight on the side of the branch facing the moon.
Do this by loosely outlining just the inner edge of the branch. If needed, add more black and blend it into the branch.
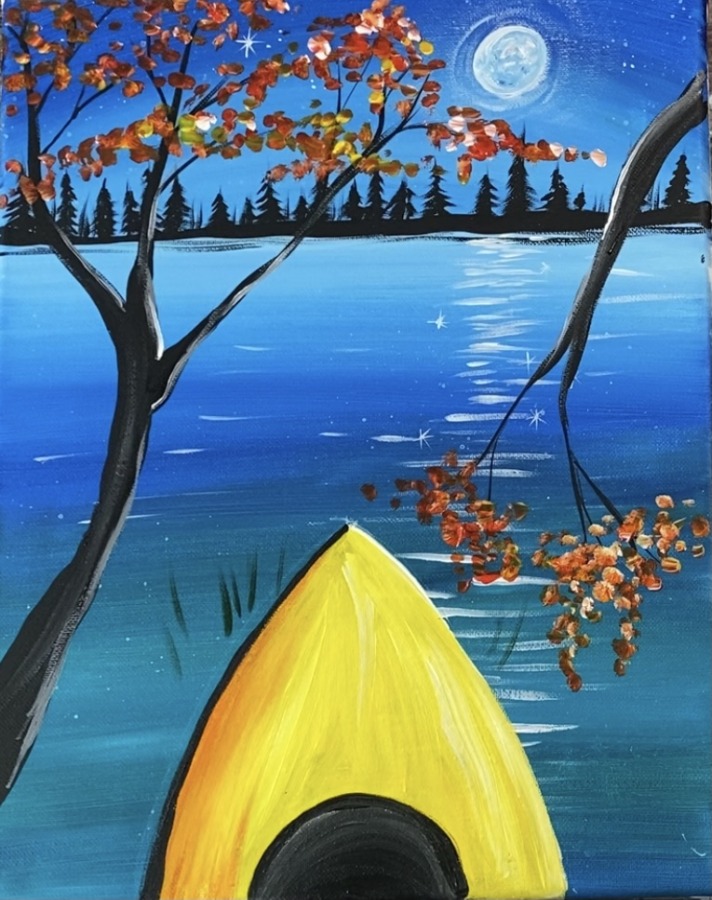
Then make a dark green on your palette by mixing 3 parts yellow, 2 parts blue and 1 part black. Use the tip of one of your round brushes to paint grass lines in the water around the kayak.
Then rinse brush off and make a lighter green (do not add black to the mix). Paint more grass lines with the lighter green.
Then paint little horizontal lines under the green grass lines and a few horizontal lines here and there throughout the water.
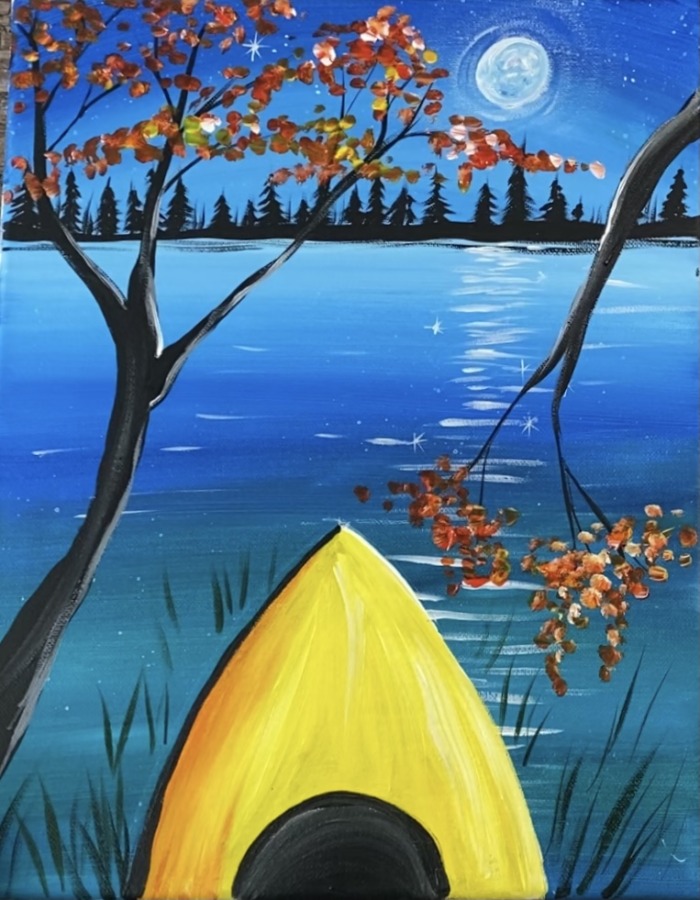
10. Paint Cords
Use your round brush to paint little black dots on the end sides of the kayak.
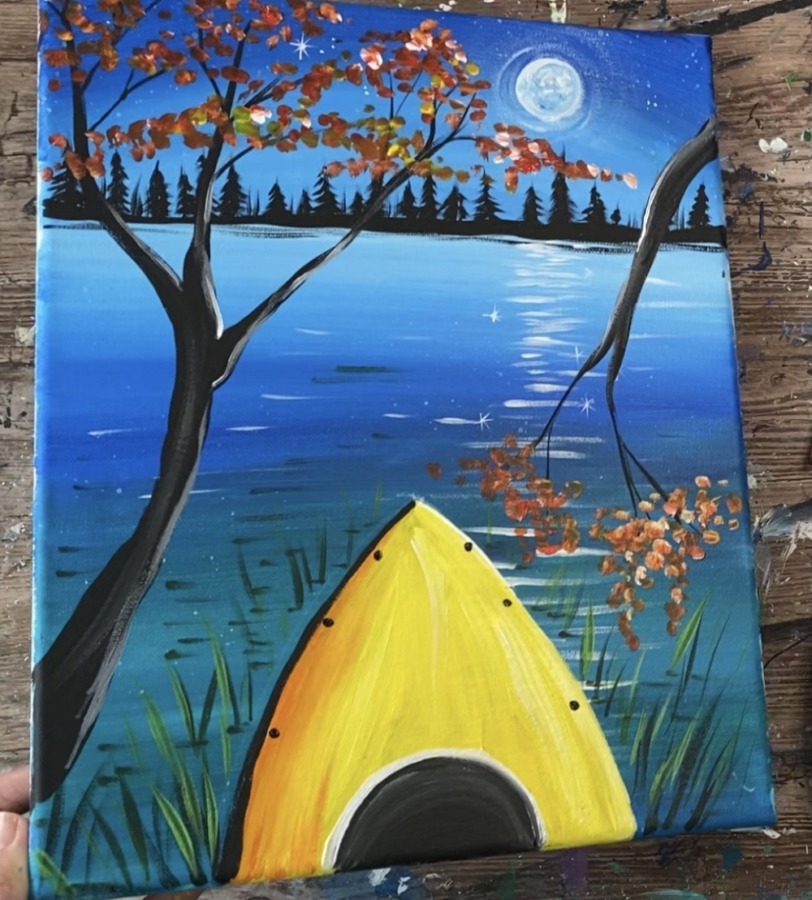
Then very loosely paint black cord lines that connect the dots in a criss-cross pattern.
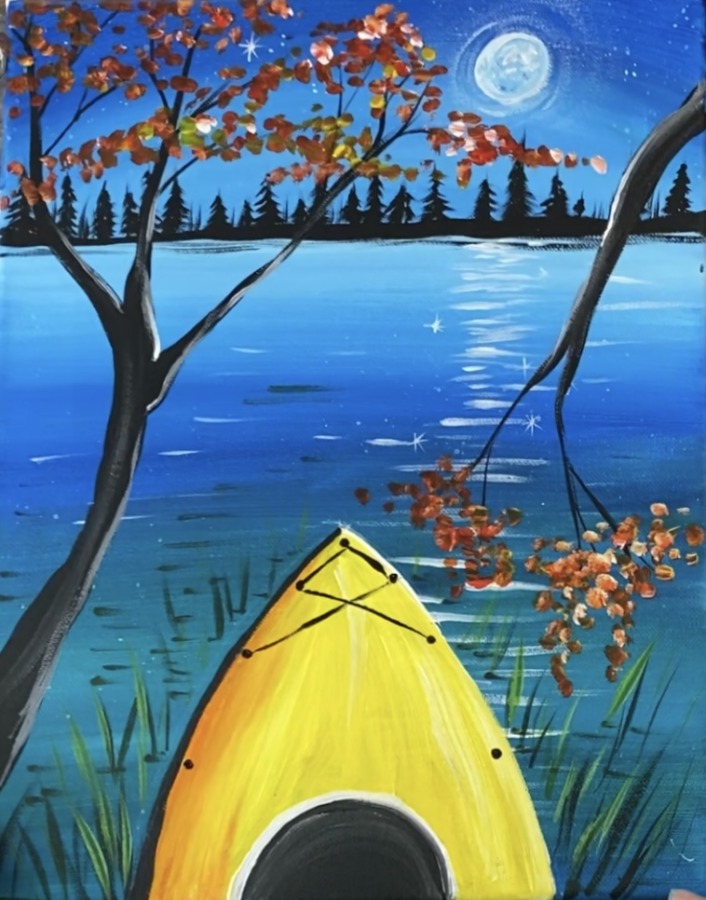
These lines should be slightly curved towards the middle of the kayak.
Then add some black shading (dry brush style) to the bottom left of the kayak.
Then rinse brush off and add some white. Dry brush some lighter highlight on the top part of the half circle opening.
11. Paint Paddle
This step is optional! If you want to do a paddle start by painting the shape of the end piece. Mine had to overlap the right branch a little (which made the perspective a little awkward).
Then paint a long diagonal line across the kayak.
Highlight it a little white white paint.
Finished!
That’s it! Sign your name and show it off!
Share Your Art Here!


