
Would you like to save this?
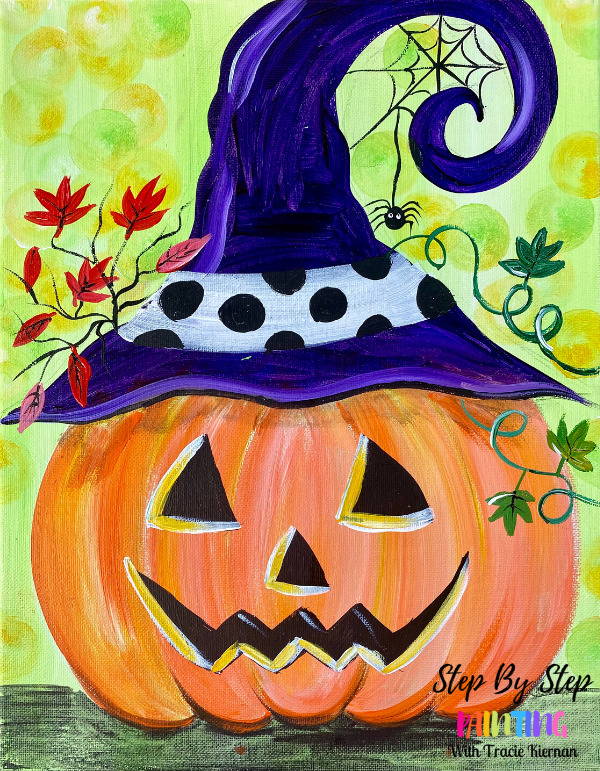
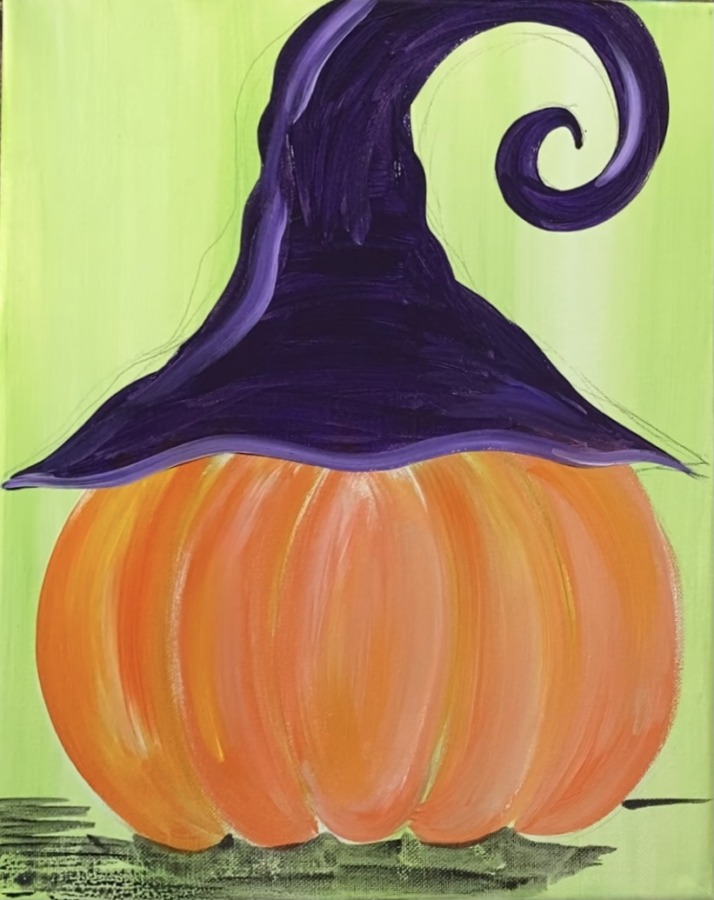
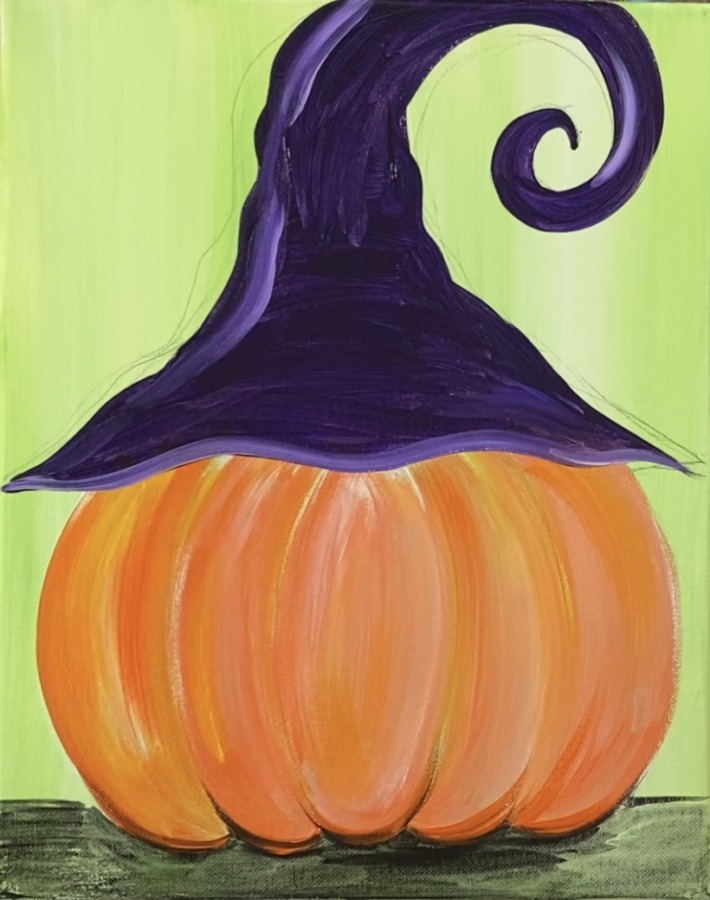
This tutorial will show you how to paint a jack o’ lantern pumpkin with a whimsical witch hat. Paint fun elements on the witch hat such as a spider, fall leaves and pumpkin vines.
Enjoy and happy painting!
Materials
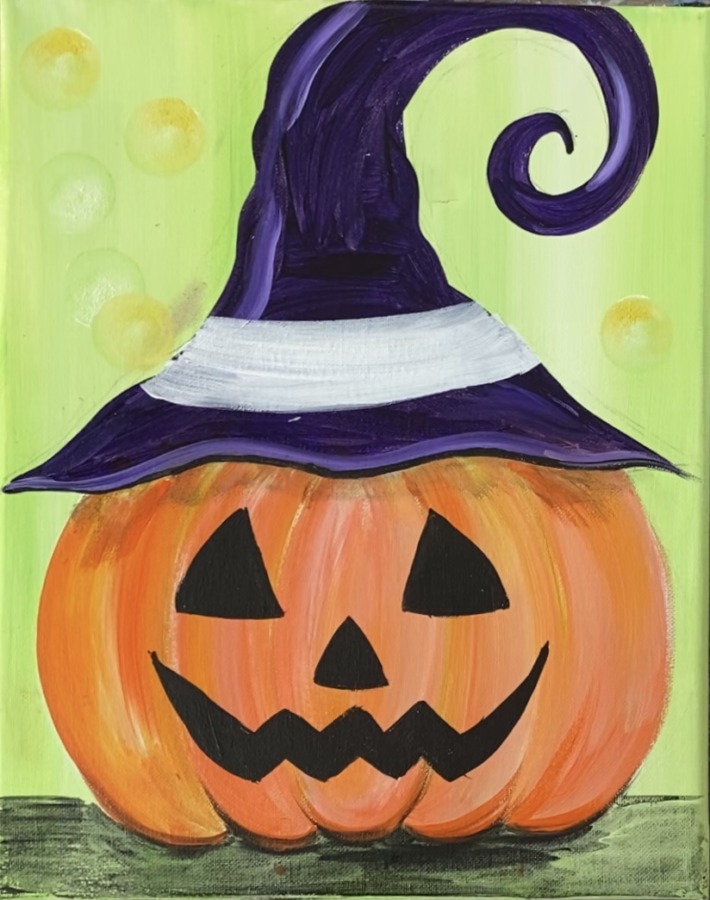
Jack O' Lantern With Witch Hat Painting Tutorial

Learn how to paint a jack o' lantern with witch hat. Step by step acrylic painting tutorial for beginners.
Materials
- 11 x 14 Canvas
- Acrylic Paint
- Paint Brushes
- Optional Traceable
- Optional Graphite Paper
- Optional Foam Pouncers
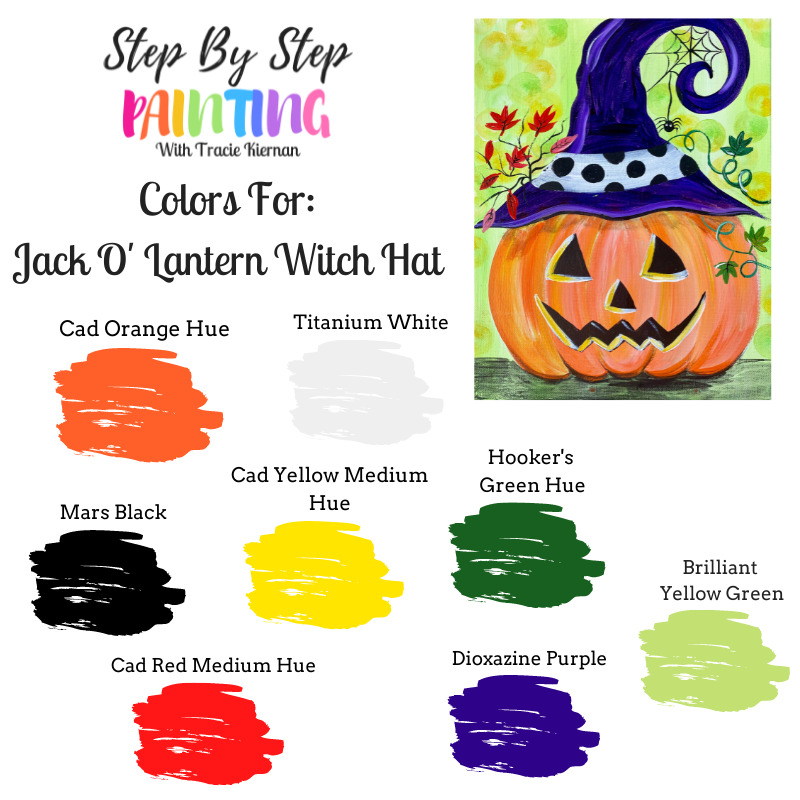
Colors
- Titanium White
- Brilliant Yellow Green
- Cadmium Orange Hue
- Cadmium Yellow Medium Hue
- Cadmium Red Medium Hue
- Hooker's Green Hue Permanent
- Dioxazine Purple
- Mars Black
Brushes
Instructions
- See tutorial on www.stepbysteppainting.net for full instructions!
Color Palette
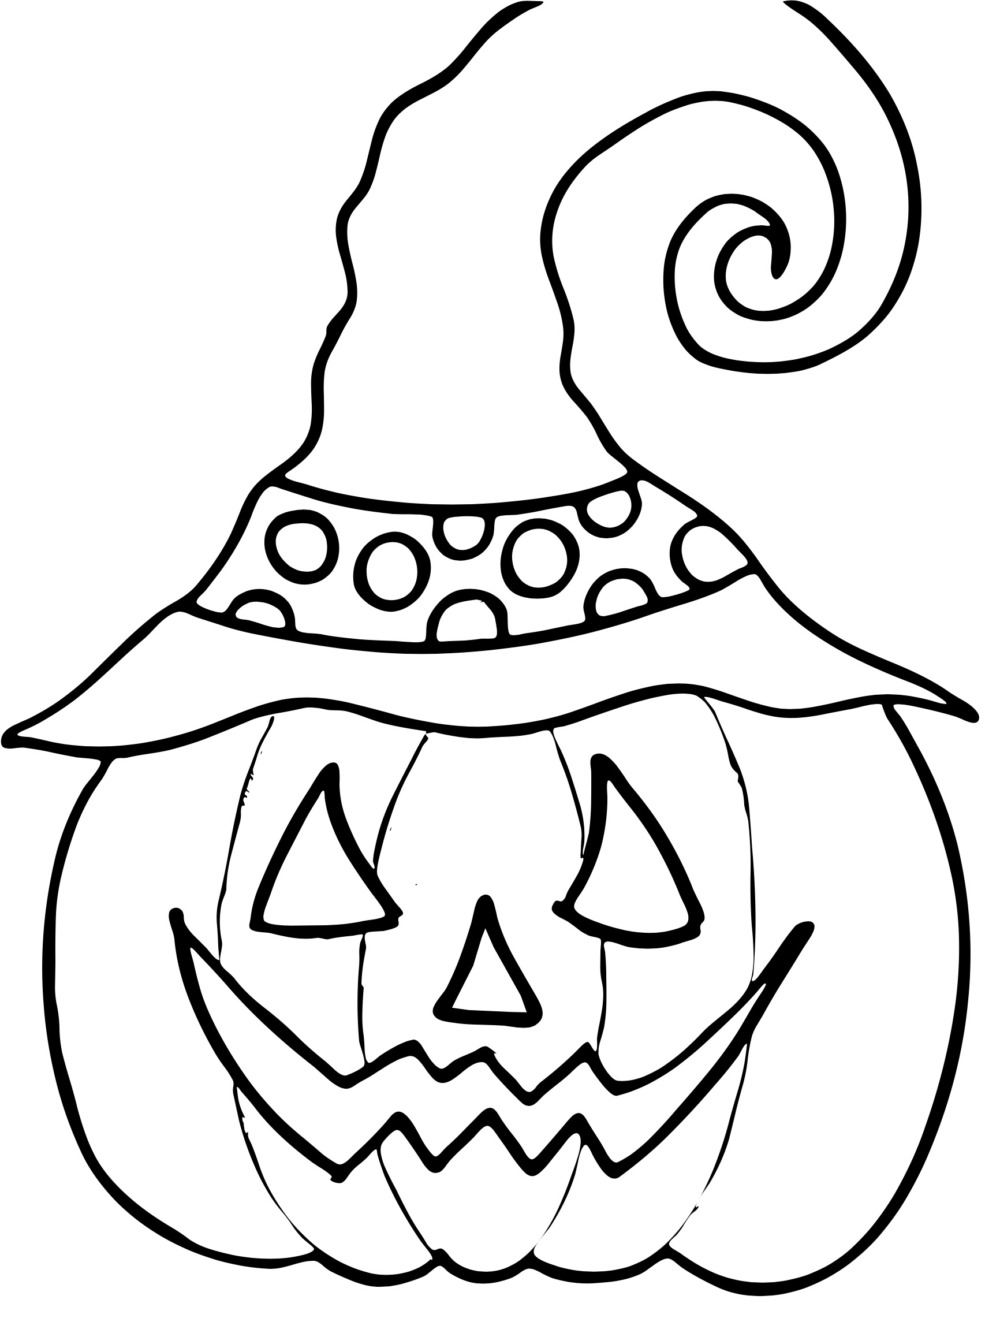
Traceable
Directions At A Glance
Video
Step By Step Directions
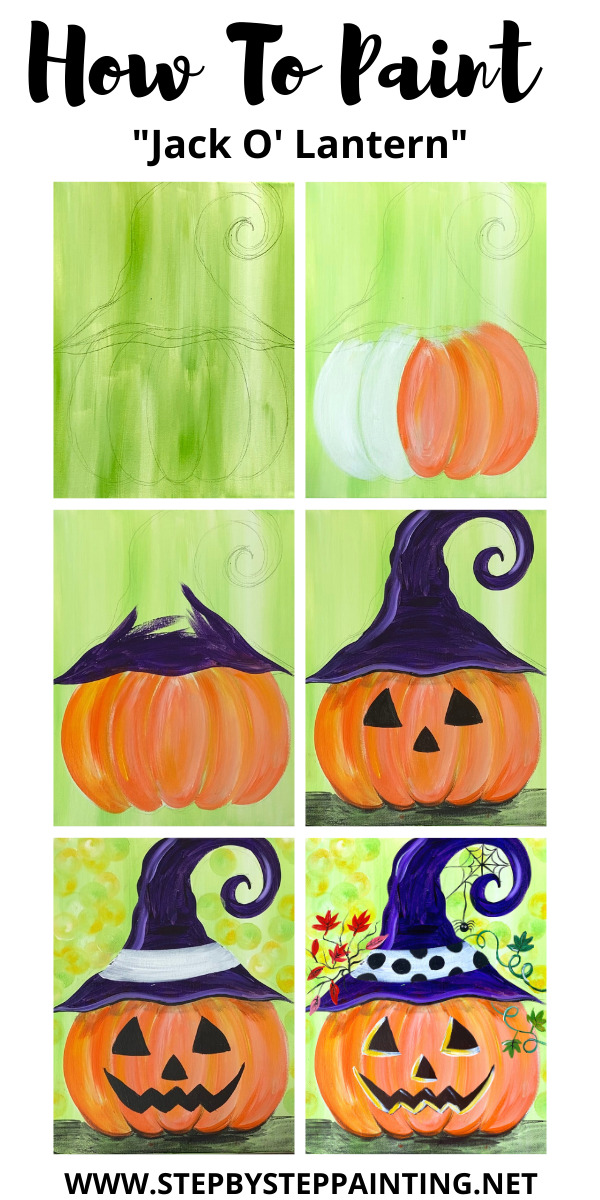
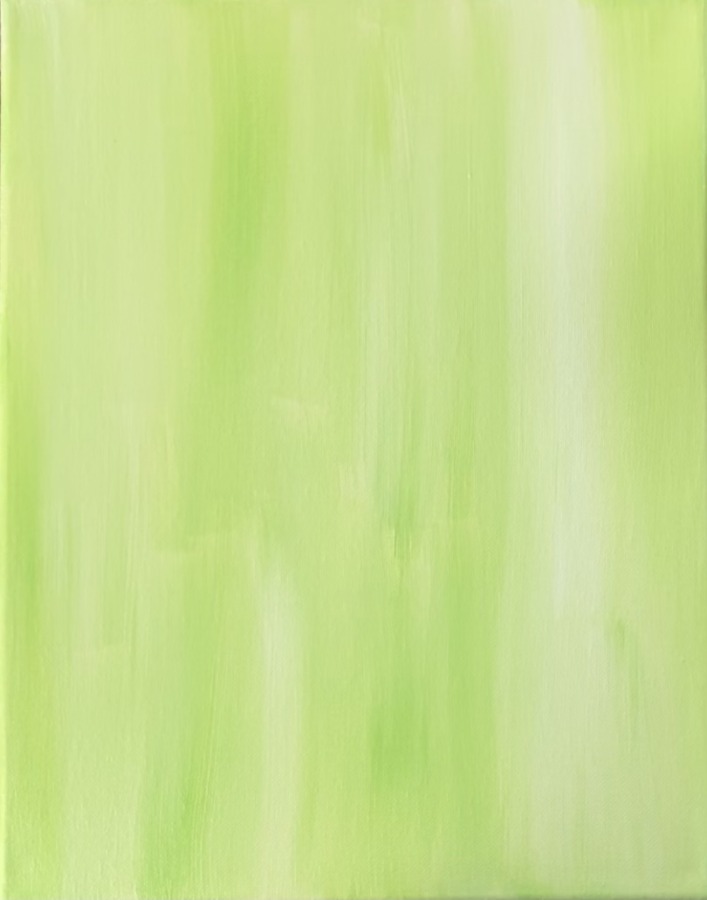
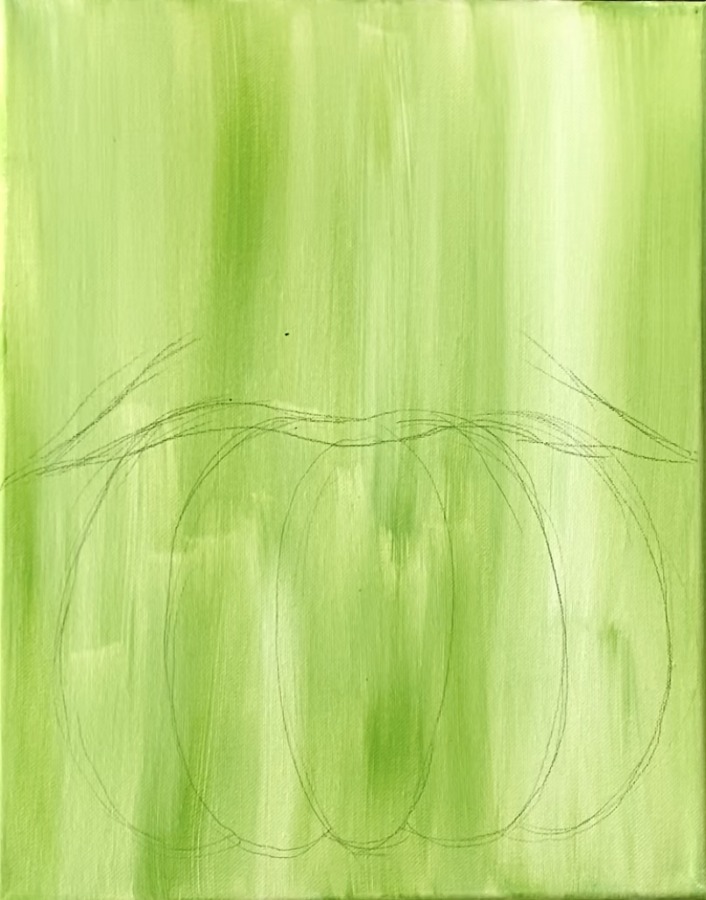
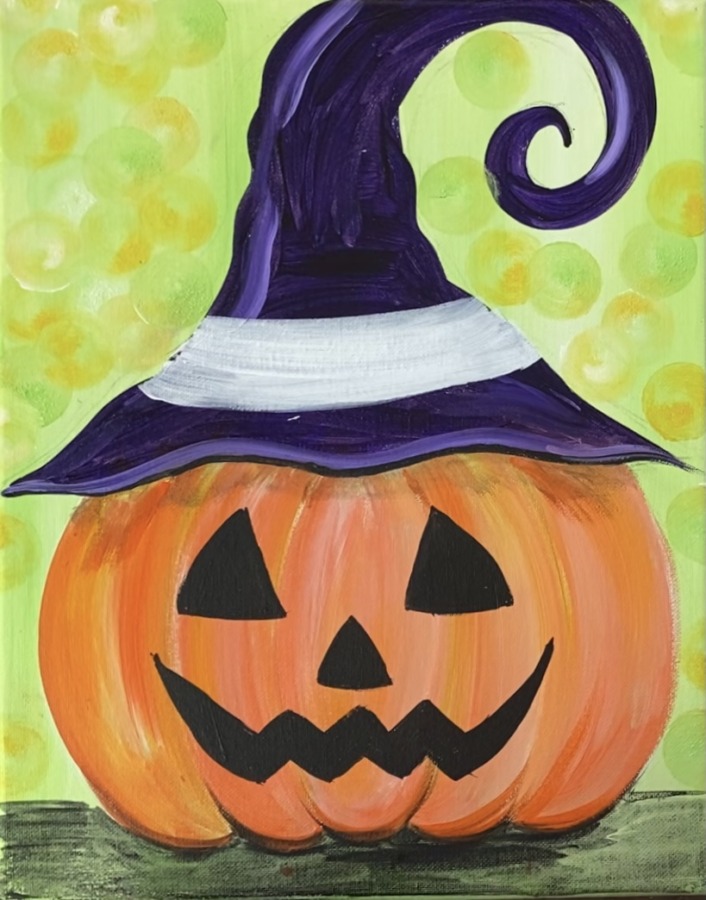
1. Paint The Background
Use a 3/4″ flat wash brush dipped in water and double load it into both the colors “brilliant yellow green” and “titanium white”.
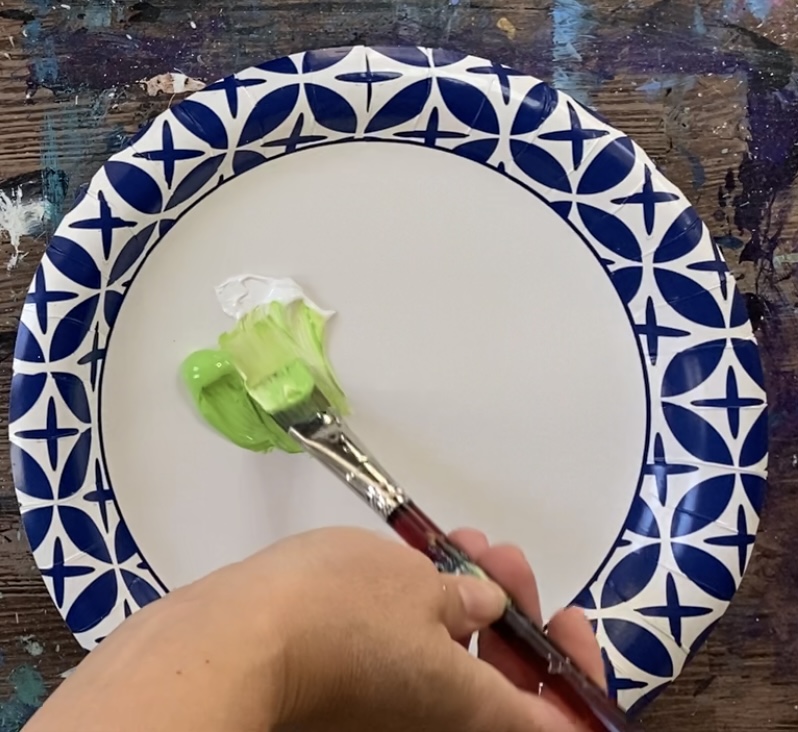
Paint up and down strokes letting the white and green mix together. Try not to over-blend the colors for an abstract look with different variations of the green and white.
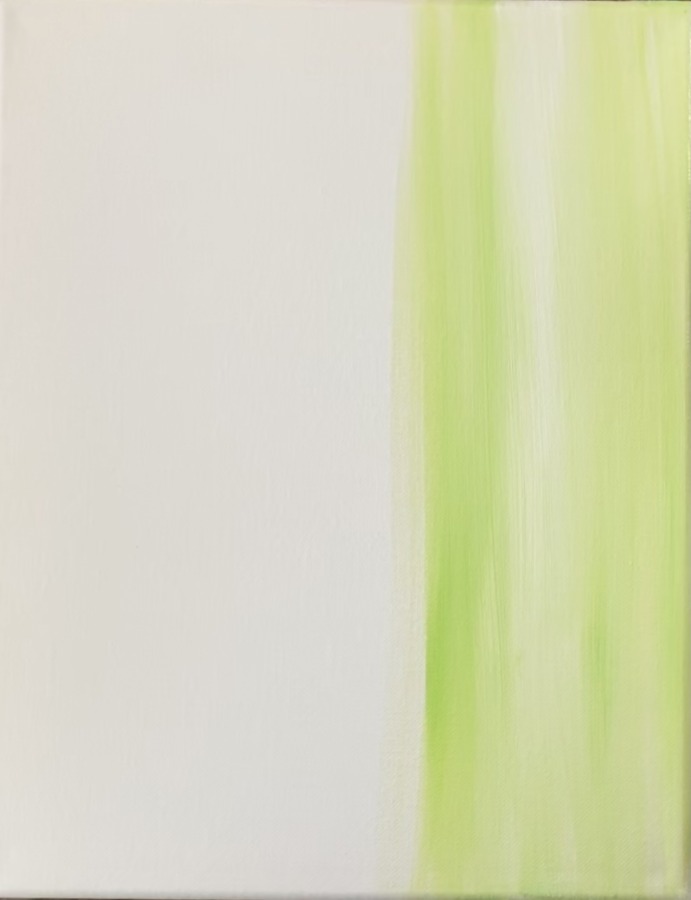
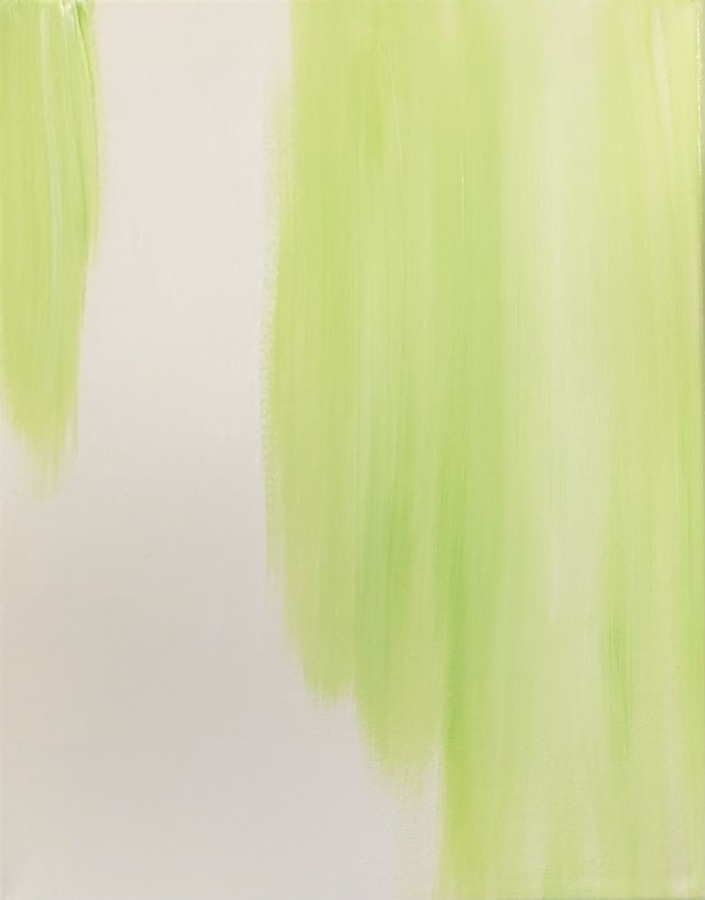
Fill the entire canvas with the green and white. It should be a thin layer of paint.
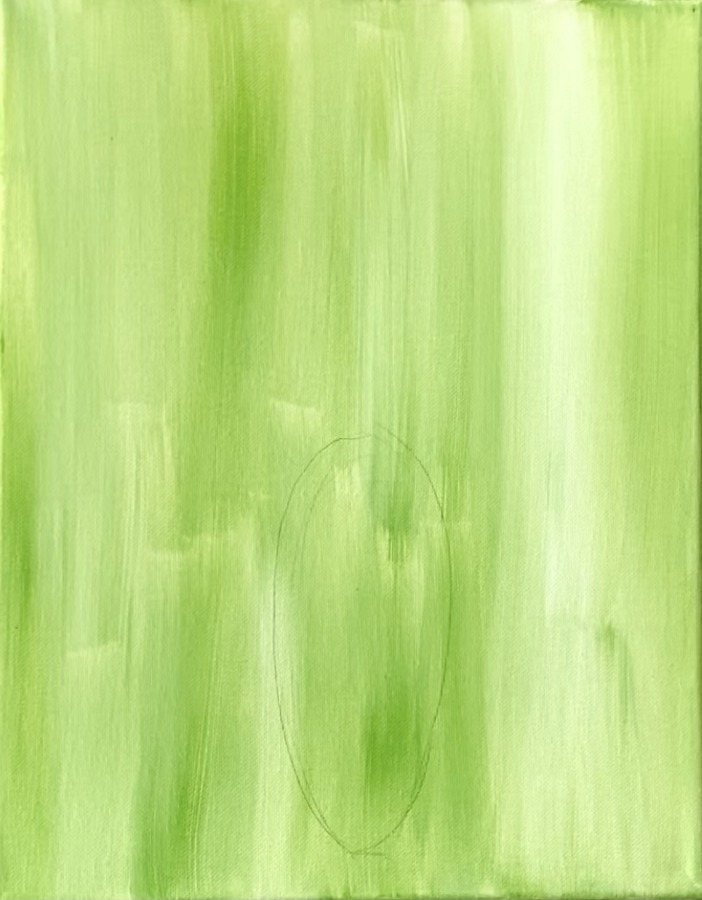
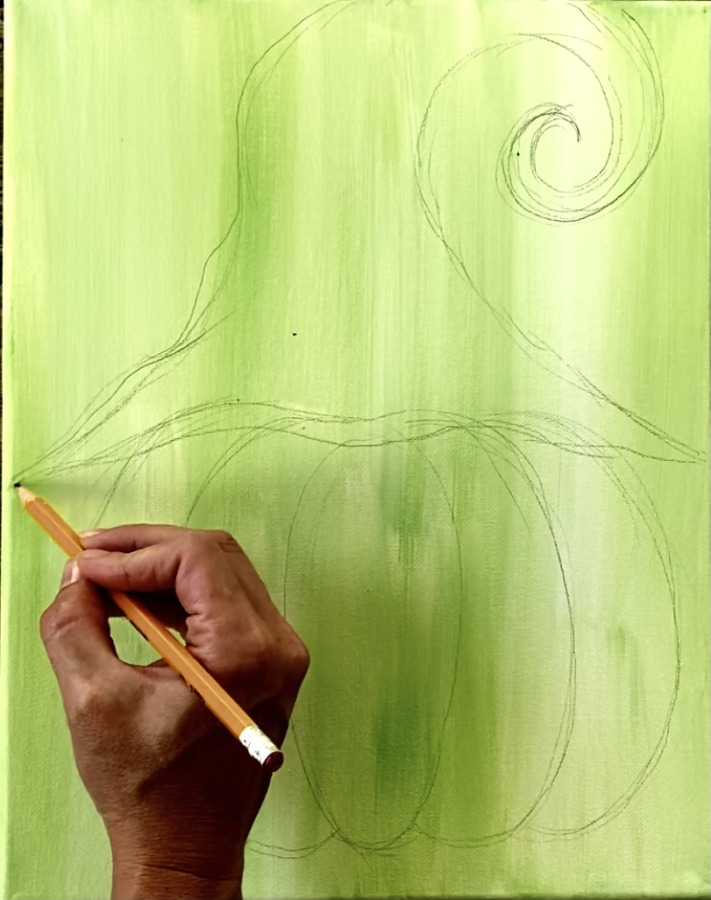
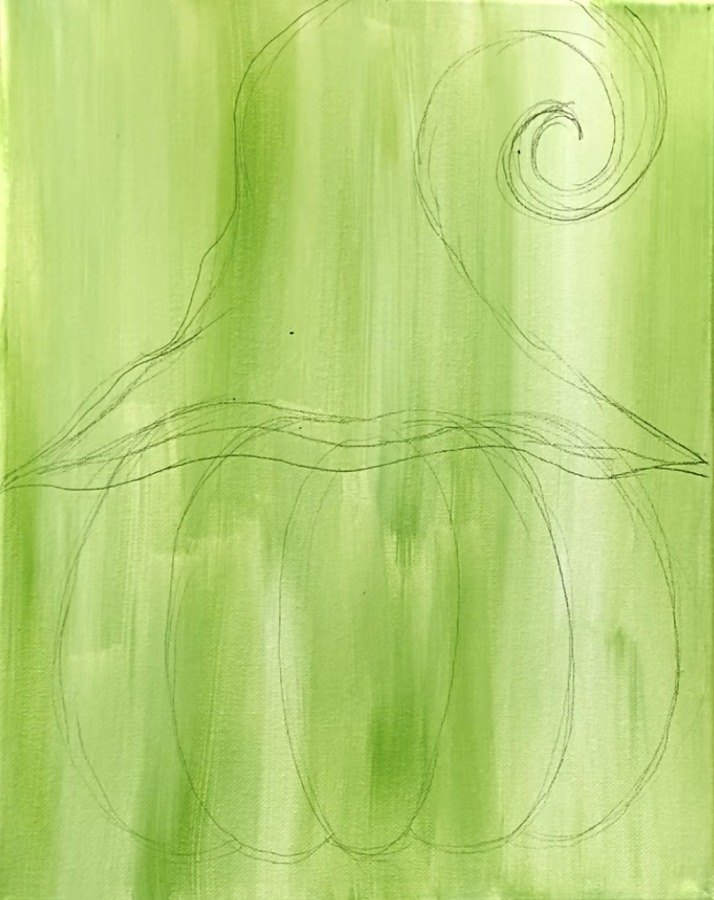
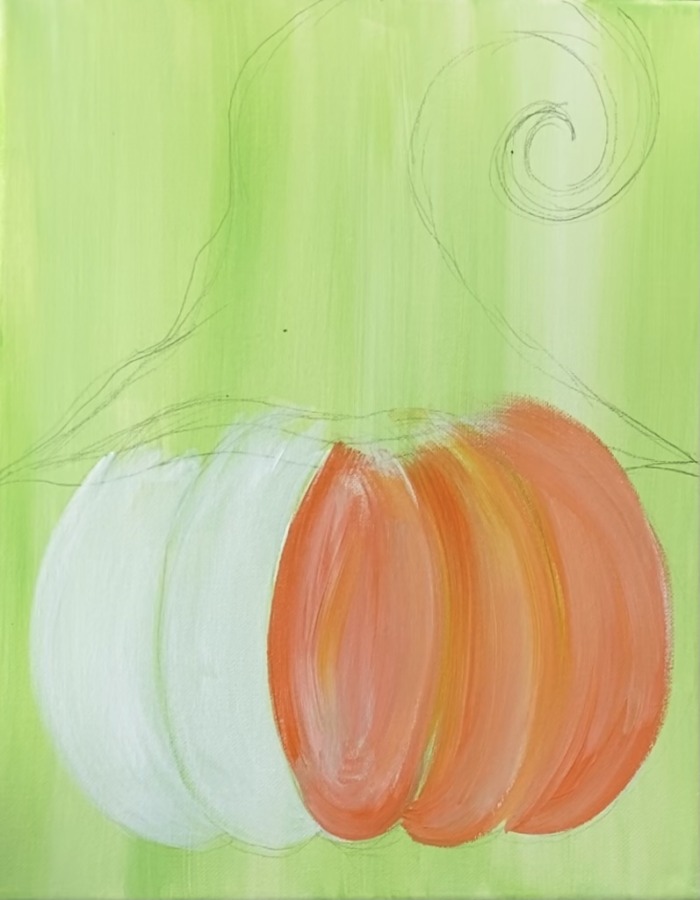
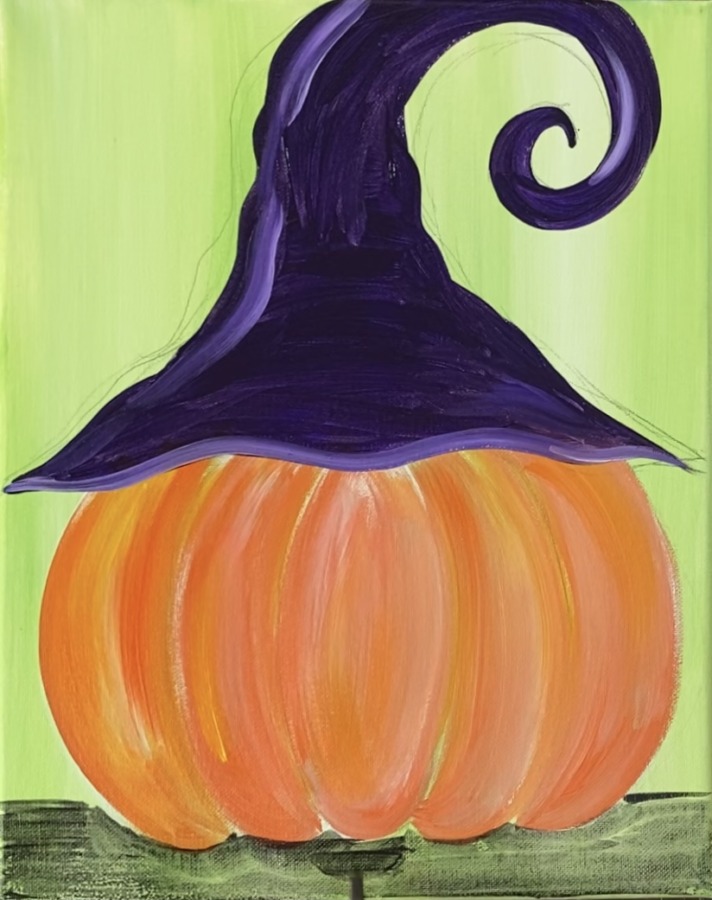
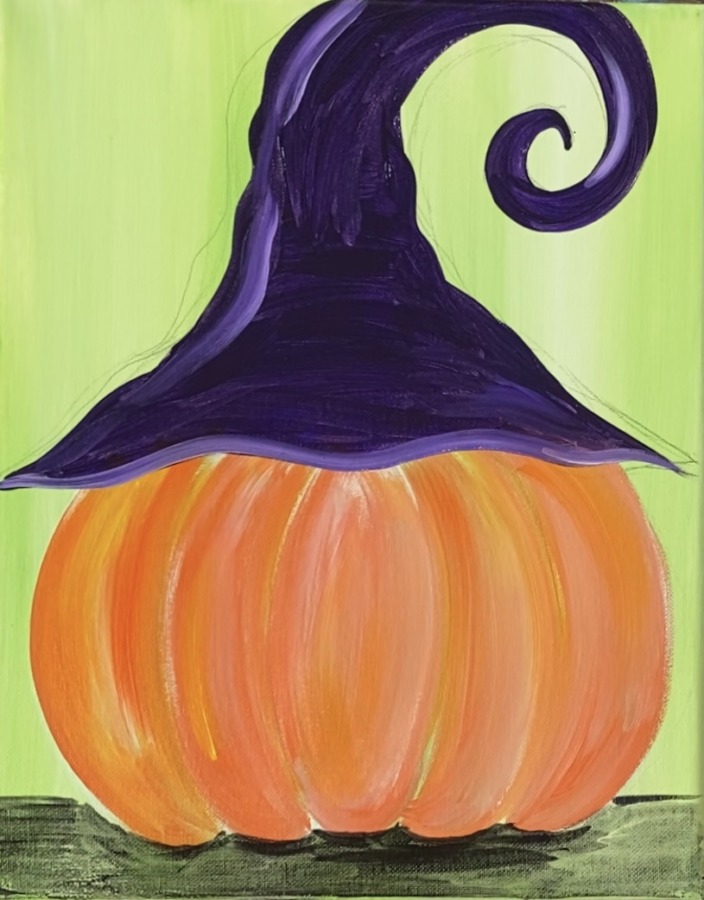
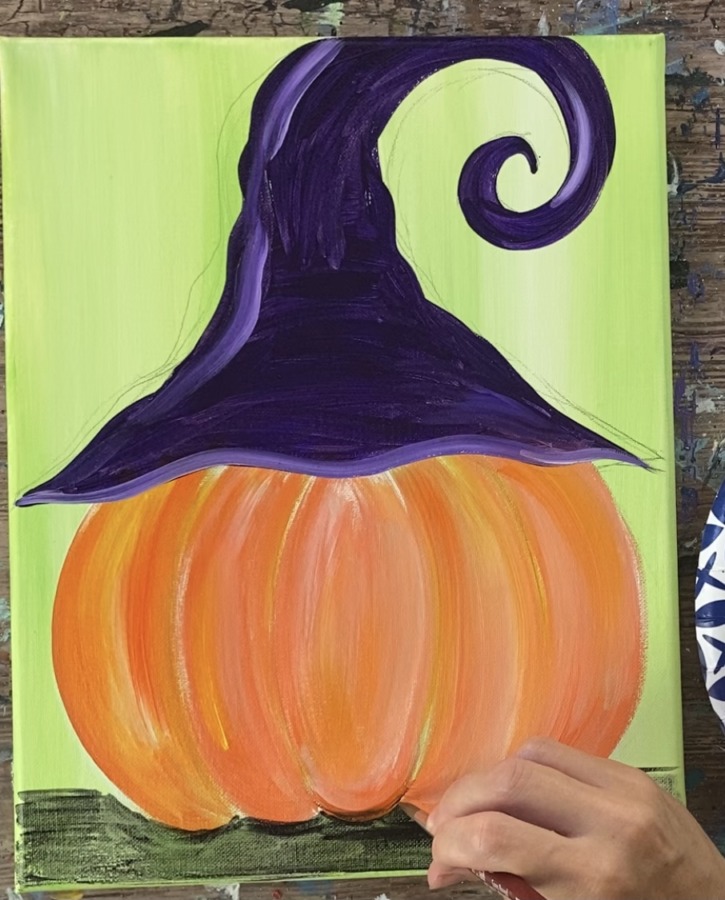
2. Draw The Pumpkin & Hat
Next, draw the pumpkin & hat or use the traceable to transfer the design to the canvas.
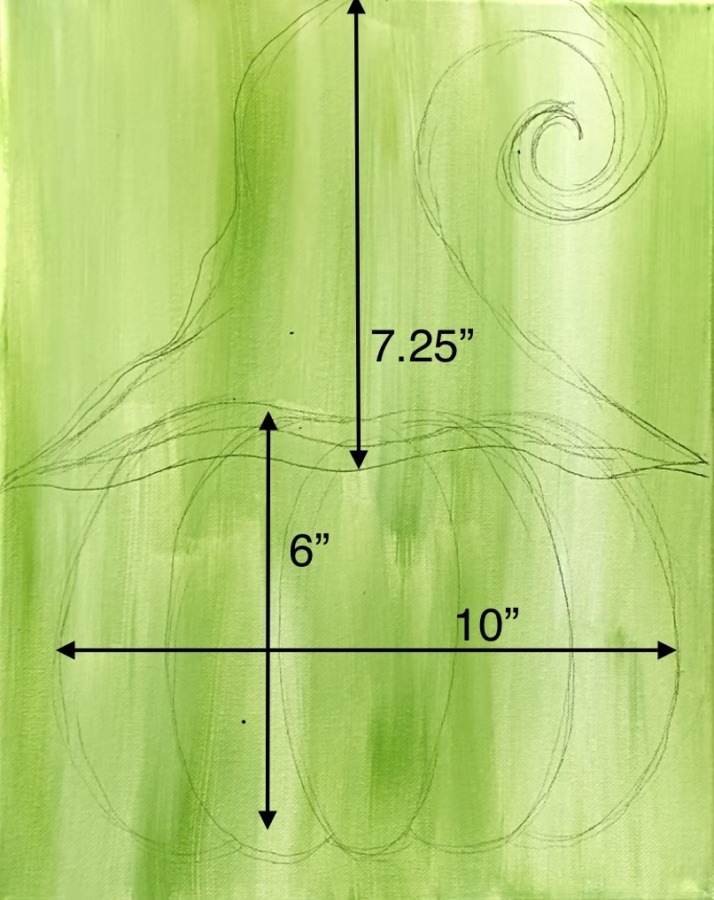
The pumpkin is about half the size of the the height of the canvas. Start by drawing an elongated oval in the middle. The oval is about 6″ high (but doesn’t have to be exact).
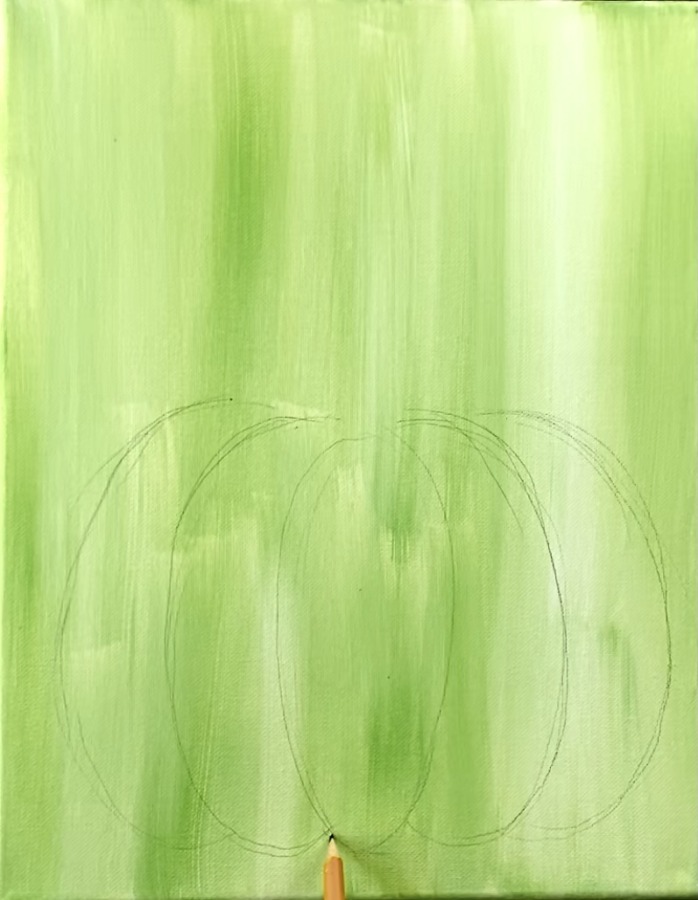
Then draw two curves on both sides of the middle oval. Note how the bottom of the pumpkin has bumps.
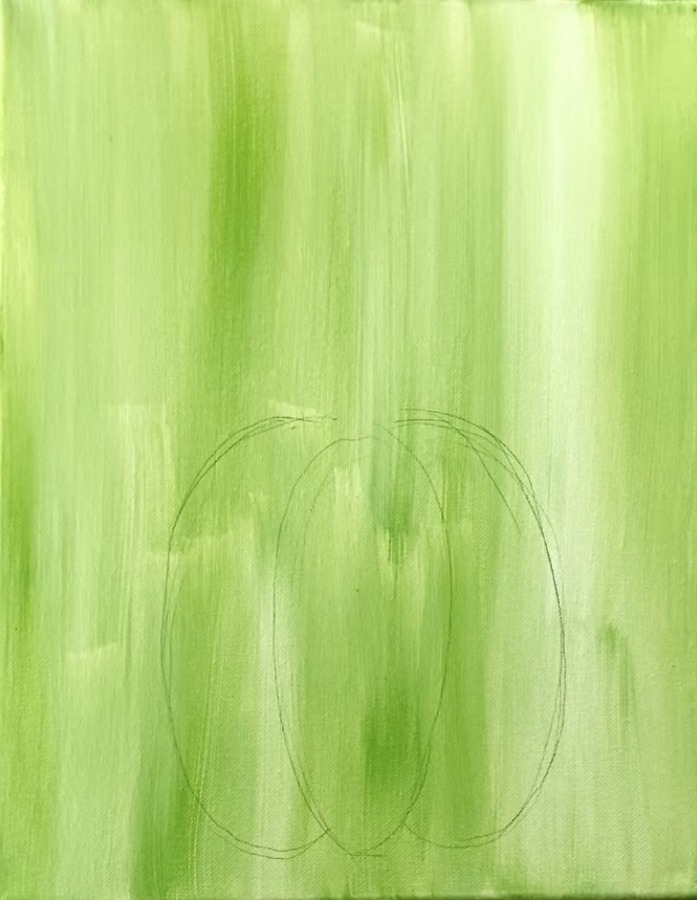
Draw two more pumpkin bumps on each side of the first set.
Then lightly draw the hat. This hat will overlap the top of the pumpkin slightly. The left and right of the bottom of the hat go to points. Then lightly sketch the hat diagonally upwards.
Draw the hat so the tip of it spirals to a point.
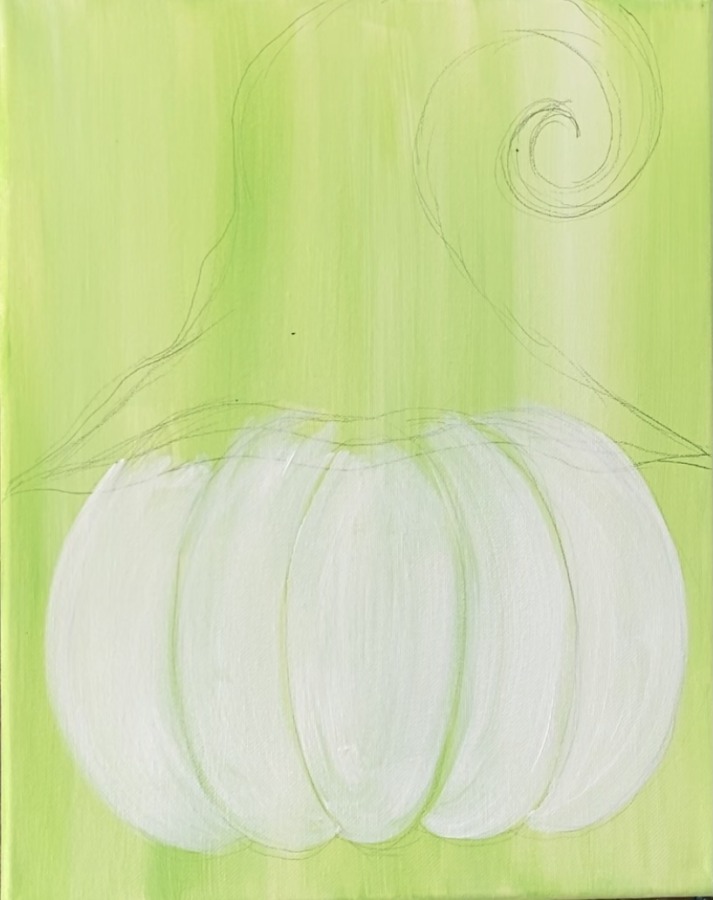
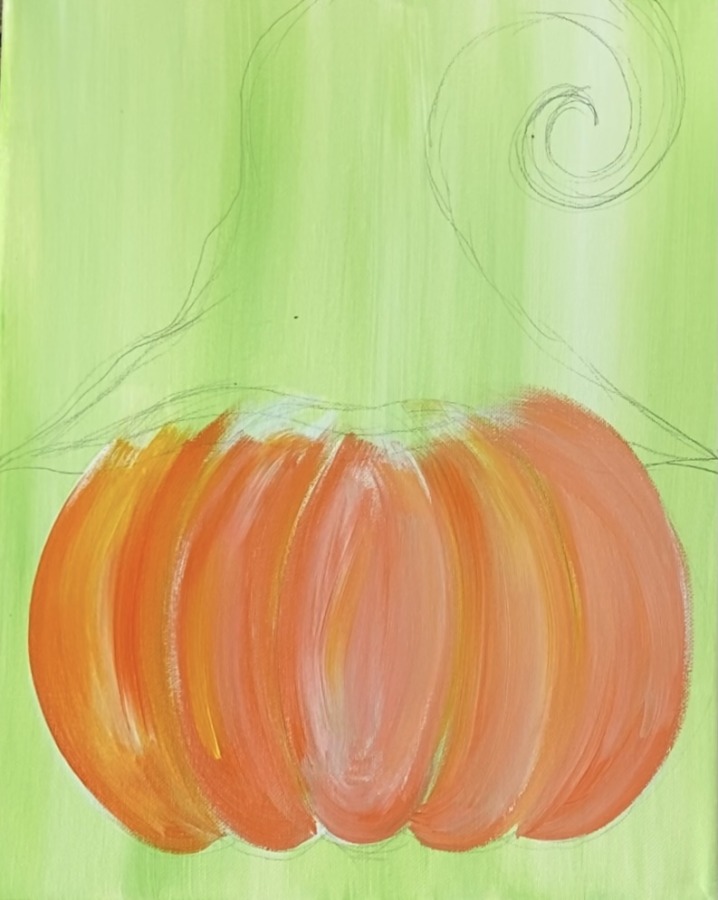
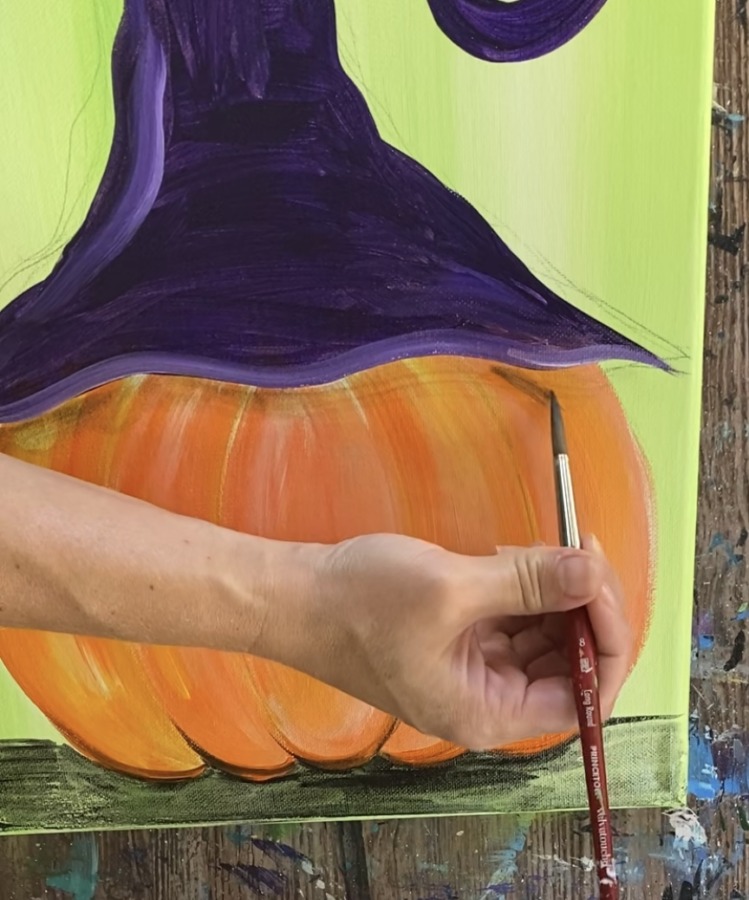
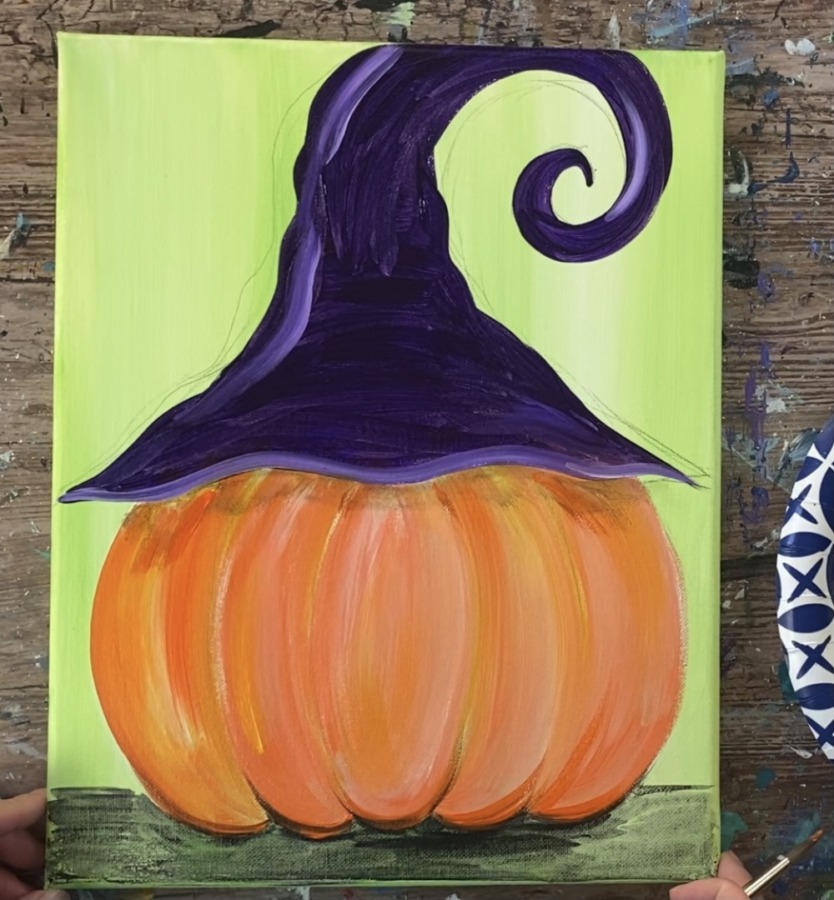
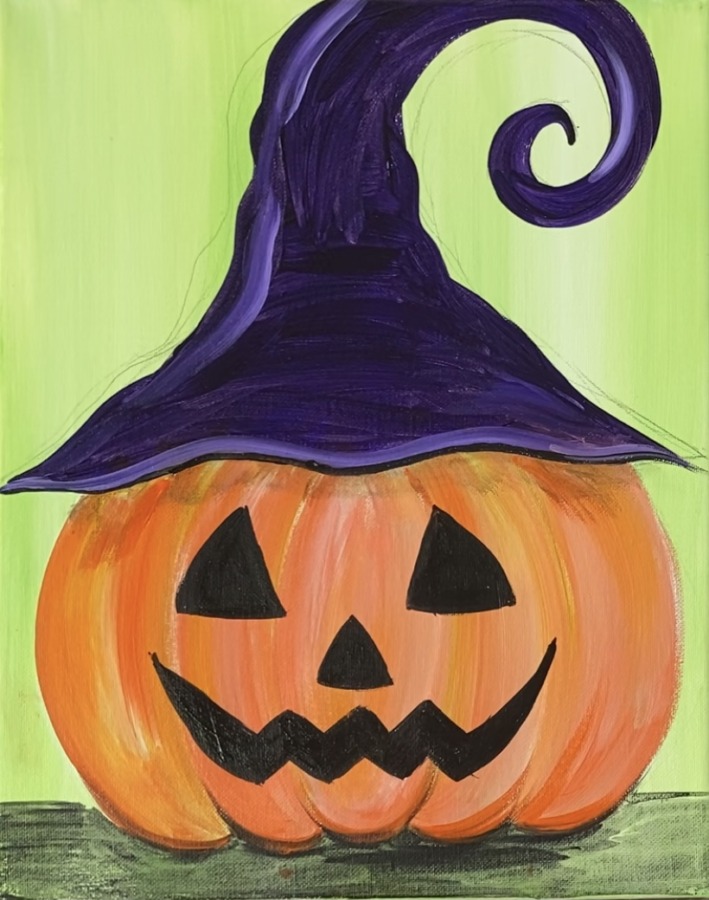
3. Paint The Pumpkin
Use a 3/4″ flat wash brush to paint the pumpkin. Start with the middle bump and paint it titanium white.
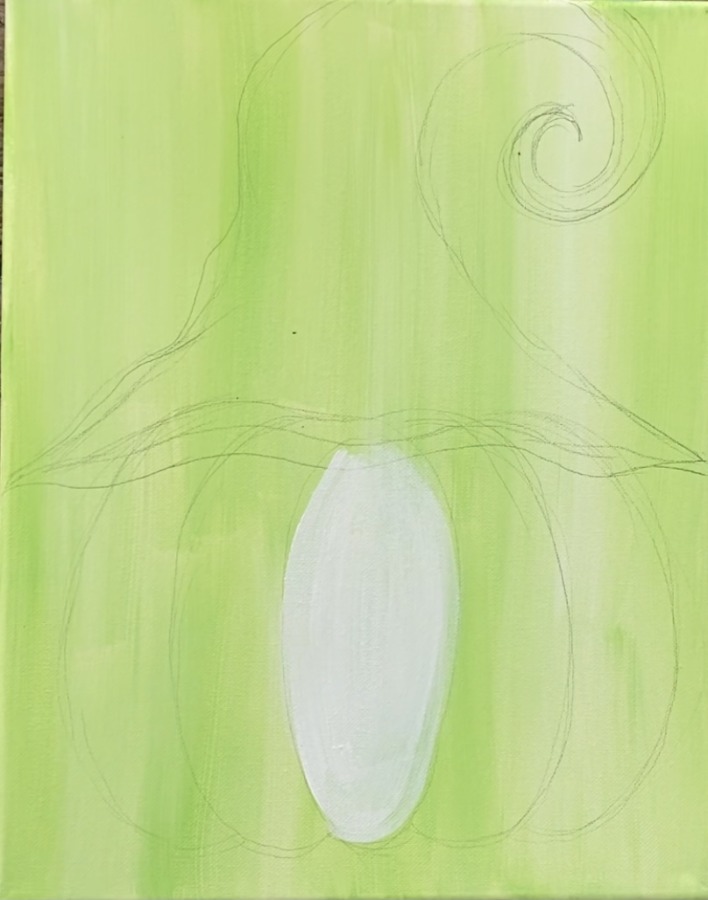
Paint each of the bumps of the pumpkin using strokes that curve and go in the direction of the shape.
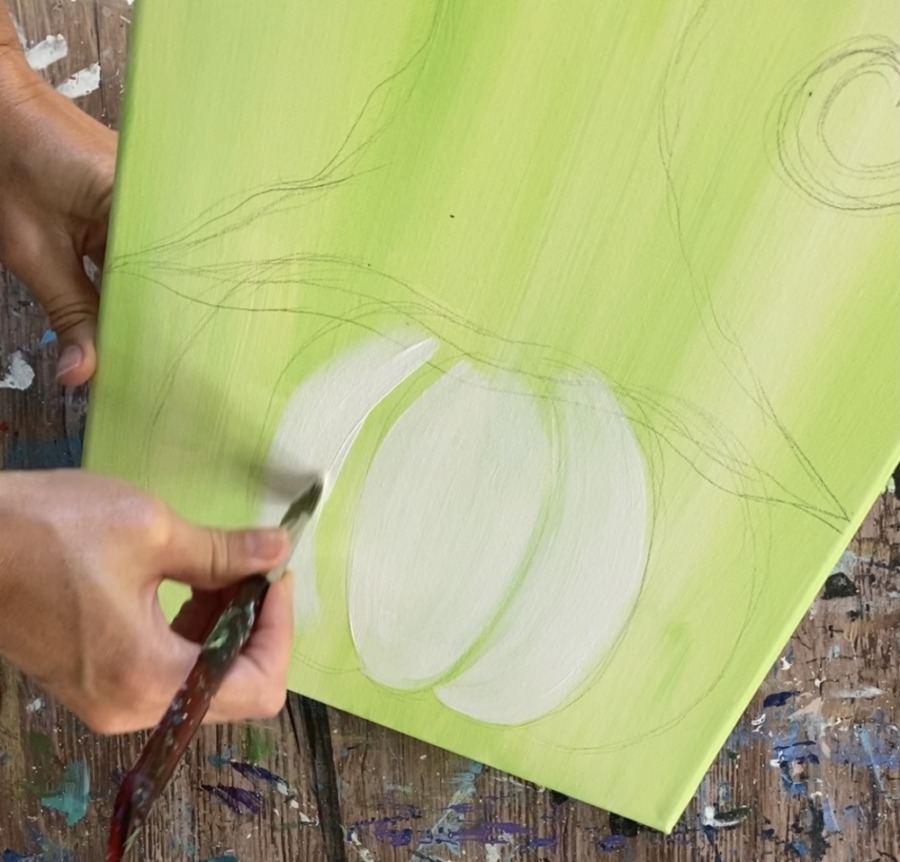
Leave a small gap between each of the “pumpkin bumps” (green still showing through) for the “ribs” of the pumpkin.
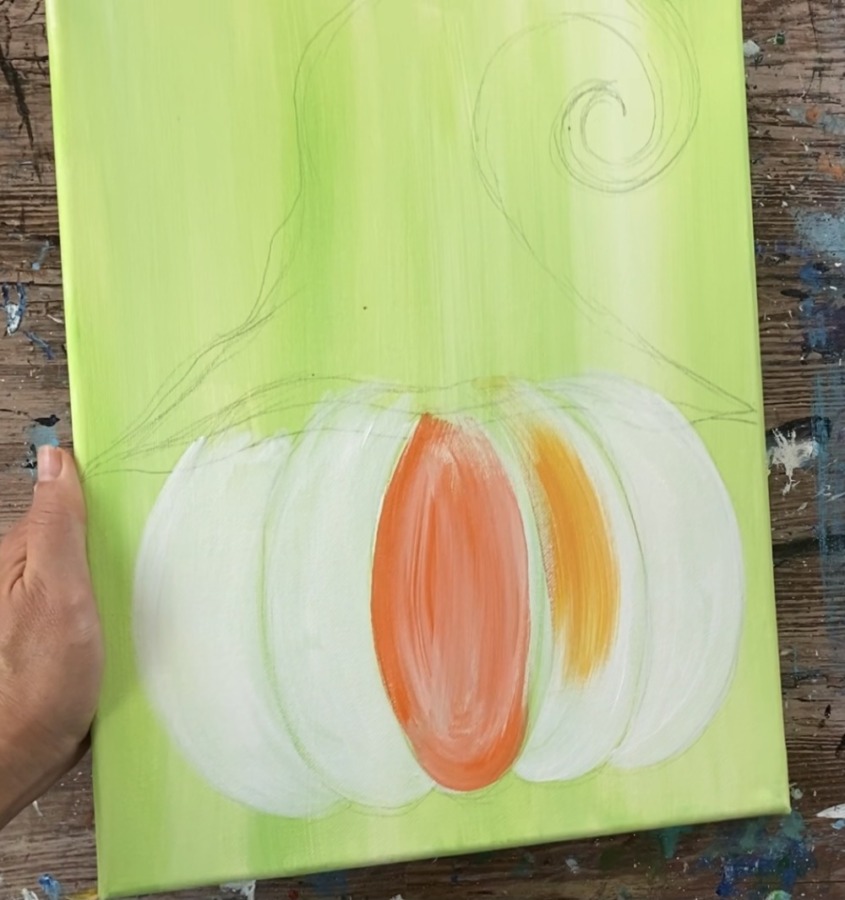
Next, load your palette with cadmium orange hue and cadmium yellow medium hue. You do not have to wait for the white to dry to do this next step.
Load your 3/4″ flat wash brush in cadmium orange hue. Then paint each of the “pumpkin bumps” separately. Stroke from the top down going in the direction of the shape.
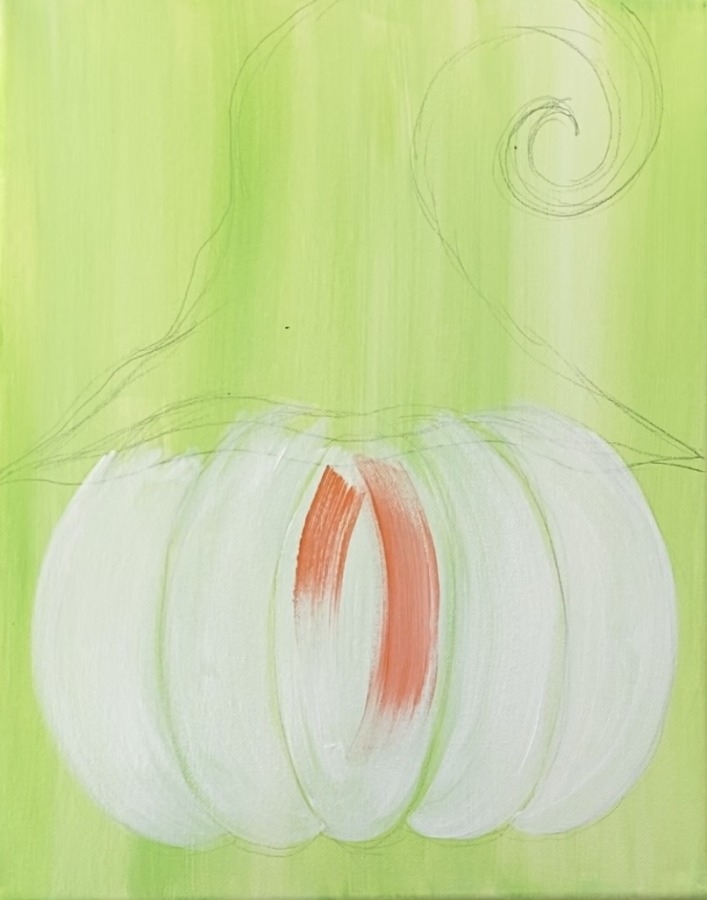
Then load your brush in some cadmium yellow medium hue and gently blend that with orange for the next pumpkin bump. Make sure you are stroking in a curved direction.
4. Paint The Hat
Use a #8 round brush and dioxazine purple to paint the hat. Outline the shape of the hat and then paint it in solid.
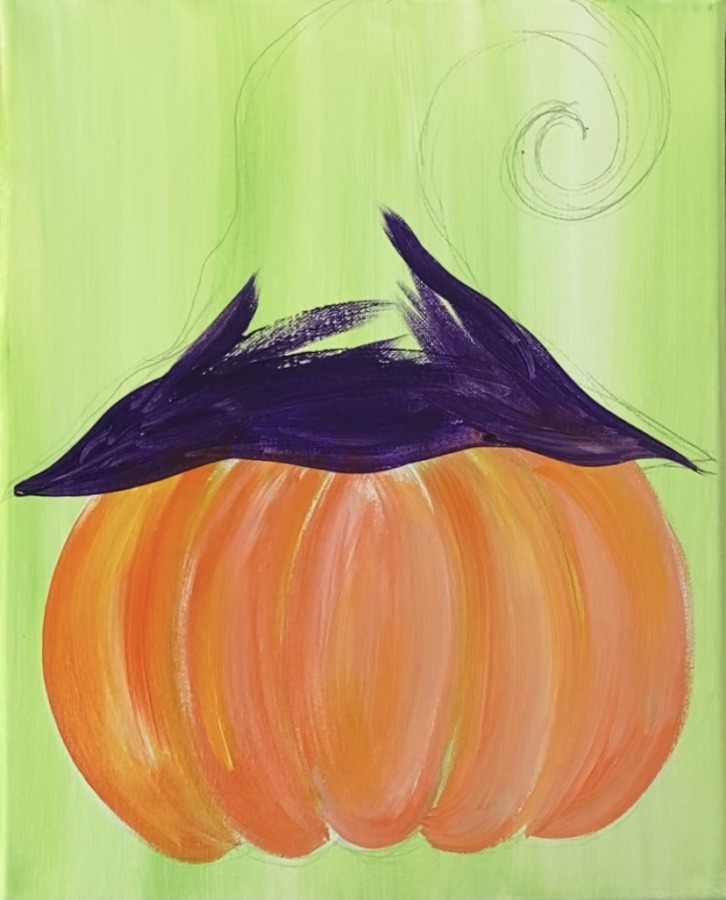
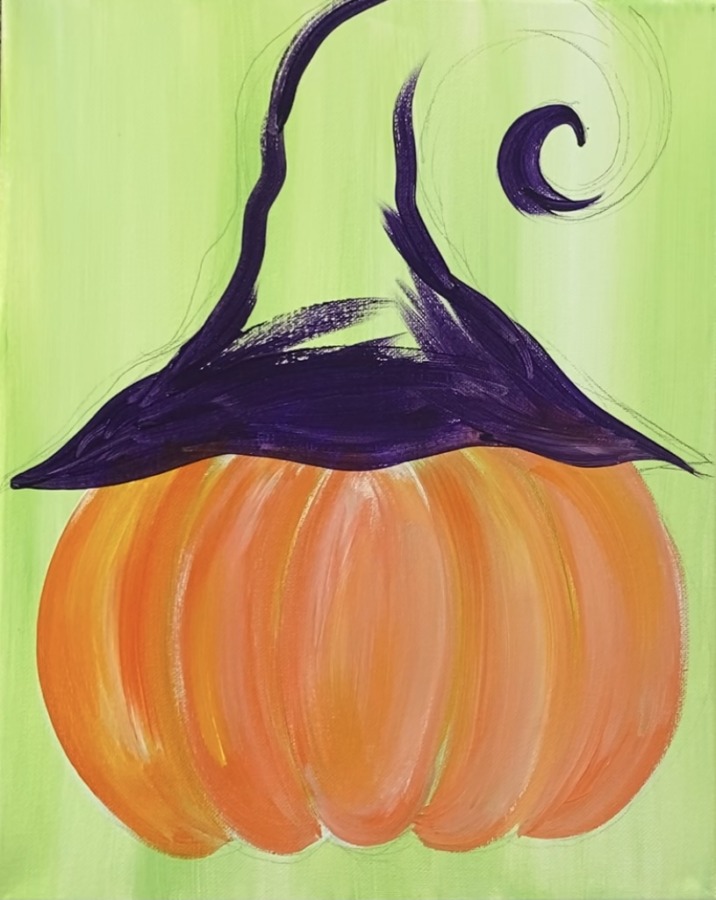
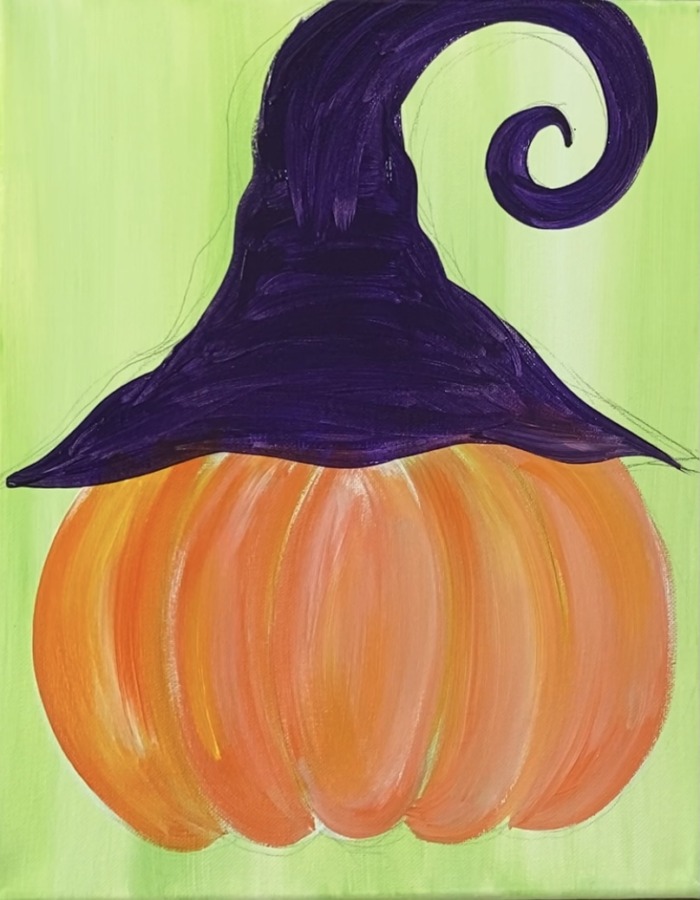
Then add some white to your brush and mix a little dioxazine purple into it to create a light to medium purple. Pain the bottom edge of the hat with that color.
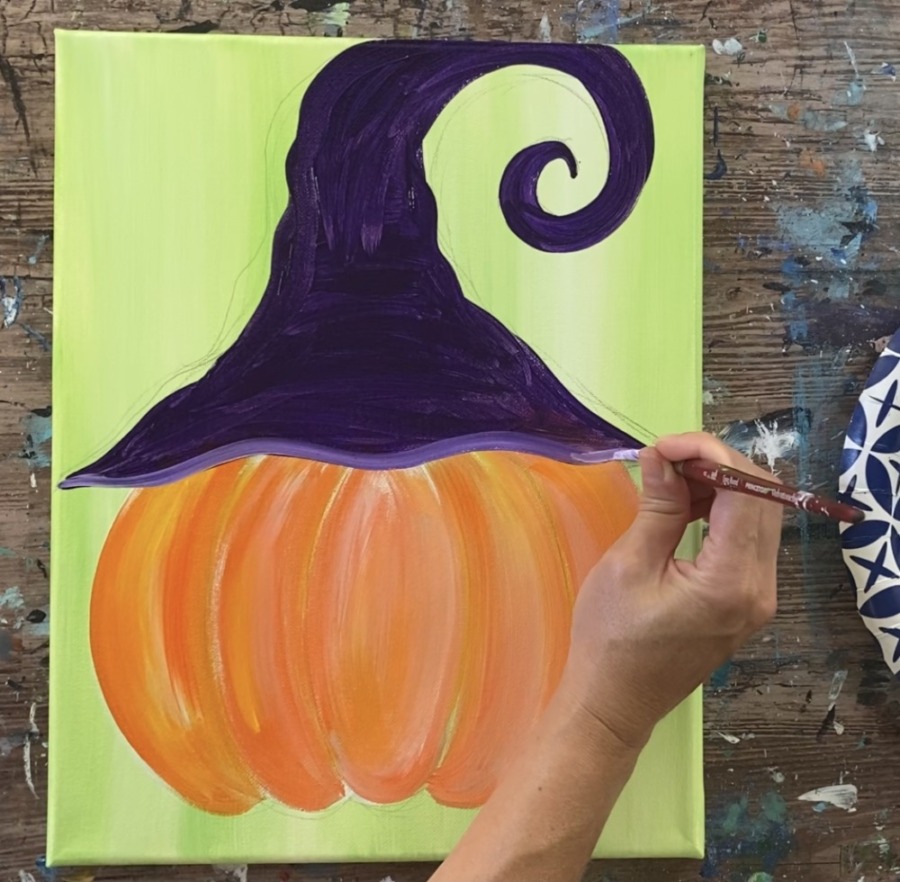
Then add some highlight strokes to the left side of the hat and where the end of the hat curls.
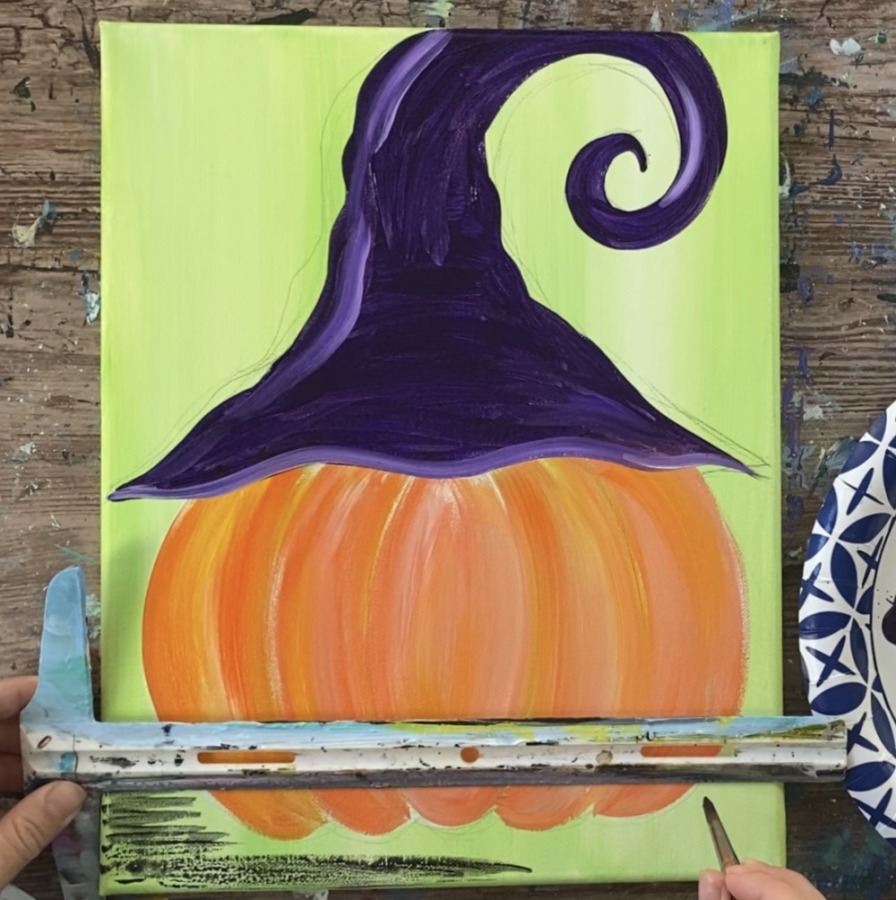
5. Paint The Ground Area
Use a t-square ruler to define the table area. Use the #8 round brush and mars black watered down to a water color consistency. Paint left and right strokes filling in the table area.
Paint a shadow under the pumpkin using more black to make the area darker.
6. Add Dark Shading On Bottom Of Pumpkin
Rinse your brush and load it into cadmium orange hue. Paint the bottom of the pumpkin defining the edges of the bottom bumps.
Drag some of the black into the orange and paint slightly upwards for the dark shadow part of the bottom of the “pumpkin ribs/ lines”.
7. Paint Shadow Under Hat
Use the #8 round brush and the watered down black to paint a shadowy area under the hat.
The orange should be completely dry and this black is very thin and watered down so it shows up translucent.
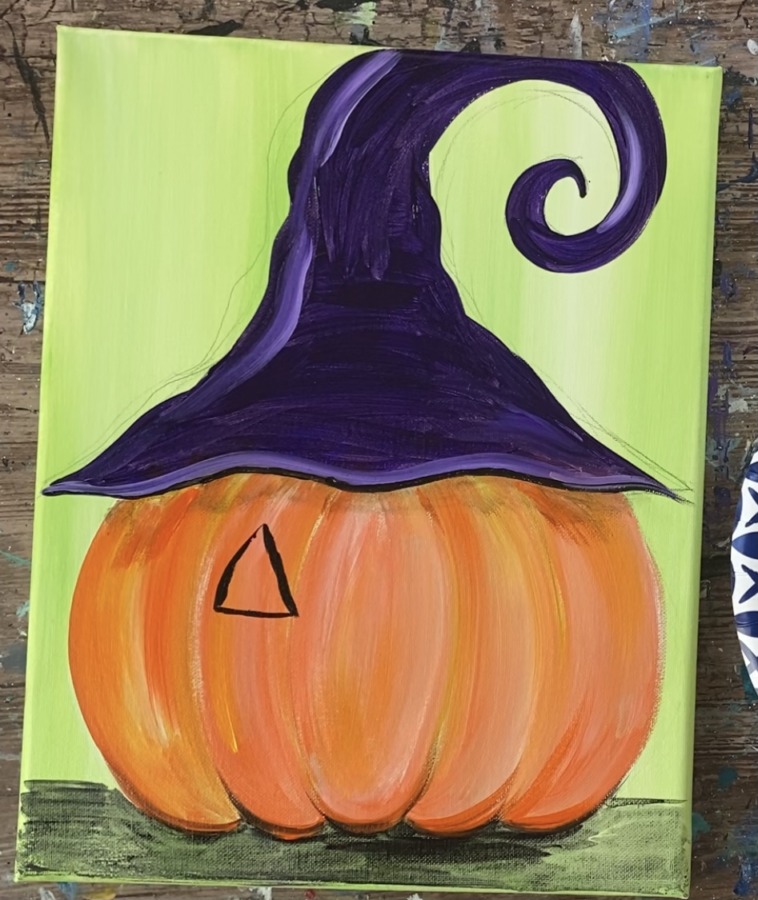
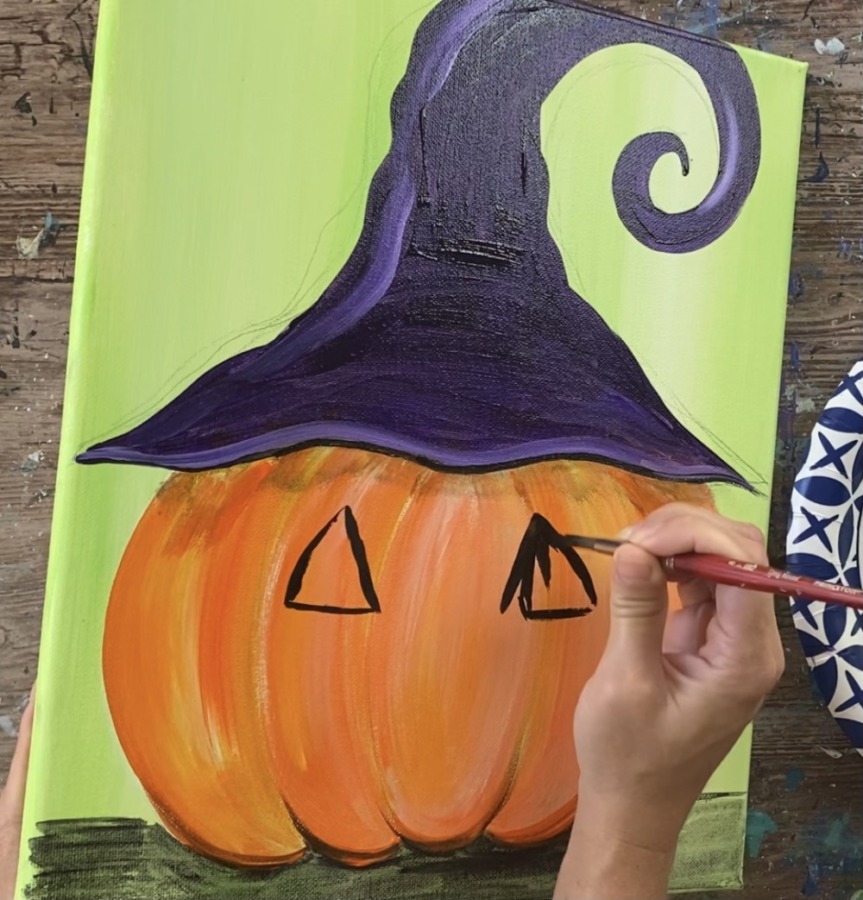
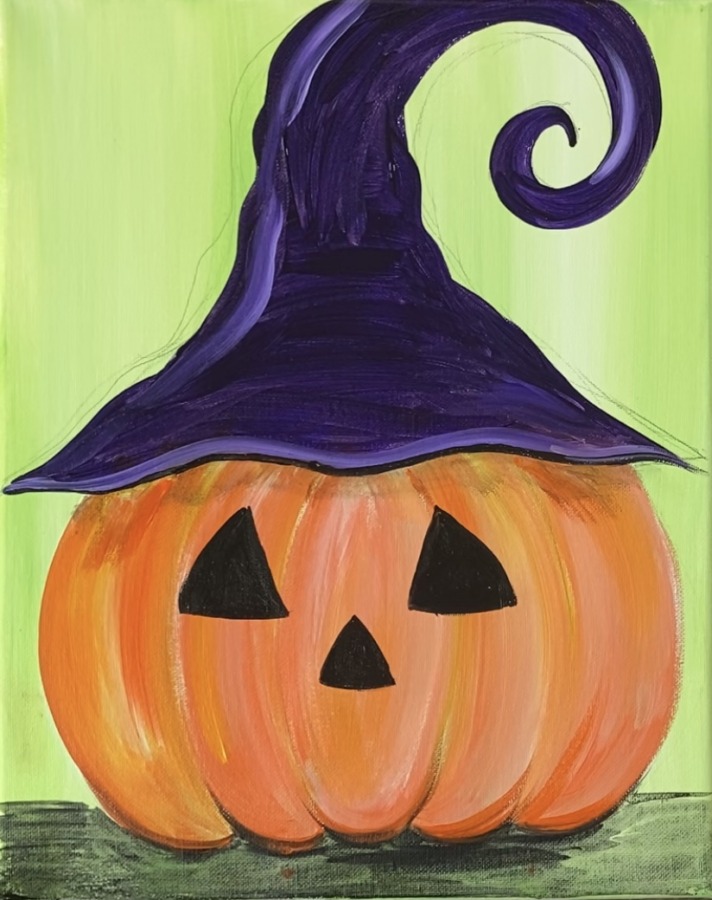
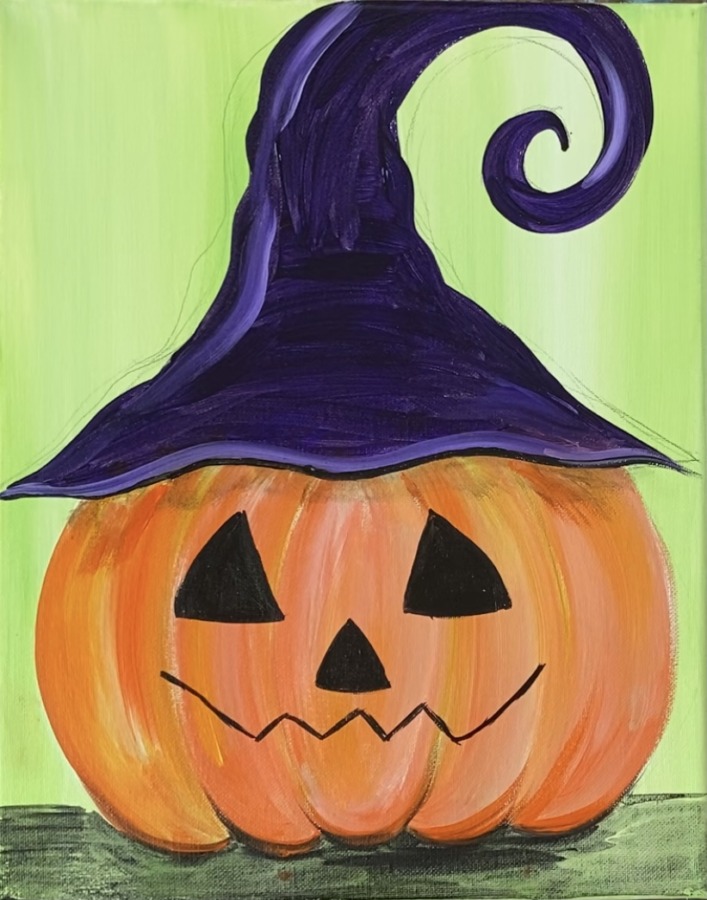
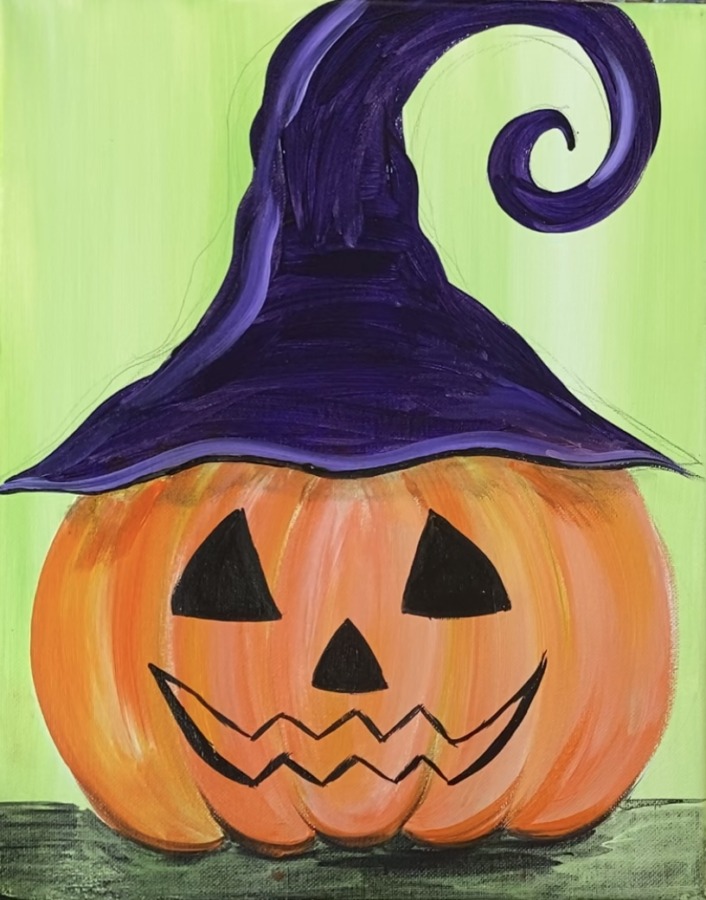
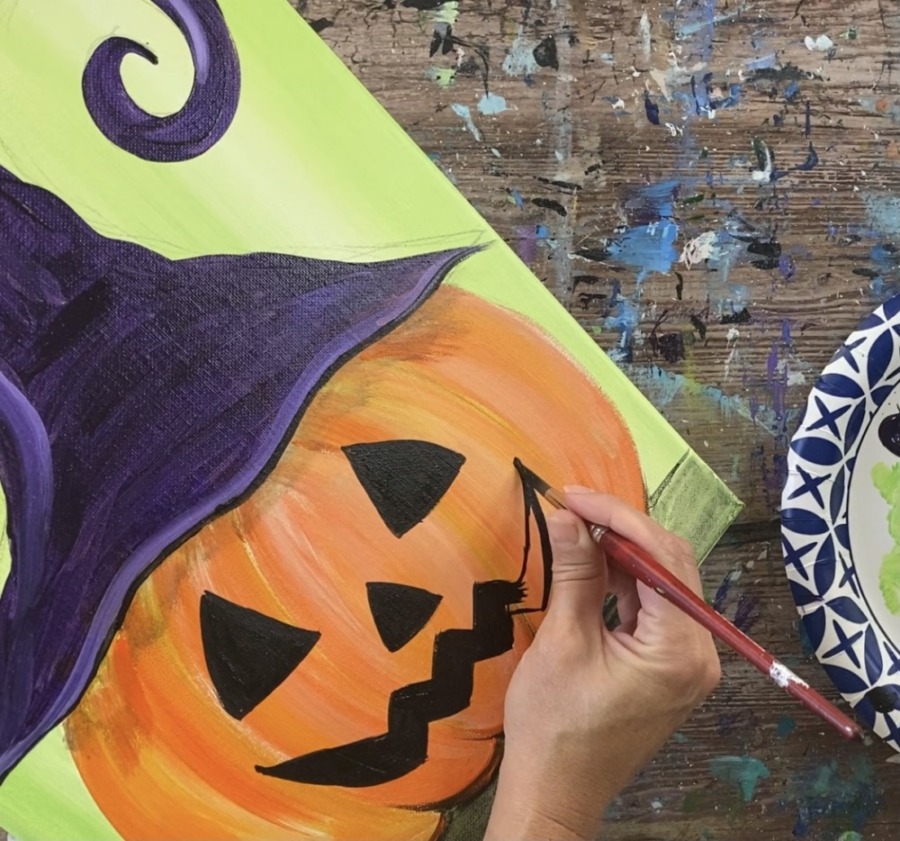
8. Paint The Face
Tip: draw the face first with chalk or pencil then paint over with black.
Use a #8 round brush to paint the shapes of the face. Paint two triangles for the eyes, a triangle for the nose and the shape of the mouth.
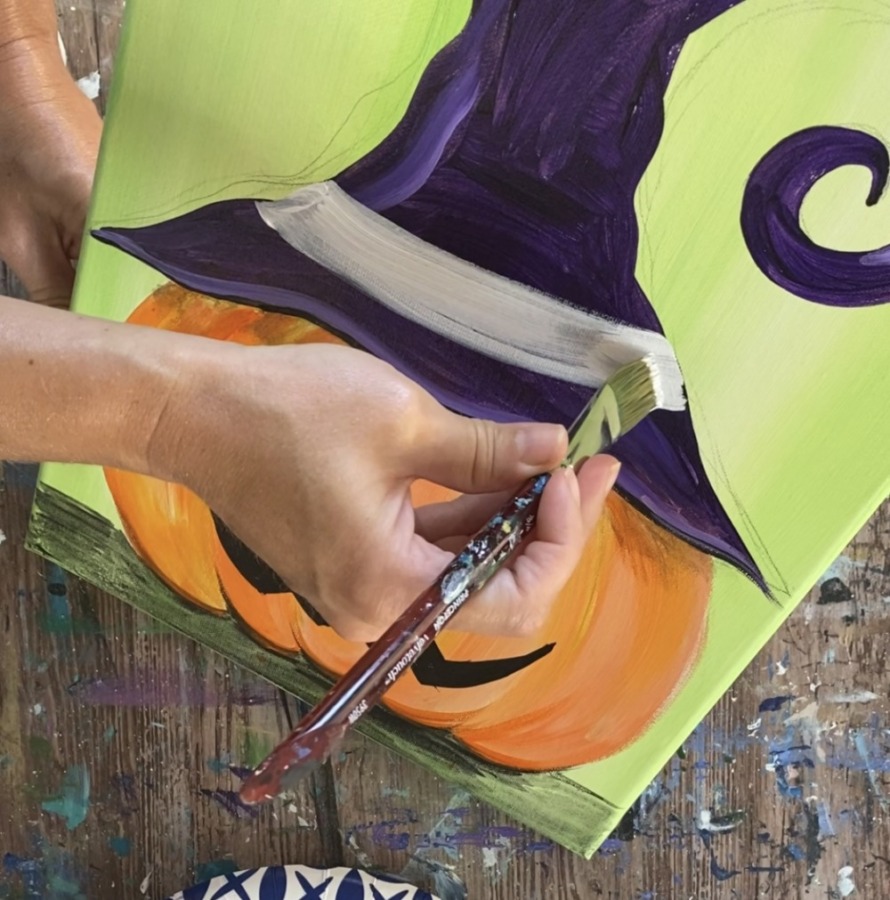
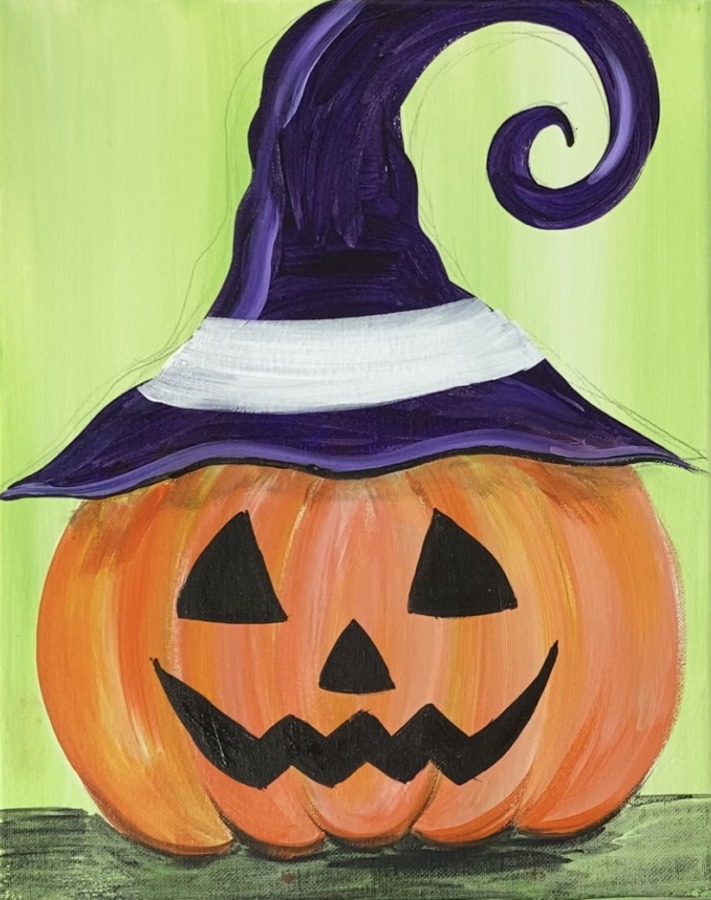
9. Paint The Hat White Band
Use a 3/4″ flat wash brush and titanium white to paint the band on the hat.
10. Add Circle Stamps With Foam Pouncer
Use the foam pouncers to paint circles in the background. Load your palette with brilliant yellow green, titanium white and cadmium yellow medium hue. Press and twist the stamp to make the circles. These should be very subtle in the background.
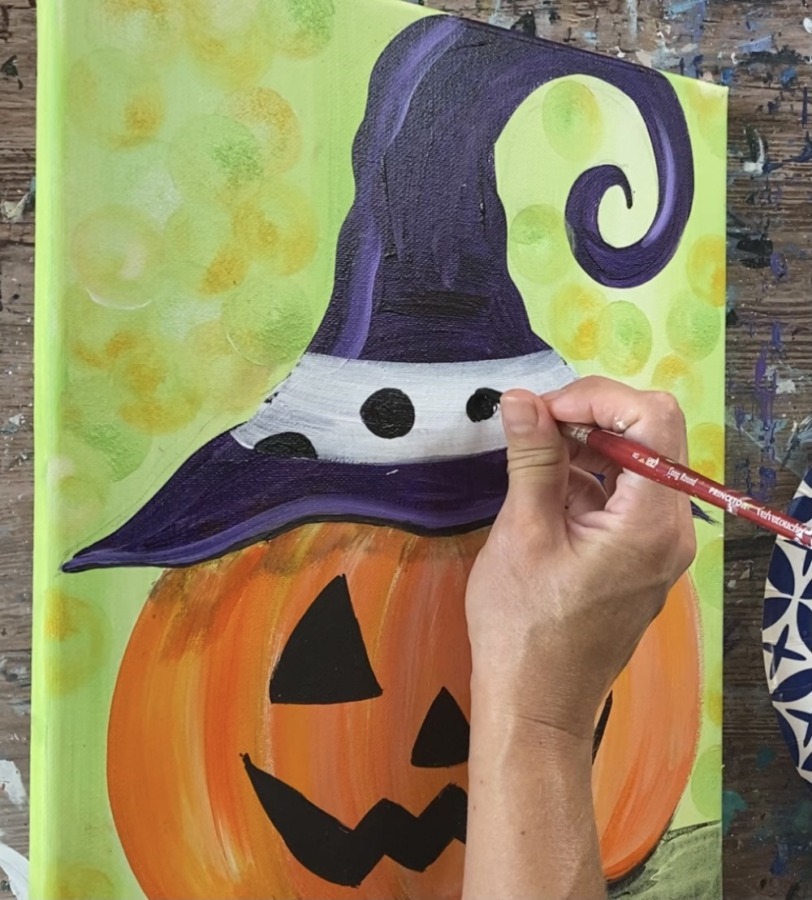
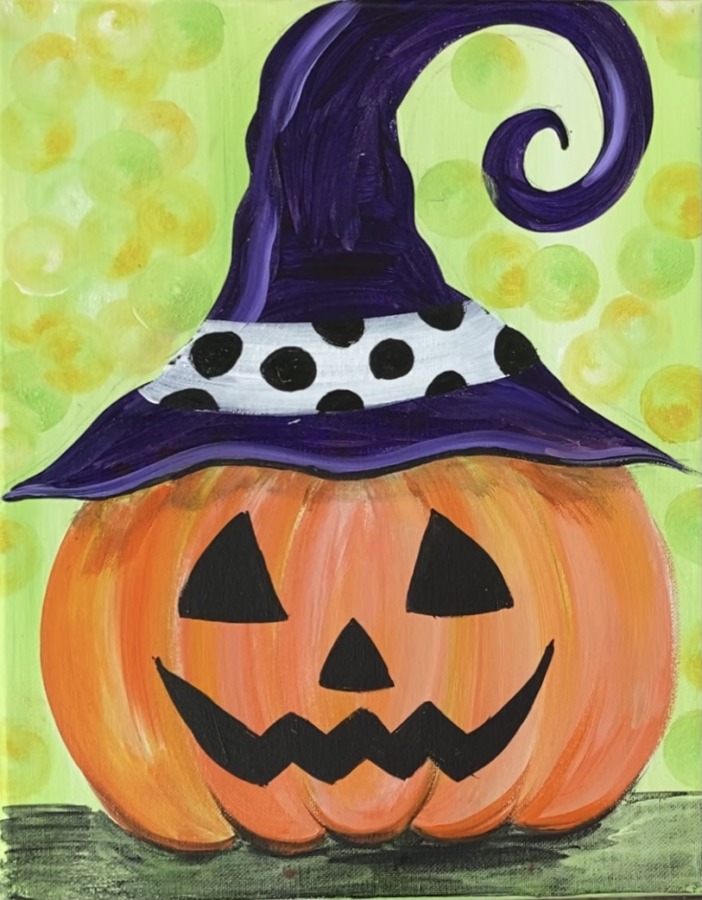
11. Paint Polka Dots
Use your #8 round brush and mars black to paint black circles on the band of the witch hat.
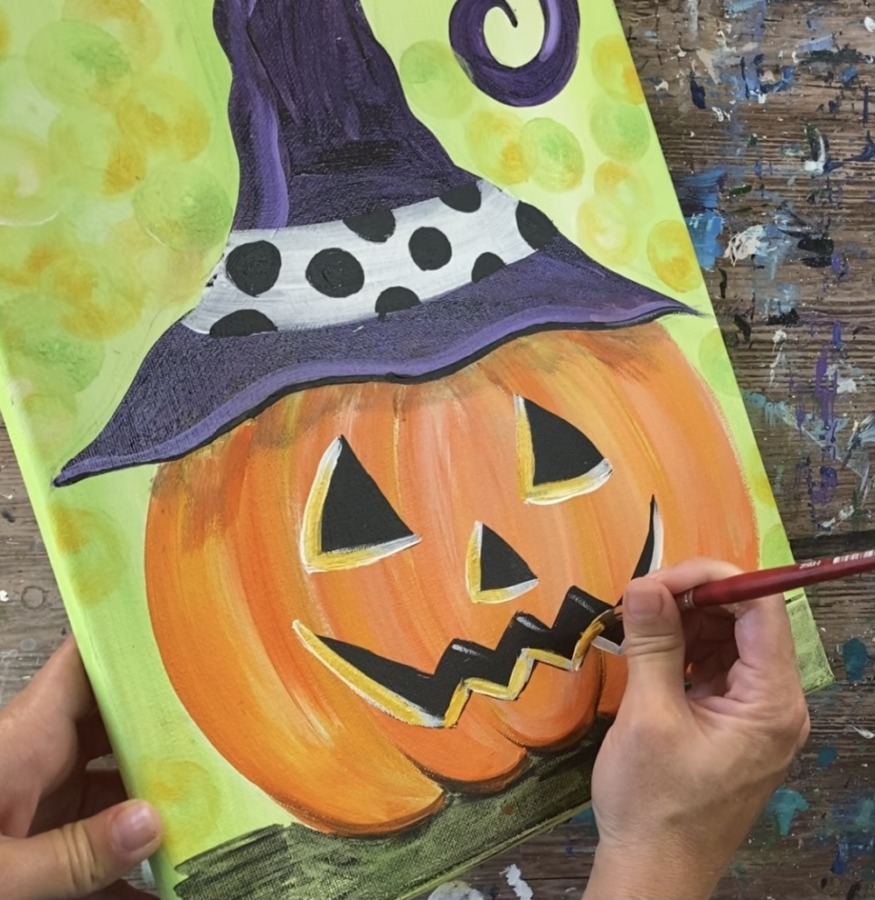
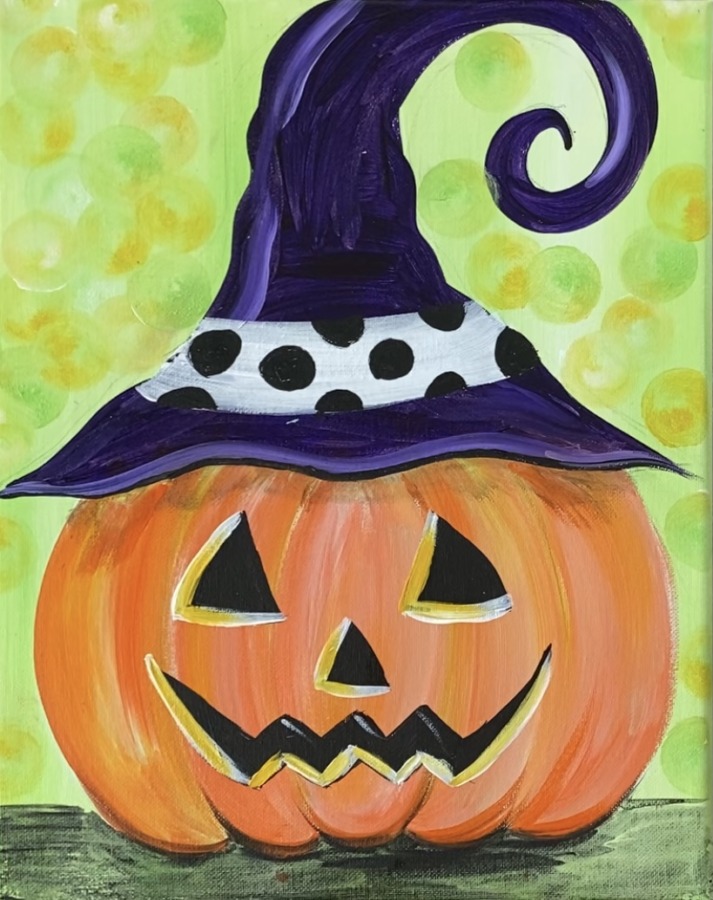
12. Paint Inner Highlight Of Face Shapes
Use titanium white and your #8 round brush to paint the highlight on the inside of the face shapes. Paint the left angle and bottom line a thick stroke of white.
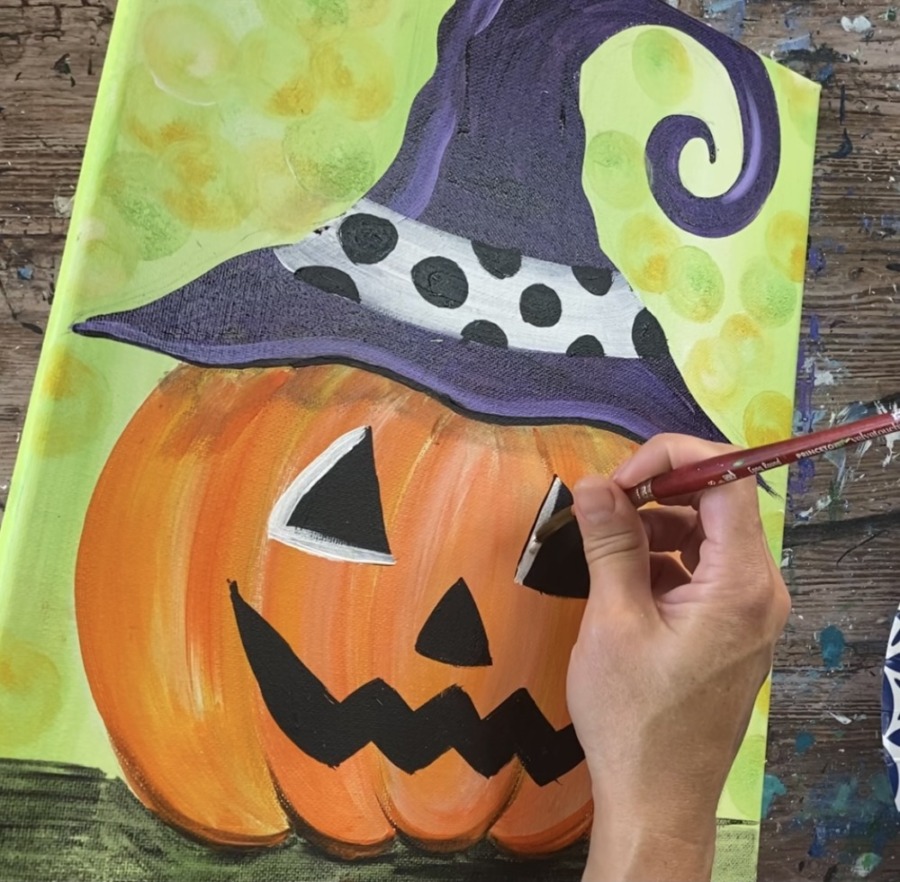
Repeat this for the nose and the mouth. Paint the left angle and bottom zig-zag line for the mouth.
Then add yellow over some of the white.
13. Paint Spider Web
Use a 10/0 liner brush and mars black to paint the spider web on the inside of the curl part of the hat. Paint a vertical and horizontal lines as well as two diagonal lines.
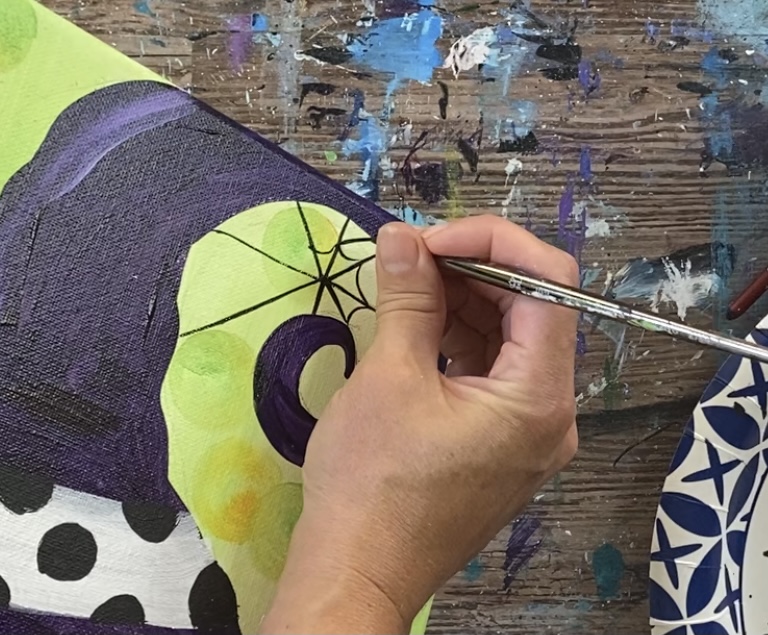
Then paint the curved web lines in between each of the angles.
Then paint a slightly wavy vertical line below the spider web. Paint a small circle for the spider.
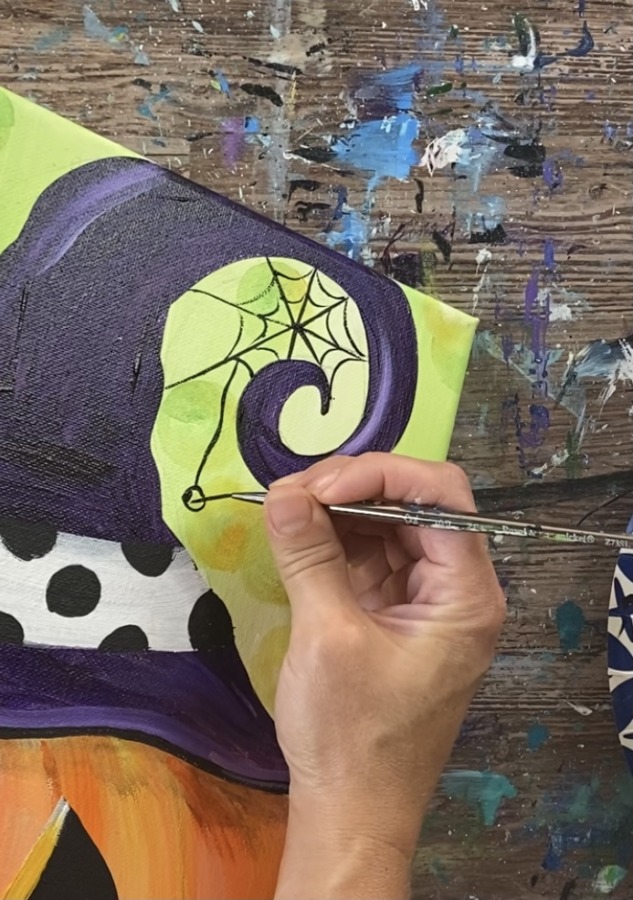
Then paint four legs on each of the spider. Paint little white dots for the eyes.

14. Paint Vines & Twigs
Use your #10/0 liner brush to paint black twigs on the left side of the hat. Use hooker’s green hue permanent to paint a curled vine under the hat. Add a little white into the green to lighten it up in some areas.
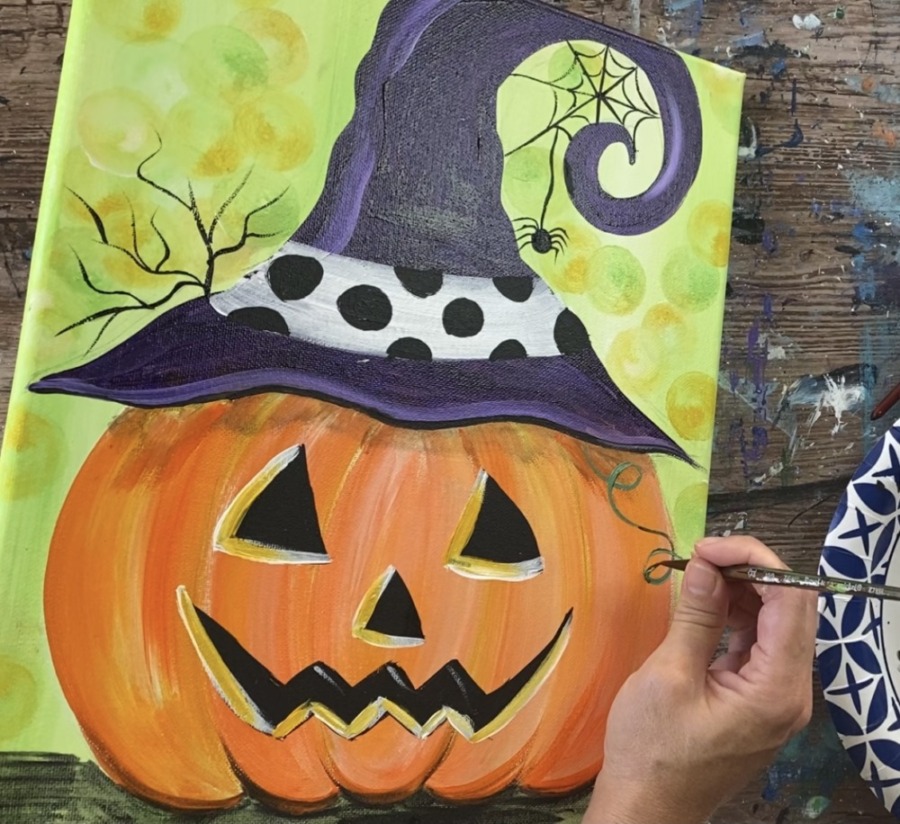
Paint small pumpkin leaves on the vine.
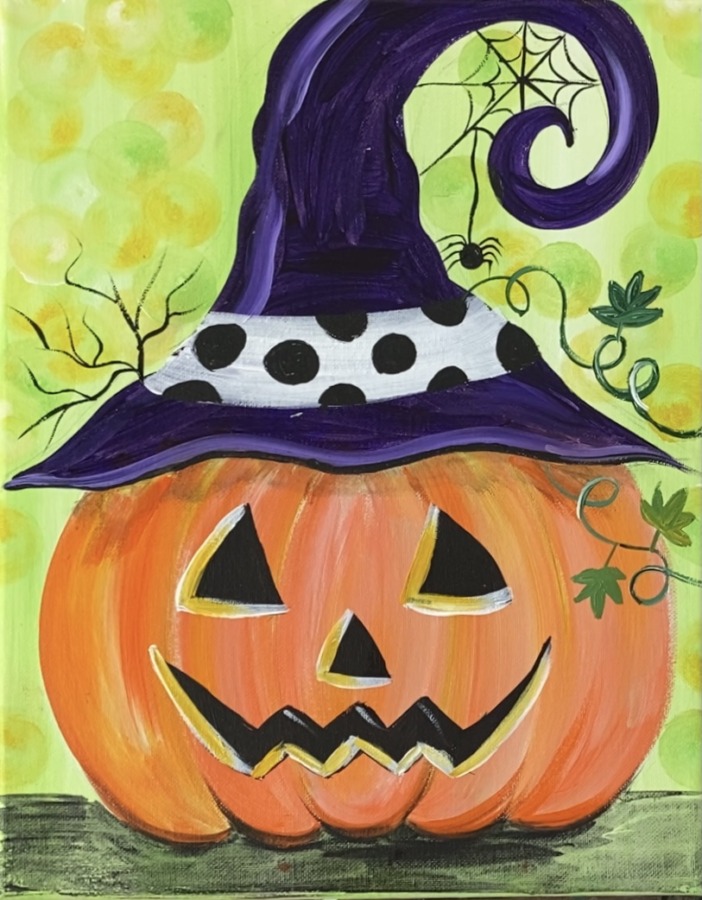
15. Paint Fall Leaves
Use your #8 round brush and cadmium red medium hue to paint fall leaves.
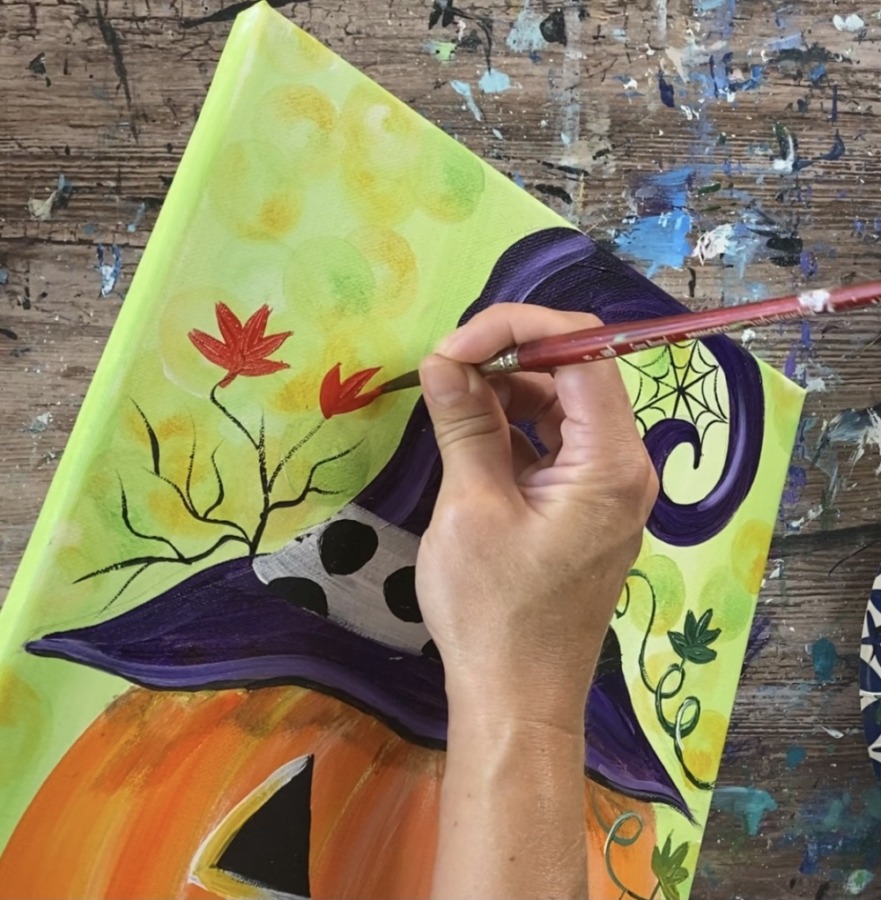
Add some white into the red to lighten it up and have it show against the hat. Use your 10/0 liner brush and mars black to paint the veins on each of the leaves.

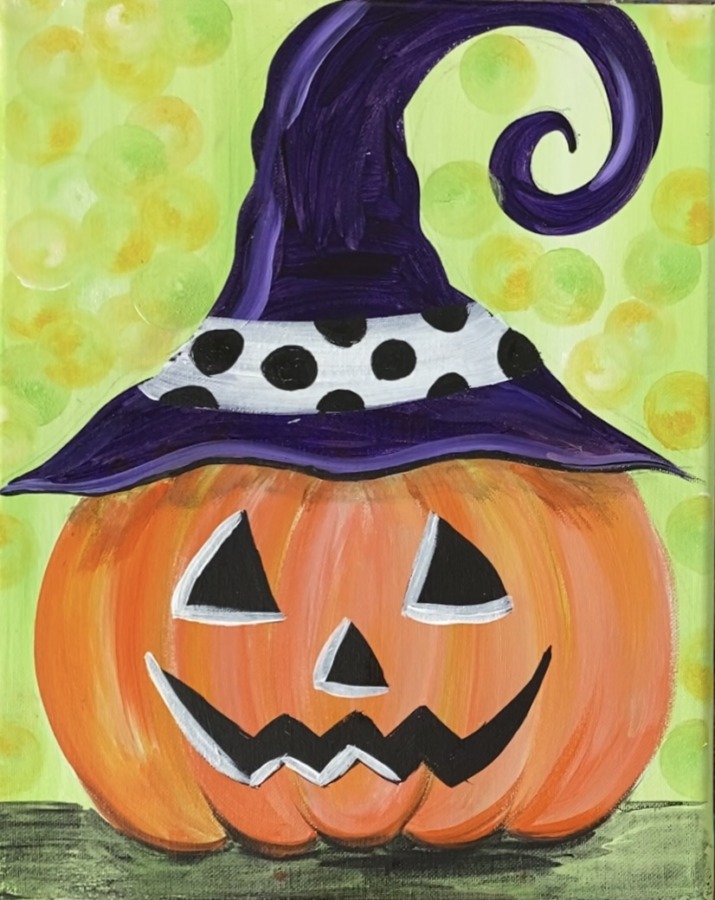
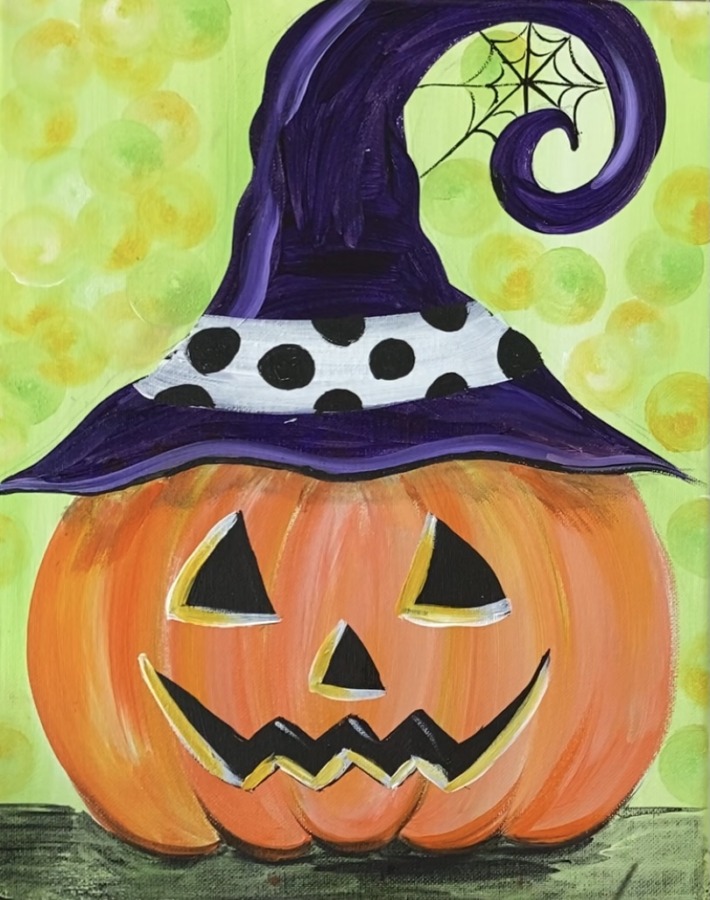
Finished!

Share your art here:


