
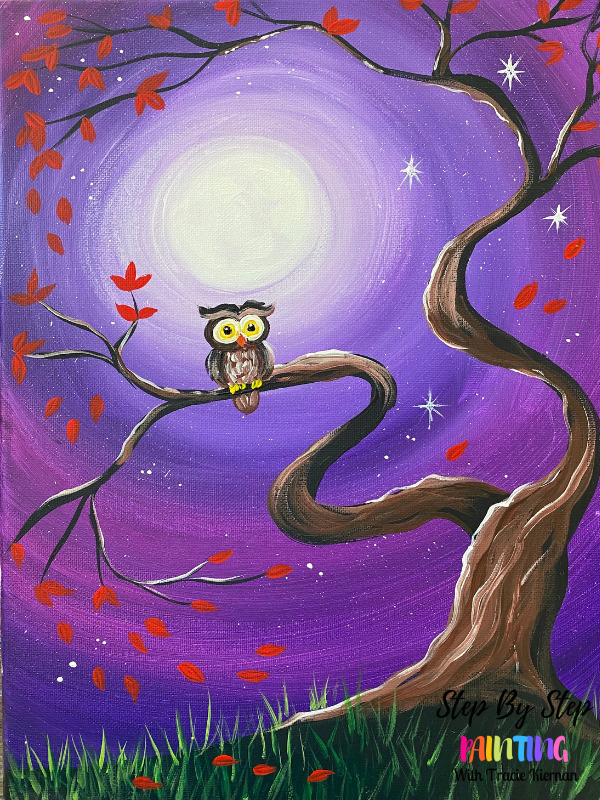
Learn how to paint a swirly purple night sky with a twisty fall tree and bright red leaves. Paint a cute owl on the branch!
Would you like to save this?
This is a beginner friendly acrylic painting tutorial that will guide you through each step with picture directions and video.
Enjoy and happy painting!

Materials
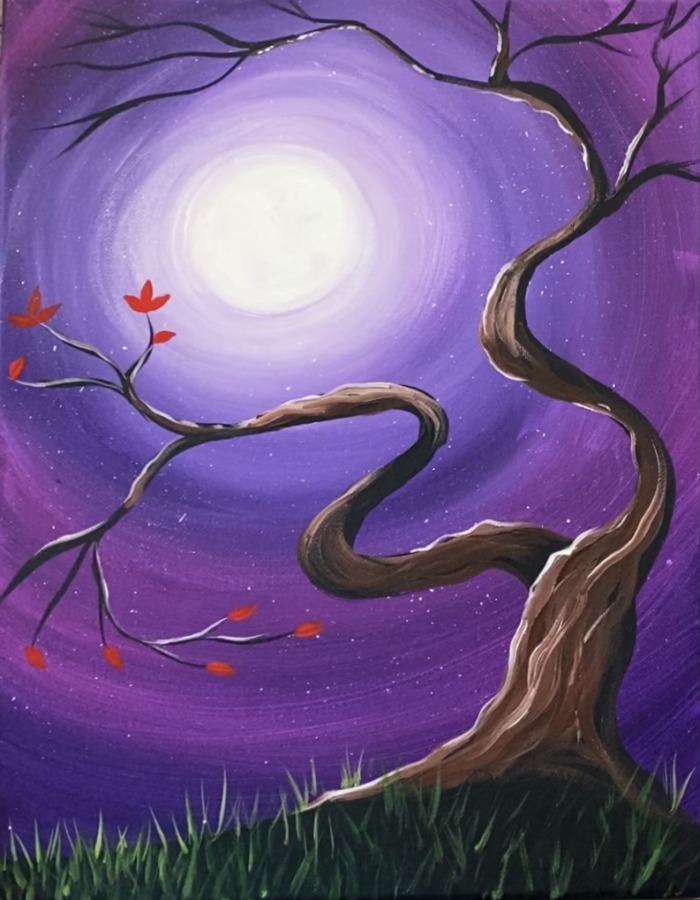
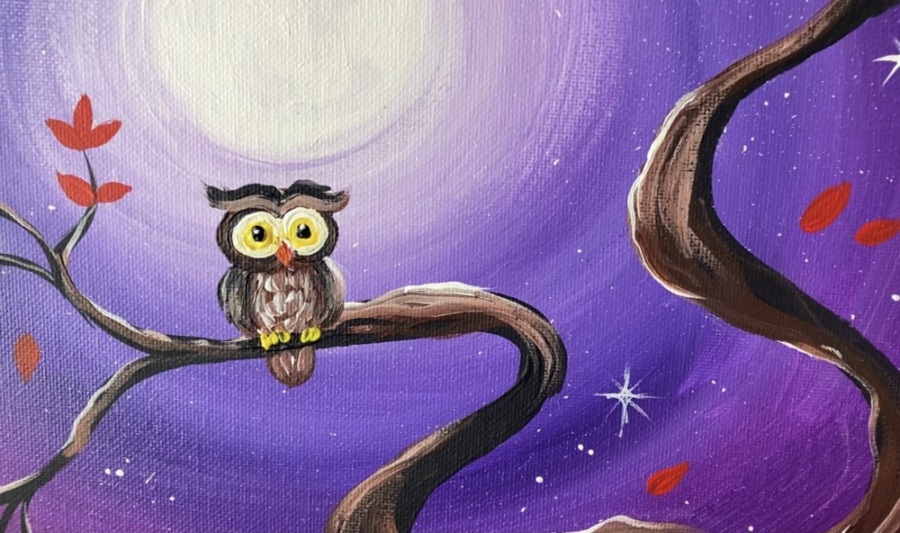
Fall Night Watcher
Learn how to paint an owl on a branch with a swirly purple night sky, full moon and fall leaves.
Materials
- Acrylic Paint
- 11 x 14 Canvas
- Paint Brushes
- White Chalk
- Chalk Pencil (optional)
Colors
- Mars Black
- Titanium White
- Pyrrole Red
- Primary Yellow
- Hooker's Green Hue Permanent
- Burnt Umber
- Dioxazine Purple
- Deep Violet
Brushes
- 3/4" Flat Wash
- #8 Round
- #4 Round
- 10/0 Liner
Instructions
- See tutorial on www.stepbysteppainting.net for full directions!
Color Palette

Using Craft Paints?
Try substituting these Apple Barrel Craft Paint colors:
- Black
- White
- Flag Red
- Yellow Flame
- Holly Branch
- Nutmeg Brown
- *Purple Iris
- *Fuchsia
*Note: Purple Iris and Fuchsia may not blend well together in the background. If that is the case, you can just use Purple Iris.
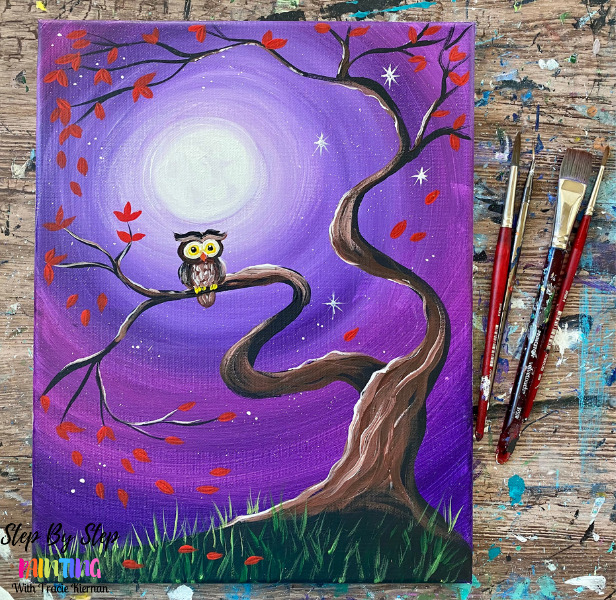
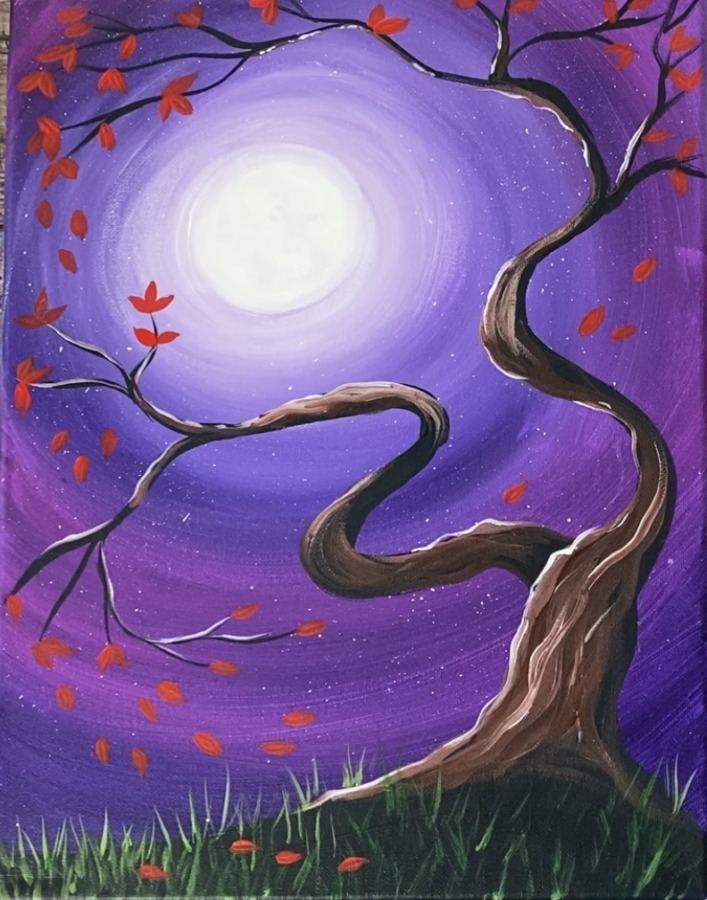
Directions At A Glance

Video
Step By Step Directions :
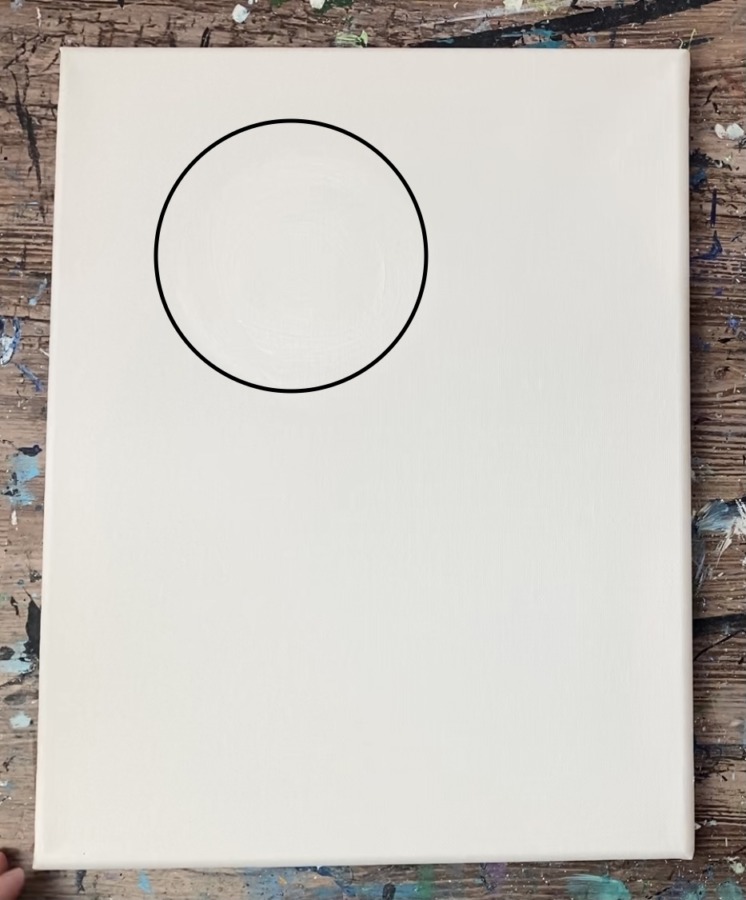
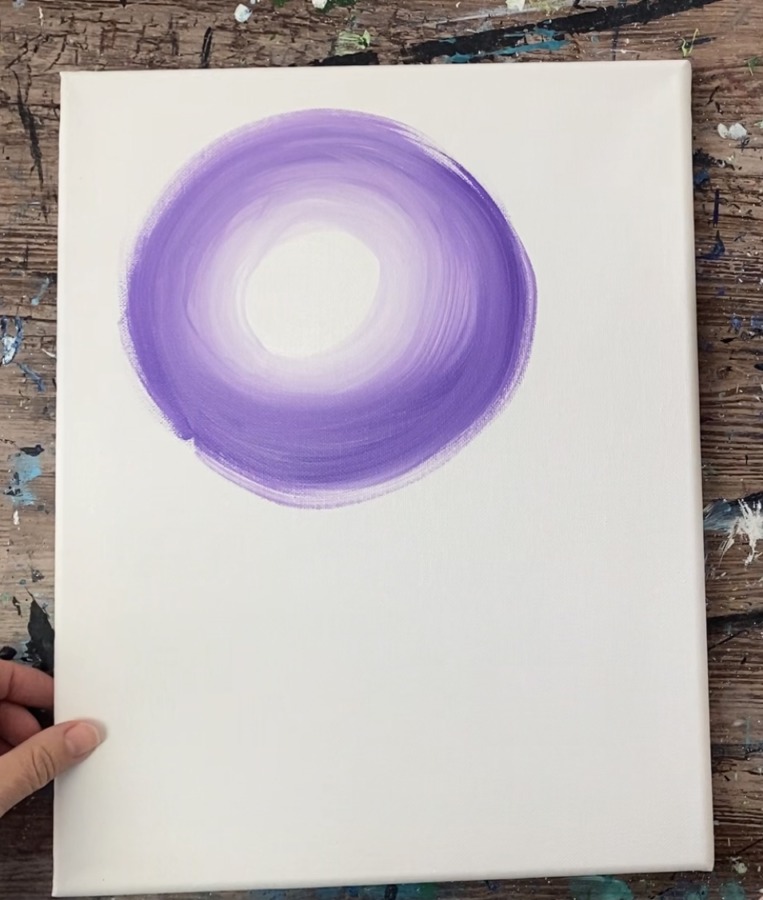
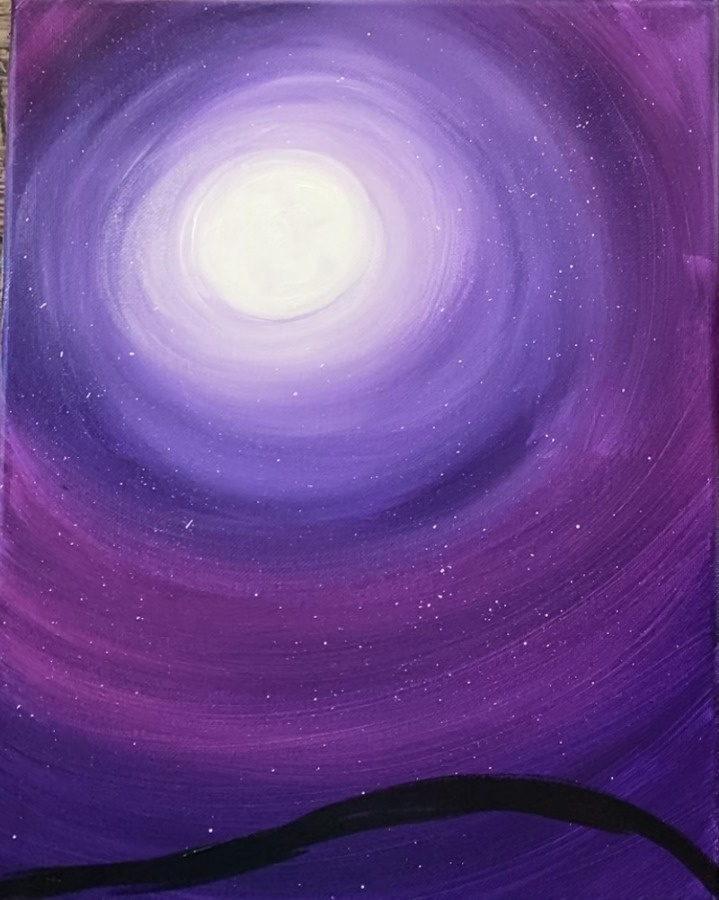
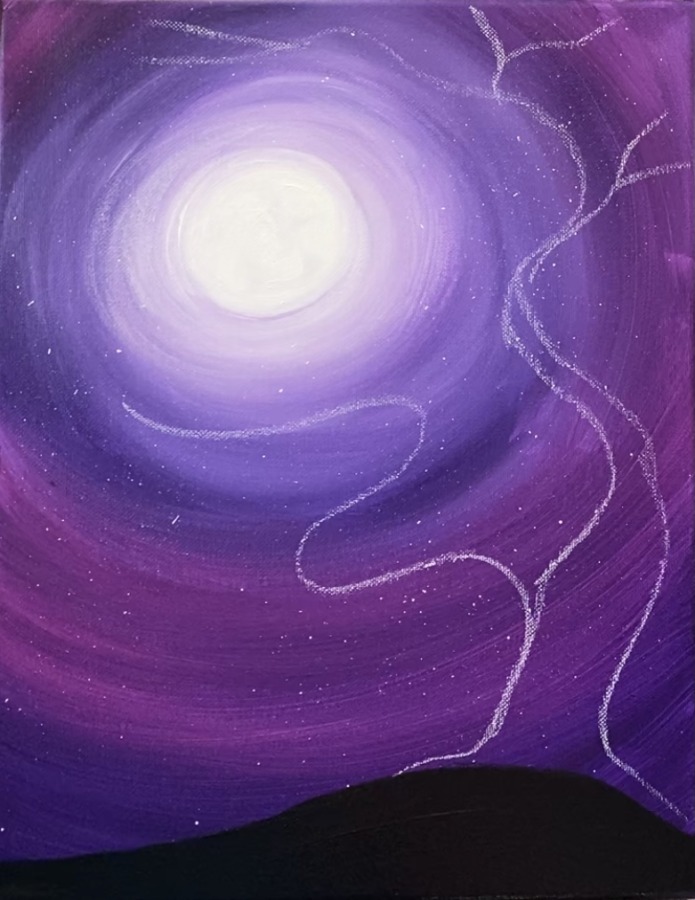
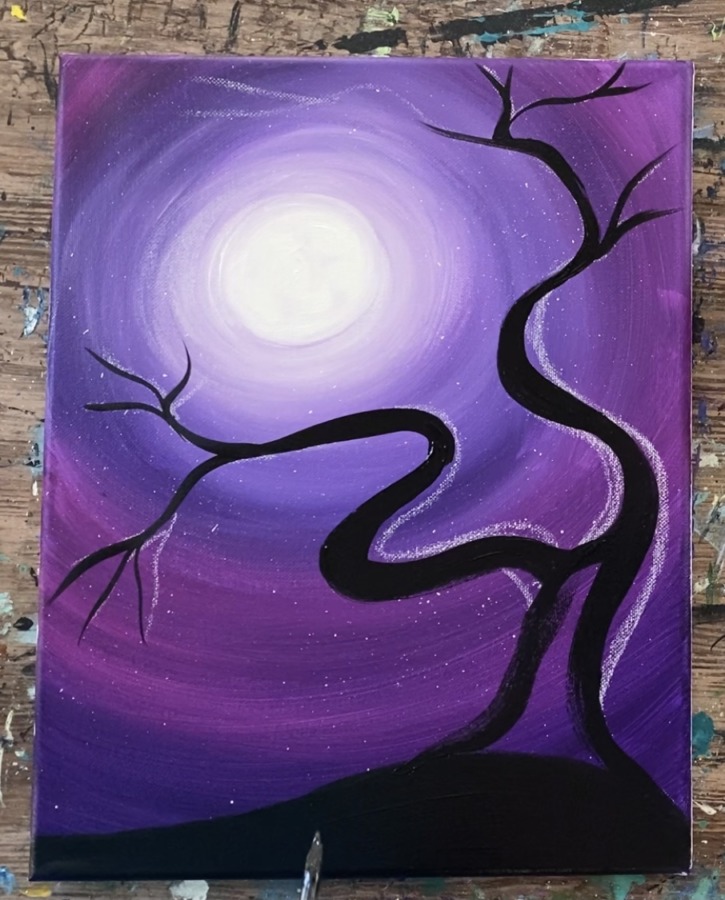
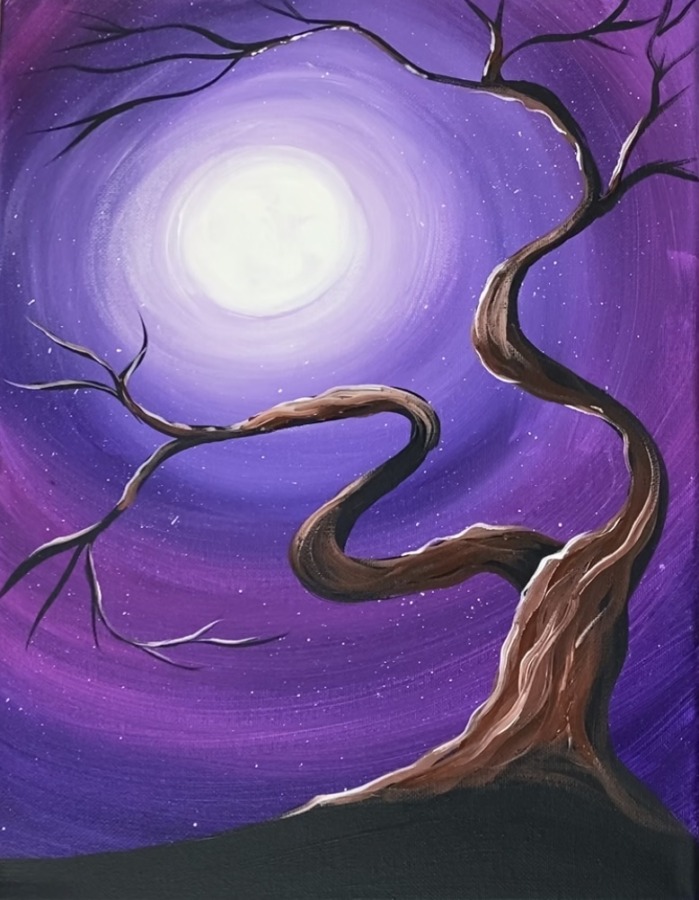
1. Paint The Background
Paint a radiating background with the moon as the center. I explain in more detail how to do this type of blended background in my post “How To Blend Acrylics“
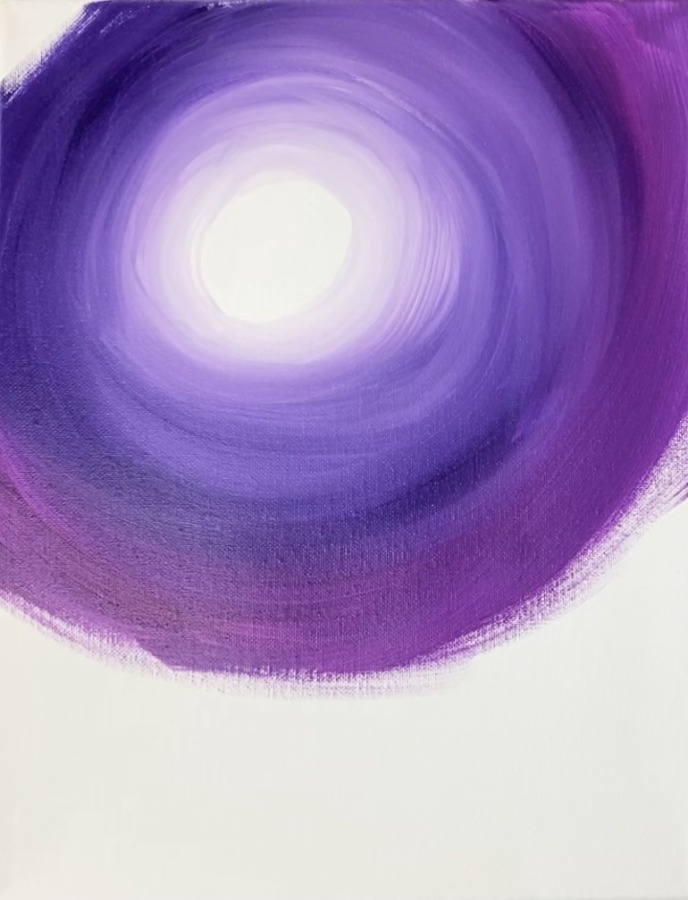
Start by using a 3/4″ flat wash brush dipped in titanium white paint. Paint a medium size circle in the upper left area of the canvas. This is where your bright white moon will be.
Then, without rinsing brush, load a small amount of dioxazine purple onto the brush. Start on the outside part of the circle and blend the paint gently into the white. Make sure you leave the size of the moon circle without any purple paint so it stays bright and white.
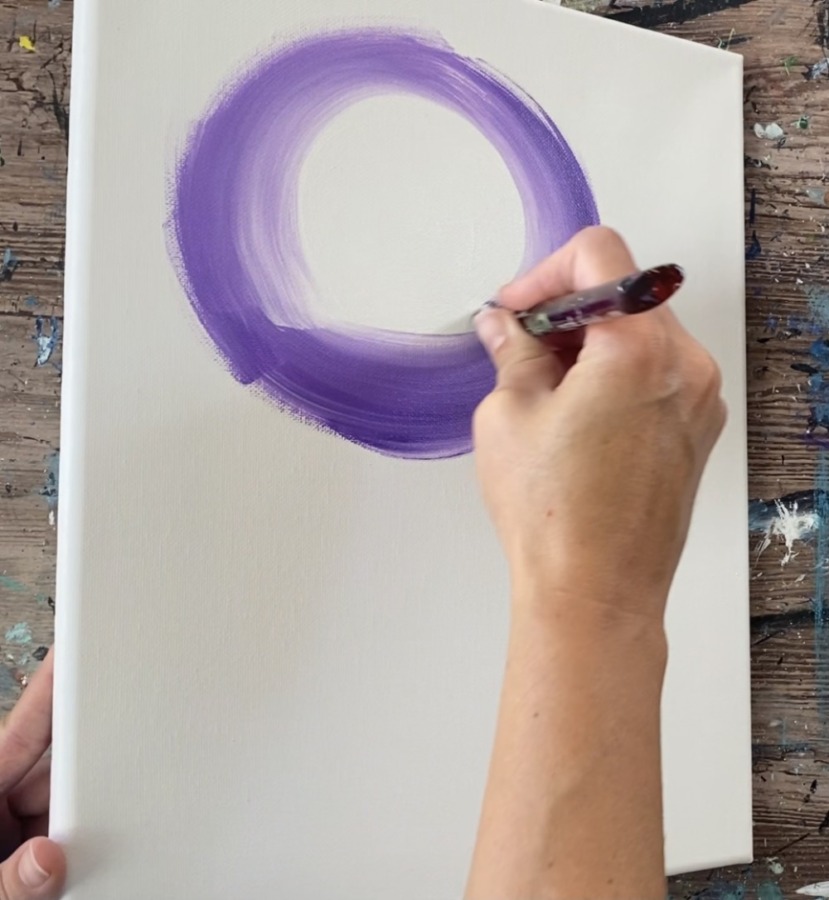
The moon is about 2-3 inches in diameter. If needed, add more white to the brush to blend some brighter white closer to that circle.
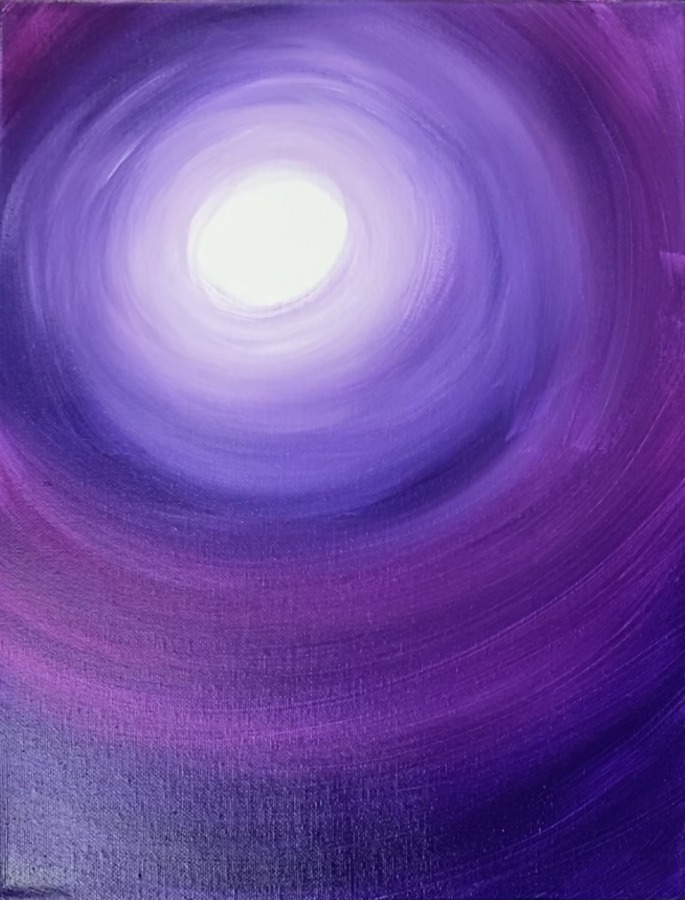
Then continue to paint circular strokes blending outwards. Add more dioxazine purple to your brush so it gets darker.
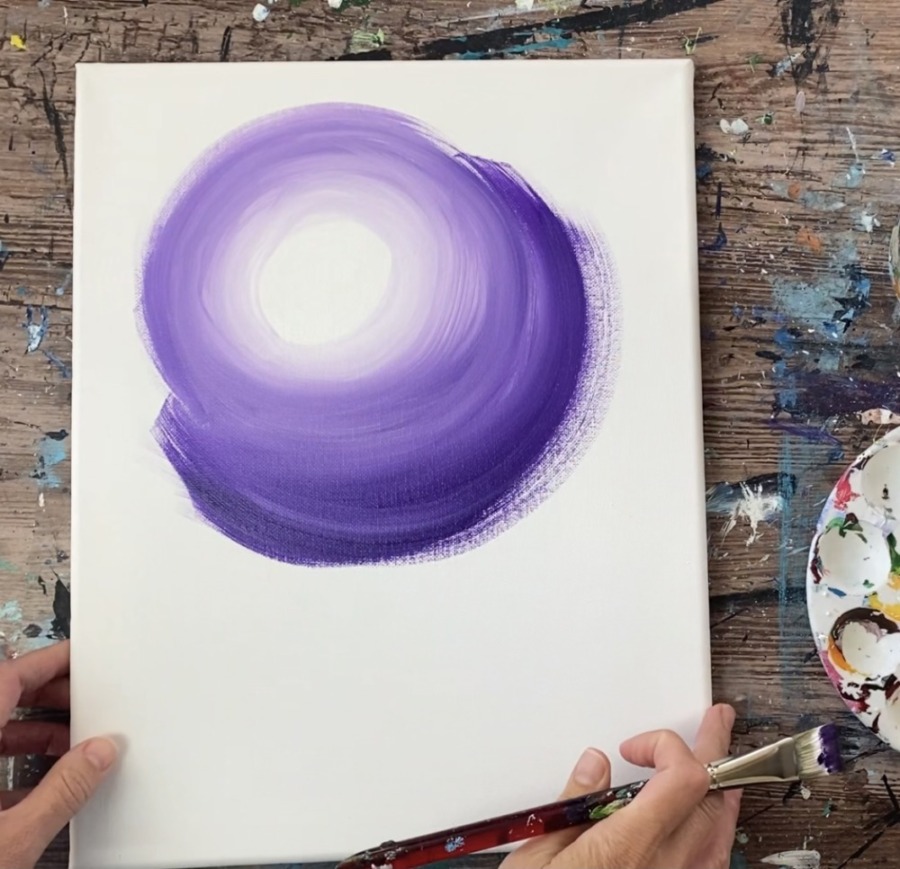
The sky should get darker the further away from the moon. The strokes blend on the canvas in a circular direction.
Need help on this technique? I have a tutorial & video that explains this technique! Check that out here!
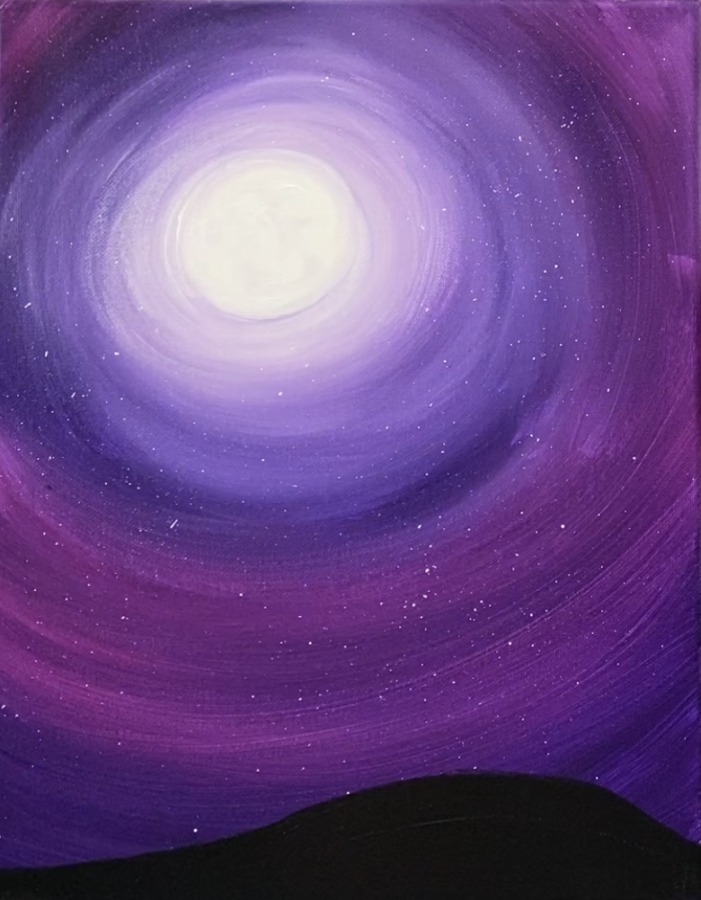
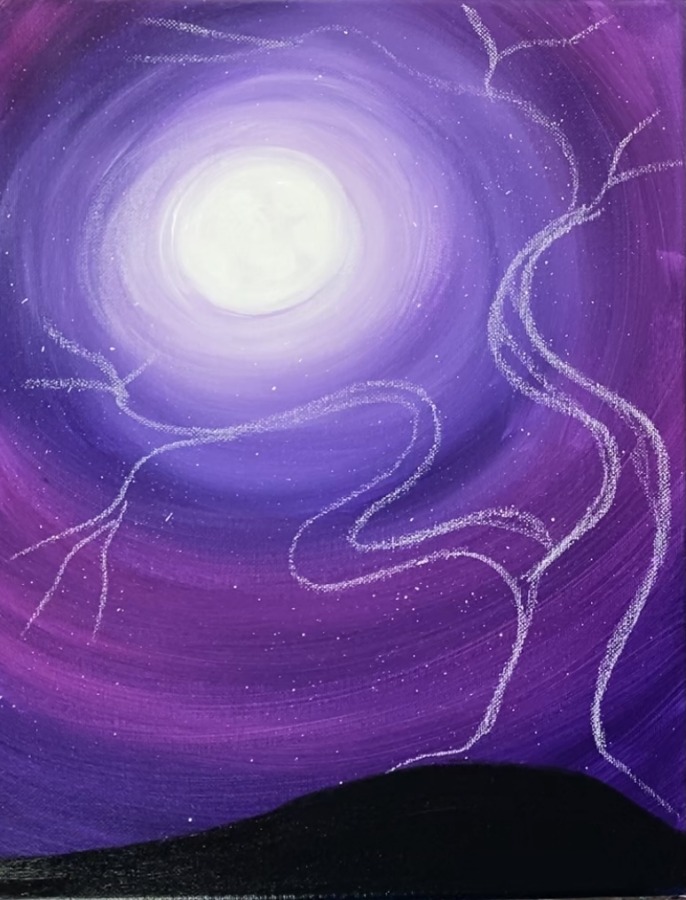
Then introduce deep violet into the sky colors. Start on the outside of the color violet and gently blend it into the deep violet.
Continue to paint more deep violet in circular strokes.
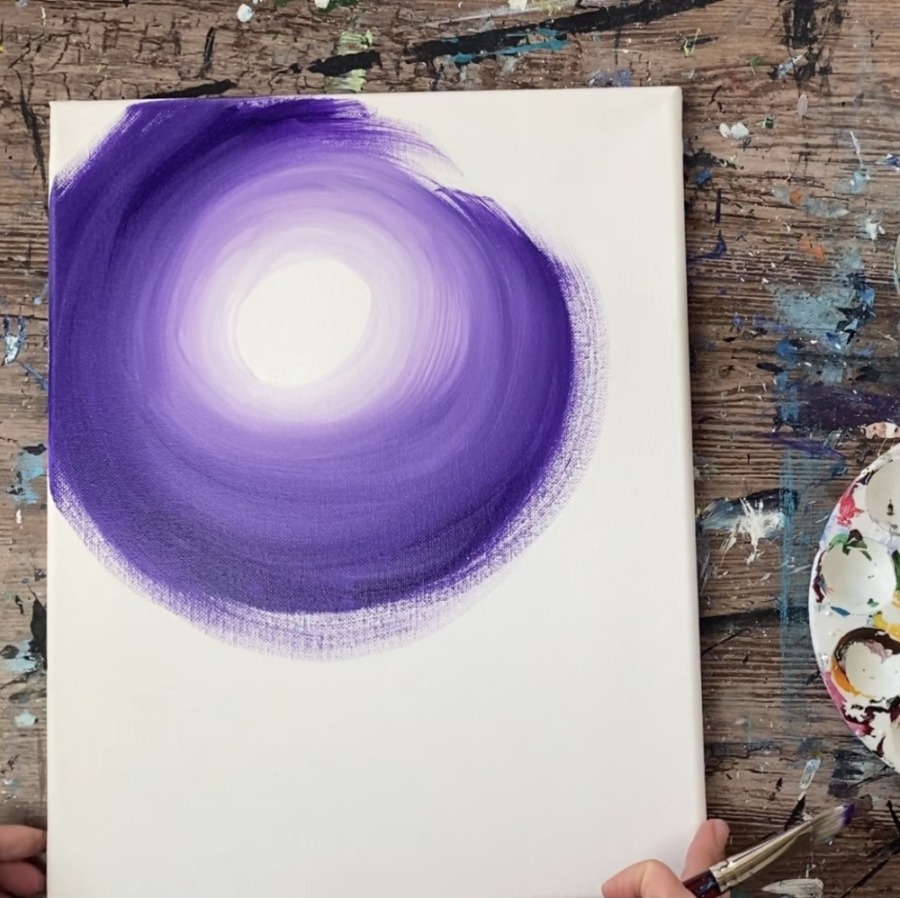
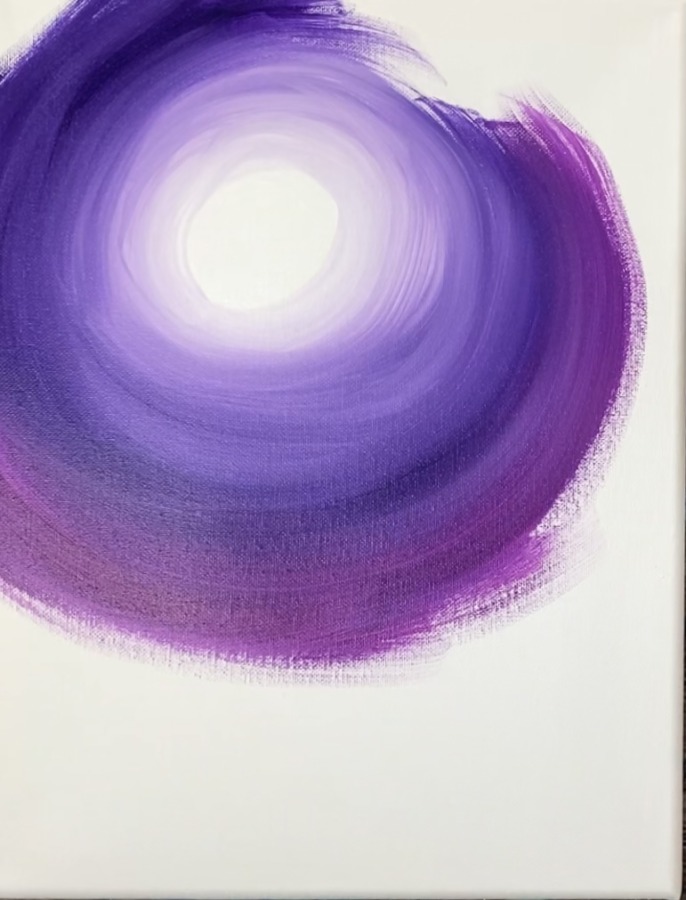
Paint more circles. Add more dioxazine purple on the outer edges of the sky so that it is darkest the furthest away from the moon. You can also go back with a #8 round brush and redefine the moon circle with titanium white paint.
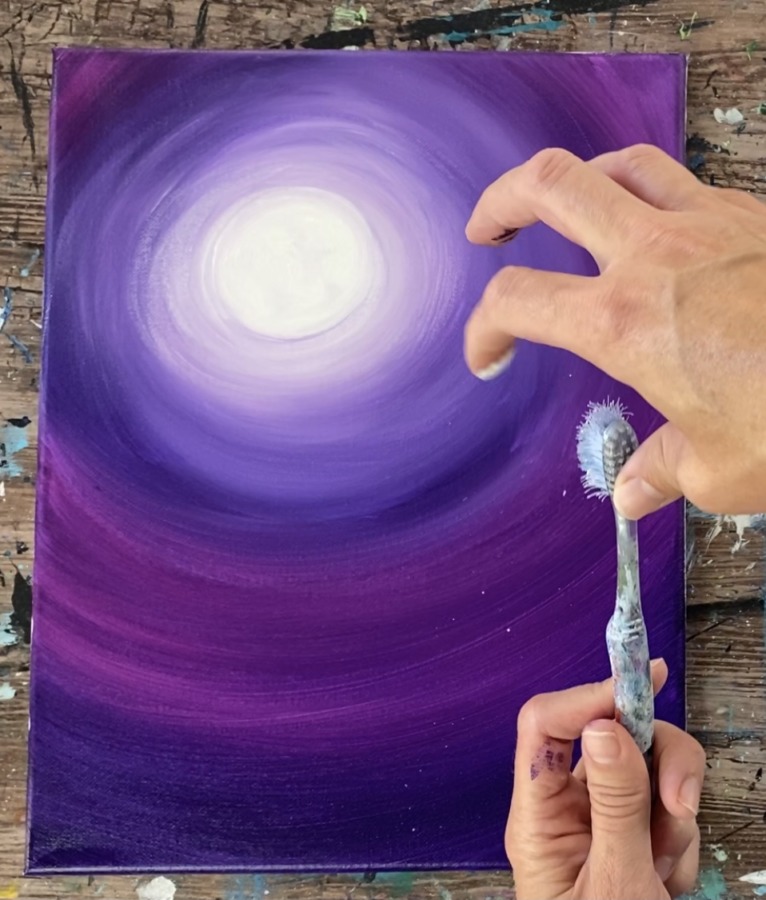
Use a toothbrush to flick white paint in the sky. Slightly water the white down and test it on another surface before flicking it on your canvas. You can also do this with a paint brush.
2. Paint Hilly Ground Area
Use a #8 round brush and mars black to paint a hill on the bottom of the canvas. This hill rises slightly higher on the right.
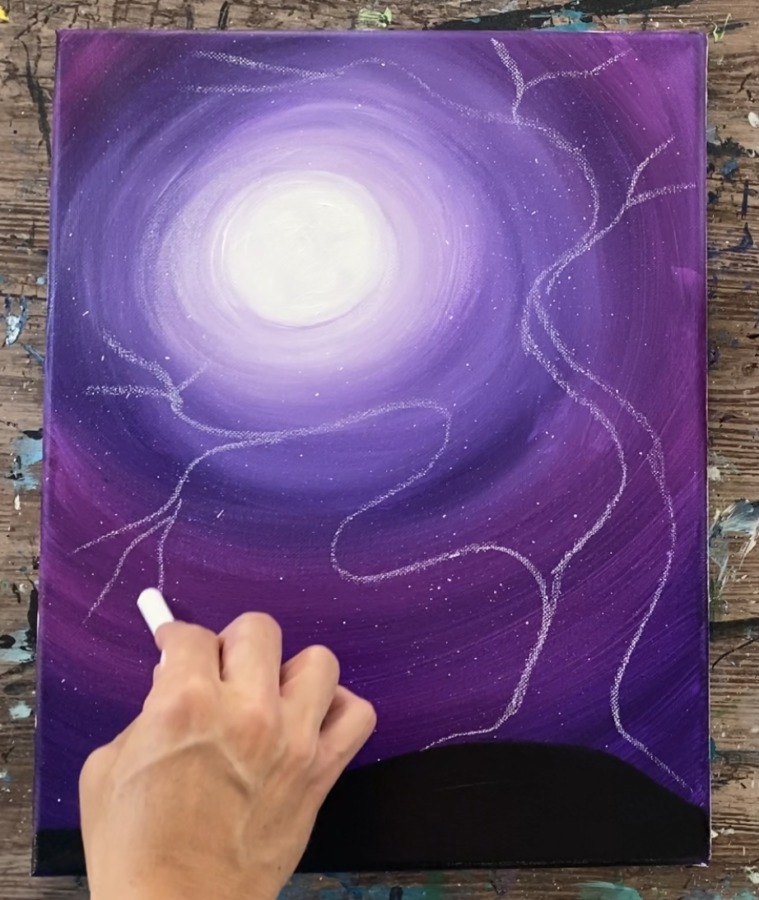
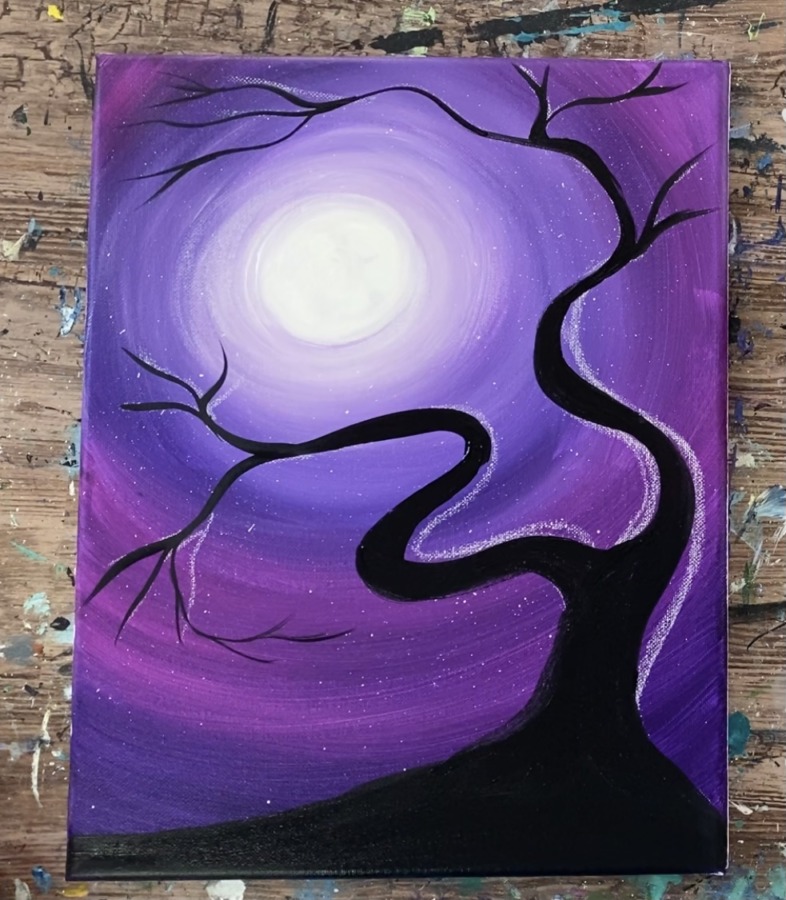
3. Draw Tree With Chalk
Then use a piece of chalk to draw the tree. Start under the moon where the twisty branch where the owl is perched. Draw an “s” line.
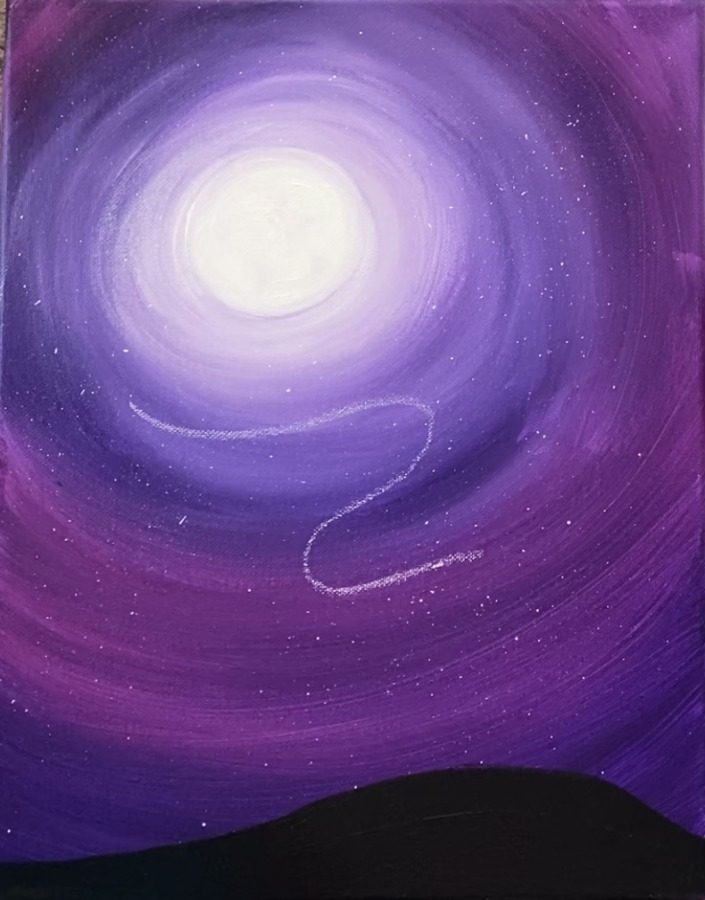
Then attach it to a trunk of the tree.
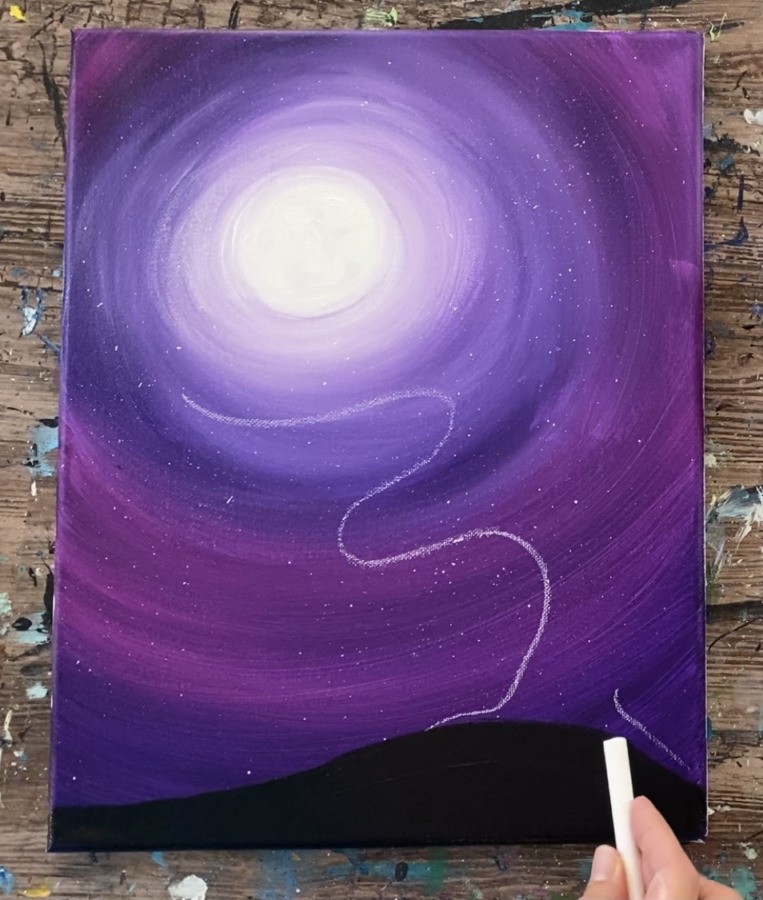
Sketch the rest of the tree with a piece of chalk. Draw the trunk so that it is thick on the base but gets thin and twists towards the top branches.
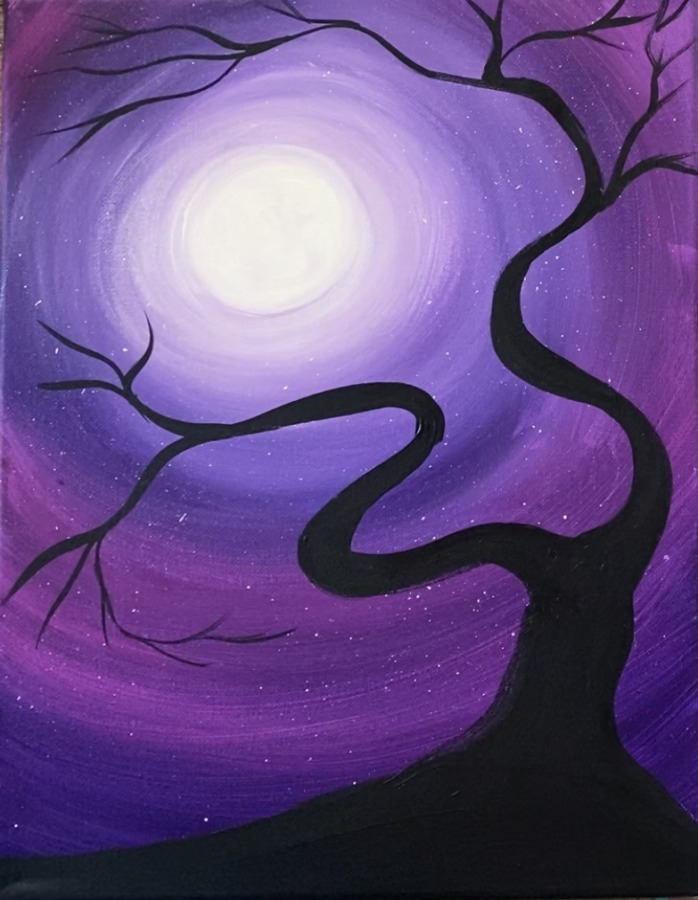
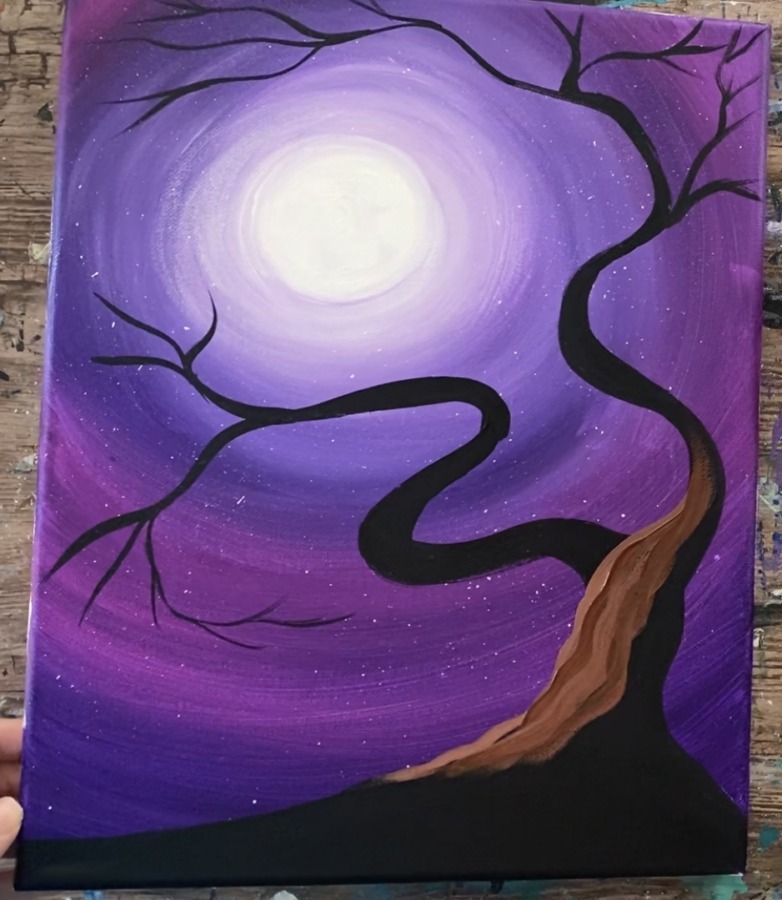
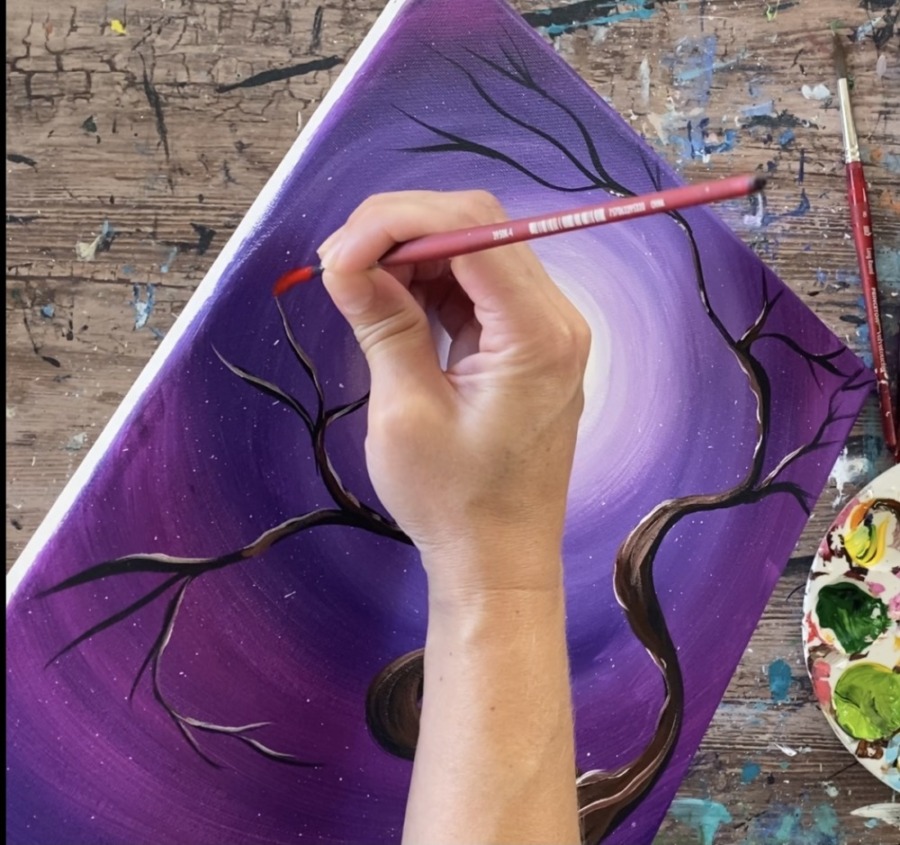
4. Paint Tree With Black Paint
Use the #8 round brush to paint the branches of the trees. Use the tip of your brush to paint the thinner lines and put more pressure on the brush to create the thicker lines.
Tip: use a round brush that has a nice tip to it so you can get the thinner lines. You may have to switch between a smaller brush and a larger round brush to get the varied thickness strokes.
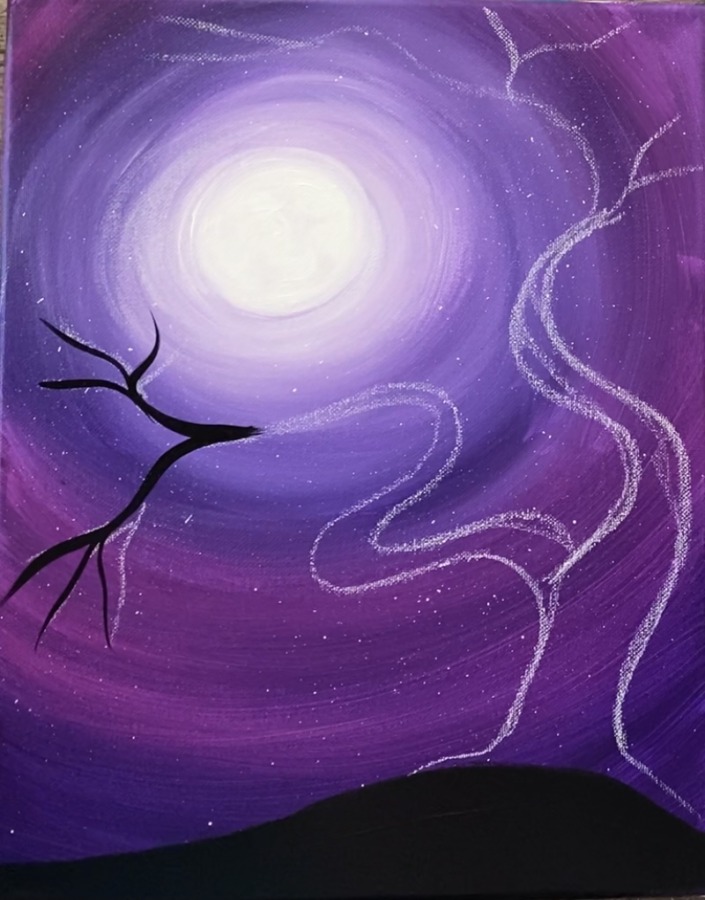
Paint the entire shape of the tree in with black.
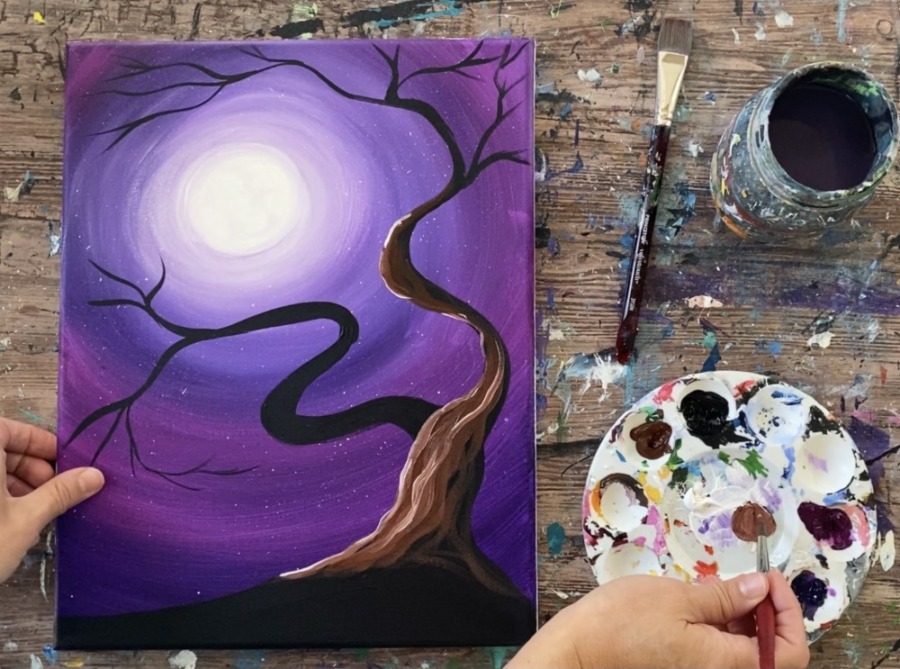
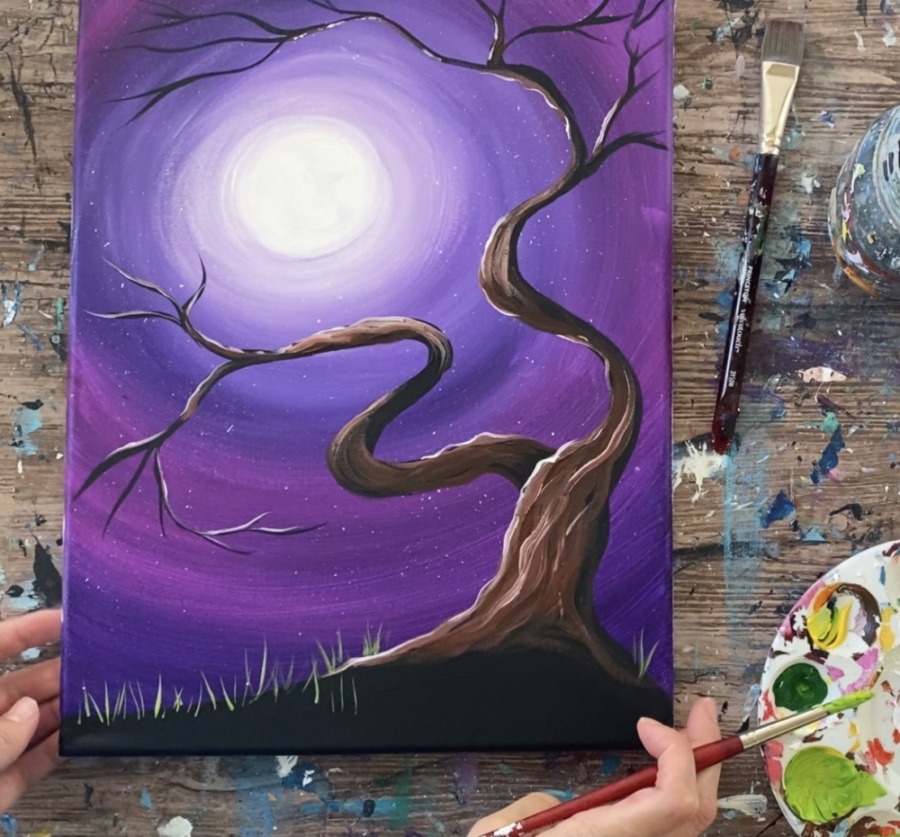
5. Add Brown & Highlights To Tree
Load your palette with burnt umber and titanium white. Mix the two together to make a light to medium brown. Use your #8 round brush to paint wavy strokes on the left side of the tree trunk.
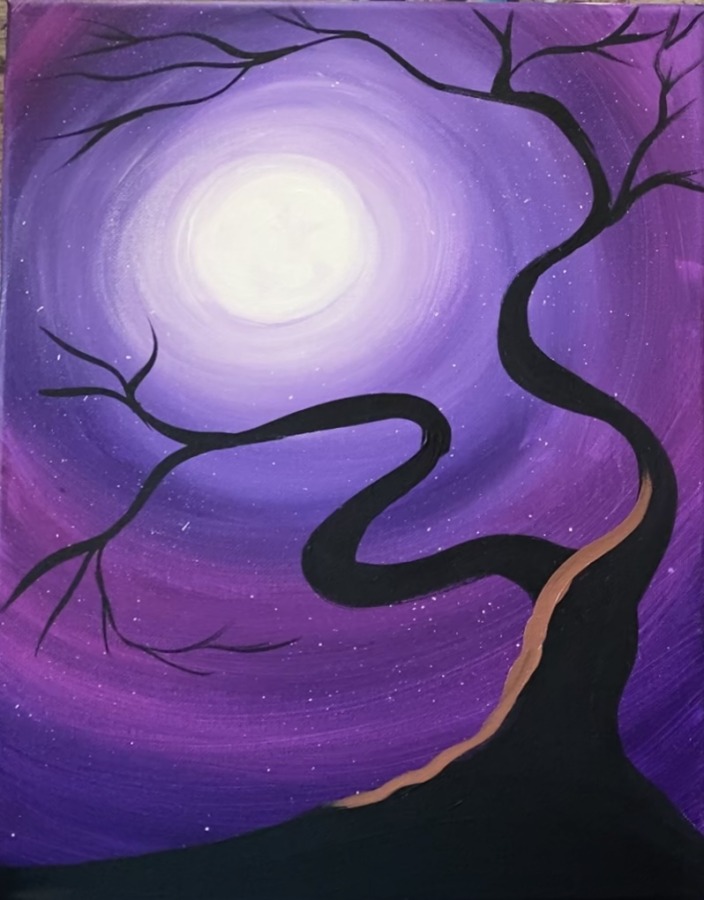
Add darker brown in there and paint more wavy strokes going in the direction of the tree trunk.
Leave the far right side of the tree dark and black. Then load a small amount of titanium white on the tip of your round brush. Lightly paint white on the far left edges of the tree trunk.
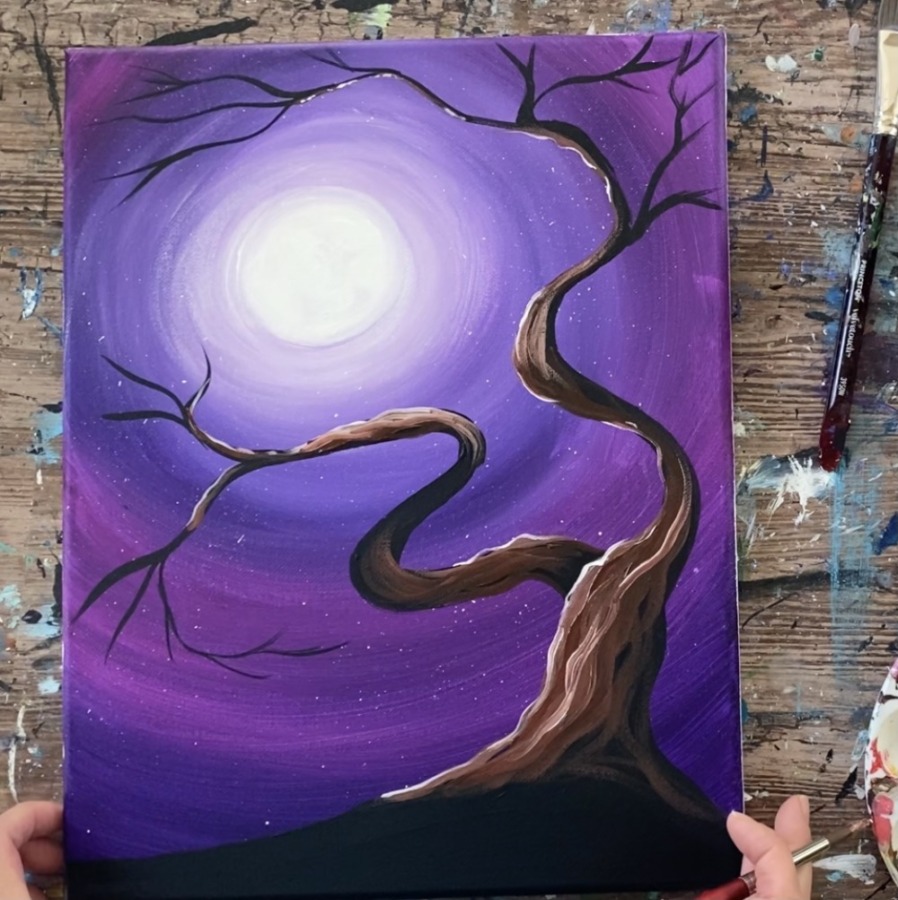
Then continue to paint more brown wavy strokes on the other branches. Keep the far edges bright with a small amount of white and the edges opposite of where the moon would be hitting it would be dark.
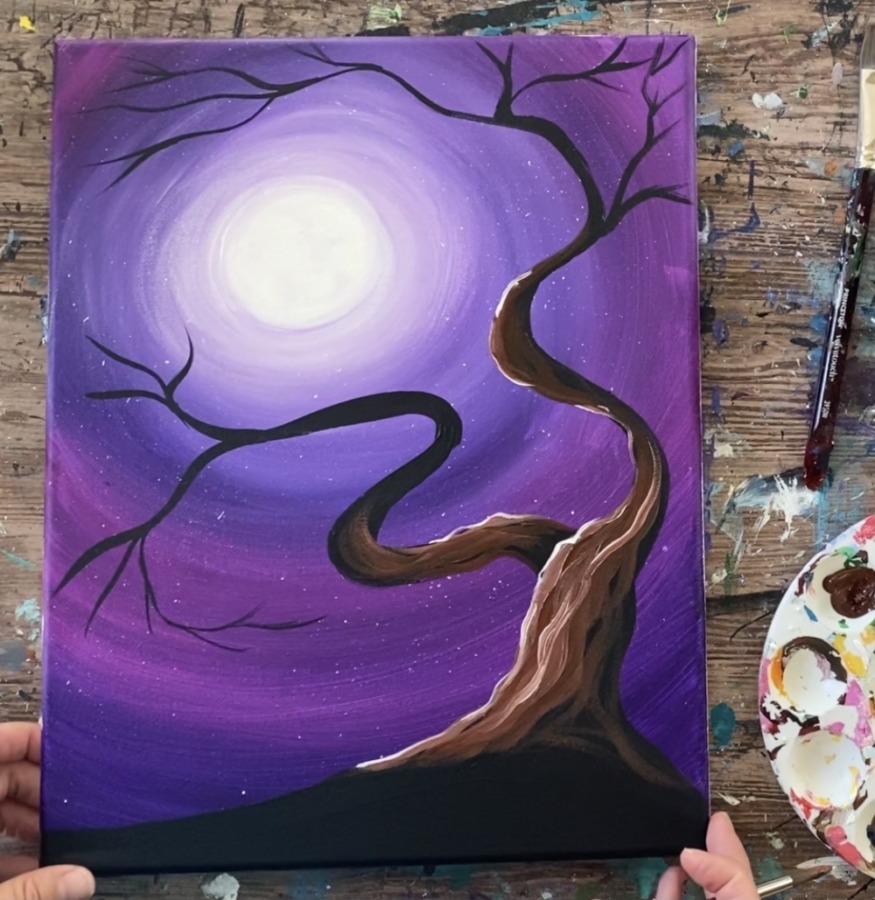
Add a small amount of white on the bottom of the tree branches at the top where the moon light would be reflecting them.
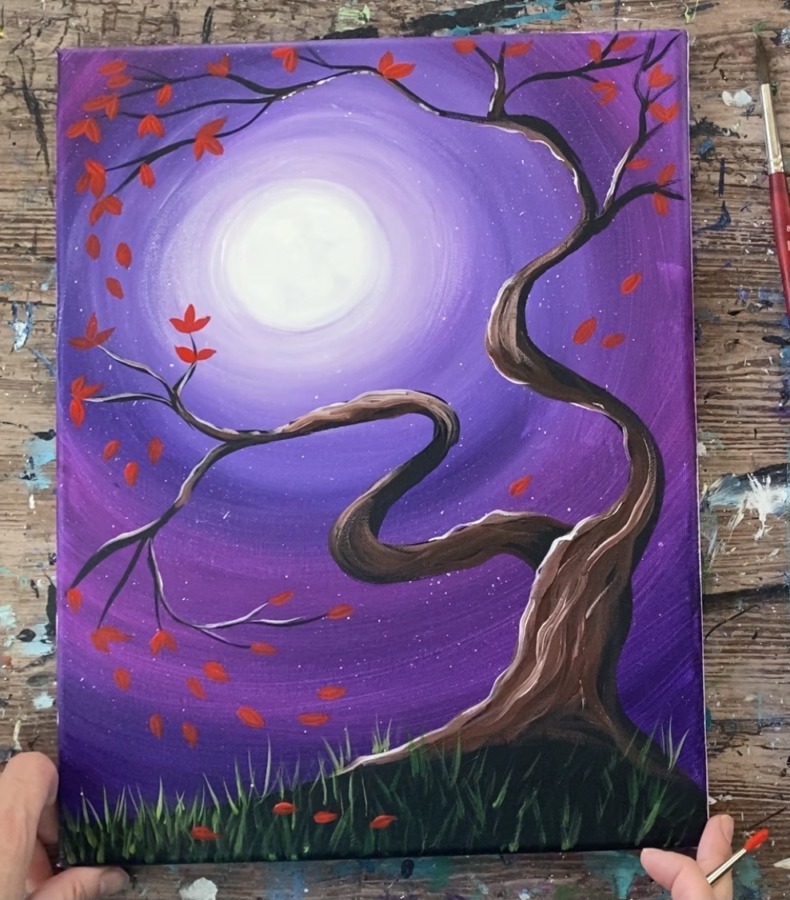
6. Paint Grass
Use the #8 round brush and the colors: hooker’s green hue permanent, titanium white and primary yellow. Mix a light yellow-green color on your palette by mixing 2 parts white, 1 parts green and 1 part yellow.
Use the tip of your round brush to paint grass blade strokes. Make them in different angles as well as going vertical.
Then add more hooker’s green hue to the grass blade colors. Paint more of those darker strokes towards the bottom and have them overlap some of the brighter green blades.
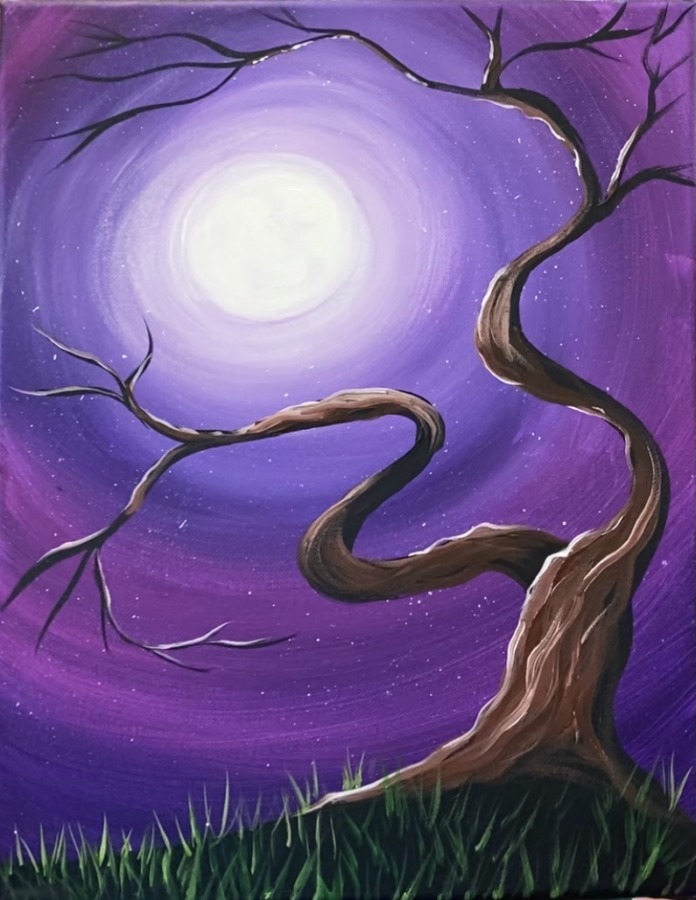
You do not have to cover all of the black with green grass blades.
7. Paint Leaves
Use a #4 round brush and pyrrole red to paint small leaves on the tips of all the branches.
Paint tear drop shapes (or dots if your prefer) on the ends of the branches and also sticking out of the sides of the branches.
Paint the leaves in clusters of two or three.
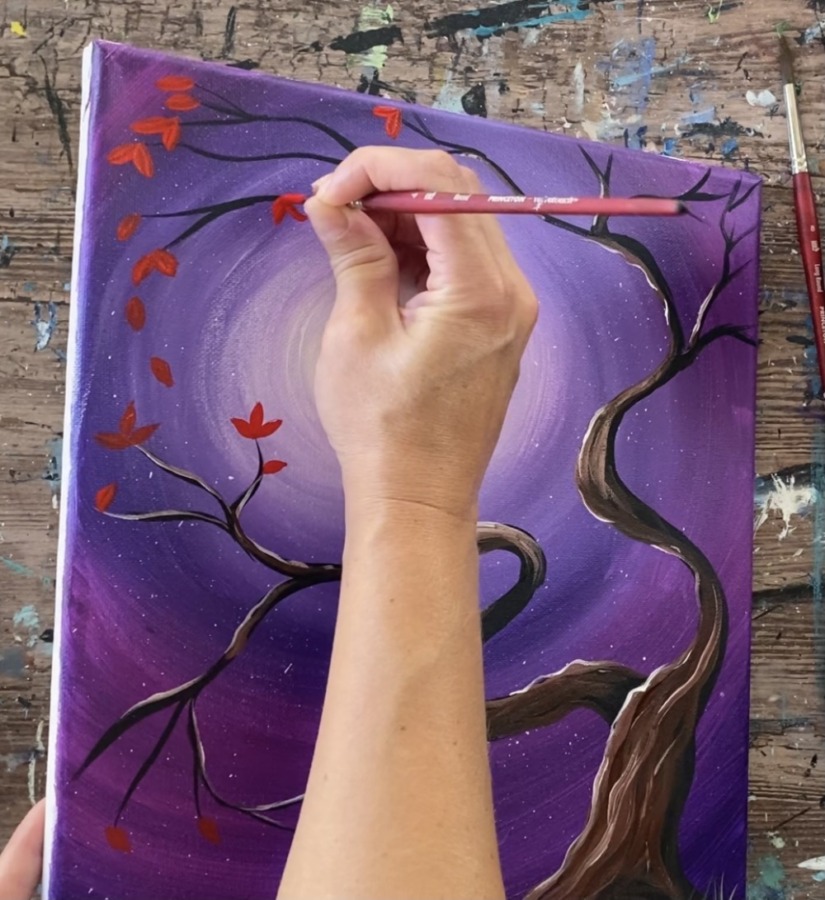
Some of the leaves are falling and going in a circular direction making it look like the wind is blowing.
Paint some leaves on the ground as well.
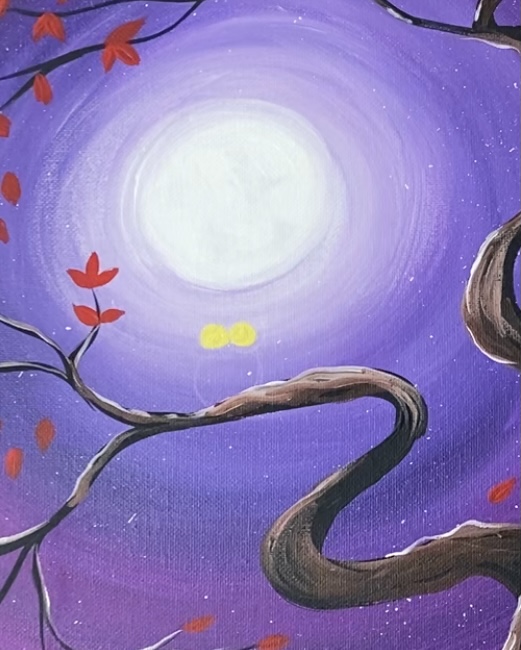
8. Draw & Paint Owl
Drawing the owl first is optional but helps get the outline of it in when you paint.
Use a pencil or chalk pencil to draw the owl. Start by drawing two small circles for the eyes. Then another set of larger circles around the two smaller circles. Draw a small triangle for the beak.
Draw two curved lines going down to the branch for the body.
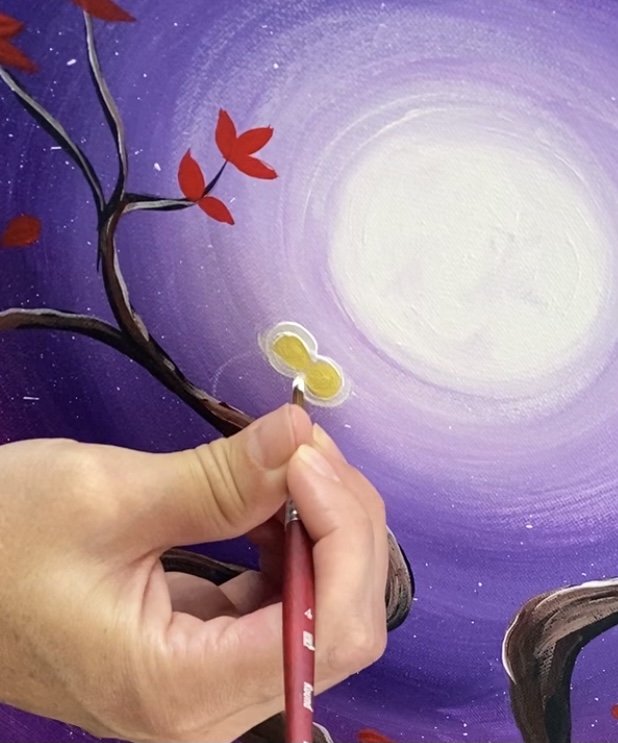
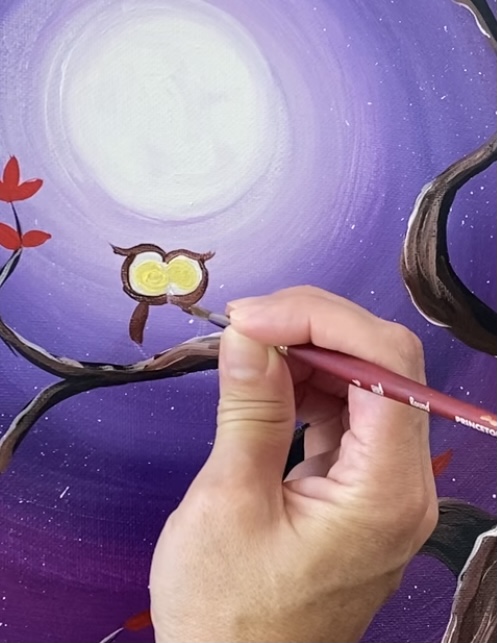
Next load your palette with primary yellow and titanium white. Mix the two colors together to get a bright yellow. Then paint the two eye circles using a #4 round brush.
Then clean and rinse brush. Paint white circles around the yellow circles.
Then rinse and dry brush. Paint brown around the eyes. Paint the top part of the owl by painting two curved strokes on each side of the head forming the ears.
Paint the body and tail in.
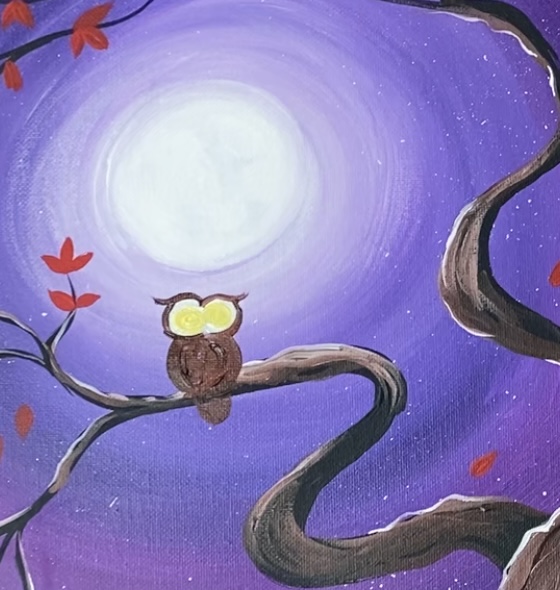
Then load your brush in a small amount of titanium white. Paint small white textured strokes over the brown in the middle of the owl.
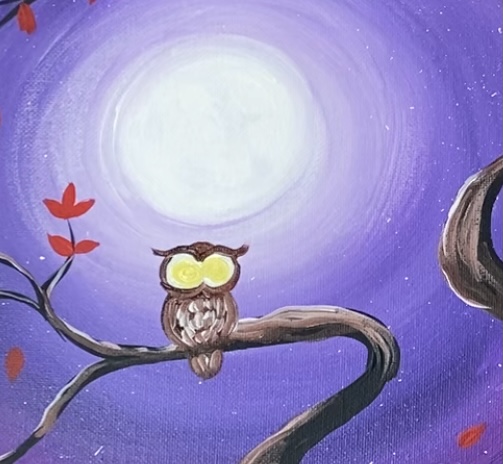
Then load your brush in mars black and paint two small black dots in the middle of the eyes.
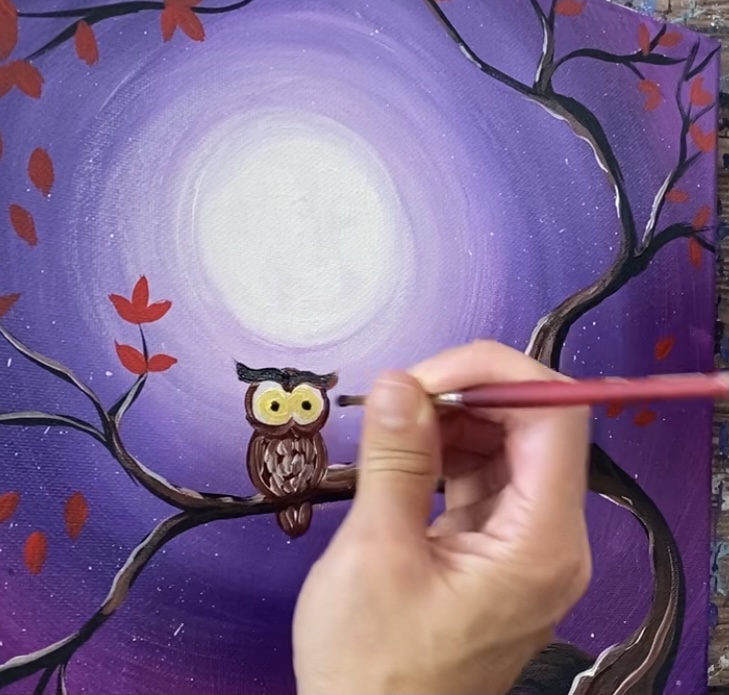
Paint an orange beak (mix red and yellow together to make orange). Paint light brown curved lines above the eyes.
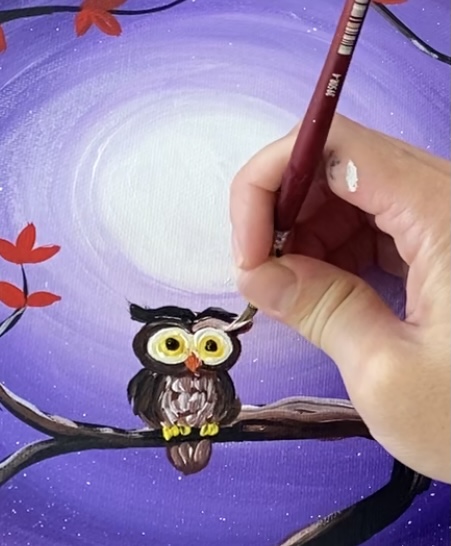
Paint yellow little strokes over the branch for the talons.
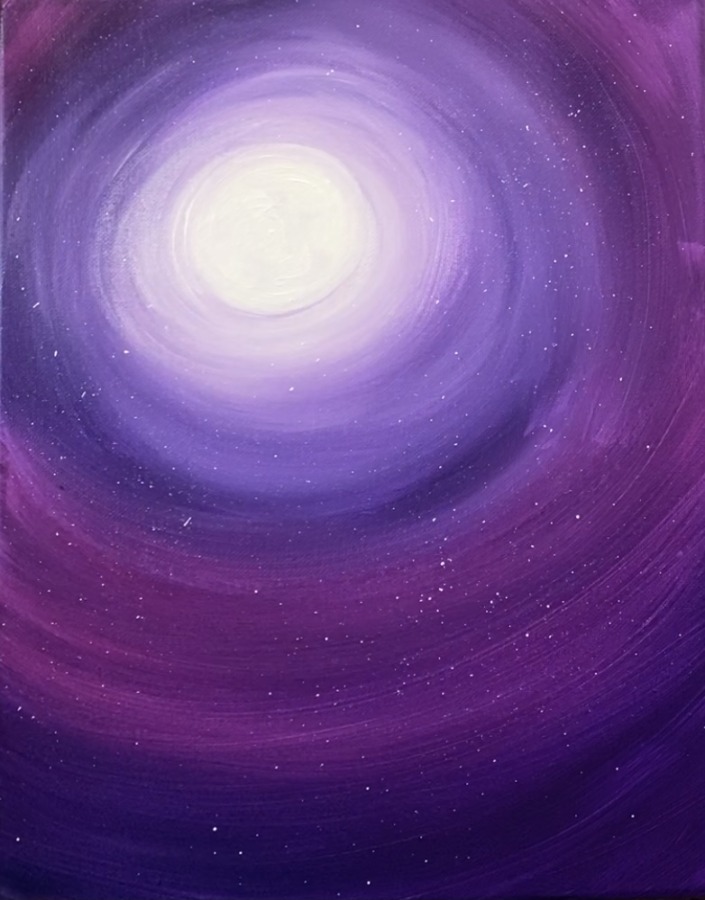
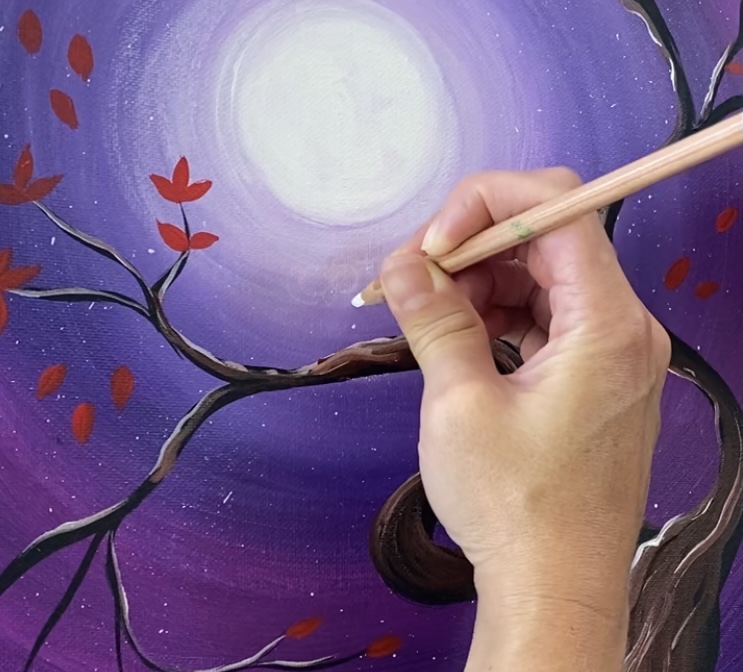
9. Paint Stars
Use a 10/0 liner brush and titanium white to paint twinkling stars in the sky.
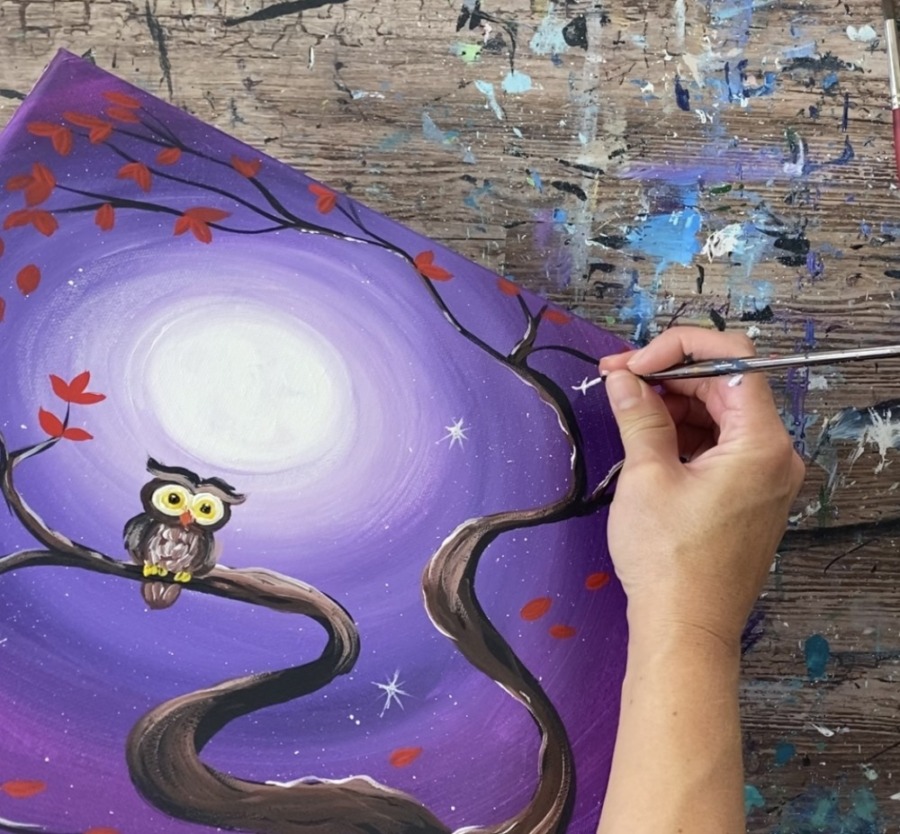
Paint two vertical strokes and two diagonal strokes to form the thinking star shape.
Paint small little dots in clusters all throughout the sky.

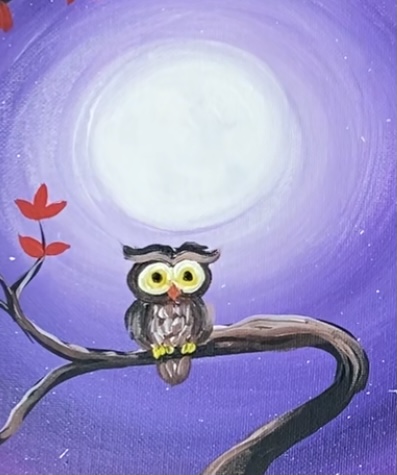
Finished!
That’s it! Sign your name and show it off!

Share Your Art Here:


