
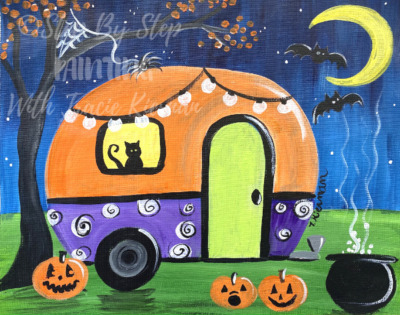
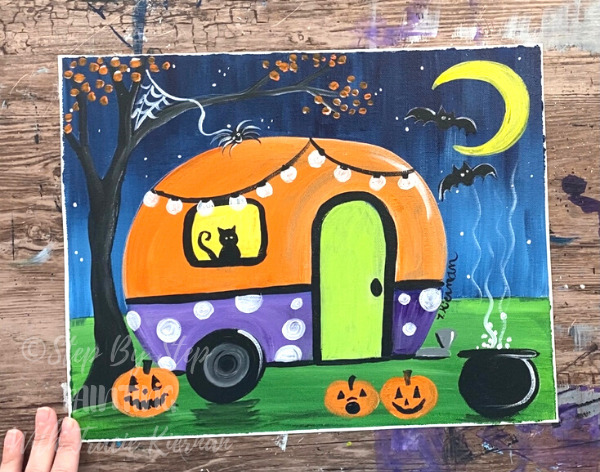
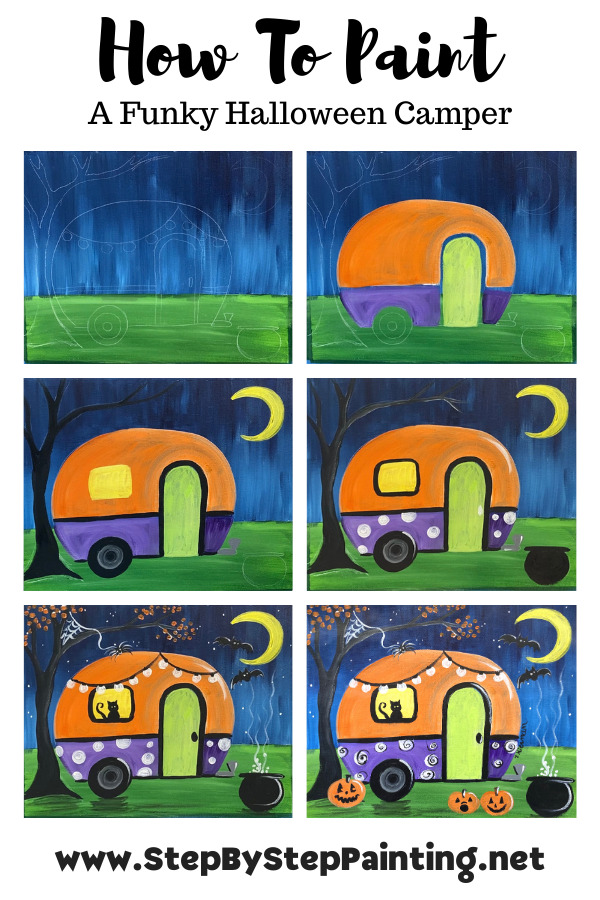
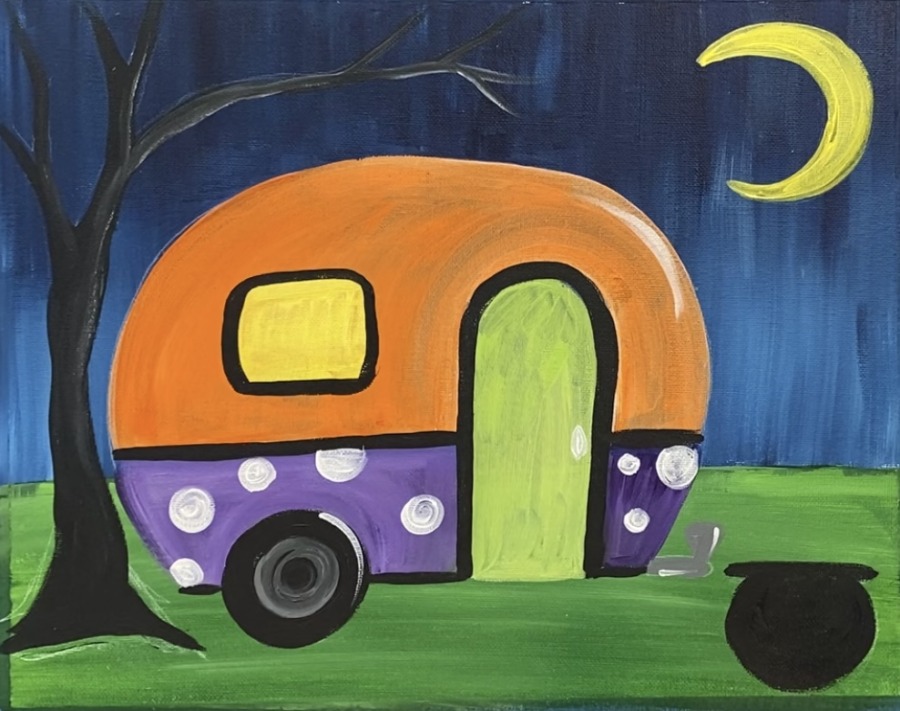
Here is a fun Halloween Twist of a Vintage Camper! You may recognize this from my Camper Painting Tutorial I did back in 2018.
This tutorial will show you how I painted a Halloween vintage camper painting!
Would you like to save this?
I used the same traceable which I will link right into this tutorial! This would be a fun painting to do with the kiddos!
They can customize the colors and add some fun Halloween details.
Enjoy and happy painting!
Materials
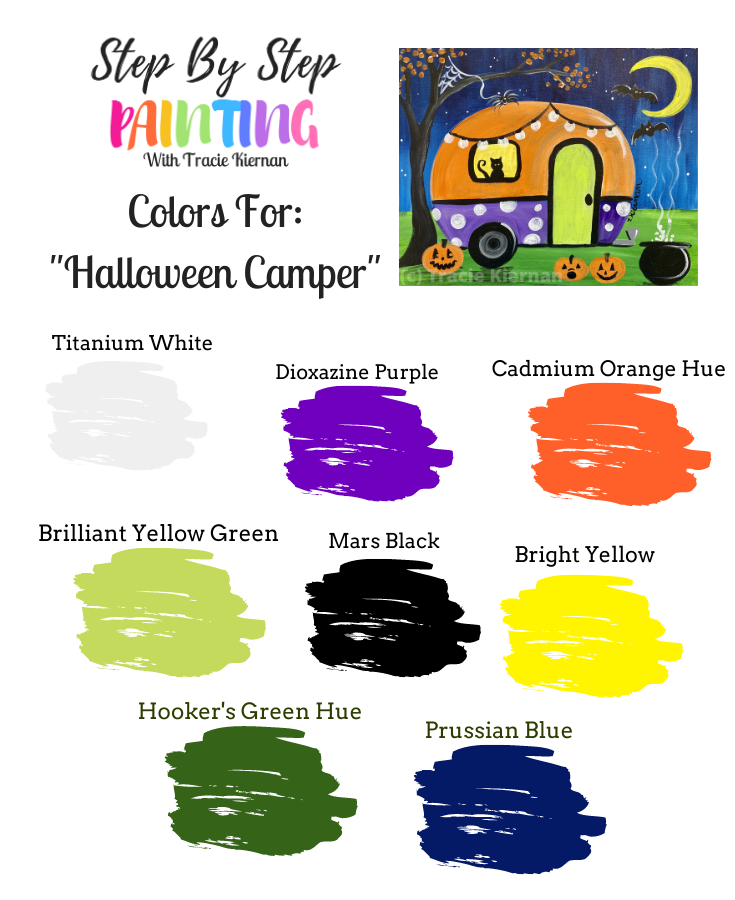
Halloween Camper

Here is a fun twist on a vintage camper! Paint a Halloween camper scene with fun colors and halloween details such as a cat, jack-o-lanterns and bats.
Materials
- 11 x 14 Canvas
- Acrylic Paint
- Brushes
- Traceable
- Graphite Paper (for transferring traceable, preferably white but can use dark)
- Paint Pen or Sharpie (optional)
Colors
- Prussian Blue (or any dark blue such as phthalocyanine blue or ultramarine blue)
- Mars Black
- Titanium White
- Cadmium Orange Hue
- Primary Yellow
- Hooker's Green Hue Permanent
- Brilliant Yellow Green
- Dioxazine Purple
Brushes
- 3/4 Flat Brush
- #4 Round Brush
- 0 Round Brush
- 12 Bright Brush (optional)
Instructions
- Follow the instructions on the tutorial website for full step by step tutorial!
Color Palette
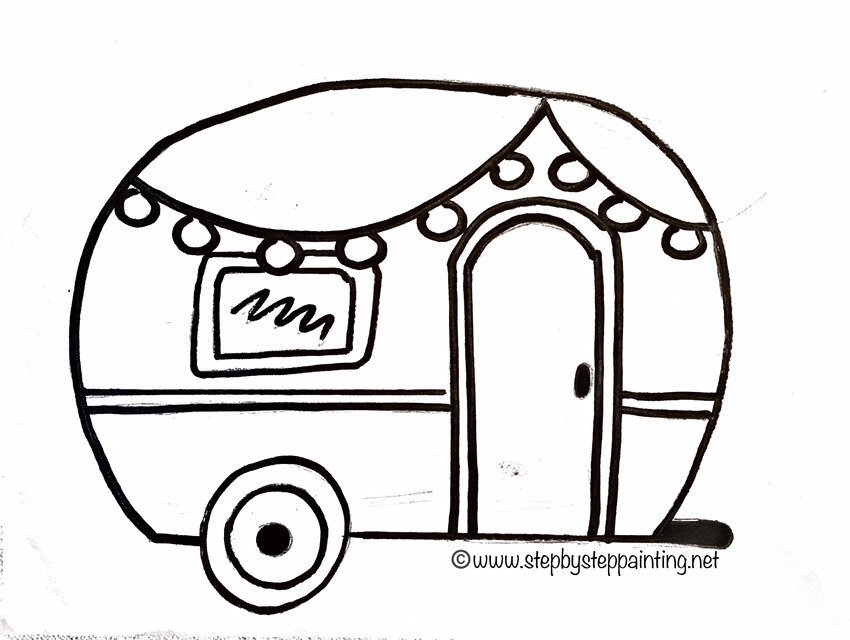
Traceable
Directions At A Glance
Video
Step By Step Directions
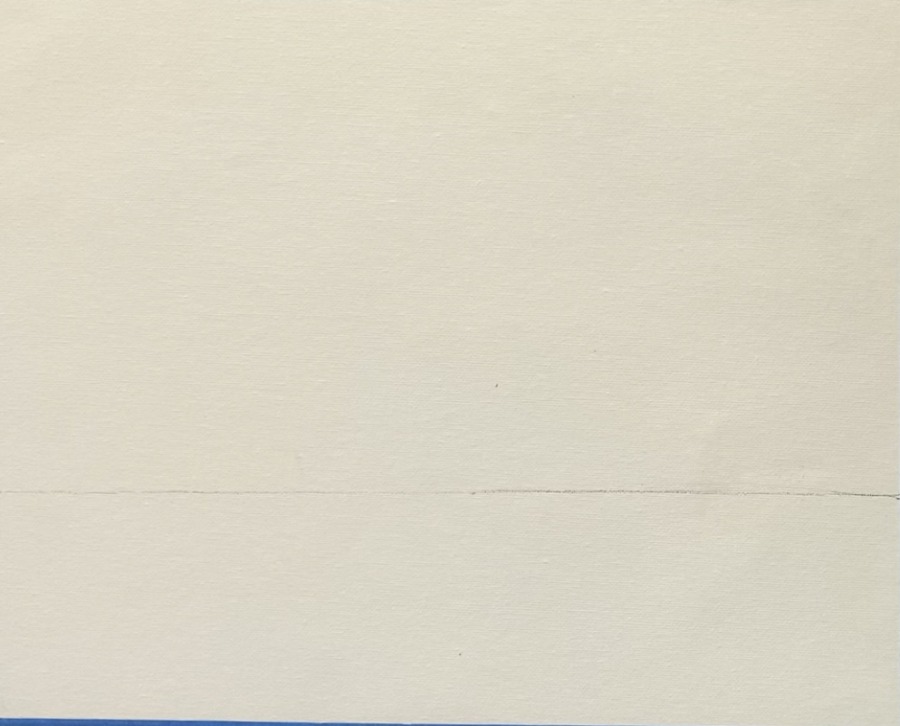
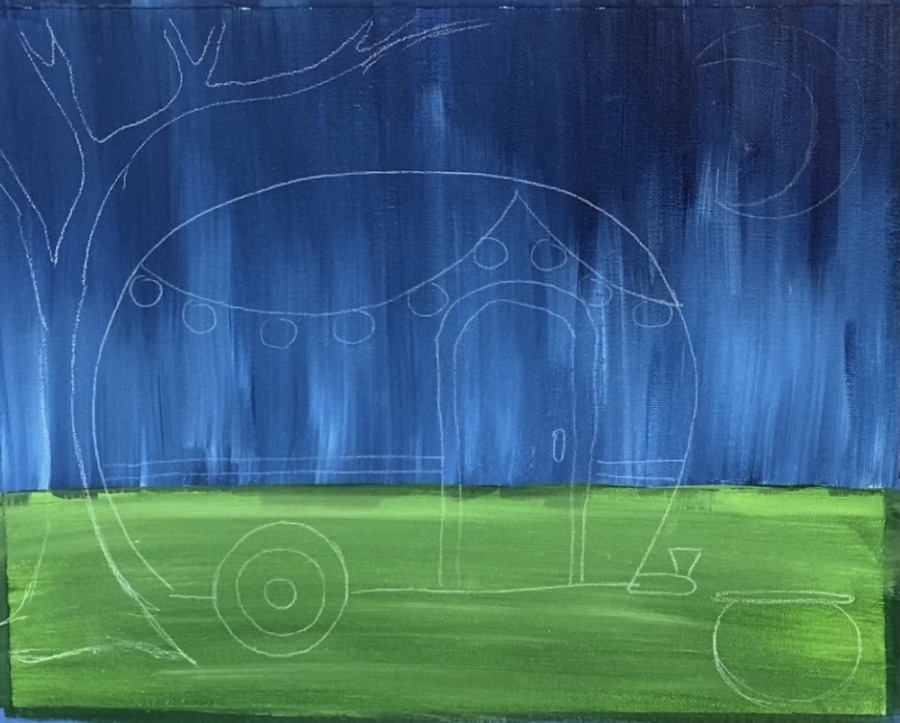
1. Draw a horizontal line for the horizon line
Lay your canvas in the horizontal mode and draw a horizontal line across it. This line is approximately 3.5″ from the bottom of the canvas.
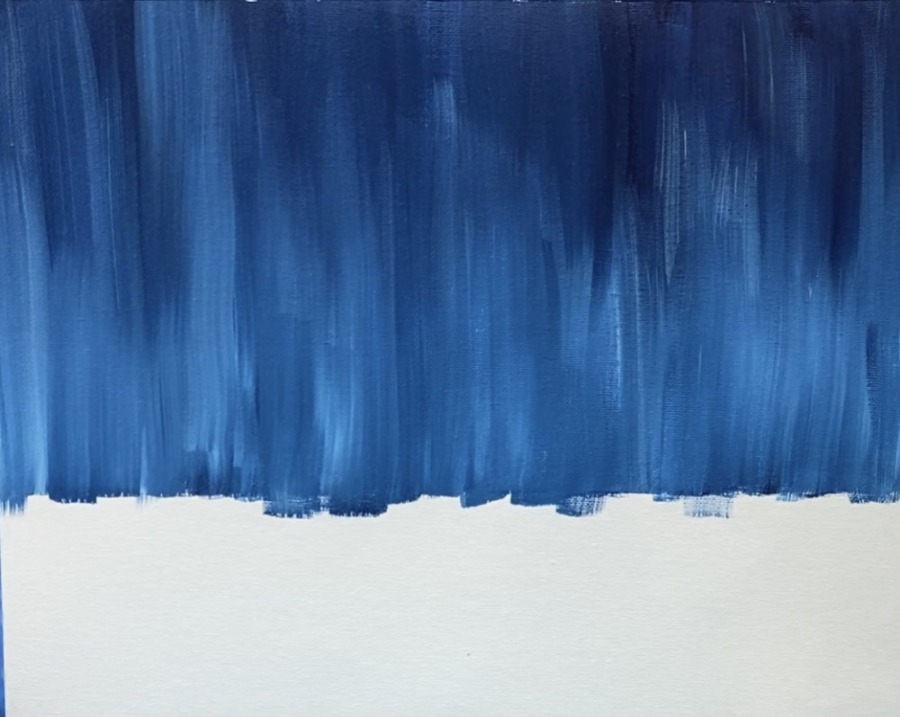
2. Paint Prussian Blue In the Sky
Use a 3/4″ Wash brush and paint up and down strokes. Note: if you do not have Prussian Blue, you can use any dark blue such as phthalocyanine blue, ultramarine, navy, etc.
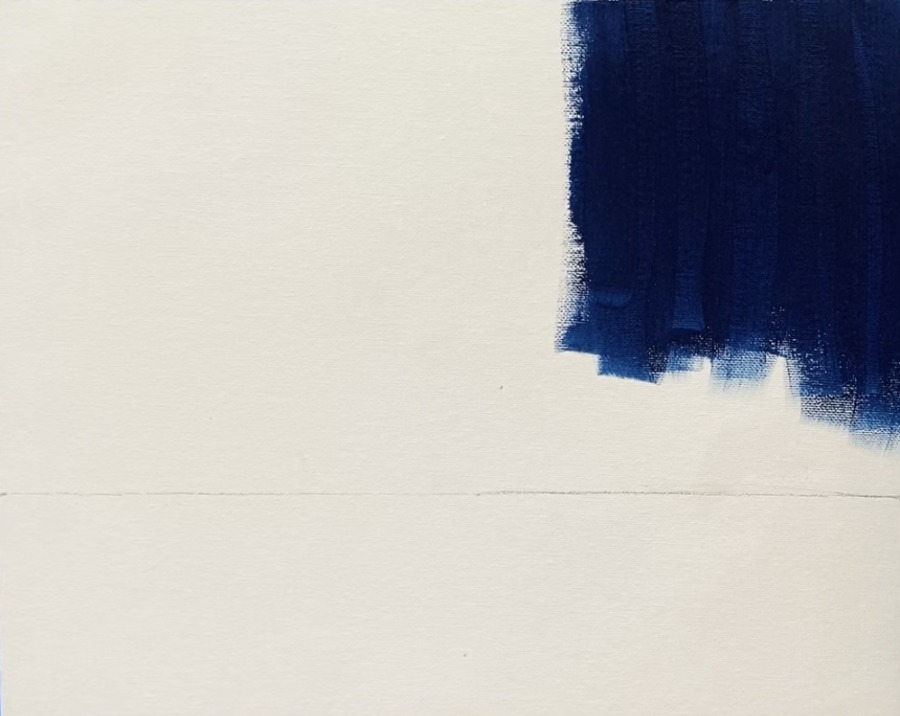
Add titanium white on the bottom and blend up so you have white that is blending streaks in the sky with the blue. Tip: to get the paint to flow more, add a tiny bit of water into it.
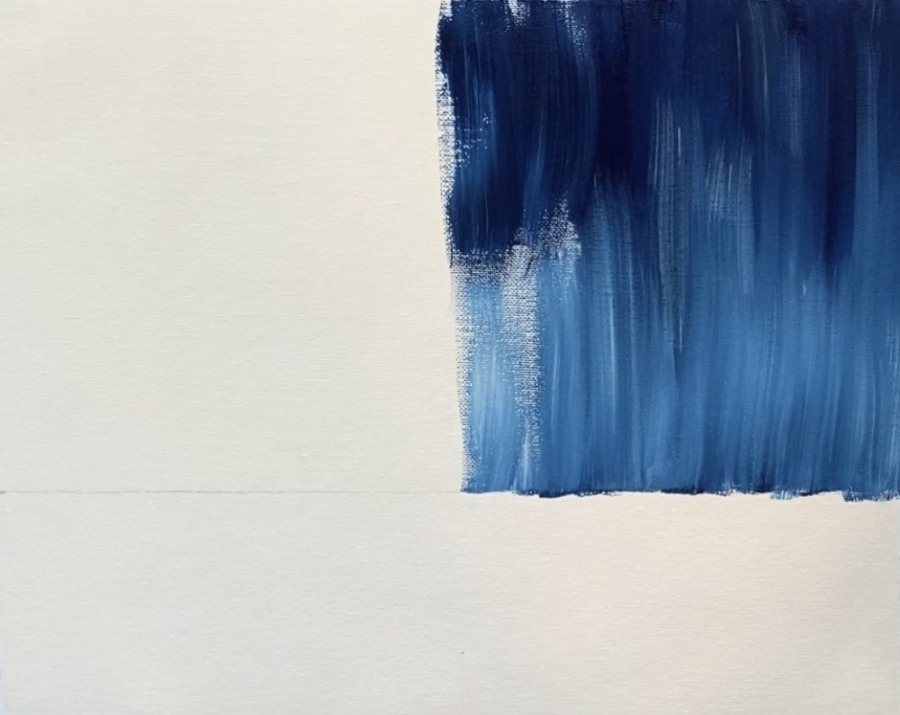
Continue this up and down stroke blending all throughout the sky. Try to get the top part of the sky to be darker and the bottom lighter but that is okay if the white and blue blend everywhere.
3. Paint the ground hookers green hue permanent
Use your 3/4 wash brush and hookers green hue to paint left and right strokes across the entire ground area.
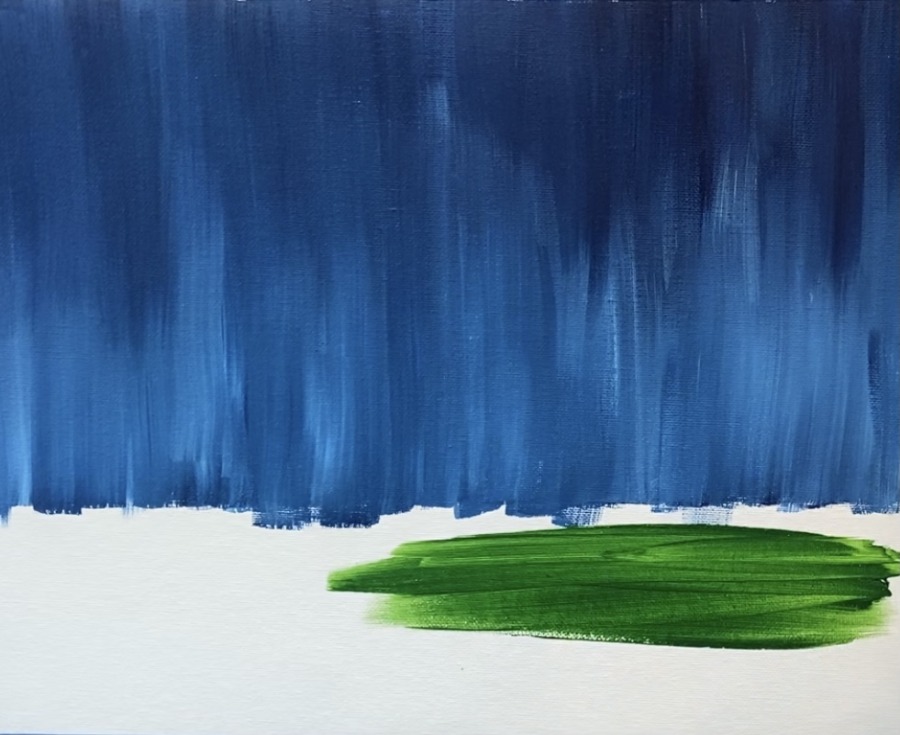
Fill the entire area. My green didn’t have good coverage here so I added some white into it.
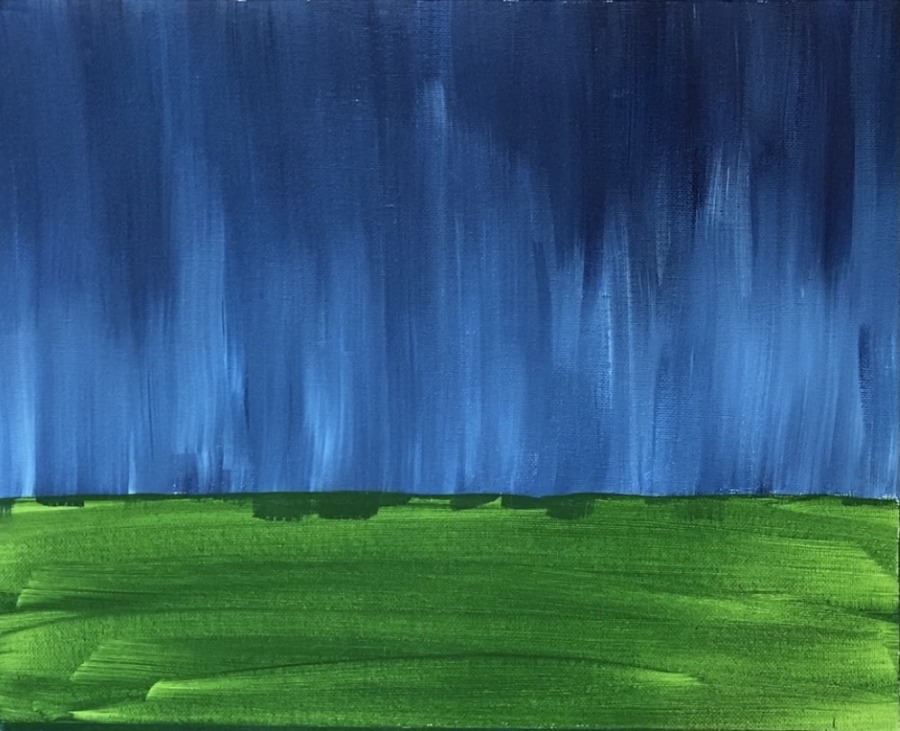
Add the white towards the top (where the horizon line is) and blend it down.
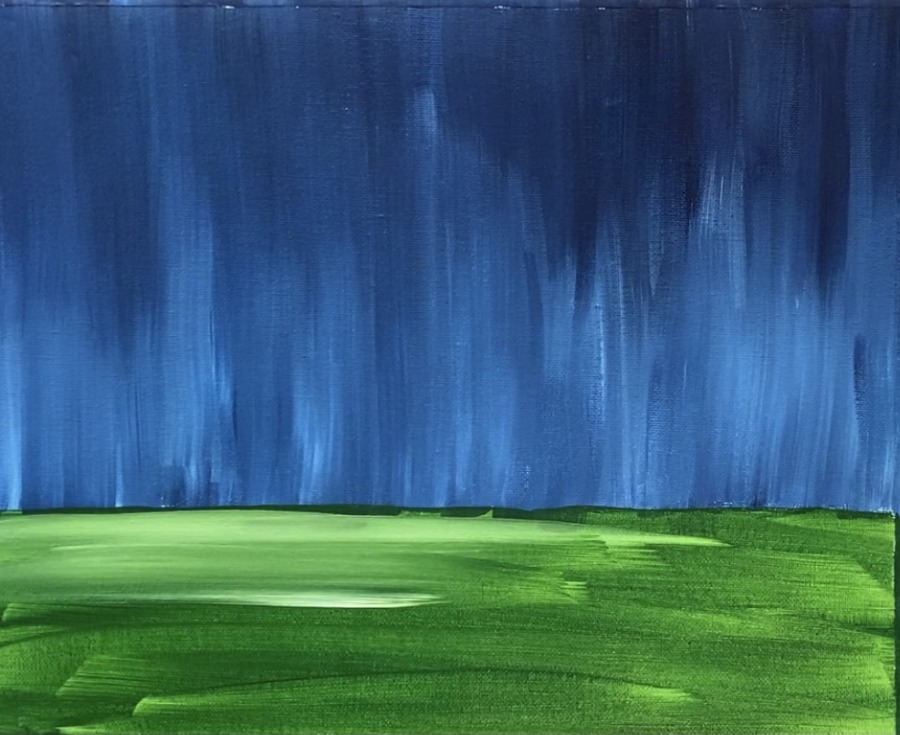
When you blend the white down into the green, it will make it more opaque. Also adding that bit of white to the background gives your ground color a bit more depth.
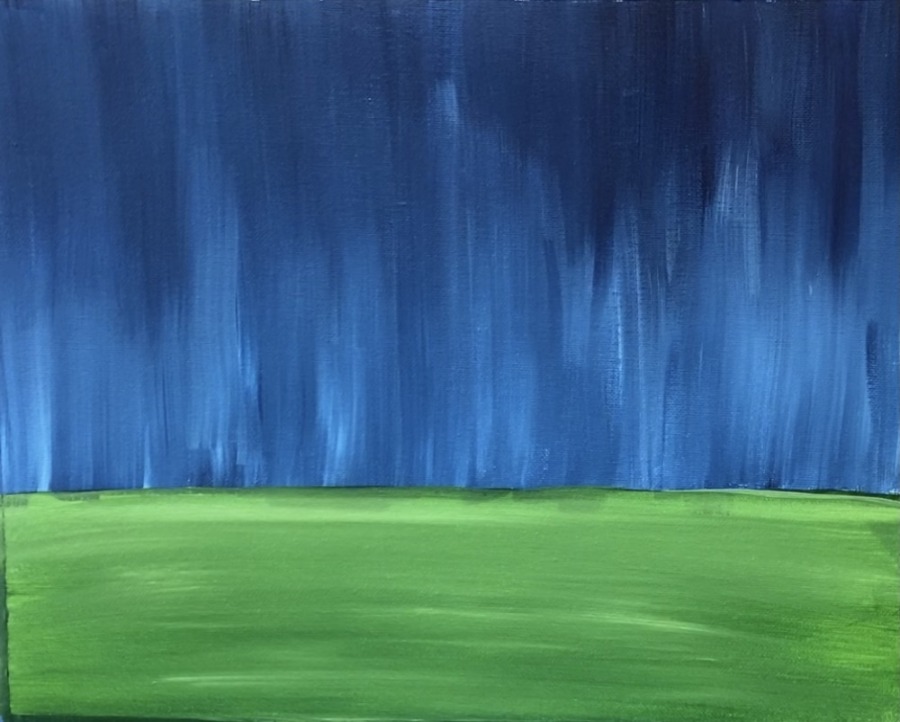
Wait for this to dry before going on to the next step.
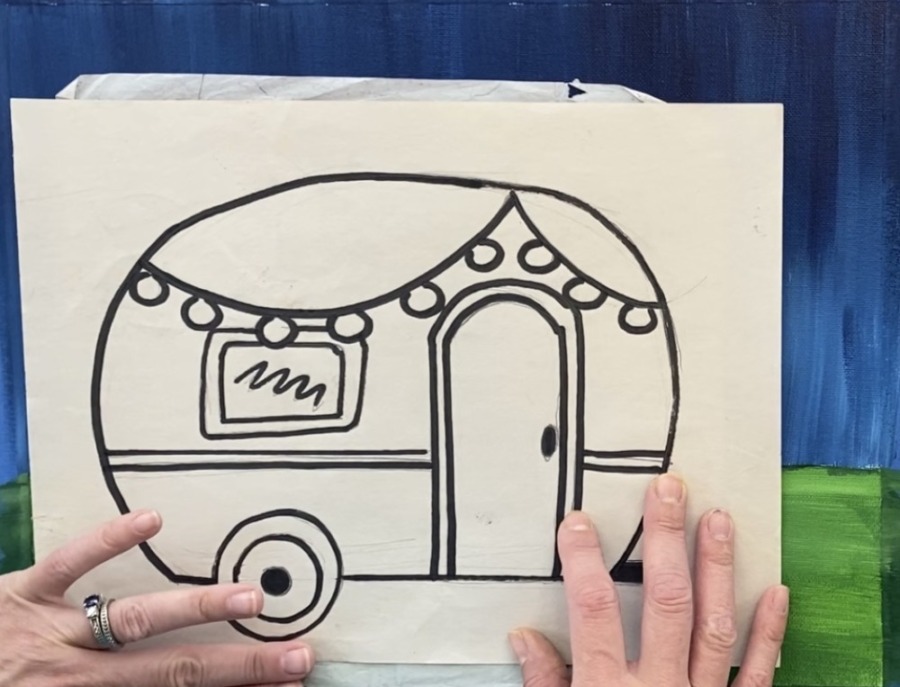
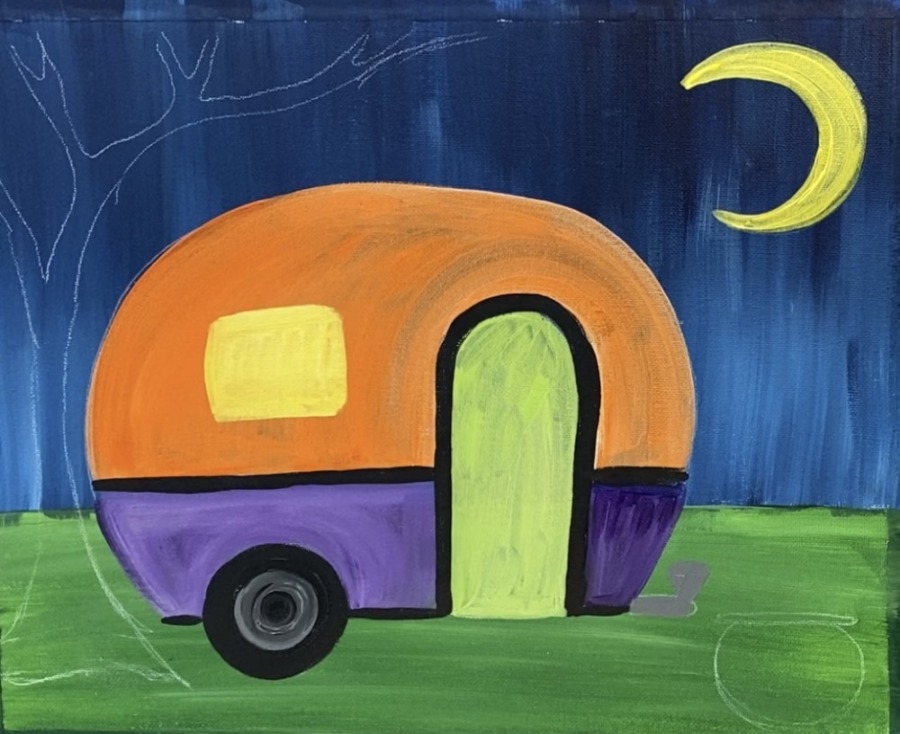
4. Transfer the traceable or draw the camper
I am using my original camper traceable for this and a white sheet of graphite paper. If you do not have graphite paper, you can use the dark paper or apply white chalk to the back of your traceable and transfer.
Position your traceable so that it is a little more to the left.
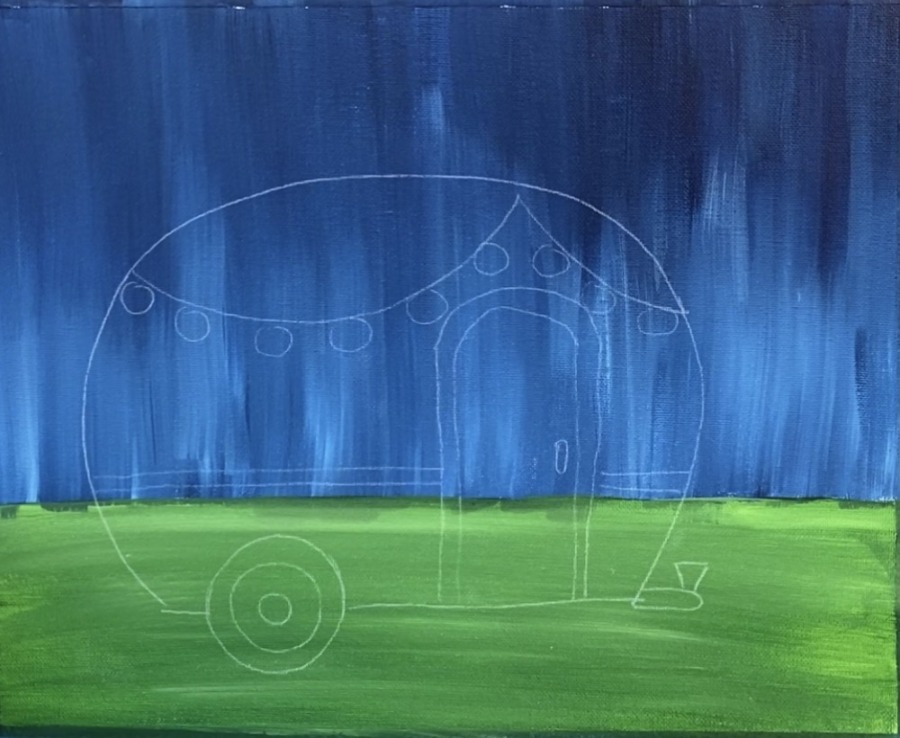
Then use a white chalk pencil, chalk, white color pencil or regular pencil to draw in some of the other things. For the moon, I traced a circle and then drew the crescent inside of the circle.
I also drew a cauldron and a tree.
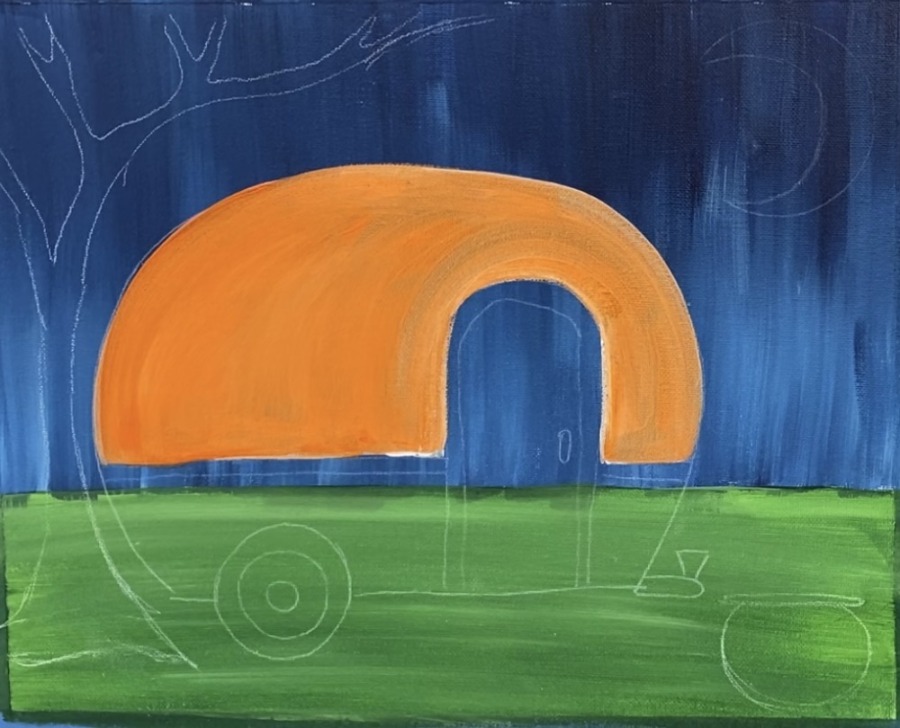
5. Paint the camper
There is no particular order for painting the camper in and you can choose your own colors too! I started at the top part and painted it with orange mixed with titanium white.
I used a combination of a #4 round brush (for smaller areas) and a #12 bright brush (for larger areas). You can also just use the round brush.
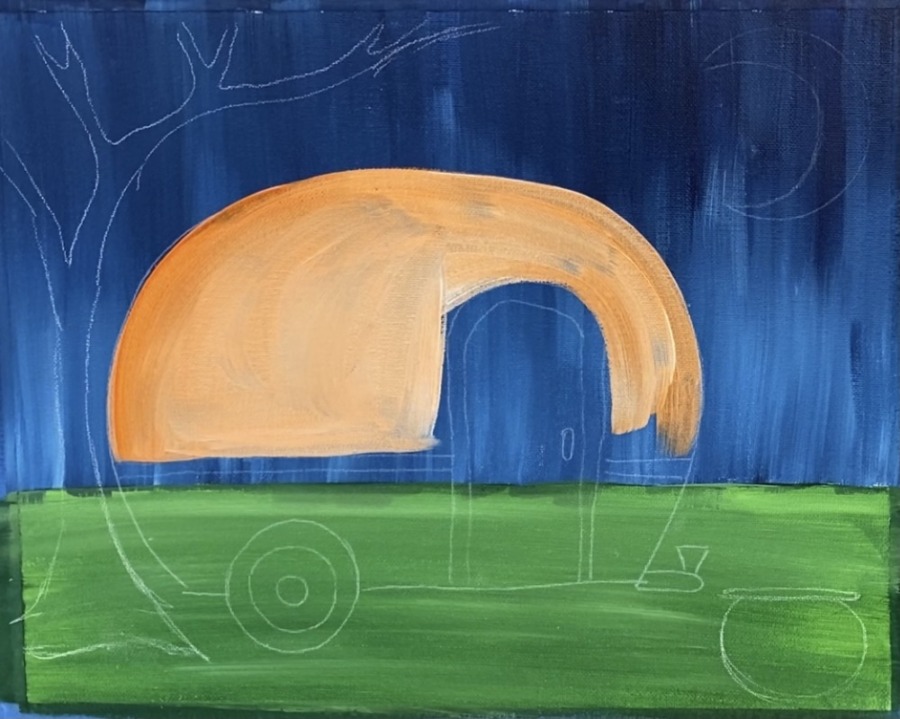
The reason for the orange and white combo was because the orange would not show up against the dark background without having titanium white mixed into it. You can also paint the camper white first and then paint over it.
I painted the bottom part with Dioxazine Purple mixed with some titanium white.

I did the door “brilliant yellow green” and the trim mars black.
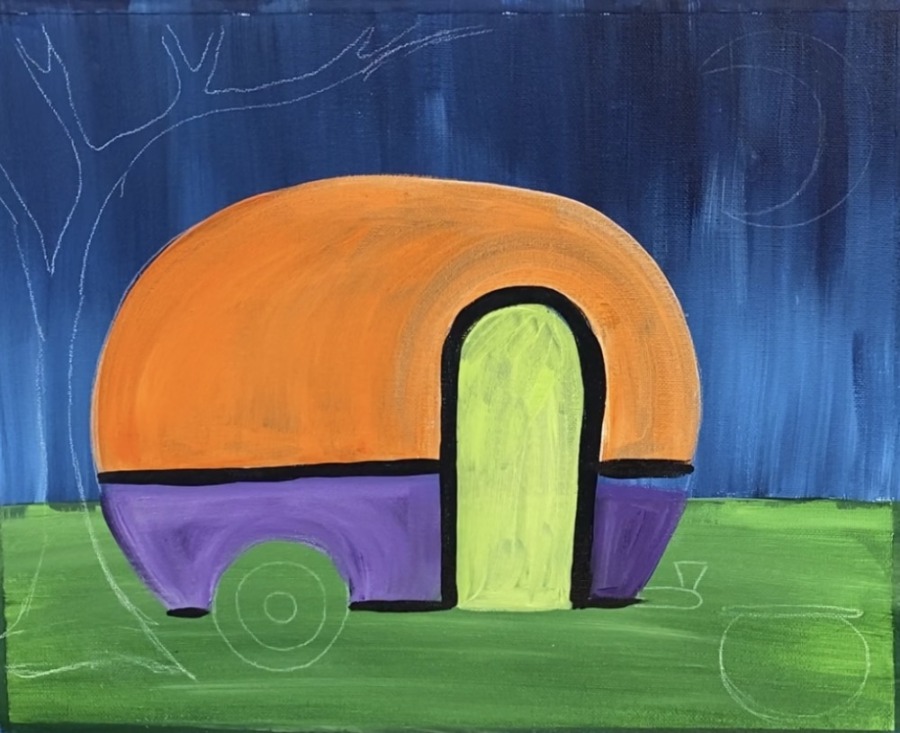
Then I did the outside tire part with mars black and the inner part with black mixed with white (to make a gray). I also painted the hitch gray.

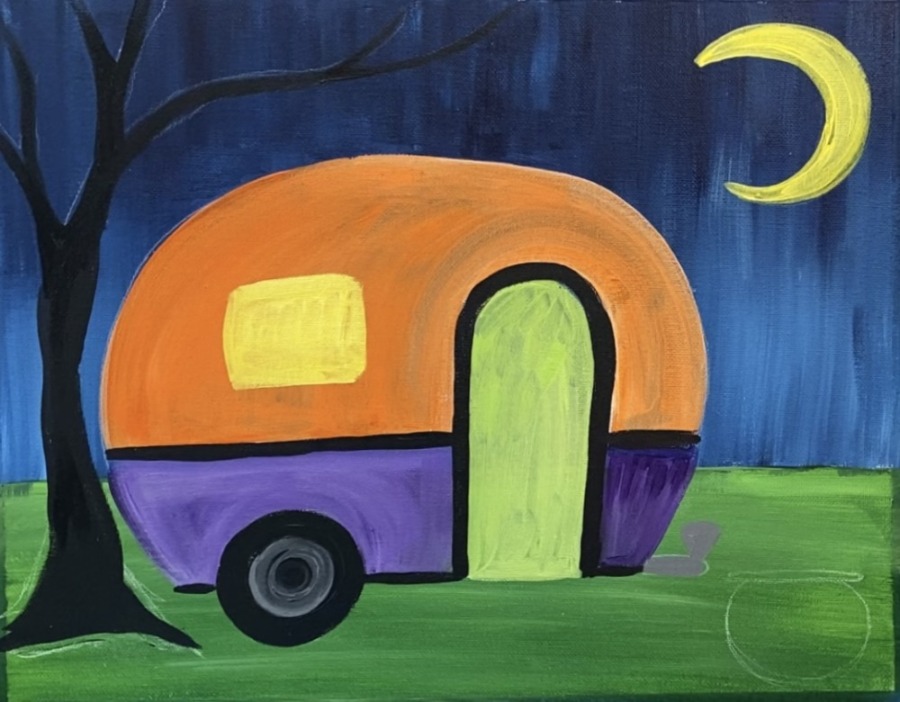
6. Paint the moon, window and trees
Mix some titanium white into the yellow to make it opaque. Then paint the moon and the window.
Then paint the tree. You can either use your 12 bright brush or a 4 round brush for this (or both). Use mars black. Also, it really helps to water the black down slightly to get your branches to really flow.
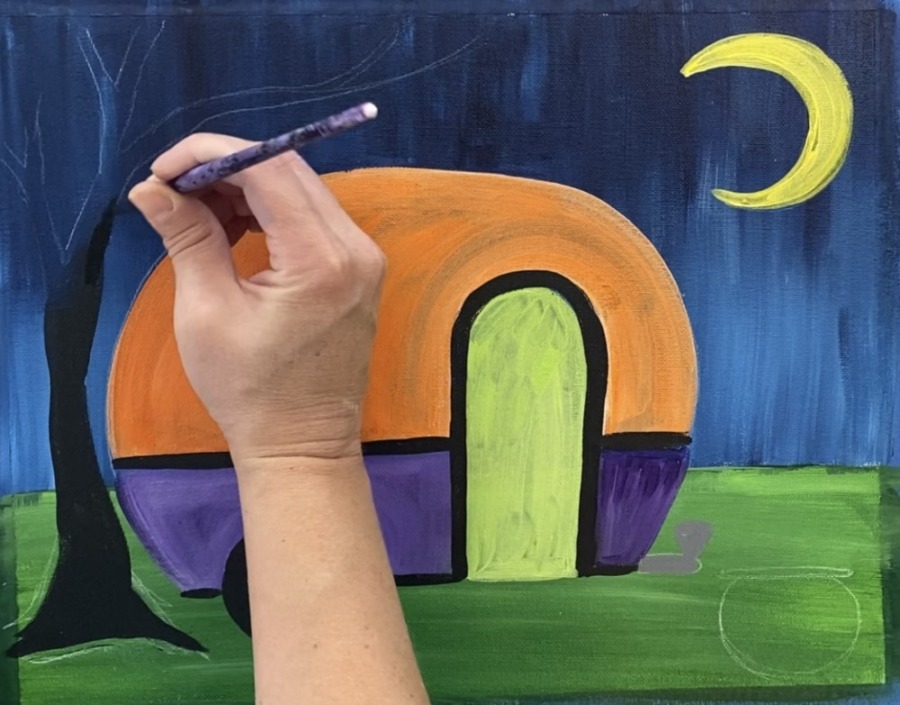
Paint the cauldron and (optional) add a little bit of light gray into the branches to give it some highlight.
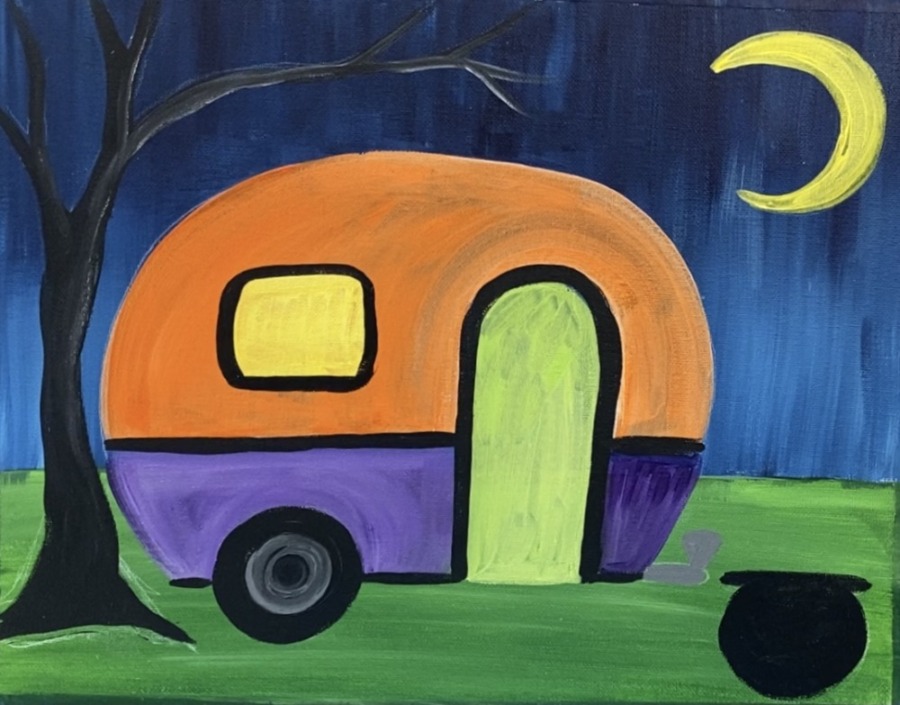
Next add some designs to your camper. I did white spots in the purple area. I also added a few highlights on the tire, hitch and upper right of the camper.
Paint a spiderweb using the #4 round or #0 round brush. Then paint a spider. Also paint some stars in the sky by painting little dots in clusters.
Add a highlight on the right of the cauldron and paint some steam coming up from the cauldron!
Tip: when you paint the steam/smoke lines coming out of the cauldron, do this “dry brush style” by wiping off white paint off your brush. That way your paint line will be thin and transparent.

Have fun adding more details! You can paint little orange dots in the tree branches for fall leaves. You can paint the string lights & a cat in the window!
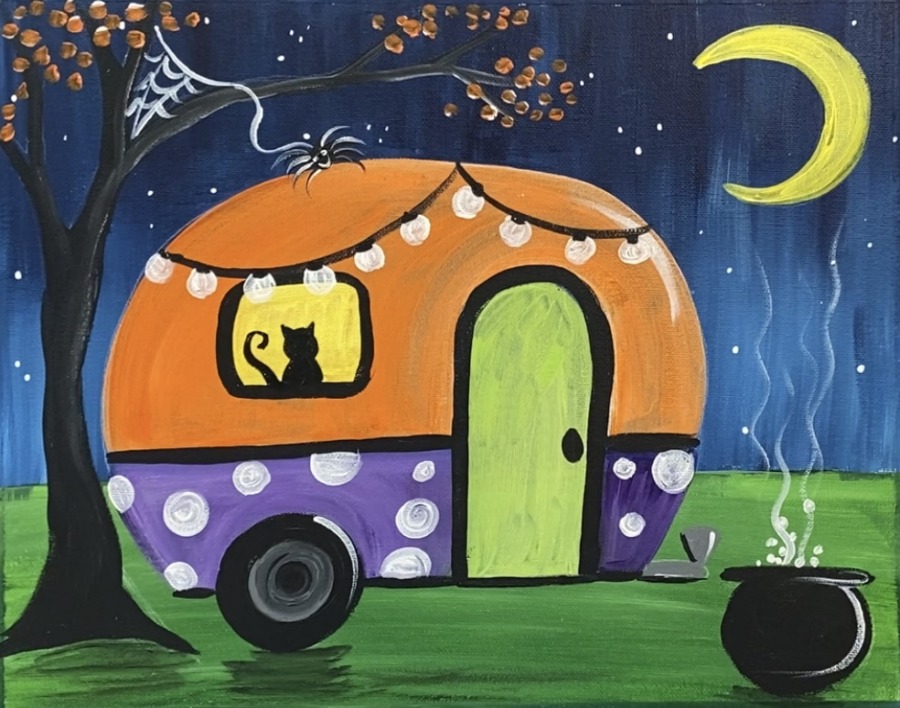
To do the shadowing under the camper, water down some black to a “water color” consistency and paint left and right strokes under the tire, tree and cauldron.
Use a sharpie or black paint pen to draw the bats in. Fill them in with black then paint some white highlights and white dots on the eyes.
Paint some white highlight lines on the spider as well!
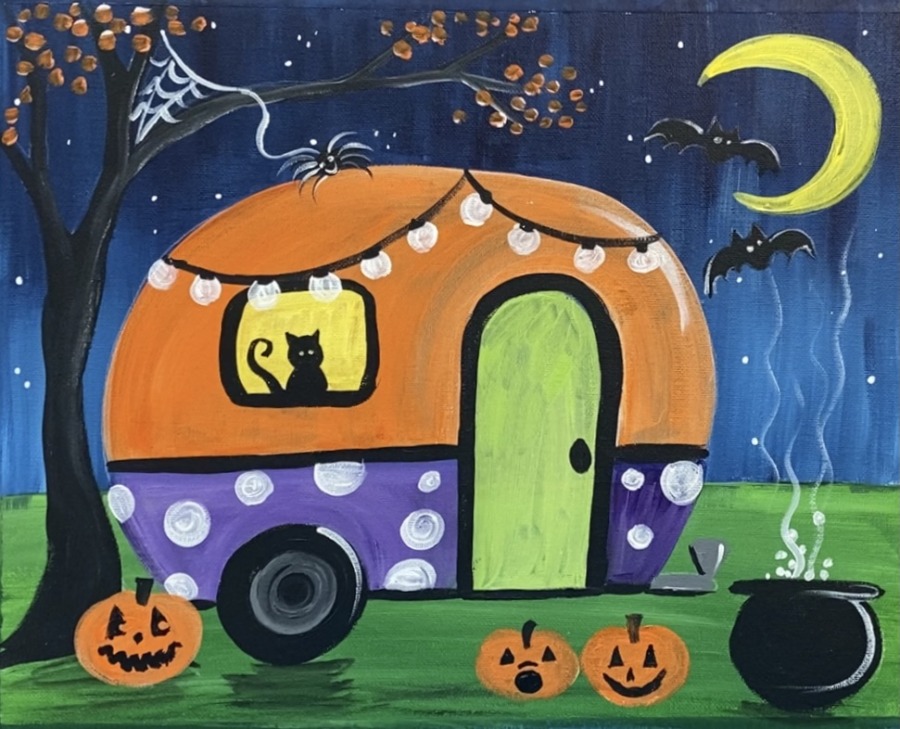
Finally, paint some jack-o-lanterns and the faces!
Finished!
Sign your name and show it off! Such a fun halloween scene!

Share your art here!


love it