
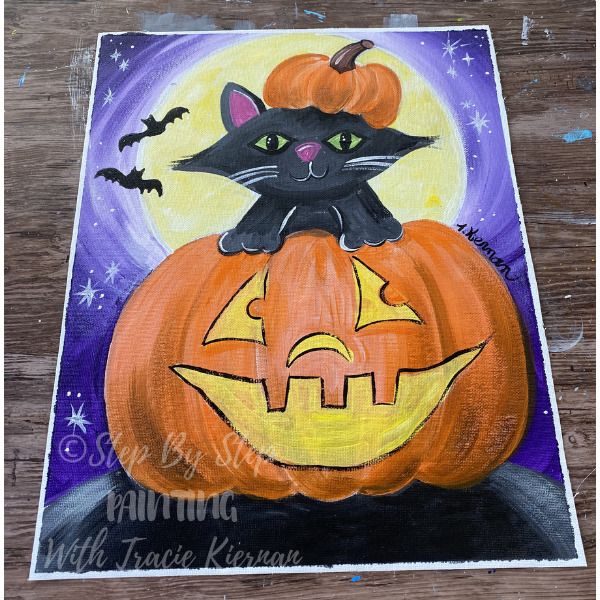
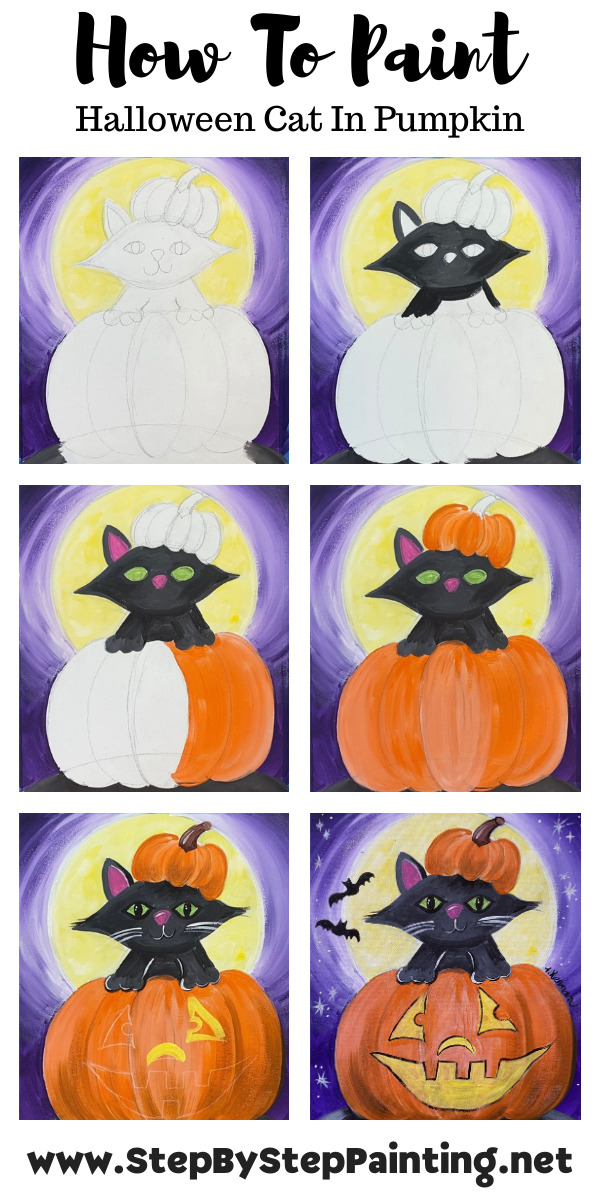
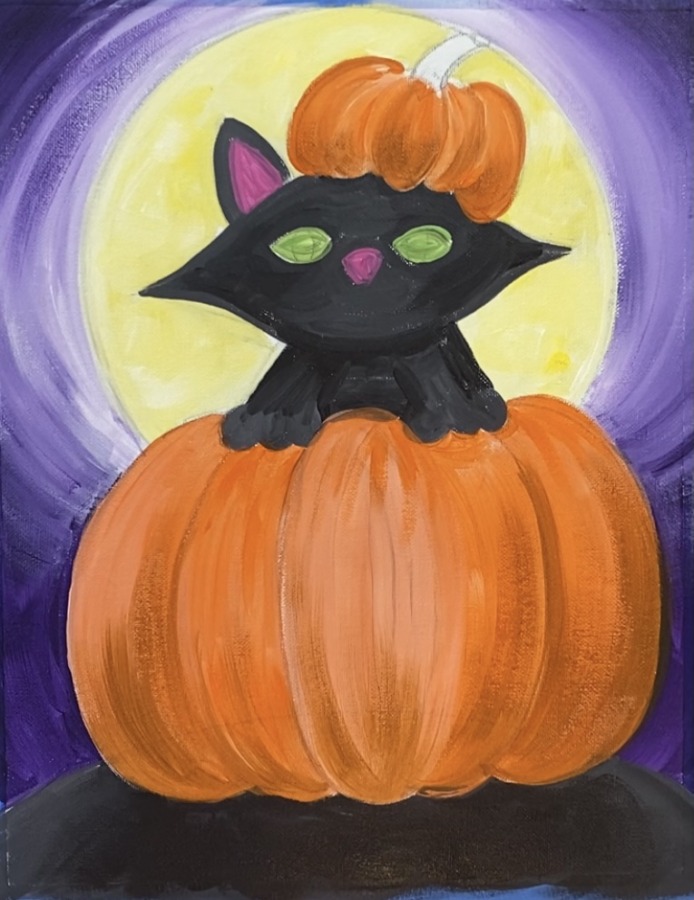
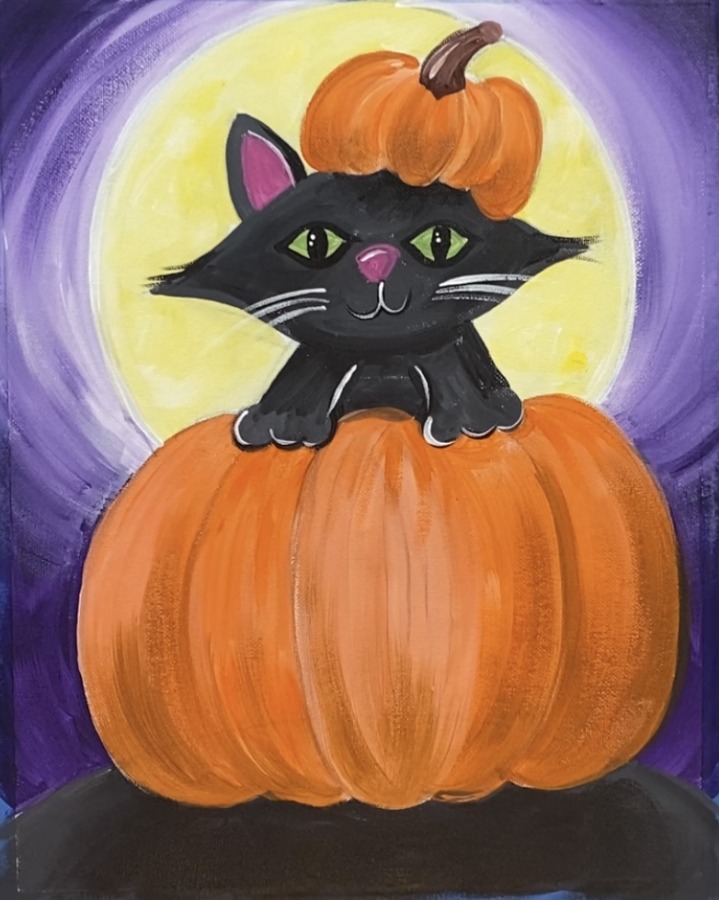
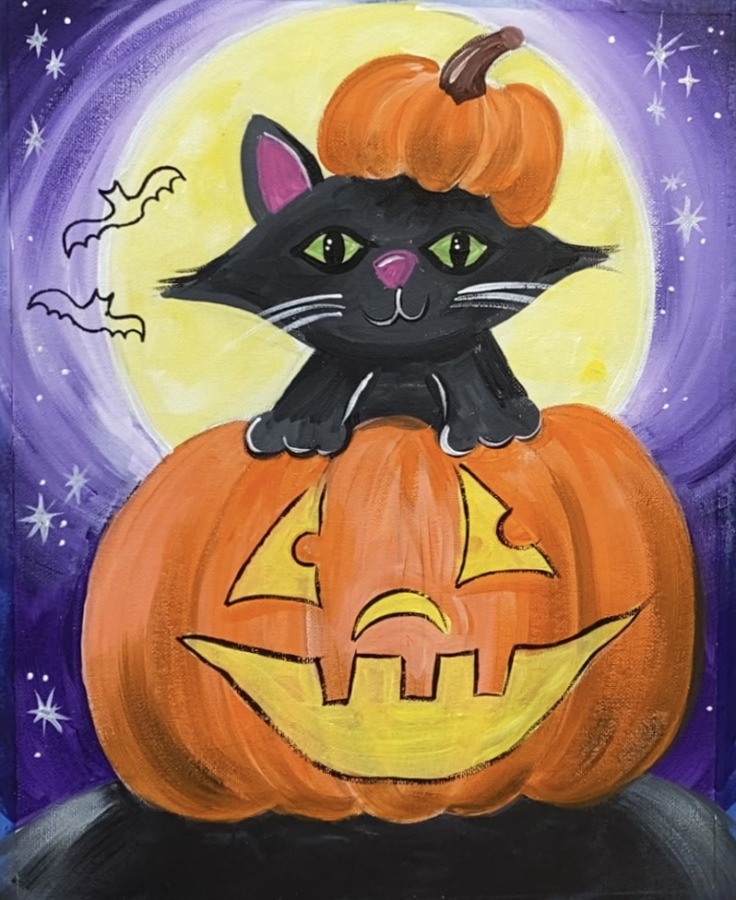
Learn to paint a cute Halloween Cat Inside a Jack O Lantern on a Halloween Night.
Would you like to save this?
This Halloween Acrylic Canvas Painting will take the beginner step by step how to paint! It includes a FREE traceable and a video (which will be released on Saturday).
I actually used a sheet of canvas paper for this painting! I’ve been getting a lot of requests about alternatives to the framed stretched canvases (which can be hard to store after you’ve done many paintings). So I decided to browse Michaels and pick out different canvas pads to try out!
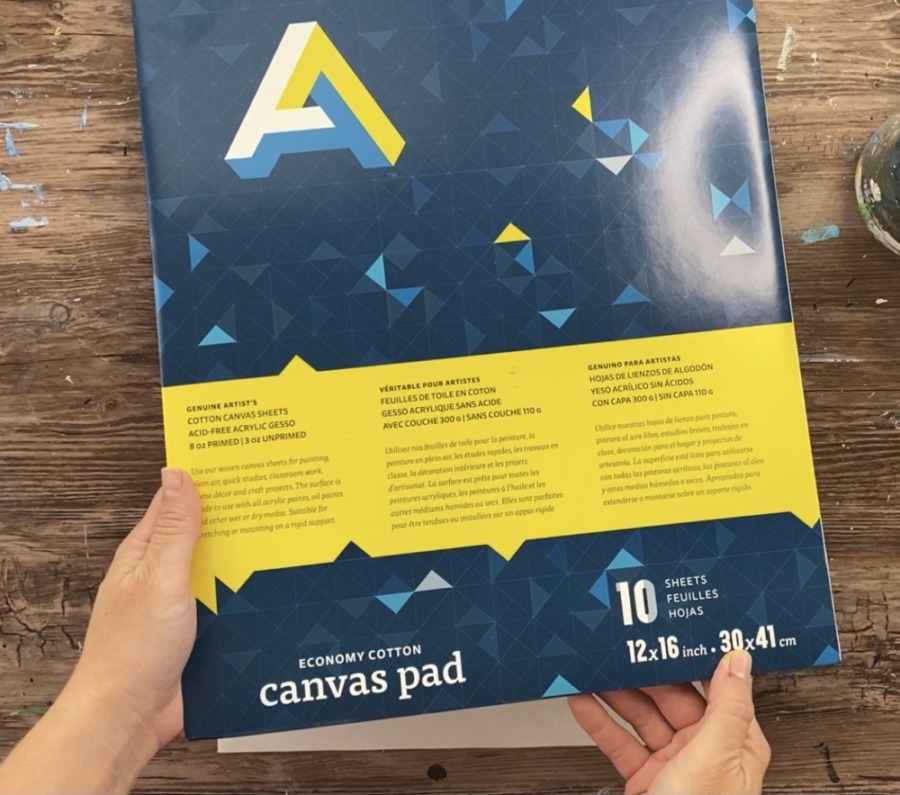
This one is the Art Alternatives Economy Cotton Canvas Pad 12 x 16 size. Although I’ve done only one painting on it so far, I am pretty sure this one will be my favorite!
The sheets are actual cotton canvas sheets with the same exact texture as a stretched canvas. Texture/ tooth is huge for me as I do not enjoy painting on a completely smooth surface!
You can easily frame them or store them in an art portfolio. They are already pre-gessoed for you (on the front side). And the material does not curl like some of the mixed media pad paper does!
I was able to easily cut this to size. Since my design is on an 11 x 14 and this sheet is a 12 x 16, I simply measured and trimmed with scissors. Definitely give this one a try if saving space is what you are trying to do!
Enjoy and happy painting!
Materials
Halloween Kitty Step By Step Painting

Learn to paint a cute Halloween Kitty step by step! This is a painting of a black cat inside a jack-o-lantern on a halloween night!
Materials
- Acrylic Paint
- Brushes
- Canvas (I used this canvas pad cut to an 11 x 14 size)
- Compass or large circle to trace the moon
- Graphite paper (if using traceable)
- Pencil
- White Chalk Pencil (optional)
- Sharpie (optional)
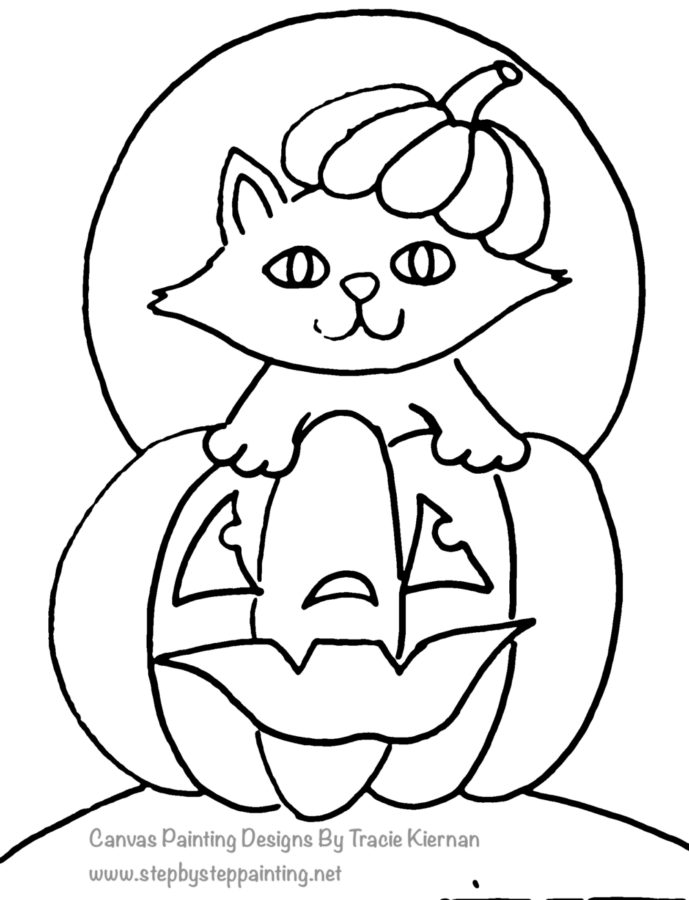
- Traceable
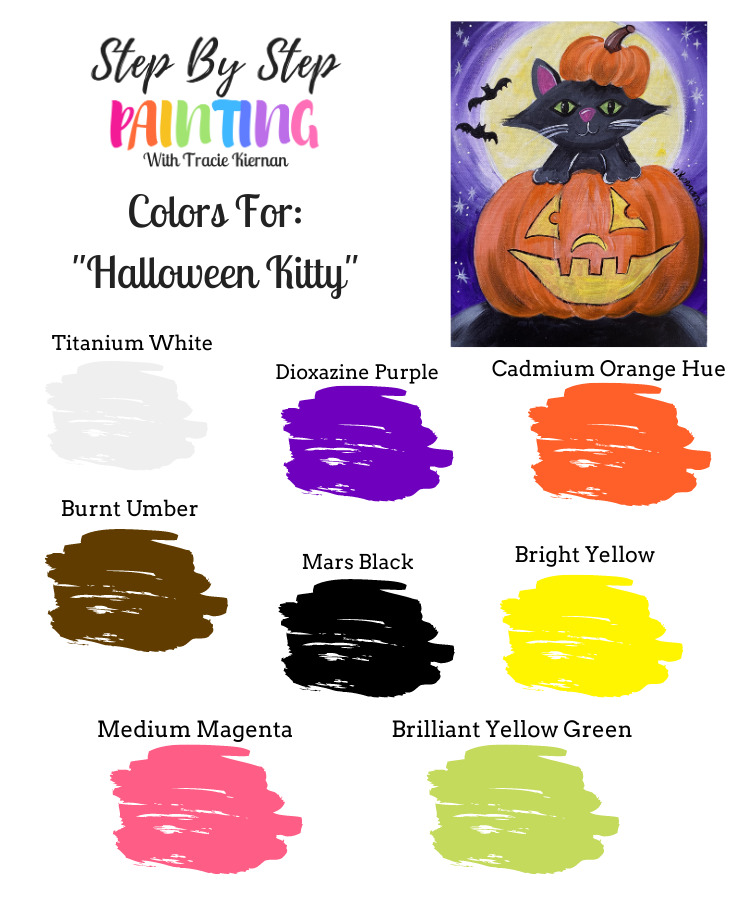
Colors
- Cadmium Orange Hue
- Bright Yellow (any yellow will work)
- Dioxazine Purple
- Mars Black
- Titanium White
- Brilliant Yellow Green (just for the eyes)
- Medium Magenta (just for the nose and inside ear)
- Burnt Umber (just for the pumpkin stem)
Brushes
- 3/4 Flat
- 12 Bright
- 4 Round
- 0 Round
Instructions
- See tutorial blog post for full step by step instructions with photos!
Color Palette
Traceable
Directions At A Glance
Video
Step By Step Directions
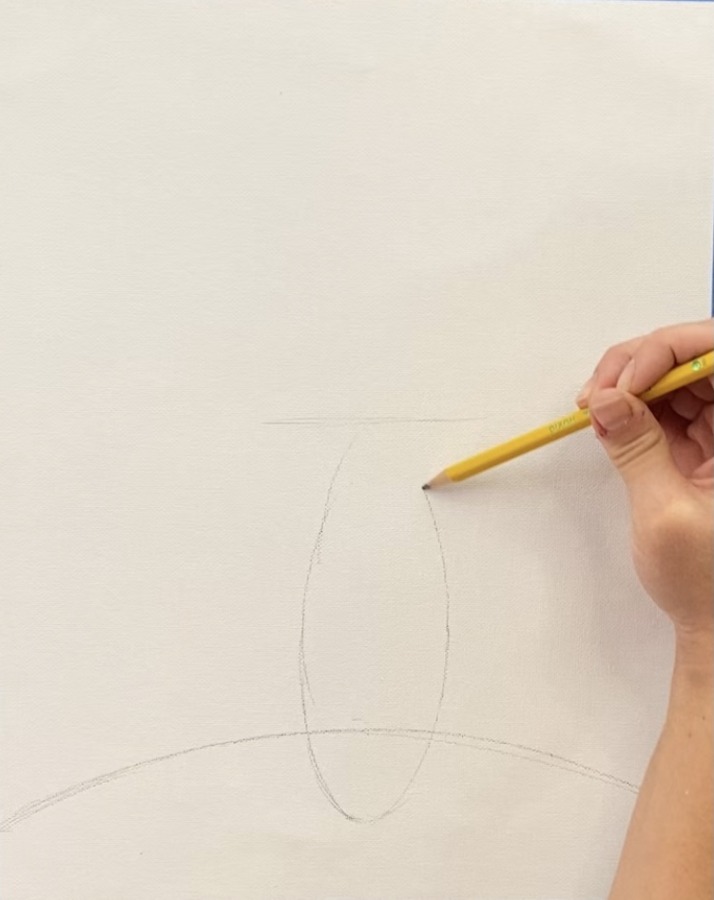
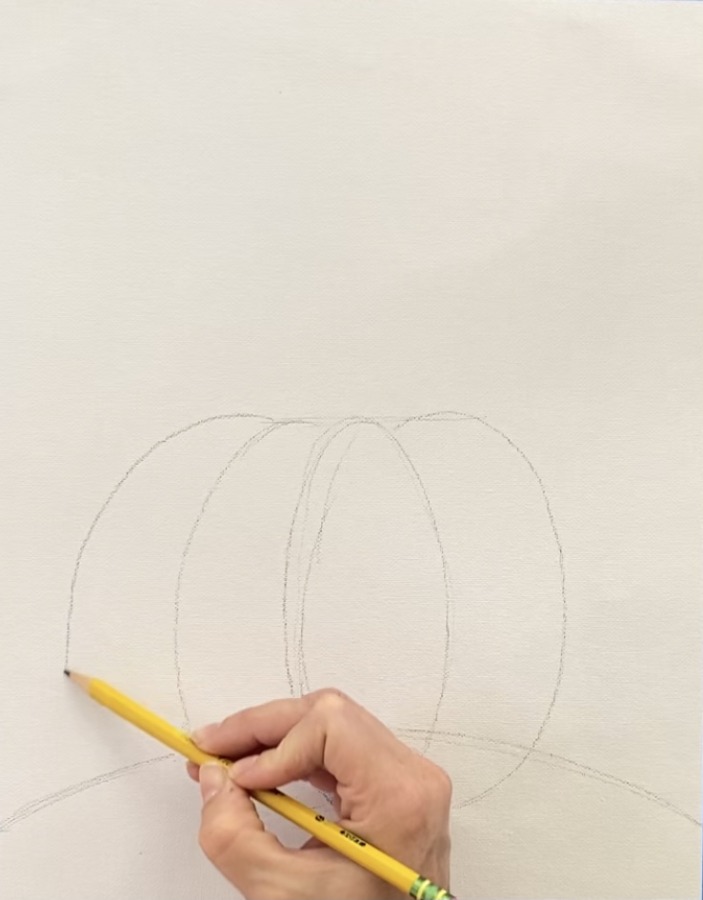
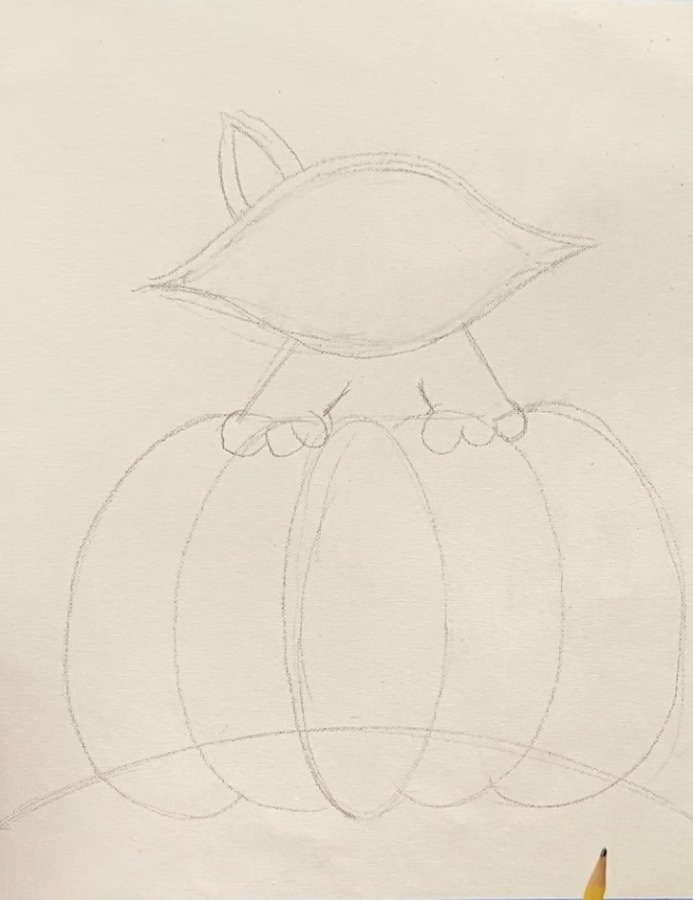
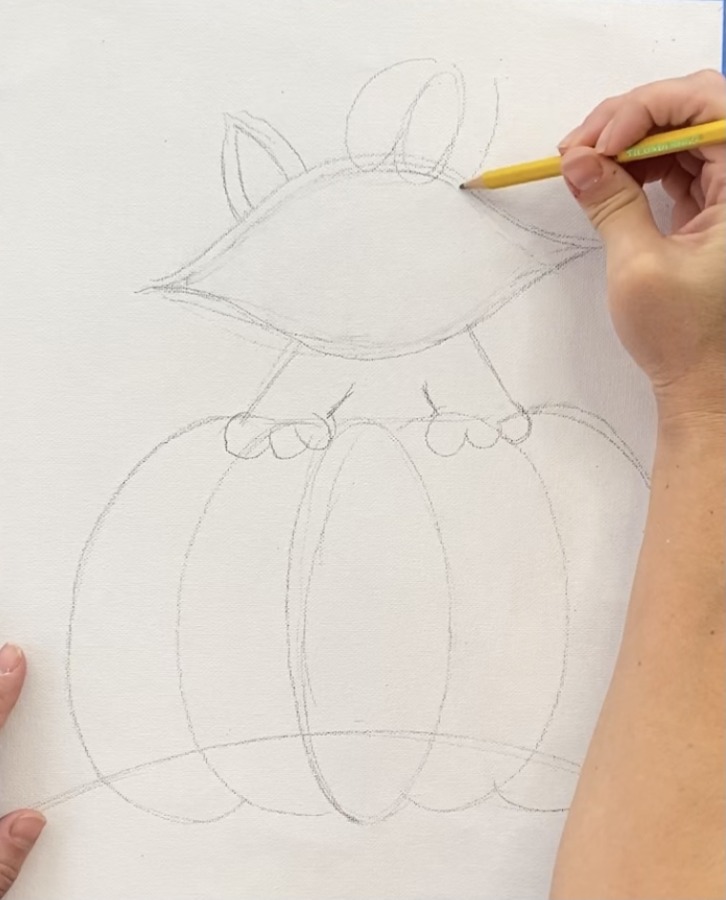
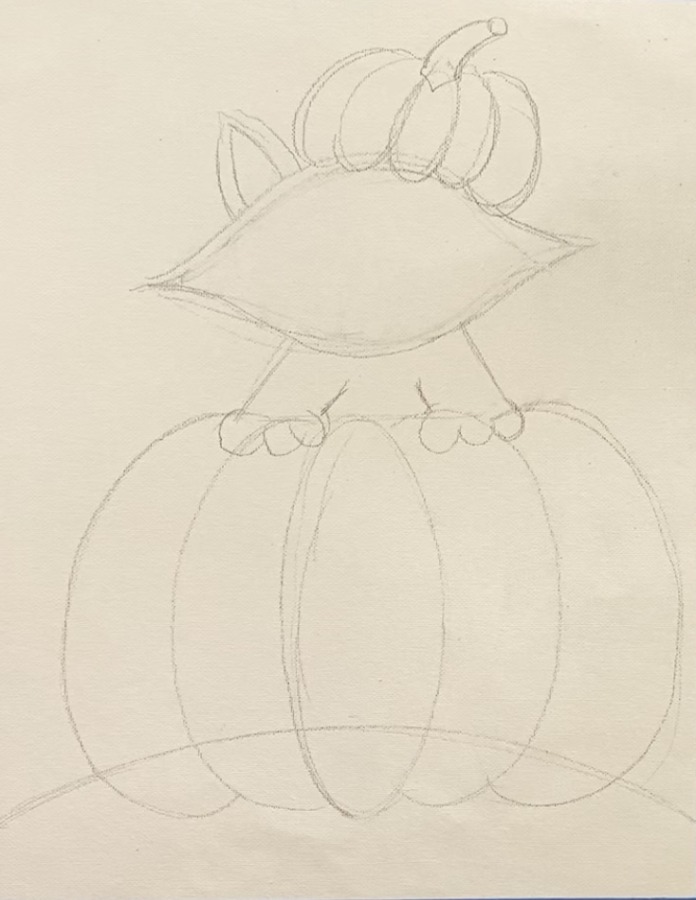
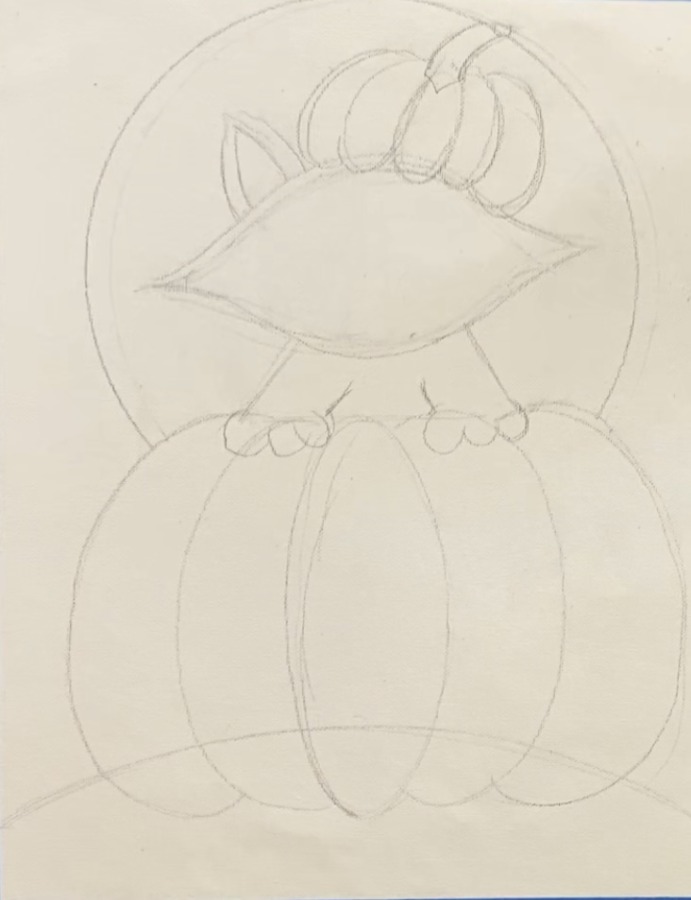
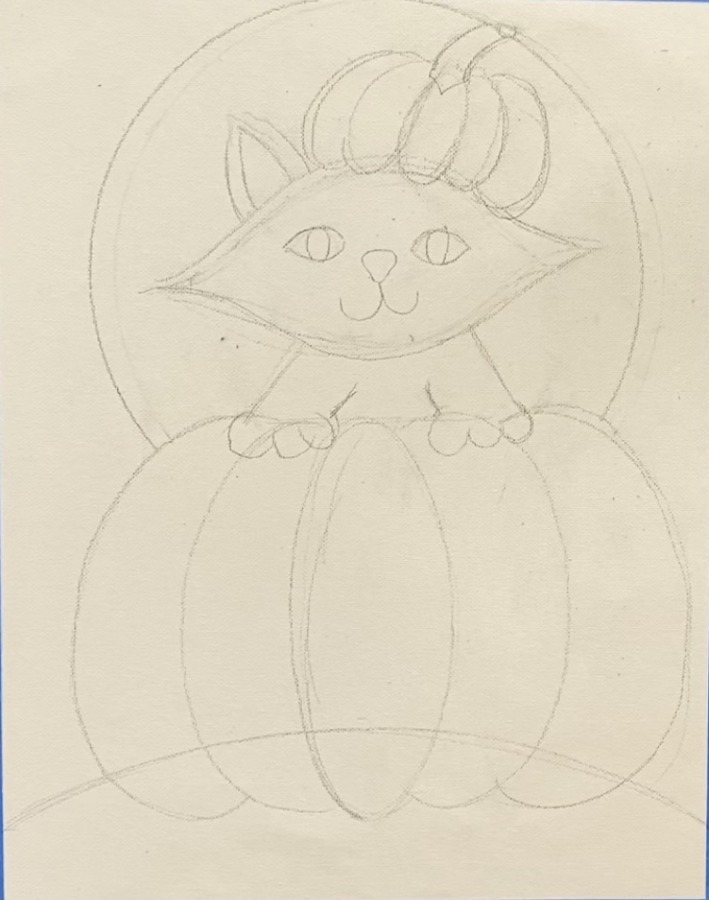
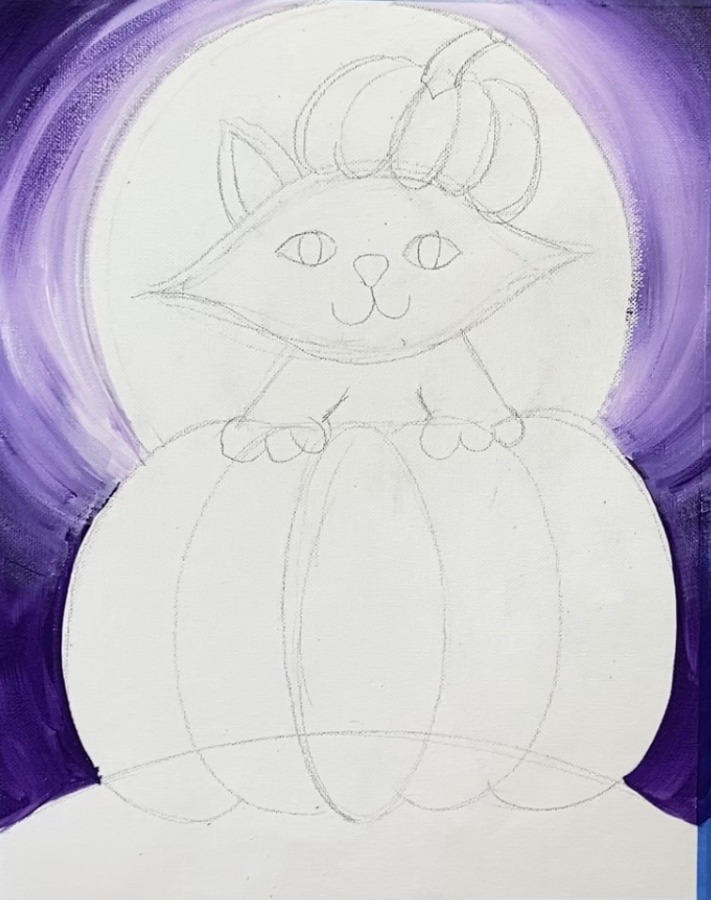
1. Draw the design onto the canvas OR use my traceable!
In the video I will be demonstrating how to do the drawing!
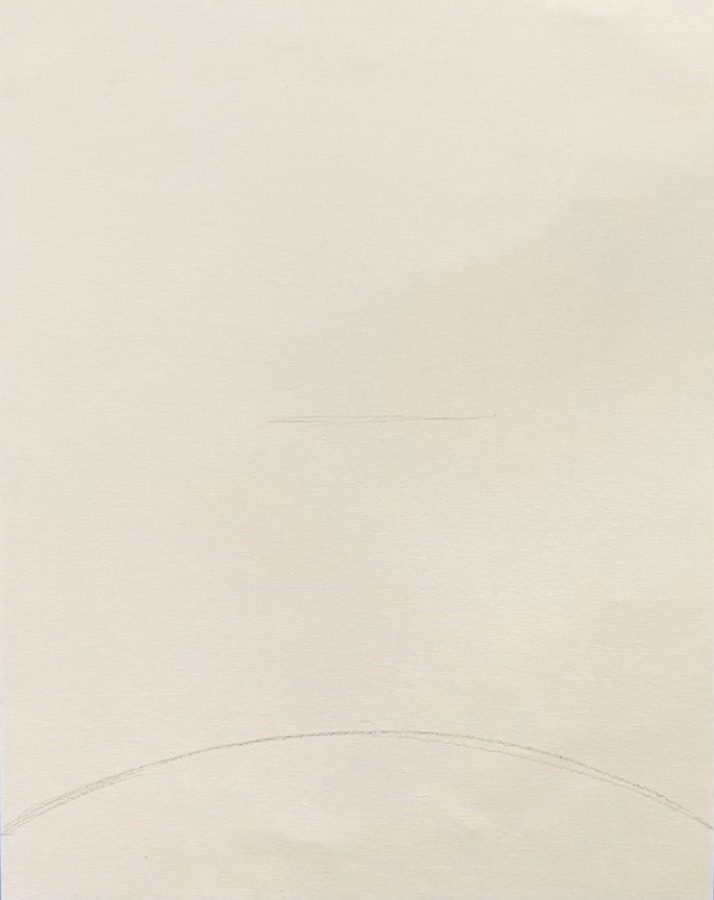
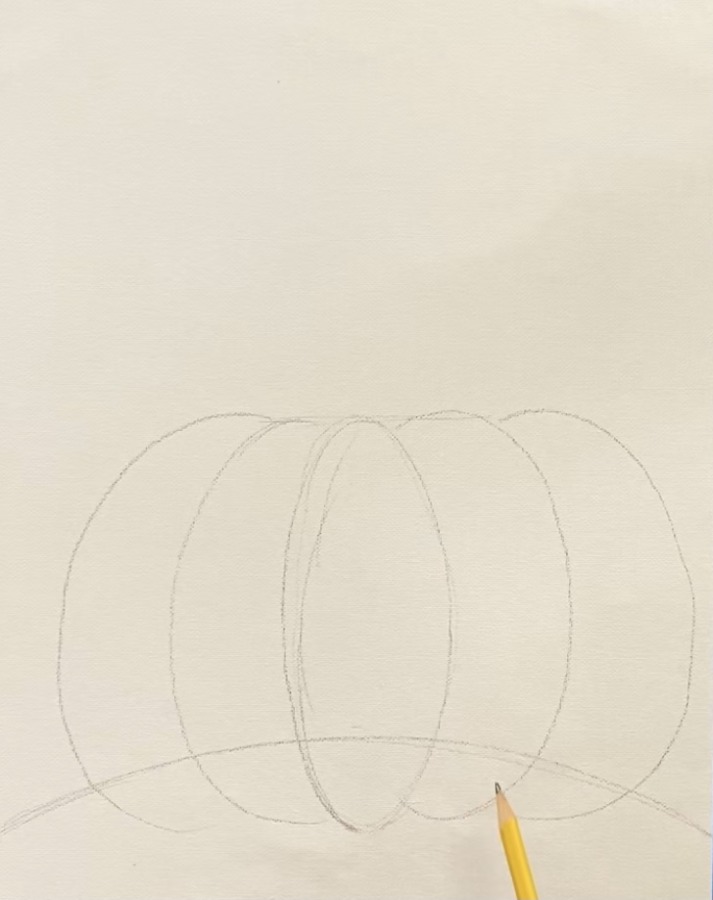
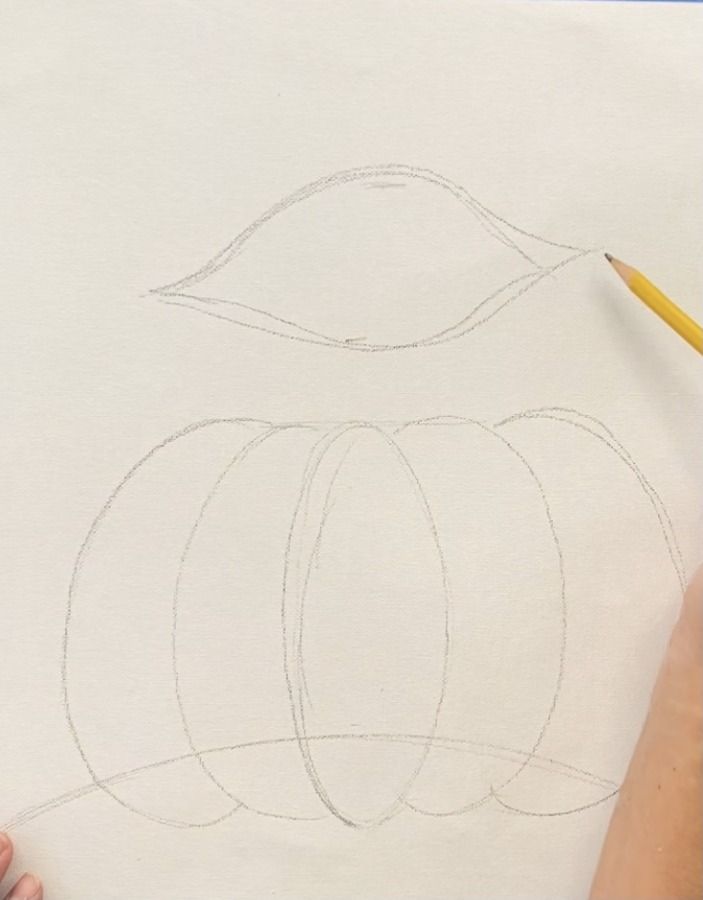
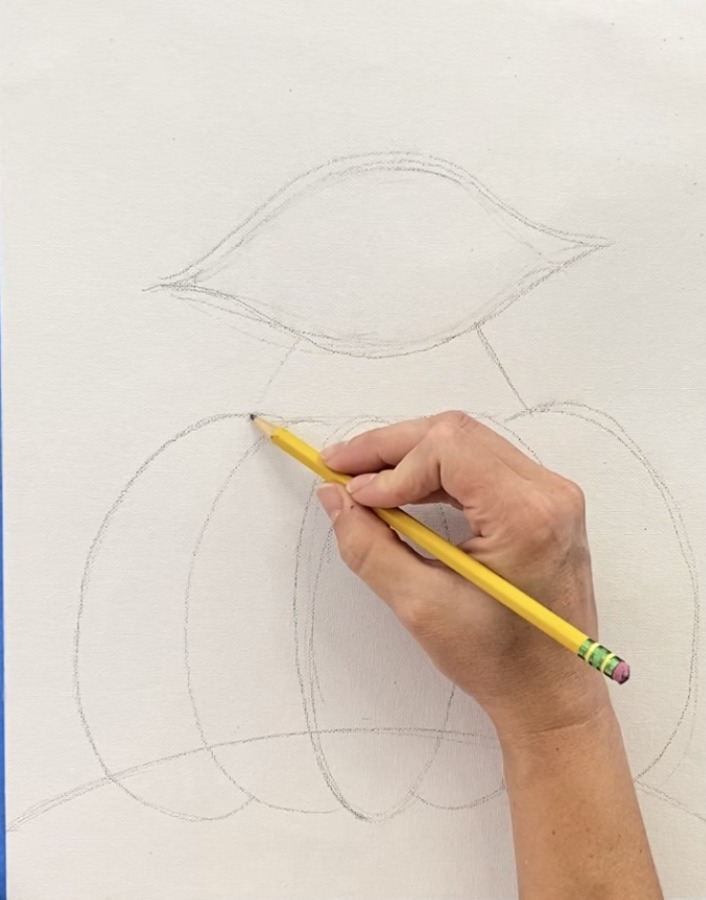
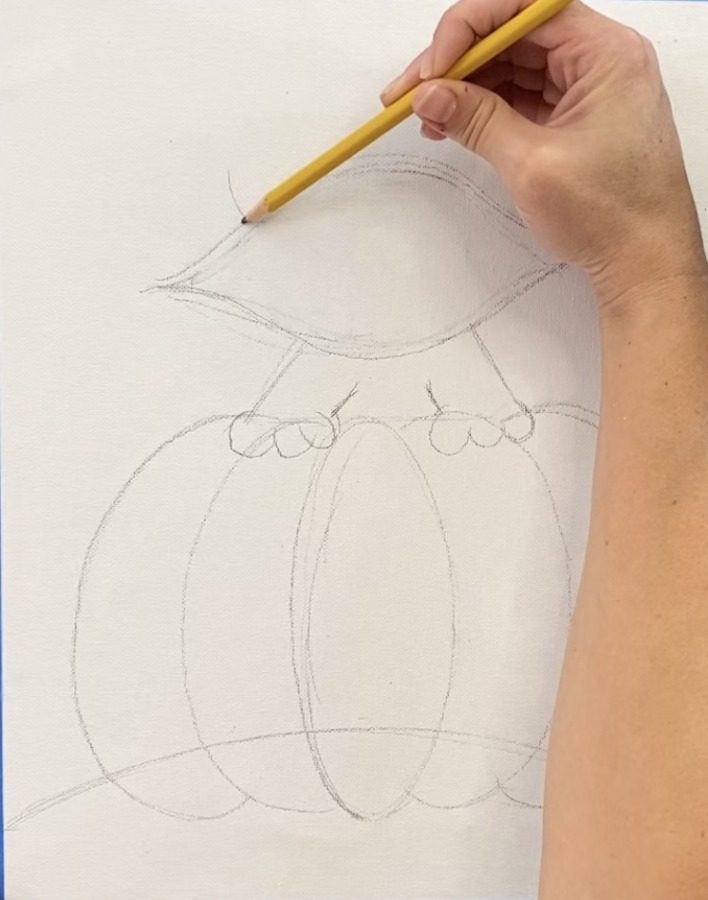
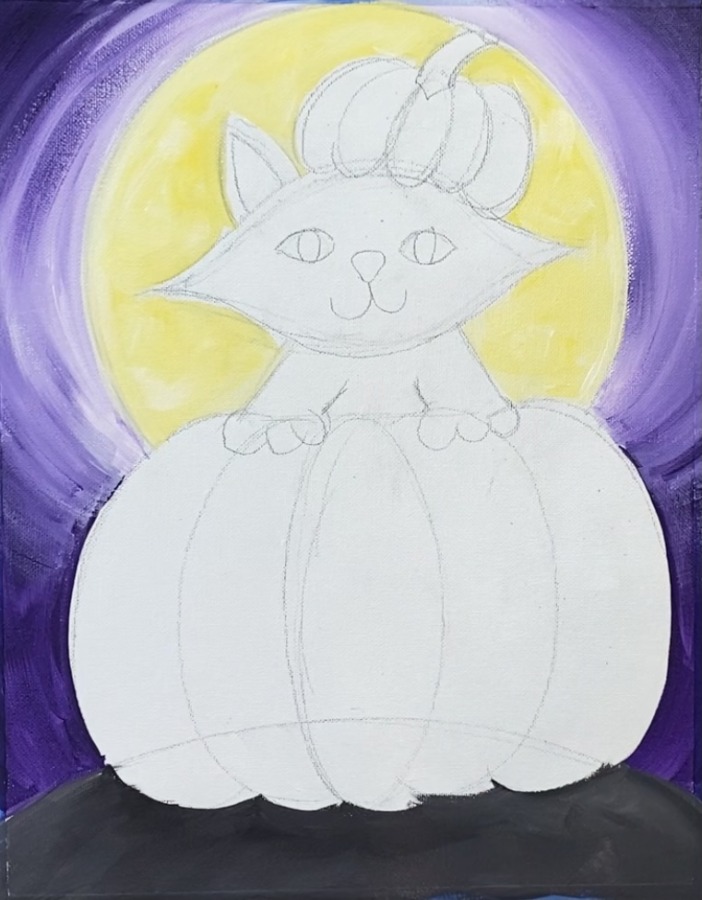
You can also look at the pictures in the gallery below for step by step how I did it. I used a pencil and lightly sketched the ground, pumpkin and cat onto the canvas.
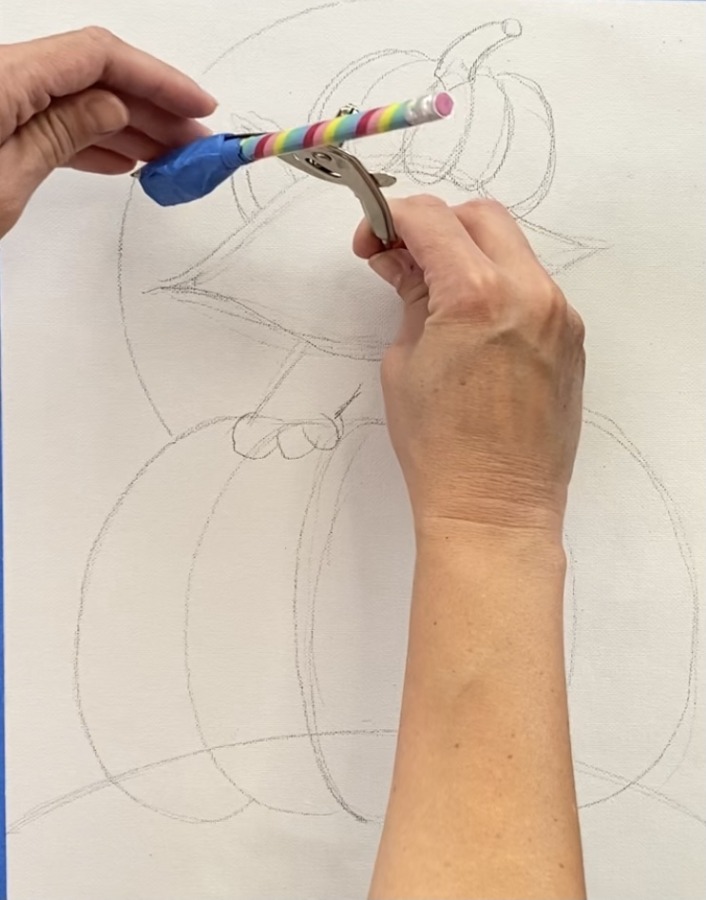
For the moon, I used a compass, however, you can use any large circle to trace!
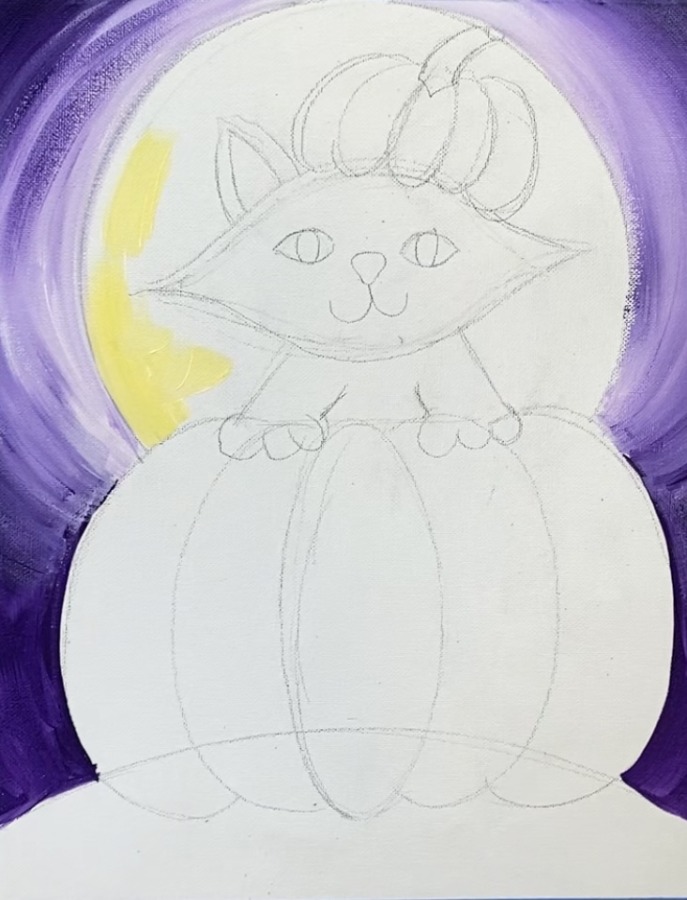
2. Paint the sky around the moon
For the sky, I used Dioxazine Purple and a 3/4″ Flat Wash Brush. I started at the bottom and painted the area around the pumpkin and above the hill.
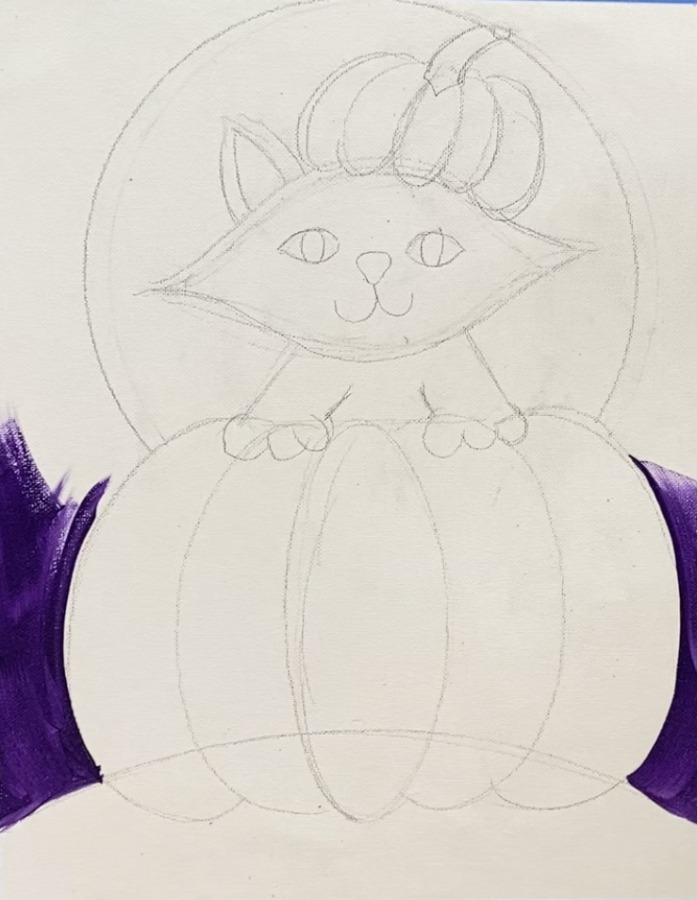
Then when I got to my moon, I made sure my strokes went in a circular formation around the moon. DO NOT paint the 1 inch gap closest to the moon because that will be an area we blend white into.
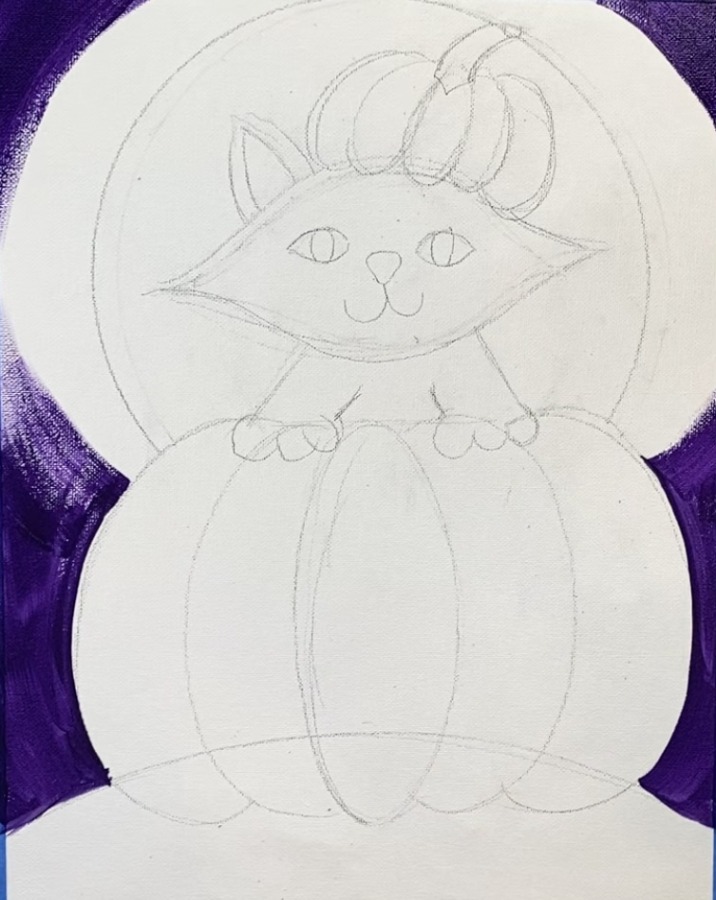
Then wipe excess paint off your brush (but do not rinse). Load in some titanium white. Gently blend in the white around the moon. Ideally you want your purple to turn lighter and blend outwards (although there isn’t a lot of space in the sky to work with here).

Closest to the moon is the brightest white. Do the best you can to blend in more white in this area but make sure it turns to a light purple. Your strokes should be going circular around the moon but they do not have to be blended all the way.
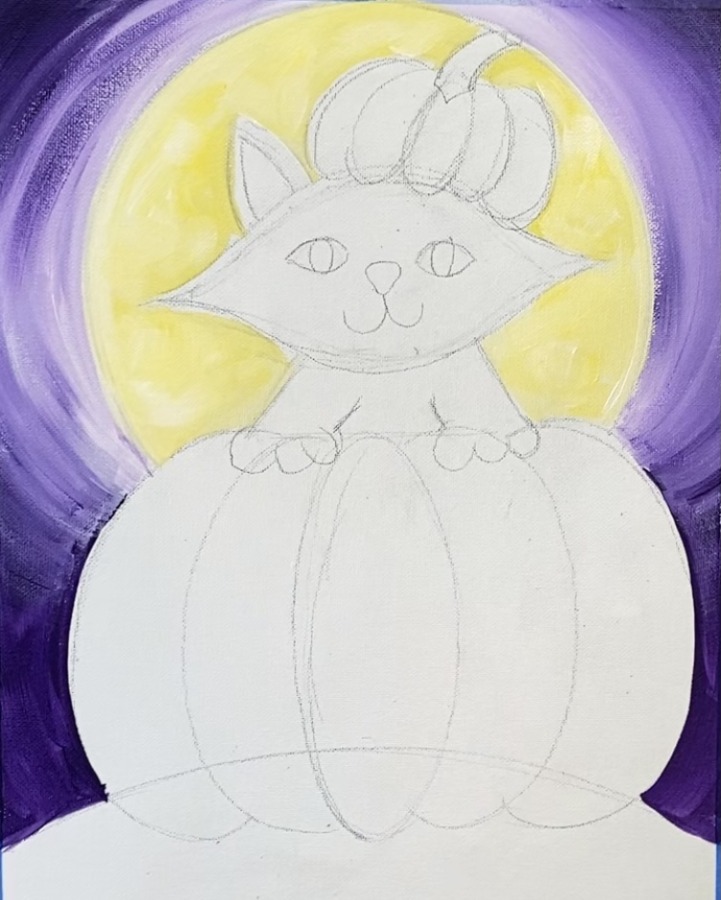
3. Paint the moon
I used a combination of bright yellow and titanium white. If you do not have this exact yellow, you can use any shade of yellow for this! Use a 12 bright brush to double load the yellow and the white.
Then paint short angular strokes all on the circle. You don’t have to get too much detail on the moon but if you do short cross hatching/ angular strokes, it gives the moon a bit of texture.
Then you can take a round brush and outline the moon to define it.
4. Paint the hill
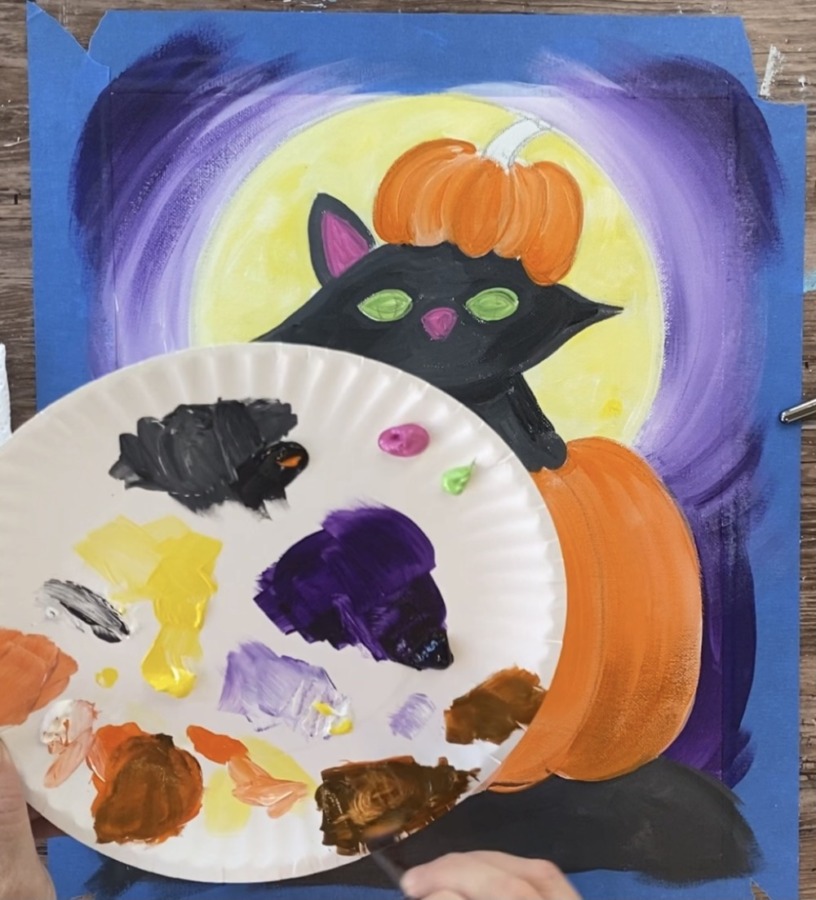
This hill is actually a dark gray as its base color and I added some highlight and shadowing later. For now, mix on your palette about 3 parts black and 1-2 parts white until you get a dark gray color.
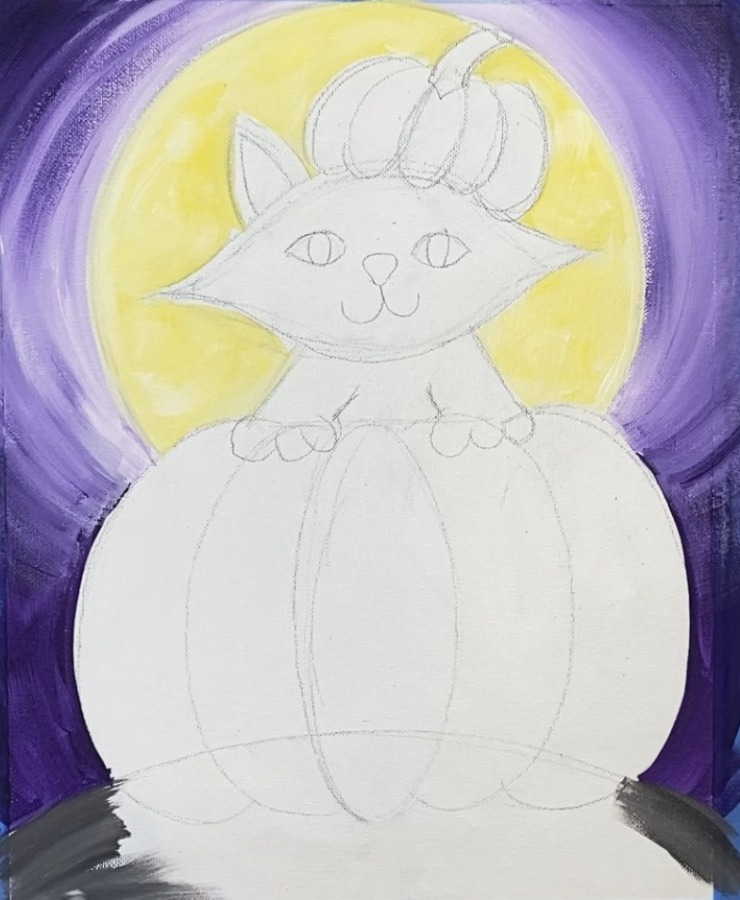
Use your 12 bright brush to paint the hill. Have your strokes go in that curved direction.
5. Paint the cat
Mix a dark gray color on your palette (same color as the hill) and use a #4 round brush to paint the outer ear, face around the eyes and nose and legs/chest/paws.
For the legs, use just black or a darker shade of gray so that area will stand out.
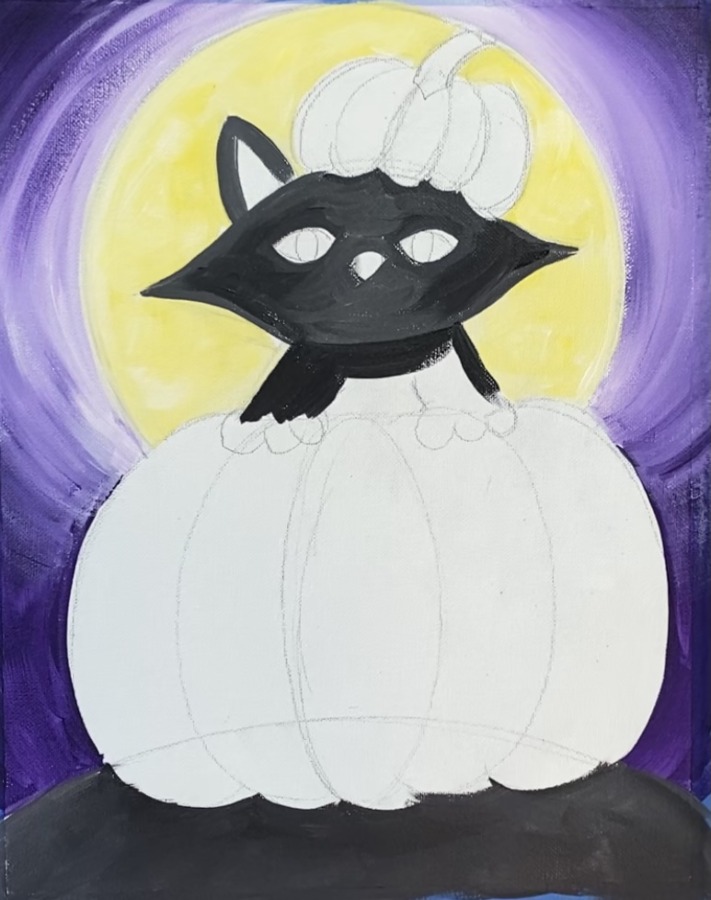
Paint the inner part of the ear and the nose with medium magenta.

Paint the eyes brilliant yellow green.
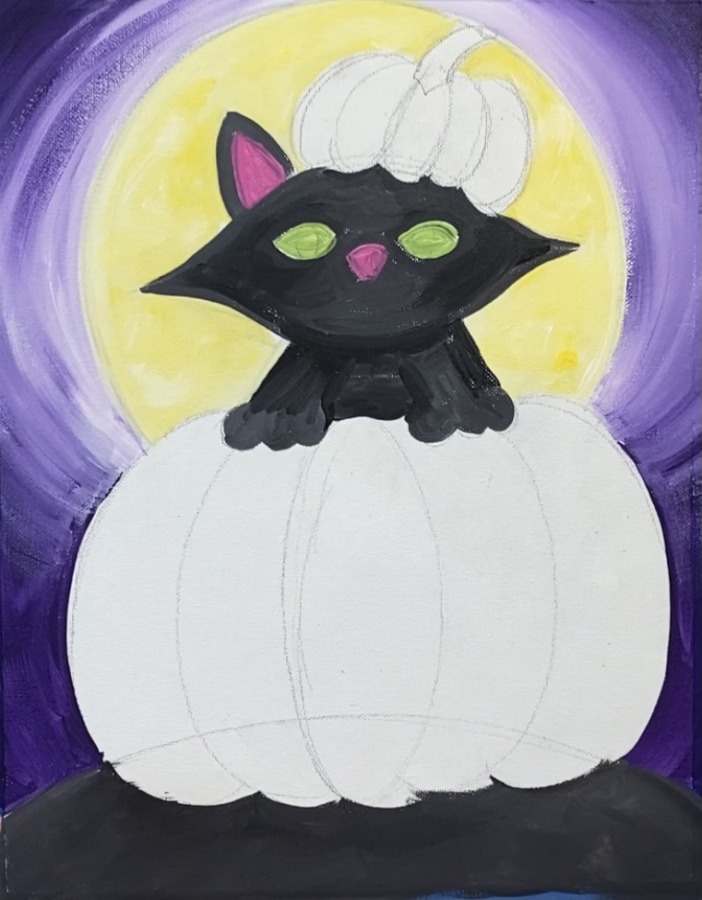
6. Paint the pumpkin
When I do pumpkins, I like to double load my brush in orange and white. For this pumpkin I used a #12 bright brush and loaded it in cadmium orange hue and the corner in titanium white.
Paint each bump one at a time. Start at the top and stroke down so the two colors blend together.
Fill each of the bumps in with the orange/ white combo. Have the two colors blend together but not all the way. This will give your pumpkin “color variation” with the white/orange blending together.
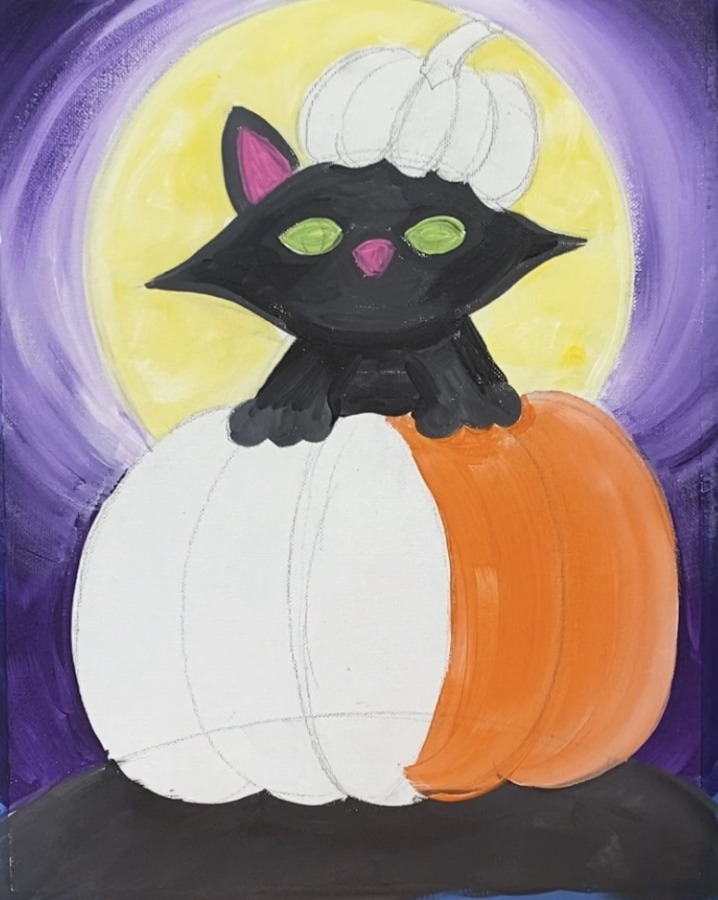
As you are filling in each of the pumpkin bumps, use contouring strokes so that it goes in the direction of the pumpkin. For the middle bump, make your strokes form an oval shape.
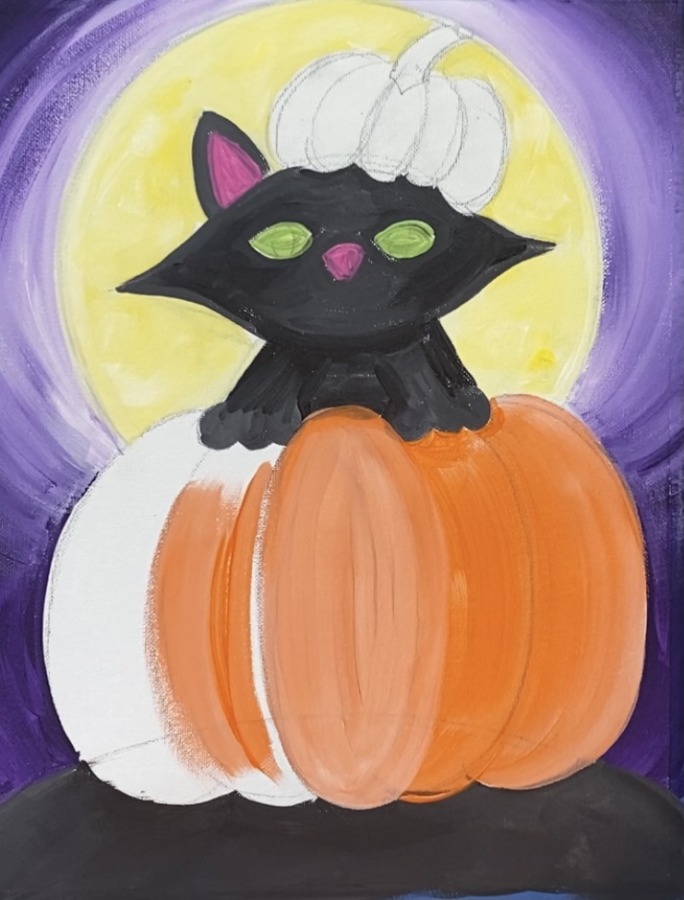
Then the bumps on the left go in an opposite direction for the strokes. Continue to use the orange and white combo having your colors blend on the canvas but not all the way.
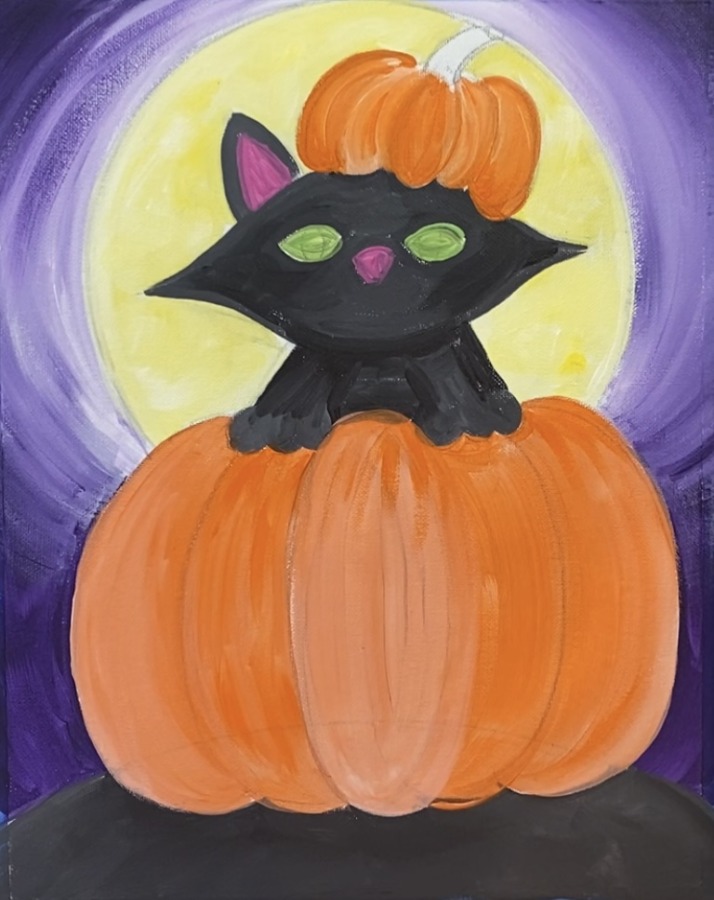
Then repeat the same steps for the top pumpkin piece on the cat’s head.
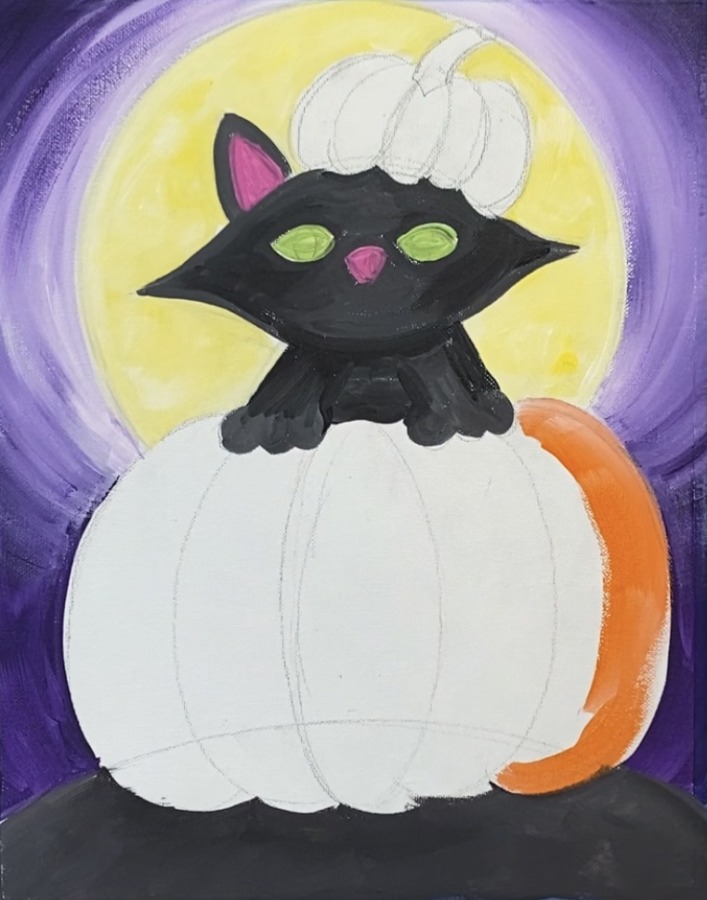
Optional: add some darker shading to the pumpkin. To do this darker shading, mix a TINY bit of black into cadmium orange hue to make a dark shade of orange.
Then use your 12 bright brush to add this darker shading to the bottom of the pumpkin. Apply it very lightly and thin like dry brush style.
I did this to the bottom of the pumpkin but also did a few strokes in between the bumps.
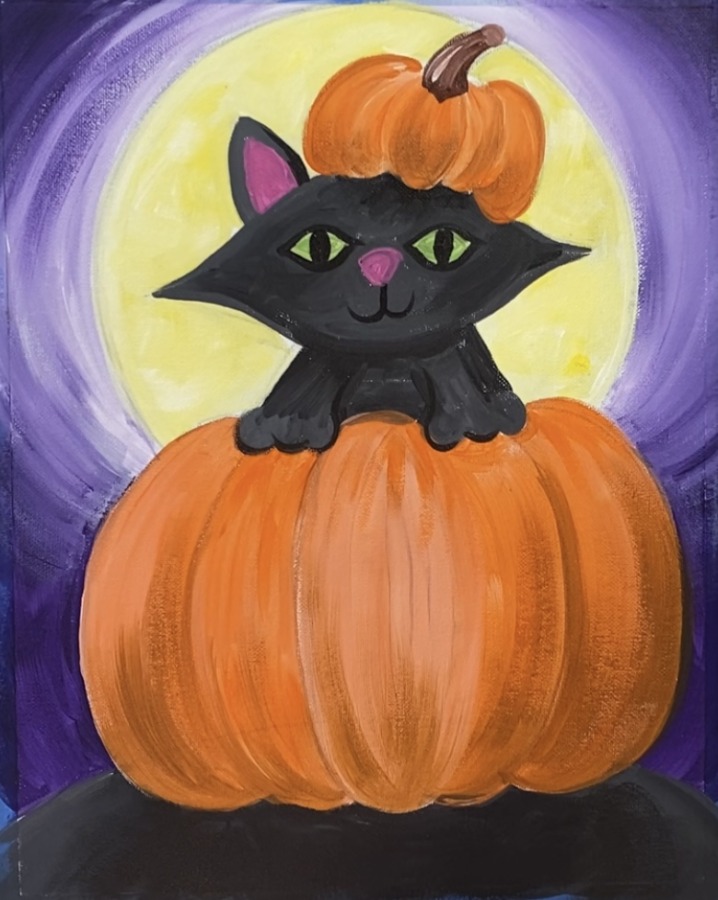
7. Details on the cat’s face
Use your #4 round brush (or your #0 if wanting thinner lines) to outline the cat’s eyes, paint the center pupils of the cat’s eyes, paint the mouth, outline the legs and paws.
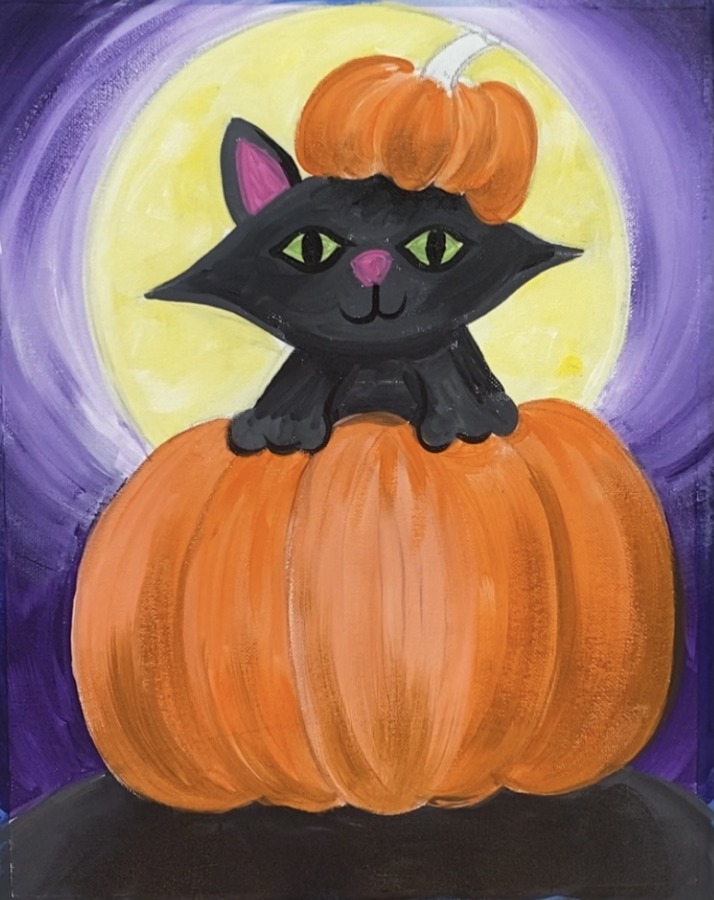
Then paint the stem of the pumpkin using burnt umber. Then add a few strokes of white into it for texture. I also made to top circle part of the stem a lighter brown.
8. Do some white detail work with a small brush
Next paint the whiskers on the cat as well as two dots inside of the cat’s eyes.
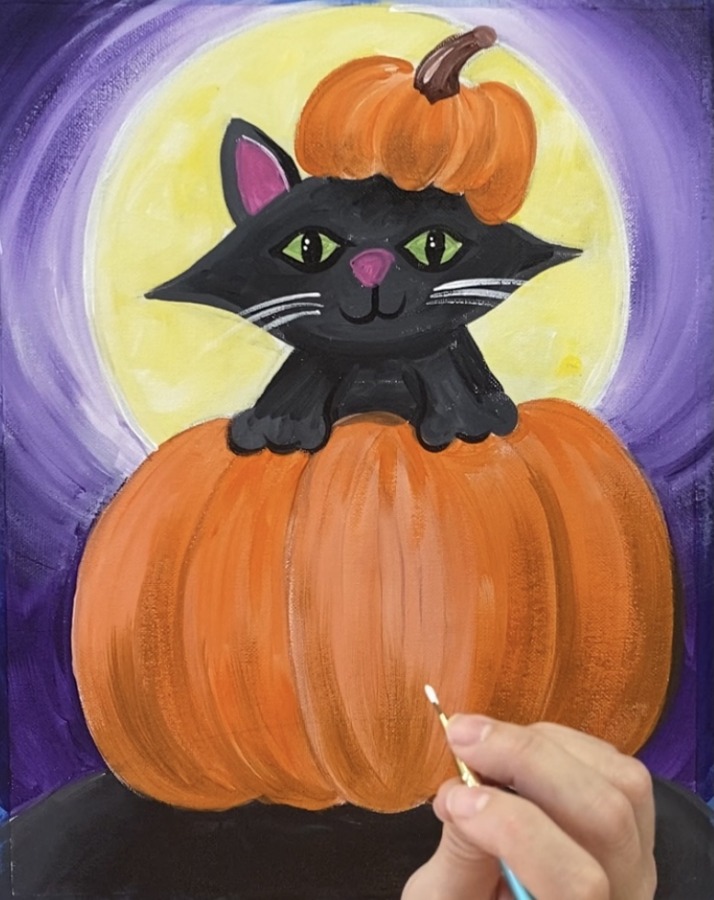
Then lightly outline the cat’s legs, paws and mouth. I also did an outline on the inner right part of the ear and a highlight on the nose.
9. Draw/paint the pumpkin face
For this step I used a white chalk pencil. You can also use regular chalk or a regular pencil. I highly recommend drawing the face first before painting it in. If you are using the traceable, you may still see the face showing through.

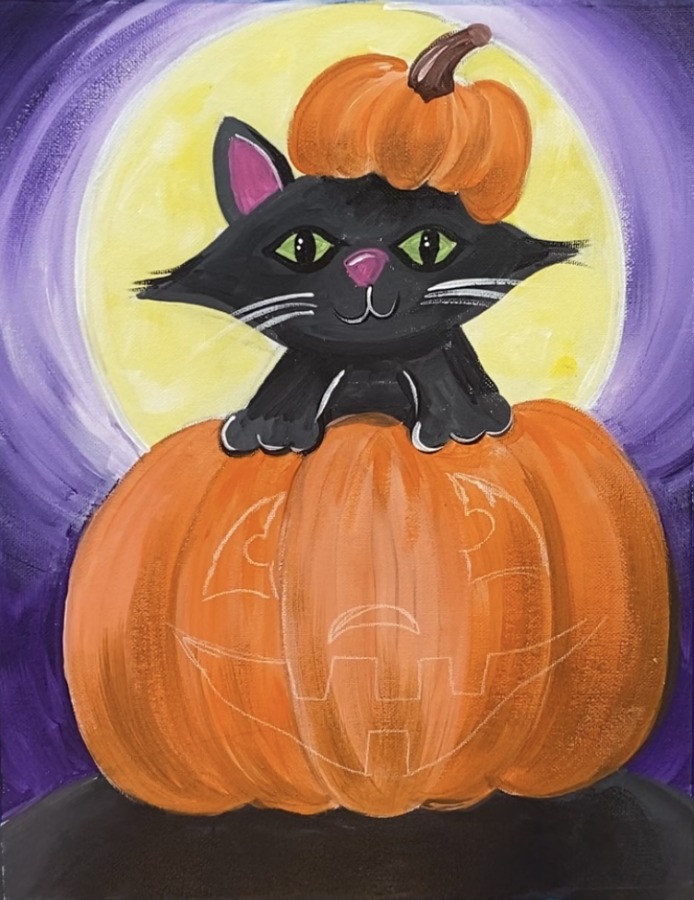
Then paint the face in yellow (or black if you prefer). I recommend mixing your yellow with titanium white to make it nice and opaque. Wait for this to dry before outlining with black.

10. Pain twinkling stars
I love how the stars give this painting a magical effect! I used my #0 round brush and titanium white to paint Dimond-like and asterisk stars in the sky. I also did little dots. It looks best when you do them in clusters around the sky!
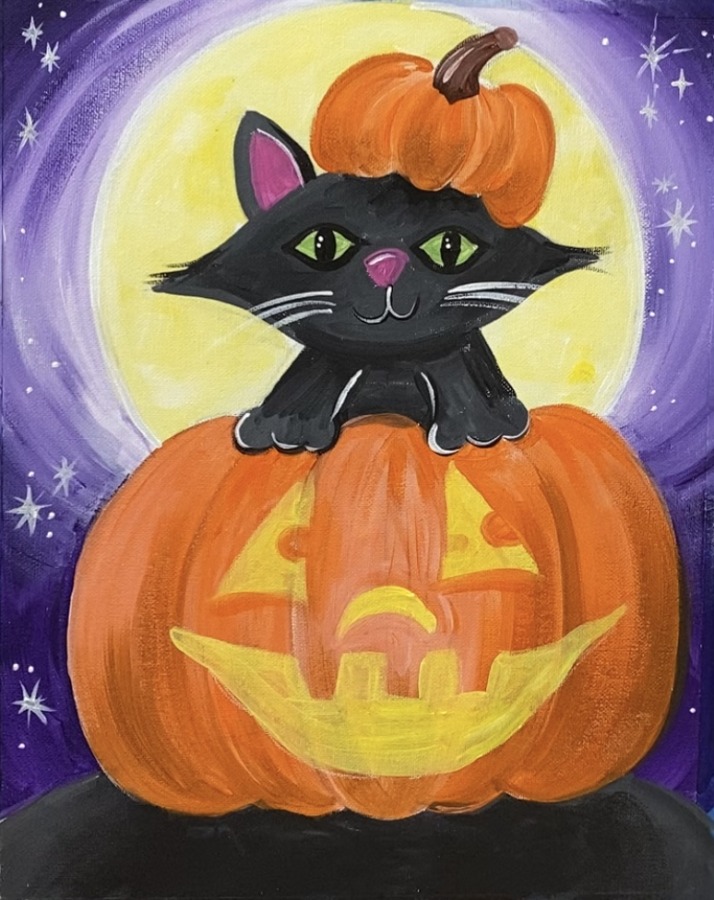
Then outline the pumpkin face. I did this with my #0 round brush and very loosely outline the shapes.

11. Add some highlight to the hill (optional).
Just on the top left and right of the hill, I dry brushed light gray (mix 1 part black and 3 parts white to make a light gray). Use the 12 bright brush and lightly add it to that area. This gives the ground a more dramatic shadow effect.
12. Draw your bats
I actually drew these with a sharpie! You can draw with chalk, pencil, paint pen, etc. Draw the outline of the bat first and then fill in solid with mars black paint (or sharpie or paint pen).
Finished!
That’s it! Sign your name and show it off! What a fun painting to add to your Halloween Decor!

Share your art!


