

Would you like to save this?
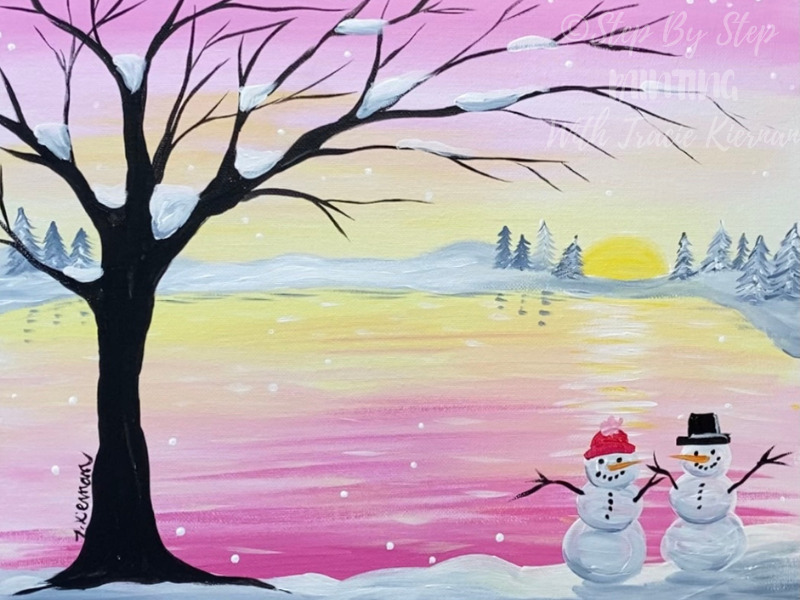
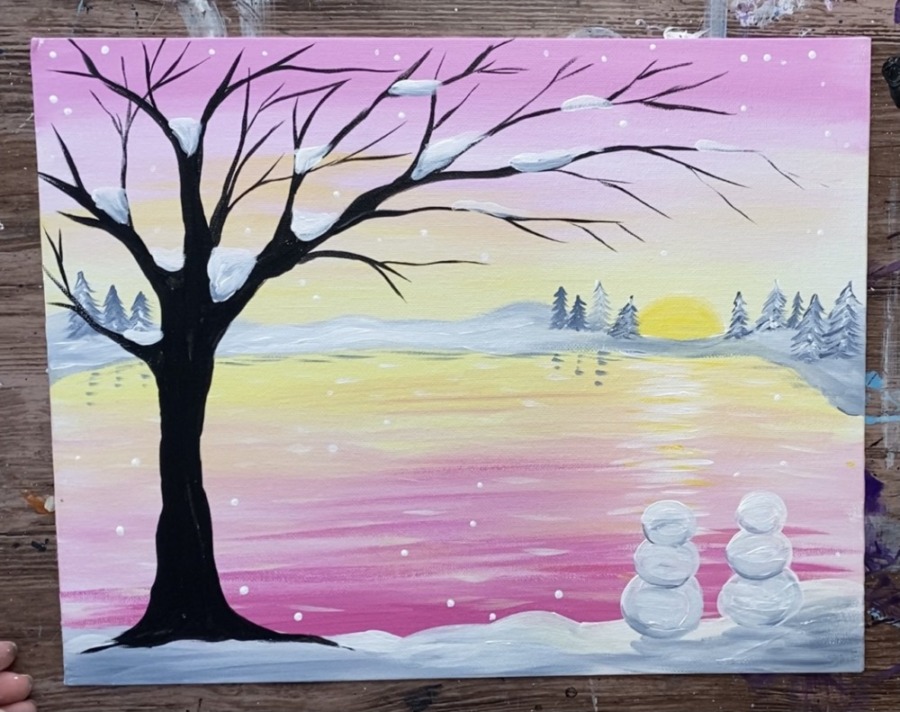
Learn how to paint a soft pastel winter sky sunset with a frozen lake, winter trees and two cute snowmen in the foreground!
This is a FREE acrylic painting tutorial for beginners!
This painting was done on an 11″ x 14″ canvas panel with acrylics. There is no traceable for this one! You can also take this design and do it on literally any canvas size.
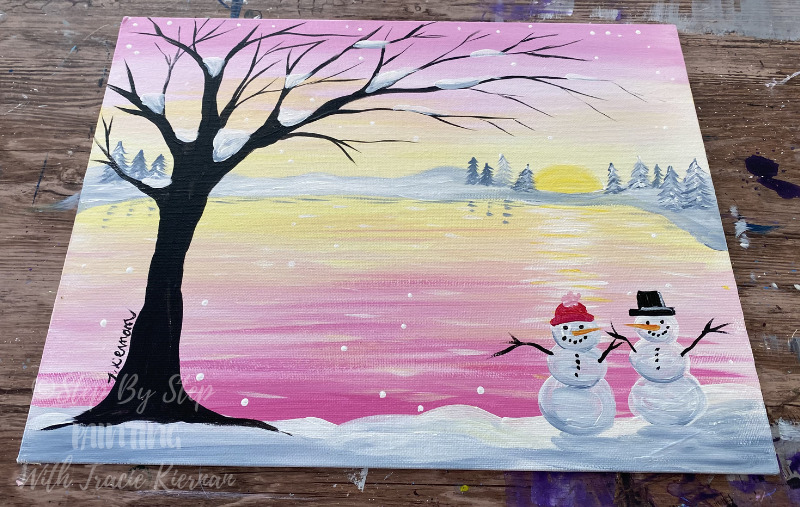
Super easy and fun! Perhaps you can customize your snowmen and paint a whole family. I did a snowman couple because I thought the snowy sunset looked super romantic! Aww!
If you need some tips on painting branches, I have a blog post that goes into more detail about how to paint beginner easy branches!
Enjoy and happy painting!
Materials
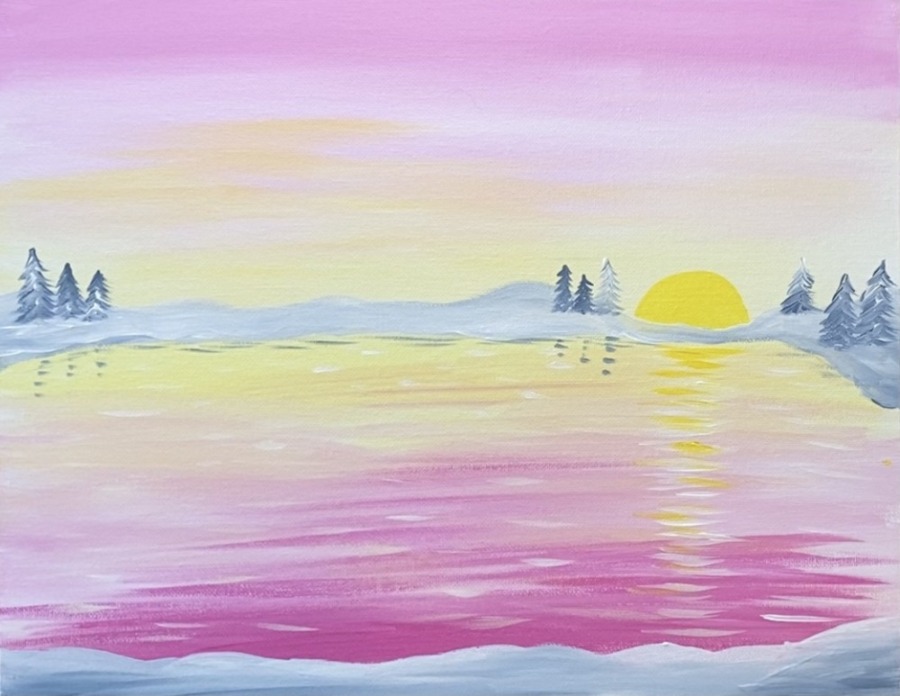
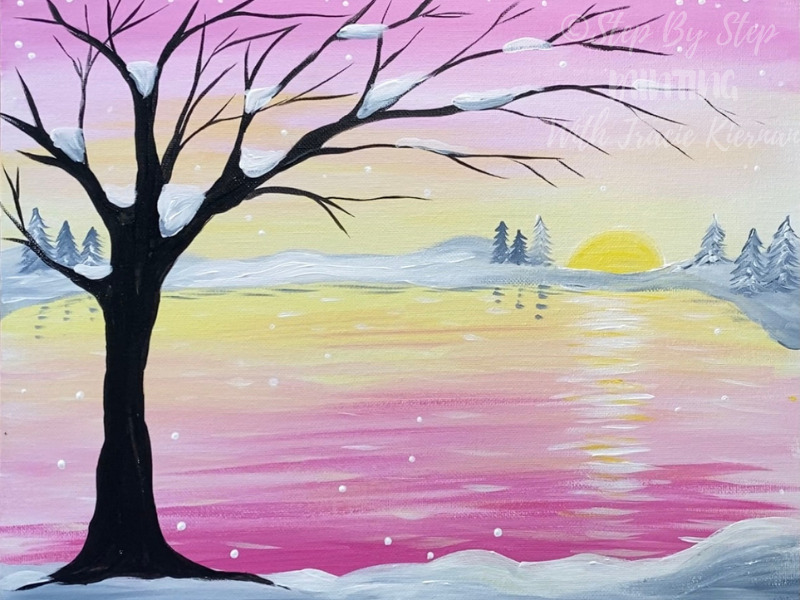
Pastel Winter Sunset With Snowmen Painting
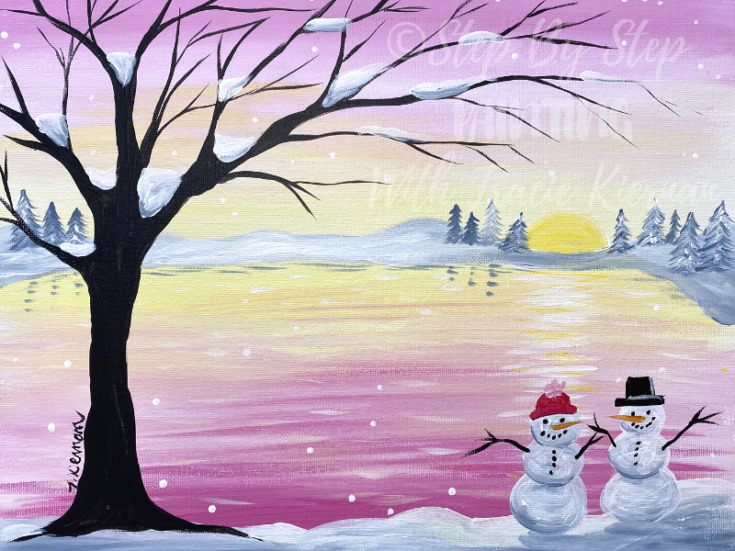
Paint a soft pink and yellow pastel winter sunset sky reflecting on a frozen lake with winter trees and two adorable snowmen.
Materials
Colors
Brushes
Instructions
See full tutorial for how to paint! Link to YouTube Video: https://youtu.be/lBwIWj7pcug
Notes
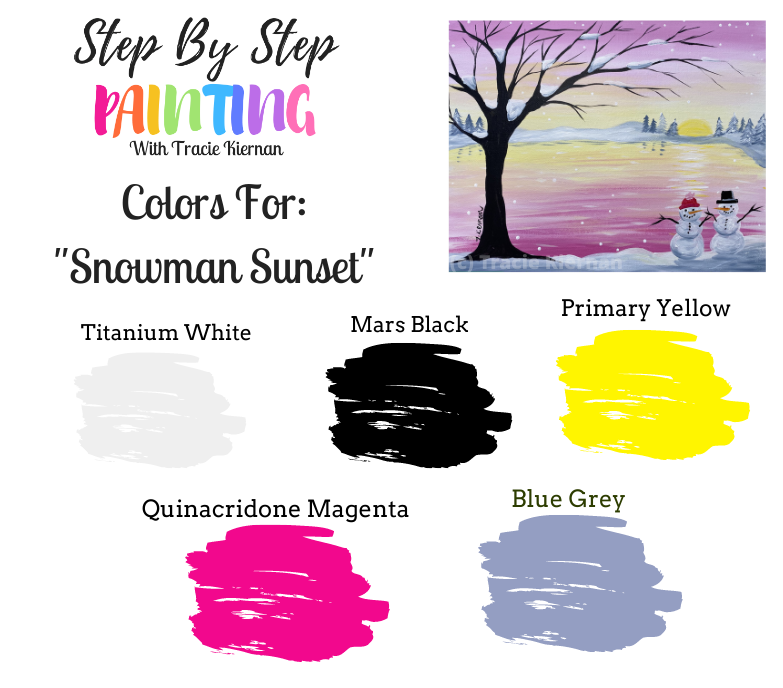
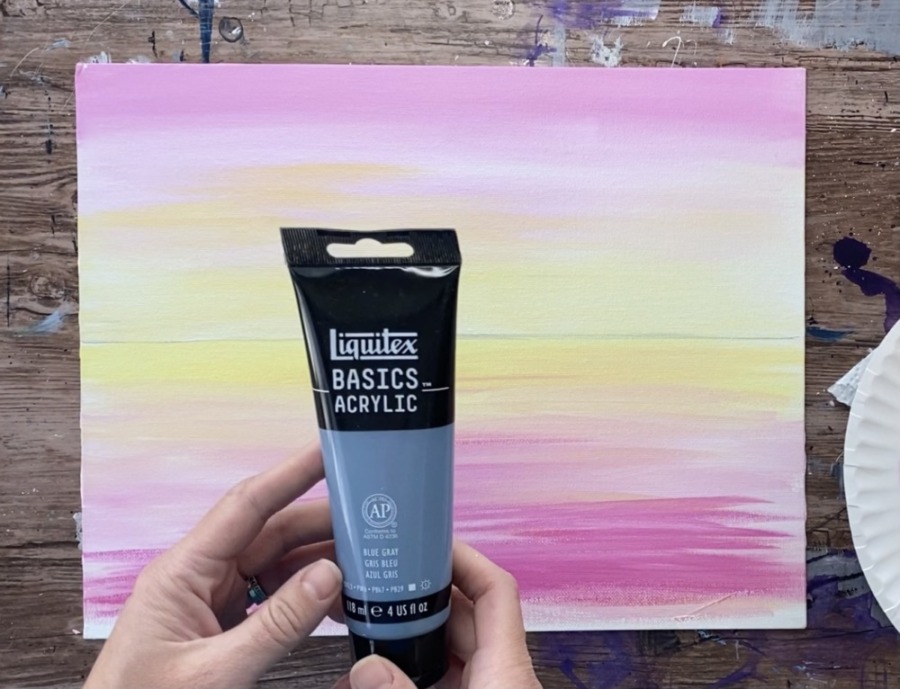
*Blue gray is a newer color released by Liquitex BASICS. If you do not have blue gray, you can make a blue gray! Mix about: 4 parts white, 2 parts primary blue and 1 part mars black.
Color Palette
Directions At A Glance
Video
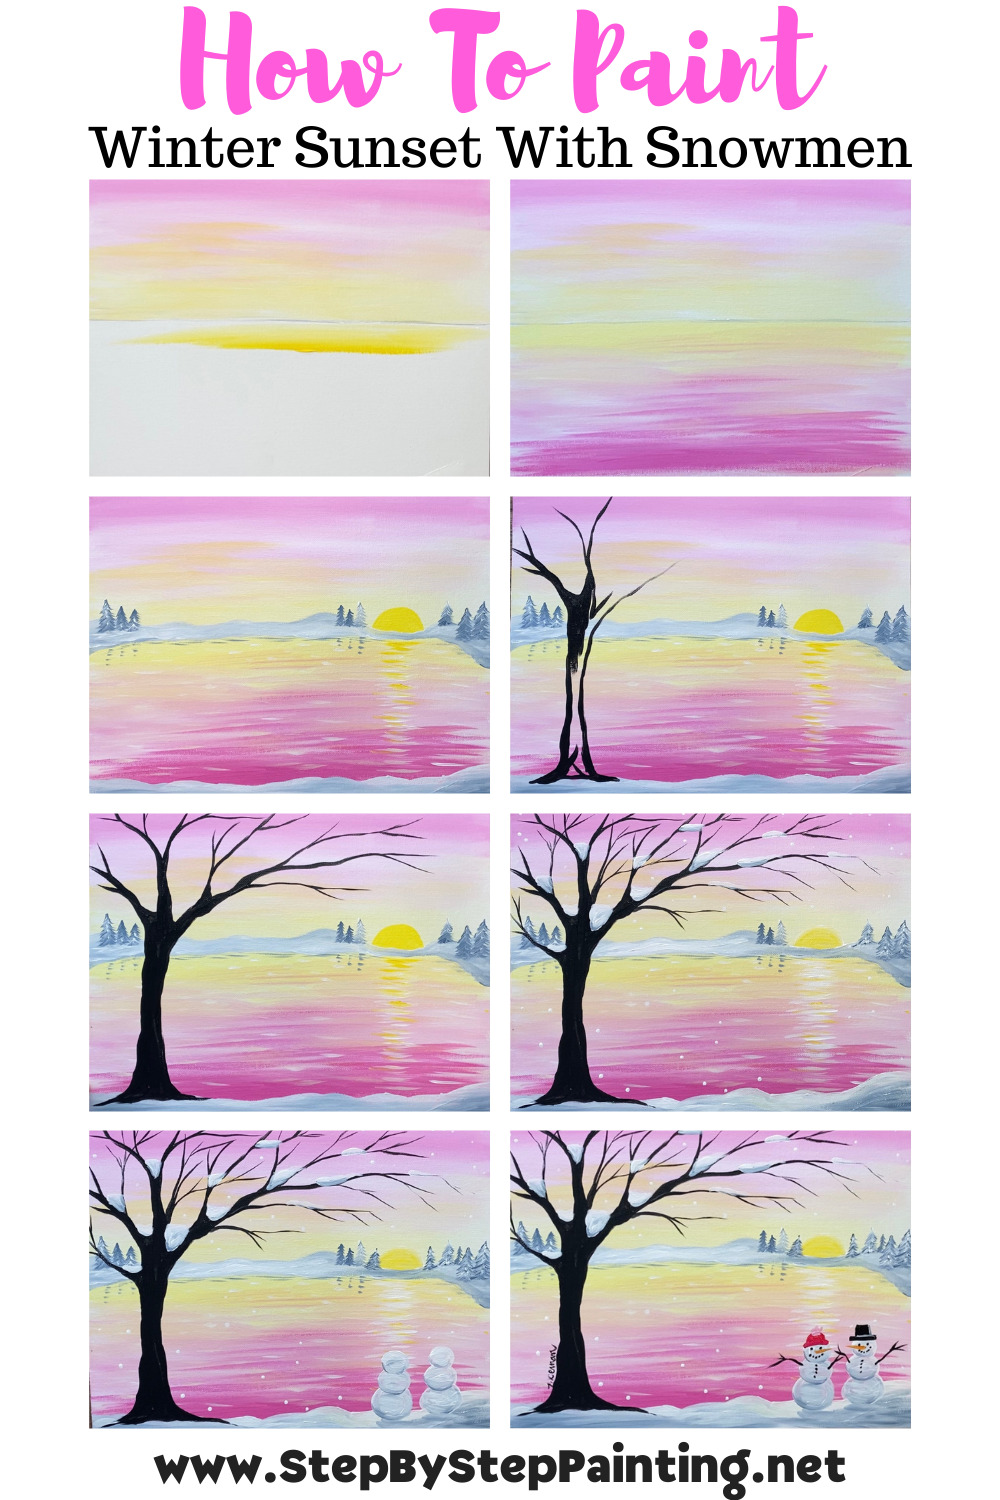
Step By Step Directions
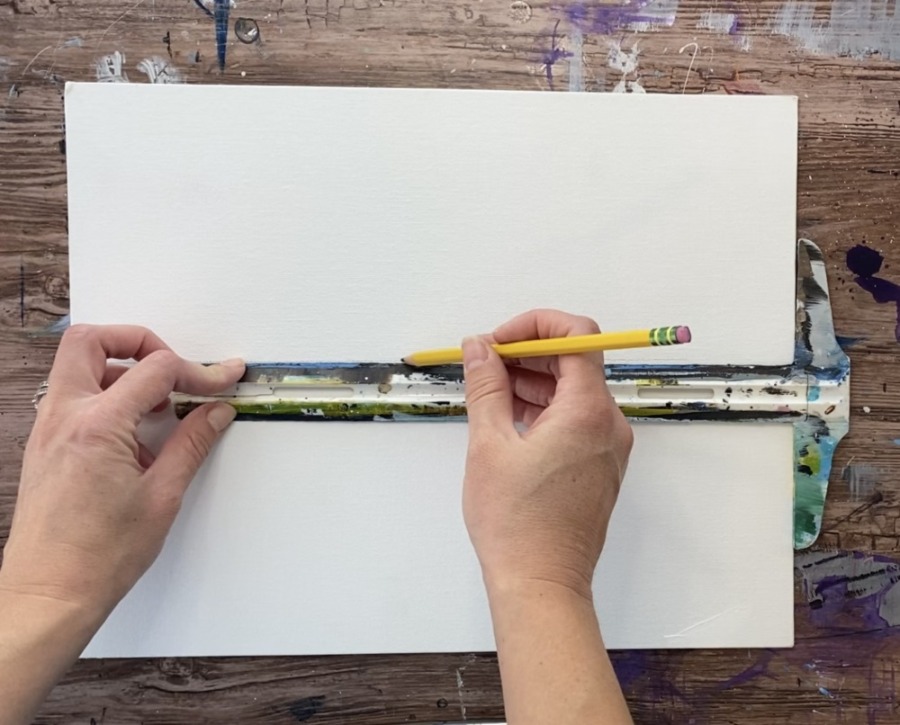
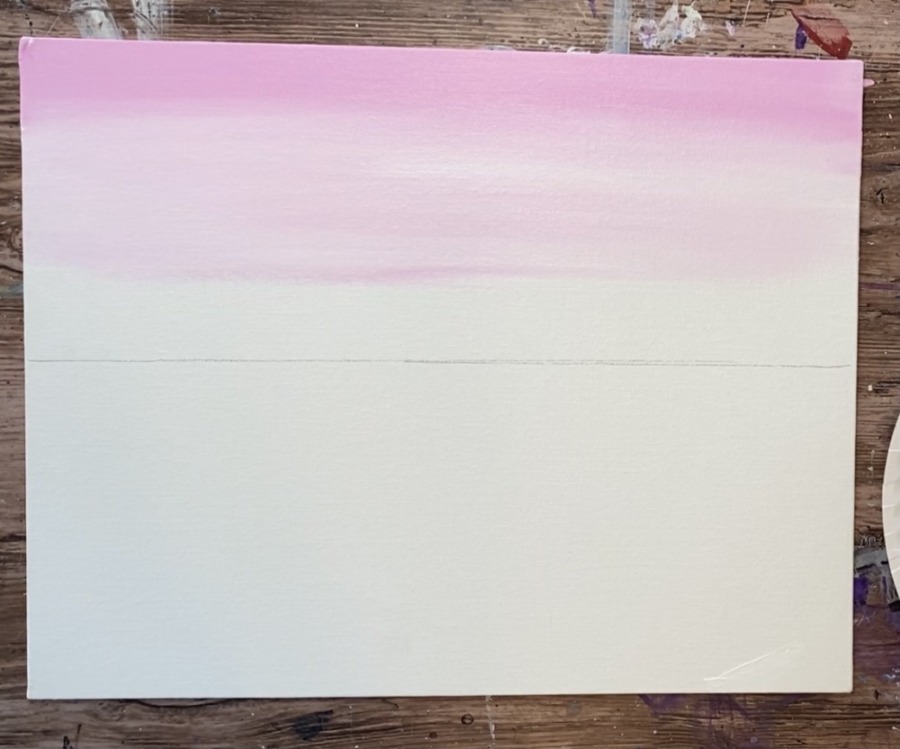
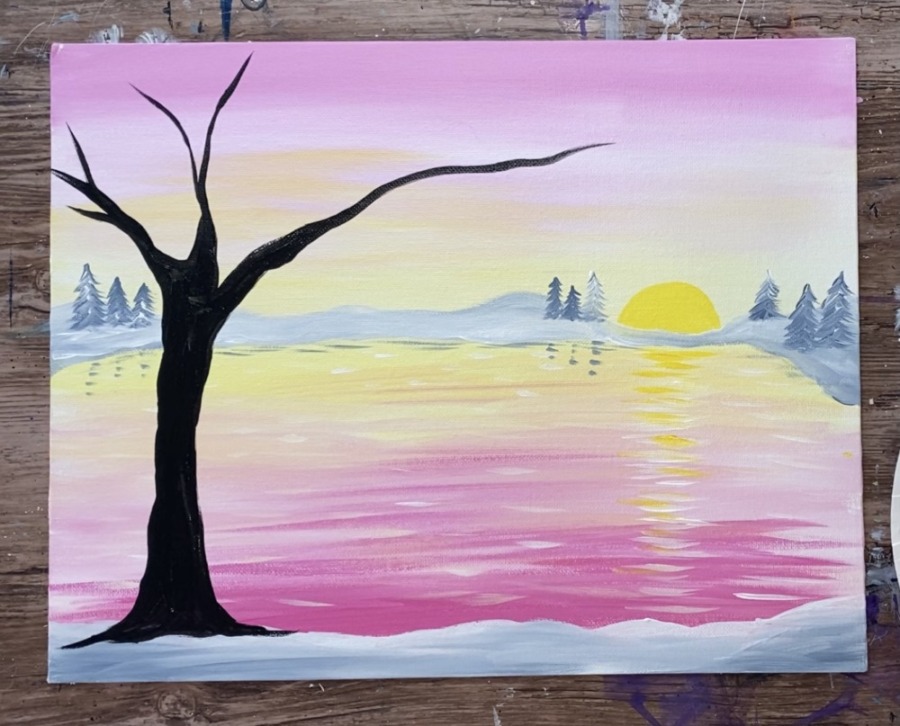
1. Draw the horizon line
Use a straight edge or t-square to draw a horizontal line that divides the canvas in half.
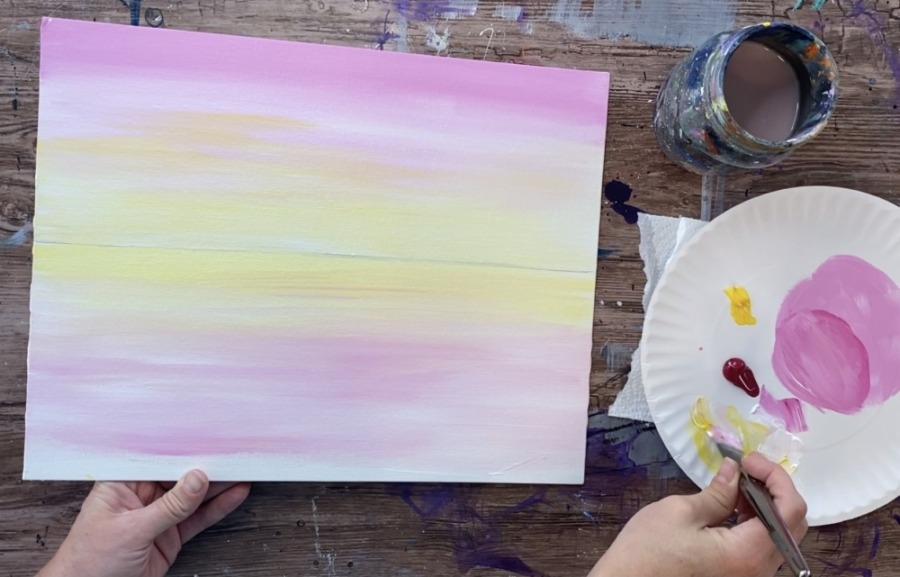
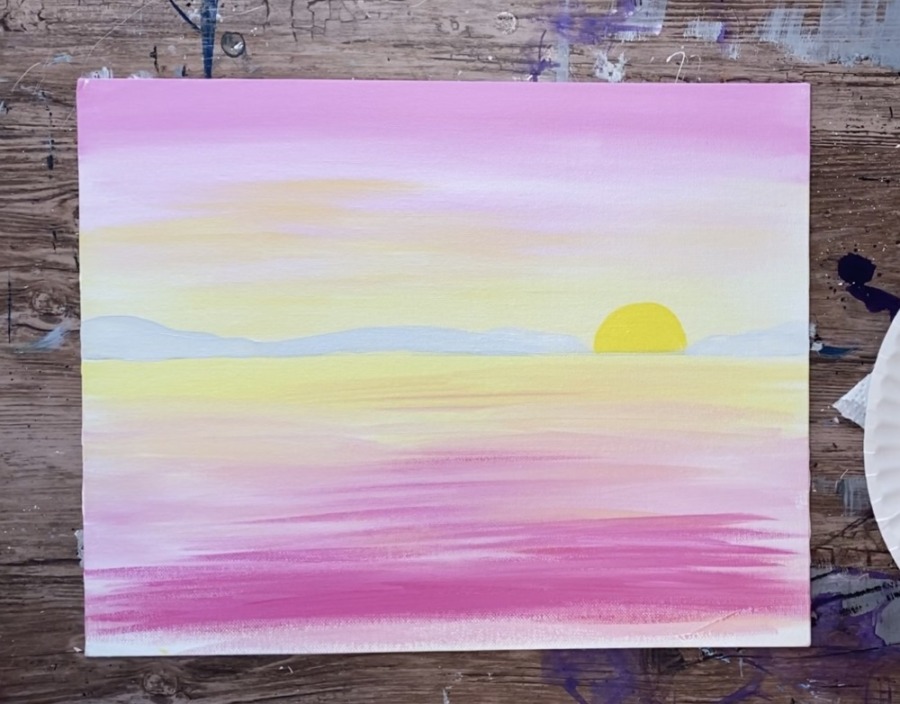
2. Paint the sky
Use a 3/4″ flat wash brush and the colors: titanium white and quinacridone magenta.
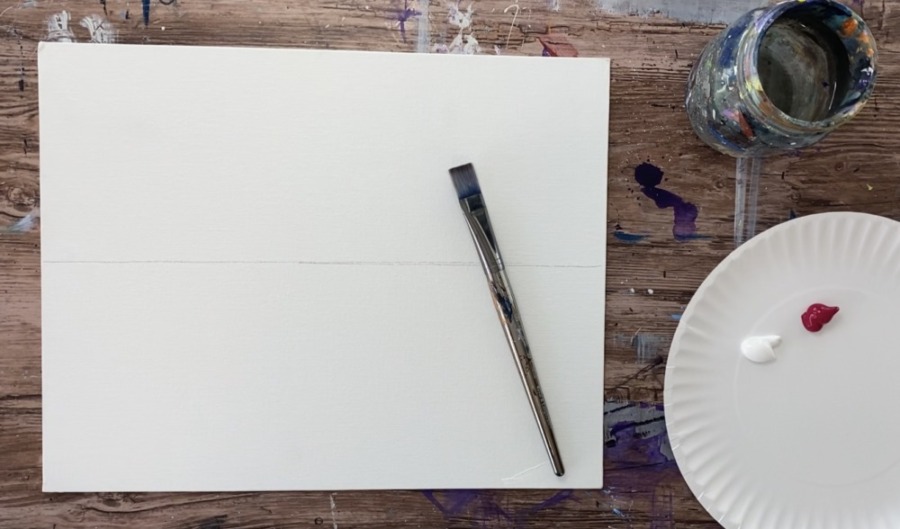
Mix titanium white and a little bit of quinacridone magenta to make a very light “pepto bismol pink” color! This is about 4 parts white, 1 part quinacridone magenta.
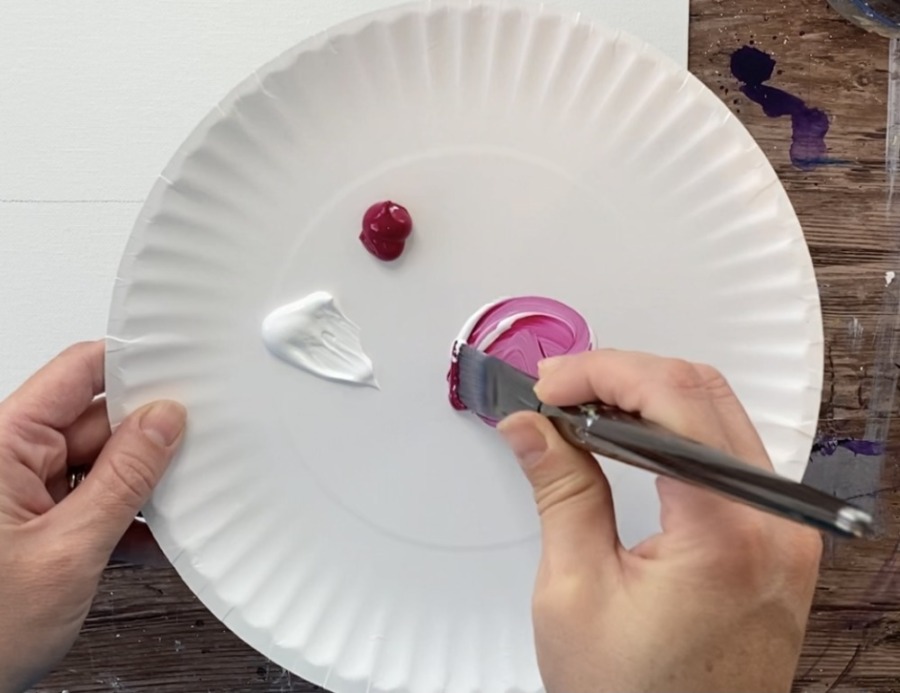
Use the 3/4″ flat brush and load it into the light pink. We will be painting the sky from the top to the horizon line.
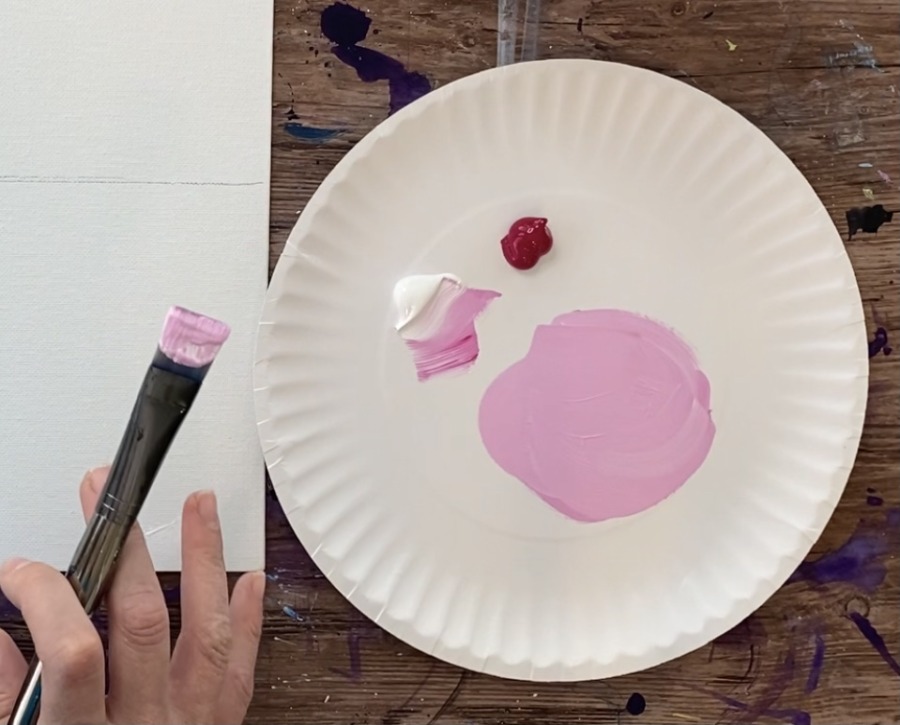
Paint left and right horizontal strokes starting from the top and work your way down. Gradually add more white to your brush so the pink gets lighter and lighter as you work towards the horizon line. This is “wet on wet” blending because the white is blending with the pink on the canvas. Go almost all the way down but leave about two inches of space above the horizon line.
Rinse and dry your brush. Then mix primary yellow with white on your palette to make a very light yellow. This is about 3 parts white, 1 part yellow.
Then paint left and right strokes in the sky blending that yellow in the middle area and having that light glowing yellow color go all the way to the horizon line.
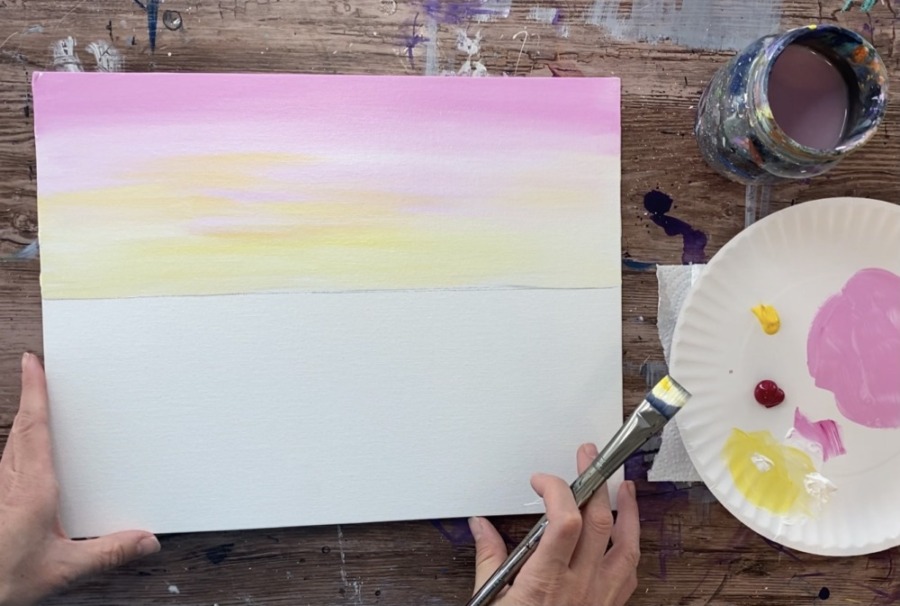
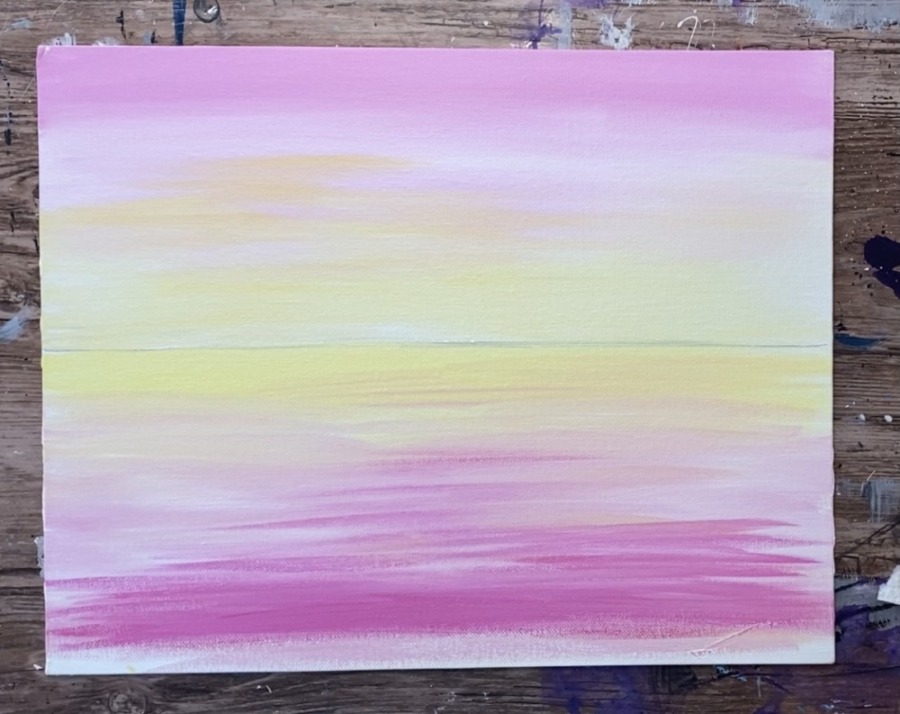
3. Paint the (frozen) water area
The water area is almost a mirror image of the sky. In other words, start with yellow at the top of the water area and blend it to white and then light pink on the bottom.
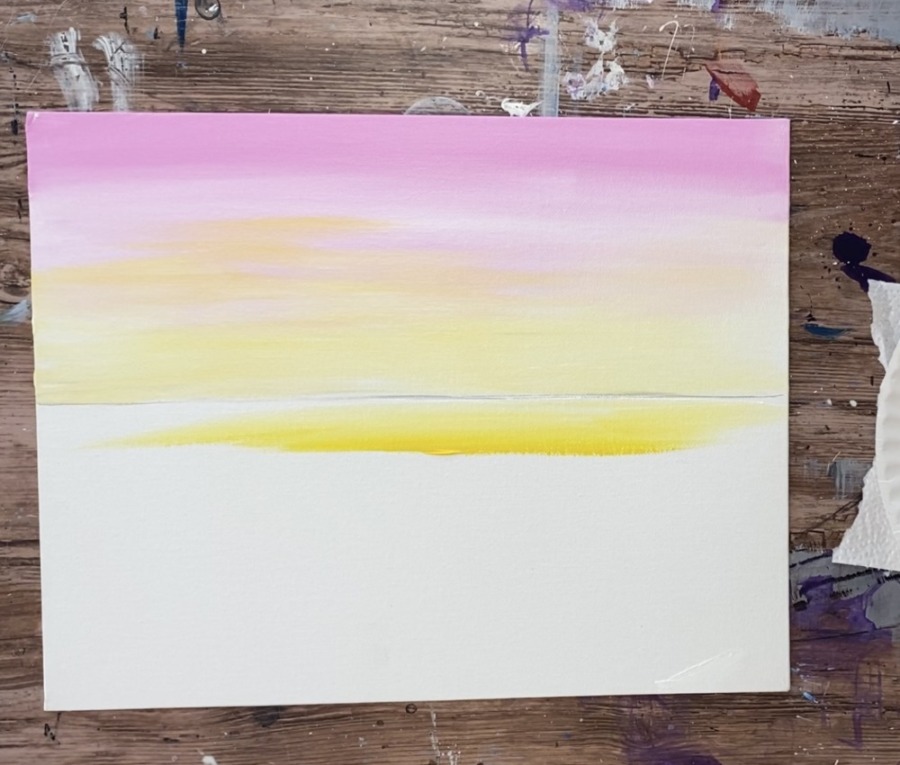
Use your 3/4″ flat wash brush and paint yellow mixed with white under the horizon line. Then blend white into it towards the middle. Then blend light pink on the bottom.
The very bottom of the painting has slightly darker pink than in the sky. To get that darker pink, simply mix the quinacridone magenta with a little less white than you did in the sky.
4. Paint the snowy hill & sun
For the snow, I used the color blue grey. If you do not have blue grey, mix 4 parts white, 2 parts primary blue and 1 part mars black. I also used my #4 round brush.
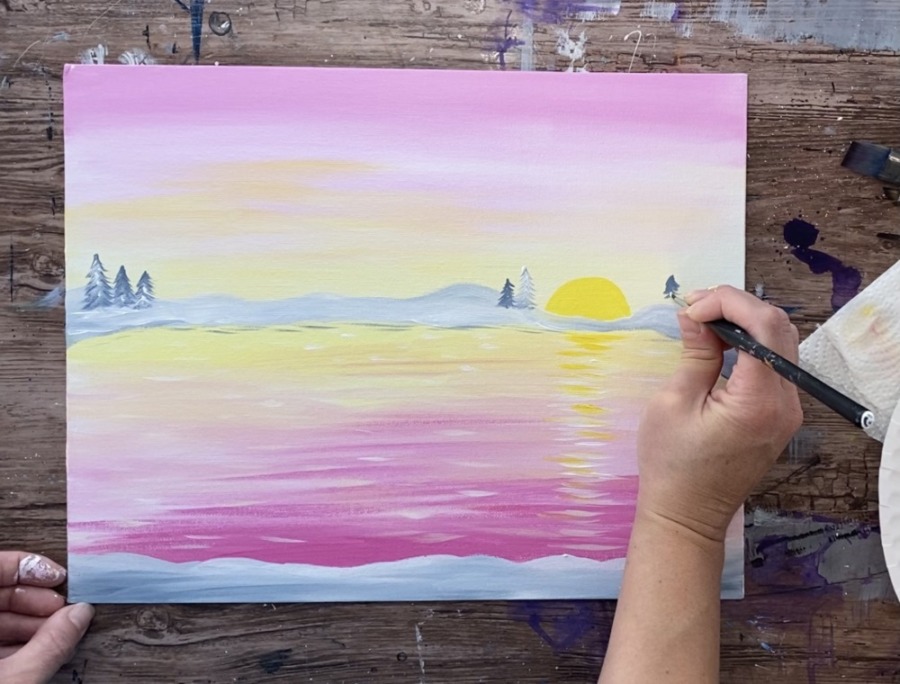
On your palette, mix the blue grey color with a little bit of titanium white to lighten it up. Then use your #4 round brush to paint a snowy hill way in the distance above the horizon line. Have it dip down in the lower right area (where the sun is going to be).
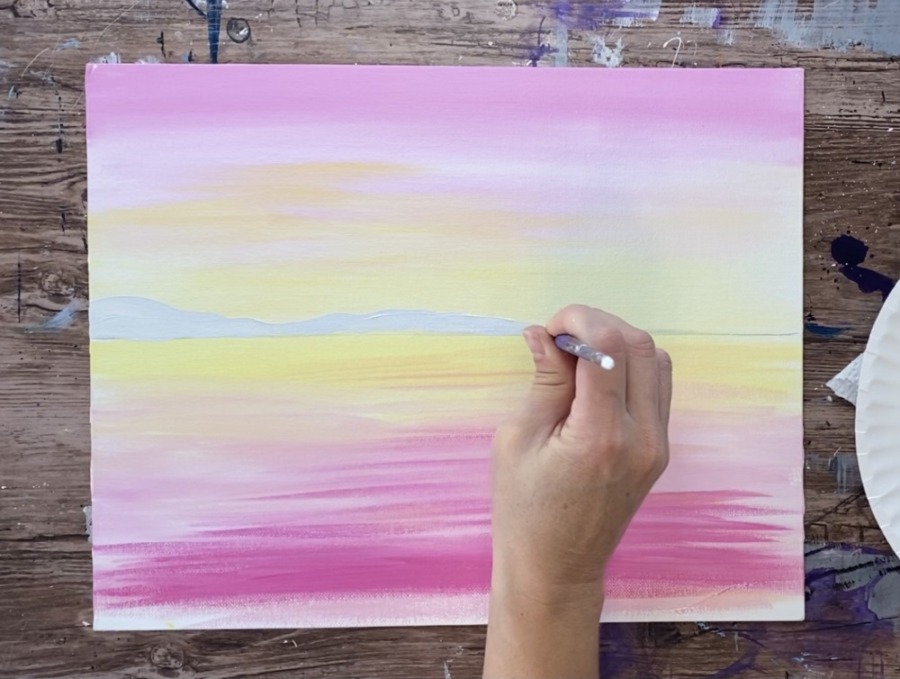
Then paint the sun using a round brush. This was done with primary yellow mixed with some titanium white (to lighten the yellow). Simply paint a half circle shape so it looks like a sun going under the horizon line.
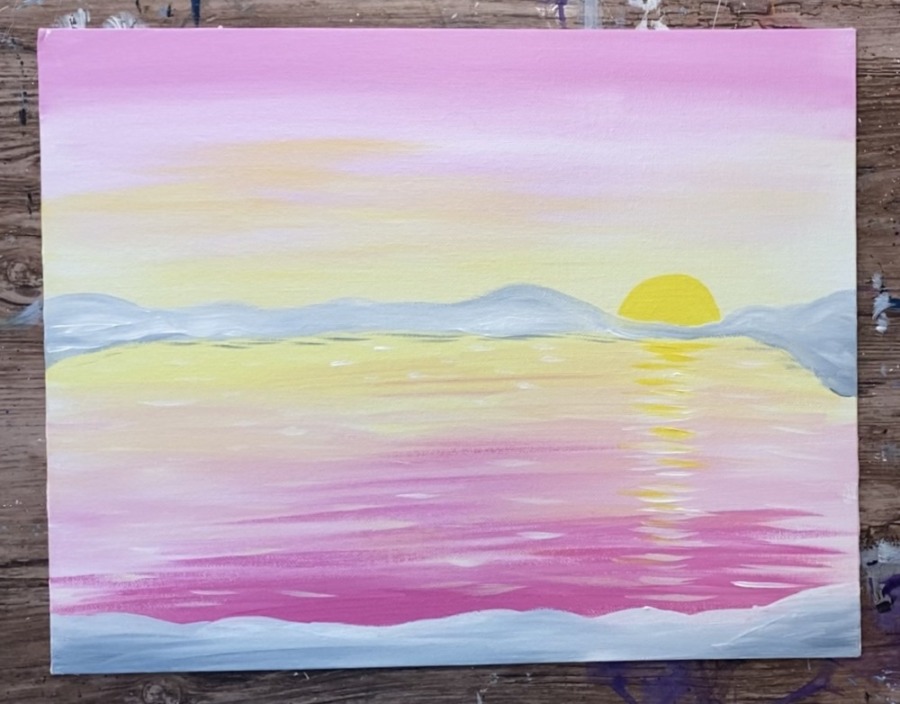
5. Paint reflection lines
I used a 1/4″ angle brush for this! If you do not have an angle brush, you can use your 0 round brush or any brush with a flat tip. Paint titanium white horizontal lines under the sun.
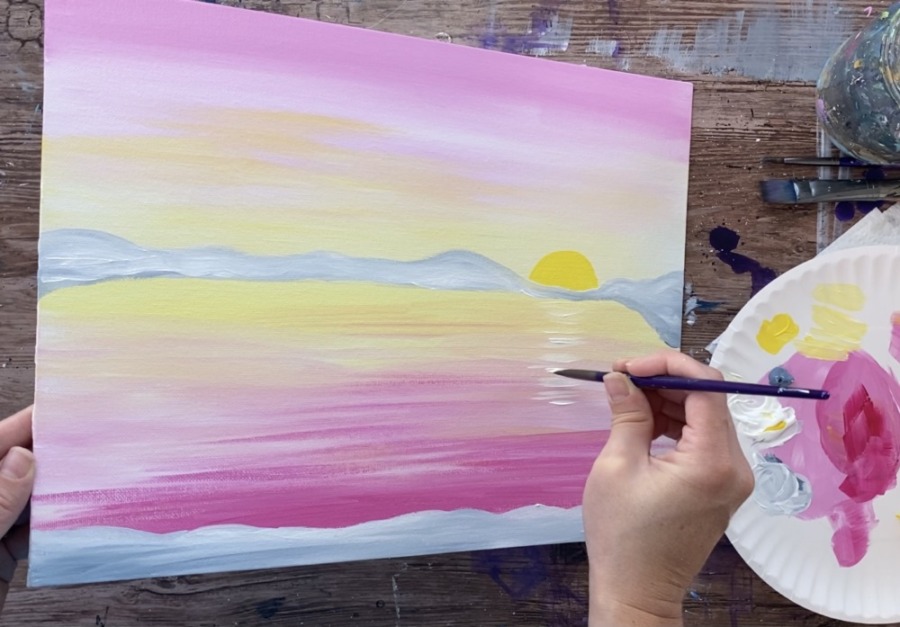
Paint a vertical area of these white reflection lines under the sun going all the way to the bottom of the canvas. Then paint some more horizontal lines all around the water area.
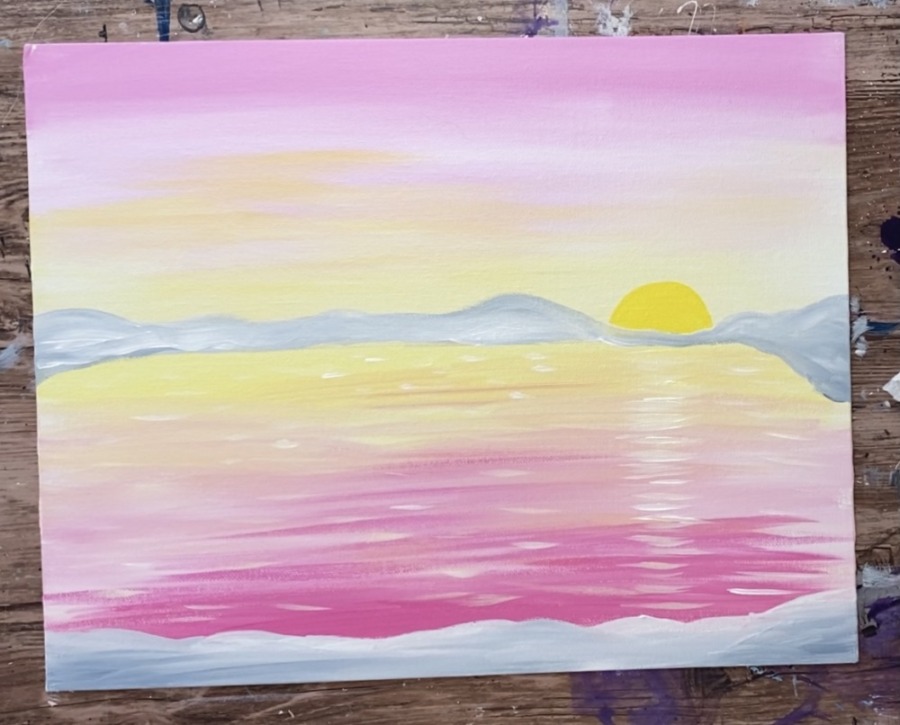
Then you can add some yellow into the reflection lines under the sun. You can also add some blue grey reflection lines under the snowy hill.
6. Paint the trees
For the trees, use a smaller round brush (such as a #0). Paint blue grey trees on the snowy hills in the distance. I start my trees at the top and stroke down to create the Christmas Tree shape.

Paint several trees in the distance. Add some titanium white onto them to make it look like they have snow on them. You can also vary the colors by having some trees look darker and some lighter.
Then paint a little more reflection lines under the trees.
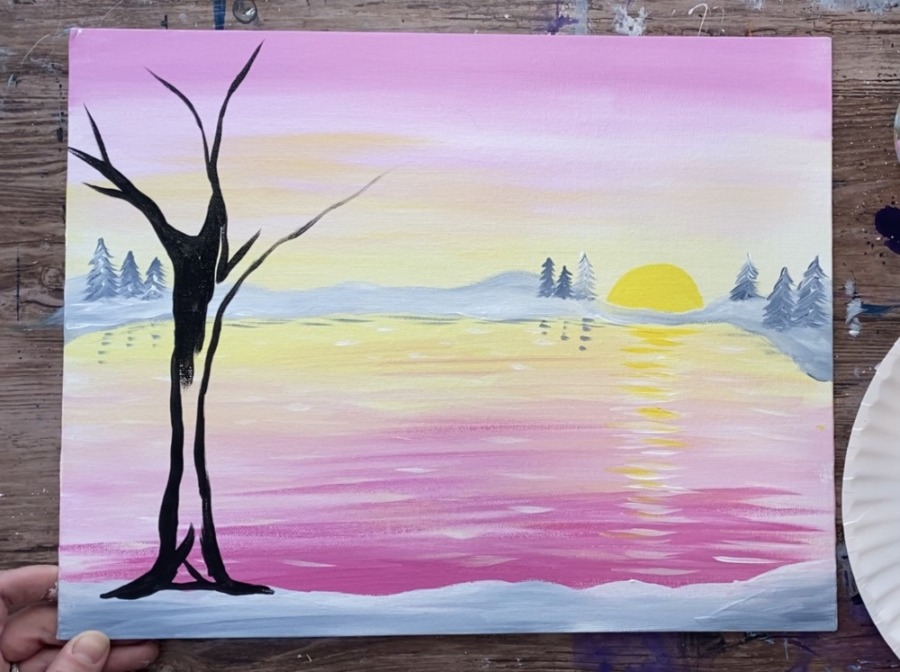
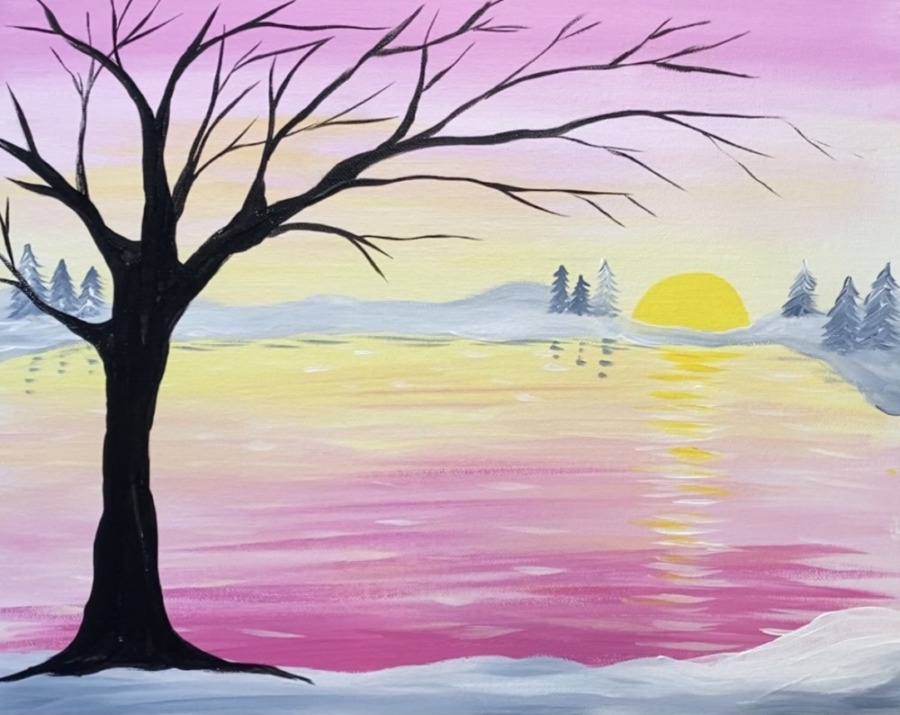
7. Paint the large black tree in the foreground
If you want, you can sketch this tree in with a pencil. This will give you an idea of the overall shape and where you want your branches to go.
I used a #4 round brush and mars black to sketch the trunk and branches out. Make sure you slightly water the black down to get it to flow well.
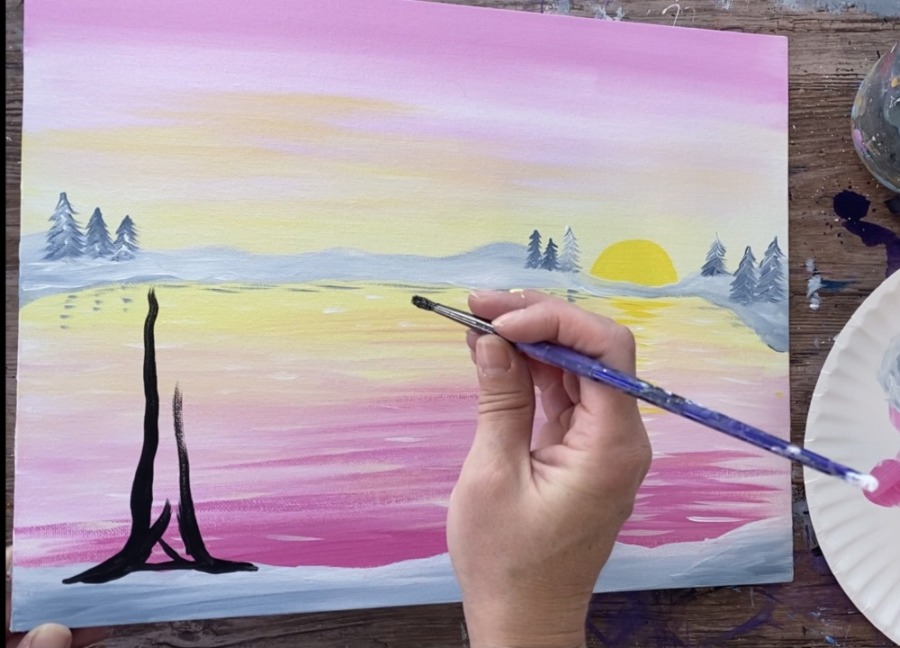
Your trunk should start out thick on the bottom and get thinner towards the middle. Then it branches off into three sections.
When it comes time to painting the thinner branches, use the 1/4″ angle brush or the #0 round brush. You really need a light hand to get your branches to go to a point. When using the angle brush, hold it so the point of the brush allows you to pain the thin line.
Continue to use your 1/4″ angle brush to make more branches that stem off from the larger branches. Make the smaller branches have very thin lines.
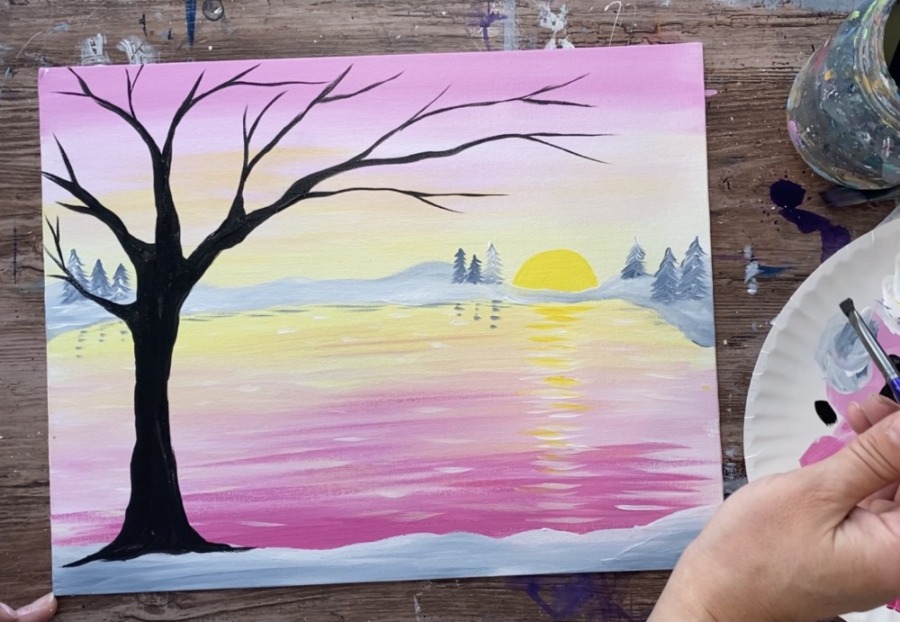
Continue to paint more thinner branches that go in different angles and go to a tip.
8. Paint snow falling
Use your round brush (either the 0 or 4) to paint small white dots all over. You can also use the back of your paint brush handle to paint these dots.

9. Paint snow on the tree branches & more snow on the ground
Then use your #4 round brush to paint white snow that has nestled on the branches. Add a TINY bit of blue gray at the bottom of this snow and slightly blend it up.
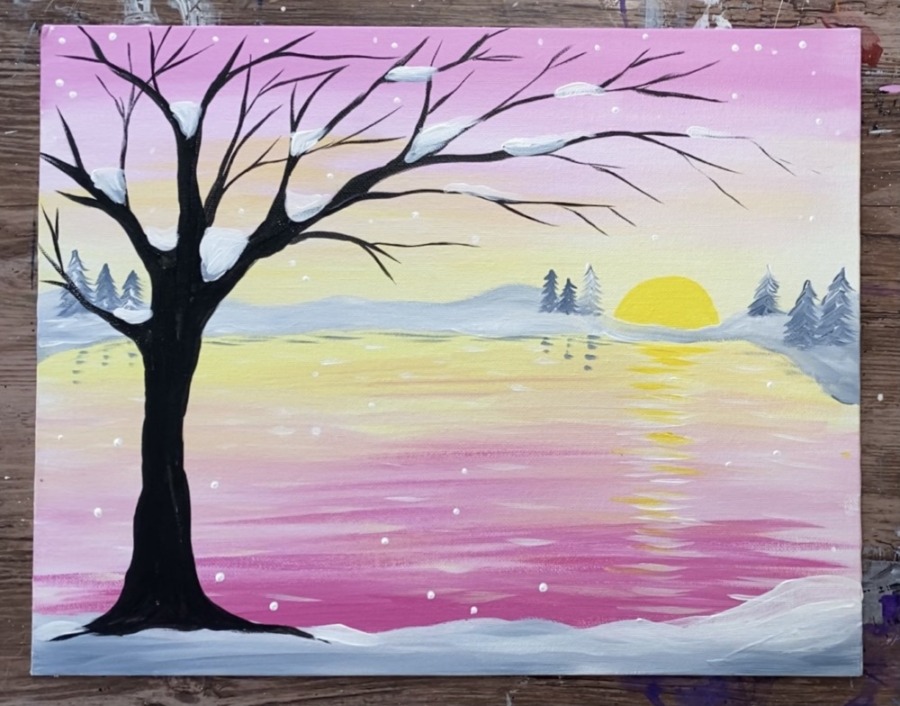
Then add some more areas of white snow in the distance (if needed). I did this to add more color variation in the snow. You can add more snow on the bottom ground area too.
Next is the snowman! When I originally did this painting, I was going to leave it like this! However, I decided to add the snowmen on the bottom.
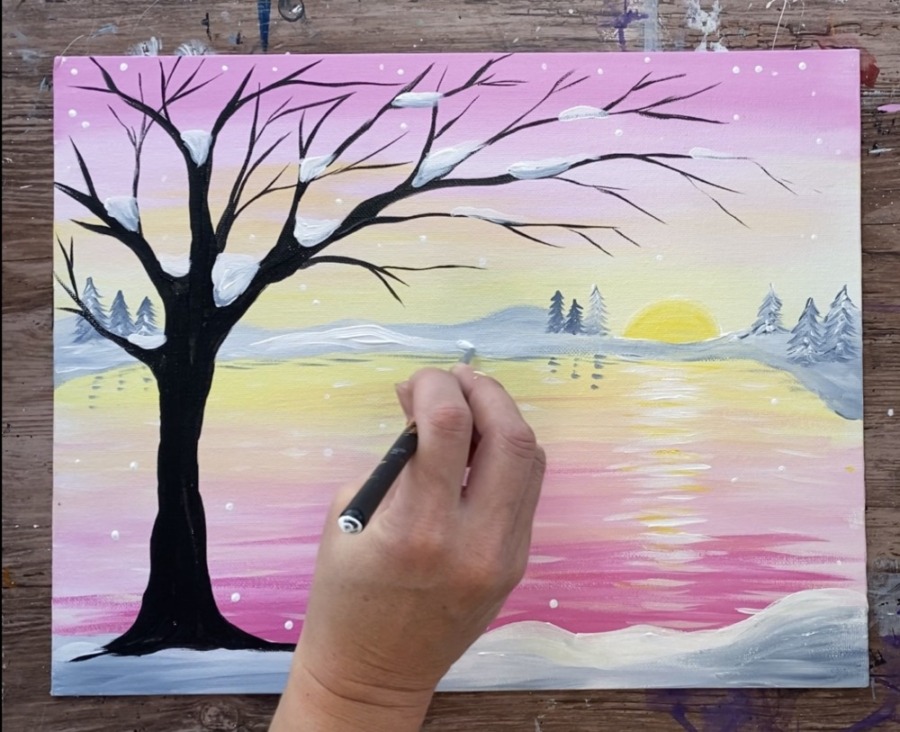
10. Paint snowmen
Use your round brush and titanium white. Paint three circles just like you would paint any typical snowman!
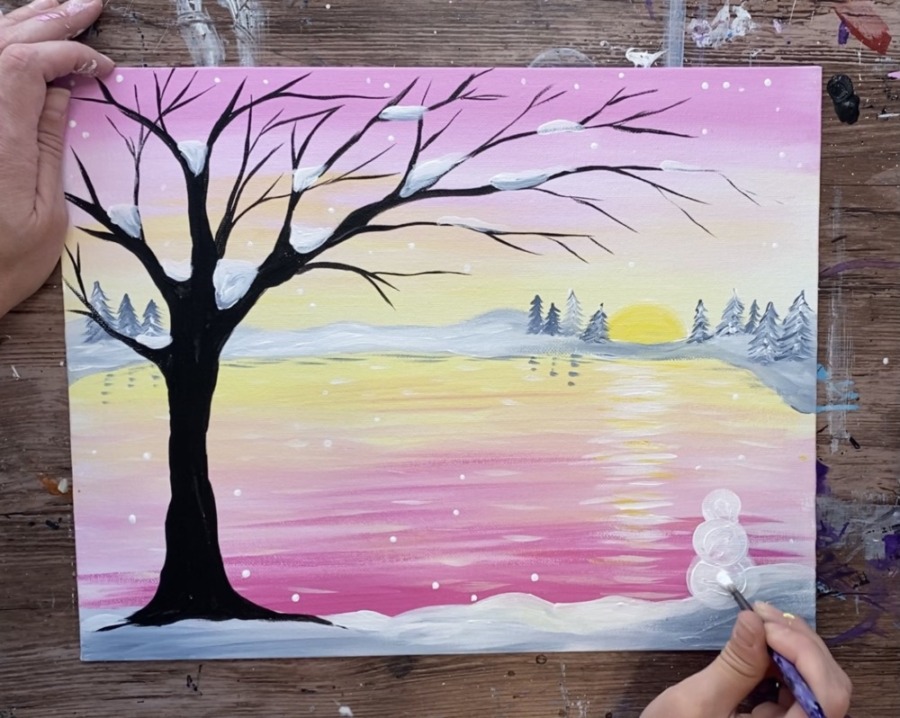
Then add some shadowing on the snowman by blending a little bit of the blue gray on the bottom of each of the circles and blending it back up. You only need a tiny bit of that blue gray!
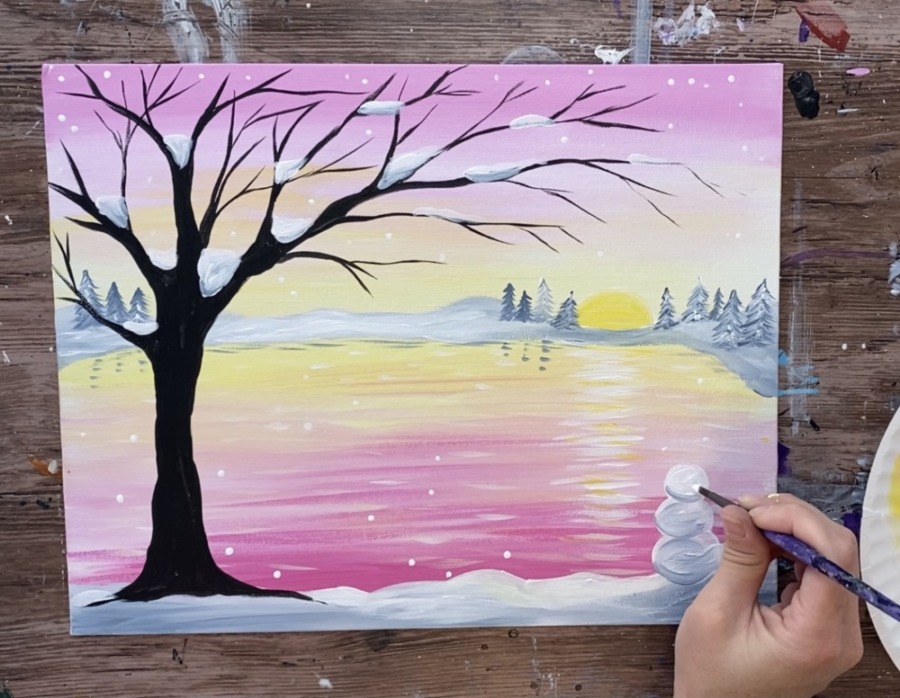
Repeat this twice (or more if you want more snowmen).
Then use your small #0 round brush to paint details with mars black.
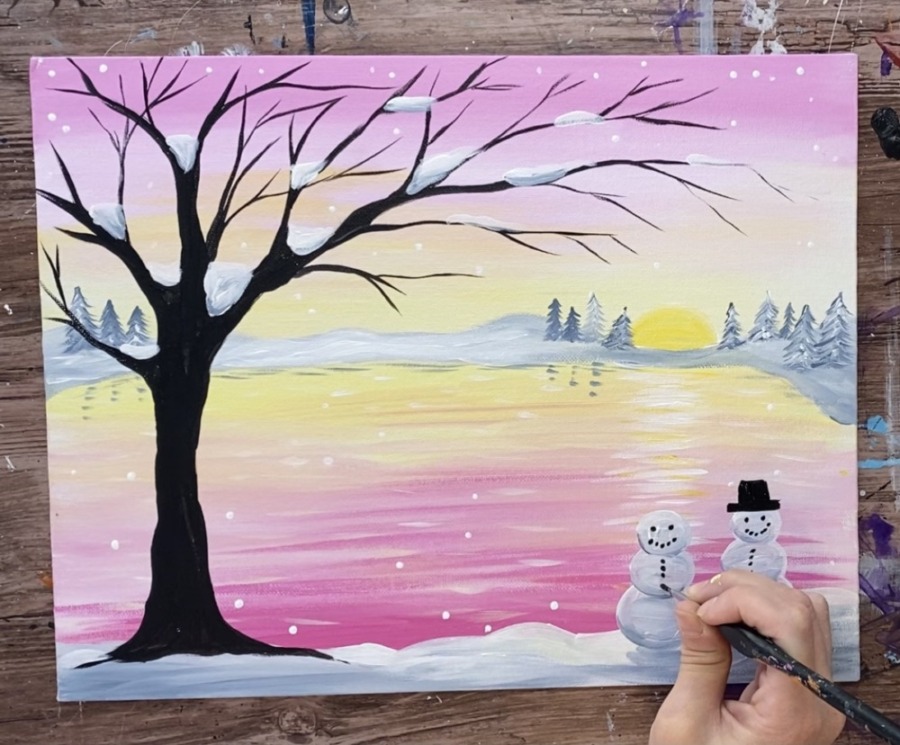
To make orange for the carrot noses, mix your quinacridone magenta with the primary yellow to make orange.
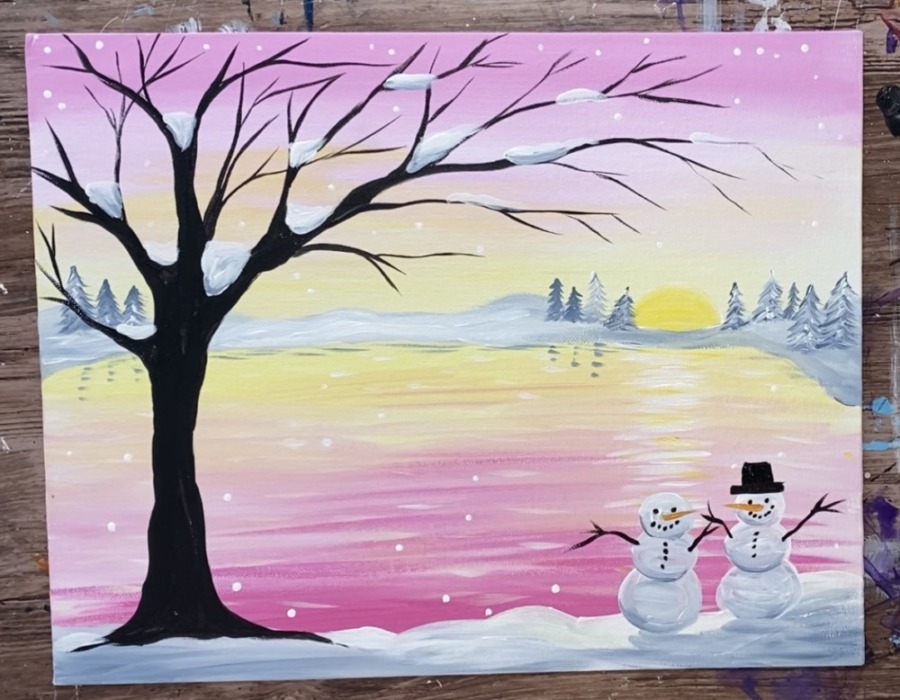
I did the hat with quinacridone magenta for the snowman on the left and the little fuzzy thing on top of the hat with a light pink.
All done! Sign your name and show it off!
Share your art here!


So ✨beautiful✨?
Thanks Veronica!
Love it!! Beautiful and romantic snow people!!
Thanks Henny! I thought it looked so romantic too ?
Is there a way to print the step by step pictures? I’ll pay for them I just don’t see where to get them.
Hi Deborah! I don’t have this one in a printable format yet. But you can print directly from the website and tweak your printer settings to scale it down 50%.
Ok thank you
Amazing! And… Could you plz share the link to buy these paints online, that would be realllyyyyy helpful of you! Thanks ?
Thank you for your videos. Just completed this one…my first ever. Really enjoyed doing it.
You’re welcome!