


Would you like to save this?
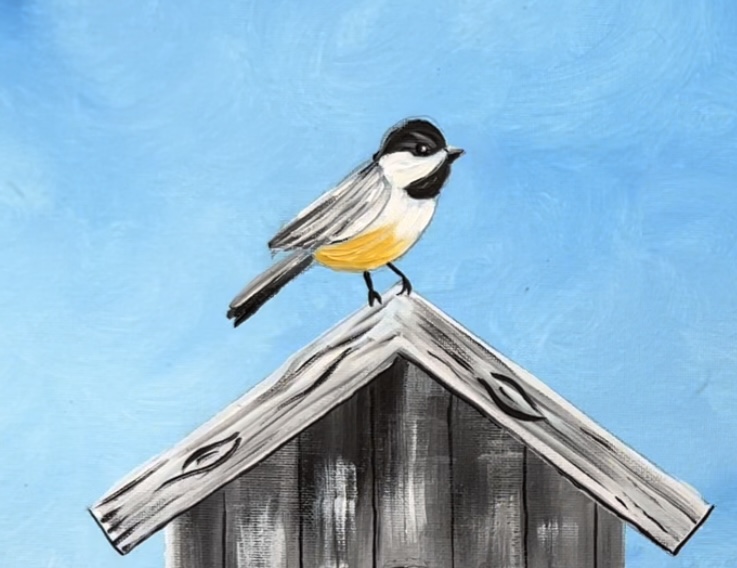
This acrylic painting tutorial will demonstrate how to paint a summer rustic, patriotic themed birdhouse with bluebonnets and red bonnets! There is also a cute chickadee perched on top of the roof!
This is a great tutorial to compliment your red, white and blue decor for the summer or as a year round painting!
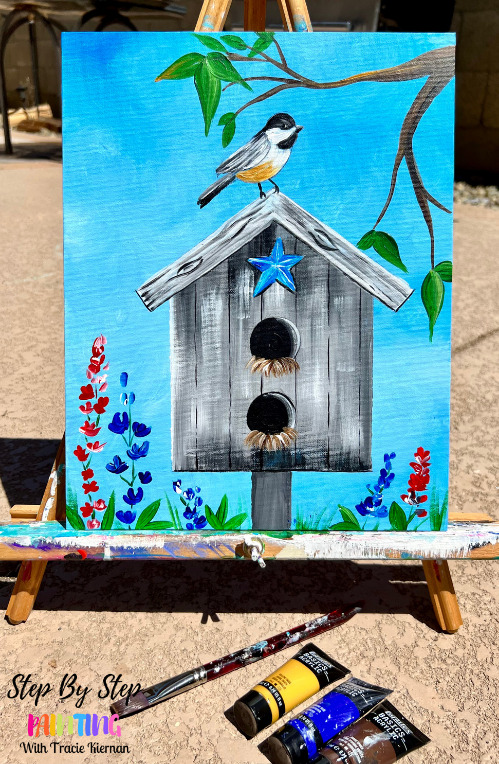
I love using the faux wood technique, especially to create an old and rustic wood effect. To do the birdhouse, I used only white and black and blended the two colors gently using the dry brush effect.
The tutorial comes with a free traceable, however, I demonstrate how to do this without the traceable. I will be providing measurements for the dimensions of the birdhouse design so you can draw it too.
Enjoy and happy painting!
Materials
Paint A Summer Birdhouse
This tutorial will show you how to paint a summer birdhouse with acrylics on an 11 x 14 Canvas.
Materials
- 11 x 14 Canvas
- Acrylic Paint
- Brushes
- Drawing Pencil
- Ruler (T-Square Is Highly Recommended)
- Optional Traceable (I demonstrate without the traceable)
- Optional Graphite Paper (If Using Traceable)
Brushes
- Round Mop Brush (I use a makeup brush)
- 3/4" Flat Wash Brush
- 12 Bright Brush
- #8 Round Brush
- #4 Round Brush
Colors
- Titanium White
- Mars Black
- Pyrrole Red
- Hooker's Green Hue Permanent
- Burnt Umber
- Cerulean Blue
- Phthalo Blue
- Yellow Oxide
Color Palette
I used Liquitex BASICS acrylic paints for this tutorial! If you are using a different brand, you can use the color chart below to help you match colors.

Using craft paints?
If you are using craft paints such as Apple Barrel Craft Paints, I would recommend subbing to these colors:
- Brown Oxide
- Jet Black
- Snow White
- Regency Blue
- Yellow
- Red Apple
- Cobalt Blue
- Parakeet
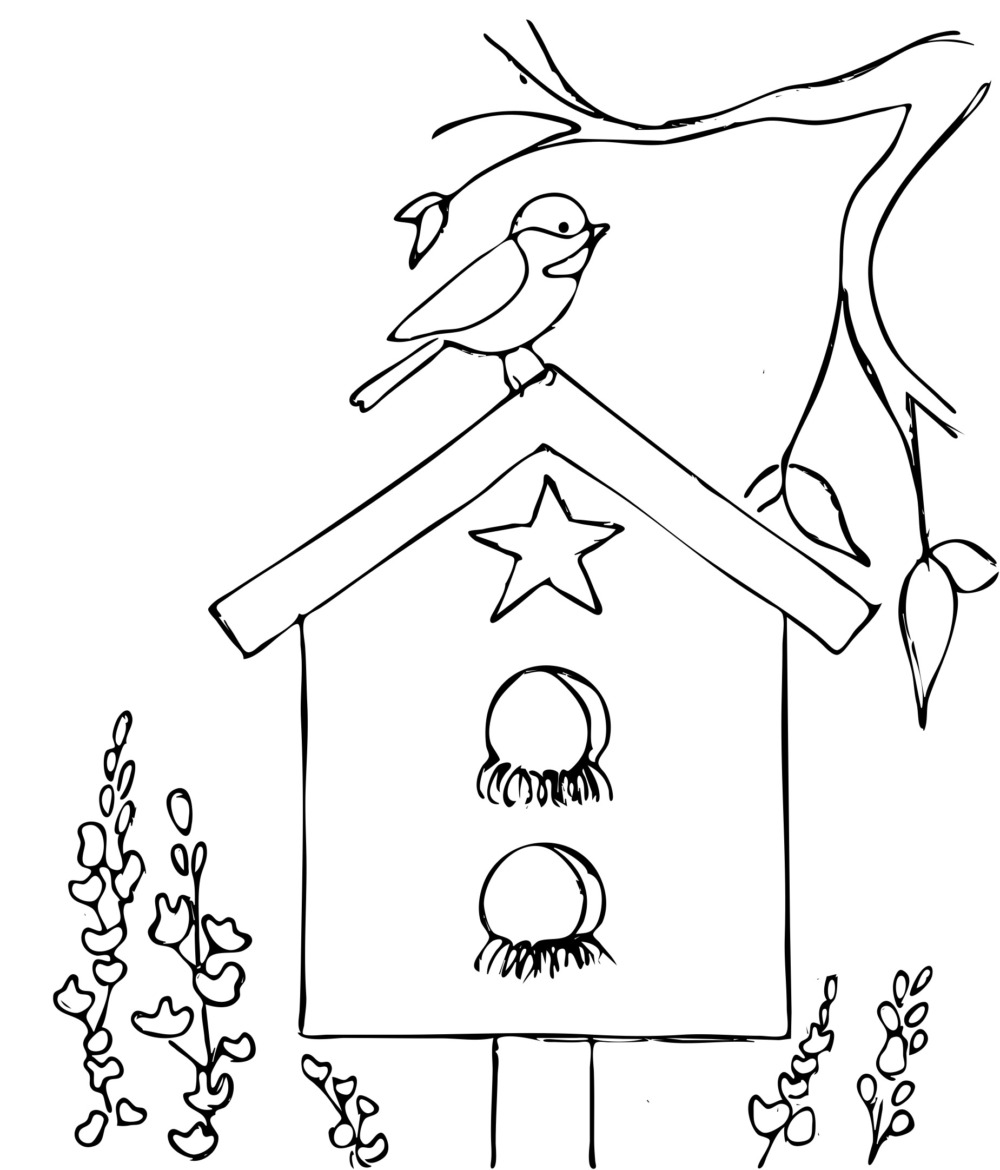
Traceable
Directions At A Glance

Video
Step By Step Instructions
1. Paint background
For the background, I used a round mop brush that happens to be a makeup brush! This will allow you to create a soft and blended background.

Load your palette with cerulean blue and titanium white. Then load the brush in the water and squeeze most of the water out. The bristles should be damp but not dripping.
Then load the brush in titanium white and a small amount of blue.

Paint in circular strokes so your blue and white gently blend together to create a blended and soft background.

Try not to over blend the colors. Let some areas be slightly darker and some lighter. Do this by simply adding more blue or white to the brush when you go to reload.

Continue to fill the entire canvas.

Wait for this to dry before going to the next step.
2. Draw Birdhouse
You can use the traceable or the dimensions that I will give you below to draw the birdhouse. You also don’t have to use these exact measurements. You can hand draw the birdhouse with your own or similar measurements.

Start by drawing the vertical post. This post is about 4.5″ from the left of the canvas. I highly recommend you use a t-square to light up the vertical line with the edge of the canvas. The height of this post is about 1.7″ high.

The width of the post is about 1″ wide.

Next, draw the horizontal line for the bottom of the house. This is about 5.5″ wide. Make sure you center this line on the vertical post.

Next, draw two more vertical lines about 5″ high.

Then measure where the peak of your roof will be and make a dot. This dot is approximately 8″ from the bottom horizontal line of the house to the peak.

Then use a ruler to draw the roof. The two roof rectangular shapes are about 3/4″ wide. They also slightly over hang from each side of the house.

Draw the roof so that the top hits that top peak and offsets about 3/4″ wide.

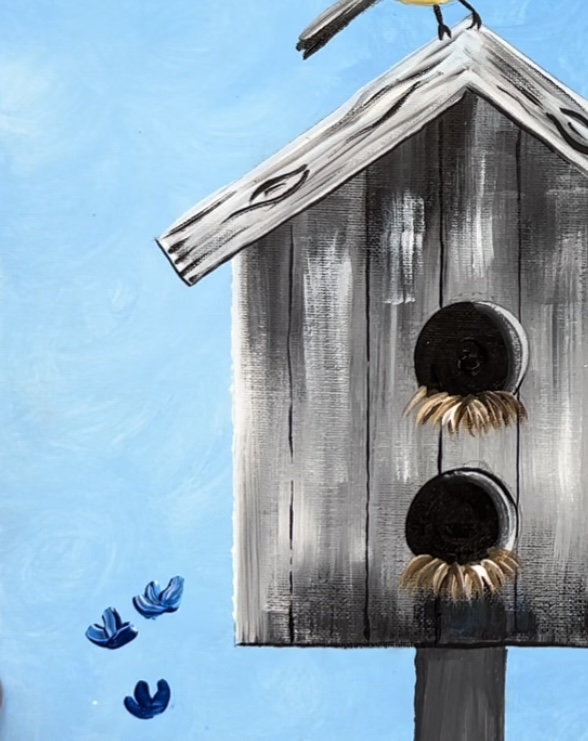
3. Paint Birdhouse
Load your palette with a small amount of mars black and freshen your titanium white if needed. Use a 3/4″ flat wash brush to paint the birdhouse using vertical strokes. Double load the brush in titanium white and a small amount of mars black.

Tip: it may be helpful to apply painters tape around your birdhouse if you are worried about it getting outside the lines. An alternative could be to use a ruler or straight edge to help block the paint.
Allow the black and white to gently blend on the canvas but try not to over blend it. You can use your t-square ruler to line up the bottom edge of the birdhouse and the sides.

You can overlap your strokes over your roof shape as that will be painted over later. Try to add a bit more black towards the top to make that area a little extra dark and shadowy.


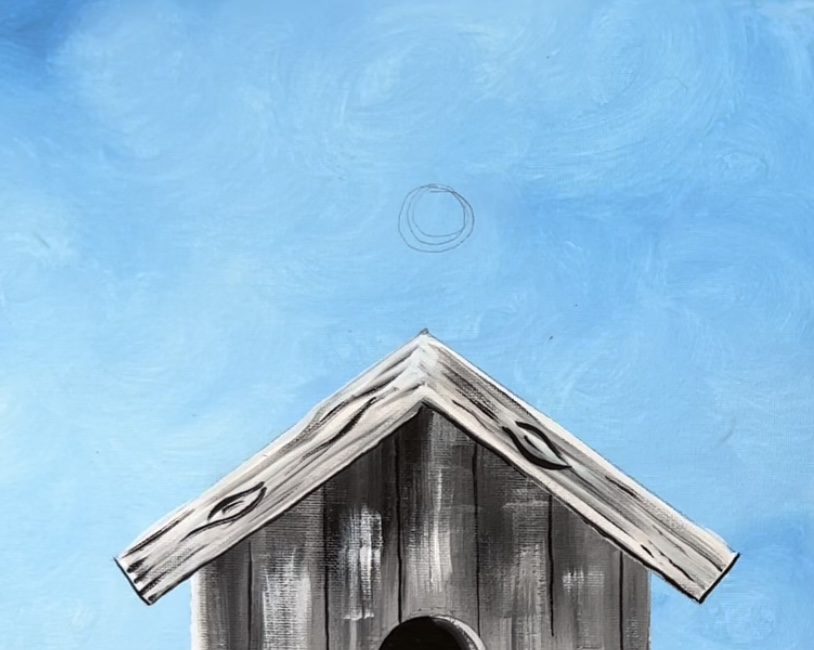
Then paint the roof. Load your brush in more white to make the roof appear lighter than the birdhouse.

At this point, you can switch to a smaller flat brush (such as a 12 bright) to fill in this smaller area.

To create a wood grain look, add a small amount of black to the brush and gently paint diagonal strokes going in the direction of the wood grain.

Next, paint the vertical post. Paint vertical strokes going in the direction of the woodgrain but use more black to make the post darker than the rest of the birdhouse.

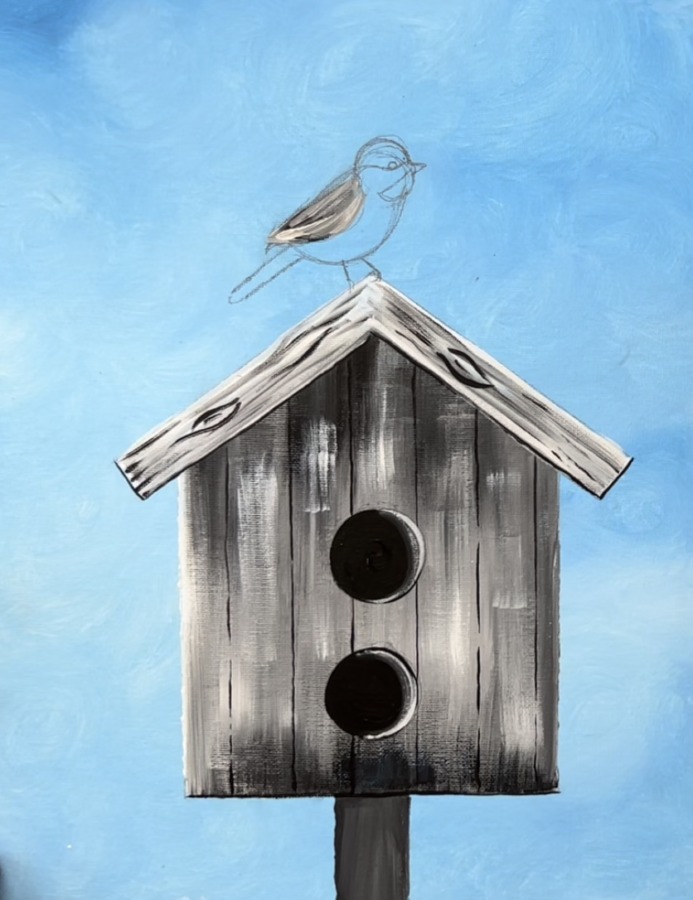
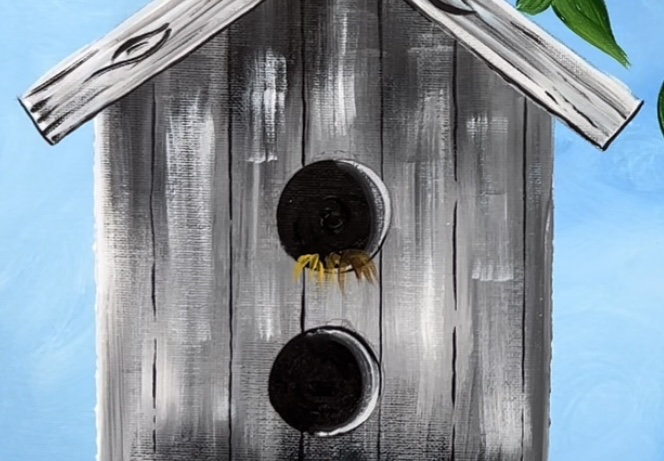
4. Draw and paint circle openings
For the circles, I traced the cap of a paint tube! This is about 1.5″ in diameter. You can do this too, find a similar size circle to trace or draw your own circles! Trace two circles going in a vertical format using a pencil.


Next, use a #4 round brush and mars black to paint the two circles.


5. Add details on roof & wood paneling
Use a #4 round brush and a tiny bit of mars black just on the tip of the brush to outline the bottom edges of the roof.

Next, paint woodgrain texture on the roof by painting small dashed lines and some wood knots.

Next, paint the division lines of the wood panels on the front of the birdhouse. Use a t-square ruler or straight edge and paint vertical lines that divide the house. Use your #4 round brush and mars black. Make a very very thin and loose line!

The panels are about 2 finger widths apart (or about 1″ – 1.5″). You can divide them wider or thinner if you want. They also don’t have to all be evenly spaced apart.

6. Paint side of circle openings
Next, paint the right side of the circle openings using your round brush and black mixed with white to make a light to medium gray.

Paint a crescent shape (almost like a thin crescent moon) on the right inside of both of the holes.

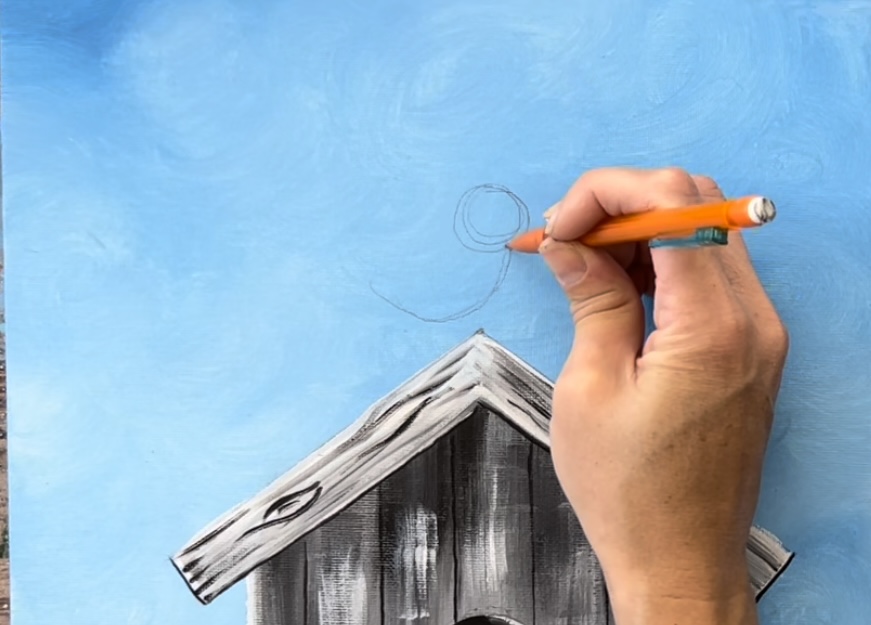
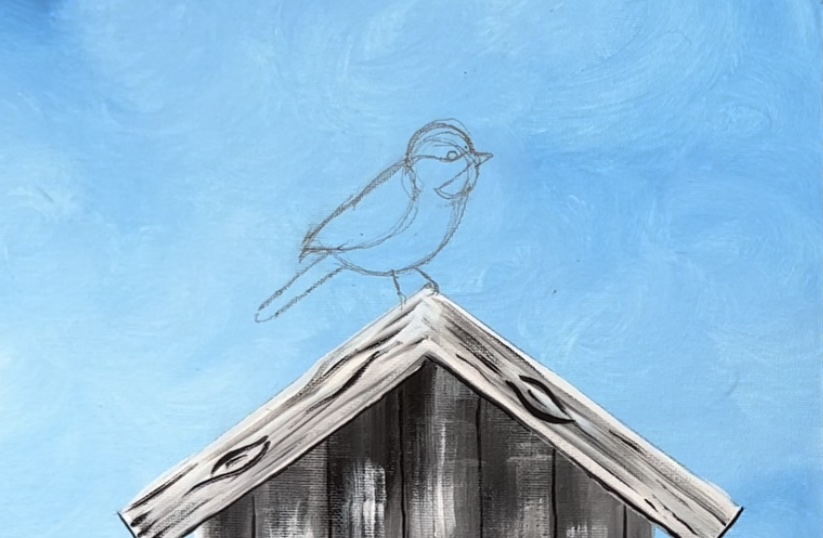
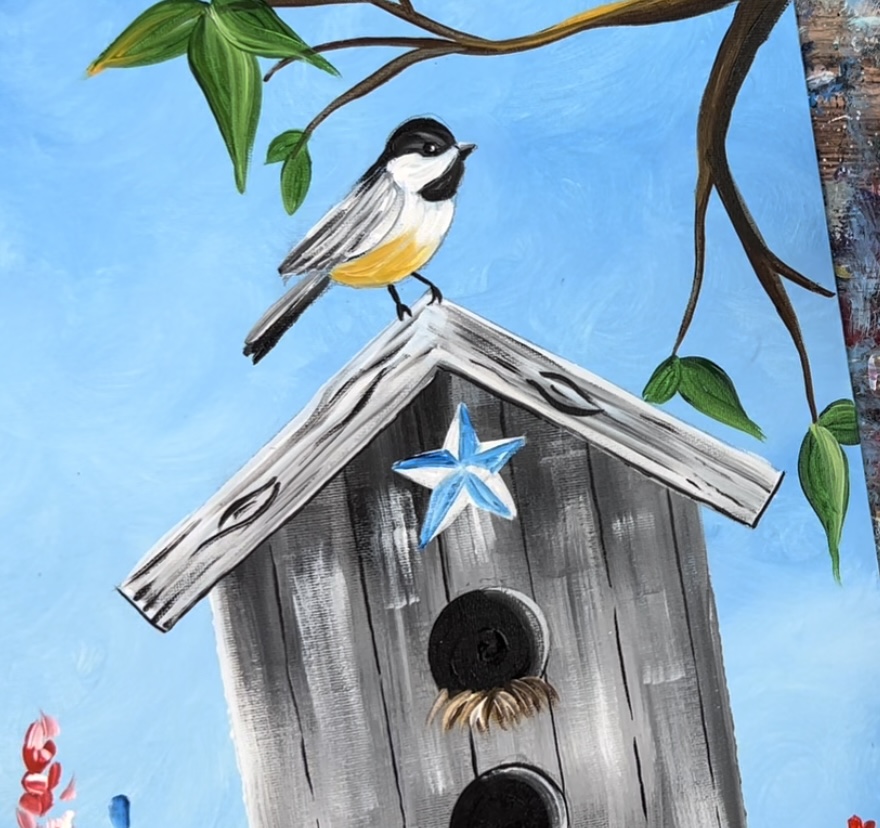
7. Draw bird
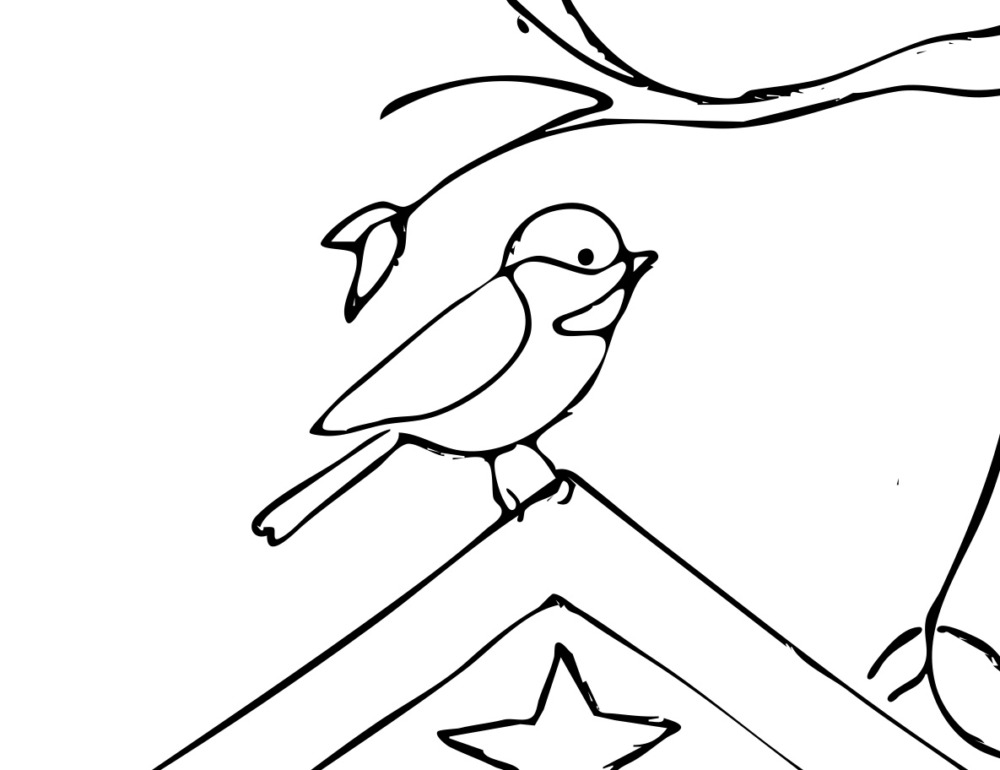
Use a pencil to lightly sketch the chickadee bird on the top of the roof. Drawing this bird is all about breaking it down to simple shapes and lines. Start with the head. Draw a circle.
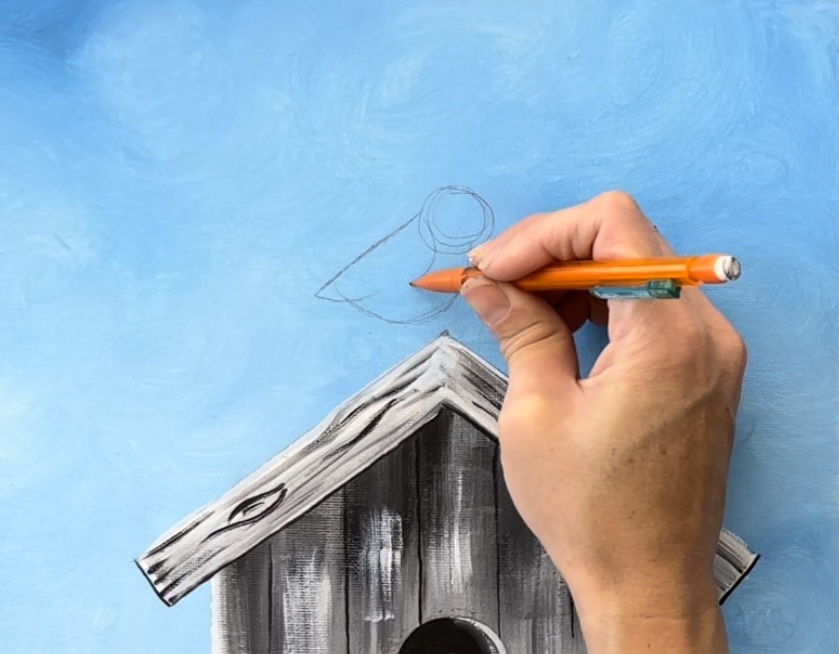
Then draw the chest/belly but drawing a curved half circle line from the head to where the side wing will overlap.
Then draw a half circle for the side wing.
Draw a diagonal line from the bottom of side wing. This will be the bird’s tail.
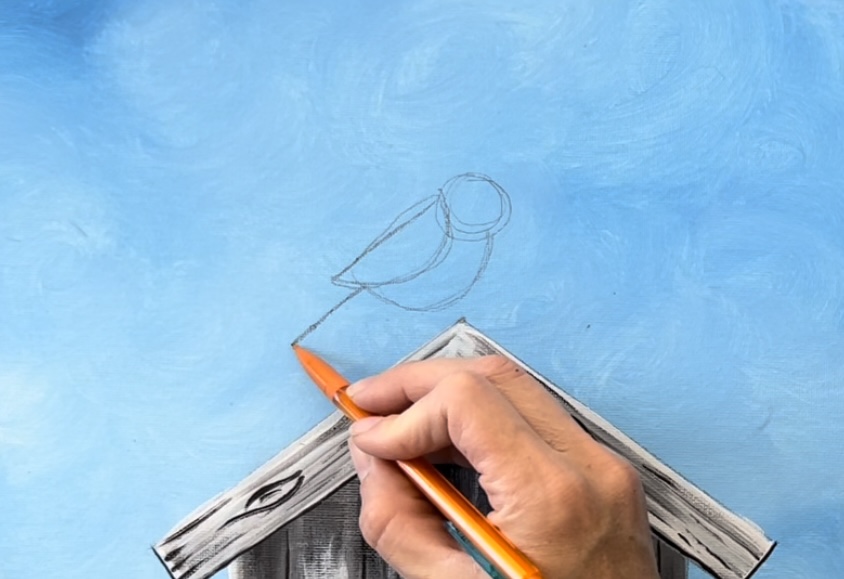
Turn that tail line into a thin rectangular shape. Then draw the legs by drawing diagonal lines and little claws that attach to the top of the roof.
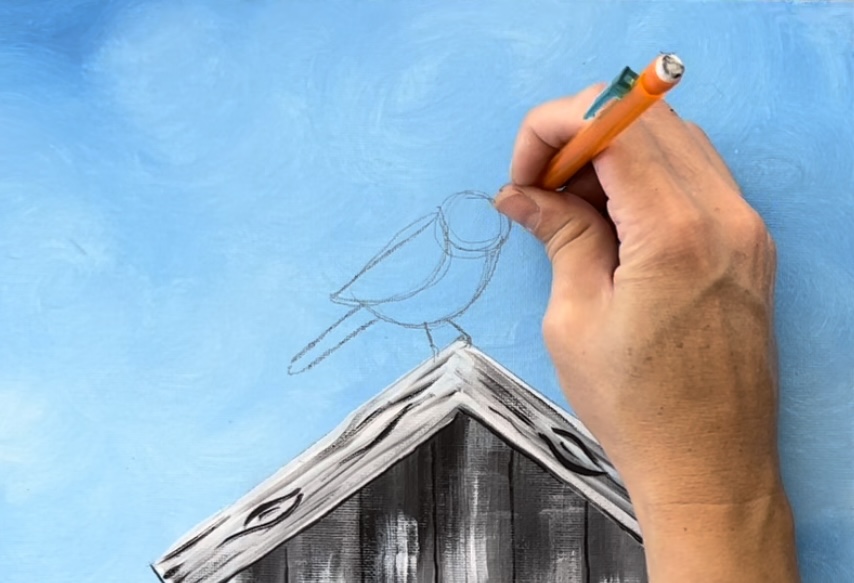
Draw a little triangle for the beak.
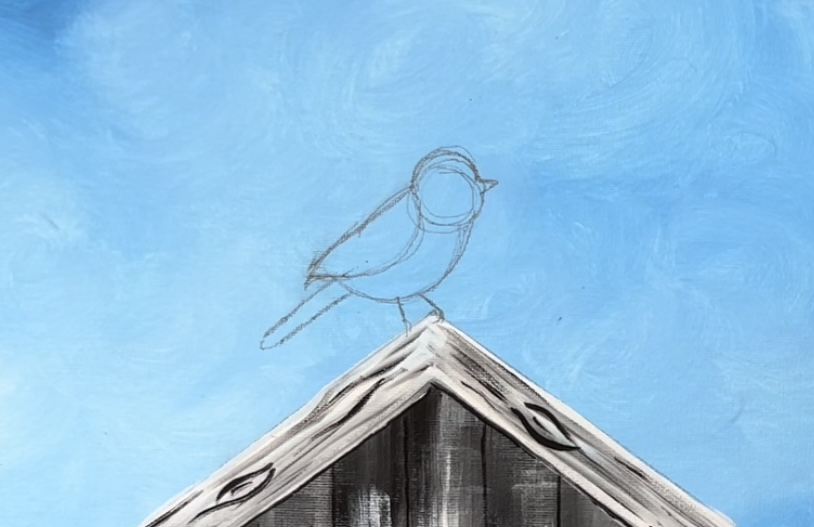
Then draw a small circle for the eyes. Draw division lines for the top of the head and under the beak area.
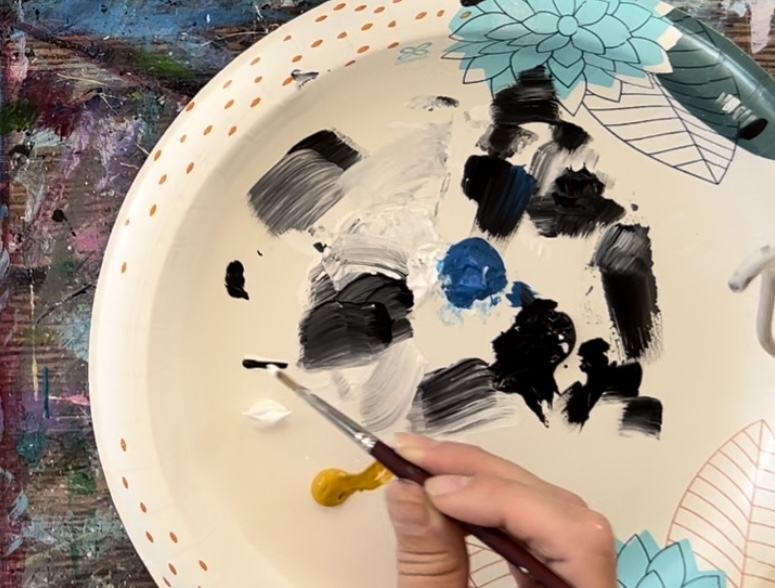
8. Paint bird
The bird consists of three colors: titanium white, mars black and yellow oxide.
Use your #4 round brush and load it into both titanium white and mars black (about equal parts).
Paint the wing starting at the far left end. Paint in short diagonal strokes that go in the direction of the wing. By doing these short strokes, you create feather texture.

Let the colors blend together on the canvas but try not to over blend the black and white. It should be a mix of the two colors that create the feather texture.
Next, paint the top of the head and under the beak region solid black. Paint the tail the same way you did the wing using black and white that gently blend together in a diagonal direction.

Then paint the chest area solid white. Use the 4 round brush to paint in curved strokes.

Then gently blend yellow oxide on the bottom of the body area. Blend the yellow oxide up into the white.

Paint the side of the bird’s head white under the black area.

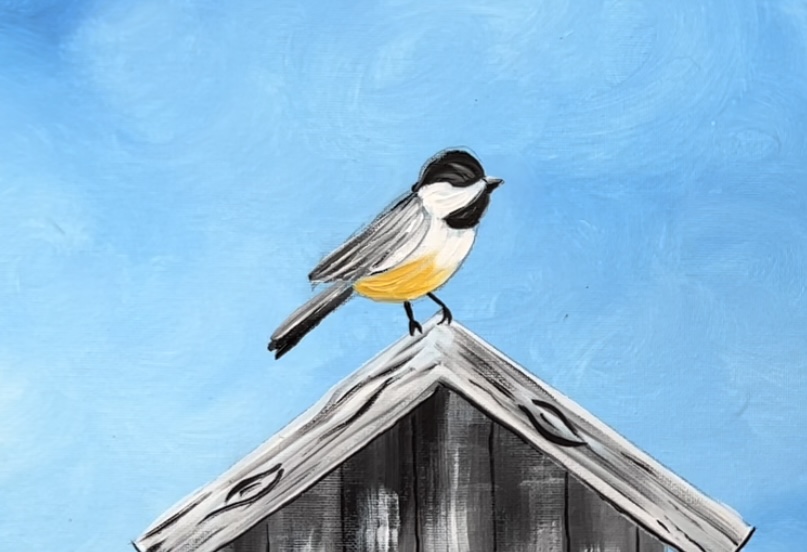
Use titanium white to paint a small white dot for the eye.
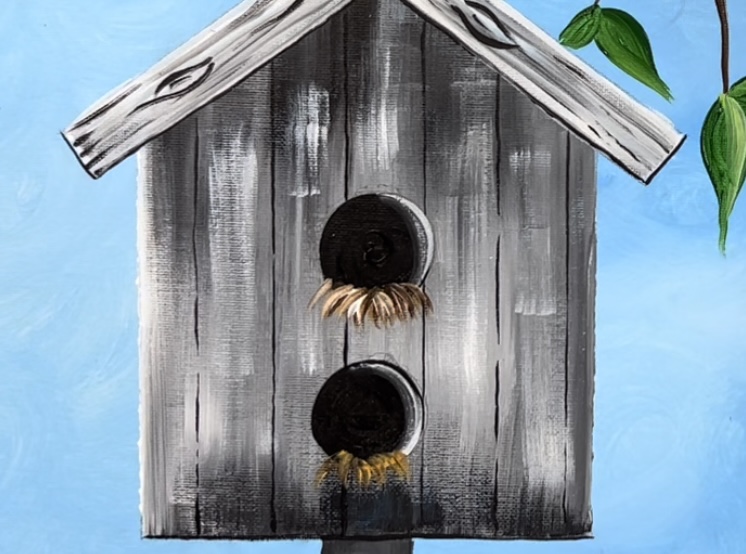
9. Paint branches & leaves
Load your palette with burnt umber. Use a #8 round brush to paint the branch. Start on the tip and then paint the branch going to the right edge of the canvas. Allow your branch to get larger towards the right.

Then paint smaller branches that attach to the larger one.

Paint a branch that goes downwards.

Optional: add small highlights to the edges of the branches by blending in some yellow oxide on the top edges of some of the branches.


Next, load you palette with hooker’s green hue permanent. Use the #8 round brush to paint leaves on the tips of your branches.

Vary the size and direction of the leaves. You can also add highlight to the leaves by blending in some yellow oxide on one side of the leaf.


10. Paint nest texture inside holes
Use a #4 round brush and the colors: bunt umber, yellow oxide and titanium white to paint small strokes on the bottom of each of the holes. Blend the colors gently together to get a variety of colors in the “twigs/grass”.
11. Paint flowers, leaves and grass
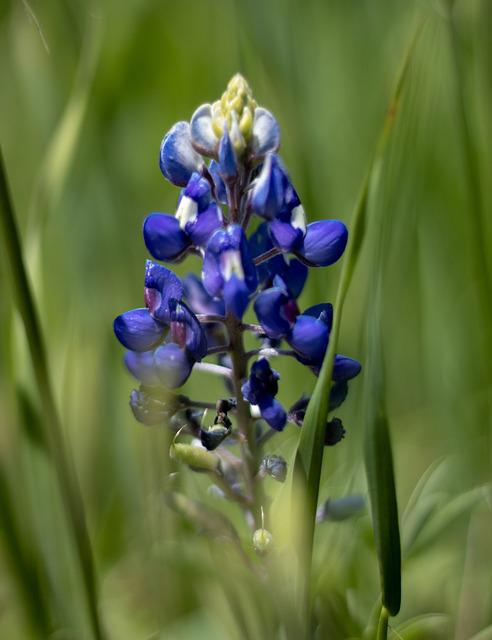
To paint the bluebonnets, load your palette with phthalo blue and titanium white. Use your #4 round brush. Double load it into the blue and the white. Paint small “cupped” strokes in clusters of 2, 3 or four. Form the individual flowers and make them go in a sort of column direction.
The flowers towards the top or single, smaller strokes and lighter.


Next, paint the green stem in between each of your flowers. Do this with your 4 round brush and hooker’s green. Paint very tiny stem lines that attach to your flowers. Then paint narrow and pointed leaves.

Repeat this technique to paint the red bluebonnets. Load your palette with pyrrole red. Double load your 4 round brush in the red and white. Then form the column clusters of flowers.

Keep in mind, these are short expressive strokes. Load a generous amount of paint on your brush and form the small petals with one stroke. Don’t worry about this looking realistic!

Add your stem and leaves.

Create more bluebonnets and red bluebonnets on both sides of the birdhouse. Also, add grass blade texture with the green and your round brush.

12. Paint star
Use a pencil to draw a basic star. Then use a #4 round brush and titanium white to fill it in solid white.


To make the star look 3D, paint only one side of each of the star points and have that color meet in the center. Paint one of the sides a lighter blue and the other darker blue.

If needed, loosely outline the outer edge of the star with black.

Finished
That’s it! Sign your name and show it off!
Share Your Art Here


This is such a beautiful painting Tracie! Your videos are amazing. Thank you for showing us how to paint a lovely birdhouse.
Thank you!! I really enjoyed this one!