

Would you like to save this?
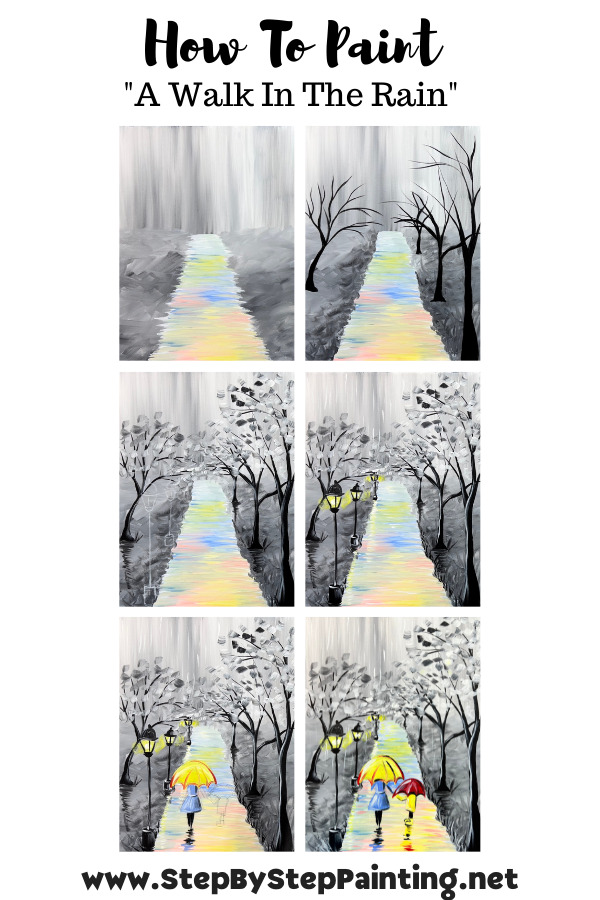
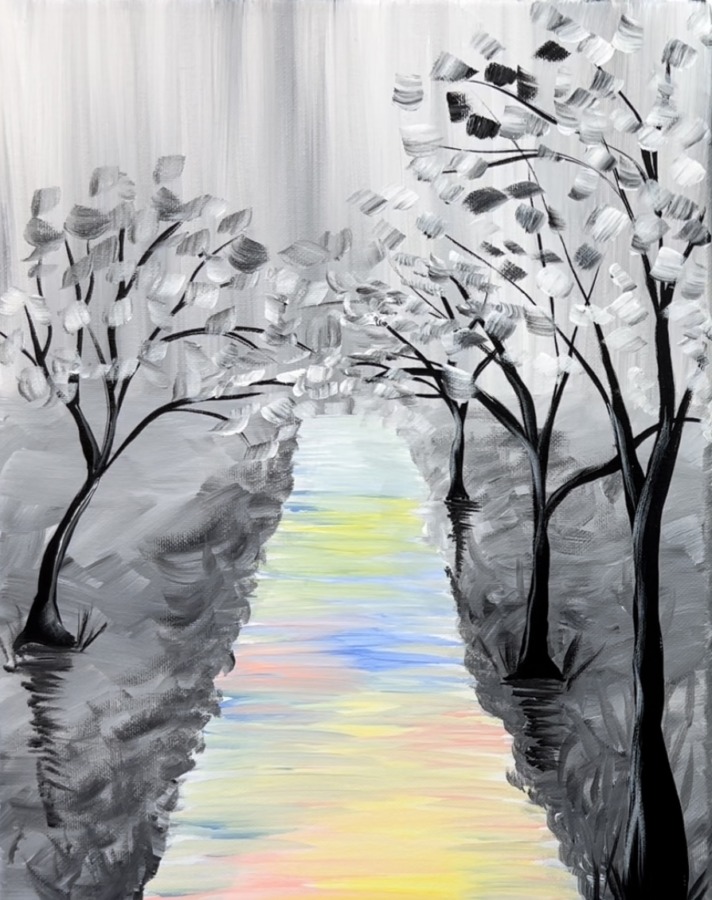
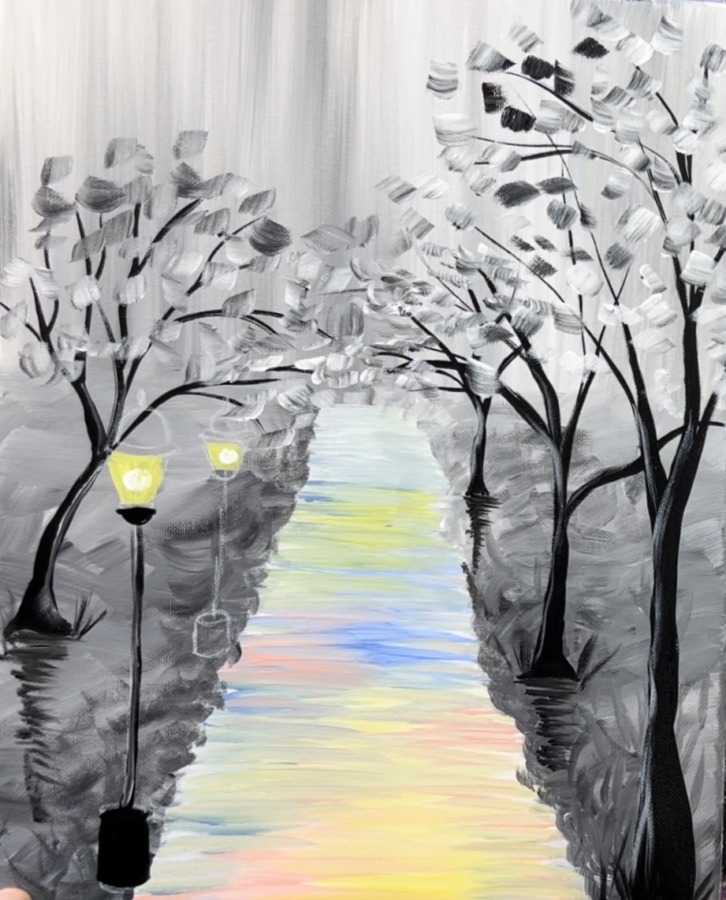
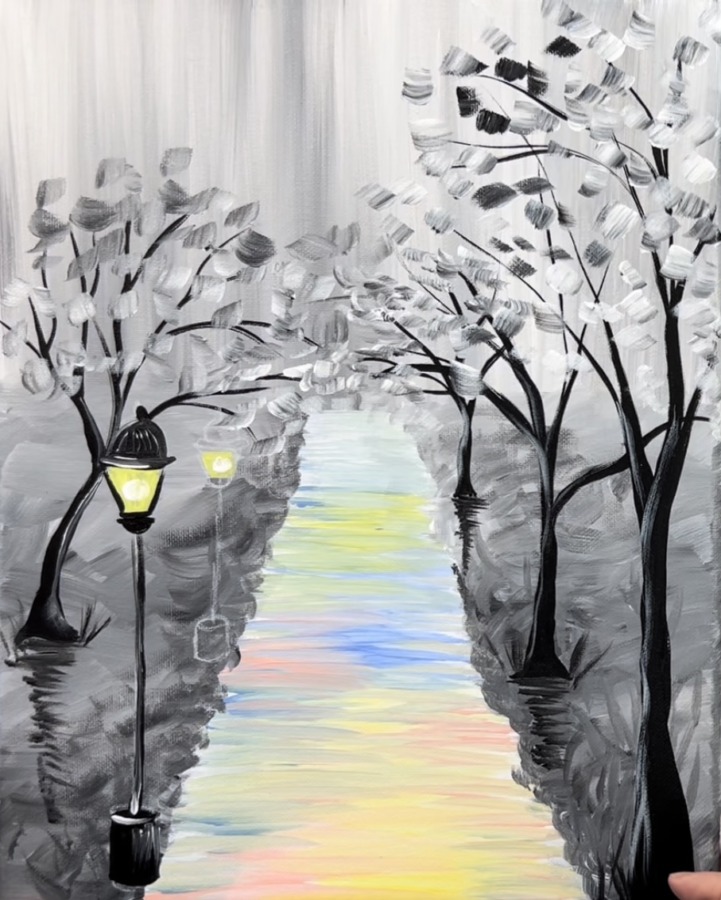
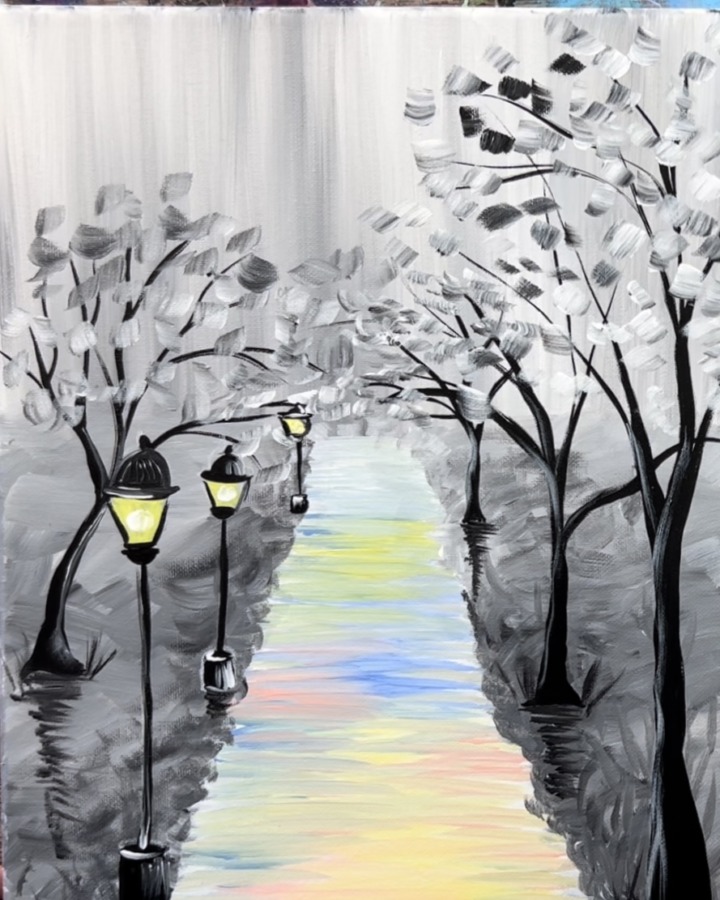
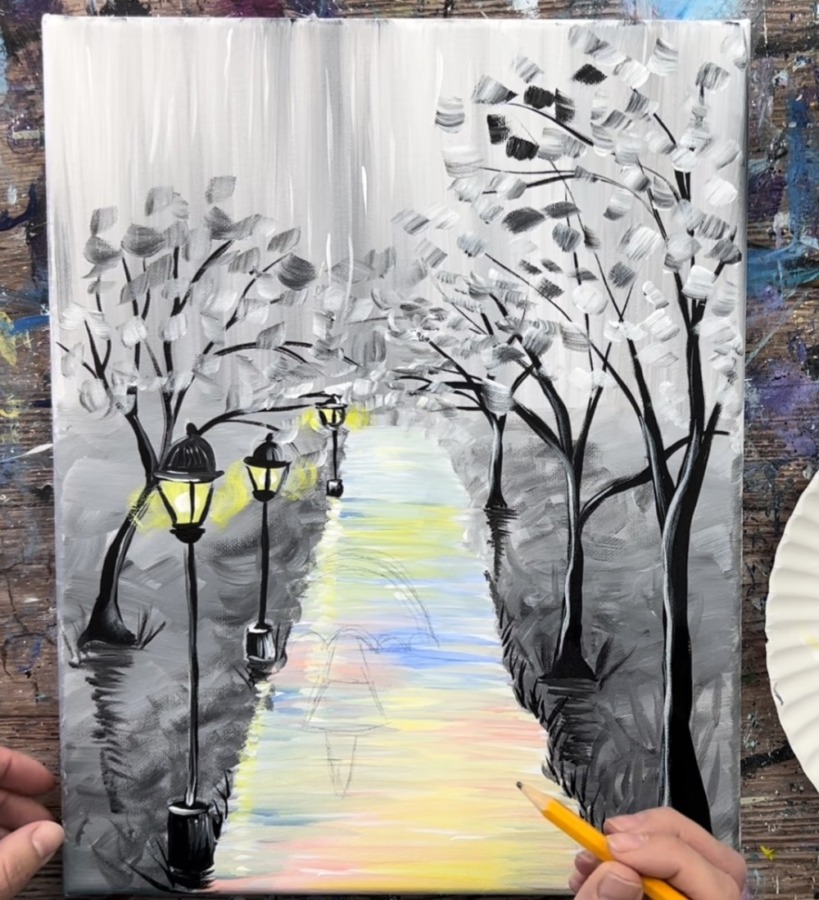
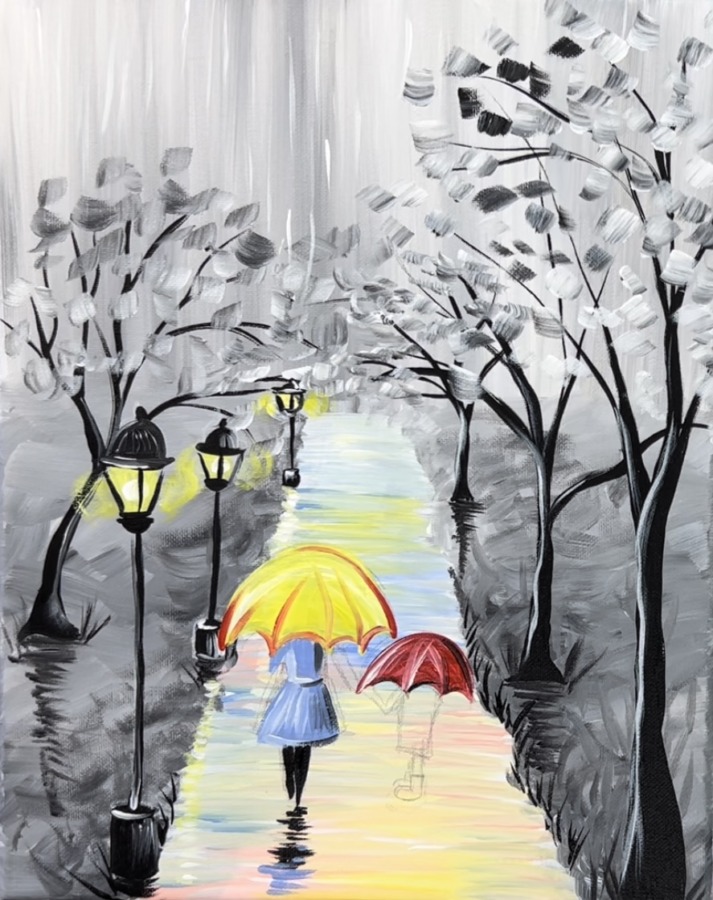
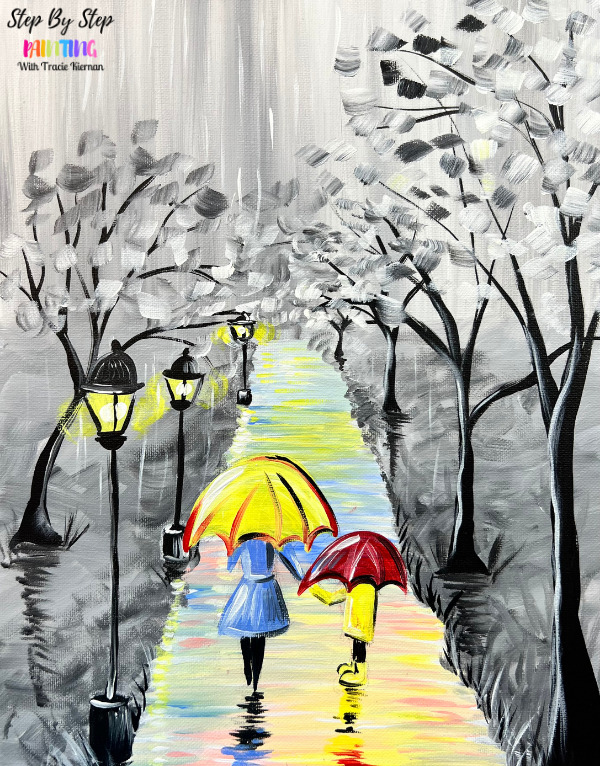
This acrylic painting tutorial will demonstrate how to paint a path in a park with trees and lampposts with a mother and child holding an umbrella.
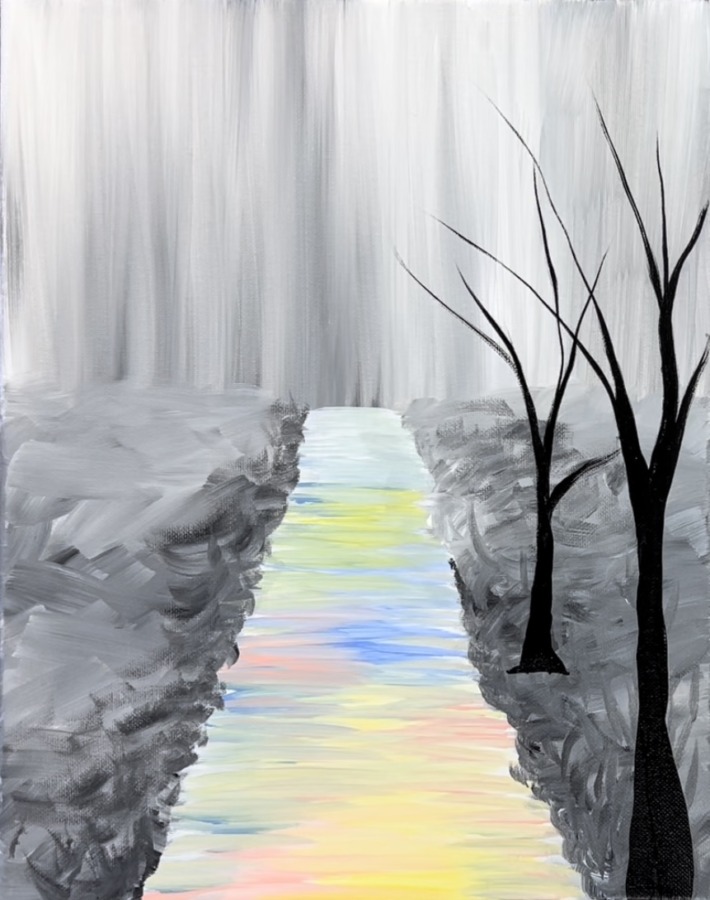
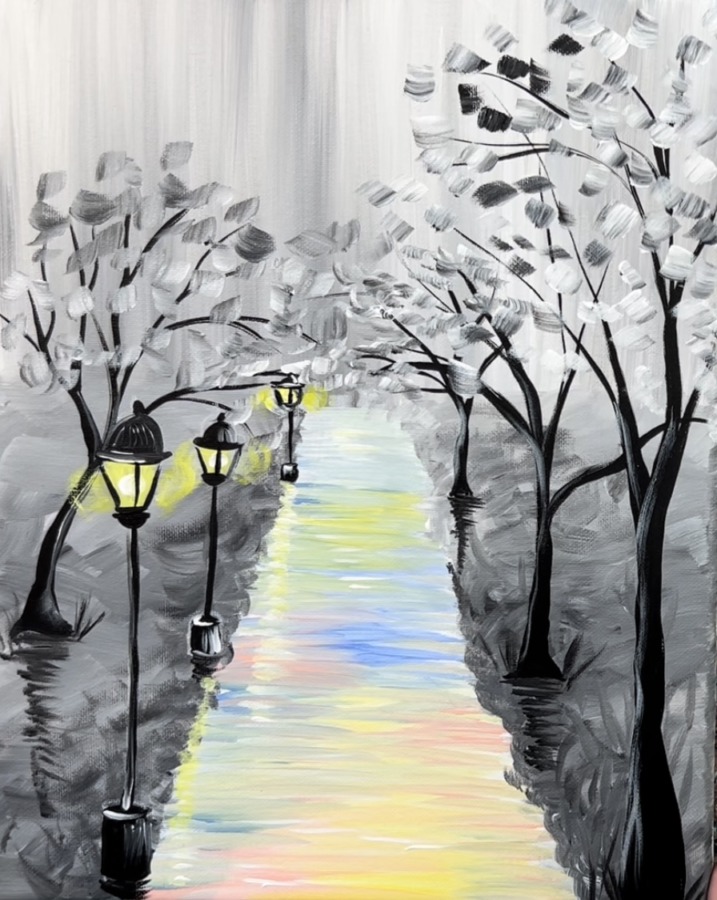
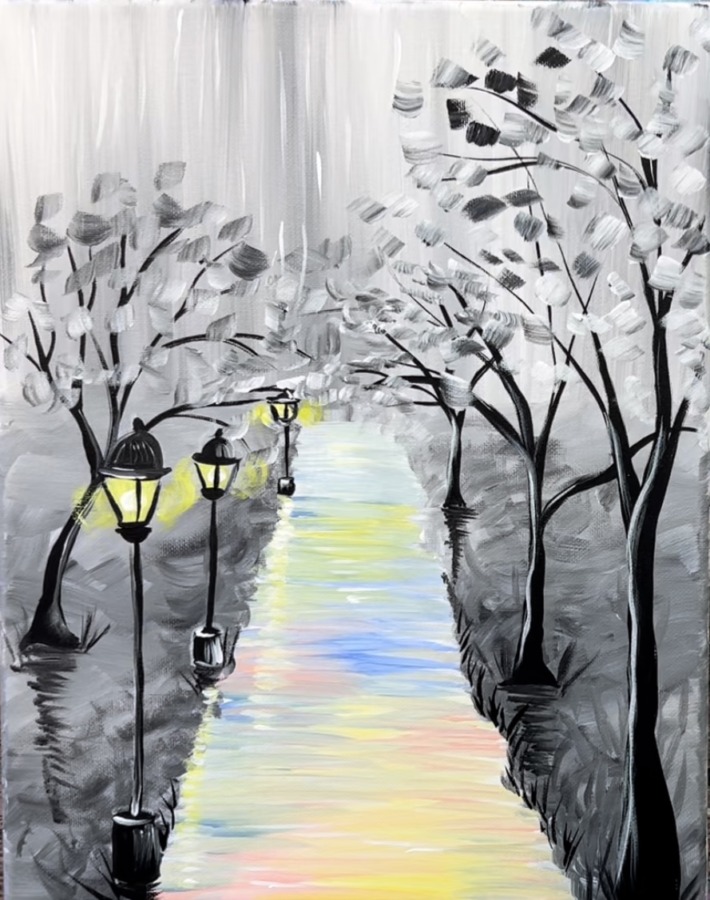
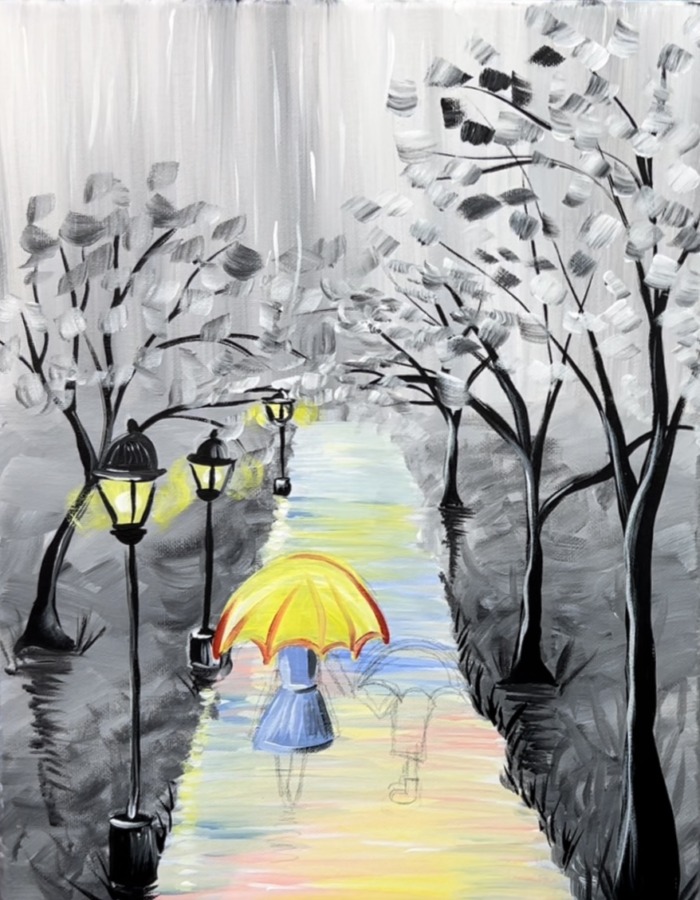
This is a unique painting in the sense that the outer parts of the path are gray and white while the inner part is full of color!
There could be multiple interpretations of this painting but I love the fact that there is a mother walking with her child! The path is colorful and inviting. It could be a symbol of the special bond between mother and son (or daughter). I almost titled the painting “you color my world”. The colorful path represents the joy and color that children bring into our lives.
You are welcome to put your own touches in this, change the colors or even make the trees & background colorful depending on the style you are going for.
Enjoy and happy painting!
Materials
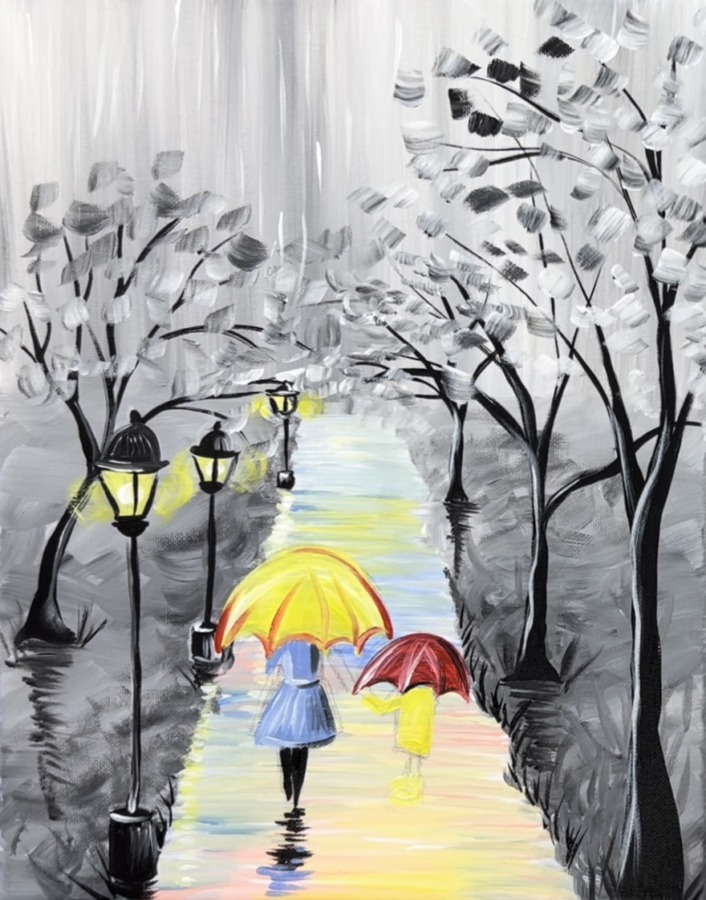
A Walk In The Rain - Mother & Child

Paint a rainy day park painting with mother and child.
Materials
- 11 x 14 Canvas
- Acrylic Paint
- White Chalk Pencil (optional)
- Drawing Pencil
- Brushes
- Water Cup
- Paint Palette
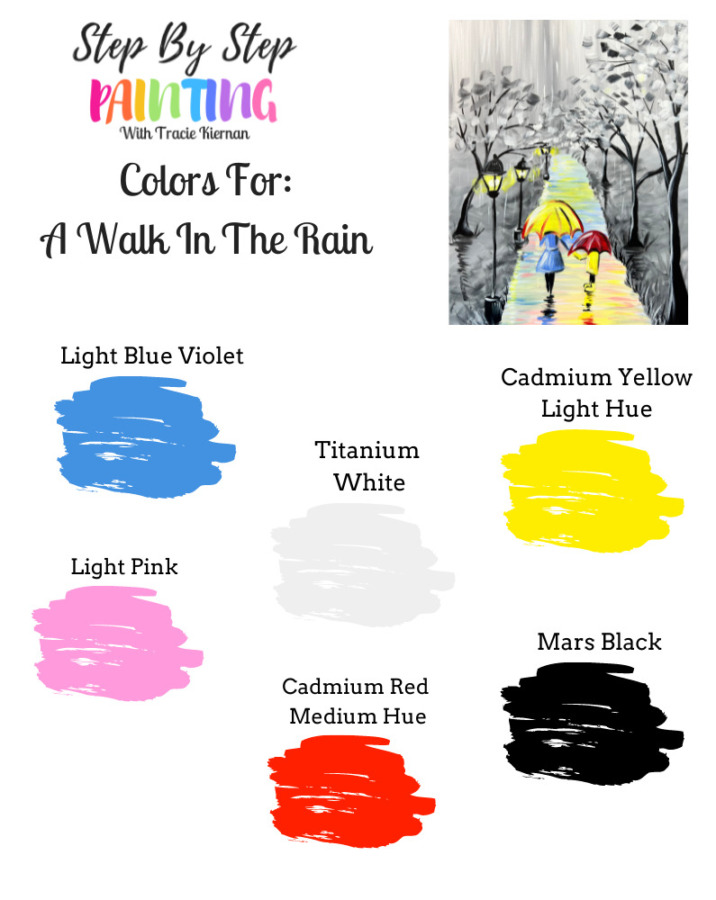
Colors
- Cadmium Red Medium Hue
- Cadmium Yellow Light Hue
- Light Blue Violet
- Mars Black
- Titanium White
- Light Pink
Brushes
- 3/4" Flat Wash Brush
- 3/8" Angle Brush (or 12 bright brush)
- #8 Round Brush
- #4 Round Brush
- Optional: Black POSCA Paint pen and/or small #0 round brush for detail work
Color Palette
I used Liquitex BASICS acrylic paints. Paint colors can vary by brand. If you are using different paints, I recommend using the color swatch below to help you try to match.
Using Craft Paints?
If you are using craft paints, such as Apple Barrel Craft Paints, I recommend subbing for these colors.
- Parrot Blue
- White
- Bright Yellow
- Fuchsia
- Flag Red
- Black
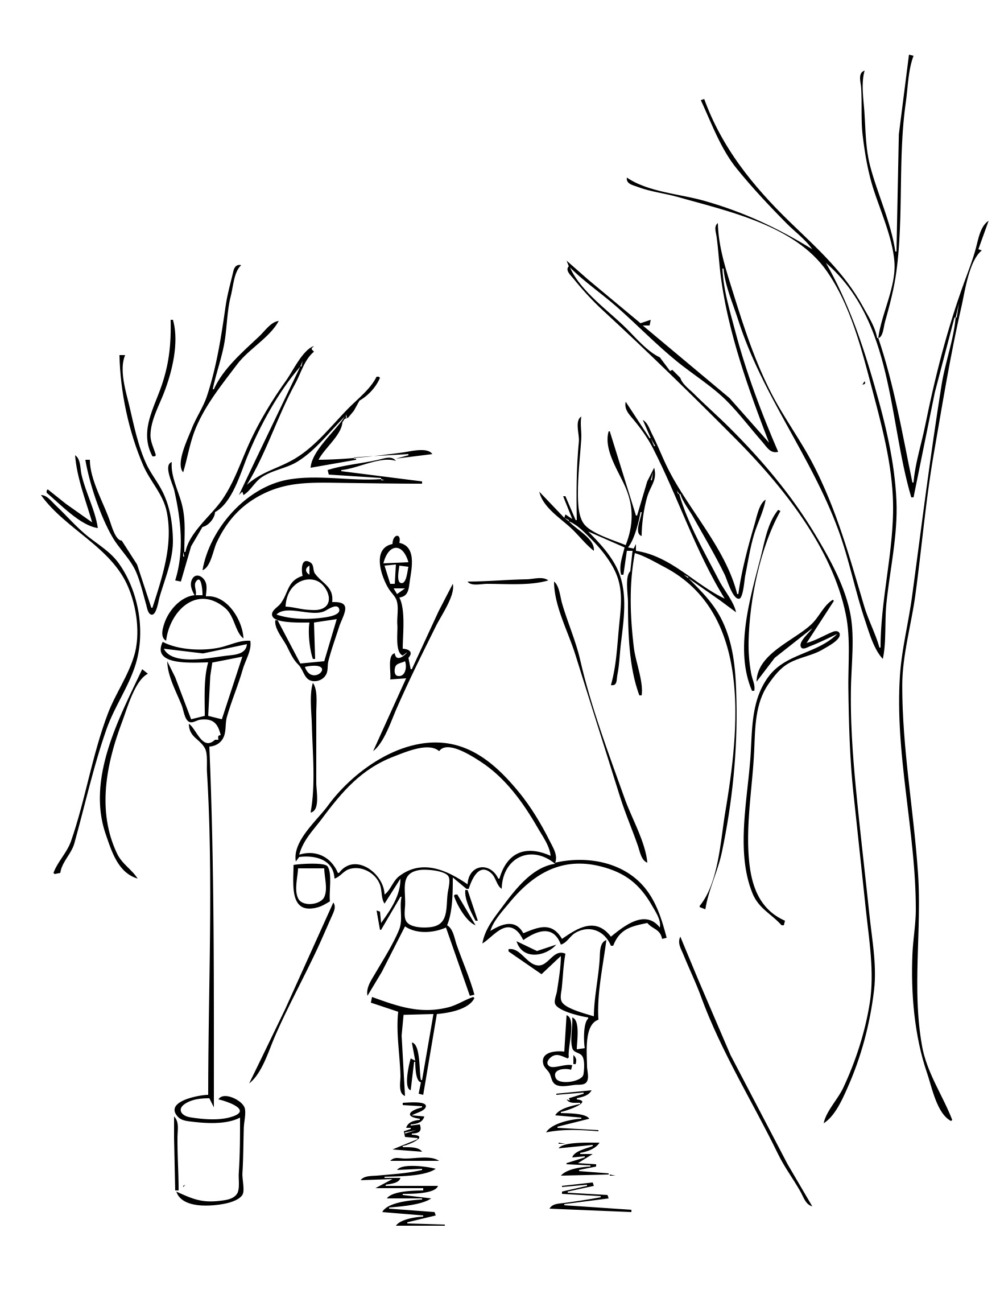
Traceable
Directions At A Glance
Video
Step By Step Instructions
Tip: this painting is a very loose, impressionistic/ abstract style of painting. Don’t worry about making it look realistic. Instead, focus more on expressing emotions and loosening up your strokes.
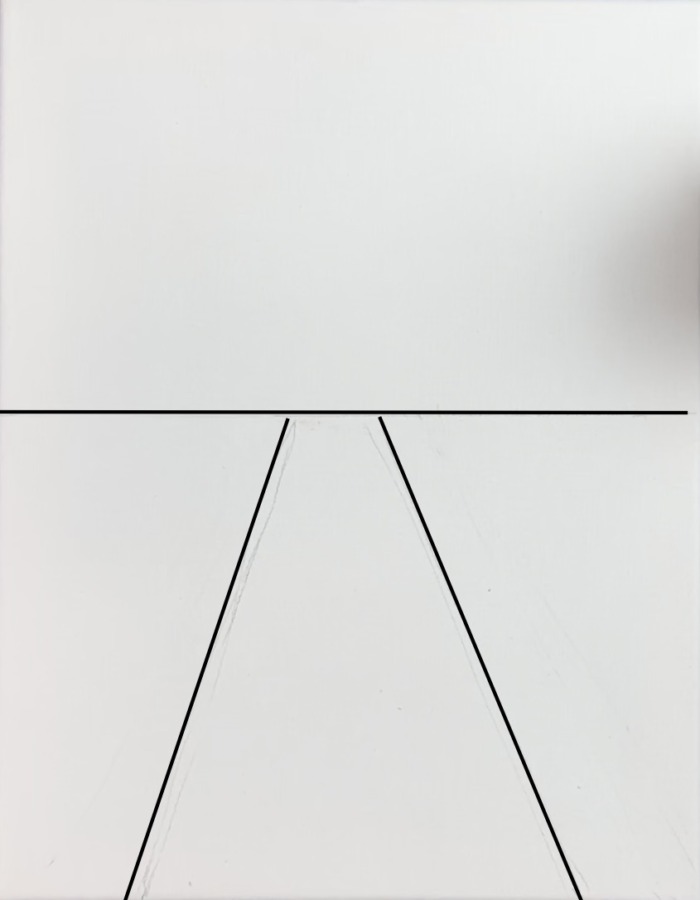
1. Draw Horizon Line and Path
Lay your canvas so that it is in a vertical position.
The horizon line is not in the exact center of the canvas. It is a little bit higher than the center. If you are working on an 11 x 14 canvas, measure about 7.5″ from the bottom of the canvas.
If you are working on a larger or smaller canvas, estimate a line that is a little higher than center.
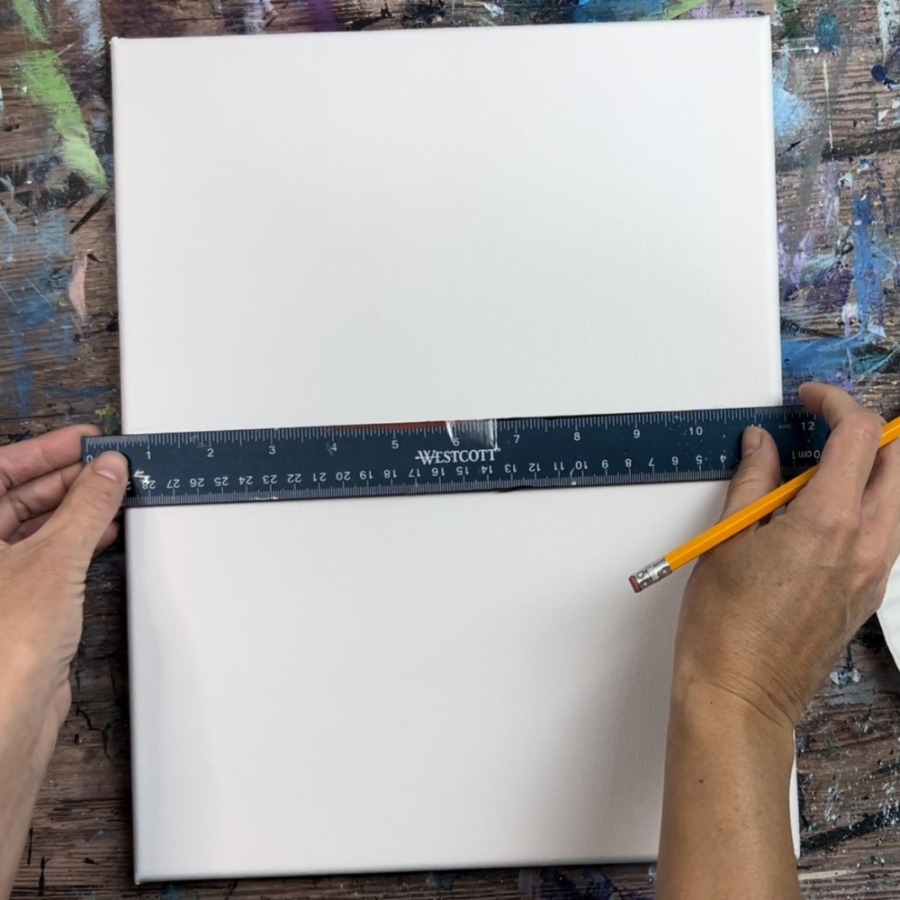
Then draw a line all the way across lightly with a pencil.
Next, draw the path. This path does not have to look perfect and it can always be adjusted later. Draw two diagonal lines that do not go to a point. Start the lines a little inwards on the bottom of both sides. This path is relatively center in the canvas.
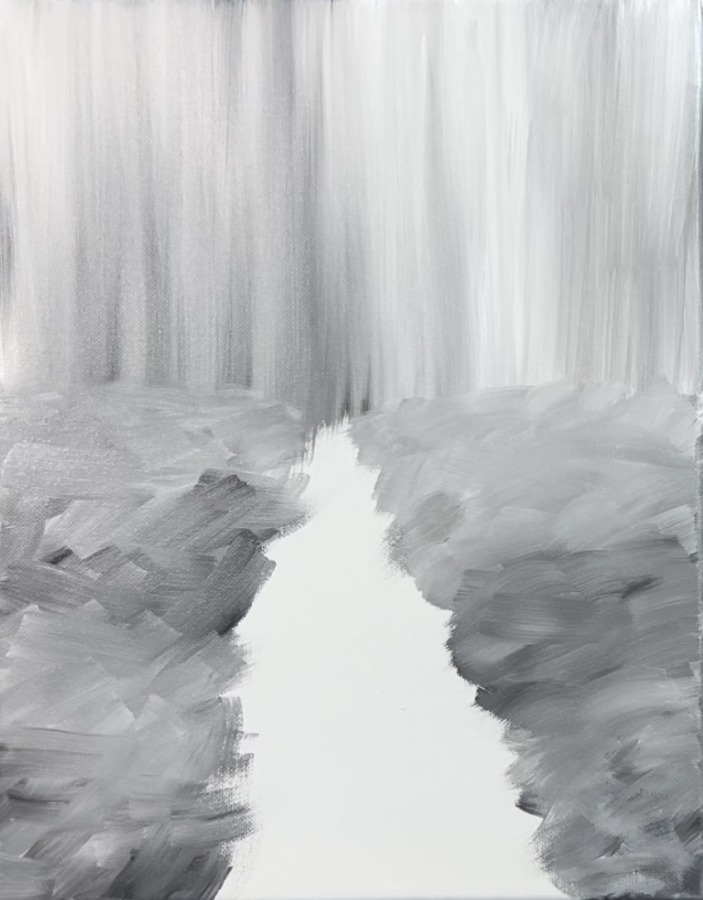
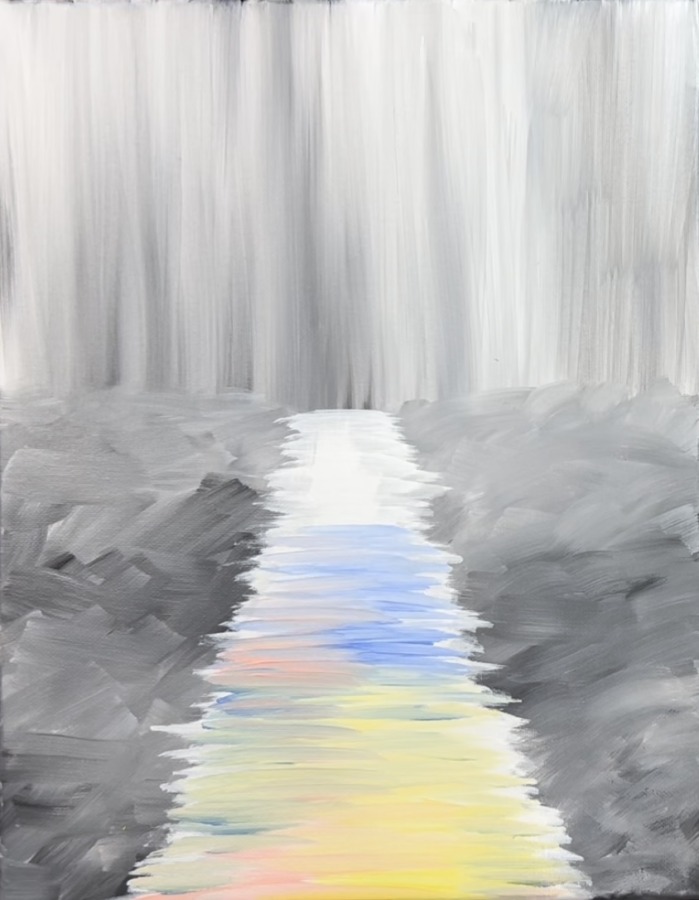
2. Paint The Sky
Then, load your palette with mars black and titanium white. The sky, ground and trees are going to be painted using only black and white. Start by painting the sky! Load your 3/4″ flat wash brush in water and kind of tap it dry. You want your brush to be wet but not dripping. Load your brush in about 3 parts white and 1 part black (load just a corner on black).
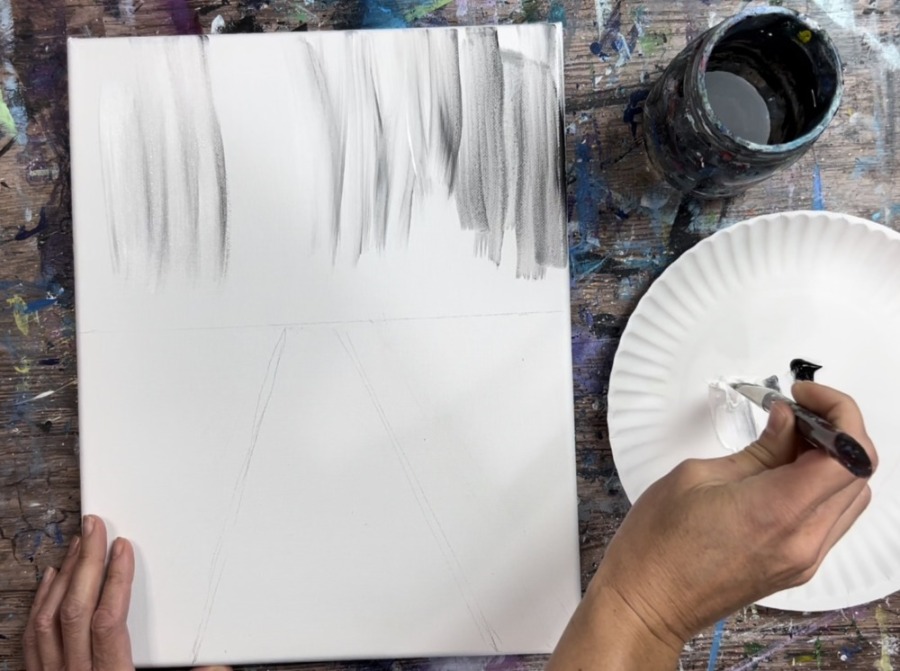
Paint up and down strokes. You will get black and white mixing on the canvas to make a gray. Adjust your white and black to make sure it is showing up either a light to medium gray. You don’t want this sky to be too dark or the trees won’t show up very well.
The paint should be relatively thin. If needed, add bits of water to your brush to help the paint glide thinly on the canvas.
Try not to over blend. You should get a “streaky” look that looks like rain in the sky. You can go below your horizon line if needed. We can always paint over and define the ground area later.
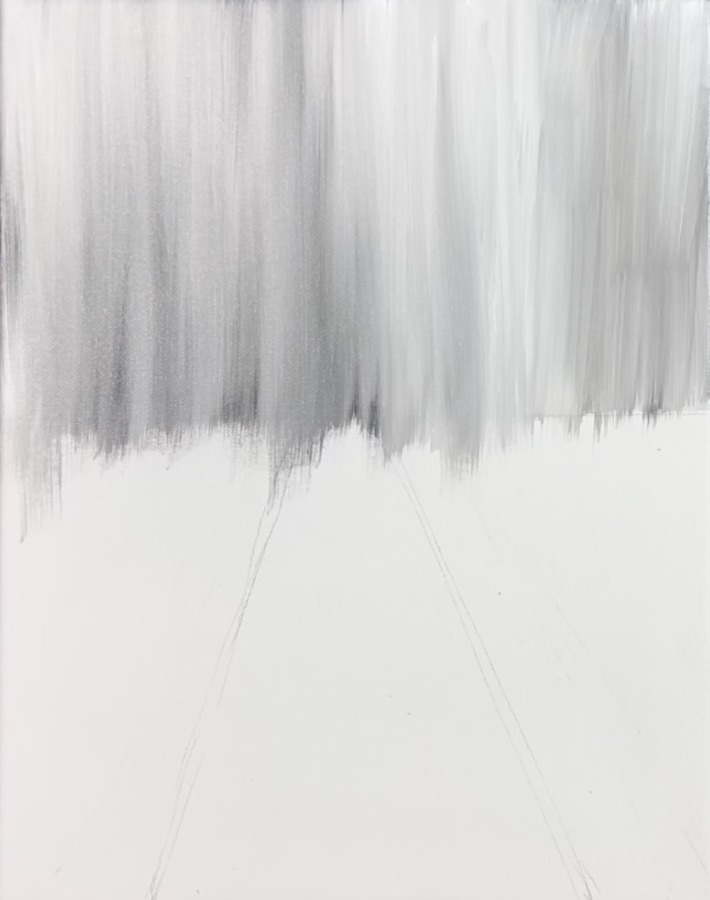
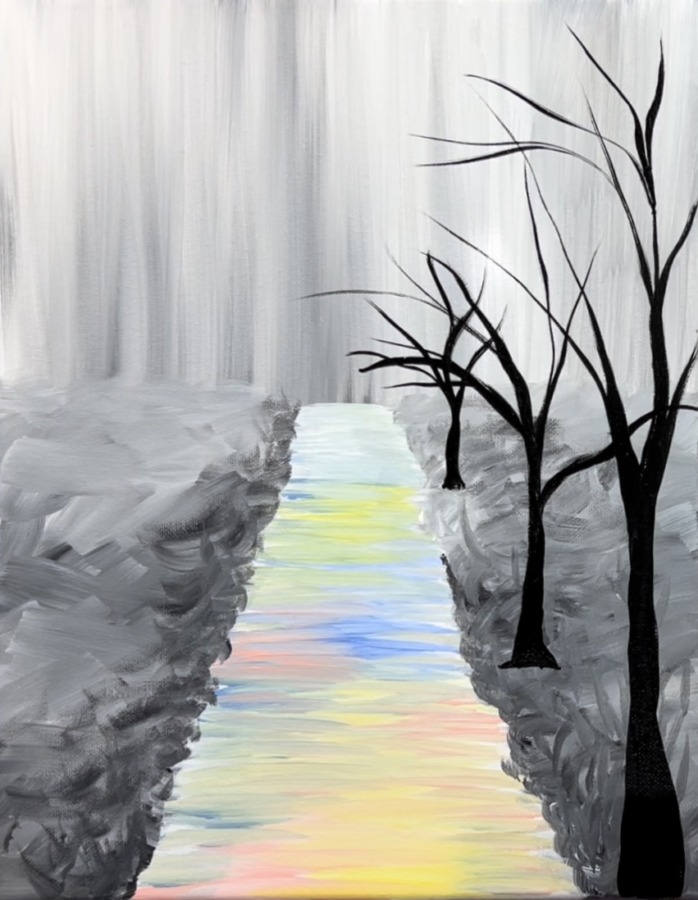
3. Paint The Ground On Each Side Of Path
Use the same black and white for the ground. This time, instead of painting up and down strokes, you will be painting textured “x” strokes. Start on the bottom of the canvas. Fill the left and right sides of the path with the criss-cross strokes.
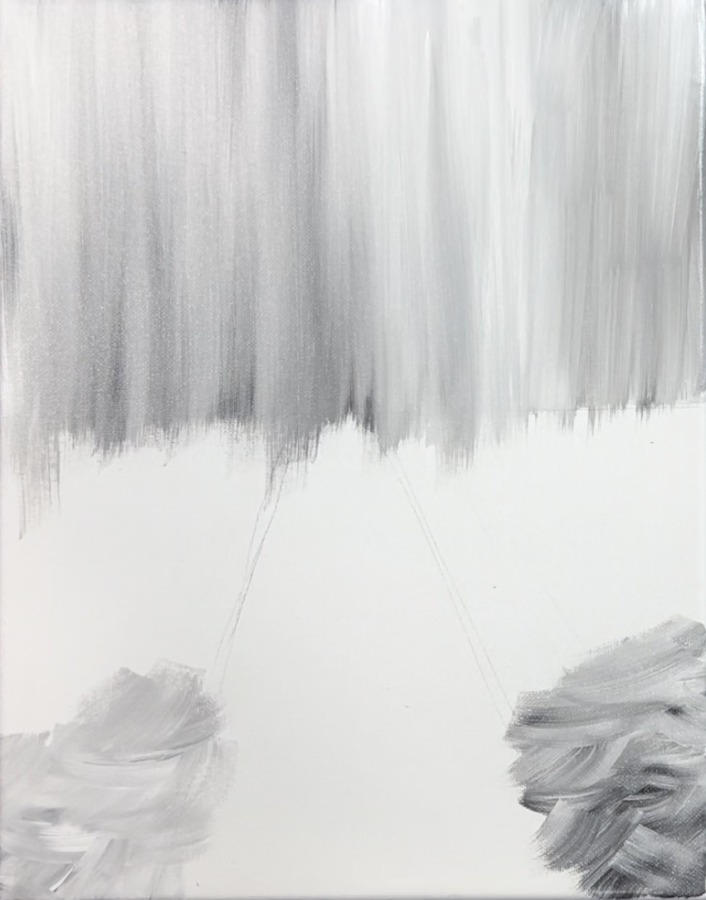
Try not to over blend the colors. This should look like an abstract grays area on both sides of the path. You can vary your colors by adding bits of black in some areas and bits of white in others.
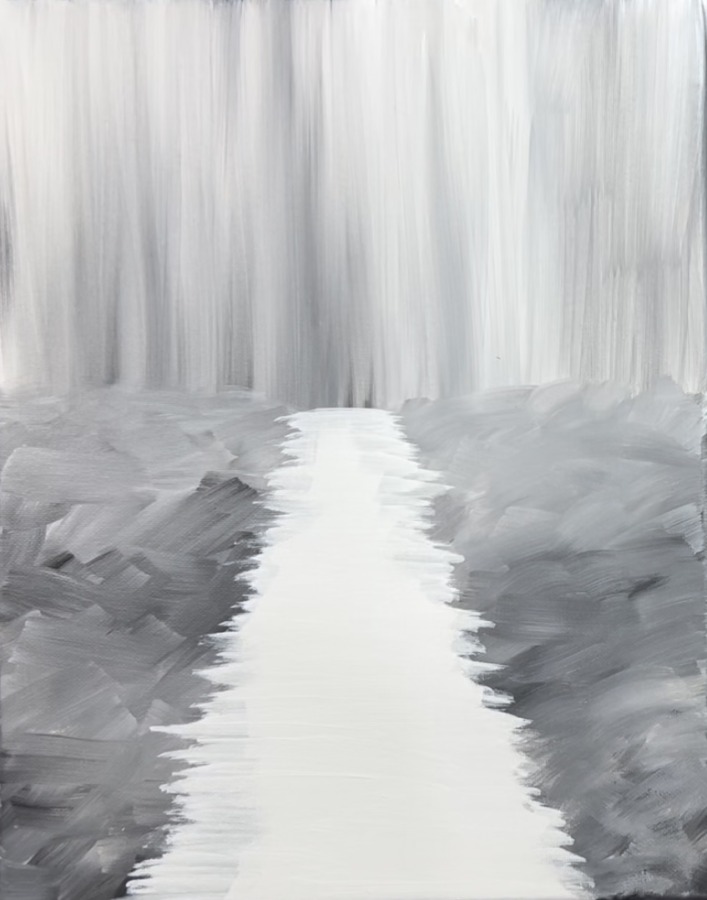
Try to make the ground that is closest to the horizon line appear slightly lighter by adding more white. This will give the illusion of some depth on your ground. Also note: your horizon line does not have to be completely straight. It can be slightly curved/sloped like a hill or higher level ground.
4. Paint Path White
Next, completely rinse and dry your brush. Load it in just titanium white. Paint the path using left and right strokes. You likely will need your strokes to go into the ground area to help you “redefine” your path. If you don’t like the uneven/rugged look on the edges of the path, you can always paint more ground over the paint to redefine it.
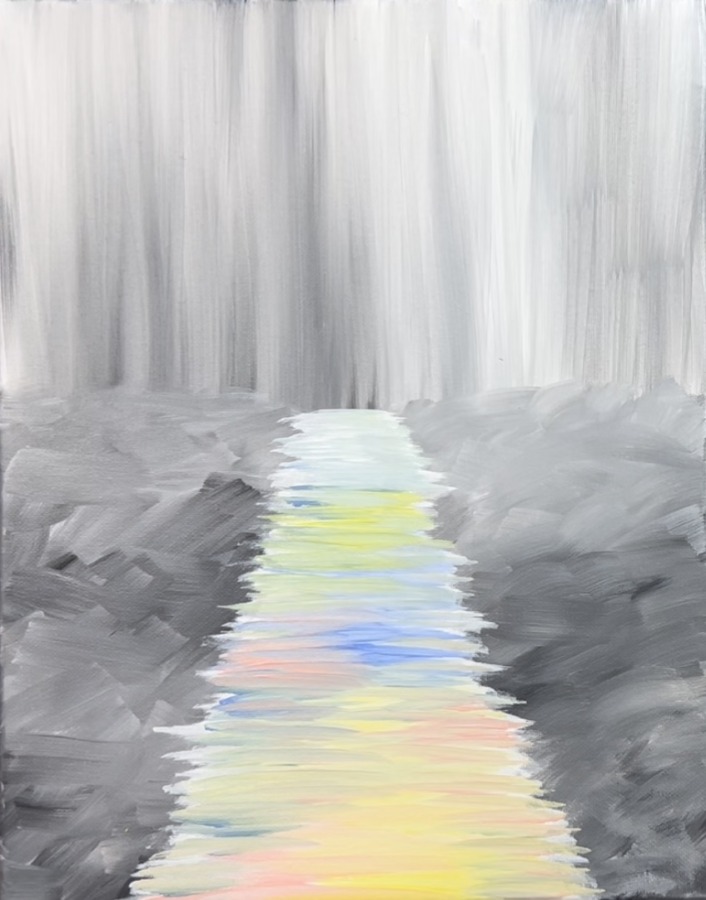
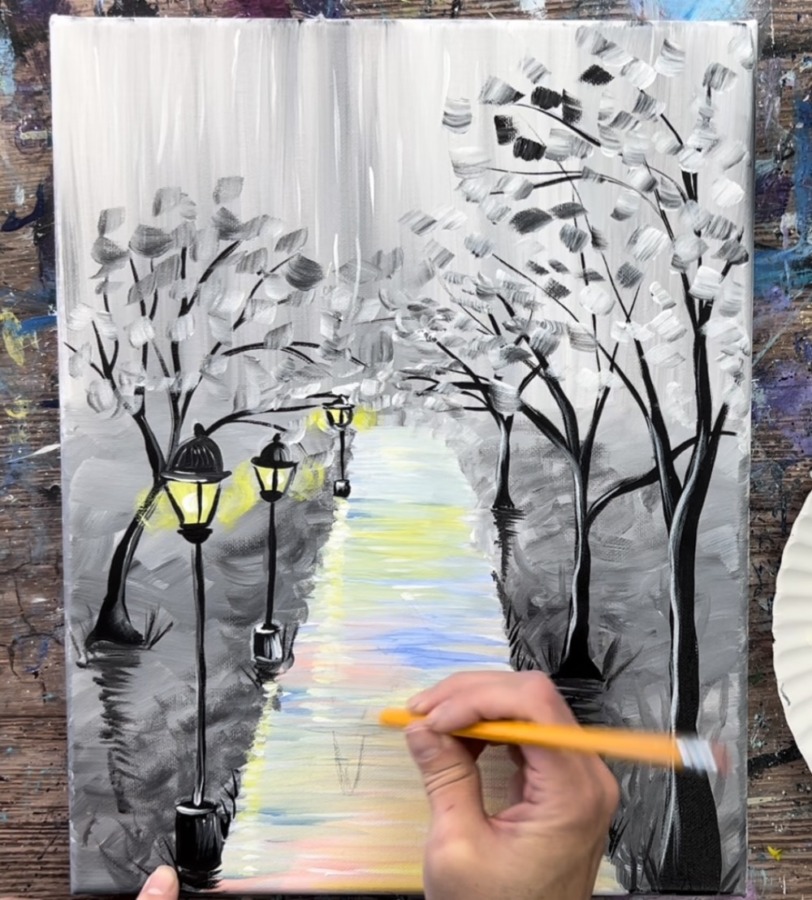
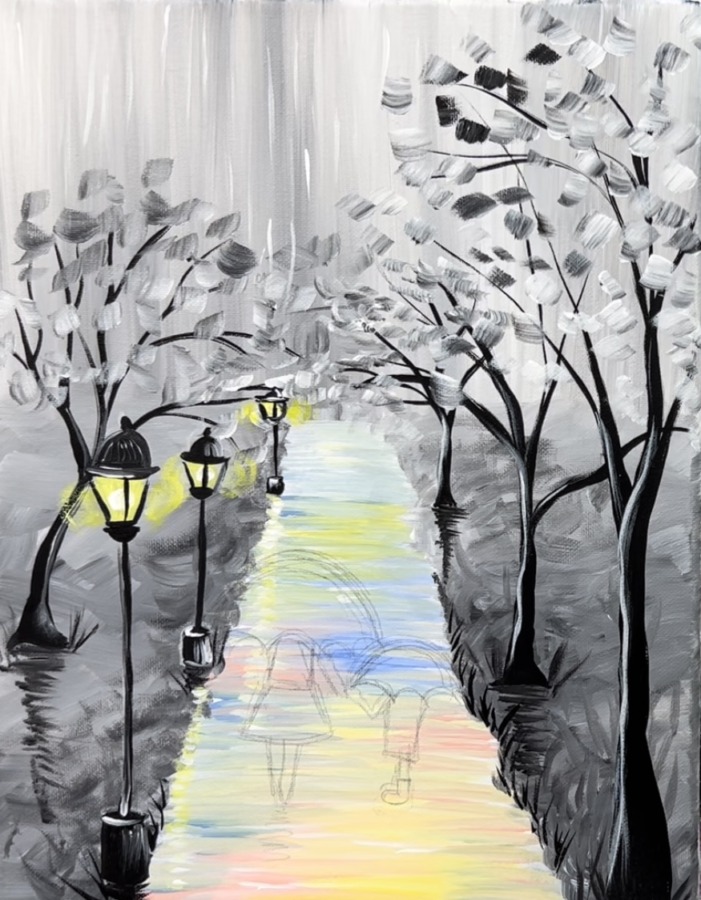
5. Paint Color On Path
Load your palette with the colors: cadmium yellow light, light pink and light blue violet.
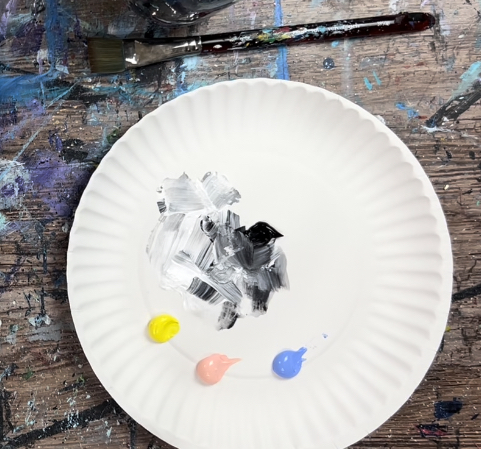
Load the tip of the brush in titanium white. Then load it into one of the colors (I started with pink). Paint left and right strokes starting at the bottom of the path area. Paint a small portion of the path pink. Then load it into the yellow and paint another area yellow.
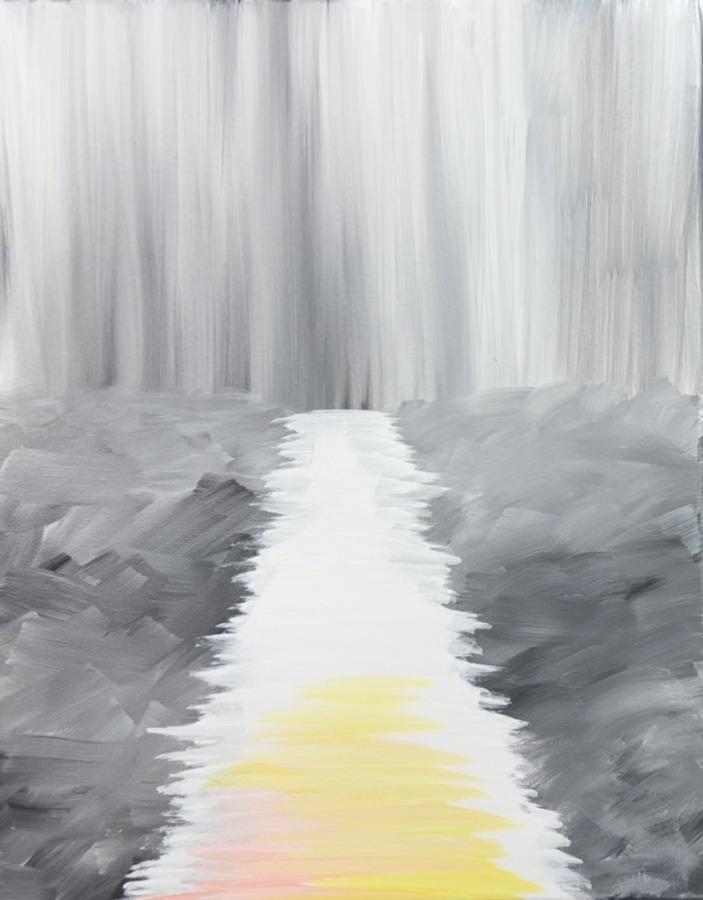
Then wipe the brush off and load some of it in light blue violet. Paint another portion of it with light blue violet.
Continue to paint the path with colorful, thin strokes using the tip of your 3/4″ wash brush. The colors can be layered and blended together. Add more white on the far end of the path closest to the horizon line so it appears lighter and creates some depth.
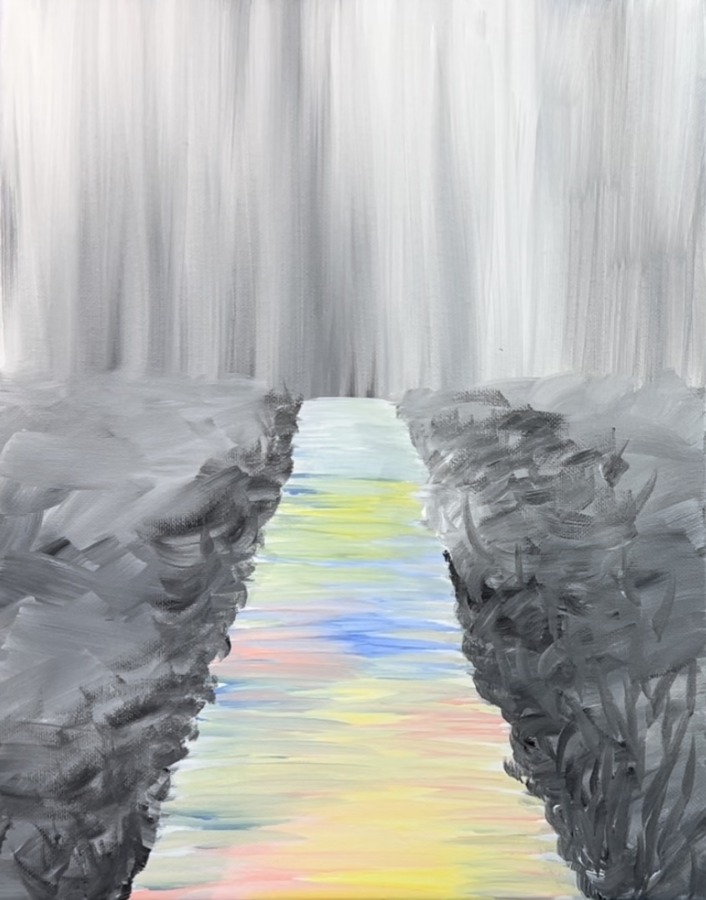
6. Paint Grass Texture On Sides Of Path
Use your 3/8″ angle brush to paint sides of the path. Load your brush in black and white. Paint textured strokes to redefine the path. You can also paint some grass texture strokes by painting in thin angled lines.
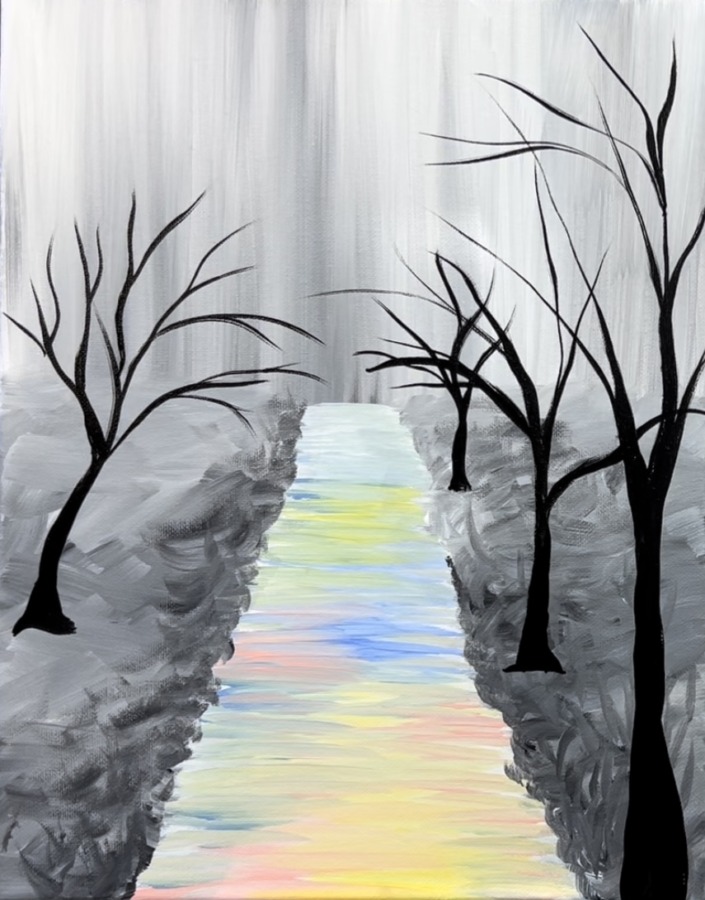
7. Paint Trees
Paint the trees using a #8 round brush and mars black that is thinned a little with some water. Load your #8 round in the black. Start at the bottom with a slightly thick stroke. Then go upwards to allow your trunk to go thinner. Let the tree branch out into two parts and release the pressure of the brush so the branch goes to a thin point.

Paint more branches that go to a point. These branches should be high up in the sky area.
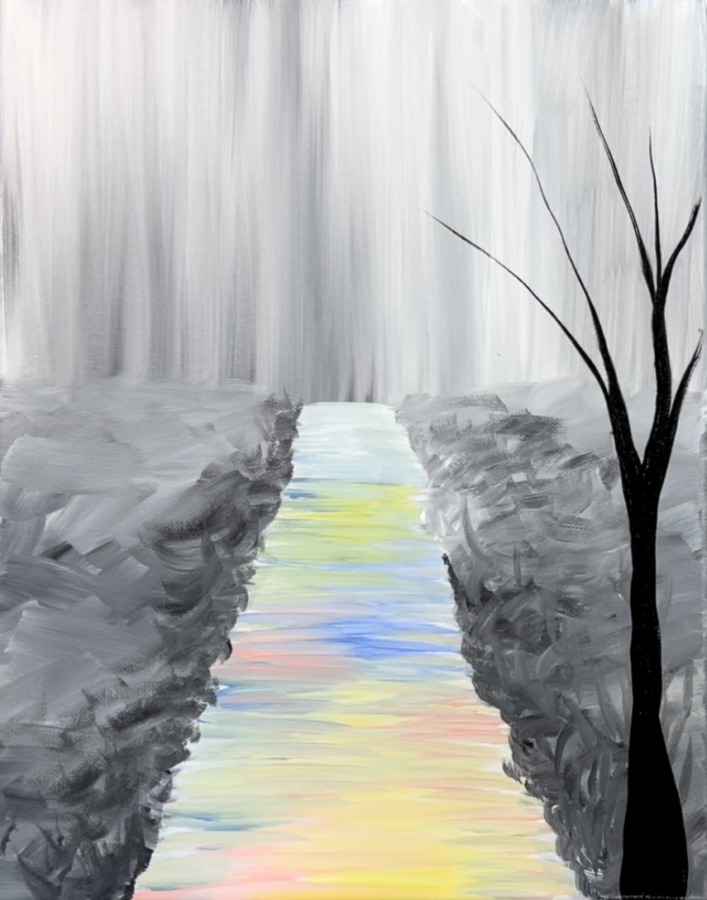
Then paint a second tree further up the path. This tree is not as tall as the first tree.
Paint a third tree that is even smaller.
Then paint just one tree on the left side of the path. I made this tree look like it was angling to the right by painting the trunk so it went in an angled direction. I made the branches kind of curve downwards a bit. You can paint more trees if you want but try to make sure there’s enough room for your lampposts.
Next, paint the leaves. Use your 3/8″ angle brush and double load it into titanium white and a little mars black. Start with the back tree and work your way to the front tree.
Paint short strokes of the black and white that blend gently together. These leaves are very impressionistic and a loose style. Don’t worry about making them look perfect. Try to get a nice variety of lights and darks.
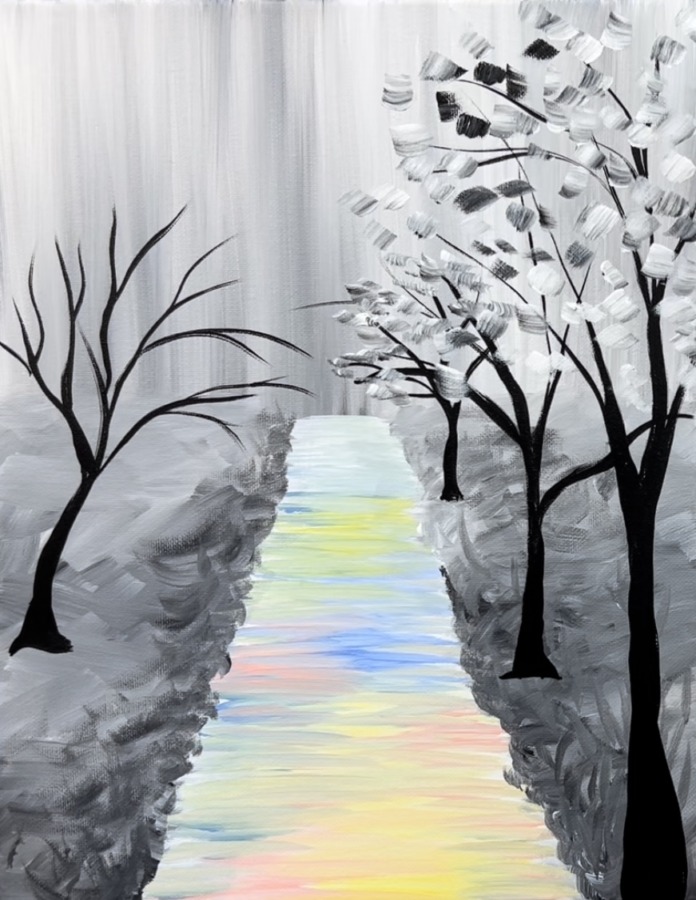
Then do the tree on the left. You can have the leaves overlap the path/ area above the horizon line. I left the sky area in the upper left blank.
Then paint shadows under the trees. Thin down some mars black paint. Use either your round brush or 3/8″ angle brush. Paint loose, left and right strokes forming the shadowy area under the tree trunks that go vertically down the landscape.
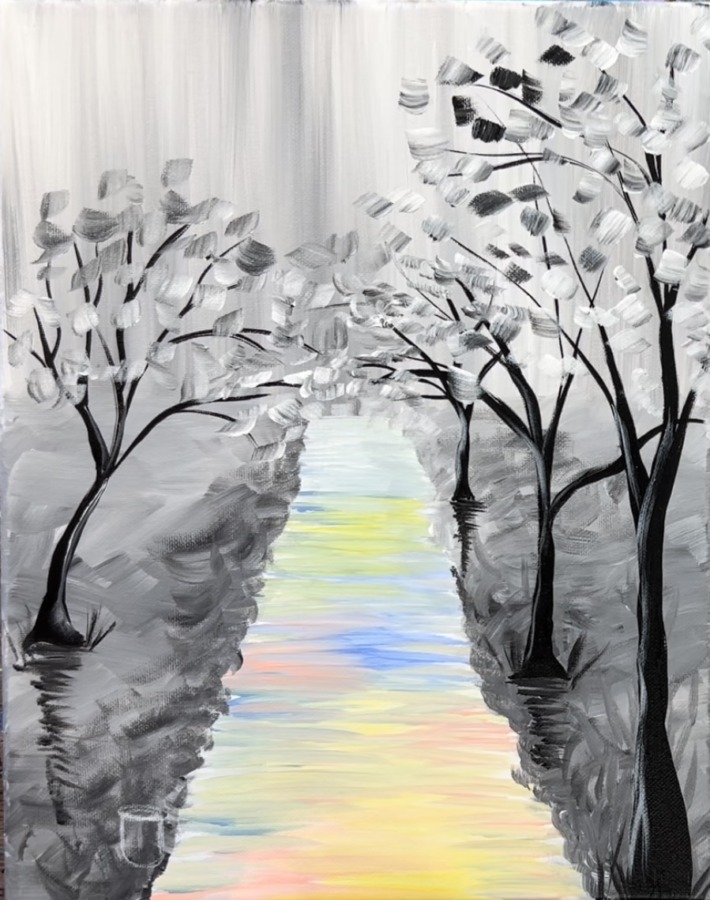
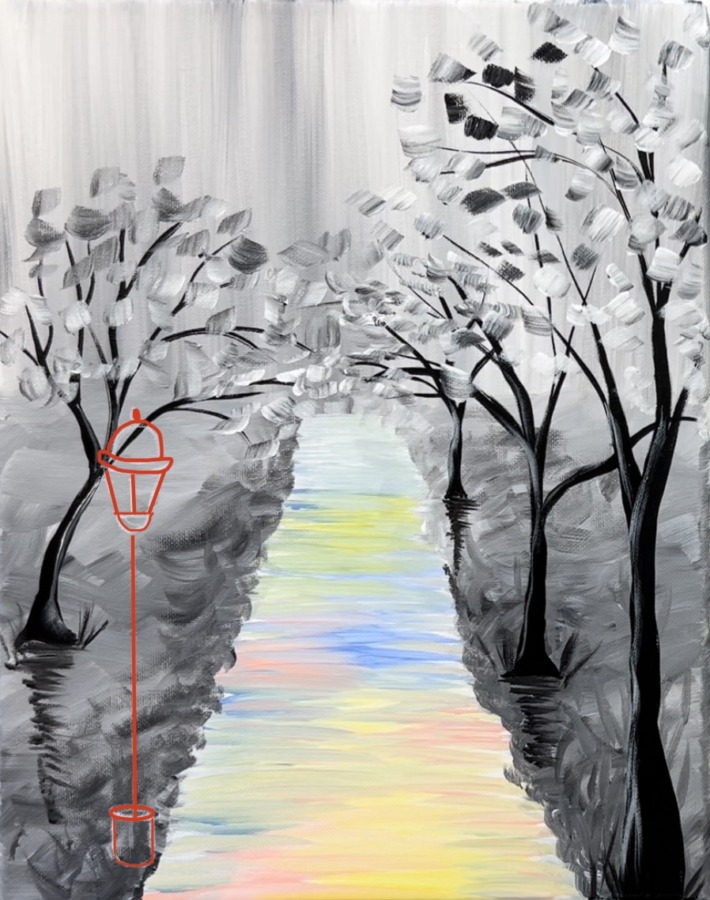
8. Draw Lampposts
Use a chalk pencil to draw the lampposts. If you do not have a chalk pencil, you can use a regular drawing pencil or color pencil.
Start by drawing the base of the post. This is a cylindrical shape. The bottom of the base is very close to the bottom of the canvas.
Next, use your ruler to draw a vertical line going up from the post. The height of the entire lamppost is approximately 7.5″. The pole itself is about 4.25″. (These measurements do not have to be exact).


Then draw a small semi-circle on the top of the pole and three lines (two diagonal and one middle vertical line.
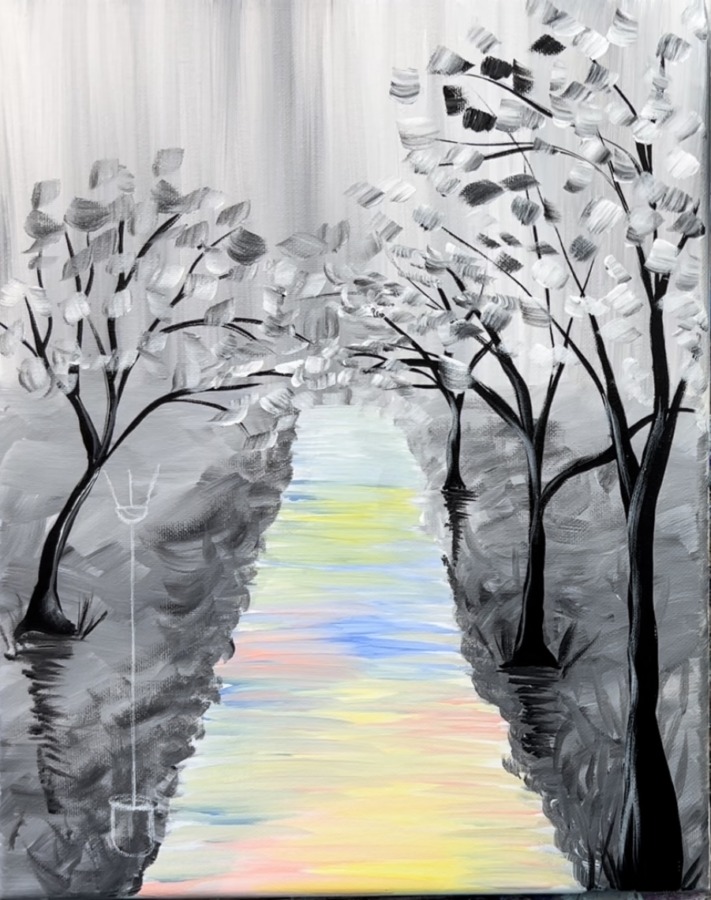
Draw the top piece of the lamp by drawing a slightly downward curved line and then another semi-circle on the top with a small notch.
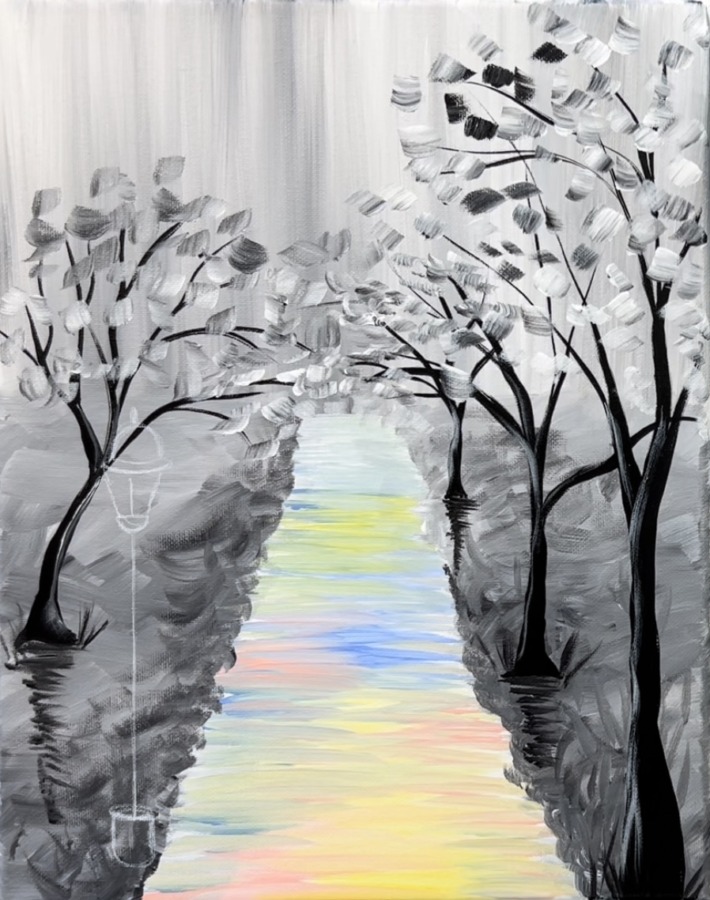
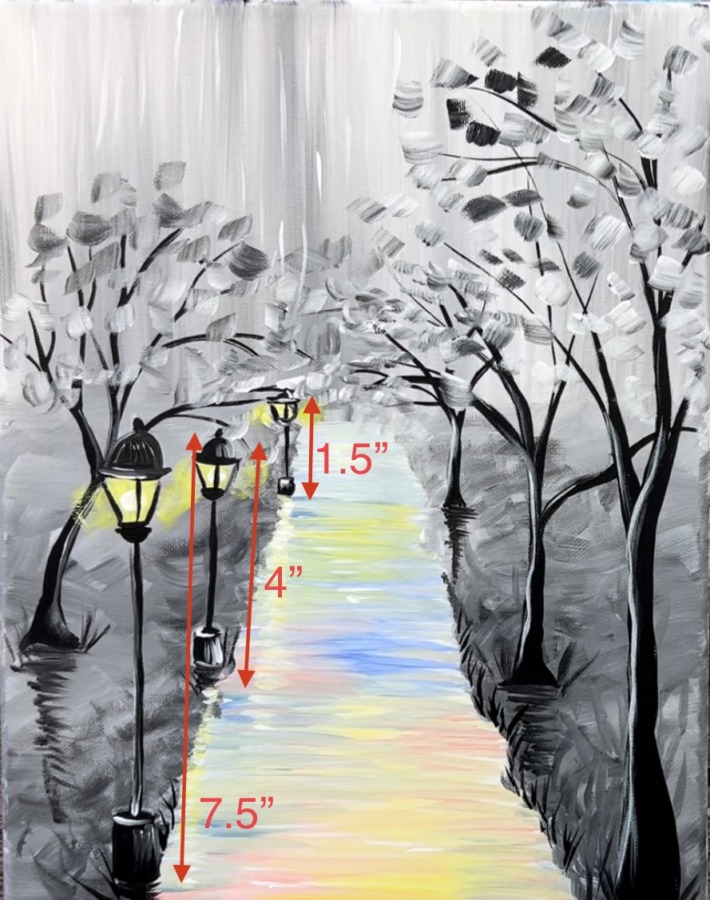
Repeat this for the next lamppost. Draw it further up the path and shorter. This one’s height is approximately 4″ and the pole is about 2″ high.
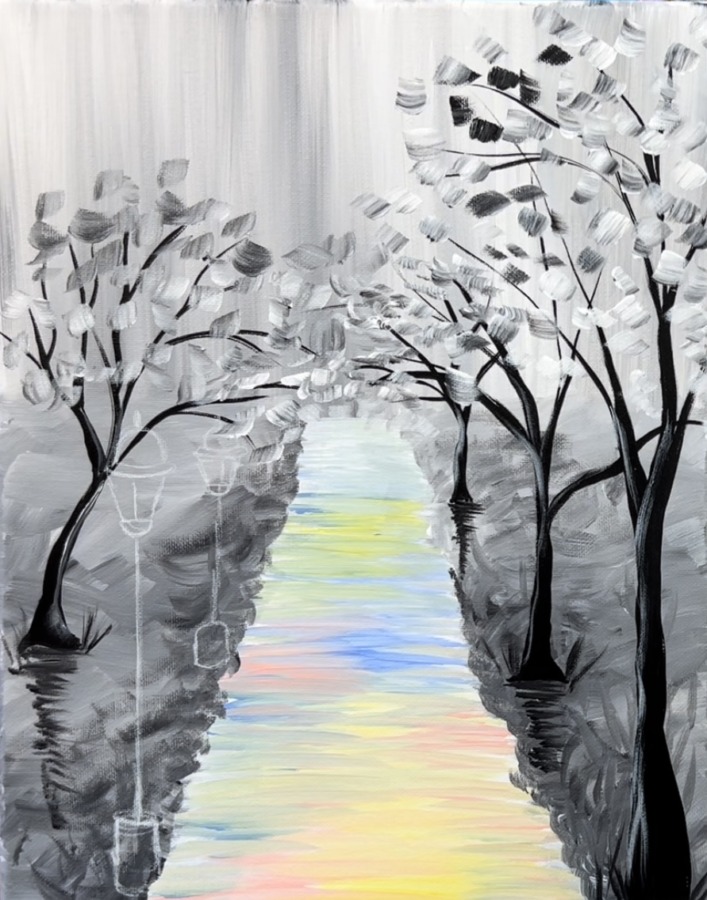
You can choose to draw the third and smallest lamppost but the white chalk pencil may not show up. That one is about 1.5″ high. Image below shows dimensions of lampposts after they are painted in.
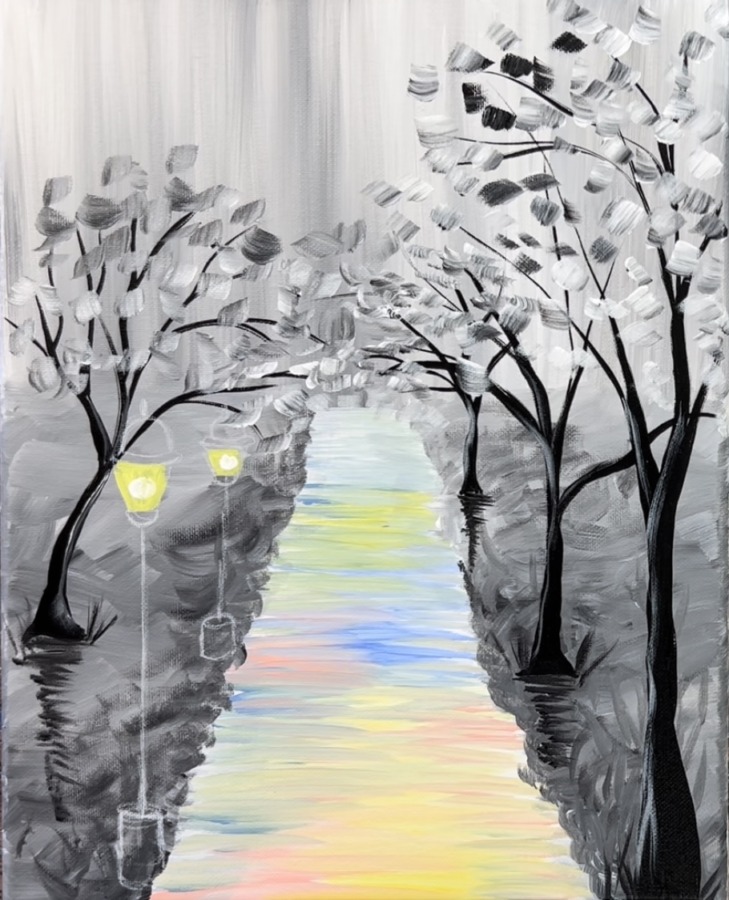
9. Paint Lampposts
Load cadmium yellow light hue and titanium white on your palette (you only need a tiny amount). Use your #4 round brush to mix the yellow and white together. Paint the inside of the lamp. Then wipe the brush off and load with titanium white. Paint a tiny circle inside the lamp over the yellow area.
Note: I painted the third lamp after I did the first two lamps.
Then paint the base, poles and light fixture with mars black and your #4 round brush. It may be helpful to add a tiny bit of water to your black to help it to flow. As an alternative, you can use a black POSCA paint pen to draw/paint your lamp.
Start by painting the cylinder base. Then paint the vertical pole line and the semi-circle. Paint the light fixture lines around the yellow light bulb area. Then paint the top piece.
Add a tiny bit of white to the tip of your brush and paint a few highlights. Paint them on the pole, the side of the base piece and the side of the top piece.
Repeat this step for the middle lamppost.
Then paint the shadows under the lampposts the same way you did the shadows under the trees. The middle lamppost’s shadow only goes down a small amount. In a later step, we can paint light reflection on the path from this lampposts.
Then paint your third lamppost. This one is about 1.5″ high. You may need to switch to a smaller round brush for this step or use a POSCA paint pen.
Next, paint the glow that goes around the lampposts. Load your #4 round brush in cadmium yellow light hue and a little bit of titanium white. Then wipe your brush off. Paint curved strokes that go around the light. These strokes should look dry and go in a curved direction.
10. Paint Rain
This is an optional detail step. Use your #8 round brush (or any brush with a very fine point). Loosely paint vertical white strokes in the upper left sky area. These do not have to be consistent lines. They are loose/ broken lines. You can overlap some of the tree area with your lines as well.
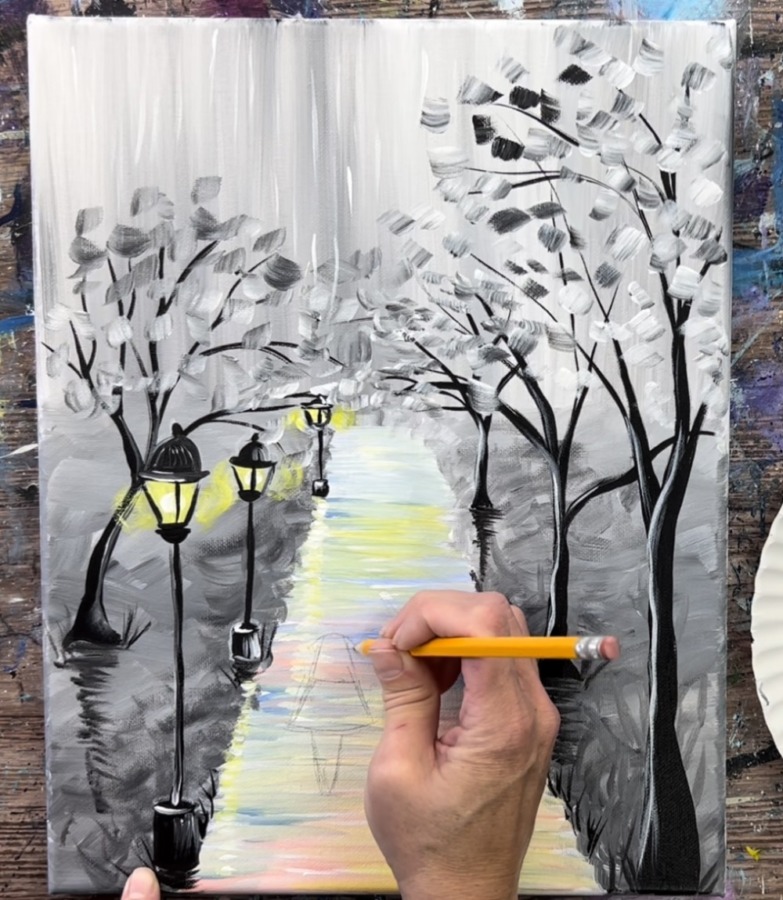
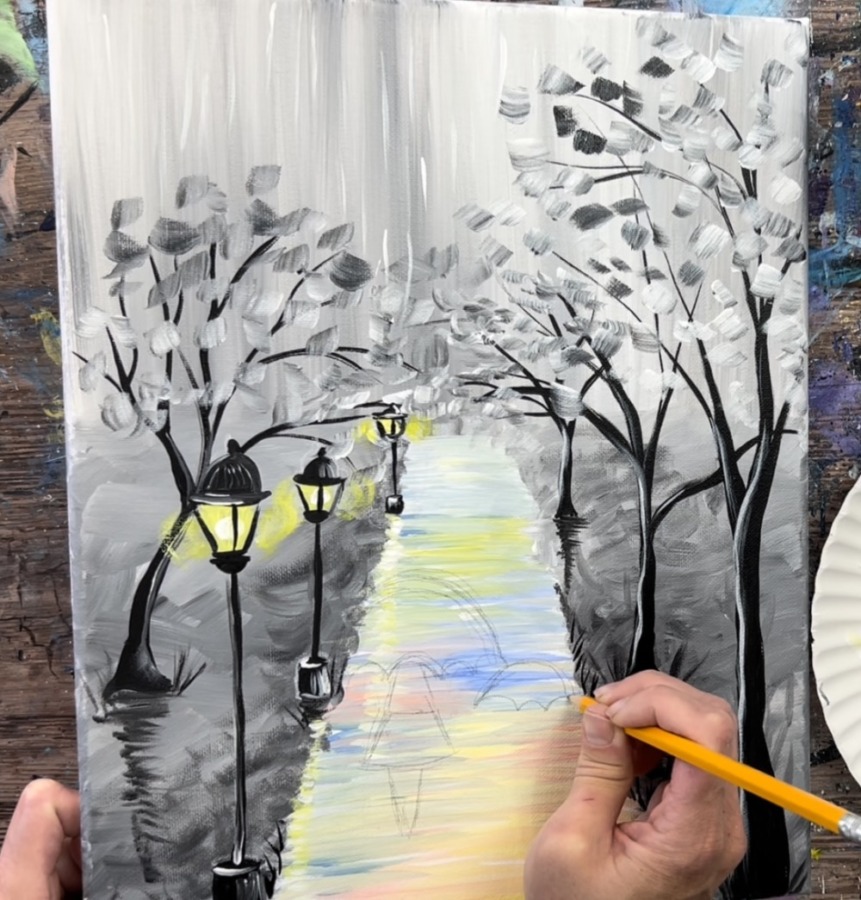
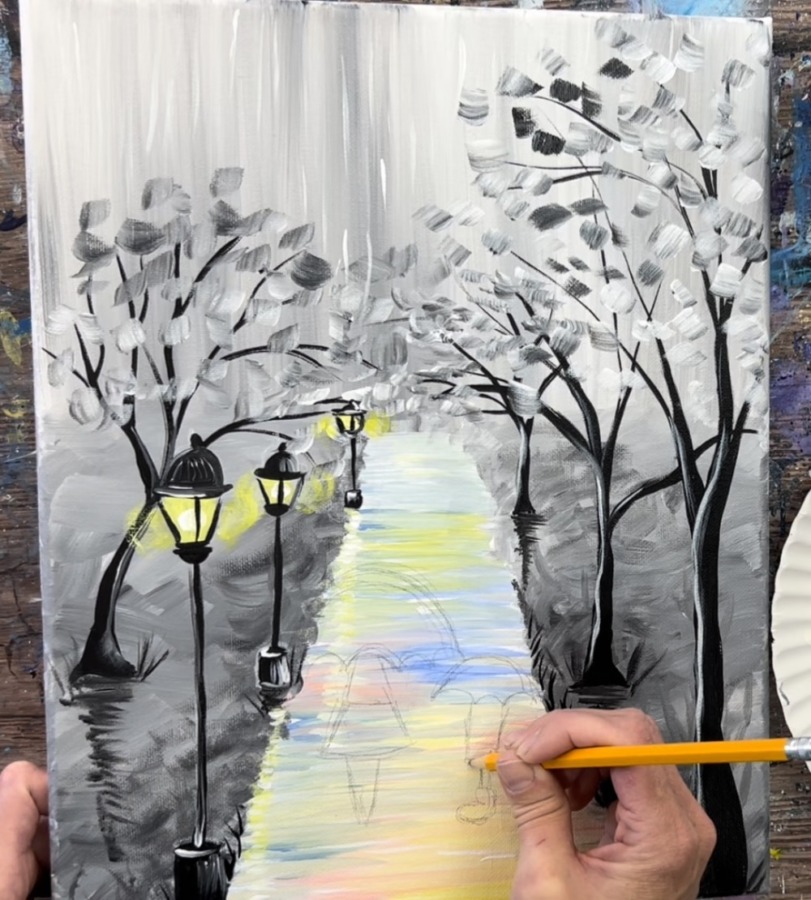
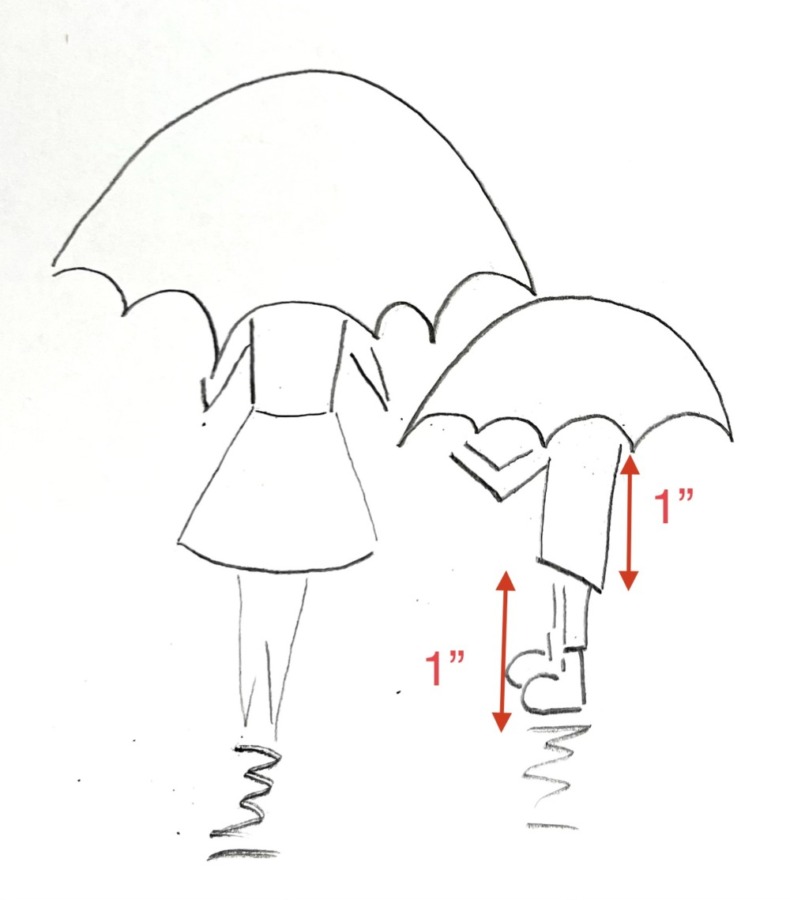
11. Draw Mother And Child With Umbrellas
Sketch lightly with a pencil for this drawing portion. Remember that this style of painting is loose/ abstract. You don’t have to make these figures look perfect! I have given you dimensions below of my drawing. These are just estimates and you don’t have to be exact! You want to position your mother and child so they are about an inch and a half from the bottom of the canvas.
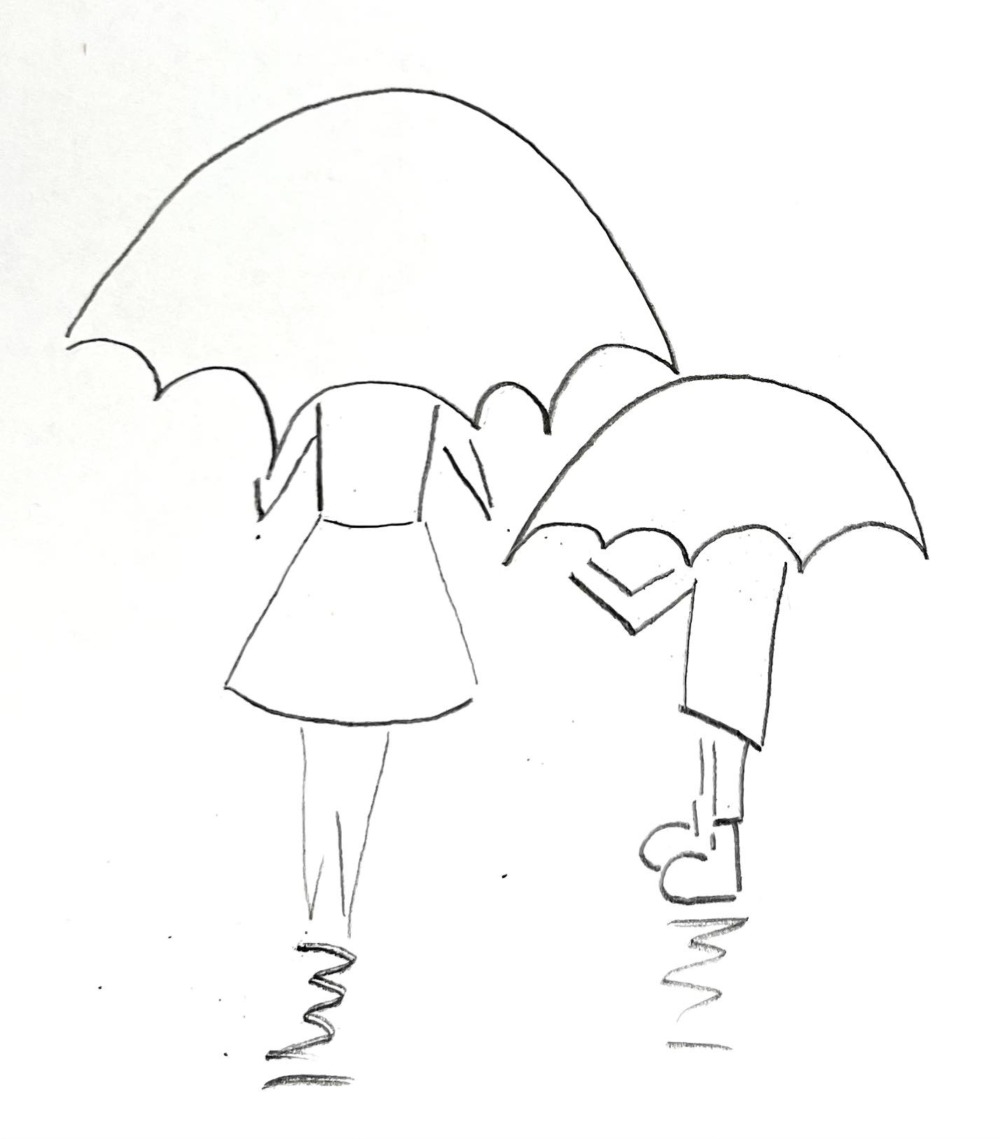
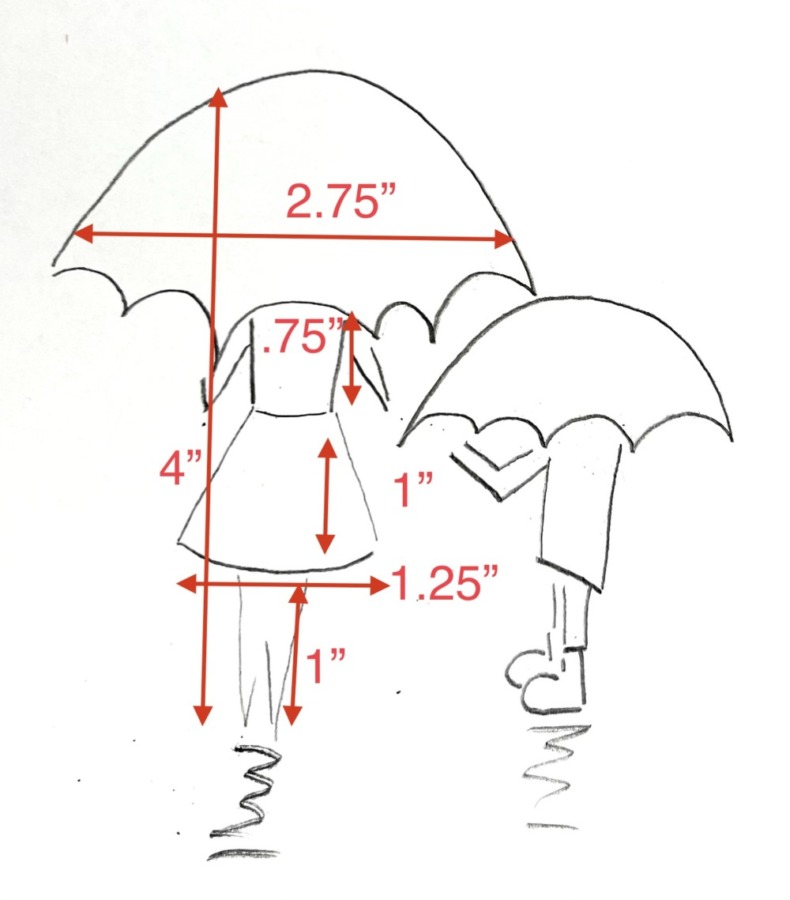
Start at the bottom and draw the mother’s legs. The bottom points of her legs are about 1.5″ from the bottom of the canvas. Draw a very narrow vertical triangular shape. We don’t see her feet in this.
Then draw the bottom of her coat/skirt. This is about 1.25″ wide and about 1″ high. Her torso is about .75″ high.
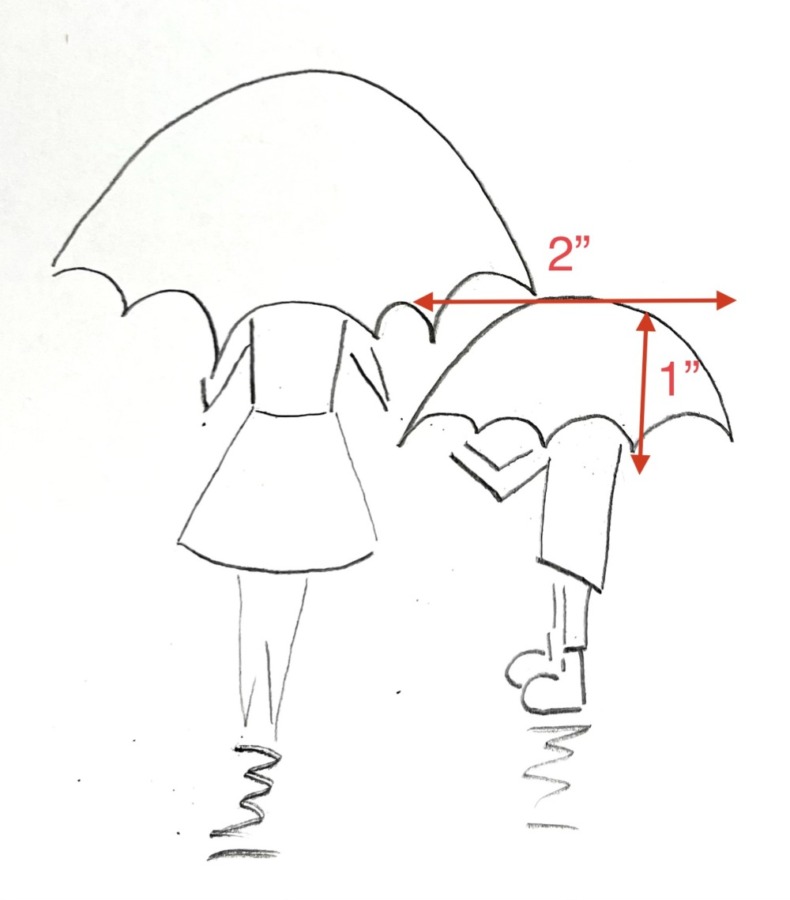
Next draw the umbrella. Draw a large curve with scalloped lines. The height of the umbrella from the bottom points to the top middle curve is about 1.5″ high. Remember, these are only estimates and yours does not have to be the same as mine.
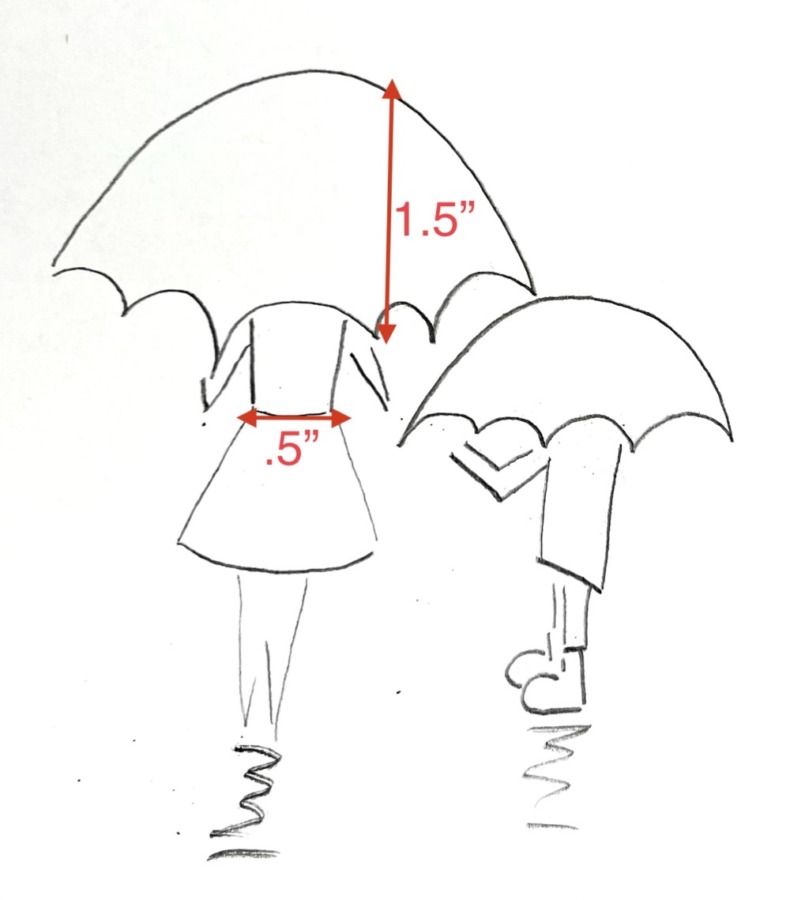
Then draw the child. He is to the right of the mom and the umbrella needs to be lower than hers. Start with the umbrella this time… Draw a curve that is smaller than the mom’s umbrella and then draw the scalloped lines on the bottom.
Then draw the boy’s rain coat. This goes down about an inch and the bottom line of the rain coat goes slightly diagonal upwards.
Draw loose vertical rectangle for the legs and then draw a simple rain boot. Draw the second rainbow behind the first and another loose vertical line for the leg. Then draw an arm with the elbow bent reaching out to the mother’s arm.
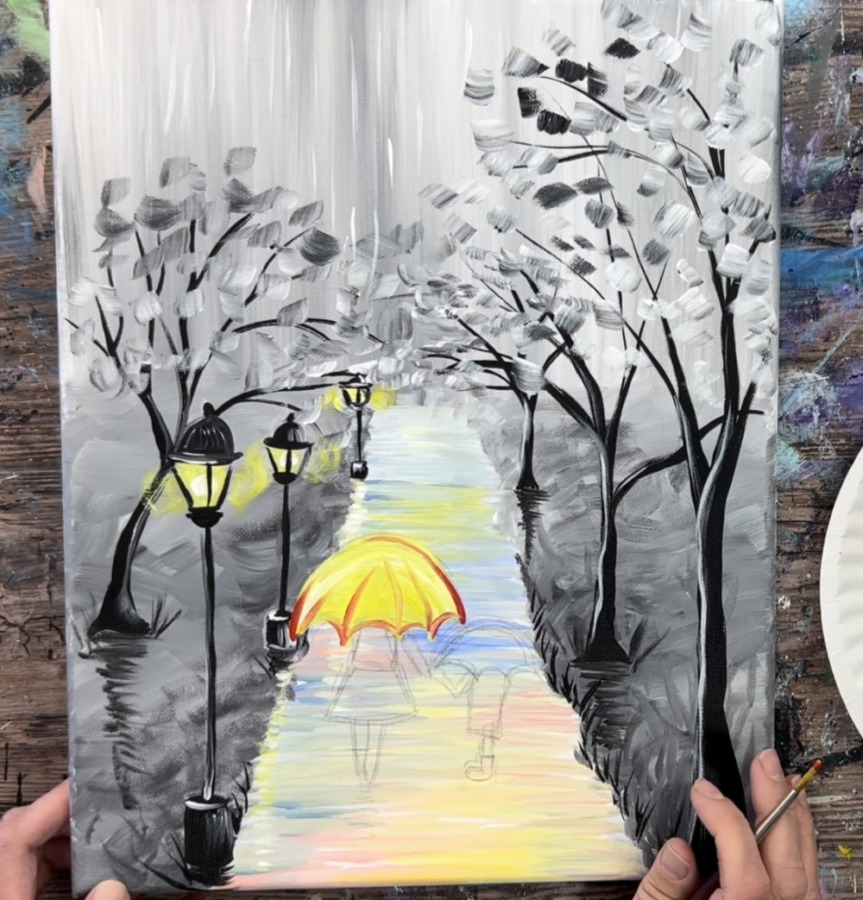
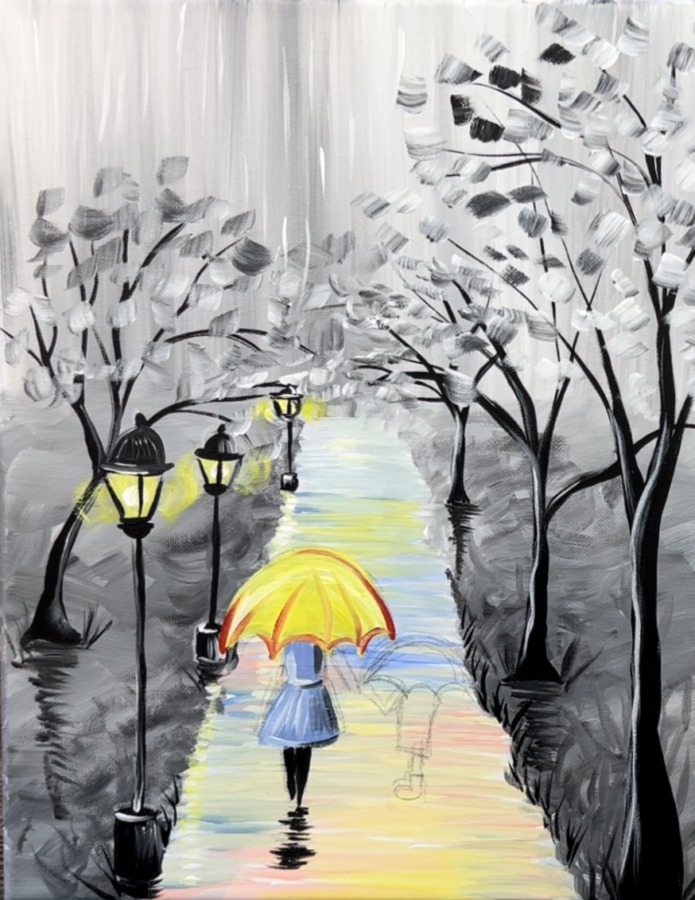
12. Paint Mother & Umbrella
Load your palette with cadmium yellow light hue and titanium white. Mix about 2 parts yellow to 1 part white. Paint the shape of the umbrella with a # 4 round brush. Then paint a few strokes with just titanium white to “highlight” the umbrella.

Then load your brush with cadmium red medium hue. Wipe the brush off. Then load the tip of your #4 round brush with cadmium red medium hue. Loosely outline the umbrella outer edges (this doesn’t have to be completely outlined). Then loosely outline the bottom scalloped lines and the middle lines that curve.
Then paint the torso and bottom part of the coat/skirt with light blue violet.
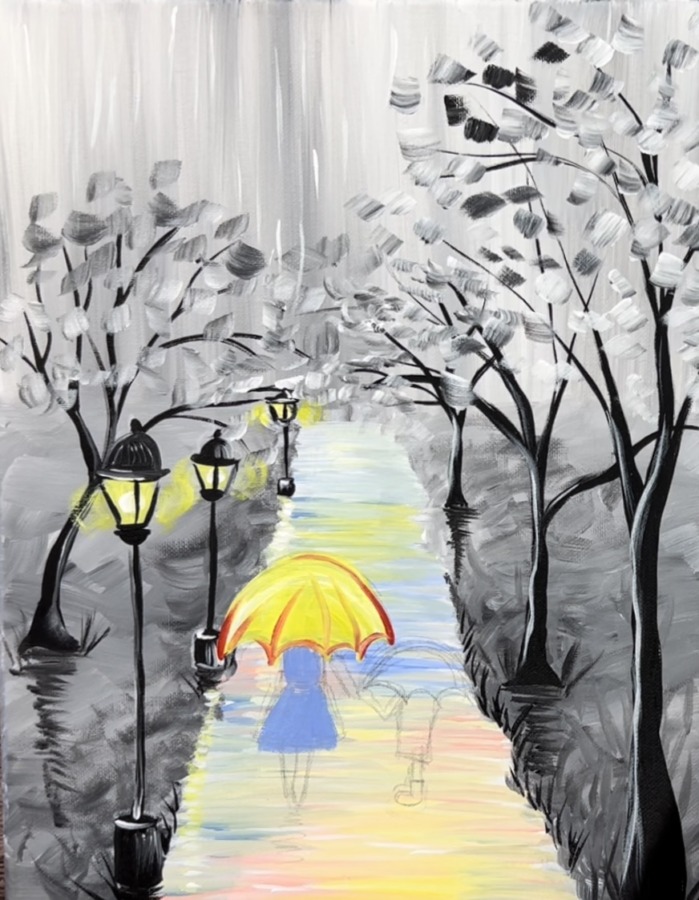
Highlight and darken the coat with white and black. Lightly paint white on the left side of the coat. Then lightly paint black on the right. Blend it slightly with the light blue.
Then paint the legs. Loosely paint the vertical triangular pieces shapes. Then loosely paint left and right horizontal strokes under the legs going in a vertical direction.
13. Paint Child And Small Umbrella
Next, paint loose light blue violet strokes on the path towards the bottom for more reflection.
Paint the child’s umbrella red (or other chosen color).
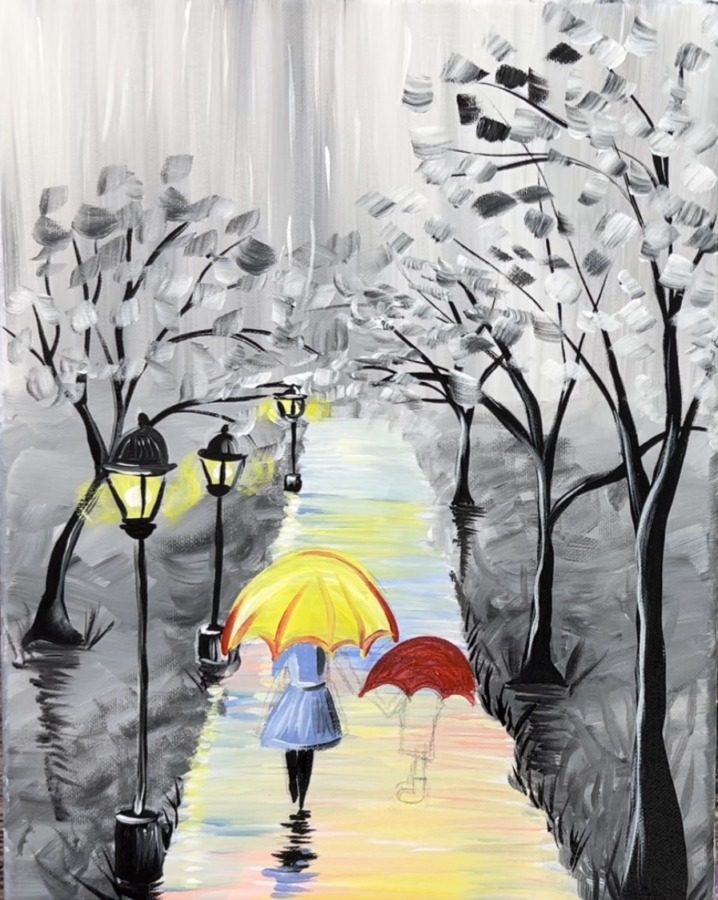
Then use white to loosely outline the umbrella and the curved lines on the inside part of the umbrella.
Then loosely paint black outline on the bottom and right of the umbrella.
Paint the coat using the #4 round brush and cadmium yellow light mixed with a little white. Paint the rain boots as well. Note: it won’t show up very well until we loosely outline the coat and boots with black.
Then paint the legs with black. Loosely outline the boots.
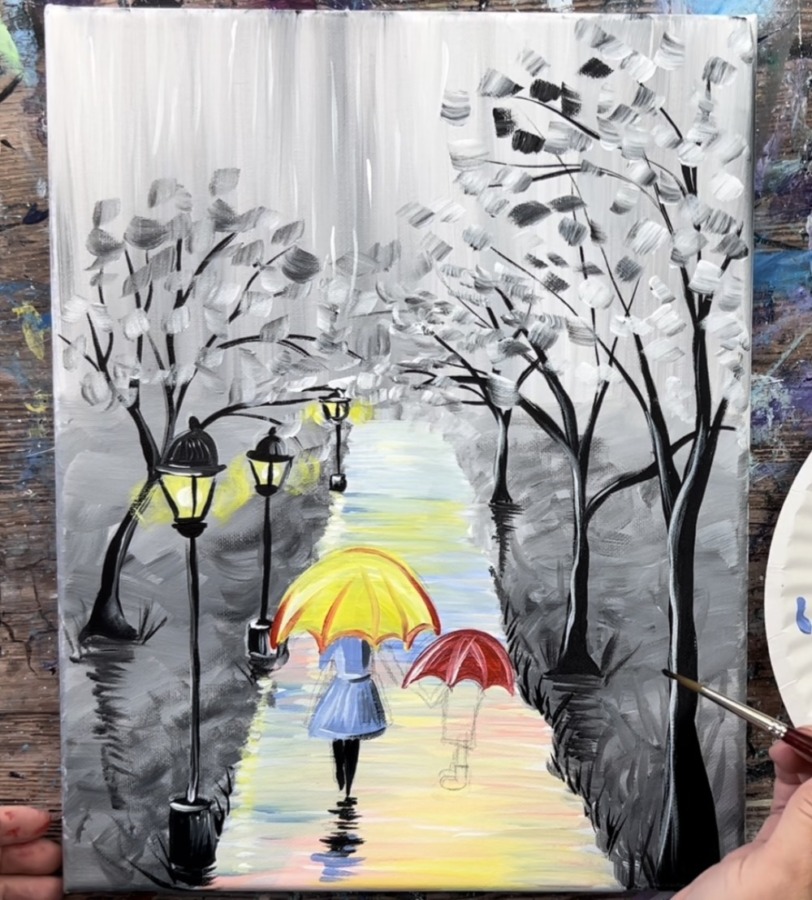
14. Final Touch Ups
Some final touch ups you can do include: painting more vertical rain lines around the lanterns, some more grass textures, white highlights on the umbrellas and raincoats. Also, paint the reflection under the boy using the same reflection techniques
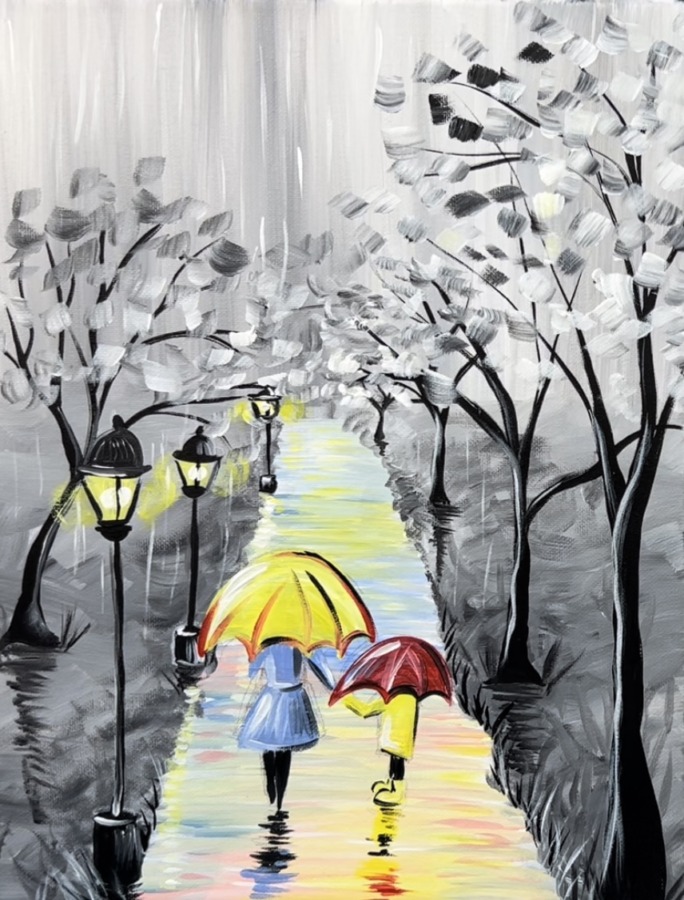
Finished!
Share Your Art Here


