


Would you like to save this?
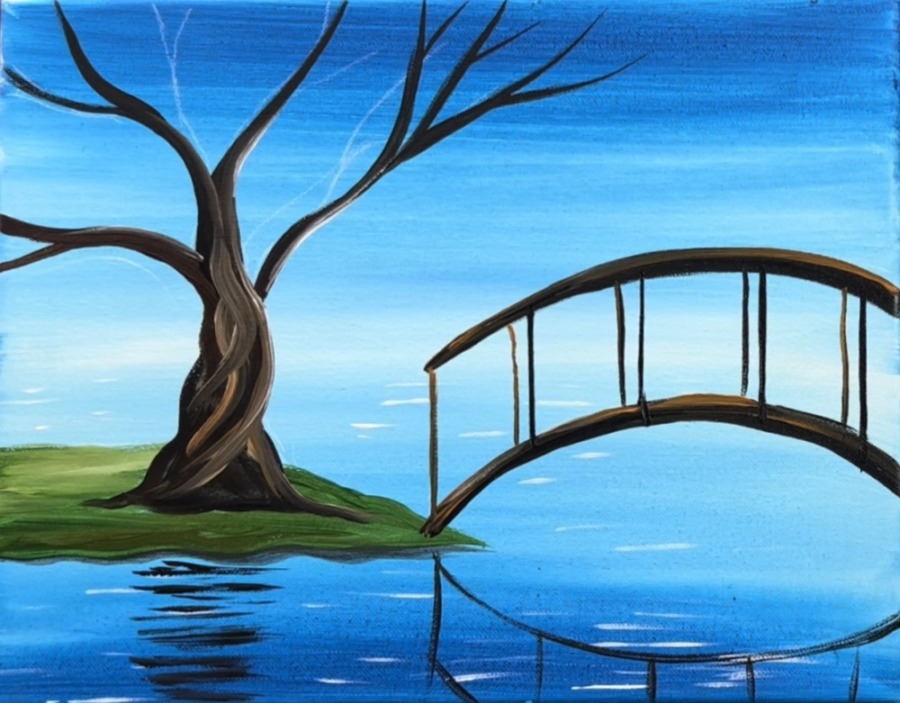
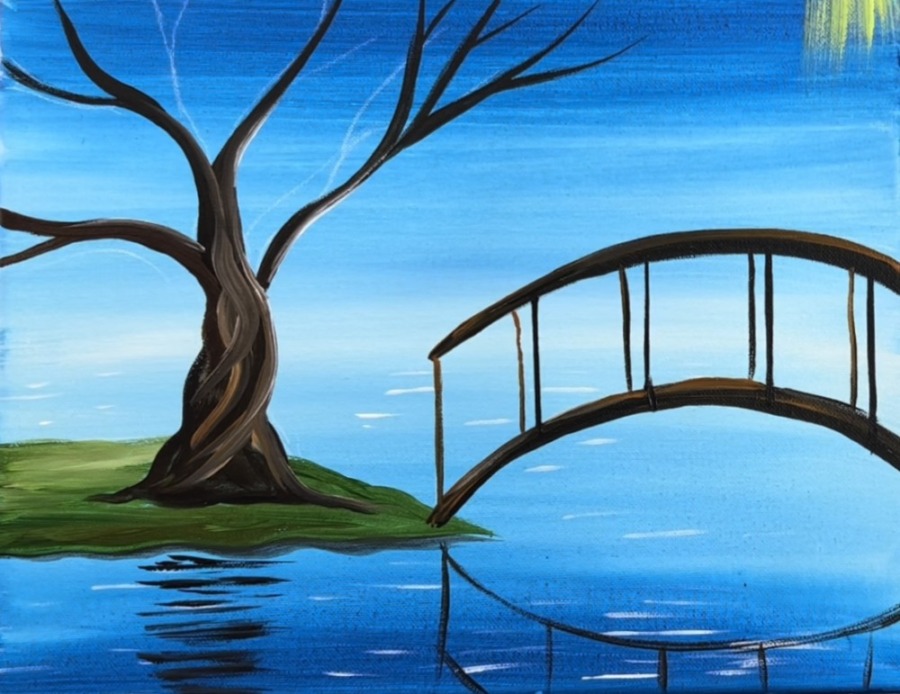
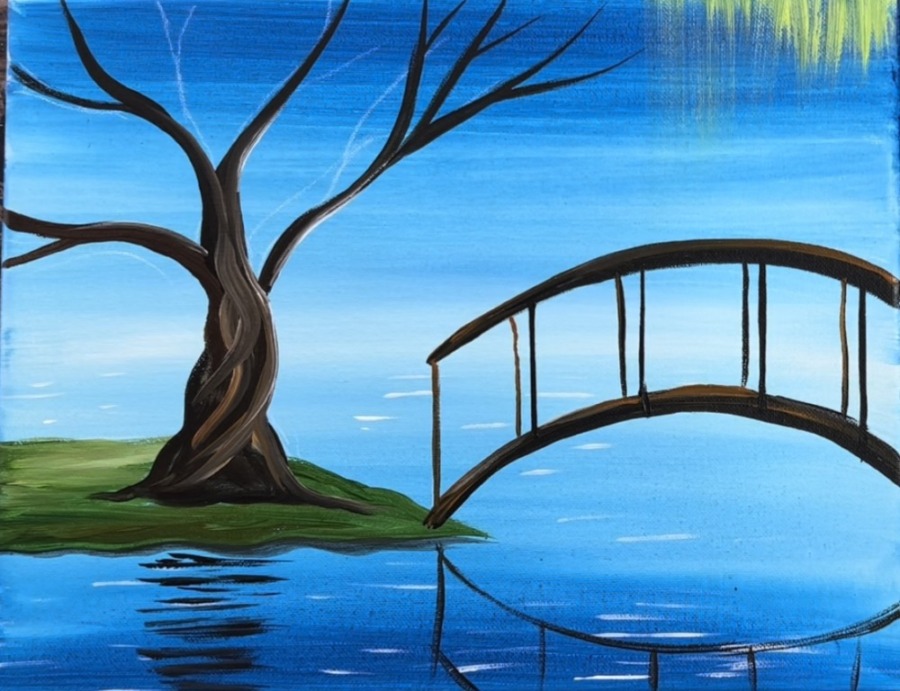
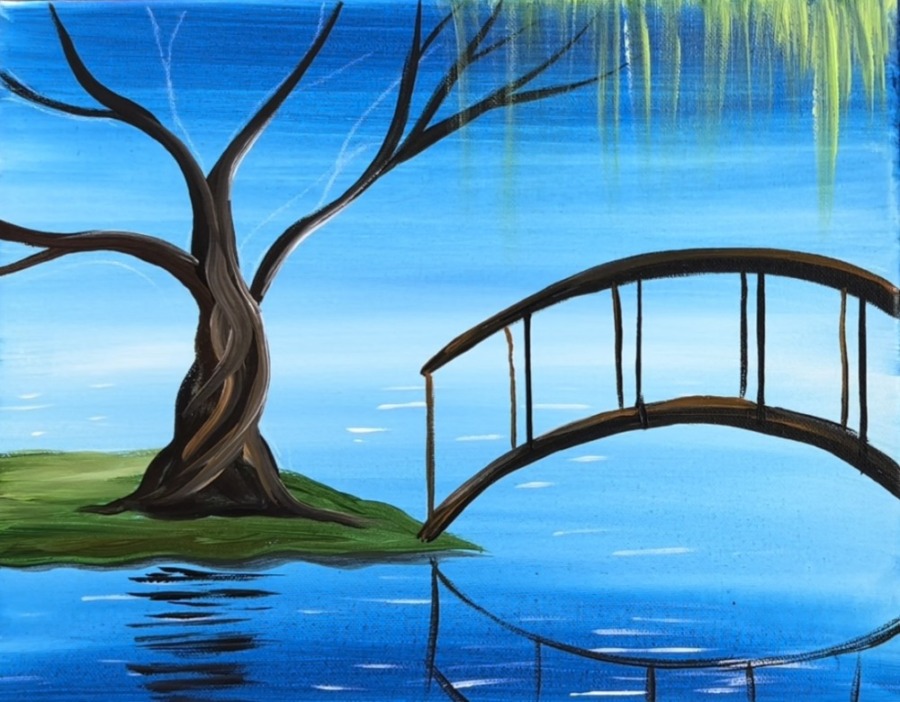
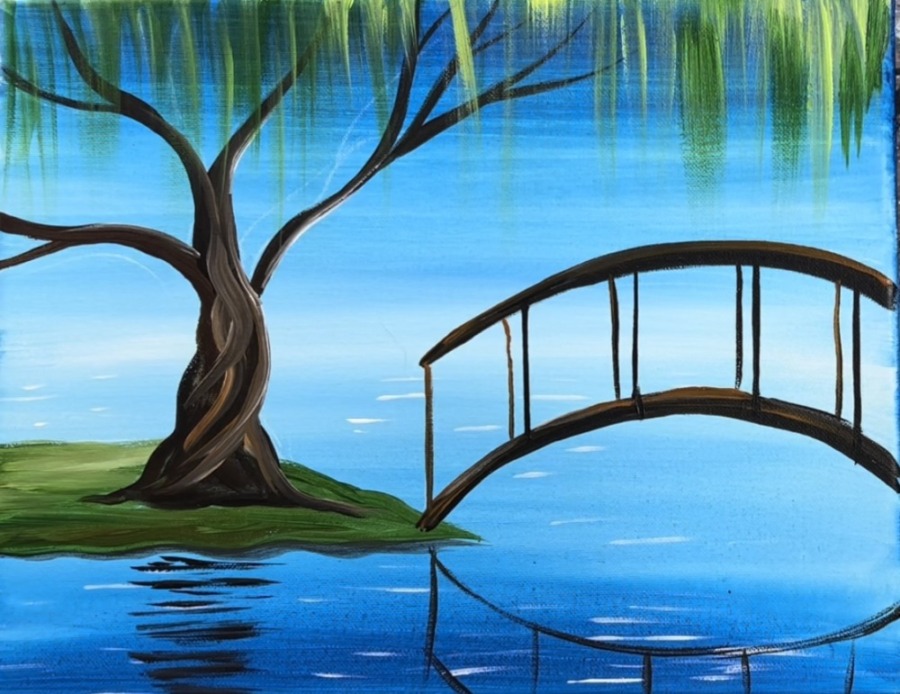
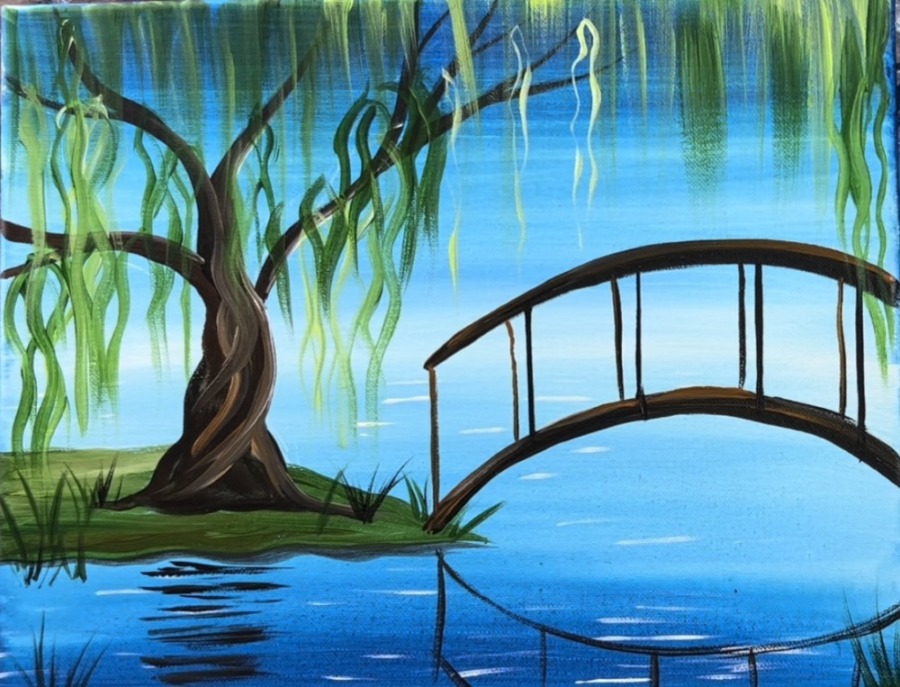
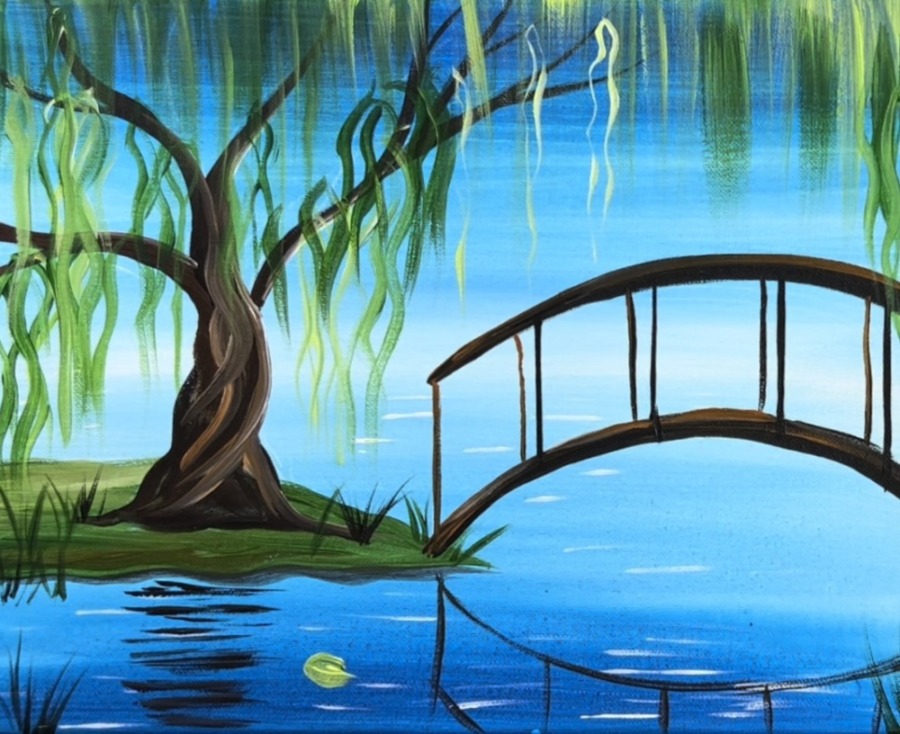
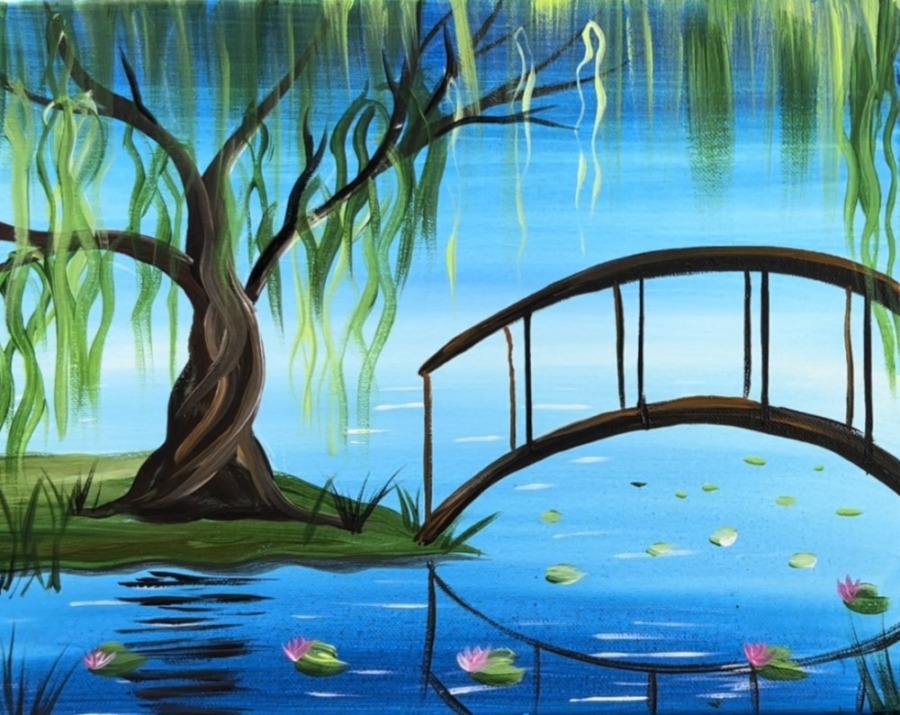
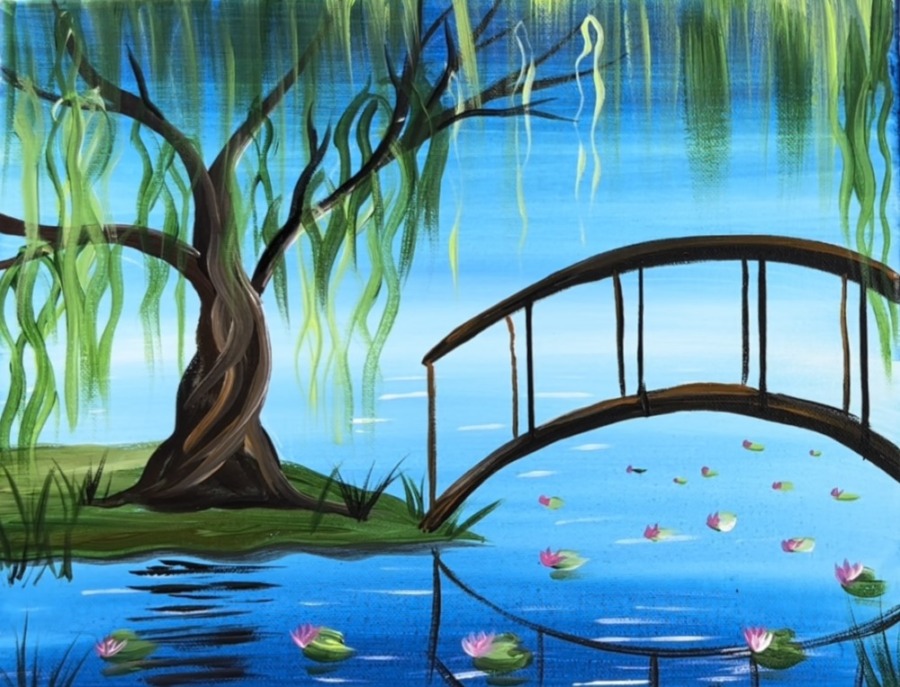
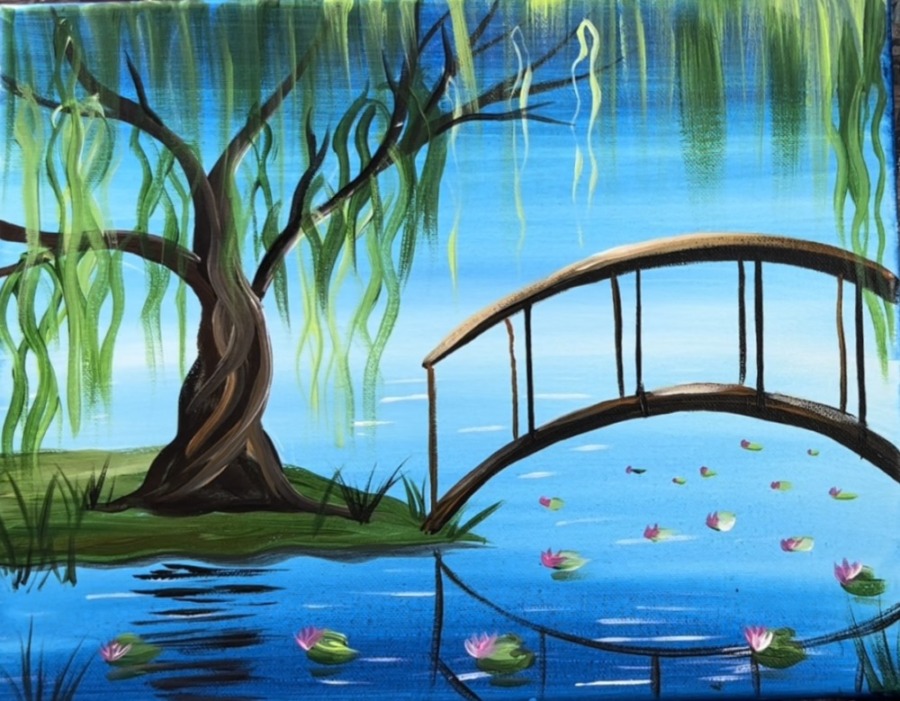
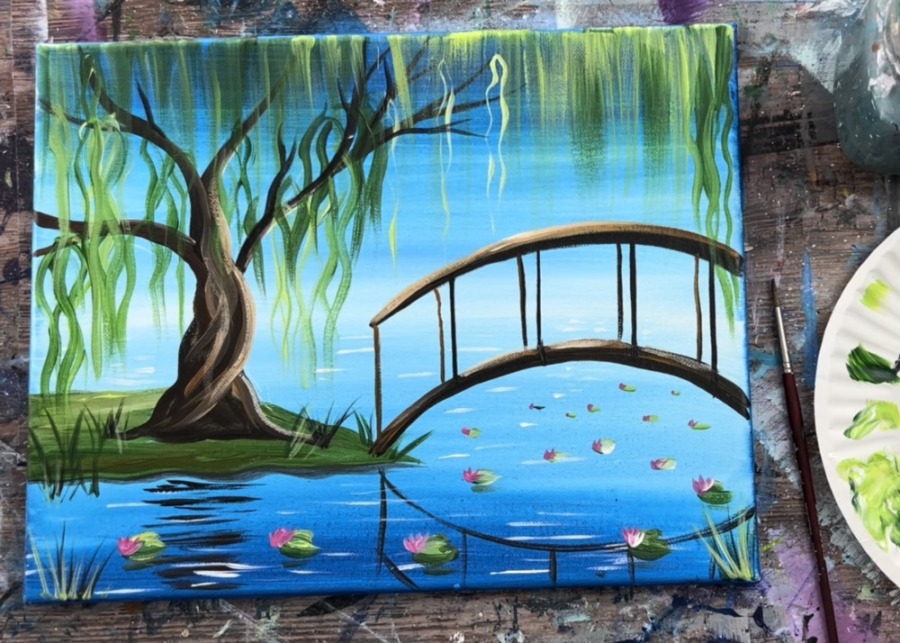
This painting tutorial will demonstrate how to paint a bridge over a pond of lily pads next to a twisty willow tree.
This is an easy and simple beginner level painting! The style of it reminds me of Monet’s Water Lilies Paintings which are an impressionistic style of painting.
Enjoy and happy painting!
Materials:
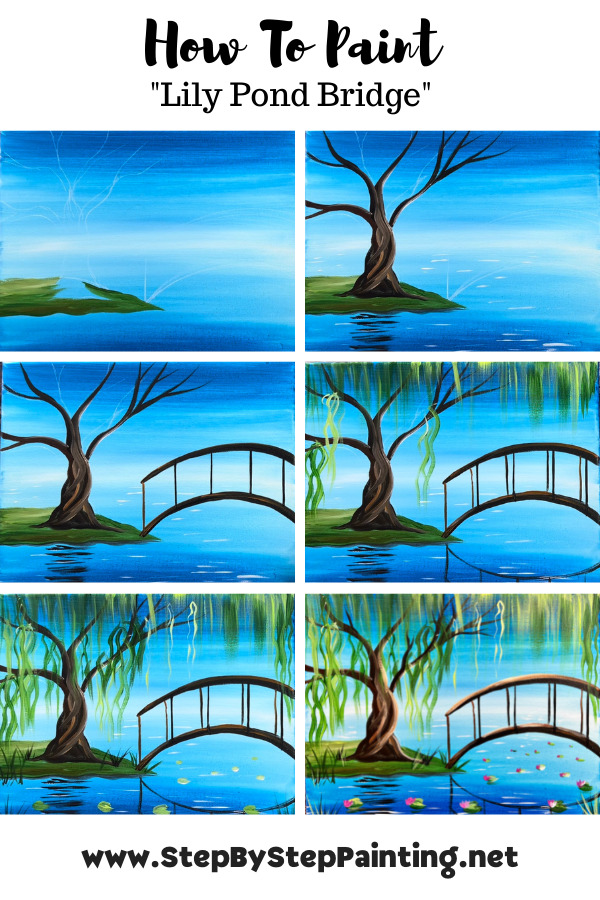
Lilly Pond Bridge Painting Tutorial
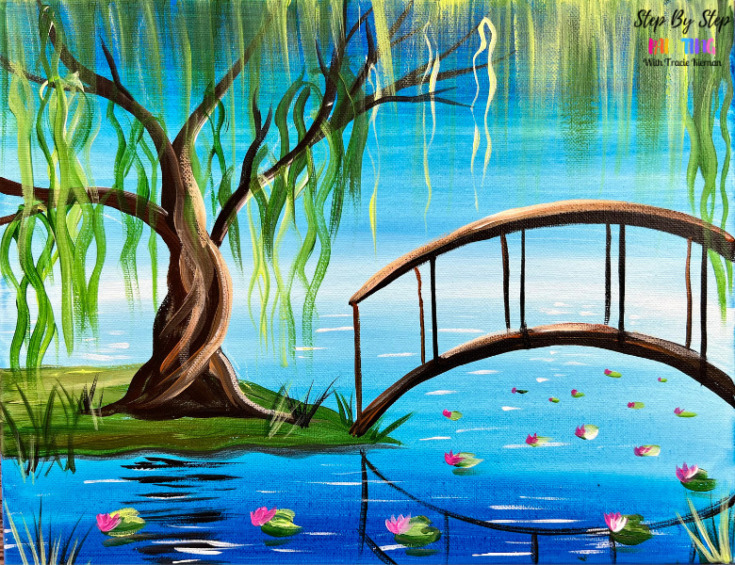
Learn to paint "Lilly Pond Bridge". This is a simply, impressionistic style painting of a willow tree next to a pond and a bridge.
Materials
- 11 x 14 Canvas
- Acrylic Paint
- Brushes
- Chalk Pencil
- Ruler
- Water Cup
- Palette
Colors
- Hooker's Green Hue Permanent
- Brilliant Yellow Green
- Titanium White
- Mars Black
- Medium Magenta
- Phthalo Blue
- Raw Sienna
- Burnt Umber
Brushes
Color Palette:
I used Liquitex BASICS acrylic paints. All the colors you would need for this painting are in this pack!
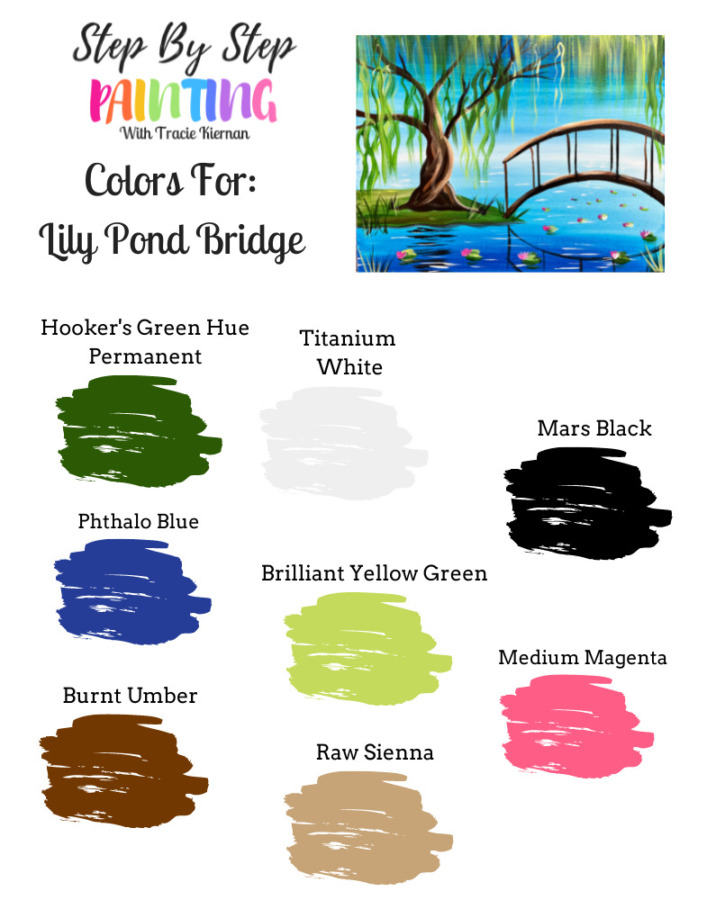
Using Craft Paints?
If you are using craft paints such as the Apple Barrel Craft Paints, I would recommend subbing with these colors:
- Black
- White
- Holly Branch
- New Shamrock
- Too Blue (or Bright Blue)
- Nutmeg Brown
- Melted Chocolate
- Bright Magenta
Directions At A Glance:
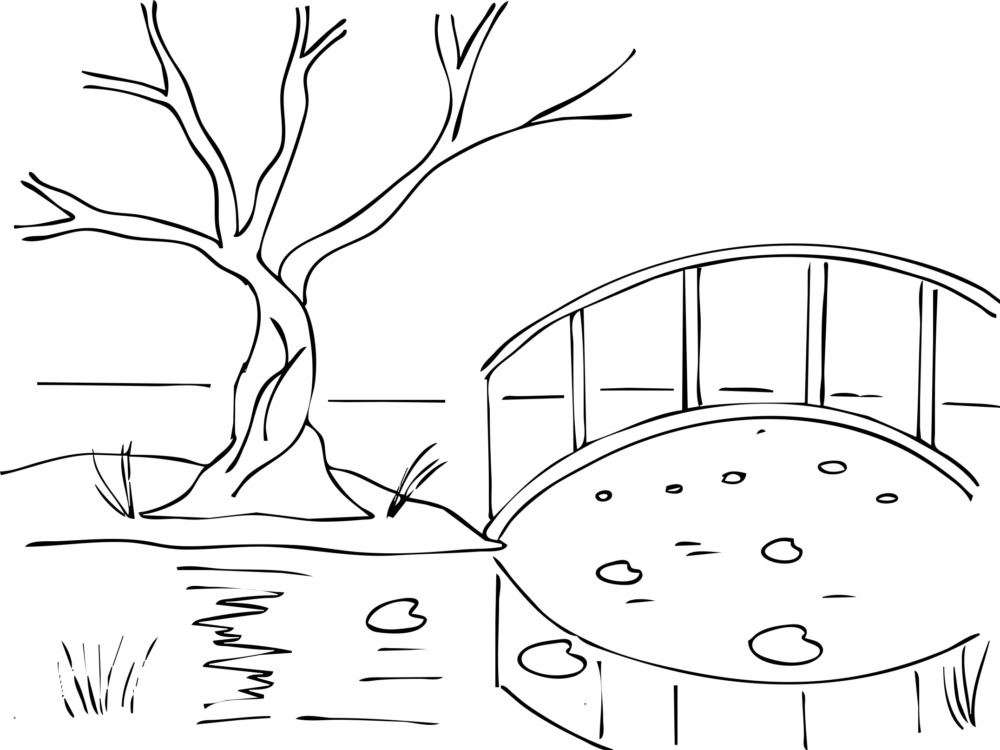
Traceable:
Video:
Step By Step Instructions:
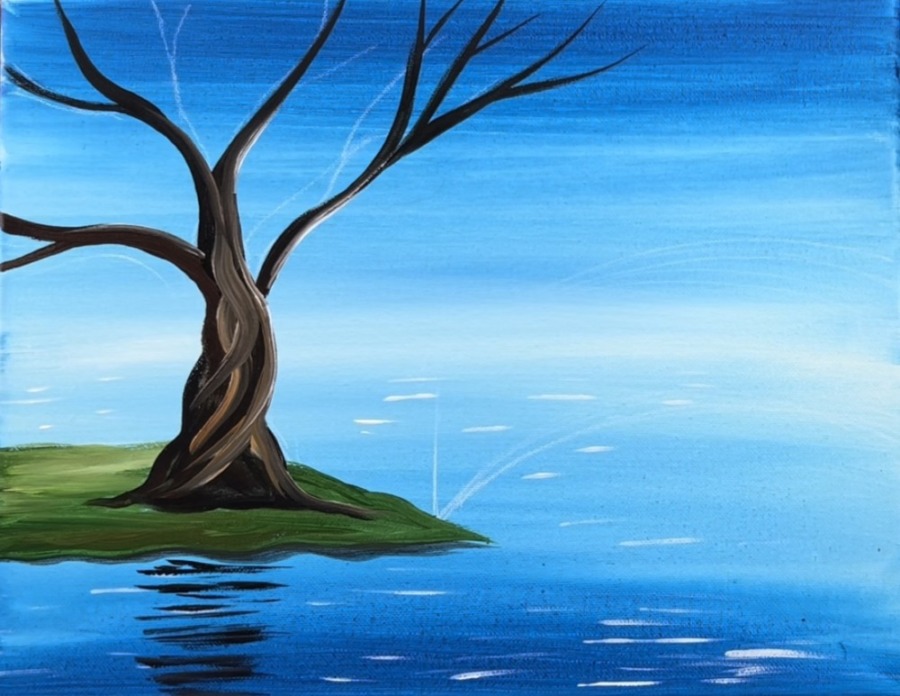
1. Paint Background
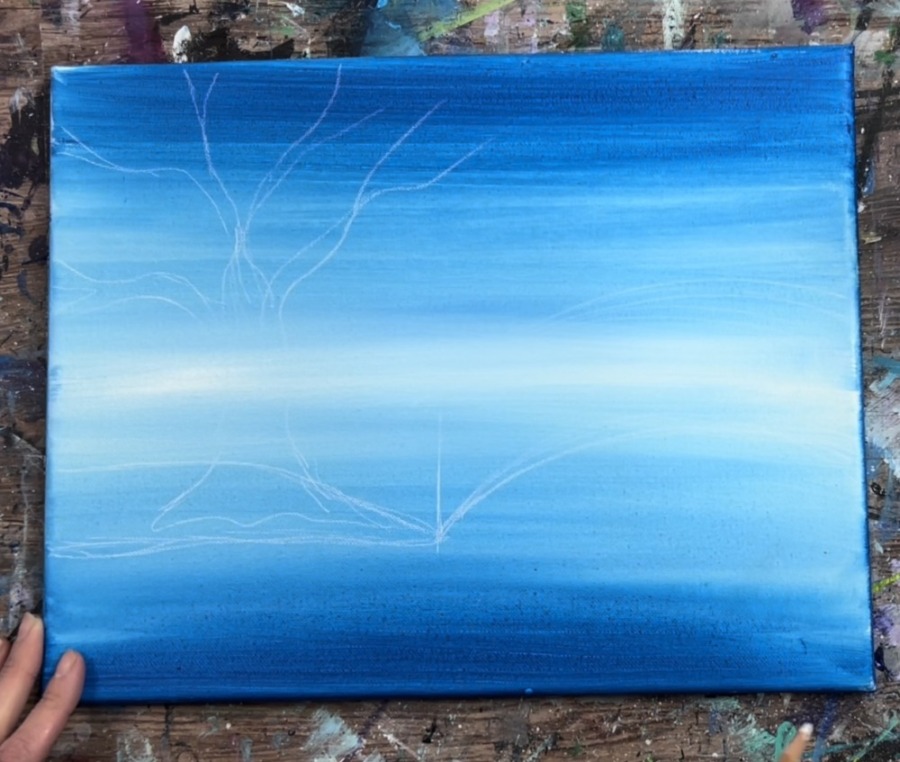
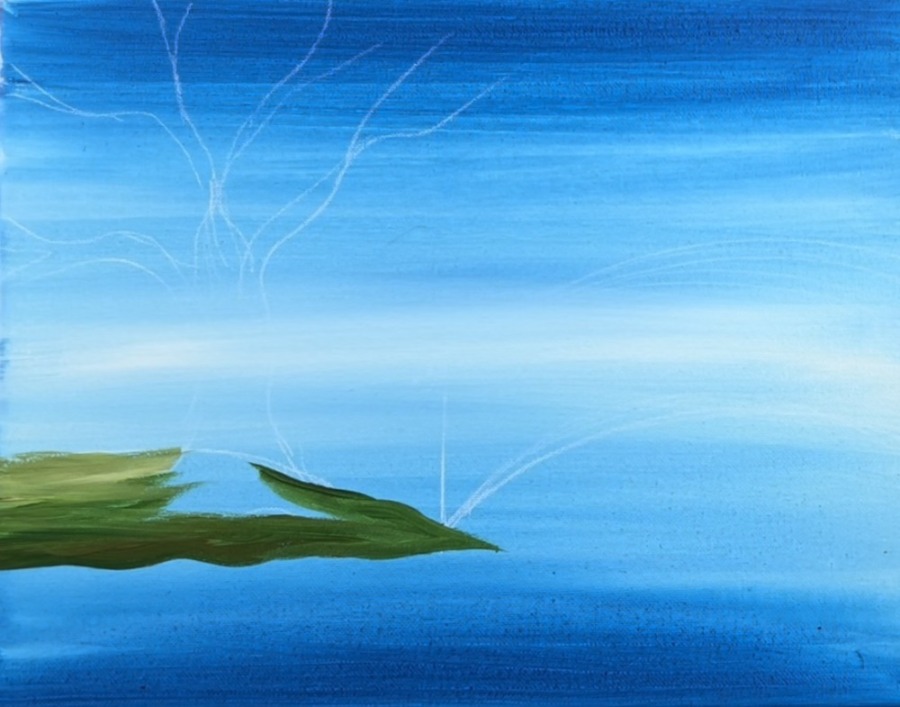
Use a fine mist spray bottle and/or a clean wet paint brush to apply a thin layer of water onto the canvas. This is going to allow the paint to flow, blend and be very thin for the background.

Next, load your 3/4″ flat wash brush in phthalo blue. Start at the bottom. Paint left and right strokes across the entire canvas. Let the paint fade out as you approach the middle of the canvas. Then load your brush in titanium white and blend that in the middle of the canvas.
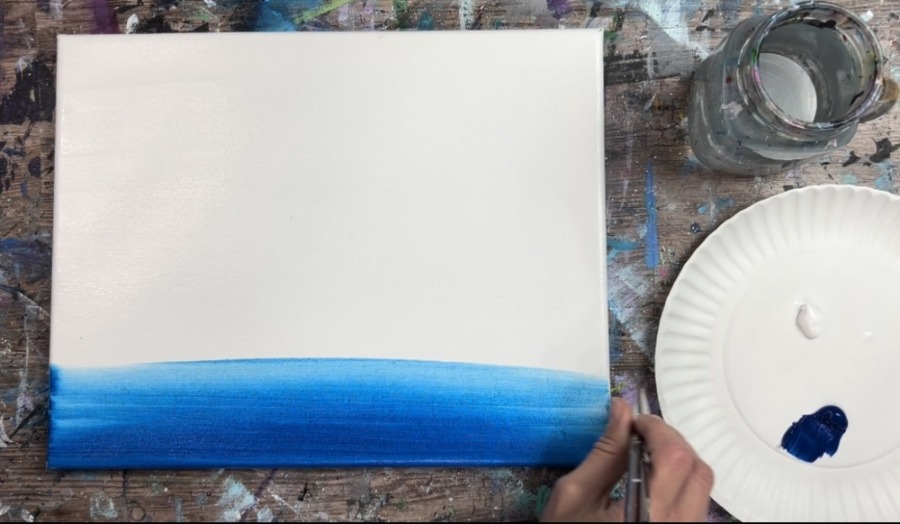
Tip: measure where the middle of the canvas is. This brighter part is where the horizon line is. If you want, you can draw a light horizontal line across the canvas in the middle with a pencil.
Repeat this technique for the top of the painting. Start at the top and apply the phthalo blue across the canvas. Let the paint fade out as you approach the middle. Then add white to the brush in the middle of the canvas.

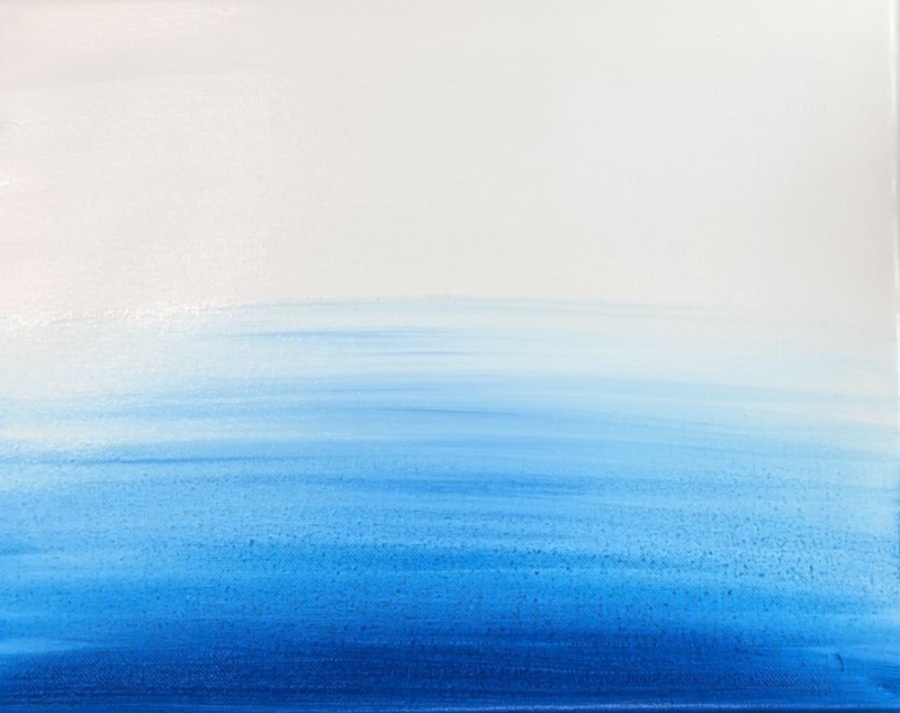
The entire canvas should be a gradient of blue that goes lighter in the middle of the canvas and then dark again on the bottom.
2. Draw Composition
Wait for the canvas to dry.
Use a chalk pencil to lightly sketch the composition of the tree, the land and the bridge. You don’t have to be detailed with your drawing and it doesn’t have to be perfect! It is only a guideline to help you paint the main features.
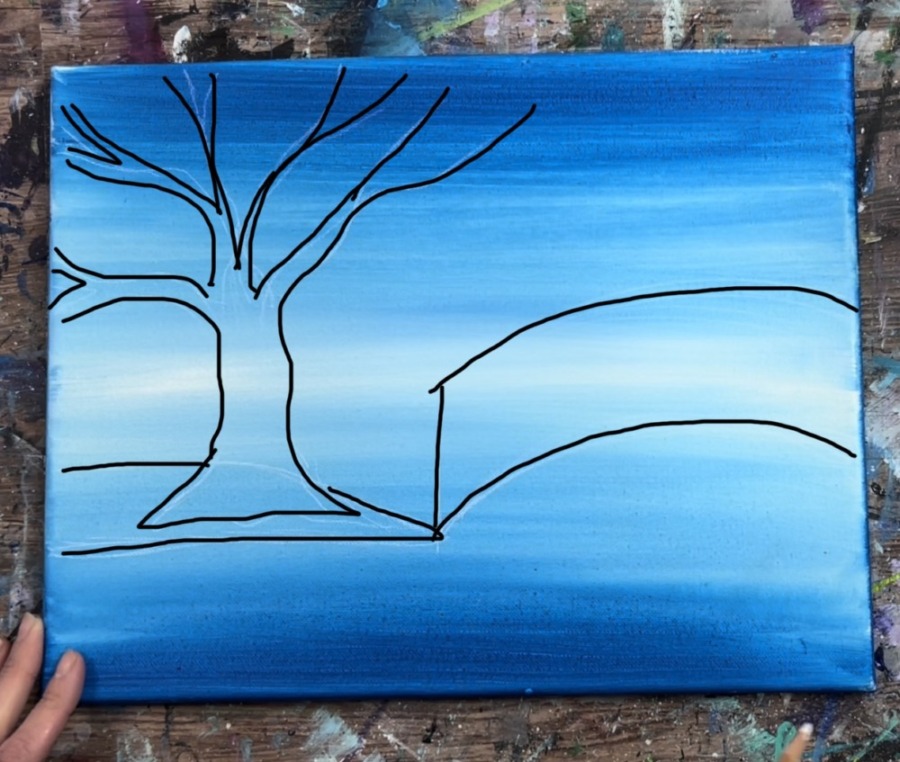
Start by drawing the “peninsula” where the willow tree will be growing on. Draw a “short, narrow hilly area” in the mid point of the water area below the horizon line. The width of this peninsula is about 7″ wide.

Then draw the arch and far left vertical line of the bridge. The vertical line starts on the edge of the land.
You don’t need to draw all the vertical lines on the bridge, just the one. Also, the bridge is about 2″ high. Draw the other arch above the bottom arch.

Then lightly sketch your tree starting at the base. Draw your branches so the tree goes outwards into three main branches. Then draw smaller branches that go outward. The willow tree is very “twisty” so try to draw wavy lines for these branches.
3. Paint Peninsula
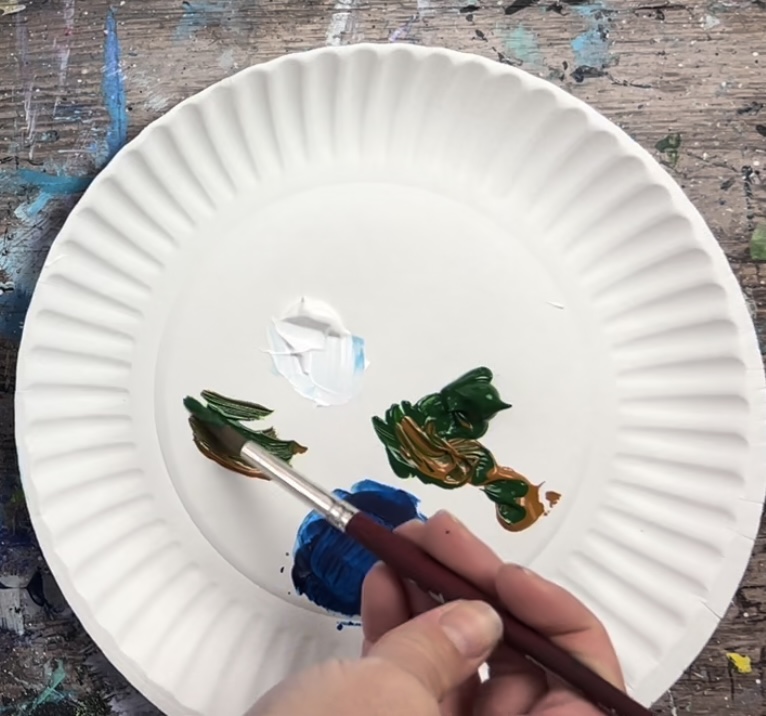
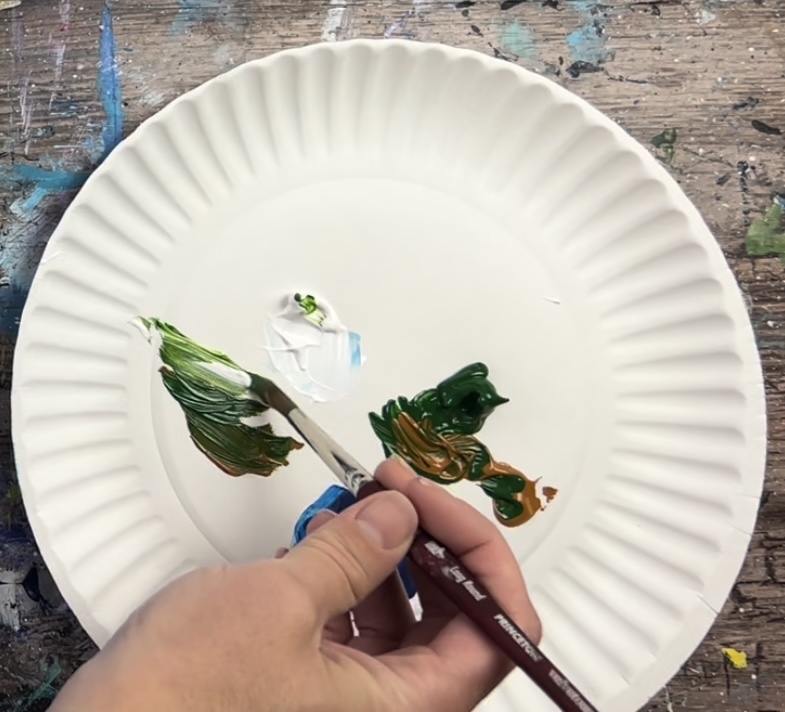
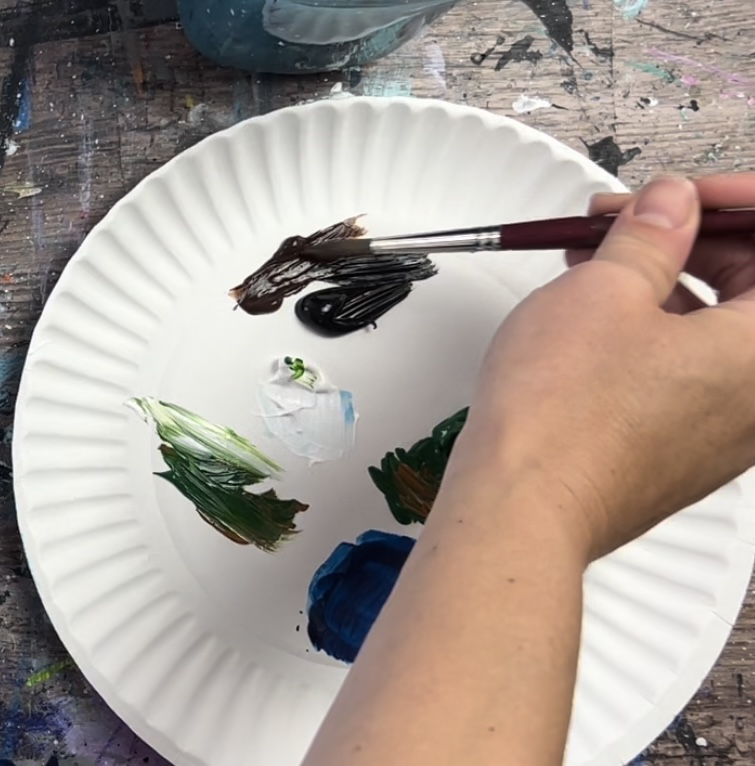
Load your palette with hooker’s green hue permanent and raw Sienna. Use your #8 round brush and mix equal parts of the brown and green together. It will make a dark/ brown green color.
Start on the bottom of the land area. Paint loose, left and right strokes under your willow tree roots.
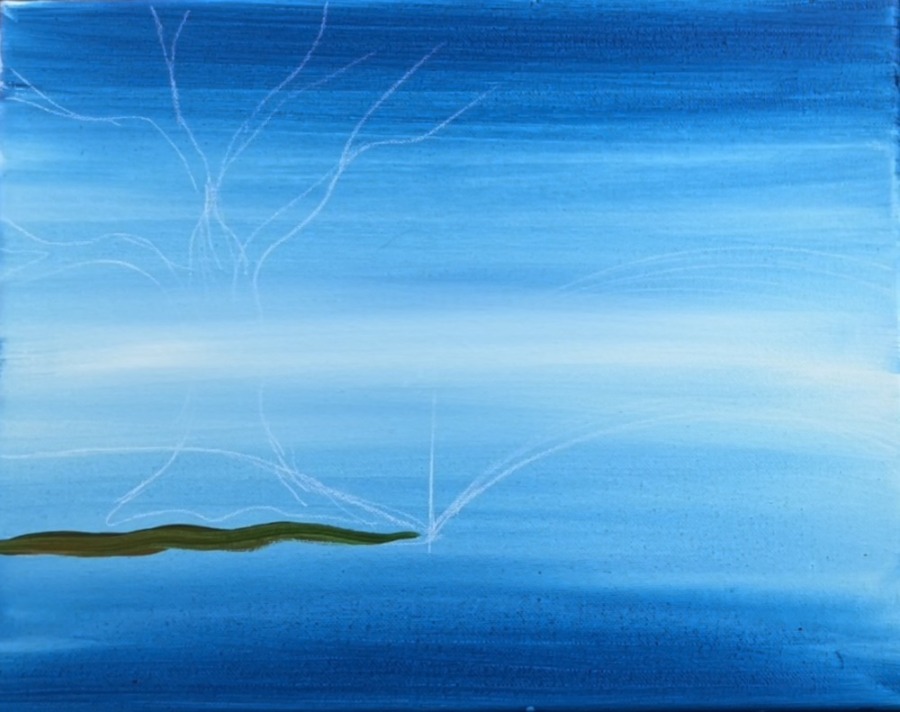
Then add a little bit of white to your brush and blend that down into the darker area so the back part of your land looks lighter.
4. Paint Tree
Load your palette with mars black and burnt umber. Use your #8 round brush to mix the brown and black together.
Paint the tree starting at the base and roots. Then paint each of the branches. Do this with slightly wavy strokes so the edges of the tree trunk look a little “twisty”.
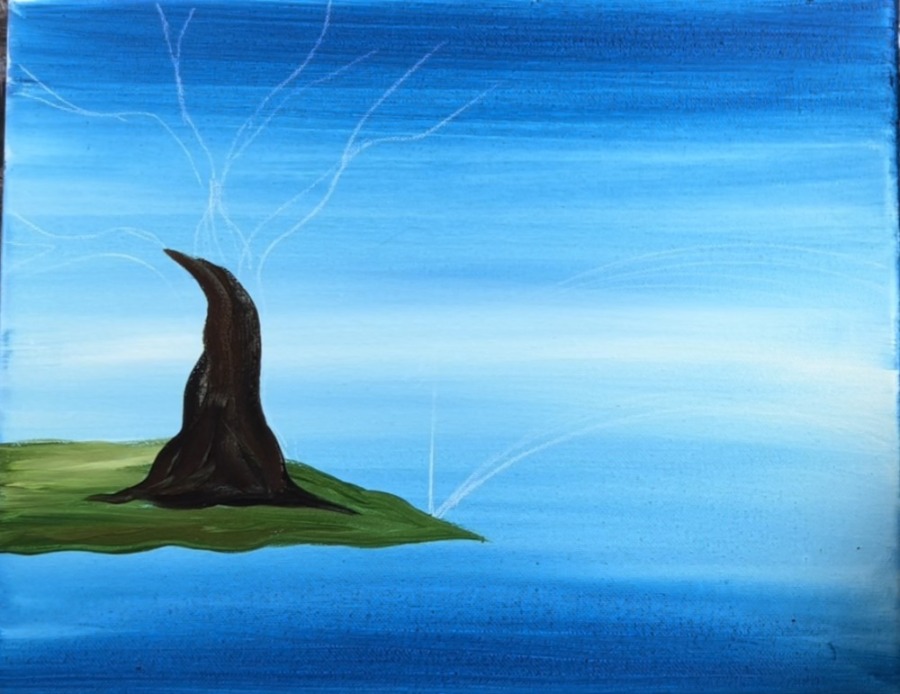
Tip: add a little water to the paint to help it flow. Use the pointy tip of the brush to create thinner branches and use more pressure on the brush to create the thicker parts of the branches.
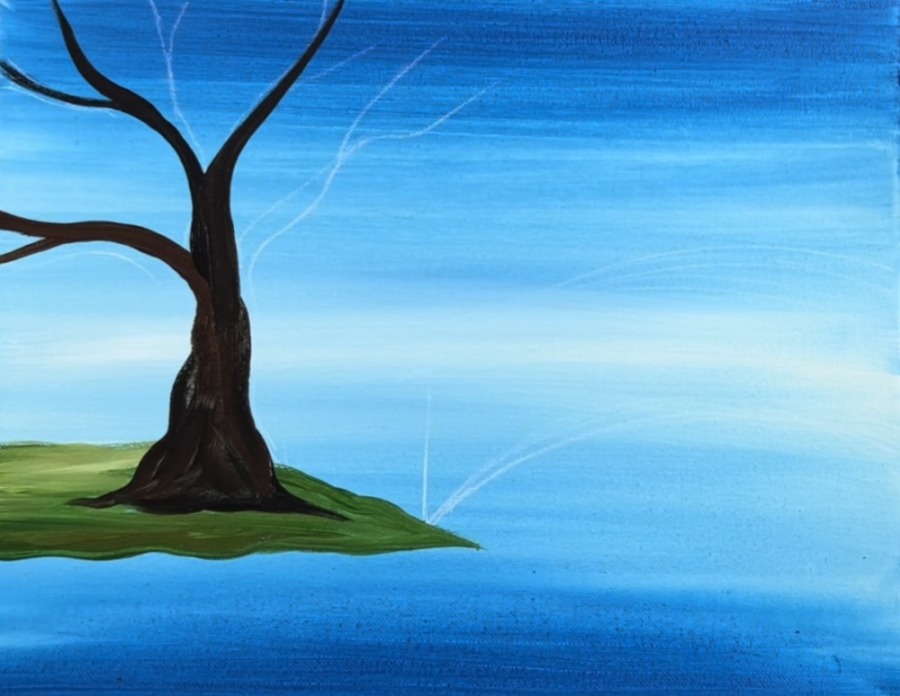

Mix some raw Sienna and titanium white into your browns to get the lighter colors. Paint “twists” on the tree on the right side. Let it blend with the darker browns (wet on wet blending).
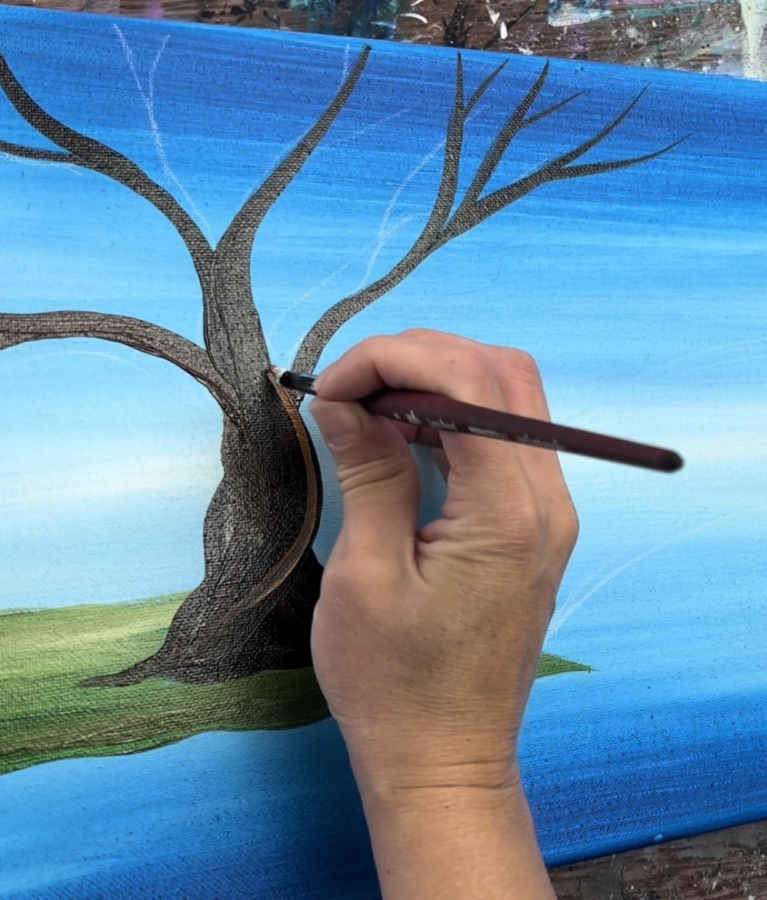
Add bits of white to the edges of the branches on the right.
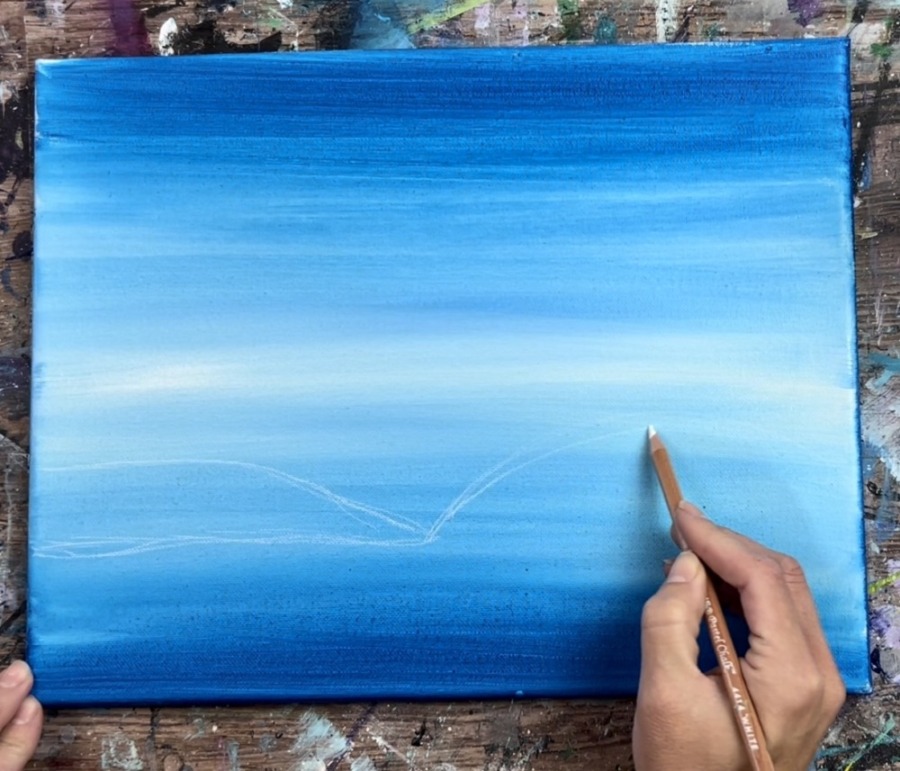
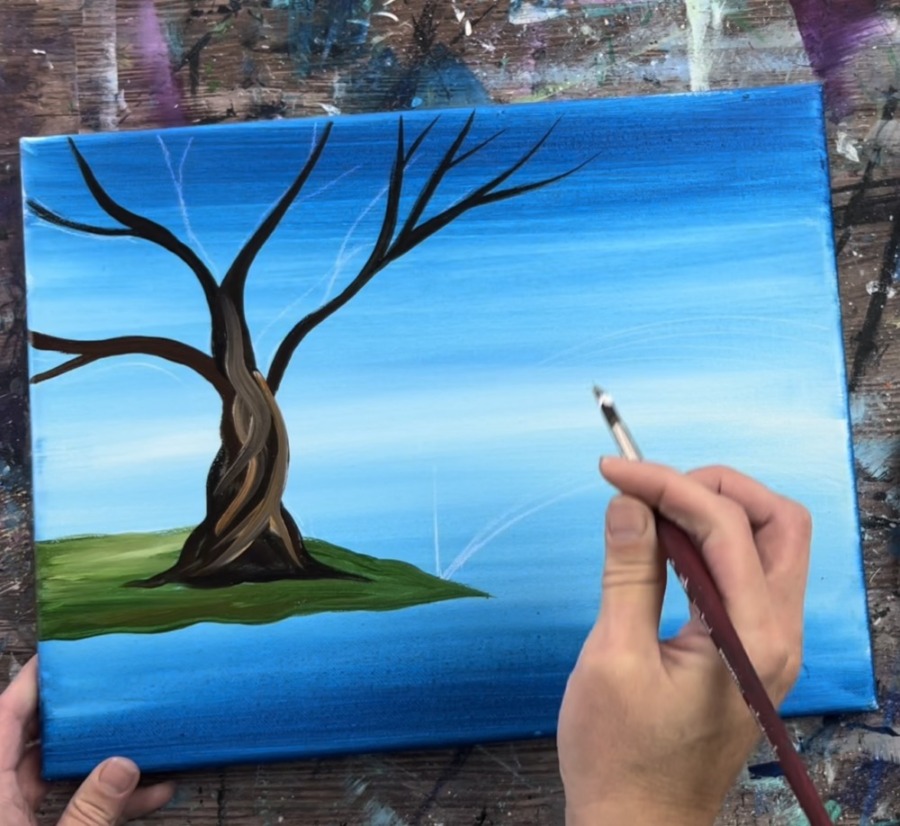
5. Paint Water Reflection Lines
Use the tip of your #8 round brush and titanium white. Paint horizontal water lines all throughout the water area.
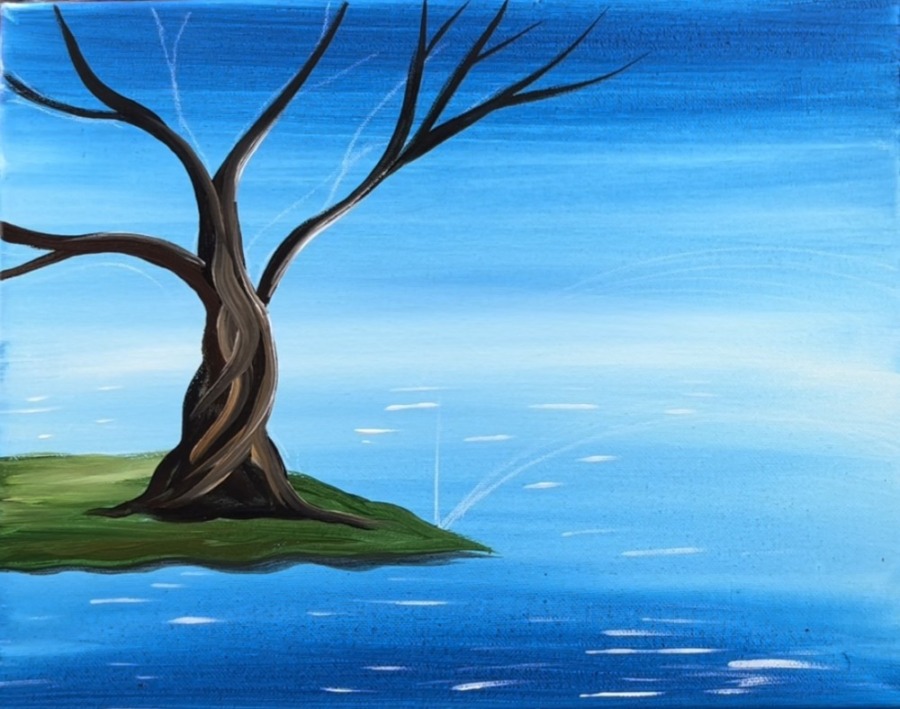
Loosely paint black reflection lines below the tree. Paint horizontal strokes going in a vertical direction down to the bottom edge of the canvas.
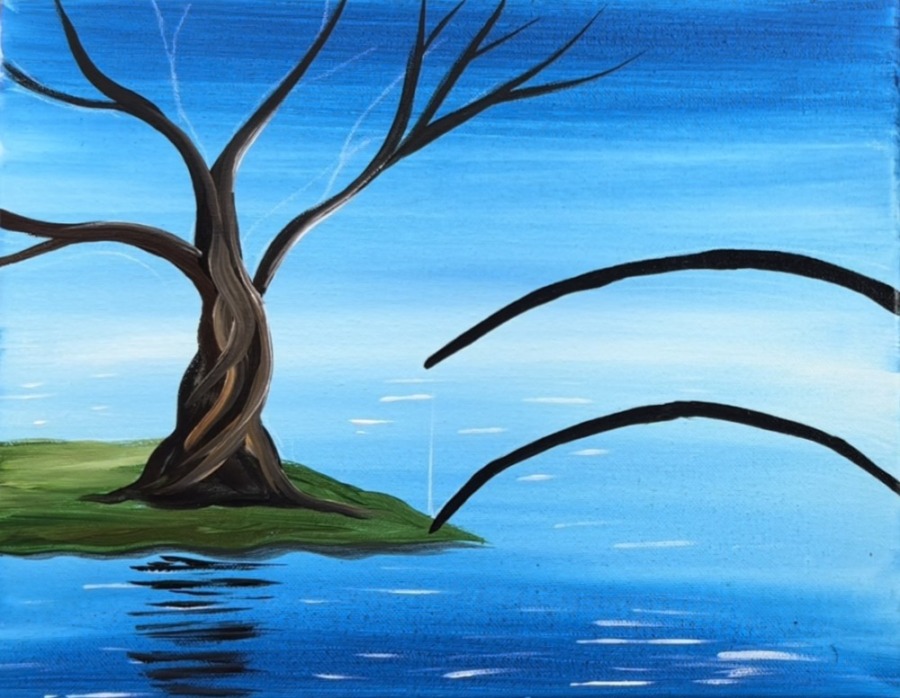
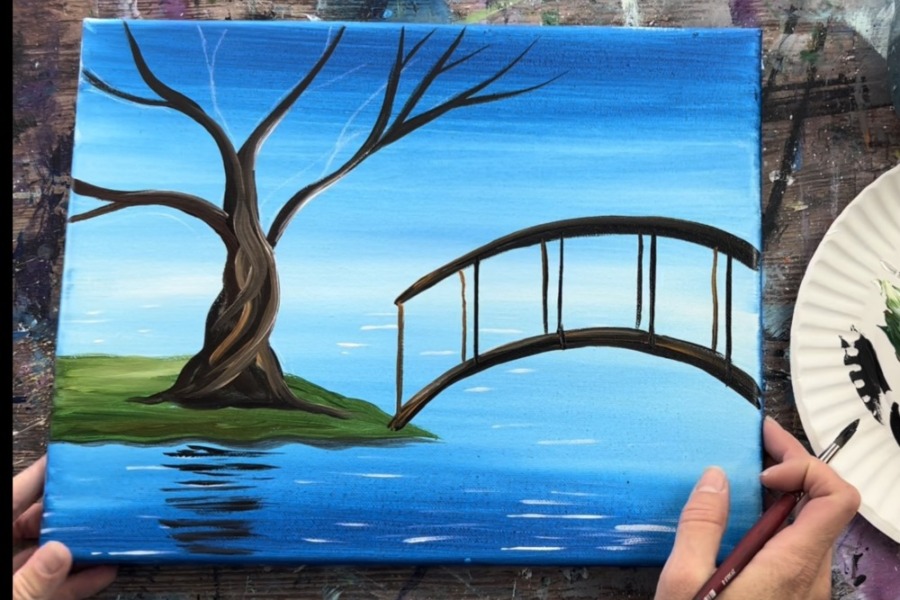
6. Paint Bridge
Use either your #8 round brush or #4 round brush to paint the bridge. Start with the bottom curve. Use a combination of the black and brown that is on your palette from the tree.
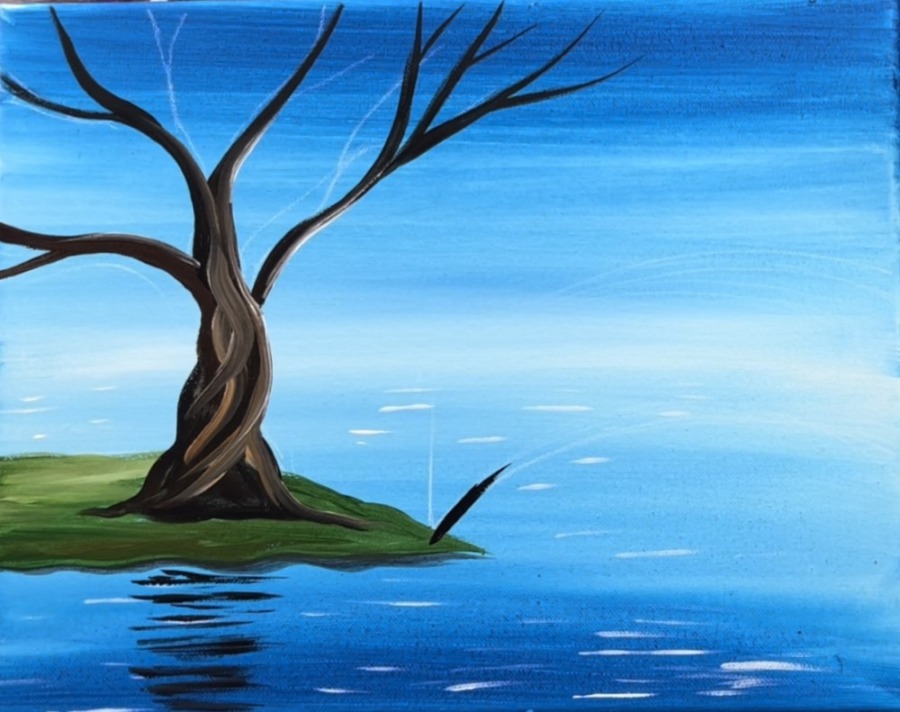
Then pain the top curve. Add a tiny bit of water to the brush to help it flow as you paint the bridge curves.
Paint the vertical lines of the bridge. Use a ruler to help guide your lines to get them to be vertical.
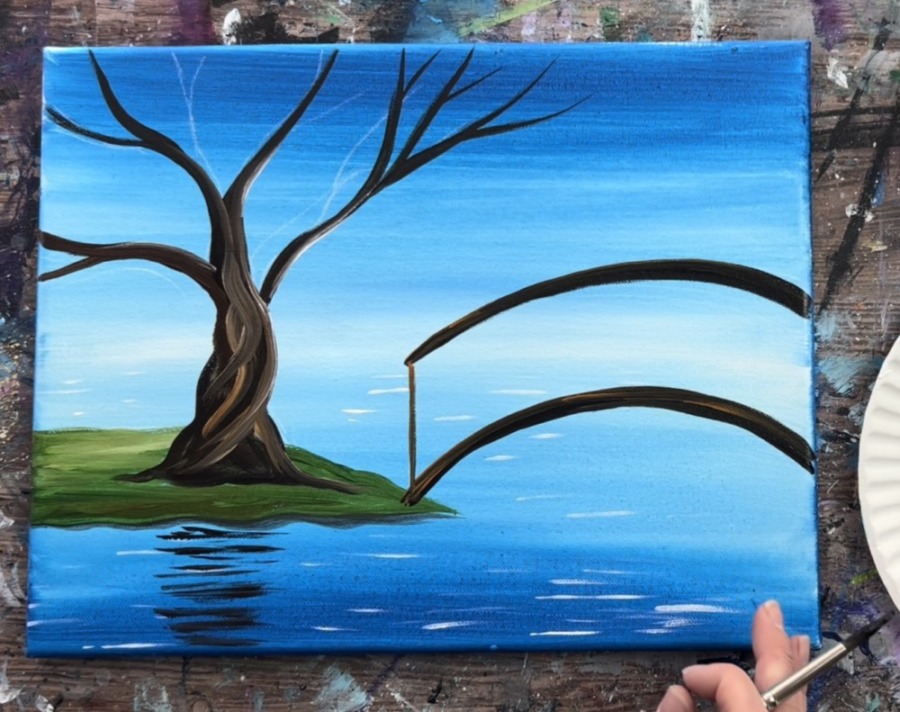
I did 5 vertical lines. You can do more or less if needed. Try to make them equally spaced apart but they don’t have to be perfect.
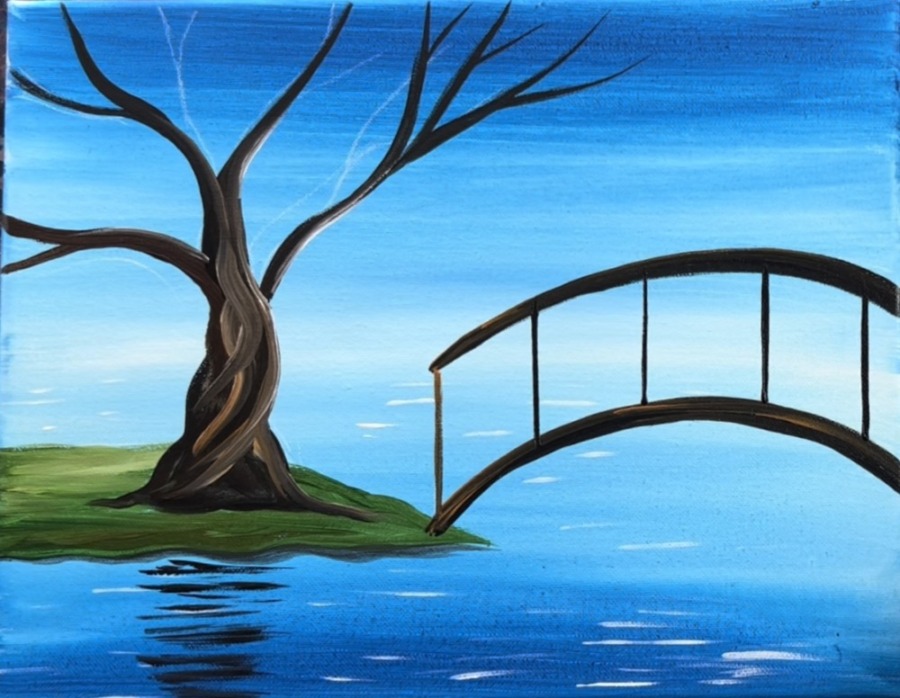
Add raw Sienna to the bridge and blend it with the darker colors to make some color variation/ highlight. You can also go back and add more highlight to this bridge later after the first layer dries.
Also, add the back vertical lines next to your first set of vertical lines. I did this with a lighter version of that brown/ added more raw Sienna to the brush.
7. Paint Bridge Reflection
Paint the reflection of the bridge as a mirror but this doesn’t have to be as detailed as the actual bridge. It also may go off the canvas a little.
8. Paint Willow Tree Leaves
Load your palette with brilliant yellow green, hooker’s green hue permanent and titanium white.
Start with your brush dry and not wet. Then triple load your brush in each of the three colors. Load only a small amount of paint on the tip of the brush. You don’t want too much paint because your strokes in this next step need to look dry and almost feathery/ dry brush style. If needed, you can wipe off some of the excess paint off your brush.
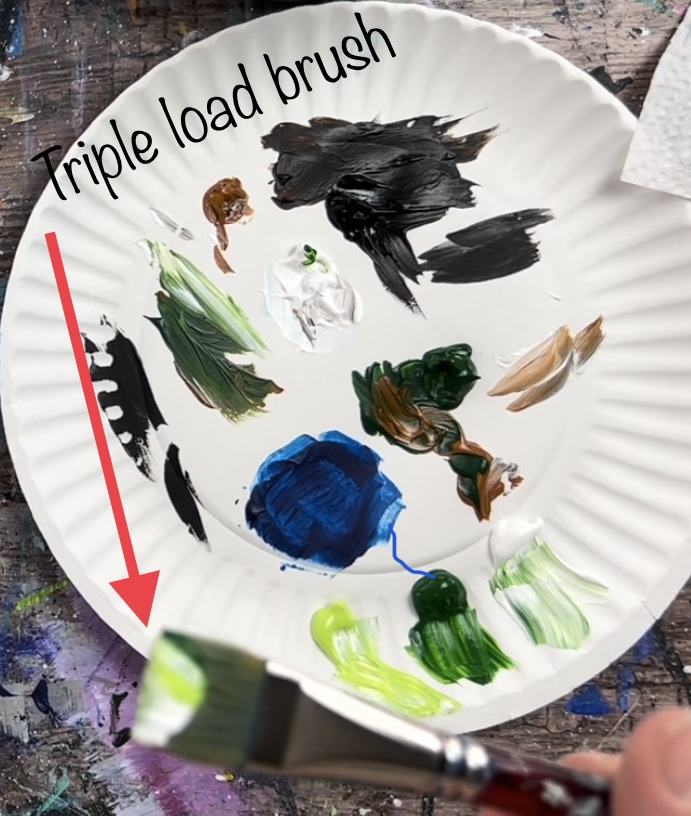
At the top of the canvas, gently drag the brush down and release the pressure quickly. The paint will blend on the canvas.
Do this across the canvas.
You can turn the brush to paint more vertical strokes. Vary the lengths of the strokes.
Vary the greens so some of them are dark and some are light. This will create depth in your leaves. You can overlap some of the branches and still have them kind of show through the thin layers of paint.
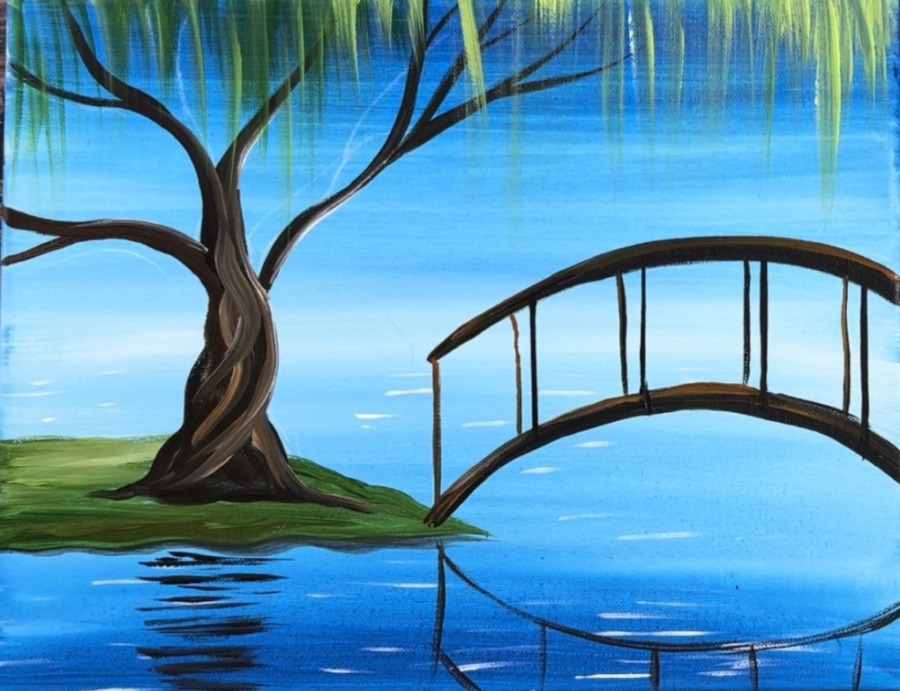
Then do a different style of willow tree branch/leaves. Use your #8 round brush and load it in the brilliant yellow green and the hooker’s green hue permanent. Paint loose, wavy strokes of leaves that go in vertical clusters.
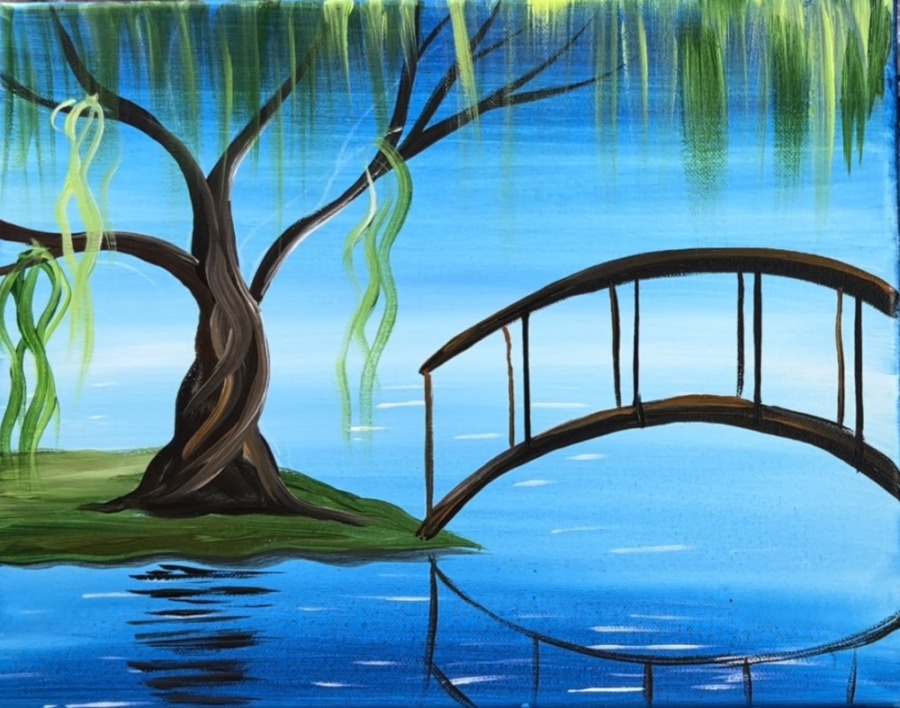
Paint these hanging pieces on various branches of the willow tree.
Vary your colors to make lighter and darker branches. Add a little white into some of the greens to make some of them lighter. You can also paint a few branches that overlap or go behind the bridge.

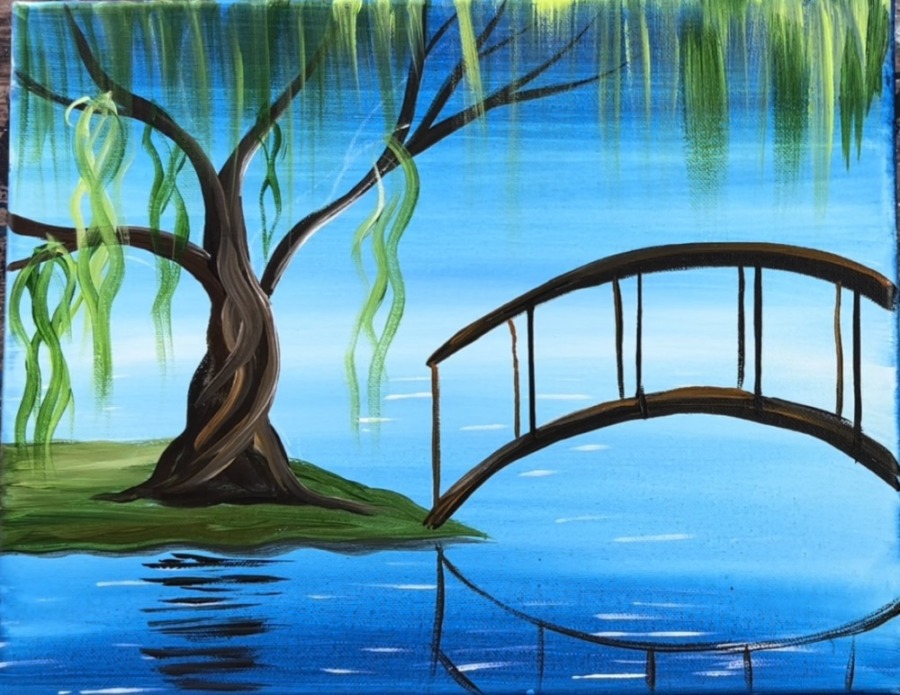
9. Paint Grass Lines
Use your #8 round brush tip to paint small grass lines. Mix a little mars black with hooker’s green to make a very dark green. Then paint little angle strokes in clusters on the land and some in the water.
Paint some pieces in the bottom left and right corners.
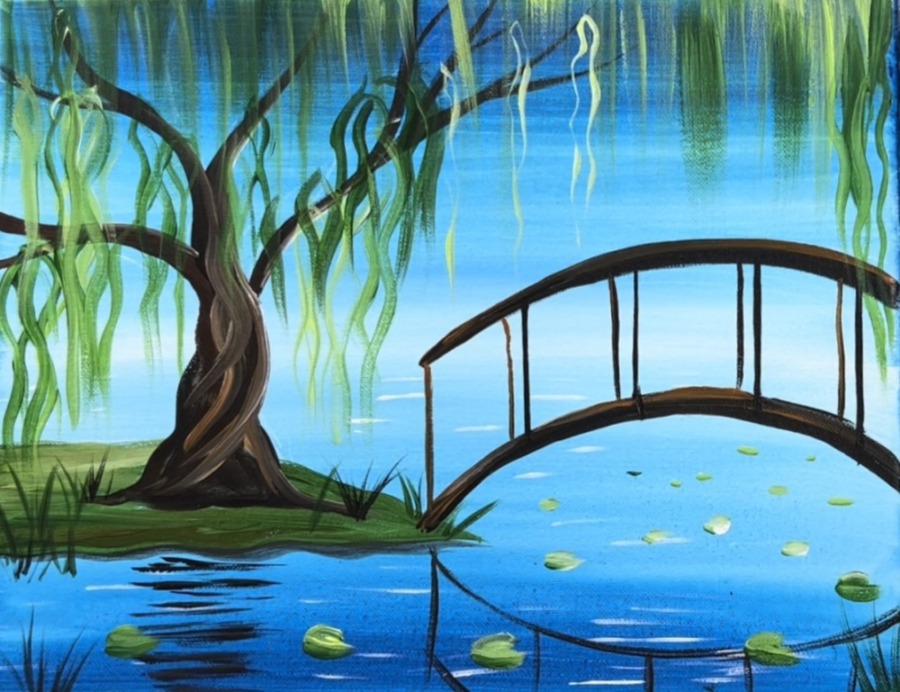
10. Paint Lily Pads
Then paint lily pads. Use your #4 round brush. Load it in a thick amount of paint using the hookers green hue, the bright yellow green and the white on your palette. Make a thick “C” stroke.
Repeat to make different size lily pads. Vary the greens so some are darker and some are lighter. Make the lily pads under the bridge/ in the distance smaller. Make the lily pads closer to the bottom larger.
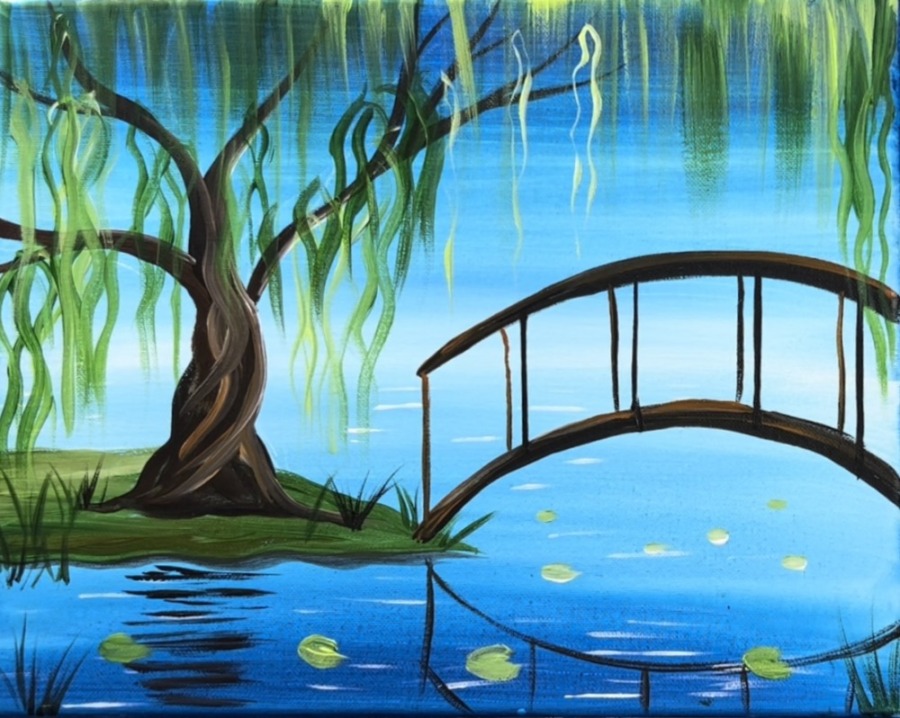
Then paint a darker green stroke under some of the lily pads so they have a little depth/ shadow.
Then paint the flowers with medium magenta, titanium white and your round brush.
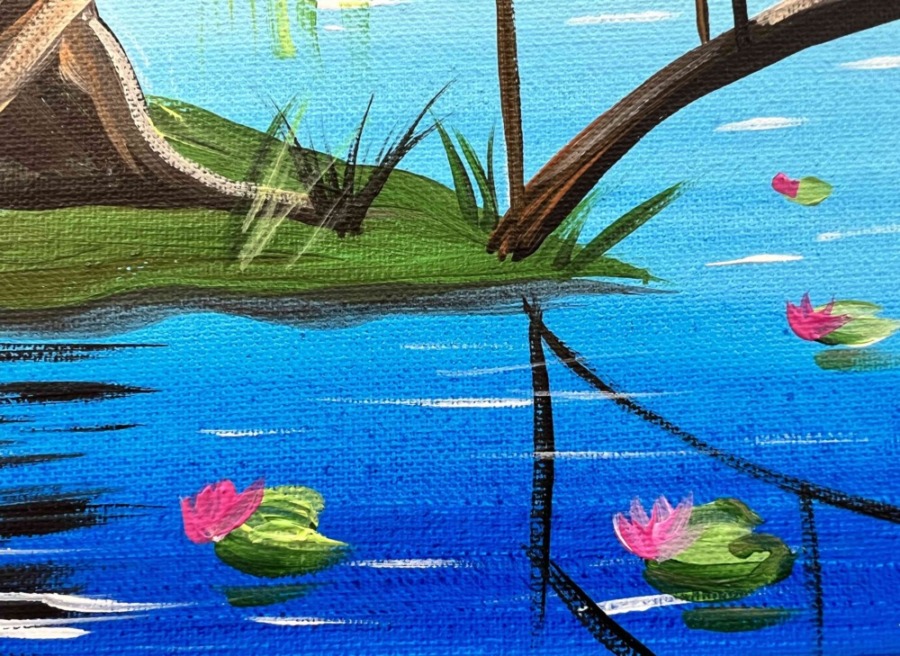
Load the pink and white on the tip of your brush. Paint each from the base and stroke up to create the flower shape.
For the flowers in the distance, you can paint smaller dots of the pink.
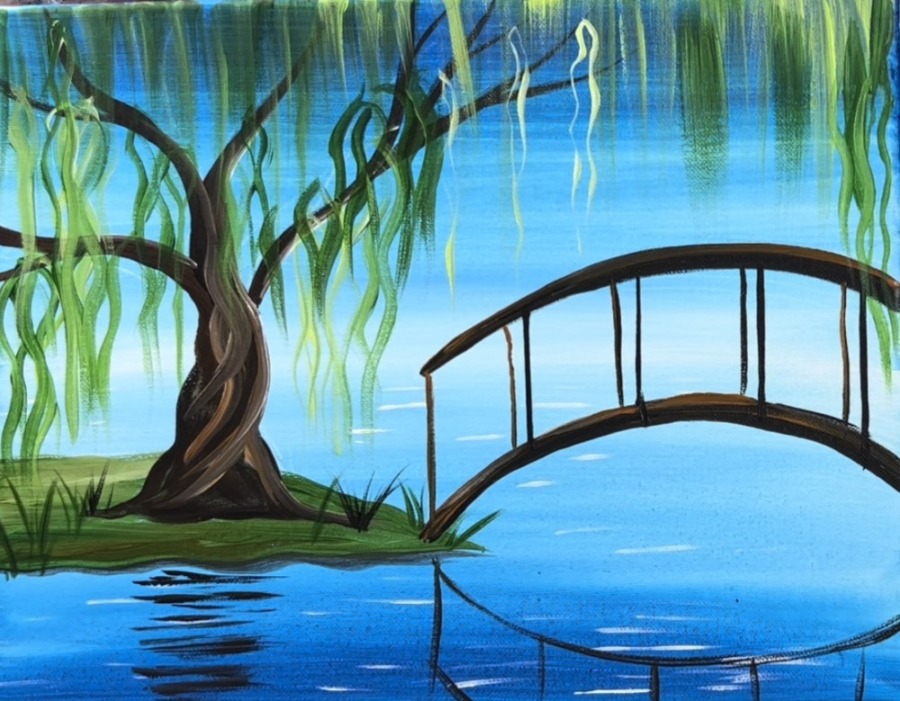
11. Final Touch Ups
Some final touch ups you can do are: highlighting the bridge. You can add a little raw Sienna and white to your brush and paint the curve of the bridge.
You can also paint more branches/ leaves and add more white water reflection lines as needed.
Finished
Sign your name and show it off!
Share your art here:


Hi Tracie. Thank you so much for doing what you do. I just love your paintings.
I want to paint this one on a 16×20 canvas. How do I enlarge the traceable?