
Would you like to save this?
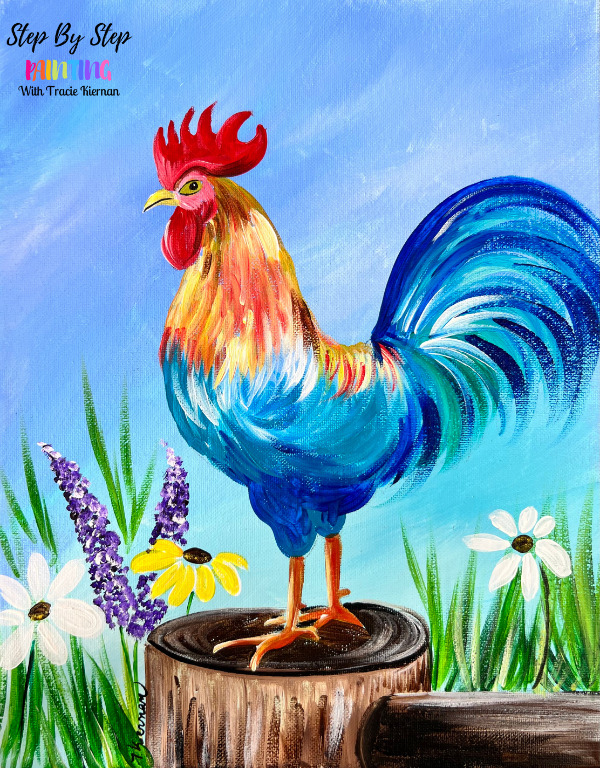
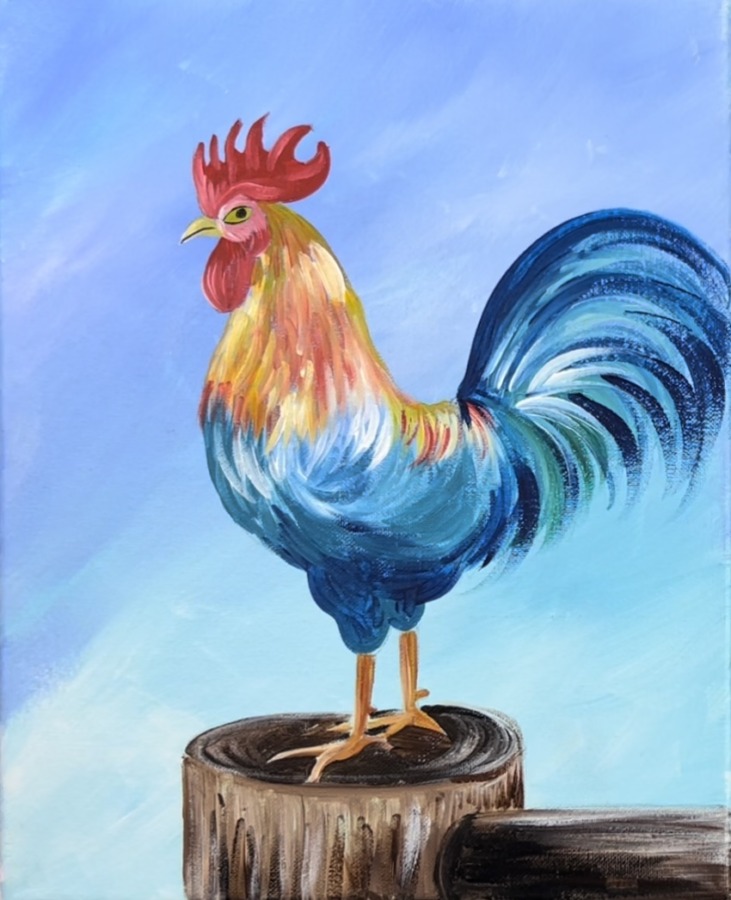
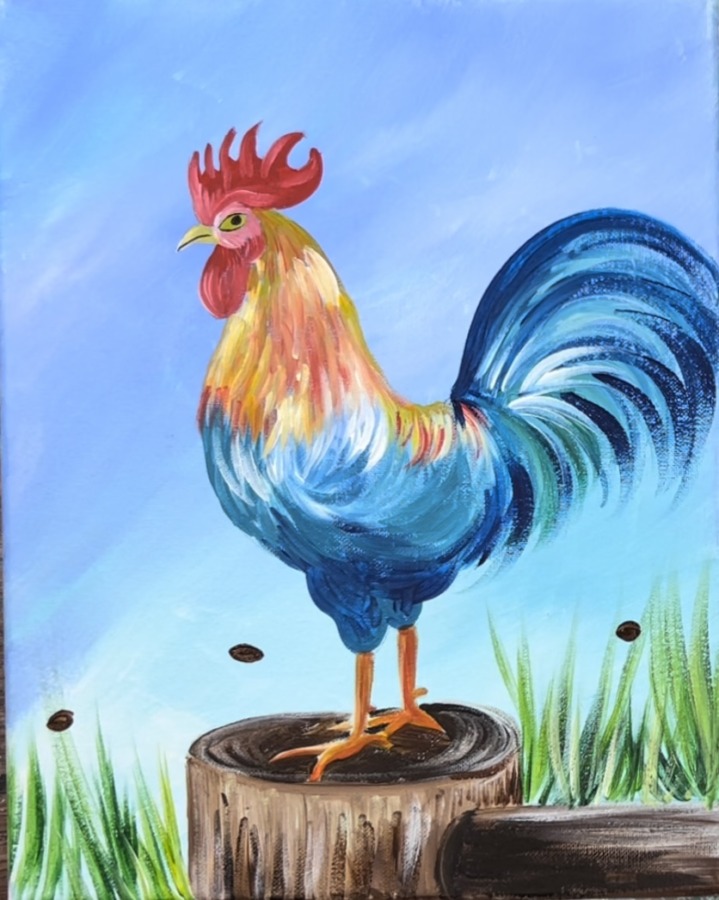
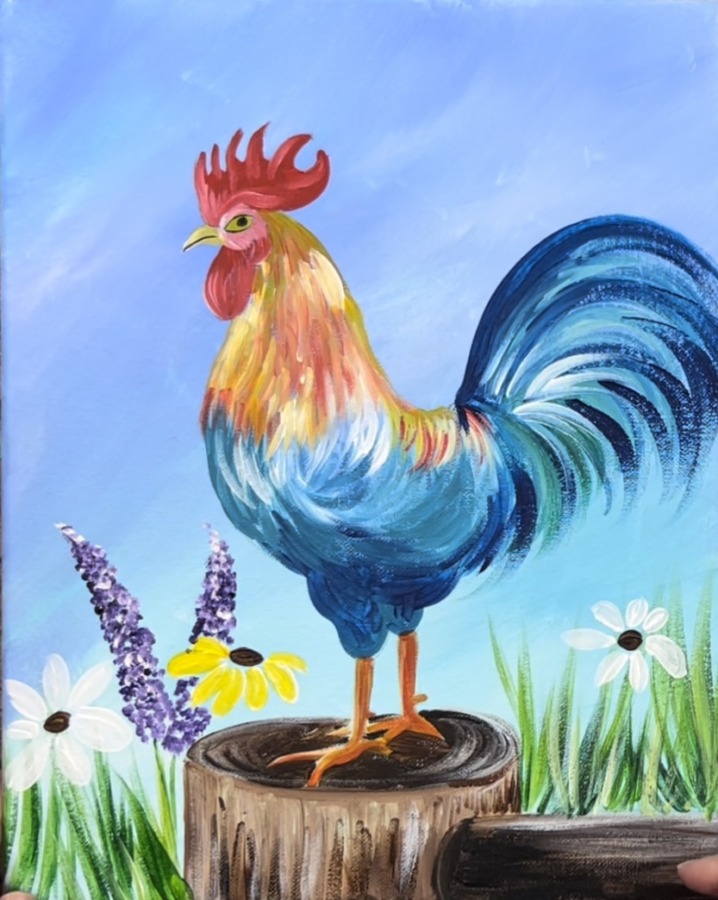
This beginner painting tutorial will demonstrate how to paint a colorful rooster on a rustic wooden fence post with wildflowers.
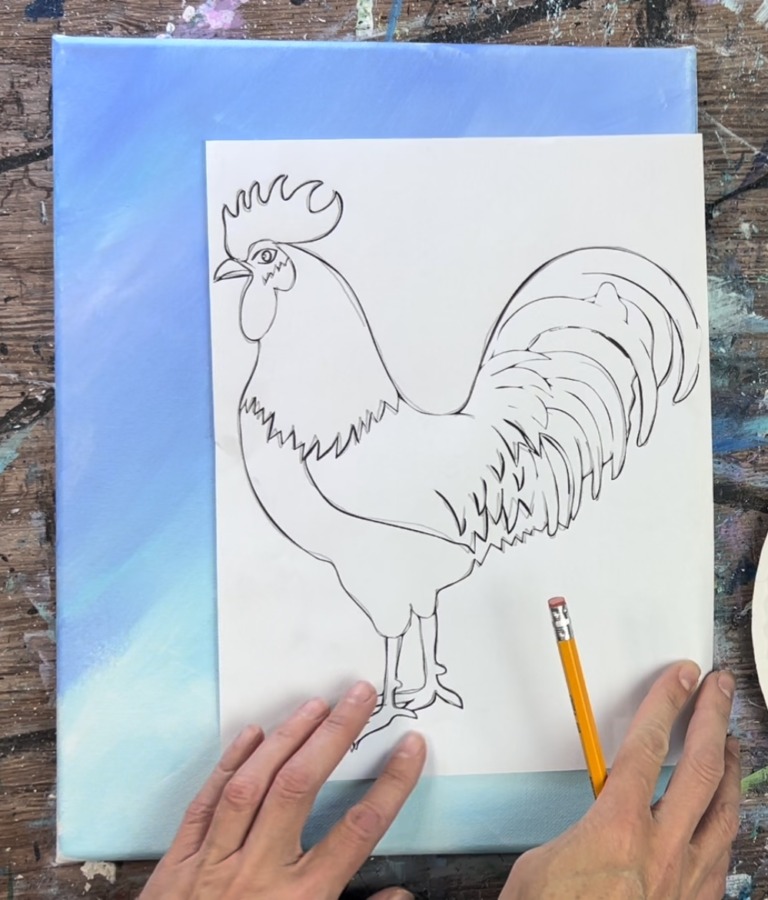
The tutorial comes with a free traceable template that you can download and print to transfer to your canvas. For information about how to transfer traceables, you can see my post here!
Enjoy and happy painting!
Materials
How To Paint A Rooster
Learn how to paint a rooster with acrylics on an 11 x 14 canvas.
Materials
Brushes
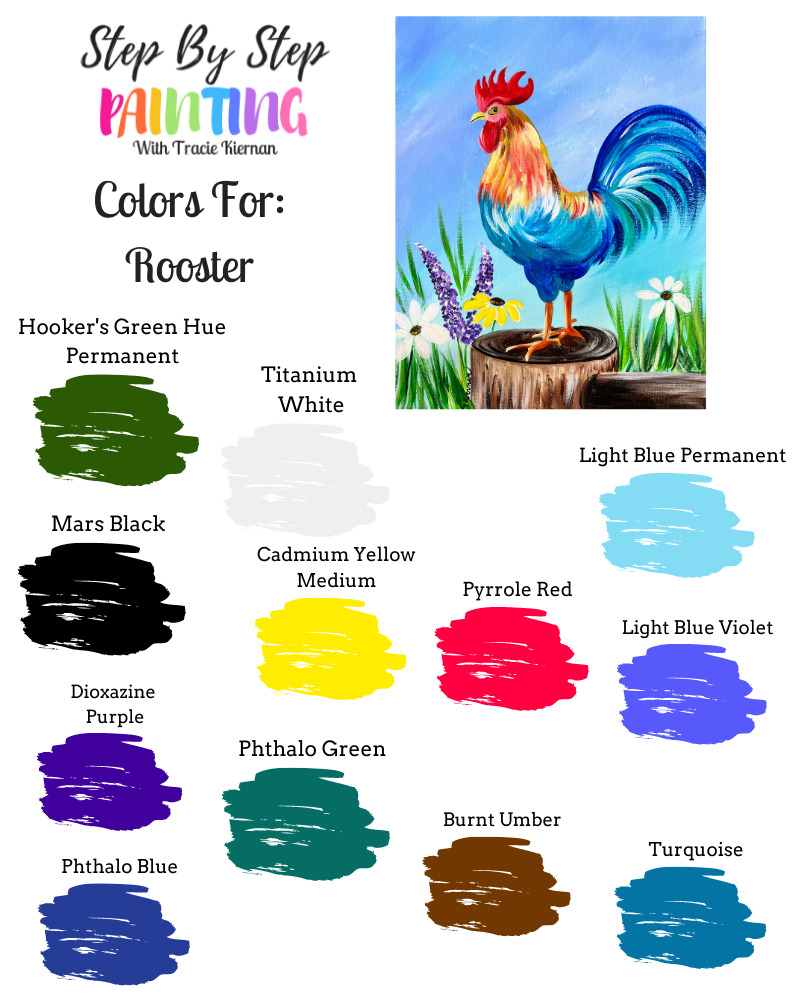
Acrylic Paint Colors
- Pyrrole Red
- Cadmium Yellow Medium Hue
- Phthalo Green (optional)
- Hooker's Green Hue Permanent
- Phthalo Blue
- Light Blue Permanent
- Light Blue Violet
- Dioxazine Purple
- Burnt Umber
- Mars Black
- Titanium White
- Turquoise
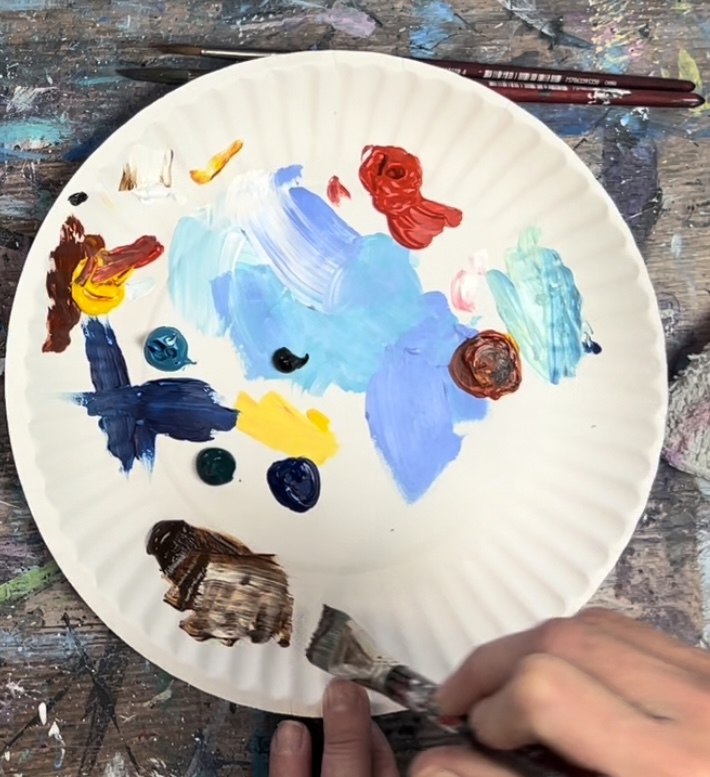
Color Palette
I used Liquitex BASICS student grade acrylic paint for this tutorial. You can get all the colors you need for this painting in this set!
Using Craft Paints?
If you are using craft paints such as the Apple Barrel Craft Paints, I would suggest subbing for these colors:
- Black
- White
- Bright Yellow
- Flag Red
- Purple Iris
- Parrot Blue
- Bright Blue
- Too Blue
- Bimini Blue
- Holly Branch
- Melted Chocolate
- New Shamrock
Traceable
Download this and print on an 8.5″ x 11″ sheet of paper. Place a sheet of graphite paper below it. You will be tracing this onto the canvas after you paint the background.
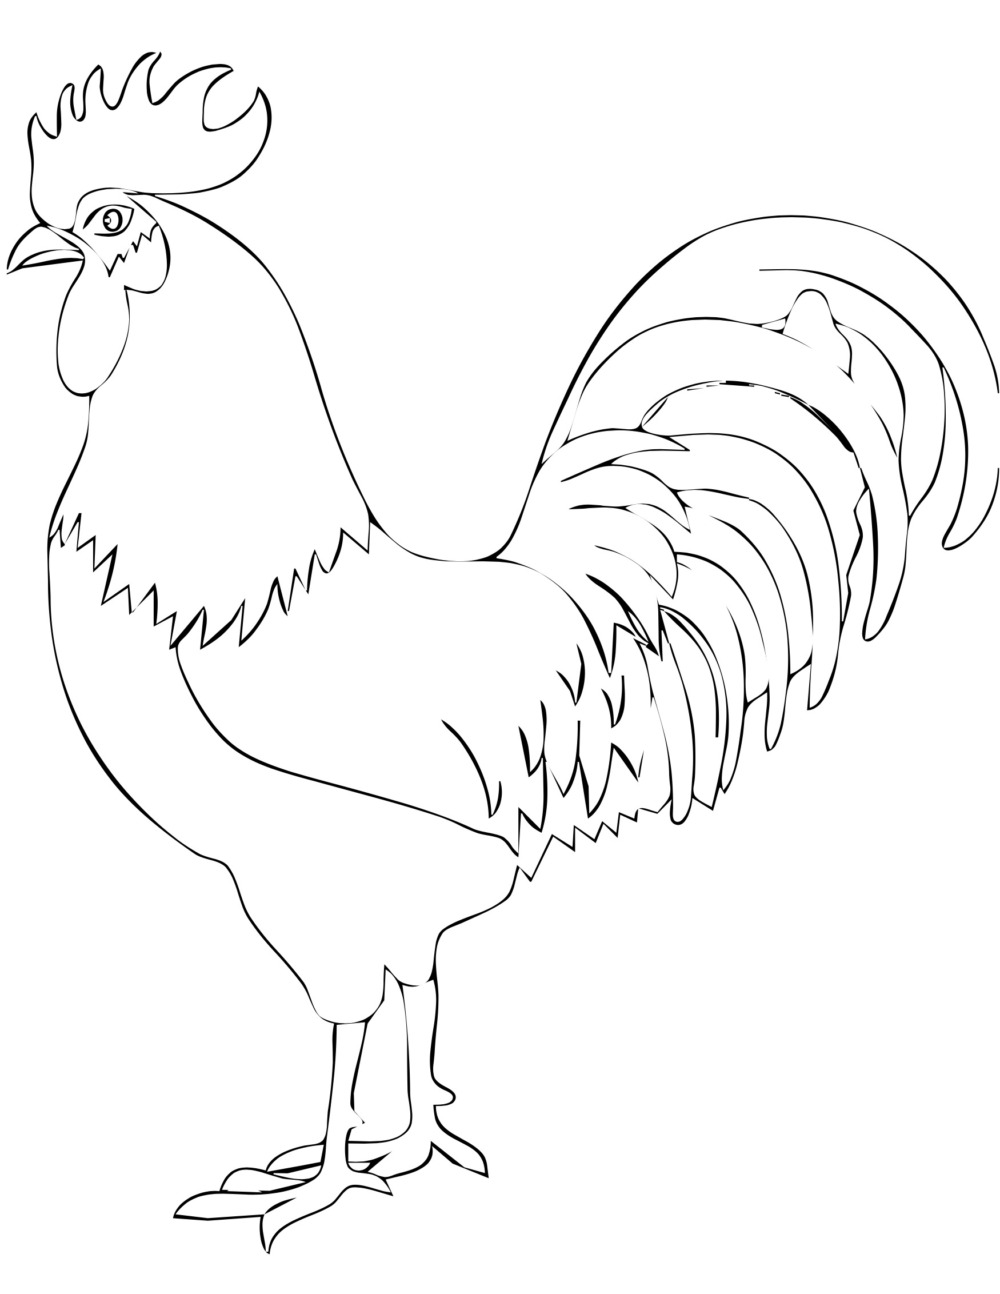
Want to draw the rooster? Here are a few how to draw a rooster tutorials you can use to draw on the canvas. I would recommend drawing lightly or drawing this on paper first and then transferring it to the canvas.
Directions At A Glance
Video
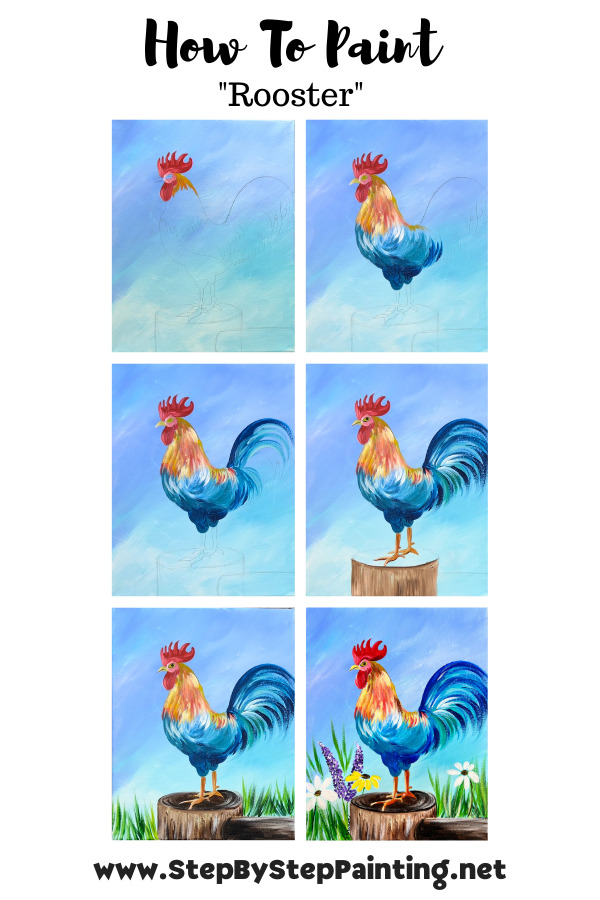
Step By Step Instructions
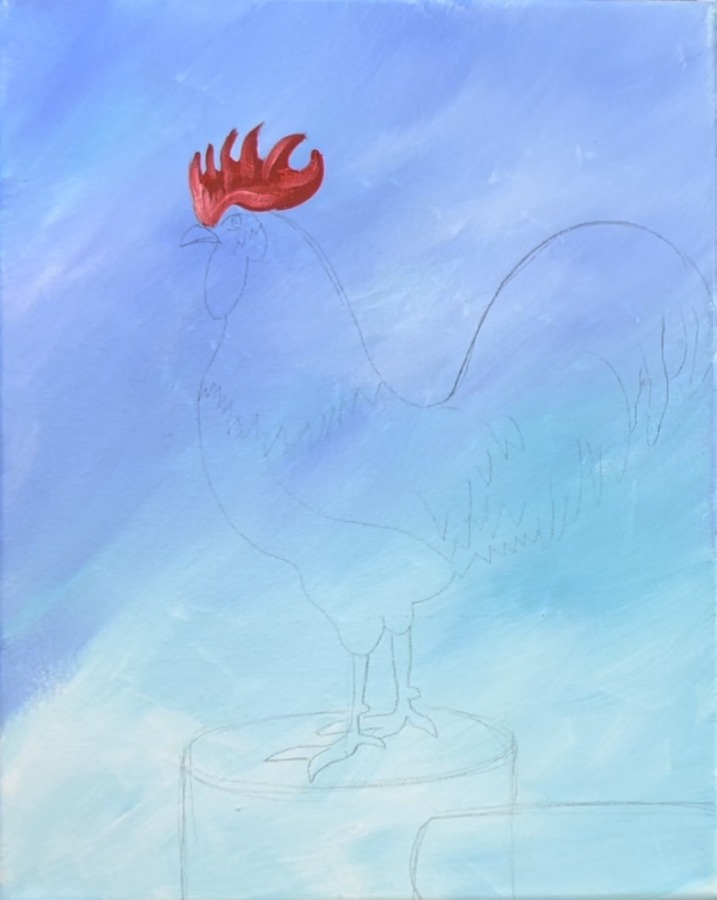
1. Paint The Background
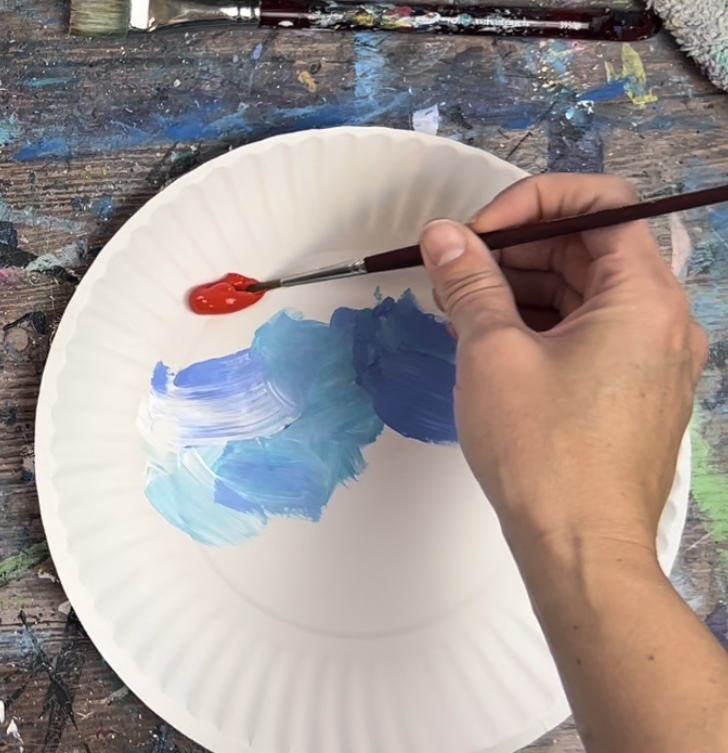
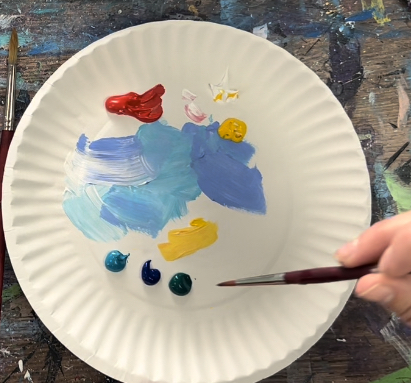
Position your canvas in vertical mode. Load your palette with: light blue permanent, light blue violet and titanium white.
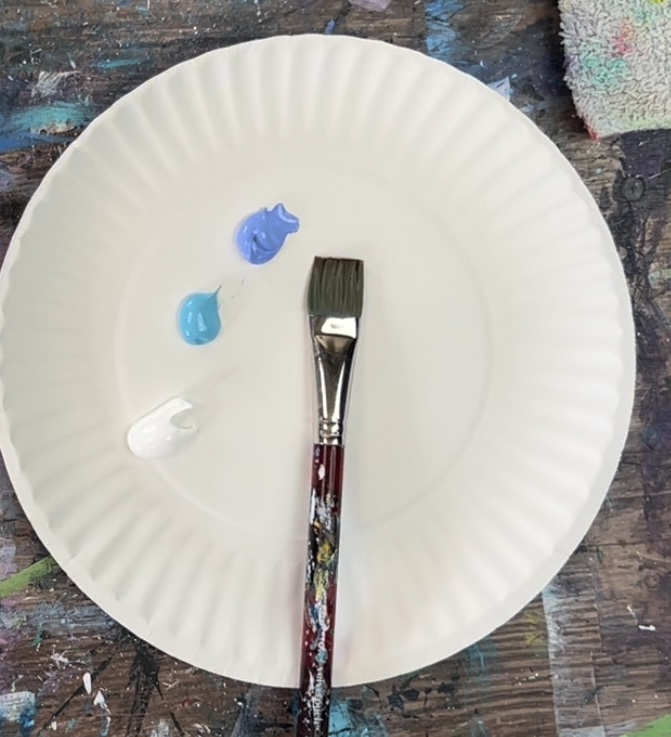
Load you 3/4″ flat wash brush in titanium white. Then mix about equal parts titanium white and light blue permanent.
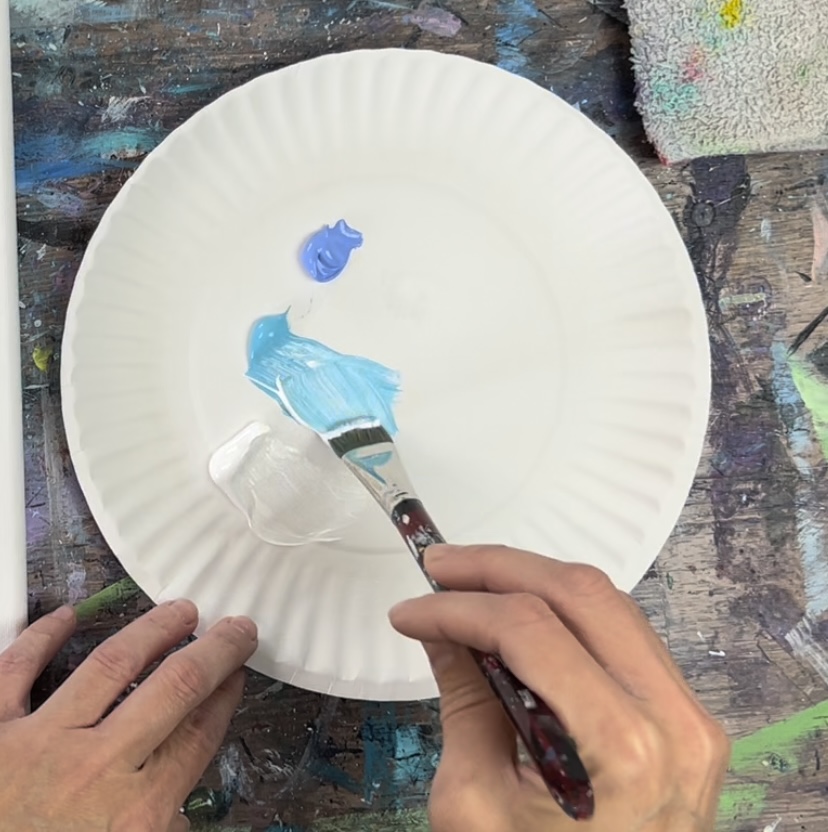
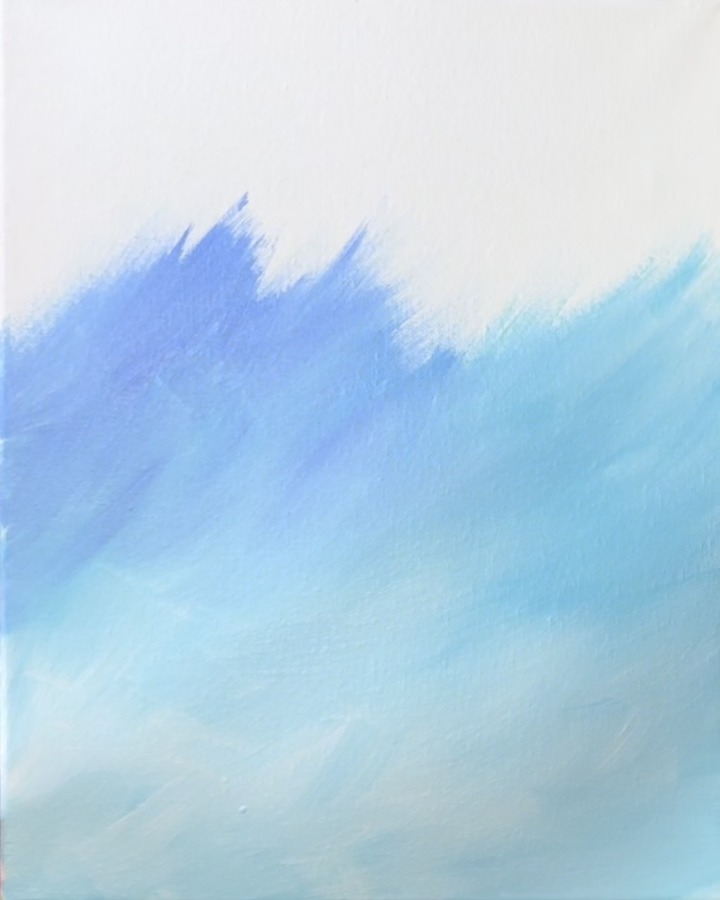
Stat on the bottom of the canvas and paint in “X” style strokes so the two colors blend on the canvas. When you go to reload your brush, you can load different amounts of white and light blue on the brush to let it have “color variation”.
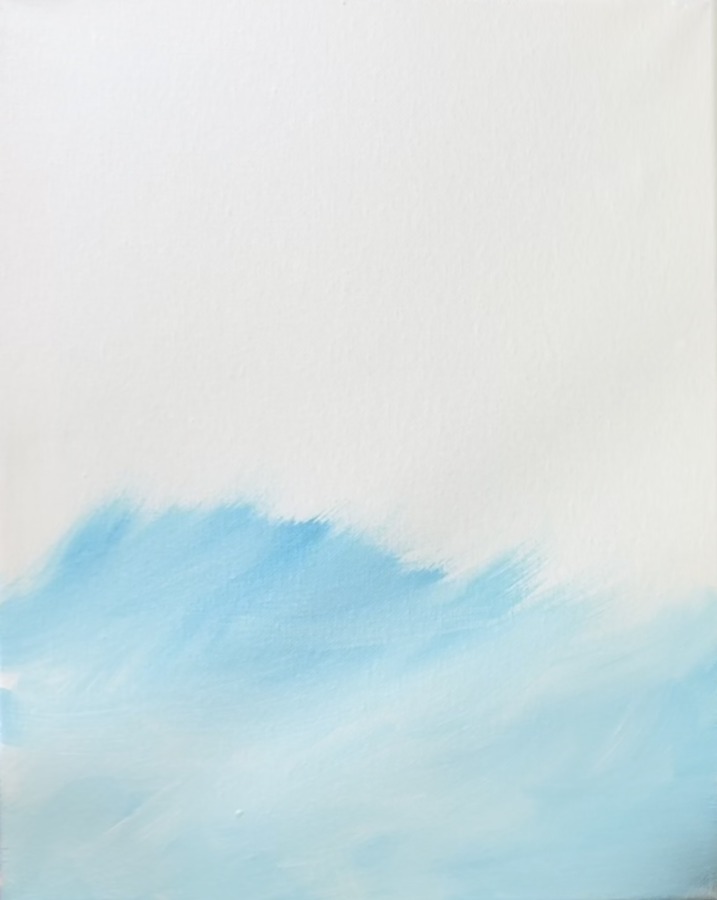
Work your way up the canvas, blending an abstract background. The paint should be relatively a thin coat of paint. Add light blue violet towards the top of the canvas so that the background gets slightly darker at the top.

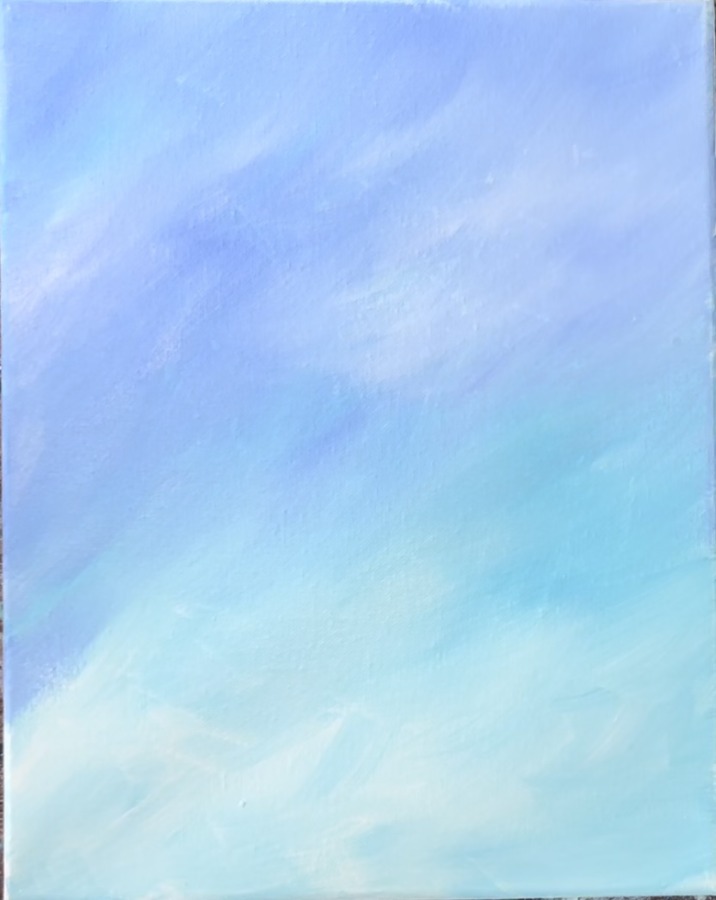
Wait for your background to dry before going onto the next step.
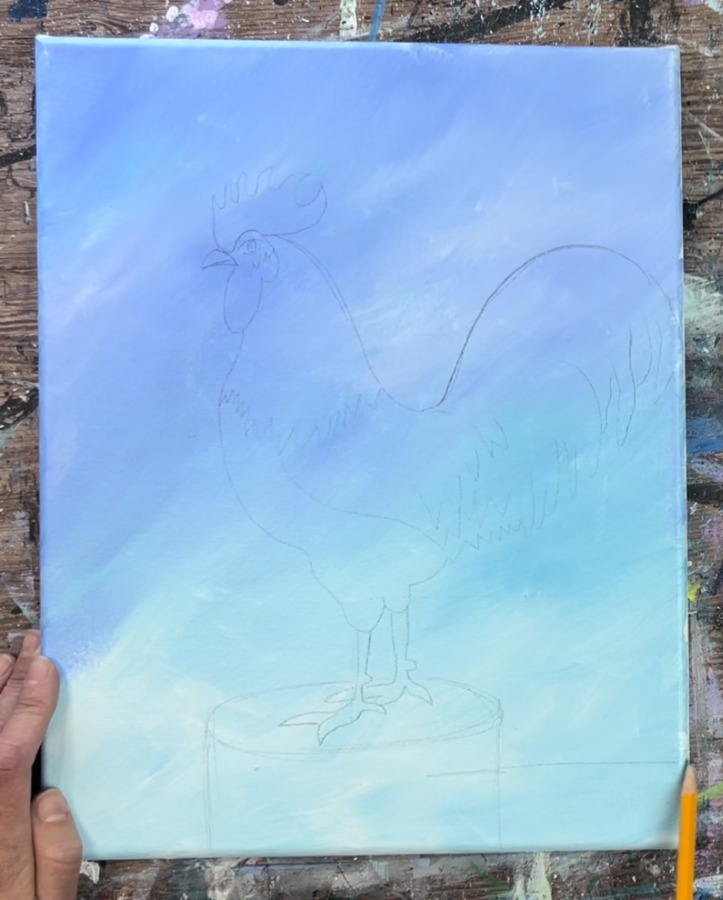
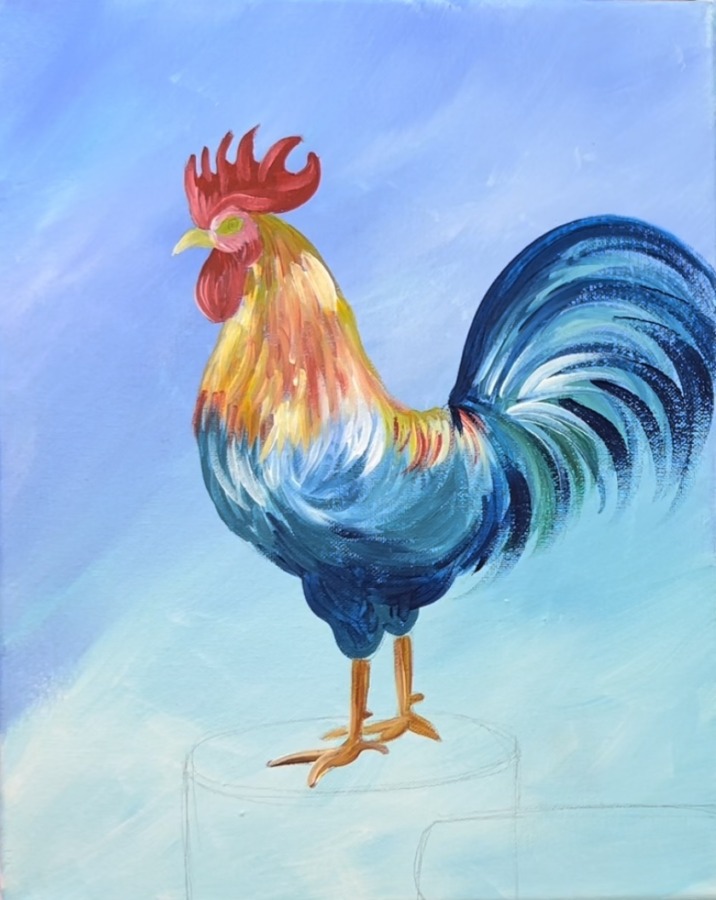
2. Transfer Rooster Drawing To Canvas
Print out the rooster template and place a sheet of graphite paper below. Position the rooster so the back tail feathers are on the right edge of the canvas. Leave space below for the fence post.
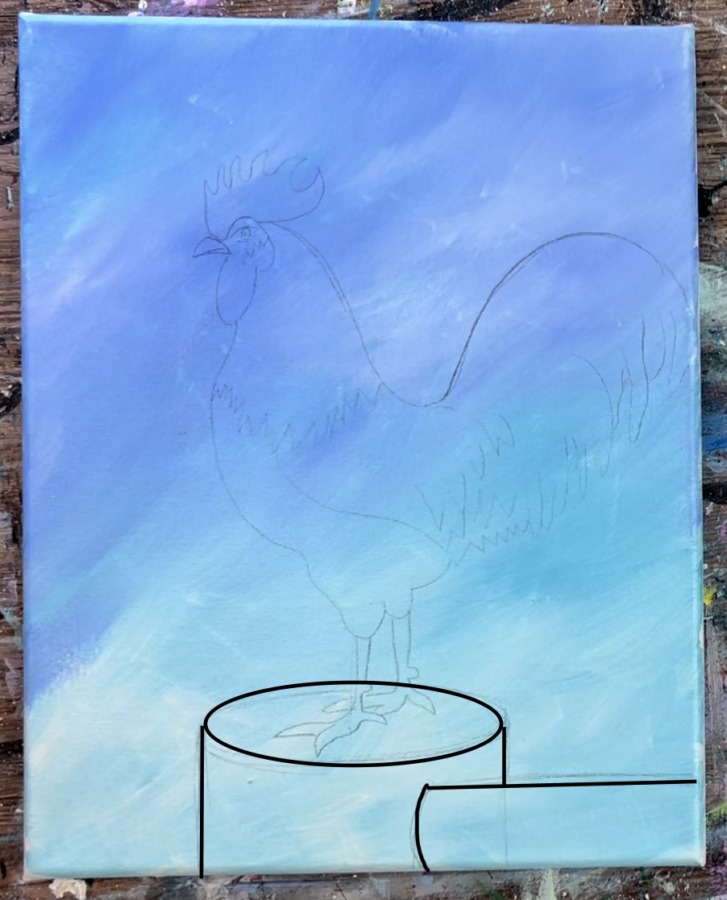
Then lightly draw the fence post with a pencil. Draw an elliptical shape below his feet. Draw two vertical lines to complete the fence post width. Then draw a horizontal beam that slightly overlaps the vertical post.
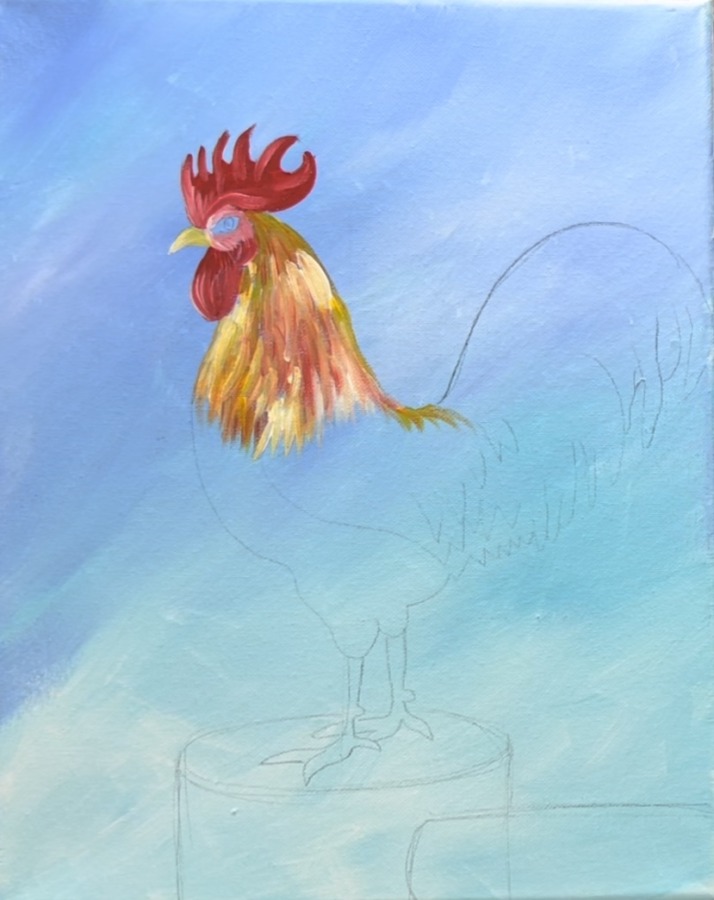
3. Paint the comb, waddle and around the eye
Load your palette with pyrrole red and titanium white. Load your #4 round brush in the red.
Paint the entire comb on the rooster’s head. Outline the shape and fill it in the direction of the shape. Optional: add bits of white to it and blend it into the red for highlighting.
Then paint the waddle using the same red and white combo.
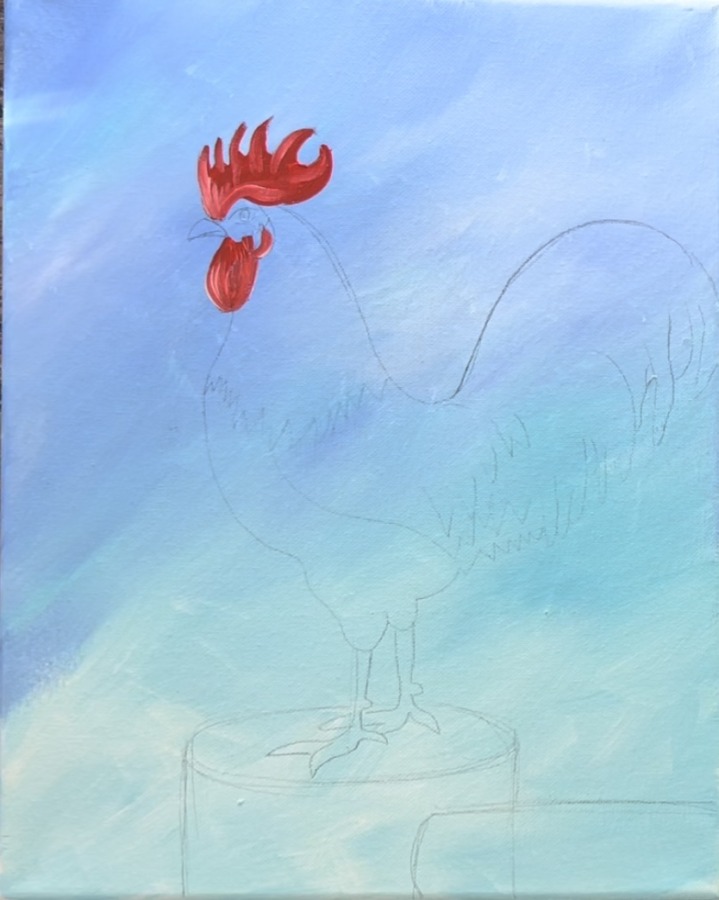
Then paint the area around the eye. Mix white with the red so that you get a lighter red.
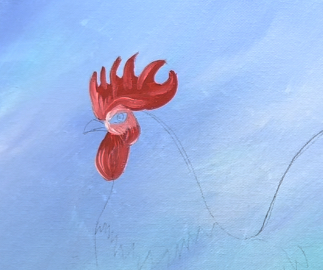
Then load cadmium yellow medium hue onto your palette. Without rinsing your round brush, load it into the yellow (you now have red and yellow on your brush but don’t mix the colors on the palette, they will blend on the canvas).

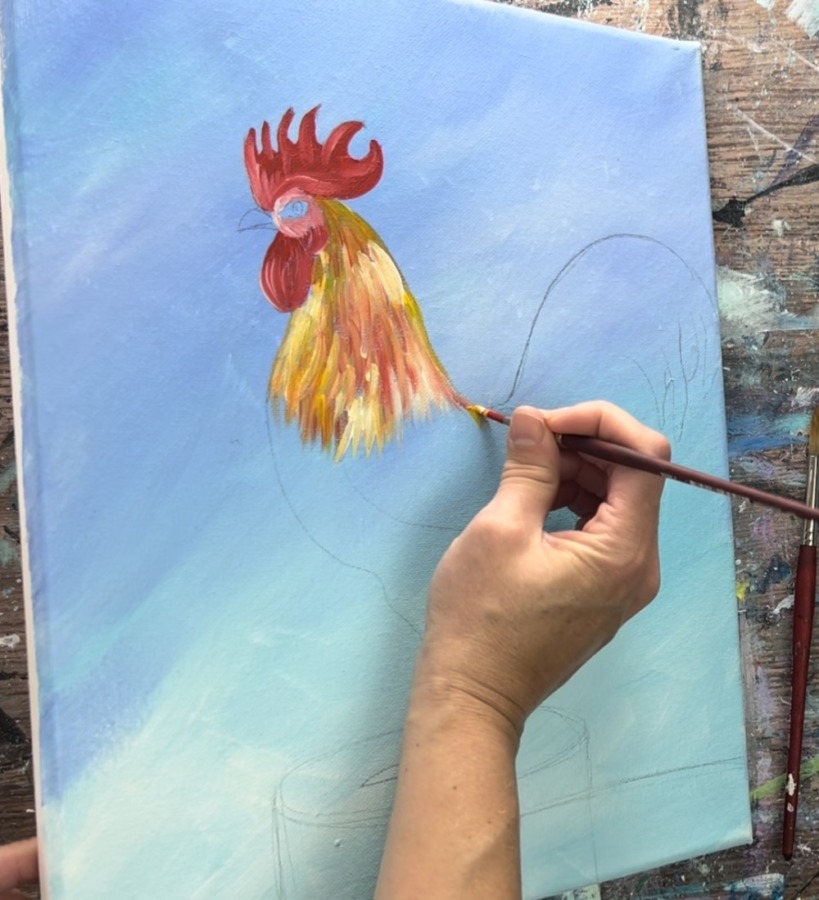
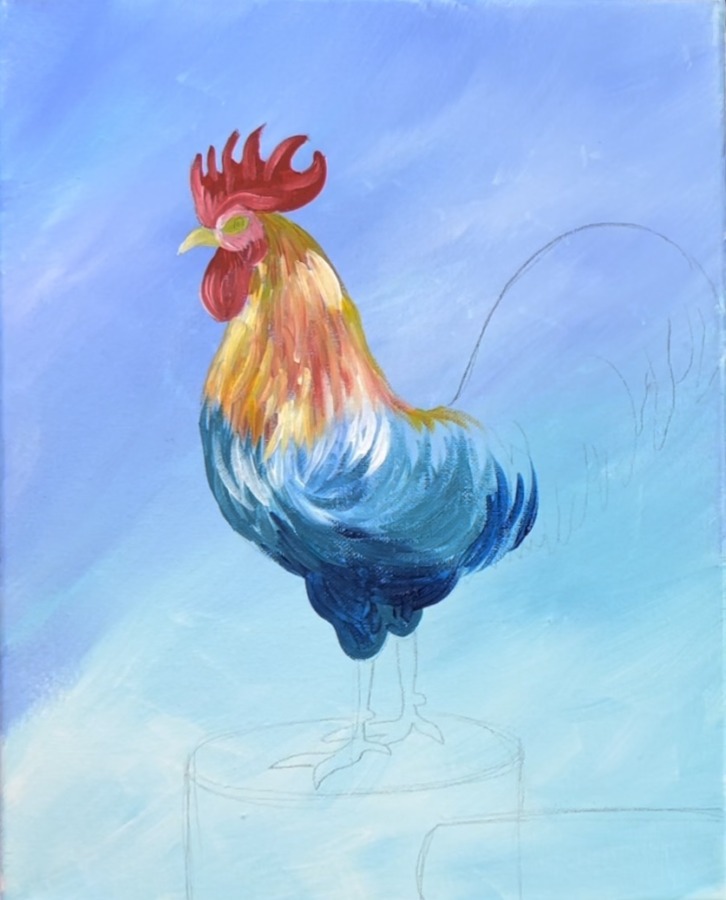
4. Paint the hackles (neck region) & beak
Paint the neck starting next to the face area. Paint short strokes going diagonally down. Let the red and yellow gently blend together but try not to over blend.
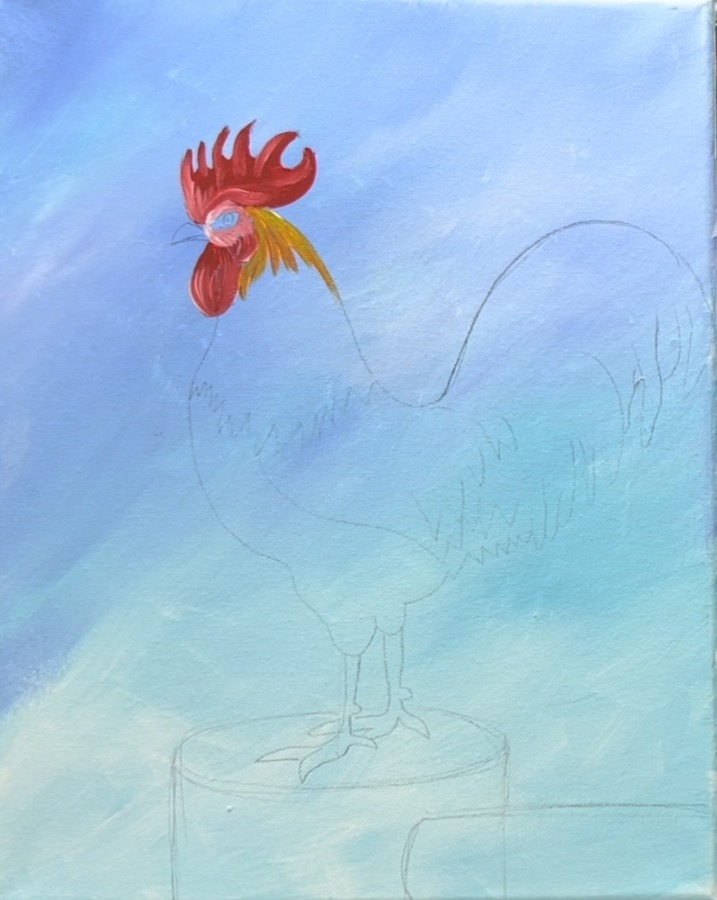
Occasionally load your brush in small amounts of white and paint short, angled strokes going in a downward direction. Continue to paint this “feather texture” as you work your way down the neck. The trick is to get different color variations of the yellow and white with small bits of red.
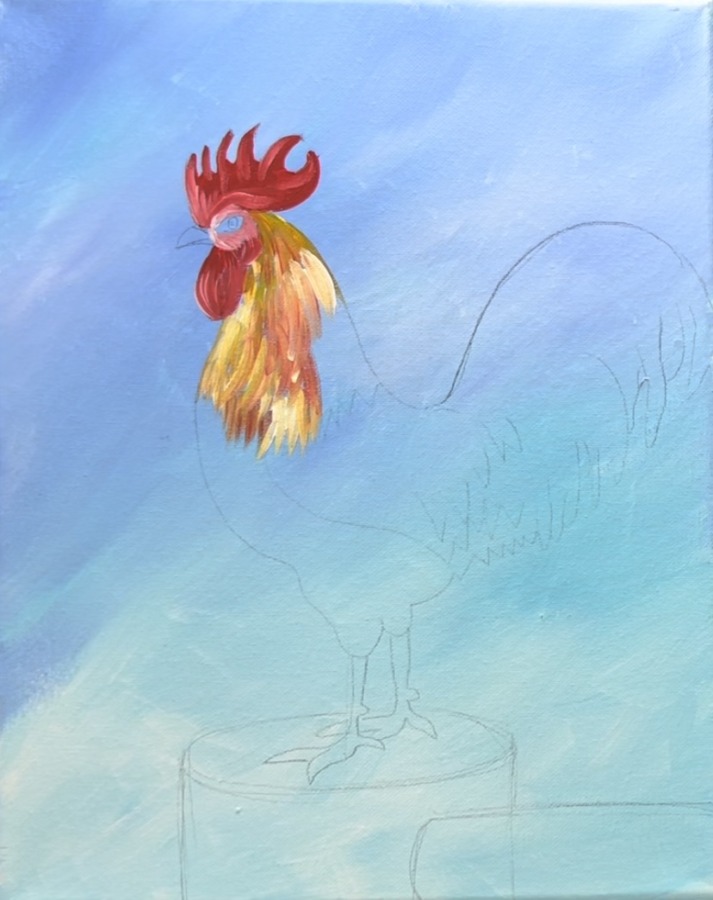
Keep painting the feathers downwards and stop when you get to about the wing/chest area.
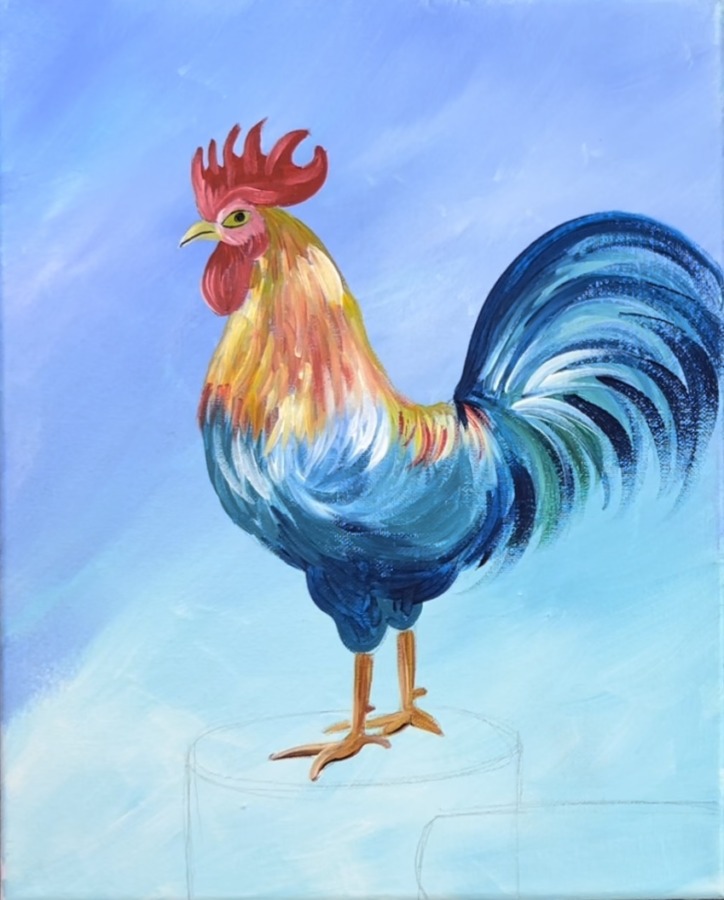
5. Paint the bottom dark blue/turquoise areas
Load your palette in: phthalo blue, turquoise and phthalo green.
Start by loading your brush in the turquoise. Paint the same kind of strokes going in a downwards/ curved direction. Then load a small amount of white on the tip of the brush and continue to paint in a downwards/ curved direction blending the color on the canvas.
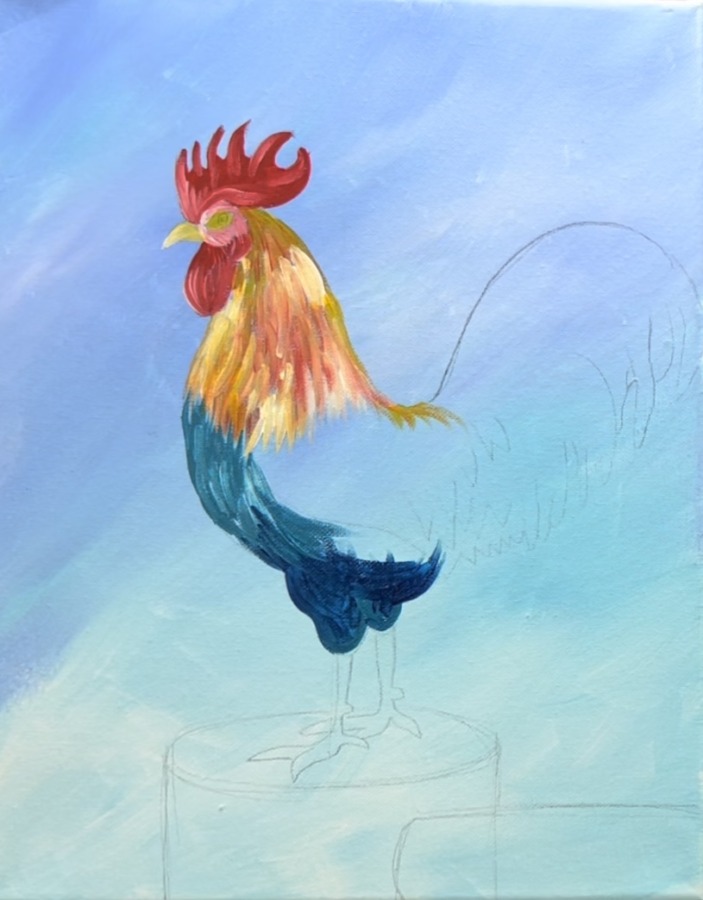
As you approach the “thighs” or bottom region, add phthalo blue to your brush. Paint that area all the way down o the legs. Let the direction of your stroke go in the direction of the shape.
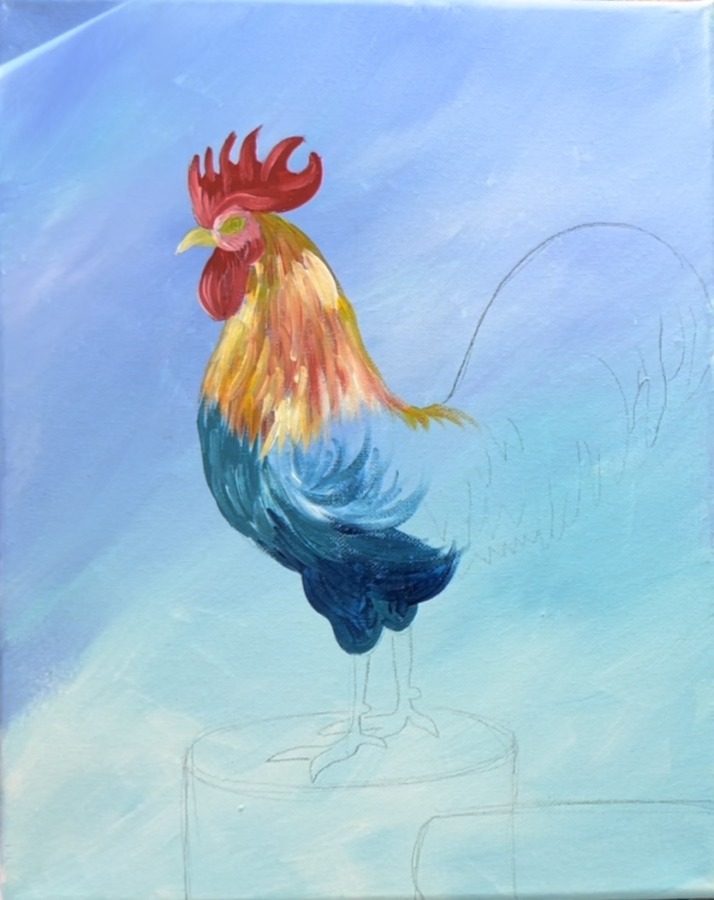
For the side of the rooster, add a small amount of white to the brush and paint in a circular direction. You can add bits of phthalo green into this area as well for “color variation”.
6. Paint The Tail
Switch to a #8 round brush. Load it into phthalo blue. Start on the far right of the rooster tail. Paint a long stroke and release the brush as you curve downwards.
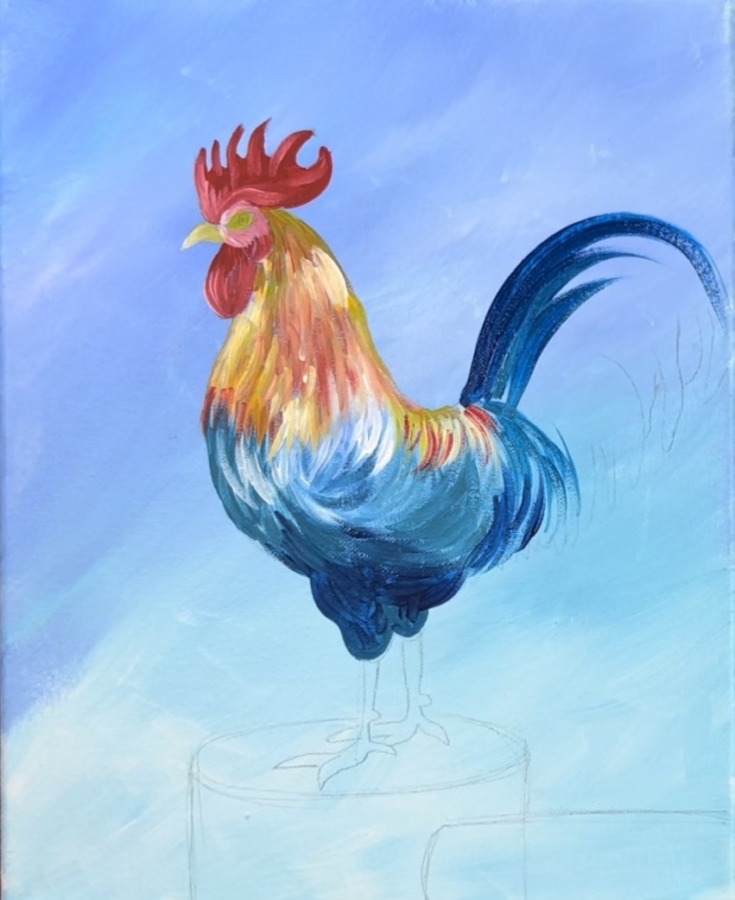
Repeat this step for a few more strokes but add turquoise and/or phthalo green onto your brush so each stroke is a different color. Then add small amounts of white on the brush. Continue to paint each of the tail feathers in one large and long, curved stroke.
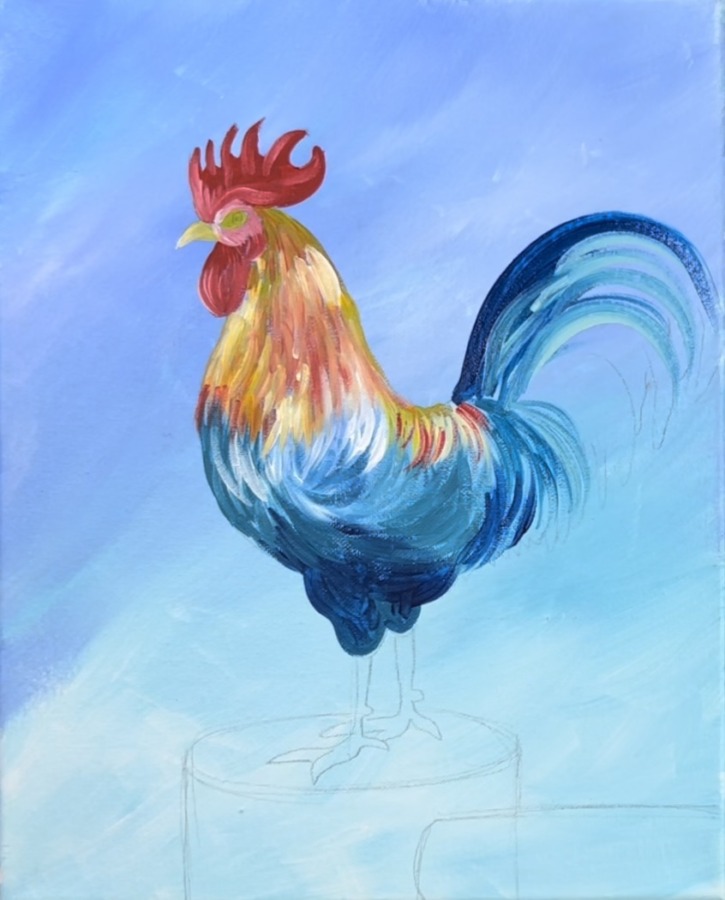
Paint more curved strokes, working your way down the entire tail feather region. Add some phthalo green to the bottom area and blend it with a little white/ blue.
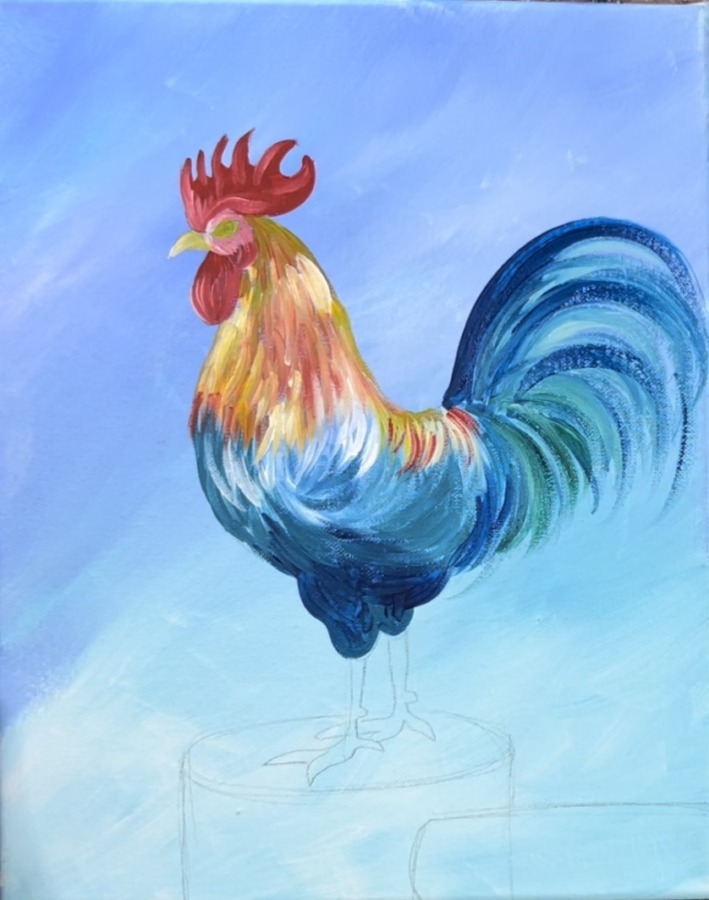
Then go back and add just phthalo blue strokes so you have some darker contrast in the tail feather lines.
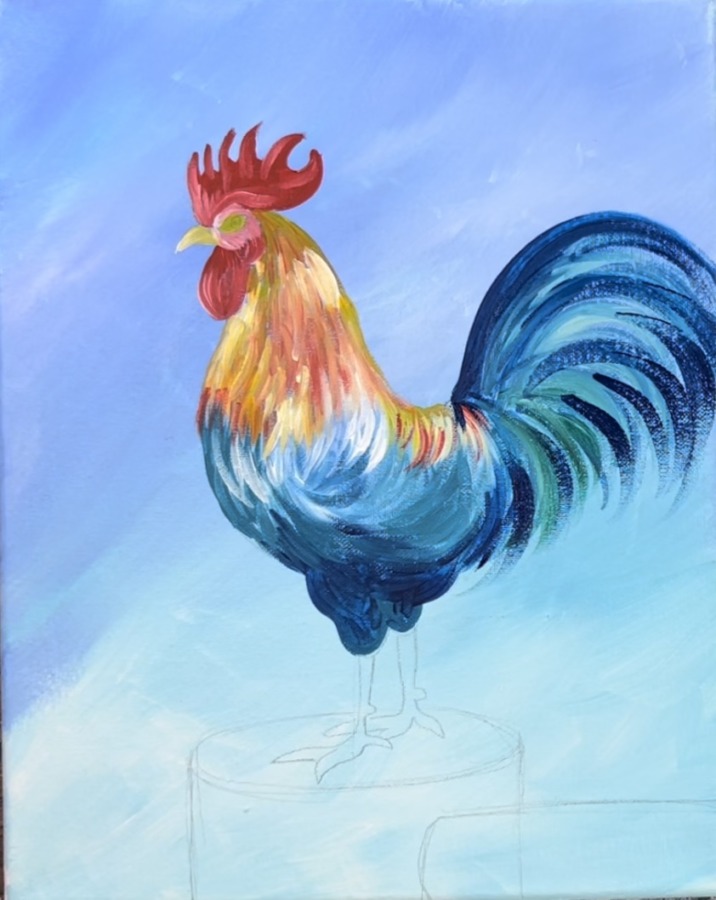
Add a few strokes of white for added highlight/ contrast.

7. Paint the feet and claws
Mix a brown/orange color on your palette by mixing 1 part burnt umber, 3 parts cadmium yellow medium and 1 part pyrolle red. Use the #4 round brush to paint the feet/claws. Add a small amount of white on the top and sides of the legs for highlights.
8. Paint pupil and middle line on beak
Use your #4 round brush to paint a very small black circle in the eye for the pupil. Then slightly outline the outer part of the eye. Then make a very thin curved line in the middle of the beak.
9. Paint Fence Post & Beam
Use your 3/4″ flat wash brush for the fence. Load your palette with burnt umber, titanium white and mars black.
Double load the brush in 3 parts burnt umber and about 1 part titanium white. Paint up and down strokes on the vertical part of the fence post.

Then paint horizontal strokes for the horizontal beam so that it overlaps the vertical beam.
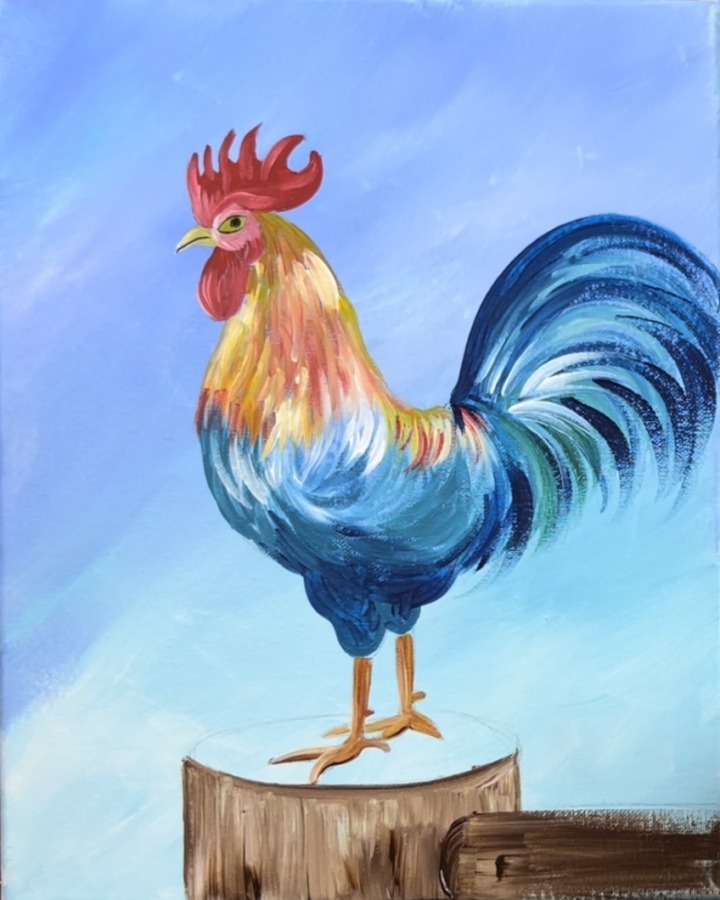
Add a little black & brown to your #4 round brush and slightly outline the top curve and the side curve for the edges of the wood.
Then paint in circular strokes with the brown and black on the top of the fence post under the feet. Add small amounts of white for highlight and more wood texture. Make the white strokes go in the direction of the wood grain and blend slightly with the brown.
10. Paint Grass
Use your #8 round brush and the colors: phthalo green, hooker’s green hue permanent, cadmium yellow medium and titanium white for the grass.
Start with the phthalo green. Slightly water down the green. Then use the brush to stroke to paint the grass blade. As you stroke up, release the pressure of the brush so the paint thins and goes to a point.
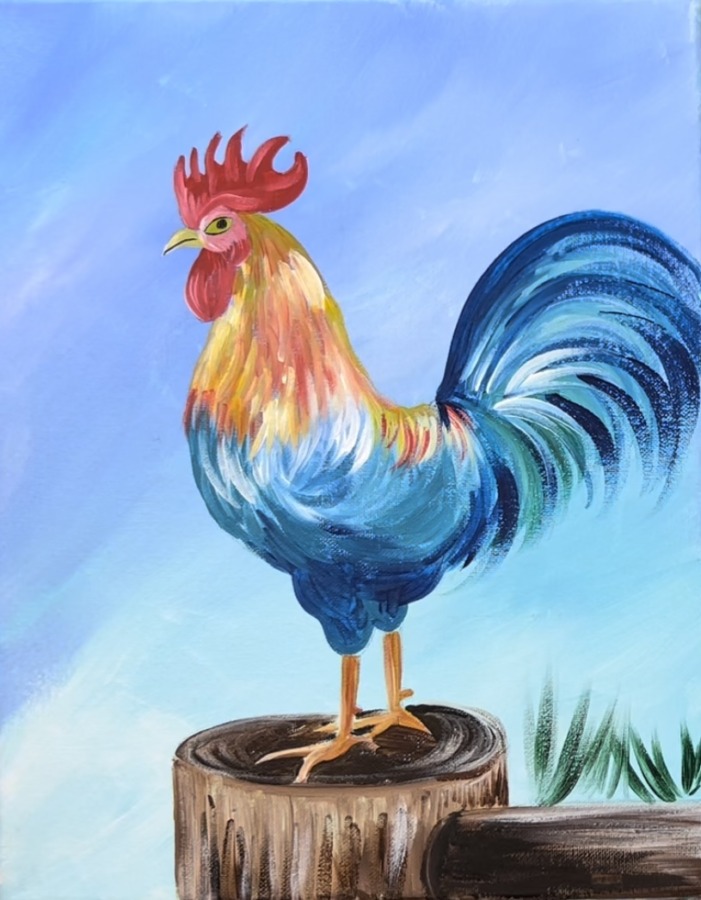
Create a row of the phthalo green grass. Then load your brush in hooker’s green and yellow to create lighter blades. Layer your grass blades and create different variations in the colors. Paint them at different angles and overlap the grass blades.
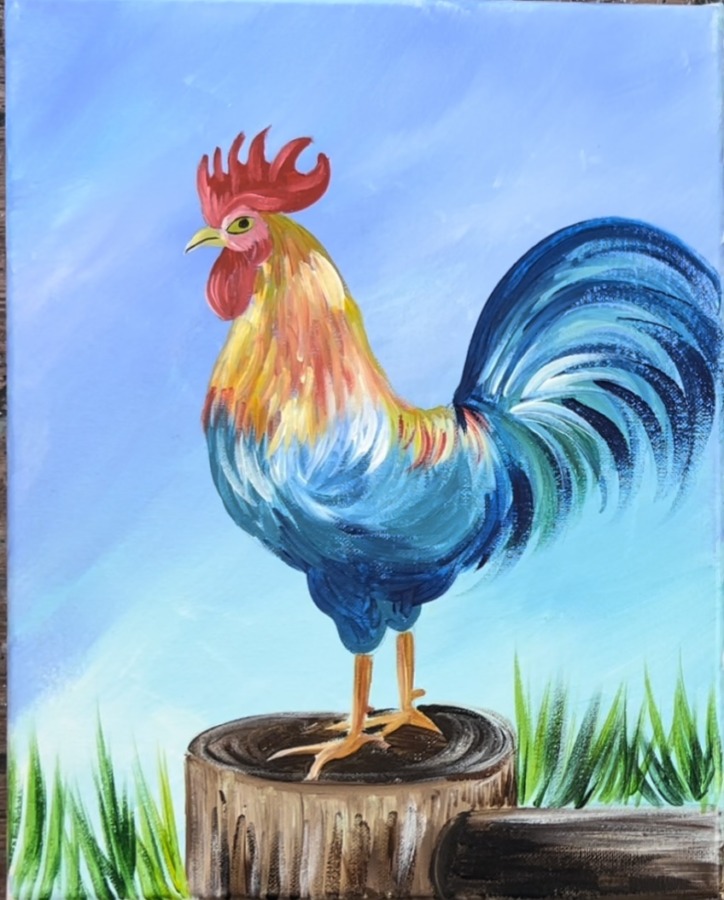
Then add some white in some of the greens to make it lighter.
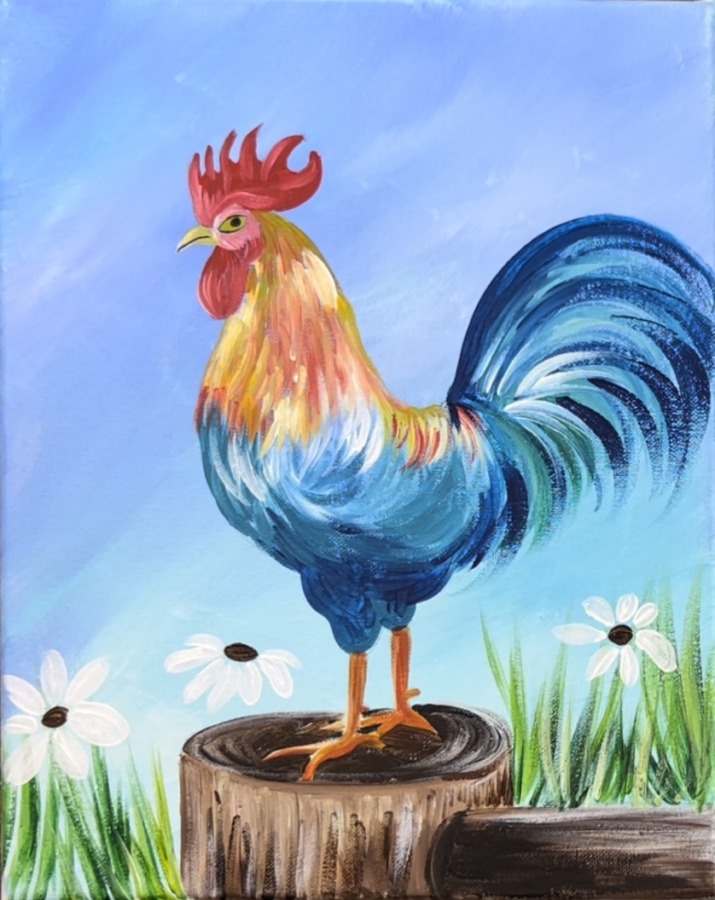
11. Paint Flowers
Paint the centers of the flowers using your #4 round brush and mars black.
Then paint the white petals of the daisy flowers using titanium white and the #4 round brush. Make the base of the petals somewhat narrow and have the petals get wider on the tips.
To paint they hyacinths, load your palette with dioxazine purple. Use your #4 round brush to paint dots forming a cone shaped flower bundle.
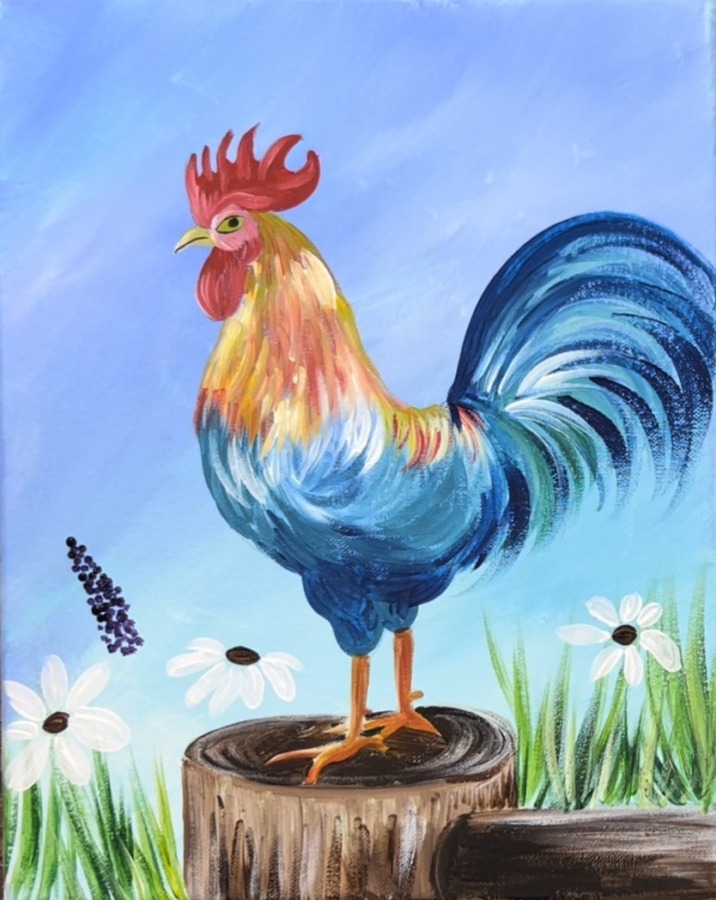
Then load your brush in white. Paint white dots over some of the purple dots to create lighter purple flowers. Repeat this and create another hyacinth next to the first one.
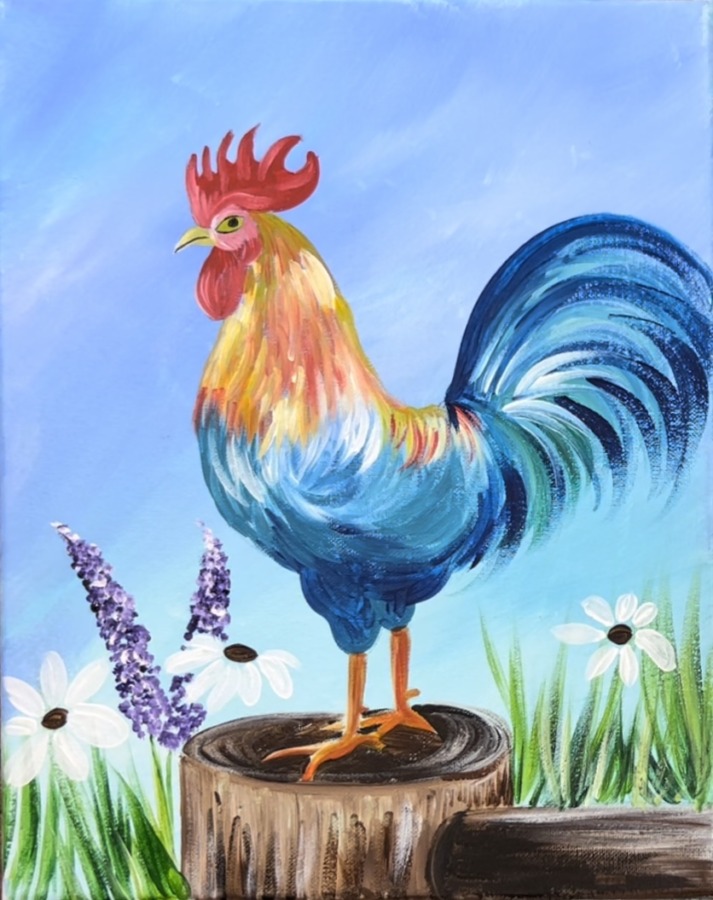
Use your #4 round brush and any of the greens to paint stems going down from the daisies and hyacinths. Make a very fine, thin line using just the tip of your brush.
Then paint yellow over the white petals on the middle daisy.
12. Final Touch Ups
As some final touchups, I added some brown in areas on his neck and back. I also loosely outlined the fence post with some mars black (the top oval). Some other touch ups could be painting a second coat on the feet and a second coat on the flower petals.
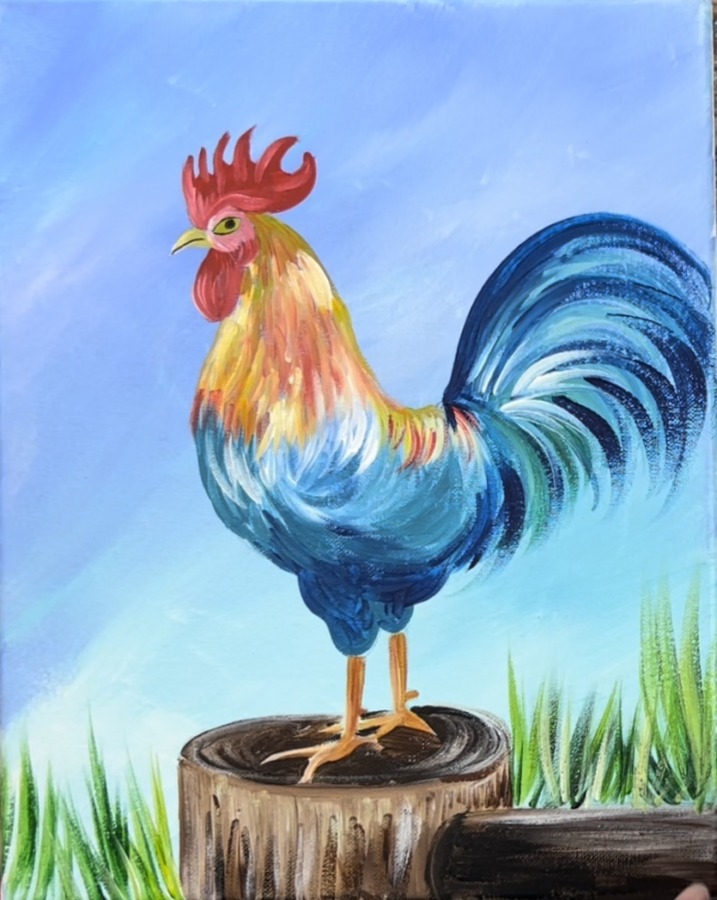
Finished!
Share your art here:


