
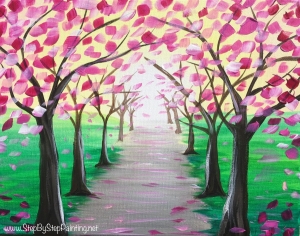
How To Paint A Fall Tree
This tutorial will demonstrate how to paint a fall tree with acrylics on canvas. I cannot WAIT for fall! It is my absolute favorite season. Even though I don’t get to experience the changing of colors with the leaves on our trees in Phoenix (or cooler temperatures), it’s still my favorite!
Would you like to save this?
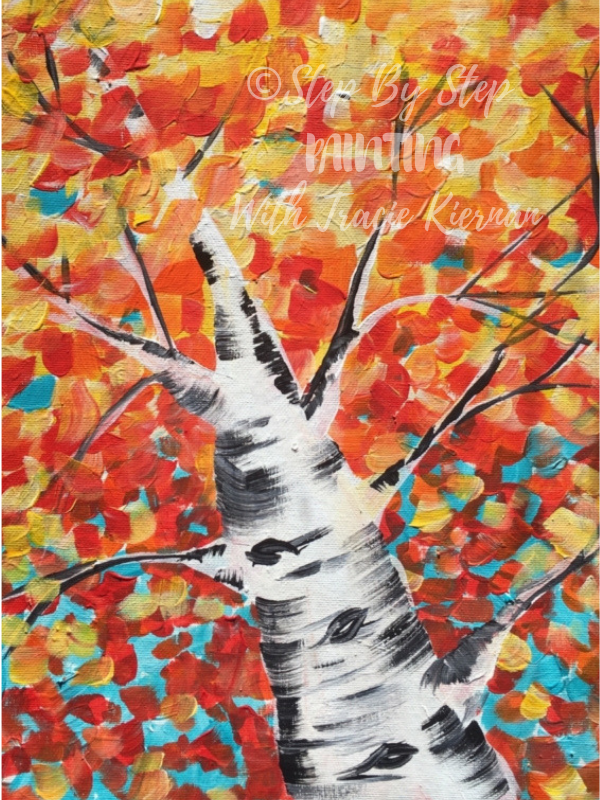
This particular tree is from the perspective of someone looking up into the tree (low angel). The trunk of the tree starts out very thick on the bottom and then gets smaller as it reaches the top of the canvas.

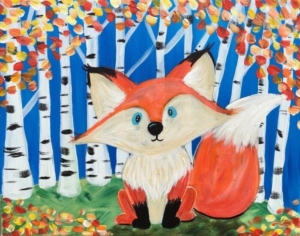
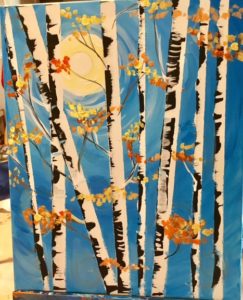
I found painting the leaves to be very relaxing because the strokes are more expressive, loose and abstract. You don’t have to think too hard when painting these fall leaves. It’s very in style to my Spring Path painting and my Fox And Birch Trees.
See Also:
Enjoy and Happy Painting!
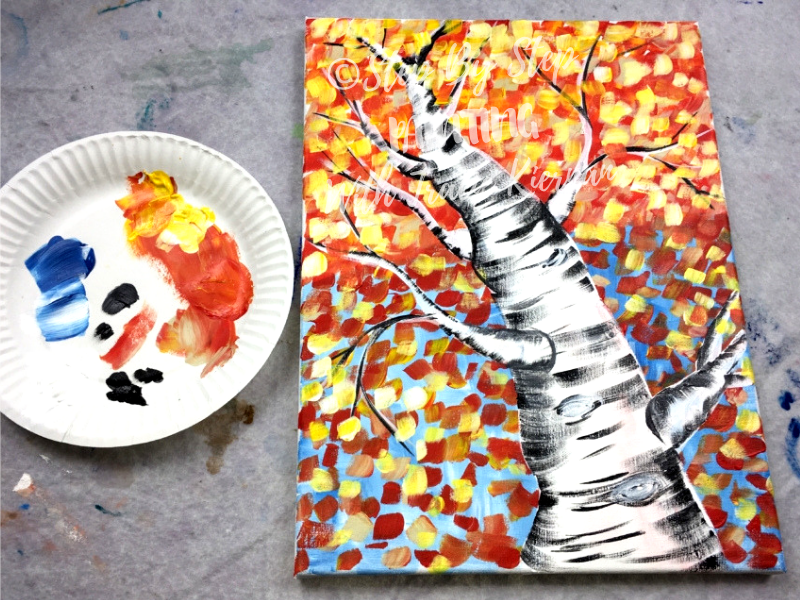
Materials
How To Paint A Fall Tree

This fall tree is in the perspective of someone looking up from the ground! Learn how to paint this easy painting with fall colors.
Materials
- 12" x 16" canvas
- Acrylic Paints
- Brushes
- Paper Towel
- Pencil
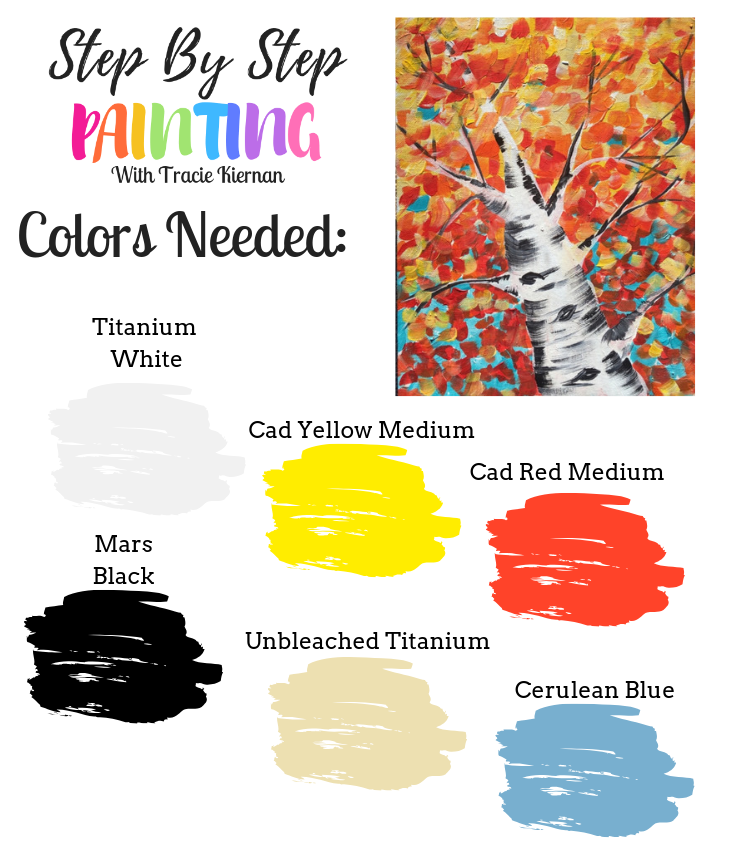
Colors
- Cadmium Red Medium
- Cadmium Yellow Medium
- Cerulean Blue
- Titanium White
- Mars Black
- Unbleached Titanium
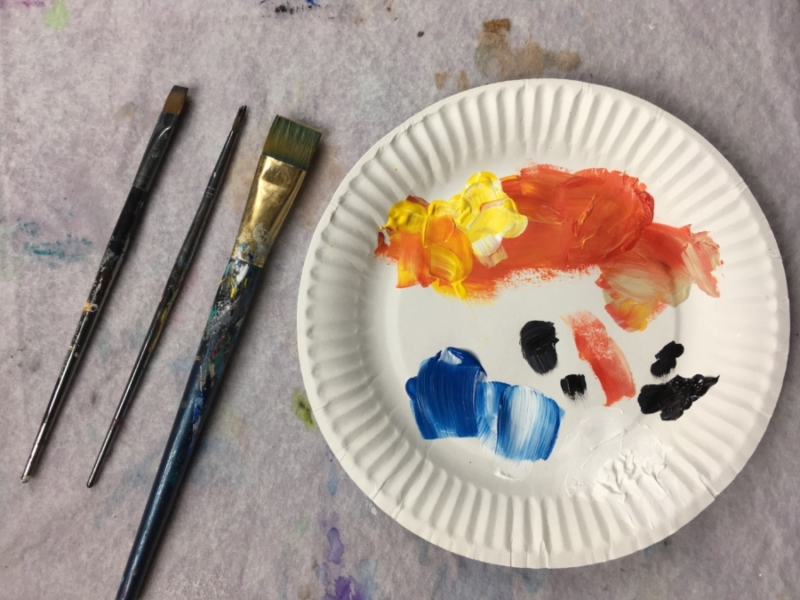
Brushes
Color Palette
Directions At A Glance:
Video:
Step By Step Directions:
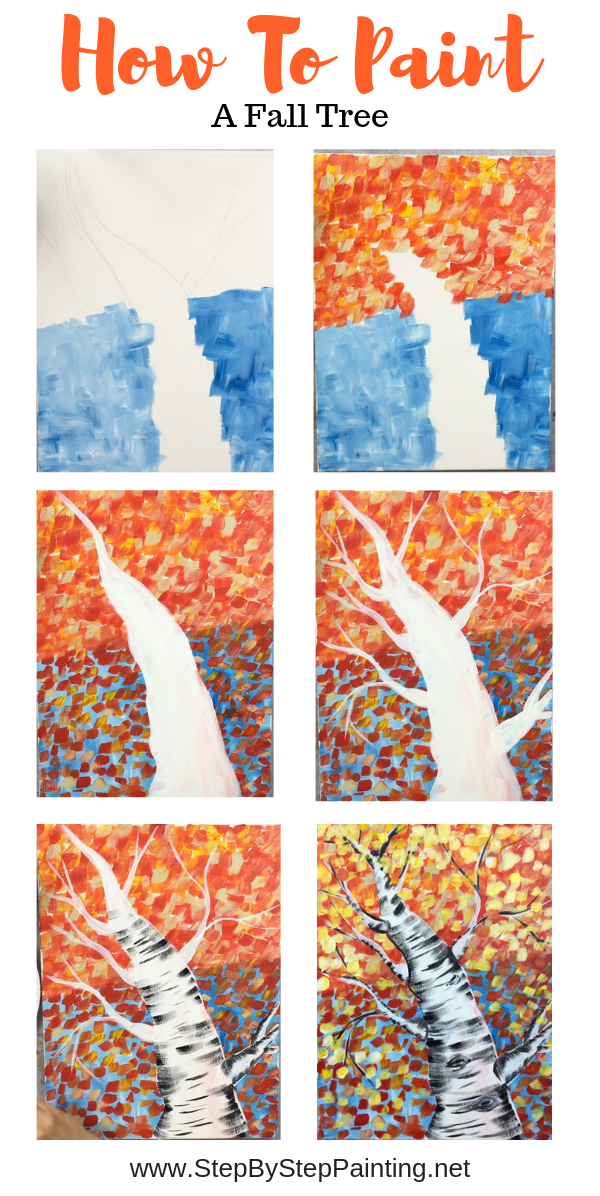
1. Draw The Tree With A Pencil
Lightly draw the tree so that the trunk is very wide on the bottom right and then goes diagonally to a point in the upper left part of the canvas. 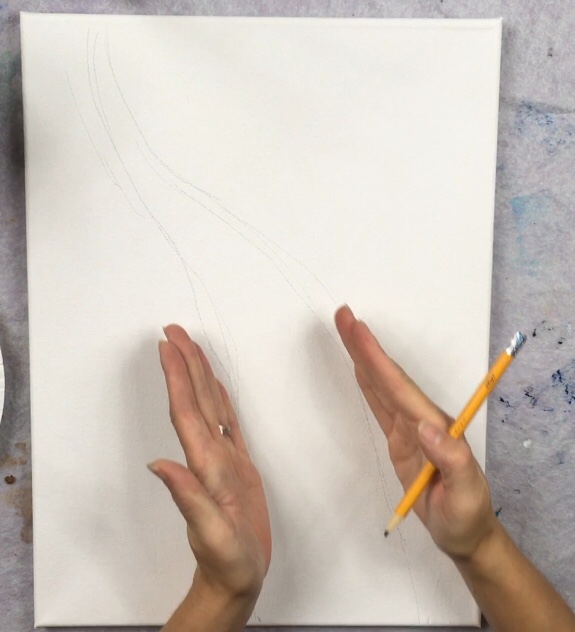
The shape of this tree is almost like a triangle. You may wish to simplify things and draw this actual triangle. 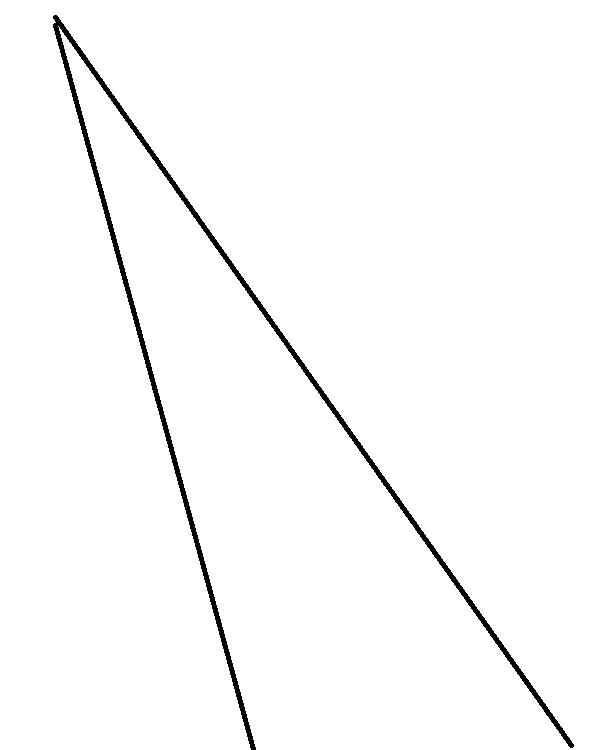
I made my tree kind of curve and I also drew some branches just for reference.However, these branches will be painted over. 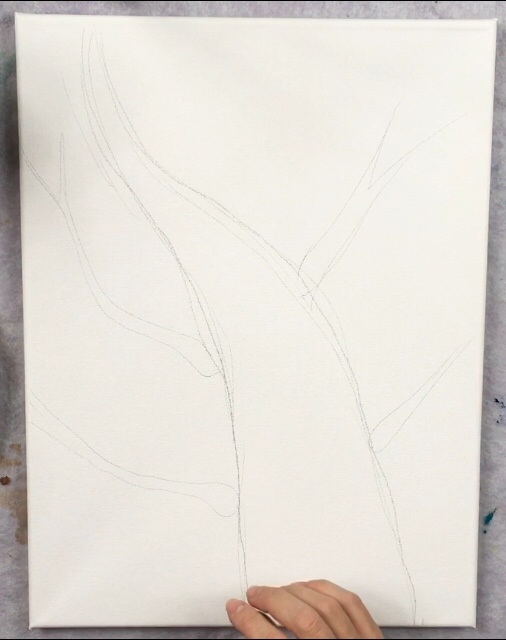
2. Paint Blue & White On The Bottom Half
You’ll need cerulean blue and titanium white as well as a 3/4″ flat brush. Double load your brush in both the colors (about equal amounts). Then paint short strokes going vertically and horizontally. 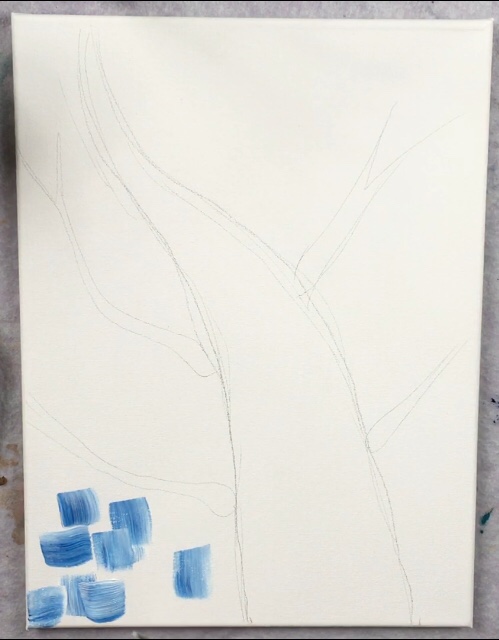
When you apply the color to the canvas, don’t blend it all the way. Let the blue and white blend on the canvas but don’t try to make a solid color. 
Fill the entire area on the bottom half of the canvas. (Note: I did not measure half, I just estimated) 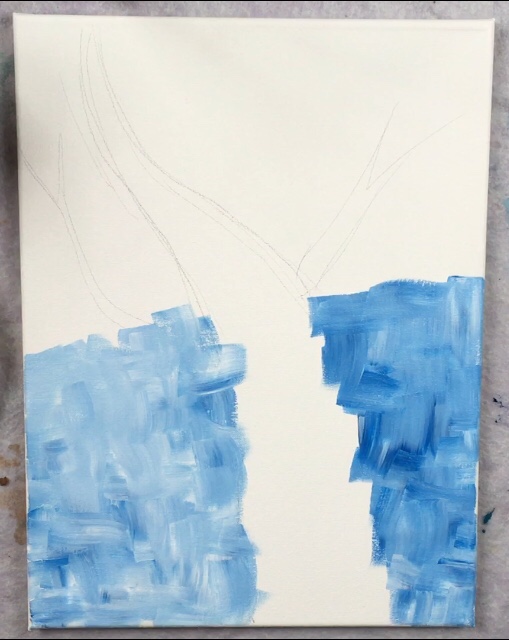
3. Paint Red And Yellow On The Top Half
Use a #12 bright brush and cadmium yellow medium and cadmium red medium. Paint short strokes with the #12 brush in the same way you did the blue strokes, only you can go diagonal and all directions. Make sure you don’t paint over the main tree trunk (you can paint over branches if you drew them). 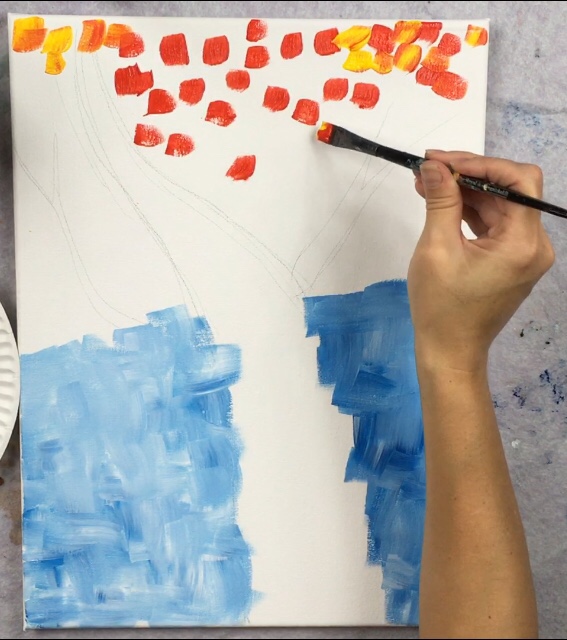
When you load your brush, apply both the yellow and the red. Make some areas with just red and some with yellow. Some areas will turn orange because you applied both the colors and they mixed together! 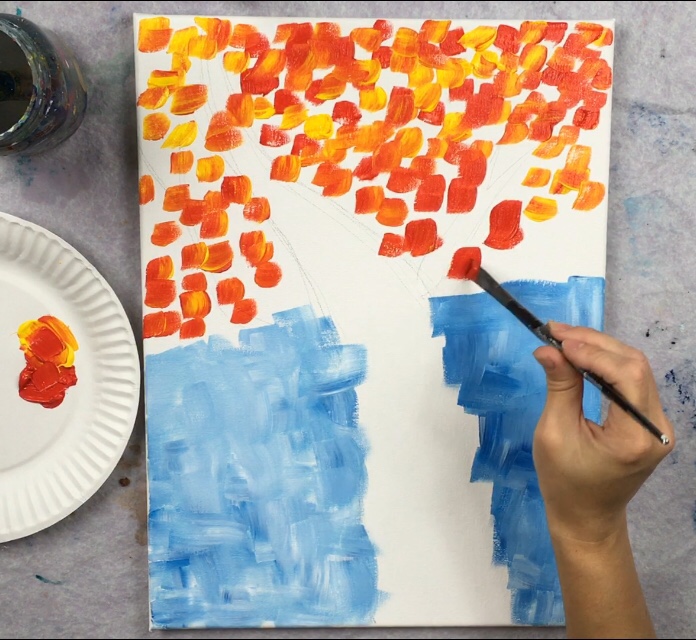
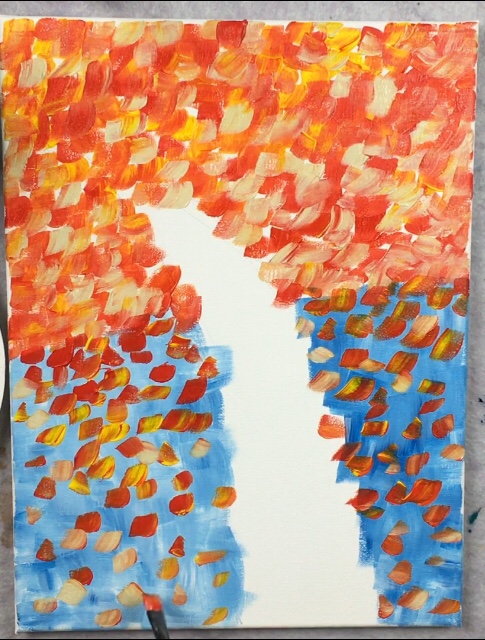
4 Add “Unbleached Titanium White”
Next load unbleached titanium onto your palette. Rinse your brush and then apply the unbleached titanium to fill up all the white spots left on your canvas. Apply it the same way you did the red and yellow. This blends nicely with the red and yellow so don’t worry about painting over wet strokes. 
This may take some time, but you’ll need to fill up as much as possible in the top area trying to leave very few white spots showing through. 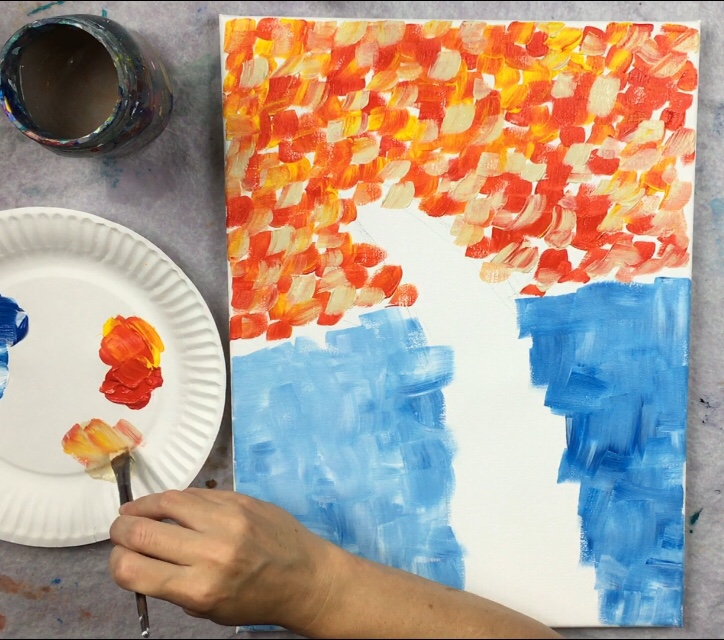
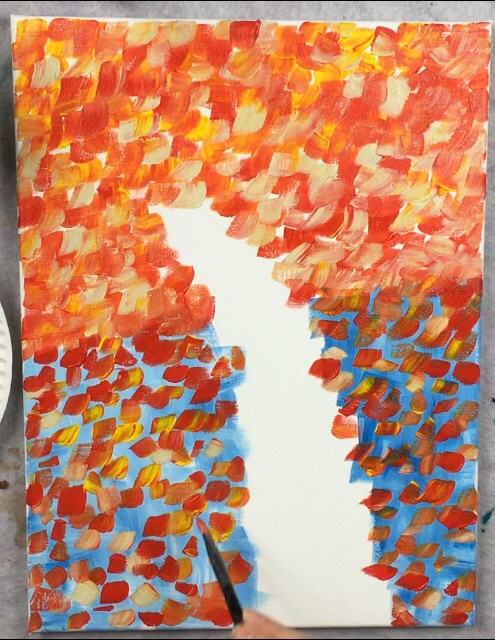
5 Paint Red, Yellow And Unbleached Titanium On The Bottom Half
The bottom half blue area should be dry by now. Apply the red, yellow and unbleached titanium white in the same style on the bottom but leave a lot of the blue still showing through. 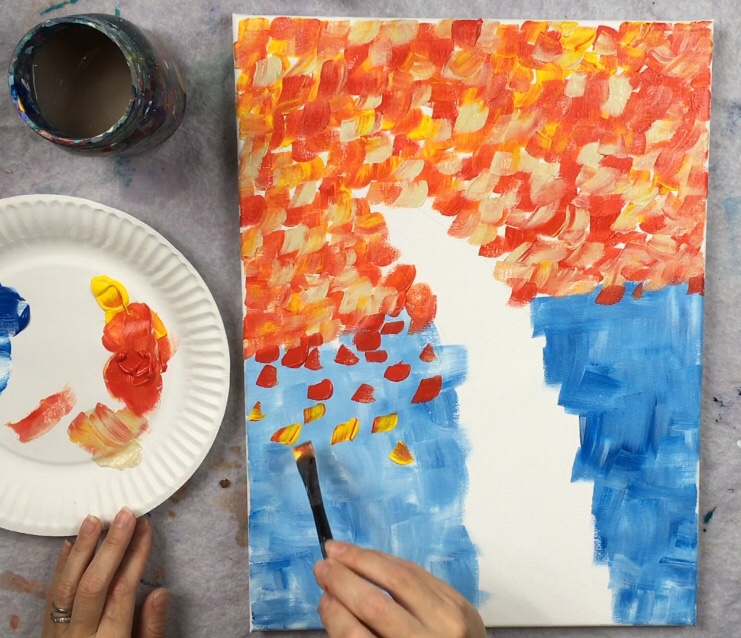
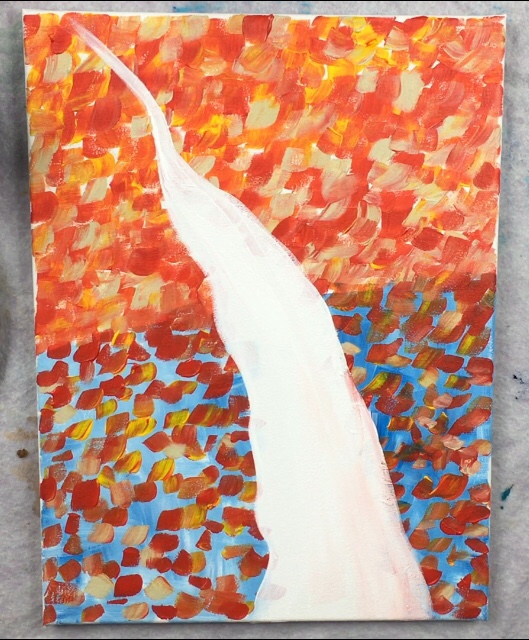
6 Wait For Painting To Dry, Then Paint The Tree White
You can use a hair dryer to quickly dry the painting or take a break and come back when the painting is completely dry. Then use your 3/4″ flat brush and titanium white to paint the tree trunk. 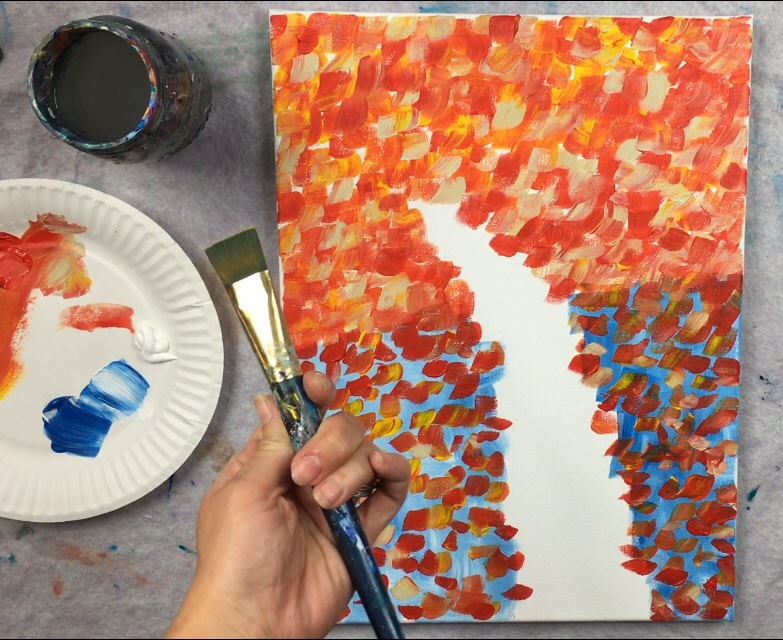
You may need to redraw your tree with the brush. Use the tip of the brush to get it to go to a point at the top and use the full width to paint the thicker trunk on the bottom. 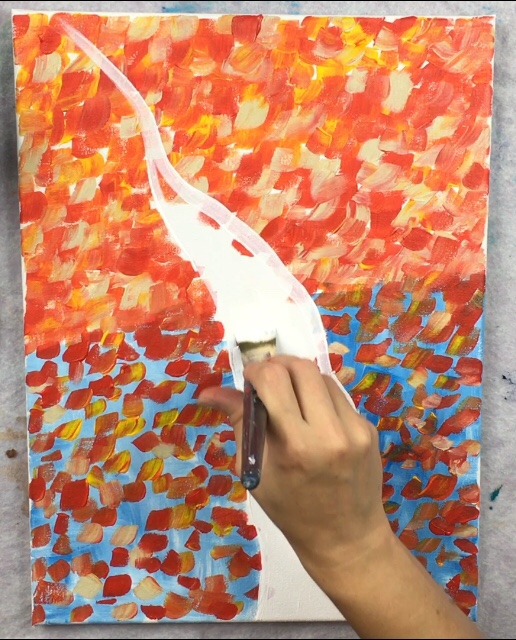
7.Paint Branches
Use your #12 bright brush to paint branches. These are smaller than the trunk but they still are thicker at the base and get thinner towards the tip. 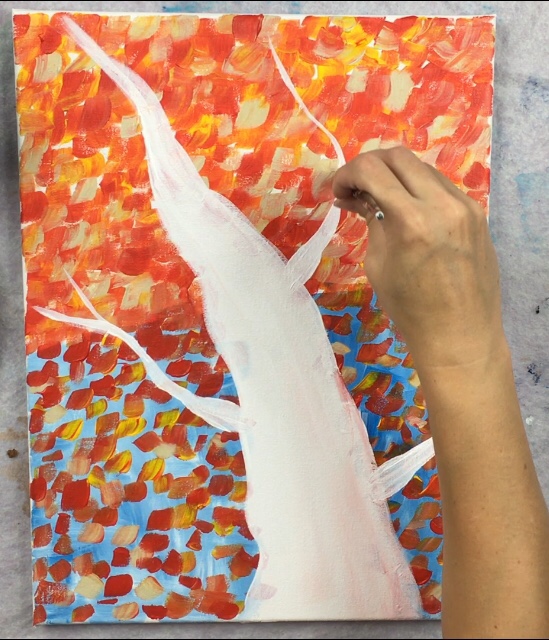
Most branches stem out to form letter “Y”s. 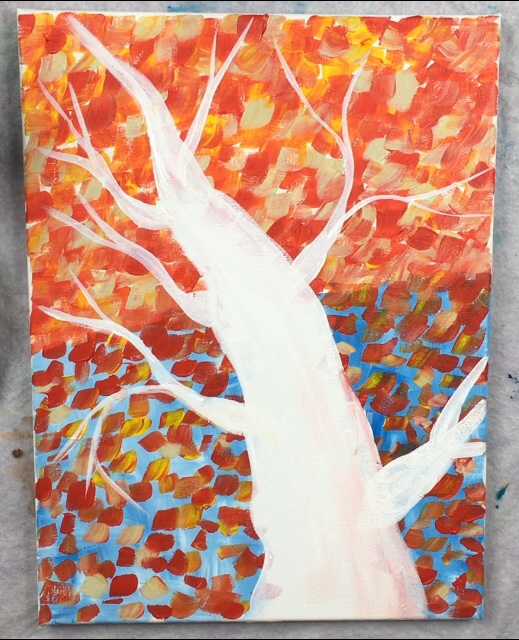
8. “Dry Brush”The Black Marks On The Trunk
Use your #12 bright brush and mars black to paint marks on the tree. These “marks” are dry brush meaning the paint brush is dry prior to dipping in the paint and some paint is wiped off the brush after it is loaded on the brush. In other words, load your brush in the black and wipe some paint off with a paper towel. 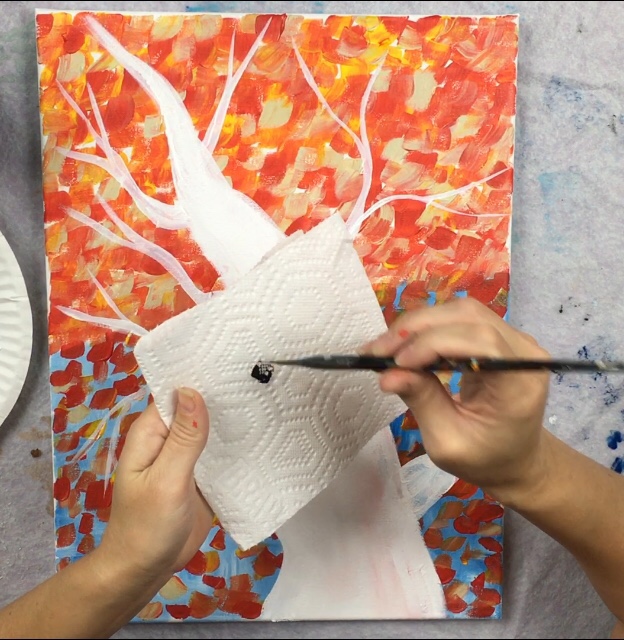
When you paint your stroke, use the full width of the brush. Start at the edge of the tree and drag inwards. 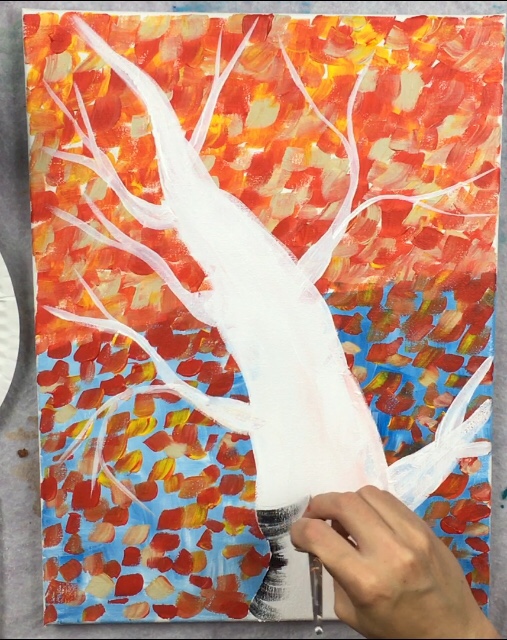
You can also use the tip of your brush to paint some dashed lines in the center of the tree. Do these marks on the branches as well. 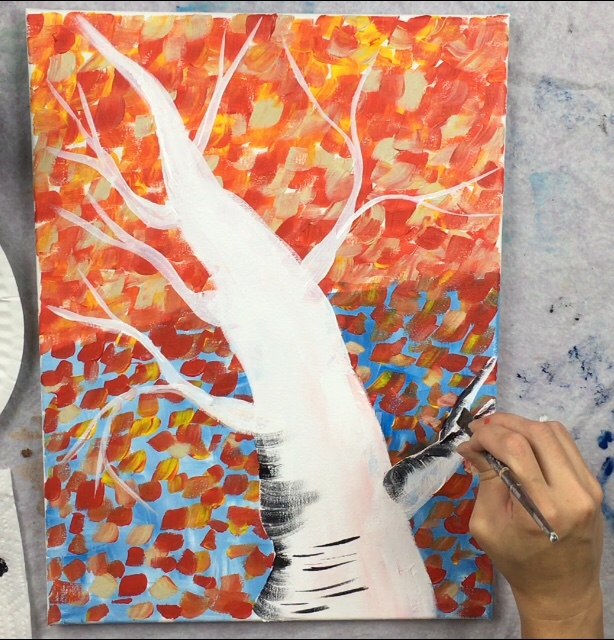
Keep applying these dry brush marks on both sides all the way up the tree. 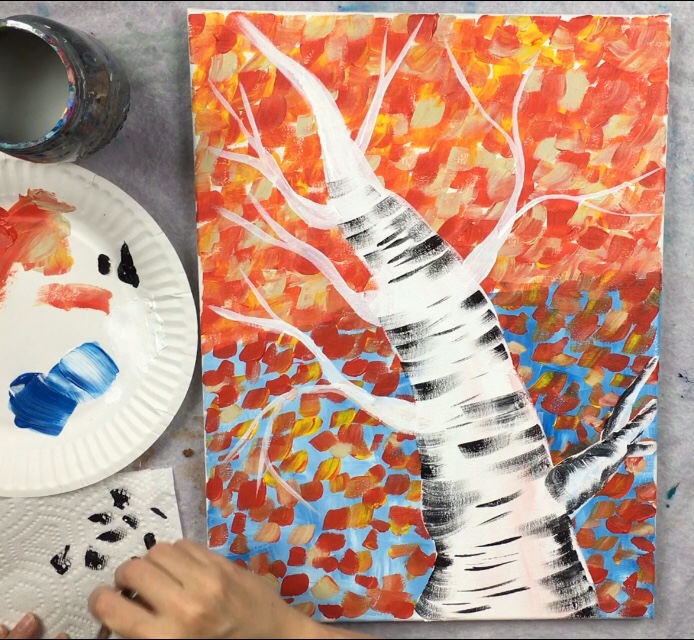
For the thinner branches use the tip of your brush to paint thin lines next to some of the white lines. I also added some new smaller branches with the black lines. 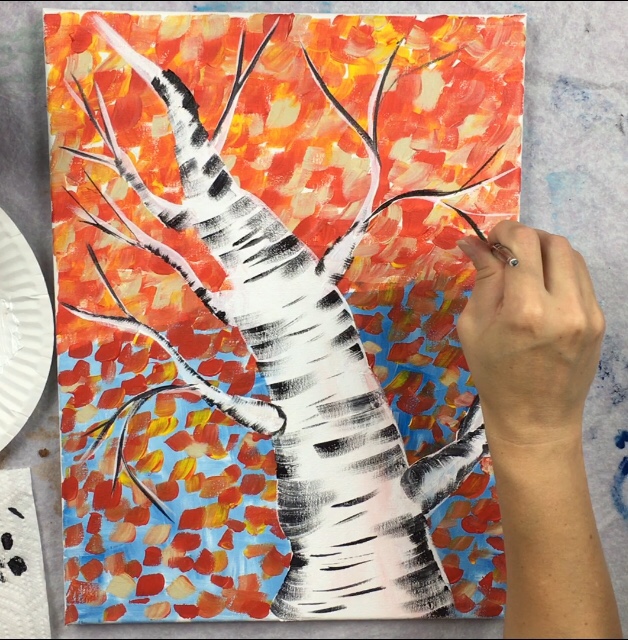
Optional: use a #4 round brush to paint some knots in the tree trunk. 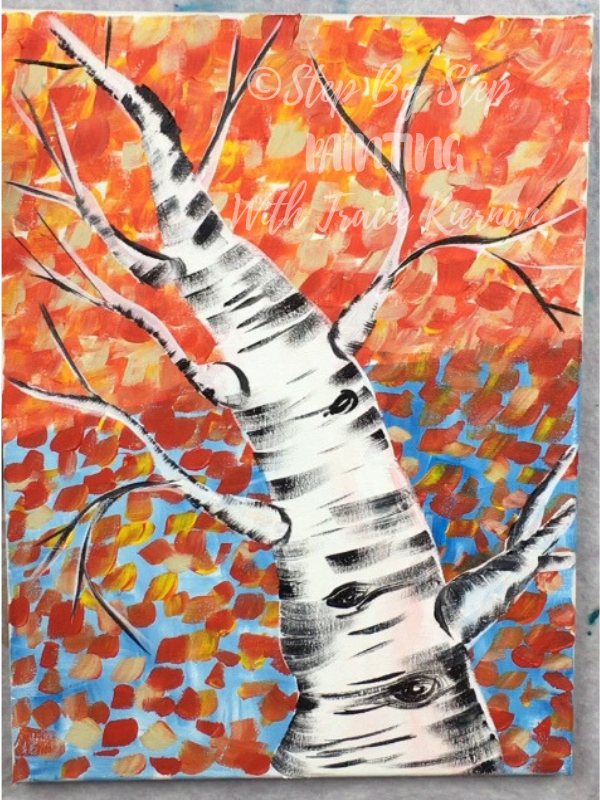
9 Paint Some More Yellow Leaves That Overlap The Branches
Double load cadmium yellow medium and titanium white (about equal amounts) with your #12 bright brush. Adding this bright yellow is a nice final touch to this painting. I did this in clusters in the top areas of the tree and I overlapped the yellow in clusters over some of the branches. 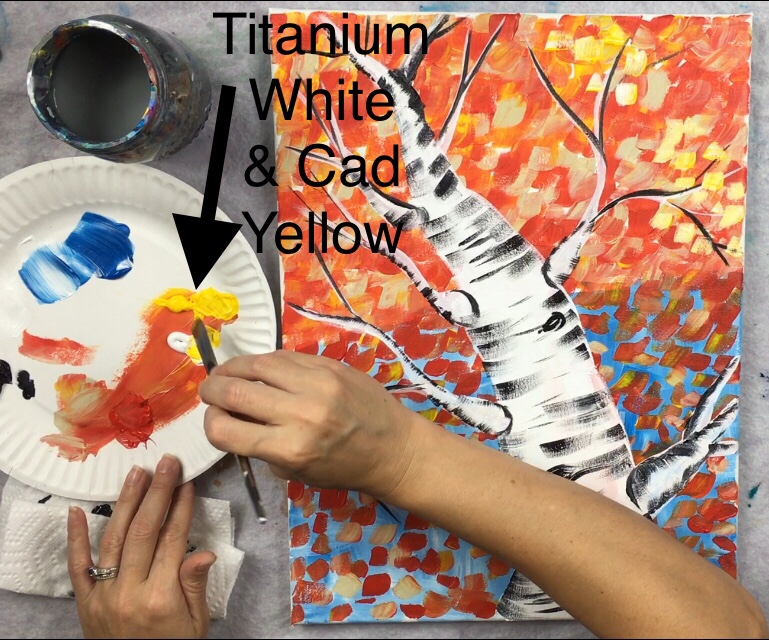
You can also add some of this yellow in the bottom areas. 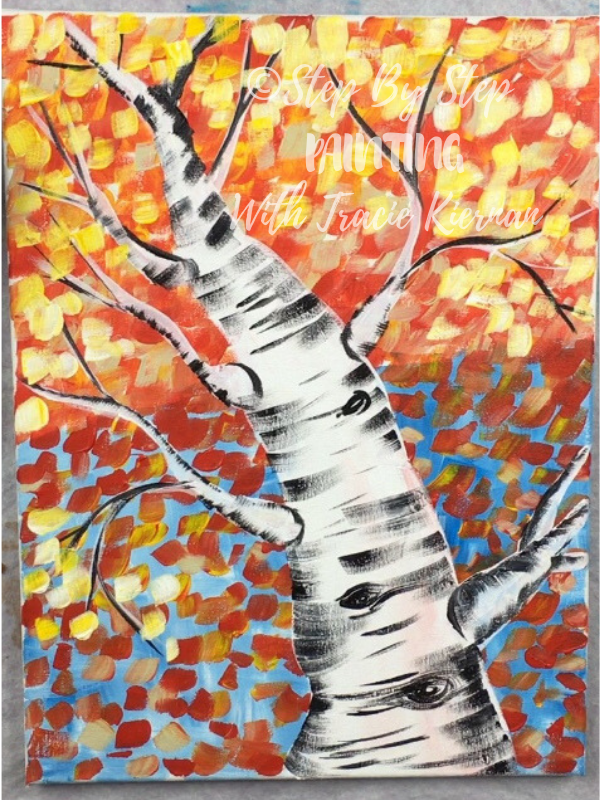
Finished!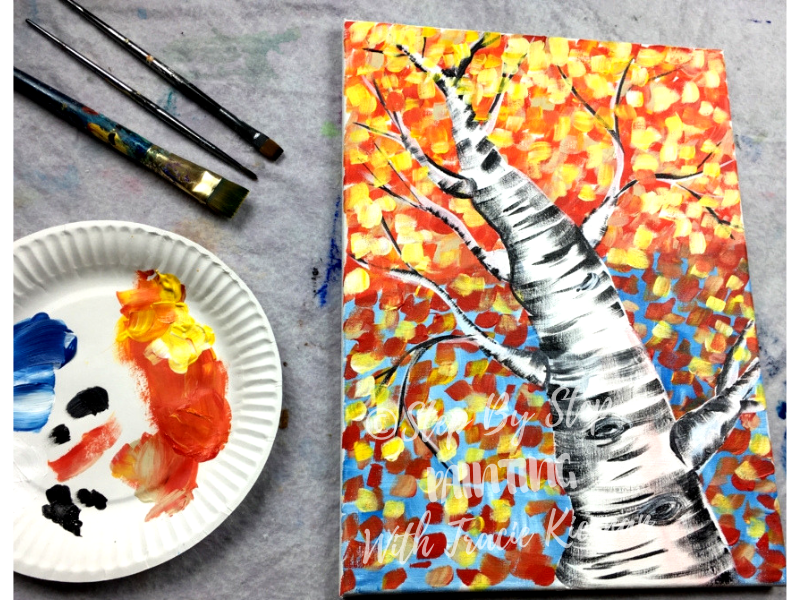


amazing
This is awesome!