

Would you like to save this?
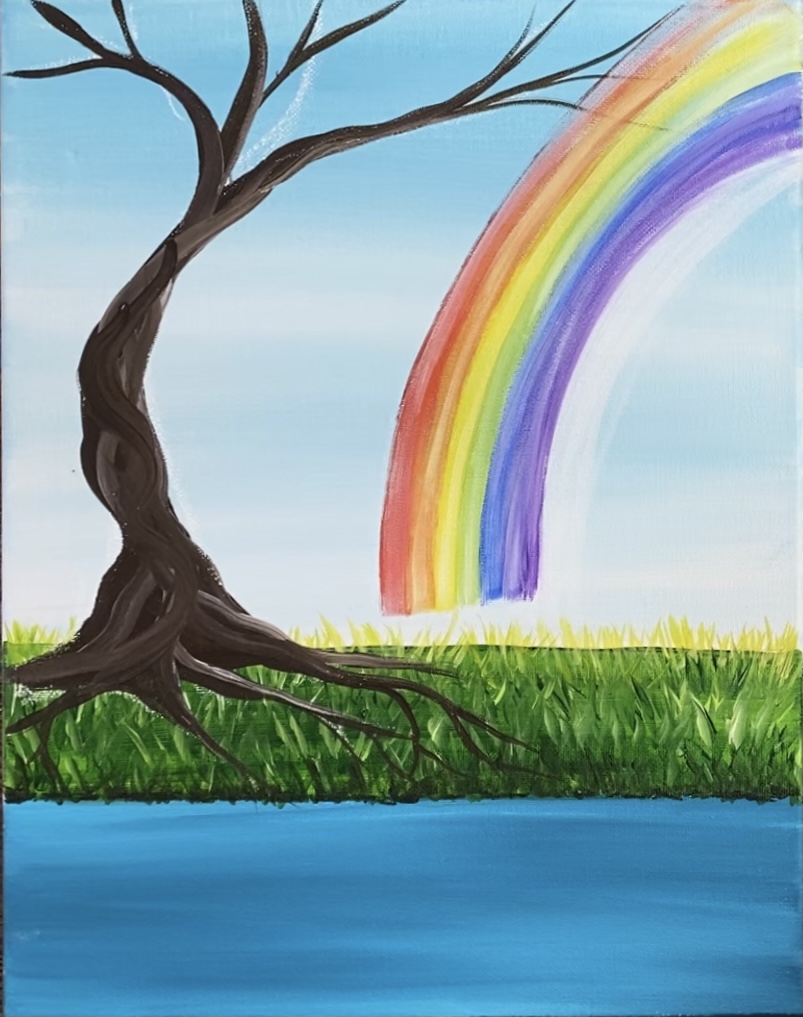
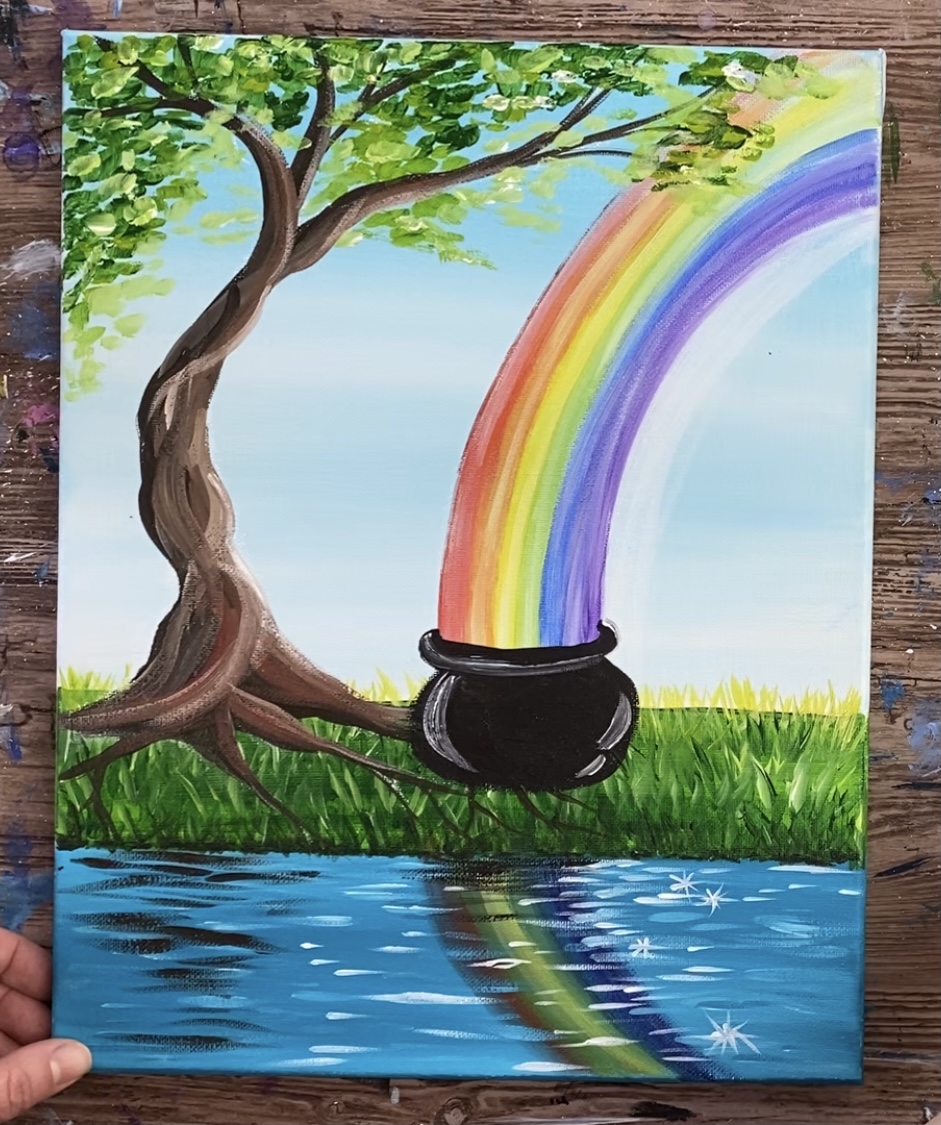
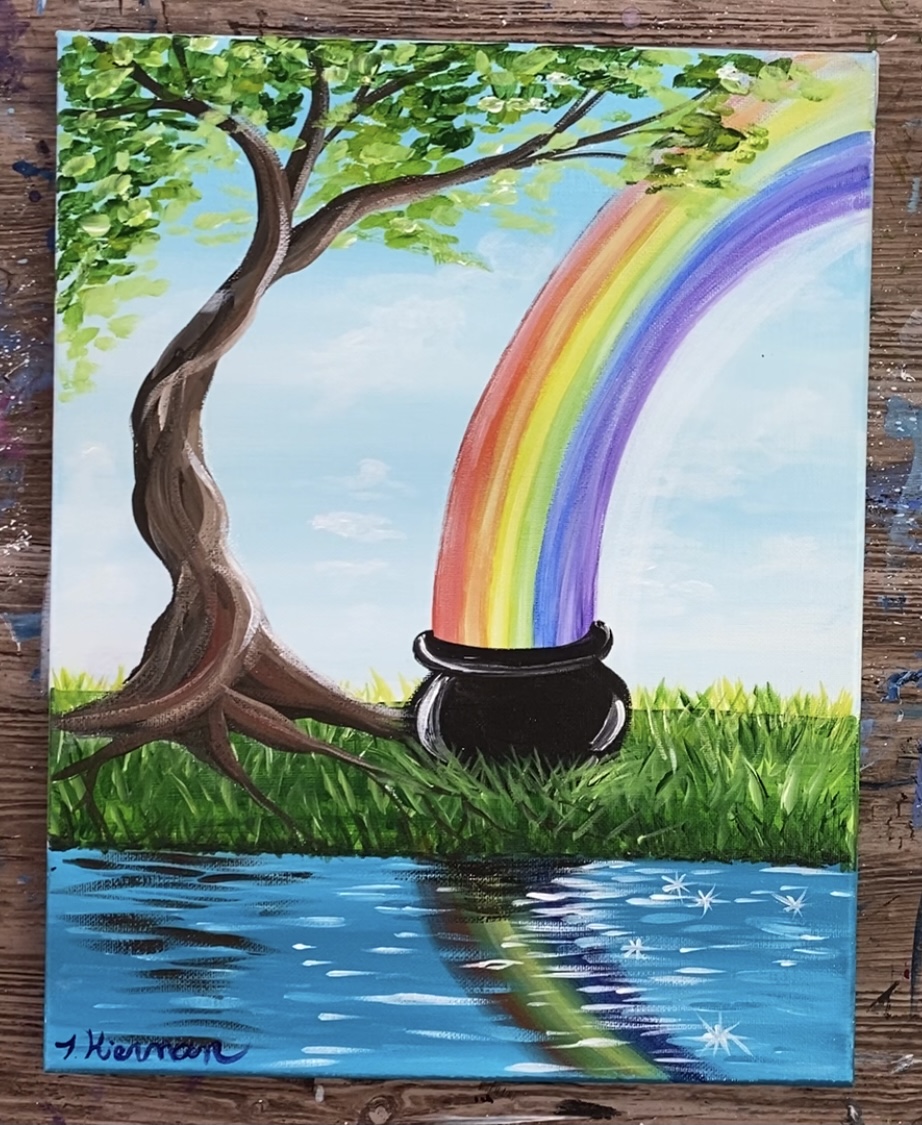
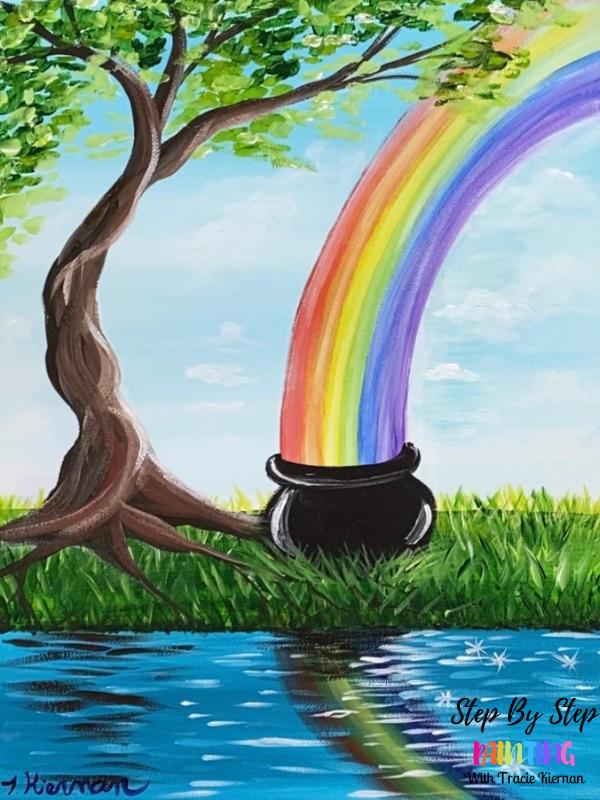
Learn how to create a rainbow painting with water reflection and a beautiful tree!
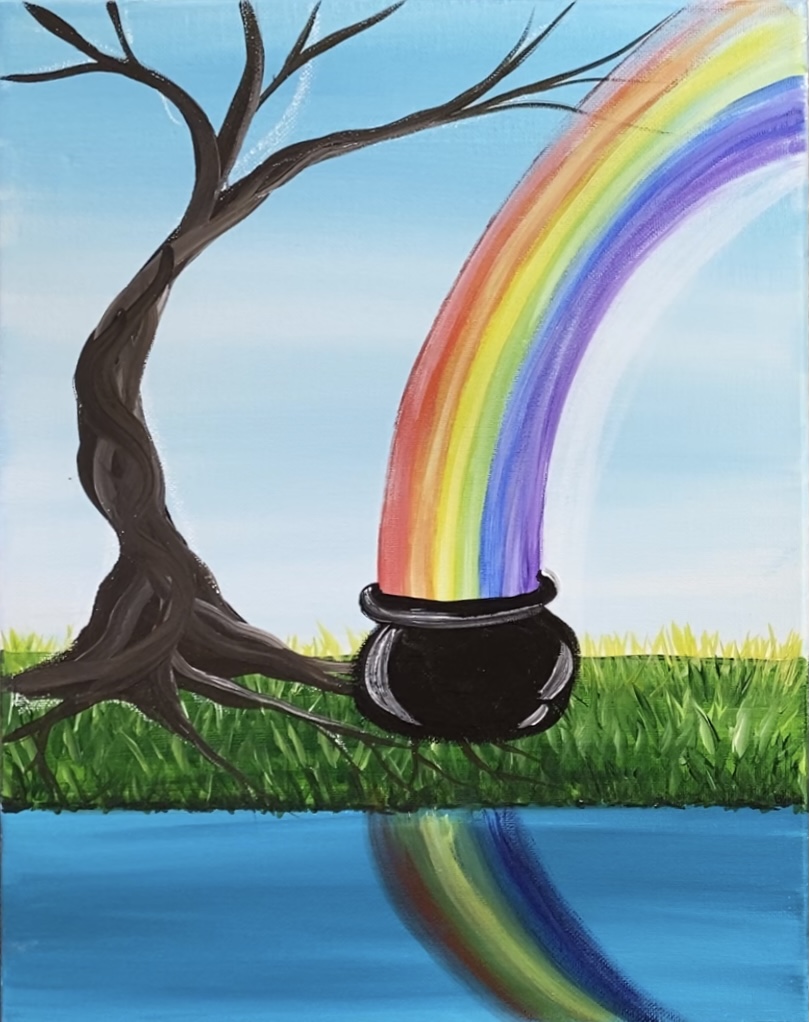
There are a lot of elements going on in this painting! I believe it can be interpreted in so many ways! It was not originally intended to be a St. Patrick’s Day painting, however, I changed the design up last minute and added the pot at the end of the rainbow making it a gorgeous painting you can display with your St. Patty’s Day decor. You can add the gold sticking out from the pot too if you wish!
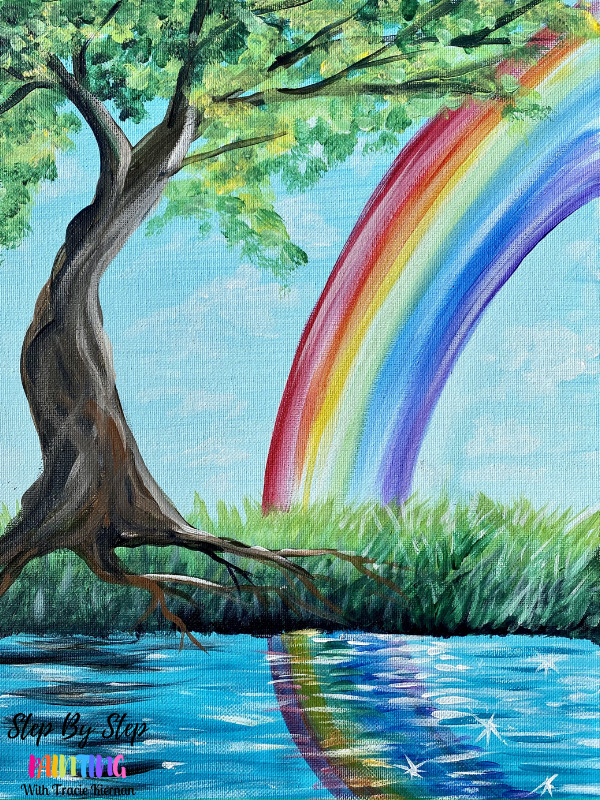
Hope, life, purity are some elements in this painting that the rainbow, tree & water represent. I did not have any particular meaning in mind – just that it can be interpreted as a significant meaning to you when you paint it.
I also thought about adding a dog and or cat silhouette on the bottom of the rainbow so that it can be a “rainbow bridge” painting. That can certainly be a design variation you can do!
Enjoy and happy painting!
Materials
Rainbow Painting
Learn how to paint a rainbow, tree & reflection in this beginner acrylic painting tutorial.
Materials
- 11 x 14 Canvas
- Acrylic Paint
- White Chalk
- Paint Brushes
- Water Cup
- Palette
- Paper Towel or Old Rag
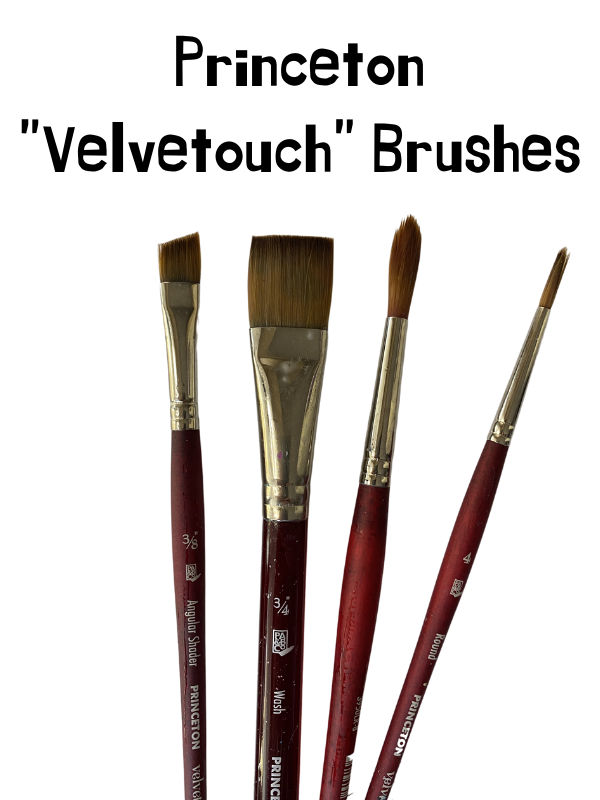
Brushes
- 3/4" Flat Wash
- #4 Round
- #8 Round
- #10 Shader (3/8" or similar size flat brush)
- 3/8" Angle Brush
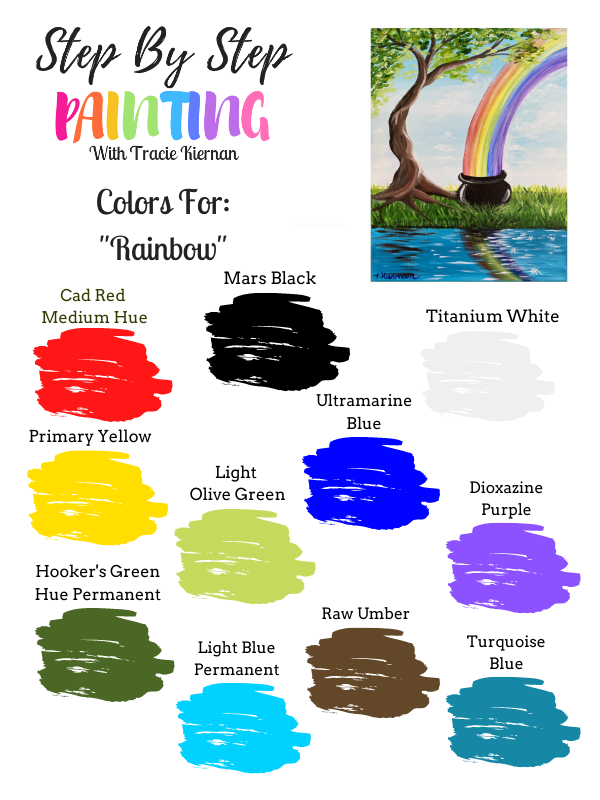
Colors
- Titanium White
- Mars Black
- Raw Umber
- Cadmium Red Medium Hue
- Primary Yellow
- Hooker's Green Hue Permanent
- Light Olive Green
- Ultramarine Blue
- Dioxazine Purple
- Turquoise Blue
- Light Blue Permanent
Instructions
- See full tutorial on www.stepbysteppainting.net
Recommended Products
As an Amazon Associate, Michaels Affiliate and a member of other affiliate programs, I earn from qualifying purchases.
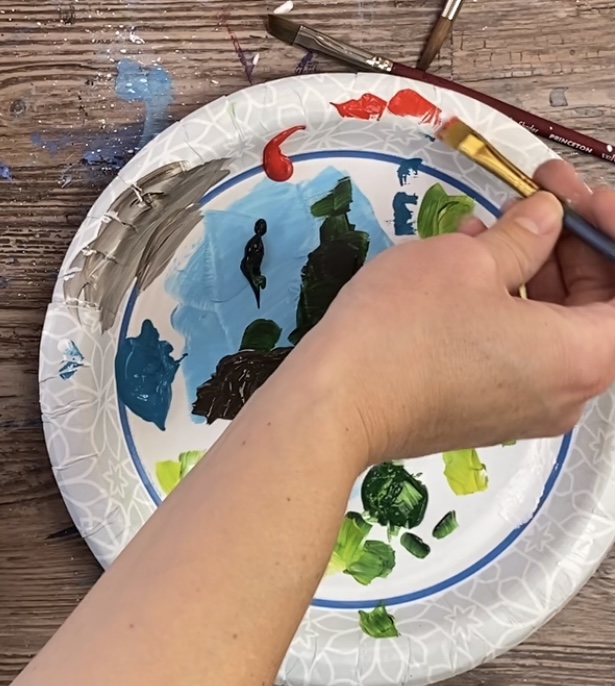
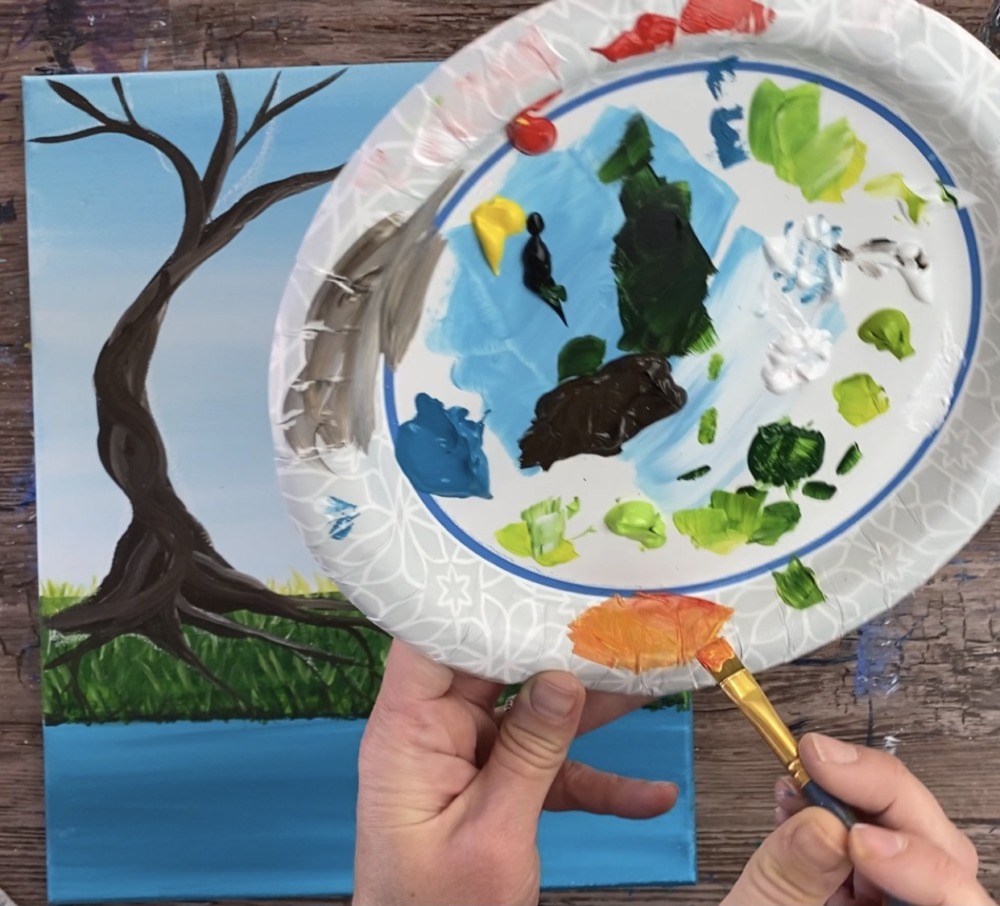
Color Palette
There are a lot of colors in this one! If you wanted to “simplify” the color palette a bit, I suppose you can do without the “turquoise” and make the water ultramarine blue instead. You can also make that “yellow green” by mixing the hooker’s green hue color with yellow and white to lighten it up. Light blue permanent can be made by mixing a love of white with a small amount of the ultramarine blue.
Directions At A Glance
Video
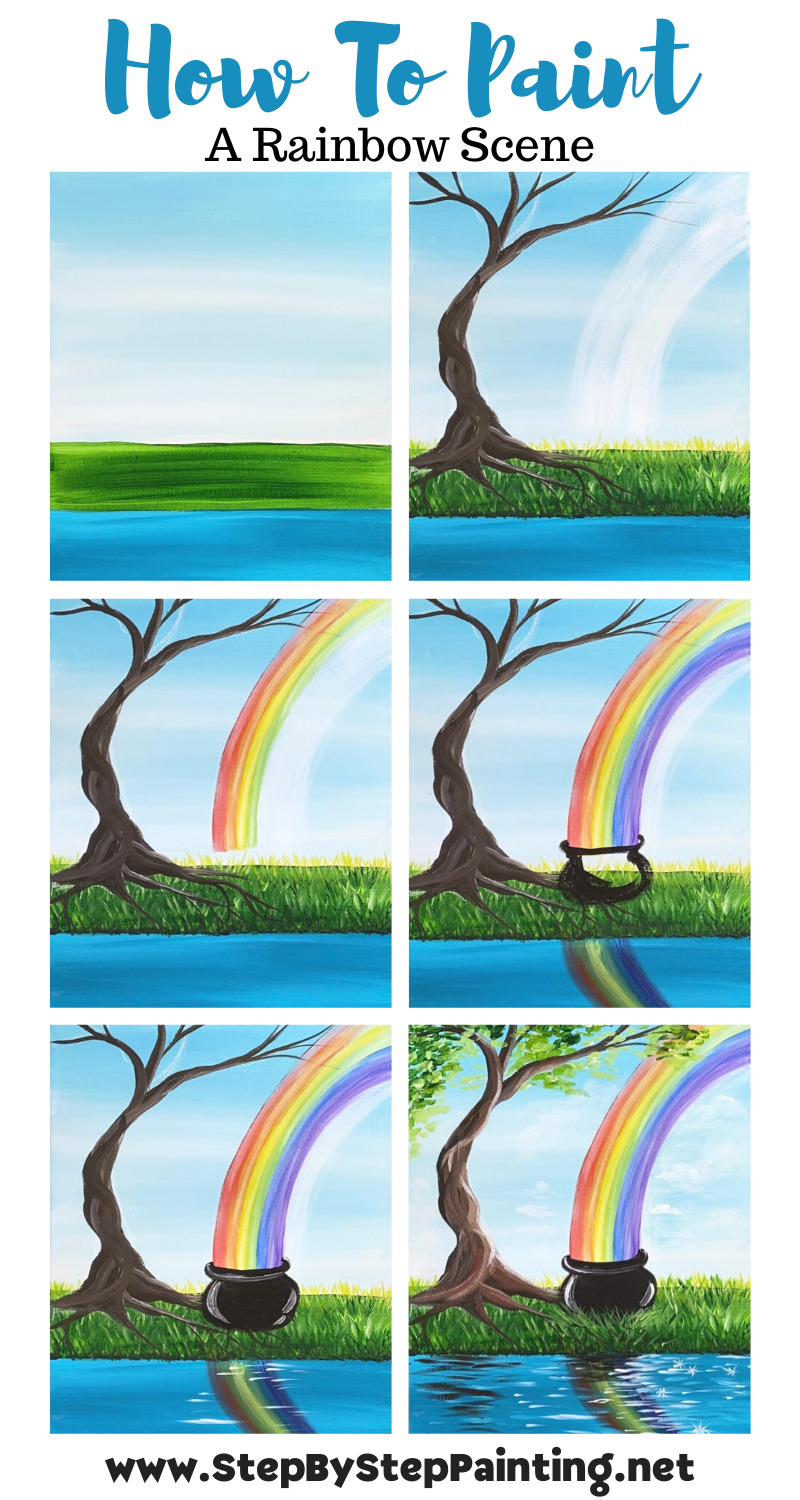
Step By Step Directions:
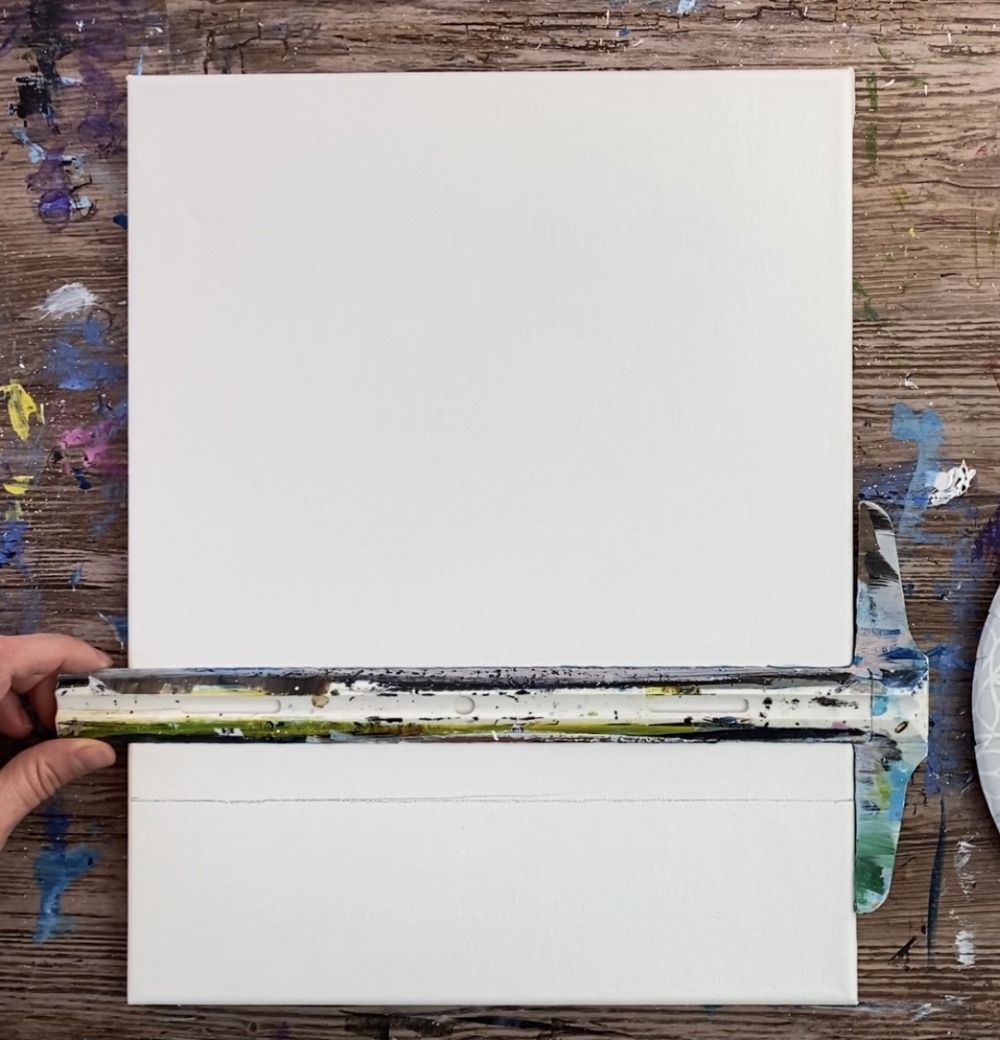
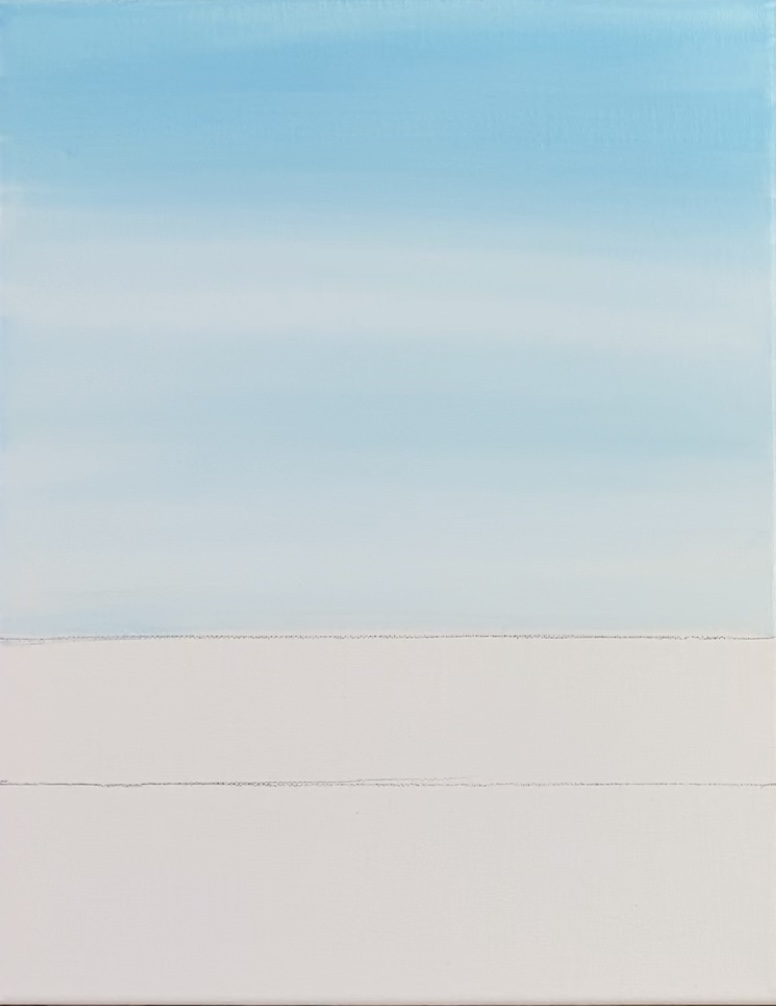
1. Divide the canvas into three sections using a ruler
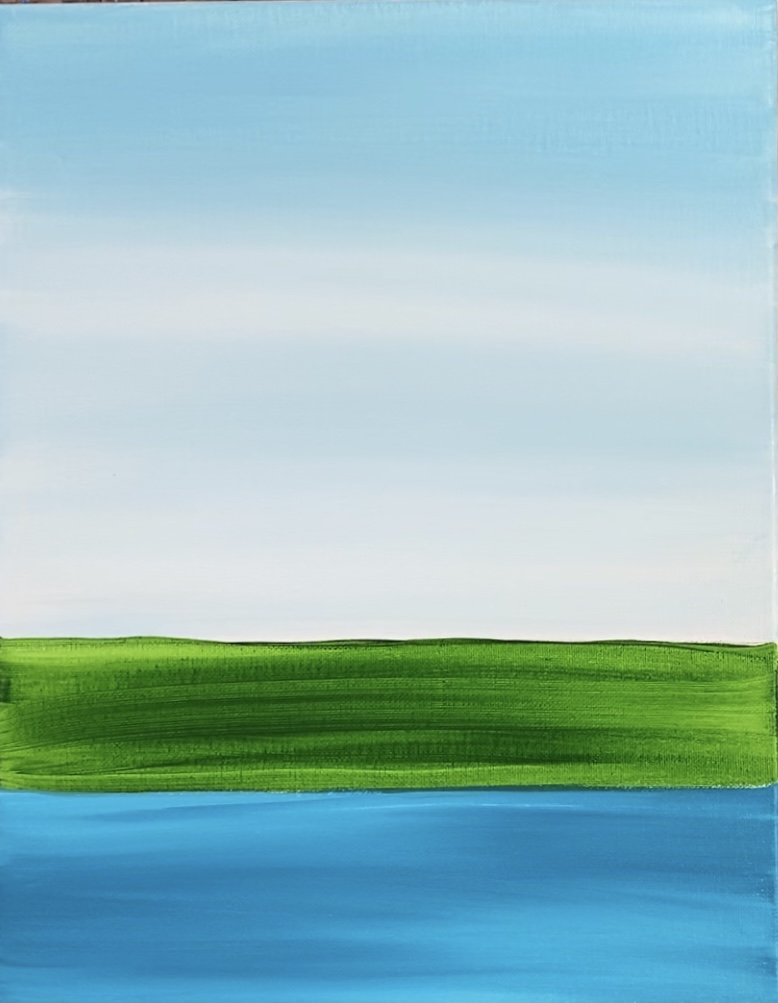
Position the canvas so that it is going vertical. Measure 3″ from the bottom of the canvas and draw a horizontal line using a t-square ruler. Then measure 2″ above that line and draw another horizontal line.
These lines divide where the sky, grassy area & water are.
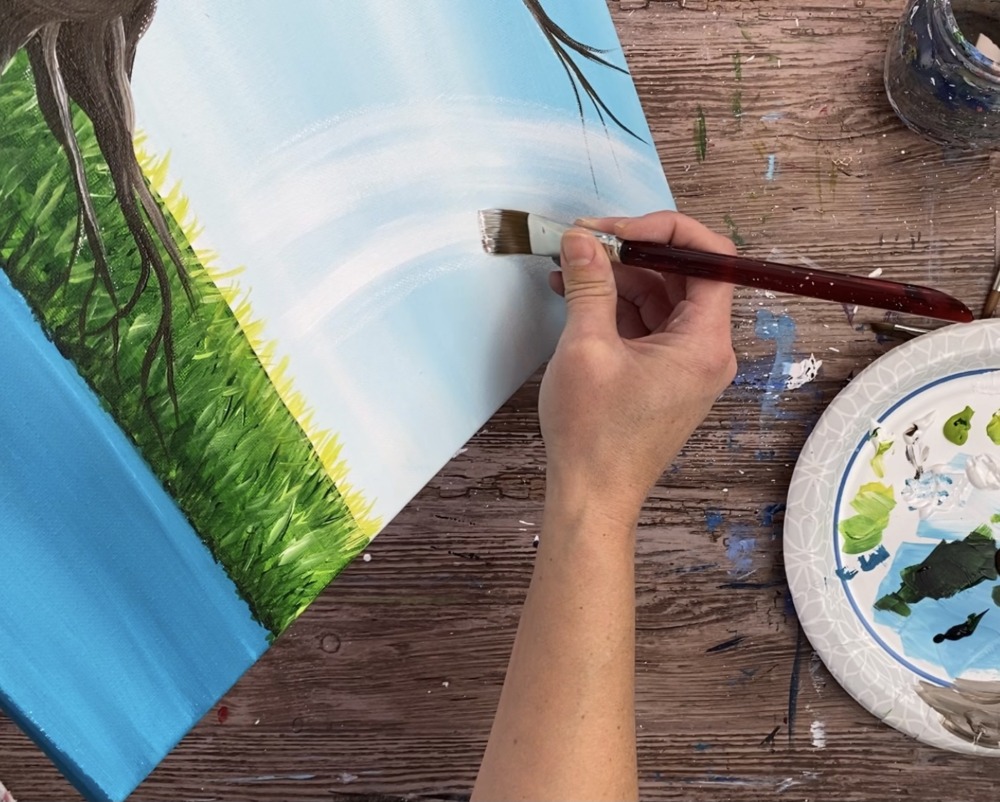
2. Paint the Sky
Load your palette with light blue permanent and titanium white. Use a 3/4″ flat wash brush dipped in the water and dried slightly. Load it into the light blue permanent.
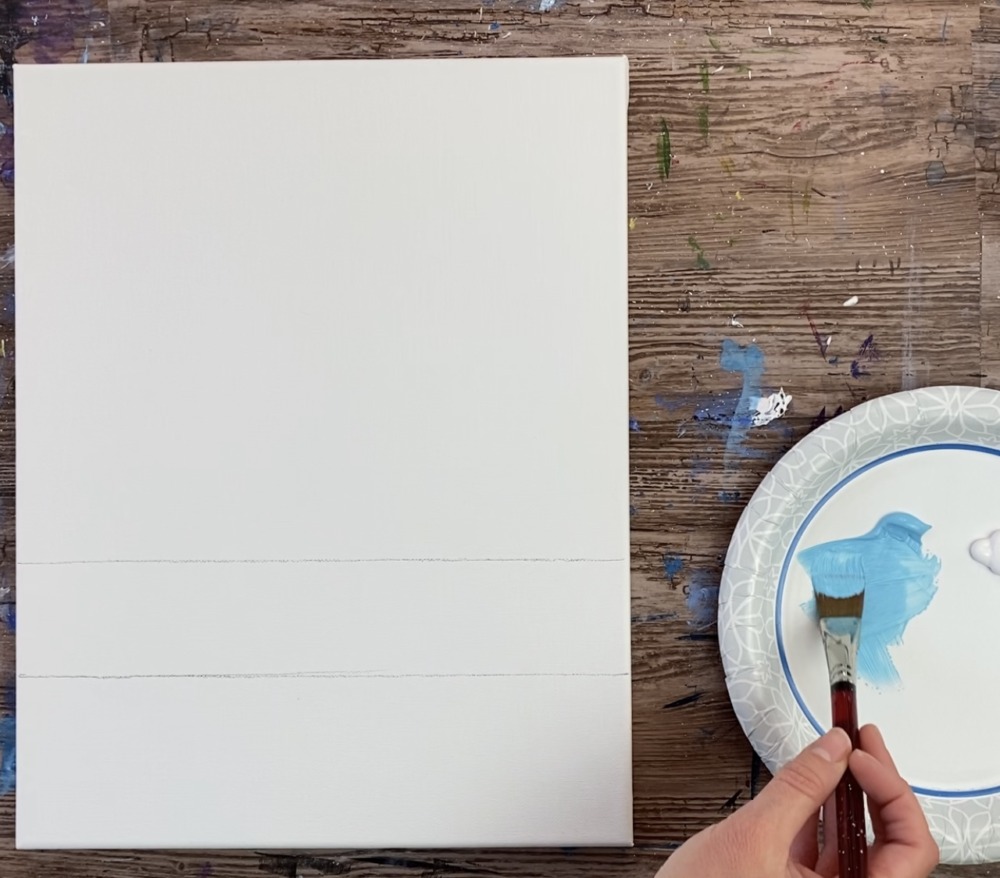
Start at the top of the canvas and paint left and right strokes working your way down the canvas. These strokes should be thin and even and go all the way across the canvas.
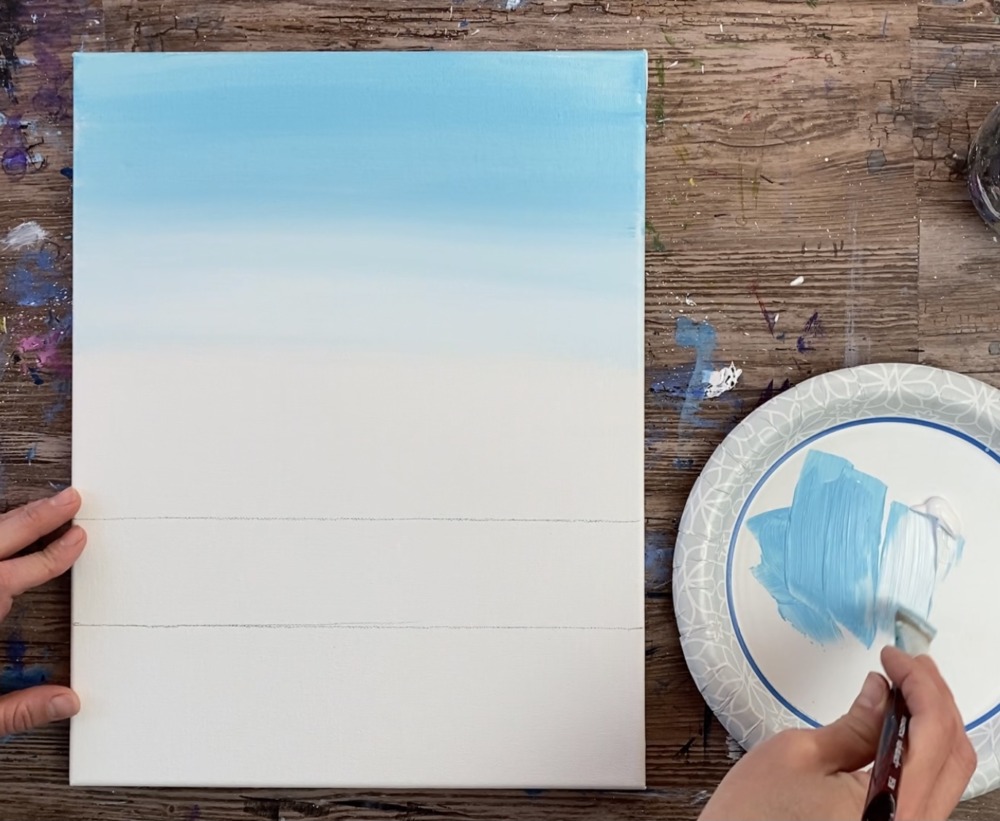
When you get to about a third of the way down, load some titanium white onto your brush and blend it with the blue so that your sky turns into a lighter blue.
Continue to blend that white and blue all the way down the canvas. Try to have the lightest part of the sky above the horizon line.
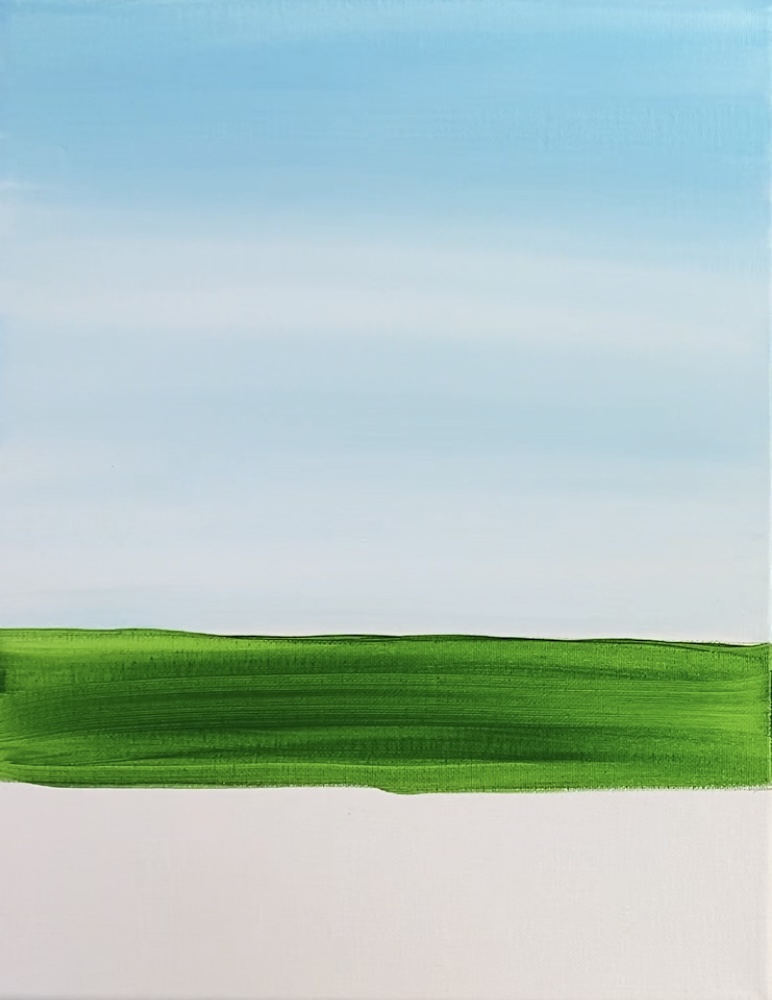
3. Paint the base layer for the grass
Rinse your 3/4″ flat wash brush and dry. Then load your palette with hooker’s green hue permanent. Paint left and right strokes in the grassy area. Do not worry about grass texture yet, this is just the first layer.
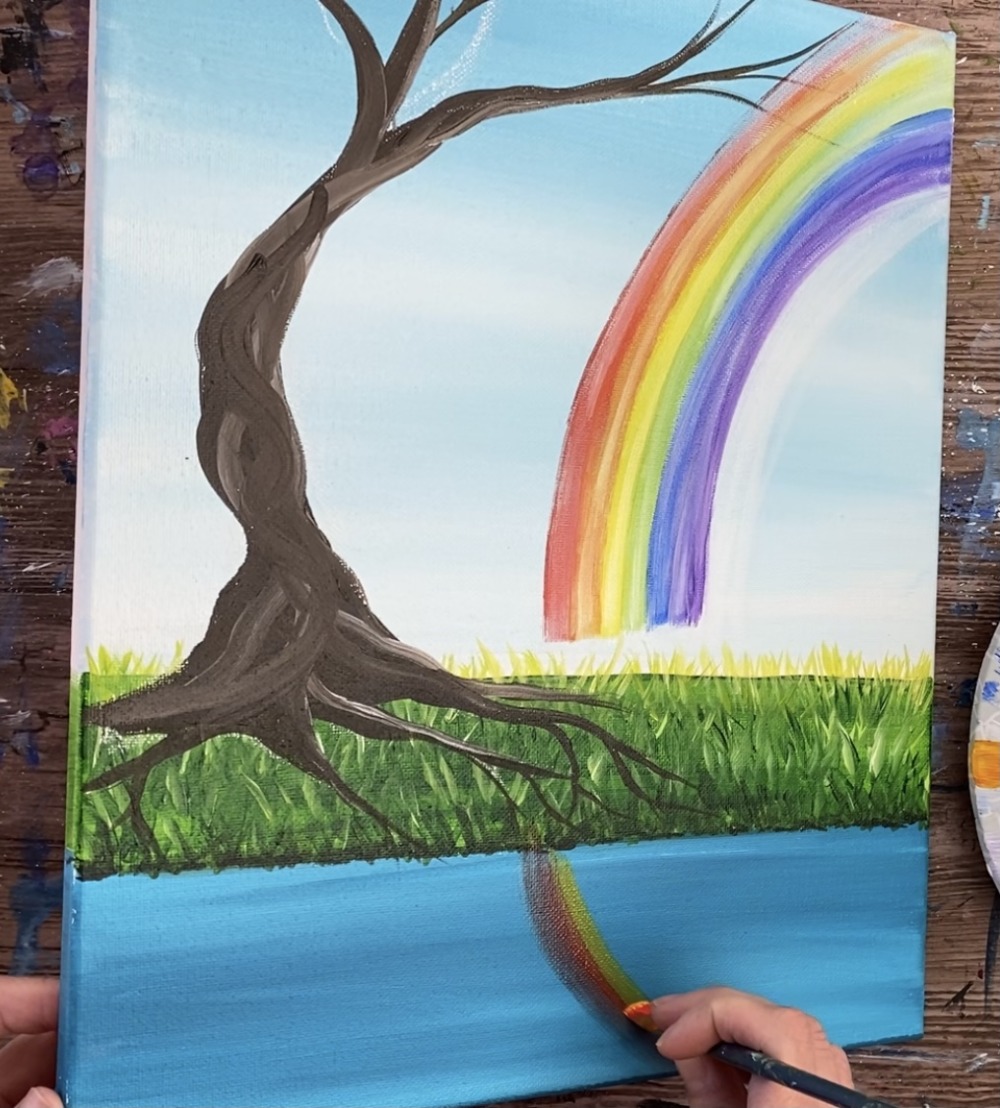
4. Paint the water
Rinse and dry your brush. Load your palette with turquoise blue. Paint the bottom area with turquoise and paint left and right strokes leaving some white areas of the canvas open.
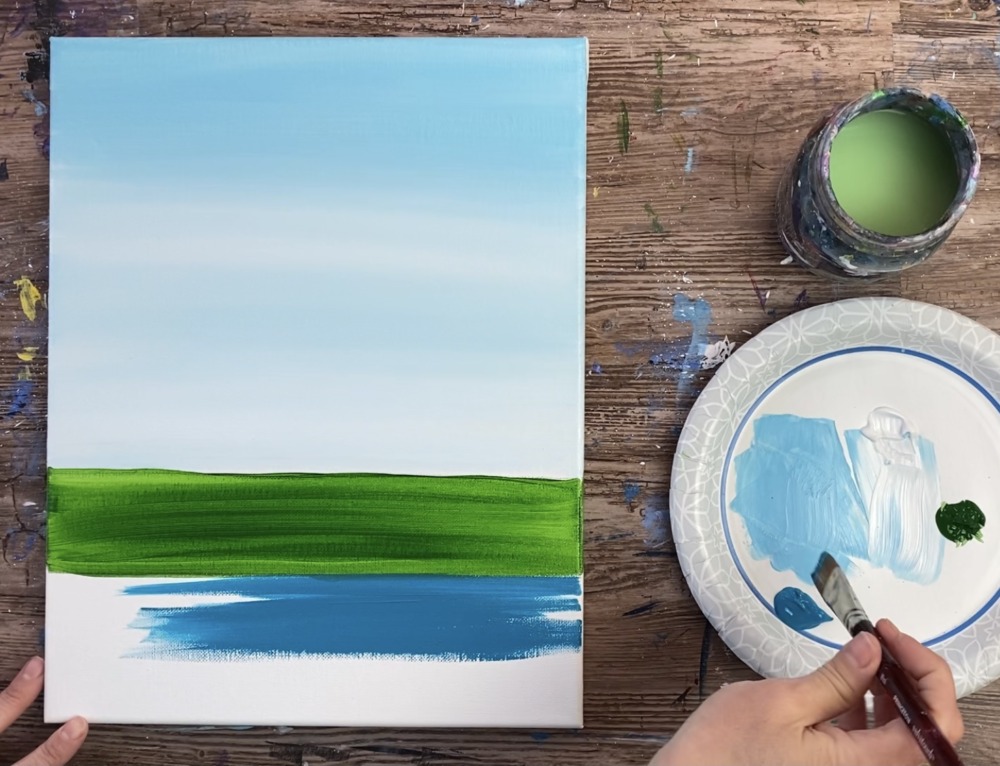
Then, without rinsing your brush, load the tip of it in a little bit of titanium white and blend that white into the turquoise. Your water will have a mix of turquoise and white so it looks like it is blended but not all the way.
Dry your painting with a hair dryer or take a 10-20 minutes break and come back.
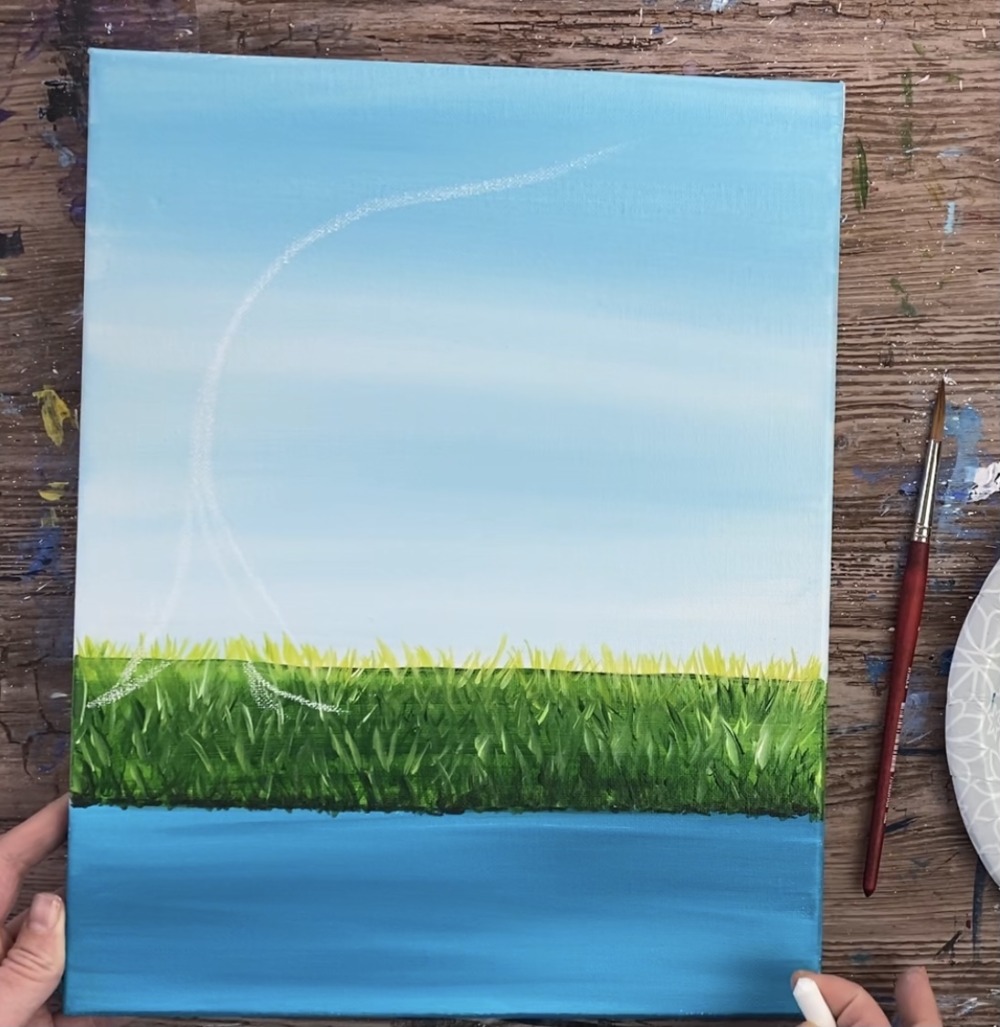
5. Paint the grass texture
For the grass texture, I used a 3/8″ angle brush but you can do this technique with a small round brush or a small flat brush.
Load your palette with: light olive green and titanium white. Slightly mix the colors together so the green is lighter. Then paint the grass blades starting in the way back along the horizon line.
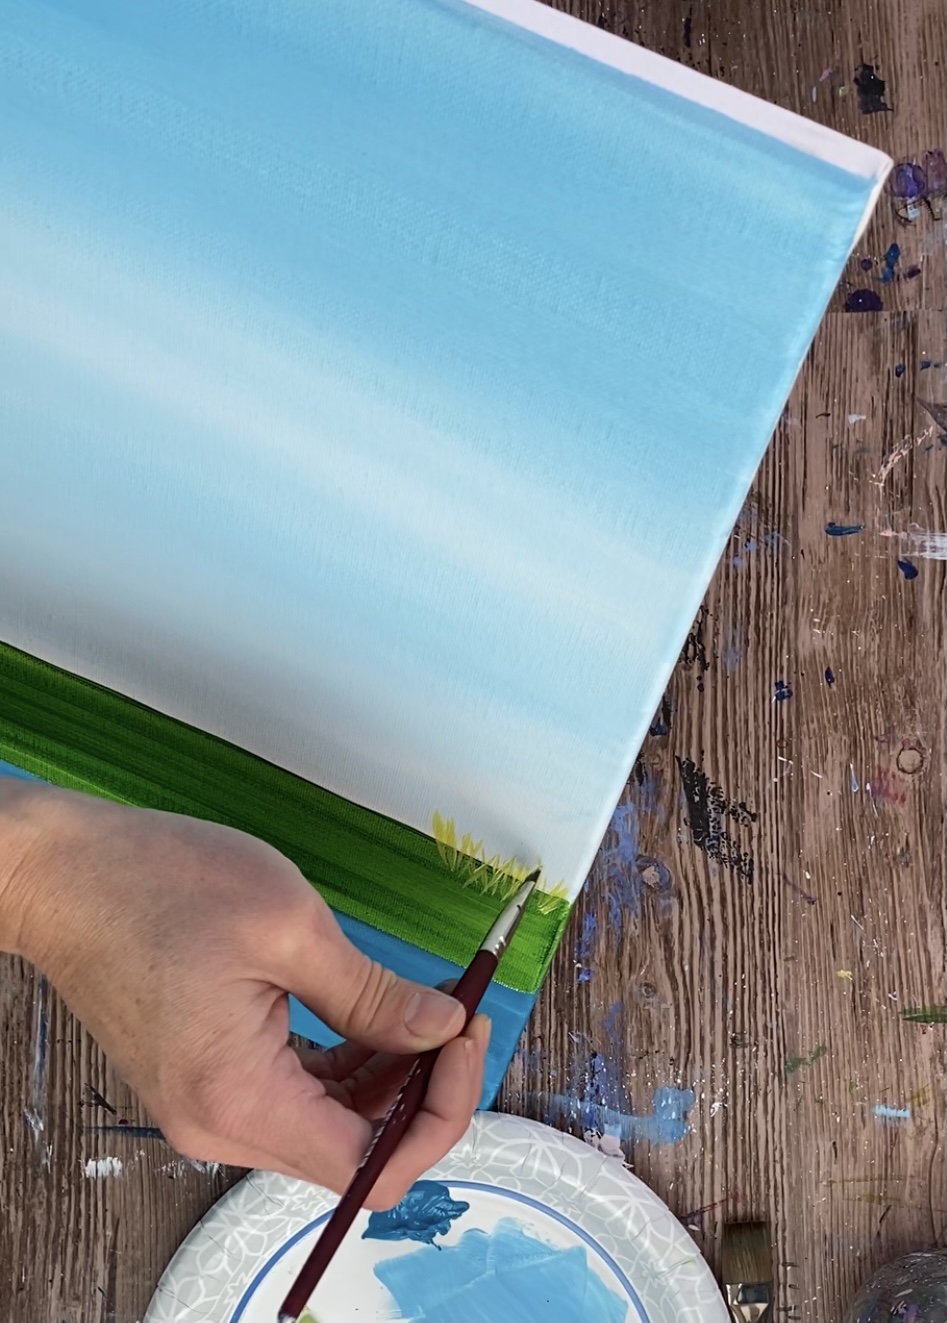
Paint short strokes going in different angled directions going across the horizon line in a horizontal row.

Then mix a slightly darker shade of green on your palette by mixing in some hooker’s green hue permanent. Paint a second and a third row of grass blades. Each row slightly overlaps the previous one.
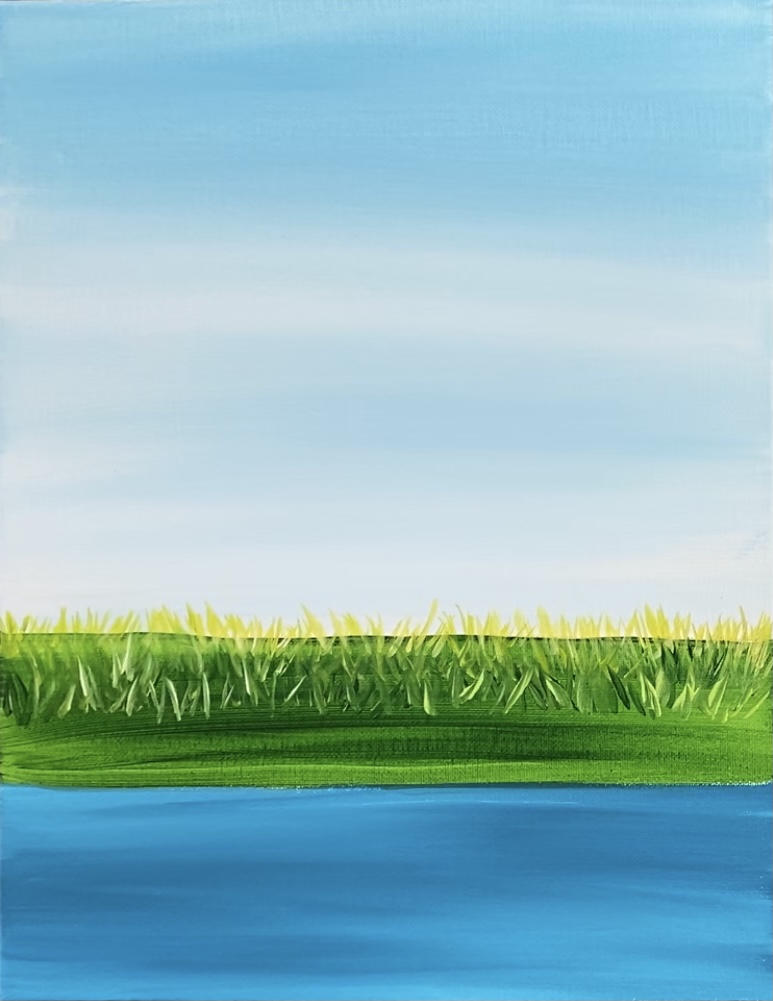
Continue to work your way down to the bottom of the grassy area. Your green gets gradually darker but also can have lighter tints in there as well.

Add some mars black to your palette and mix a tiny bit of mars black with the hookers green hue permanent so the grass blades is super dark. Paint the darker grass blades on the bottom along the water bank.

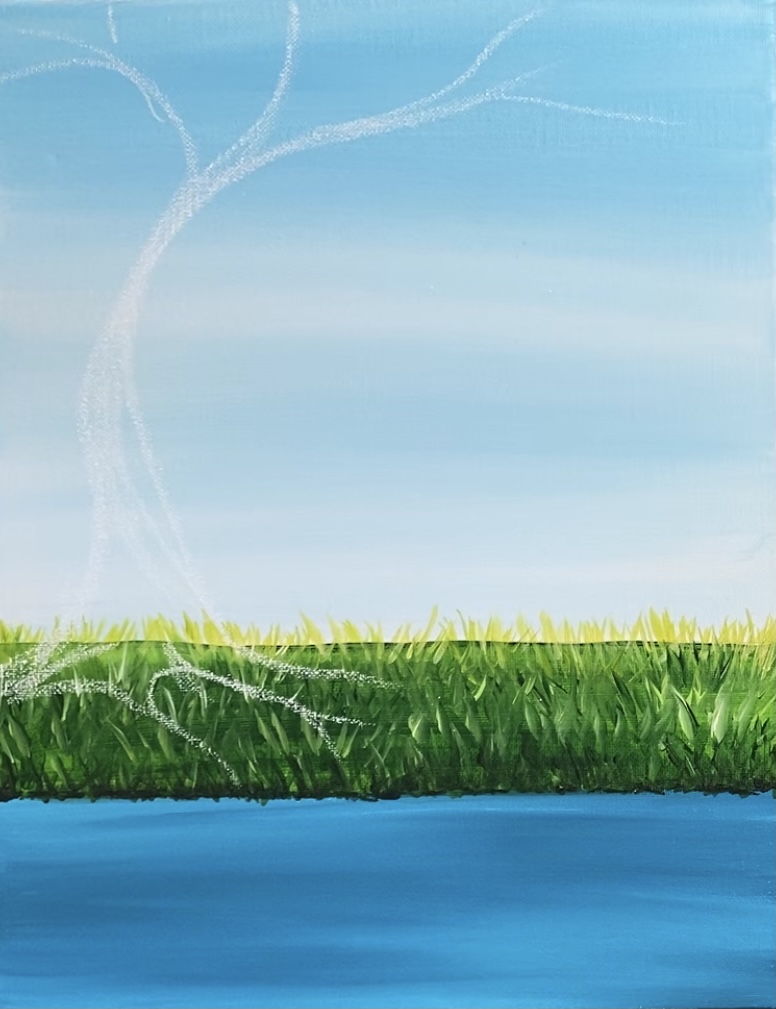
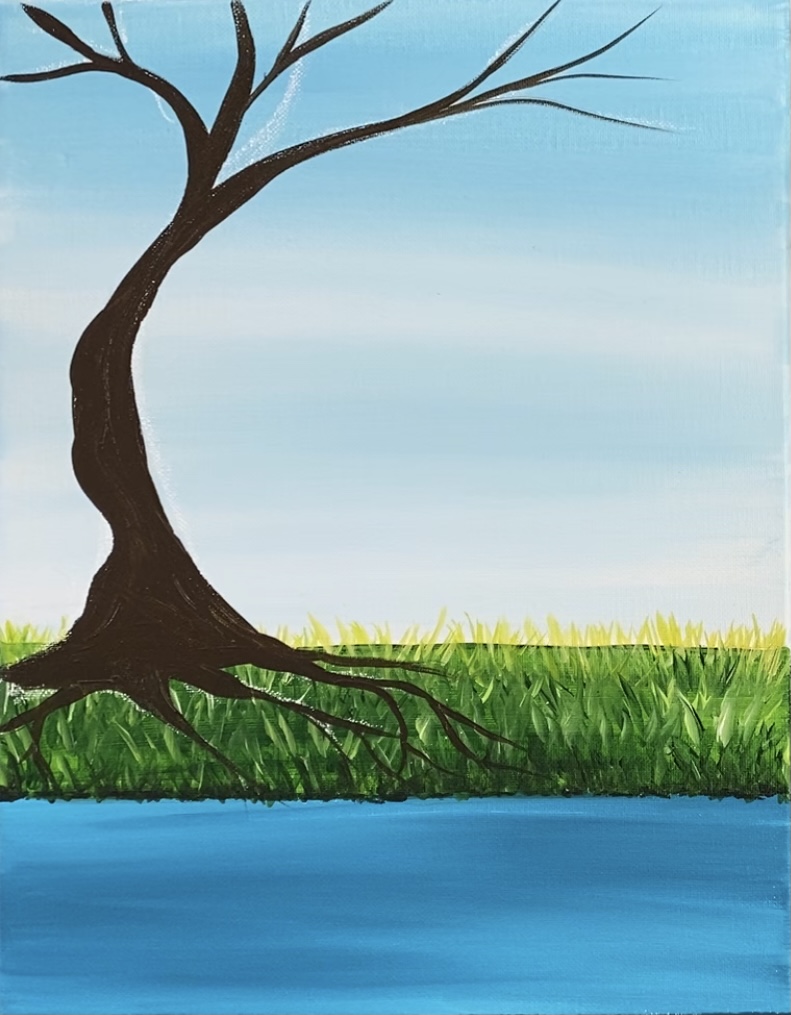
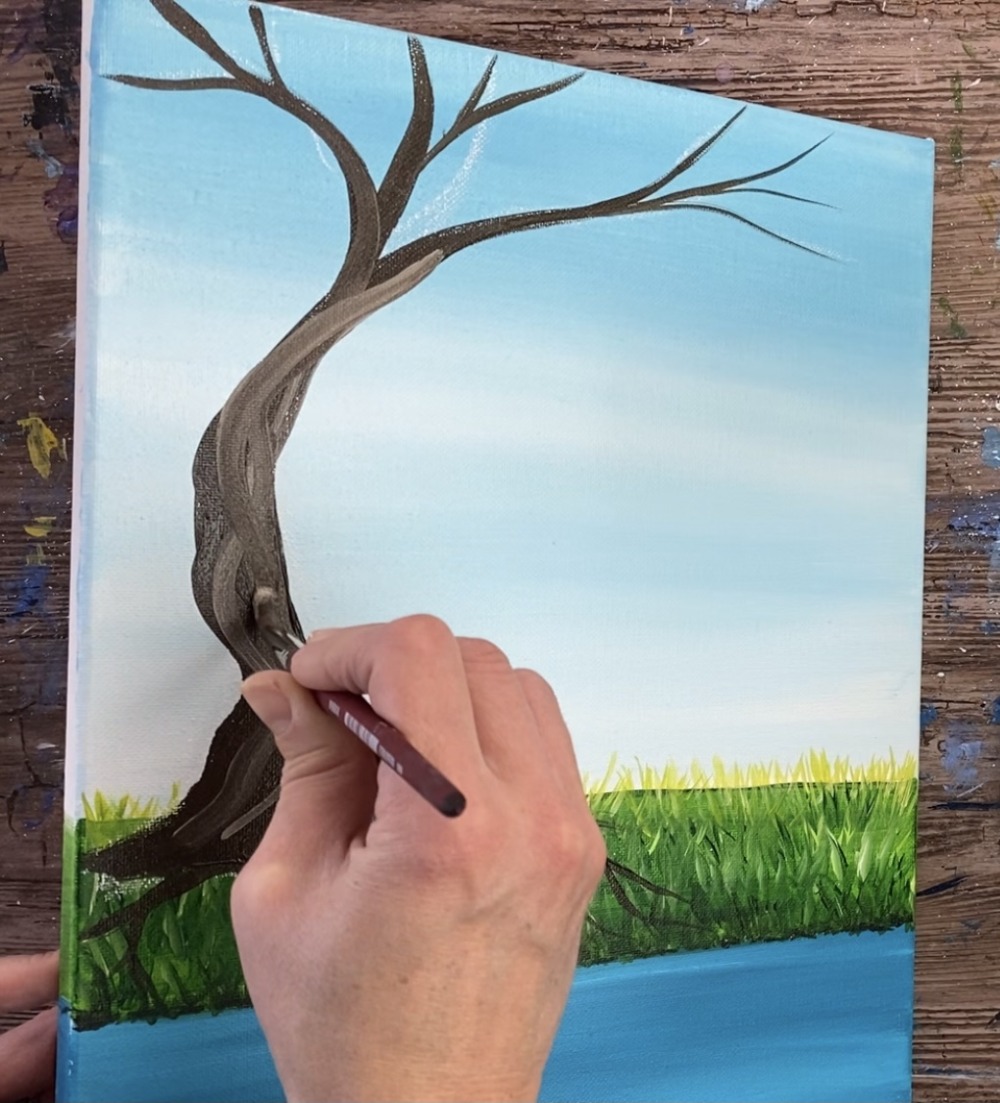
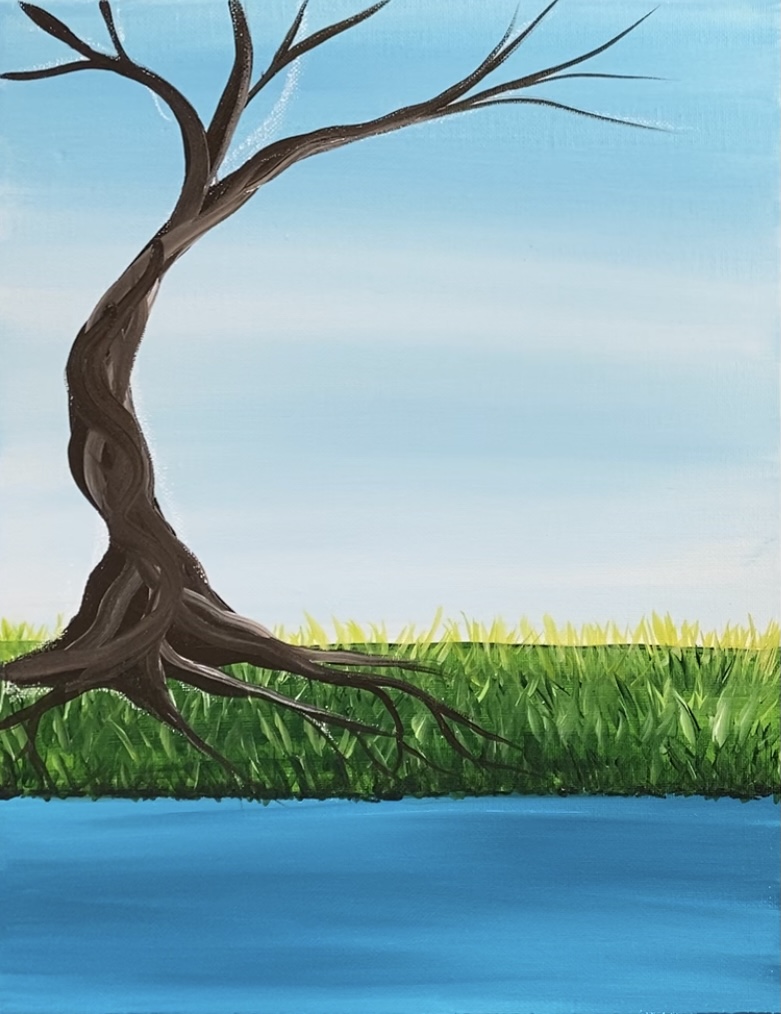
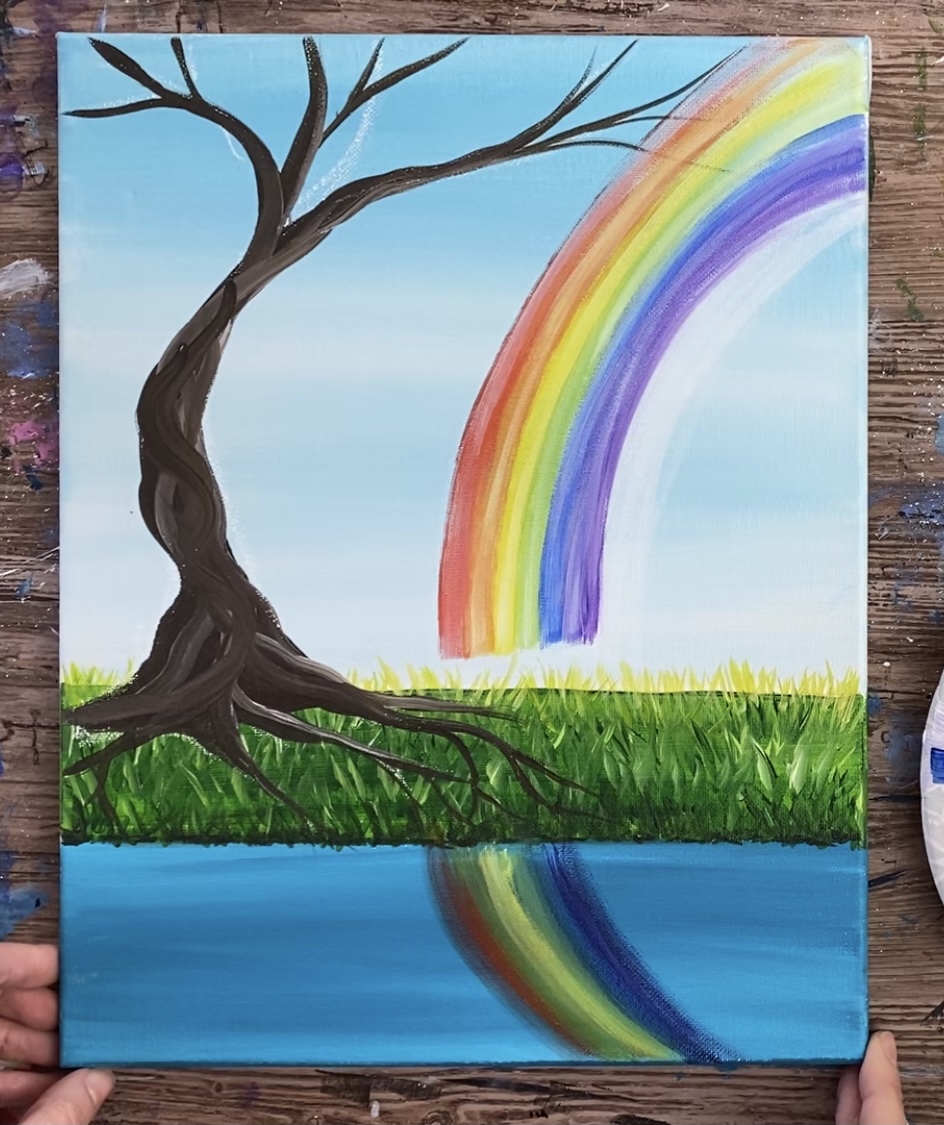
6. Draw the tree
I recommend drawing this tree with a piece of white chalk before painting it in. Draw a tree that trumpets at the bottom and then twists and curves along the trunk.
This tree sways to the left and branches out into three main branches. Then draw some smaller branches stemming out from the three main branches. Draw the roots of the tree as well.
7. Paint the tree
Use a #8 round brush (or the brush you feel most comfortable painting trees with). Load your palette with raw umber and slightly water it down. Paint the tree emphasizing the fact that the trunk of this tree twists and sways to the left.
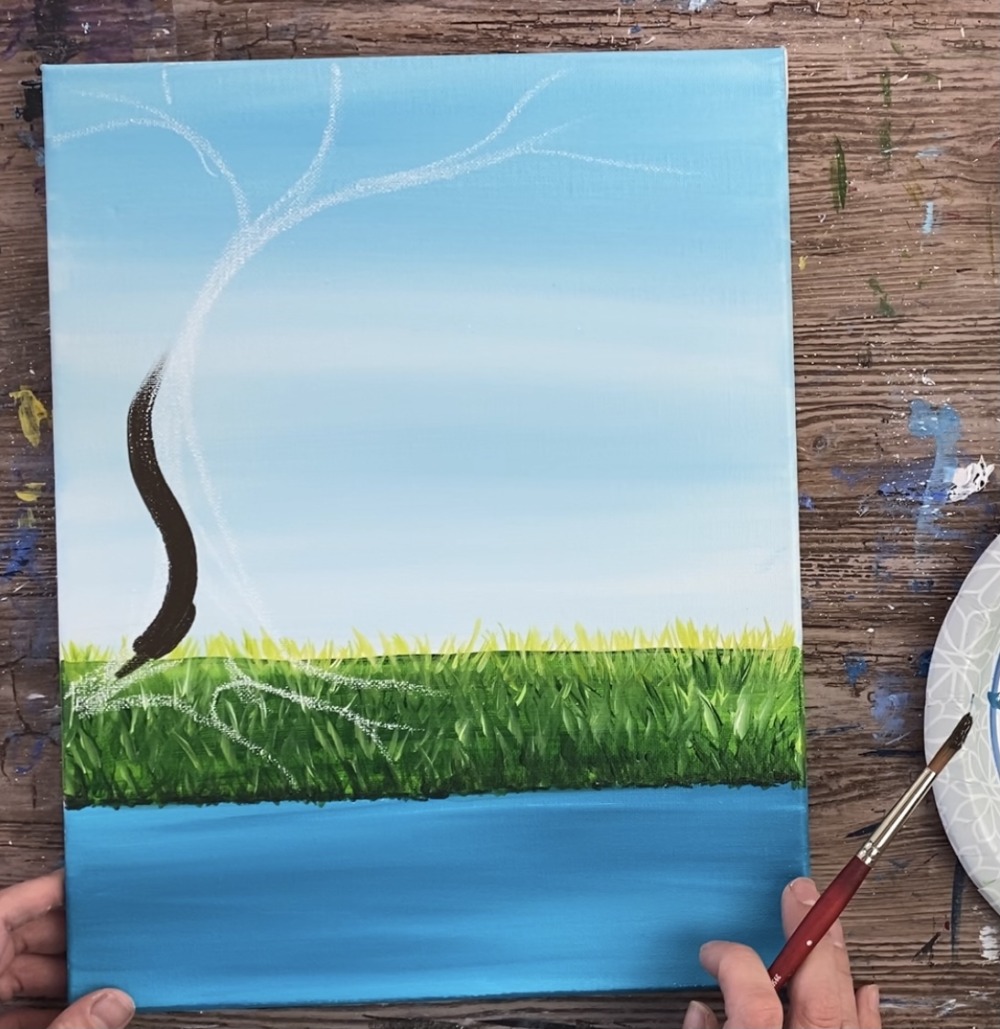
Paint the overall shape of the tree in solid with this brown. Don’t worry about texture yet. The side of the tree has kind of a wavy edge to it.
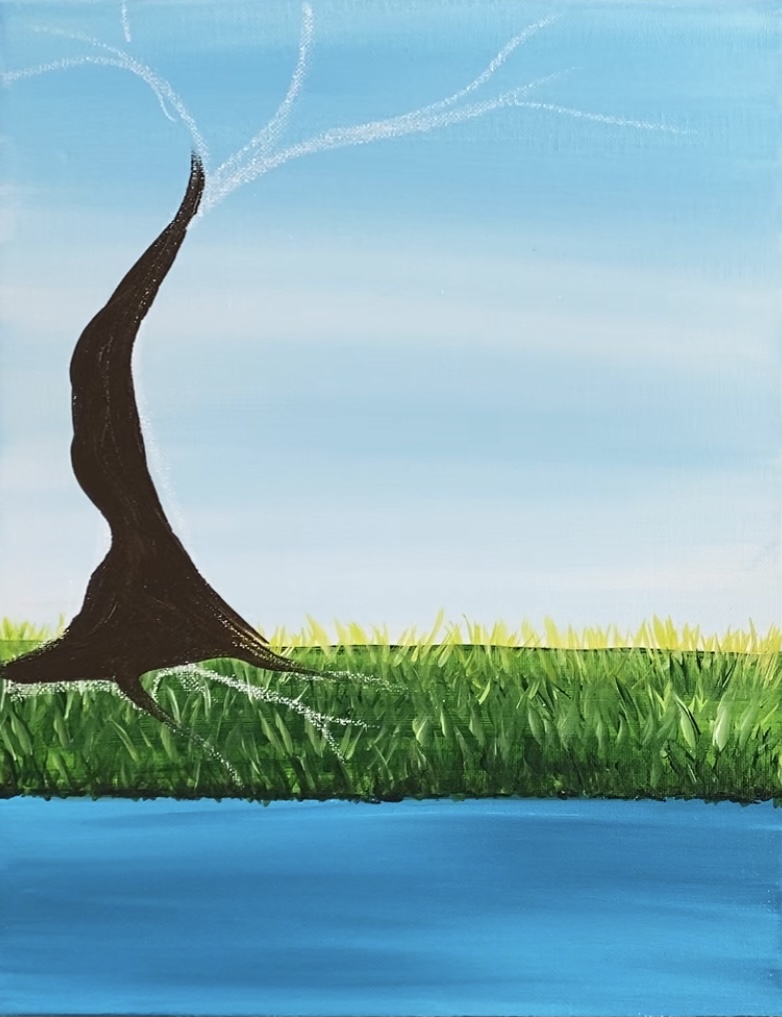
Paint the smaller branches and the roots using just the tip of your brush. If needed, switch to smaller brush or even an angle brush to get those smaller branch lines.
To do the texture, mix white into the raw umber on your palette so the brown turns lighter. Use the #8 round brush to paint wavy, twisting strokes along the trunk of the tree.
More highlights to the tree will be added later.
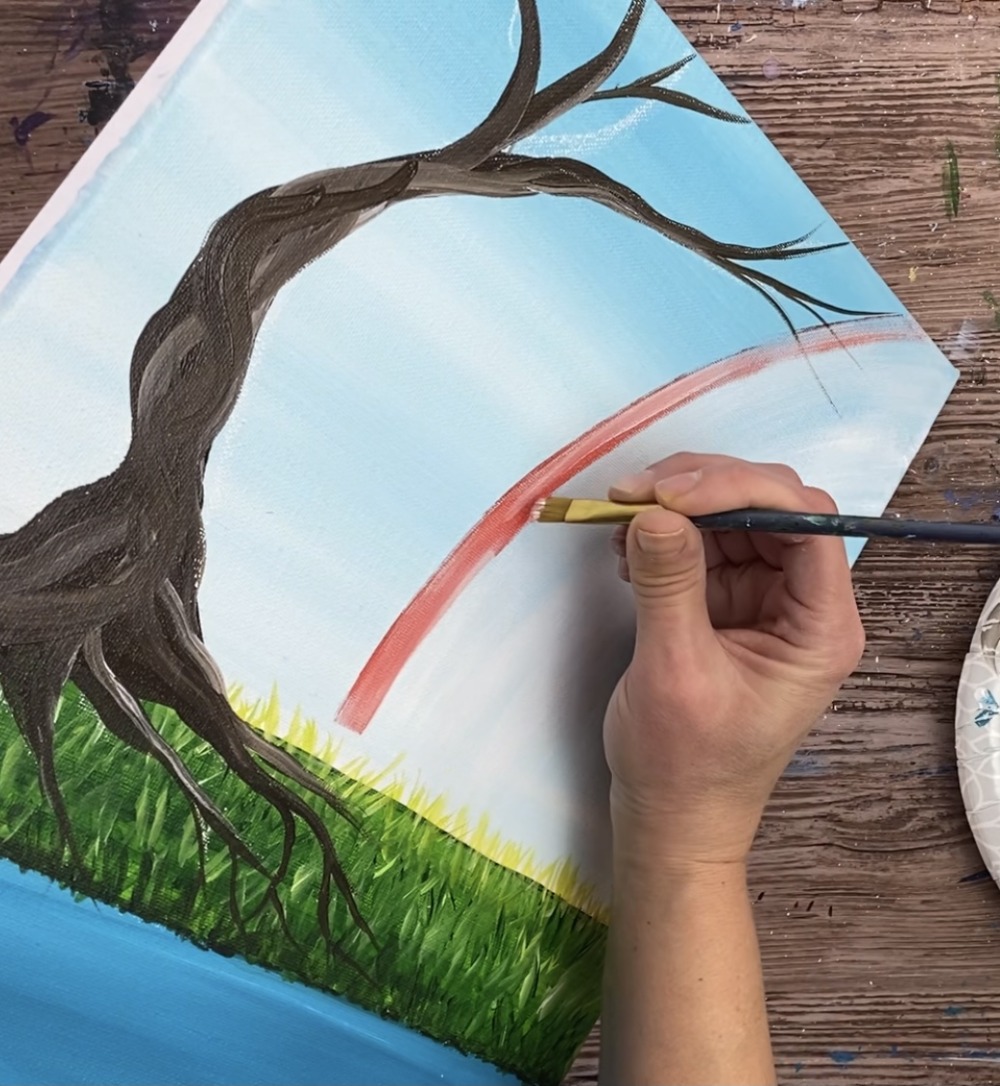
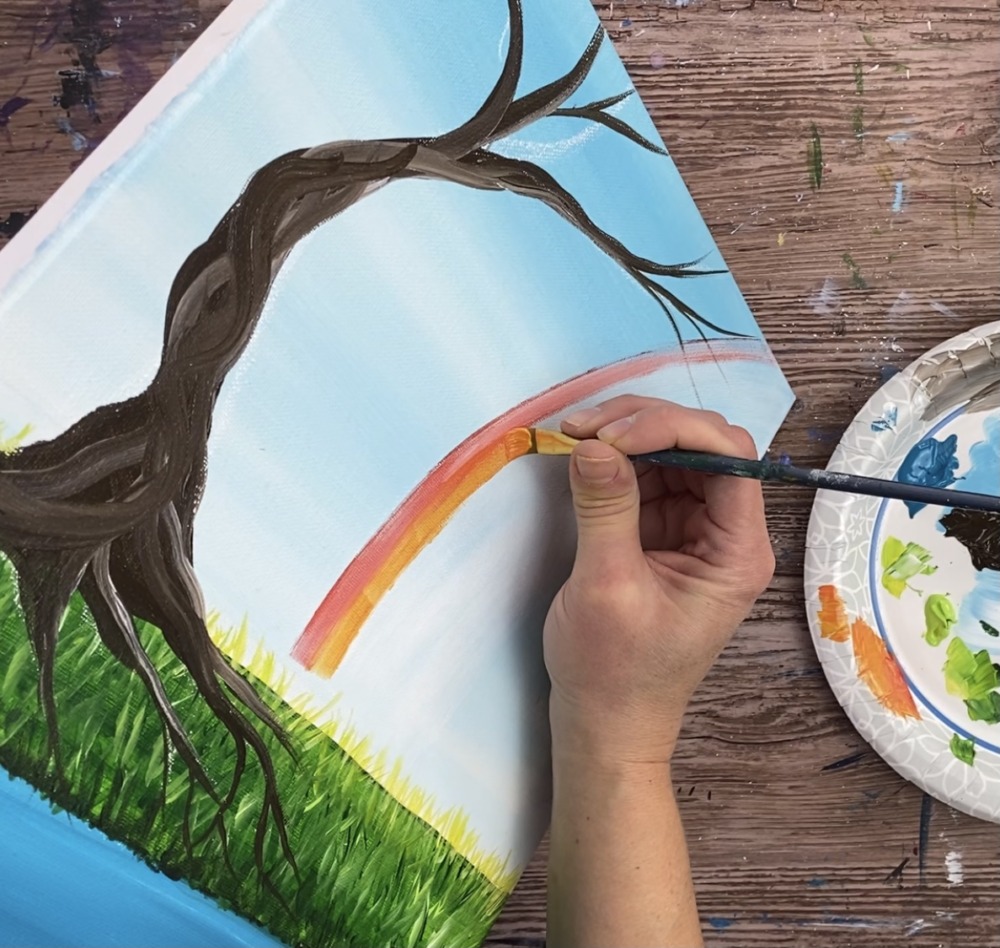
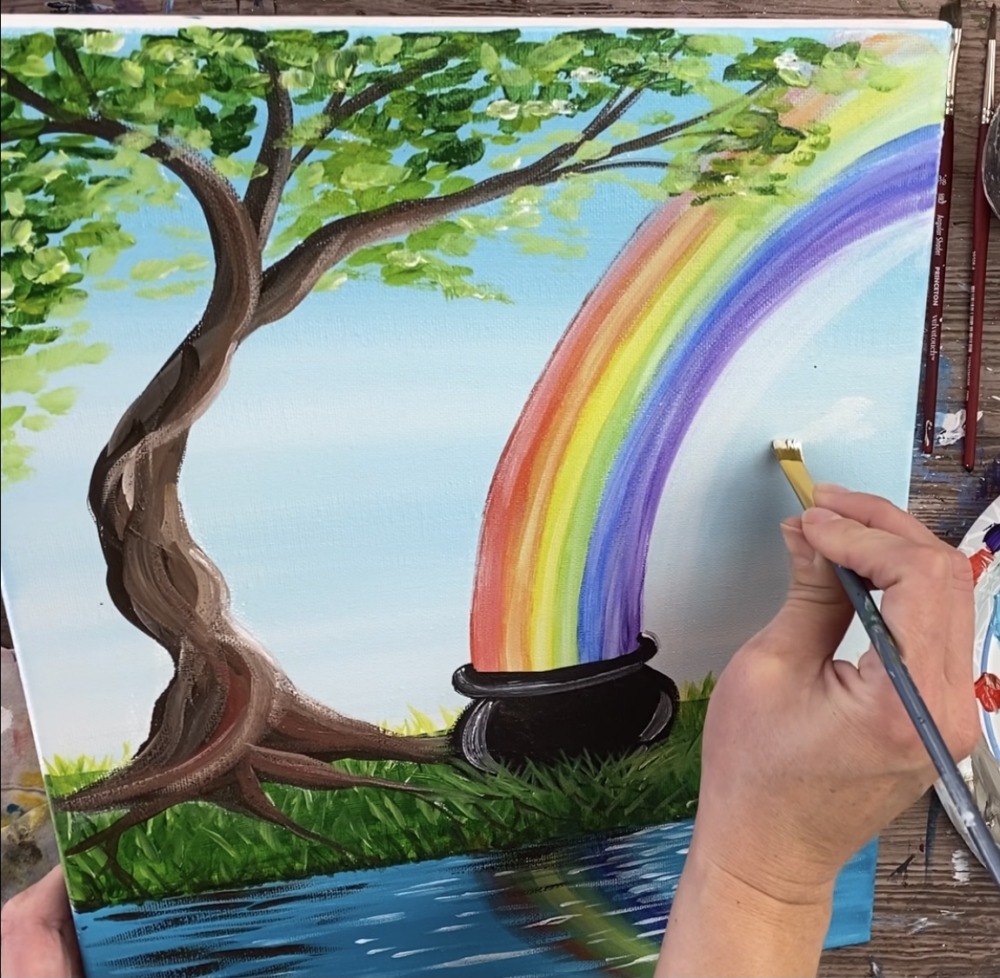
8. Paint the base layer of the rainbow
For the rainbow, I recommend drawing the area with chalk first. I did the width about 3″ wide, although this can be different depending on how wide of a rainbow you want.
Then I used a 3/4″ flat wash brush and applied a very thin “dry brush” layer of white. Note: this can be optional but it helps get a brighter base for the rainbow if you want your colors to show up super bright!
To do “dry brush” load only a small amount of white onto your brush and then wipe it off. Apply a very thin layer of white so that it streaks in that area you drew with chalk. There should still be a lot of blue showing through.
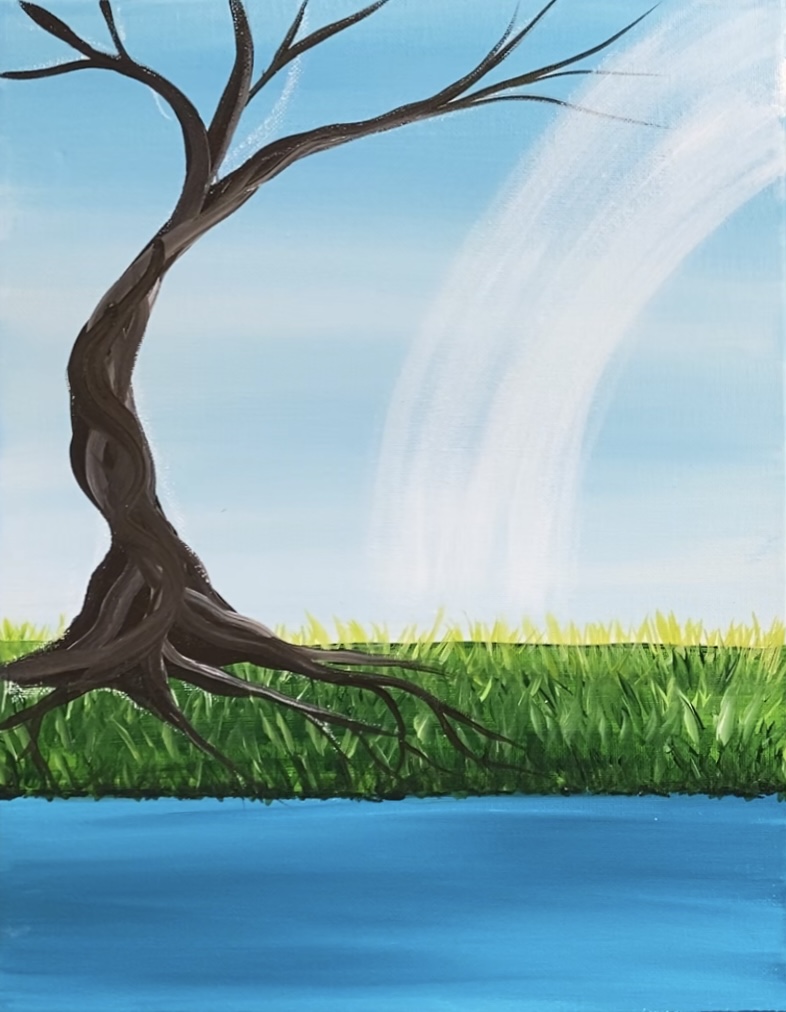
9. Paint each color band of the rainbow
I used a #10 shader brush to do the red, orange, yellow, green blue, indigo and violet.
This is a small flat brush, about 3/8″ width. You can use any similar size. The reason I chose this brush is because each rainbow “color” or “band” is going to be that width.
Start with red. Load your palette with cadmium red medium hue. Then load the tip of the brush into the red. Wipe off a little paint so that it will be “dry brush style”.
Red:
Paint the first rainbow band at the top cadmium red. The stroke should be dry brush. It should look faded and translucent. Then (optional), you can add a little white to the brush and dry brush a little white onto the red in some areas. This will brighten the color up a bit.
Orange:
Next repeat this step for the orange band. Make orange on your palette by mixing a little cadmium red medium with primary yellow. Tip: you need more yellow than red to make the orange color.
Use the 3/8″ width of the brush to paint that orange band. Slightly overlap that orange over the red. Tip: remember the rainbow should be kind of “see through”. You do not need to apply multiple coats of paint. One coat of a dry brush stroke will be enough.
Yellow:
Then rinse and dry your brush. Repeat the same steps for “primary yellow”.
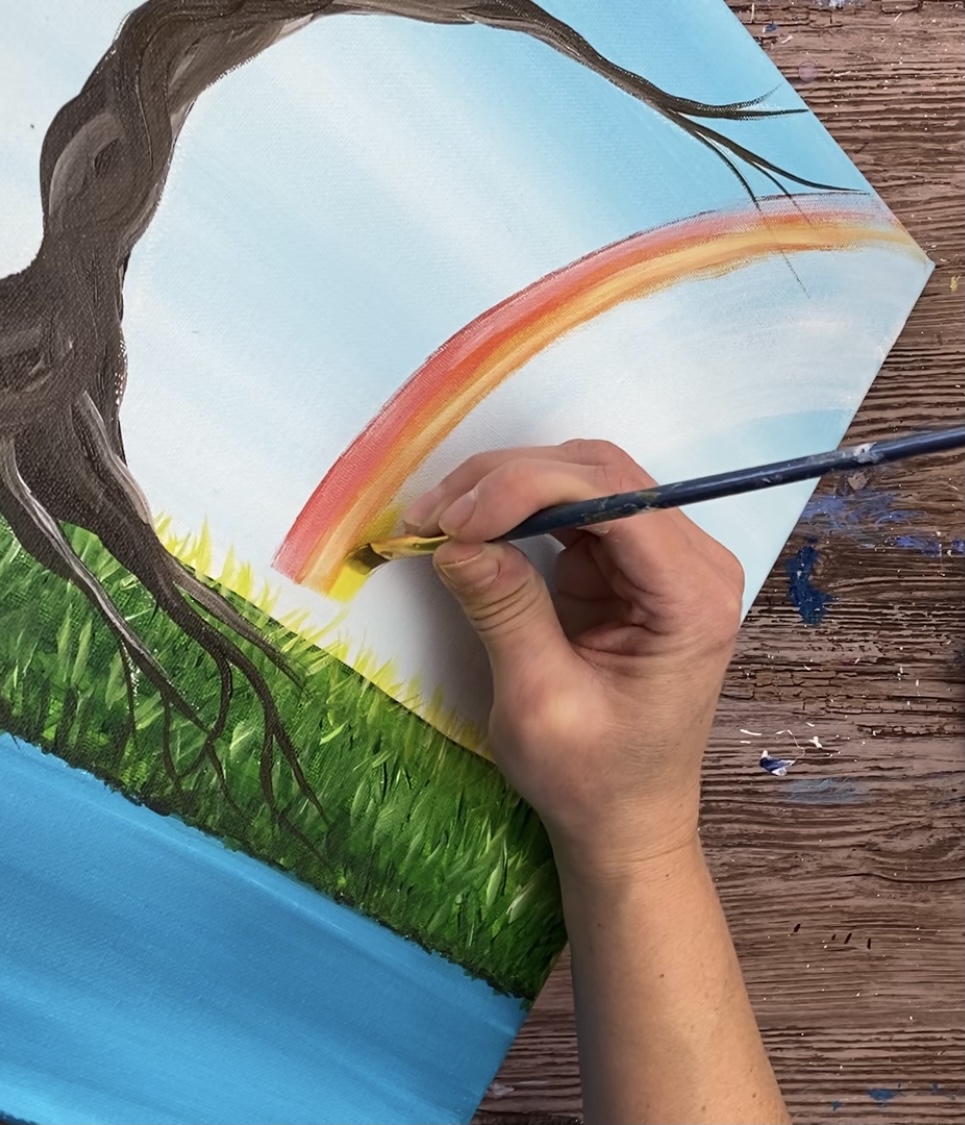
Green:
Then rinse and dry brush and do the green color. I used the “light olive green” for this band.
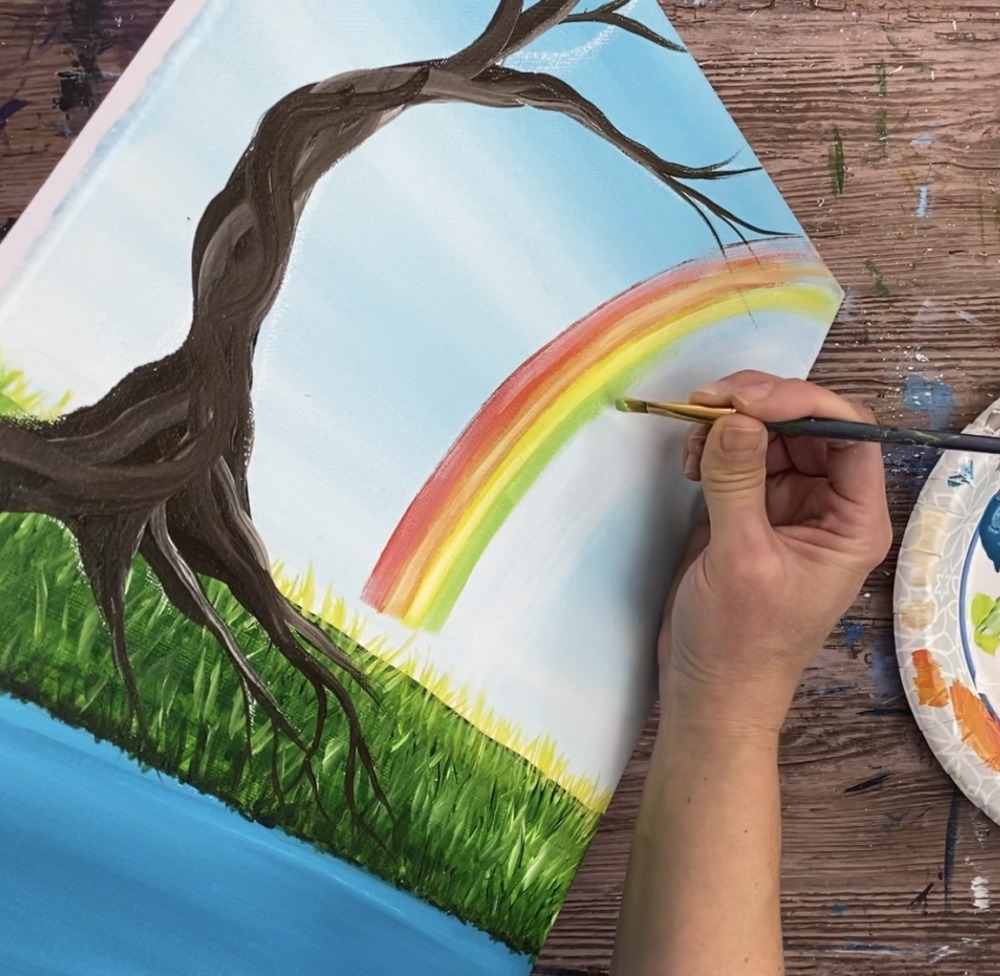
Blue:
Then I did ultramarine blue for the blue rainbow stripe. You can do this a lighter blue if you prefer.
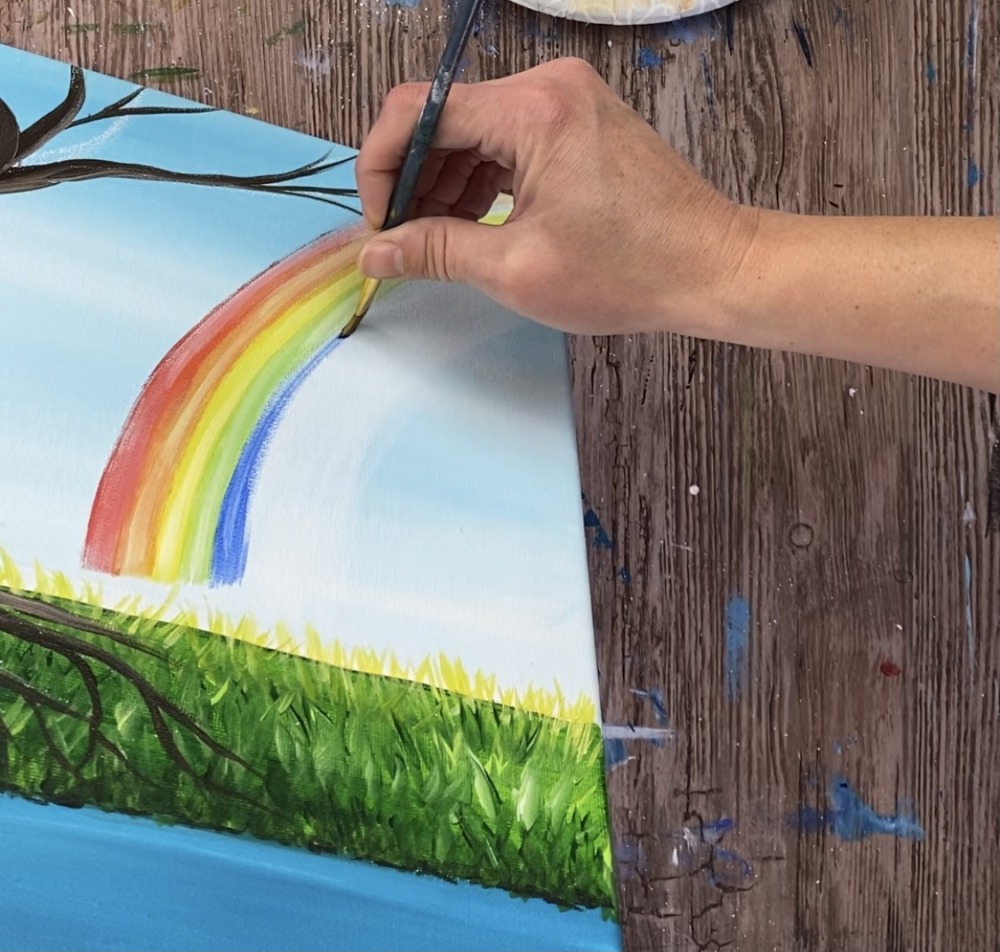
Indigo:
For indigo, mix ultramarine blue and dioxazine purple together.
Violet:
Then do the bottom stripe with dioxazine purple.
Note: I had leftover white layer still showing. This can easily be painted over with the sky color. I didn’t paint over it until the very end.
10. Paint rainbow reflection in the water
For the reflection in the water, it is pretty much the same technique only more loose. Paint each of the bands as opposite as they are from the rainbow in the sky. Make sure it is not solid. It should also be dry brush (or watered/ thinned down) so the color of the water is still showing through.
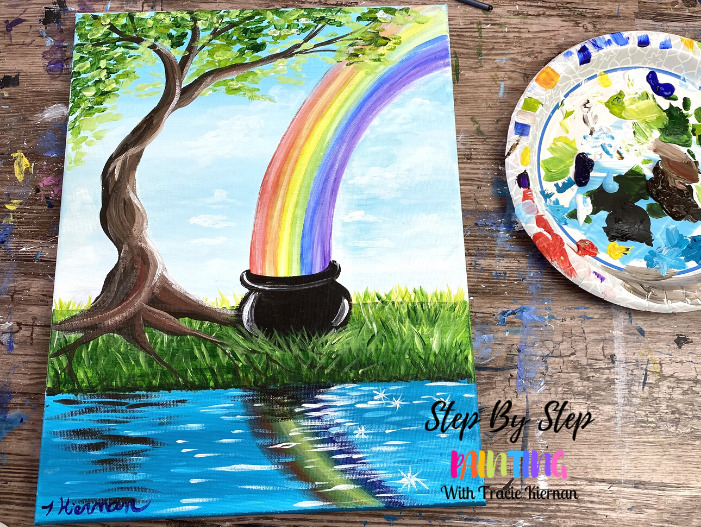
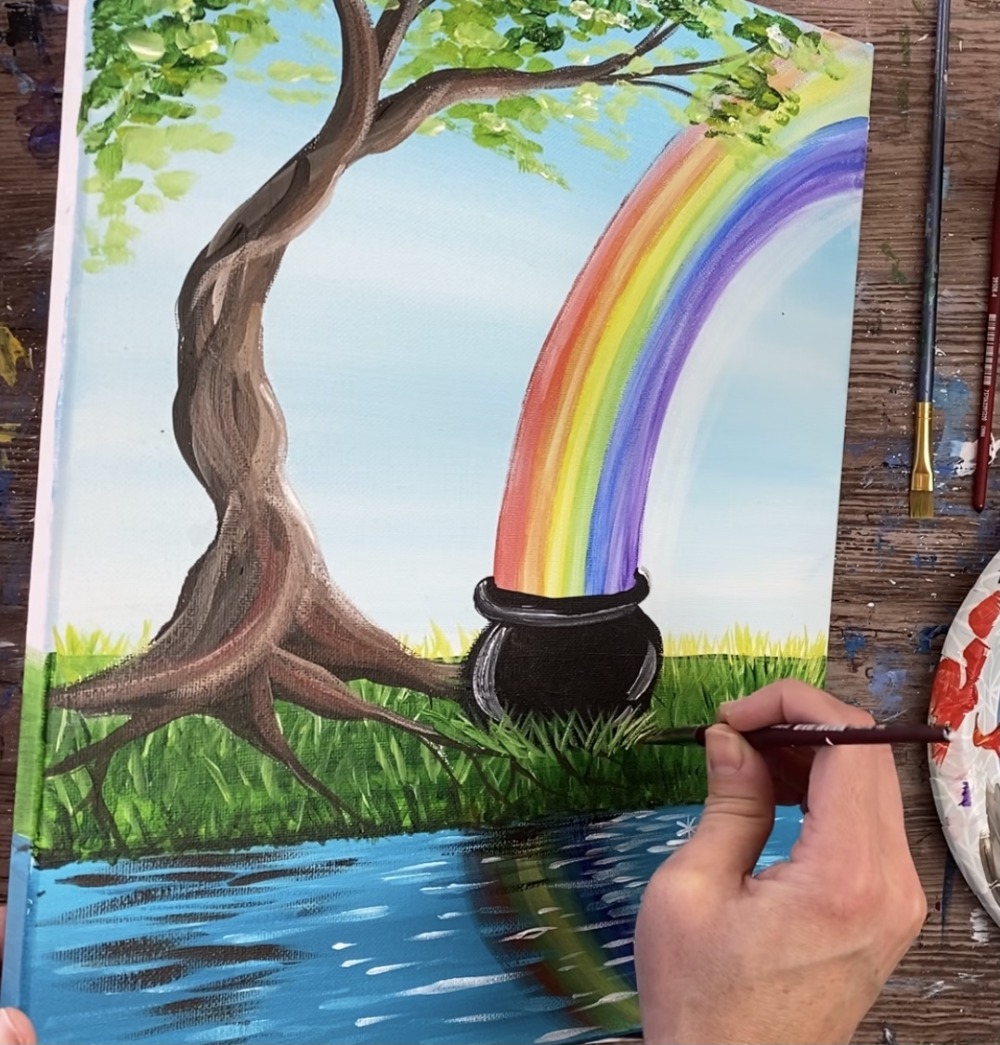
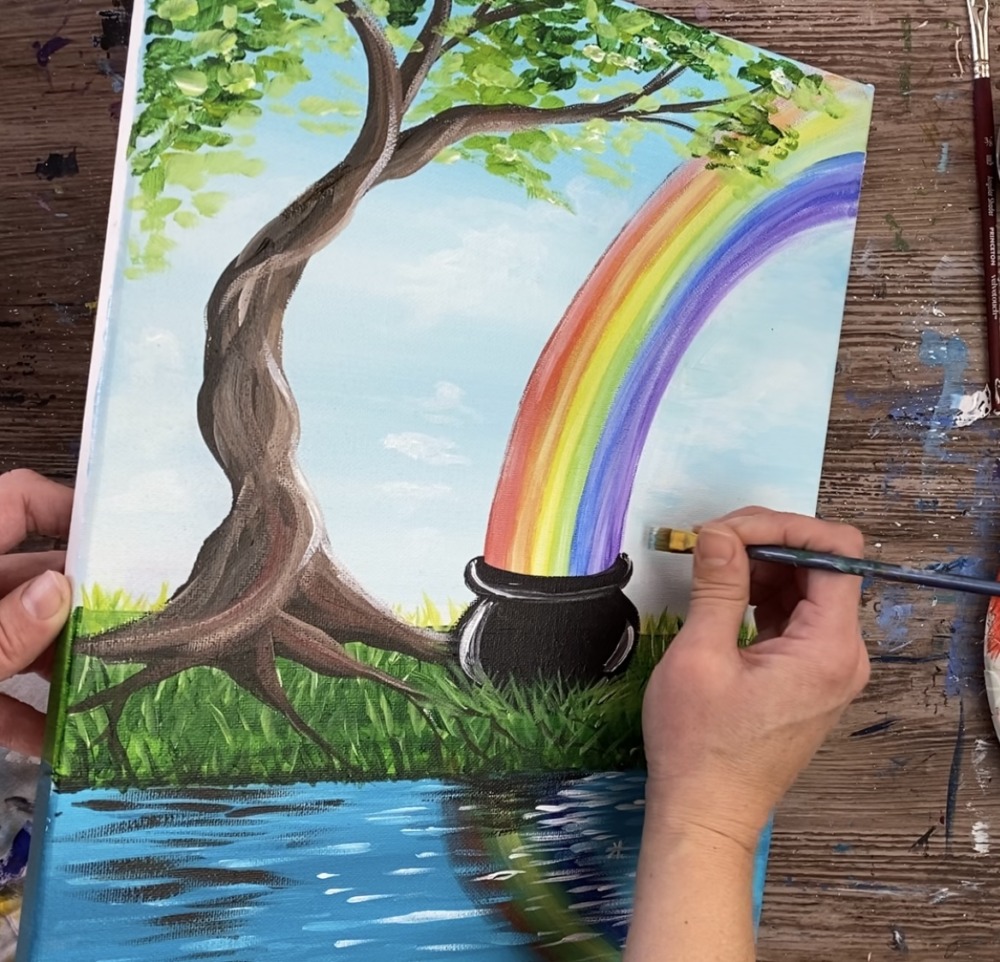
11. Paint the cauldron
If you are doing the “pot of gold”, you can use a piece of chalk or pencil to draw your pot in or just start painting it. I used a #4 round brush and mars black to outline the shape of the cauldron. Then I painted it in solid with black.
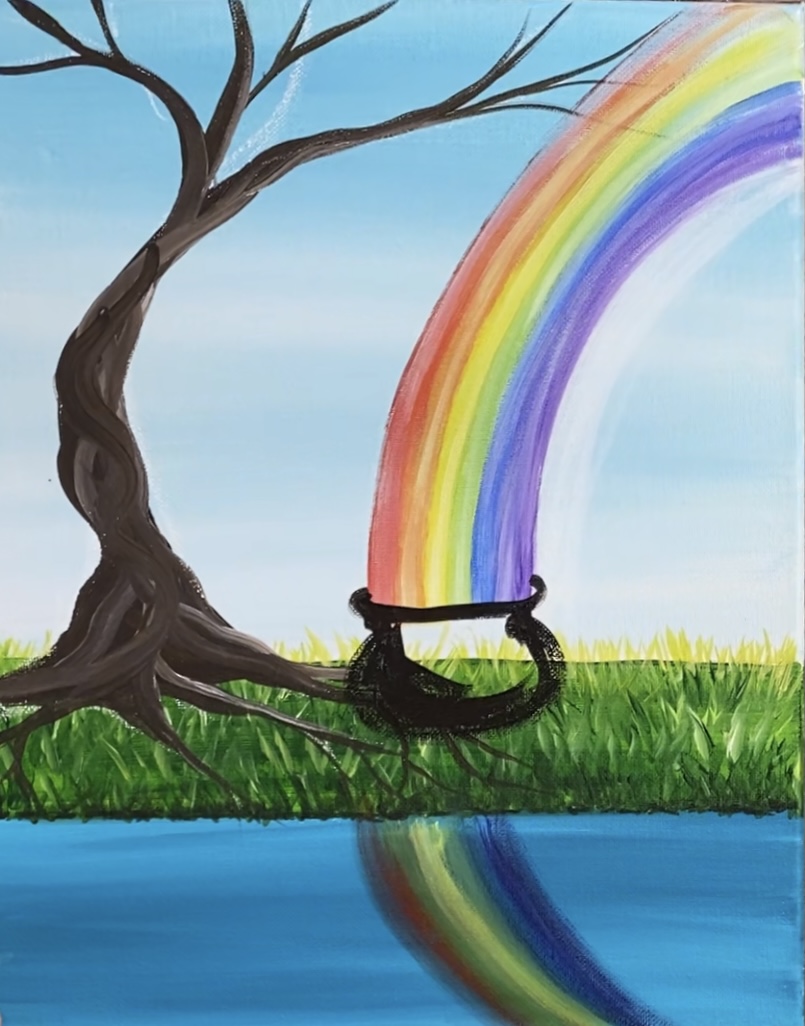
For the highlights, I did titanium white. I painted a white line along the under part of the rim. Then I did a large highlight on the left and two smaller ones on the right. You can change this to your liking.
12. Paint reflections in the water
Use a #4 round brush and titanium white. Paint small horizontal strokes in the water overlapping the rainbow reflection.
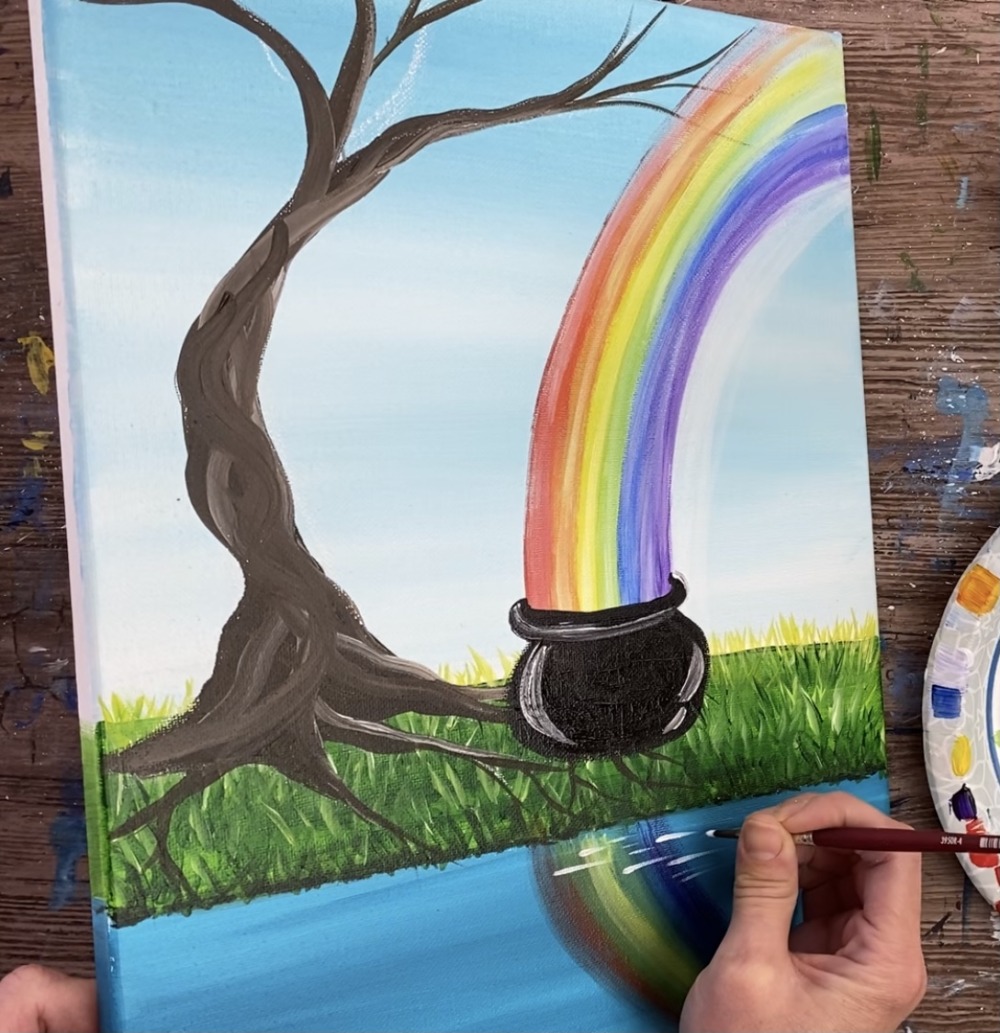
Mix a little turquoise into the white and paint more horizontal strokes.

The little lines closer to the grass are slightly shorter than the lines closer to the bottom. Also, emphasize that there is a brighter area of light to the right of the rainbow in the water.
To make it look like the water is “sparkling”, add a few start shapes (asterisks) into the water.
Then paint a darker reflection under the tree. I did this with raw umber. Paint a few horizontal strokes under the tree area but the reflection does not have to take up all that space (it can be subtle).
You can also paint a few black stokes under the cauldron in the reflection of the water in that area.
13. Paint leaves on tree
For the leaves, I used a #10 flat brush (the same brush I used for the stripes on the rainbow). Load the palette with hooker’s green hue permanent. Load just the tip of the brush in the green. Then “dab” the brush creating clusters of leaves on the edges of the branches.

Fill the top canopy of the tree with these short “dabbed” strokes.
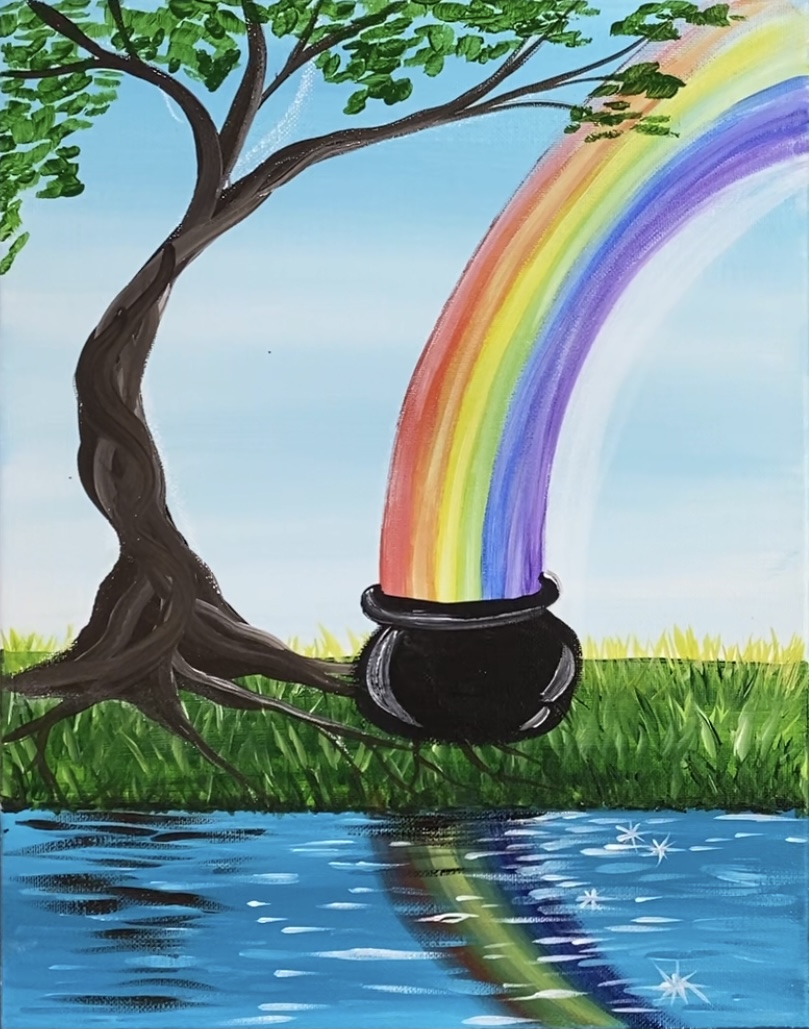
Then load your brush in some lighter green (the light olive green). Add that light green over areas of the darker green.
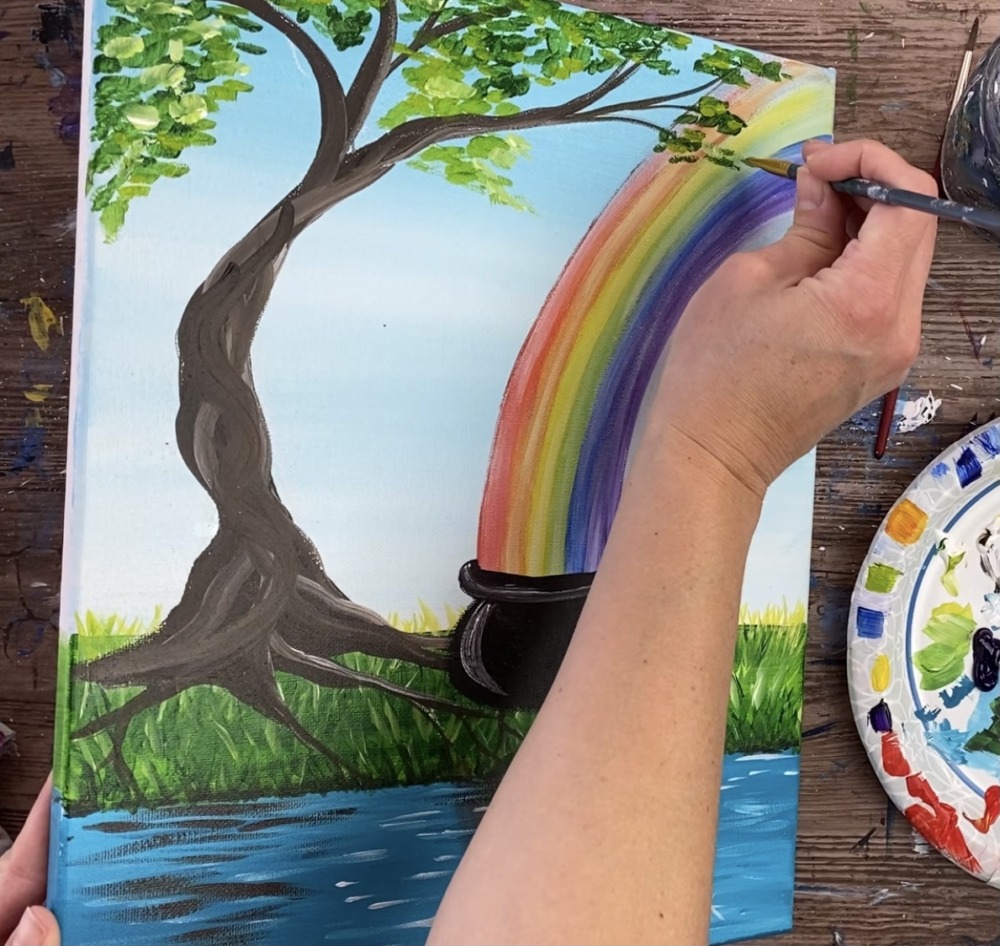
Then add a third layer of more leaves with a lighter green. Mix white into the light olive green and paint the same strokes in clusters around the tree. You should see different dimensions of light and dark leaf colors.
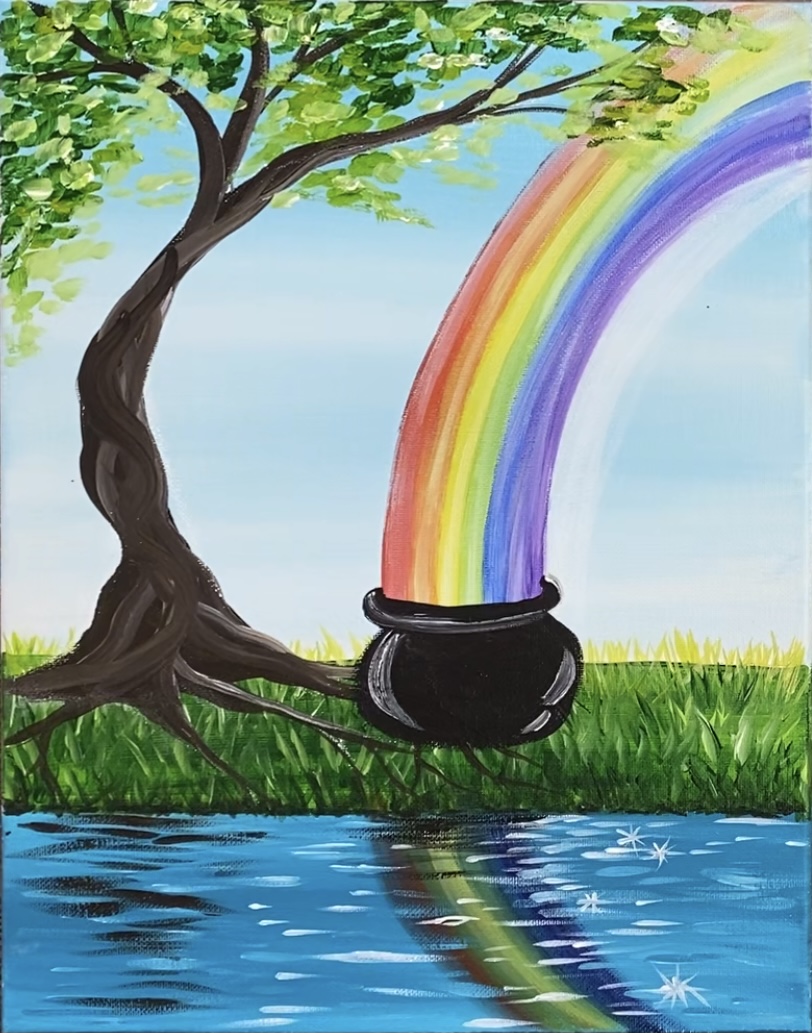
14. Paint texture on tree trunk
To do more texture on the tree, mix a lighter shade of brown on your palette. I mixed red and yellow into the brown to make it a warmer shade. Then I added white into it. (1 part red, 3 parts raw umber, 1 part yellow, 1 part white).
Paint more twisty strokes on the tree trunk using the #8 round brush. Overlap the twists on the tree. Leave areas of dark especially on the right side of the trunk.
Then add more white into that brown colors. Paint the white strokes just on the right side of the branches and the main tree trunk. Do some highlights on the roots as well.
15. Paint grass under cauldron
Use the angle brush to paint grass blades under the pot to make it look like it is nestled into the grass area. To this with the light olive green color mixed with a little bit of white so that it shows up against the black.
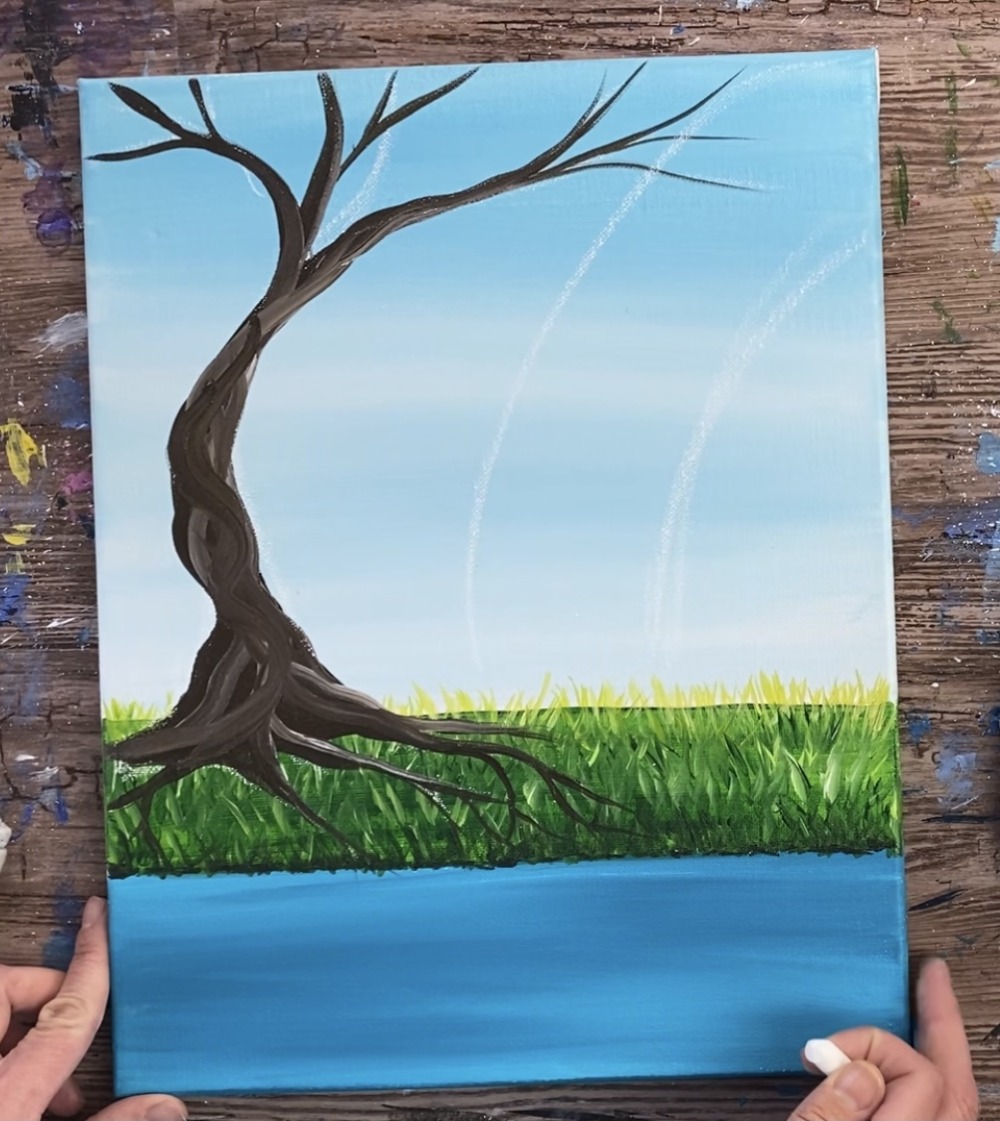
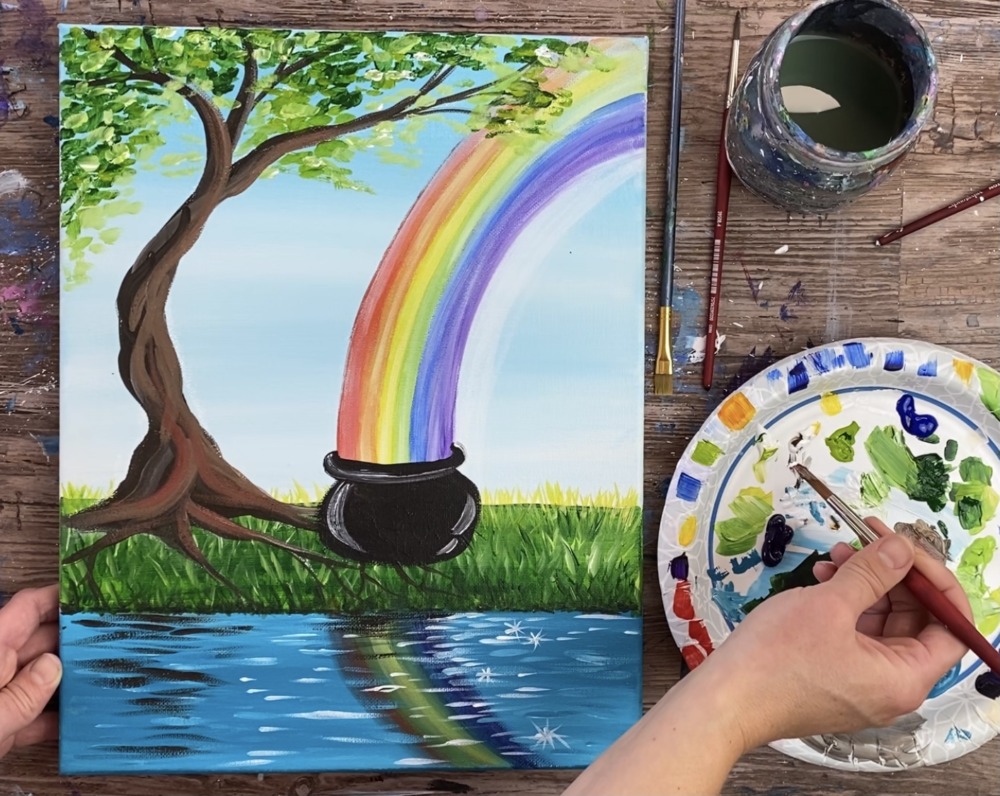
16. Paint Clouds & do final touch ups
For the clouds, I did the technique I demonstrated in this tutorial only the bottoms of the clouds were not flat. They had more shape to them. Use a #12 shader brush and titanium white. Load just just tip of the brush into the white but wipe off excess paint. Dab the brush to form the shape of the cloud.
The white here is very subtle as there is only a small amount of paint on the brush. The clouds are not a super bright white.
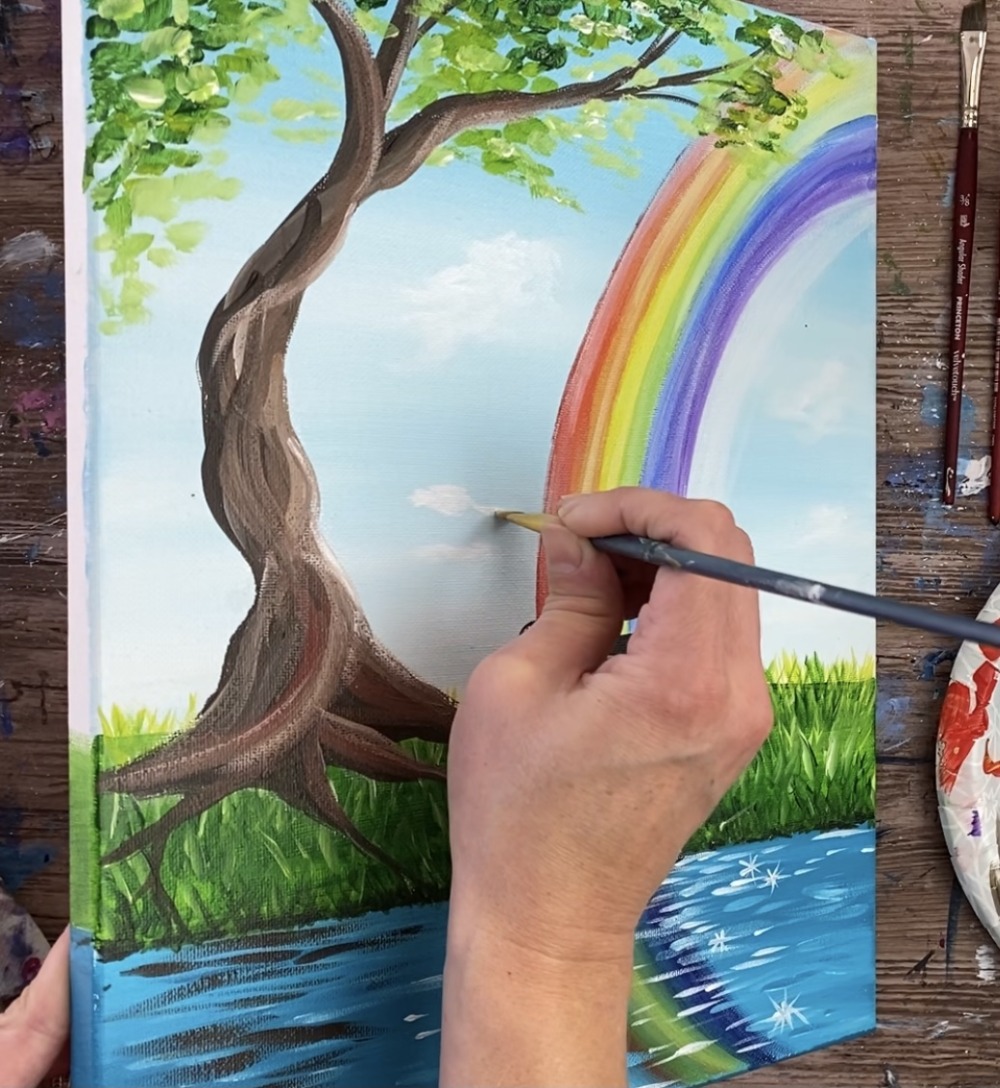
Tip: try to make your clouds that are up high “larger” and the clouds that are closer to the horizon line “smaller”.
Lastly, to cover up that white streak next to the rainbow, I painted it over with the color in the sky (light blue permanent and titanium white). Then I painted a few clouds over that.
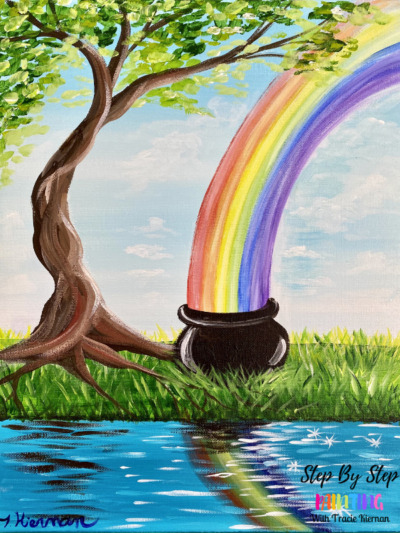
That’s it! Sign your name and show it off!
Share Your Art Here!


