
Would you like to save this?
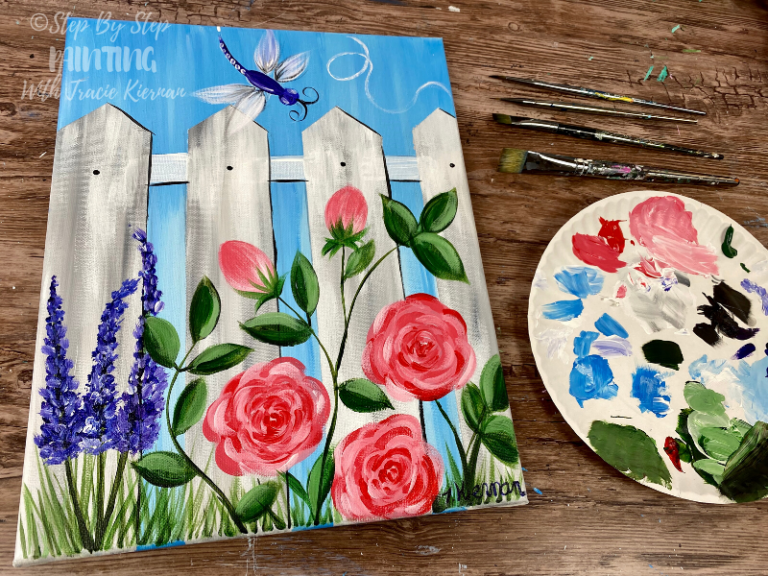
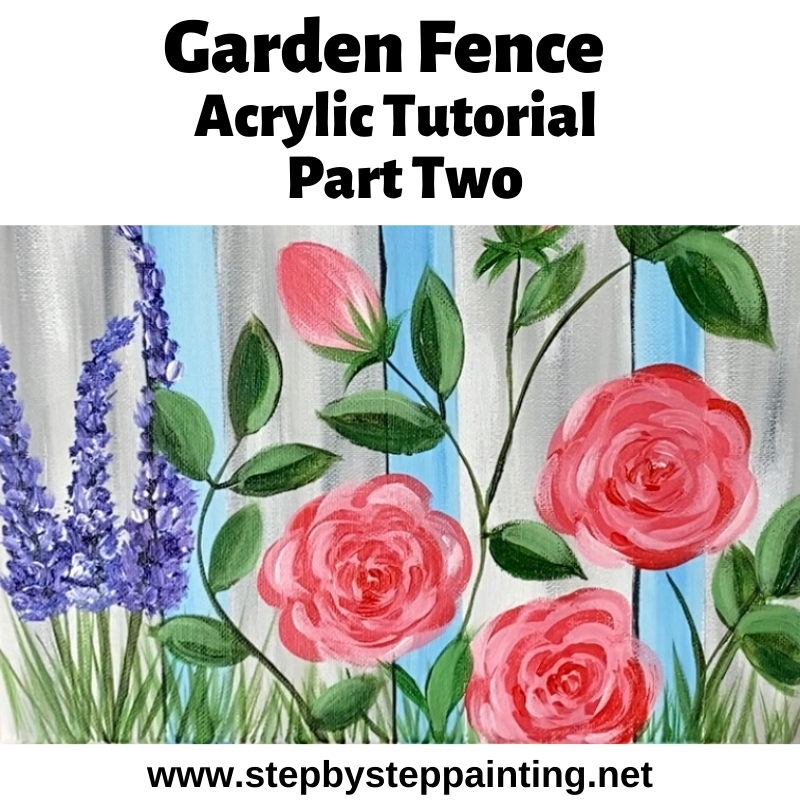
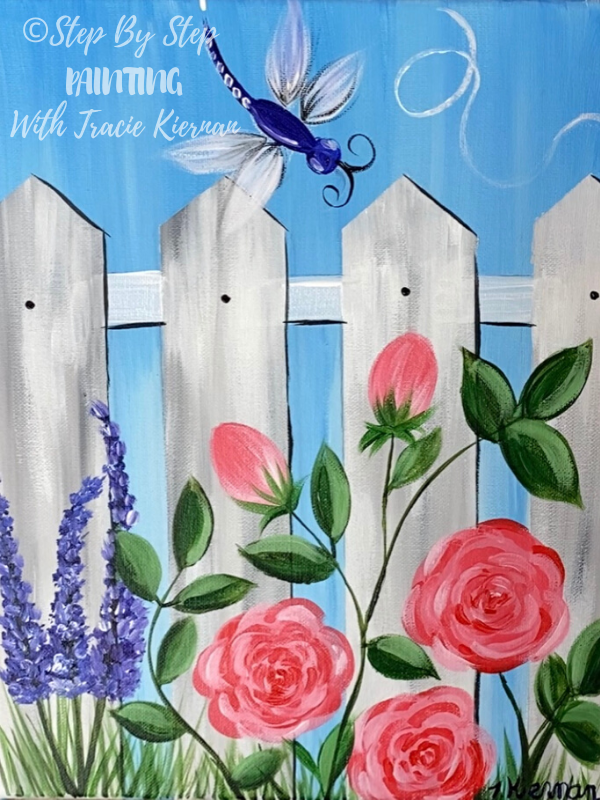
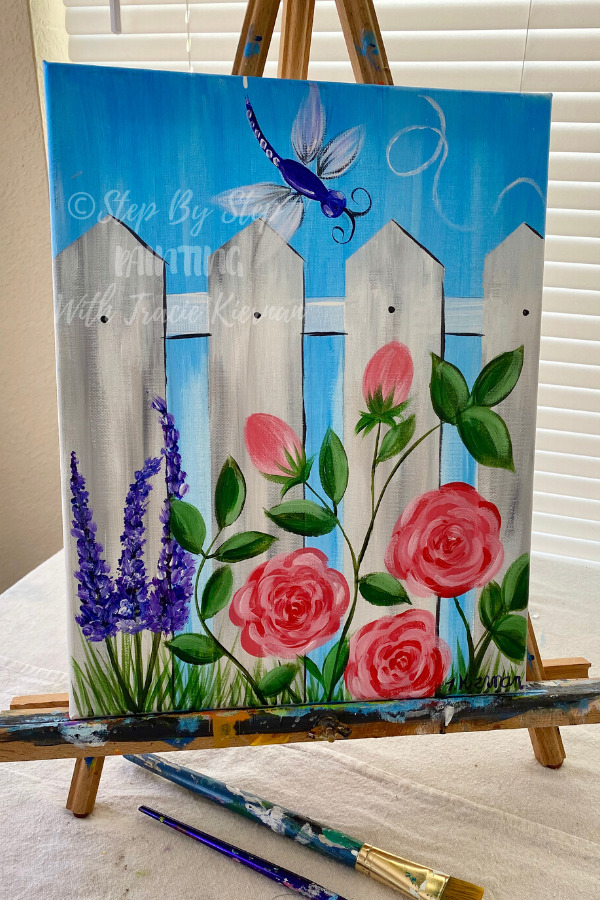
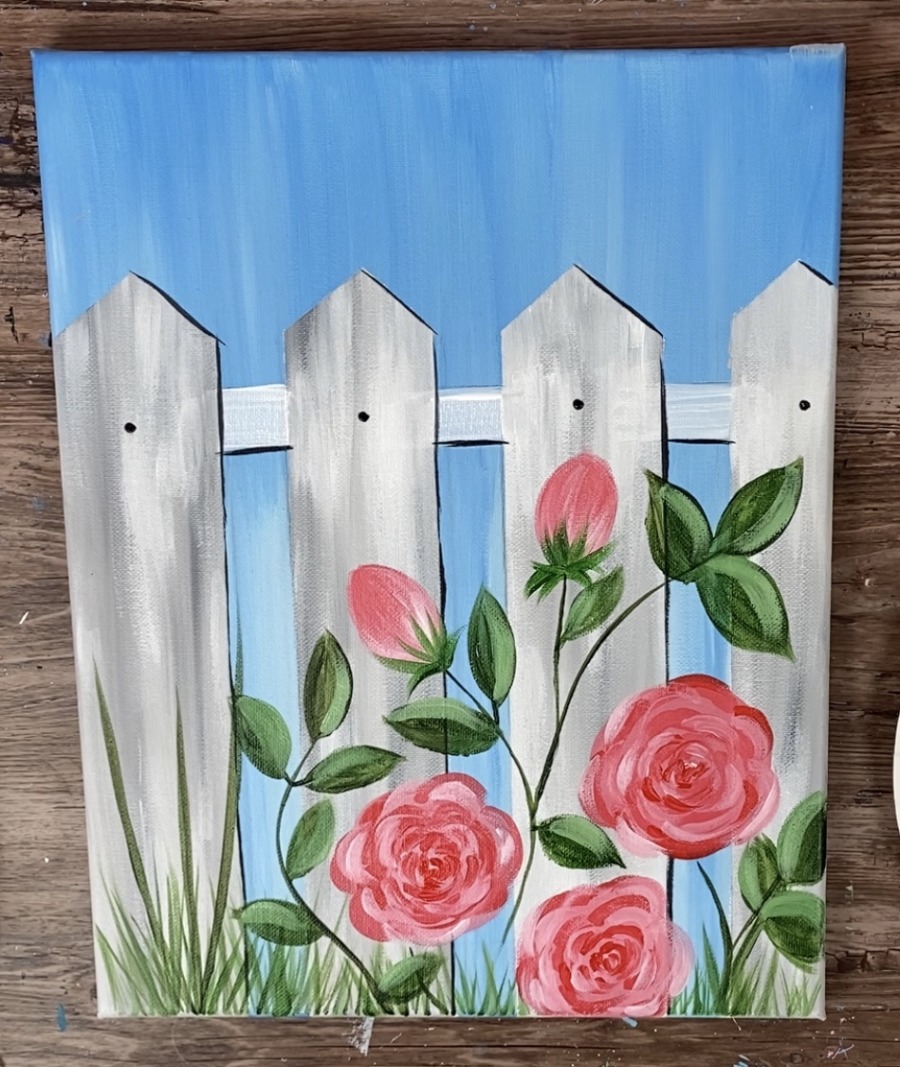
This tutorial is a continuation of my part one tutorial for how to paint this garden fence acrylic painting.
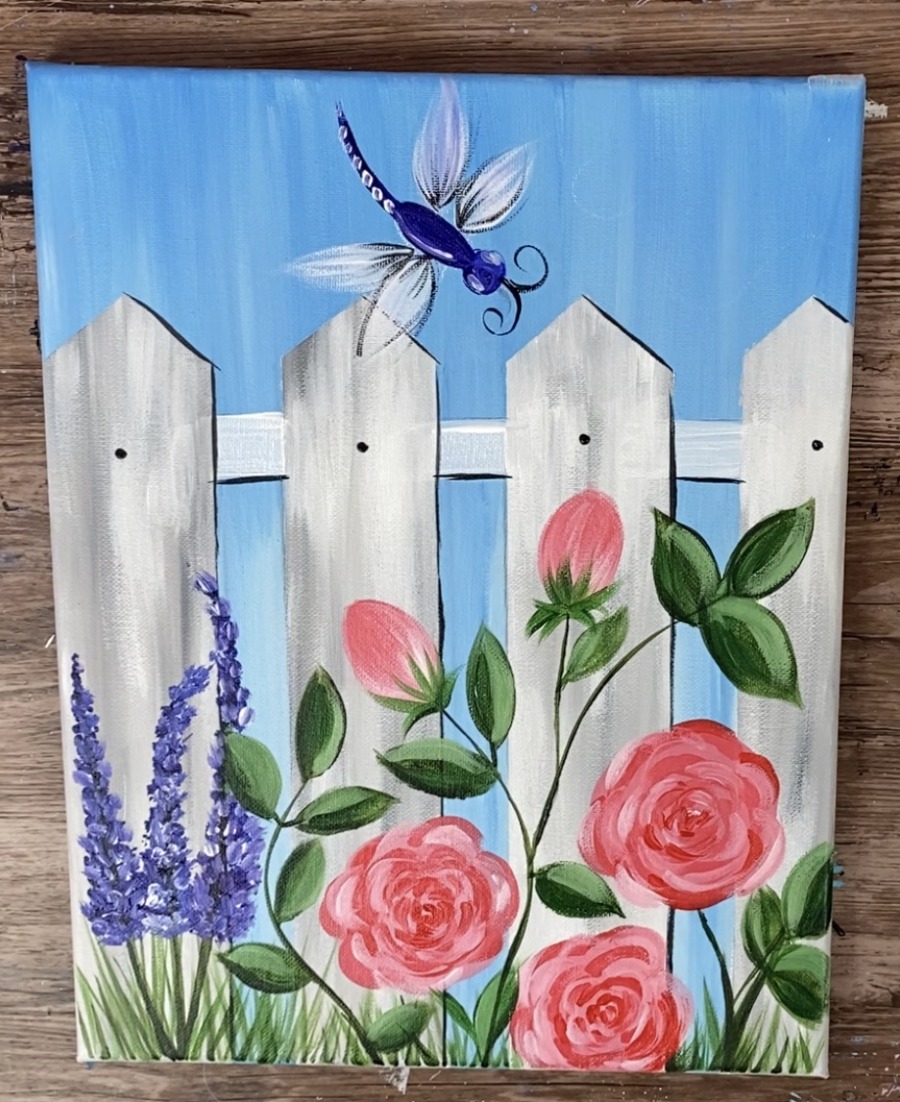
You will be guided step by step how to paint the grass, roses, hyacinth and the dragonfly.
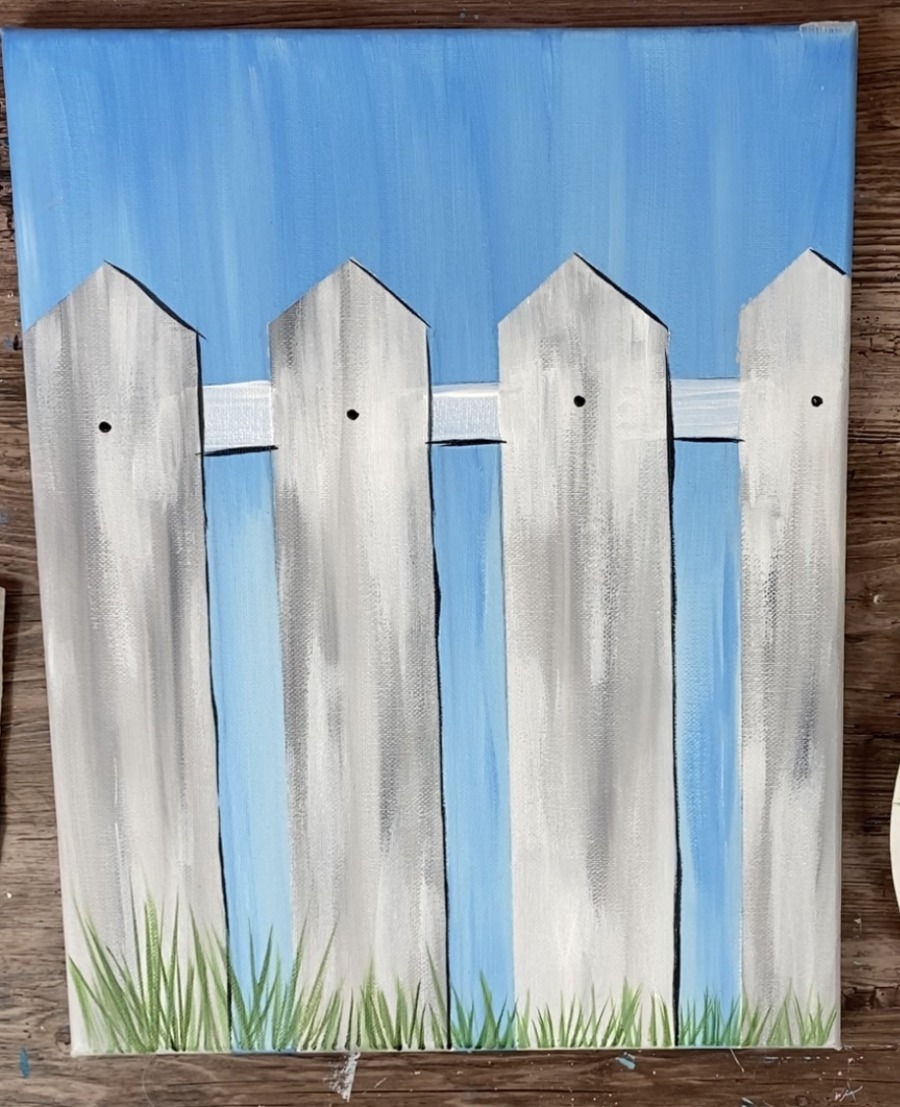
You can see further instructions for how to paint the fence and sky part of this painting here.
Materials
To see a list of materials for this tutorial, go to part one of the garden fence painting.
Directions At A Glance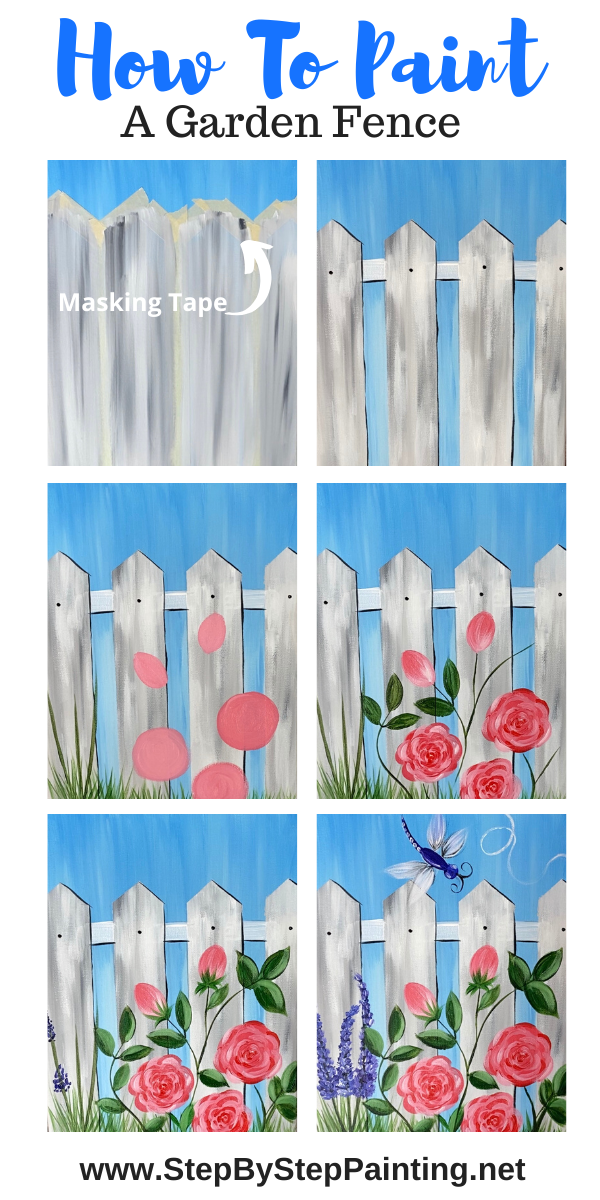

Video:
Step By Step Directions – Part Two
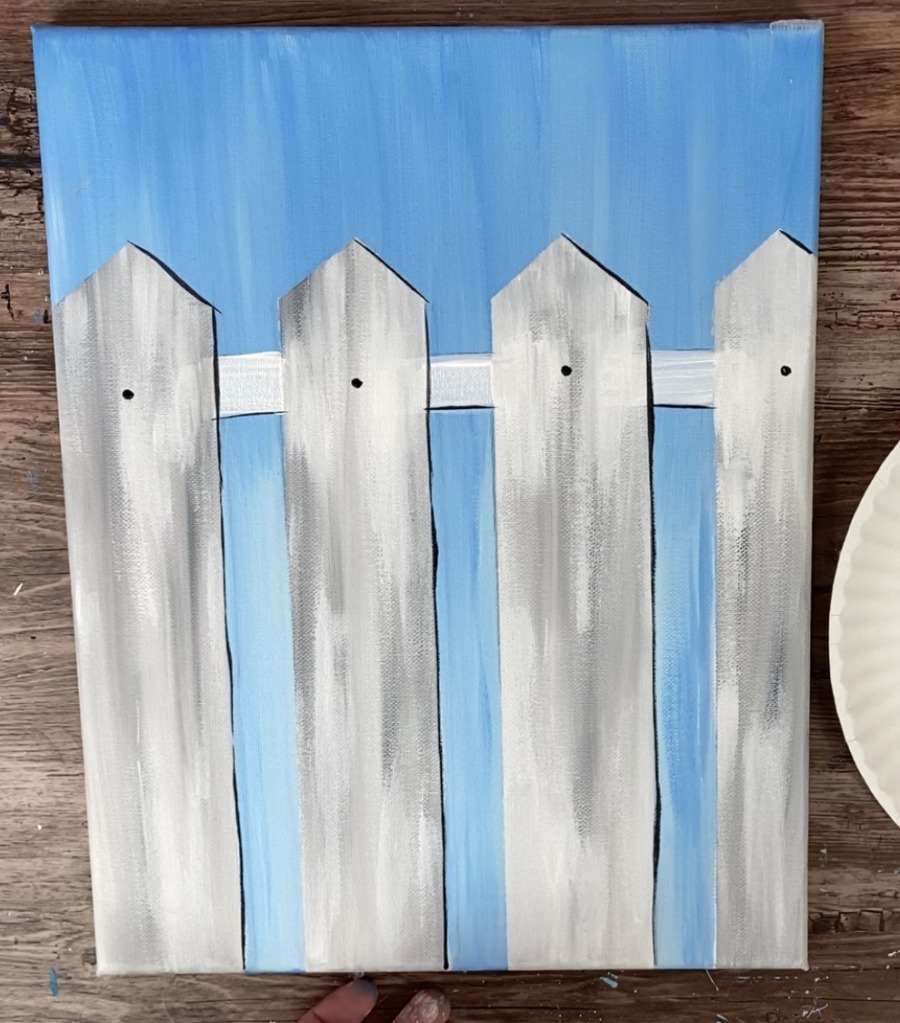
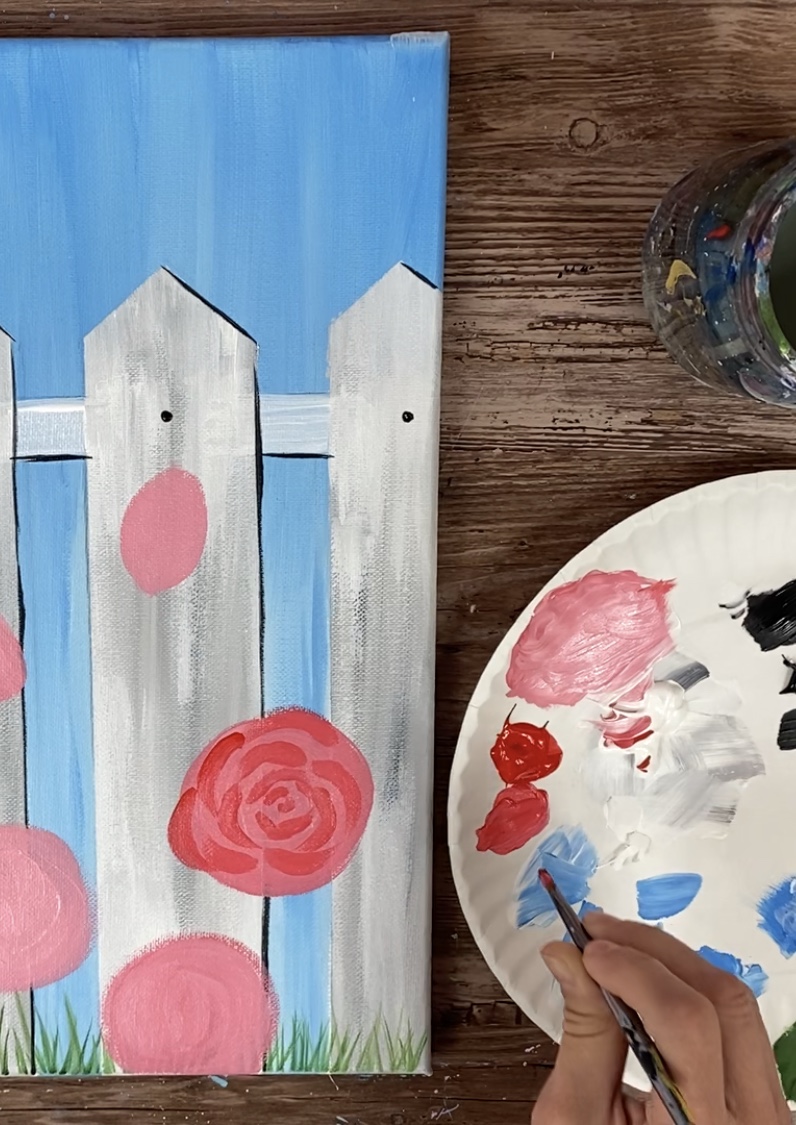
1. Paint The Fence & Dry
If you have not already done so, you will need to paint the fence of this painting. You can find directions for how to do there here in part one.
Let your painting completely dry.
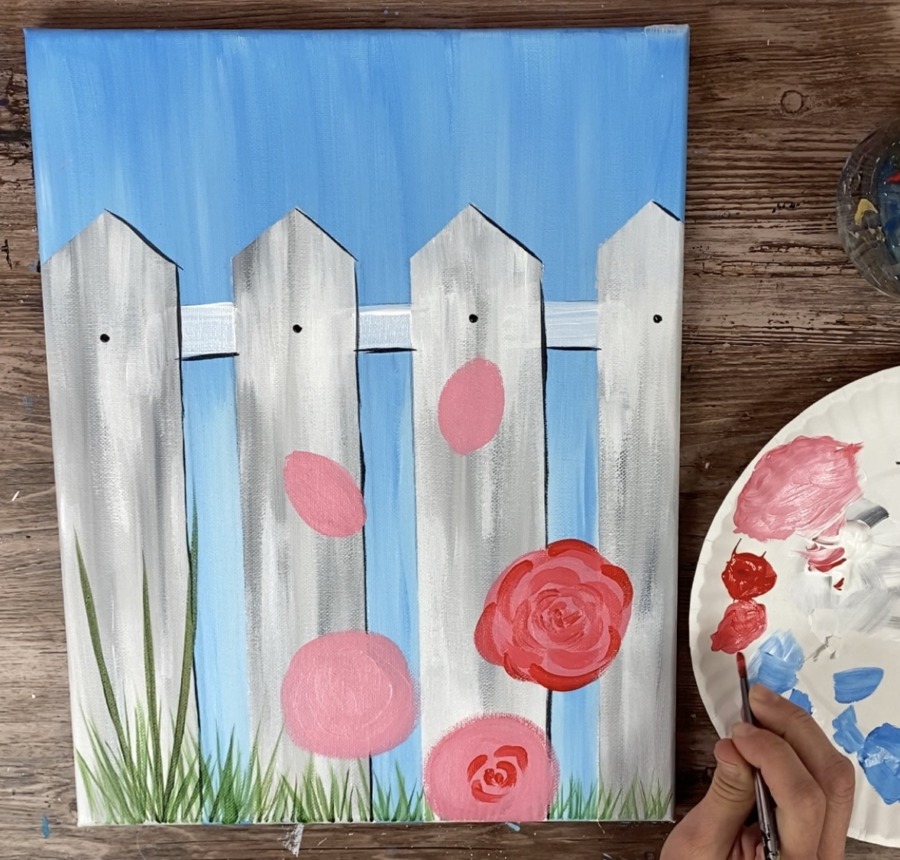
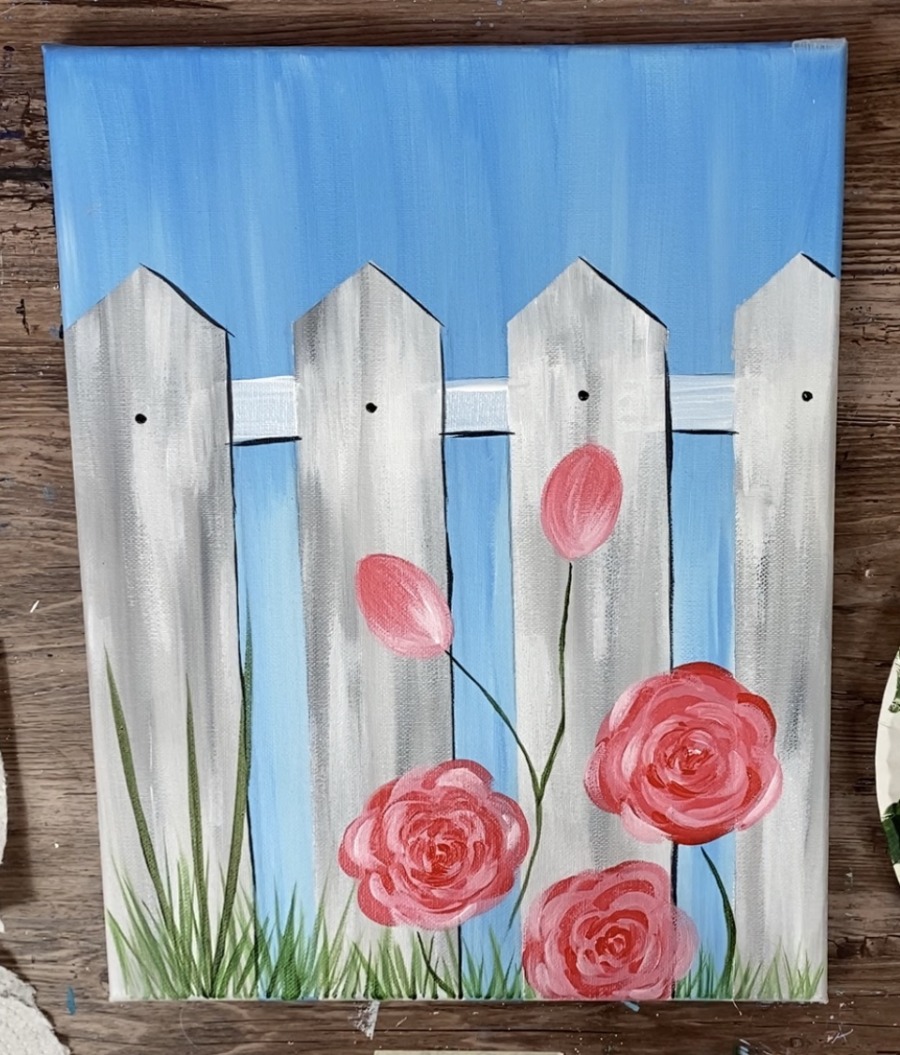
2. Paint the grass
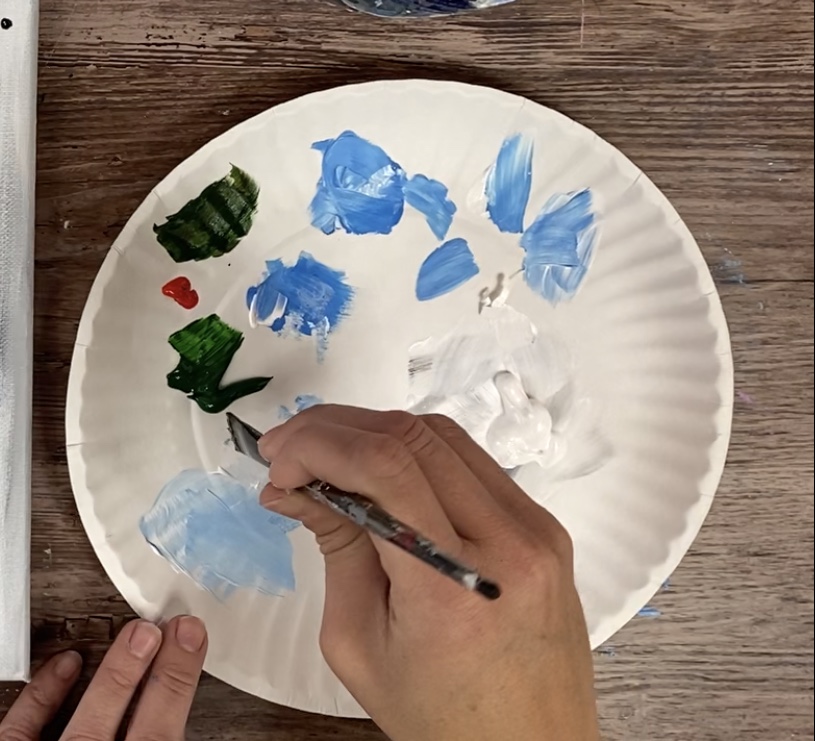
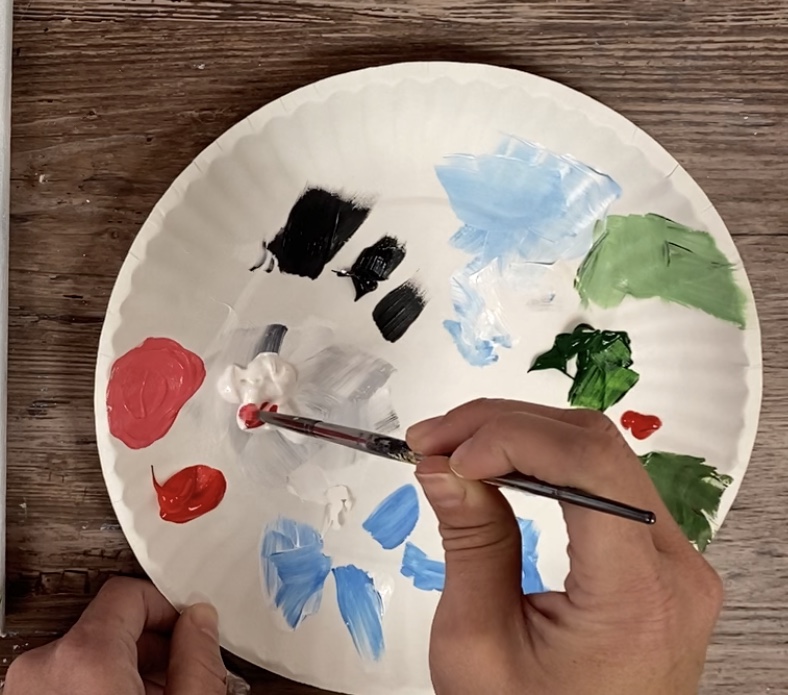
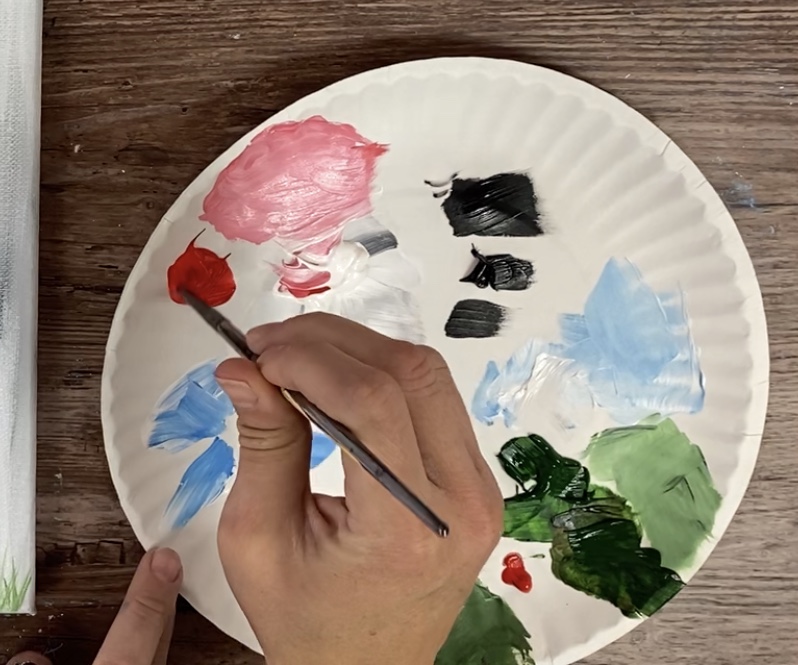
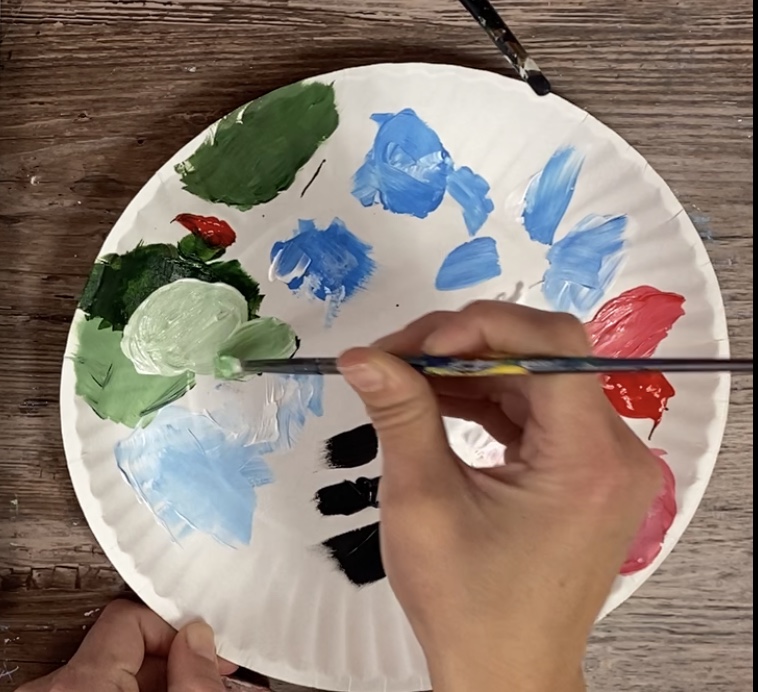
I used a 12 bright brush (the tip on its side) to paint the grass. I used hookers green permanent, cadmium red medium hue and titanium white.
On your palette, mix a little bit of the cad red hue with the green. You will create a deeper, more natural looking green
To do the grass strokes, use the tip of your bright brush vertically and stroke each grass blade from bottom up.
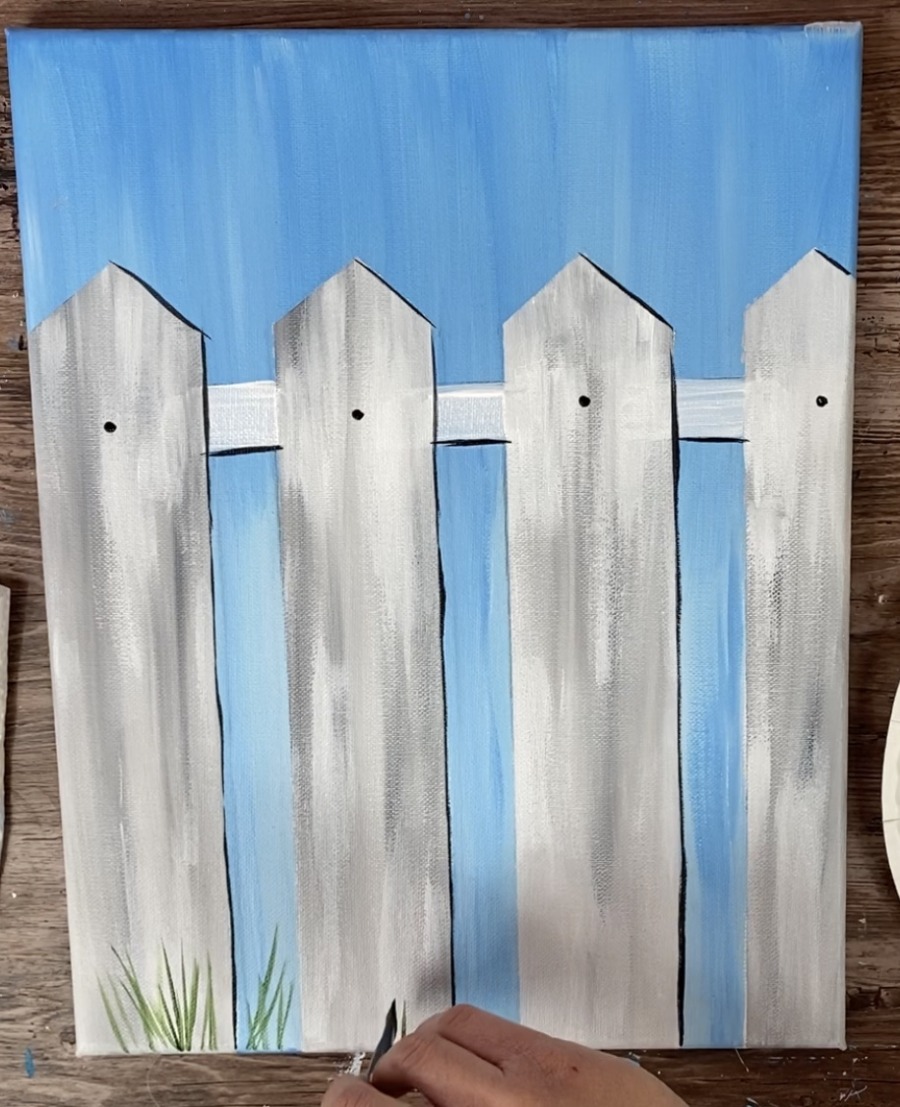
Re load your brush in various amounts of green, dark green (green mixed with red) and white. This will create different color blades of grass.
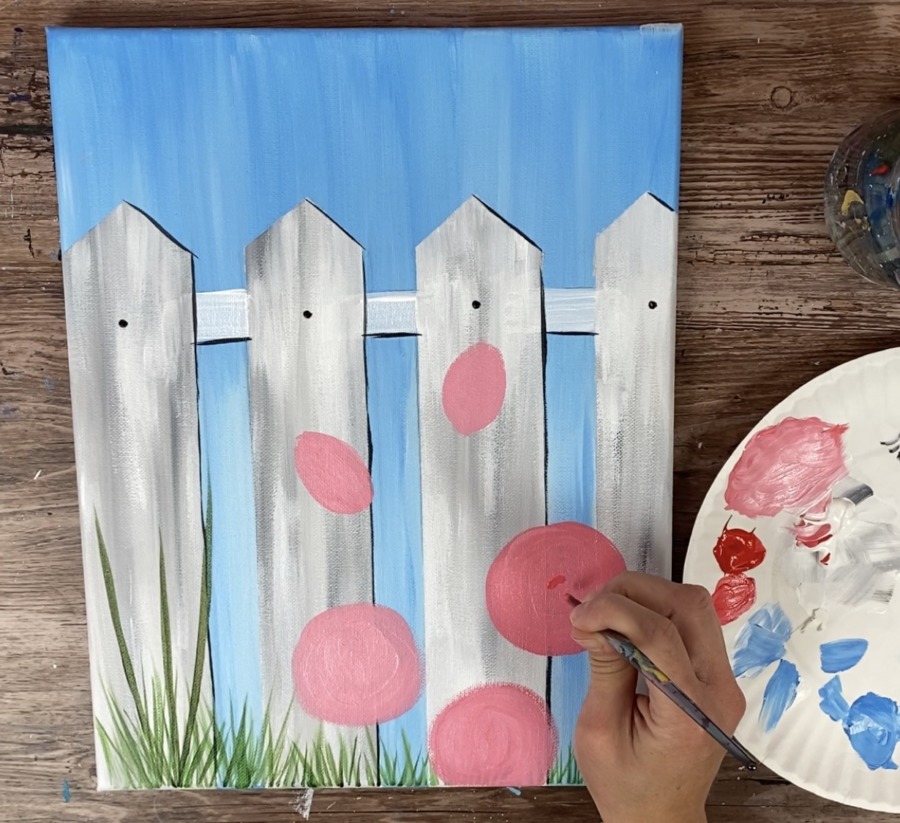
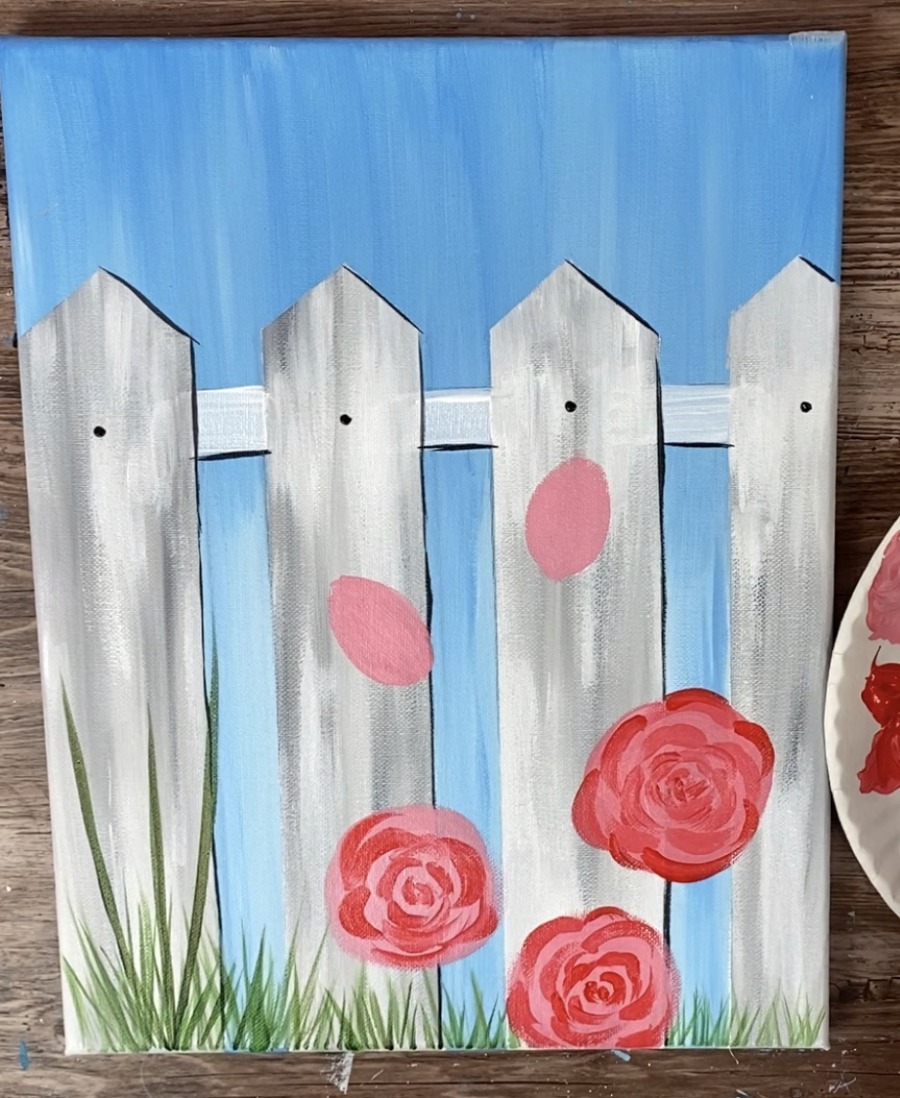
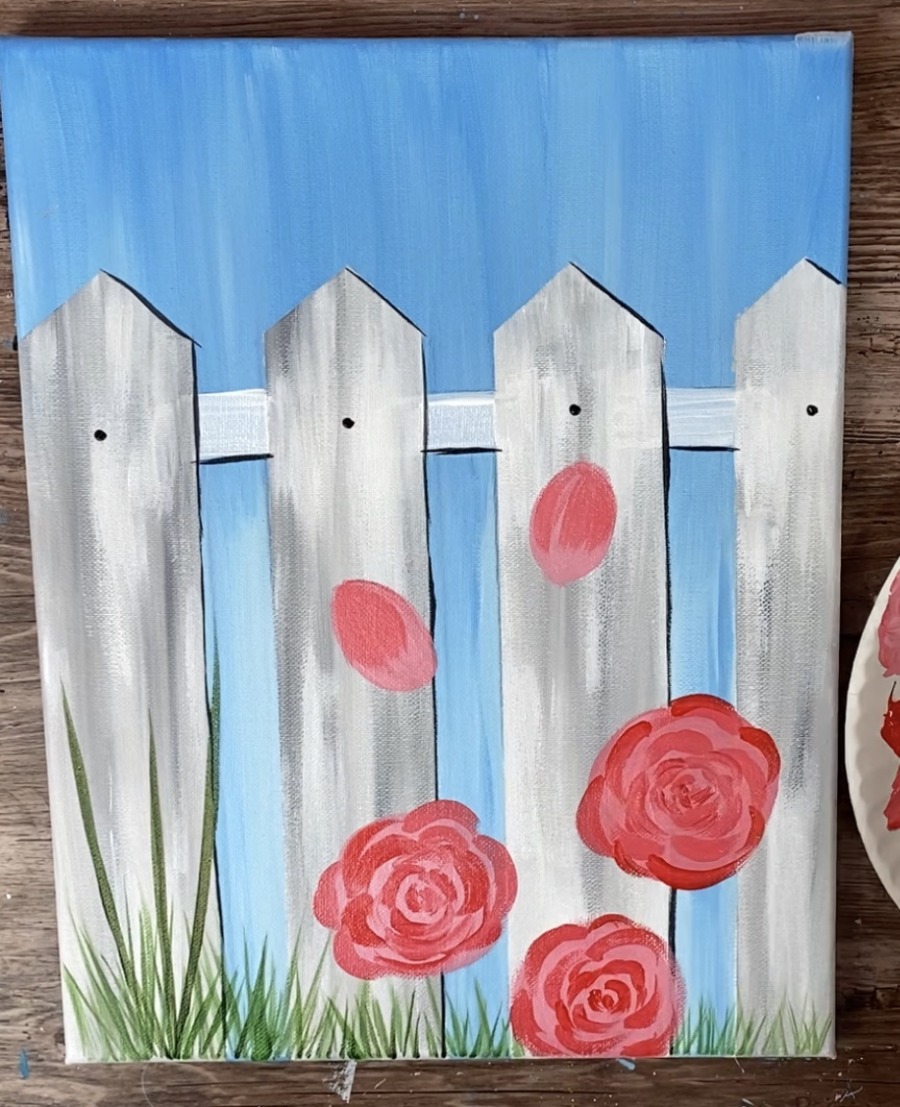
3. Paint The Base Shape Of The Roses
I only used two colors for the roses: cadmium red medium hue and titanium white.
On your palette, mix a little white in with the red.
Then paint large circles with your 4 round brush where you want your rose buds to be.
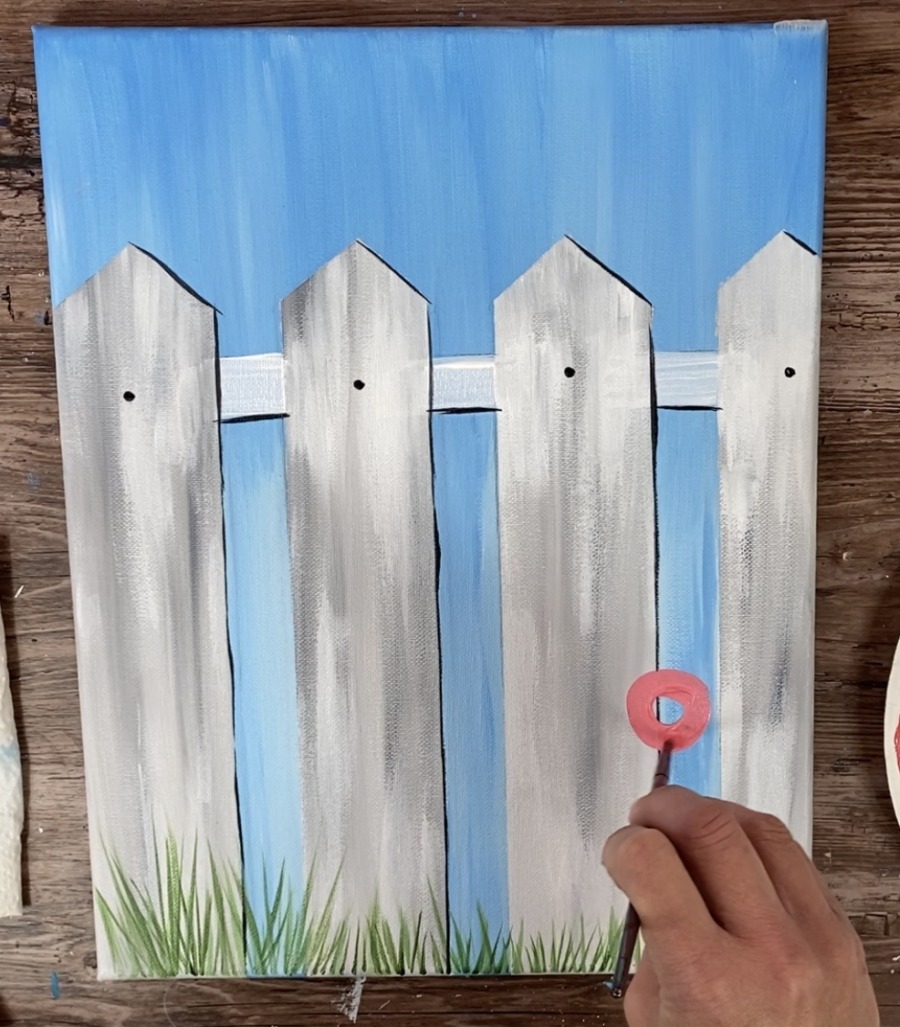
For the sake of variety, I made each circle a slightly different shade of pink by mixing different amounts of red and pink (but you can do them the same if you want).
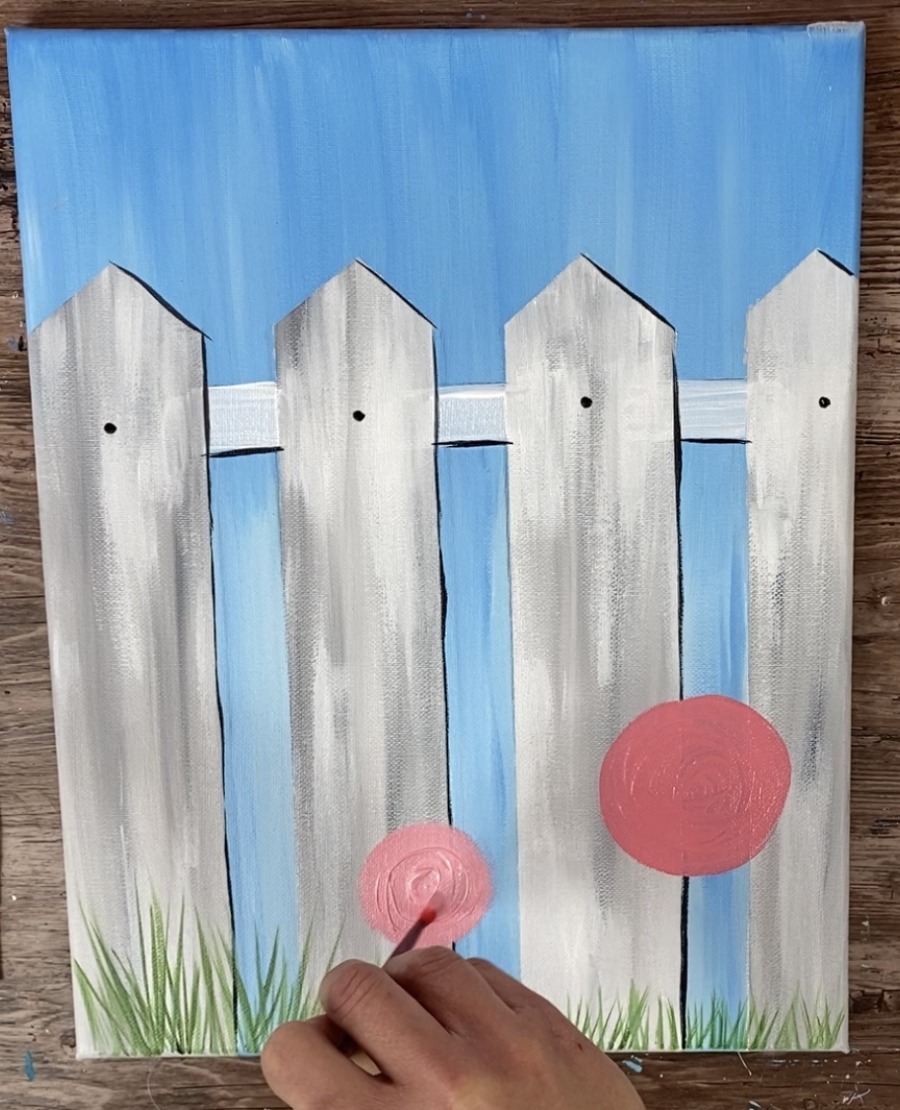
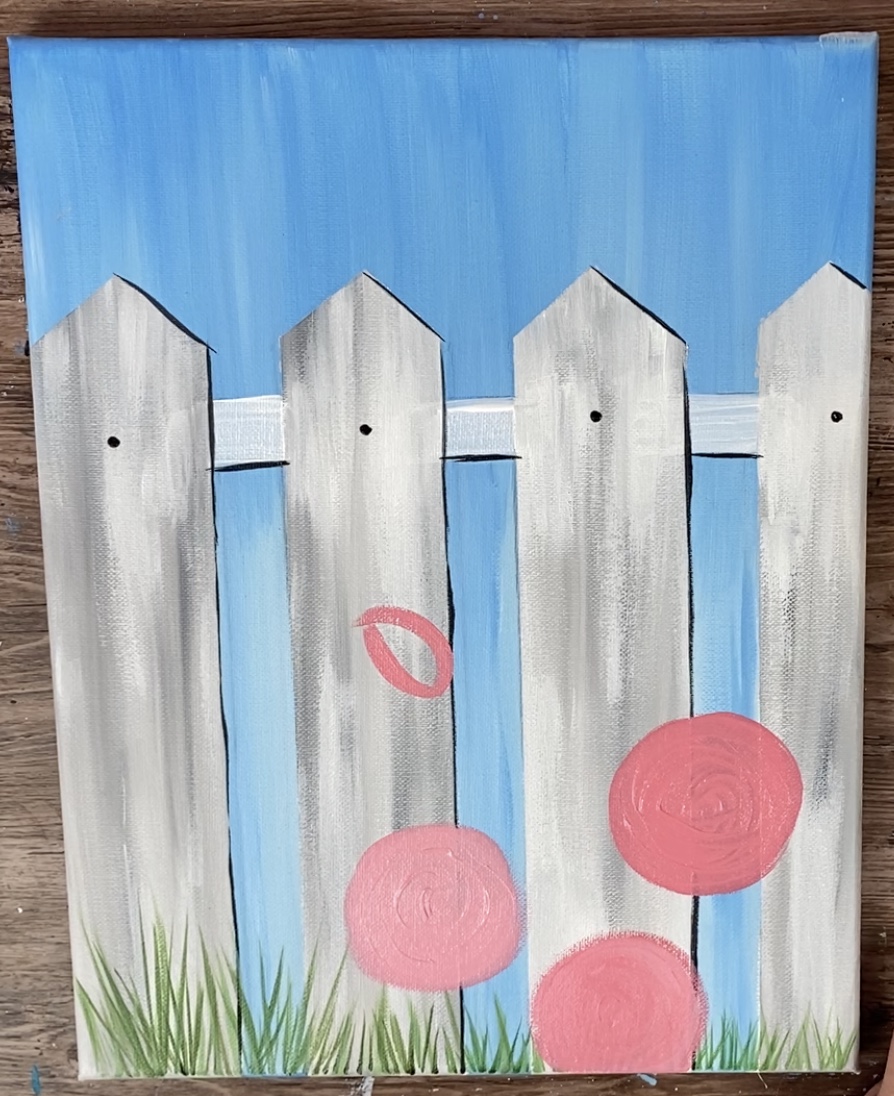
To do the rose buds, paint a sort of cat-eye shape.
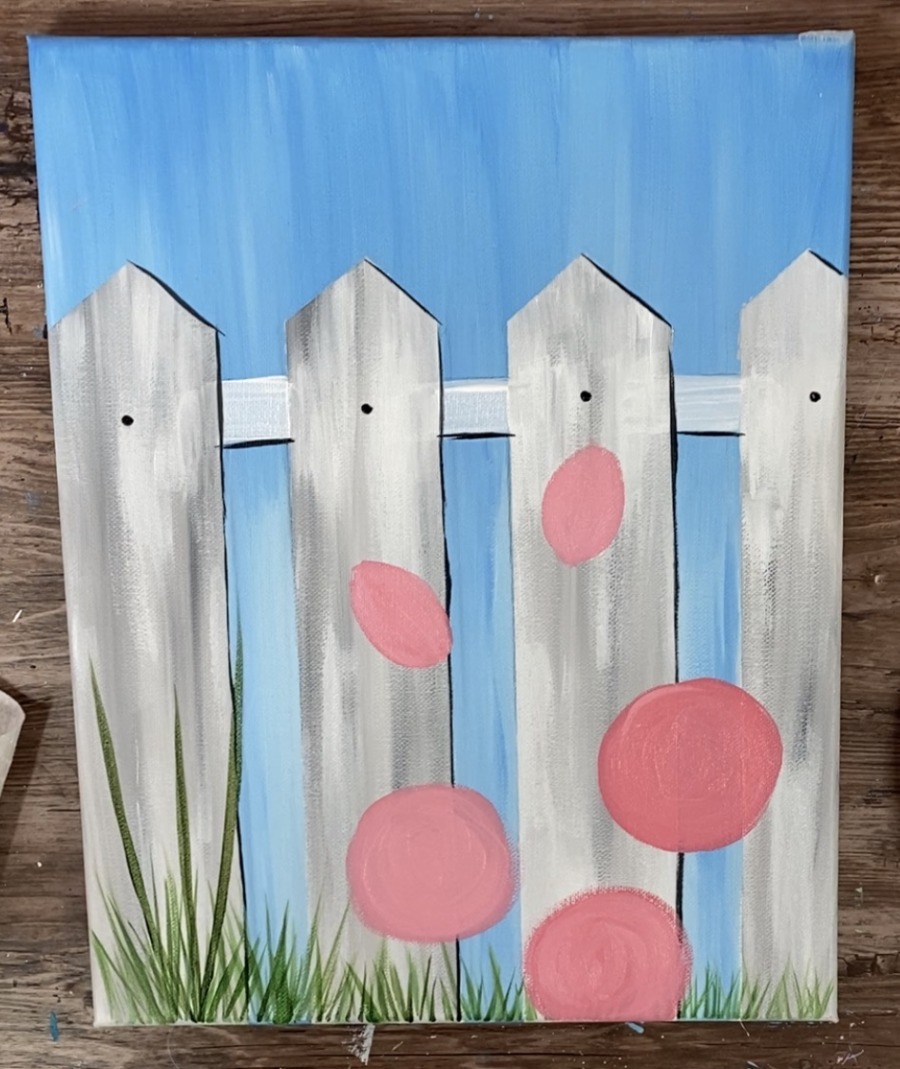
I did three rose bloom circles and two buds. Then I also painted three larger green stems on the left where the hyacinths will be.
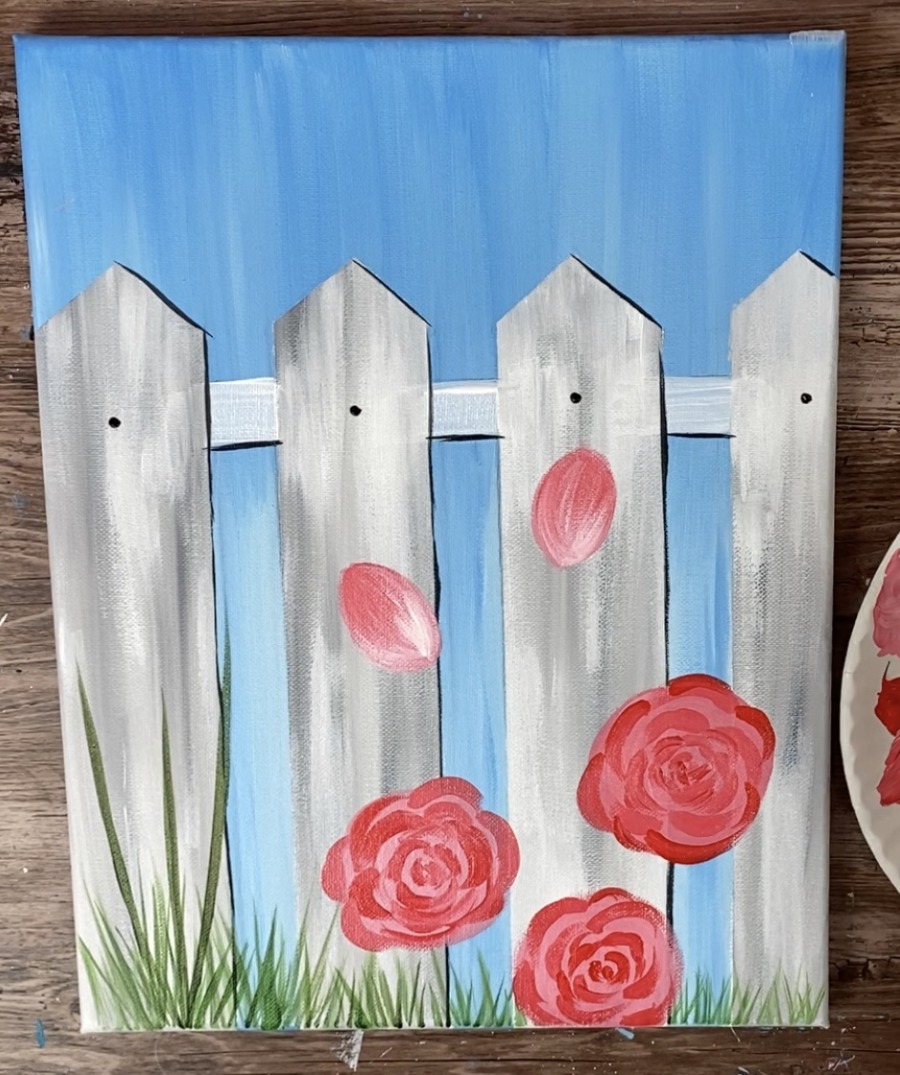
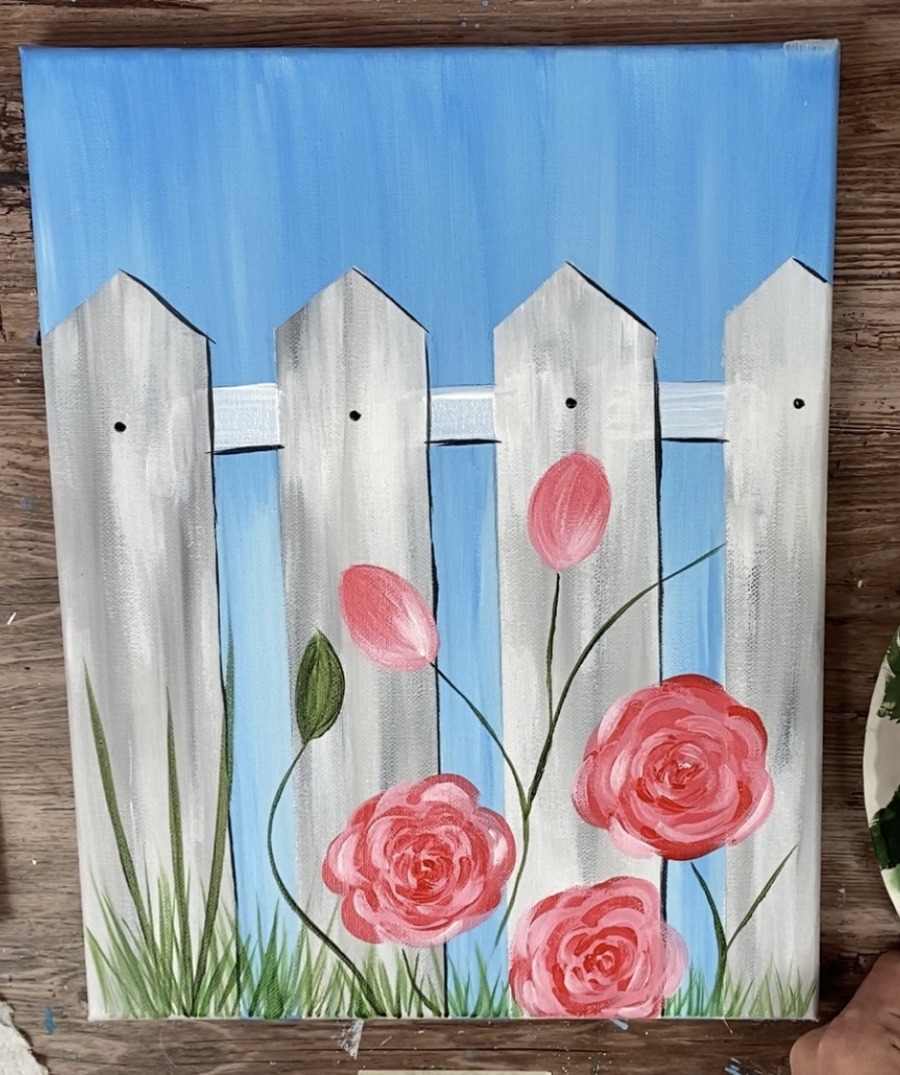
4. Paint the rose petals
Next paint the inside details of the roses. To do this, use your 4 round brush.
On your palette mix a darker shade of pink (red mixed with white). This color should be darker than your circle, so pretty much almost all red with a tiny bit of white.
Then start in the middle of the circle and paint a little “C” line.
Form the bloom by painting the curved lines that form around your initial line.
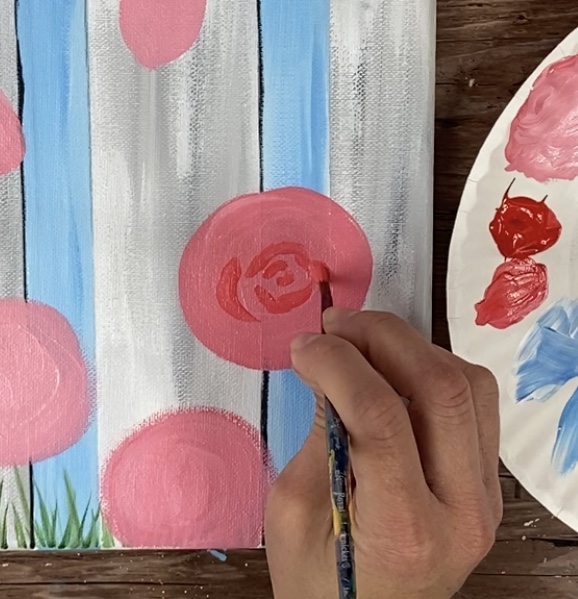
Use mostly the tip of your brush for this.
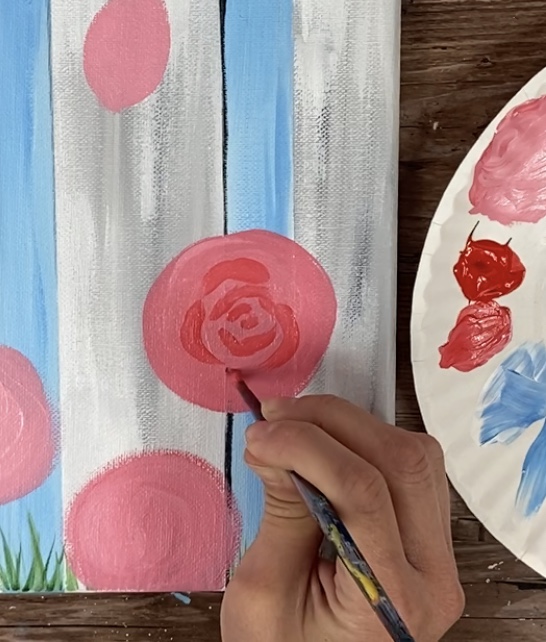
Keep painting more curved lines that go in a blooming fashion as you work your way to the outer part of the circle.
When you get to the outer part of the circle, paint outside of the circle a little bit to form the flower shape on the edges.

Repeat these steps for each of the rose blooms. You can use different variations of red mixed with the white since the circles were different.

5. Add some more color to the rose buds
If you look at the rose buds in this painting, the bottom part of it is lighter and the top is darker.
To do that, mix a slightly darker red/pink combo and apply it to the top of the bud.
Then wipe your brush off and add white. Paint the bottom of the bud with the white and blend it up.
6. Paint The Stems & Leaves
For the stems I used my 12 bright brush and the same dark green color combo of the green mixed with a little red.
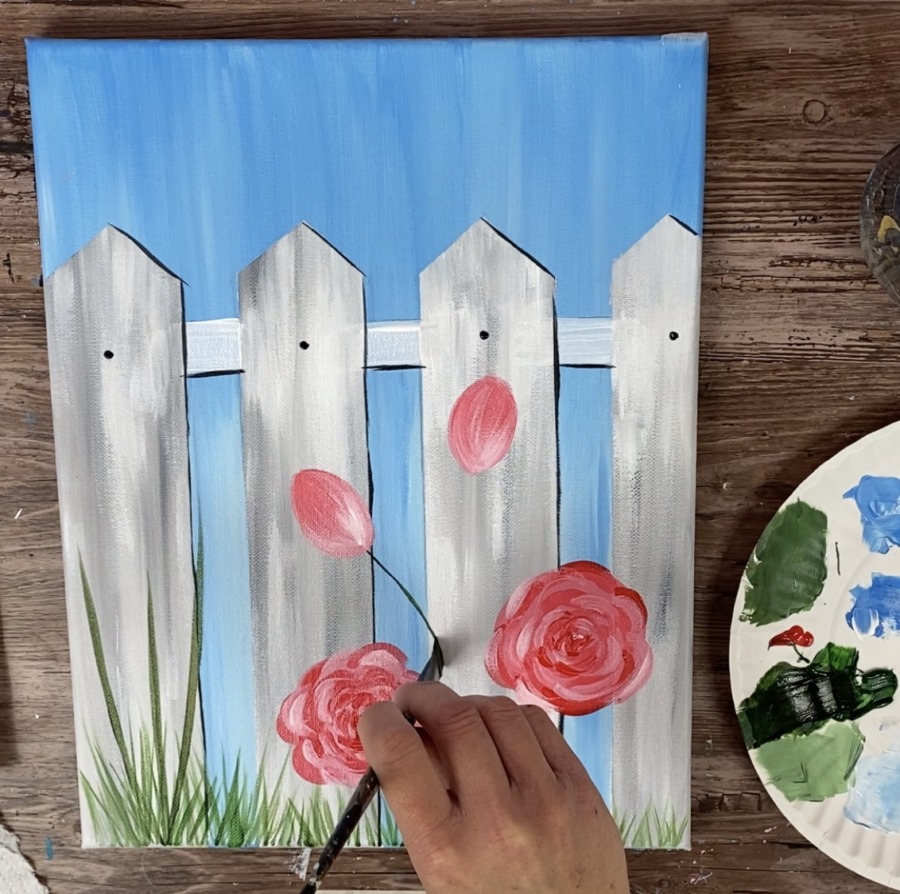
Paint lines going down from each of the rose blossoms and buds.
To do the leaves, I also used my bright brush.
Paint bunches of leaves in groups of threes throughout the stem areas.
Tip: if you prefer, you can paint the leaves with a round brush.
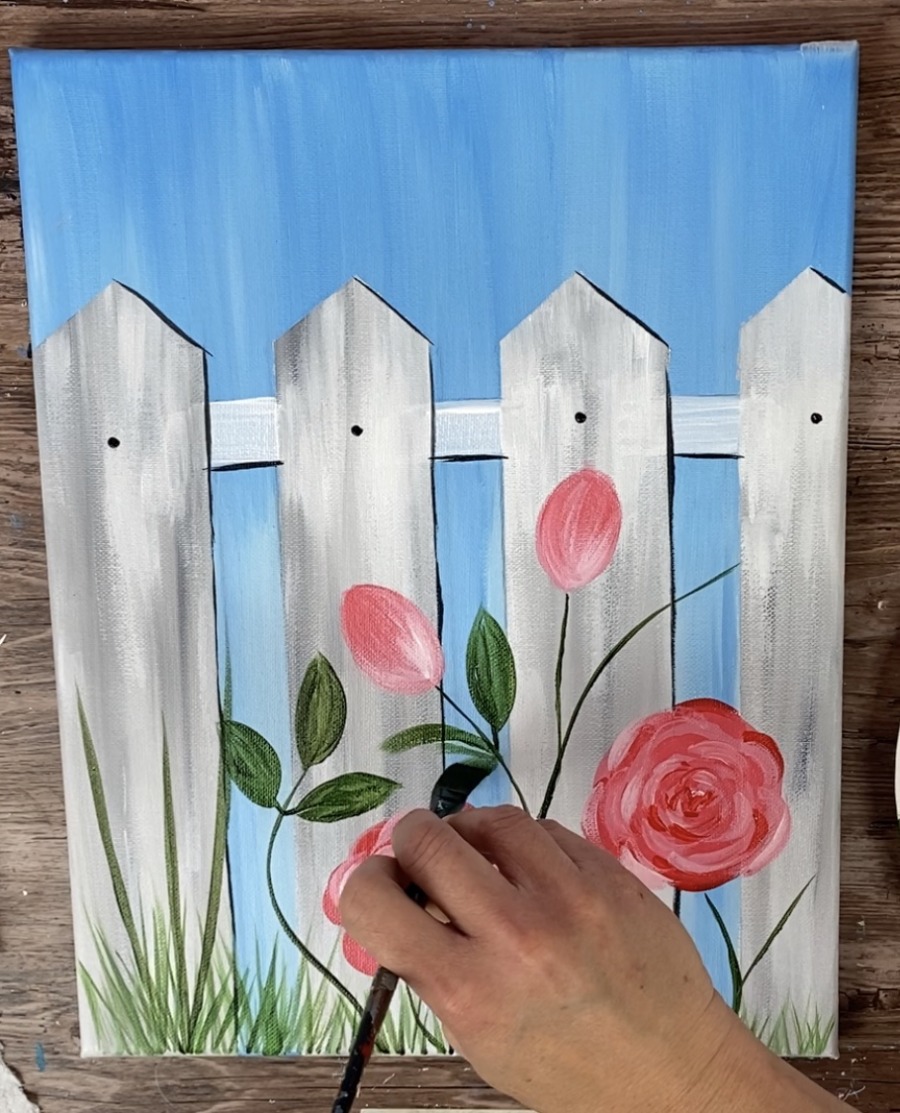
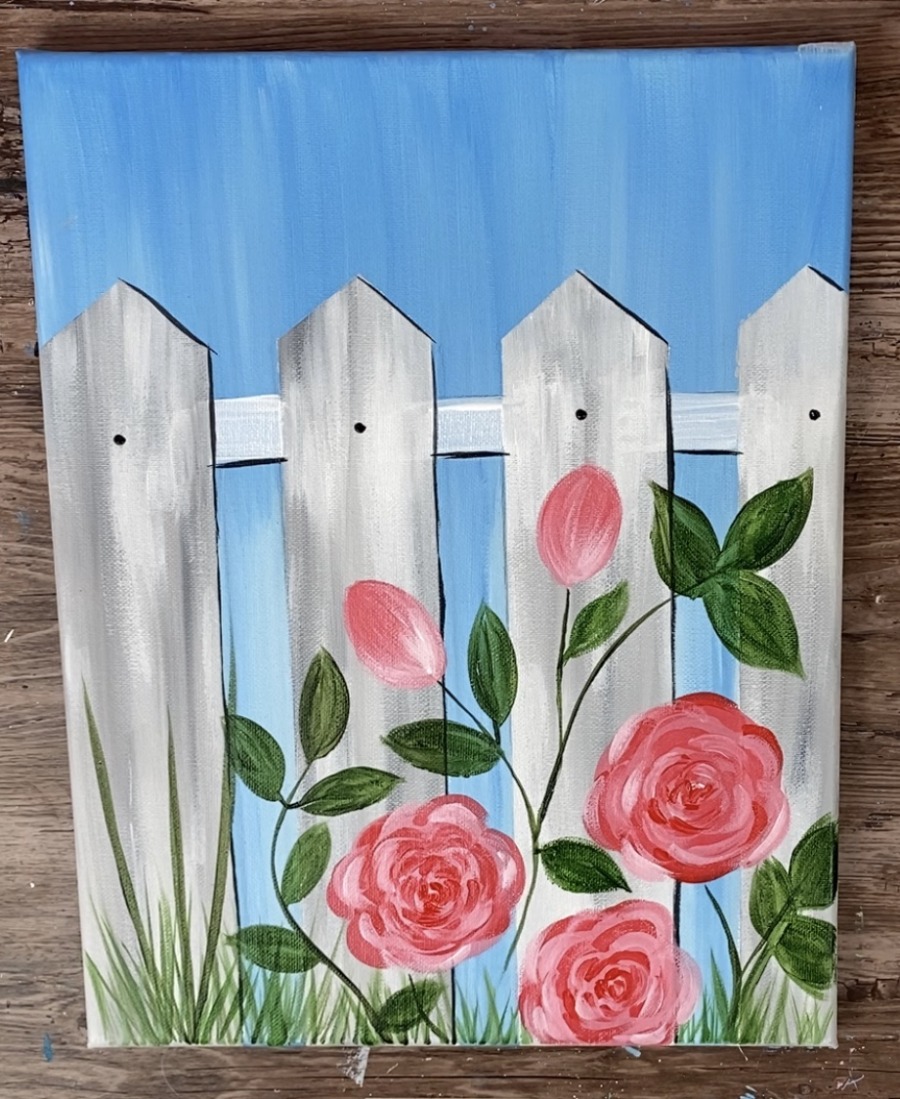
Then on my palette, I mixed white with the green to make a lighter green.
Then on one side (preferably all the same side) of the leaves, I painted them this light green color.
I also used my round brush to paint the bottom smaller leaves that attach to the bottom of the rose buds.
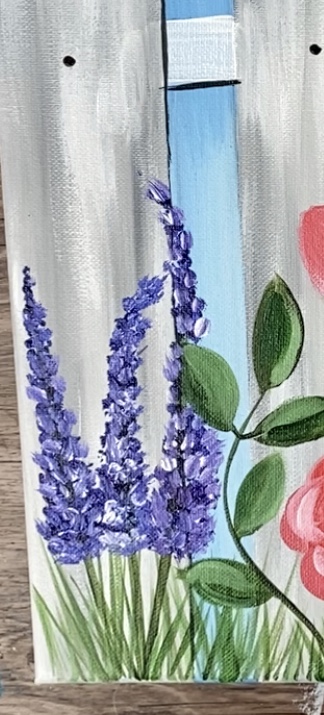
7. Paint The Hyacinth
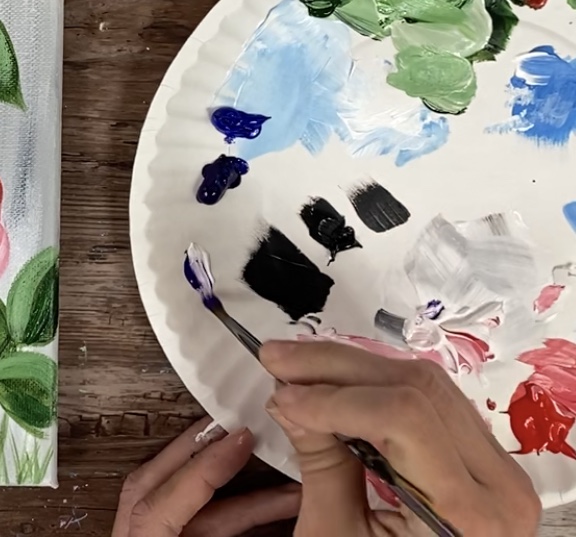
For the hyacinth, I used the colors: dioxazine purple, utramarine blue and titanium white. I also used my 4 round brush.
Dip the tip of your brush in both the blue and the purple.
Then paint dots at the end of the stems that you painted earlier.
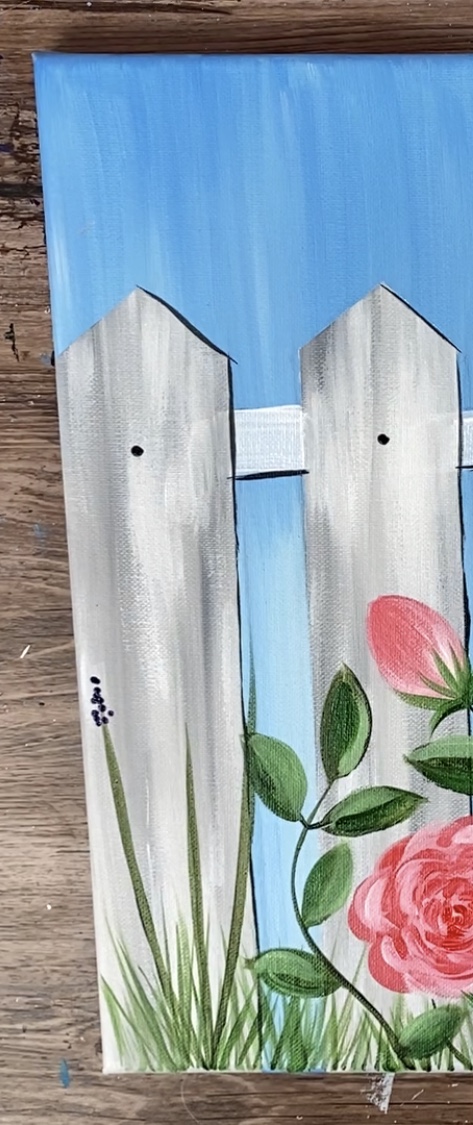
These hyacinths form a sort of slender triangular shape. I then proceeded to paint the bottom so I knew what shape these dots were to form.
Continue to fill in this long slender triangular shape with all dots of blue and purple.
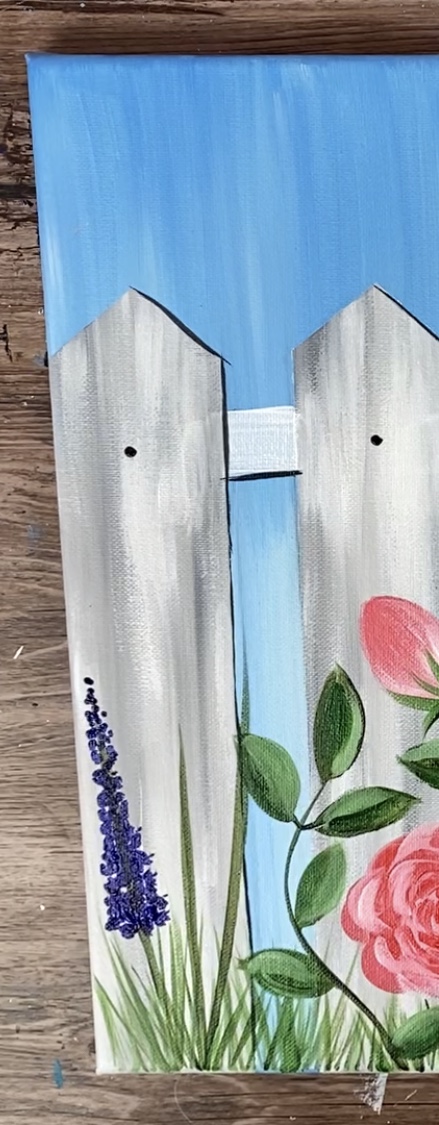
Repeat the steps for each of the three hyacinths.
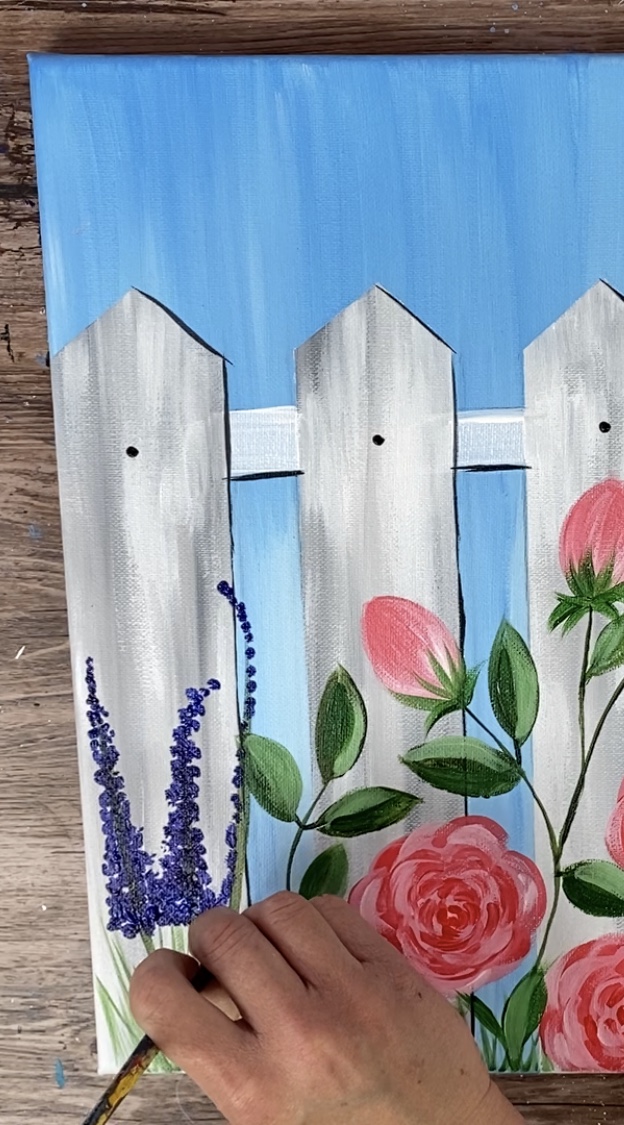
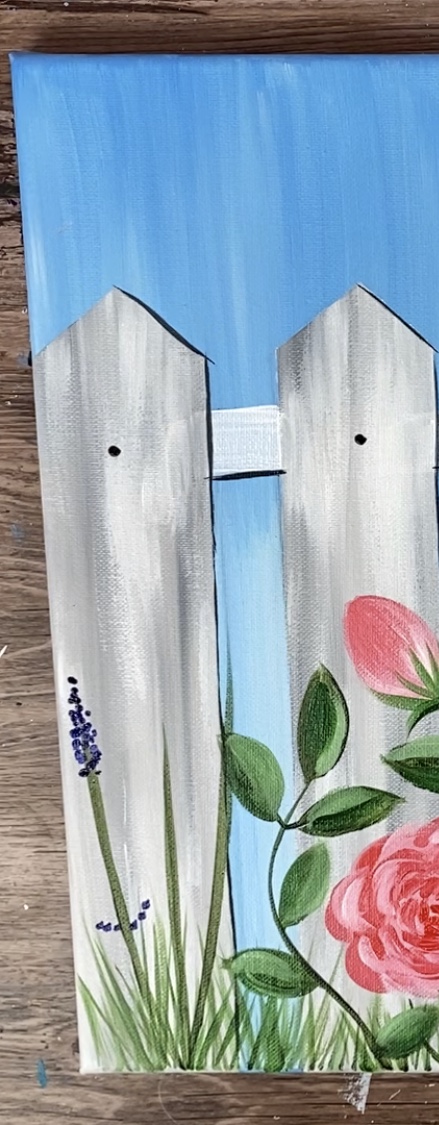
Then, to get some spectacular color variation, load your brush in a little bit of white (without rinsing).
Paint little white dots of clusters on each of your hyacinth blooms. The white will blend with the blue and purple to create the variation of color.
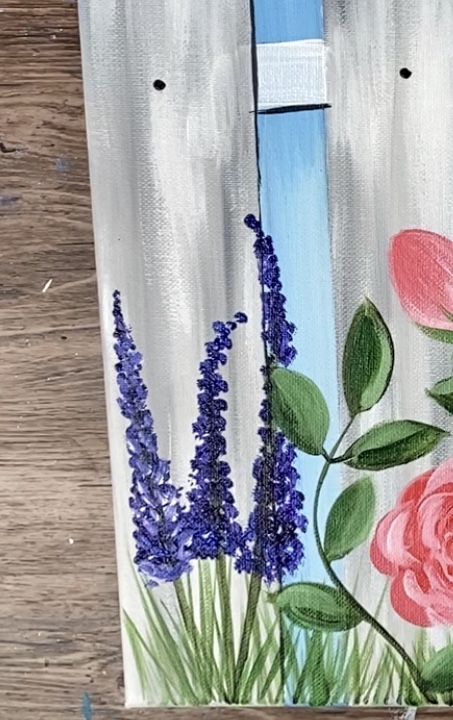
Tip: I worked from the bottom up when I did the white part. I also made my dots more like little angular strokes.
Almost done!! Now all we need to do is that dragonfly!
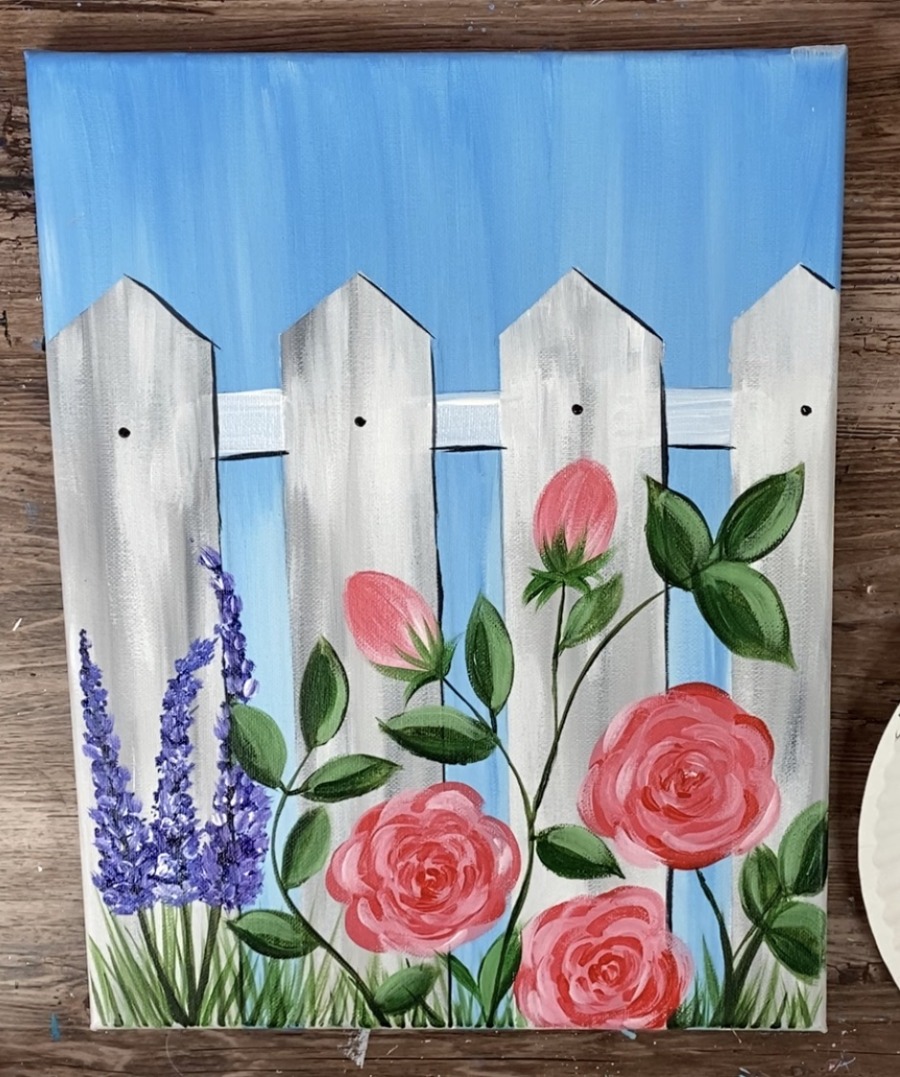
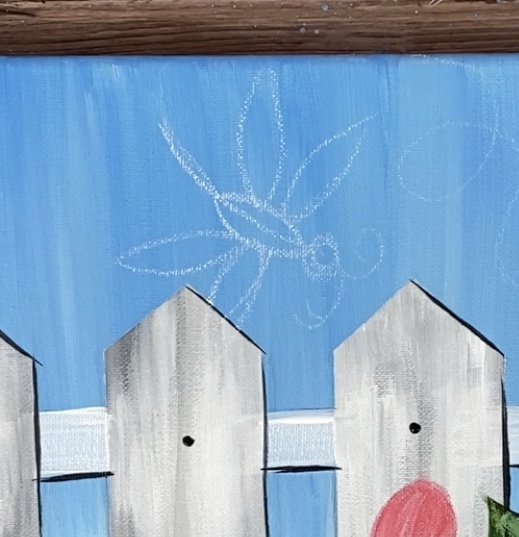
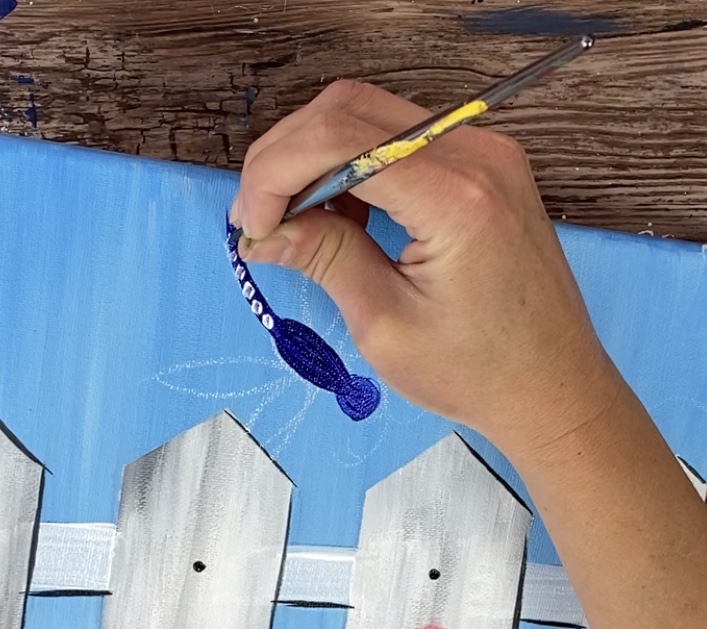
8. Draw the Dragonfly & Paint It In
I used a piece of white chalk to draw the dragonfly. First draw the center part with a slightly curved line.
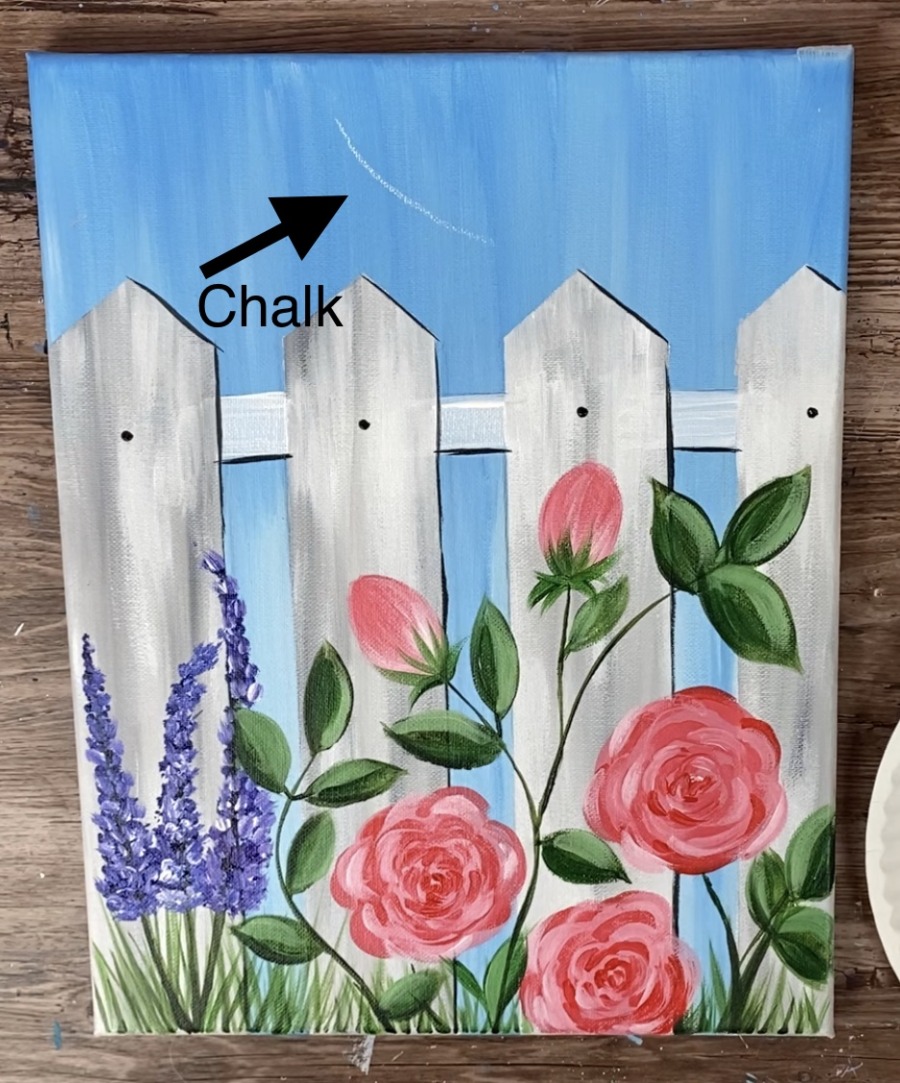
Then draw a small circle for the head and the body.
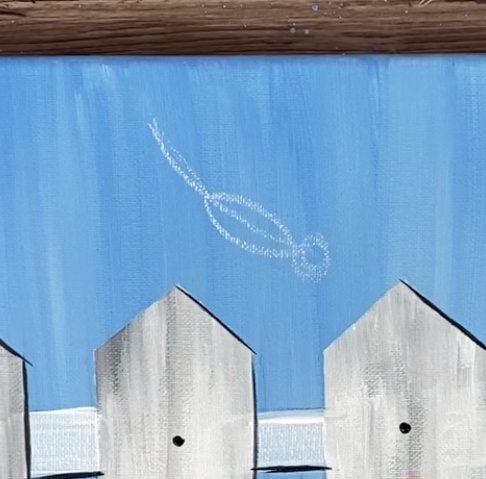
Next draw the wings. These wings are a sort of cat eye shape/ stretched elliptical where the base is a point that touches the body of the dragonfly.
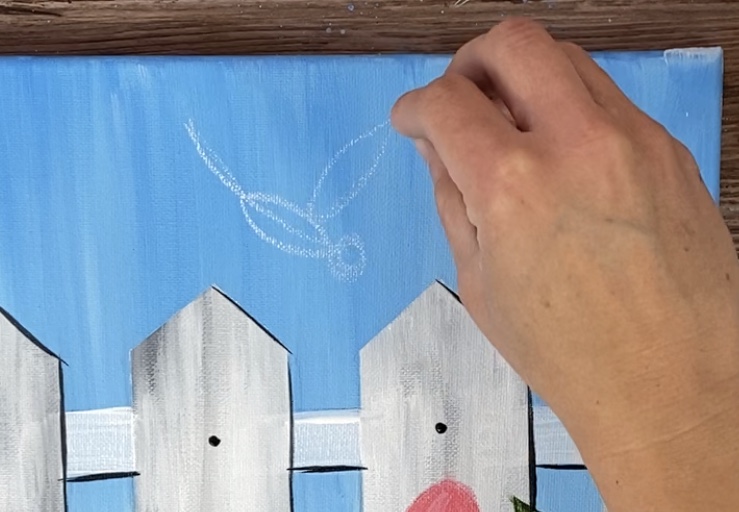
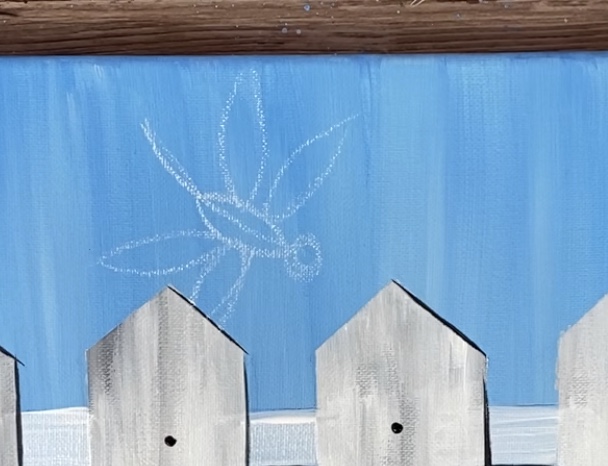
And draw the antennae and the path.
Next use a round brush to paint the dragonfly in. I used a combo of the dioxazine purple and ultramarine blue (mix the two together).
Paint the body first.
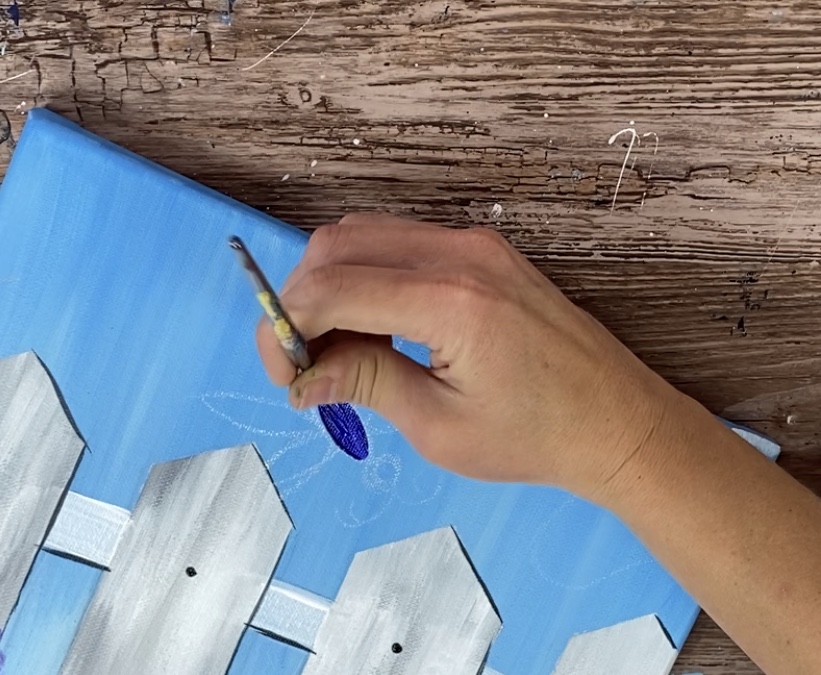
Then paint the tail and head.
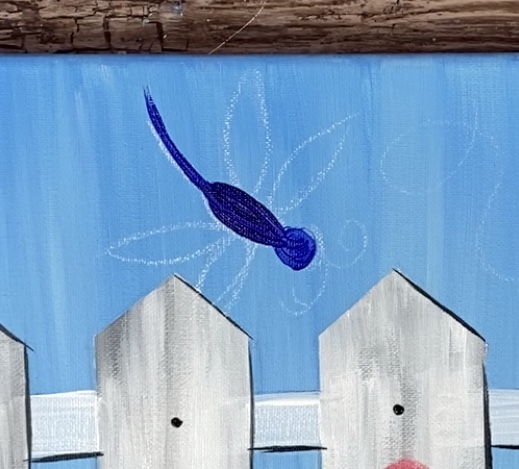
Next load the tip of your brush in white and paint some small dots on the tail.
And paint a white highlight line on the body.
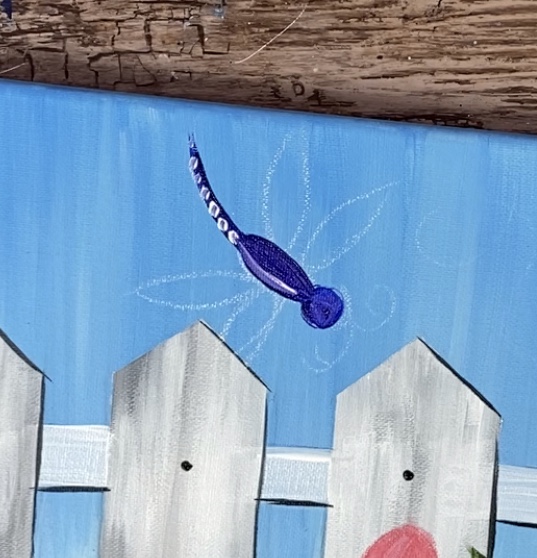
Then paint eyes. I mixed white with the purple to create a lighter color of the purple.
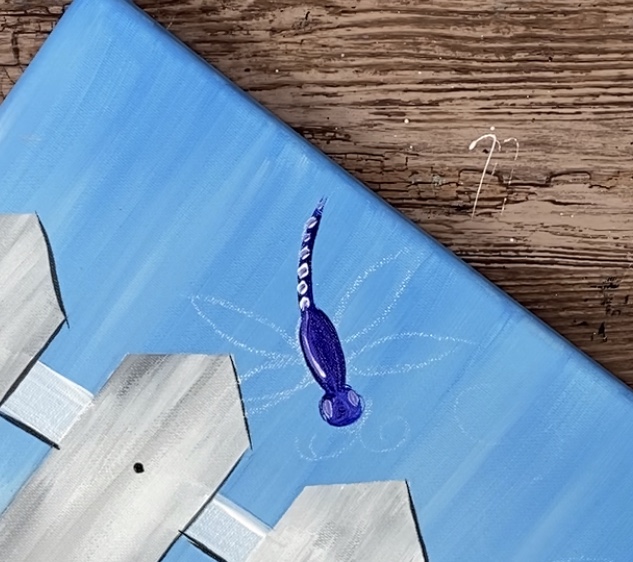
Paint the antennae using your 0 round brush and mars black.

Then to do the wings, use titanium white and your 4 round brush. Wipe a little excess paint off the brush so it is dry with not a lot of paint.
When you paint the wings, start from the base and stroke out-words to make a dry brush stroke.
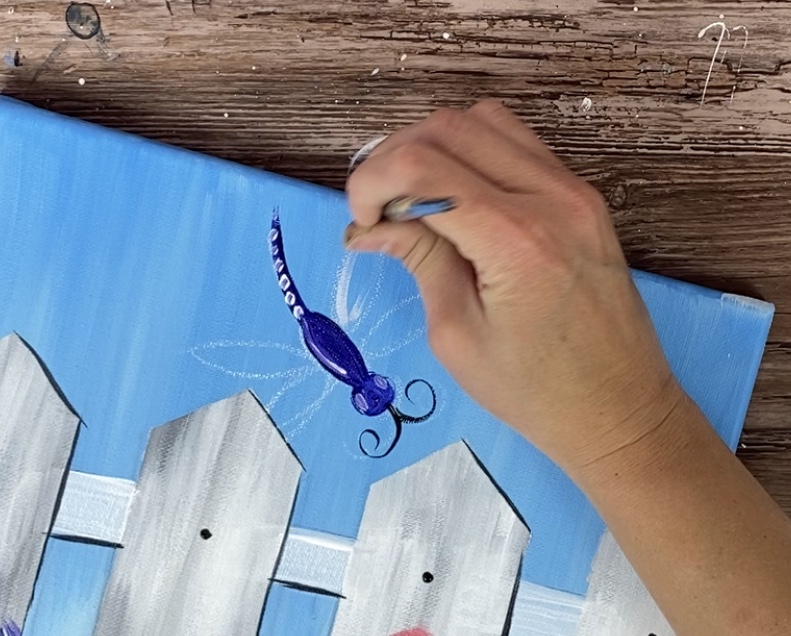

Then use your 0 round brush and mars black to paint some curved lines on the base of the wings.
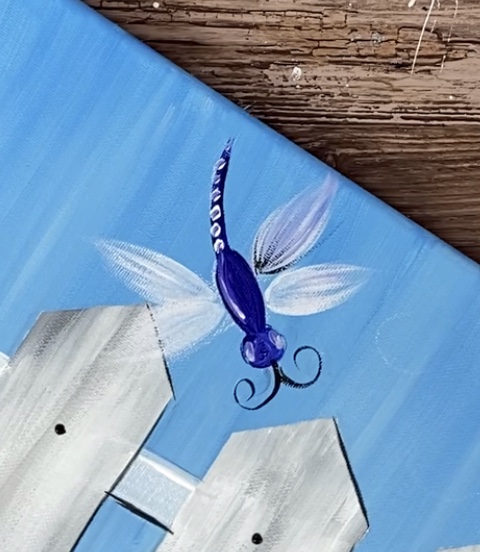
Finally, paint the trail line of the dragonfly!
Finished!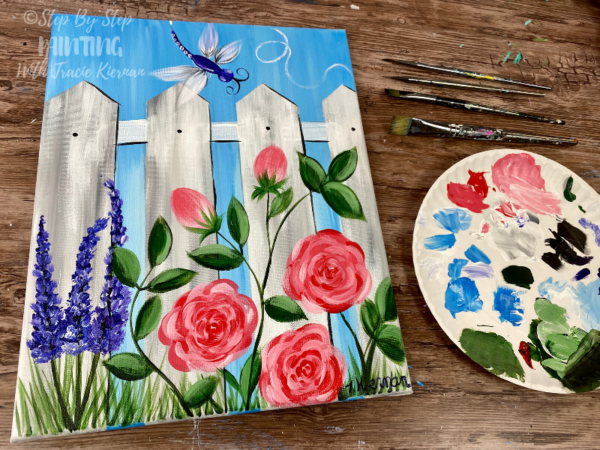

Ugh! So beautiful and colorful! I love it!
Love your paintings and tutorials. Your voice is so clear and calming. Thank you.
You’re welcome ?
These are so much fun to paint! Thank you for sharing your talent!!